DIY Autumn Wood Slice Sign
Learn how to make a beautiful wood slice sign for Autumn using cardstock and vinyl. Use my Cricut Design Space file to help you get started making pretty paper flowers.
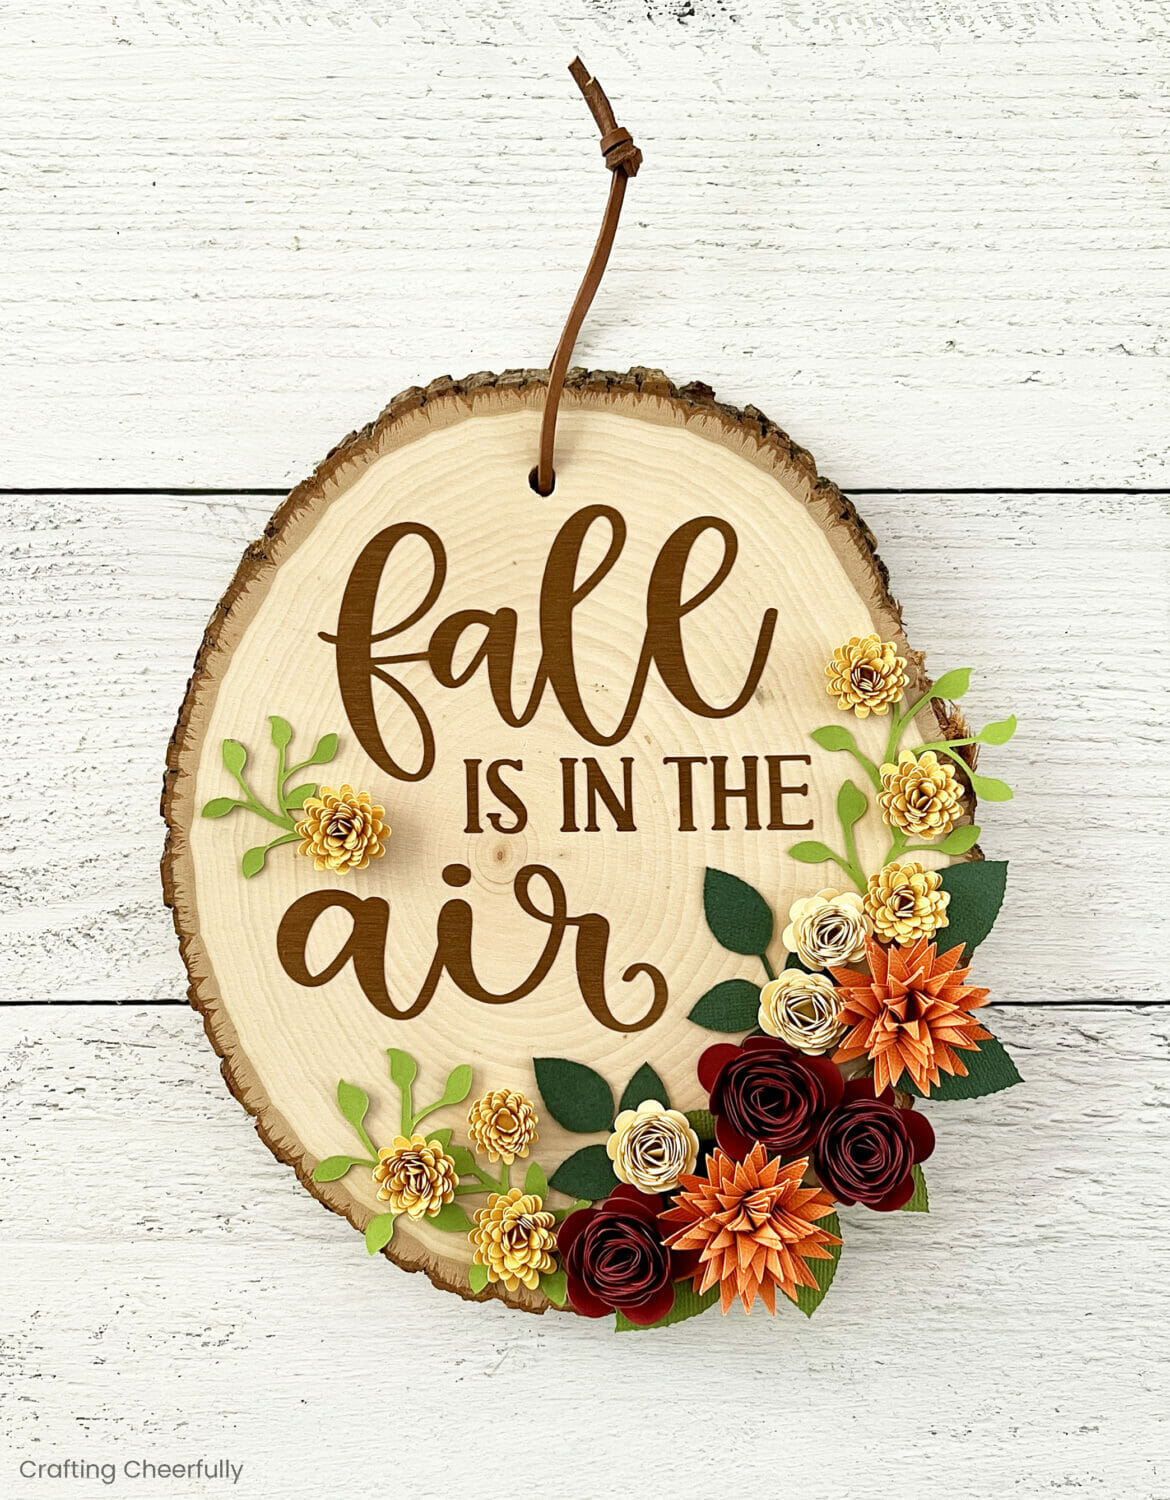
Hello Crafty Friends! September is here and I am so excited for fall crafting. Today I’m sharing this pretty wood slice sign you can make using paper, vinyl and your Cricut cutting machine. This was such a fun craft to make for Autumn and it looks beautiful hanging up. If you are new to making paper flowers I hope you’ll give this a try. I found them really fun to make and a little simpler than I expected!
For this wood slice sign I used my Cricut cutting machine to cut the phrase “Fall is in the Air” out of a beautiful brushed vinyl in copper. For the flowers, I used cardstock in an autumn color palette. You can use the file I created in Cricut Design Space to create this same sign! Just grab a large wood slice and you’ll be ready to go!
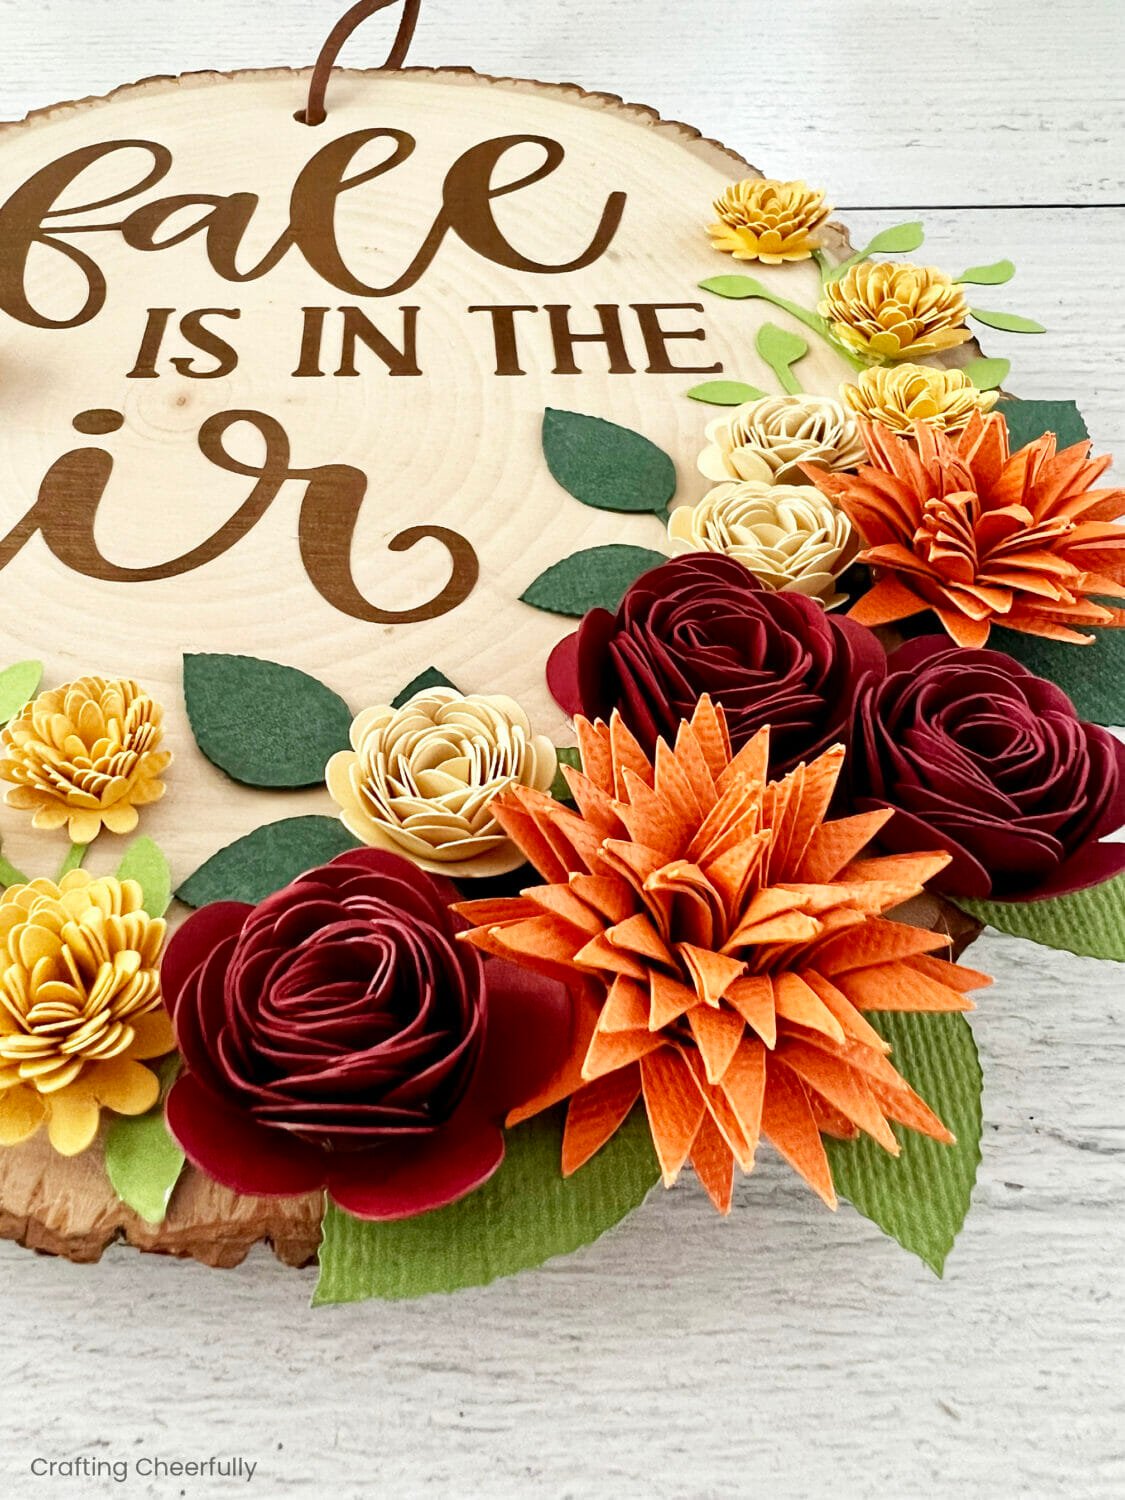
In this tutorial, I’m sharing all of my tips and tricks to make a wood slice sign. I hope you’ll give this fun fall craft a try. You can check out my other seasonal crafts on my Autumn Crafts Page.

How to Make A Fall Wood Slice Sign
Supplies Needed
- Large wood slice. My wood slice was a basswood country round size large from Joann Fabrics and it measured 9″ tall and 7.5″ at it’s widest point.
- Cardstock for flowers: burgundy, orange, yellow, and cream. 65lb is a nice weight for flowers.
- I used paper from my stash including AC Tropical Cardstock Carrot, and Sunflower, Color Mates Medium Totally Tan and Burgundy.
- Cardstock for leaves. I used three shades of green for the leaves.
- I used paper from my stash including Bazzill Aspen, Bazzill Lime Crush and AC Tropical Cardstock Spinach
- Hot Glue
- Brushed Vinyl in Copper
- Transfer Tape
- Cricut Cutting Machine
- Cricut tools and cutting mat
- Cricut Design Space file

The Cricut Design Space File
I created the cut file for this project in Cricut Design Space using leaves, 3D flowers and the fall phrase that are all part of Cricut Access. If your wood slice is a different size or you would like to change the colors of the cardstock, simply customize the file before cutting.
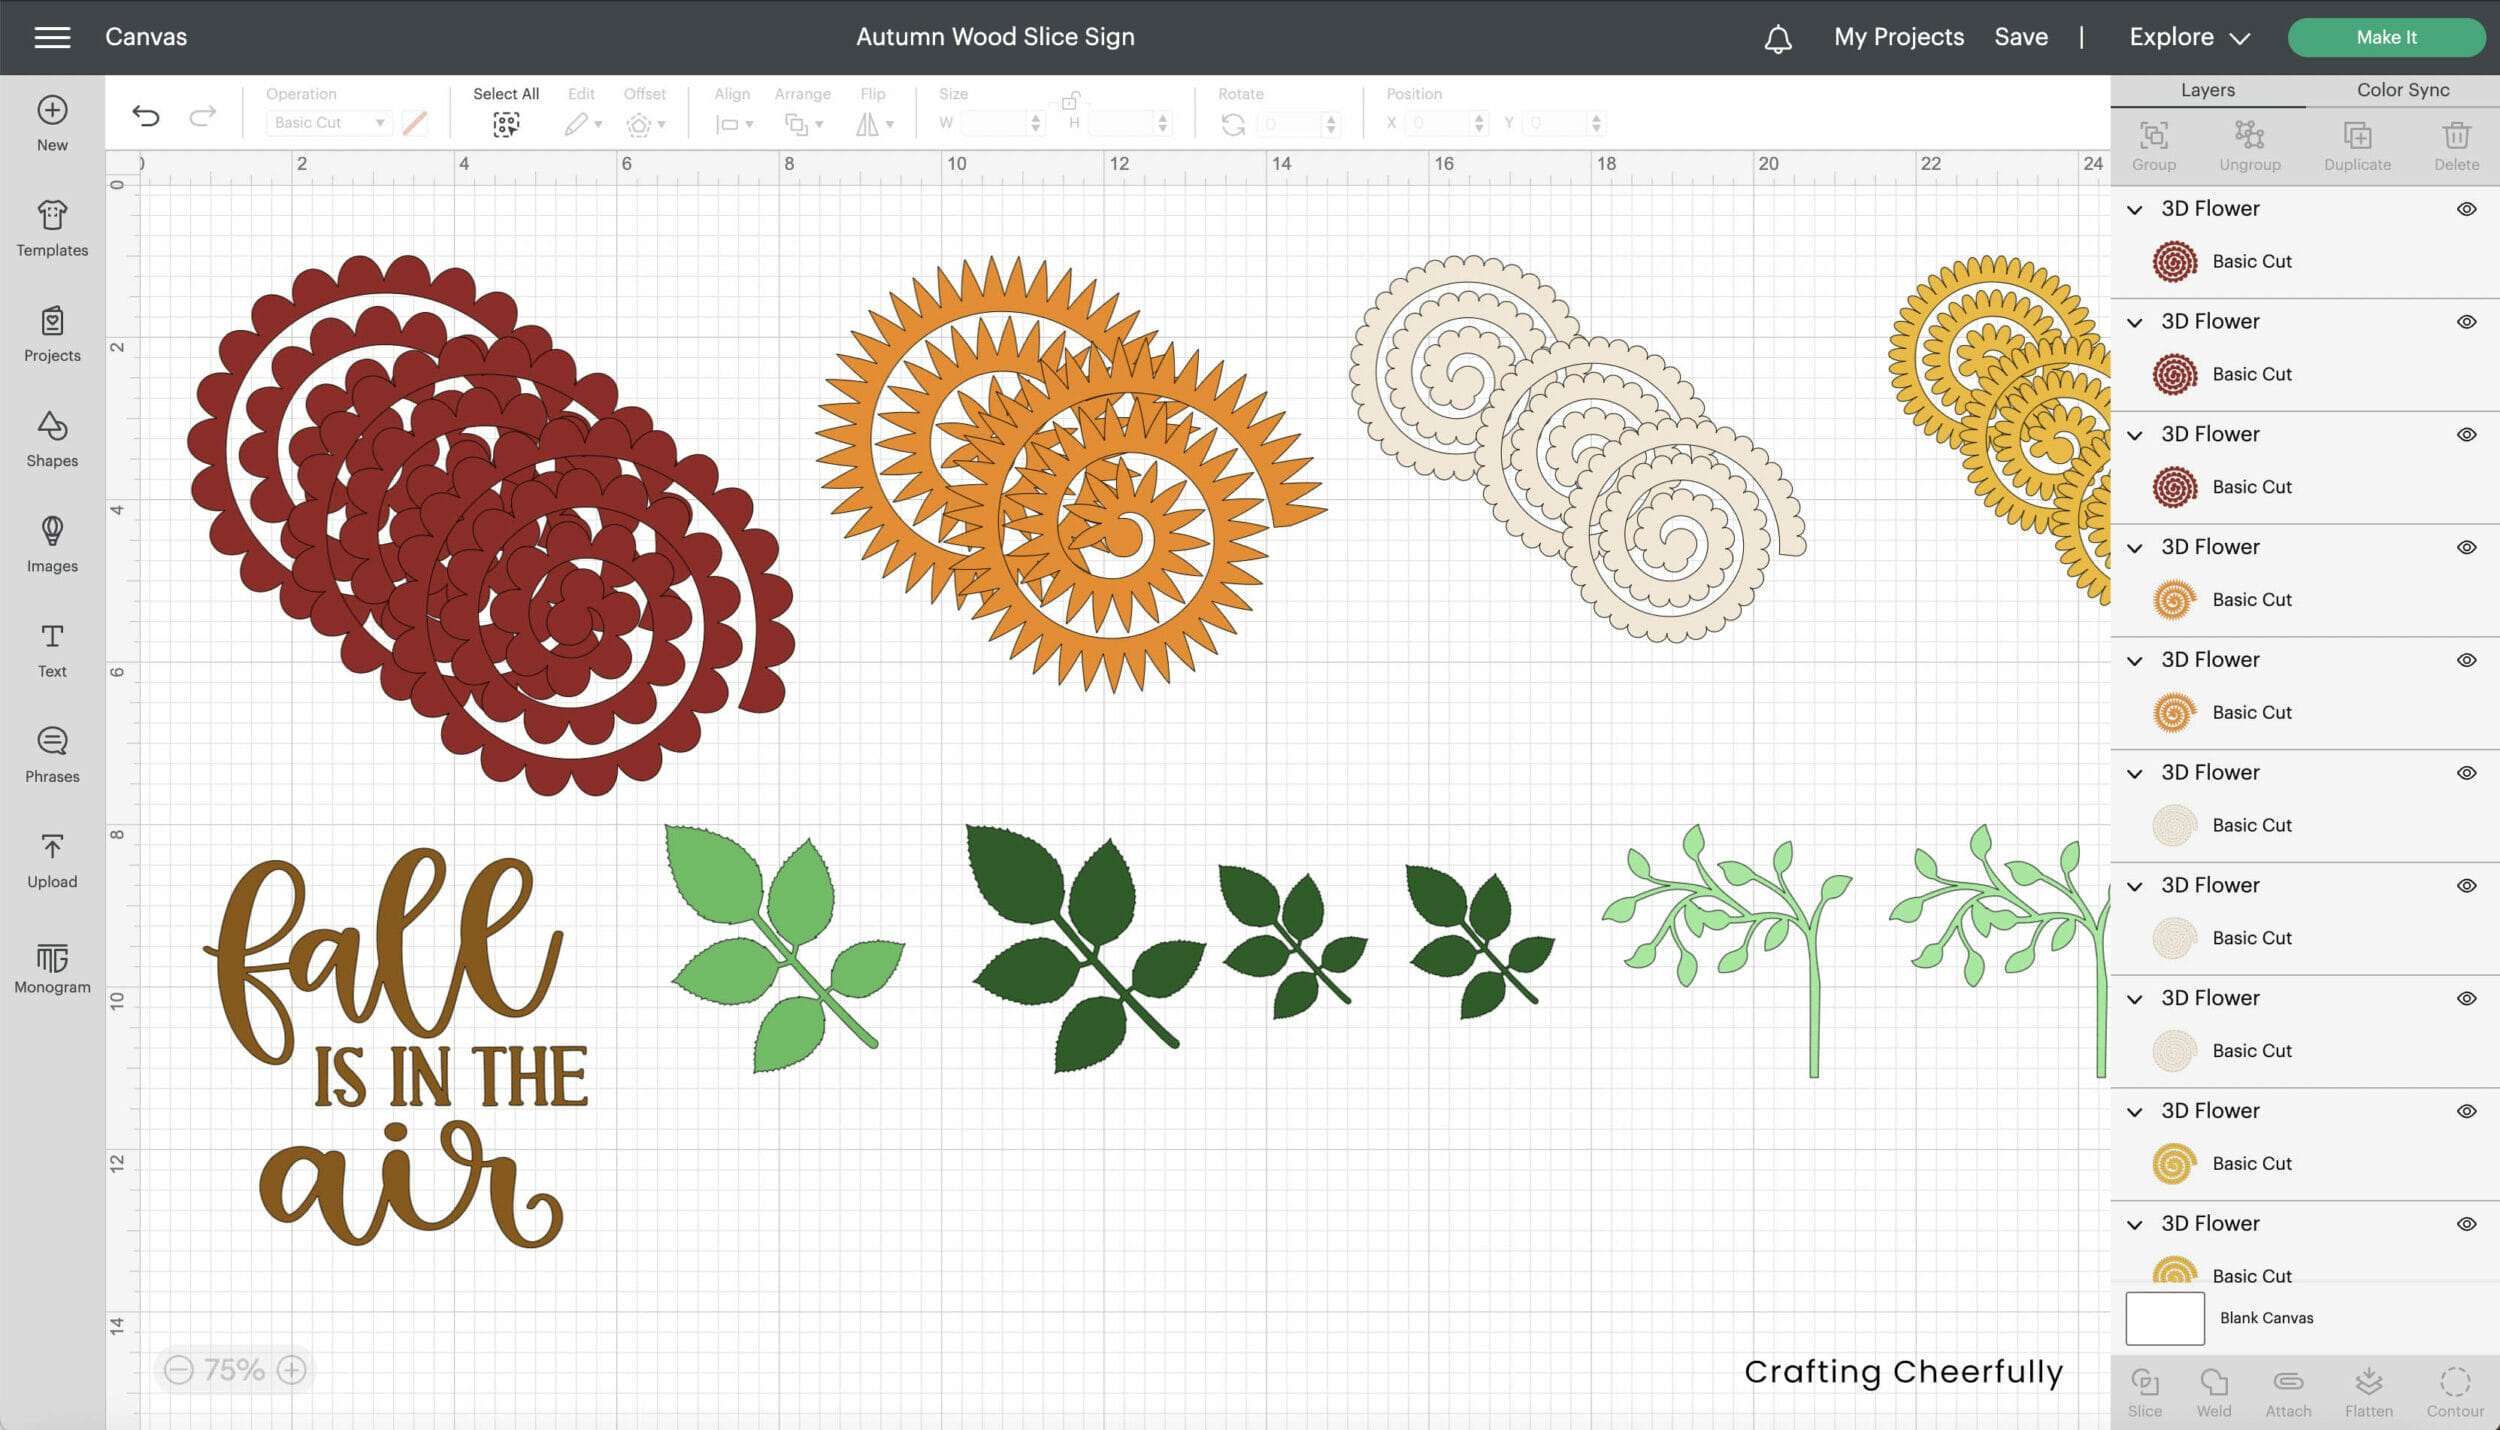
Cutting the 3D Paper Flowers
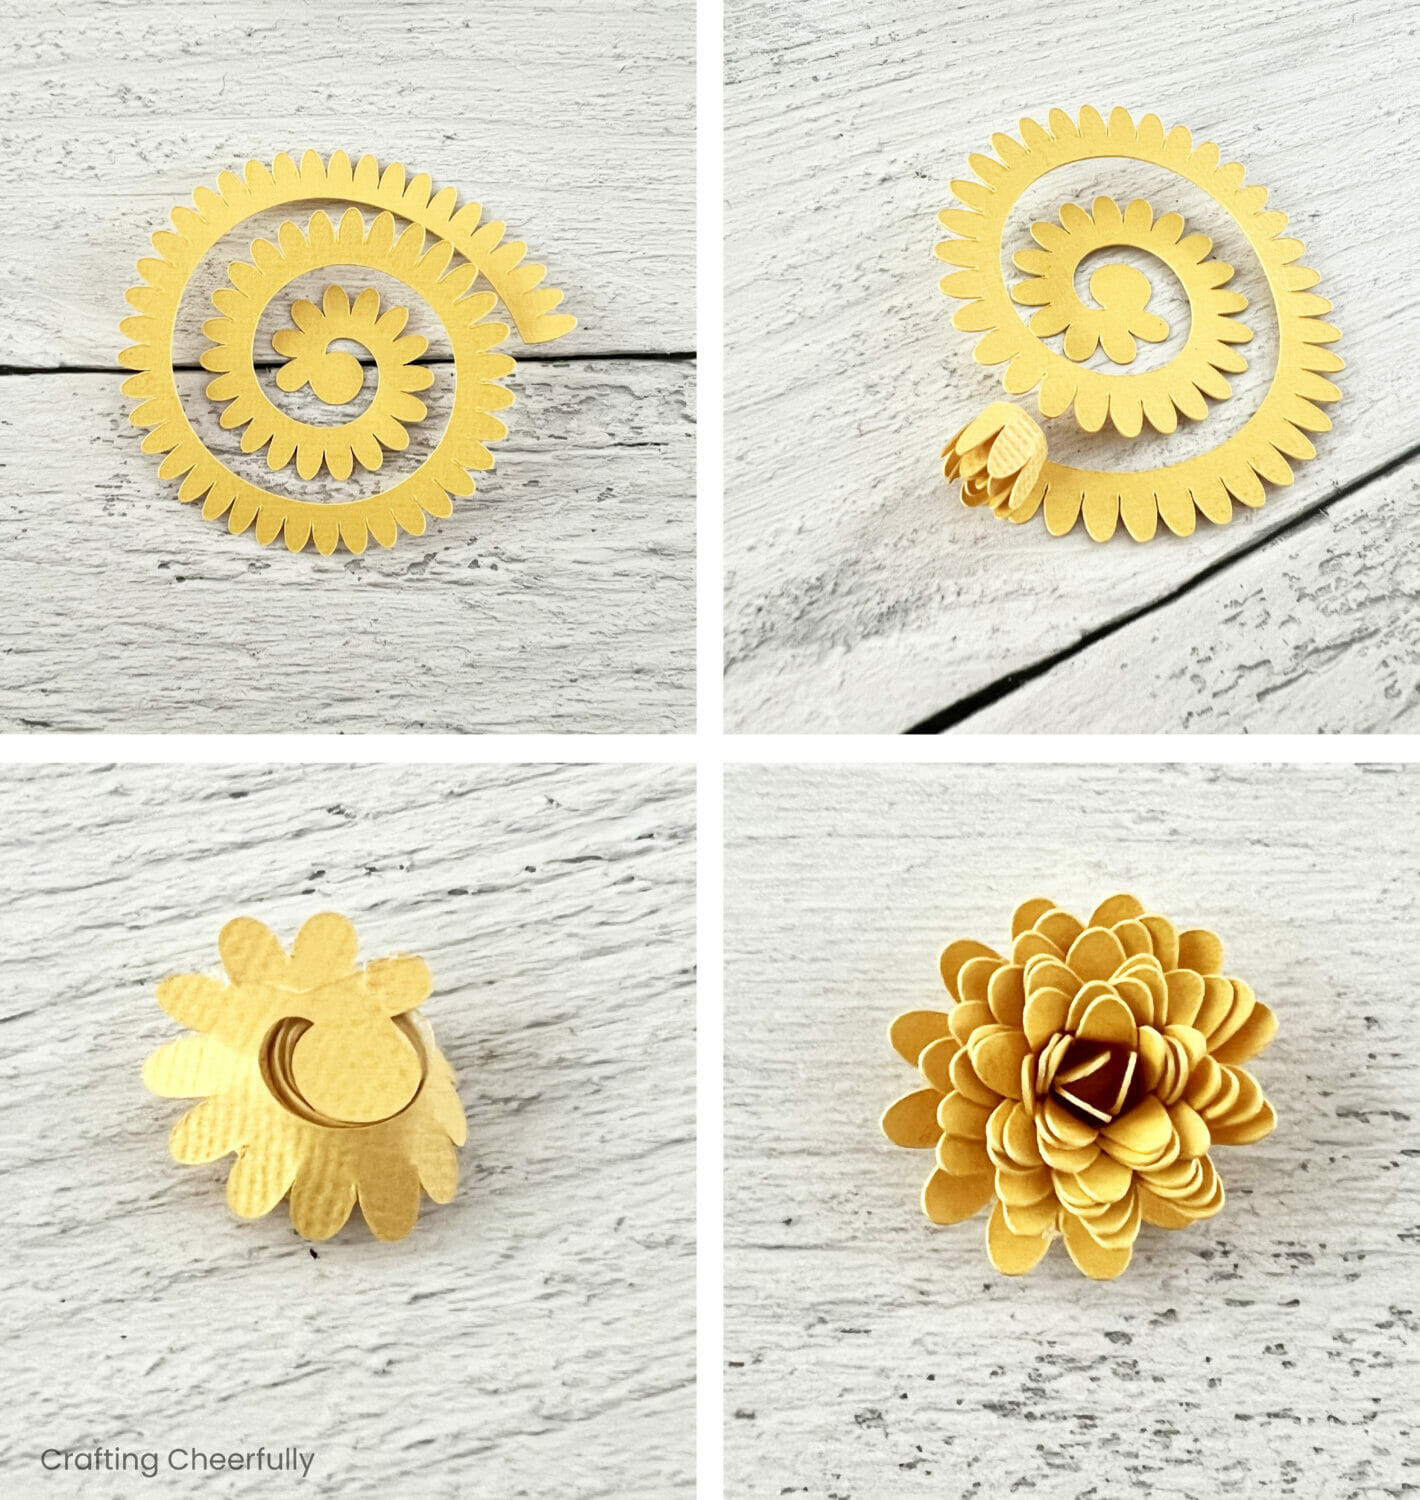
For this project, you will need to make paper flowers to decorate the wood slice. If you are new to paper flowers, as I was recently was, I wanted to share a quick tutorial on how you make them. They are surprisingly simple for how beautiful and intricate the finished flower is!

The paper flowers are cut as spirals. My Cricut cut most of them beautifully, but on a few flowers the spiral came up and caught in the blade and I had to recut the flower. It didn’t happen often, but I recommend using a new, or very sticky, mat and a sharp blade to avoid problems.
After the flower is cut, roll the paper starting with the outside edge. Roll the paper until you reach the center, keeping the straight side of the spiral even against one of your fingers. Use a dab of hot glue to secure the round circle at the center of the spiral to the bottom of the rolled flower. Gently push the petals open a bit until the flower looks how you’d like. The flowers will look slightly different depending on how tightly you roll them.
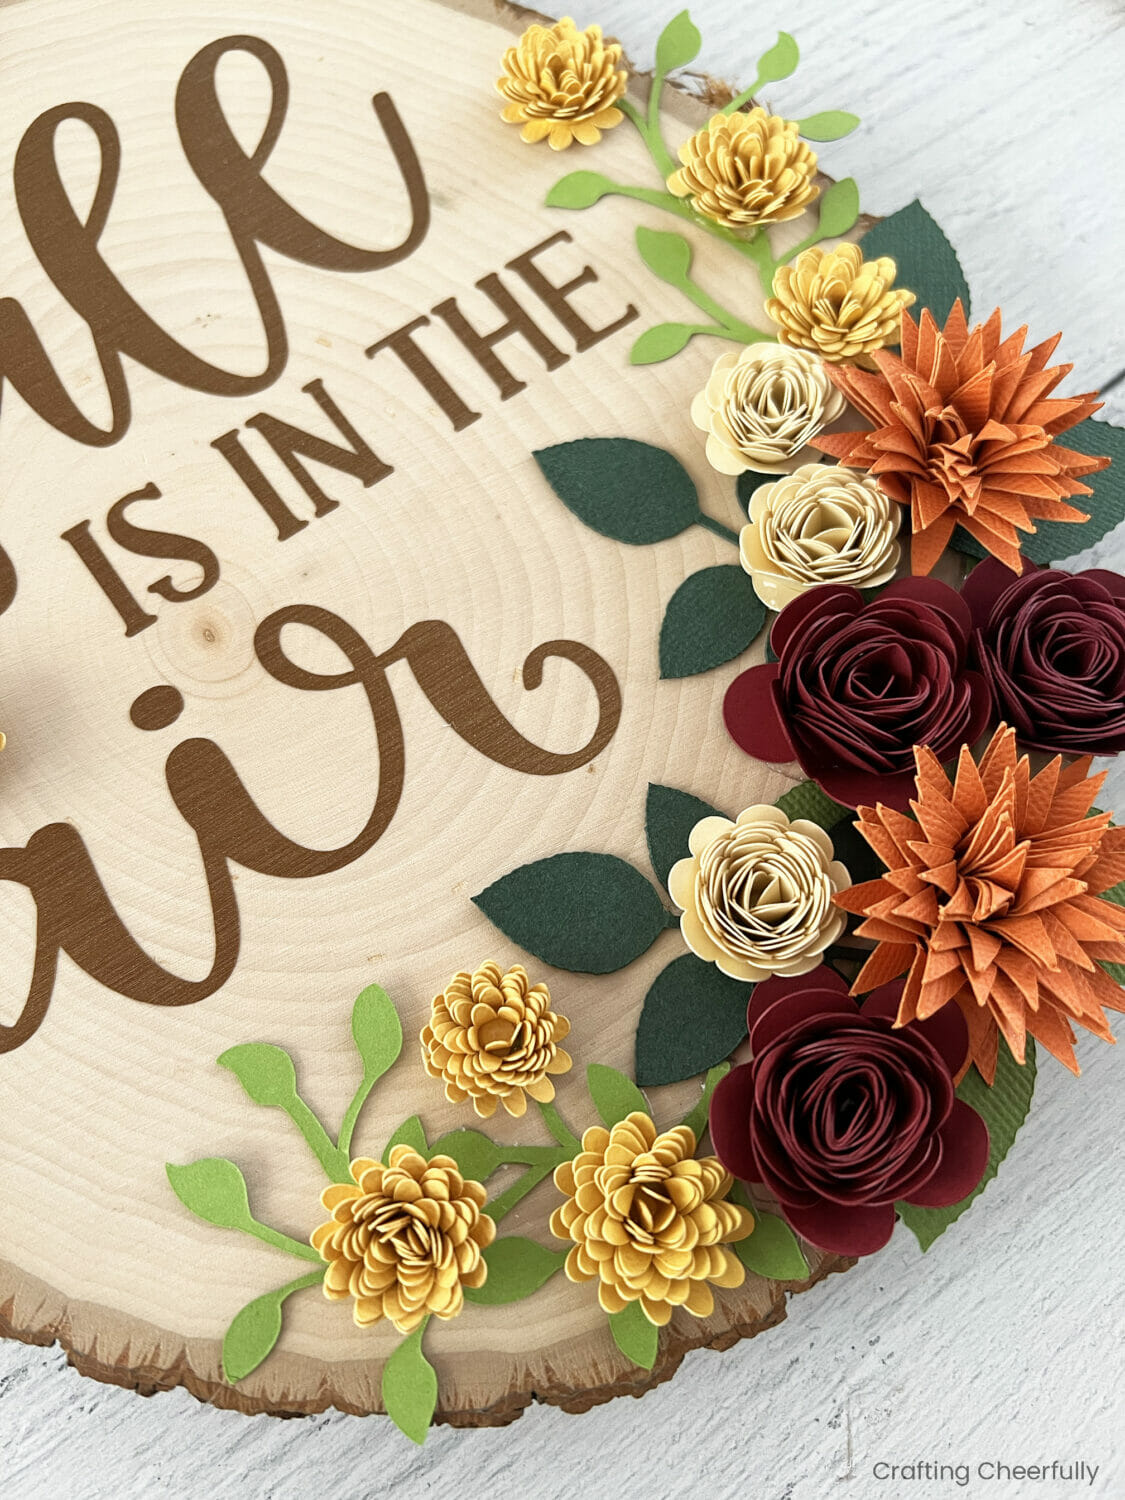
For this project, use a cutting machine to cut multiple flowers in different sizes and shapes. Use fall colors like red, orange, yellow, burgundy, green and purple. Cut leaves from different shades of green. If using my Cricut Design Space file, you can create the same flowers and leaves as I did, or you can create your own arrangement!
*Tip: It helps to decide what leaves go with which flowers. For example, I decided the light green intricate leaves belong to the yellow flowers, so I positioned them together.
Assembling the Wood Slice Sign
Step One: Cut the fall phrase from vinyl and apply it to the top of the wood slice.
Cut a fall phrase out of vinyl. I used a beautiful Brushed Vinyl in copper. It has a really pretty texture to it. Add the phrase to the top of the wood slice using Transfer Tape. After cutting the phrase, I decided to separate the word “air” so I could position it after I figured out the placement of my paper flowers.


Step Two: Arrange the paper flowers on the wood slice.
After adding the top of my phrase, I played around with where I wanted the flowers to go. *TIP: Once you are happy with the arrangement, snap a picture of it so you can reference it when gluing them into place.
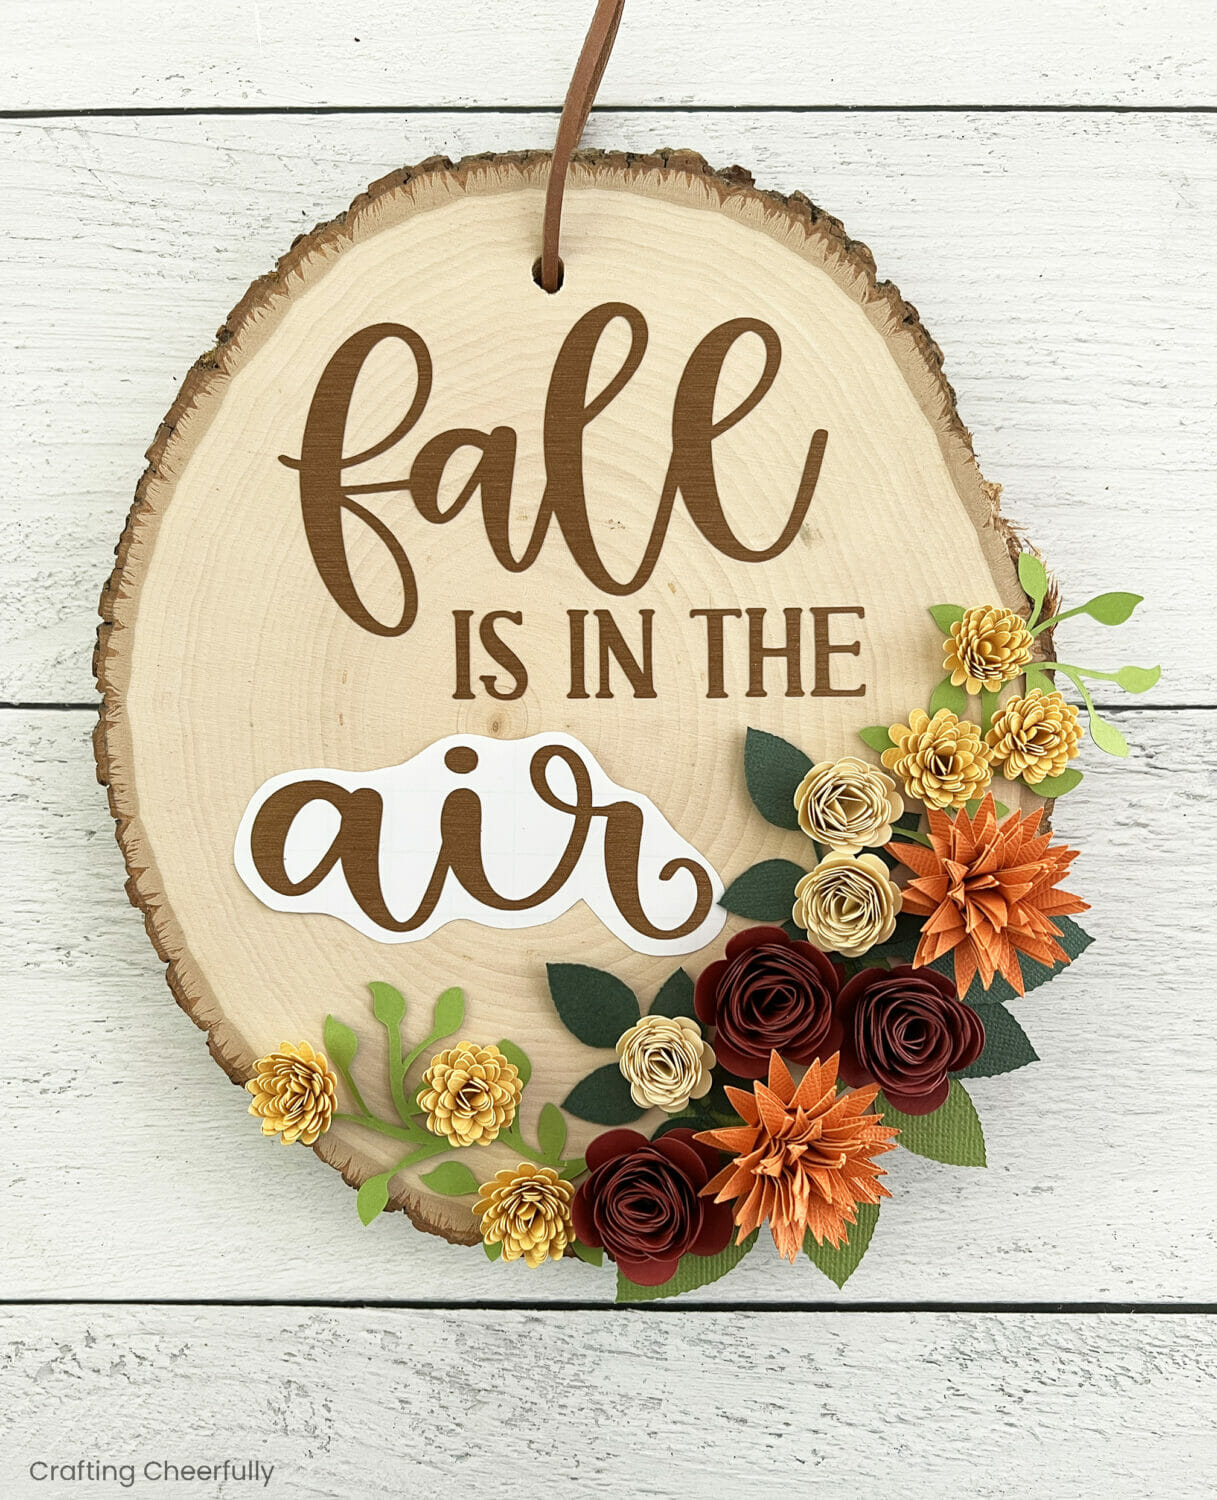
Remove the flowers but leave the leaves in place. Carefully finish applying the rest of the fall phrase.

Step Three: Glue the leaves and flowers in place.
Start by gluing the leaves down, then glue the flowers on top using hot glue. *TIP: When gluing the leaves, use a pencil to lightly mark where the leaves go before lifting them up. These pencil lines will act as a guide to help you place them.
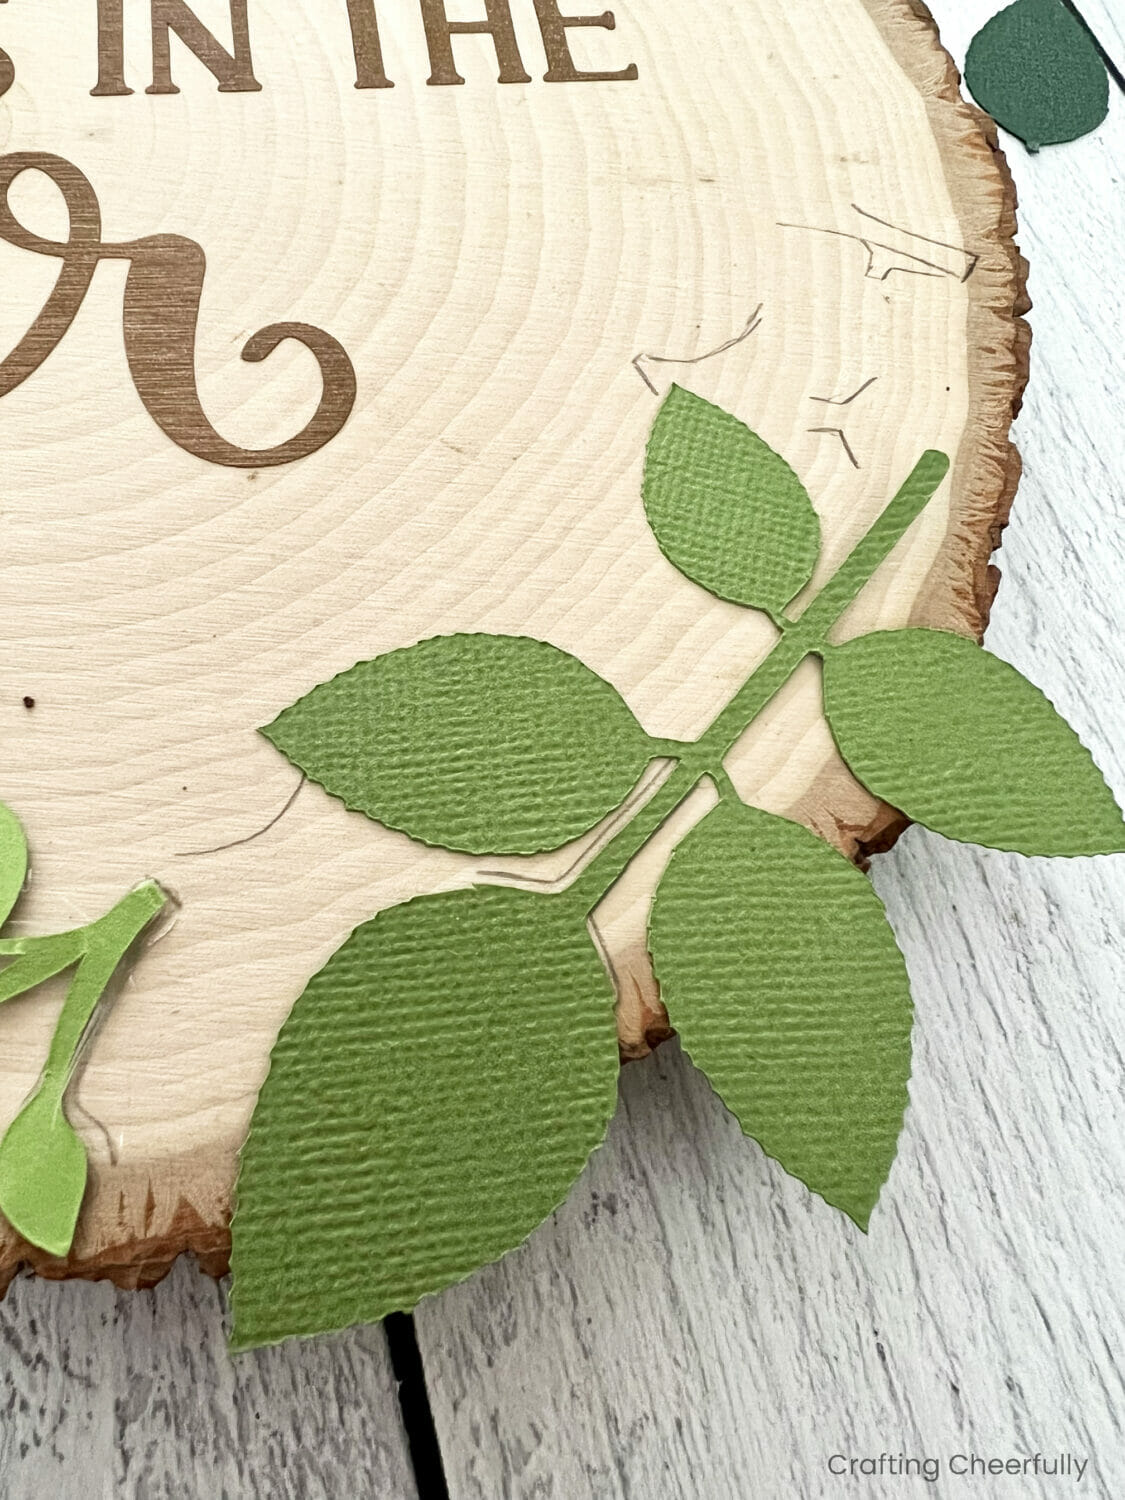
After the leaves are in place, glue the flowers! I added a yellow flower and a bit of leaf to a spot on the left to help balance things out.


The wood slice sign is complete! The fall flowers look beautiful mixed together on the wood slice.

Step Four: Hang up and enjoy!
Depending on how you place your flowers, when you hang the wood slice it may not hang straight from the uneven weight of the flowers. *Tip: If this happens, use a small Command Strip behind the wood slice to keep it hanging straight. Even a light Poster Size may be enough to do the trick!
I hope you enjoy making this sweet sign with your cutting machine! I love how it turned out and can’t wait for the leaves to start changing outside. Last year, I made a paint palette fall sign using my Cricut Explore. I now have both signs hanging up ready to welcome fall!


