
Homemade Advent Calendar
Learn how to make a unique handmade advent calendar using a wooden frame, mini boxes, decorative scrapbook paper, and stickers!
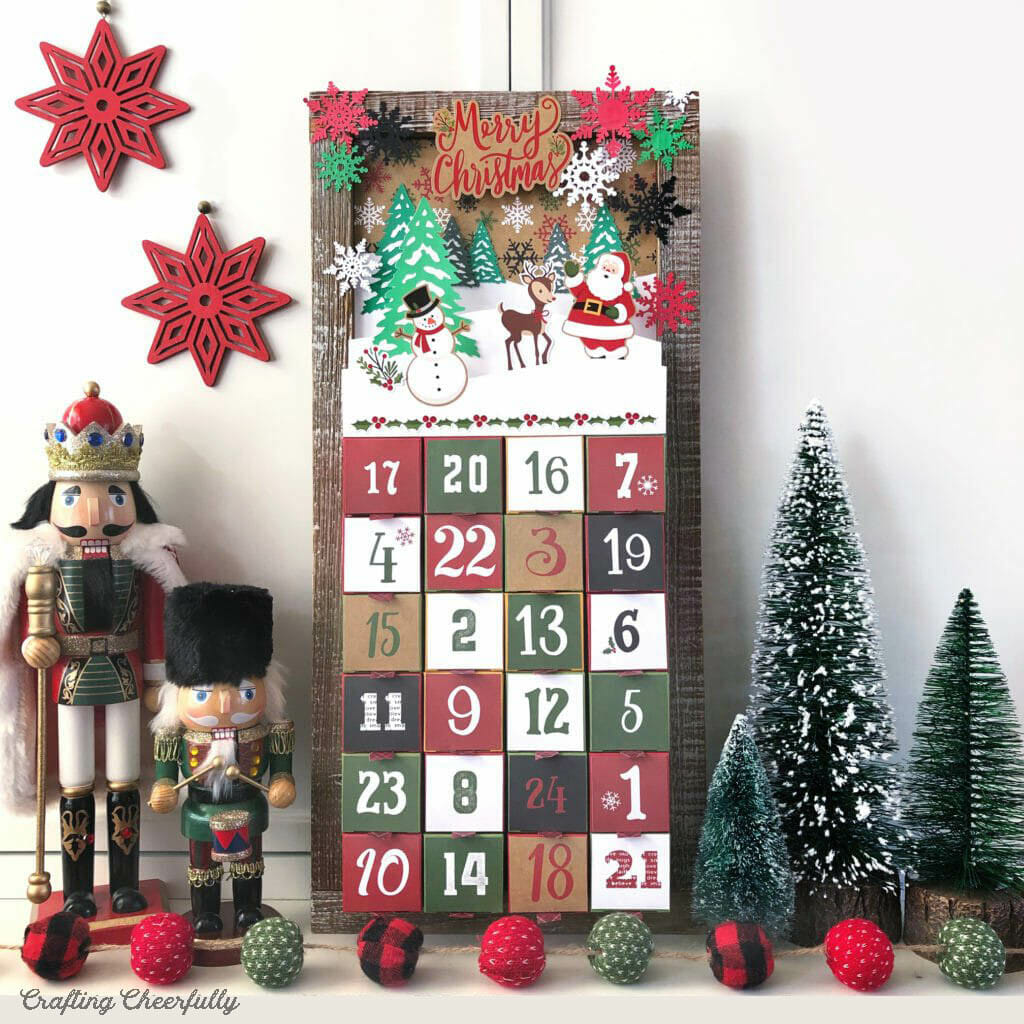
December 1st is coming up, marking the first day of Advent Calendars! Our family loves this tradition and looks forward to it every year. I wanted to share with you one more handmade Advent Calendar I created using tiny boxes and paper.
This calendar is so much fun to create and it can be customized to match any holiday decor theme or color palette. The small boxes are the perfect size for small treats, candy, gifts and trinkets. This calendar is reusable and can be used year after year.
I originally made this calendar for my mom and filled it with puzzle pieces. Each day she opened a new box with 12 puzzle pieces in it until the entire puzzle was assembled on December 25th. SO while you can fill this with candy and more traditional items, you can also get creative and fill it with anything you’d like!

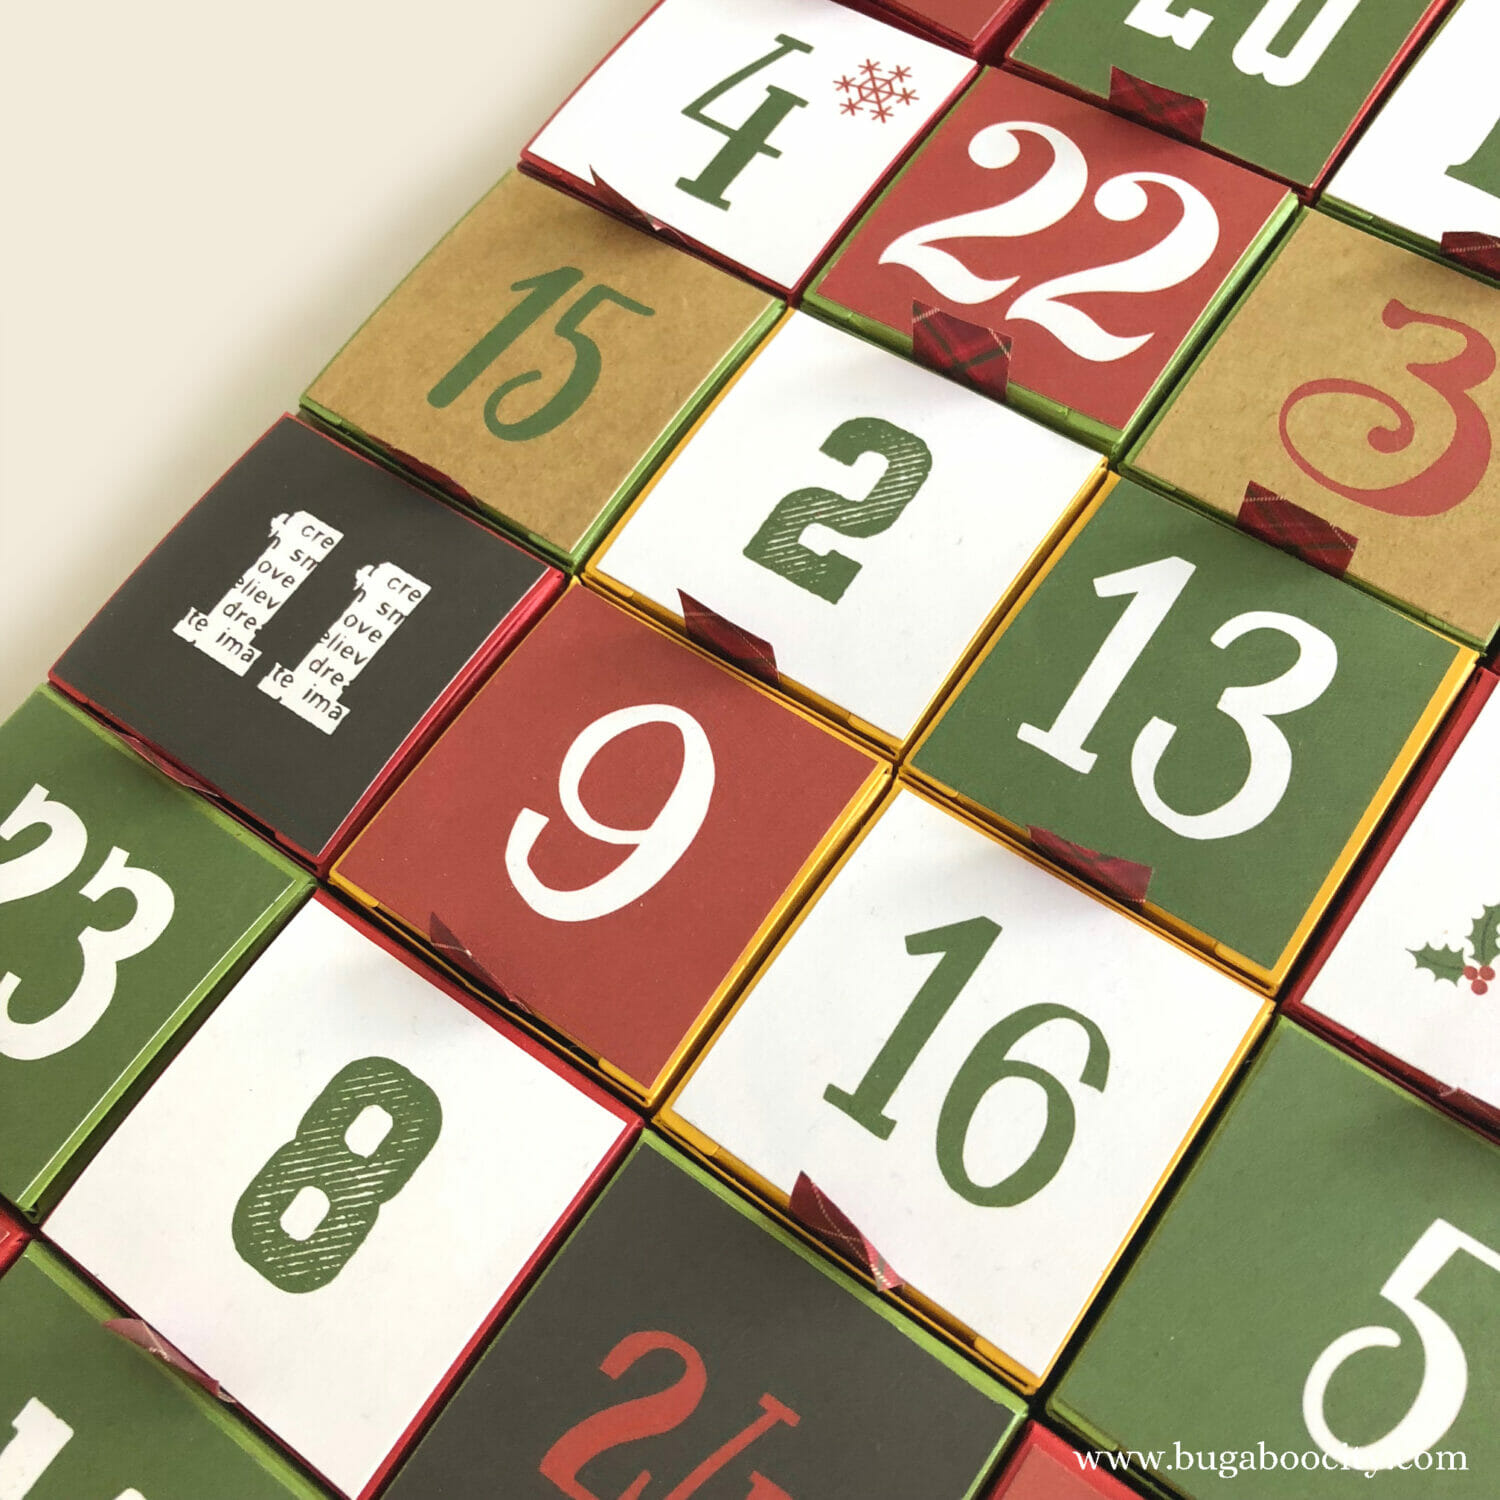
When I found the paper stack “Celebrate Christmas” by Echo Park Paper Co., I knew it would be perfect for this type of Advent Calendar. The stack even came with a sheet of paper divided into 2″ squares with numbers 1-24 on it. These mini boxes worked perfectly and fit into a wooden sign I had purchased on sale from Joann Fabrics months ago! So needless to say, this calendar just fell into place and I’m so happy it did because I love it!
Creating the winter wonderland on top of the calendar out of paper was my favorite part. The paper stack came with such sweet Christmas stickers I wanted to use them somewhere on the calendar.
Below you can see how my Advent Calendar started out – as a sign for carrots! I like to buy signs when I find them on super sale at Joann Fabrics – always with the intention of making them into something completely different.

How to Make A Handmade Advent Calendar
Supplies Needed:
- Tiny boxes! I used these small 2″ Mini Ring Boxes I found on Amazon. I bought the 50 pack which made two calendars
- Numbers – either from Scrapbook paper like mine, stickers, printed numbers or numbers cut from paper/vinyl with a cutting machine
- ” rel=”nofollow noopener noreferrer”>Scor-tape or another double-sided tape adhesive
- Paper Trimmer
- Scissors
- Ribbon or Washi Tape
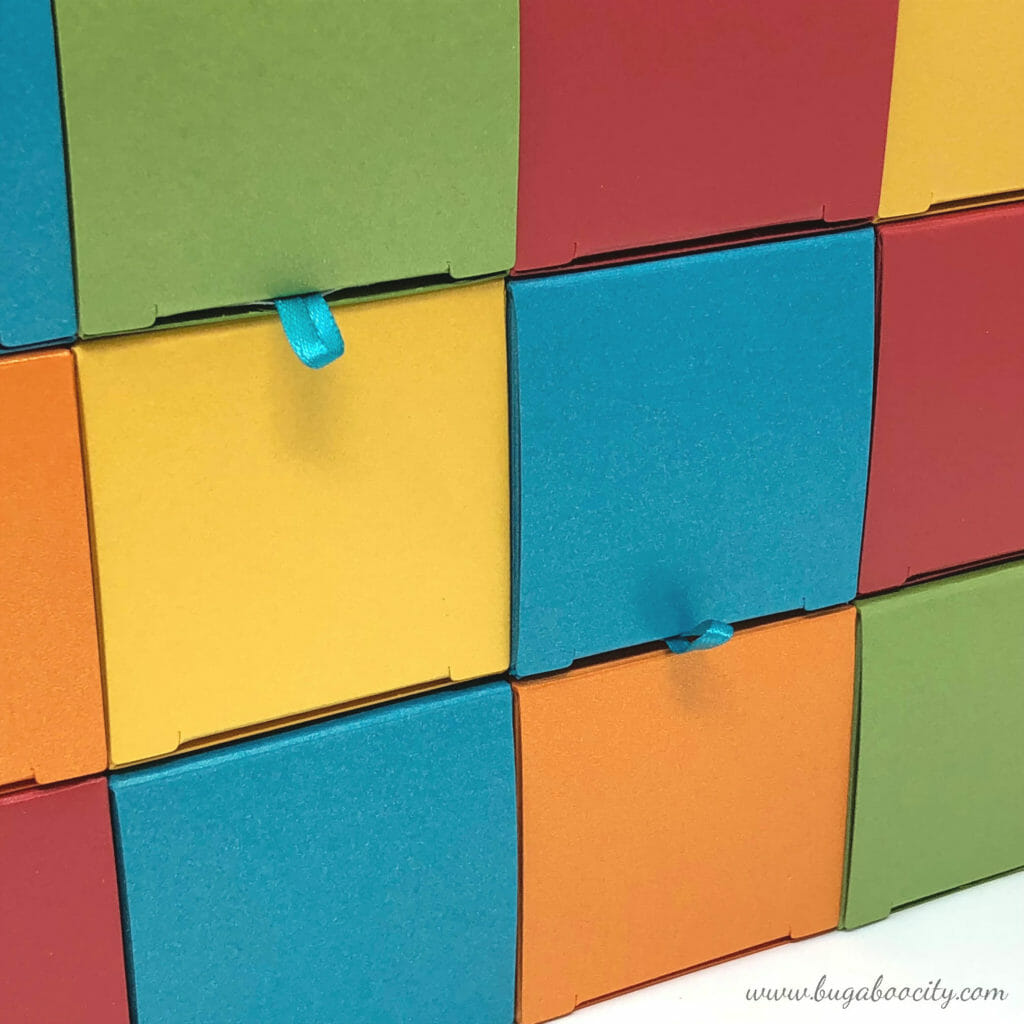
*Some of the pictures below are from an Advent Calendar I made right before this one so the colors of the boxes are slightly different. I also used ribbon initially but switched to little Washi-tape pull tabs for this one to match the paper I was using.
Making the Calendar with Small Boxes
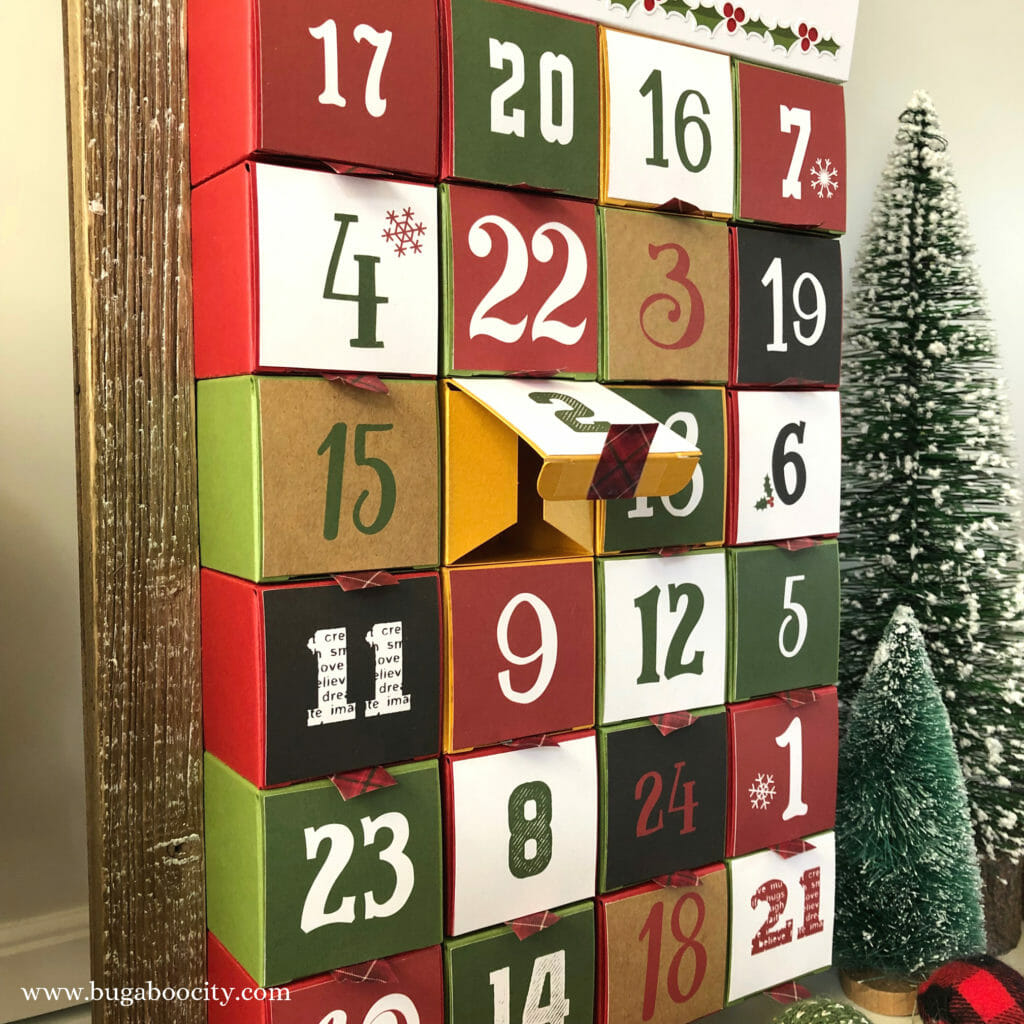
Step One: Assemble all of the tiny boxes you plan to use. Depending on your frame you may use 24 or 25 boxes. This one fit 24 boxes.

Step Two: Tape the boxes to the wooded frame using very strong double-sided tape. I attached the back of each box to the frame and added tape in-between the boxes to so they were attached to each other.
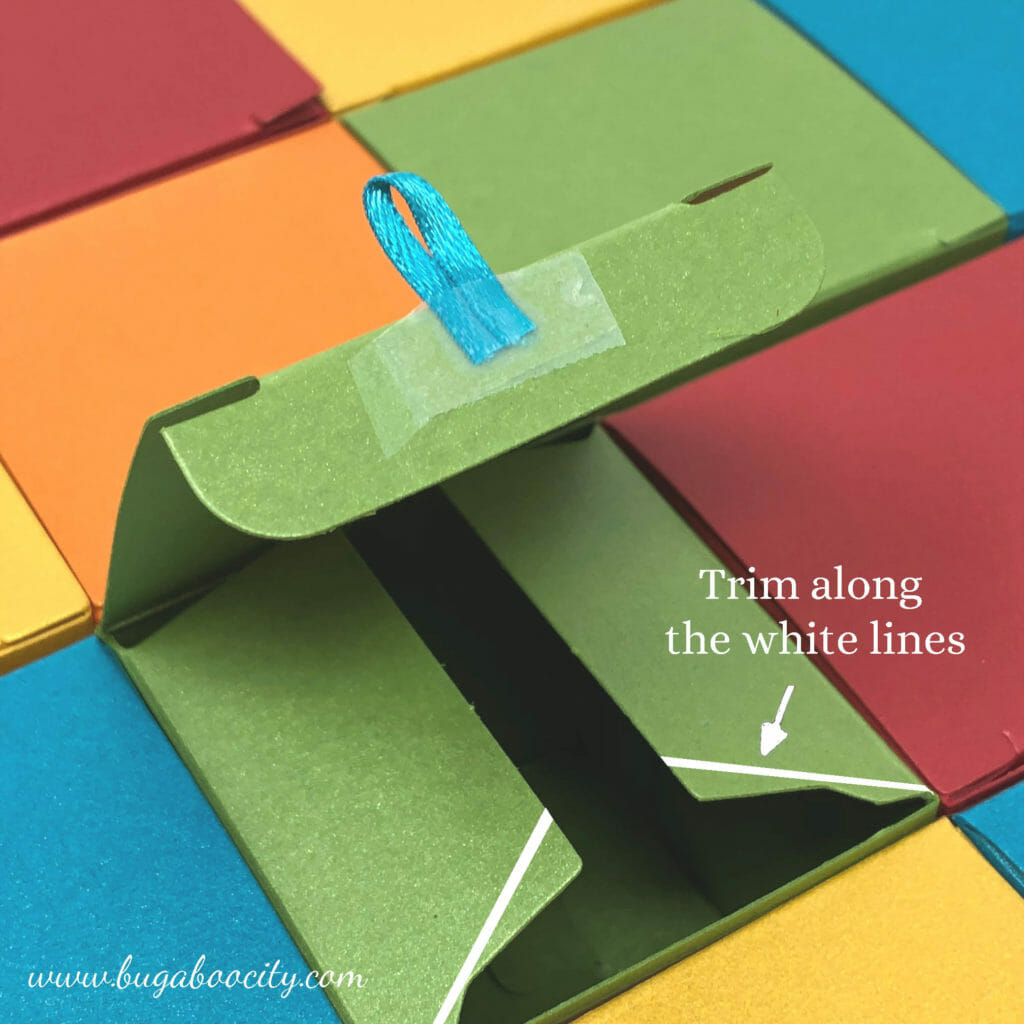
Step Three: Add tabs to help the boxes open. Once the boxes are stacked together they can be tricky to open. To fix this, add tabs made from ribbon or Washi-Tape. This step can be done before you attach them to the frame.
For ribbon, place a small piece of 1/4″ Scor-Tape on the tab and then tape a ribbon loop down on top of that using Scotch-tape. If using Washi tape you can do it the same way but fold a small piece of Washi-tape into a tab.

To help the boxes open and close easier, trim away the bottom of each side tab – but just a little bit. If you cut too much away the lids will not stay closed.
Decorating the Boxes
Step Four: Add numbers to the front of the boxes! Adhere numbers to the front of each box. I chose to place my numbers in a random order so the recipient will need to locate the number each day before opening. Since I had a sheet of scrapbook paper with numbers, I was able to cut them out and add them to the boxes with double-side tape. You could also use stickers, printed numbers, numbers cut from vinyl or paper on a cutting machine, or hand-write the numbers on each box.
Create the top of the Advent Calendar
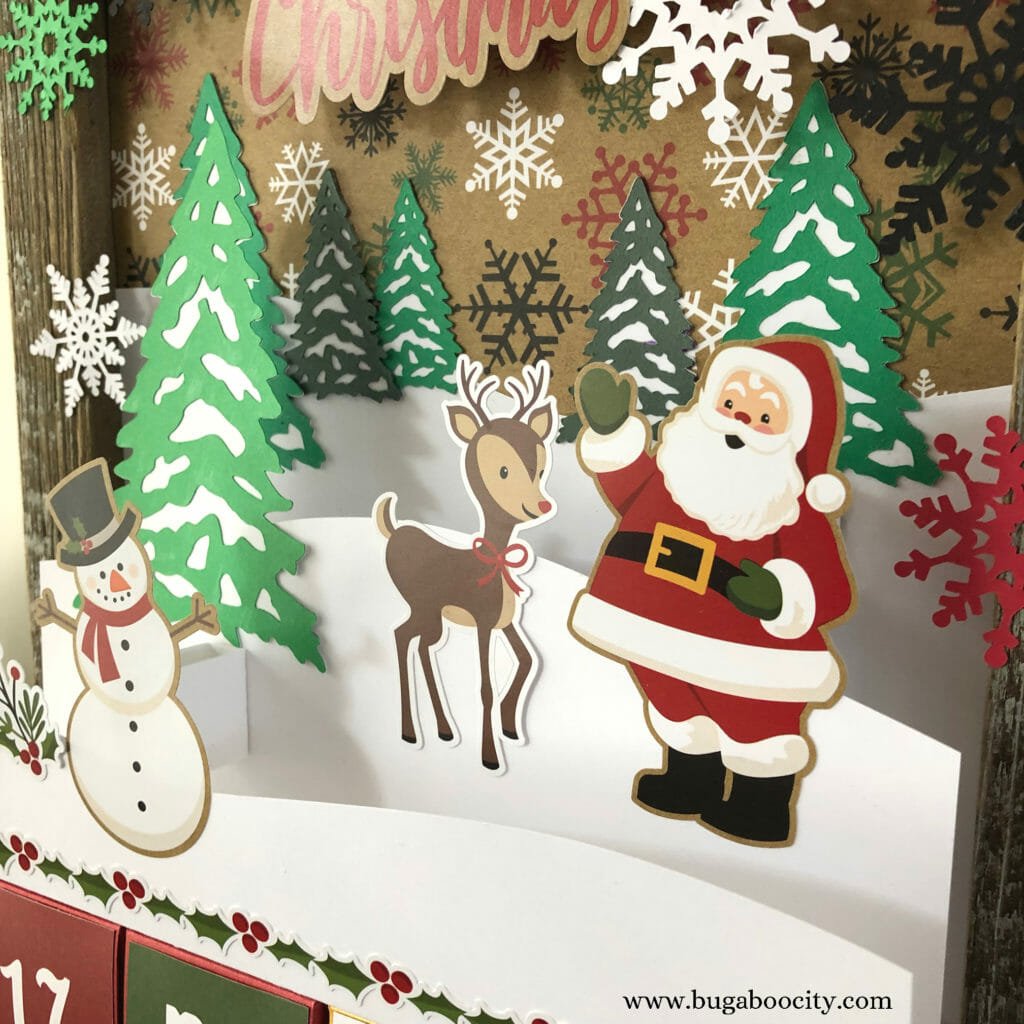
If your frame is tall like mine and there is leftover space after adding the boxes you will have rom to decorate! This can be as simple or elaborate as you want! After covering the inside of the frame with snowflake scrapbook paper, I chose to create a winter scene using paper. I started by cutting white cardstock to look like snow covered hills.
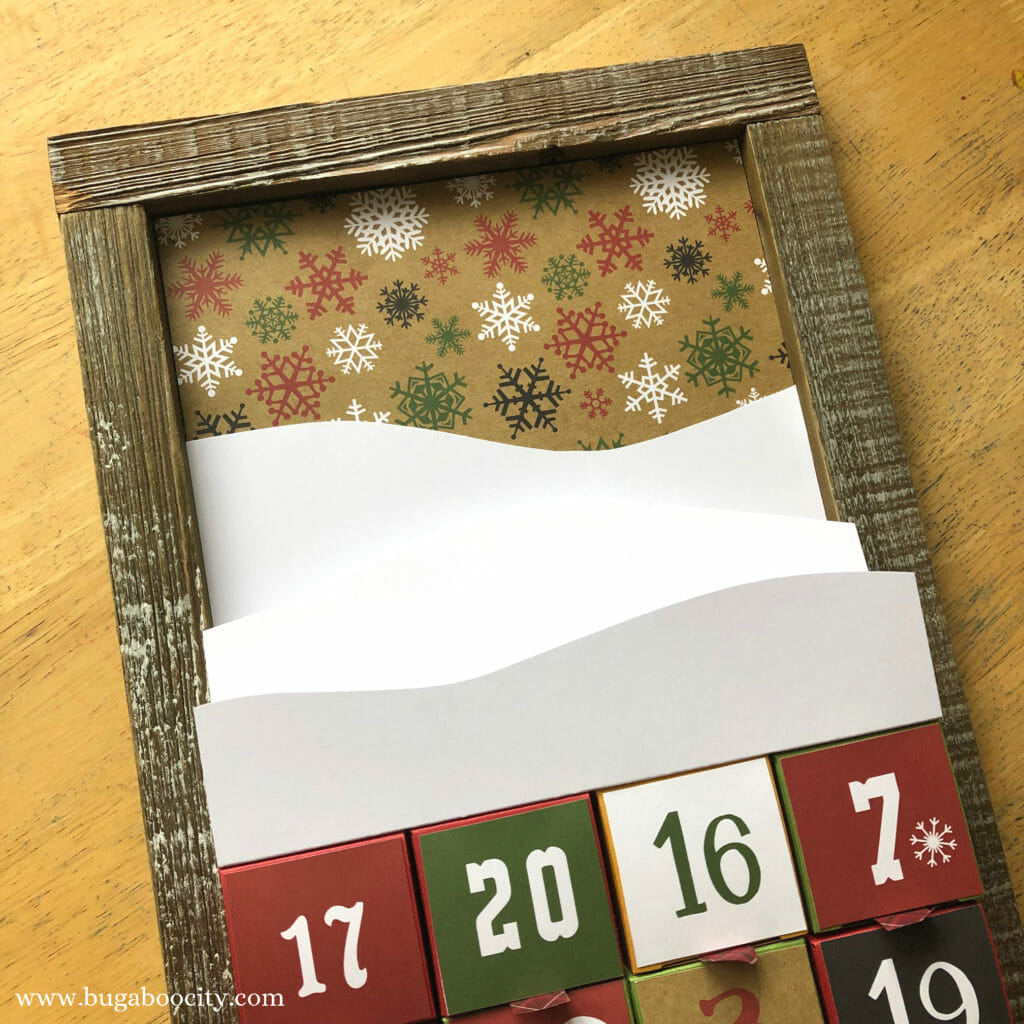
Once the snowy hills were in place, I added some stickers from the stack and then used my Cricut Explore to make trees and snowflakes in coordinating colors. Adding the stickers did make my snowy hills want to fall over, so to fix this, I added folded paper rectangles in back of the heavy stickers to support them. You can really play around and create a fun scene on top using paper, stickers, or drawings.
I love how magical this calendar turned out. It can be hung or leaned against the wall. You can create something similar using any size wooden frame. I normally do 25 boxes for my Advent Calendars, but only 24 boxes would fit. Depending on the size of your frame, you may be able to do a different arrangement and fit 25 boxes.
Do you count down to Christmas with an Advent Calendar? There really are so many different kinds out there – both handmade and store-bought. All have their own unique charm!
Here are a few of my other fun DIY Advent Calendars!
- Beer Advent Calendar
- Kindness Advent Calendar
- 12 Day Advent Calendar for Sewers
- Puzzle Advent Calendar
- 12 Days of Christmas Gift Tag Ornaments
I hope all of your Christmas preparations are going well! I have some fun Christmas crafts to share with you over the next couple weeks! :)

![]()


