
DIY Christmas Place Card Ornaments
Create these festive DIY Christmas place card ornaments for your holiday table in Cricut Design Space. These make wonderful place cards and favors for your holiday dinner guests.

It’s the ninth day of “12 Days of Holiday Crafts” and today I’m sharing a tutorial for making DIY Christmas place cards ornaments. These place cards make a great addition to your holiday table! Made with clear acrylic ornaments and vinyl, these are a fun Christmas craft you can make with your cutting machine. I used my Cricut Explore and files found in Cricut Design Space.

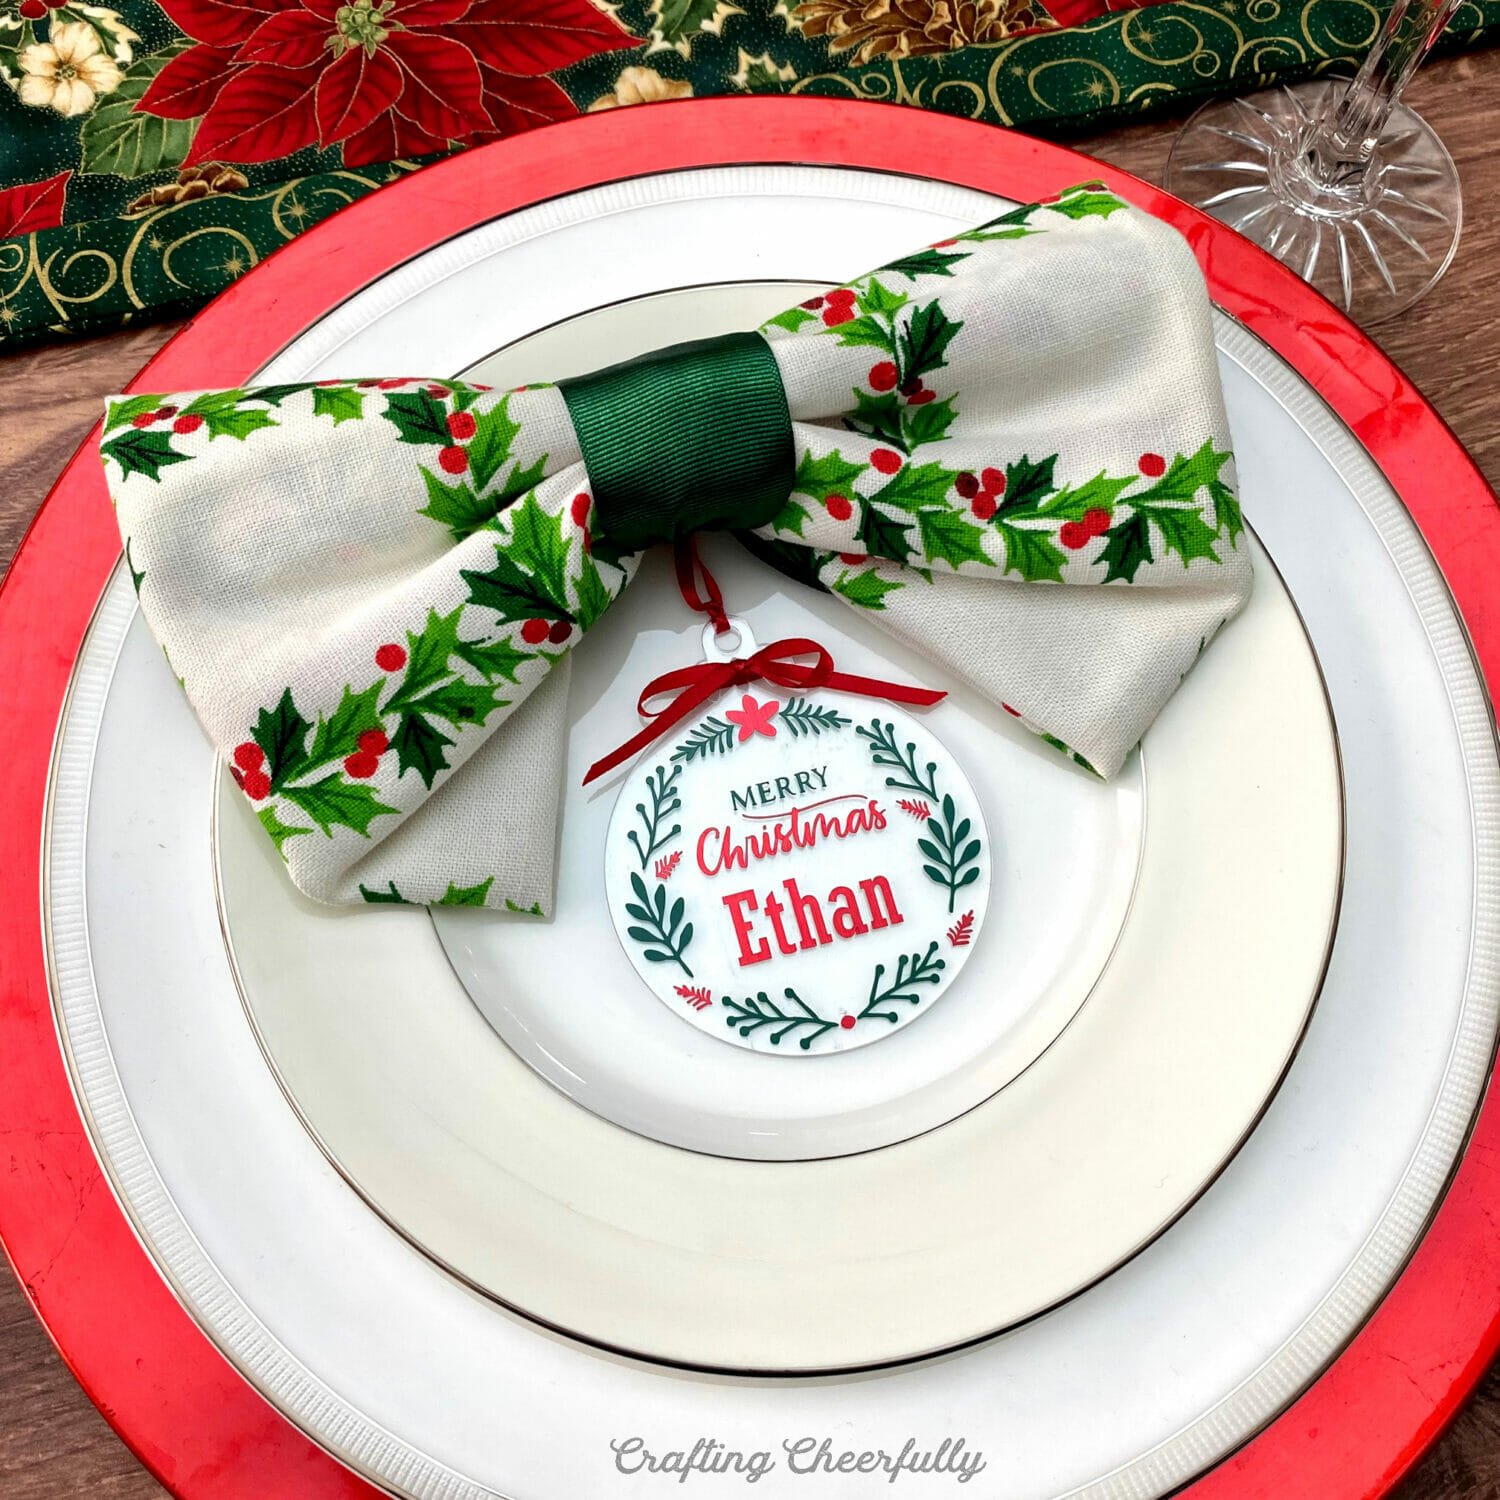
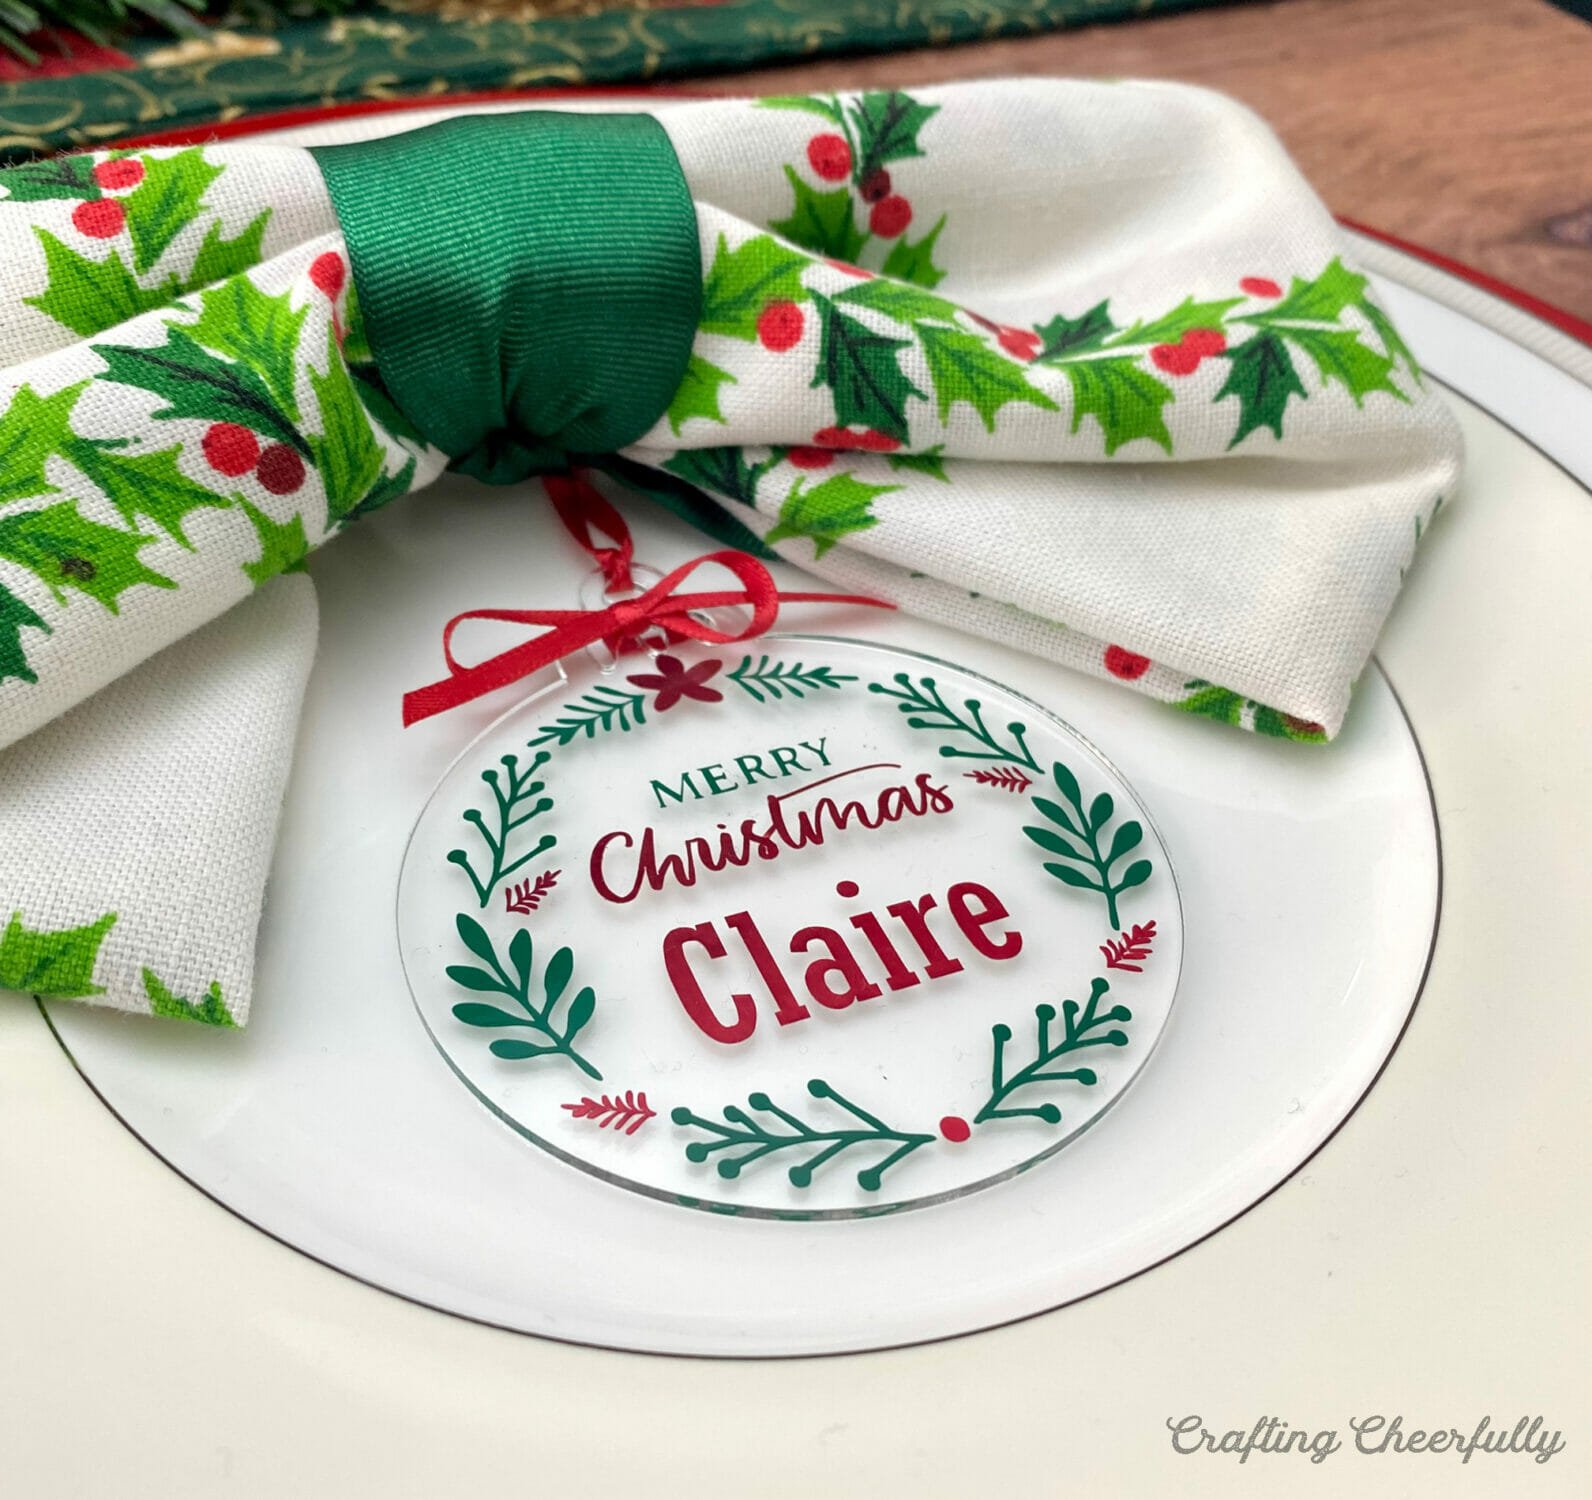
If you are hosting family and friends for the holiday, these ornaments pull double-duty as both place cards and favors. Guests can take one home and hang it on their Christmas tree. If you host the same group each year, you can save these and use them as place cards year after year.
Since these ornaments are clear, they will look best against a white or cream plate or napkin. If you have patterned plates, you can use white ornaments instead of clear to create your place cards.
Below is the tutorial for how to make these place card ornaments, including a step-by-step picture tutorial for how to design the ornament in Cricut Design Space.
How to Make Christmas Place Card Ornaments
Supplies Needed:
- Cut file created in Cricut Design Space
- Wreath with Poinsettia #M113A7E42
- Merry Christmas #M26EA4B8B
- Font for Names: Rockwell Condensed
- Clear Acrylic Ornaments
- Green Vinyl
- Red Adhesive Metallic Foil
- Cutting machine, Cricut Tools and Cricut Mat
Create the Ornament Design in Cricut Design Space
These ornaments were designed and created in Cricut Design Space. If you’d like to use the cut file, check out my Cricut Design Space cut file. You will need to personalize it with your own name. I used the font, “Rockwell Condensed”. You’ll need to download that font for free online before creating the ornament, or choose a different font in Design Space.
The circle in the project is there to help you arrange the pieces so they will fit on a round acrylic ornament. My ornaments were 3″ so I made my image 2.75″ wide. You can select the entire design and resize it. Be sure to hide the circle layer before cutting, as it is there as a guide, not as a piece to be actually cut.

When it’s time to change the name, simply un-attach the red layers, change the name, and re-attach them. You could also duplicate the design for the number of ornaments you are making, change all of the names at once, and cut multiple ornaments at one time.
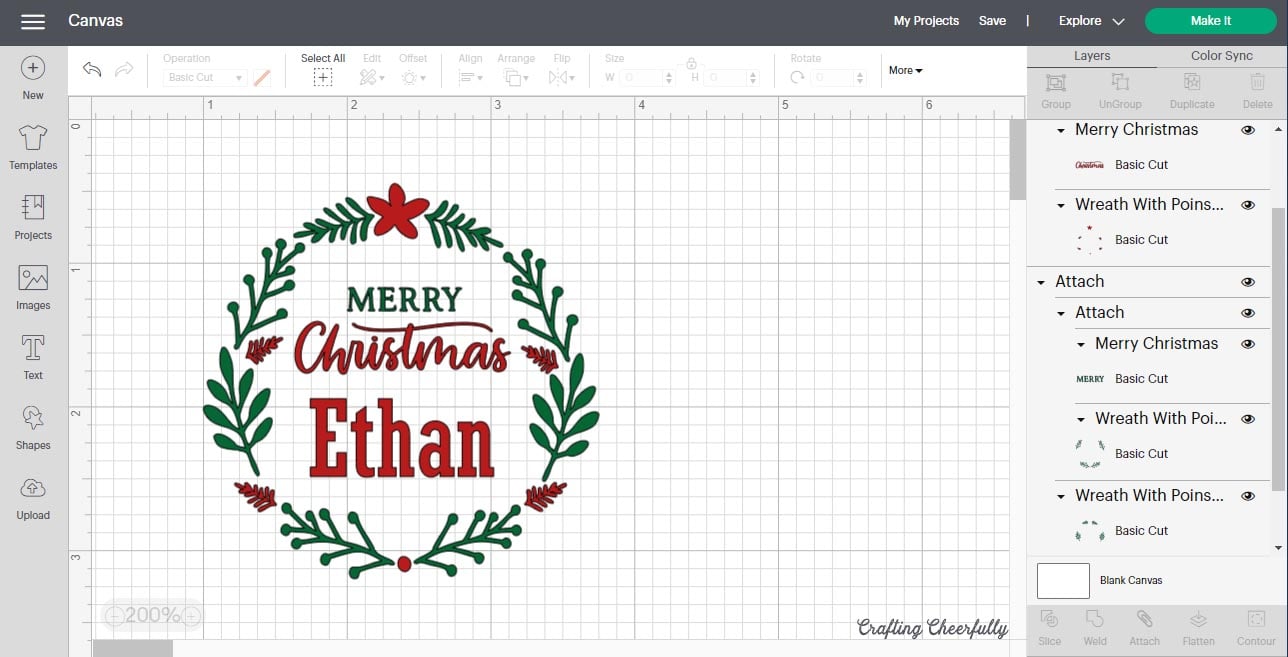

For my ornaments, I used green Everyday Vinyl and red Metallic Adhesive Foil. I love the shine the foil has!

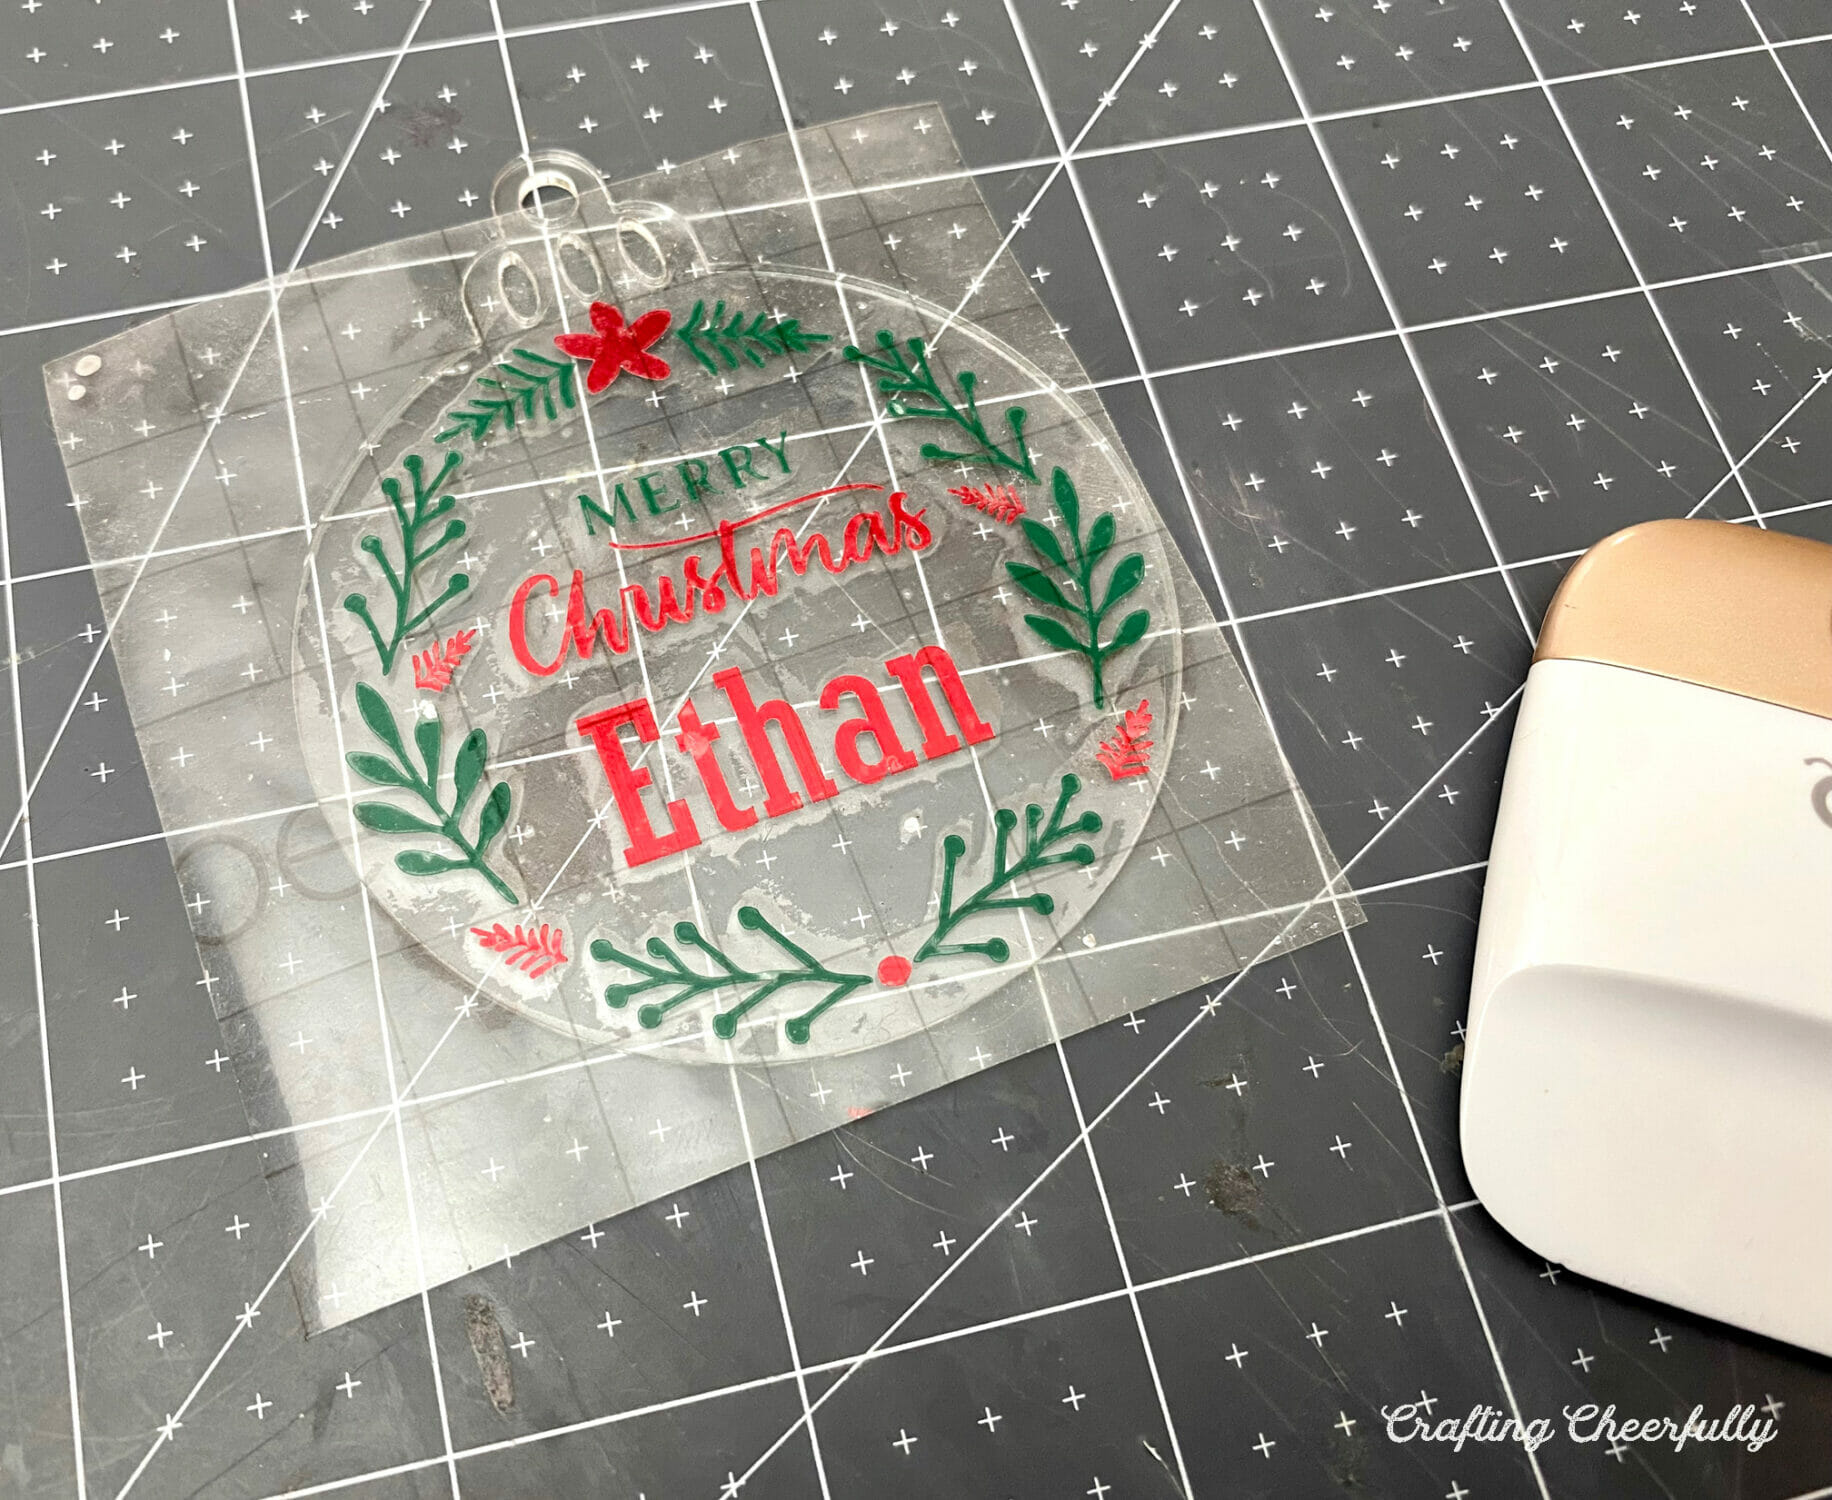
Apply the Design to the Ornaments
Start by weeding the designs carefully.

Use Cricut Transfer Tape to apply the vinyl and foil to the ornaments. Start by first applying the red layer to the green layer using the Transfer Tape, then apply the entire design to the clear ornament.


Add a Hanging Loop
Add a ribbon bow to the top of the ornament, threading the ribbon through the holes in the acrylic ornament. Add a hanging loop with the same ribbon.
Setting the Table
The Christmas place card ornaments are finished! I love how these turned out and how lovely they look on our holiday table. I paired the ornament place cards with vintage cloth napkins from my grandmother. I folded the napkins into a bow and used green ribbon to hold them. The bows are perfect because they hide the ends of the hanging loop. I followed this tutorial by Made by Fate to fold my napkins into bows and used green ribbon instead of napkin rings. Apartment Therapy also has a great video for folding napkin bows.

I hope you enjoyed this fun Cricut Christmas craft! If you’re interested in more craft ideas for your cutting machine, check out these holiday tutorials!


do you happen to sell these? My mother saw them when I was searching for something else and is in love, but doesn’t want to make her own. I also don’t have the stuff necessary to make it, but i have money!
Hi! It’s so nice to hear your mom likes these ornaments! I’m so sorry I don’t sell these, I just have the tutorial available. You may be to able to make something similar without using a cutting machine by using stickers or paint with the clear acrylic ornaments!