DIY Ribbon Wreath for Christmas
Create a simple DIY ribbon wreath for the holidays! This wreath looks like a candy cane when finished and is perfect for Christmas.

It’s the eighth day of my “12 Days of Holiday Crafts” series and I’m sharing this simple DIY ribbon wreath you can make for the holidays! This is by far one of the easiest wreaths I have ever made and I get so many compliments on it – go figure! It looks like a candy cane or peppermint and is the perfect wreath for Christmas!
To make this wreath, you only need a few supplies, including a large foam wreath form and red and green ribbon. I chose to use satin ribbon and love the sheen it gives the wreath. Satin ribbon is also easy to find at most craft stores or online. At first I was going to purchase a pre-made bow, to make this the quickest craft ever, but at the last minute, I decided to try making my own bow.

To make my bow, I used a bow maker my mom gave me. She used to make lots of beautiful floral arrangements and used the bow to decorate the vases. I thought it was going to be tricky to use, but after making my green bow for this wreath, I regret not using it sooner! I love how big and fluffy my bow turned out.
While I decided to make my own bow for this wreath, most craft stores sell pre-made bows during the holiday season. Grab one in a color that matches your ribbon and this wreath will be extra easy to pull together!

Supplies Needed for DIY Ribbon Wreath:
- 15.6″ White Foam Wreath
- 1.5″ Wide Red Satin Ribbon
- 3/8″ green satin ribbon
- 2.5″ green satin ribbon for bow or purchase an already-made bow
- Bow Maker – optional but lots of fun to use!
- Hot glue or tape

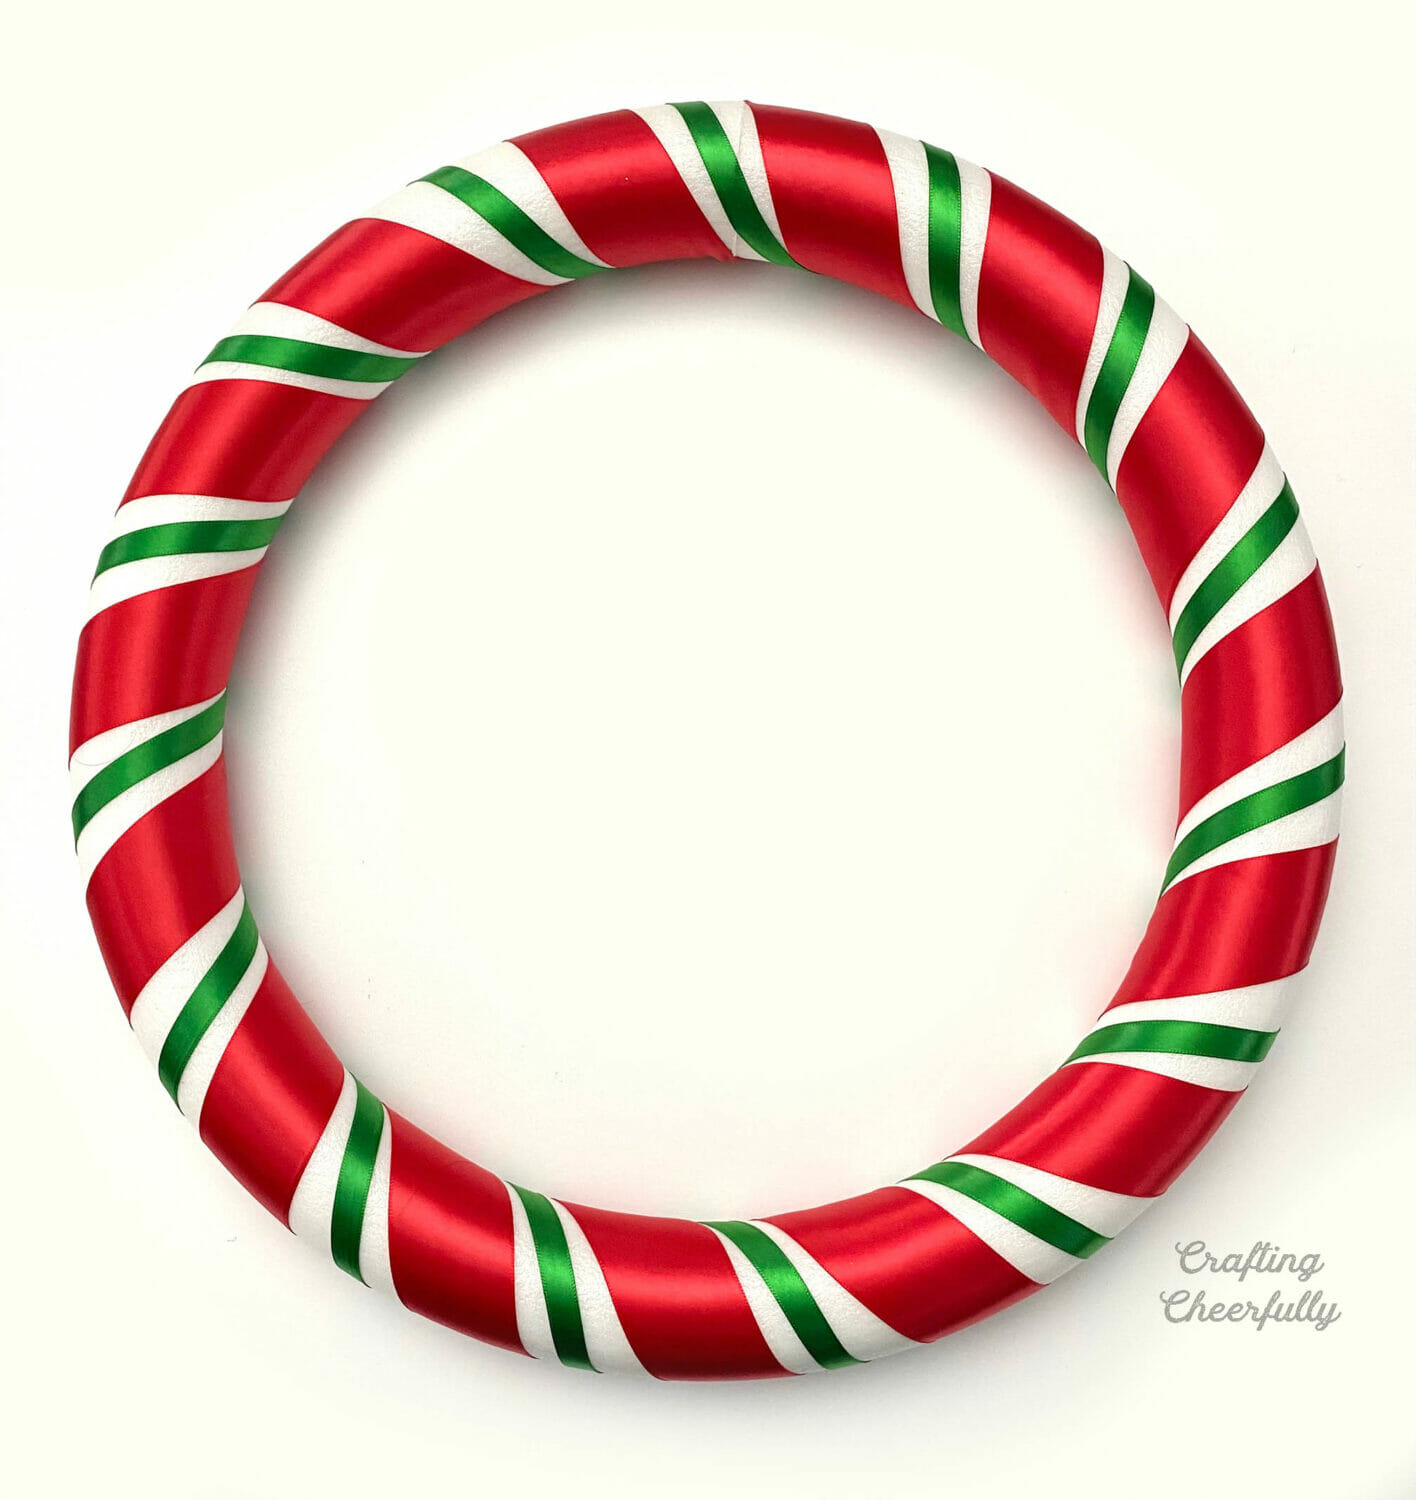
Step One: Start by wrapping the foam wreath with 1.5″ red satin ribbon. Use hot glue or tape to hold the beginning and end of the ribbon in place. You could make this wreath temporary by just using tape. After the holidays, you can remove the ribbon and use it for other projects. While wrapping the ribbon, try to space the bands out evenly and be sure to leave enough room for the green ribbon which comes next.

Step Two: After the red ribbon is in place, wrap the thin 3/8″ green ribbon around the wreath form so the green ribbon falls in between each strip of red ribbon.
Step Three: Add a bow! You can use a pre-purchased bow from the craft store or create your own. I used a bow maker my mom had to make my large green bow and followed the directions for a “wreath bow”. I used about 4 yards of ribbon.
The bow was made with three loops that were 10″ long (the loops extended to the 5″ marking on my bow maker) and two loops 8″ long (these loops extended to the 4″ marking on my bow maker). The center loop was 1.5″ long and my streamers ended up being about 11.5″ long. I used a thin piece of wire to hold the bow together.


If you don’t have a bow maker and want to try making your own bow, there are lots of handy YouTube videos showing how to make your own bows by hand. You can of course skip the handmade bow and simply purchase a pre-made bow. I found lots of beautiful bows at both Michaels and Joann Fabrics, plus there are even more available on Amazon. Look for a bow that is about 10″ wide.
Step Four: Add a hanging loop. Cover the top of the wreath form, where your red and green ribbon began, with a wide strip of ribbon. I used the same ribbon as my bow. Add a hanging loop with thinner ribbon around this. Attach your bow with wire or another piece of ribbon.

The wreath is finished! I love a quick Christmas project! Hang the wreath up and enjoy your new DIY ribbon wreath!
I love peppermint crafts at Christmas-time! Check out my collection of peppermint and gingerbread-themed crafts like my Gingerbread and Peppermint Banner and my Gingerbread House Treat Boxes!