
Christmas Sweater Treat Boxes
Create cute and colorful Christmas sweater treat boxes! Perfect for holding gift cards and small treats. Free printables to help get you started!

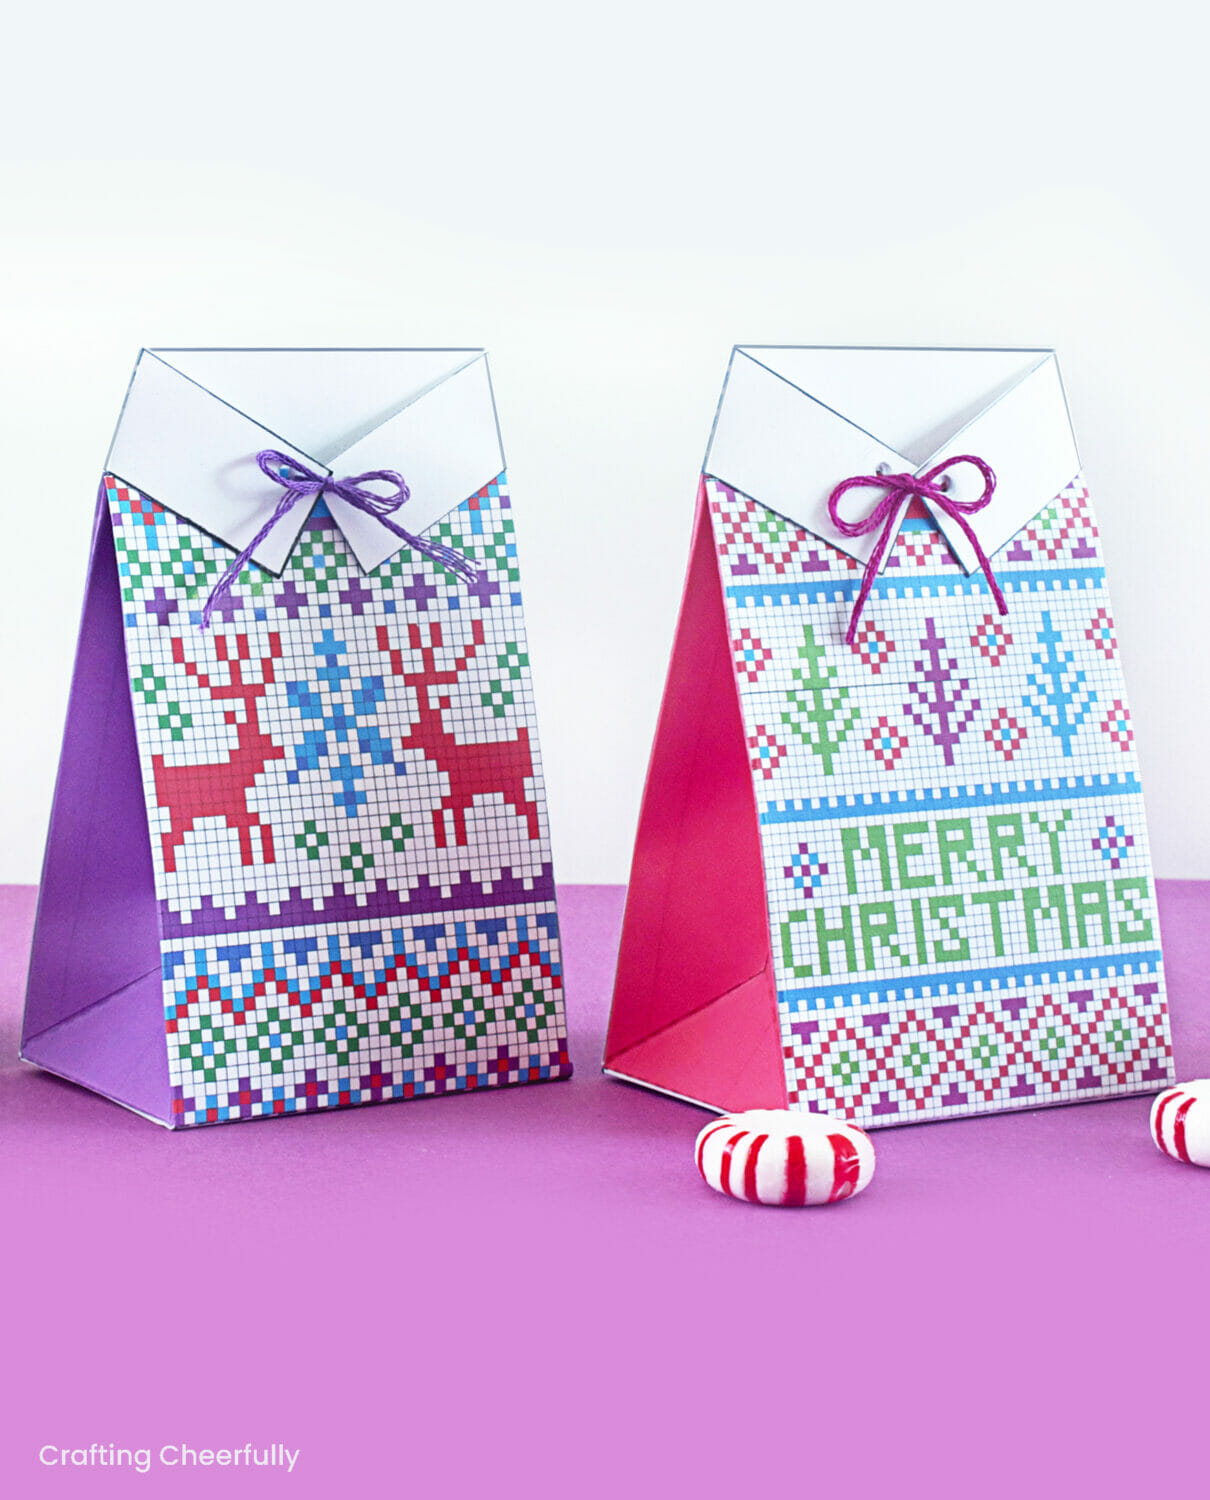
Hello Crafty Friends! Today I am sharing how to make your own Christmas Sweater Treat Boxes! These little boxes are so cute and are the perfect size for small treats and gift cards. They also make adorable party favors for your next holiday get-together.
I had a lot of fun creating these boxes. I started with a blank grid in Photoshop and filled the squares with different colors to make holiday designs. There are three designs total, all a little different. They look great all-together as a trio or on their own. It took me a while to figure out how to create the collar of the shirt and how it could be used to keep the treat box closed. I am really happy with how it all turned out.
Treat boxes are perfect for the holidays! Fill them with a little something special and they make great gifts for family members, co-workers, teachers ands kids. I love making them and offer a several free printable treat boxes. Check out some of my favorites!
- Cozy Cabin Treat Boxes
- Gingerbread House Treat Boxes
- Color-Your-Own Holiday Treat Boxes
- Color-Your-Own Gingerbread House Boxes
Below is the tutorial to make your own Christmas Sweater Treat Boxes!
How to Make Holiday Sweater Treat Boxes
Supplies Needed:
- Free printables – Grab the free files by filling out the purple form at the end of this post.
- White cardstock to print on – I printed on 110lb white index paper
- Embroidery floss or Baker’s Twine
- Paper Trimmer and/or scissors
- 1/8″ Hole punch
- Scoring Board – optional, but it makes things much easier!
- Adhesive: glue stick, tape roller or 1/4″ Scor-Tape

Step by Step Tutorial
Step One: Download, print and cut out each sweater treat box. Each box has two pieces, a front and a back.

Step Two: Score along the dotted lines, then gently fold along the scored lines.


Step Three: Poke holes in the top of the box and collar. There are two holes on each piece marked with dots. I used a push pin to poke through each hole and then used my scoring tool to make the holes slightly bigger. You could also use a 1/8″ hole punch.

Step Four: Assemble the box. You will need to attach the front and back pieces together using the flaps found on the front piece. I used my tape roller to adhere those pieces as well as the bottom pieces. Fold the bottom together so the last flap to close, the one that will be on the outside, is coming from the front piece. This way, when you look at the treat box from the front, the bottom will lay nicely.


Step Five: Fill the box with goodies!, This box is a great size for small treats and even gift cards. Close the box by folding the collar pieces and bringing them to the front. Line up the holes on the collar pieces with the holes on the front of the sweater. It was easiest for me to tie the boxes shut if I laid them on their backs.


The treat boxes are complete and ready to be gifted! I’ll be back tomorrow with the last project in this year’s series “12 Days of DIY Holiday Crafting”. Yay! Looking for more DIY holiday crafts? Check out my Christmas Craft page for more ideas and inspirations :)

Get the free Holiday Sweater Treat Boxes!
Fill out the purple form below with your first name and email address! The free file will be sent straight to your inbox! If you have already filled out the form below, don’t worry – you won’t be added to my list twice! This freebie is for personal use only. I hope you enjoy crafting something special. Please let me know if you have any questions :)


I love all of your posts but the purple window to get your free printables is always missing. I cannot ever find it. Please help point me in the right direction.
Hi! The purple form is always at the end of the post, after my signature “Happy Crafting,-Kimberly” and right before the comment section. If you have any trouble finding the form, please don’t hesitate to email me at kimberly@craftingcheerfully.com and I’d be happy to email the file you are looking for directly to you! :)
These little sweater treat boxes are SO CUTE! Can’t wait to make them & fill with treats for my family! Thank you so much for sharing your talent!
Thank you!! I hope you have fun making the little sweater boxes and you have a wonderful holiday :)