DIY Candy Treat Boxes
Create cute candy treat boxes with this free pattern and cut file. These versatile treat boxes use two sheets of scrapbook paper. They are perfect for birthdays, holidays and parties!

Hello Crafty Friends! Today I have a tutorial for these sweet little candy treat boxes! They are endlessly customizable and the perfect size for small candies and goodies. Each box is made with two different decorative papers. Mix and match scrapbook paper to make a treat box for any occasion, holiday or celebration.
For these farmhouse-themed boxes I used gorgeous floral paper from BoBunny (from the collections “Petal Lane” and Felicity”) alongside woodgrain paper. The darker woodgrain piece of paper is from Simple Stories (Elm/Cream Ledger). I filled my boxes with white chocolate truffles. Three truffles fit perfectly in each box.

These candy treat boxes can be created by hand or with a cutting machine. Using a cutting machine will make cutting out the window on the top of the box and the scalloped edges of the lid easier. If you create these by hand, you could skip the scalloped edges and keep them straight.
Below is the tutorial showing how you can create your own boxes. They are perfect for birthdays, Mother’s Day, wedding showers, and can even be customized for different holidays by switching up the paper used.

DIY Candy Treat Box
Supplies Needed:
- Free PDF and SVG Cut Files – Grab the free files by filling out the purple form at the end of this post.
- 2 sheets of scrapbook paper – 65lb – 80lb paper
- Grafix clear craft plastic– 1.75″ x 3.75 “
- 1/4″ Scor Tape Adhesive
- White chocolate truffles
- For PDF Pattern:
- For SVG Cut File:

Step by Step Tutorial
Preparing the SVG Cut File in Cricut Design Space
The SVG cut file comes with score lines that need to be attached. First open a new project in Design Space and upload the SVG. Once added to your project, ungroup the entire image as well as the smaller purple piece group.
The score lines are marked in bright pink. Highlight all of them and change their operation from cut to score.

Finally, we need to attach them to the box pieces. Highlight a score line and the piece it is positioned on top of and select “Attach” found in the bottom right corner. Once attached, the pieces with move to the top of the layers panel and appear under the label “attach”. Repeat for each piece and then you are ready to cut. When you go to cut, double check your score lines are attached. They will appear as dashed lines on the pieces and score will be listed above basic cut in the left menu.


Step One: Cut out the paper boxes.
Start by cutting the box pieces. If cutting them by hand, use a scissors to cut out all 4 pieces and then use a craft knife and self-healing mat to carefully cut out the peekaboo window and the three slots.
Both the PDF pattern and SVG cut file come with lid options including scalloped edges and straight edges. (You can see an example of a box with straight edges on my tropical boxes pictured after the tutorial).

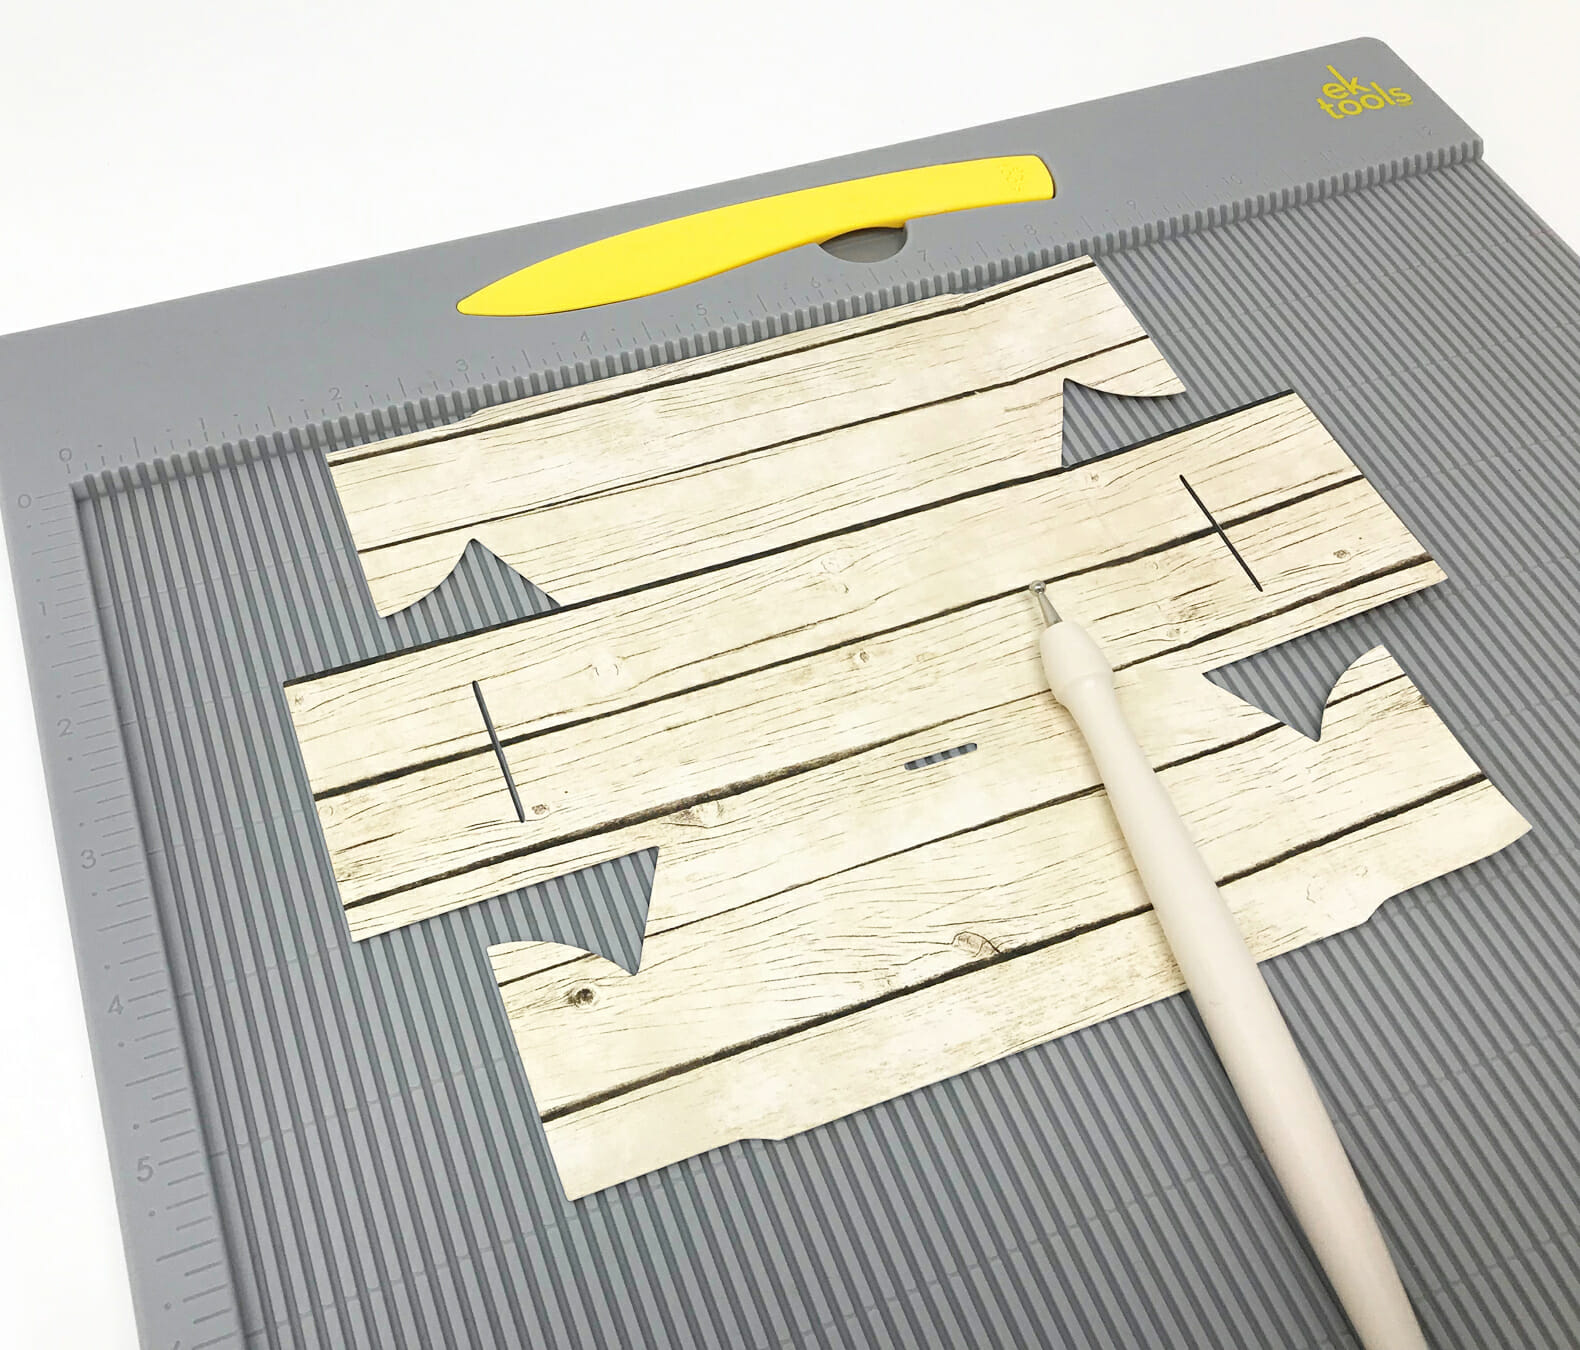
Step Two: Score and gently fold the box pieces.
Score the treat box using a scoring board and stylus. If you cut your treat box out by hand you will want to score all of the fold lines using the pattern as a guide. You can mark these, prior to scoring, lightly with a pencil on the wrong side or with little tick marks at the top of each scoring line.
Sometimes even though my Cricut Explore will score my pieces, I will go over them using my scoring board. I find it makes the box easier to fold.

Step Three: Create the box lid.
Attach the small piece of craft plastic to the inside of the lid using double-sided tape.

Next, attach the two side flaps to the lid.

Step Four: Attach the lid to the box.
Once the lid is complete, it is time to attach it to the box. Place a row of adhesive along the back flap of the lid as show below. Attach this to the back of the treat box. You can tell which side of the treat box is the back because it does not have the notch cut out of it.
 Fold in the sides of the boxes as shown below and use tiny pieces of adhesive to secure them. I always fold in the back of the box first and then the front so that from the front the side of the box looks the neatest.

Fold the tiny tab at the point of the lid.

The treat boxes are finished! You can close the lid of the treat box by folding the lid around to the front and tucking it into the tiny opening. The sides will slip into the openings on each side

Fill the boxes with sweets and treats and gift to someone special. The boxes fit three chocolate truffles perfectly. Tie a ribbon or twine around them and embelish them as much as you want!


Examples of Candy Treat Boxes
These boxes are so easy to customize for different occasions and holidays. Below you can see a couple boxes I made using birthday-themed paper. I made a small paper bow to decorate the top of one box and love how sweet the bows look.


I used this pattern to make fruit-themed boxes for a summer gift. Filled with fruity candies, these boxes were so fun to decorate.


I hope you enjoyed this tutorial! These little candy boxes make such sweet gifts. As you can see, I’ve already used these for a few different gifts and they are quickly becoming a go-to treat box for me! If you love making paper treat boxes, I have a huge collection under my DIY Treat Box page.

Get the Free Candy Treat Box Files!
Fill out the purple form below with your first name and email address! The free file will be sent straight to your inbox! If you have already filled out the form below, don’t worry – you won’t be added to my list twice! This freebie is for personal use only. I hope you enjoy crafting something special. Please let me know if you have any questions :)


