DIY Felt Phoenix Mask
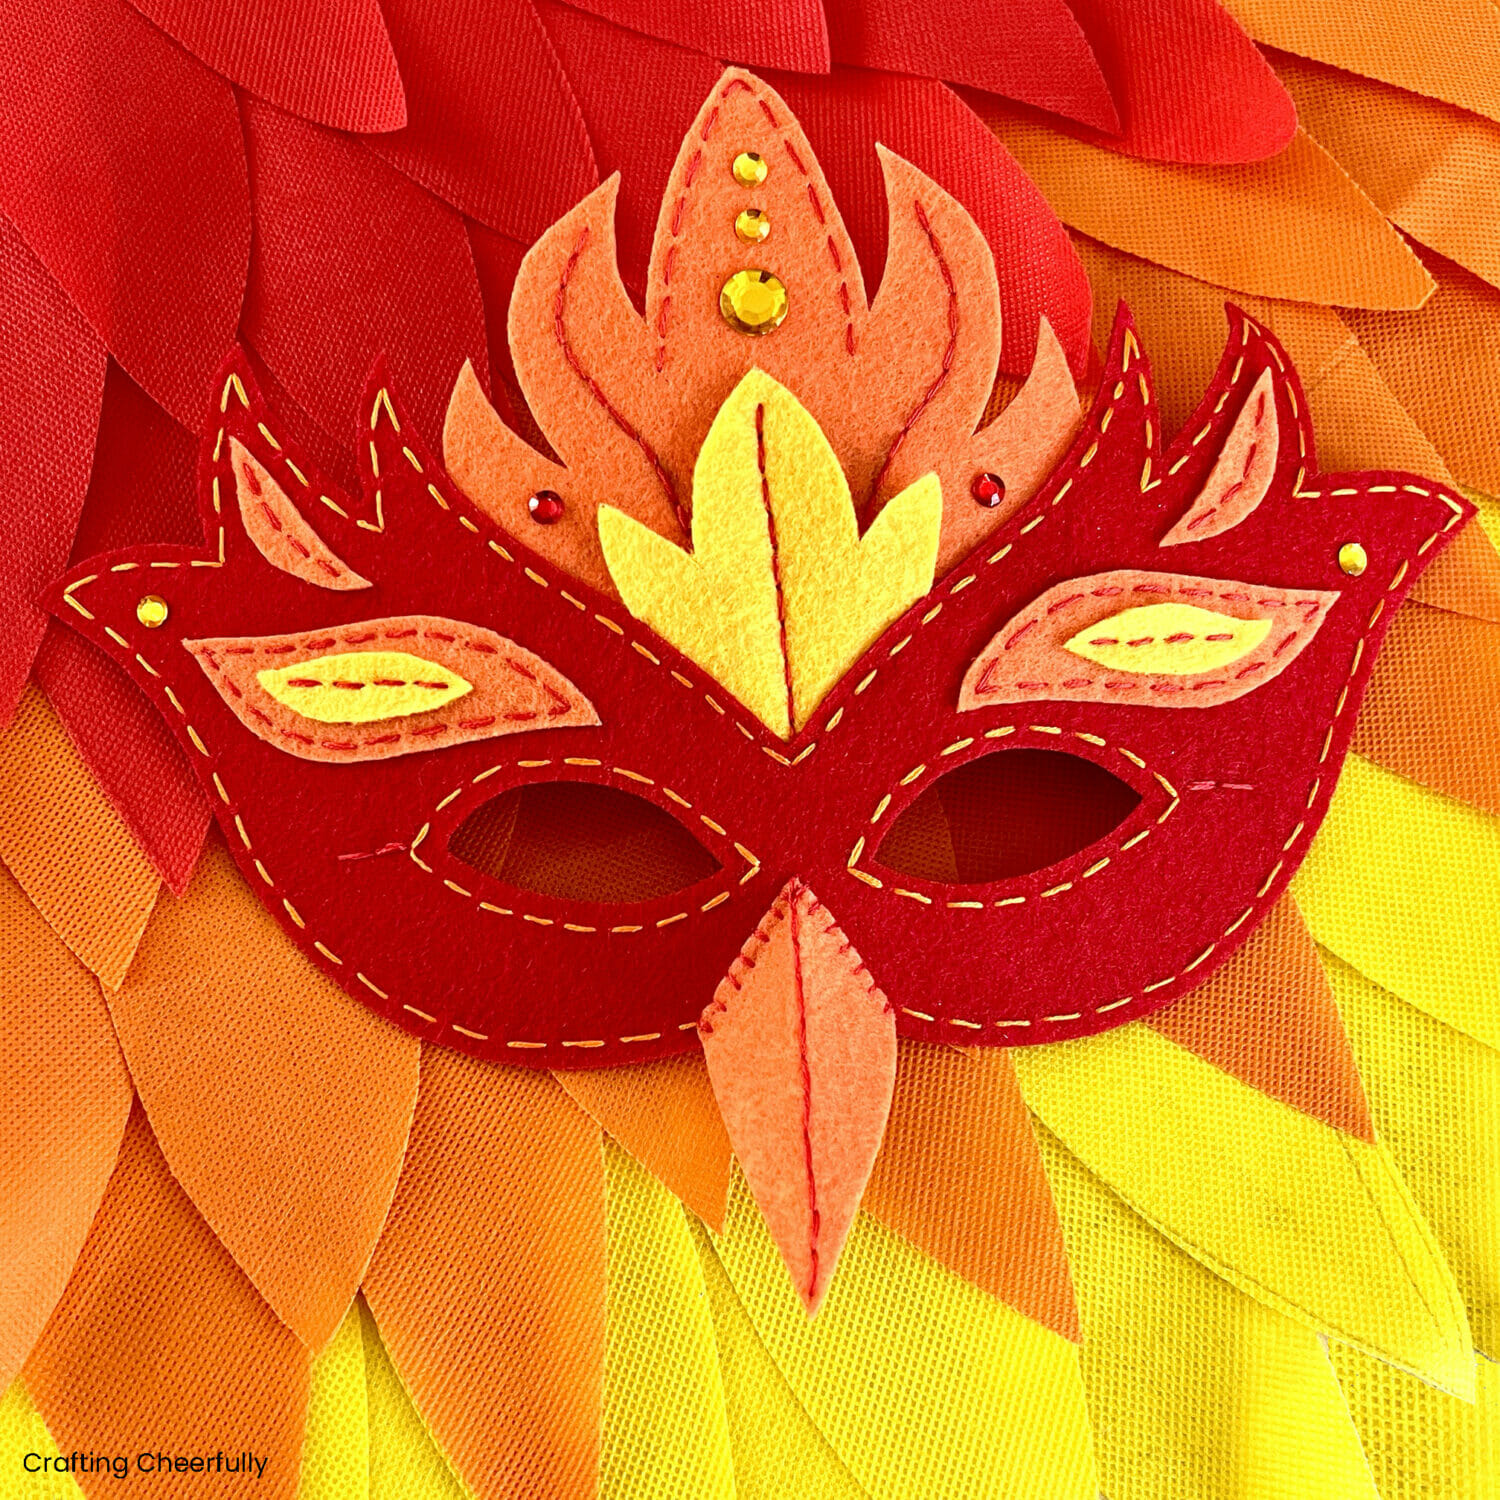
Learn how to make a beautiful felt phoenix mask using just a few supplies including felt, embroidery floss and a few stick-on gems!

Hello Crafty Friends! I’m here today with a tutorial on how to make your own felt phoenix mask! Last year my daughter went as a phoenix for Halloween. It was such a fun costume to create and one of the best parts was creating this mask. It was one of those last minute projects that turns out a little better than you expect!
This year I remade the mask and took step-by-step pictures so I could share the tutorial with you. I’m also sharing the pattern as a free download so you can create your own phoenix mask. Whether you are making it for Halloween or for pretend play, it is a fun maks that comes together with just a few supplies.

I recently shared a post all about the phoenix costume with details of the supplies I used, a link to the wing tutorial and a bit more info on how the costume came together. The wings turned out so well and were incredibly light-weight. The costume was really made complete though once we added the mask. It brought everything to life and my daughter loved wearing it – which I was worried about!

This mask is created with just three colors of felt, matching embroidery floss, a bit of elastic and a few stick-on gems I found in my daughter’s craft kit. Grab the free pattern by filling out the purple form at the end of this post and get ready to craft!

DIY Phoenix Felt Mask
Supplies Needed
- Printable pattern – Download the file by filling out the purple form at the end of this post.
- Red, orange and yellow stiffened felt – I used Kunin brand felt. The yellow pieces can be regular felt or stiffened felt but the orange and red need to be stiffened so the mask holds it’s shape.
- Red and orange embroidery floss
- Embroidery needle
- Embroidery Scissors
- Fabric Scissors
- Straight Pins
- Pencil
- Optional Gems
Cutting the Pieces
Start by downloading the free printable pattern and cutting out the pieces.

Trace the pieces onto felt. I used a Sharpie but you could also use a sharp pencil that shows up or a ballpoint pen.

Carefully cut out the pieces using a sharp fabric scissors.

Hand Sewing the Felt Mask
Stitch the pieces together using embroidery floss. Embroidery floss is made of 6 strands. I separated 2 strands and threaded my needle, tying a knot at the end of the floss. This made it so I was stitching with 4 strands of floss.
Below you can see the layout of the pieces and how they will be stitched together.

Start by stitching around the edges of the red mask using orange embroidery floss. Leave the top of the mask unstitched. I used a simple running stitch and tried to keep my stitches even and between 1/8″ and 1/4″ from the edge. Stitch around the eye openings in the same way.

Next, stitch the flames over the eyes of the mask using red embroidery floss. Stitch around the edges of the flames going through the red layer of felt so you are attaching them together. I stitched around the edges for the orange flame and did a simple line of stitched down the center of the yellow flame.

Adding the Large Flames
Add decorative stitching to the two large flame pieces using red embroidery floss. I used a pencil to lightly draw stitch lines that I could follow. To cover these pencil lines up, I used a backstitch rather than a running stitch.
Fold the beak in half and stitch along the fold line down the center of the beak. I again used a backstitch so it would be bold and stand out more.

Pin the large flames to the top of the mask. The red mask should overlap the flames about 3/8″ to 1/2″. Stitch along the top edge of the red mask with orange embroidery floss. Be sure your stitching is going through all two or three layers of felt and securing the flames to the top of the mask as you stitch.


Attaching the Felt Beak
Lay the beak on the red mask so that the top right side is in place. The top point of the beak should be centered between the eye openings and the side point should be touching the bottom of the mask. Use a whip stitch to stitch the side of the beak in place.
When you get to the top point of the beak, move the top left side of the beak so it is in place and repeat the process, this time stitching down towards the bottom of the mask. The beak will become 3-dimensional and lift away from the mask.


Adding the Elastic Head Band
There are two ways you can wear the felt phoenix mask. First, you can attach the mask to a long dowel using hot glue. This is perfect for a masquerade or if you prefer to hold the mask in front of your face. I recommend painting the dowel red before attaching it. You could even add red, orange, and yellow ribbons to the dowel for extra flair.
If you would like to make the mask wearable without a dowel, use elastic so the mask can be worn hands-free! Use a thin piece of elastic and stitch it to the inside of the mask on the outer edge of the eye opening. Use red embroidery floss so the stitches blend in in the front of the mask and make sure to secure the elastic in place.

Figure out how long the elastic should be by measuring it on your head, or on the head of whomever will be wearing the mask. Stitch the other end of the elastic down on the opposite side of the mask.

Decorate with Gems
Finally, decorate the mask with a few gems to give it a little sparkle. I found these gems in my daughter’s art supplies and they were perfect. Use a bit of fabric glue to make sure they stay in place!


The mask is finished! I love the way it turned out and overall it was a quick make that really made my daughter’s phoenix costume!

I hope you enjoyed this tutorial! Be sure to check out my DIY Costume Page for more fun ideas for homemade Halloween costumes.

Get the Phoenix Mask Pattern
Fill out the purple form below with your first name and email! The free file will be sent straight to your inbox! If you have already filled out the form below, don’t worry – you won’t be added to my list twice! This freebie is for personal use only. I hope you enjoy crafting something special. Please let me know if you have any questions :)


