Outdoor Wood Flower Garden Art
Create a beautiful trio of flowers with this outdoor hanging garden art! Using wooden flowers, outdoor paint and colorful gemstones, you can make a fun piece of art that will look amazing in your yard or garden.
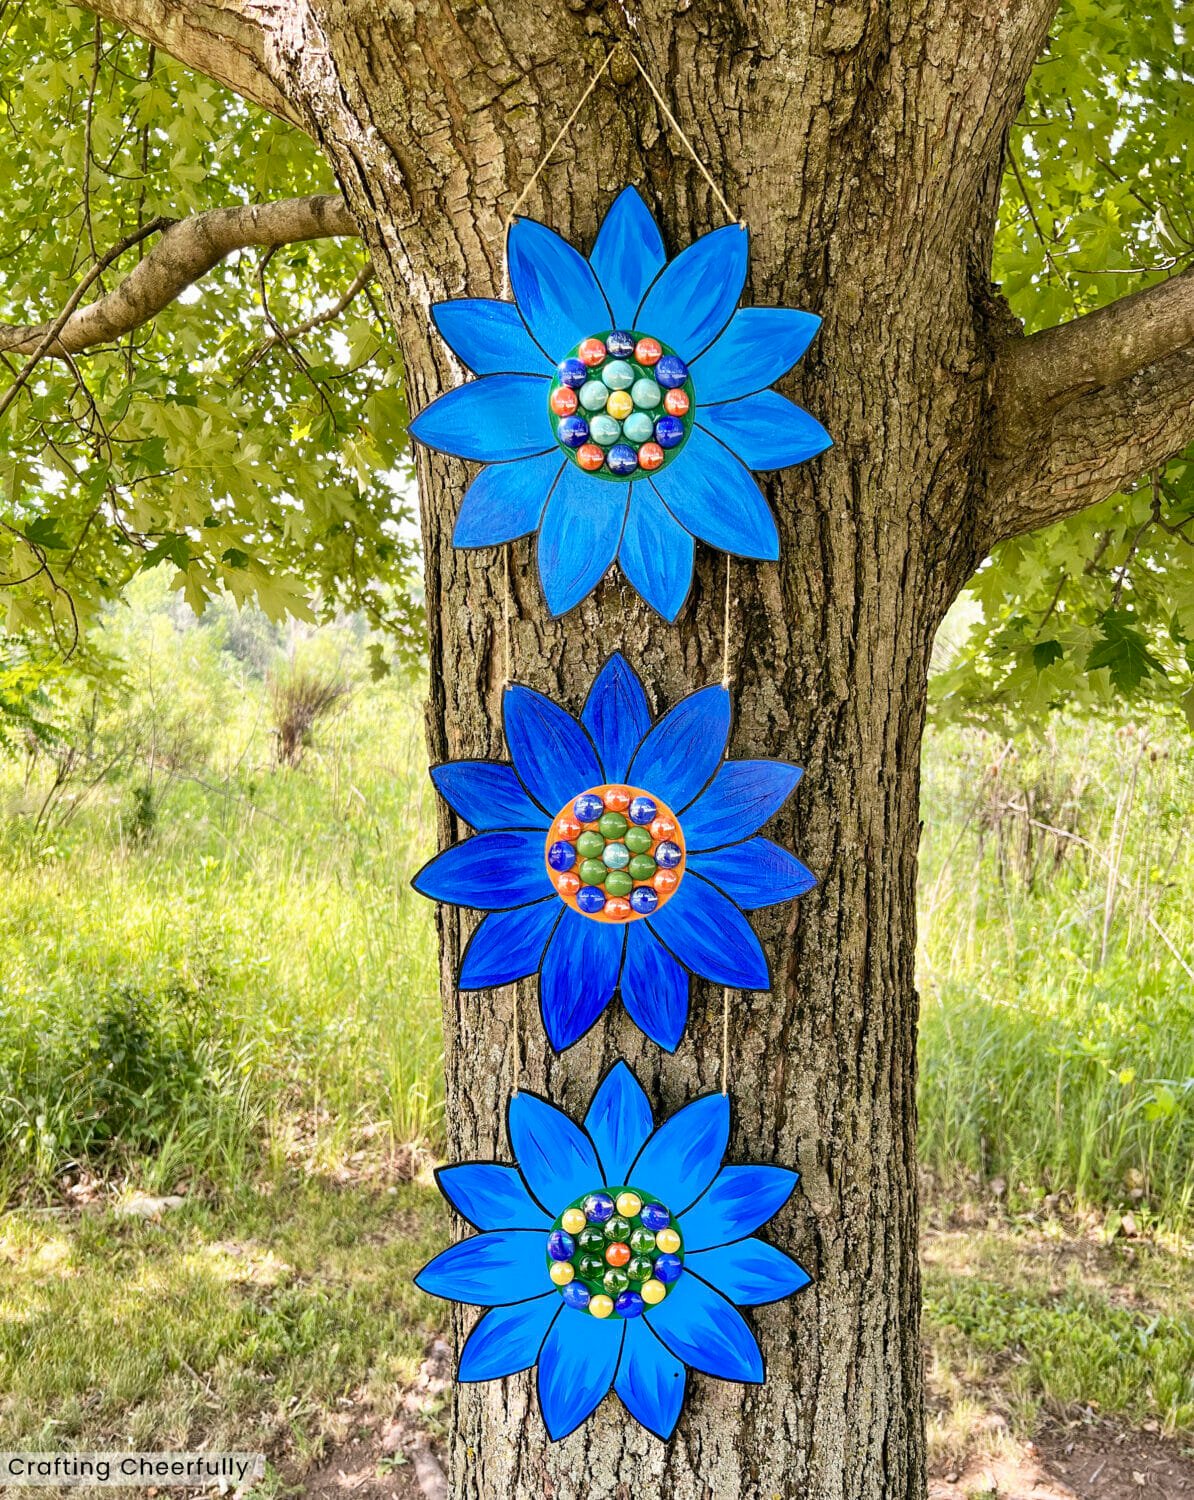
Hello Crafty Friends! I’ve been on a roll making new garden art for our yard this summer and today I’m excited to share this trio of hanging flowers!
I recently created a sunflower sun catcher and purchased a wooden flower to make it. The flowers came in a pack of four so I had three flowers left over. I decided to paint them and string them together to make this fun, and very colorful new garden ornament.
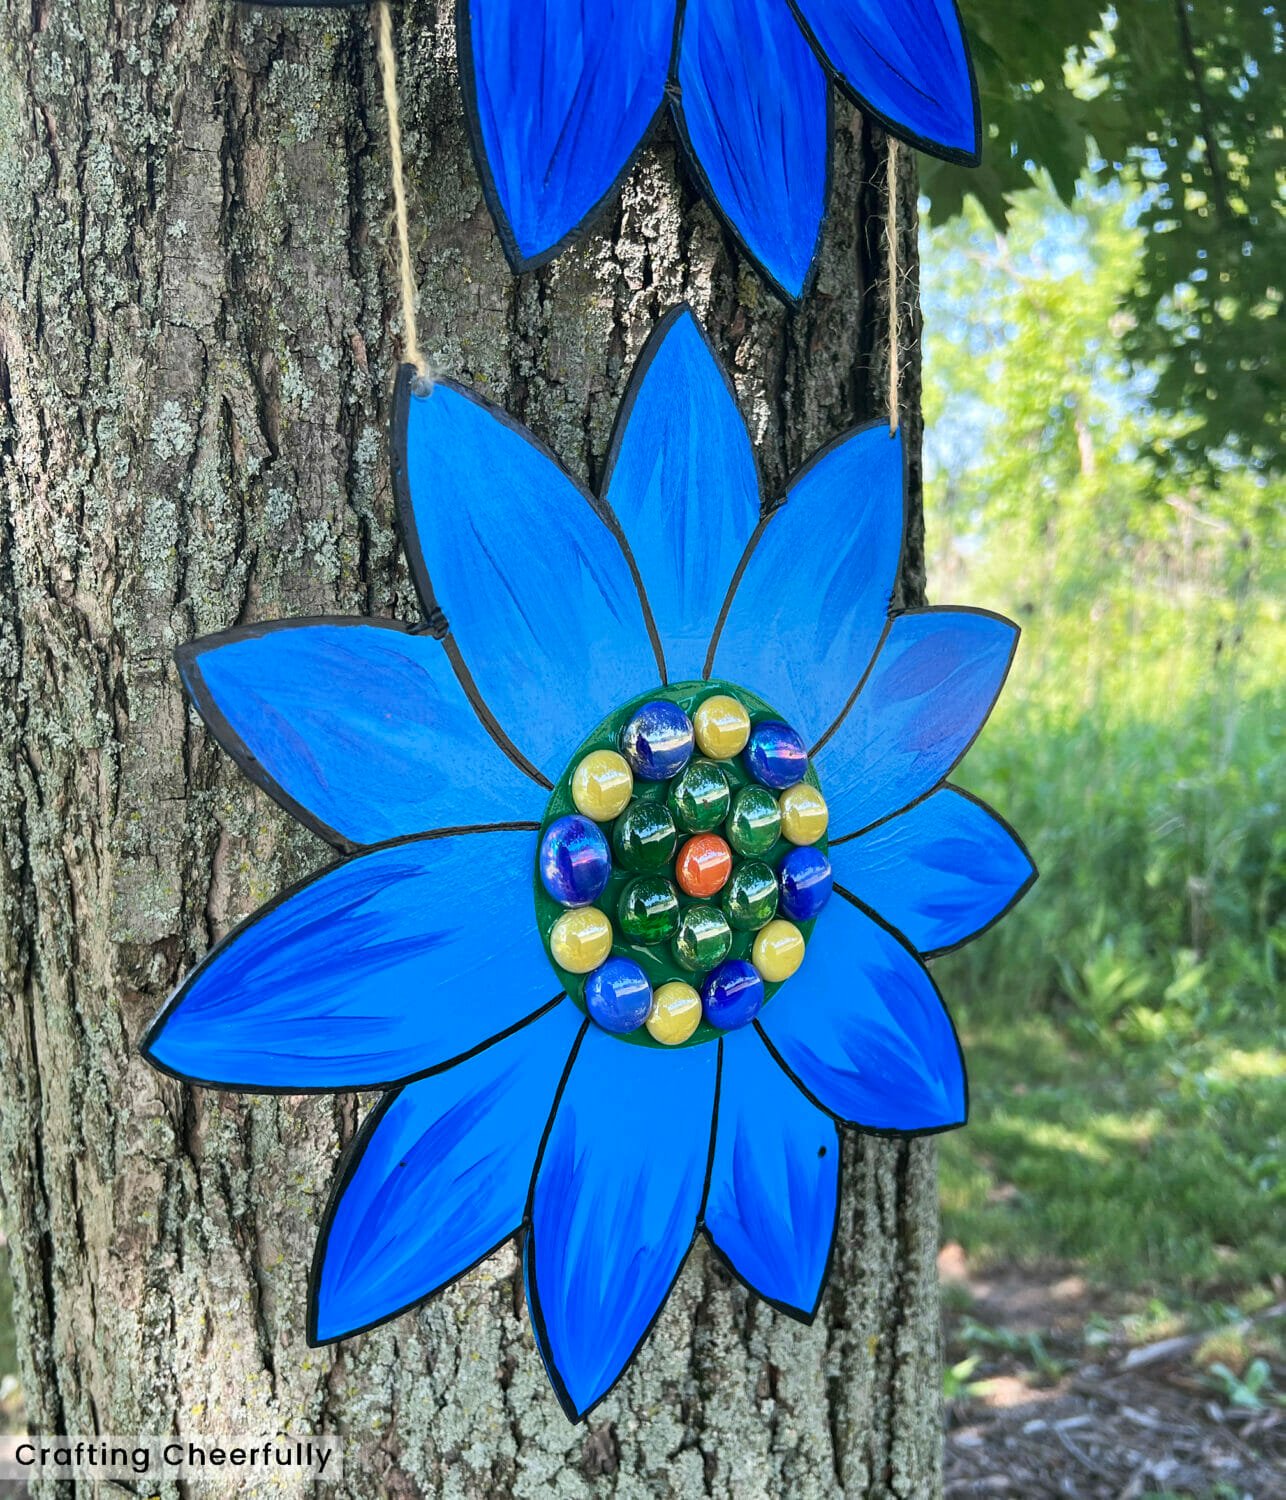
With just a bit of outdoor acrylic paint and some pretty glass gems, these flowers were simple to make. I made mine blue and then added colorful gems that were green, blue, orange and yellow to the centers of the flowers. You could paint these flowers any color you want!
Choose to paint them all a similar color as I did, or mix and match different colors to create a whimsical piece of garden art for your home. Since this is hanging against our home, in an area that needed a little bit of fun, I painted these blue so they would stand out against the color of our home.
Below is the tutorial! I hope you’ll give this craft a try. Be sure to check out my section of DIY Garden Crafts for lots of project ideas including more garden art like my mandalas, ladybugs and butterflies!

I also recently made a holiday version of these flowers! My wood poinsettias were a fun addition to our outdoor holiday decor!

DIY Wood Flower Garden Art
Supplies Needed
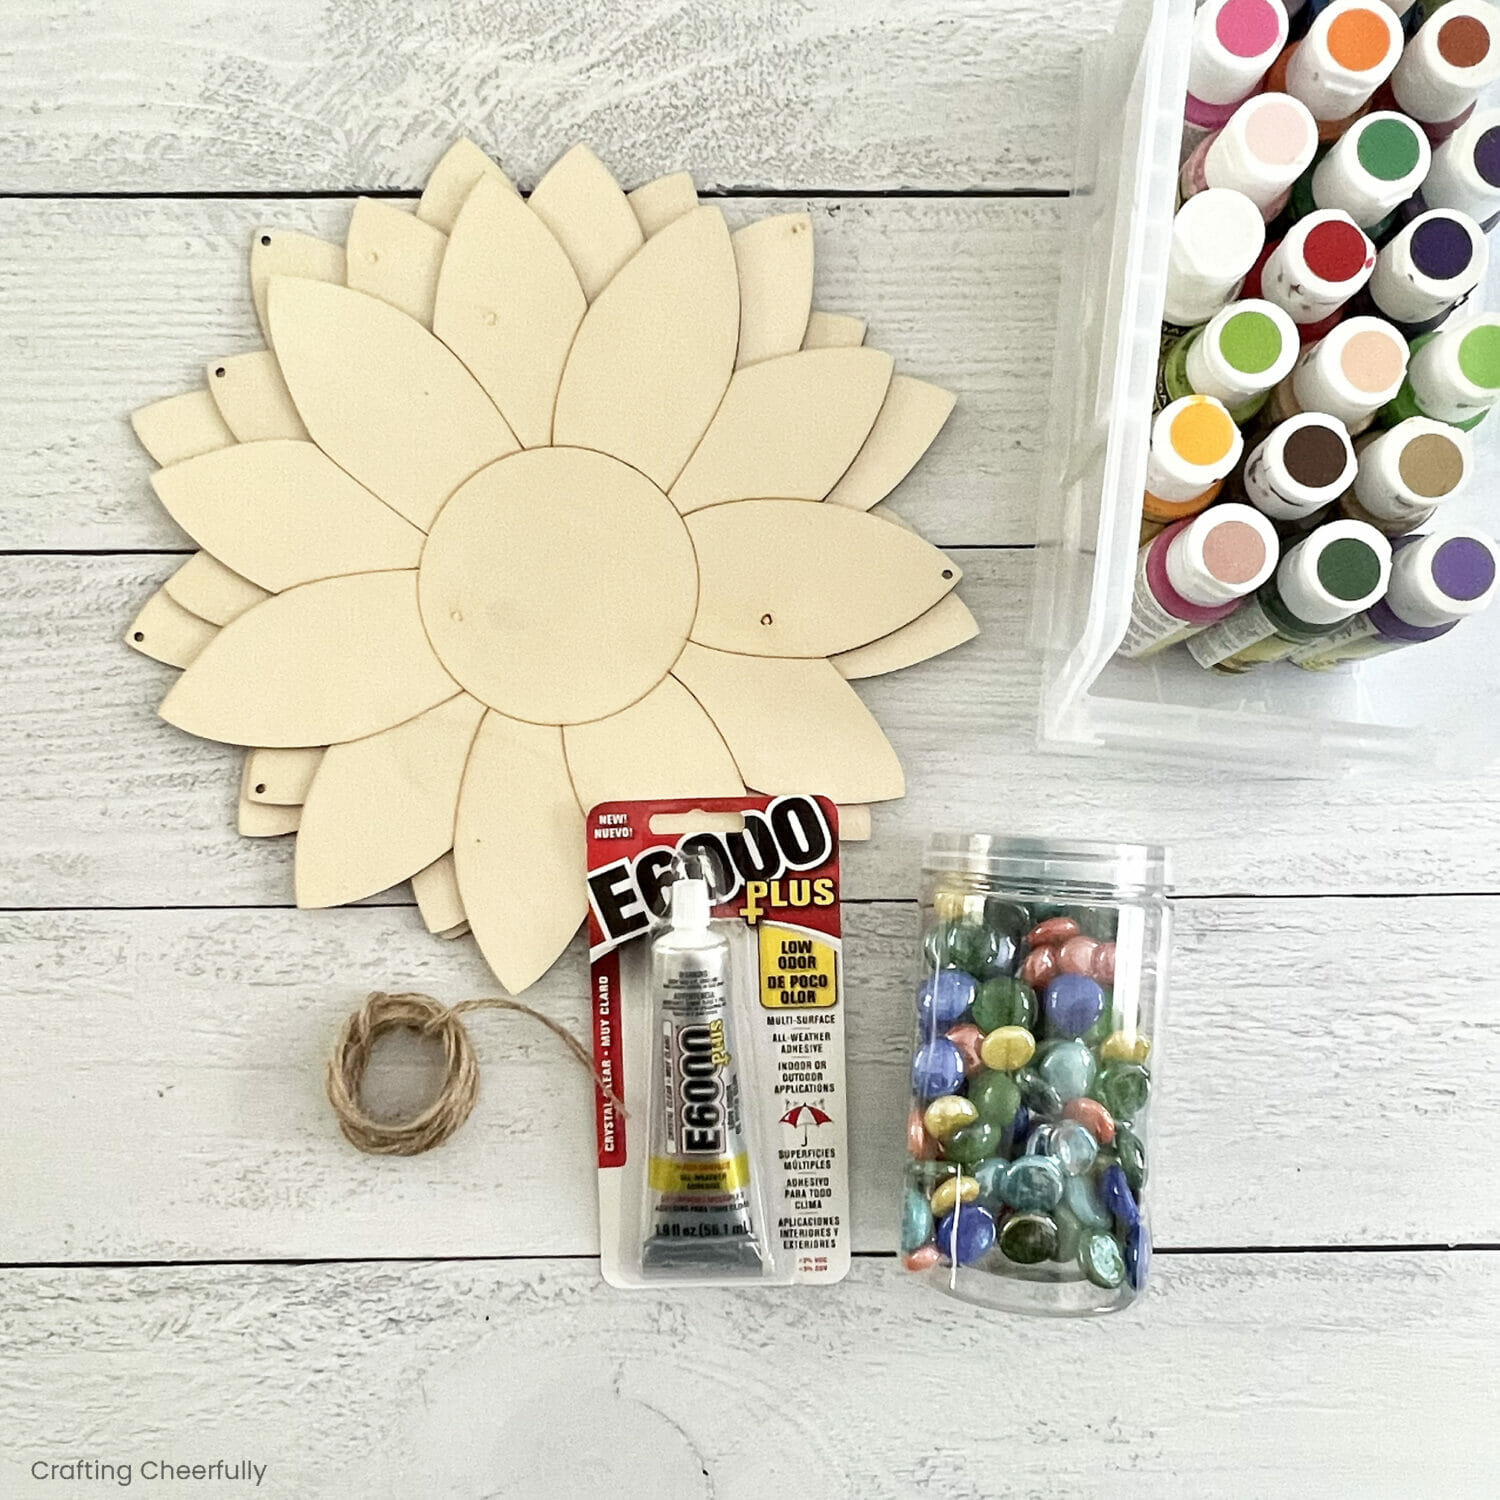
- Wood flowers
- Patio Paint Outdoor Acrylic Paint – I used Summer Sky Blue, Pumpkin, Mistletoe Green and Wrought Iron Black from the 18 piece set and purchased Blue Jay and Tango Blue separately from Michaels.
- Sealer – I used DuraClear Satin Varnish
- Paint brushes
- Twine (I used the twine that came with the wood flowers)
- Glass Gemstones – I used these Gems from Michaels, but these on Amazon look similar
- E6000+ All Weather Adhesive
Painting the Wooden Flowers
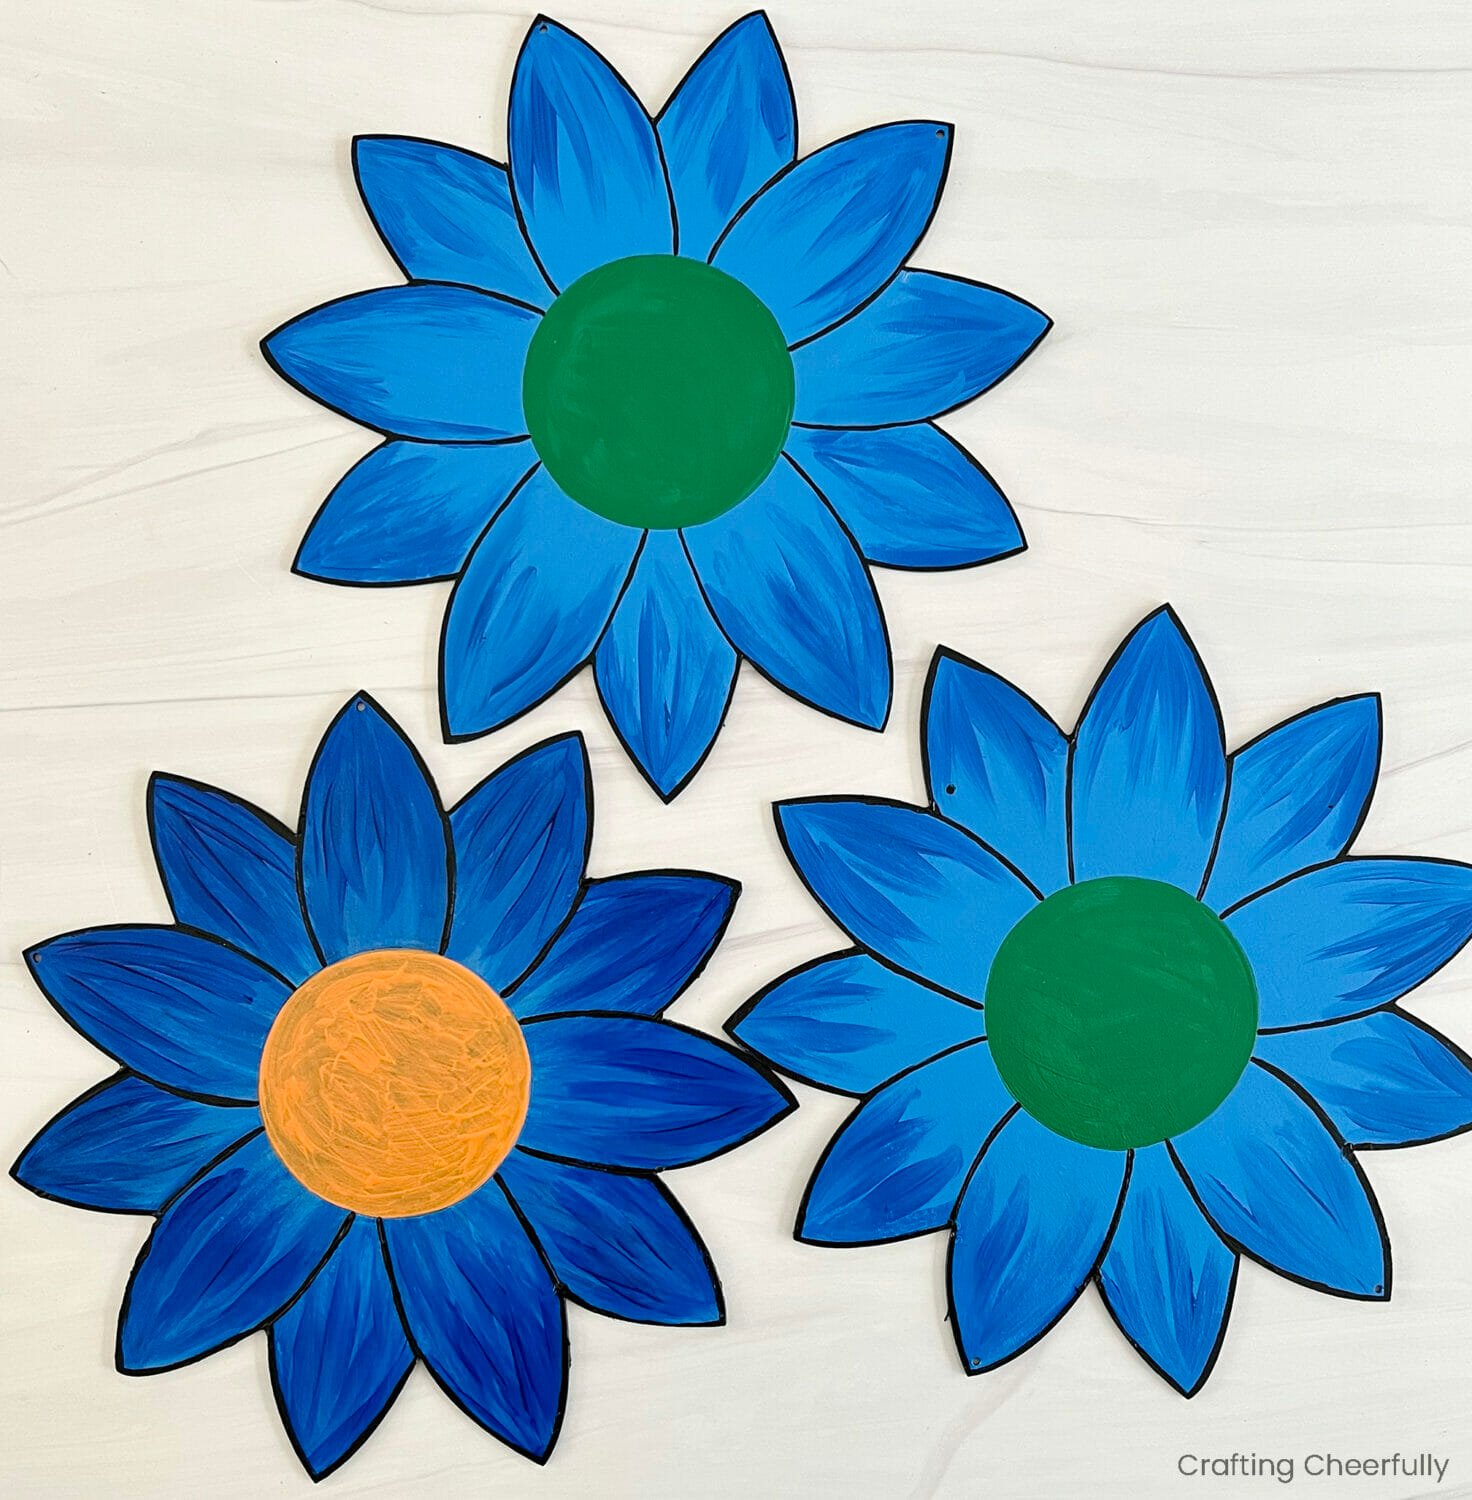
Paint the wood flowers in any color you’d like! I used three blues from my DecoArt Patio Paint collection including, Blue Jay, Summer Sky Blue, and Tango Blue.
Start by painting the front and back of each flower using the lightest shade of blue, Blue Jay. Next, use a darker shade of blue to paint the tips of the petals. The brushstrokes will be visible and give the flowers dimension. I let the base color dry slightly, but not all the way, before adding my darker shades.
For the top and bottom flowers I used my middle shade of blue, Summer Sky Blue, on the tips of the petals. I made sure a lot of the base layer was still visible.
The middle flower is slightly different, I used both of the darker shades of blue, Summer Sky Blue and Tango Blue, to add add brushstrokes to the tips of the petals. I made the brushstrokes closer together and brought them further to the center of the flower so less of the base color was visible.


Paint the center of each flower using a contrasting color. For my flowers I used MistleToe Green and Pumpkin. Use a thin brush and black paint to outline each of the petals. This is optional, but I love how clearly defined each petal is once the black outline is added.
Once you are happy with how the painted flowers look, you have the option of sealing them on both sides. The DecoArt Patio Paint does not require sealing, just 72 hours before it exposed to moisture. I did not seal my stepping stones or painted doormats when I used it…but I usually seal my garden art. Figure it can’t hurt to have an extra layer of protection!
Add the Gemstones to the Flowers
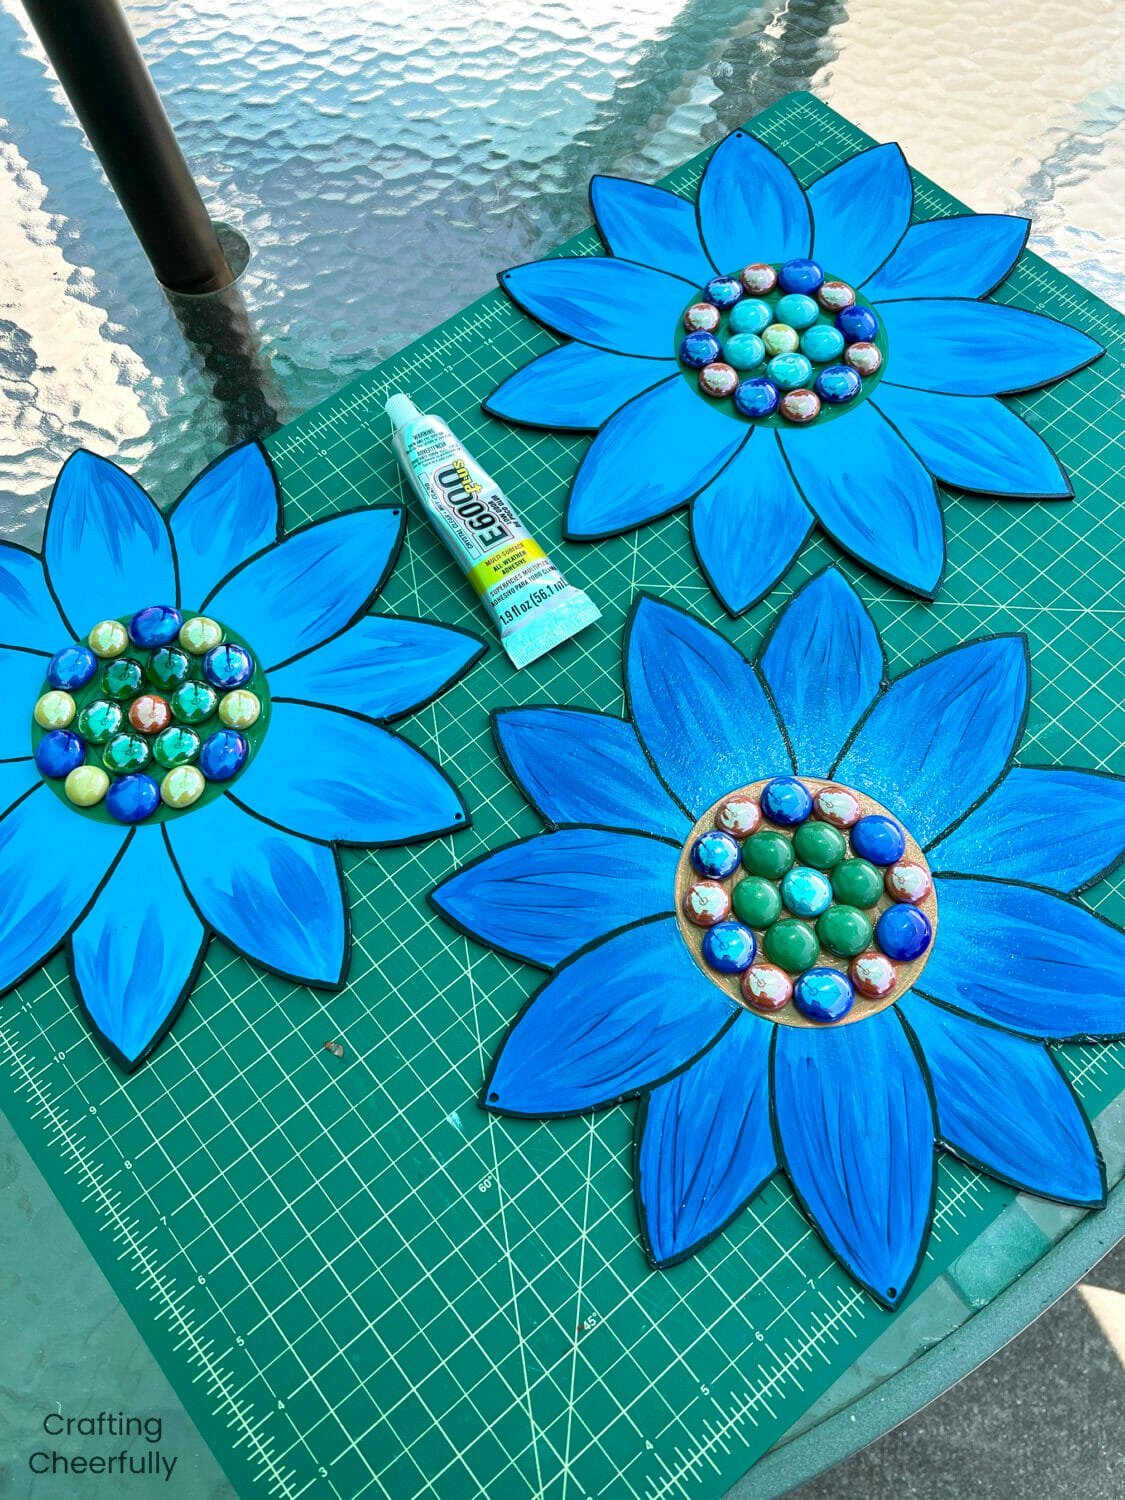
Once the flowers are completely dry it’s time to add the gemstones! These are a fun way to add real dimension to the flowers and they look cool when the sun hits them.
Arrange the gemstones in a pattern on the center of each flower until you like the design. I like to snap a quick photo in case I bump them or I’m not able to glue them down right away.

Adhere the gemstones with strong outdoor glue like E6000+. I recommend using this glue outside in a well-ventilated area and with gloves.

Attach the Trio of Flowers Together with Twine
The wooden flowers came with a long length of twine so I decided to use this to connect the flowers. This can be a little tricky but I’ll let you know how I approached it using one length of twine. I started by laying my three flowers down on my cutting mat and lined them up so they were about the same distance apart.
Next, I attached one end of the twine to the right hole of the bottom flower with a double knot. I passed the twine underneath the middle flower and tied a knot in the middle flower’s right hole. Repeating the process, I passed the twine underneath the top flower and tied a knot in the top flower’s right hole.
Leave a bit of twine at the top for hanging, then tie the twine in a knot in the top flower’s left hole. Pass the twine underneath the top flower and tie a knot in the middle flower’s left hole. Repeat for the bottom flower and pass the twine underneath and tie a final knot in the bottom flower’s left hole.
I then hung my flower on a hook and tested how it hung. I had to adjust the bottom two knots on the left side to get it to hang perfectly straight. It was a little tricky doing it while it was hanging but I found this was the best way to fix it.

Secure the twine on the back of the flowers using strong outdoor glue. I used painter’s tape to hold my twine in place, then added the glue. I also added a bit of glue to each knot.

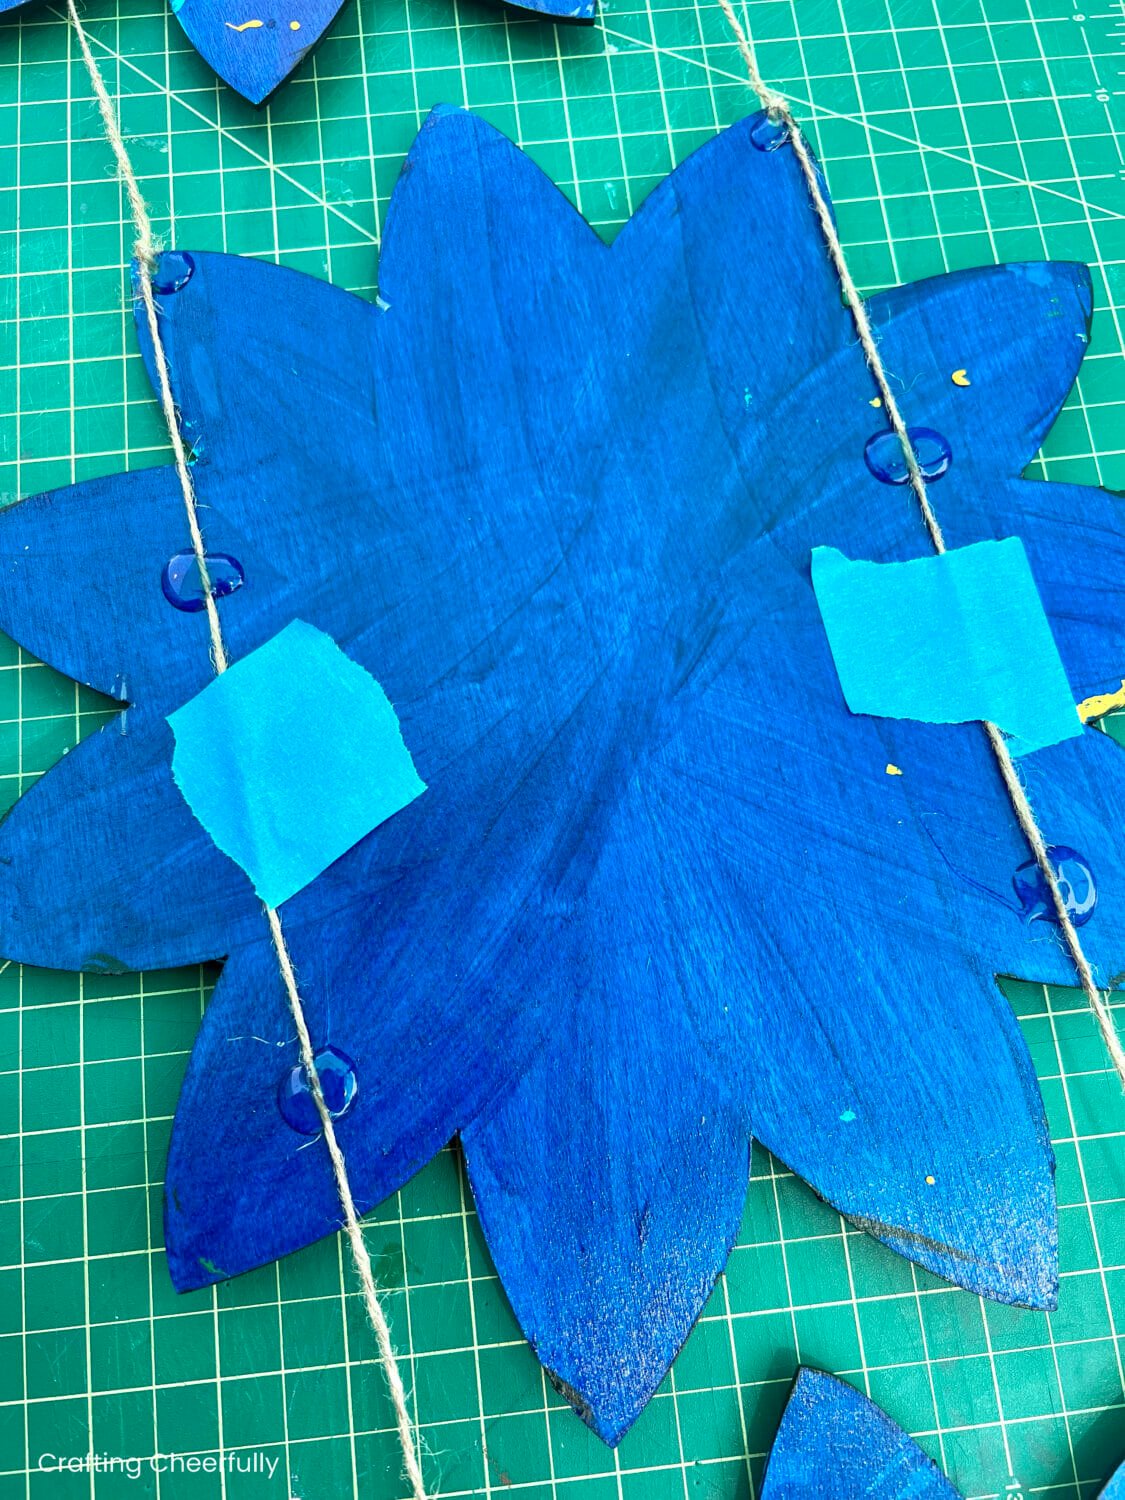
Once the glue is dry the flowers are finished and ready to be hung!
Hanging the Trio of Flowers Garden Art
The flower art is ready to be hung and enjoyed in your outdoor space! This garden art will work best when hung against something like a wall, fence or tree. This will keep it from blowing in the wind and help it to last longer.
I hung our art against our house on a decorative hook that has been there since we purchased the home. I am happy to finally have something fun to hang in that space.
The outdoor paint should hold up well outside, I’ve had really good luck with DecoArt Patio Paint lasting a long time. On my ladybug garden art the color of the plastic bowls faded before the paint did. When I touched them up I painted them entirely with outdoor paint and they look awesome.
Placing the flower art under a roof line, covering, or awning will extend it’s life even further! I’ve also found my garden art that is against our home or sheltered a bit from the elements lasts longer. My mandala garden art has been outside for several years now in a garden bed against our house under our roof and they still look great!


