
DIY Ladybug Garden Art
Create these cute ladybugs for your yard! This DIY Ladybug Garden Art tutorial uses outdoor paint, beads and plastic bowls to create a unique addition to your garden!
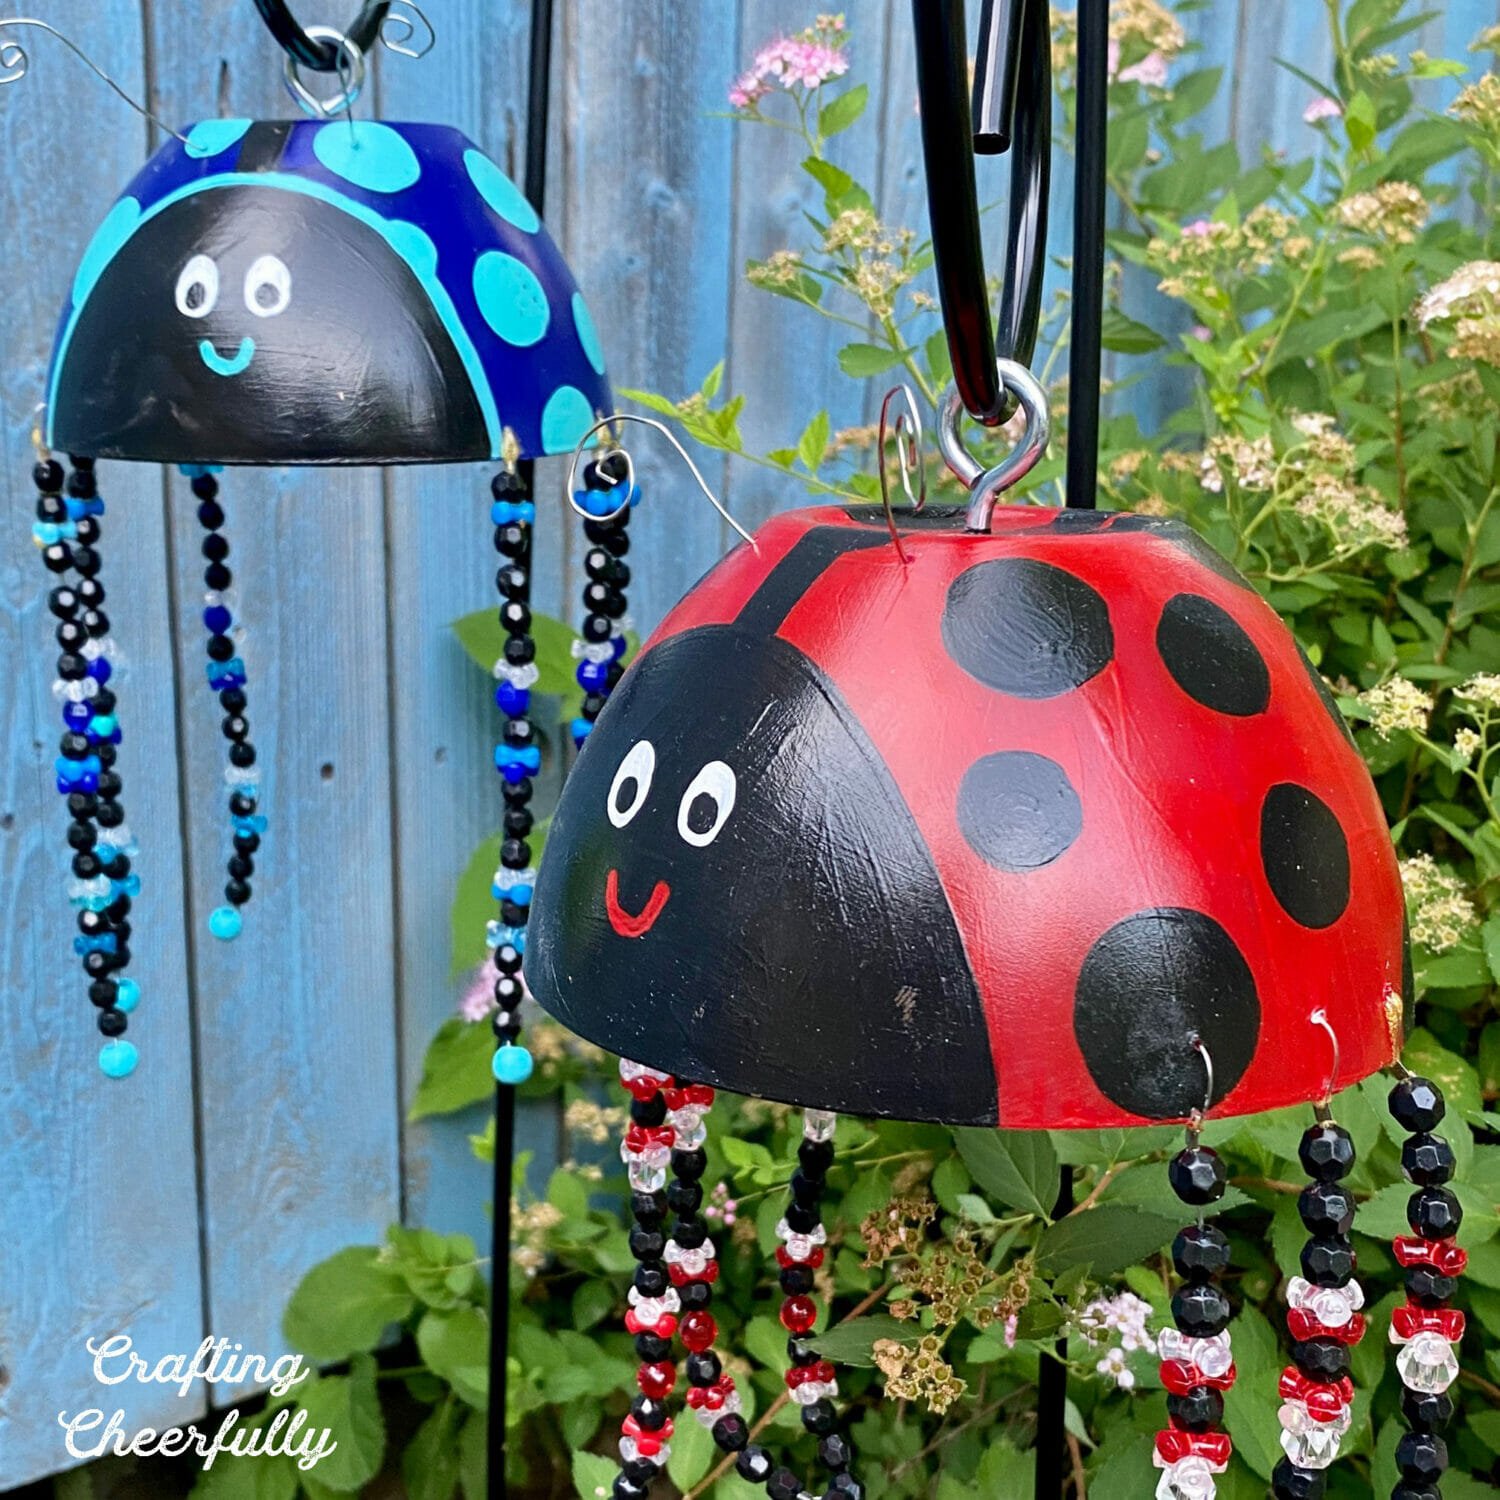
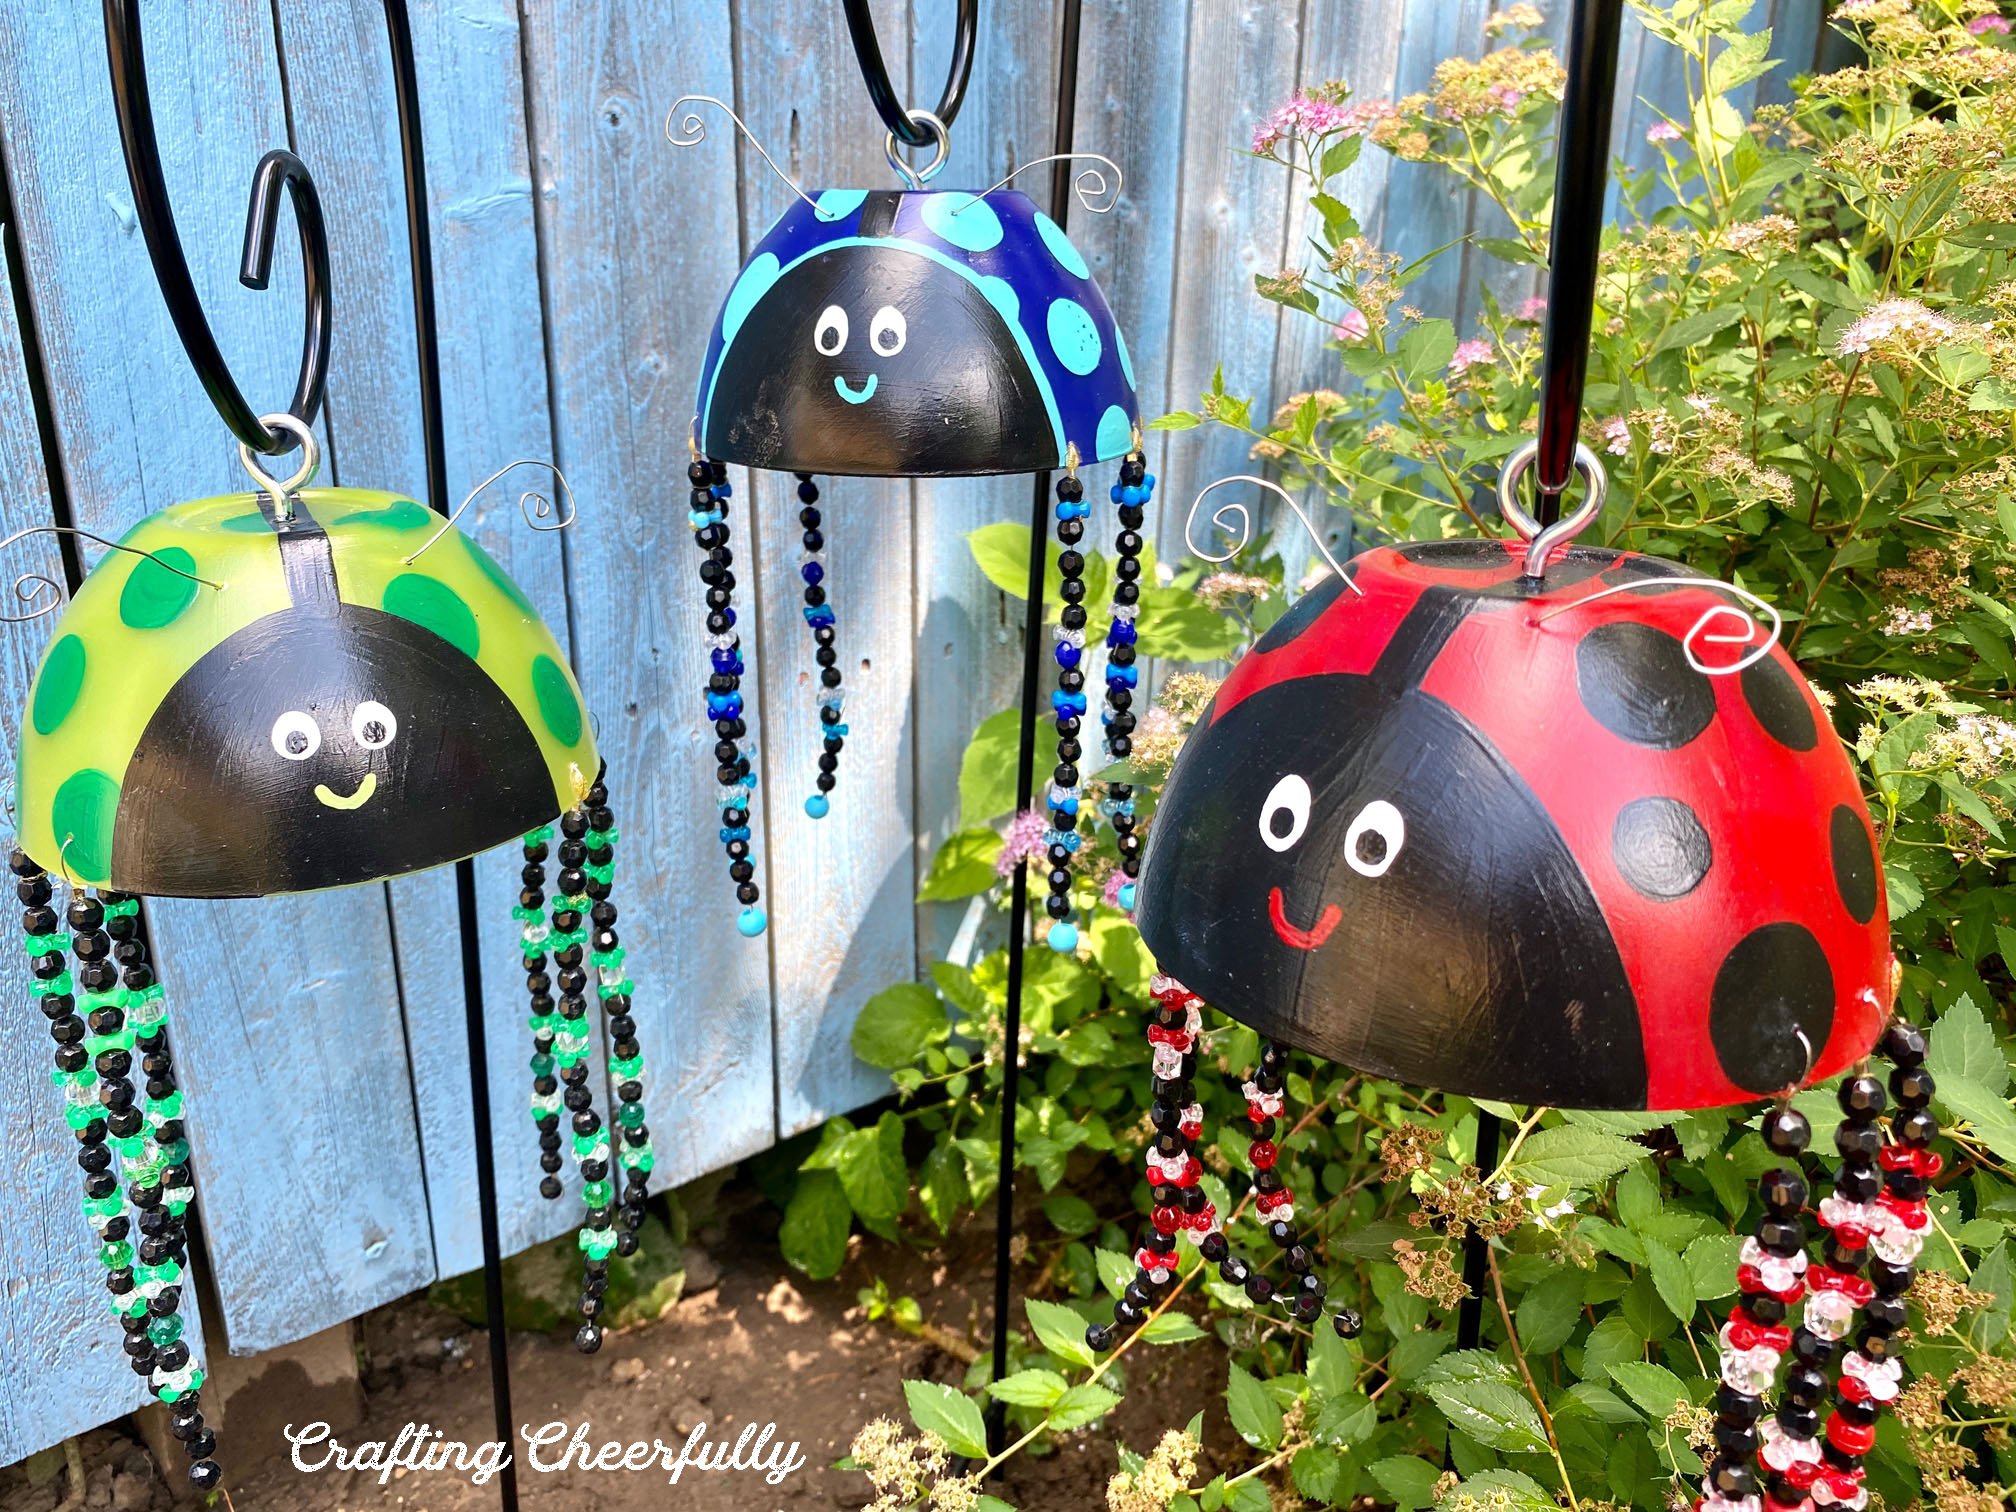
Looking for cute garden art you can make for your yard? These ladybug garden ornaments are a unique craft you can make! I love creating DIY yard art for our garden and these ladybugs add so much color and whimsy to our garden beds.
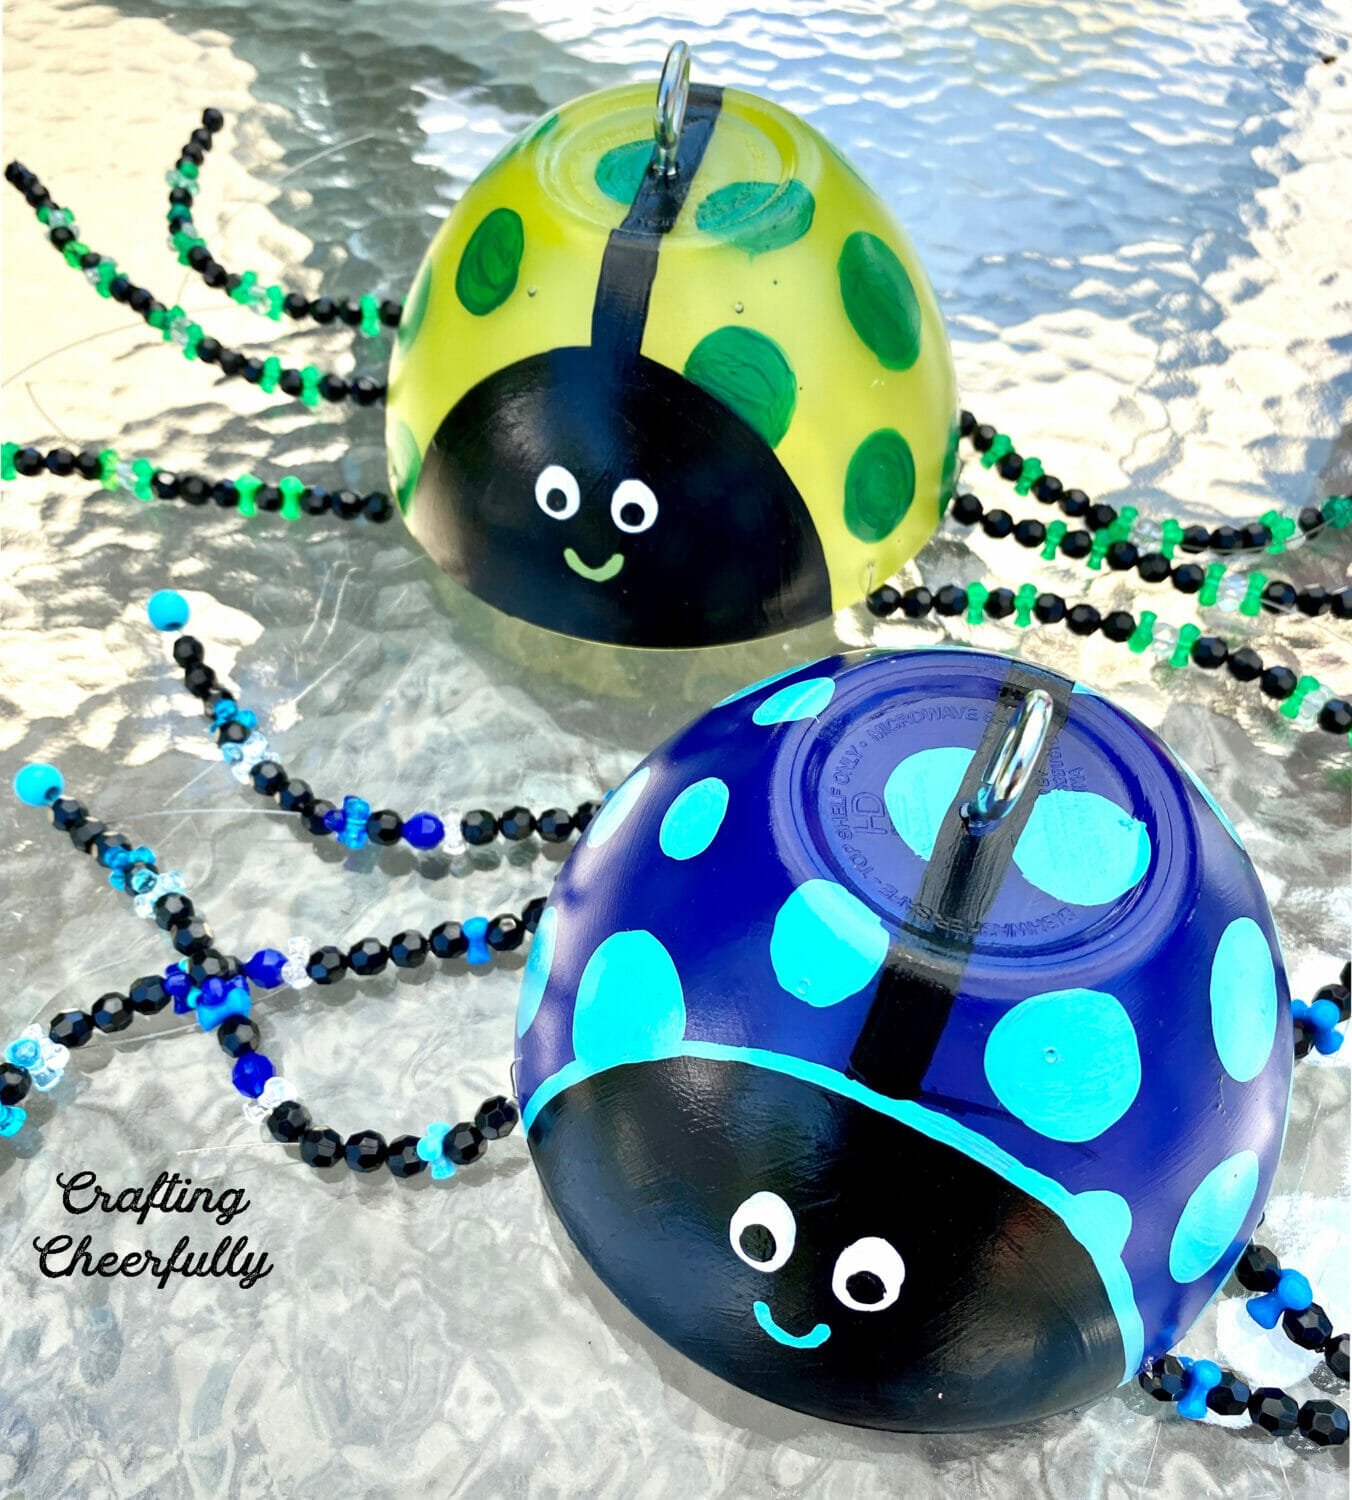
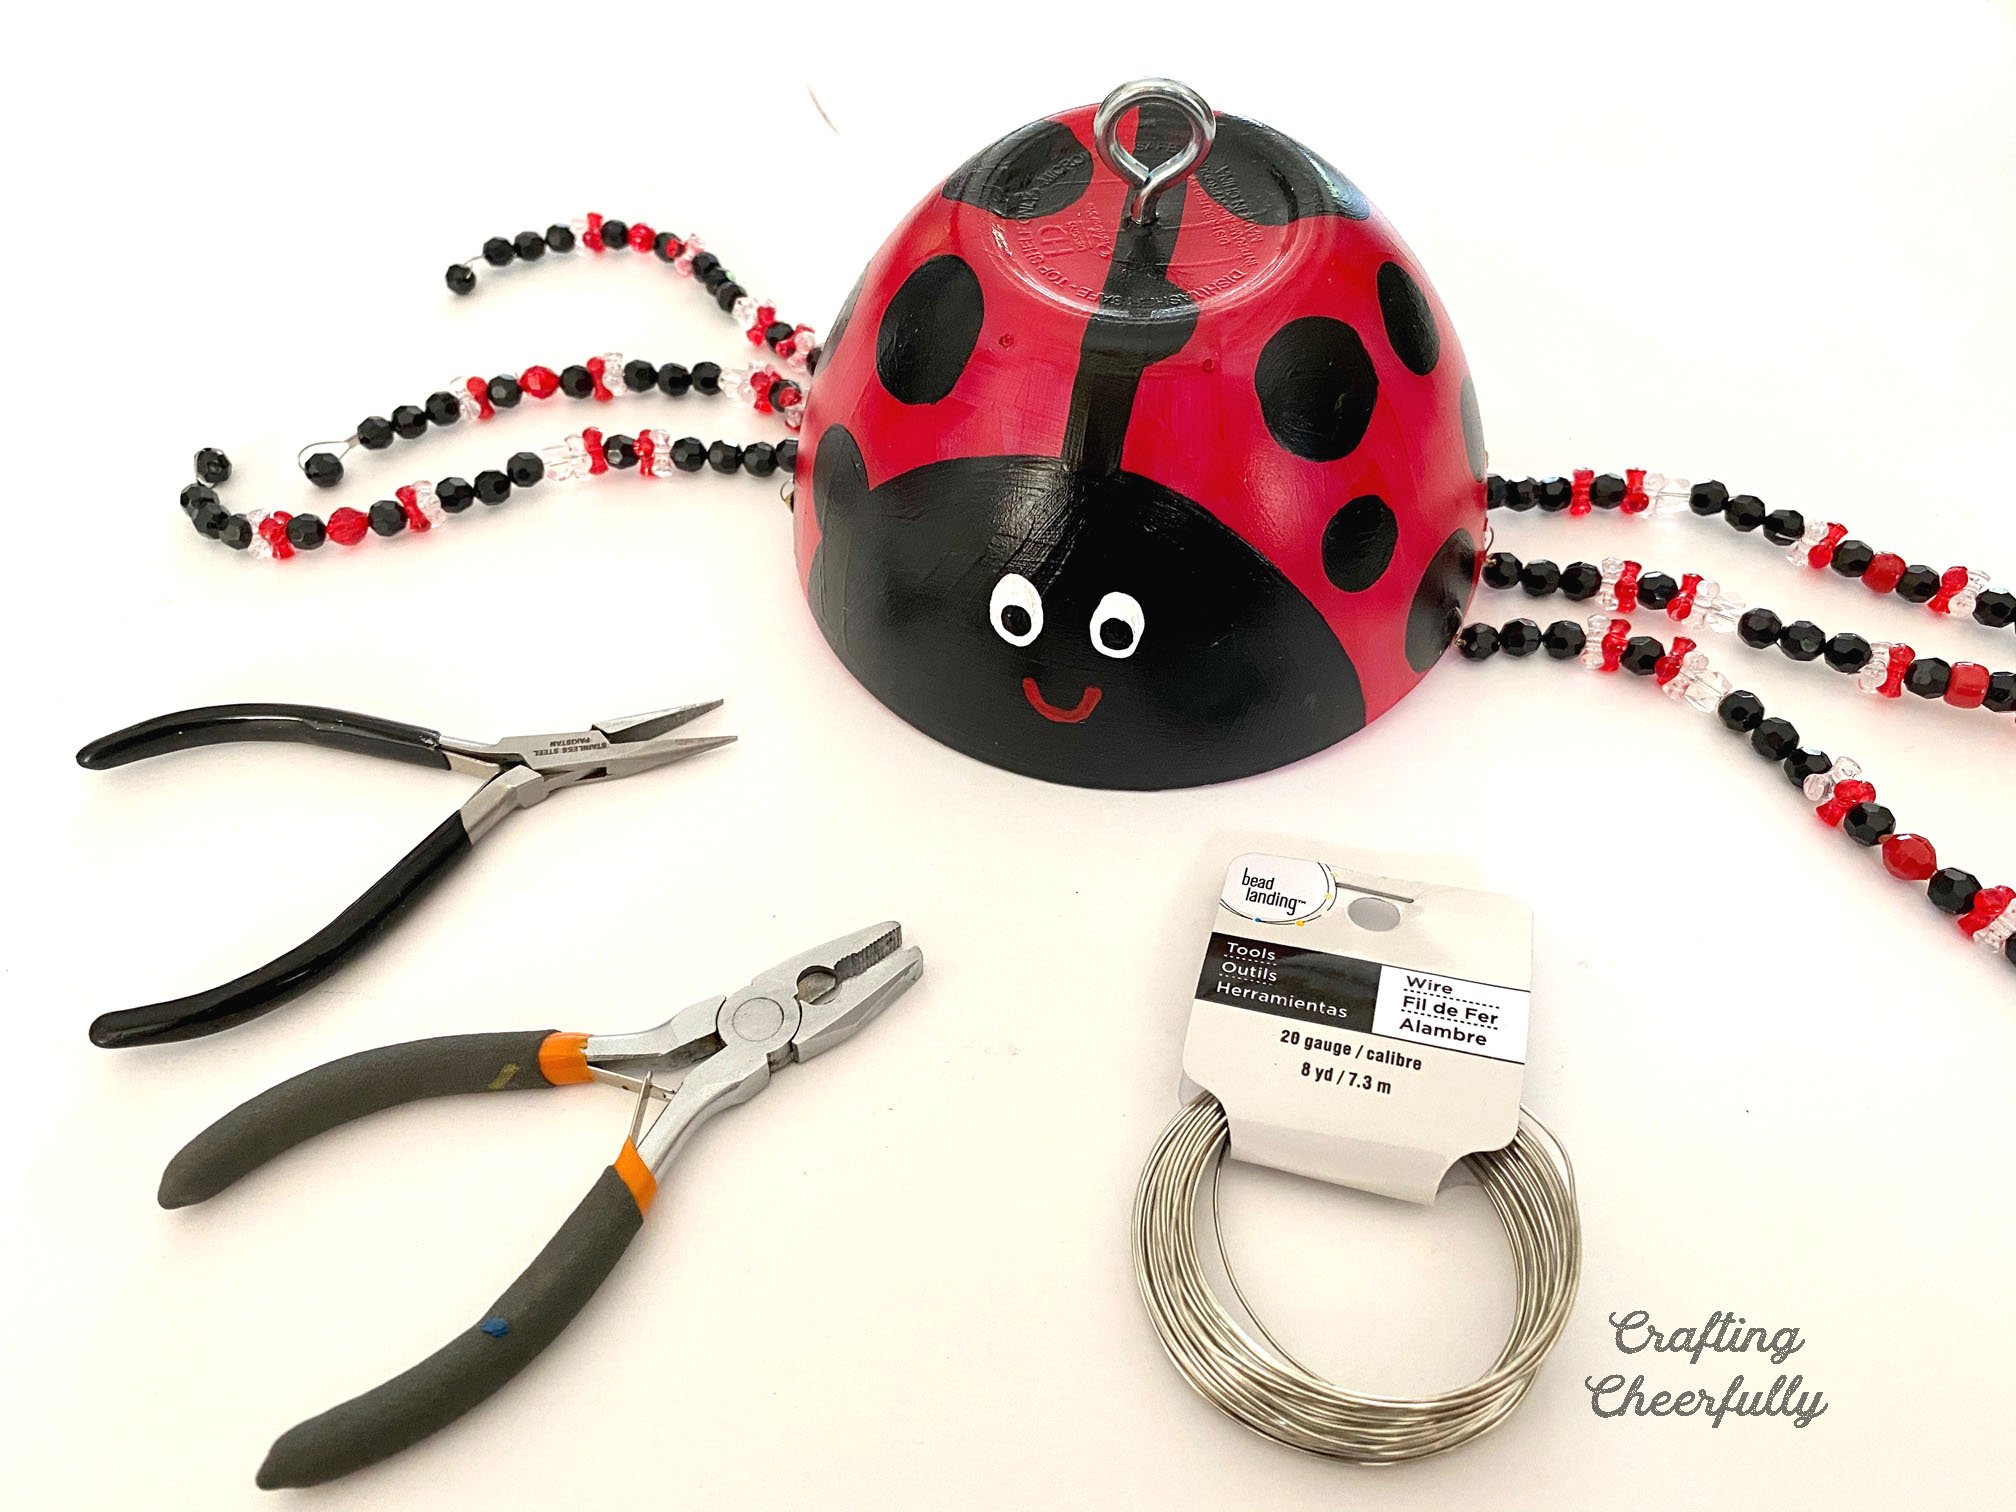
Each ladybug is made from a plastic bowl! They were sold as a four pack in the summer patio section of our local grocery store last year. Each bowl was less than $1! I used my favorite outdoor paint, Patio Paint by DecoArt, and beads from my daughter’s bead kit! She was nice enough to share ;)
Update: This will be the fourth summer of displaying my ladybugs outside and much to my delight they are still going strong! Before setting them out this summer I gave them a paint touch up – the color of the green and blue bowls faded a bit so I ended up painting those areas. One ladybug lost a leg so I fixed that up too.
The ladybugs are in a garden bed that gets direct sunlight and is not sheltered from the rain. I bring them inside when we have high wind warnings but otherwise I leave them out all summer long.
Below is the tutorial for creating your own cute ladybug yard art. They are a great project to do outside if you have an outdoor table or space to sit. If you are interested in making other garden art projects for your yard, check out some of my other DIY garden projects!
DIY Ladybug Garden Art


More DIY Garden Art Tutorials
- DIY Watering Can Garden Art
- Garden Art from Paper Plate Holders
- Butterfly Fence Art
- Wind Stock made from Recycled Markers
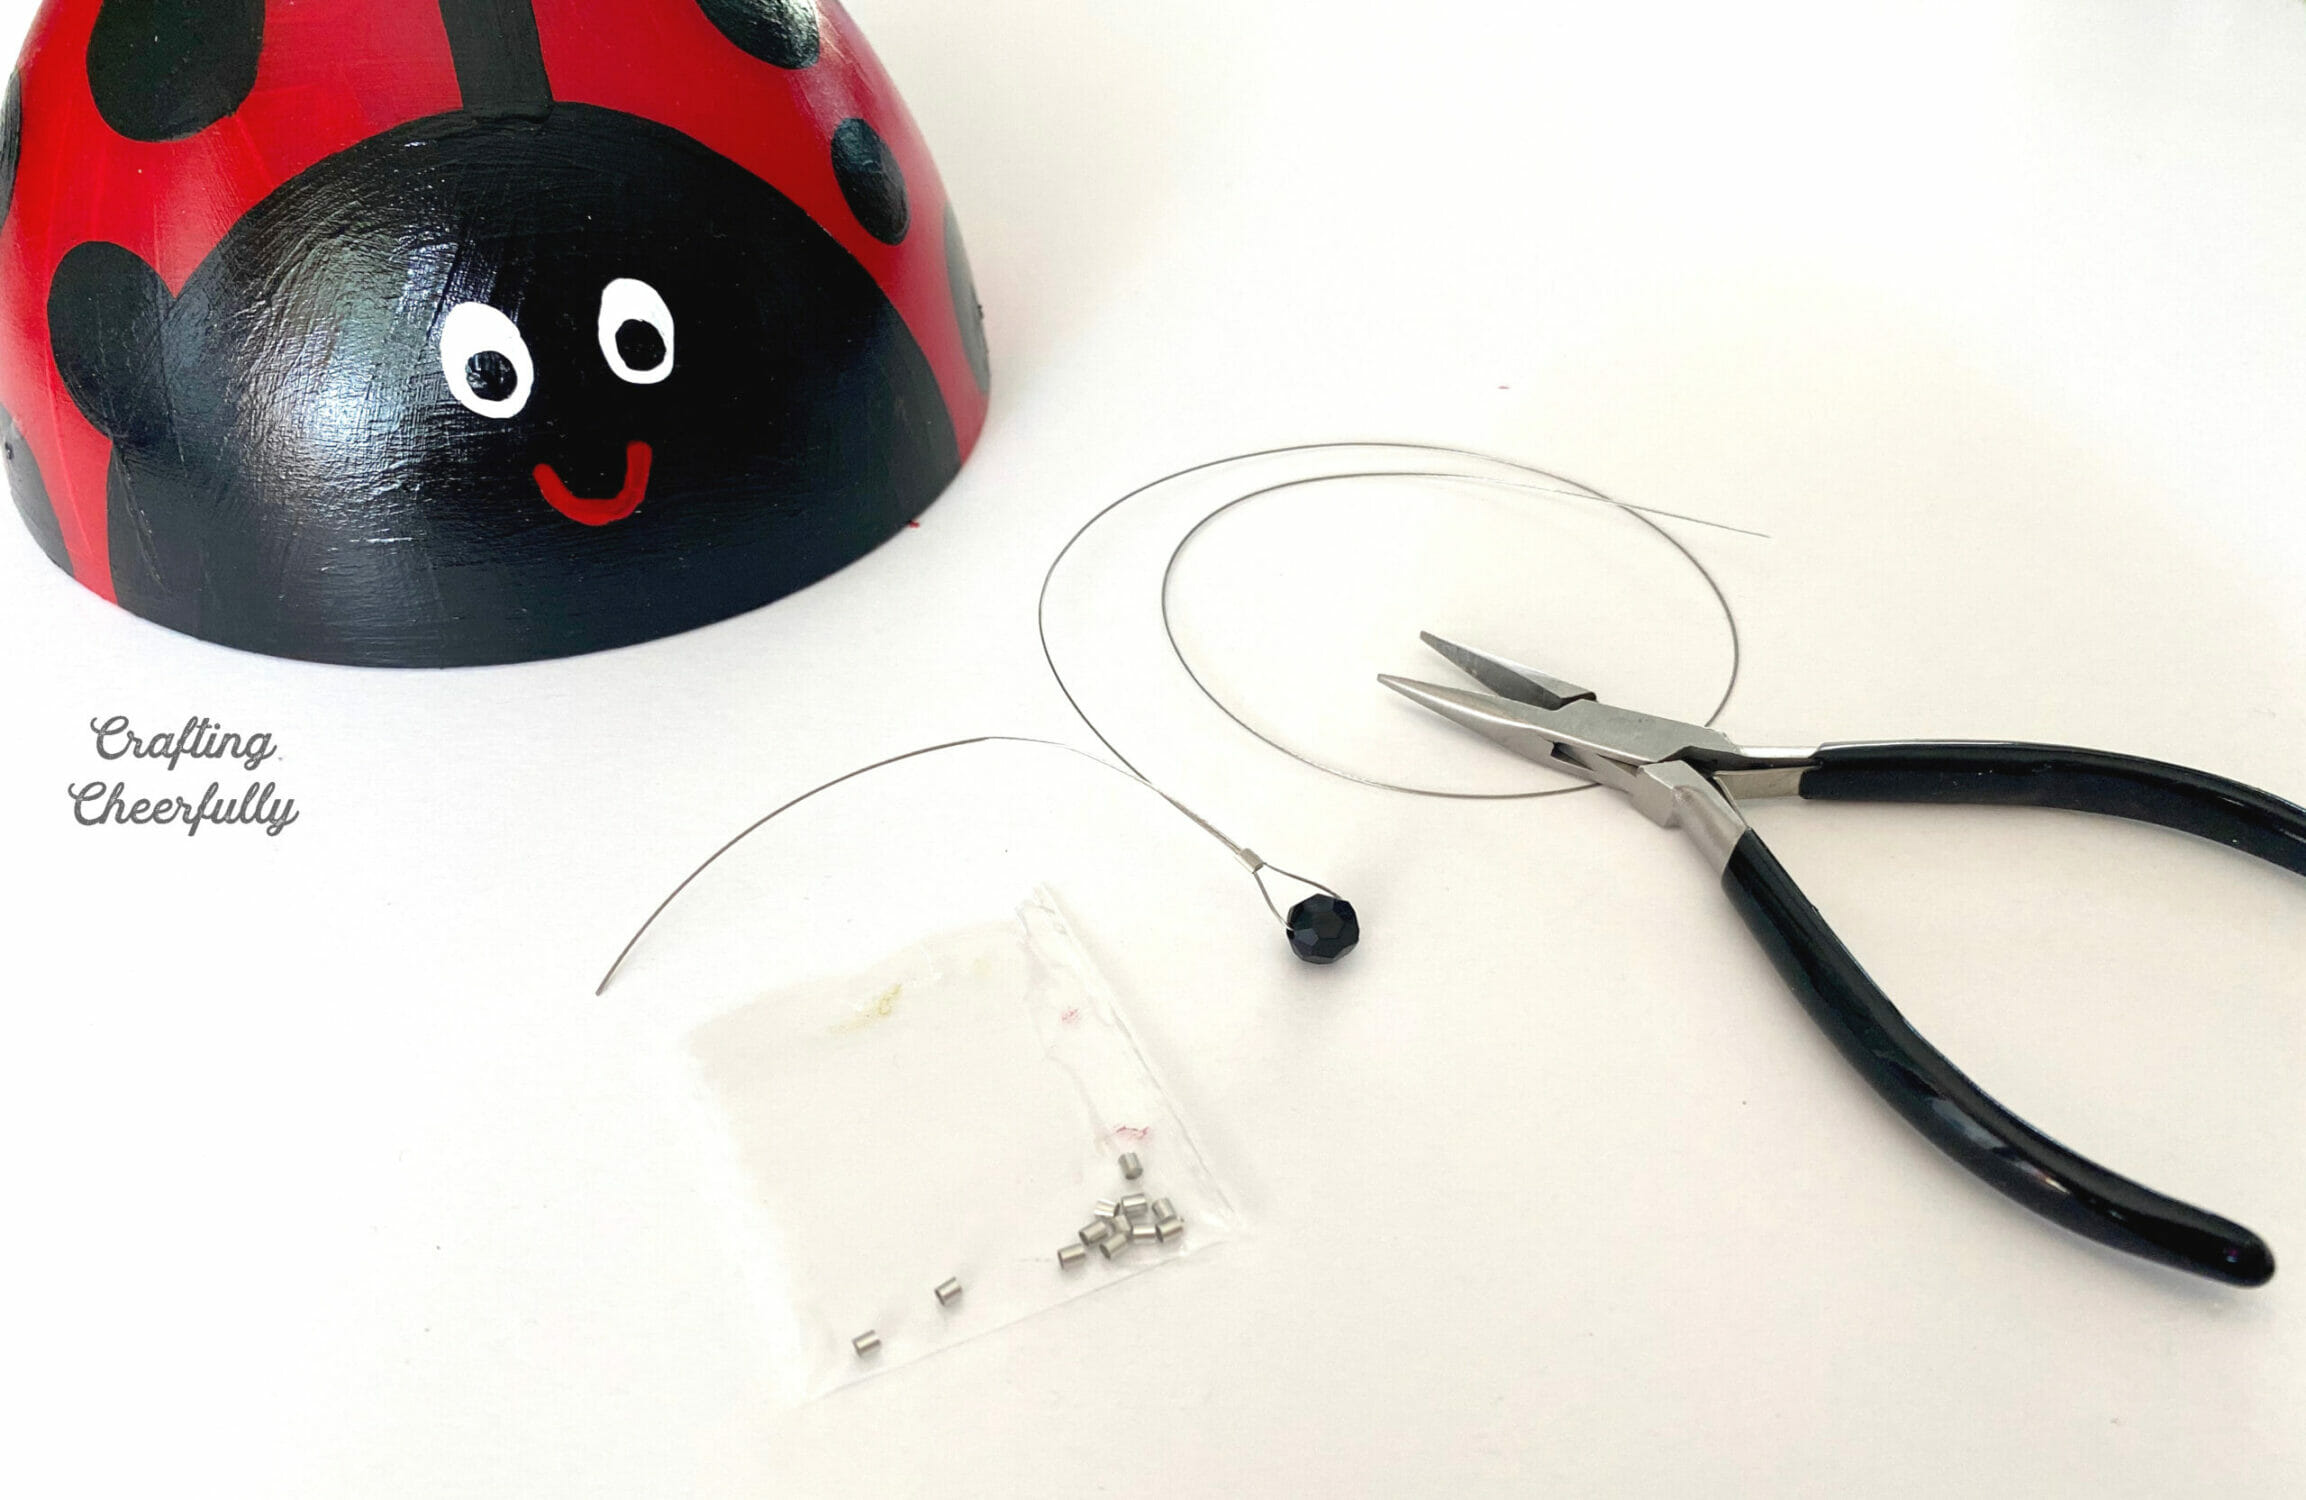
Supplies Needed:
- Plastic bowls
- Outdoor acrylic paint – I used Patio Paint by DecoArt
- Multi-Purpose Sealer
- Bead Stringing Wire – I used 7 strand size 0.18in.
- Beads – black beads plus beads that match the color of your plastic bowls.
- Crimp beads – little beads that help stop and space beads
- Jewelry tools – I highly recommend a Bead Crimping Tool though I used a Needle Nose Pliers I had on hand.
- Gorilla Waterproof Glue

- Wire for Antennae – I used 20 gauge wire
- Drill
- Hanging loops – I used 3/16 in. Diameter x 1-5/8 in. long Zinc-Plated Steel Screw Eyes from the hardware store.
- Shepherd’s Hooks
Painting the Ladybug Bowls
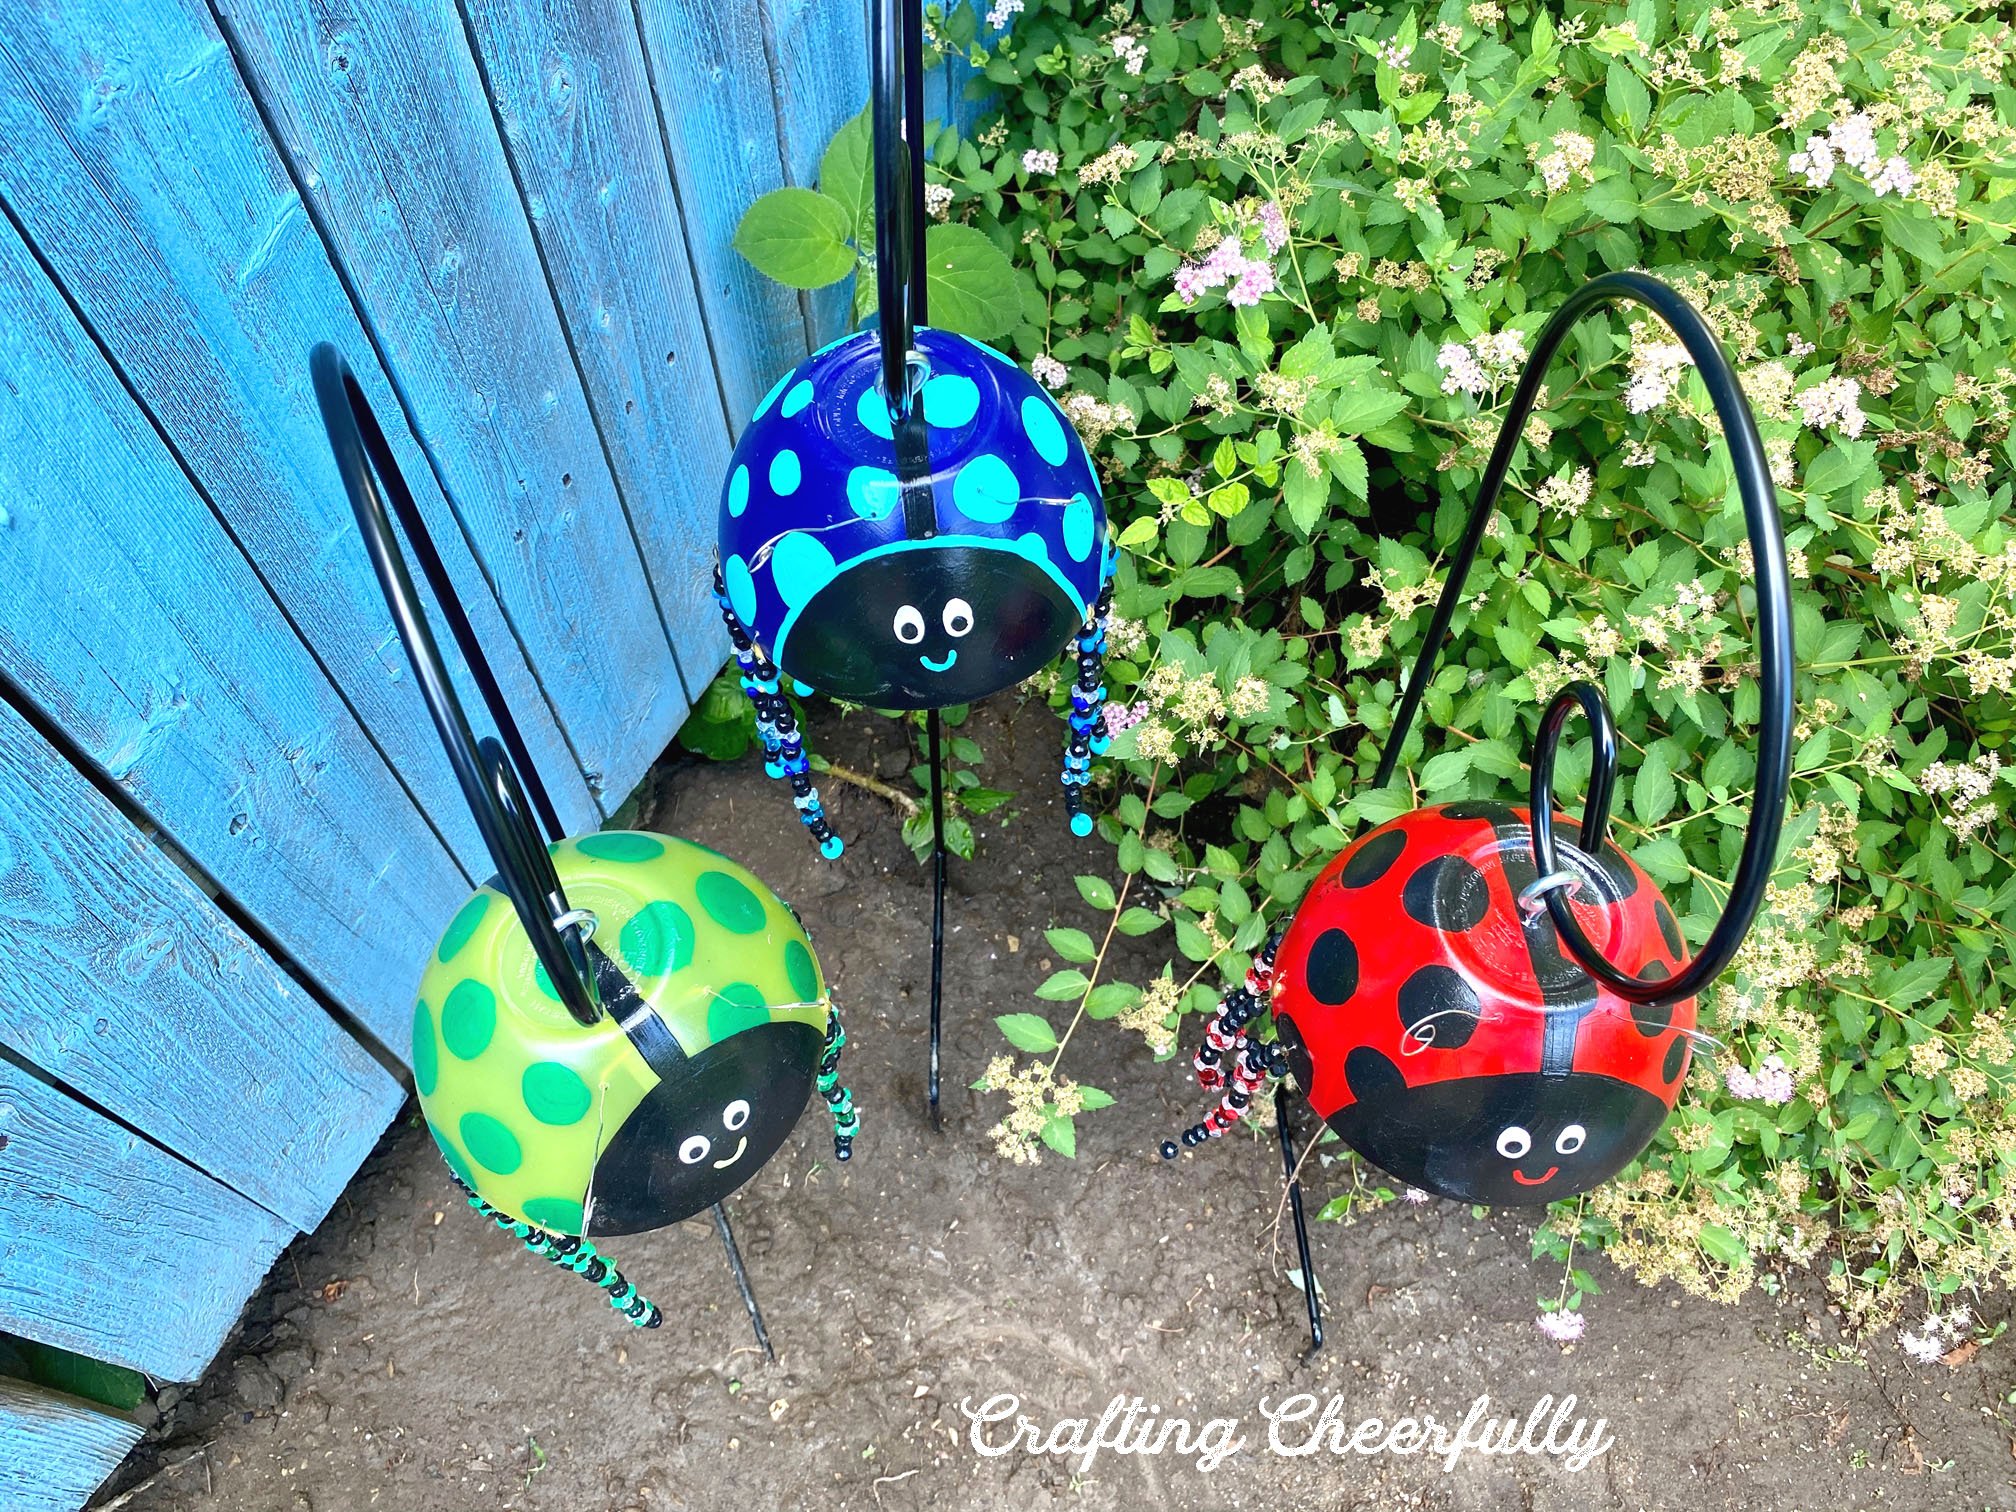
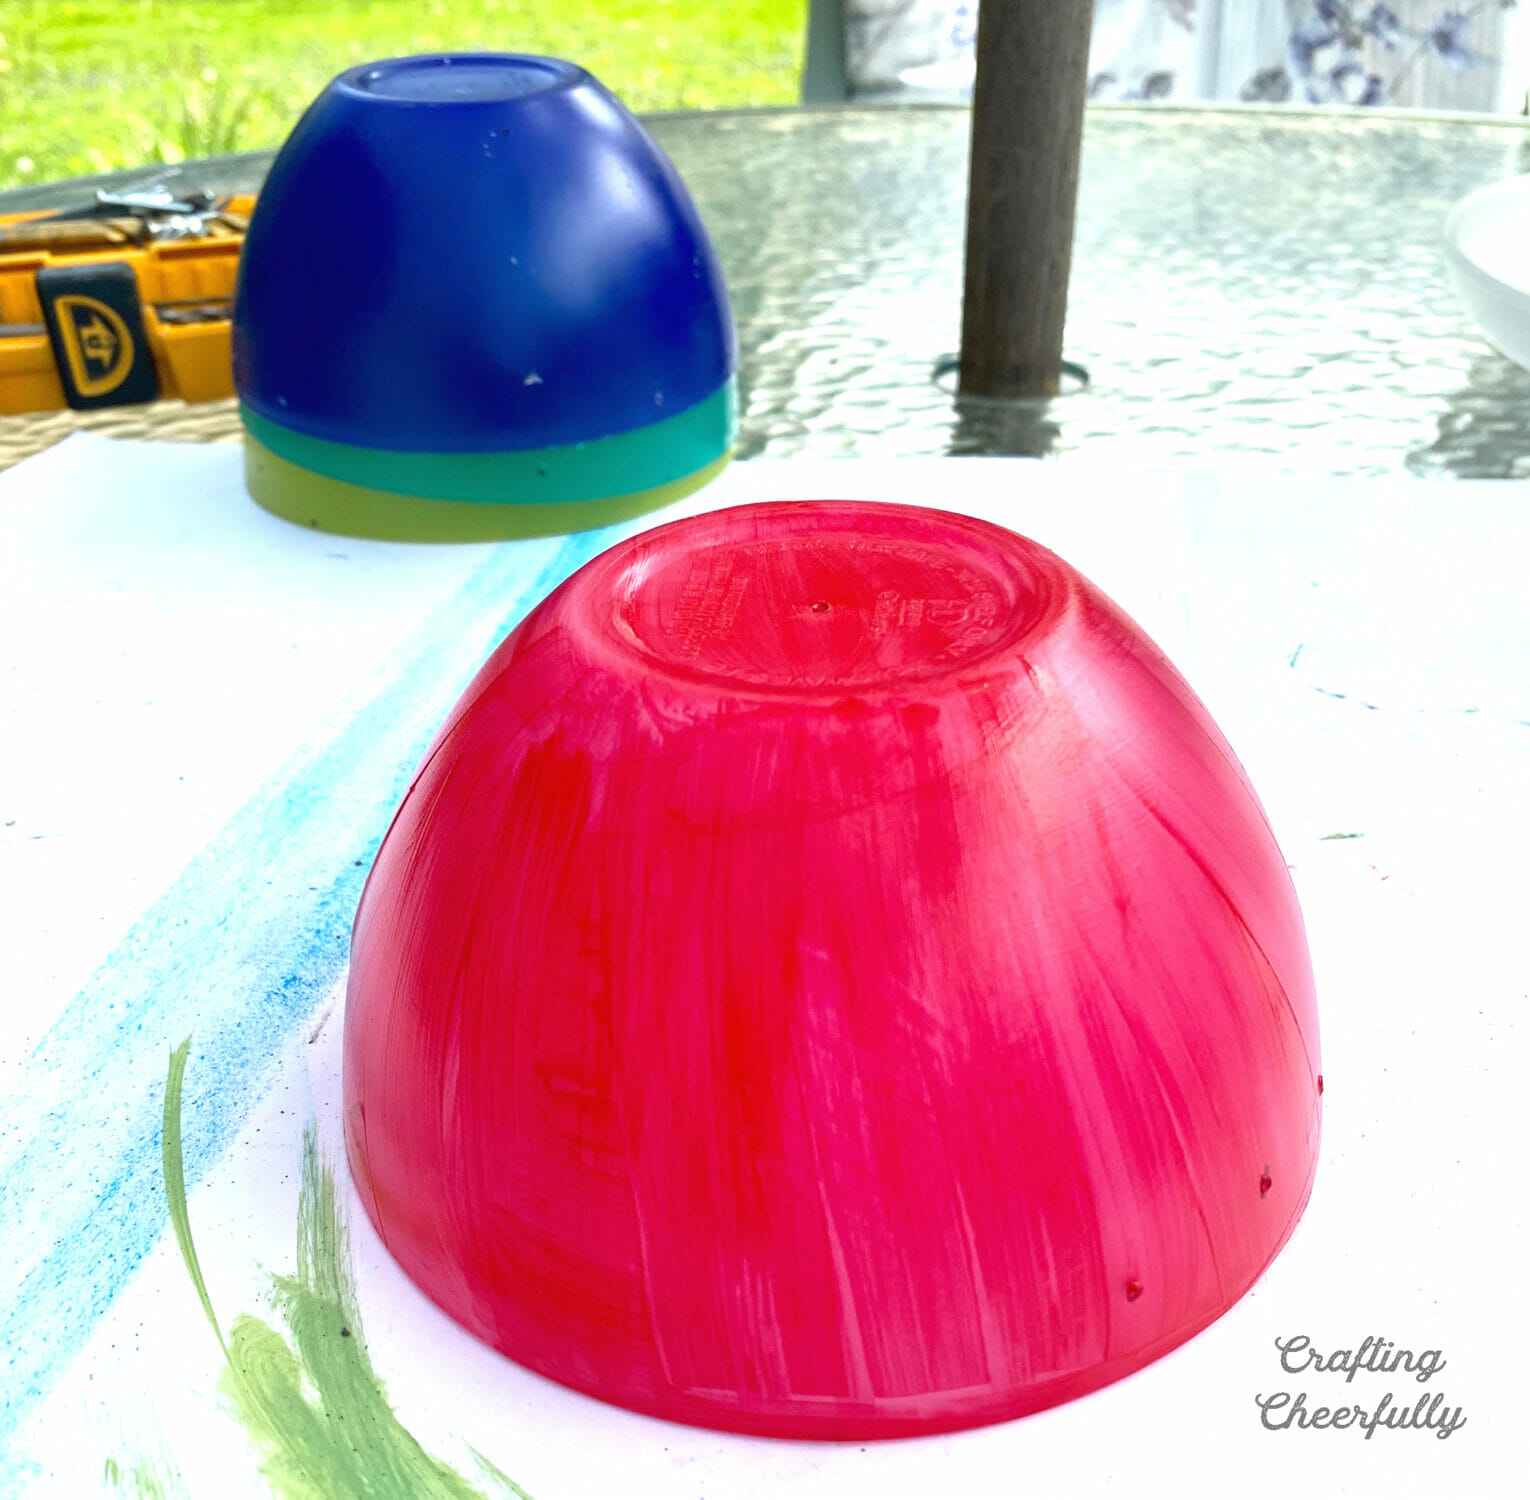
Step One: Drill holes and paint the bowls! Drill 9 holes into each bowl. 6 for the legs, 2 for the antennae and 1 on the top for hanging. Mark the holes with a Sharpie first. For the legs, drill 3 holes on either side of the bowl that are spaced about 1″ apart. You can wait to add the holes for the antenna until after you have painted the face if that helps with placement.
I purchased a four pack of plastic bowls that came with blue, teal, yellow-green and white bowls. Since I wanted to make a red and black ladybug, I decided to paint the white bowl red using red outdoor acrylic paint. It helped to use a sealer first so the paint adhered to the bowl. It took several coats of paint to get an opaque color. I used the blue and yellow-green bowl in colors they came!
*Four years later and the color of the blue and green bowls faded whereas the areas I painted still look good. I painted over the faded areas with green and blue Patio Paint and they look good as new!
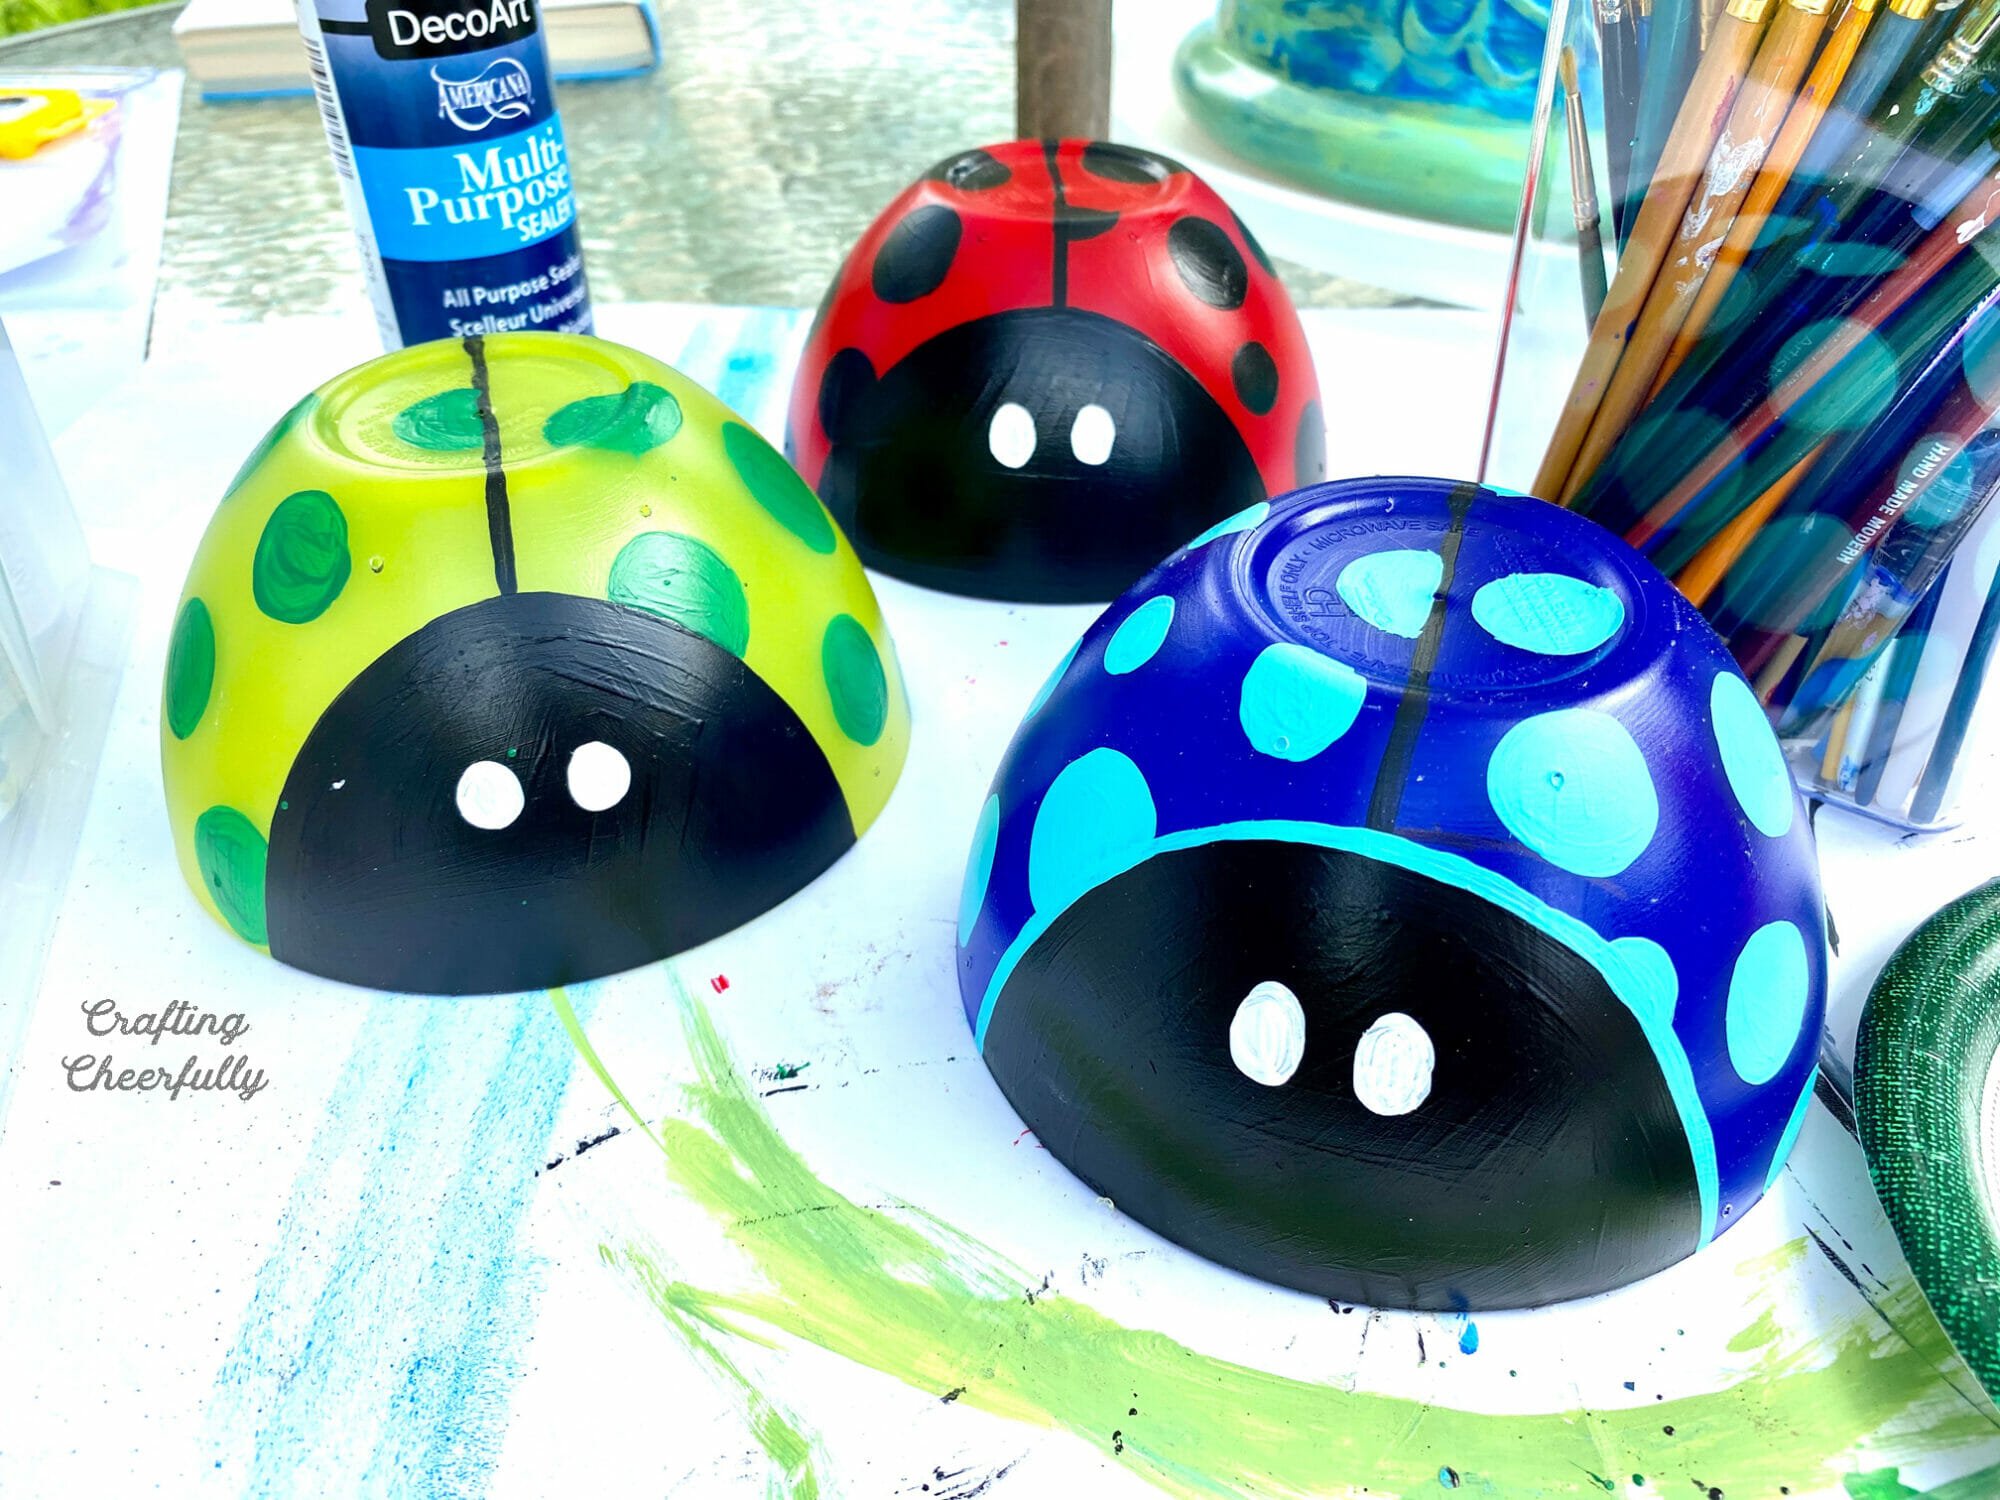
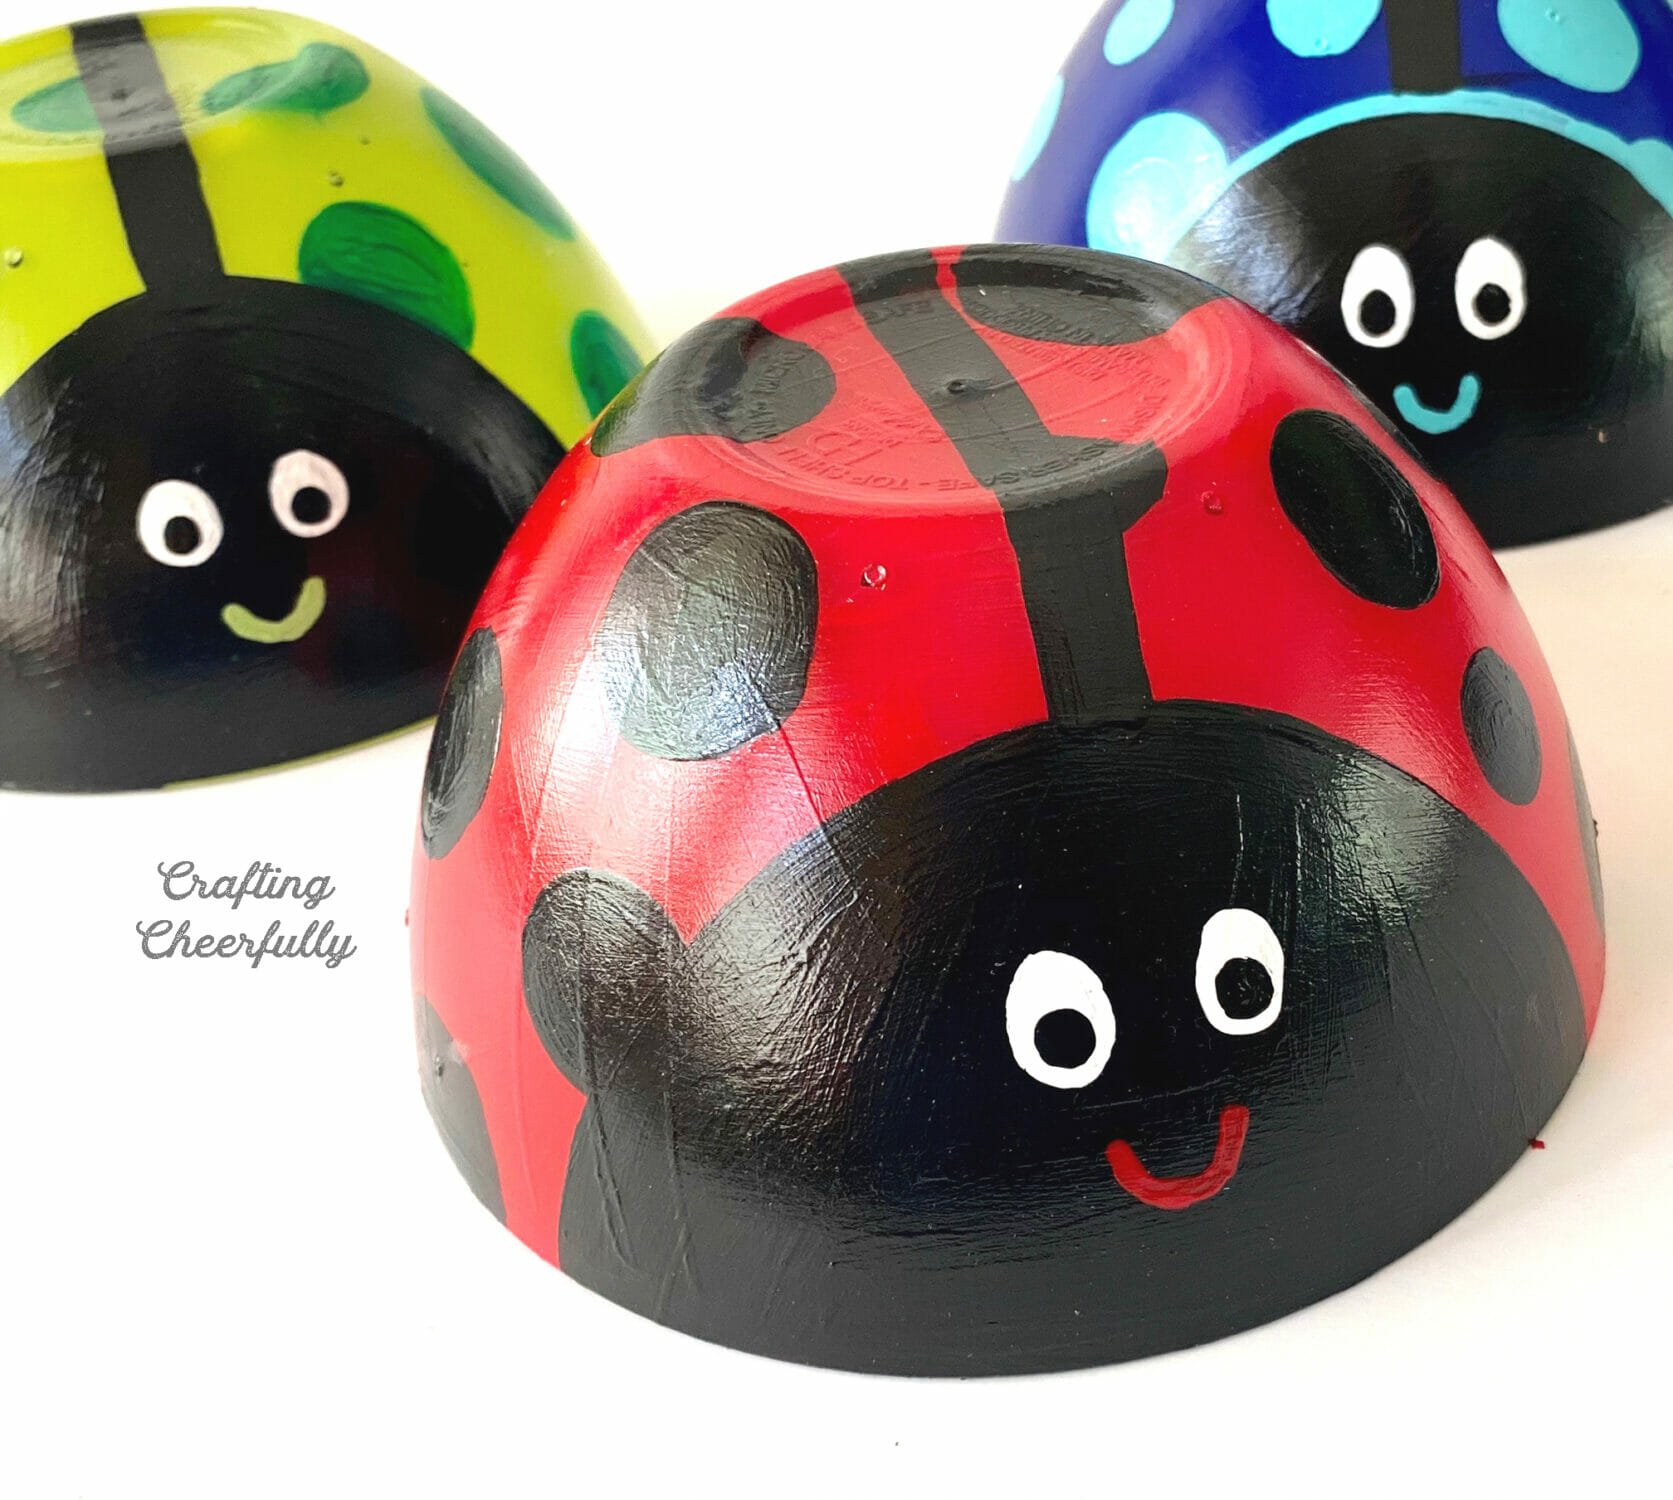
Paint a large half-circle in black paint for the face of each beetle.
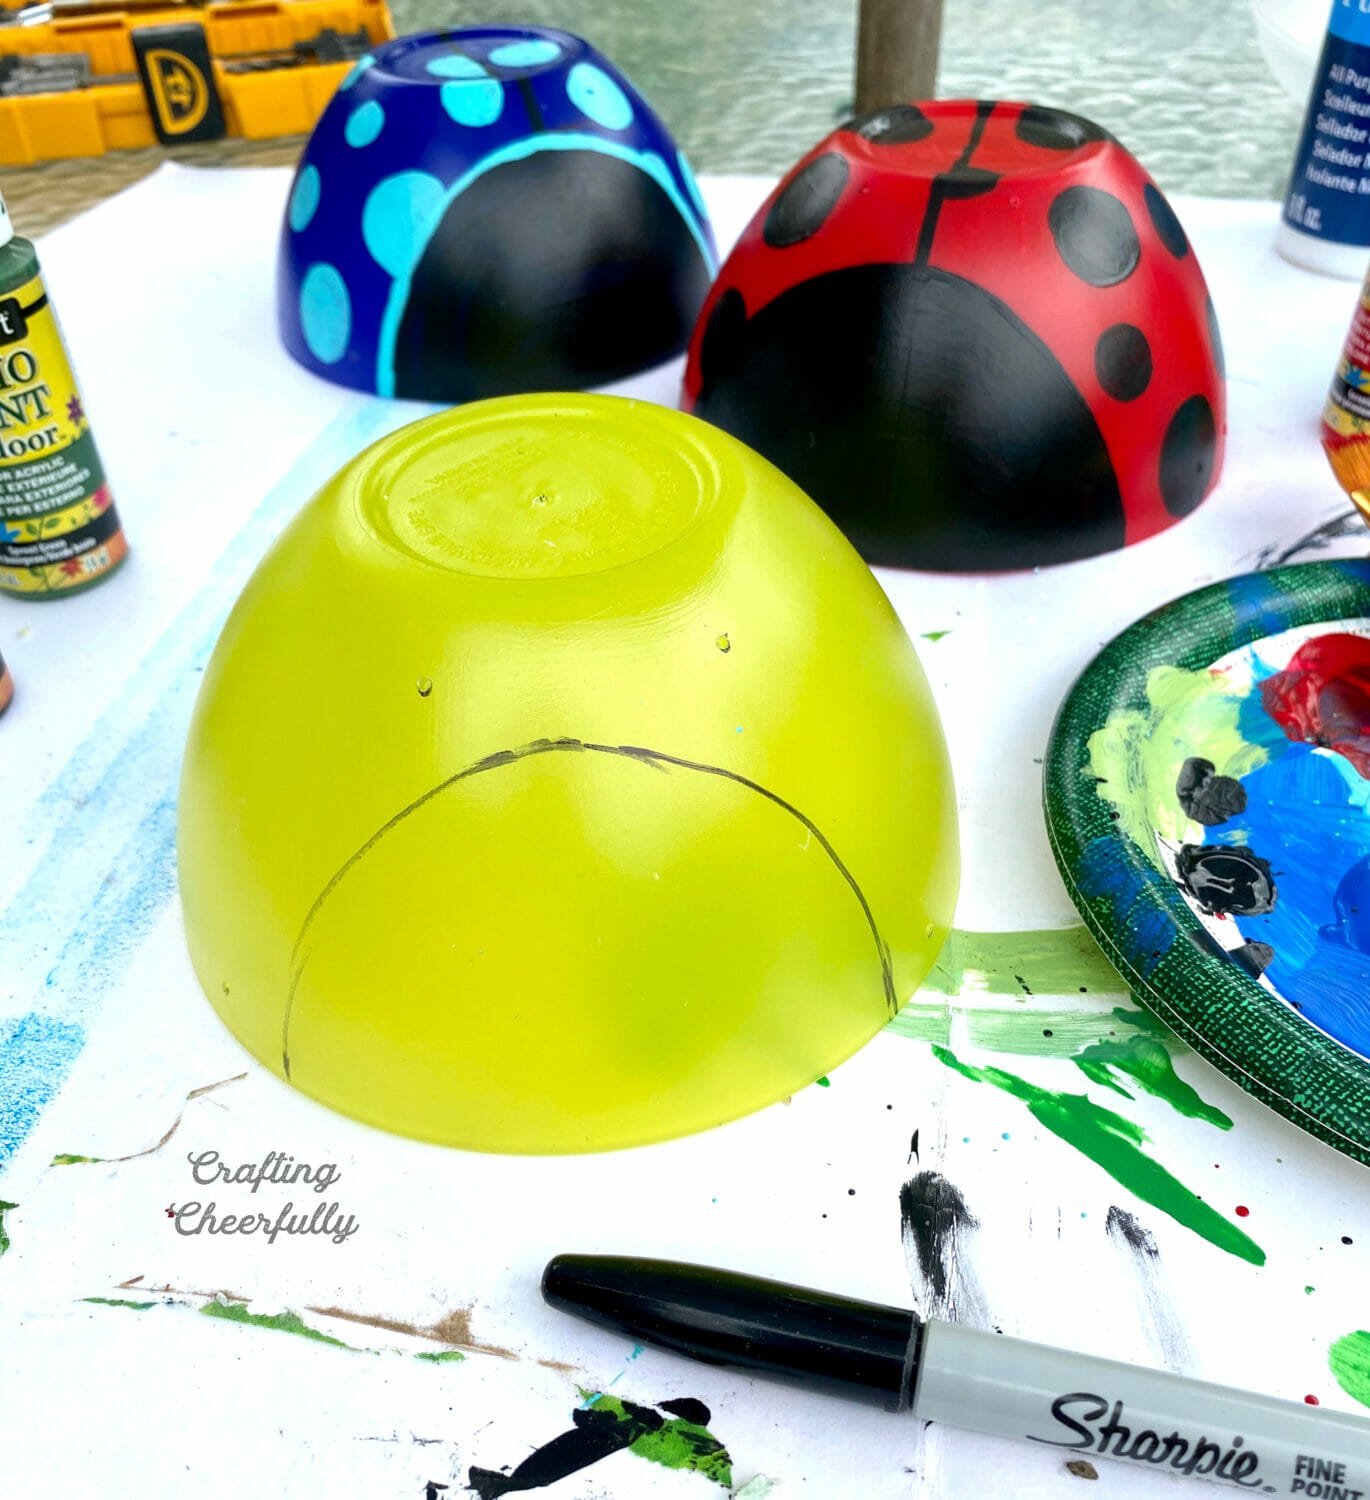
Once the face is painted, add a line down the center of the bowl to separate the beetle’s wings.

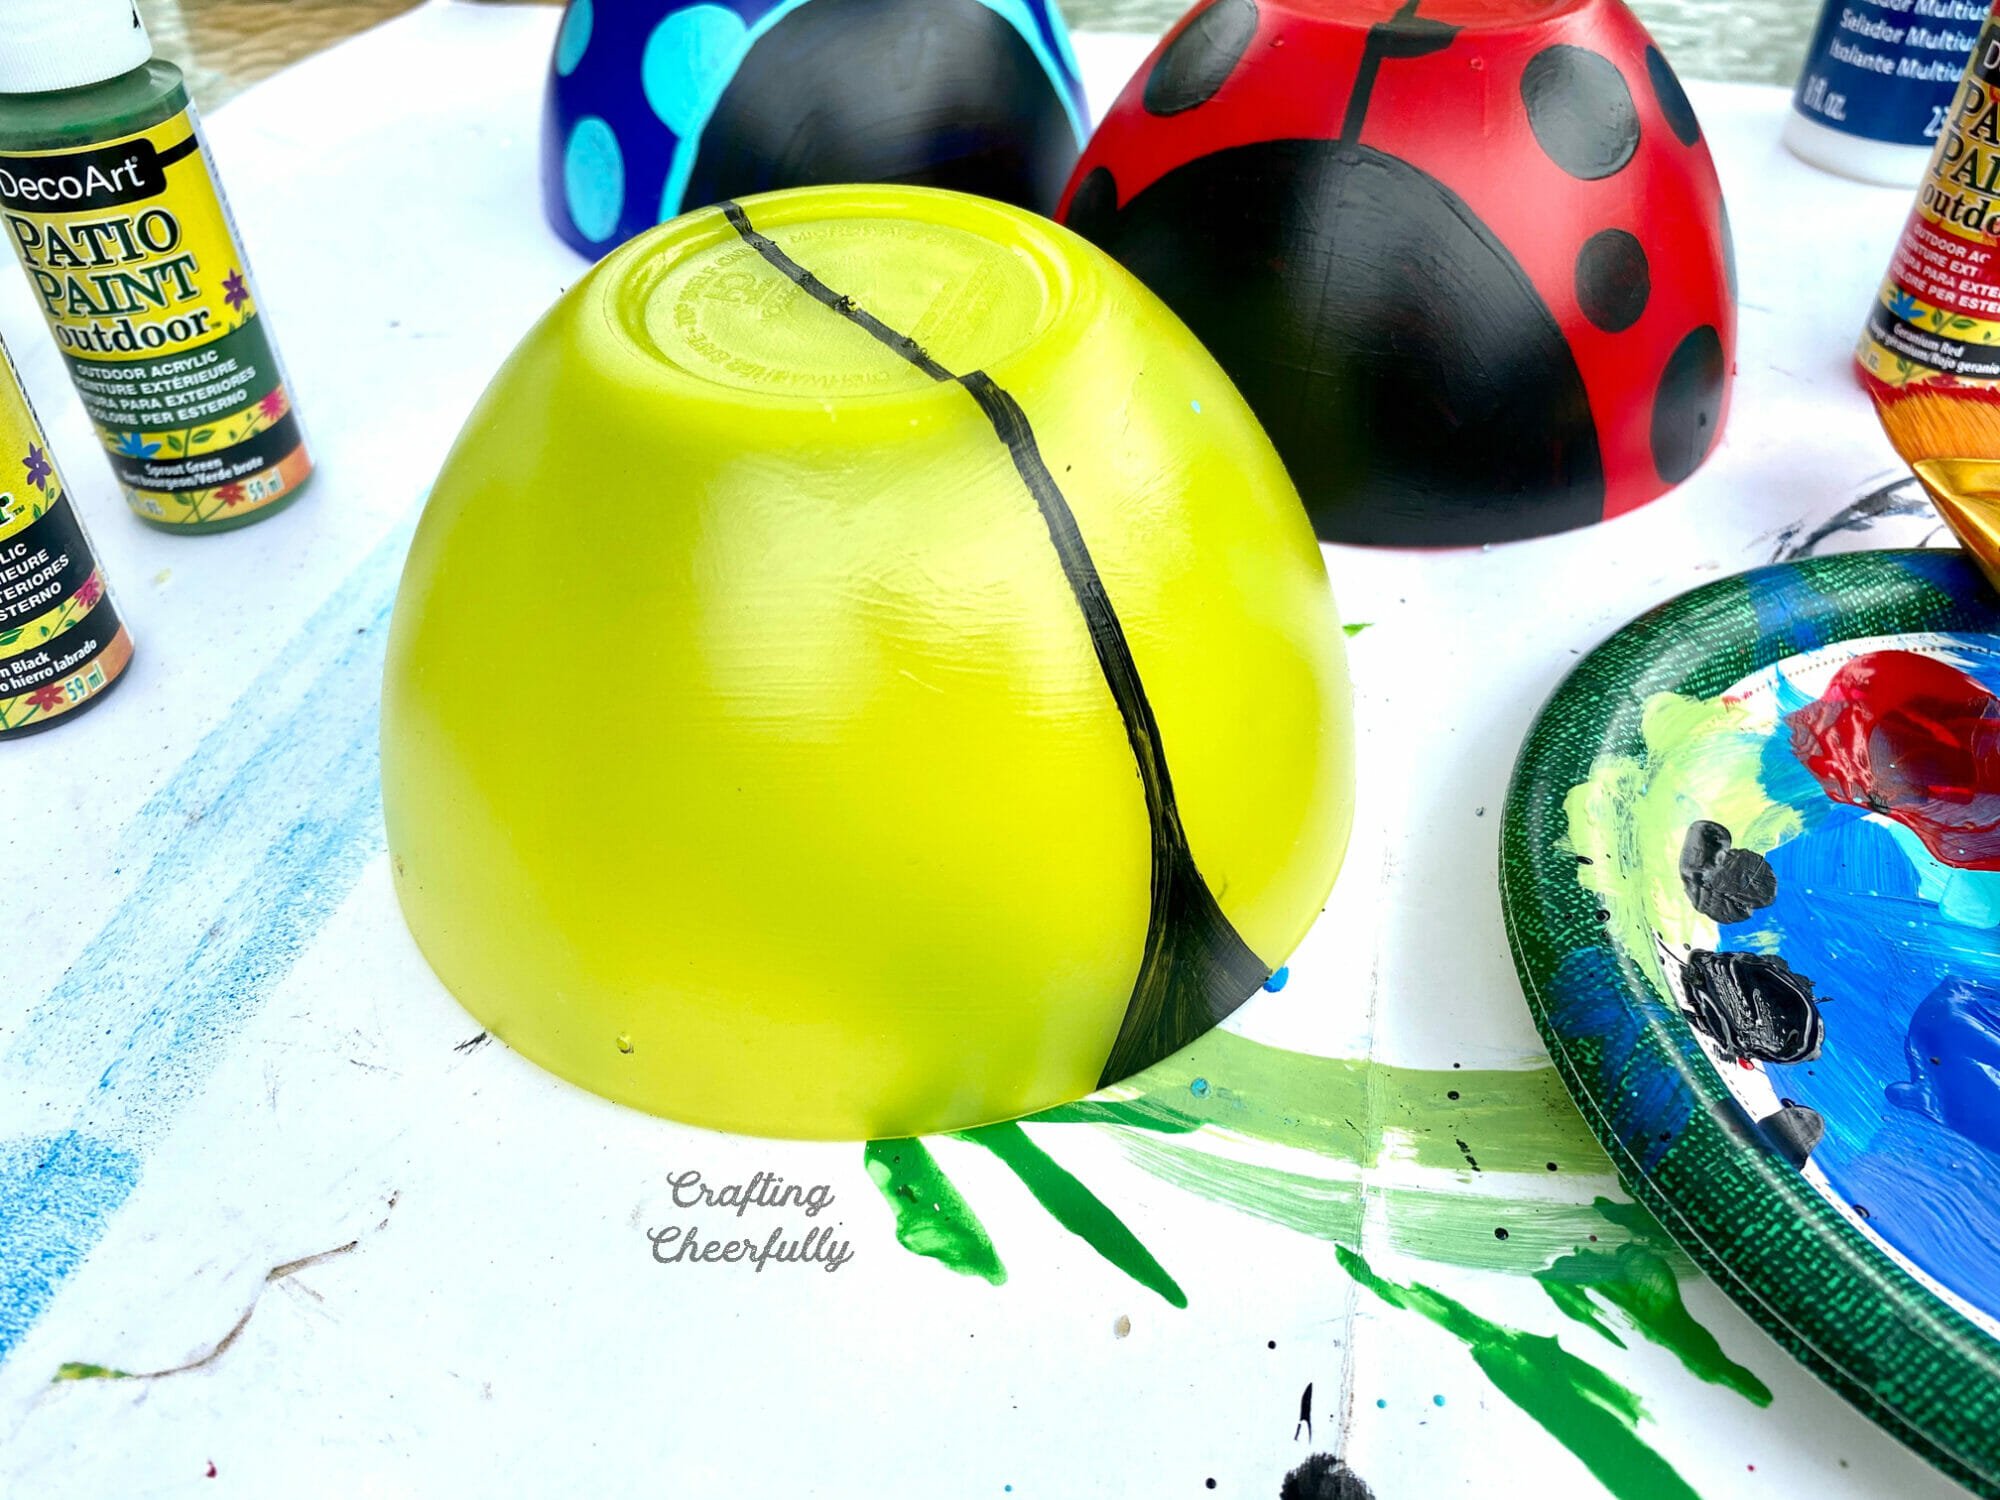
Next, add spots and then finally paint eyes and a smile for the face.
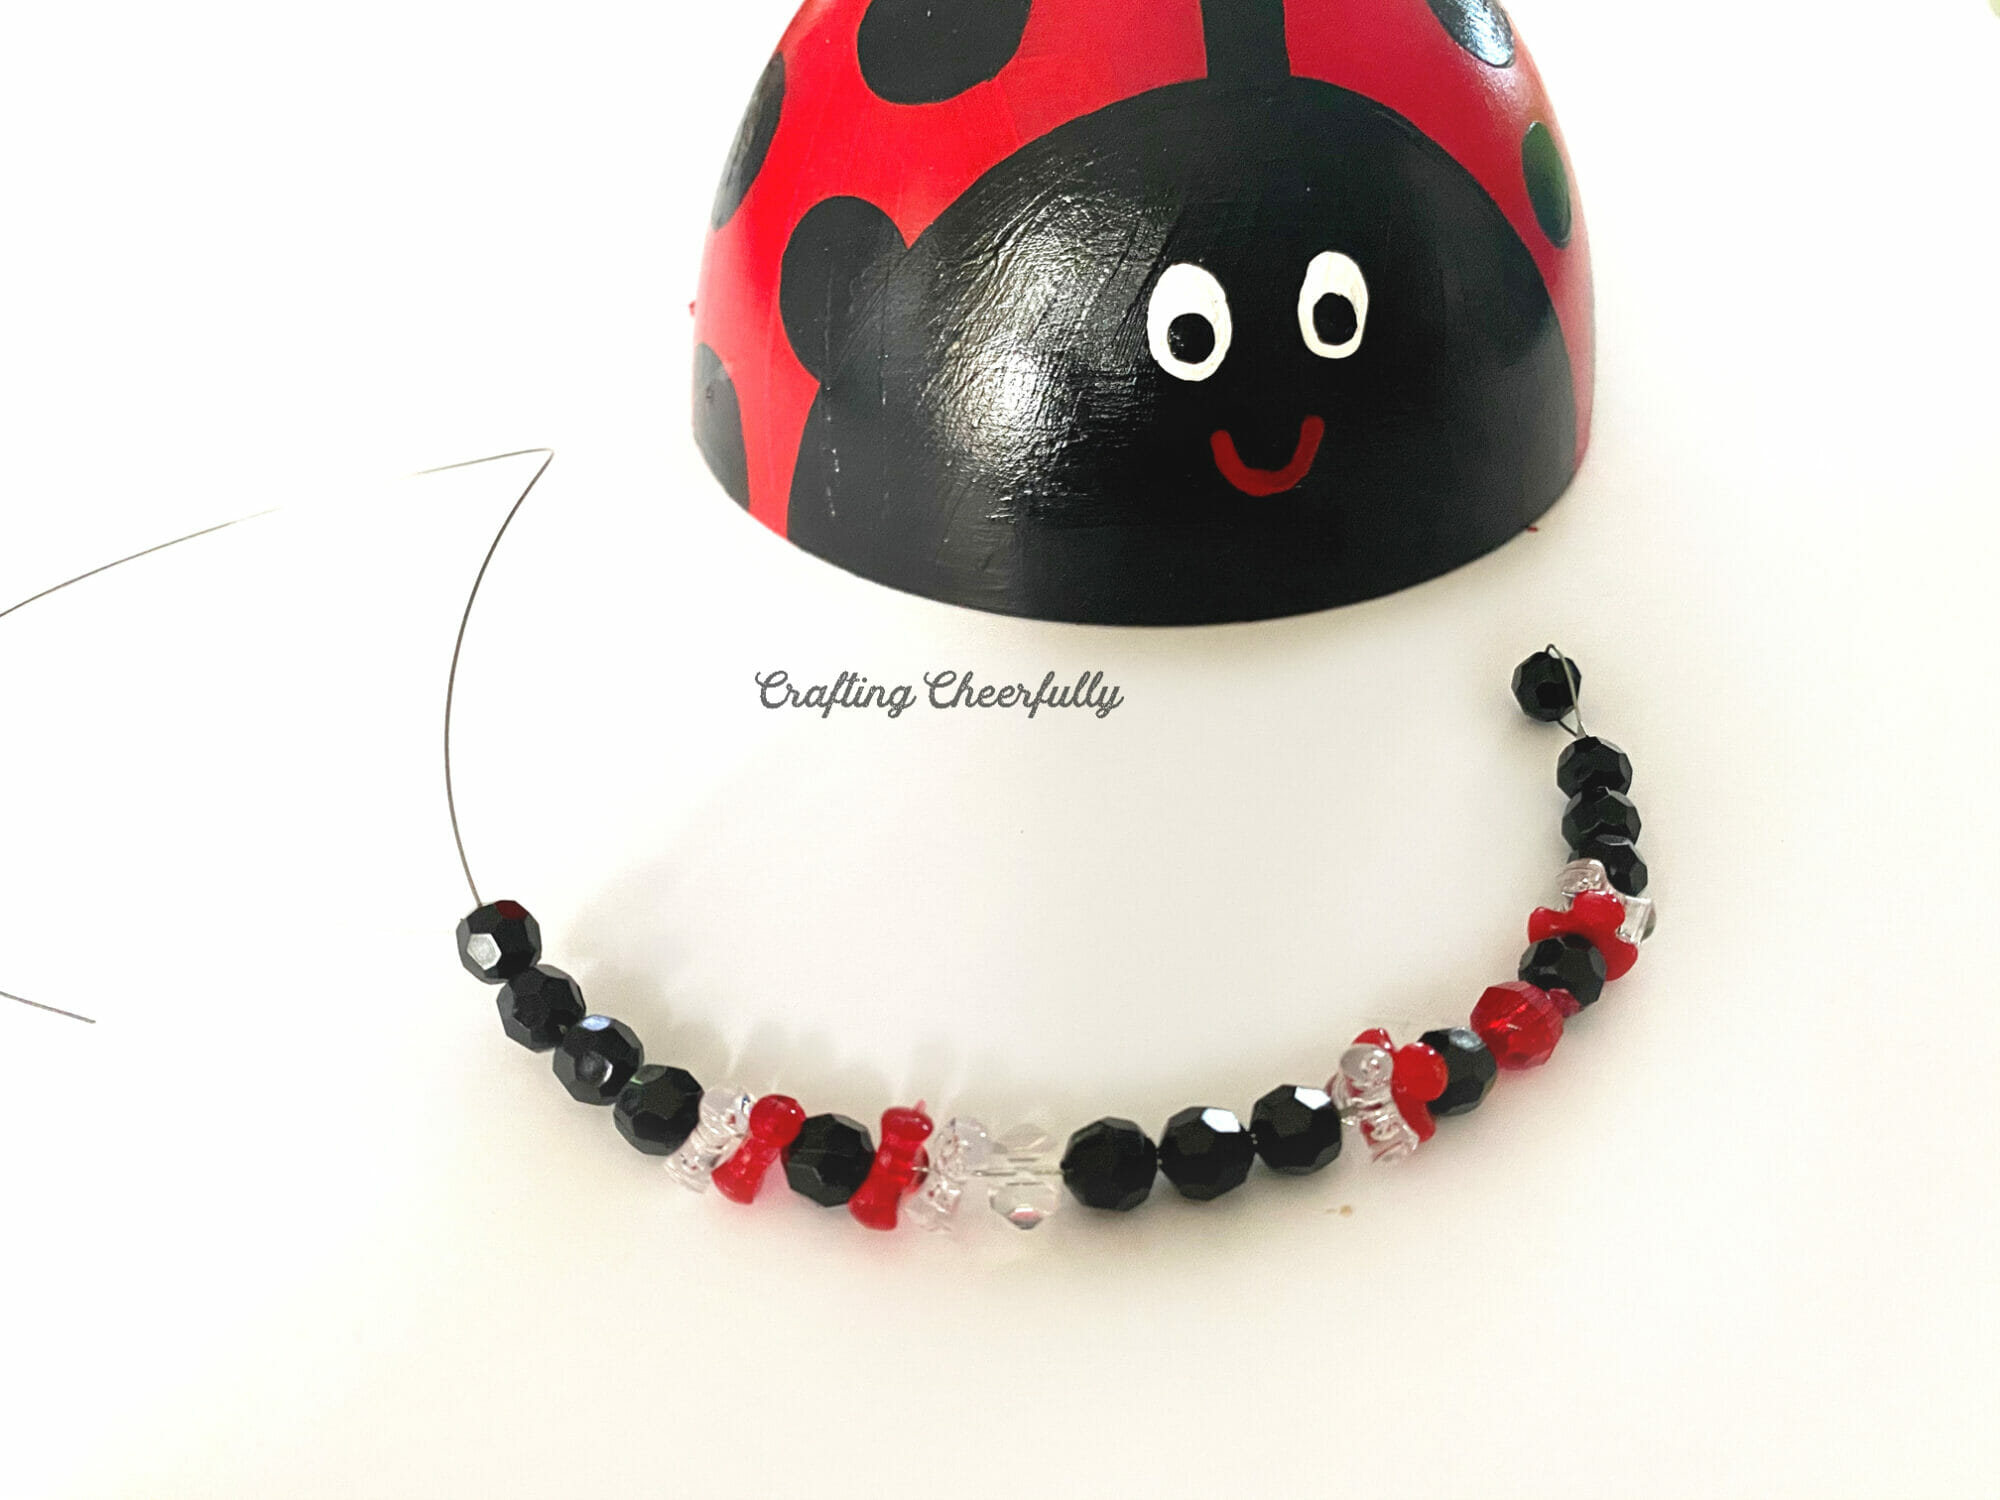
Create the Ladybug’s Beaded Legs
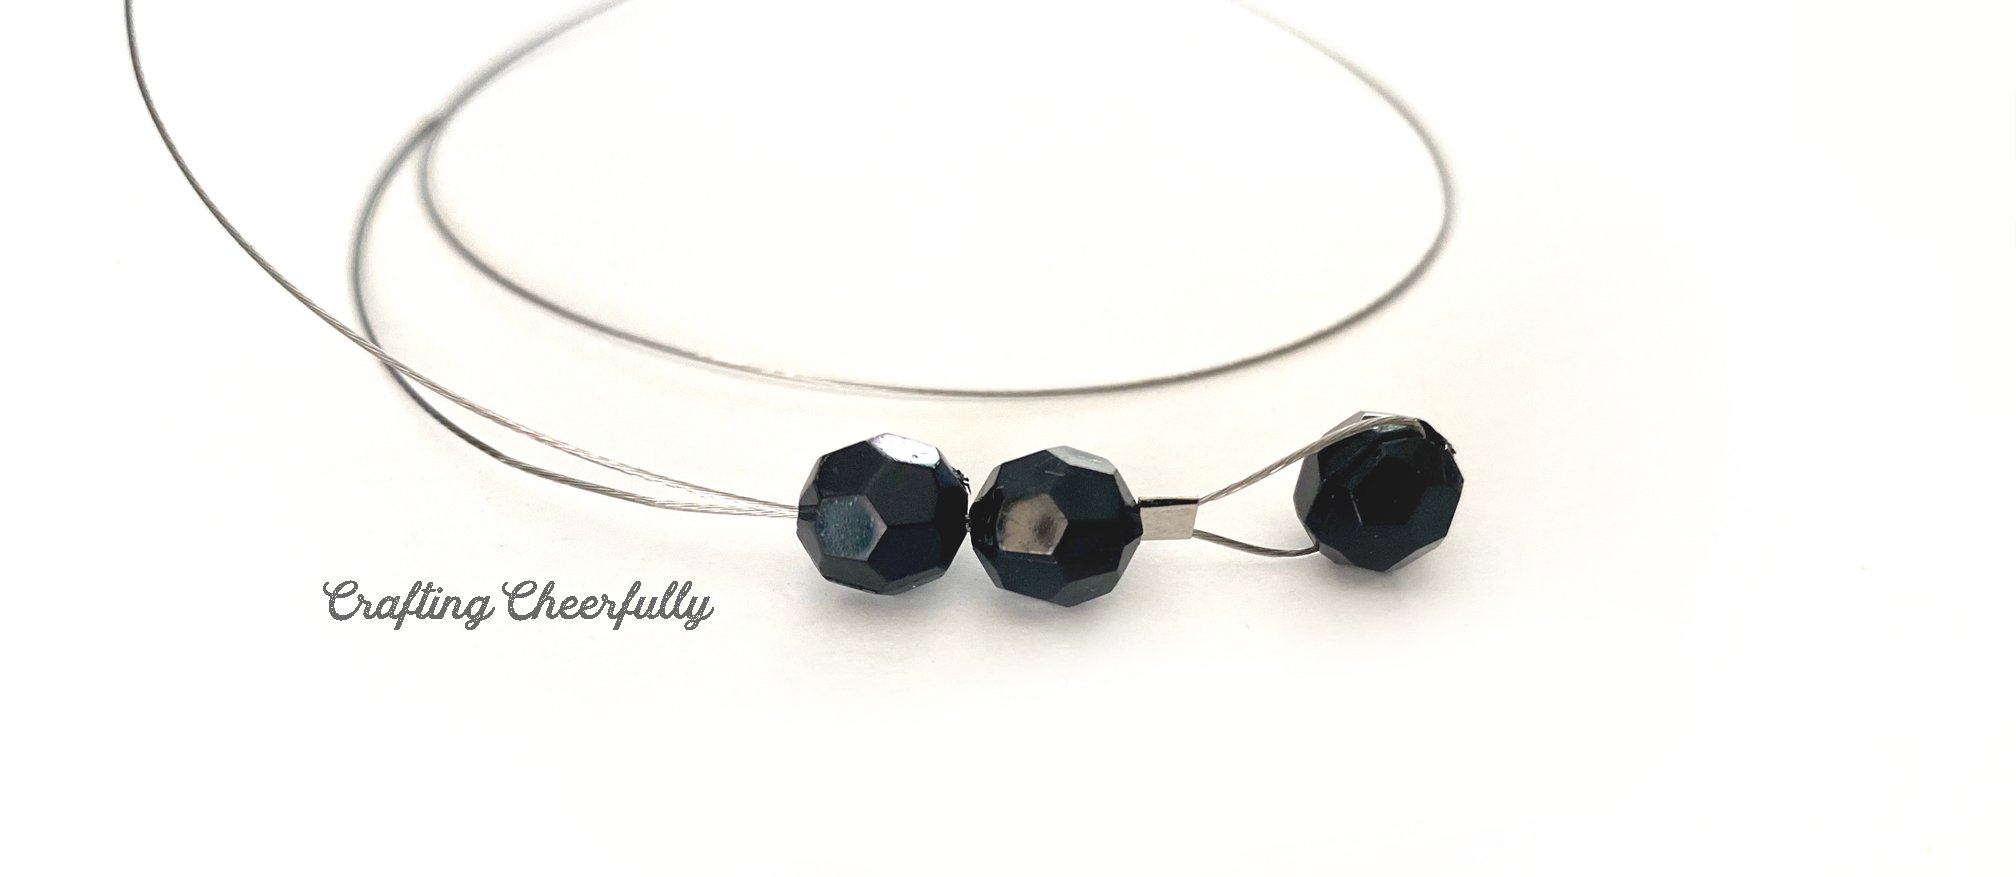
Step Two: Create the dangling legs from beads! Cut a long length of bead stringing wire and string a black bead onto the wire leaving a small tail. Thread both ends of the wire (the long and short tail) through a crimp bead and use a crimping tool to clamp down and secure the bead in place. I used a needle nose pliers I had on hand (pictured below) but if I were to do this again I would probably get the actual crimping tool since this will make the crimp bead more secure.
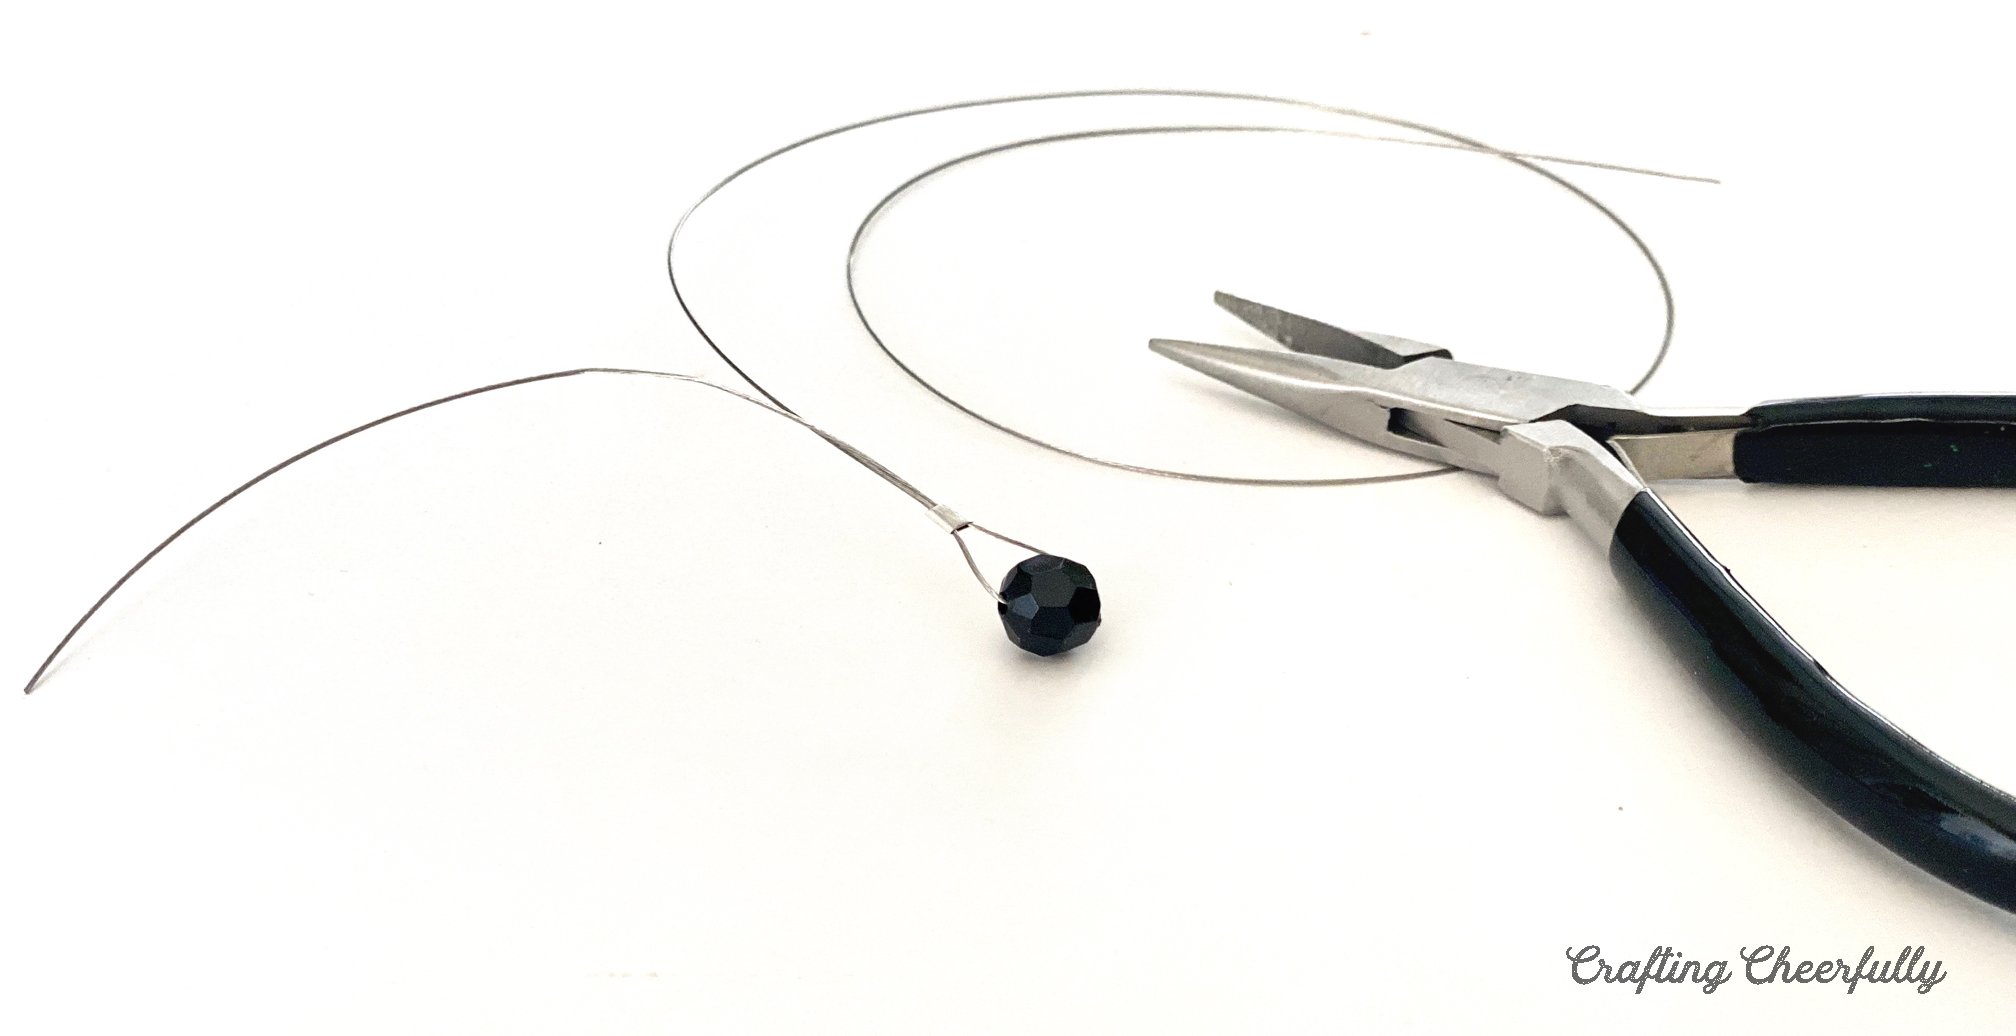
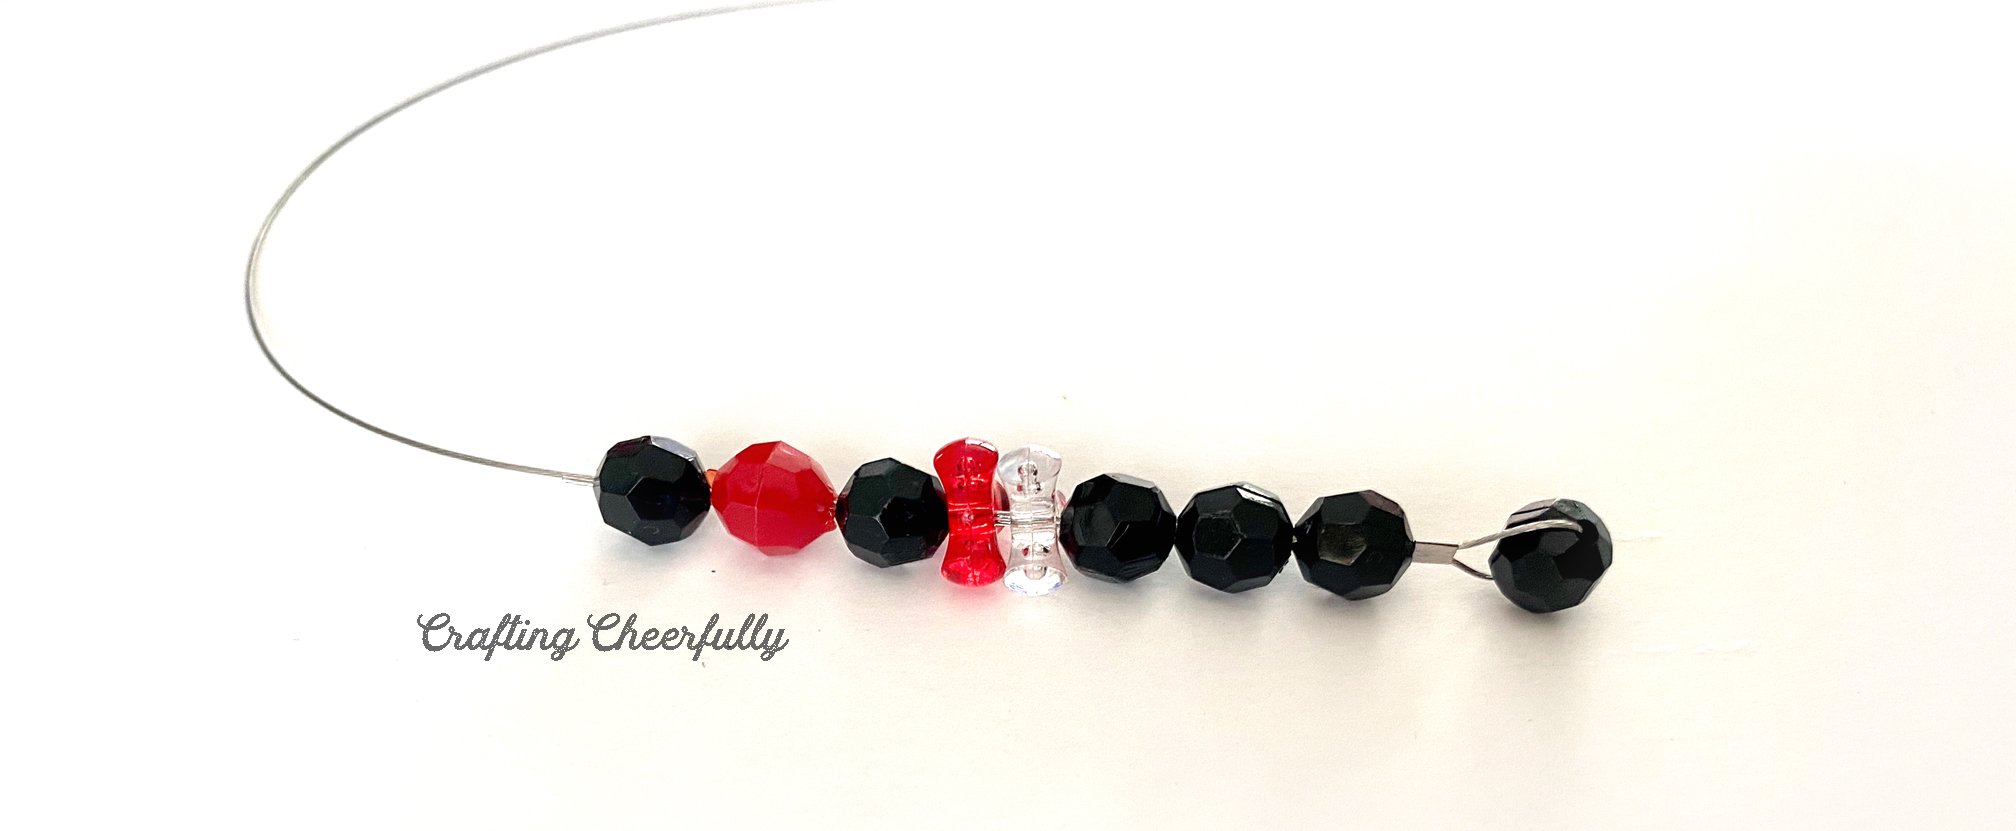
The next step is to add the rest of the beads and create a fun pattern. You will repeat this pattern on all six legs. Make sure to string everything over the two strands of jewelry wire until eventually the shorter strand is completely covered with beads and you just have the longer strand left.
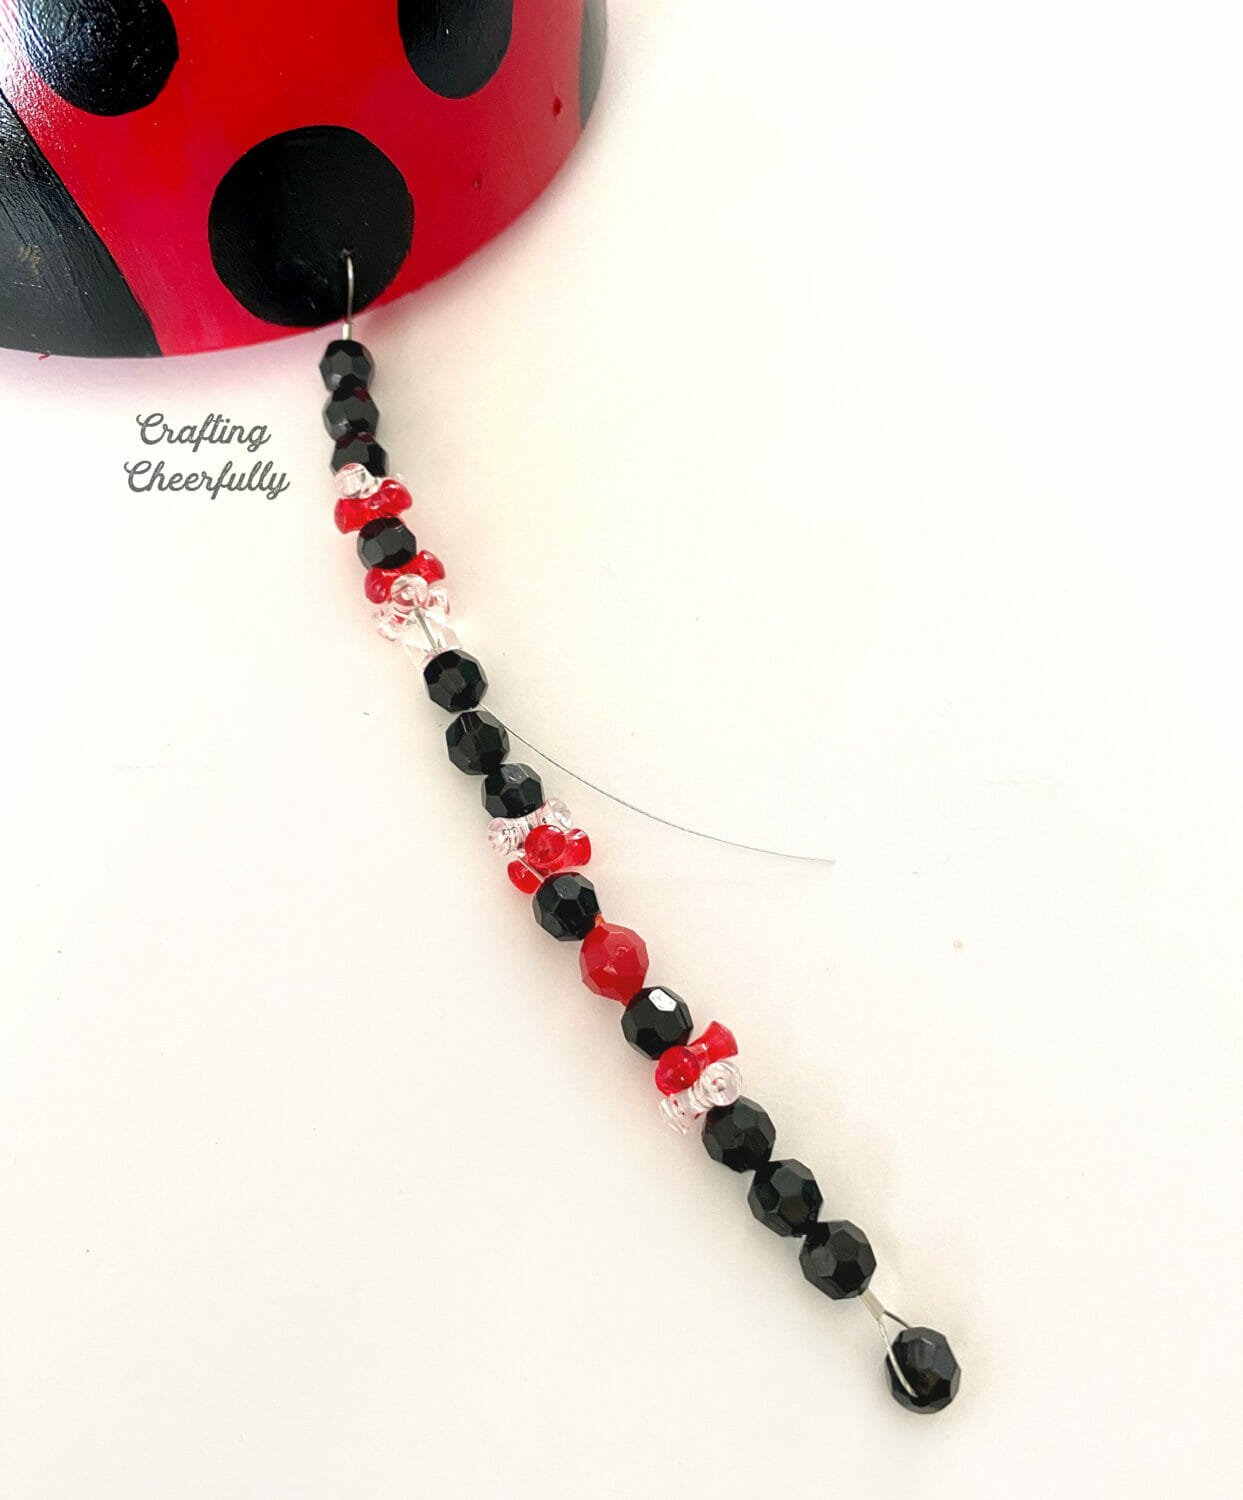
Attaching the Beaded Legs
Step Three: Attach the beaded legs to each ladybug bowl. Once you have the leg finished, place a crimper bead at the top. Thread the wire through one of the drilled leg holes on the bowl and then pass the wire back through the crimper bead and down through as many beads as you can. Use the needle nose pliers or crimping tool to clamp down on the crimper bead.
Cut off any leftover wire. I tried to pass my wire back through at least 10 beads and then cut the wire tail that was left.
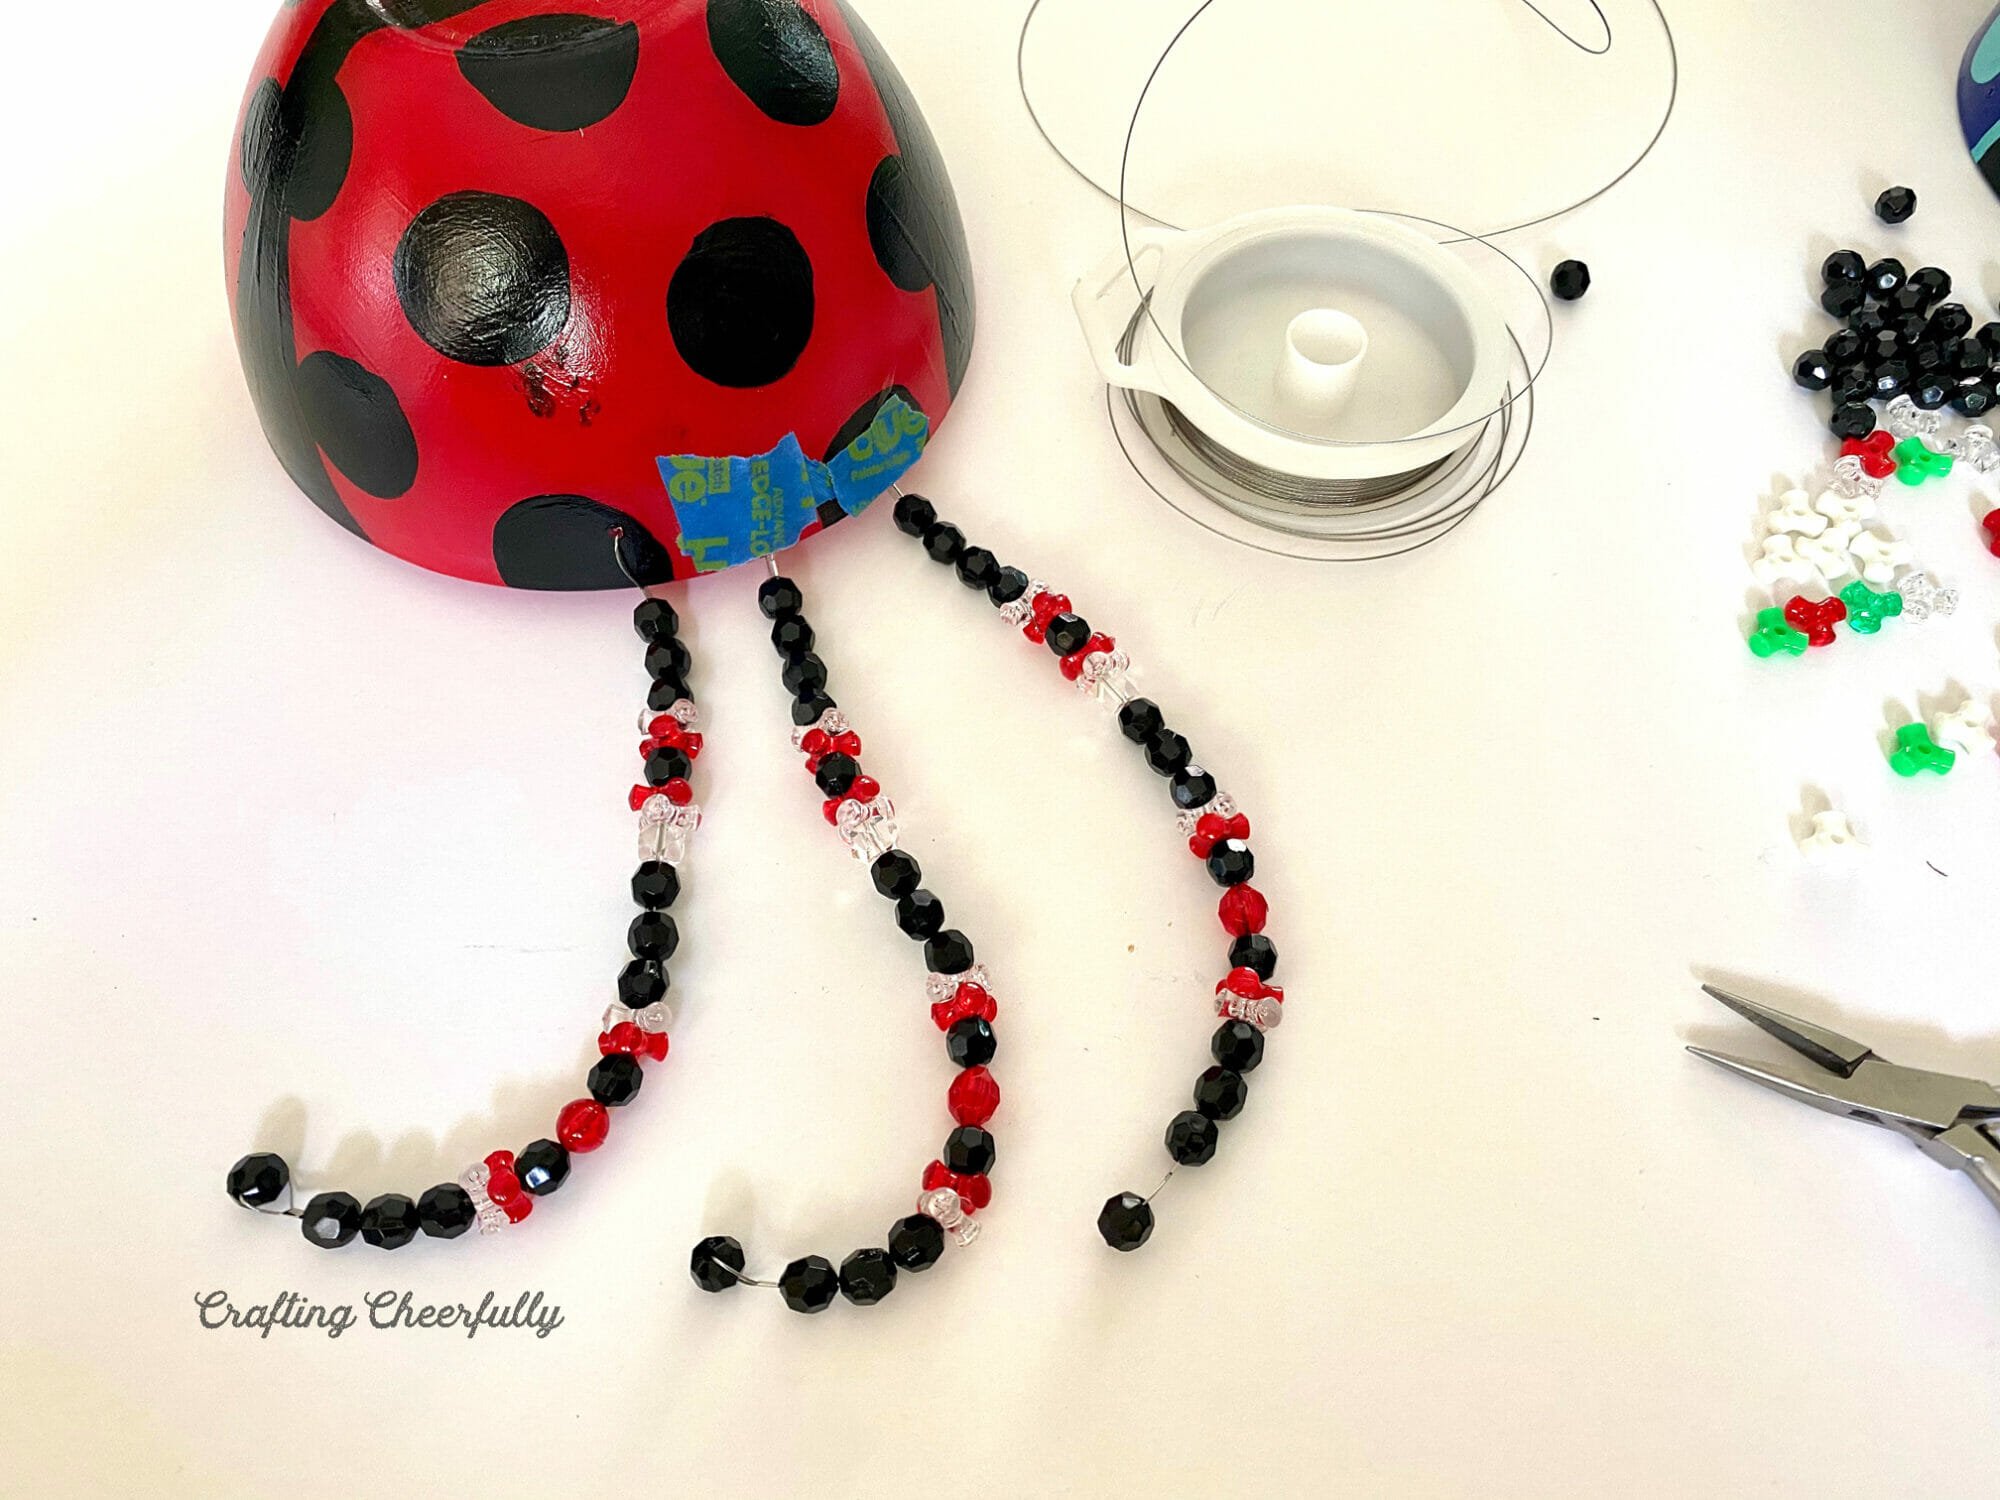
While working on adding all six legs, I used a little piece of tape over the top of the finished legs to make sure the crimper bead didn’t slide. I don’t think this would be a problem if you are using a real crimping tool but I was using a needle nose pliers.
Once all of the legs are done, use a bit of gorilla glue to secure the top of each leg to the bowl. I made sure the glue covered the crimper bead and touched the first bead of the leg as well as the bottom of the bowl.
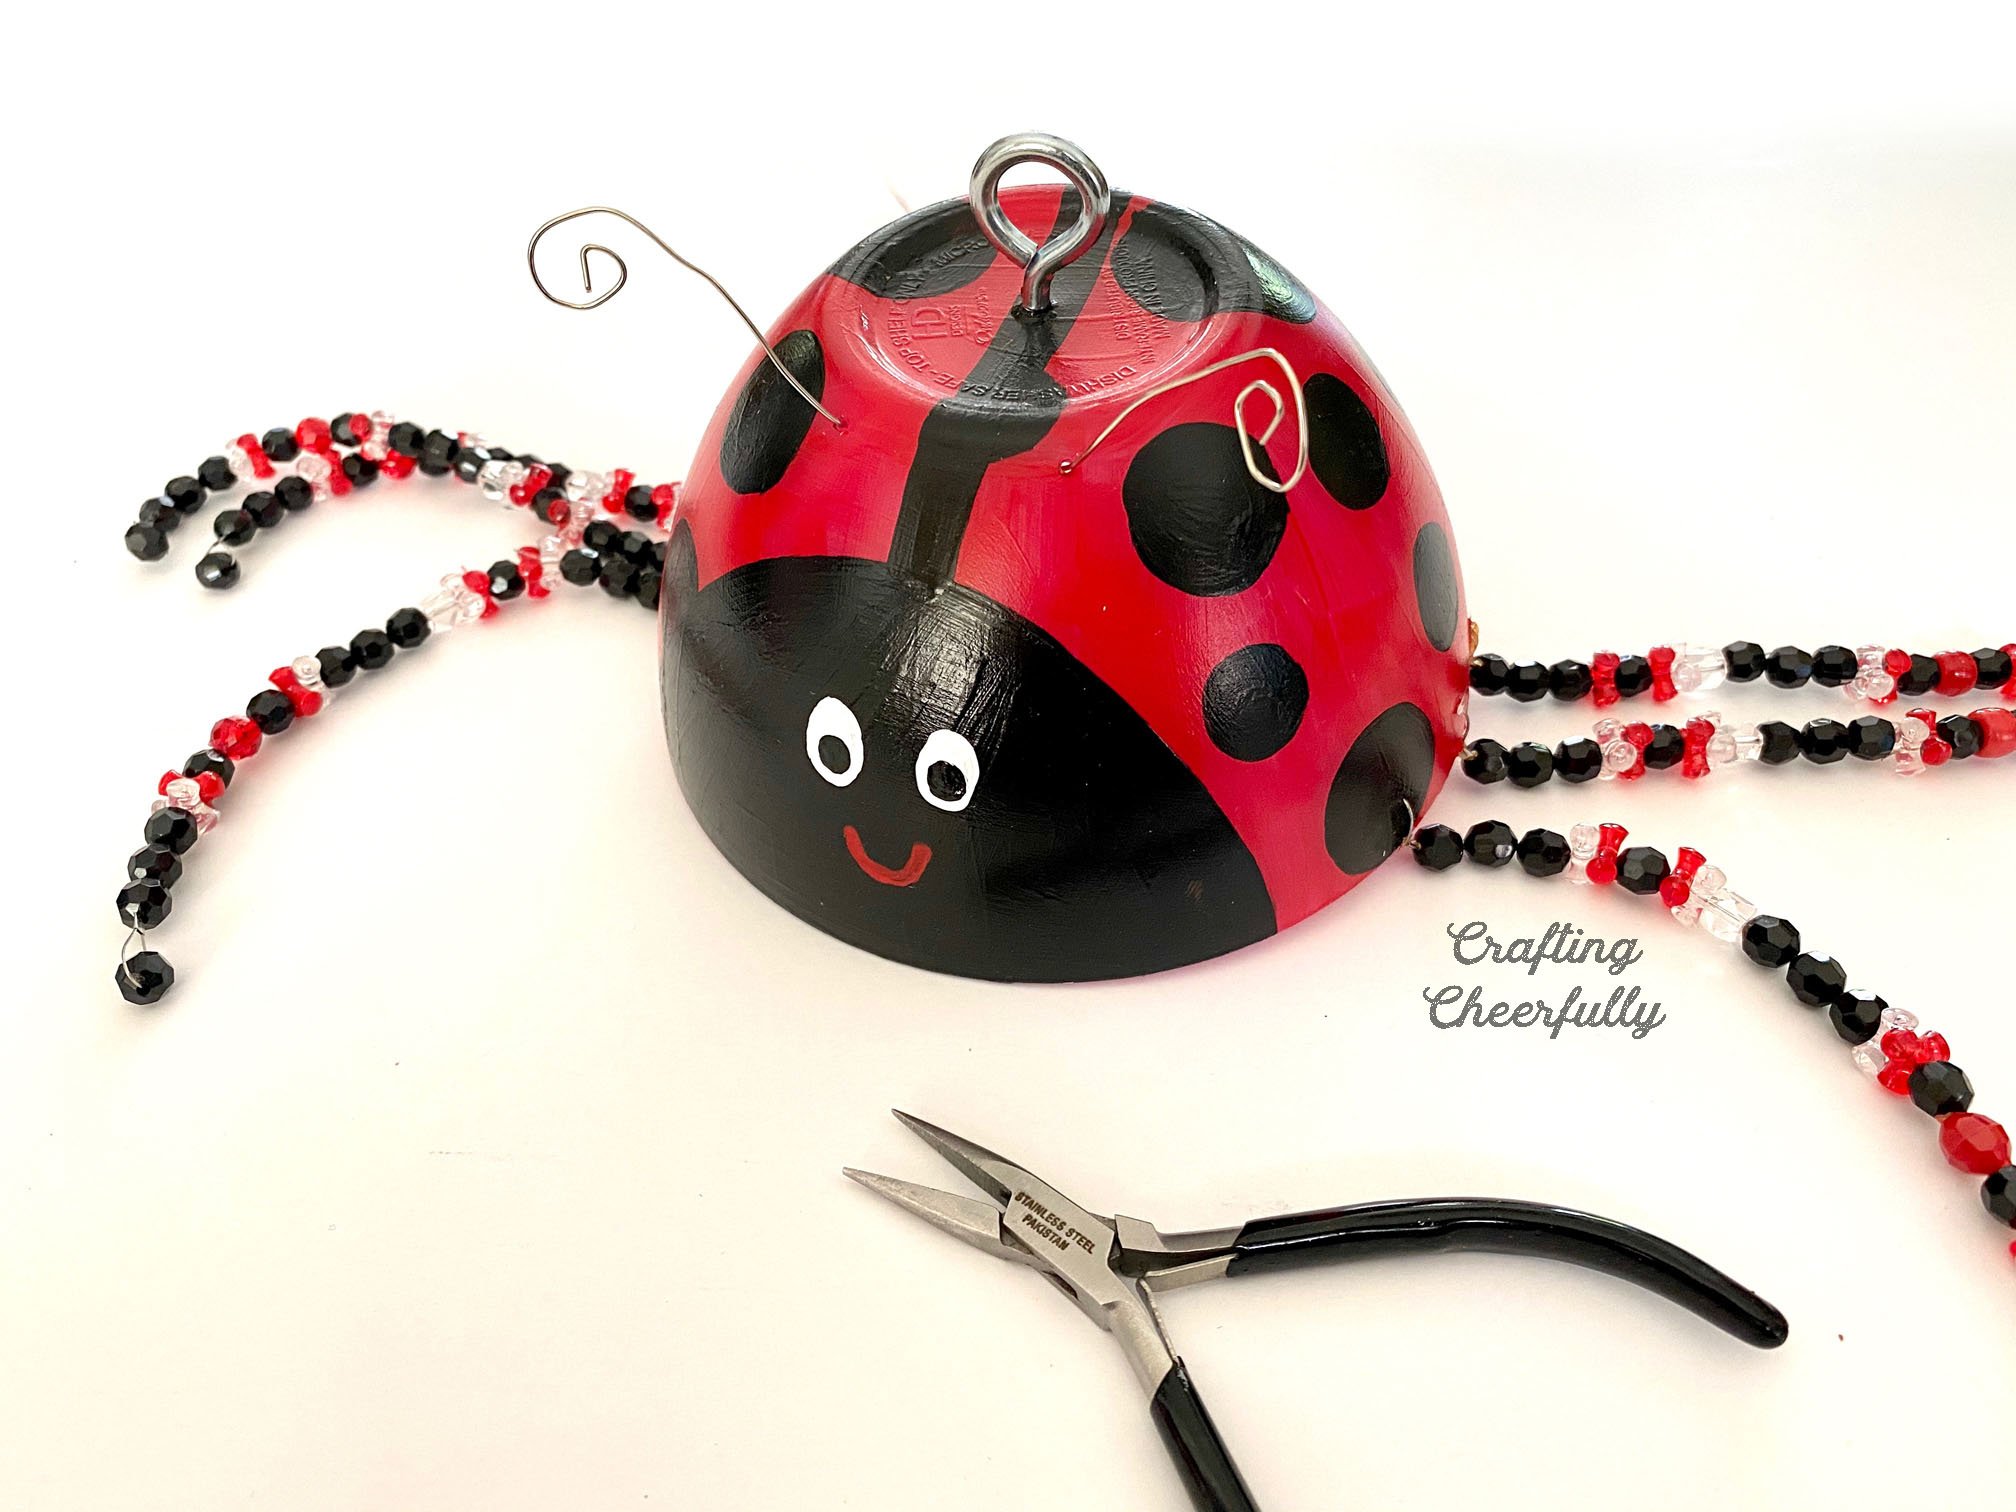
Add the hanging loop!
Step Four: Add a hanging loop to the top of each ladybug. I used a hardware eye on the top of each of my ladybug beetles since I knew I wanted to hang these on shepherd’s hooks in the garden.
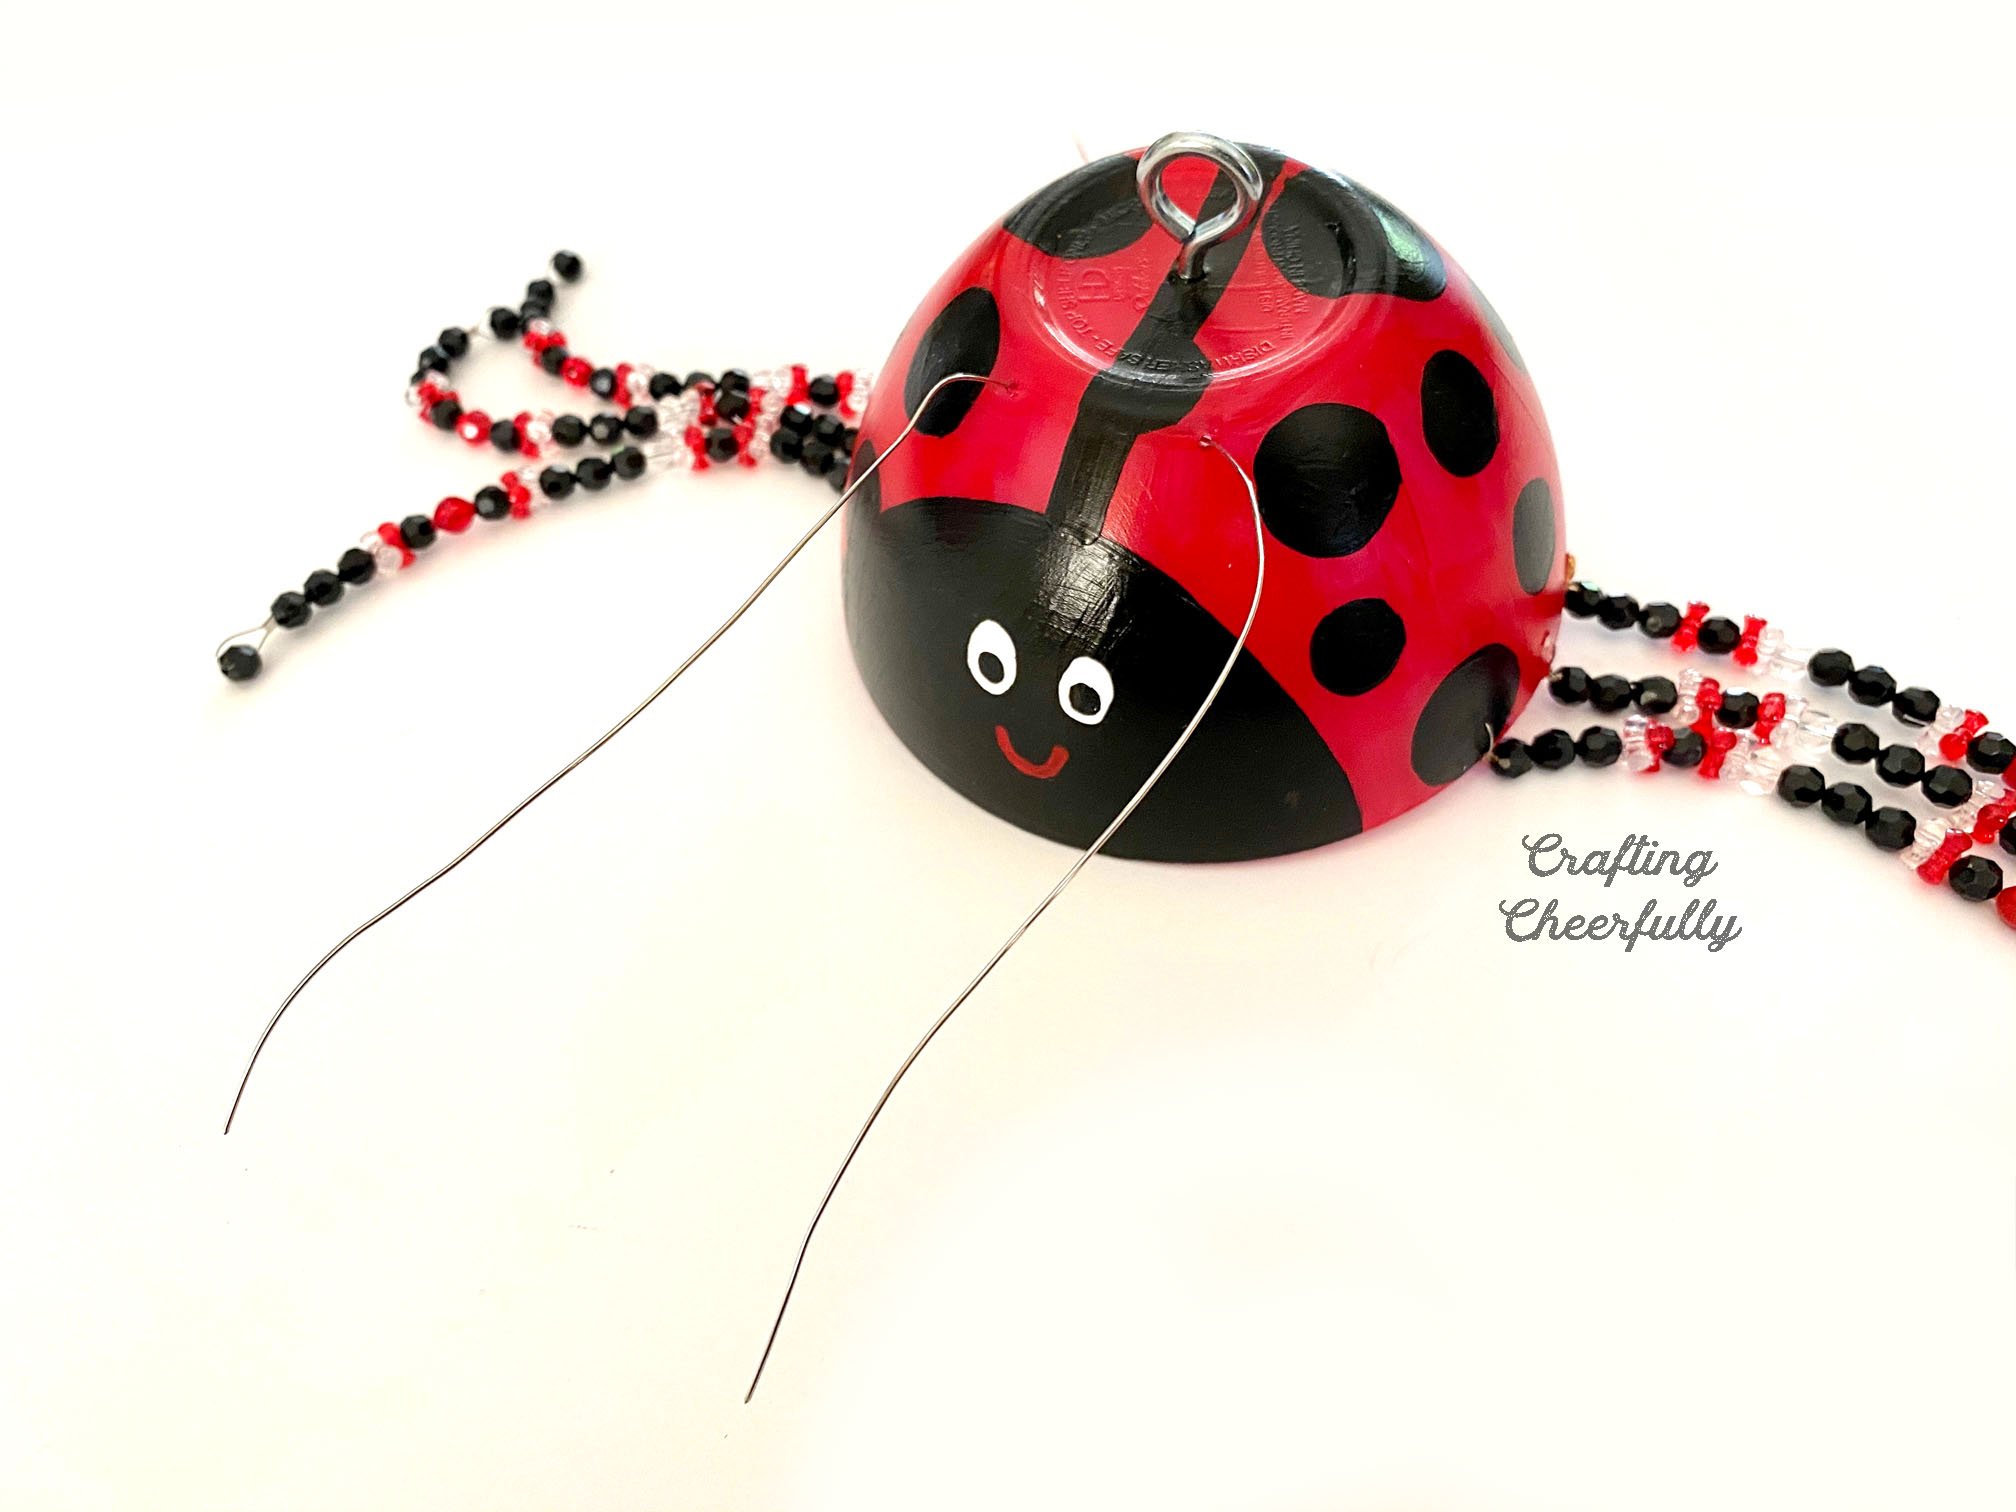
Add the ladybug antennae!
Step Five: Finish these ladybug beetles up by adding their cute little antennae! I the created antennae using wire and curled each end around my needle nose pliers to create a spiral at the end of each antenna.
The ladybug ornaments are finished!! They are ready to be hung outside and enjoyed. My ladybugs on hanging on small swirly shepherds hooks.
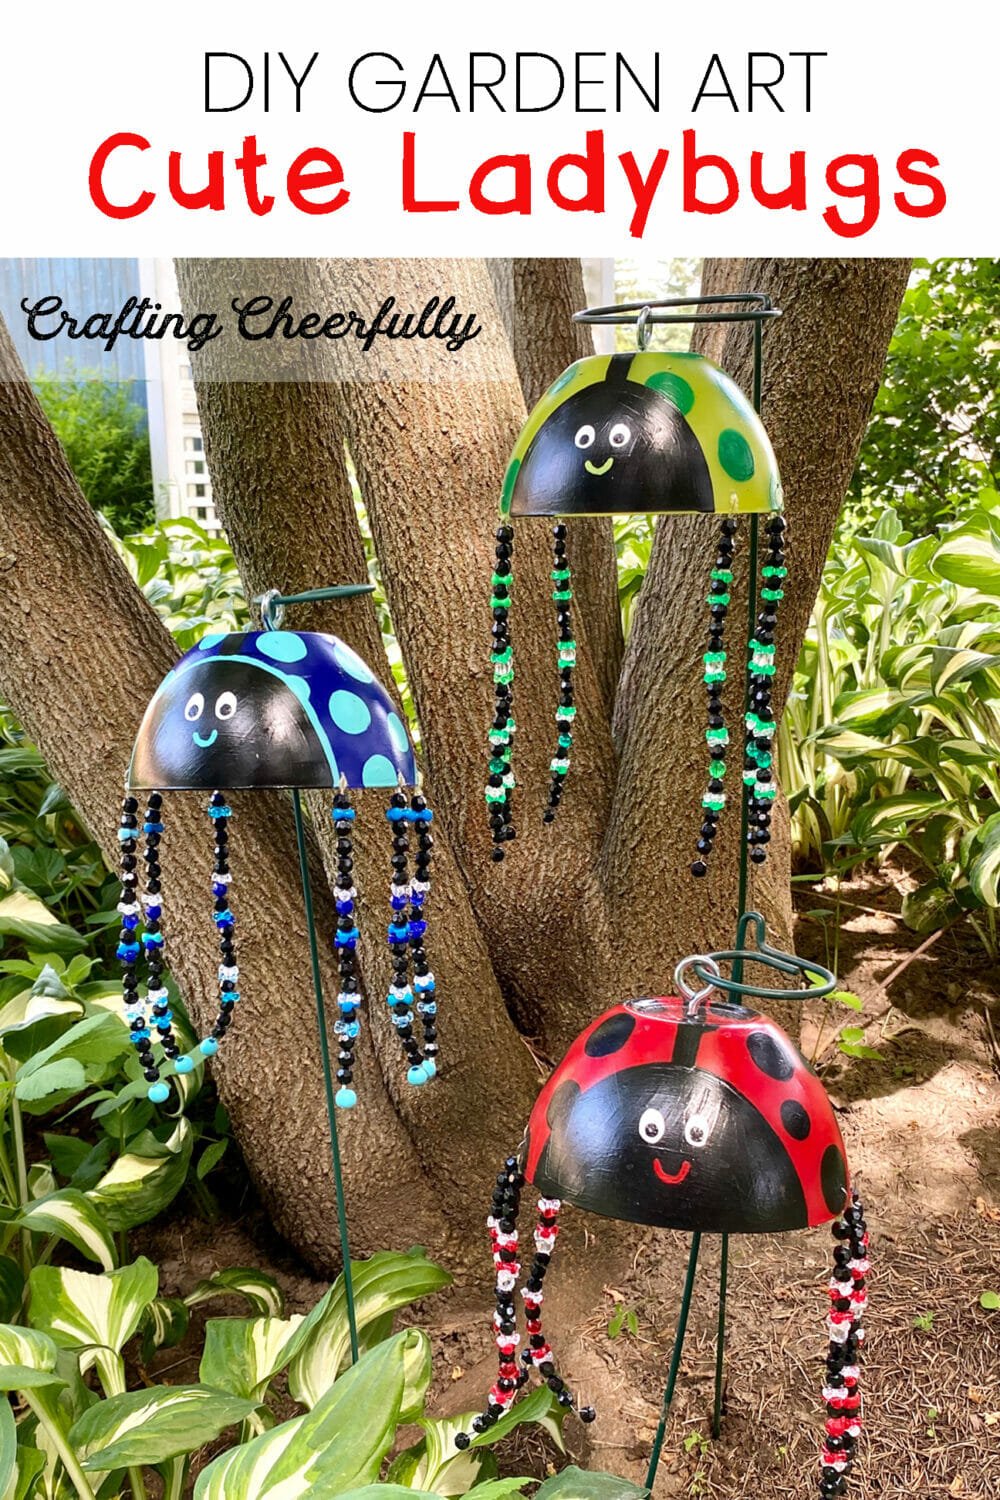
I hope you enjoyed another fun garden art tutorial! There are a few more garden art tutorials coming this summer so be on the lookout for those! You can always check my Garden Craft Section on my blog to see my latest outdoor crafts!

![]()


You are amazing! Your creativity knows no bounds! Thank you so much for inspiring me with such great, fun projects–especially now that isolation from others is such so prevalent. My neighbor will love these. I’ll have to make some for her. She thoroughly enjoys fun garden works of art. : ) You are a treasure!
Thank you so much – that really means a lot! I hope you have fun making them! :) We are definitely enjoying our backyard more than ever this summer and it has been fun adding new artwork. Thank you!! :)