
DIY Butterfly Garden Ornaments
Create beautiful DIY butterfly garden ornaments to display in your garden or yard this summer! These butterflies are made with recycled cardboard, aluminum foil, hot glue and paint. Grab the free template to get started!
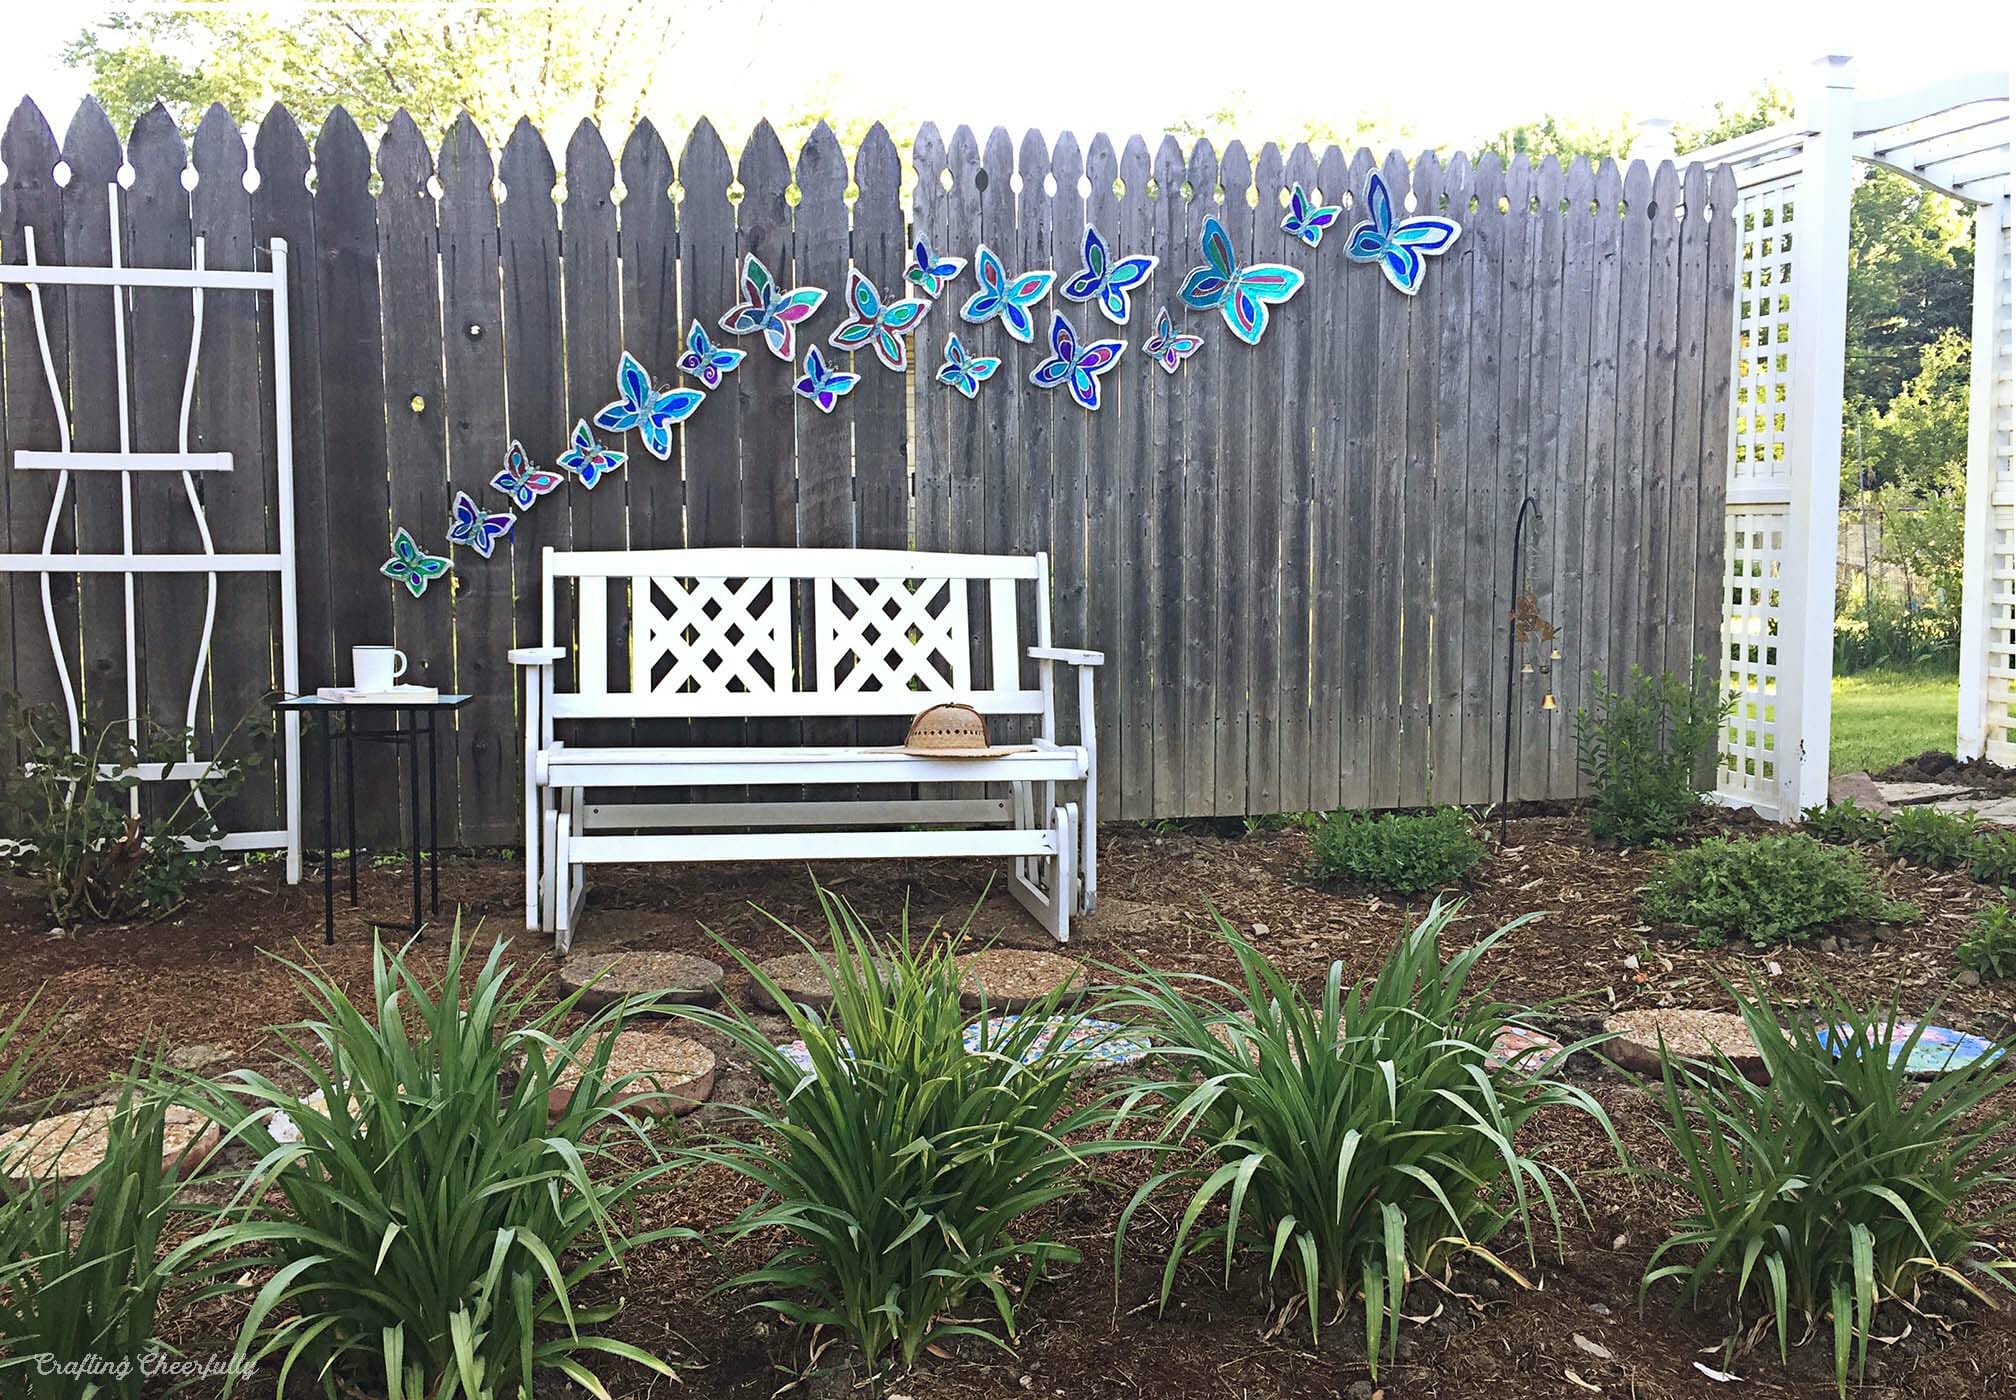
Hello Crafty Friends! Today I’m excited to share these DIY butterfly lawn ornaments with you today! We just finished cleaning up an area of our yard that had become overgrown with weeds. We planted a whole new garden and when it was done I kept feeling like the fence, that was there when we bought our home, was so drab and boring. To spruce it up, I decided to try making my own dimensional butterflies to decorate it.
I used upcycled cardboard, tin foil, hot glue and acrylic paint to create each butterfly. I love how bright the colors on the foil look in the sunlight. The butterflies add a whimsical feel to the entire garden and some much needed color to the drab fence.
This butterfly fence art is super doable and a fun craft project. You can make one and hang it on a hook outside or make a whole bunch and create your very own art installation like I did!

Update: I wanted to revisit this post and let you know my tin foil butterflies lasted four midwestern summers outside on our fence! I took them in each winter but they lived outside in direct sunlight and rain for the whole summer.
These butterflies may have lasted even longer if they were in the shade and not directly exposed to the elements. Some of the jewels in the center fell off here and there but the butterflies held on for four summers! Not bad for cardboard and tin foil!
After it was time to say goodbye to these butterflies, I tried making new 3D Butterflies using my Cricut machine and binder material. I really liked them and they were a little quicker to make but they only lasted two summers and the plastic faded in the sun. Comparing the two different methods of making my fence butterflies, this was my favorite way.

More Garden Crafts
- Watering Can Garden Ornament
- Cute Ladybug Garden Art
- Garden Art from a Paper Plate Holders
- 3D Butterfly Art with Cricut
How to Make Your Own Butterfly Garden Ornaments
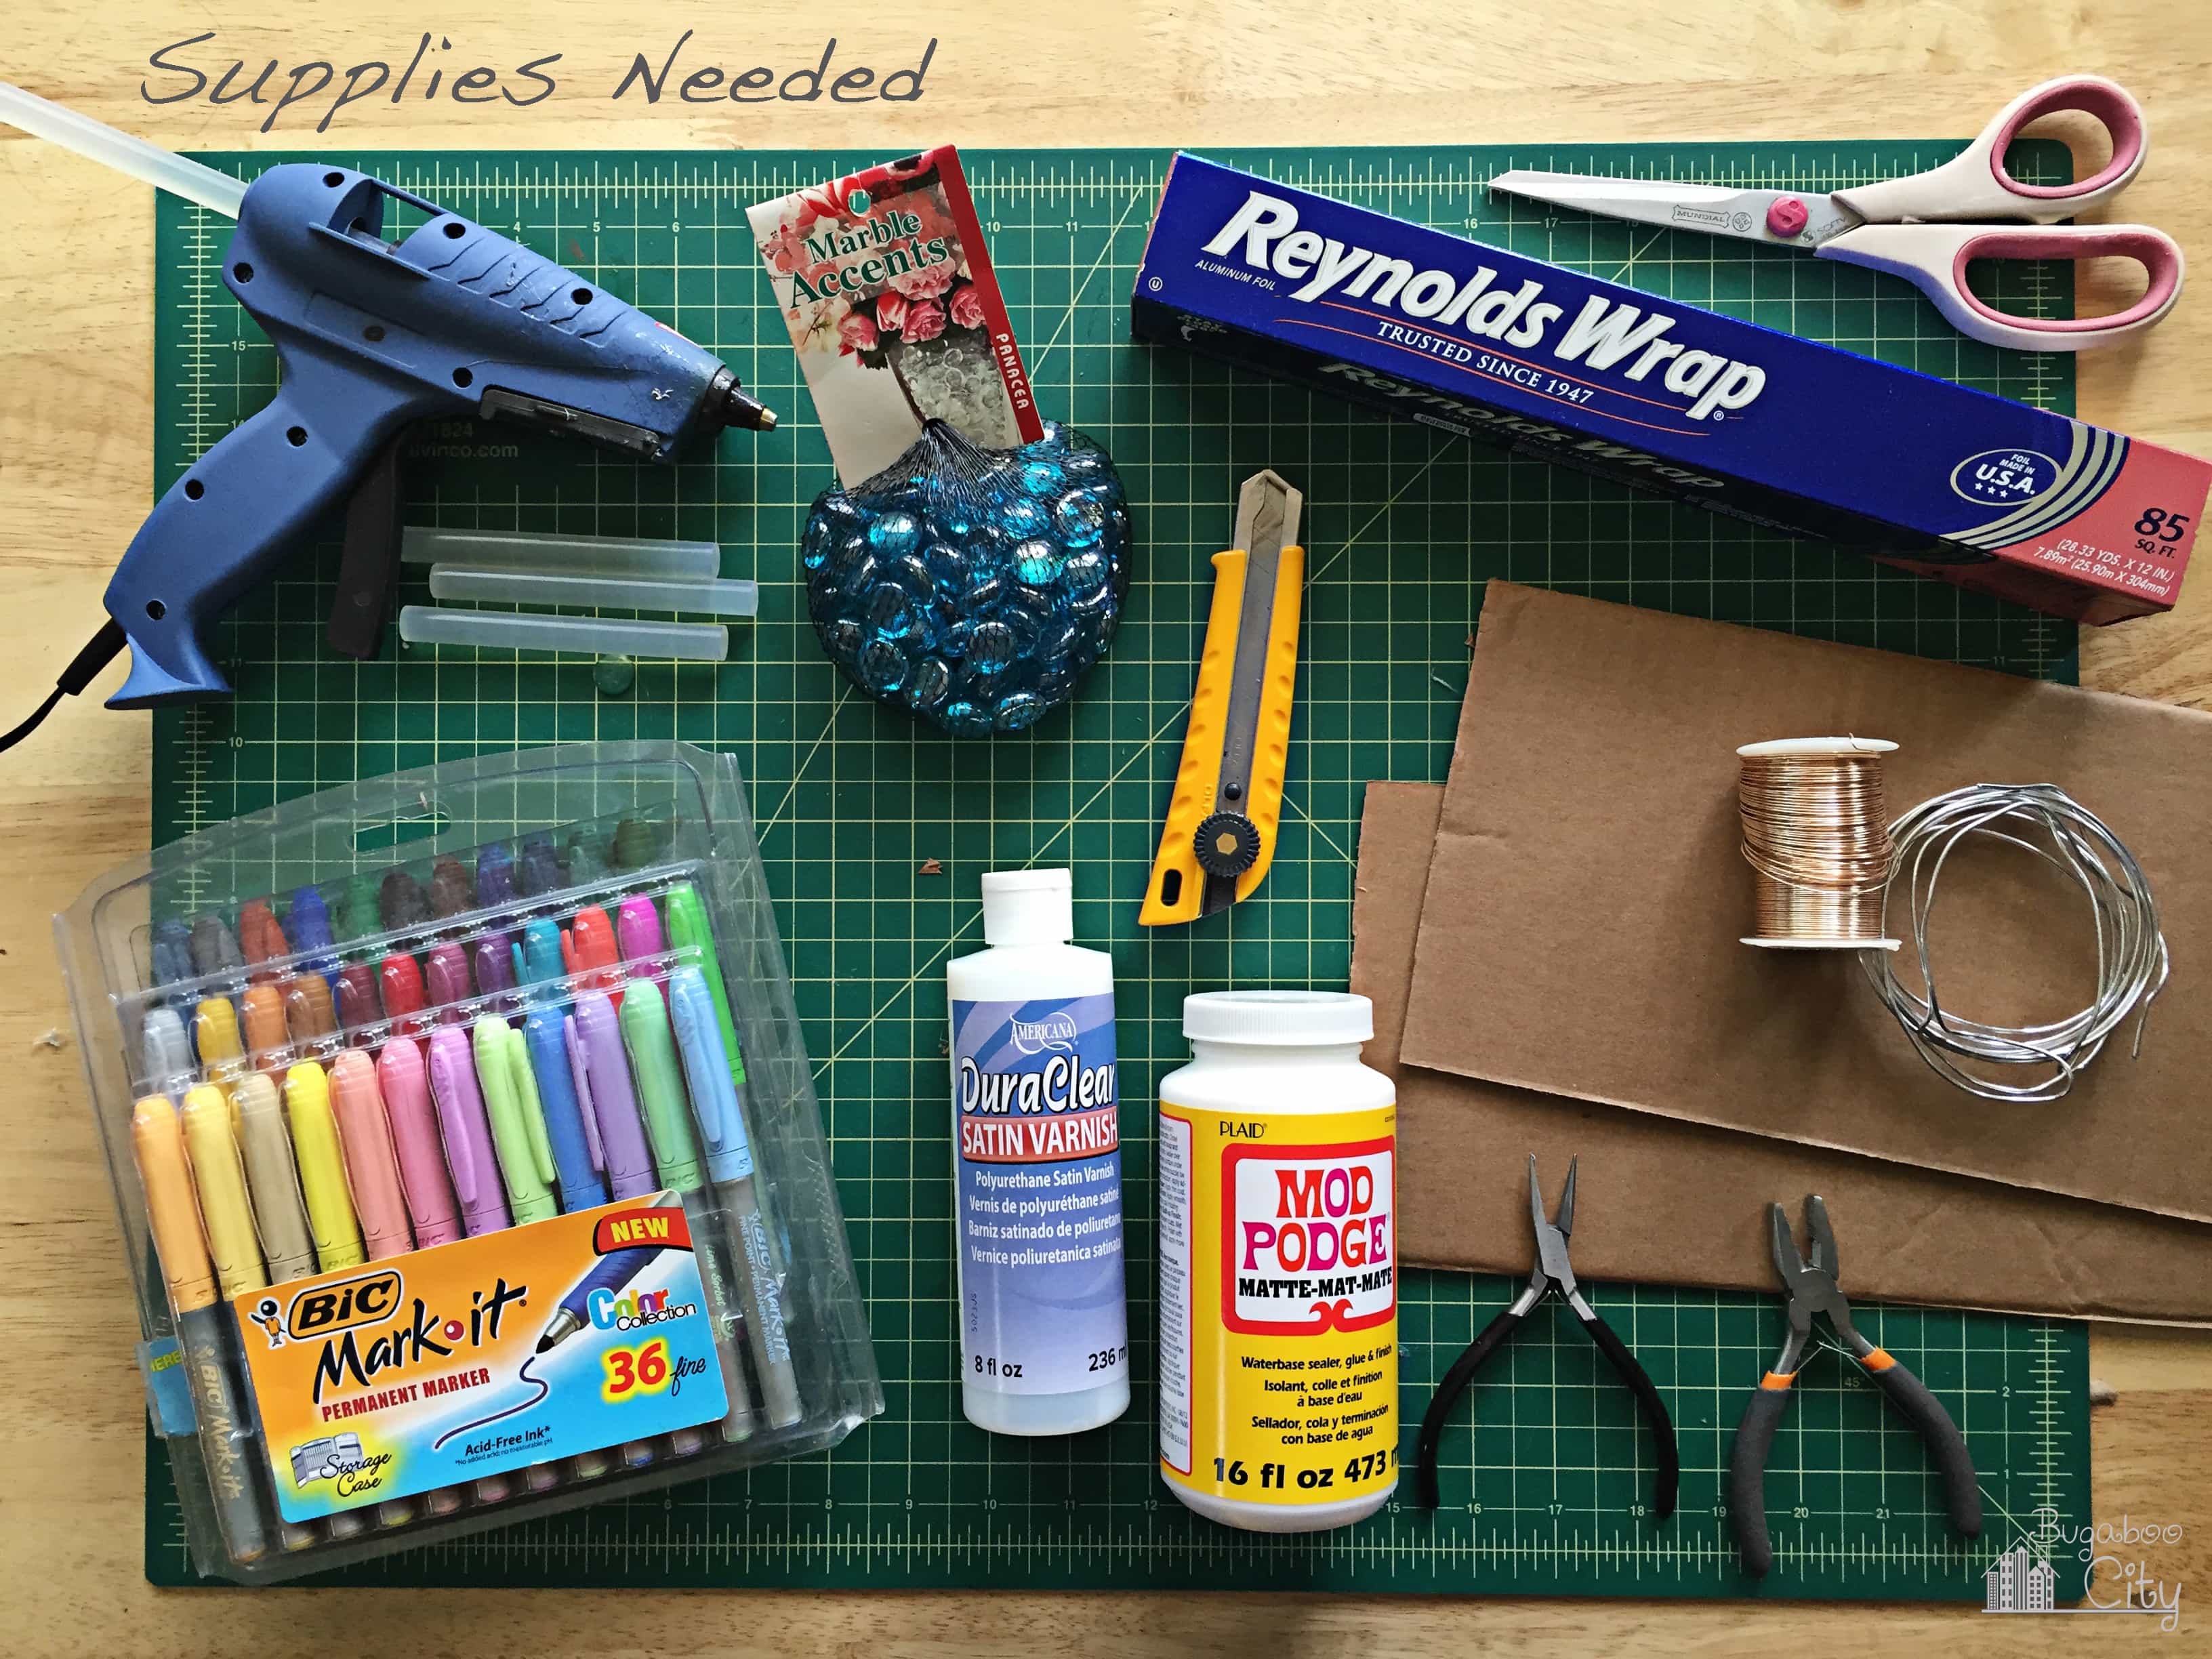
Supplies Needed
- Free template – Grab the free file by filling out the purple form at the end of this post
- Cardboard – corrugated is best
- Aluminum foil
- Thick wire for antennas
- Thin wire for attaching or hanging butterflies
- Acrylic Paint: I first colored my butterflies using markers and Sharpie but the colors faded in the sunlight. I re-colored them with acrylic paint and they didn’t fade – so I recommend using acrylic paint.
- Craft knife or box cutter and self-healing mat
- Flat glass marbles
- Hot glue
- Tape
- Mod Podge and/or Americana DuraClear Varnish – OR try this Outdoor Mod Podge
- Paper, pen, and scissors for creating the template
Cutting out the Butterflies
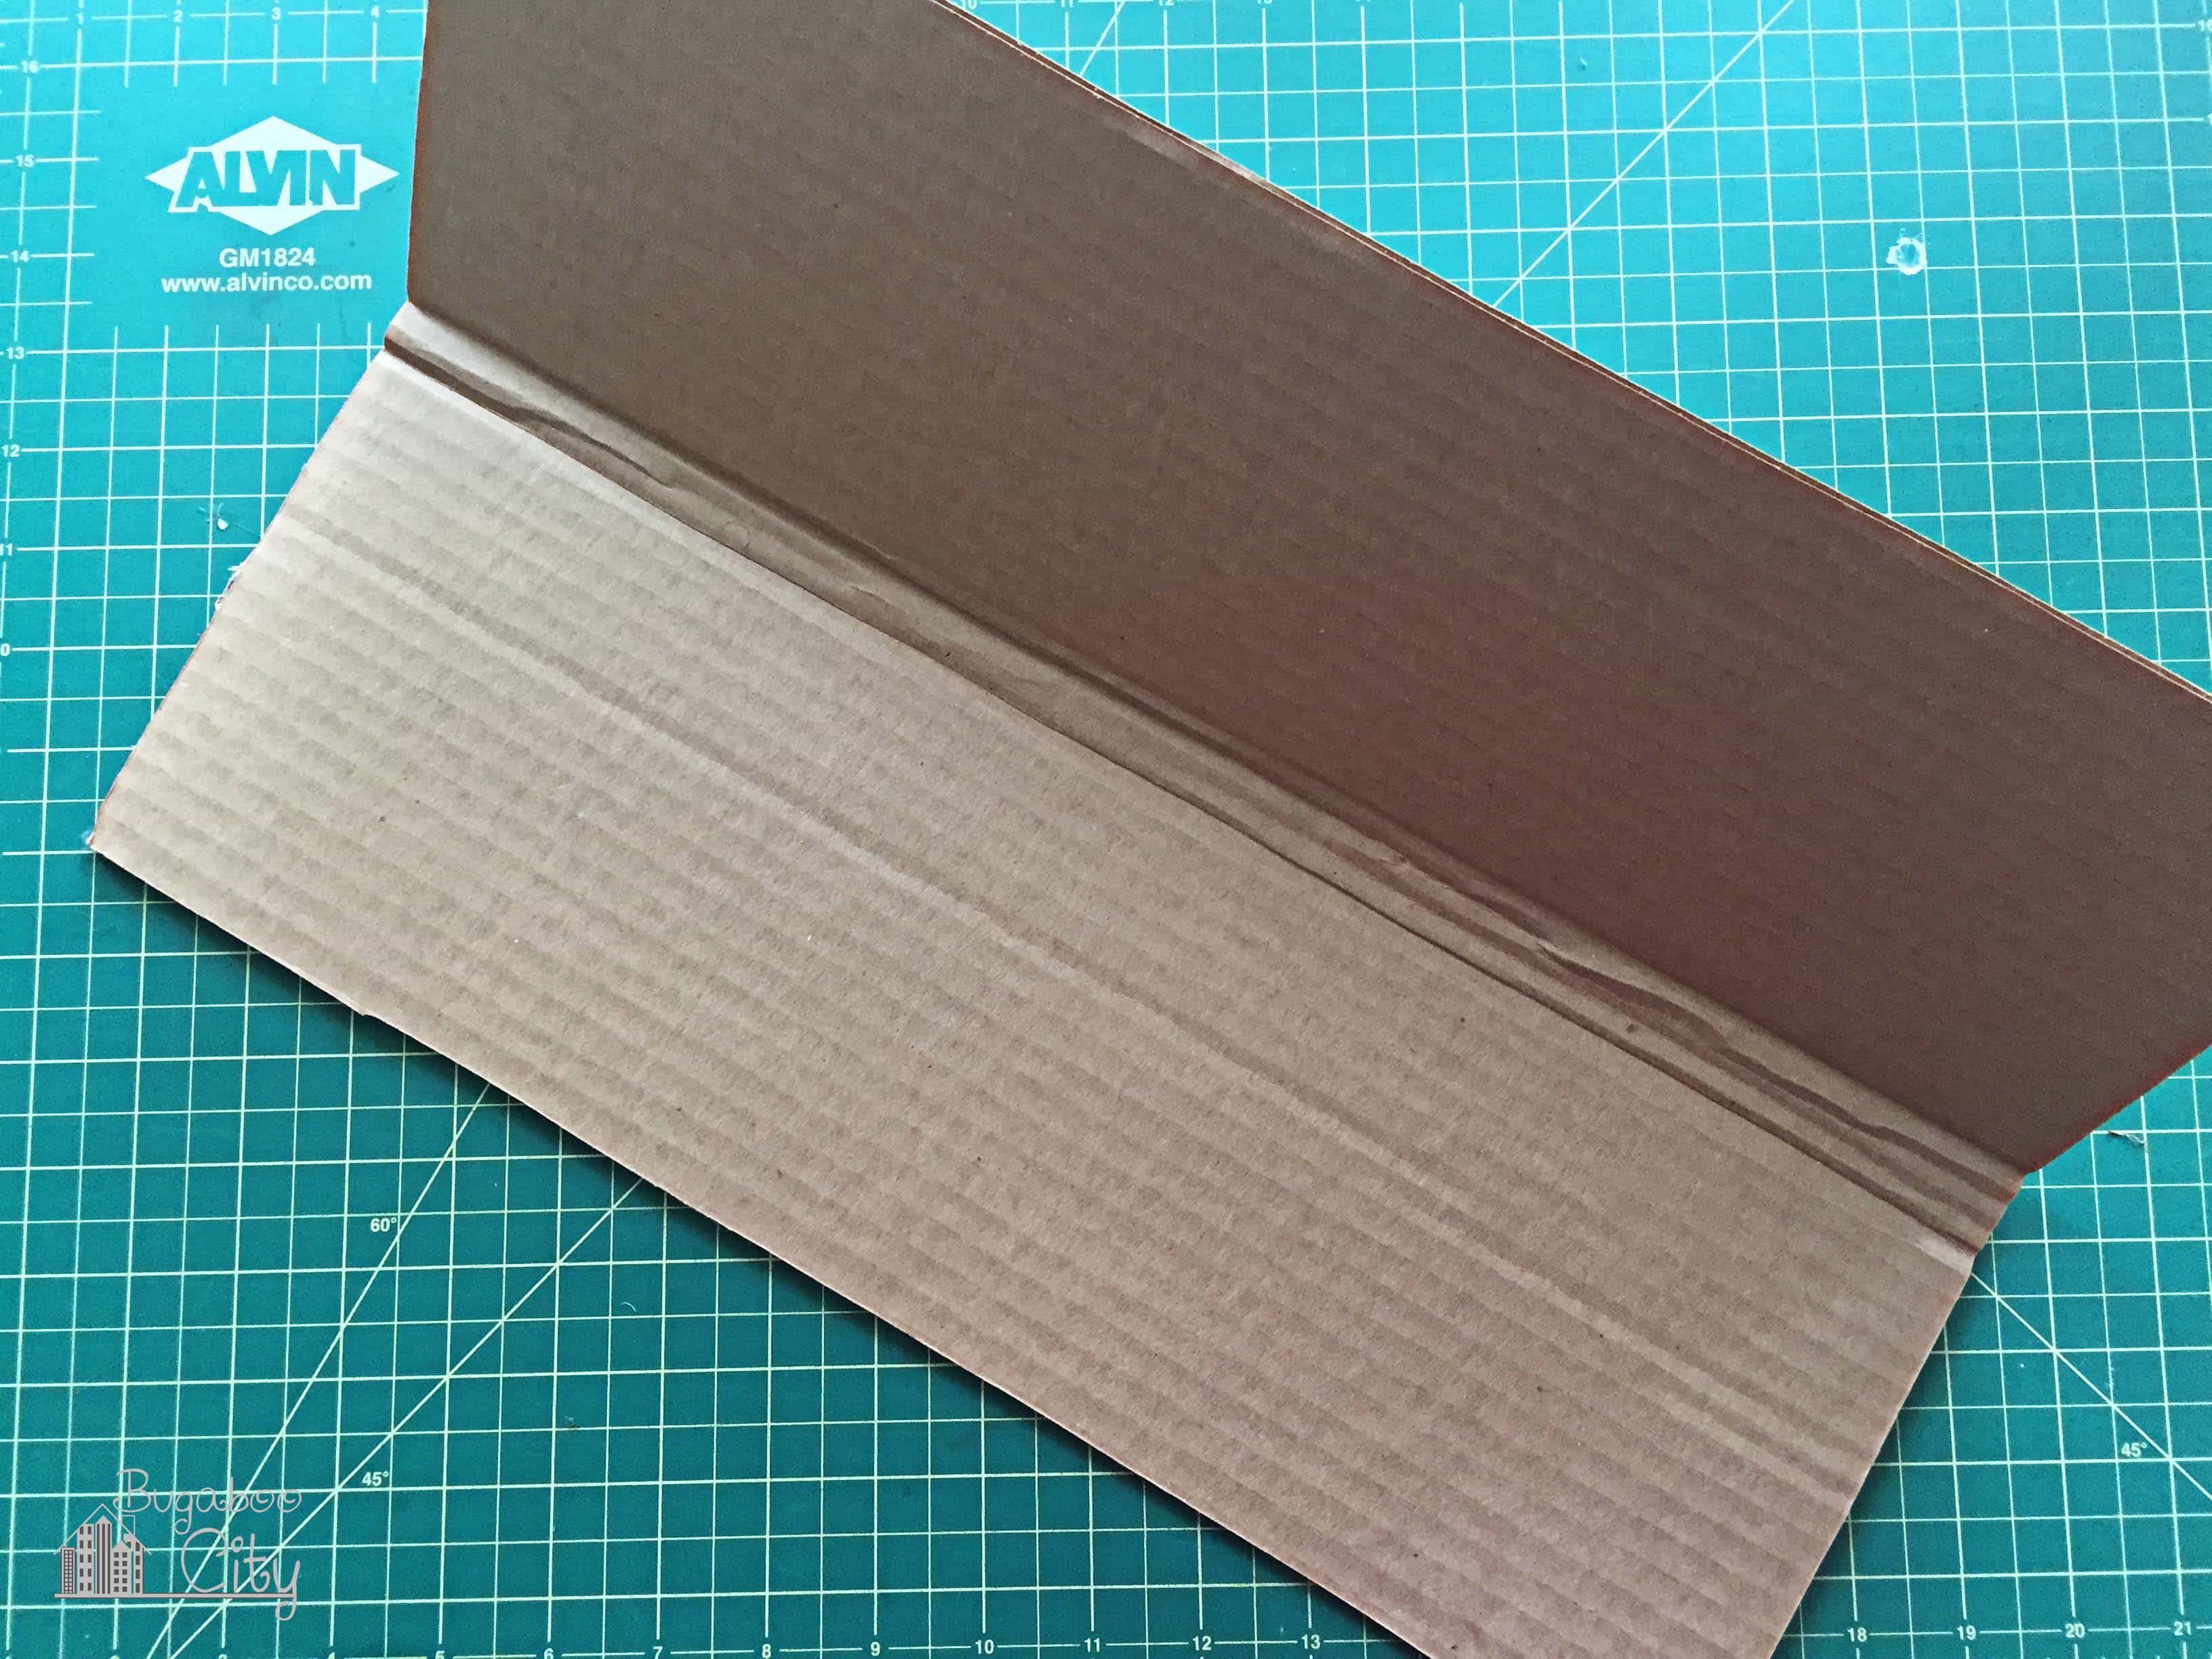
Step One: Cut out the butterflies. Use my free printable templates or create your own. Bend a piece of cardboard so there is a thin strip for the body of the butterfly and two wings on either side. I found corrugated cardboard was easiest to fold.
Trace your butterfly wings onto the cardboard on either side of the body.
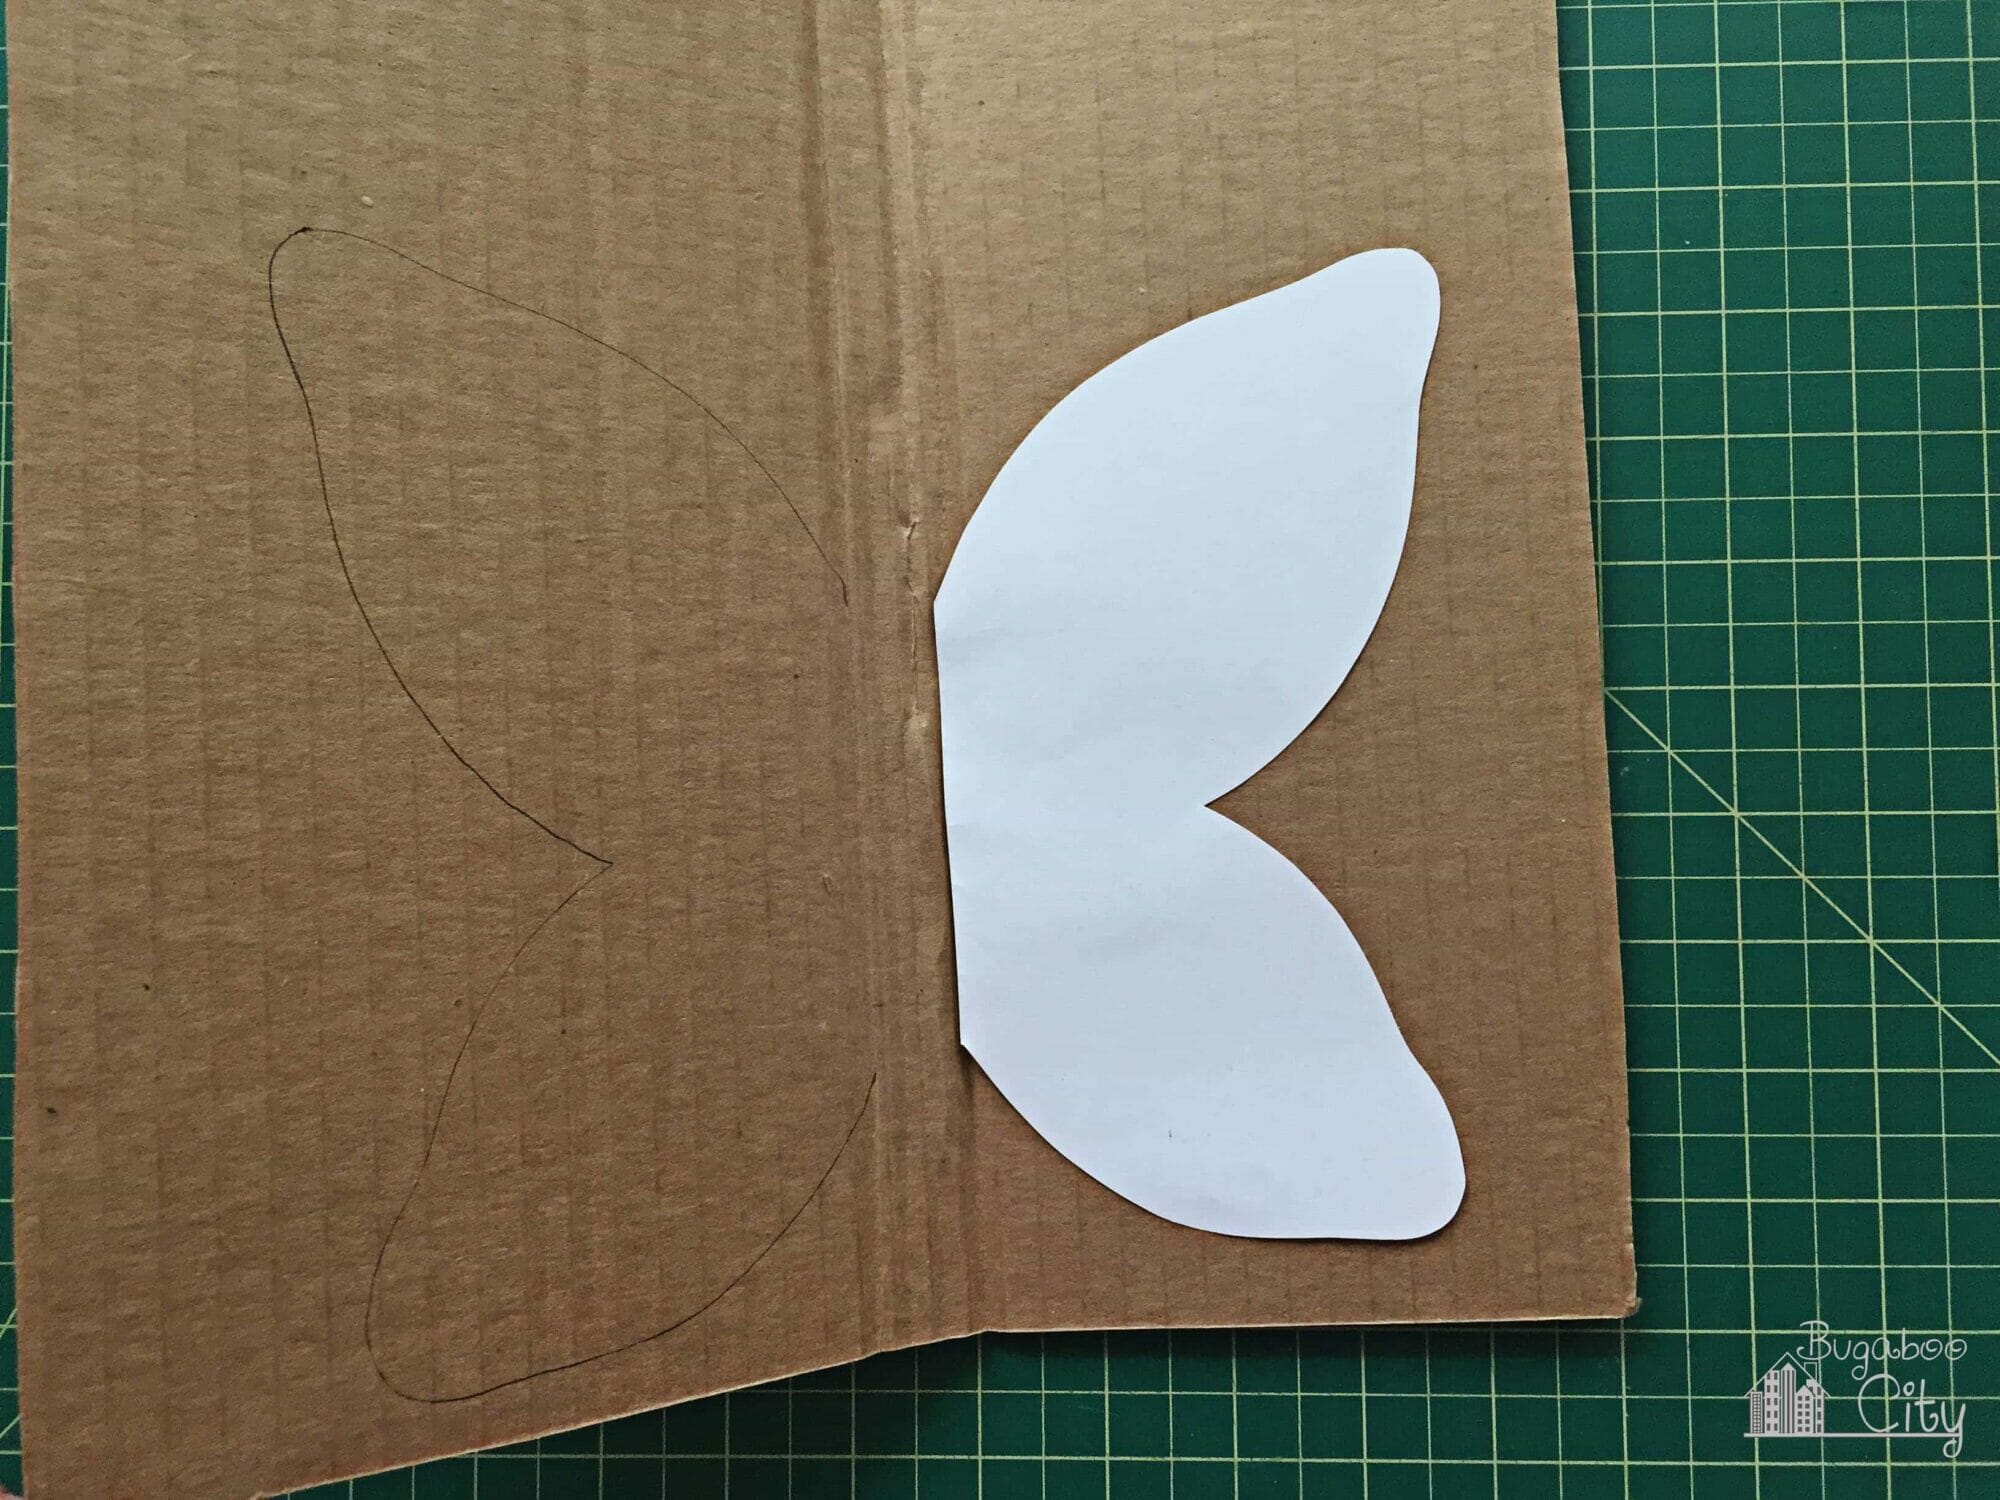
Carefully cut the butterfly out with a craft knife or box cutter.
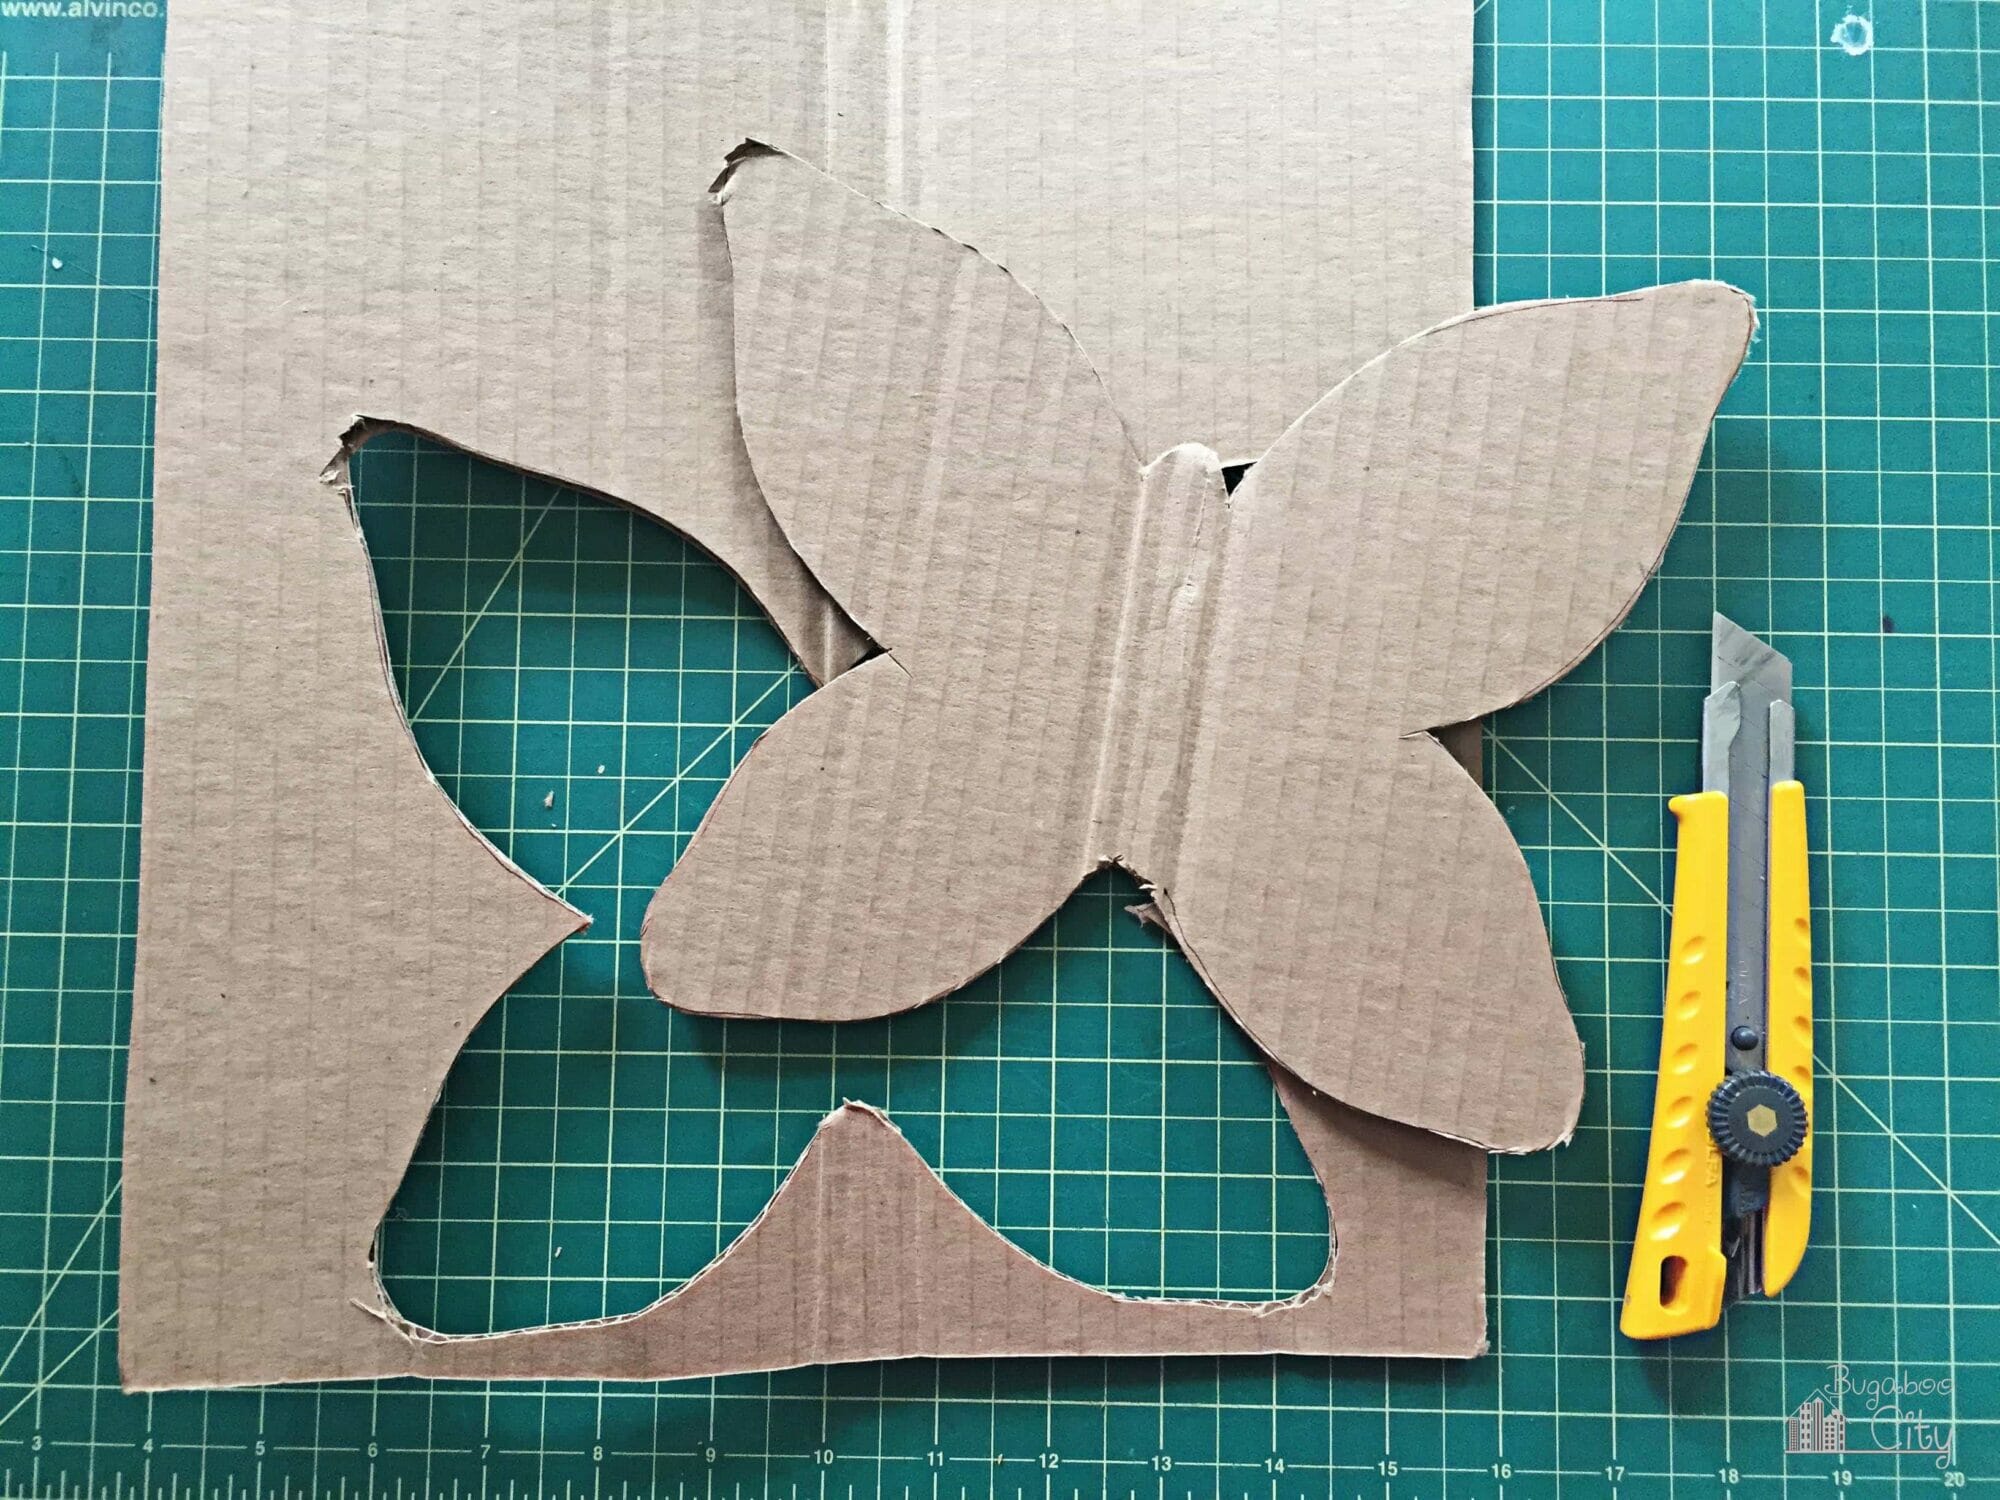
Step Two: Create a design with hot glue on each butterfly. Use hot glue to create a raised pattern on each butterfly wing. Keep the designs simple so it isn’t too hard to mold the tin foil around them.

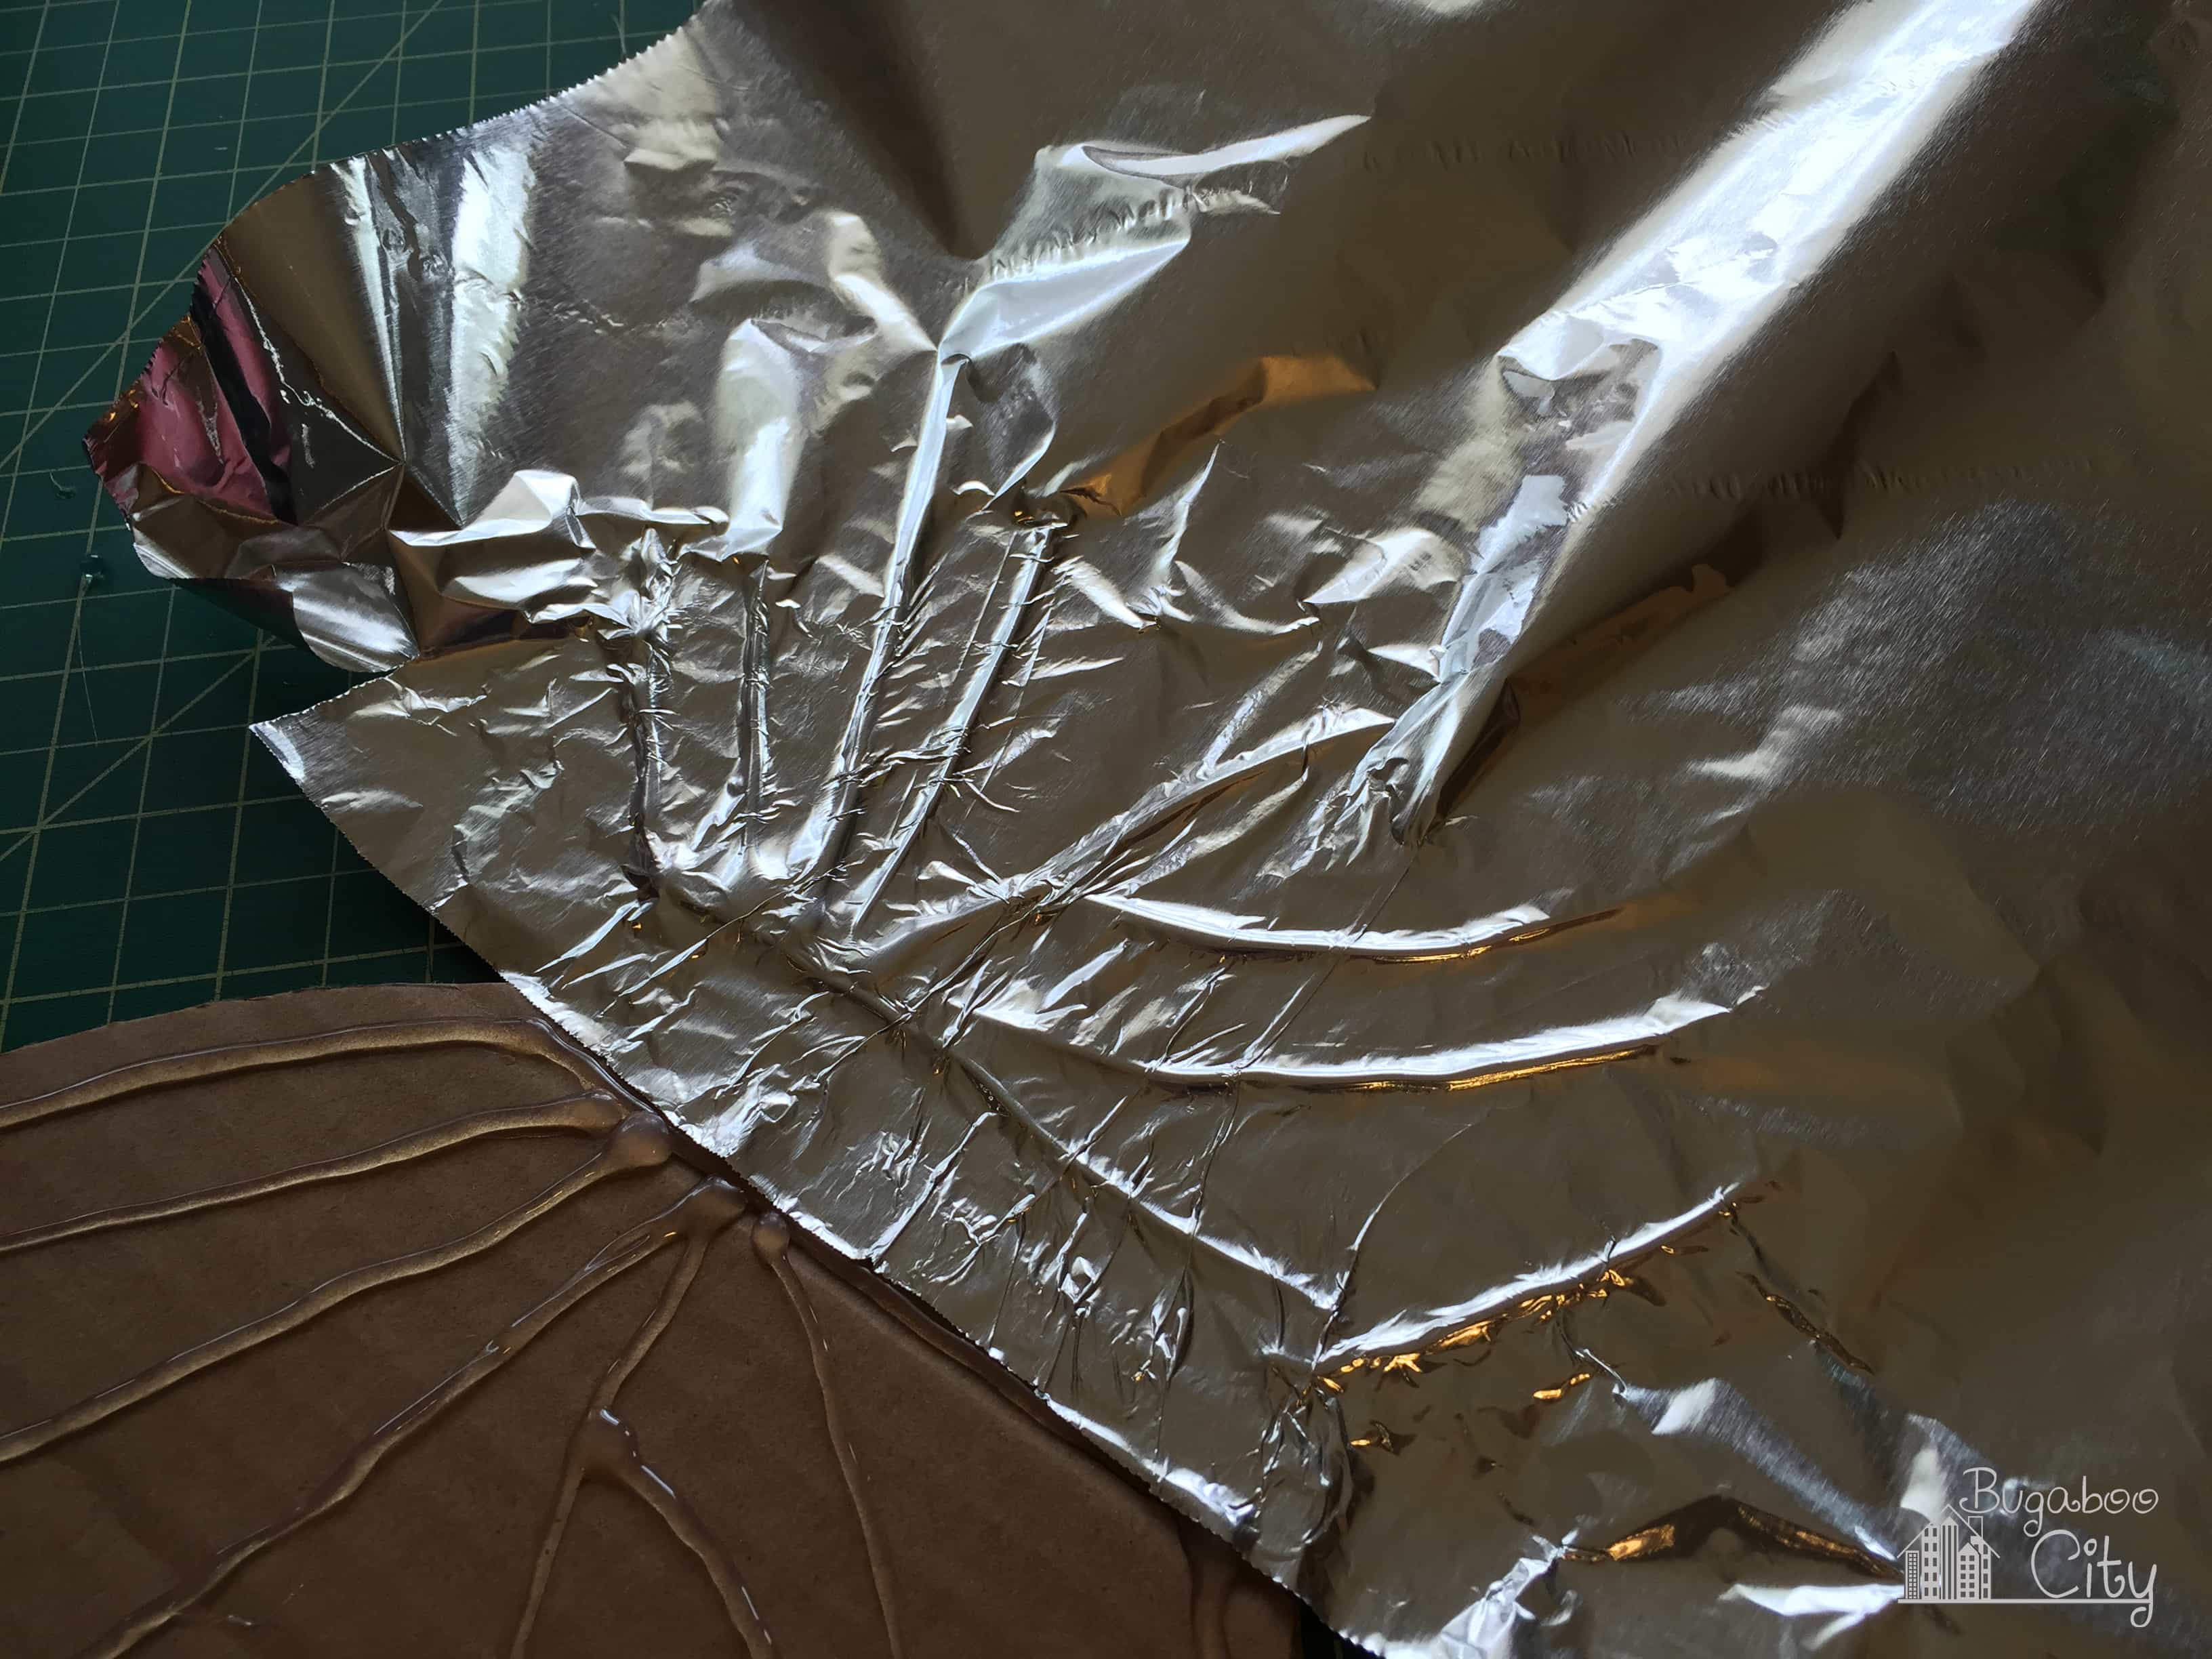
Cover the Butterflies
Step Three: Cover the butterflies with aluminum foil. Start at the center of the butterfly and slowly press the aluminum foil down, smoothing it out in between the glue. If you press too hard or go too quickly you may rip the foil. Cover the front of the butterfly first and then the back. I used glue to hold the foil on to the back, and if there were any spots of cardboard still showing, I glued a little piece of foil to cover it.


Color and Decorate the Butterflies
Step Four: Color the butterflies. When I first made my butterflies I used Sharpie and marker and loved how cool the marker looked on the foil. I hung them on my fence and within one week I noticed my colors had already started fading!
I took my butterflies all down and re-colored them, this time using acrylic paint. This worked much better and lasted the entire summer (and three summers after that). You may be able to use marker if the butterflies are for an indoor display or are in a very shaded area of your yard, but I recommend using acrylic paint so you don’t have to worry about fading!
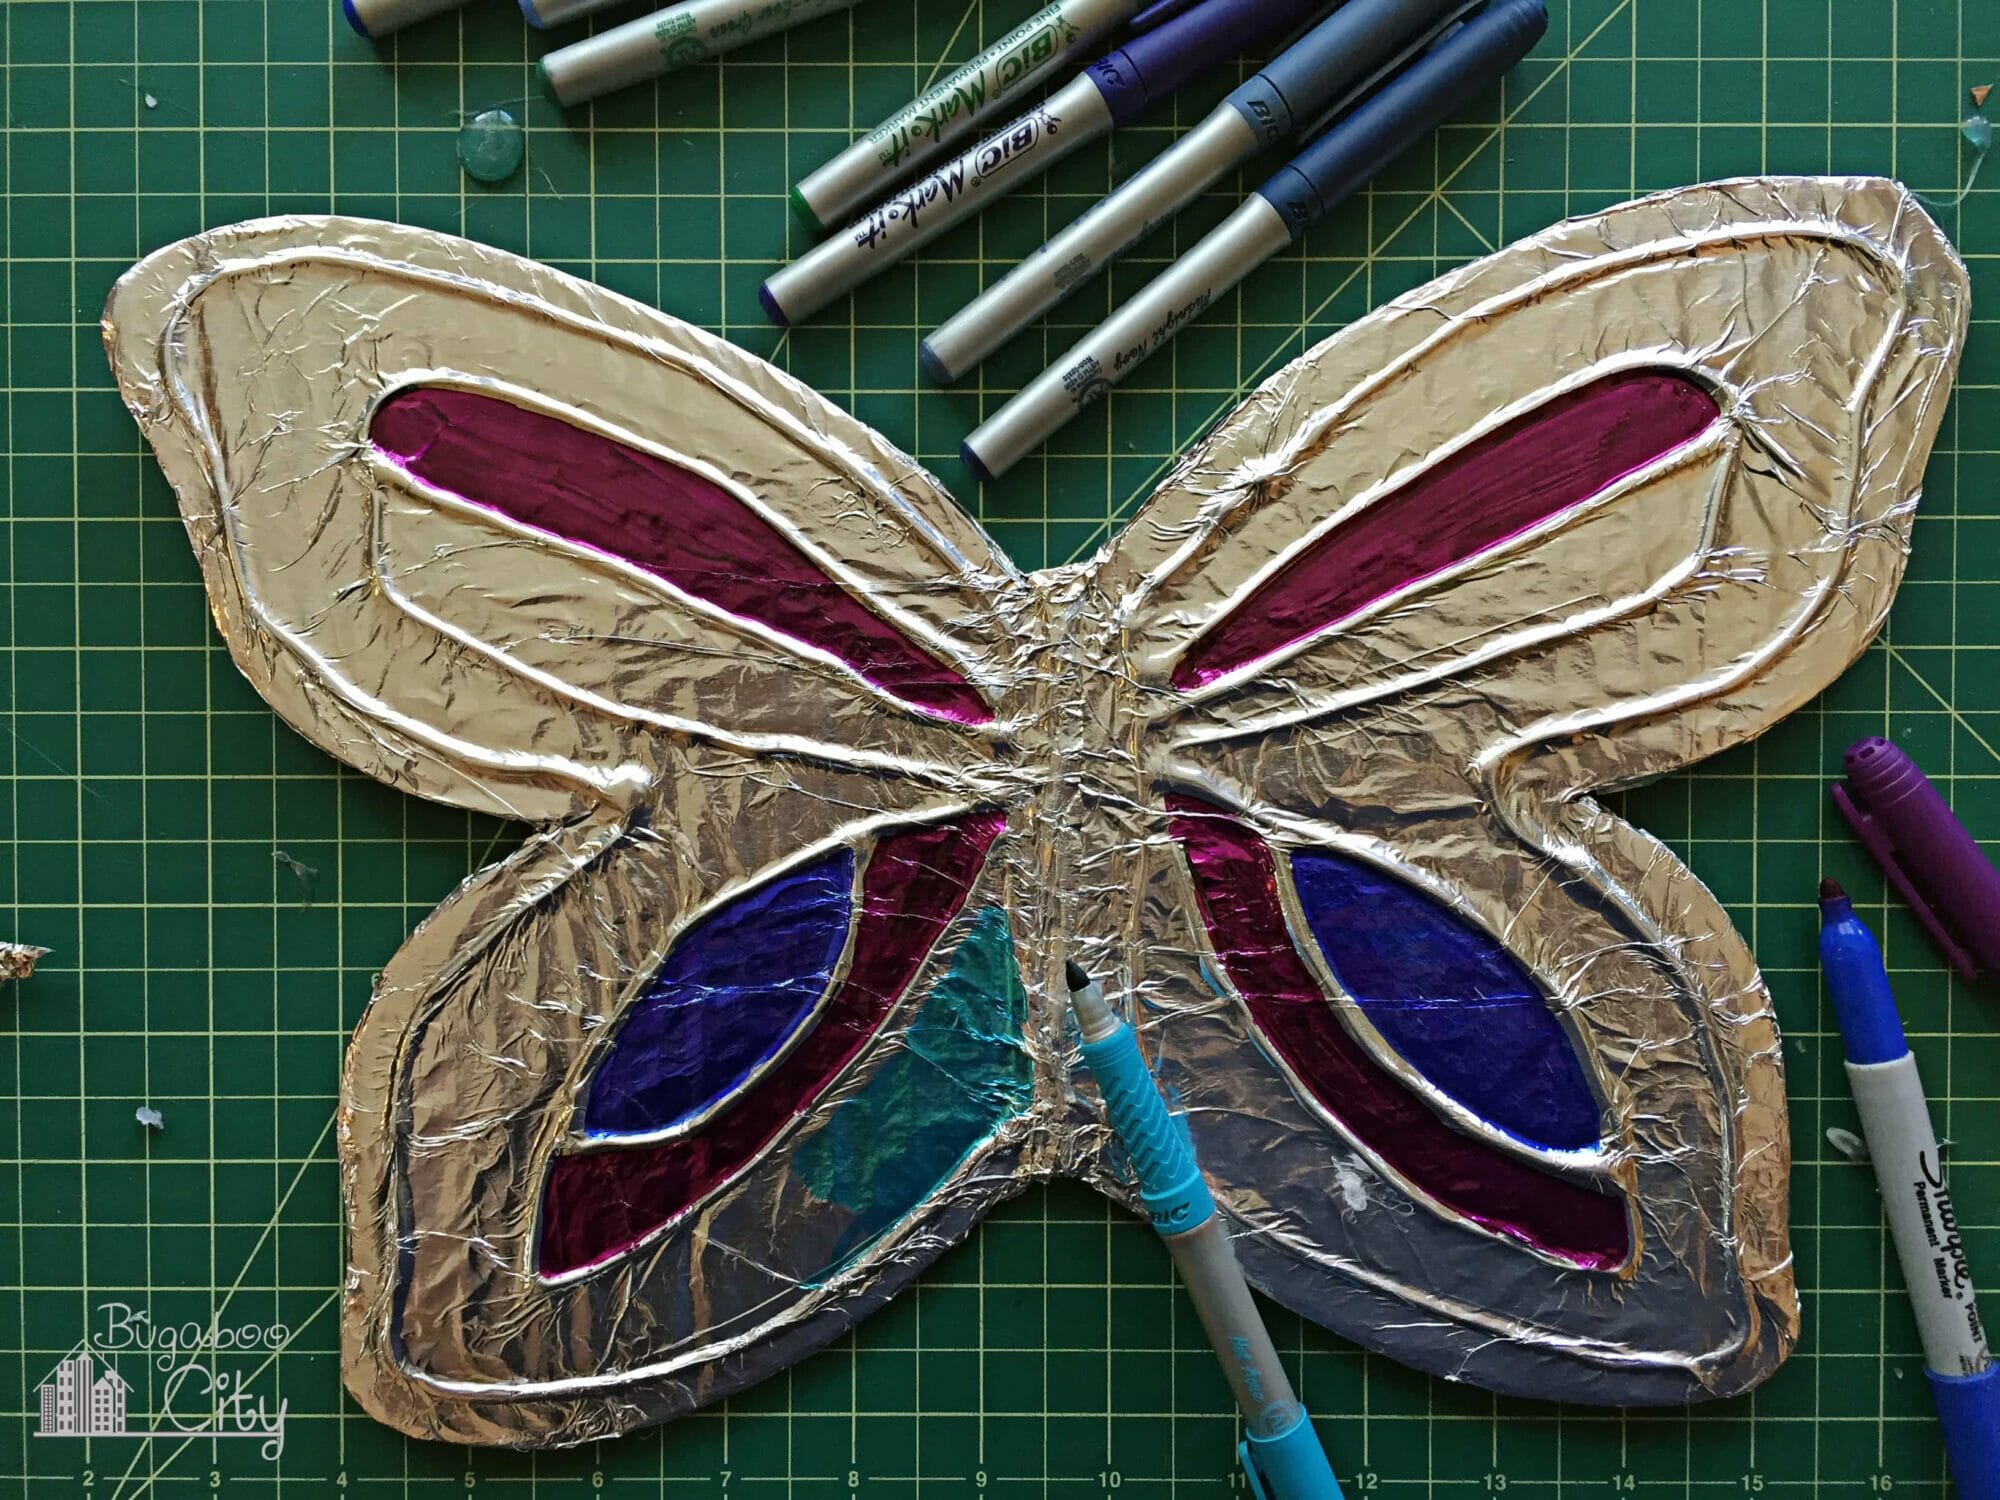

Step Five: Hot glue decorative stones to each butterfly. Add decorative stones down the center of each butterfly. I used hot glue but I did have stones fall off here and there over the years which was disappointing. A different type of adhesive may work better, especially if the adhesive is rated for outdoor use. You could also skip the decorative stones and paint the body instead.

Step 6: Add wire antennae to each butterfly. Using needle-nose pliers, curl the ends of two pieces of thick wire into an antennae shape. Glue them to the back of the butterfly and then cover with a little piece of foil.


Seal the Butterflies and Prepare them for Hanging
Step Seven: Add wire holders to each butterfly so they can be attached to a fence. I poked two holes into the butterfly on either side of the butterfly’s body. Then using the thin wire, I threaded it through the holes and left about 12″ on either end. This is how I attached each butterfly to a fence post.

Step Eight: Seal the butterflies for outdoor use. I started by applying Mod Podge to the butterflies, starting with the back and then the front. I then found Outdoor Varnish and repeated the process. I may have only needed the Outdoor Varnish, I’m not sure. I just wanted to create a good barrier to protect the cardboard under the tin foil from getting wet.

Hang the Butterflies in Your Garden
Step Nine: Hang the butterflies up and enjoy! I found the easiest way to hang my butterflies was to arrange them on my fence using Painter’s tape. Once I was happy with the arrangement, I pushed the wires of each butterfly to the other side of the fence. Then on the back side of the fence, I twisted the wires together tightly to hold the butterflies.

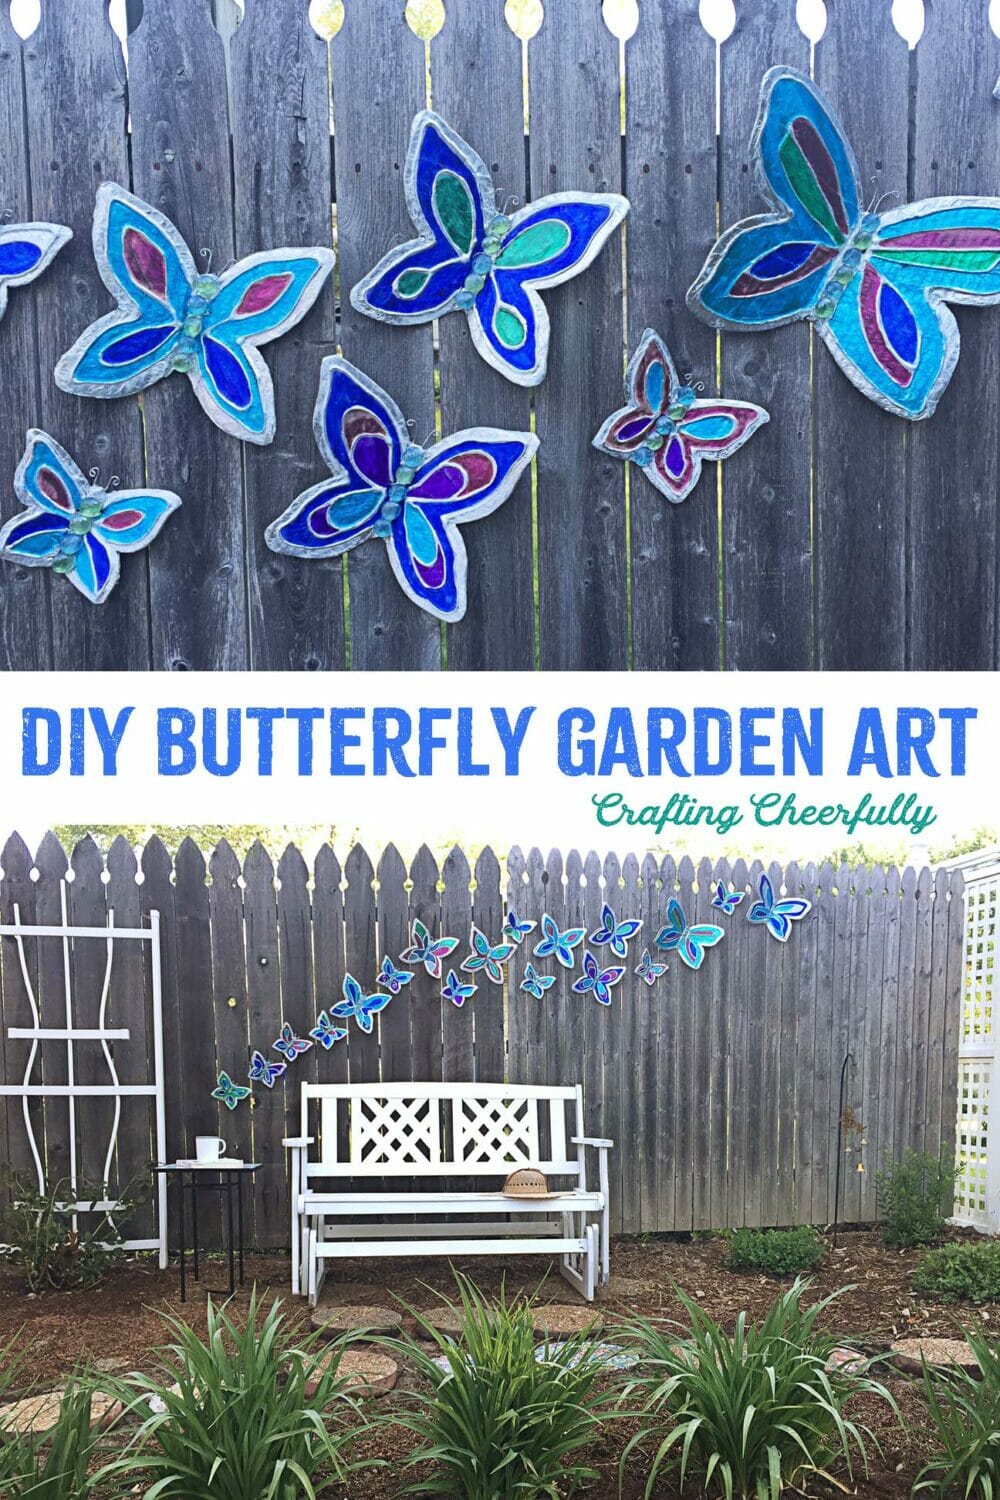
I love the whimsy these butterflies add to our garden! View all of my Garden Crafts for more fun ideas!

Get the Free Butterfly Garden Ornaments!
Fill out the purple form below with your first name and email address! The free file will be sent straight to your inbox! If you have already filled out the form below, don’t worry – you won’t be added to my list twice! This freebie is for personal use only. I hope you enjoy crafting something special. Please let me know if you have any questions :)


So beautiful. Great project for our daughter. Thank you…..mae
Thank you! Enjoy making them – they are a lot of fun :)
What a clever idea! Why didn’t I think of it. You are beautiful!
Thank you! I just hung them up again this year and they make me smile every time I go outside :)
This is very nice. I like the layout, I may try to do this for my yard.
Thank you!!
I love your butterflies and will be making some for my garden. This will be a great project to do with the grandkids. Thanks for sharing.
Thank you Linda!
Great project, just popped into craft gawker after quite a while and saw you there. I would love it if you’d join my linky party, Craft Schooling Sunday, always looking for some great crafters and I feature almost all the posts with good photos, so it’s great exposure for you too! Hope to see you there!
Thank you for the invite! I’ll be sure to join this week :)