DIY Watering Can Garden Ornament
Learn how to make your own watering can garden ornament for your yard or garden! This fun craft uses Cricut Outdoor Vinyl, beads and an unexpected office supply.
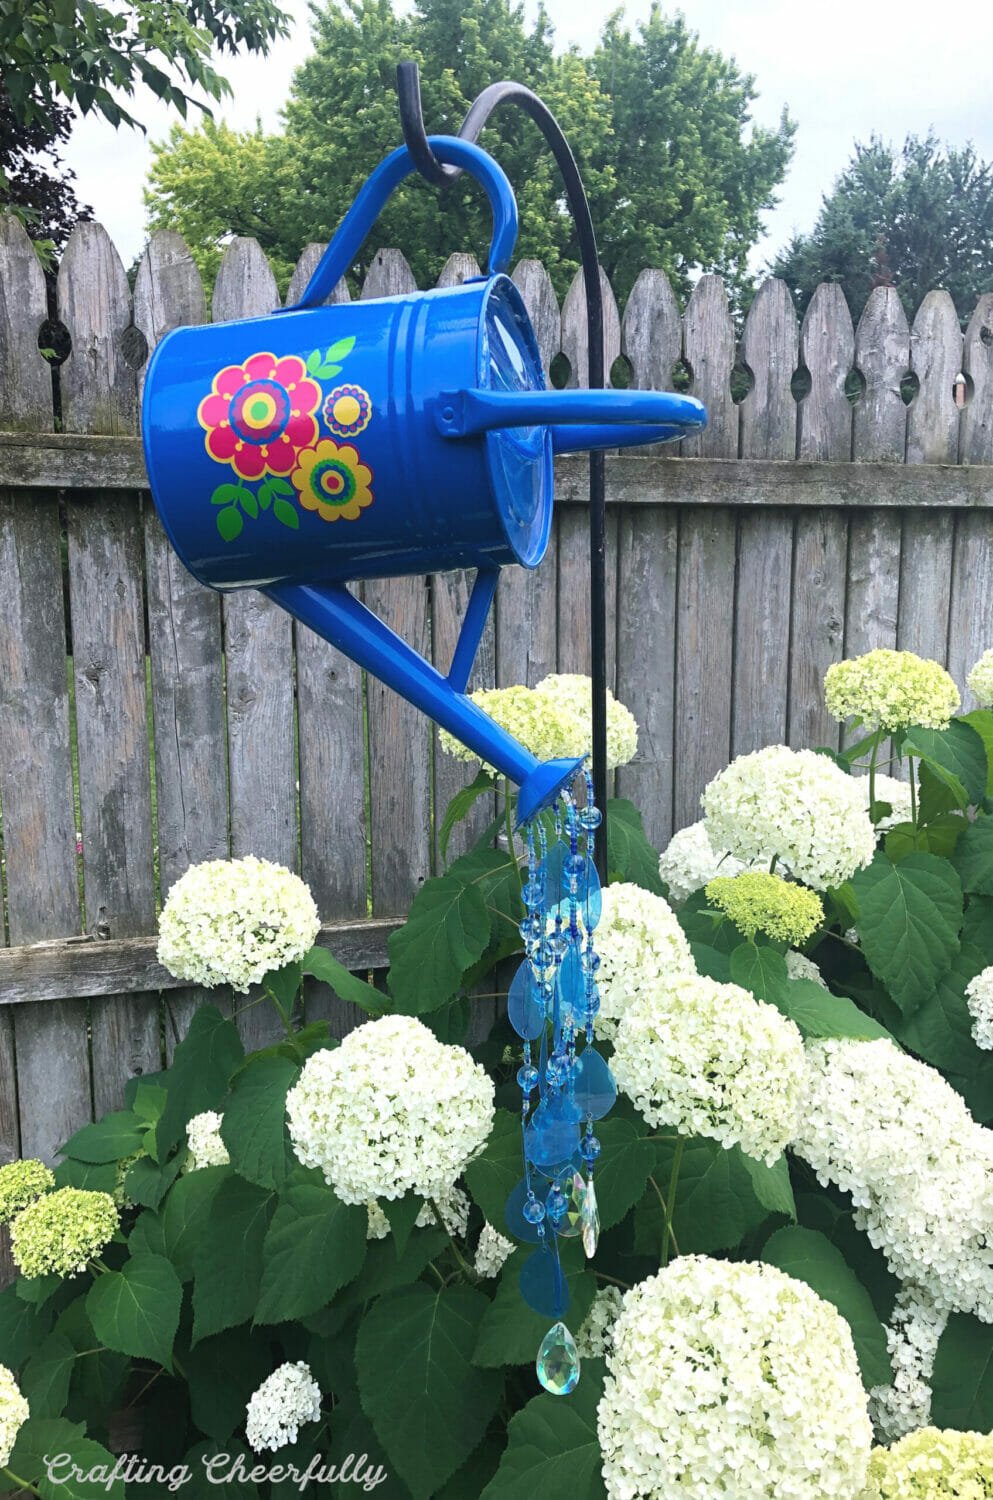
Hello Crafty Friends! Gardening has become a fun hobby of mine since buying our home and I love the idea of filling our gardens with handmade ornaments and crafts. This DIY Watering Can Garden Ornament is definitely my new favorite garden craft!
Last year I purchased a sampler pack of Cricut Outdoor Vinyl in the hopes of making something cool with it but never came up with the right idea until this summer. I have seen lots of versions of this watering can pouring out water made of beads and thought this would be a fun project to try.
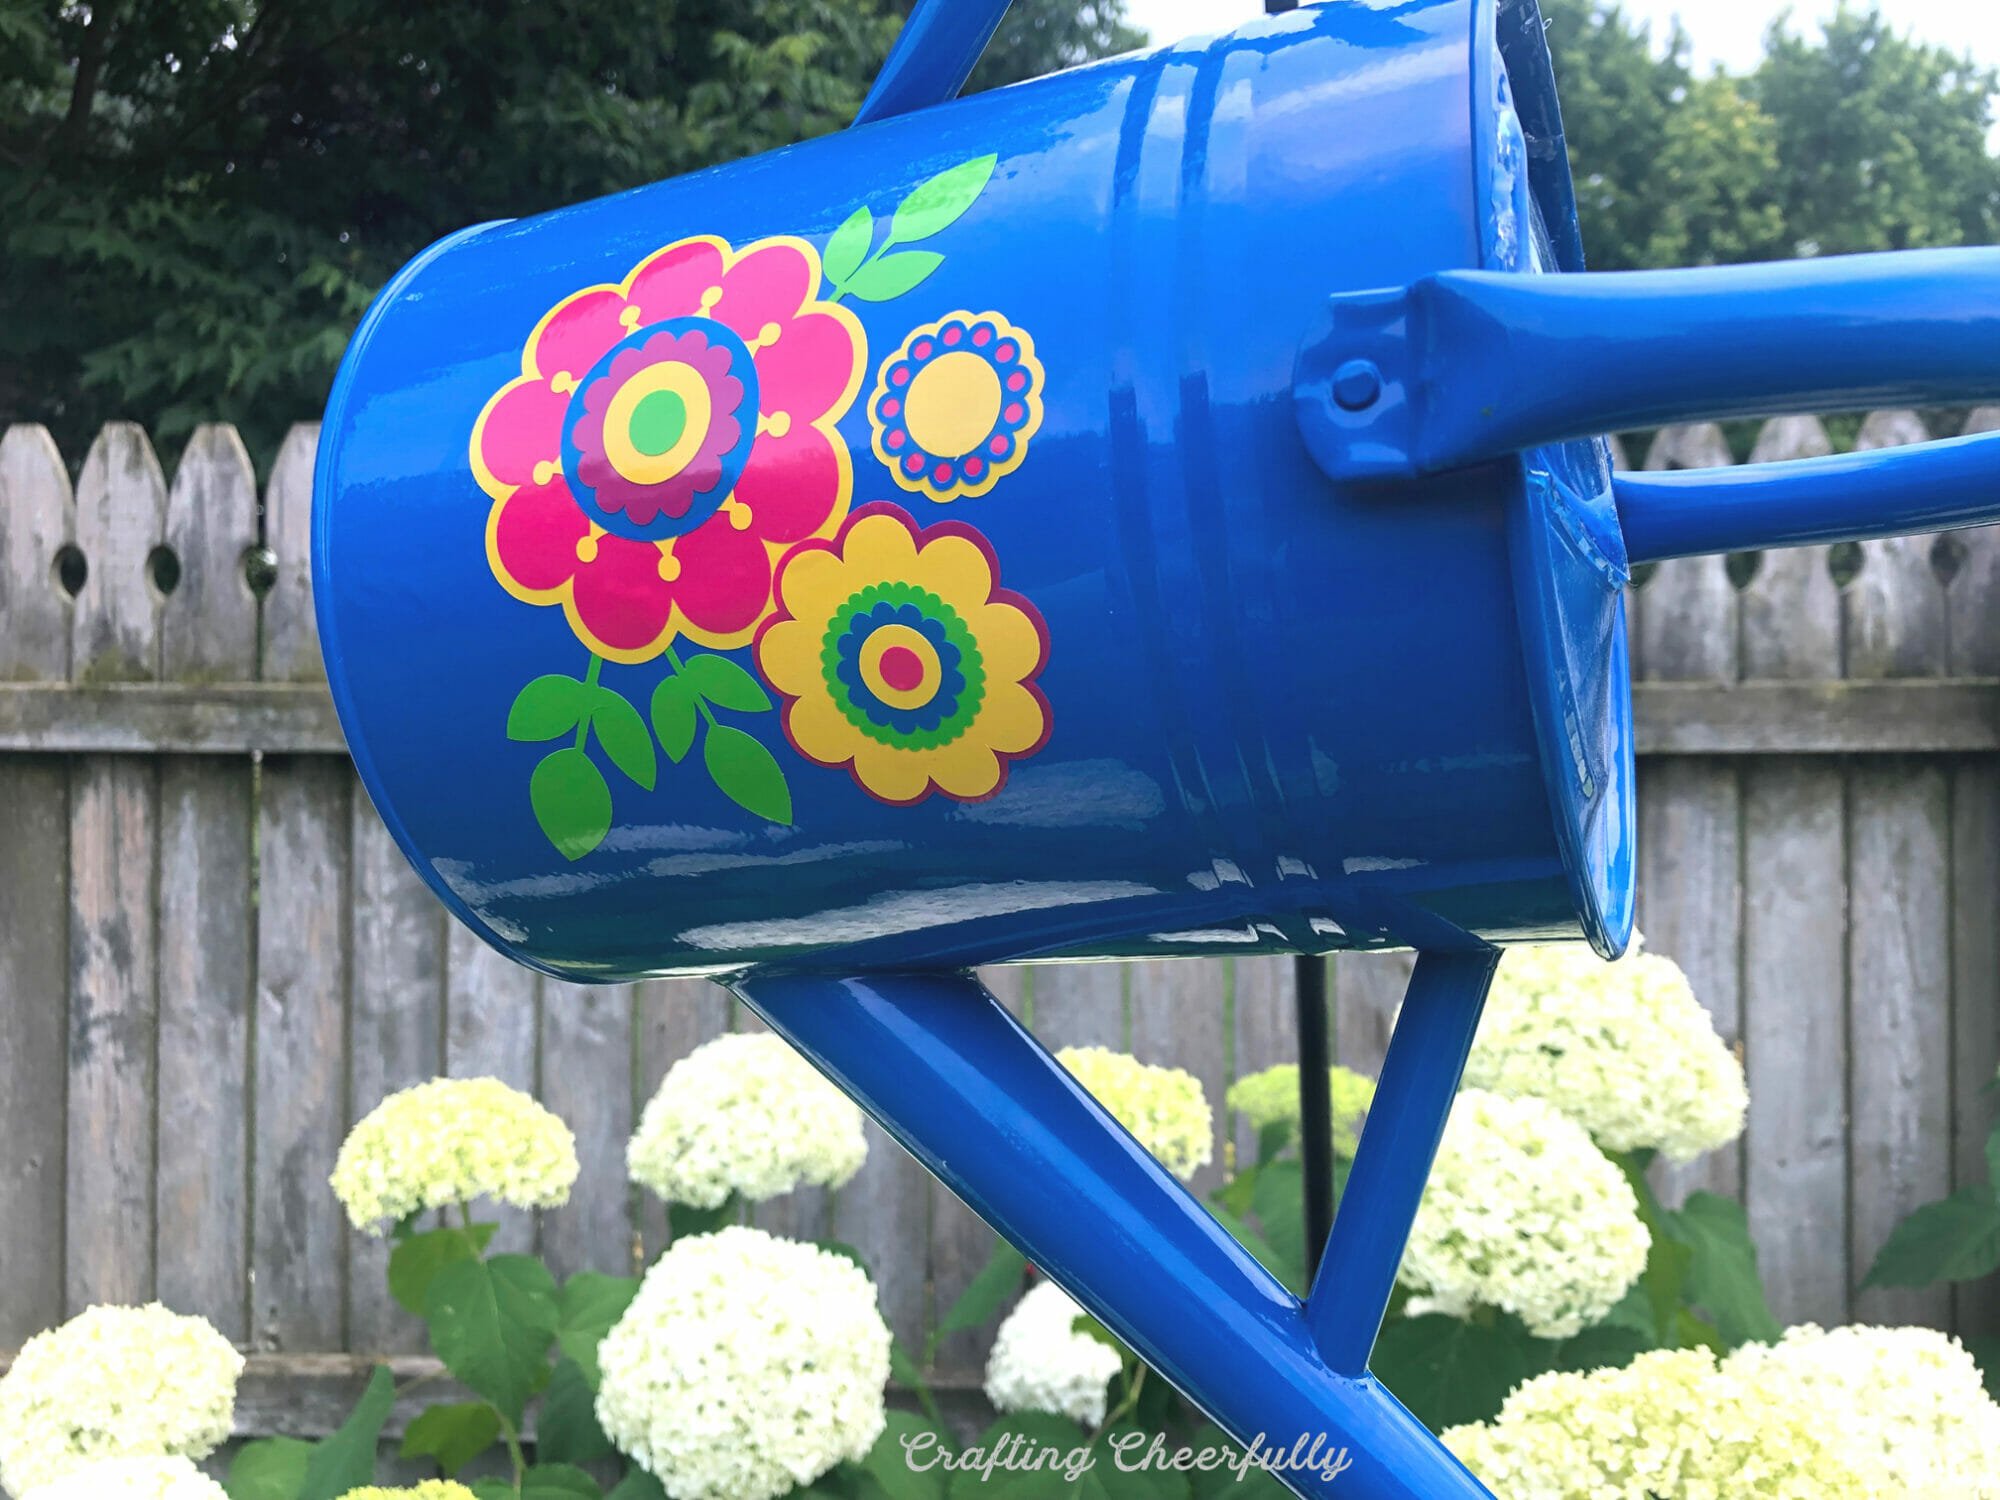
After finding this awesome blue watering can at my local hardware store, this project was a definite go. I love how vibrant the flowers on the watering can are and how the beads make the water glisten in the sunlight.
Creating the beaded water was a bit challenging on this project. I don’t usually work with beads and jewelry supplies, so it was a bit of trial and error. Beads can get expensive but I purchased mine on sale at Joann Fabrics. I also came up with a neat way to space out my beads – I used a blue plastic divider, the kind you use in binders, to create the water drops!

My watering can is hung on a large shepherd’s hook near our hydrangeas. It looks so pretty outside and the beads sparkle in the sun.


Below is the tutorial so you can see how I created my watering can garden ornament. You can even use my same design in Cricut Design Space!
Update: My watering can garden ornament is going on its fifth summer and still going strong. The watering can is in a garden bed that gets direct sunlight and is not sheltered from the rain. The vinyl has held up really well along with the beaded water. Last year, towards the end of summer #4, a few of the plastic raindrops became brittle and broke apart. I’m not sure if I will replace them since the beads are still fine.
How to Make a Watering Can Garden Ornament
Supplies Needed
- Watering Can – I found mine at a local hardware store, but this blue watering can is similar!
- Cricut cutting machine
- Permanent Vinyl – * The Cricut Outdoor Vinyl Sampler I used is no longer available but Cricut Premium Vinyl is rated for outdoors and is water and UV resistant so it should work the same.
- Cricut Transfer Tape
-
Flower design
- I used a design found in Cricut Design Space. Miss Kate Cuttables, Spring Has Sprung – “Flowers and Twigs” #MA7A9976
- Bead Stringing Wire – I used 7 strand size 0.18in.
- Beads in blue, clear or white – I used Hildie & Jo beads from Joann Fabrics
- Crimp beads – little beads that help stop and space beads
- Plastic binder divider in blue – preferably somewhat see-through as opposed to the opaque plastic dividers. The blue I used came in a 6-pack with other colors.
- Jewelry tools – Needle Nose Pliers or Bead Crimping Tool
- Gorilla Glue – Waterproof Indoor/Outdoor. This is the kind I found that worked: Gorilla White Waterproof Polyurethane Glue.
Decorate the Watering Can with Outdoor Vinyl

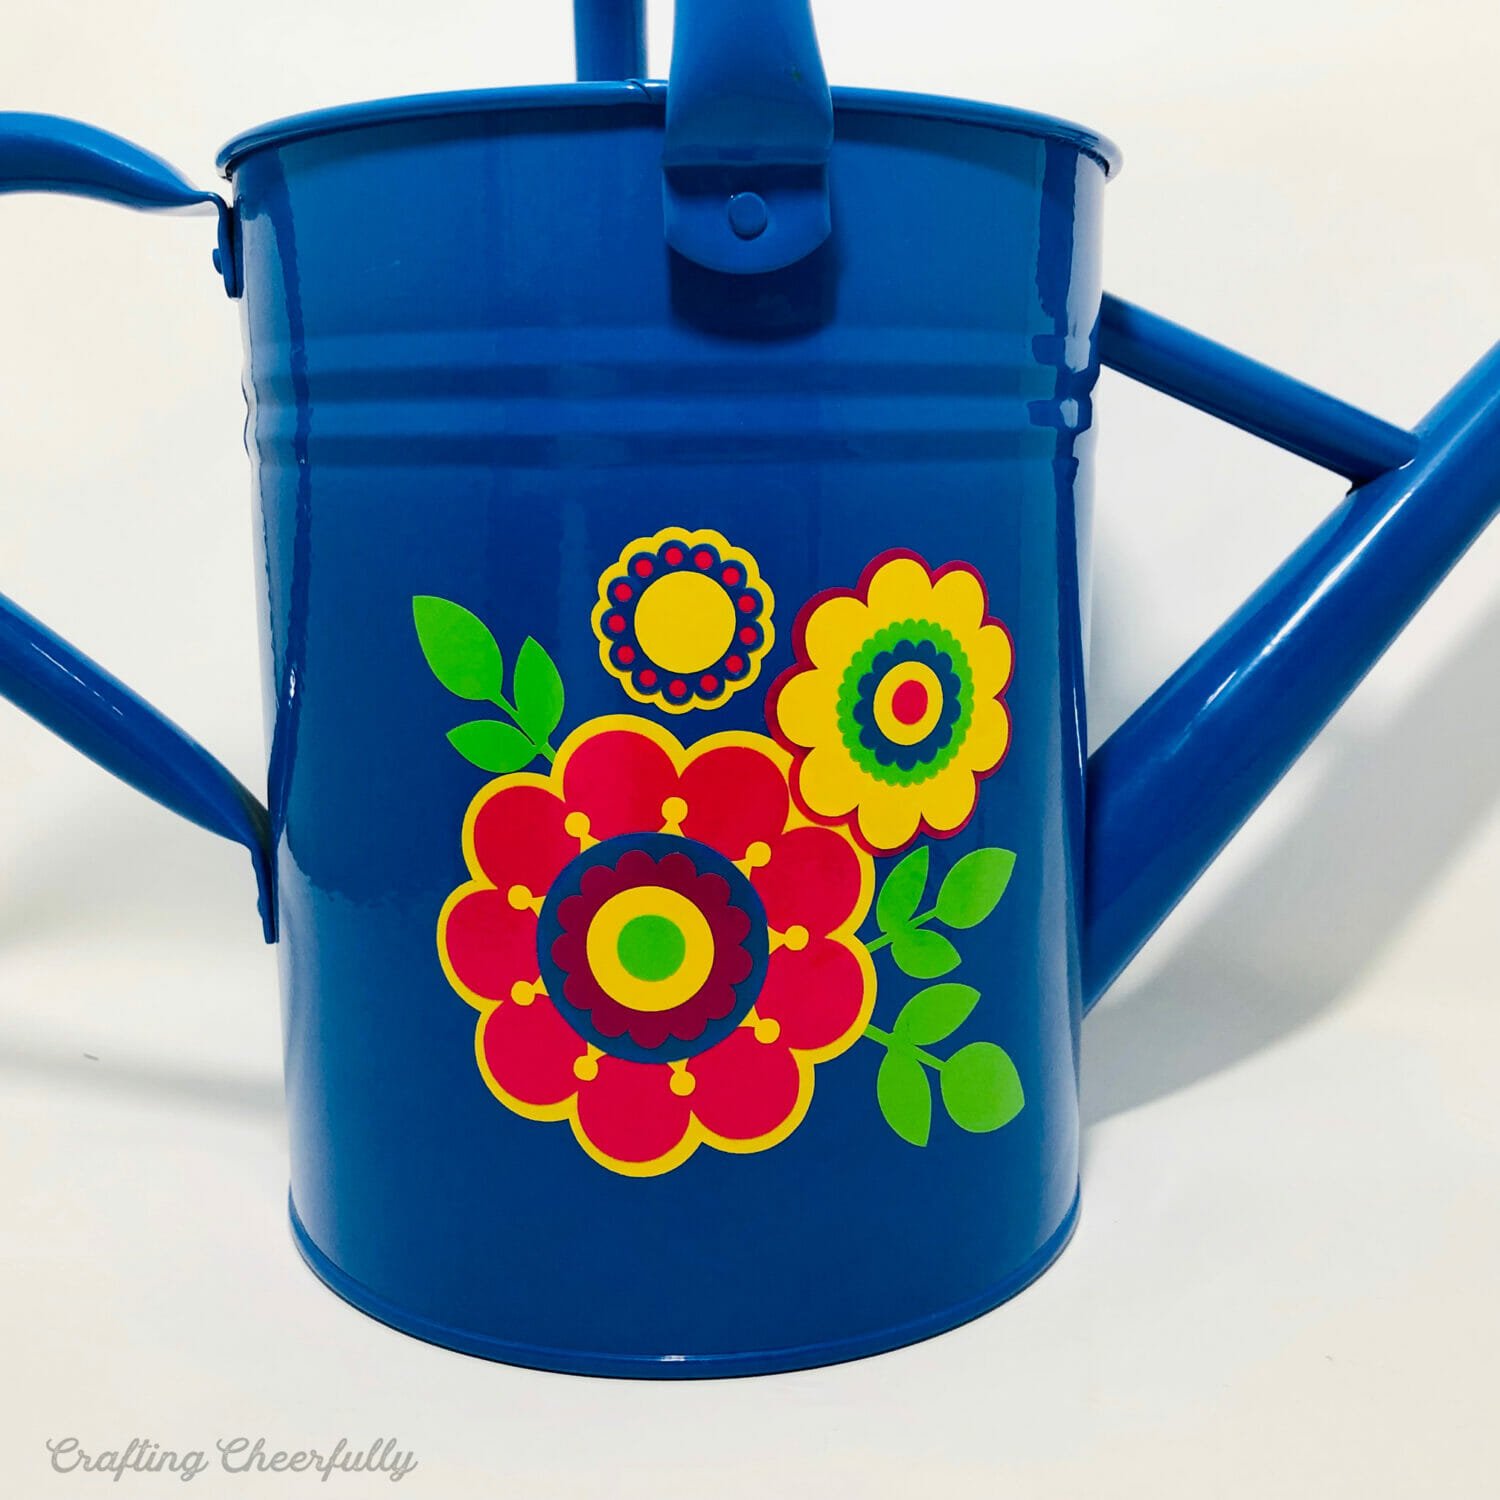
Step One: Use Cricut Outdoor Vinyl to create a fun design on your watering can! I searched Cricut Design Space for a flower design I liked and found one called “Flowers and Twigs” by Miss Kate Cuttables. The Cricut Outdoor Vinyl Sampler pack came with 6 colors. I chose to edit the design to include 4 of the 6 colors – blue, green, pink and yellow. The pack also came with black and white, which I didn’t use.
Cut your design and use Cricut Transfer Tape to transfer the vinyl onto the watering can.

Below you can see my watering can with the finished design. The Outdoor Vinyl is super bright and glossy, which looks really nice on my bright blue watering can.
Create Water using Beads
Step Two: Create water coming out of the spout using beads. I wanted to create my water entirely out of blue and white beads but didn’t want to spend that much money. So I searched my house for something I could use that would work outside and found some plastic dividers – the kind you use to divide sections of a binder.
I used a blue divider to create raindrops that could be mixed in with my beads. I cut them by hand and punched holes at both the top and bottom of each raindrop using a small 1/8″ hole punch. (Please note that at the end of the fourth summer outside some of the raindrops became brittle and broke apart).

I started each of my water strands with a large clear pennant. First, I cut a long length of bead stringing wire and strung a pennant so it was dangling in the middle. Next, I threaded both ends of the wire through a crimp bead and used a needle nose pliers to clamp down and secure the bead.

Next, I added blue and clear beads to the wire, adding in the large blue raindrops here and there.

When it was time to add the blue raindrops, I used two more of the crimping beads to secure the decorative beads above and below it. When I tried stringing the raindrops on without those, the beads fell down on top of the raindrop, causing it to squish and bubble out.
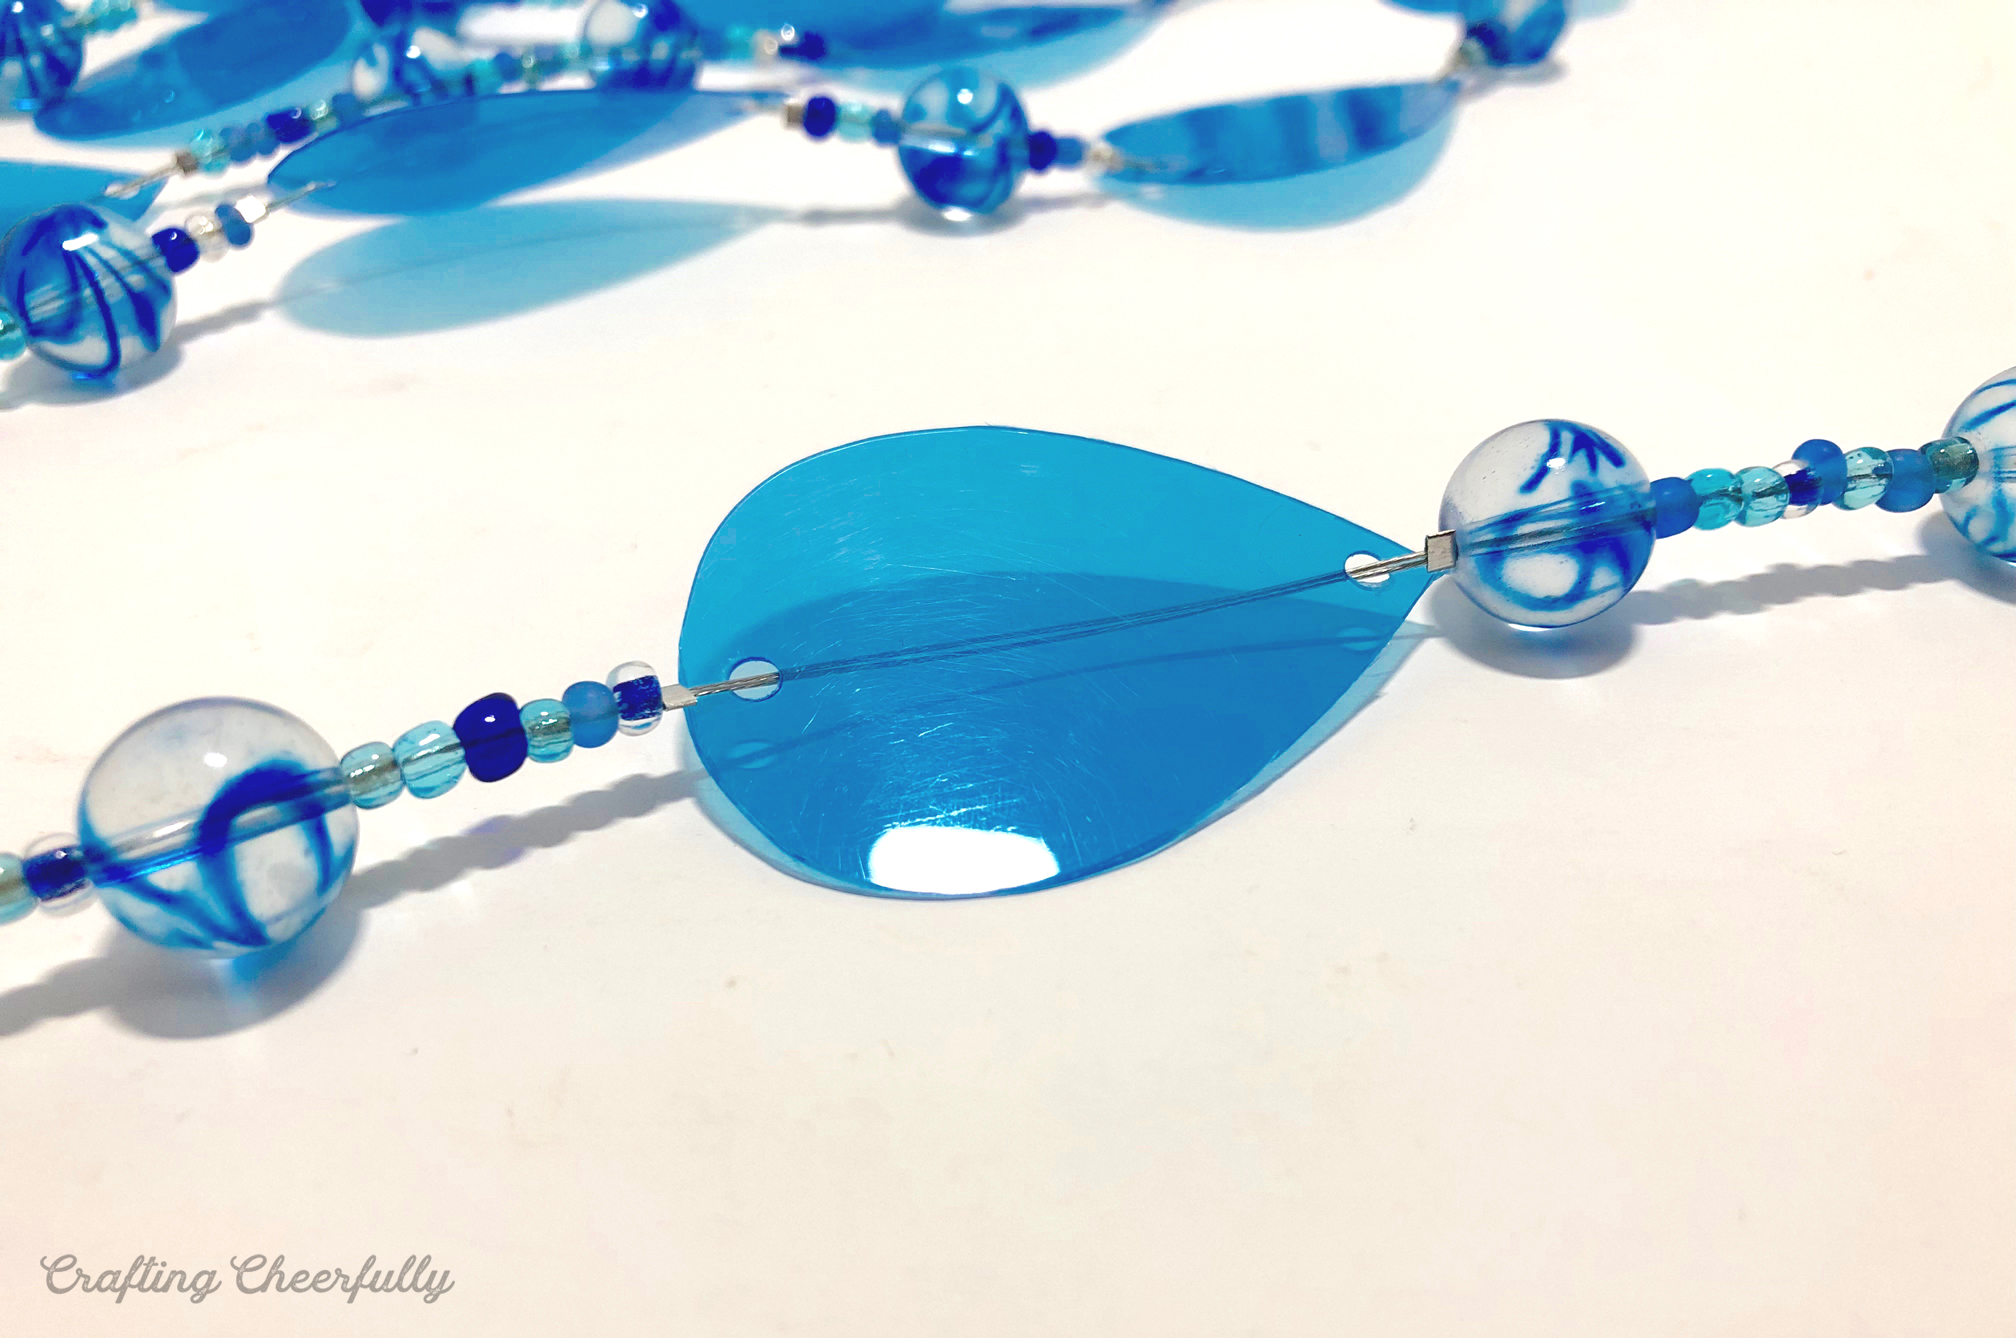
When the strand was finished, I added one more crimp bead to end the strand of beads.

Since I only had 3 large clear pennants, I used my blue raindrops to start my other three water strands. I started them the same way as I did when I used the clear crystal pennants.

Cover the Watering Can Opening
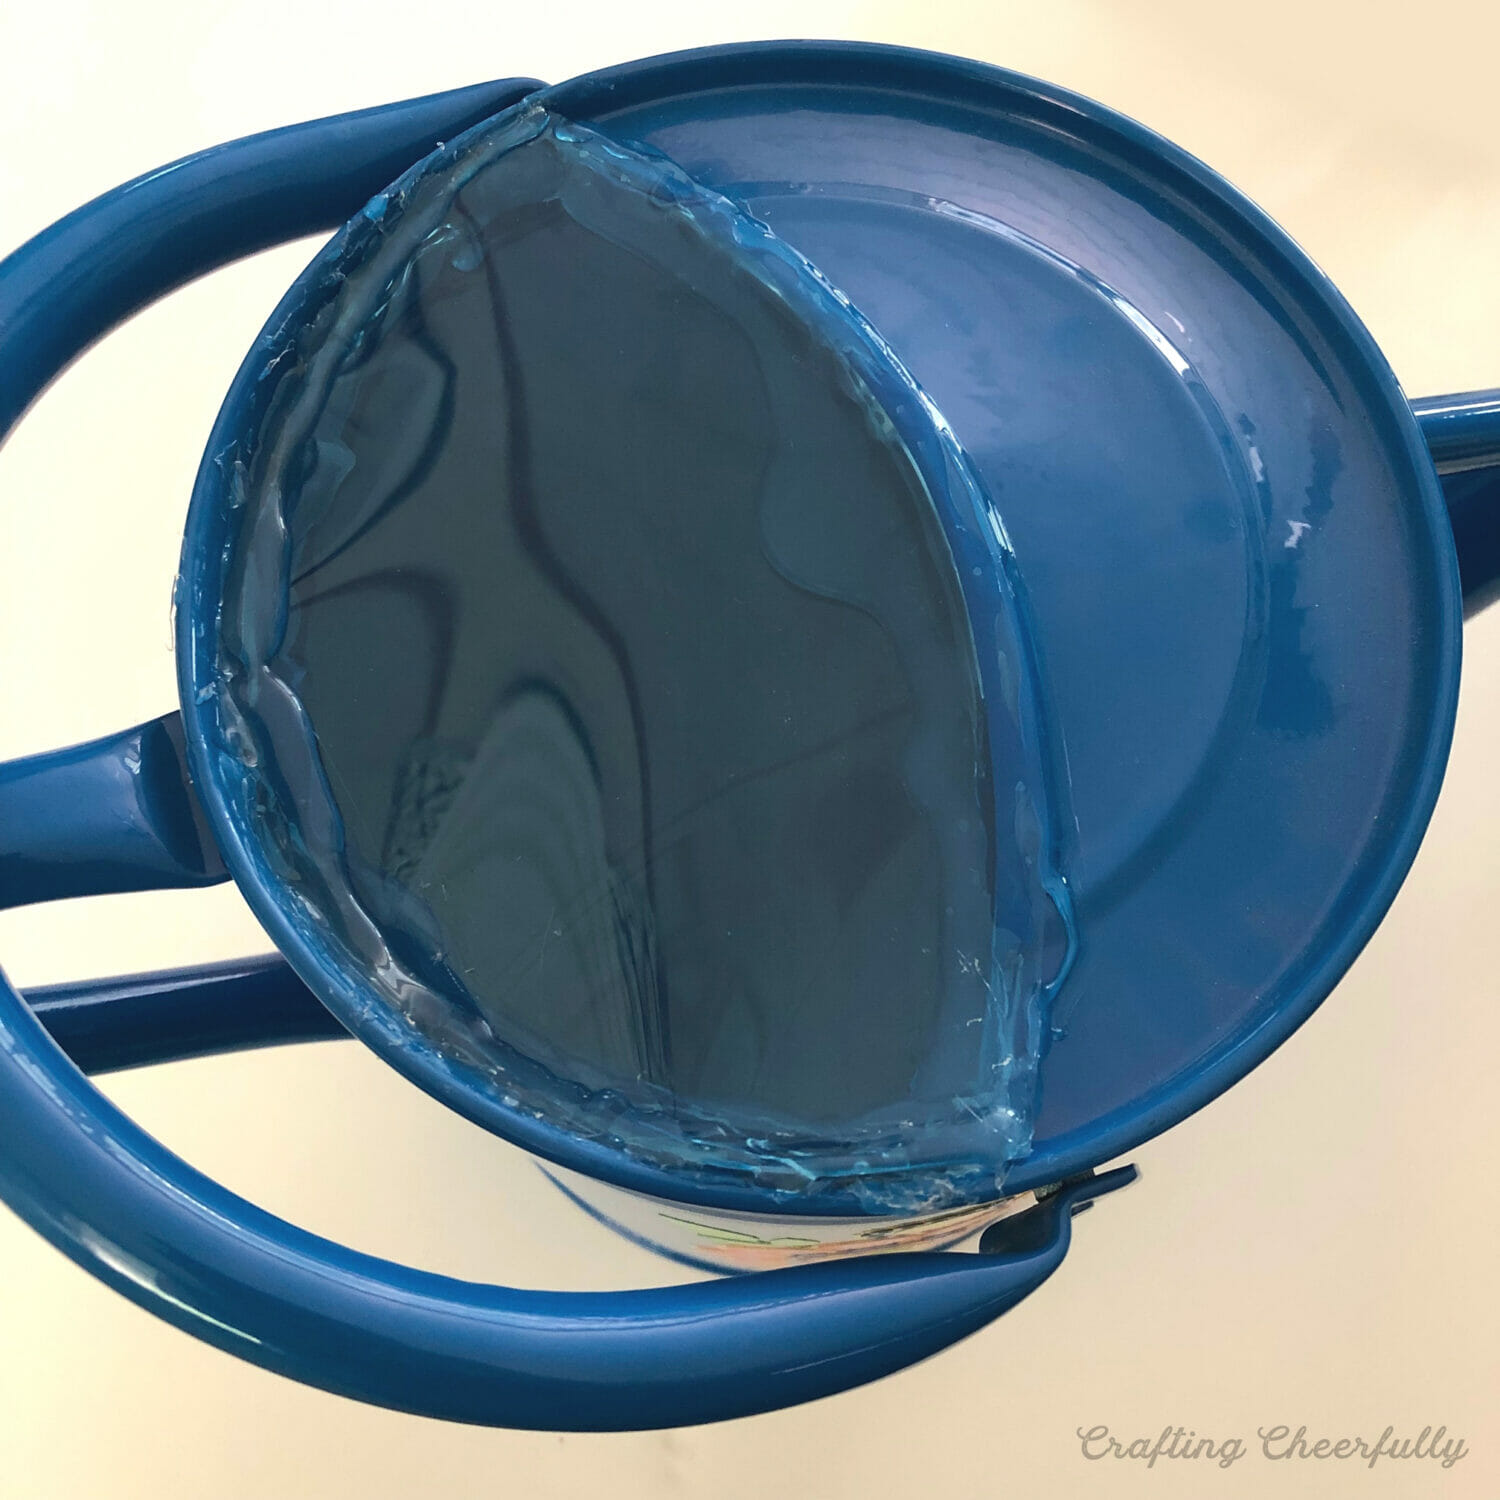
Step Three: Cover the watering can opening with a sheet of blue plastic divider. You can skip this step, but since I didn’t want the can to hold water and attract mosquitos or become a home for little critters, I decided to cover mine. I stuck the divider into the can and used a silver Sharpie to trace along the edge of the watering can.

I cut this out and glued it to the inside of the watering can using hot glue. It took one more piece of binder plastic to completely seal things, but overall, this seemed to work really well. I sealed around all the edges with more hot glue. It got a little messy but once the can is hanging up you don’t really notice all my hot glue!

Attach the Water Beads
Step Four: Attach the water bead strands to the spout of the watering can. This took me a little trial and error. Gorilla Glue worked better than hot glue and craft glue. I stuck the ends of each strand of beads into the spout holes then secured them with Gorilla Glue.
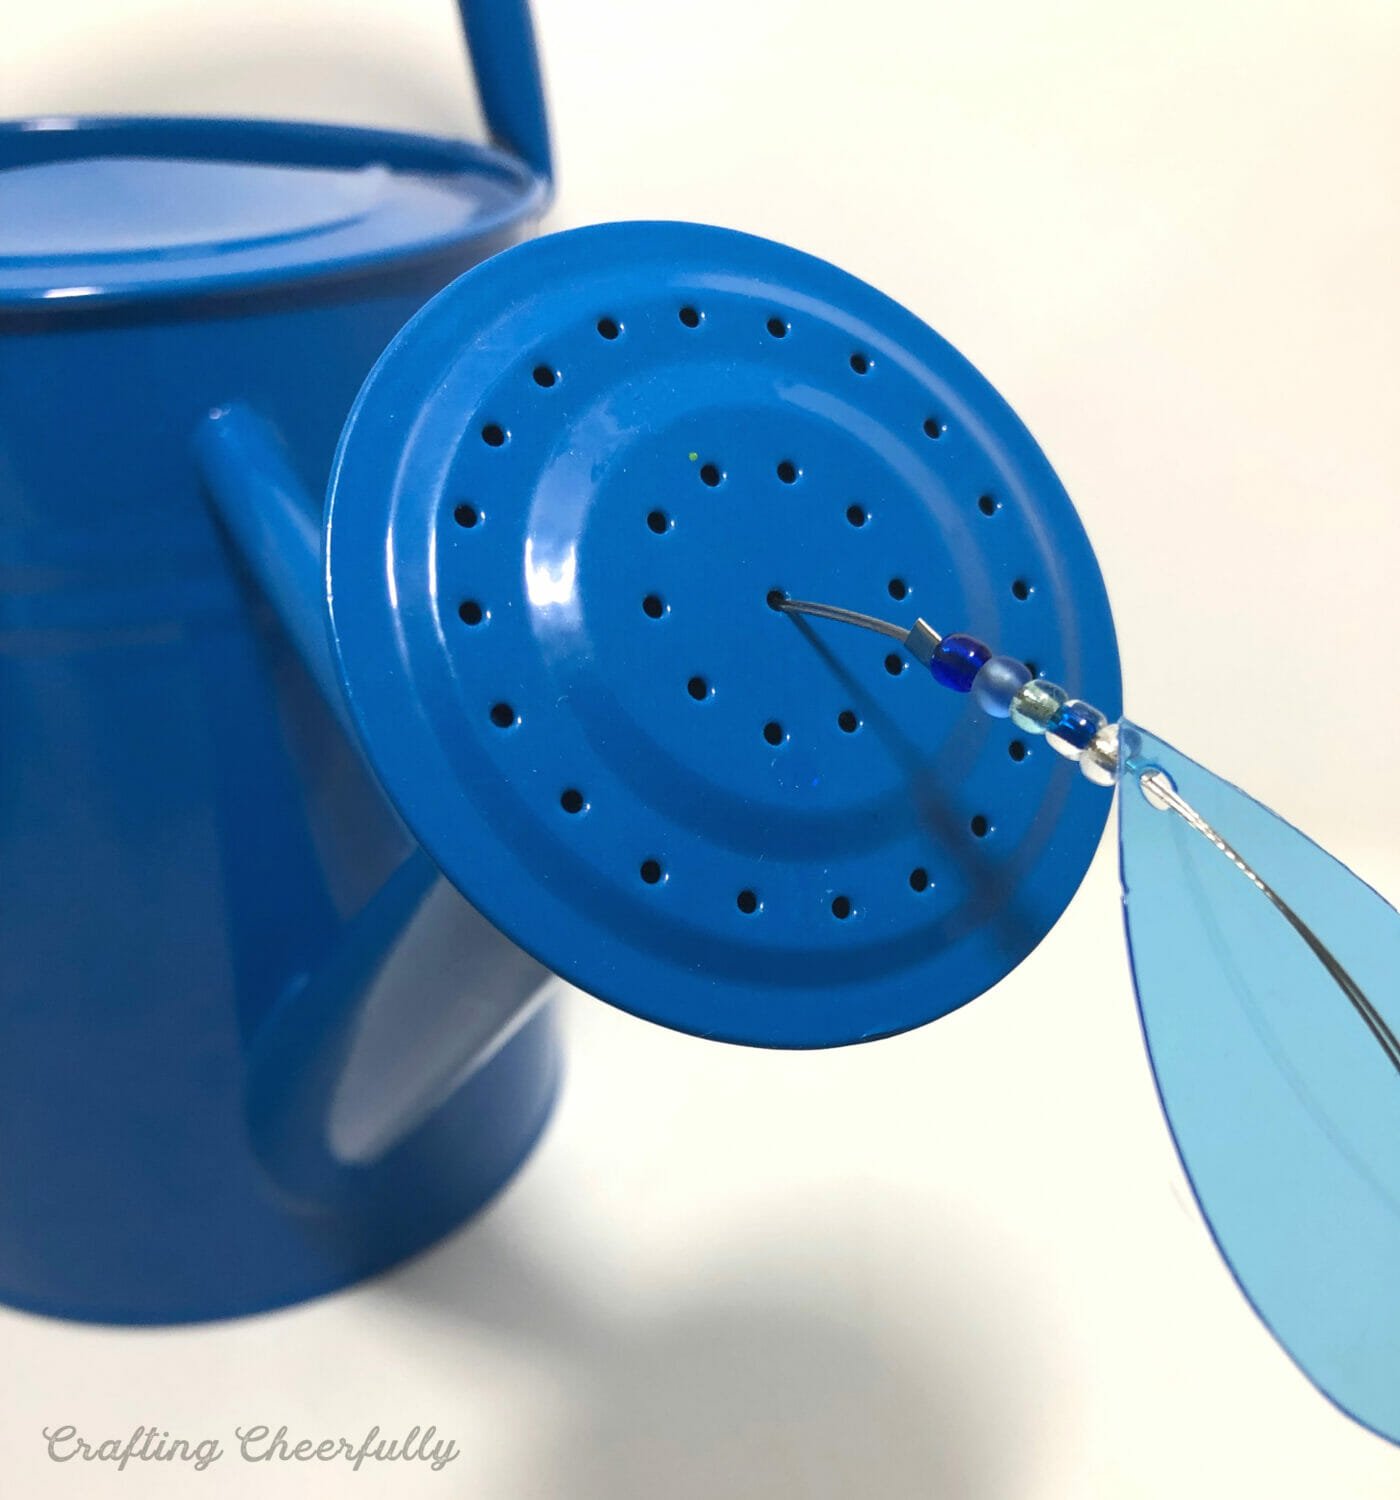
I propped the bead strands up on a stapler and used painters tape to hold them in place. It looked crazy, as you can see below, but did the job of holding the beads against the watering can for the 24-hour cure time. Once that was complete, I did fill all of the empty holes with hot glue, to again prevent bugs and water from going inside the can.

The watering can decoration is finished! It really looks nice against our Annabelle hydrangeas. The colors pop against the white blooms. We have since painted our fence a nice bright blue. You can see it in my Butterfly Garden Art post!

The watering can has held up great!
With my outdoor crafts, I like to give an update on how they have faired after a year or two. Some of my crafts only last a season or two outside but this watering can is going on four years and still looks beautiful outside!
- 1 year update: – The watering can stayed outside for the whole summer in an un-sheltered area exposed to sun and rain. The outdoor vinyl has held up amazing – no signs of peeling or bubbling!
- 3 year update: The watering can has been outside going on its fourth summer and still looks great. The Gorilla Glue on the spout did turn a weird orange, so I painted over it with blue acrylic paint and it looks good as new. After taking it out of winter storage, two of the plastic raindrops were broken – most likely due to how I stored it.
- 5 year update: The raindrops became brittle at the end of summer #4 and some have broken apart.

I hope you enjoyed this garden craft! Garden ornaments are such a cool way to brighten up your yard and make it more playful and fun! I’ve tried making other crafts for the garden, including these fun butterflies, stepping stones and a patio umbrella cover. I have more ideas than I do time, but hopefully, I can sneak in a couple more before the season ends!


