
Free Printable Bunny Paper Dolls
Create sweet bunny paper dolls using my fun free printables! They are available already colored or you can download coloring pages to color them yourself before you create them. There are so many fun clothing options, making this a great quiet activity for kids!

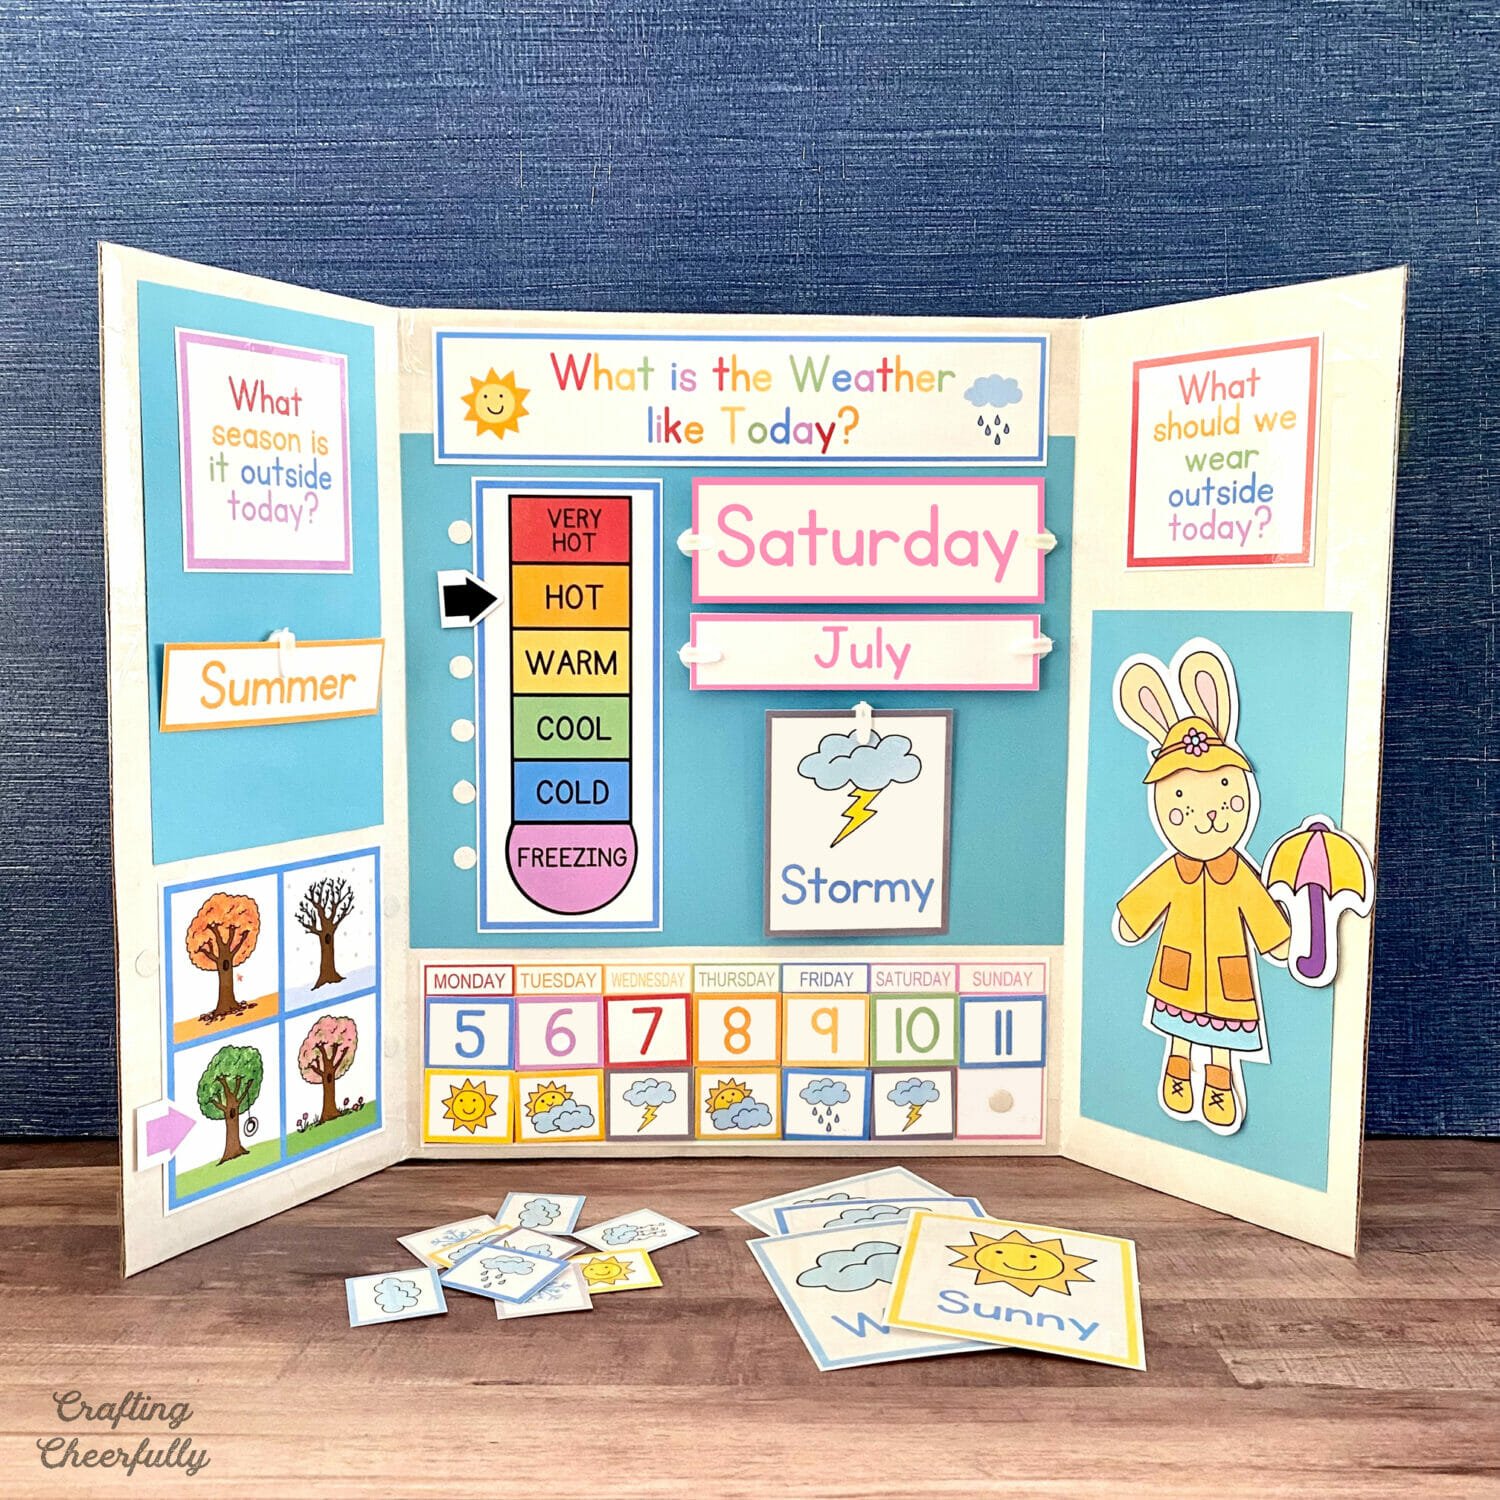
Hello Crafty Friends! Today I wanted to share a bit more about my bunny paper dolls! I have shown them many times with my free DIY Children’s Calendar but they can actually be used on their own for a great quiet activity! After discovering the bunnies were one of my daughter’s favorite parts of calendar time, I expanded their clothing collection and turned it into an activity she asks to do over and over again.
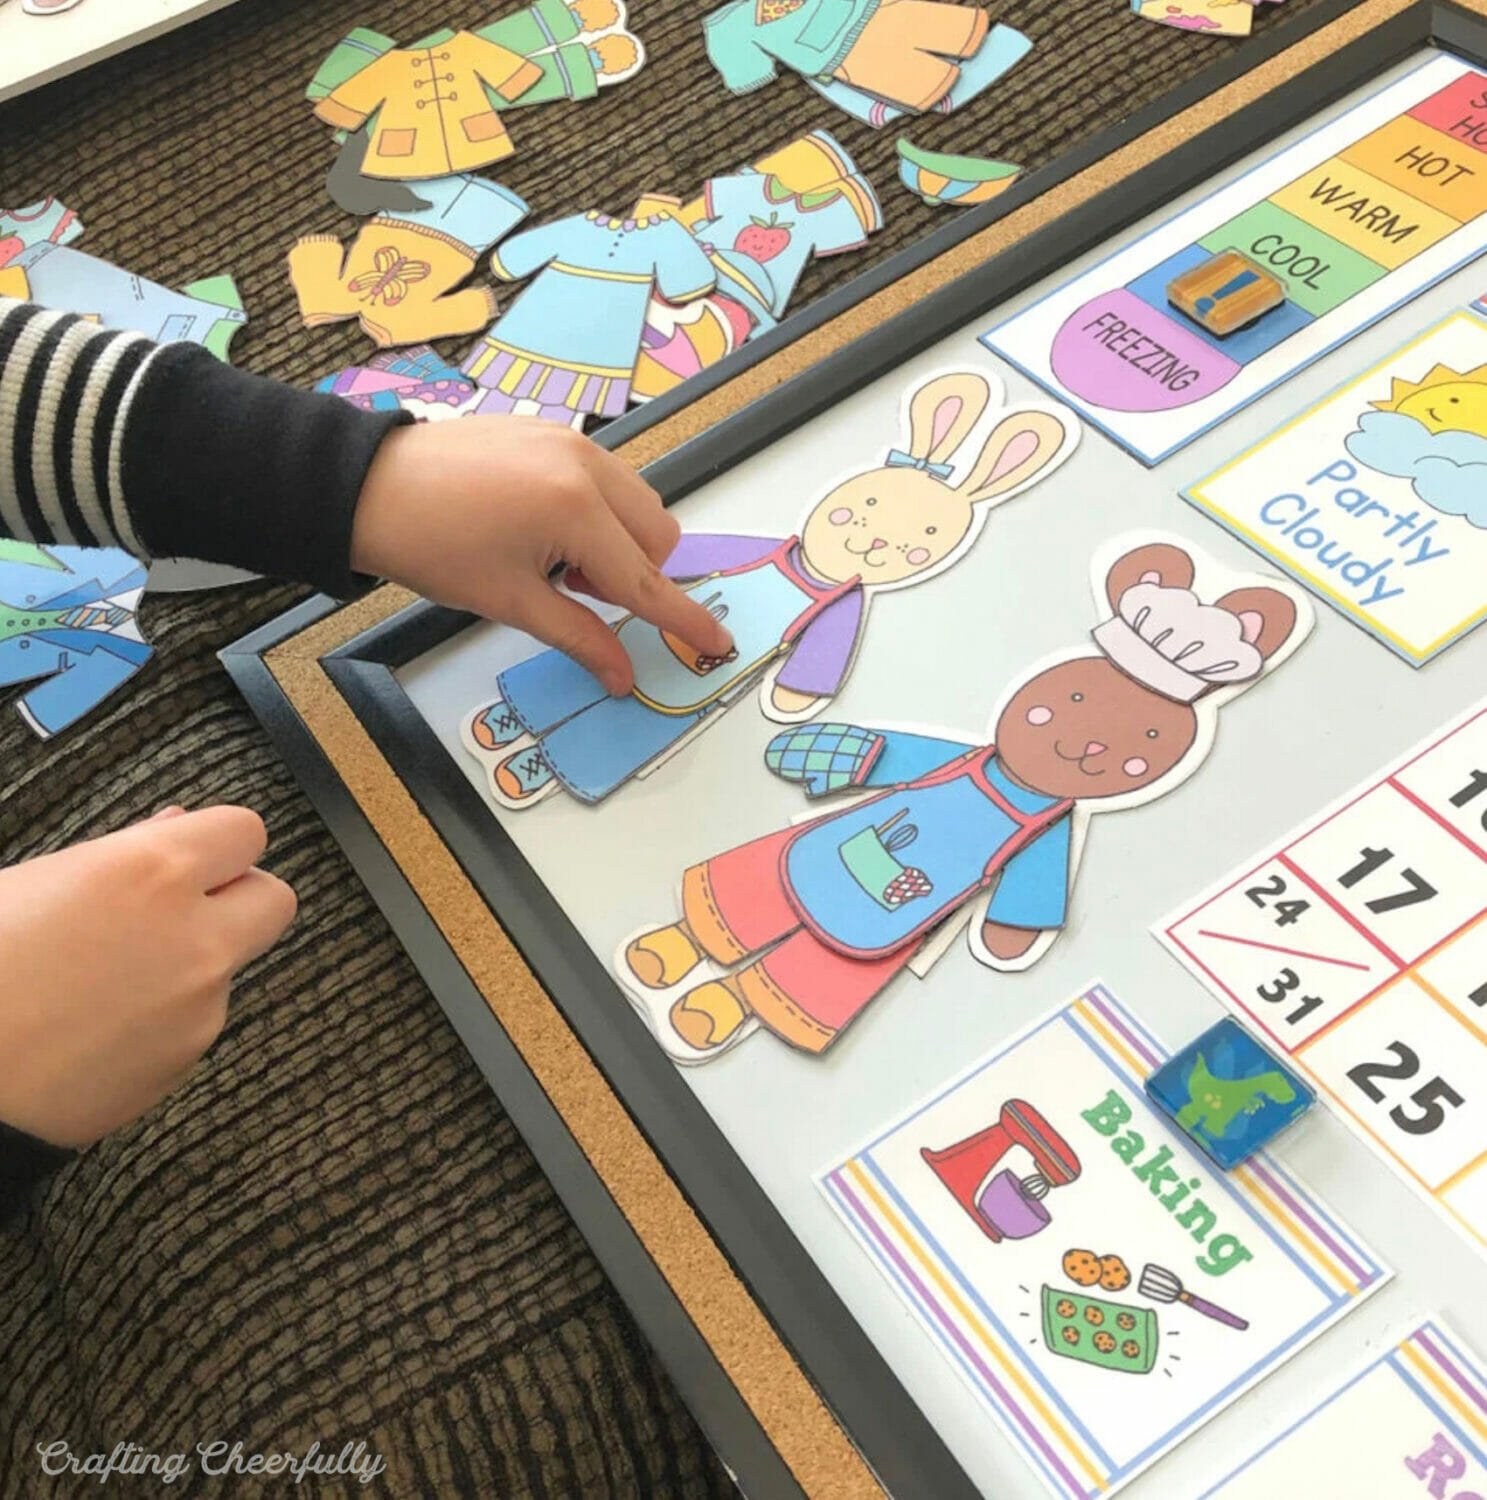
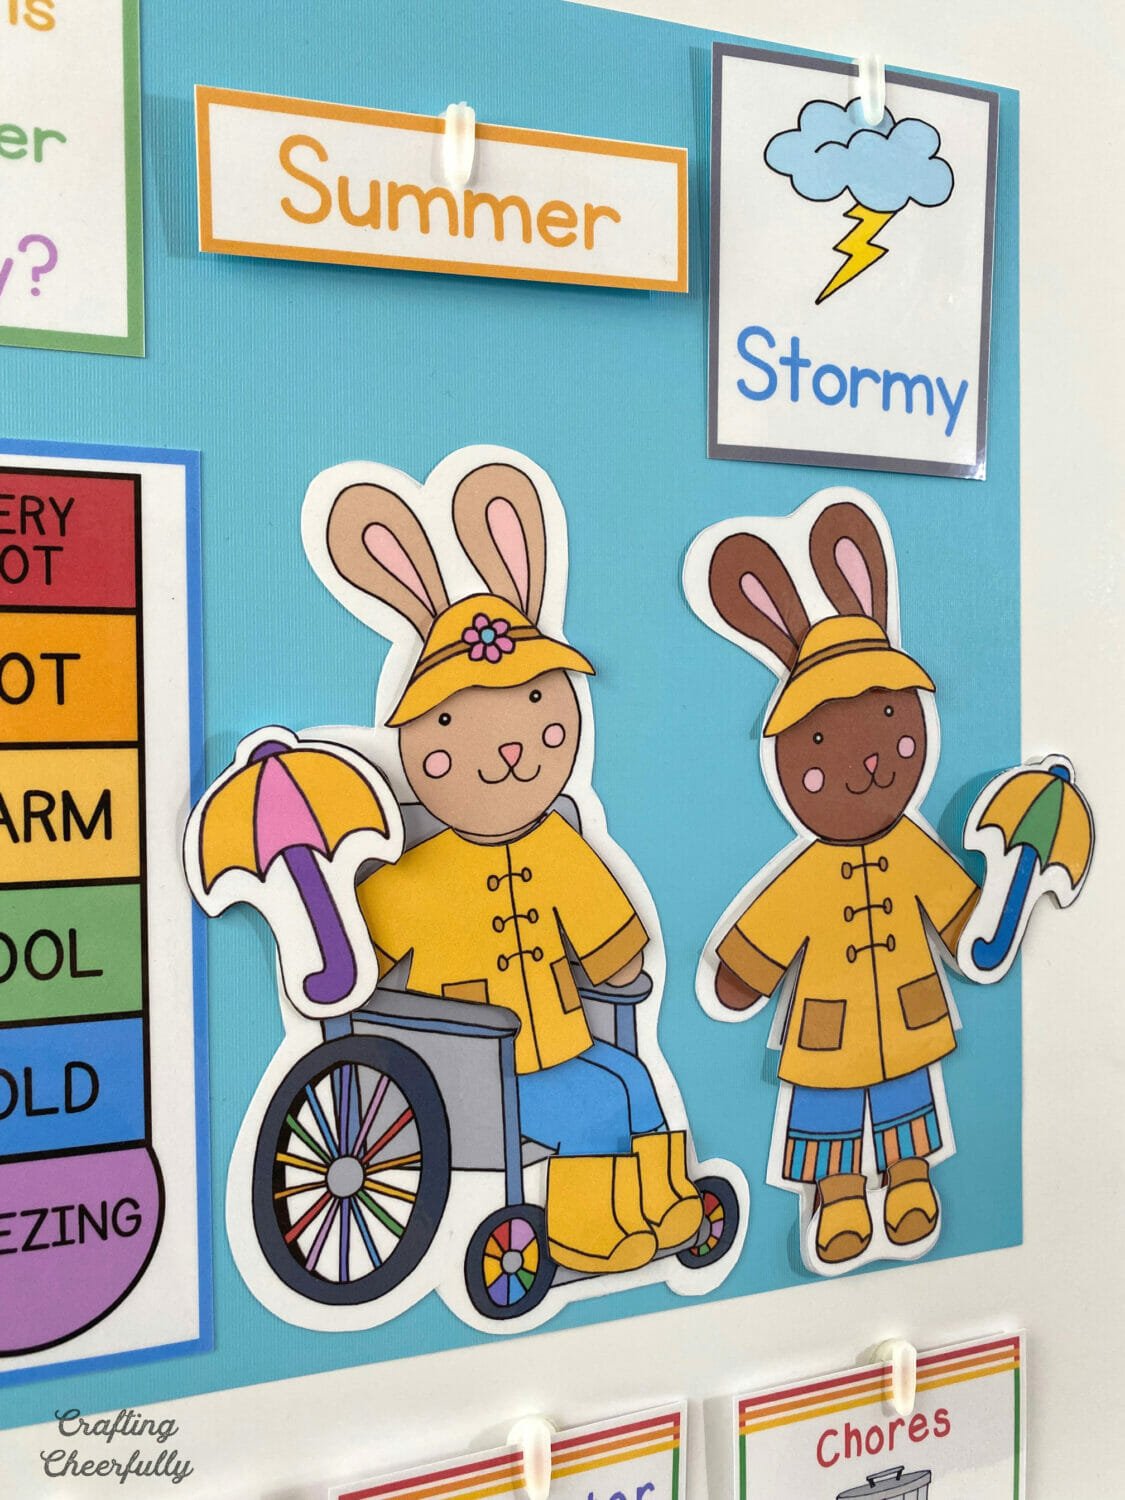
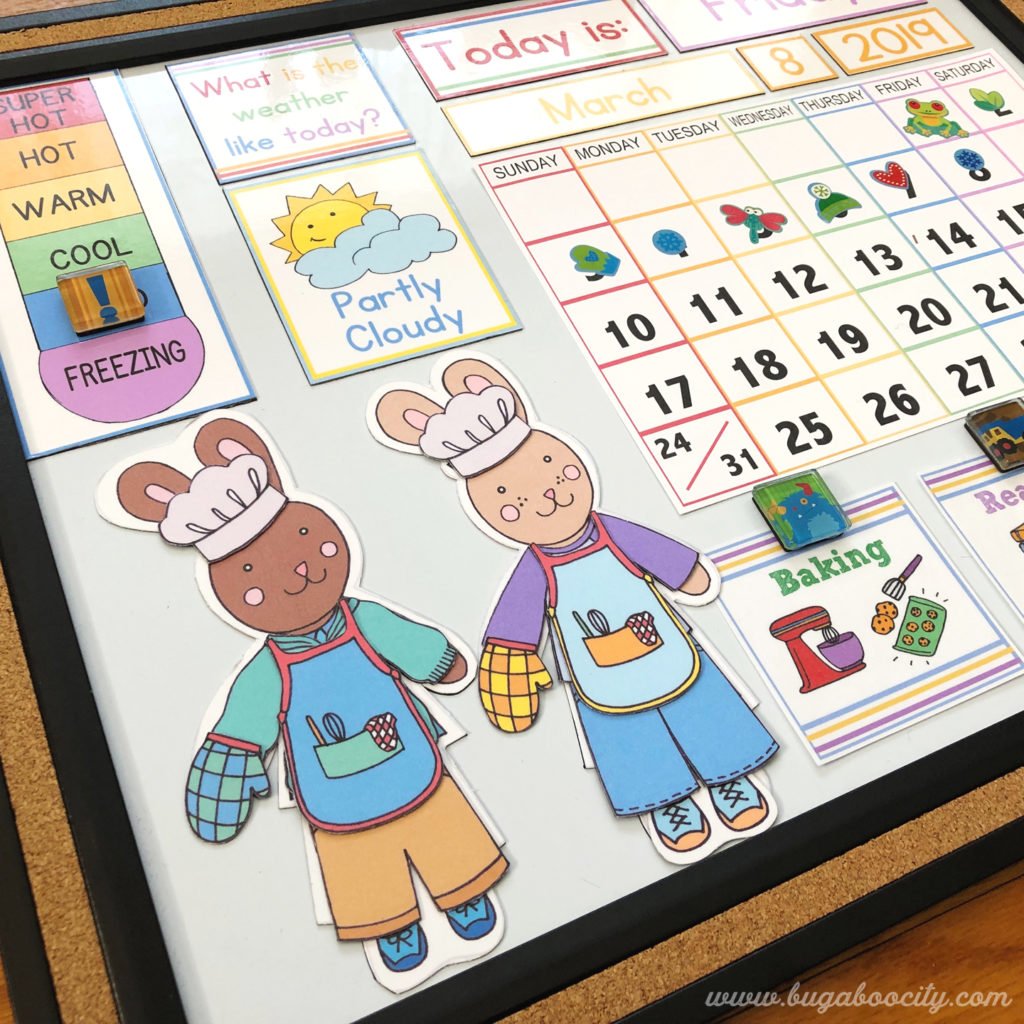
With our calendar we use the bunnies to dress for the weather. They come with all sorts of clothing like raincoats, jackets, boots, winter clothes and summer hats. Your child can look outside and decide what the bunnies should wear that day. They coordinate in color with my other calendar printables are fit well on a dry erase board or chalkboard.


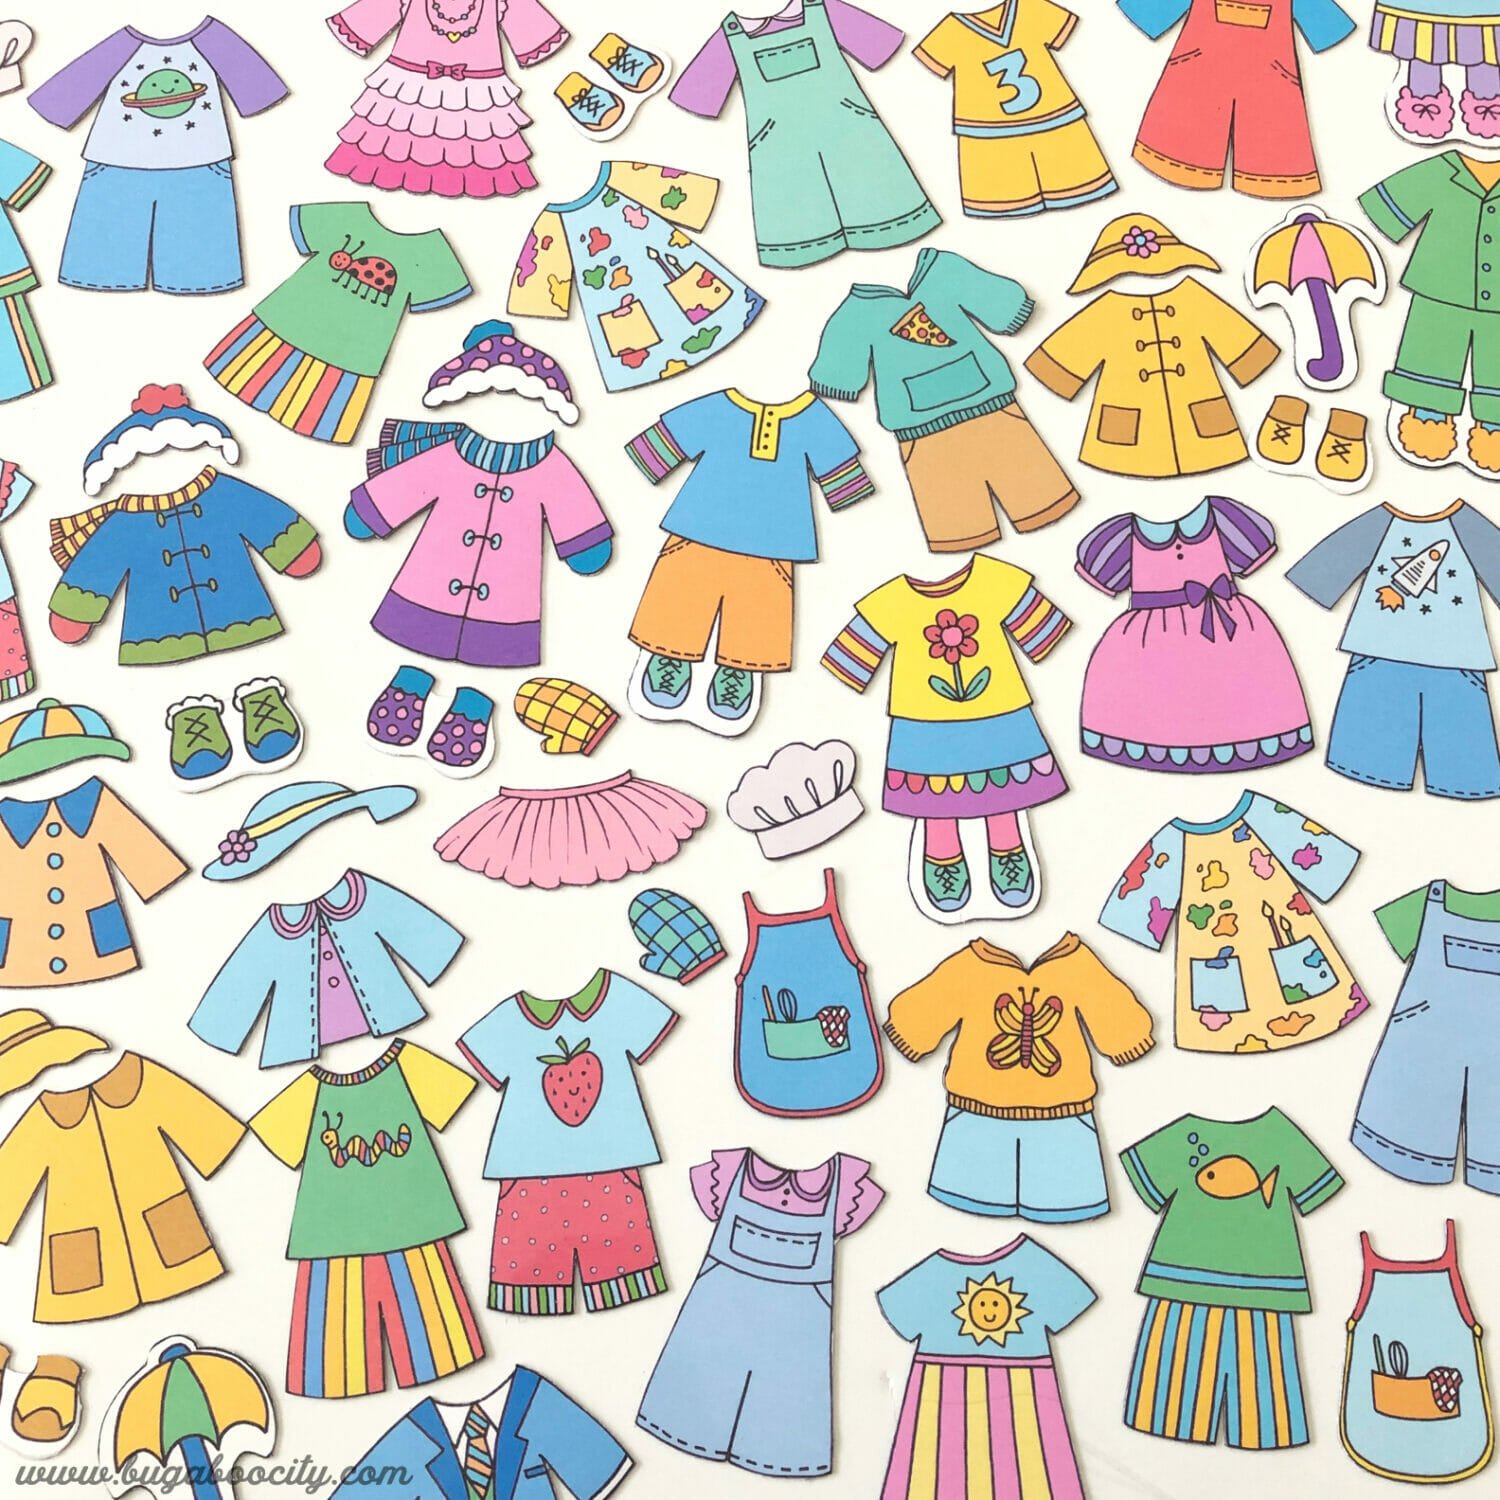
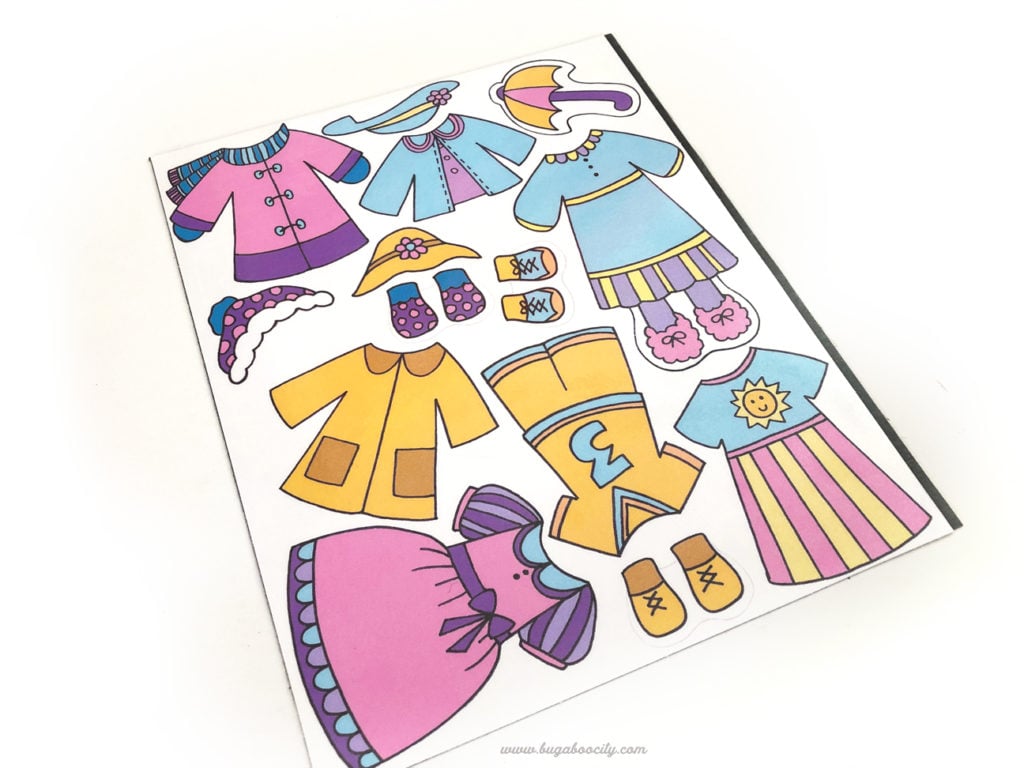
Once I realized my kids liked to play with the bunnies like I used play with my paper dolls, I knew I needed to make more clothes. I also had a few reader requests for different kinds of clothes, especially more pant options for girls. I’ve added SO many new clothes and hopefully something for everyone! The new clothing includes lots of fun options! Sweatshirts, overalls, baking aprons, smocks and new play clothes for every season.

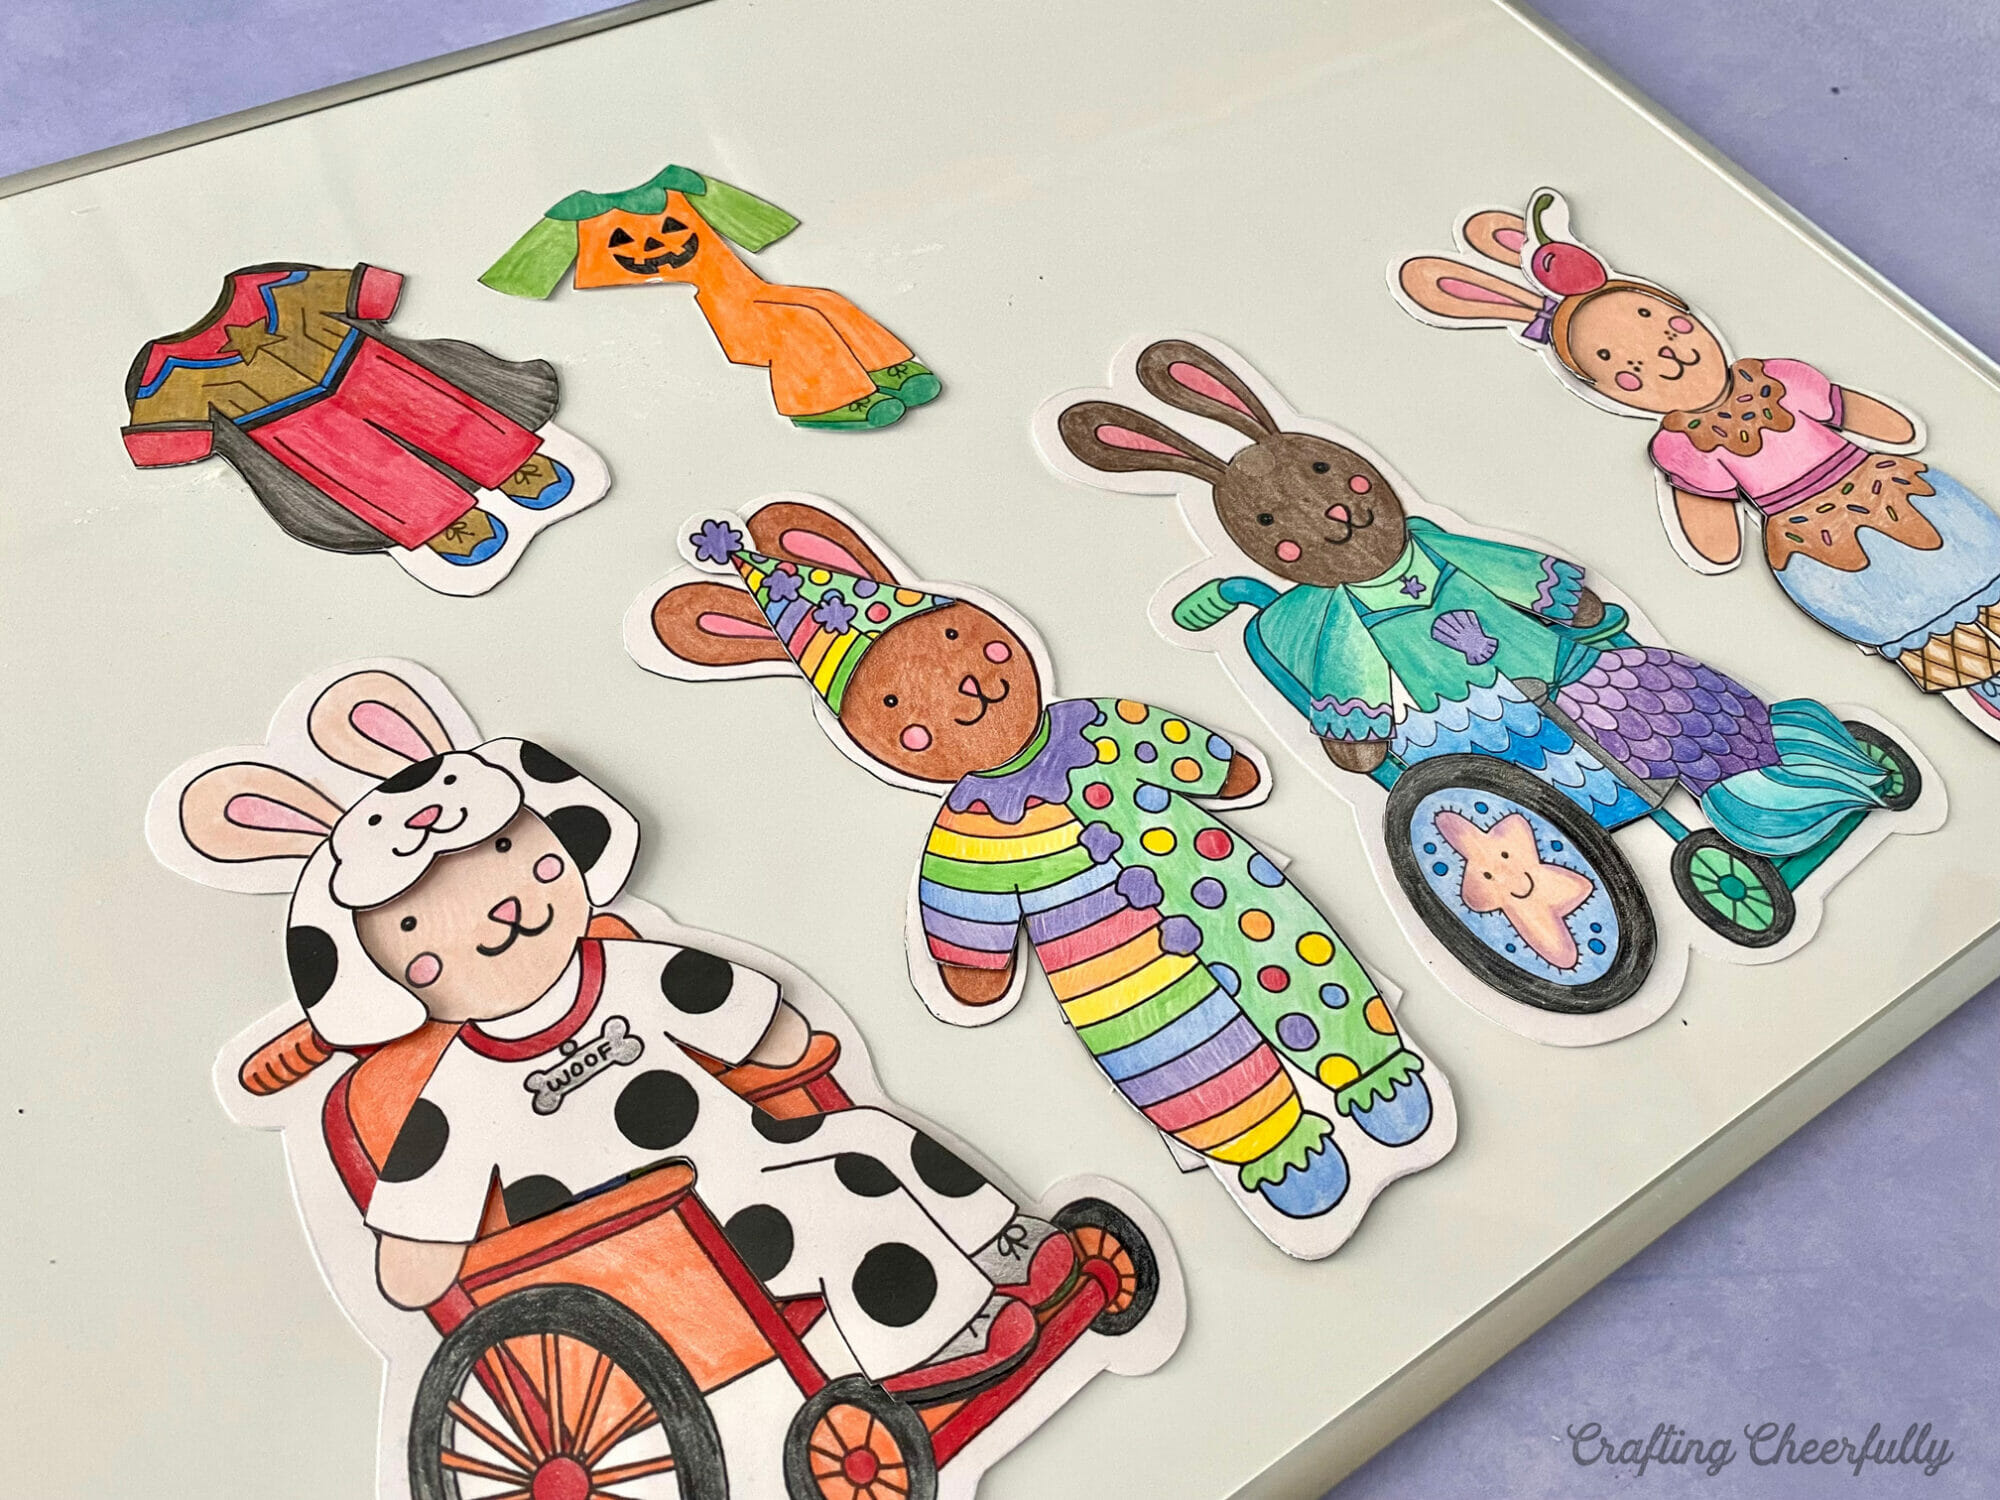
There is also the option to color-your-own bunnies and clothing. Download the bunny coloring pages and you and your kids can color the clothing, choosing whatever colors you want!

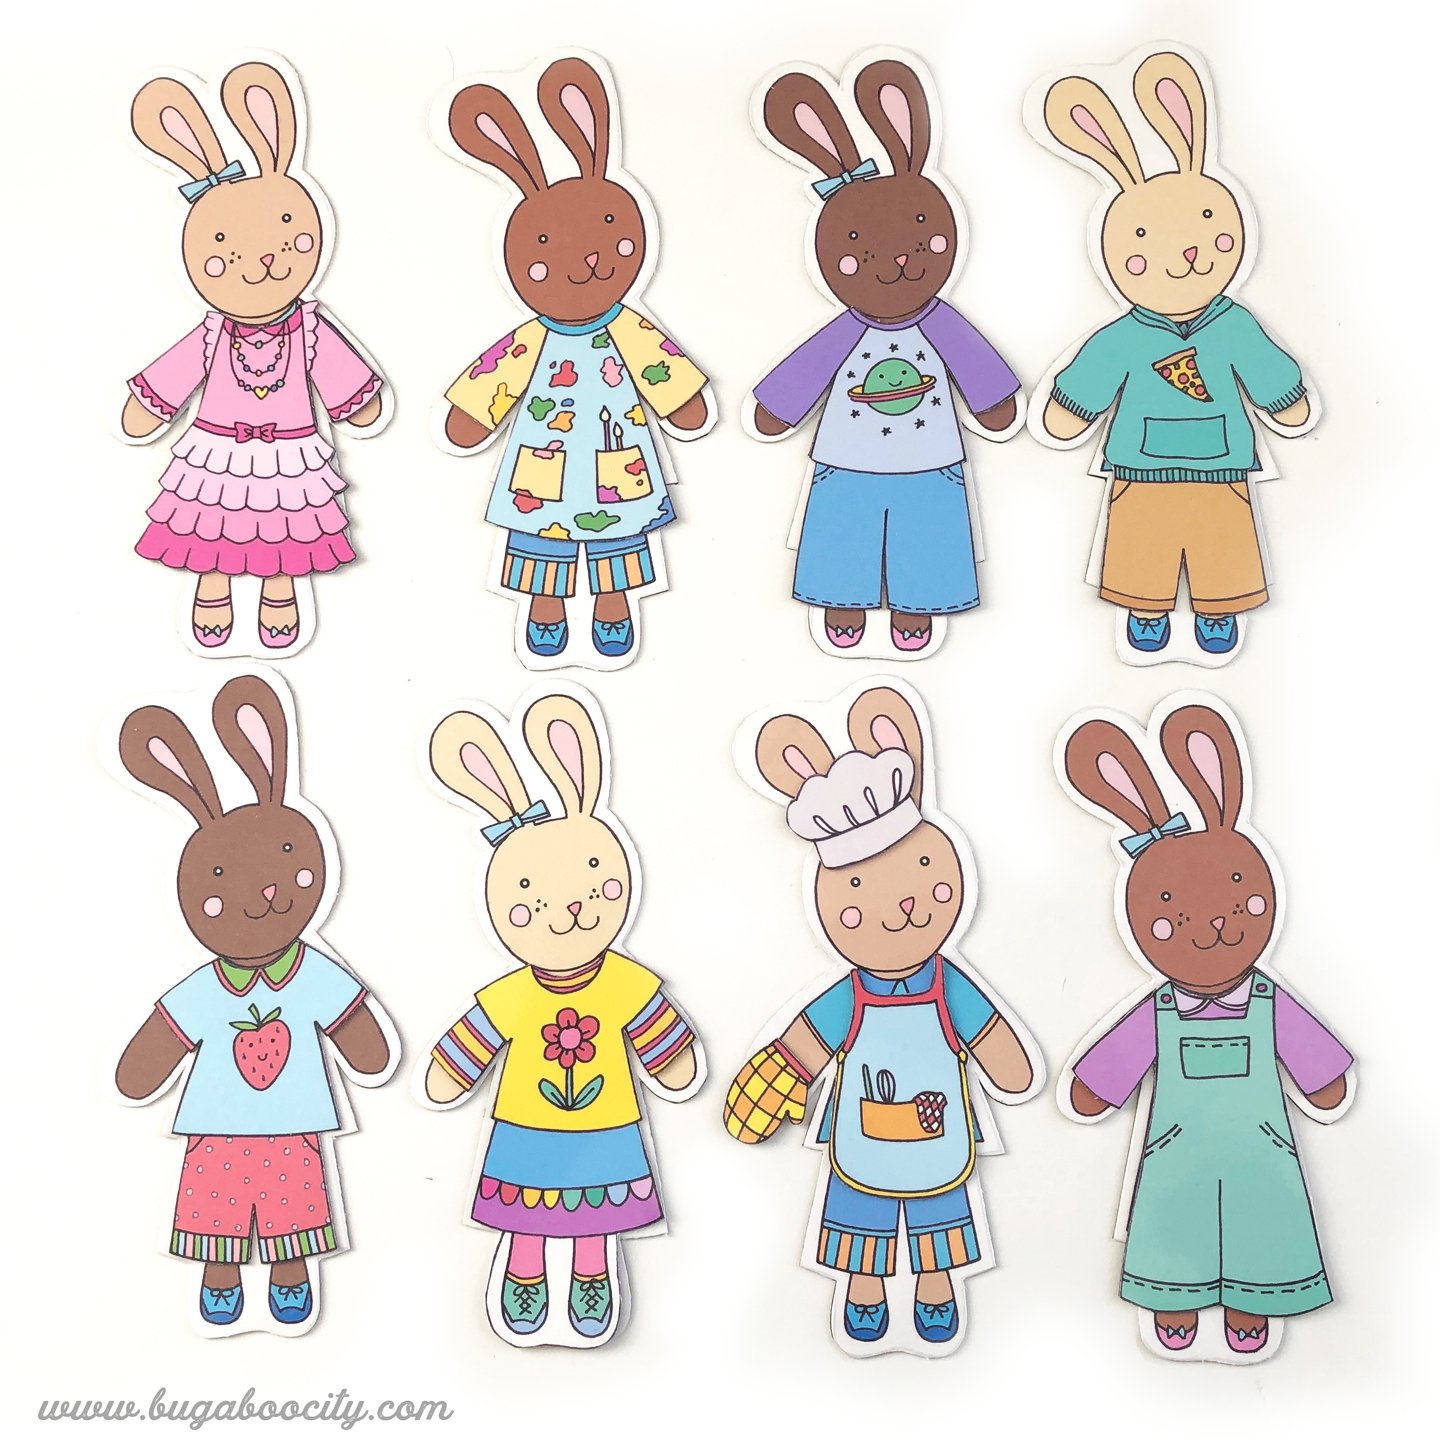
The bunnies come in four different fur colors in the hopes you can find a bunny that your children can see themselves in. My kids play with all eight bunnies and we frequently switch out which two are on our calendar.
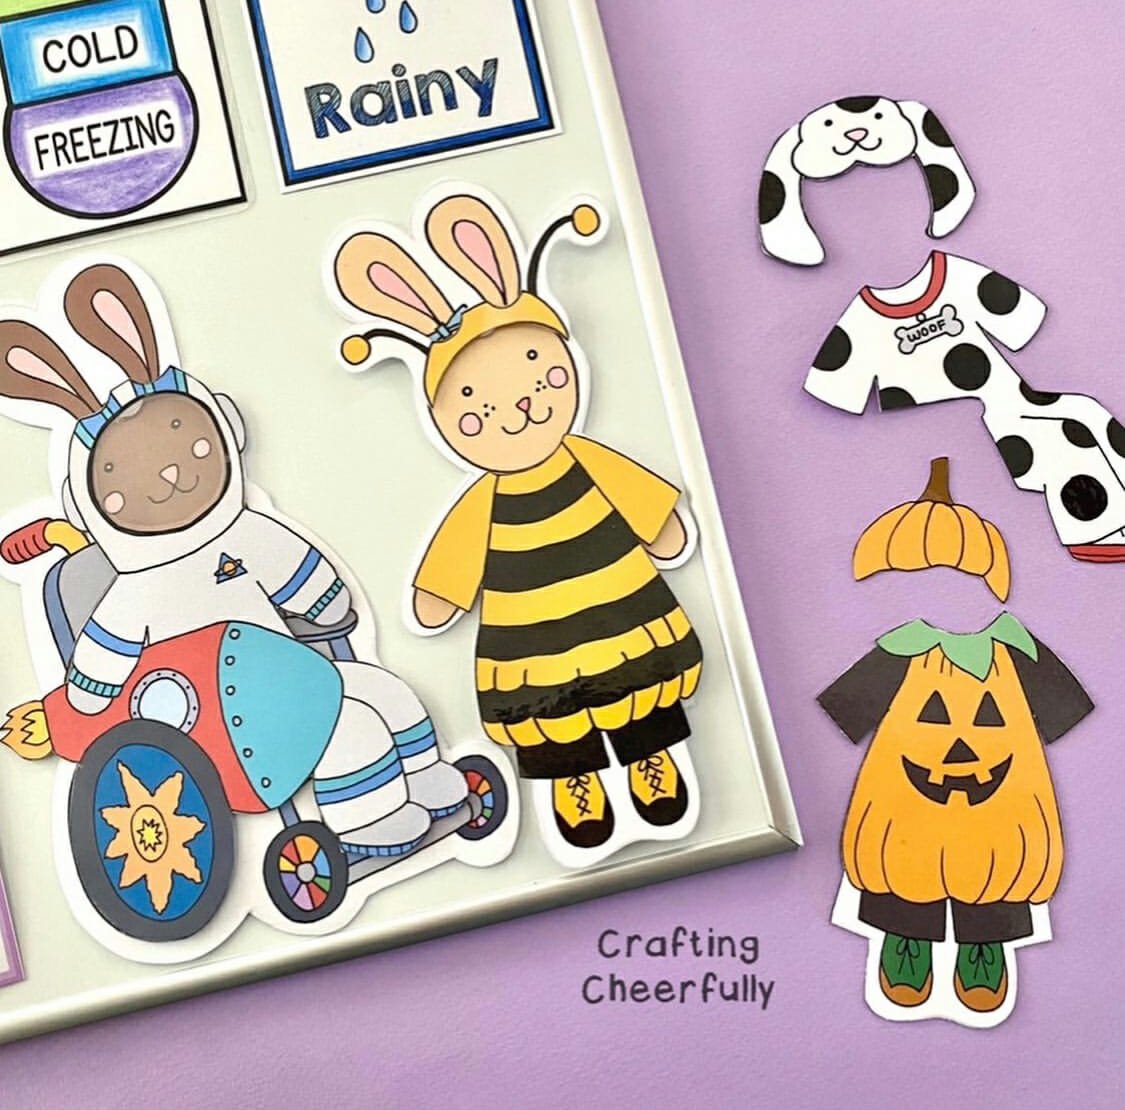
*Update: There are now bunnies who use wheelchairs available to download. They come with all of the weather clothing plus some of the extra clothes and some Halloween costumes.

My main packet of Bunny Paper Dolls comes with the bunnies and their weather clothing. After many reader requests, you can also download a new packet of extra Bunny clothing that comes with so many new clothing options including art smocks, sweatshirts, baking aprons, overalls and more.
How to Make the Bunny Paper Dolls
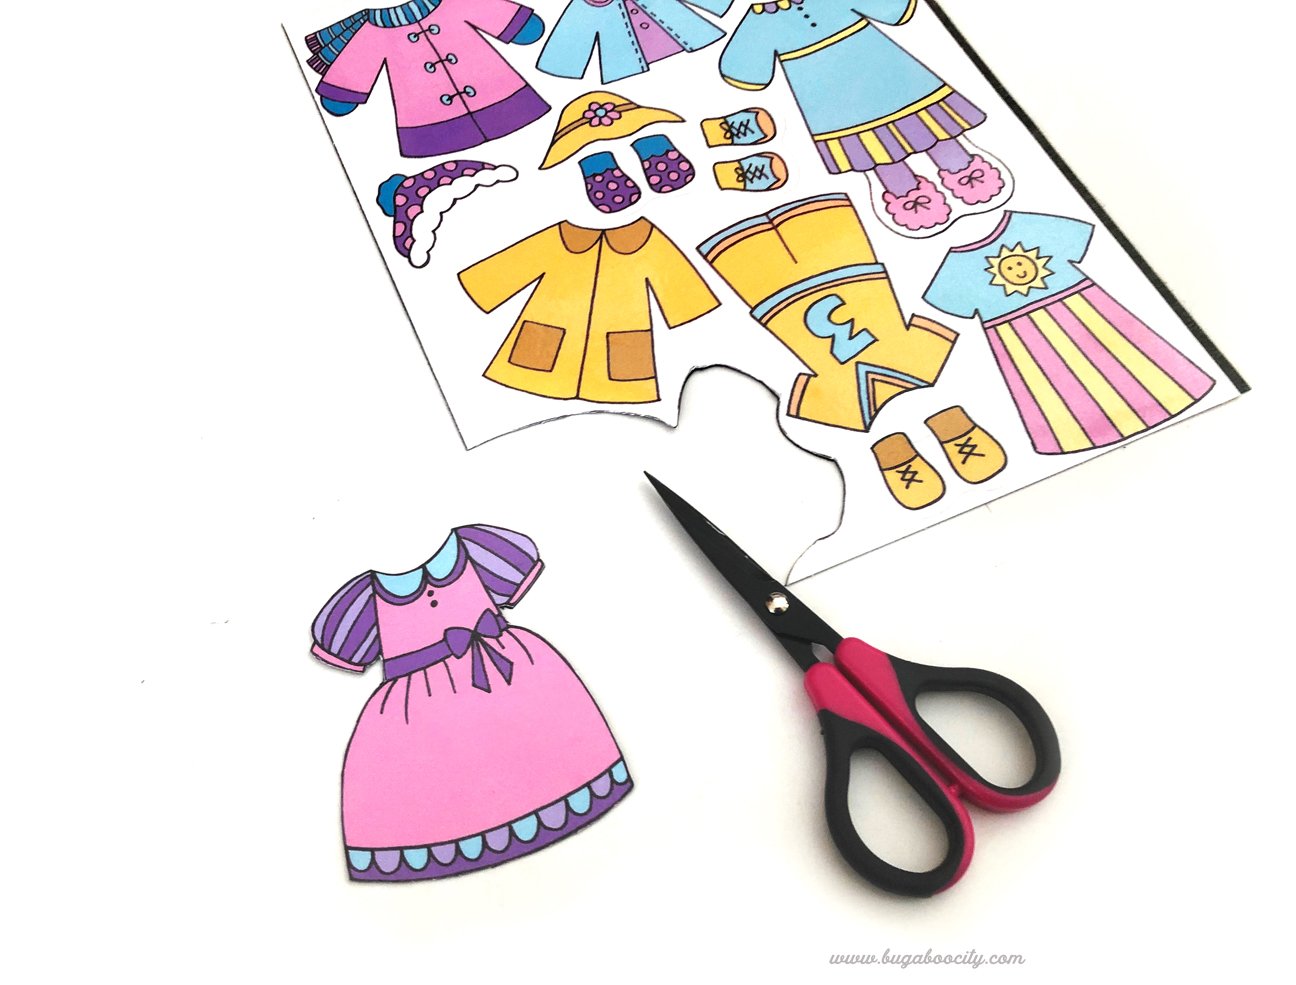
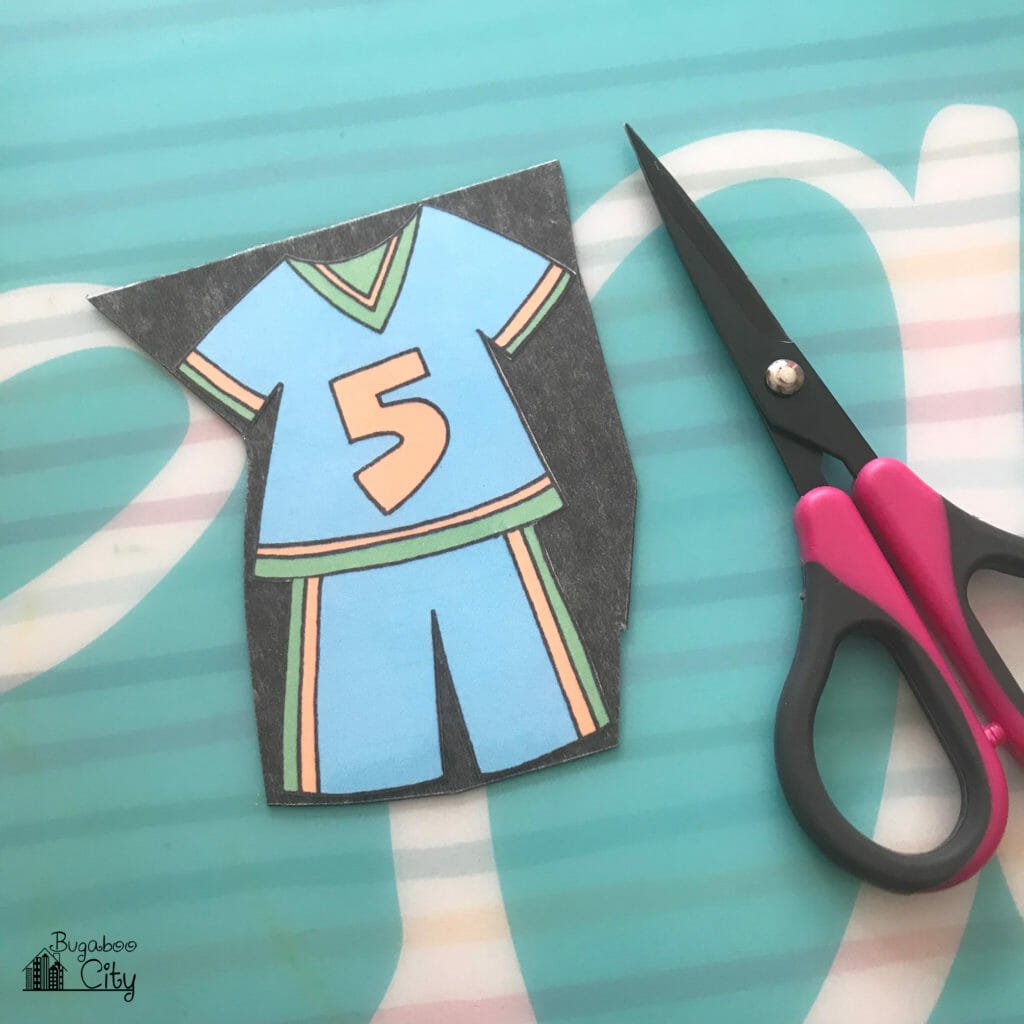
In this post, I’ll show you two different ways you can create the bunny dolls and their clothing. While I do call these paper dolls, they do not have the traditional paper tabs that paper dolls have. I have made these using magnet sheets or Velcro Fasteners instead of the paper tabs and find they are easier and more durable for my kids to play with. I would not recommend turning them into magnets if younger children will be using them as some of the pieces can be small. Using Velcro Fasteners is an easy and safe option that is also a little quicker to assemble!
Supplies Needed:
-
- Free bunny dolls and clothing: Grab the free files by clicking the links at the bottom of this post.
- Halloween costumes and Christmas clothing are in my Etsy Shop
- White cardstock – I print on Neenah 110 lb white paper
- Scissors
- For Magnetic Bunnies:
- For Velcro Fastener Bunnies:
- Laminator and Thermal Laminating Pouches 3 MIL
- Clear Velcro Fasteners – I used Velcro Brand 3/8″ Thin Clear Fasteners
For Magnetic Paper Dolls
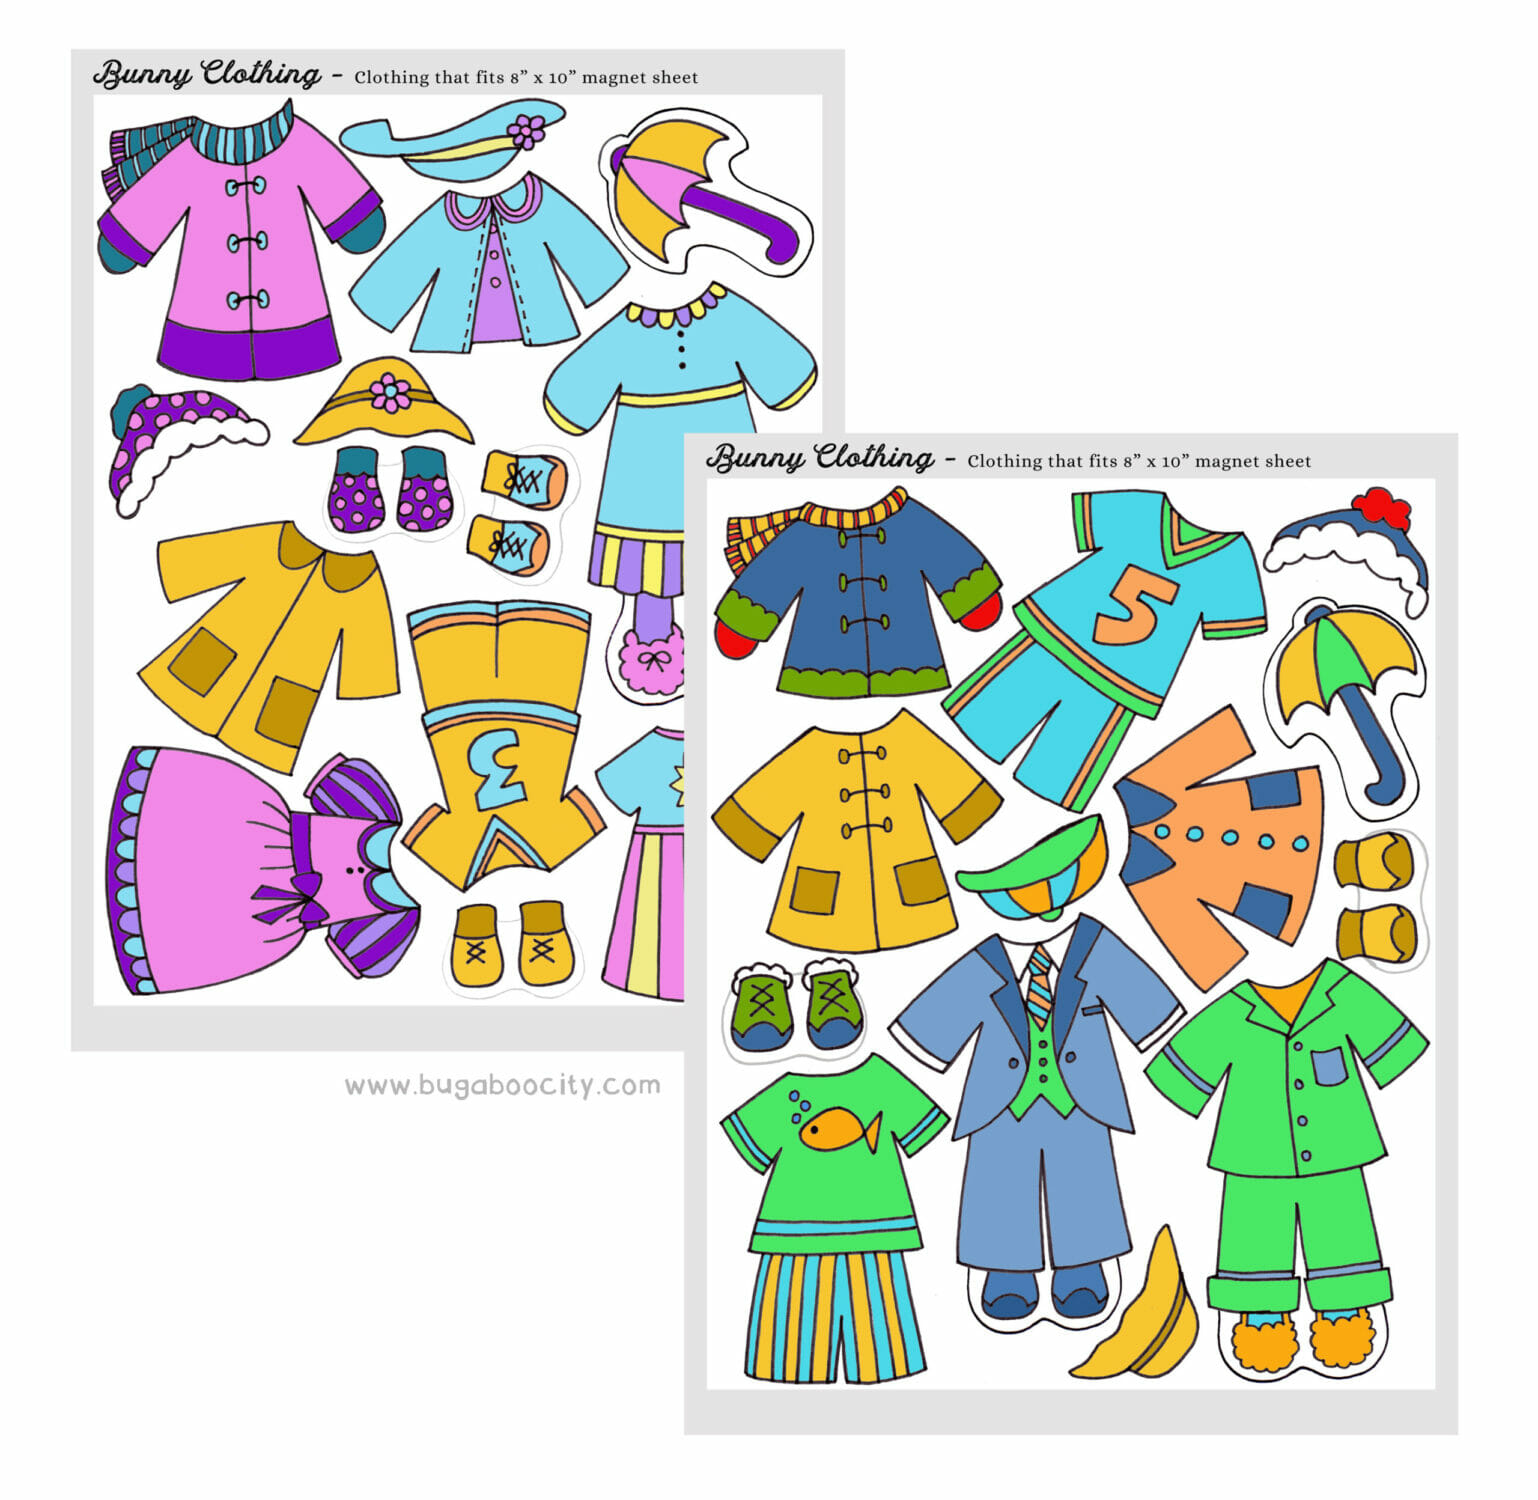
Select which pages you want to print. First choose the bunnies you want to print. Don’t forget you can also use the color-your-own version. Print the last few pages of bunny clothing that are formatted to fit an 8″x10″ magnet sheets.
When using the magnet sheets, I recommend using self-laminating sheets and only laminating the top side of the bunnies and clothes. These sheets are thinner than when you use a laminator – the less lamination, especially thick lamination, the more powerful the magnets will be. Laminate the top side of each printable.
Cut them out around the 8″ x 10″ guidelines.

Adhere each laminated sheet of bunny clothing to a magnet sheet and carefully cut out the clothing along the lines.
It can be difficult to cut through all three layers at once (the lamination, paper and magnet sheet). To avoid this, you can cut out each piece of clothing after laminating the top of it and adhere the individual pieces to the magnet sheet. Then simply cut around the shape only cutting through the one layer of magnet sheet.
For Velcro Fastener Paper Dolls
If you plan to use Velcro Fasteners, laminate the bunny printables on both sides using a laminator or self-laminating sheets. Cut out the bunnies and their clothing along the lines.
Place clear Velcro Dots first on the bunnies themselves. I used the rough side because they are more clear. Place the soft dots on the rough dots with the sticky side up. Press a piece of clothing onto the bunny and hold for a few seconds until the dots stick to the back of the clothing pieces. Repeat this process for all of the clothing pieces you want to make!


How to Store the Bunny Paper Dolls
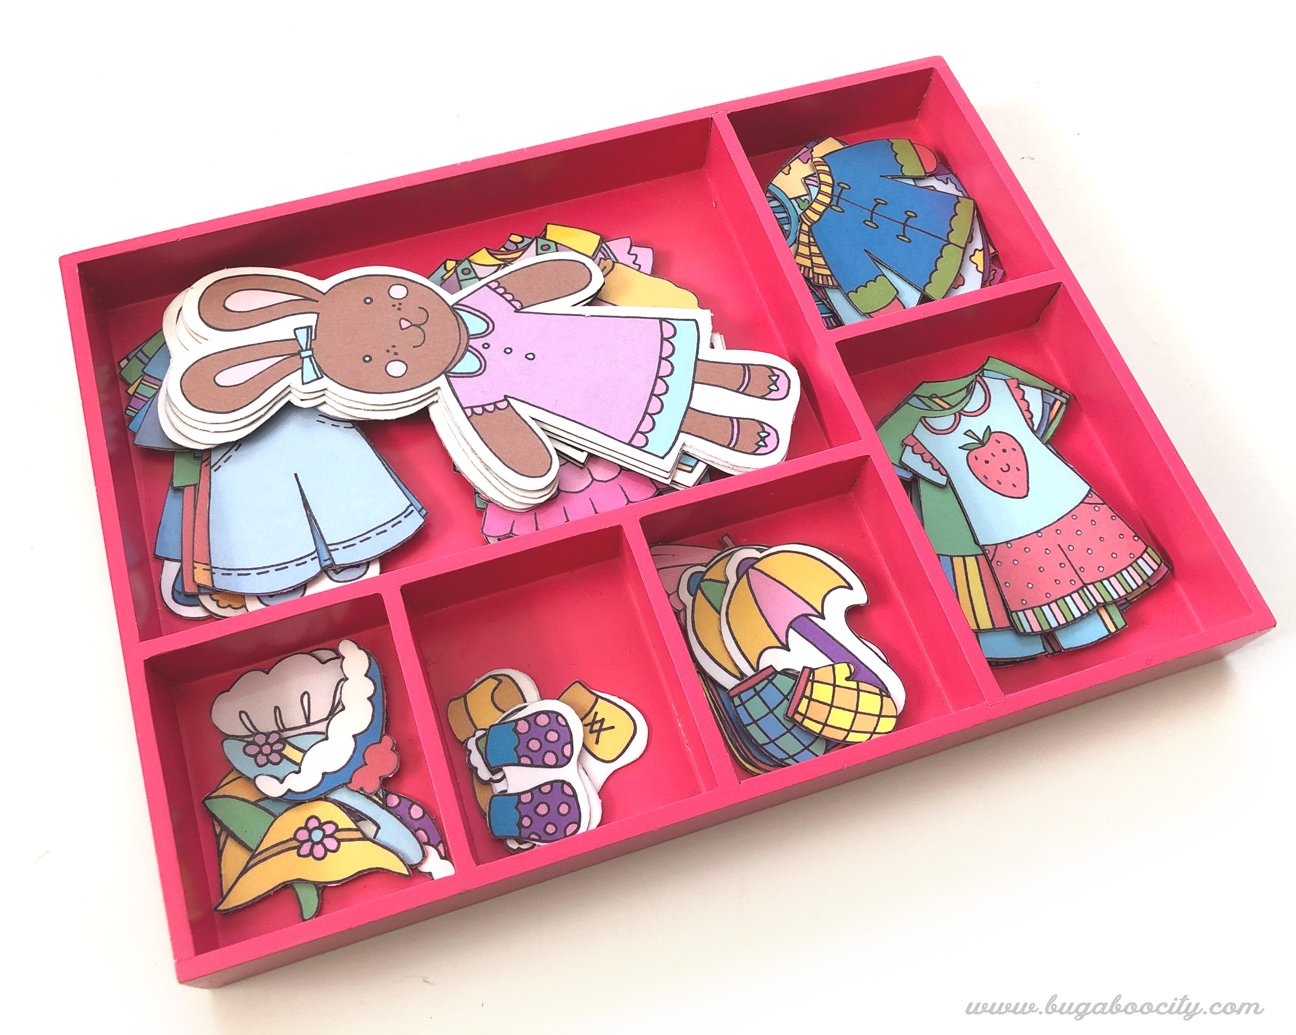
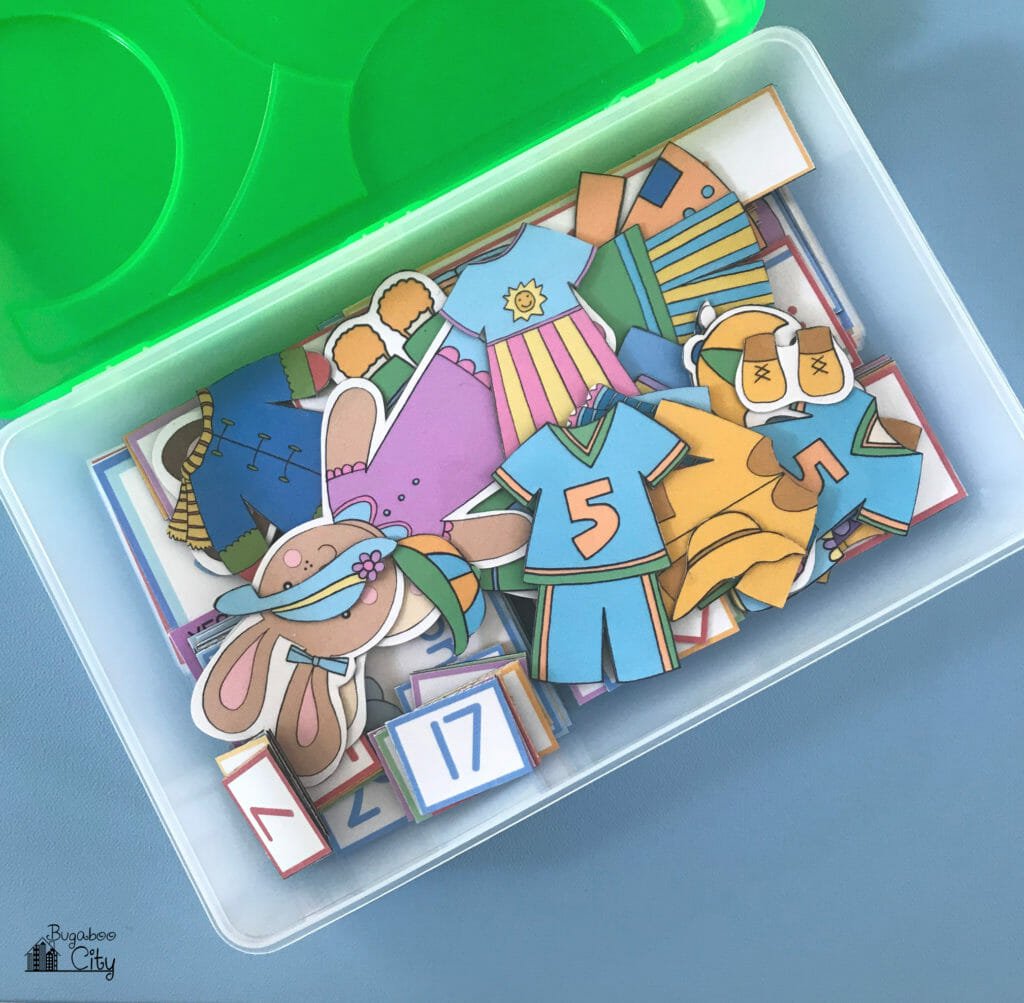
Story the bunny clothes with your calendar if they will be for calendar time. We use ours for a quiet activity as well as with our calendar so we store them separatly. At first we used a wooden tray from an old Minnie Mouse toy, but now we keep them in a plastic pencil case so they can travel. We have brought these bunny paper dolls along with a small magnet board along on trips and to places were we need to quietly wait. You can also store them in a large plastic Ziploc bag – whatever works!
Pictures of our Bunny Paper Dolls In Use
Below are a bunch of pictures showing off some of the new clothes! My bunnies and their clothes are all laminated, so I took a lot of the pictures at an angle to reduce the glare.


Extra Bunny Clothes
You’ll find extra Halloween Bunny Costumes (more than 20 costumes!) in my Etsy shop along with Christmas Bunny Clothes for the bunnies included with my Christmas calendar cards :)


Download the Free Bunny Paper Dolls and Printable Clothing
To download the free files, click the links below and a form will appear. Fill in your first name and email and the PDF printable packet will be sent straight to your inbox! Fill out as many forms as you’d like to get the printables you want to use – don’t worry, you won’t be added to my list twice.
These files are for personal use only. You are not permitted to sell the files or sell physical products made from the files. I hope you enjoy crafting something special. Please let me know if you have any questions :)
- Download – Bunny Paper Dolls – Bunny dolls plus clothes for the weather and fun extras like pajamas.
- Download -Extra Bunny Clothing – Lots more fun clothing options!
- Download – Bunnies Who Use Wheelchairs Paper Dolls – Bunny dolls plus clothes for the weather and fun extra clothes!
- Download – Halloween Costumes – 3 free costumes for both Bunny Dolls and Bunny Dolls who use Wheelchairs.
If you would like the bunny paper dolls that are coloring pages, please visit this post Bunny Paper Doll Coloring Pages.


OMG I got an email from you (so glad I got it to) about your Easter craft projects and Im so excited about this and the chance of making some of them and share it with my granddaughter. She’ll be as excited as I am about making some crafts together. You’re such a sweet lady to share this!!!! THANK YOU ever so much for being so kind to share these projects!!! I’d love to receive more projects you’d be willing to share. If you put out newsletters I’d love to be added to your list please. Again thank you and I hope you have a great day. 😃
Thank you SO much!! I hope you and your granddaughter have so much fun crafting! If you received my email today then you are on my newsletter list and should continue receiving them! I send a newsletter usually about once a week :) Thank you!! I hope you have a great upcoming weekend :)