DIY Fourth of July Banner
Learn how to use ribbon and the journaling cards from scrapbook paper to create a festive DIY Fourth of July banner!

Hello Crafty Friends! Do you love the journaling cards that come in paper packs and on scrapbook paper but are like me and often don’t know what to use them for? Today I have a fun way you can easily craft with them – by creating a banner! I made this festive Fourth of July banner using ribbon, cardstock and journaling cards!
I recently picked up this cute paper from Echo Park Paper Co. called “Celebrate America” at my local scrapbook store. Some of the cardstock featured journaling cards on one side with cute little illustrations. After finding the Celebrate America paper, I found some fun ribbons and star embellishments at Joann Fabrics and got to work creating the banner.
I love banners…a lot. They are easy to hang up and instantly decorate your house for a holiday or celebration. We have a mantle I usually hang our banners on, but they are also great for hanging on food tables or as backdrops for parties.
How to Make a Fourth of July Paper Banner
 Choosing Your Paper
You could follow this tutorial using paper for a different holiday, season or party theme. Just look for cardstock that includes journaling cards. This can be purchased seperately at a scrapbook store or online at stores like A Cherry On Top, or in a paperstack or paper pack. Most DCWV paperstacks include two pages of different journaling cards. My journaling cards came from the paper collection Celebrate America by Echo Park Paper. I love Echo Park Paper because it is sturdy and all of the journaling cards were the same height, making them easy to turn into a banner.

Supplies Needed
- Journaling Cards
- Purchase in a paper pack: Echo Park Paper: “America” and “Let Freedom Ring“. Carta Bella “God Bless America“
- Purchase as individual sheets at your local scrapbook store or online at A Cherry On Top
- Coordinating Cardstock
- Paper Trimmer
- Adhesive: tape runner, glue stick or Scor-Tape
- Clear Gel Tacky Glue
- 3/8″ star ribbon in navy and red (I found mine at Joanne Fabrics, these patriotic ribbons from Amazon would be cute too!)
- 5/8″ navy/red ribbon
- Needle
- Silver star embellishments – I found mine at Joann Fabrics
- Red and White Bakers Twine
- Sewing clips
 How to Assemble the Banner
 How to Assemble the Banner
First, use a paper trimmer to cut apart all of the different journaling cards. Decide on which ones you want to use. My banner has 11 pennants total. It uses 4 small cards (about 3″ wide), 6 medium cards (about 4″ wide) and one large card in the center (about 6″ wide). All of the cards were the same height, 4″ tall.
Next, cut background pieces of cardstock from my solid paper. I cut my background pieces the same width as each journaling card and 5.25″ in tall. Glue the journaling cards to the solid cardstock, leaving 1/2″ at the top and 3/4″ at the bottom.
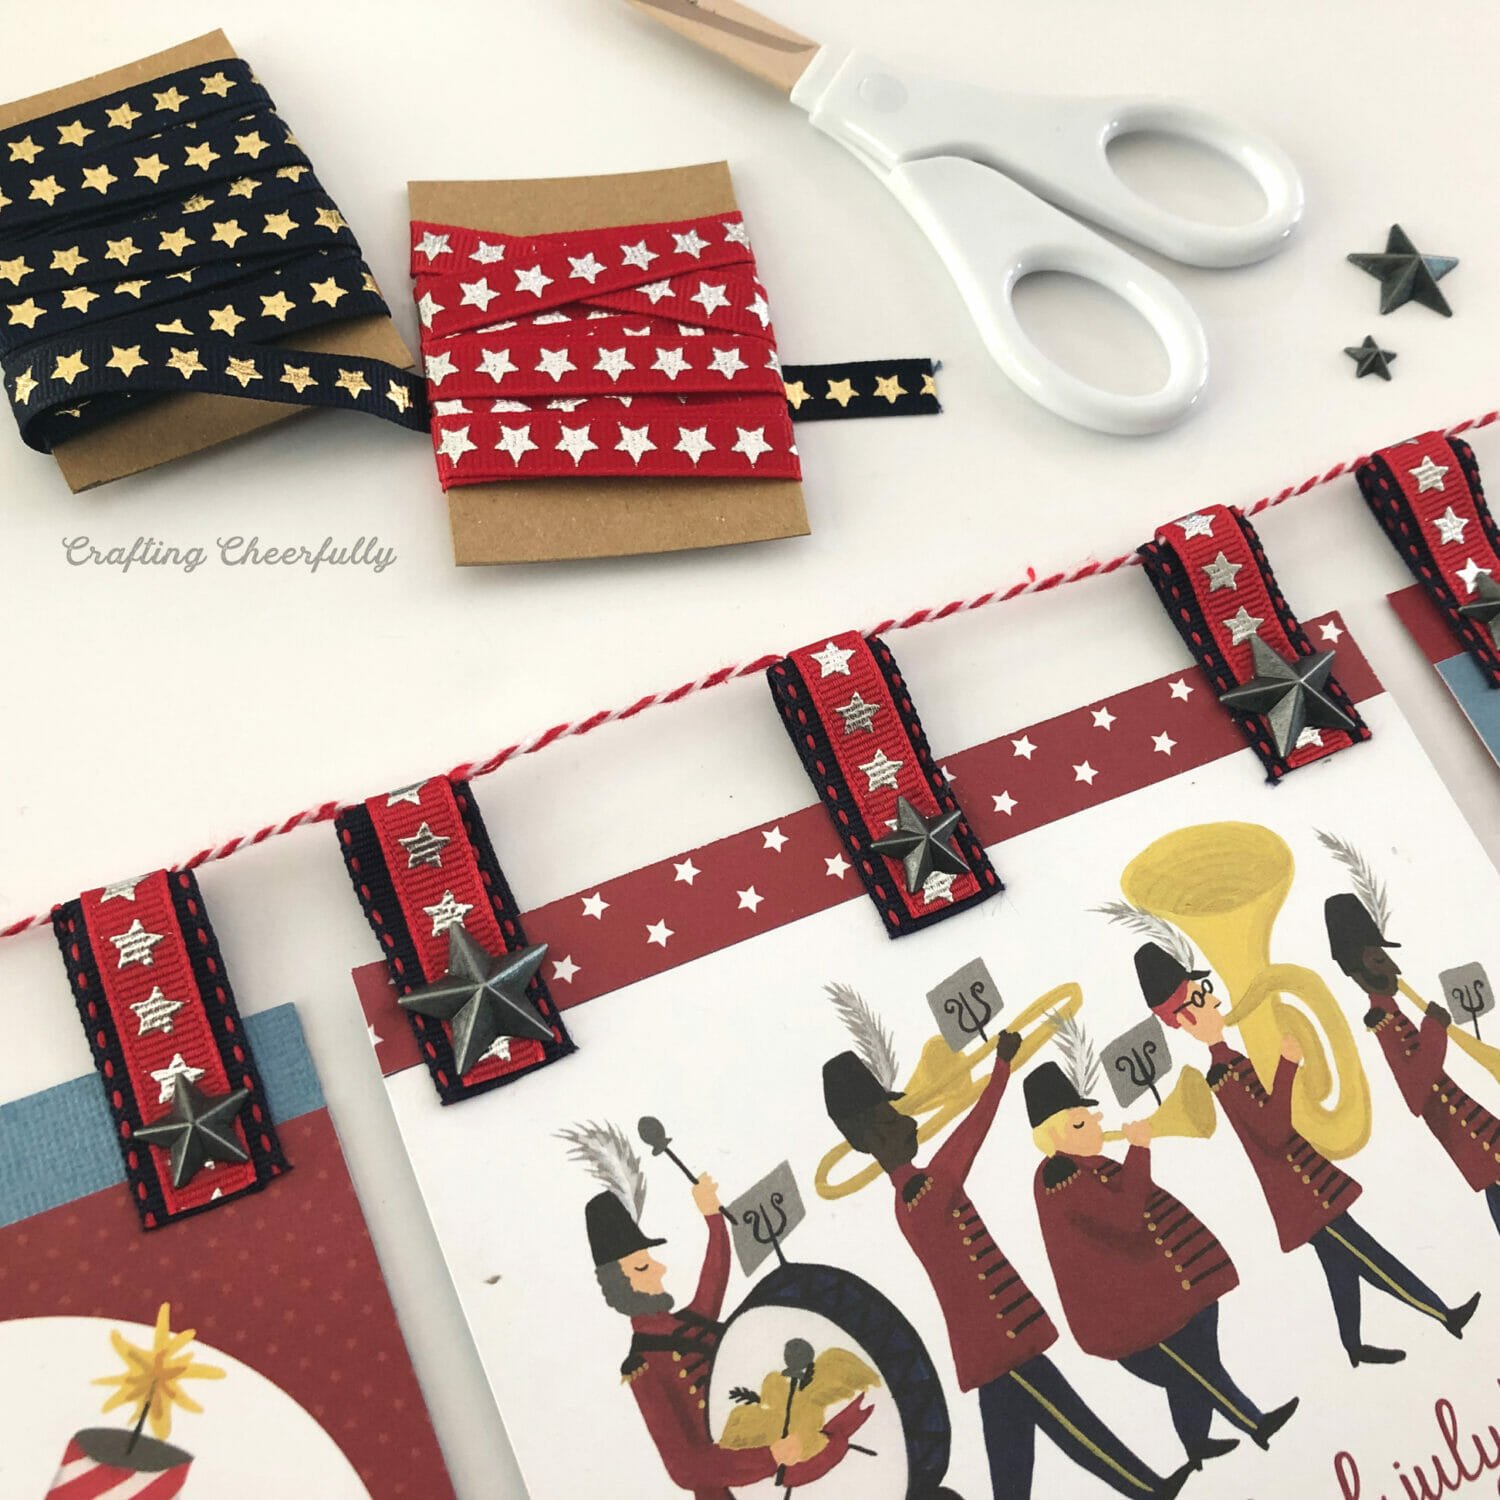
Decorate the bottom of each pennant with ribbon. Cut pieces of star ribbon the width of each pennant and glue it to the bottom. On the red paper, I used navy star ribbon; and on the blue paper, I used red star ribbon.

Create ribbon loops to hang each pennant. Cut strips of ribbon that are 3″ long. For my small pennants, I just used a single layer of navy 3/8″ star ribbon. For my pennants that were wider, I layered my ribbons with a piece of red 3/8″ star ribbon over a 5/8″ piece of decorative navy ribbon.
Marked a line in light pencil on the back of each pennant that is 1/2″ down from the top. Use this pencil mark to line up the ribbon loops. Using tacky glue, glue the ribbon into loops going from the back of each pennant to the front. I taped over the ribbon on the back of each pennant and also used little red clips to hold the ribbon while it dried since it didn’t want to stay on its own!


Add star embellishments once the ribbon loops are in place. I found a cute set of metal stars at my local craft store. They came in big and small sizes, so I alternated between the two and added them to the ribbon loops.
Finally, string the pennants together on twine. I chose to use red and white Baker’s twine I had on hand but you can use yarn, string or ribbon.

The banner is finished!! I love the way it turned out and how the journaling cards are really the star of the banner. Creating the ribbon loops took a little time – but I think they add a lot to the banner without taking away from the neat pictures on the paper.
I love the idea of using these type of scrapbook pages that come with such fun pictures that are all coordinating to create a banner. This would work for just about any holiday or themed birthday if you find the right paper!
I hope you enjoyed this banner tutorial. There are lots of different banner ideas here on my blog! Visit the links below to check them out!
Visit my Paper Banner Idea Page
Visit Fabric Banners Idea Page


![]()

![]()

![]()

![]()

![]()

![]()

![]()

![]()

![]()