
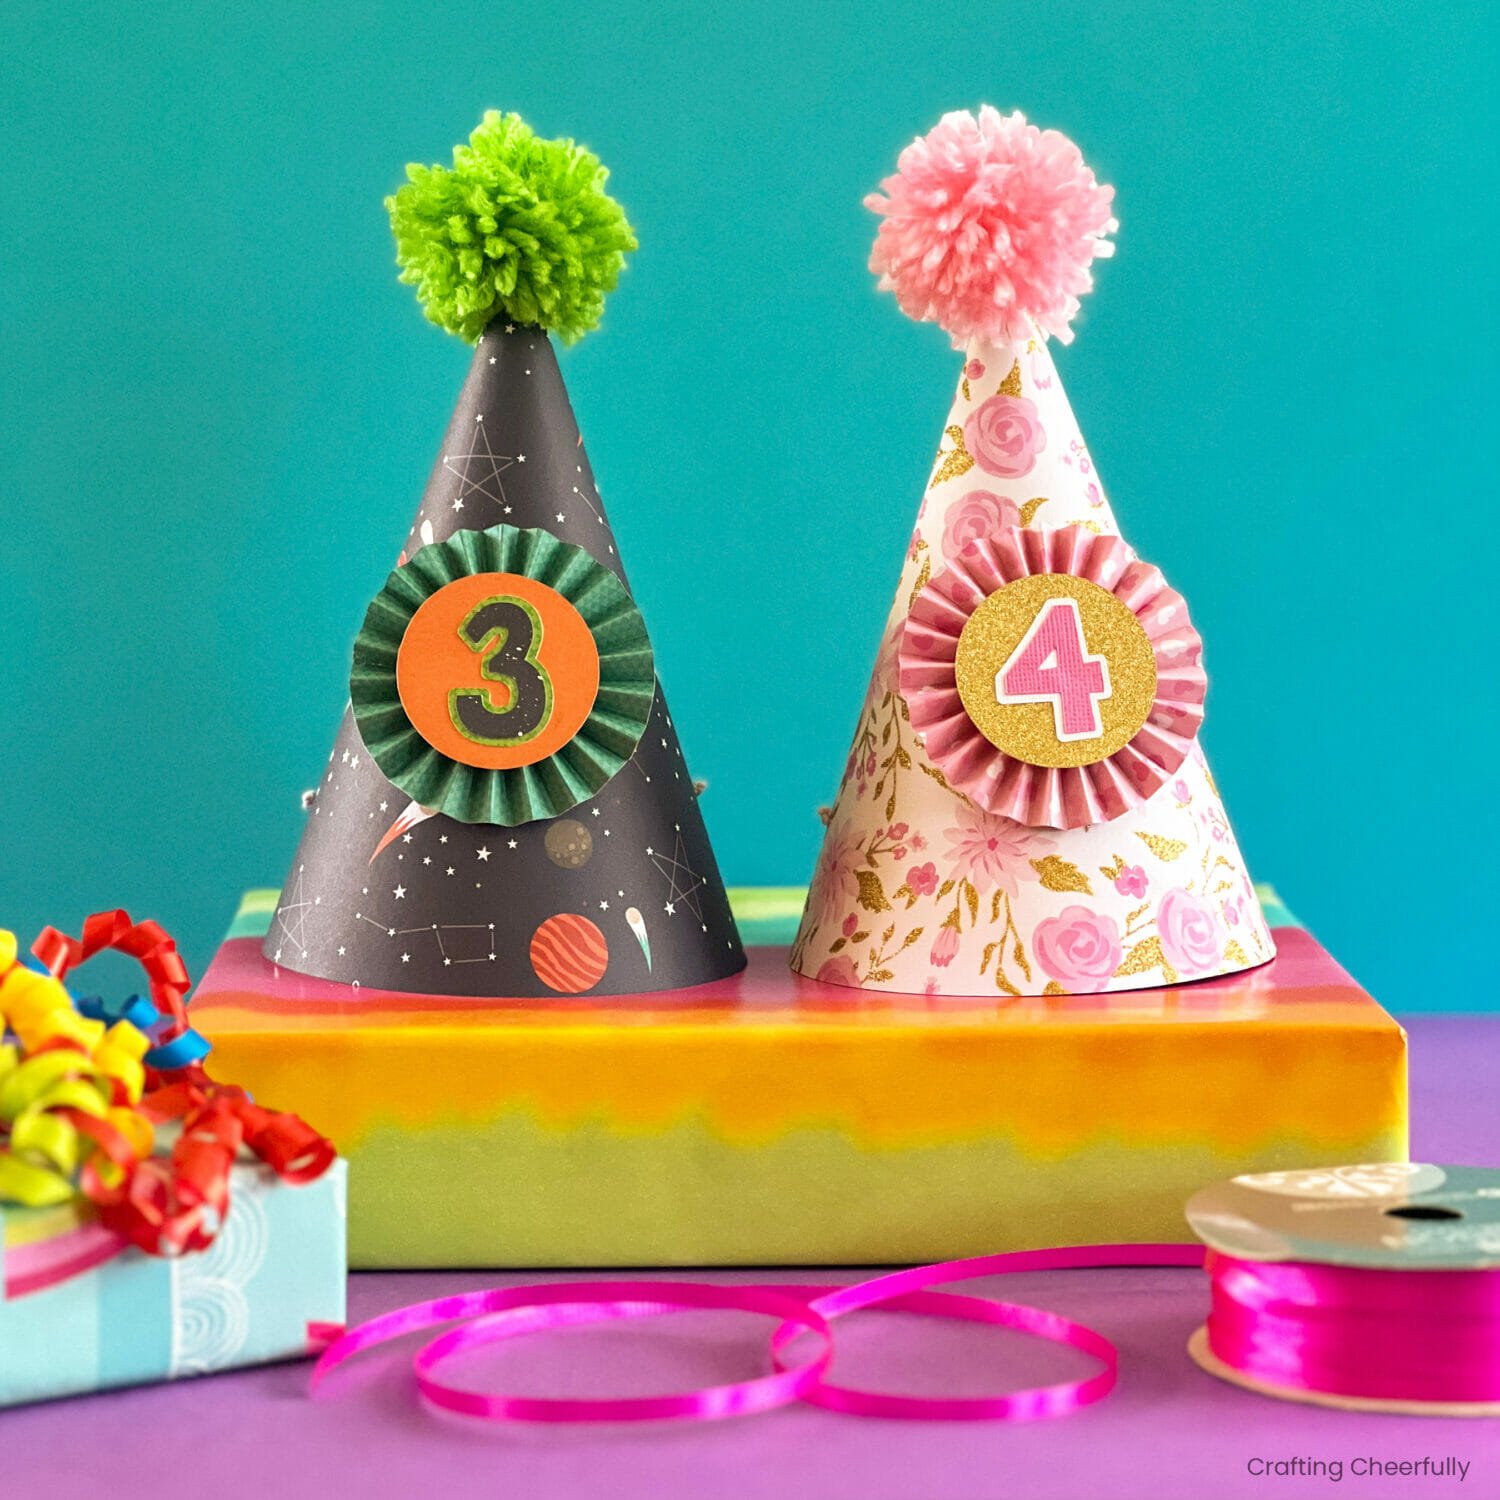
DIY Birthday Party Hat!
Create a DIY Birthday party hat to match any party theme using scrapbook paper and yarn! Free template and SVG cut file to help you get started.
Hello Crafty Friends! Today I’m excited to show you how to make your own paper party hats! Making your own party hats allows you to customize the hats to match any theme or occasion. You can personalize the hats with the year the birthday boy or girl is turning and it becomes a sweet keepsake to hold onto. Make one hat for the birthday child or make one for every guest! With just a little bit of scrapbook paper and yarn, these hats come together quickly.

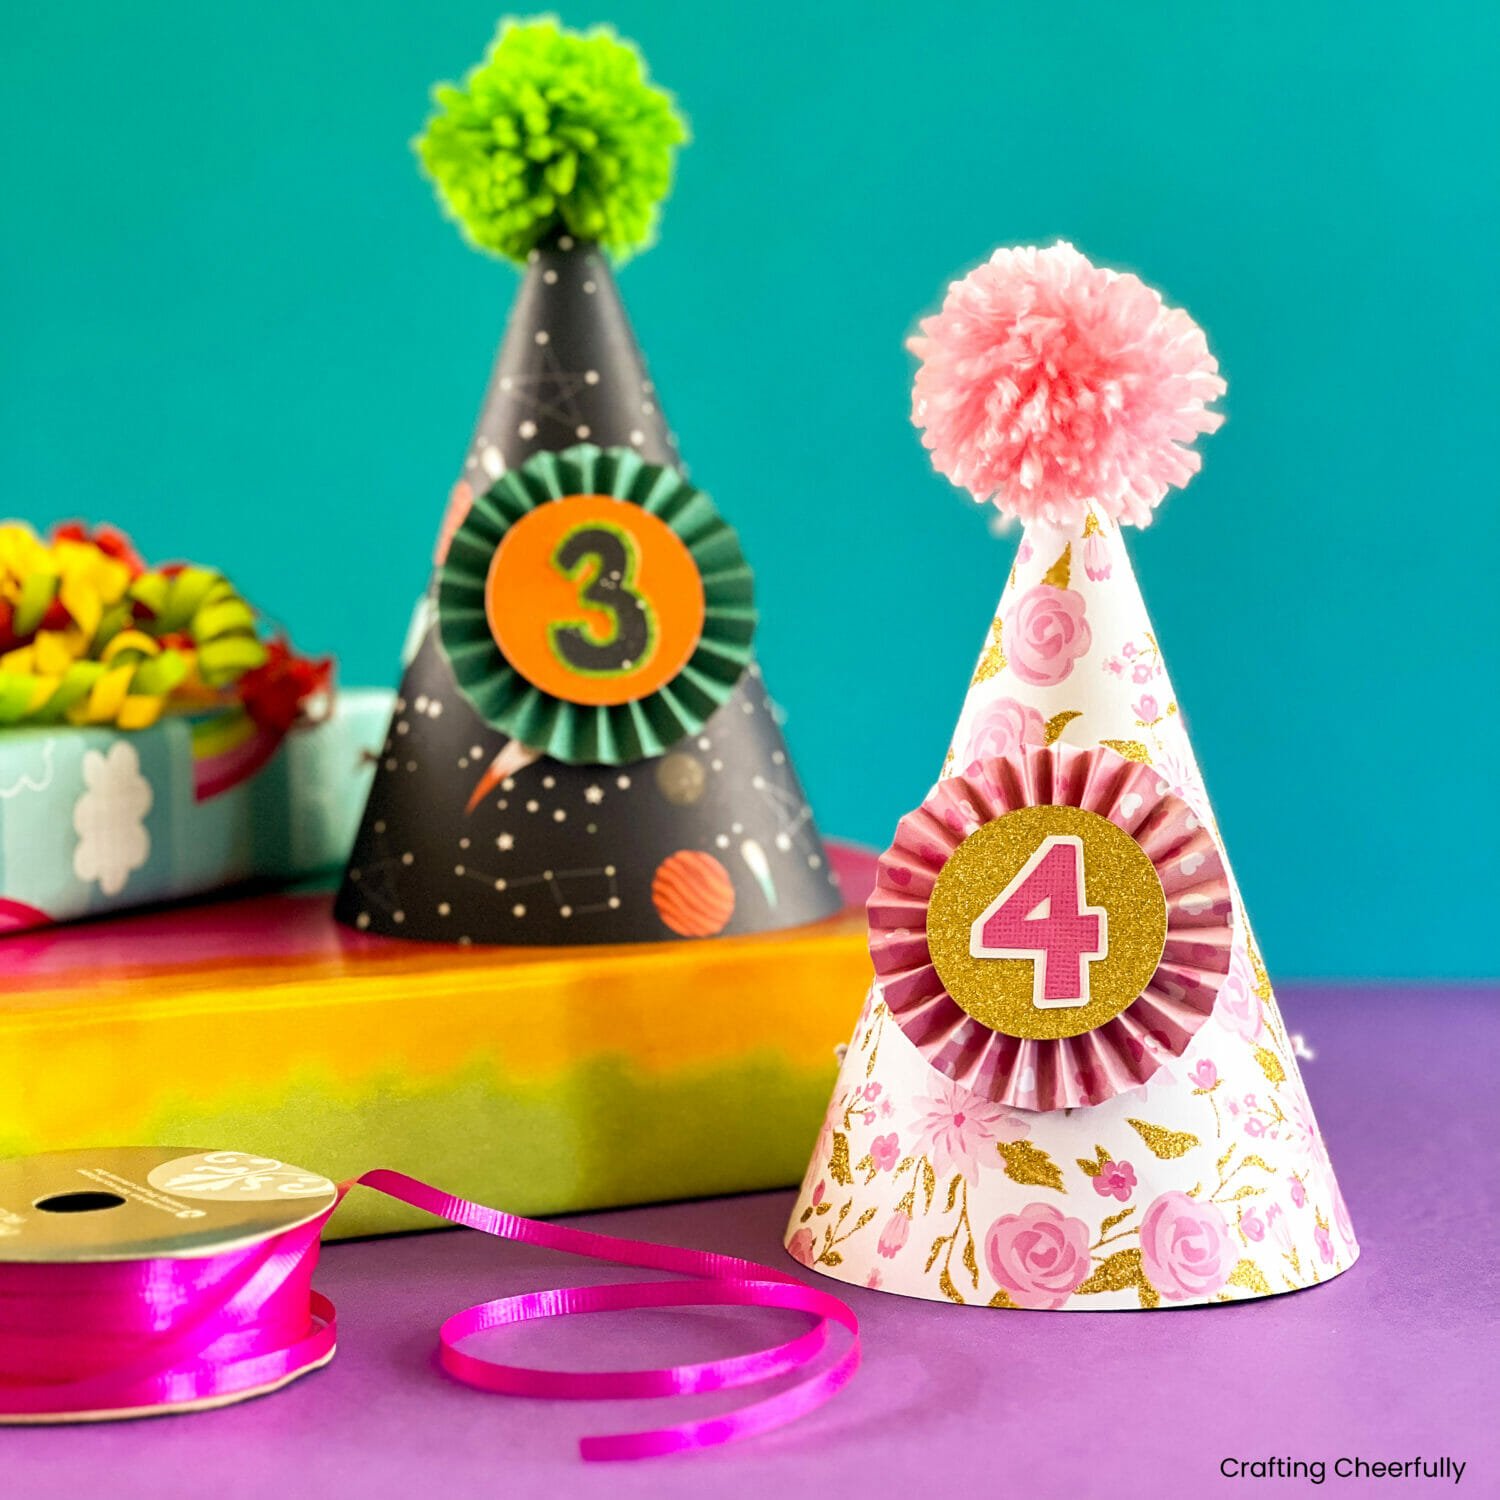
Examples of my Paper Party Hats
When I was planning a Winnie the Pooh-themed party for my littles ones, I wasn’t able to find a party hat that fit the theme. I decided it would be simple to make my own! I was able to use the same scrapbook paper and cute bee embellishments that I used in other places of the party. It was so fun to be able to make a party hat that matched the look and theme of our party perfectly.
I used the hat as a prop while taking birthday pictures of my son and then used it at the party as well. When my son was done wearing it, I added it to a cute teddy bear we were displaying on our food table.


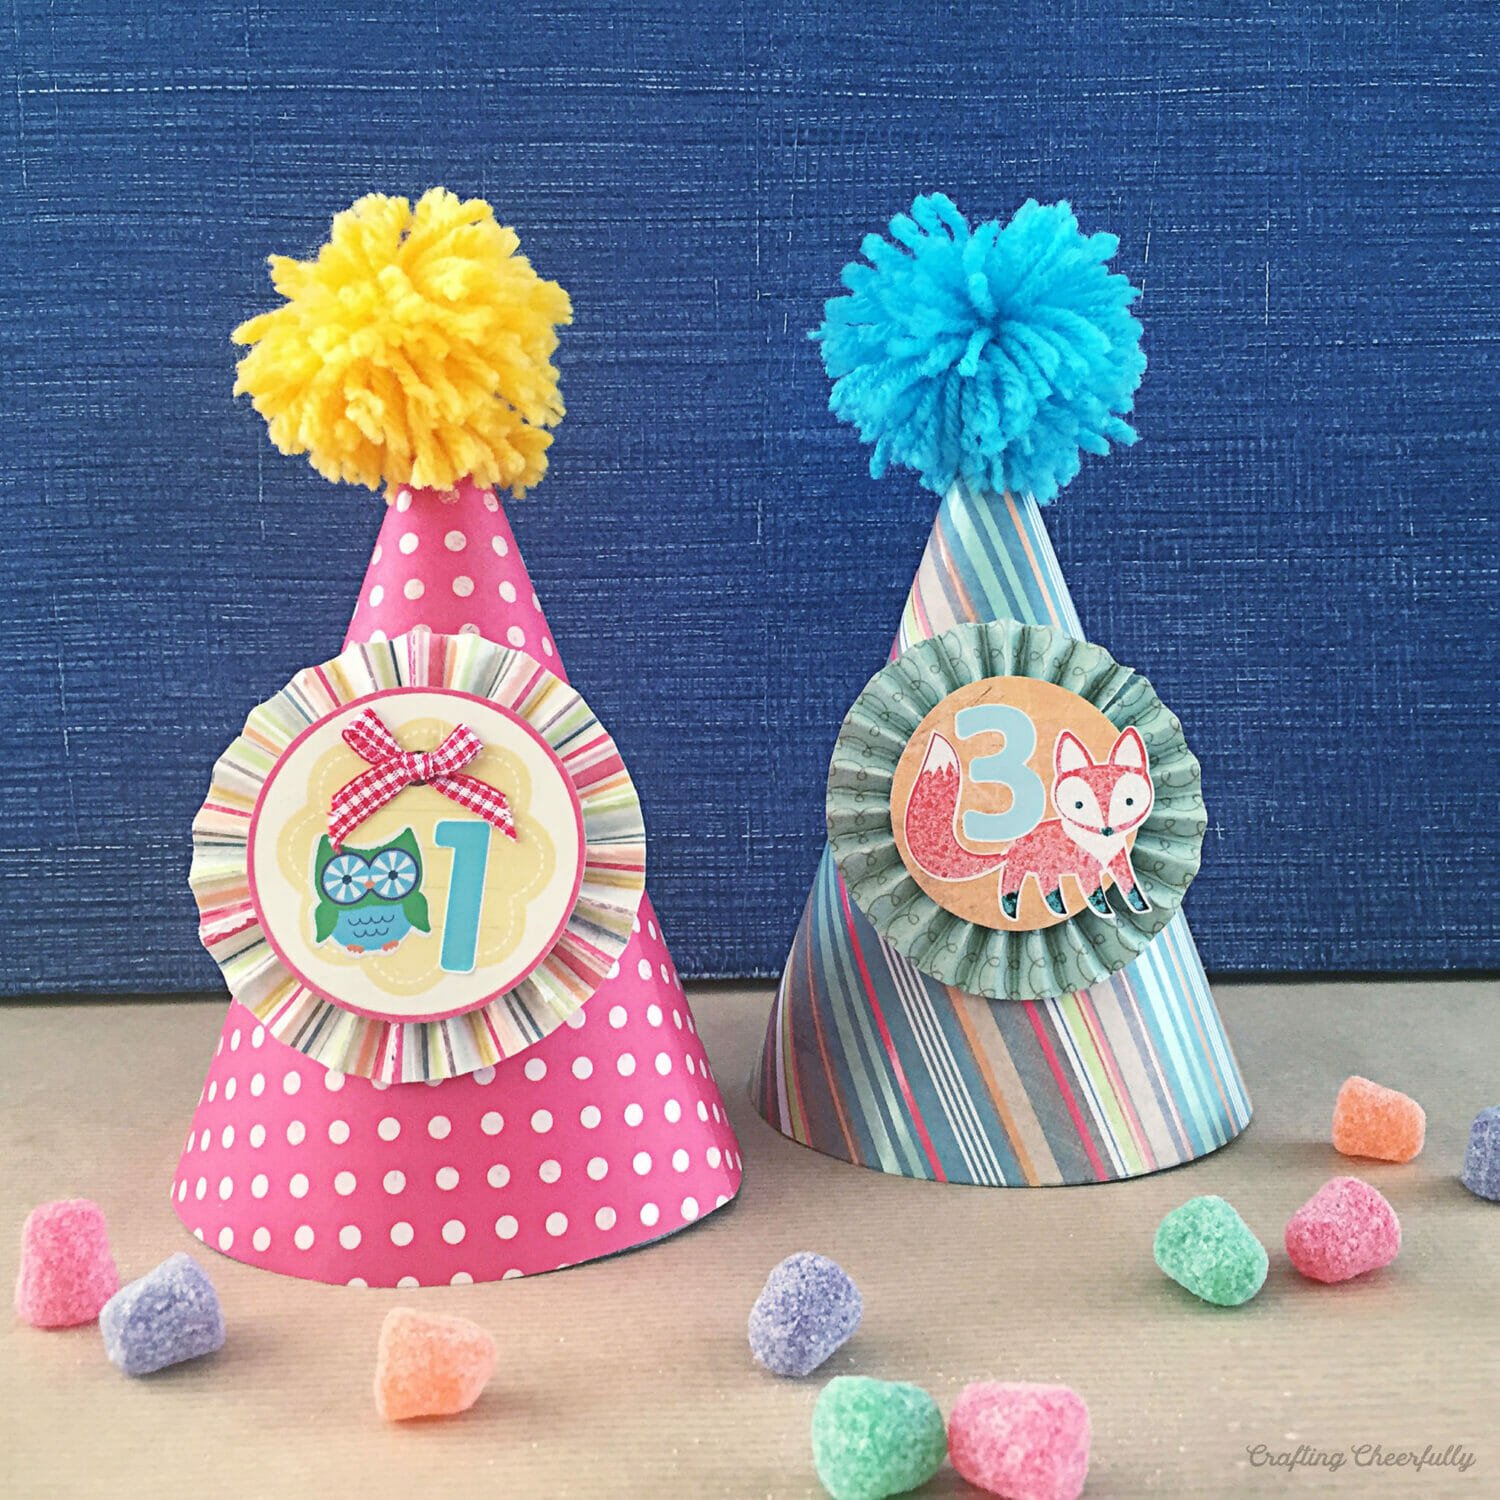
Below are the birthday hats I made for our Woodland Animal Party the following year! I used stickers and ribbon to decorate the medallions.
I’ve also made these hats for a Minnie Mouse party! Instead of adding a paper medallion to the front, I added Mouse ears cut from Cricut Design Space. My red and white polka-dot paper was really thin, so I layered it over a thicker piece of black cardstock.

DIY Birthday Party Hat
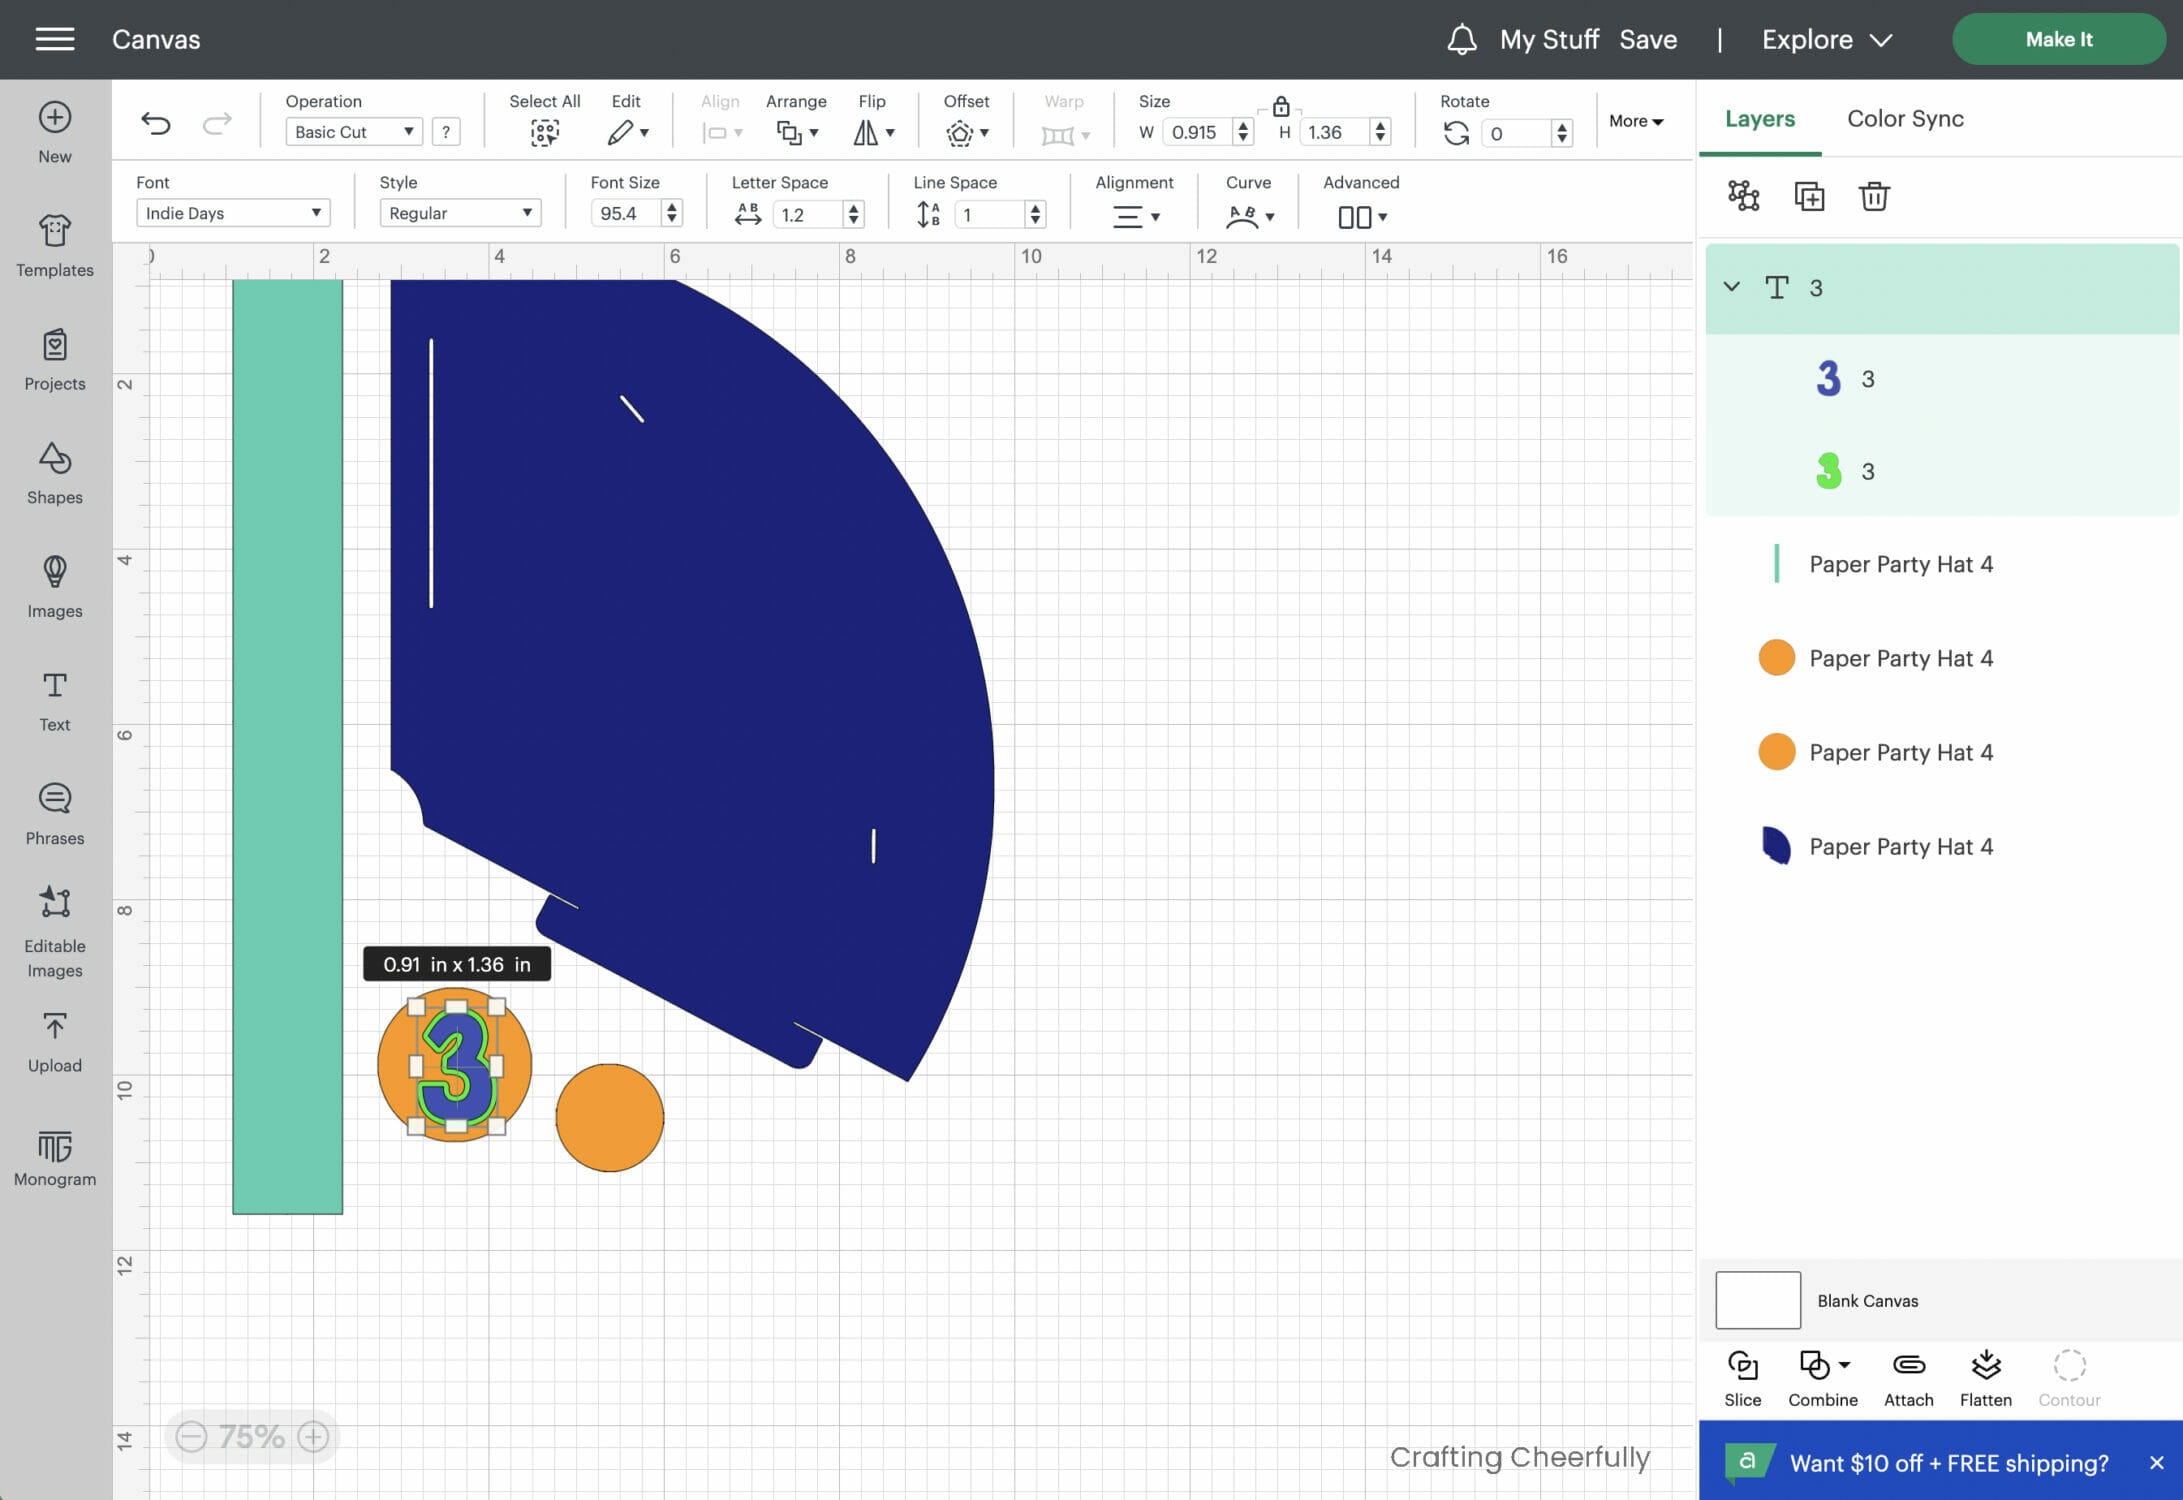
I’m so excited to share a newly updated tutorial with you as well as updated patterns. You can still grab my free PDF pattern but now I also have a free SVG cut file so you can the party hat using your cutting machine!
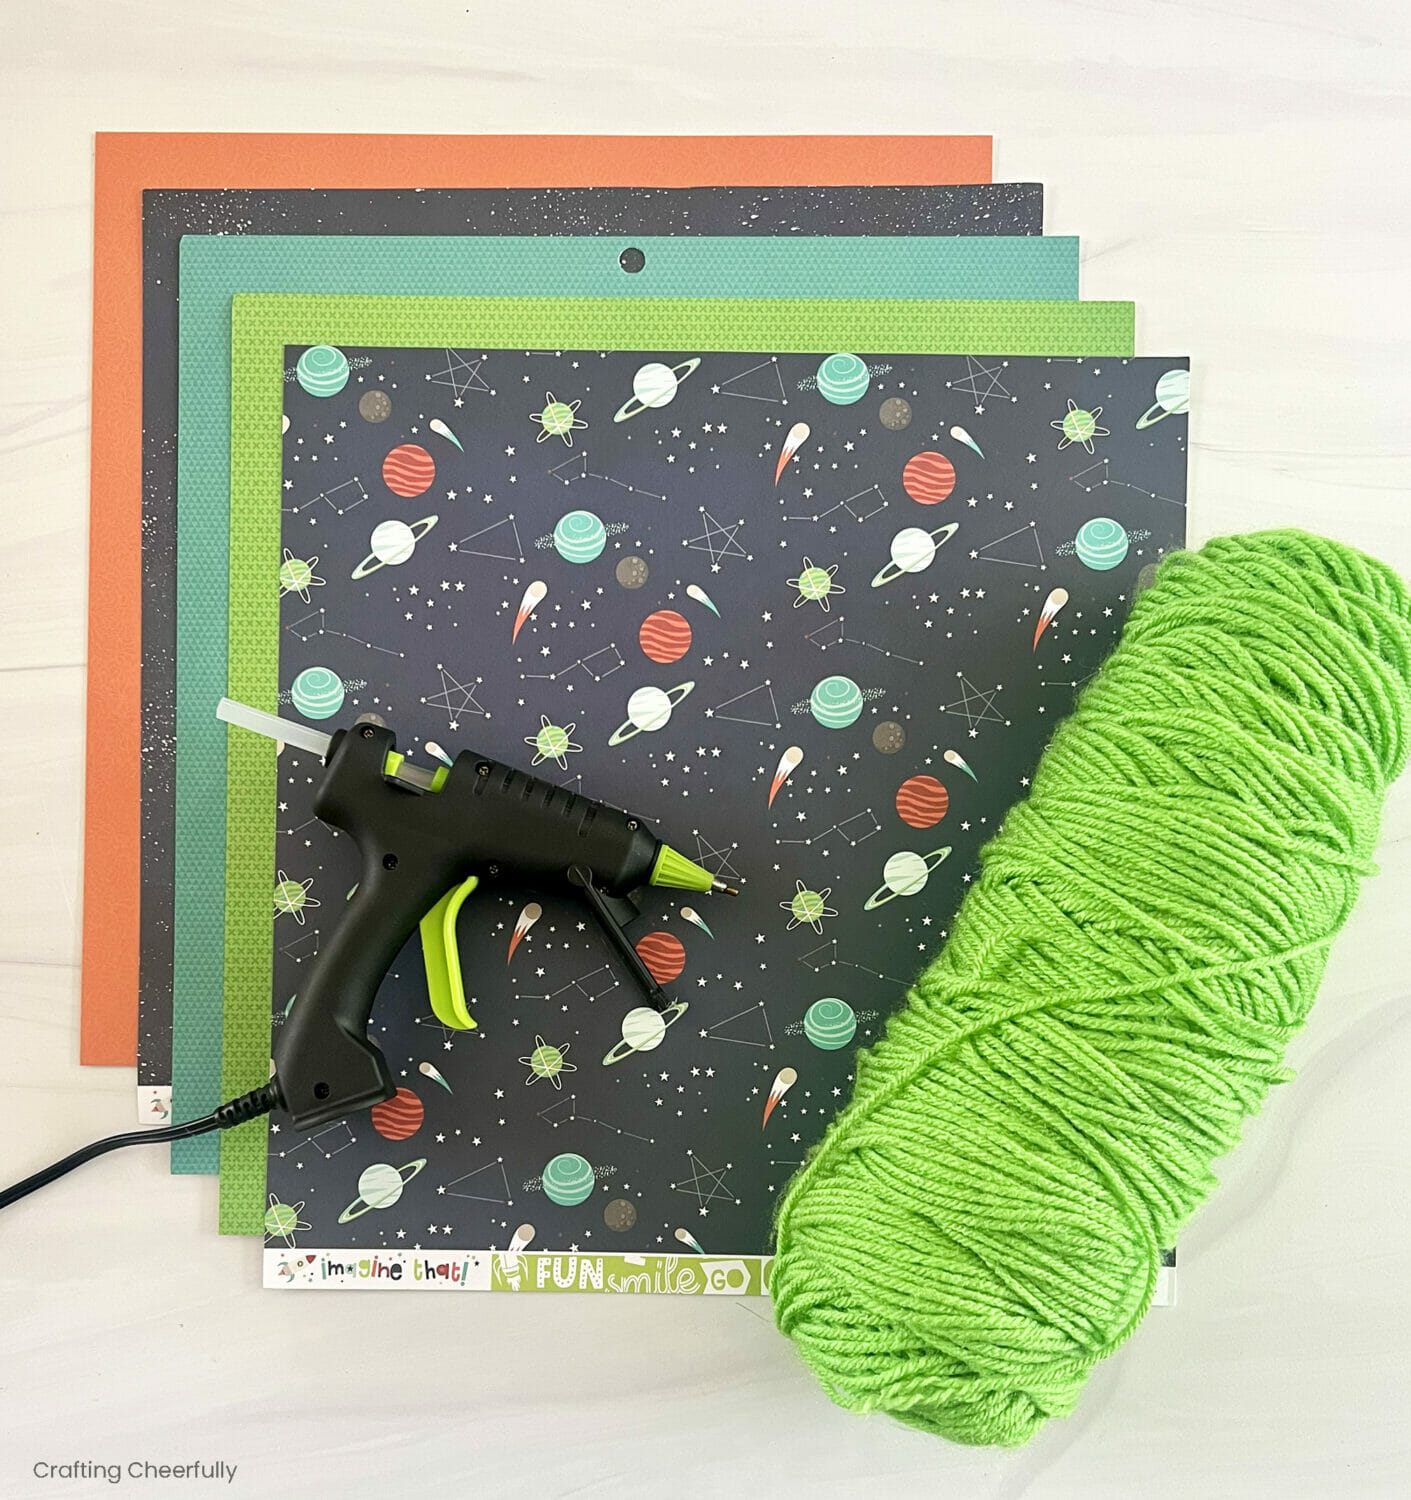
Supplies Needed
- Free PDF pattern and SVG cut file – grab the free files by filling out the purple form at the end of this post.
- Decorative scrapbook paper
- Cone hat – 7.5″ x 10.5″ sheet of paper. 65lb-80lb is best.
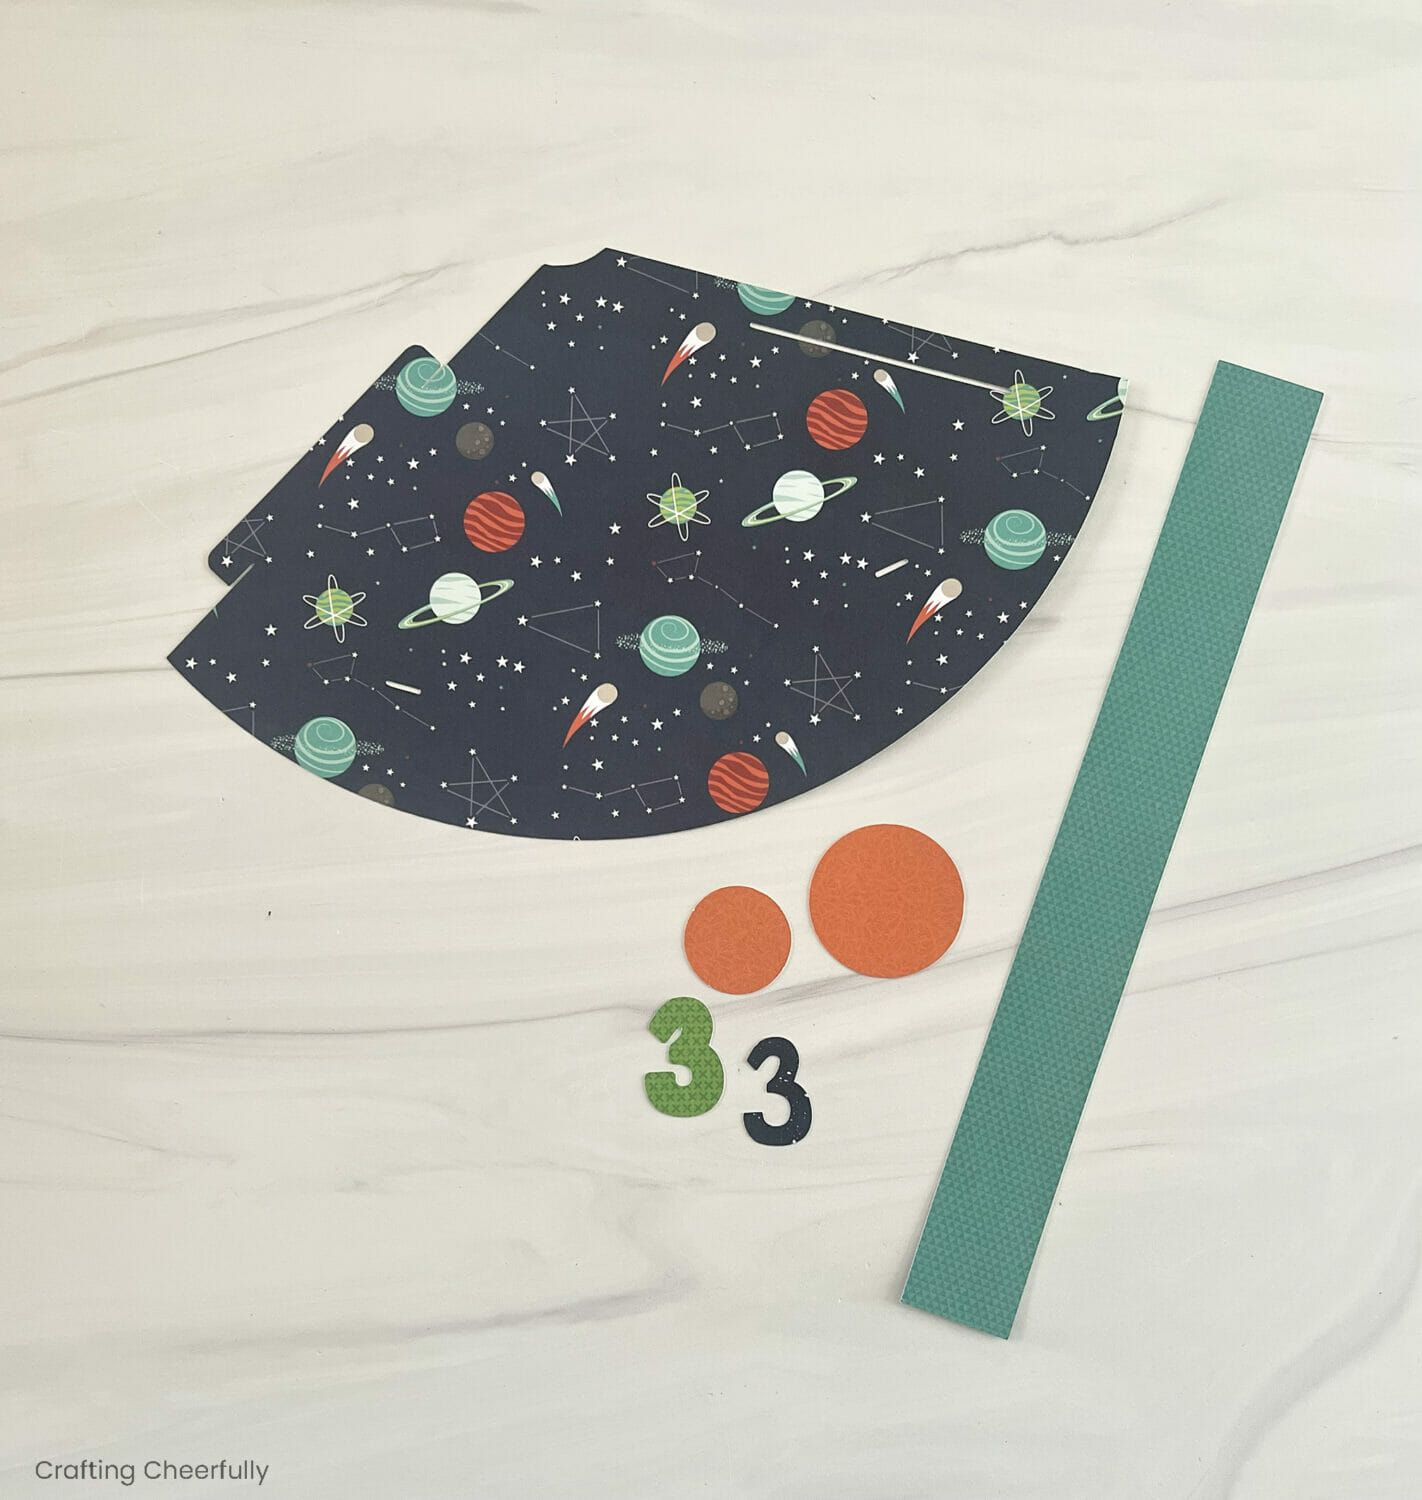
- Paper Medallion – 1.25″ x 11.25″ piece of paper
- Medallion Circles – 2″ x 3″ piece of paper
- Yarn for the pom pom
- Adhesive – I used a glue stick and hot glue
- Scoring board
- Thin elastic – I used Dritz Beading Cord Elastic
- Cutting by Hand
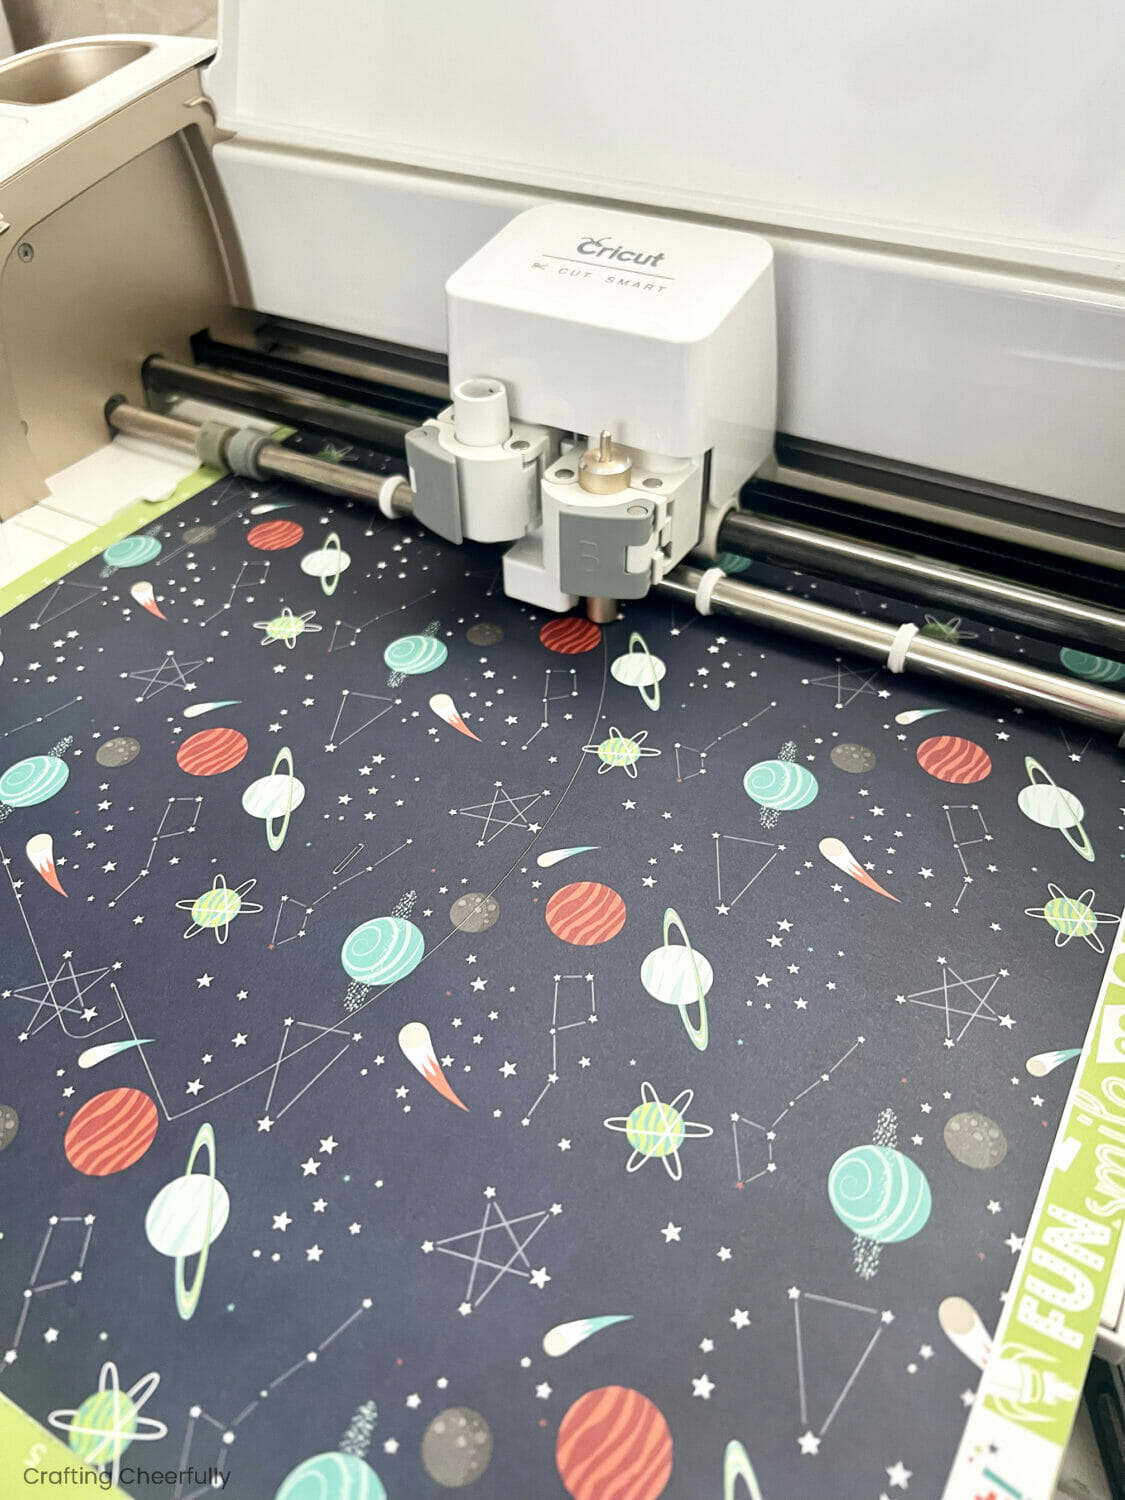
- Cutting with a Cutting Machine
Step by Step Tutorial
Step One: Use the free pattern or cut file to cut out the pieces needed to make the hat.
I used my Cricut to cut numbers with the font “Indie Days” that measure 1.36″ tall. You can skip cutting numbers out of cardstock and instead use stickers, print numbers from your computer (this is what I did for my Winnie the Pooh hat), or draw the number with marker. You can also skip the number all-together and opt for a cute sticker or picture that matches your party theme.
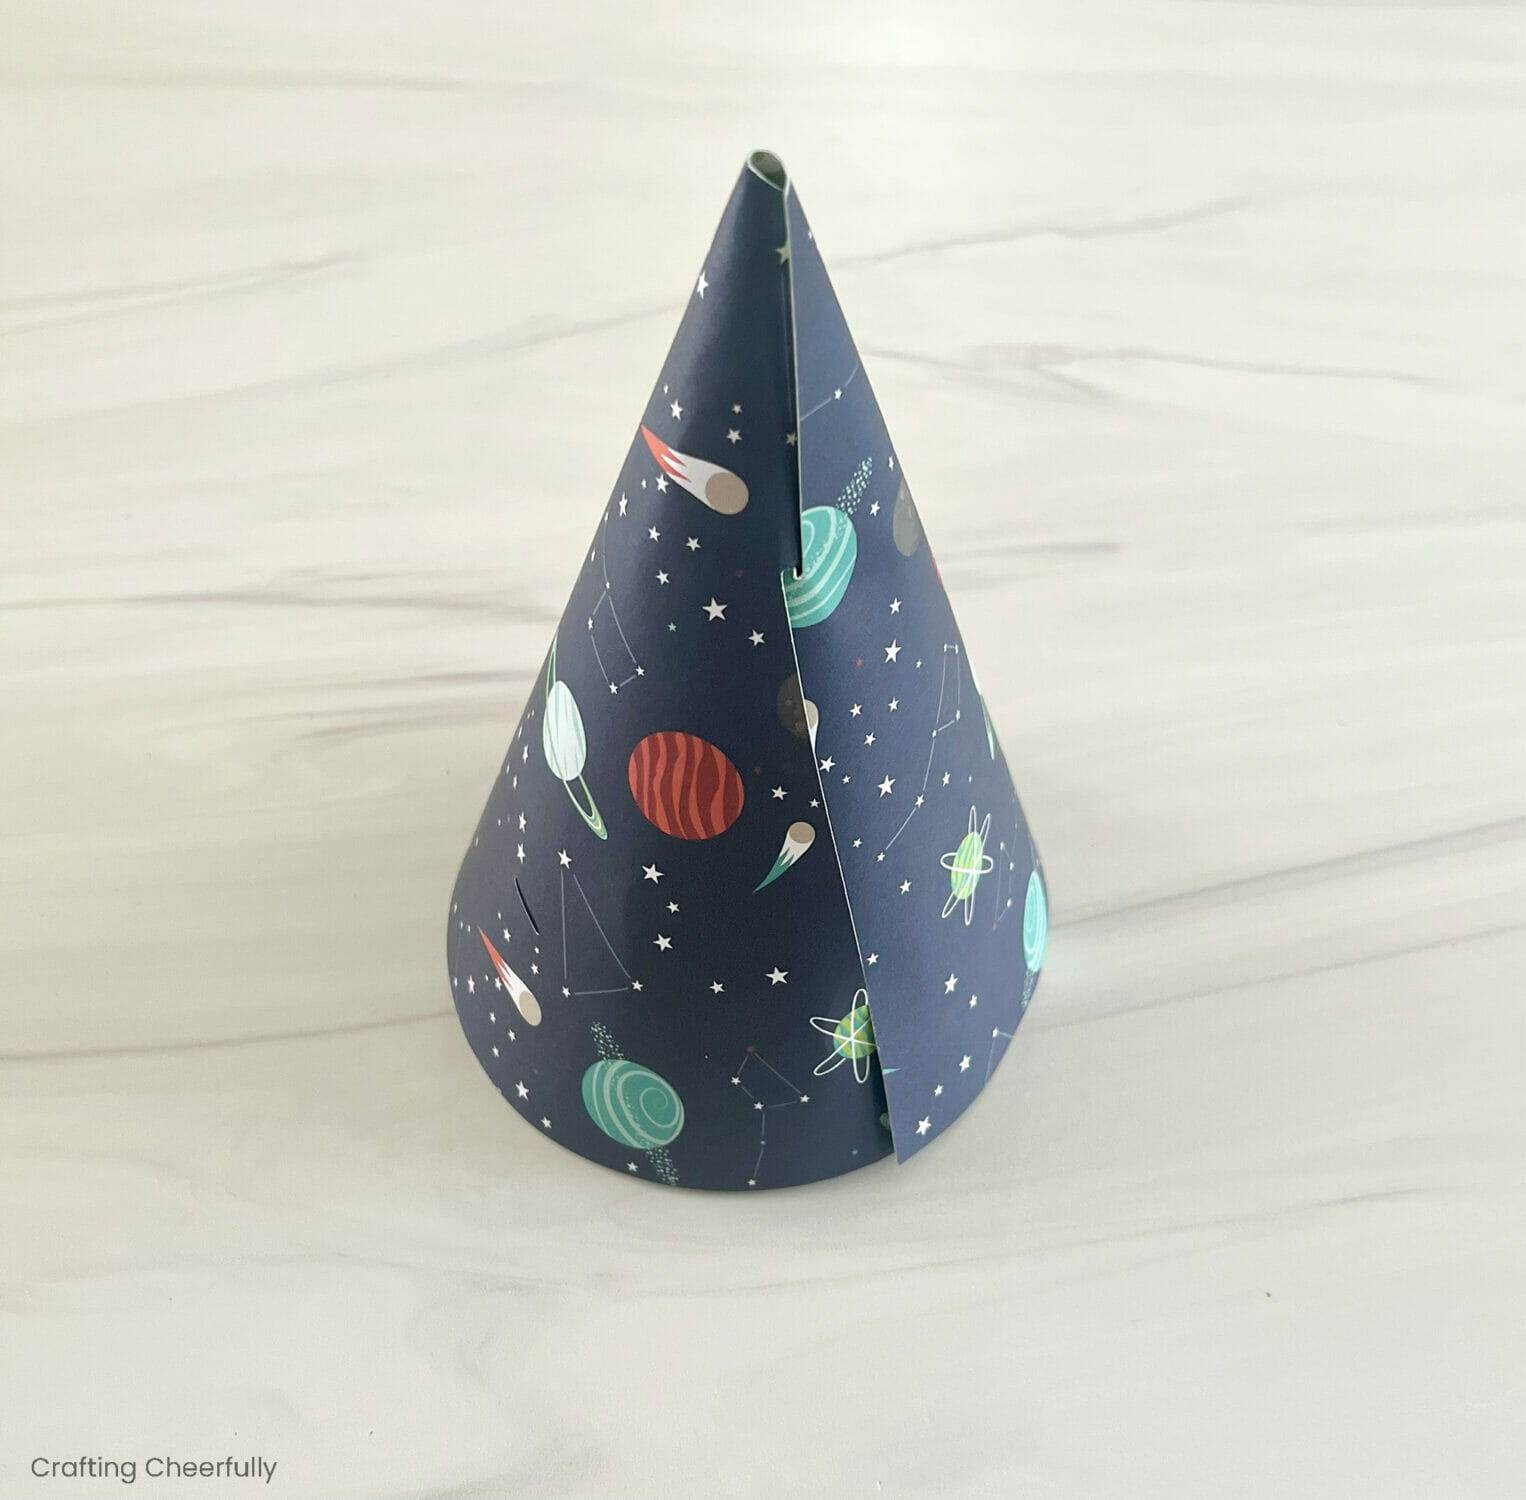
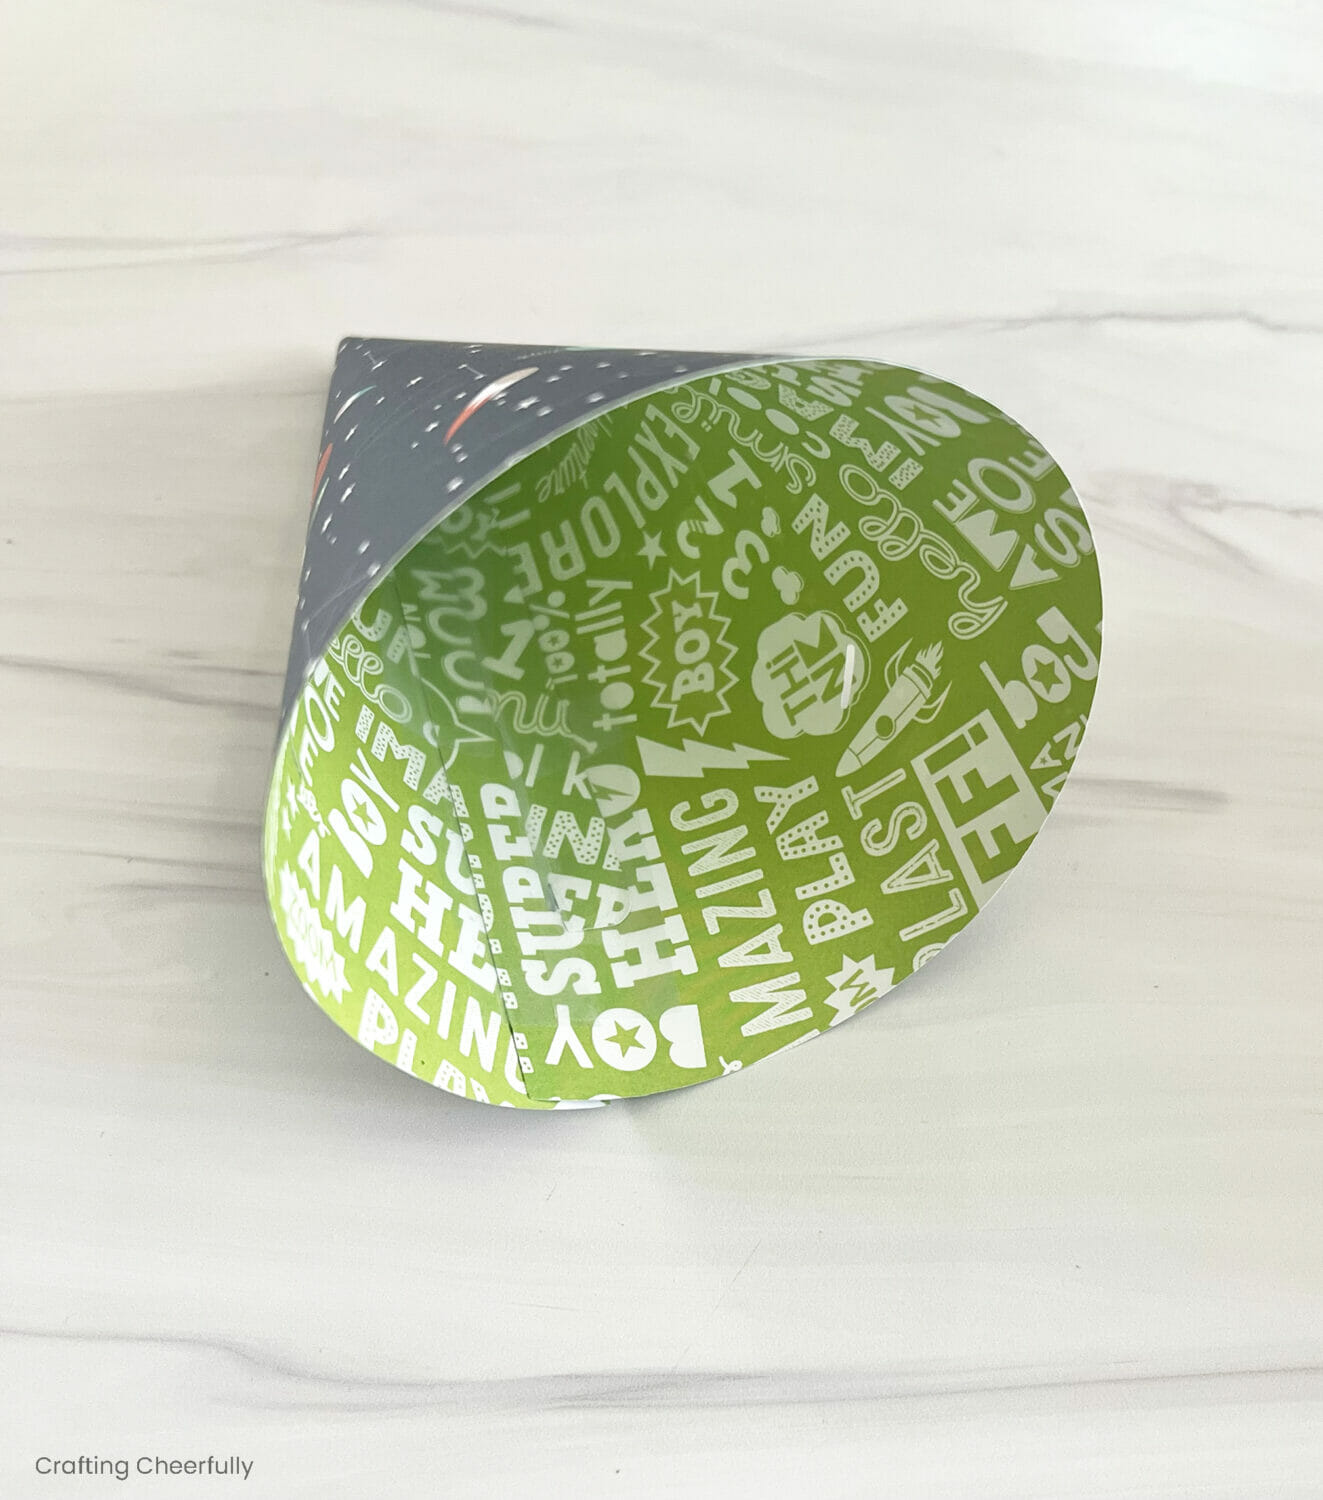
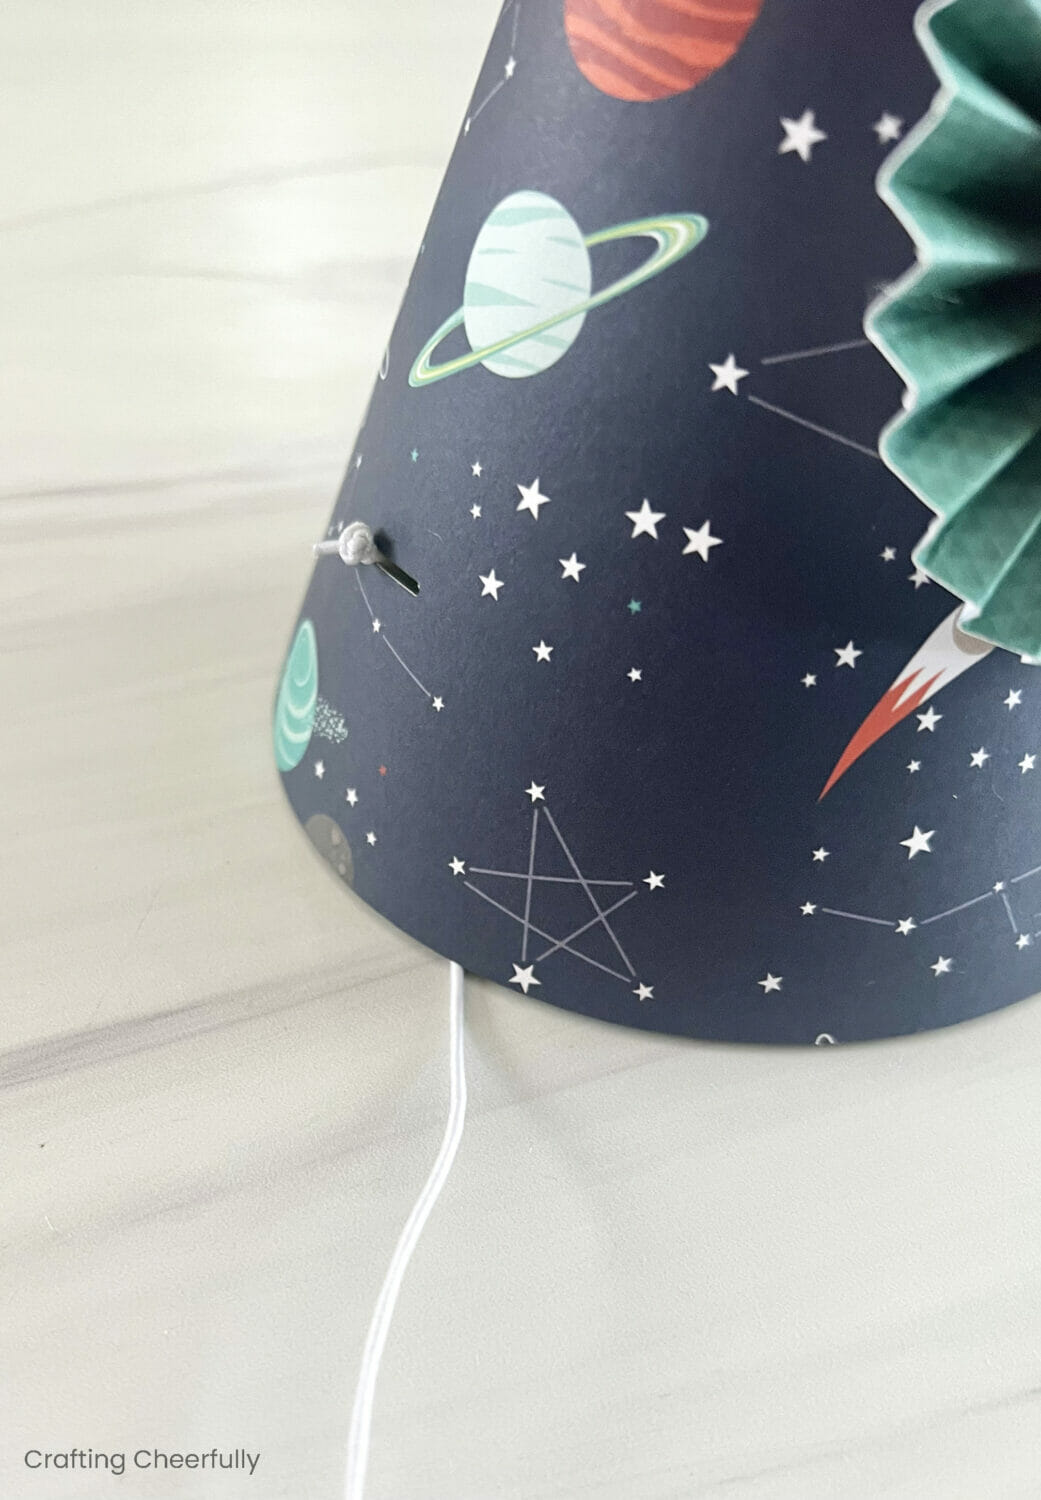
Step Two: Shape the cone of the party hat and tape into place on the inside. This party is a little tricky. I rolled my paper into a cone first and held it for a little to try to help the paper form curve. Then I found it easiest to get the tab closest to the tip of the cone in first and then the second tab. It can be hard to do this without crushing the cone so take your time and be patient. Once the tab is through, tape it on the inside with clear tape.
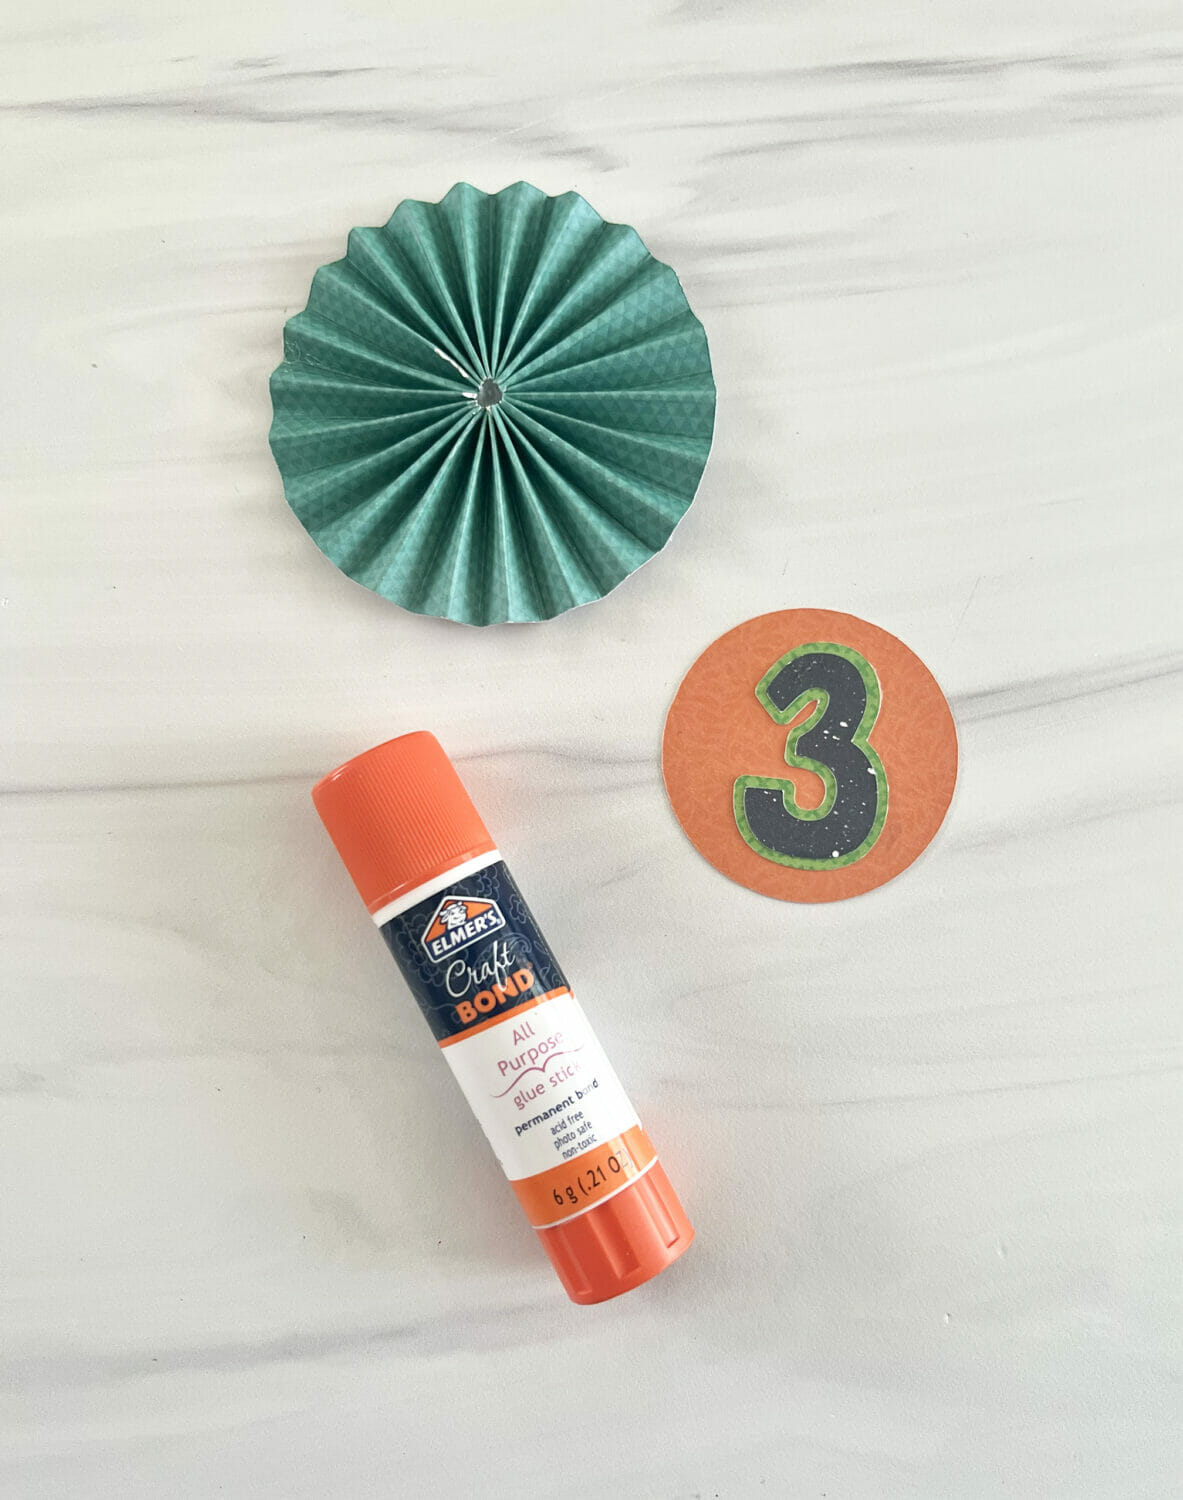
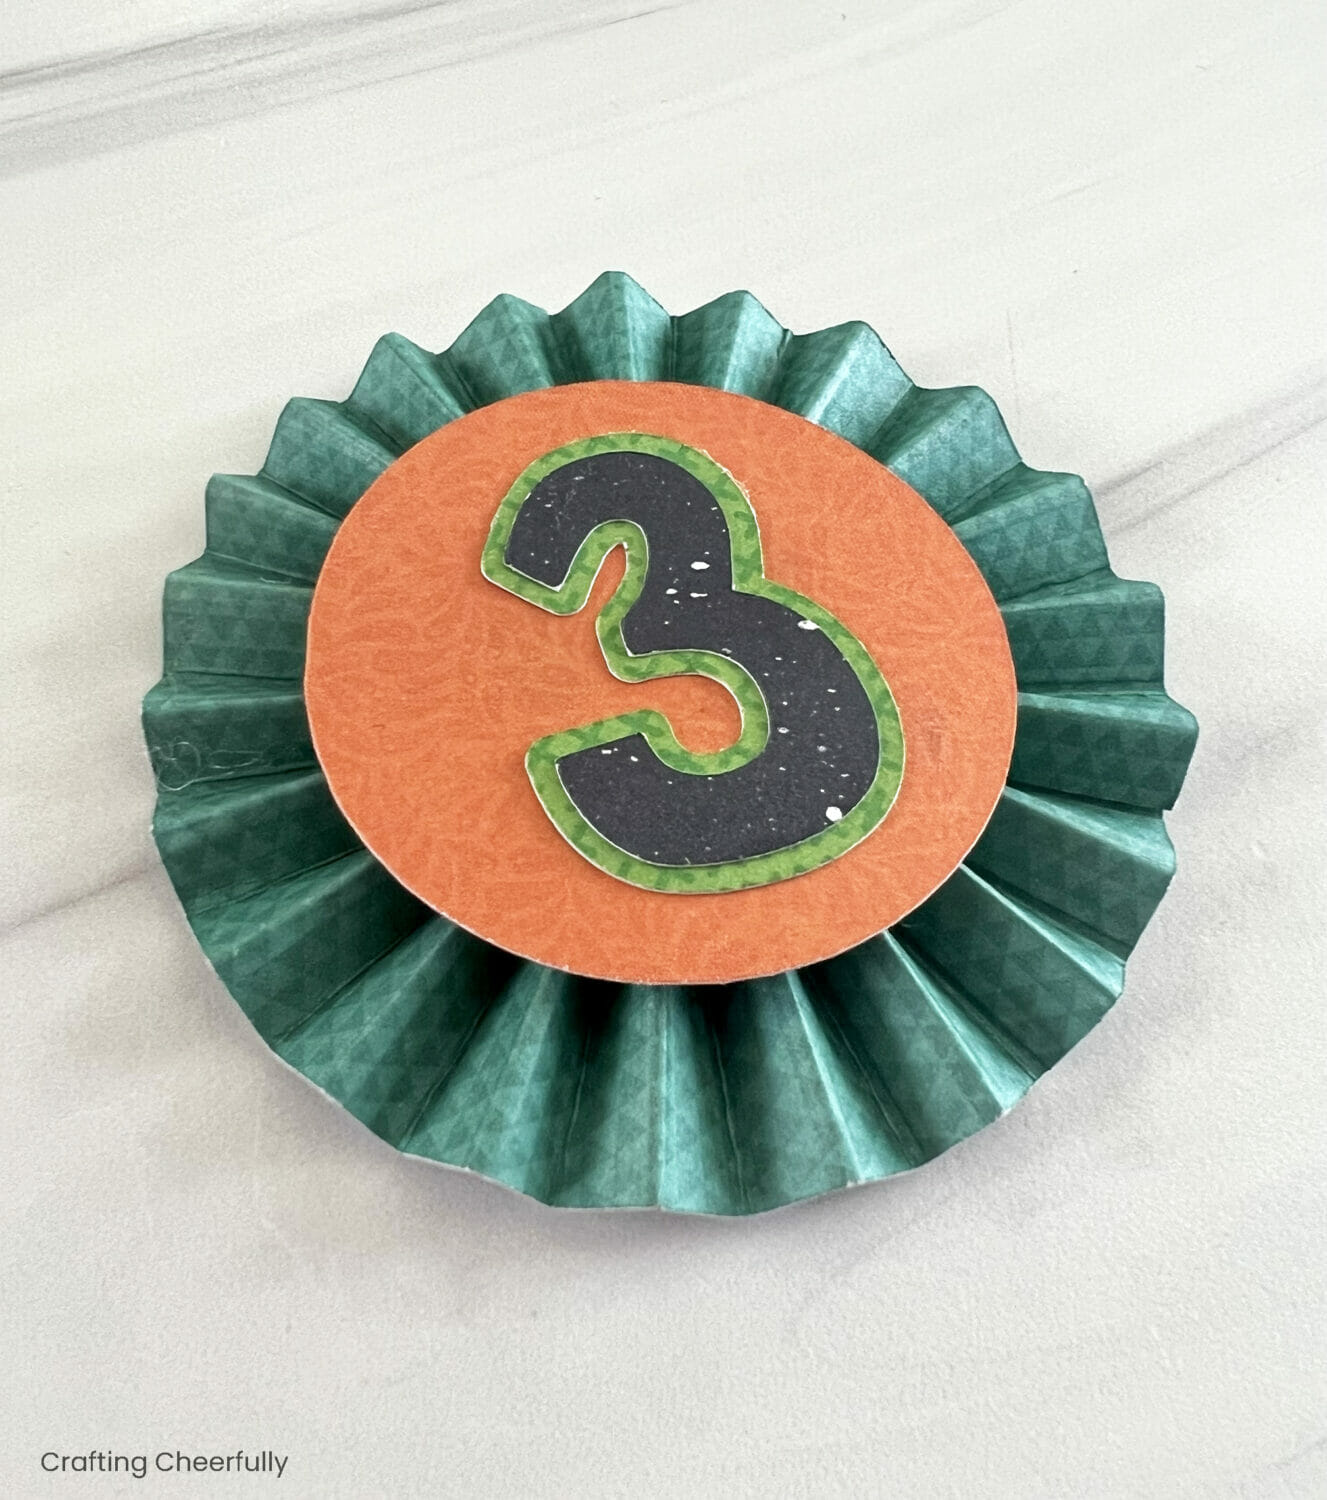
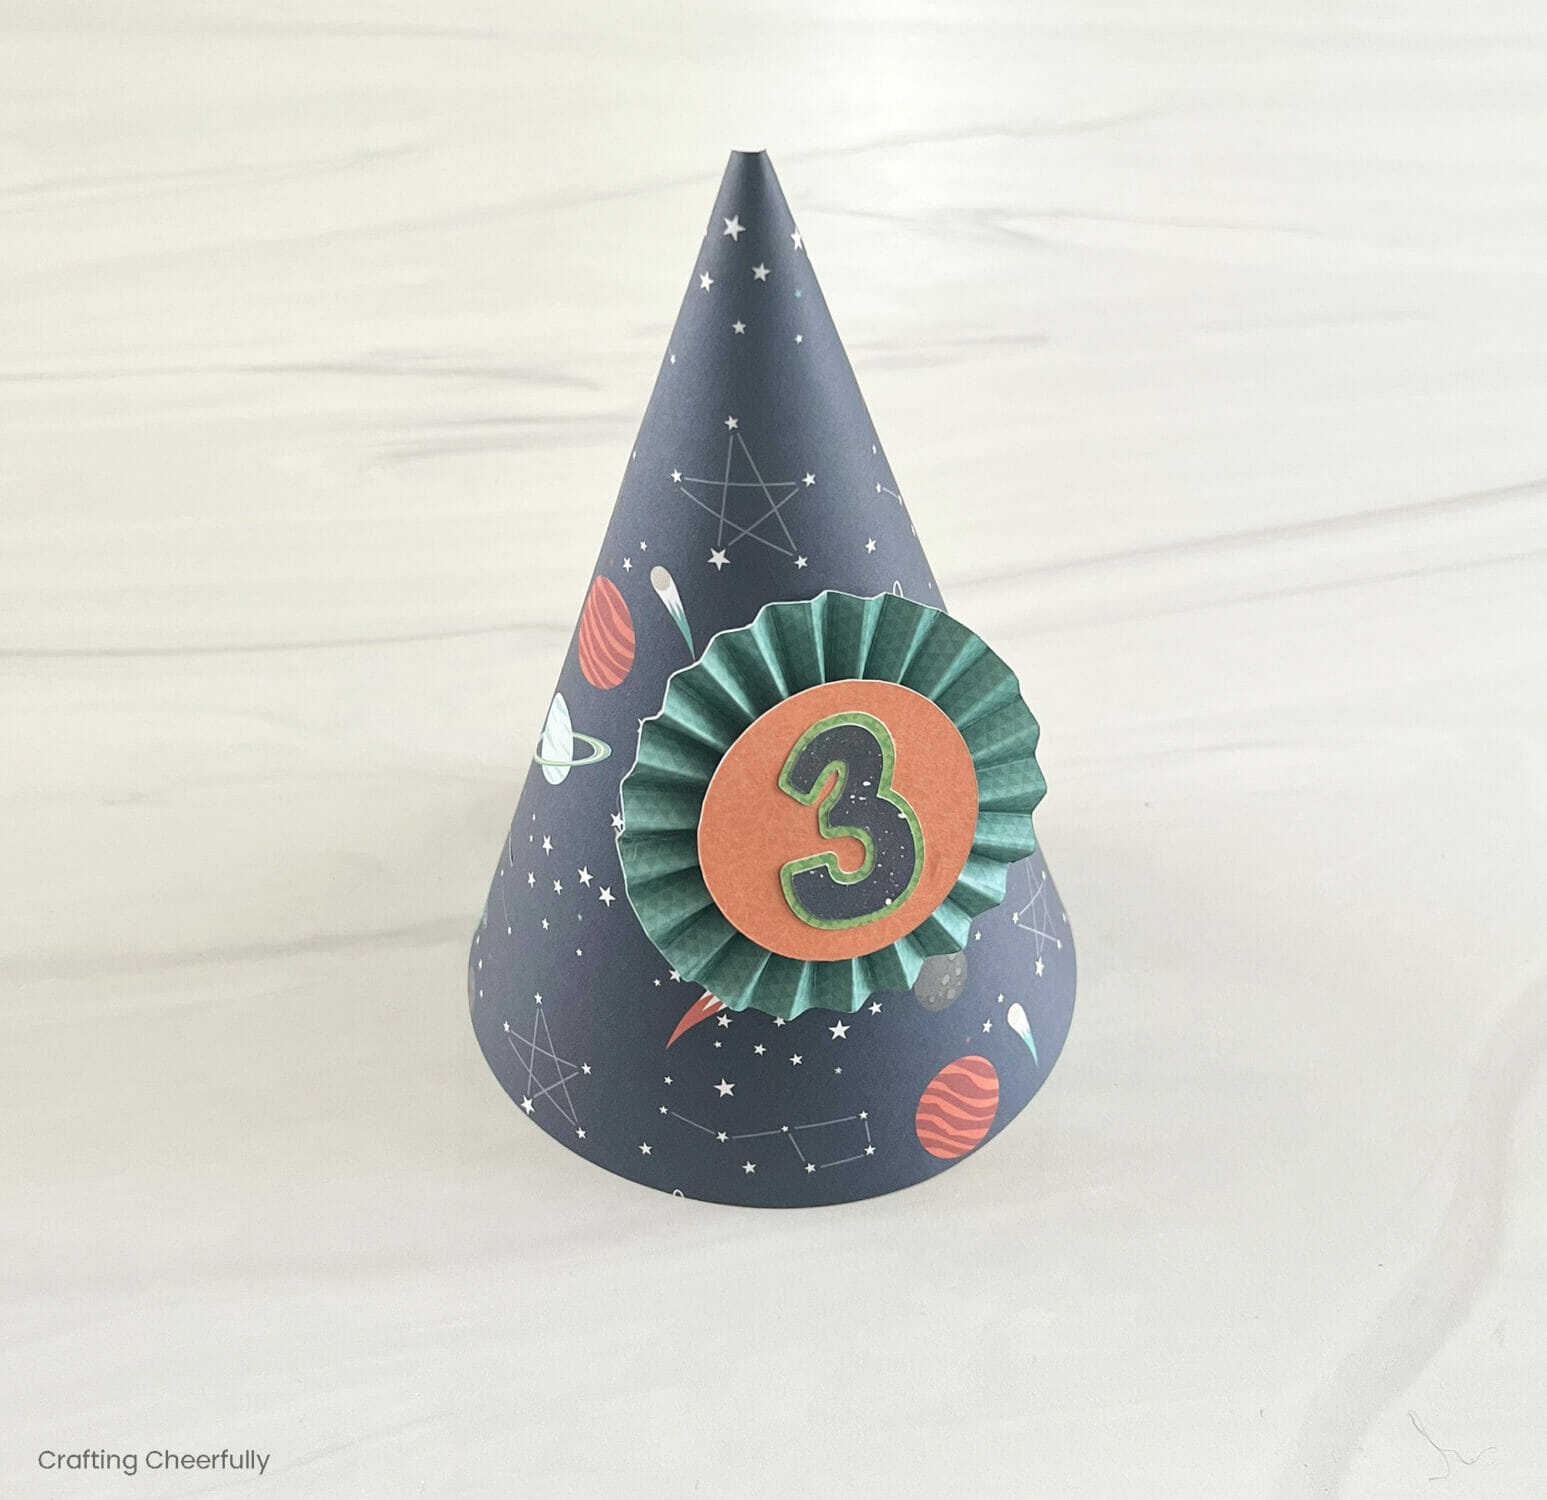
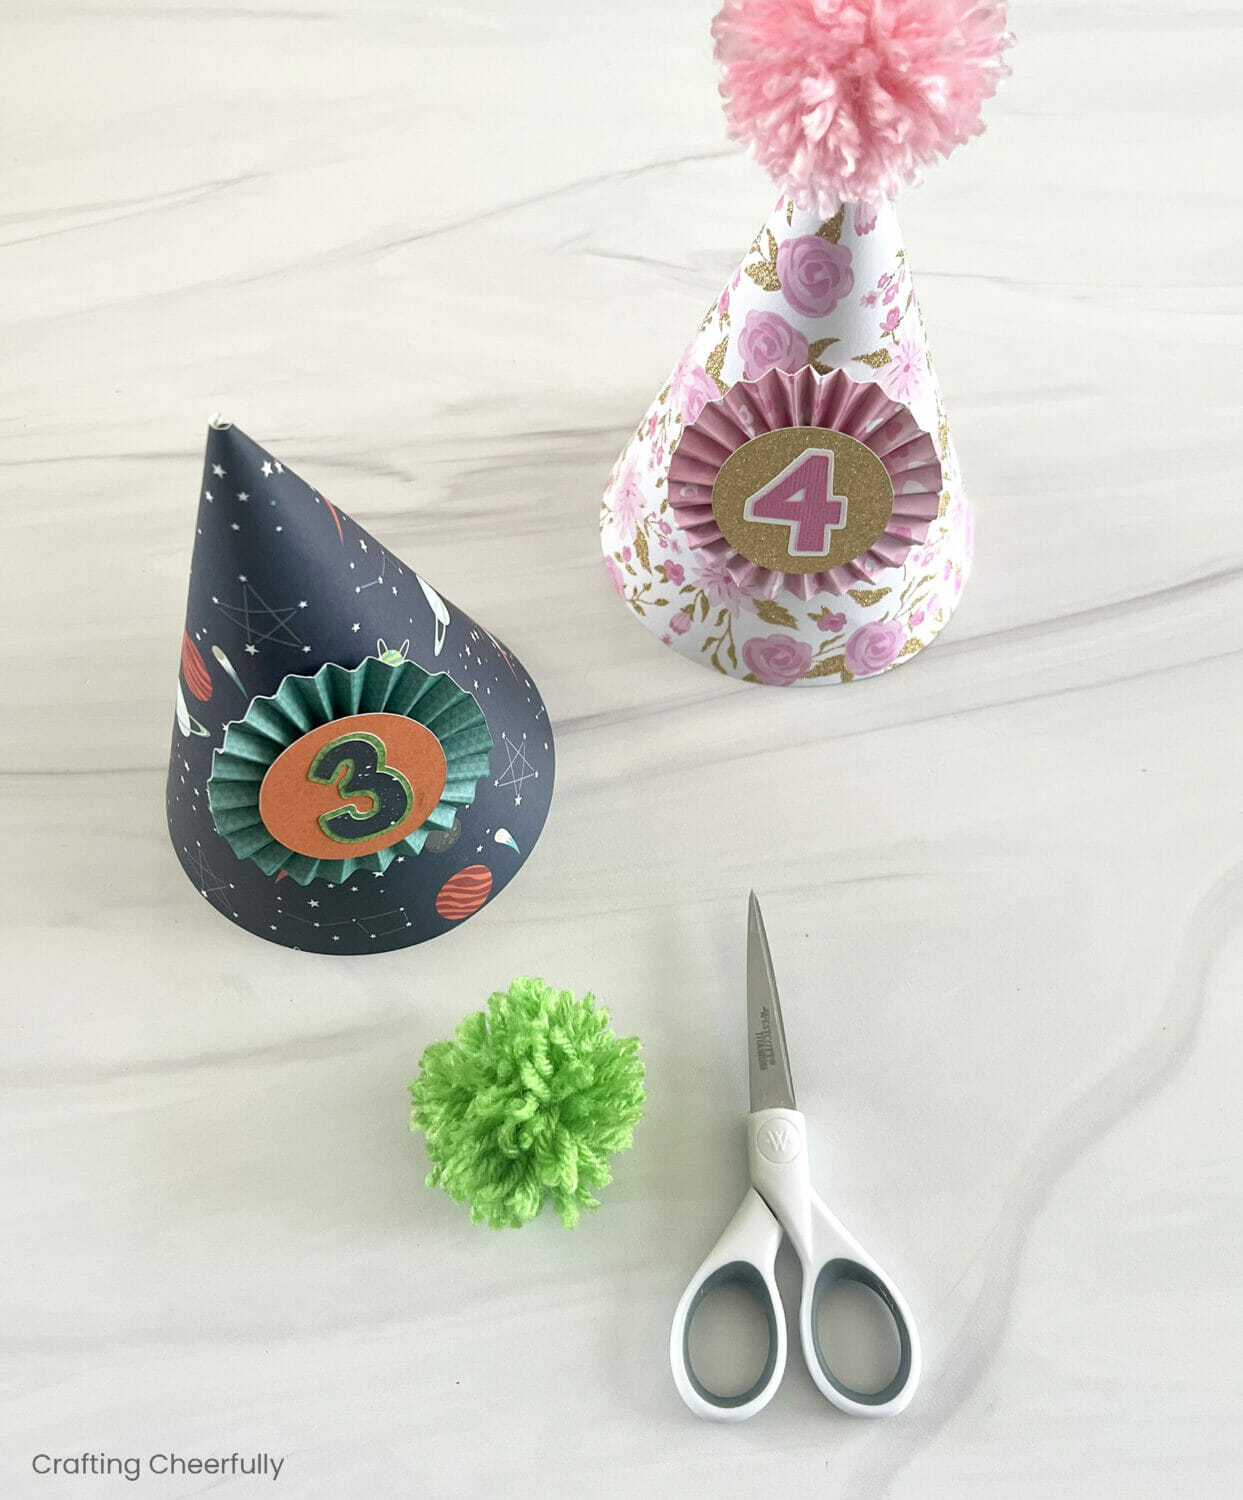
Step Three: Create the paper medallion. I love paper medallions, especially on party hats! They add such nice dimension and are so cute!
To create one, start by scoring a the long strip of paper every 1/4″ using a scoring board if you have one. Next accordion fold the paper and adhere the ends together using hot glue or double-sided tape to form a tube. Place hot glue on the small paper circle centered inside the accordion tube. Push the top edges of the tube down forming the paper medallion shape. The center should be on top of the hot glue. Hold until the glue is set.

Before I purchased a scoring board, I used my paper trimmer and a sharp object like my needle nose pliers. I marked the paper every 1/4″ on the back side with small pencil ticks, then laid the paper in the paper trimmer and scored it in the groove where you would usually cut. Some paper trimmers actually come with a scoring blade which is another great option!


Decorate the large paper circle with a number or other decorations that match your party theme.
Step Four: Adhere the medallion to the front of the party hat! I used a dab of hot glue and stuck the medallion to the center of the party hat.

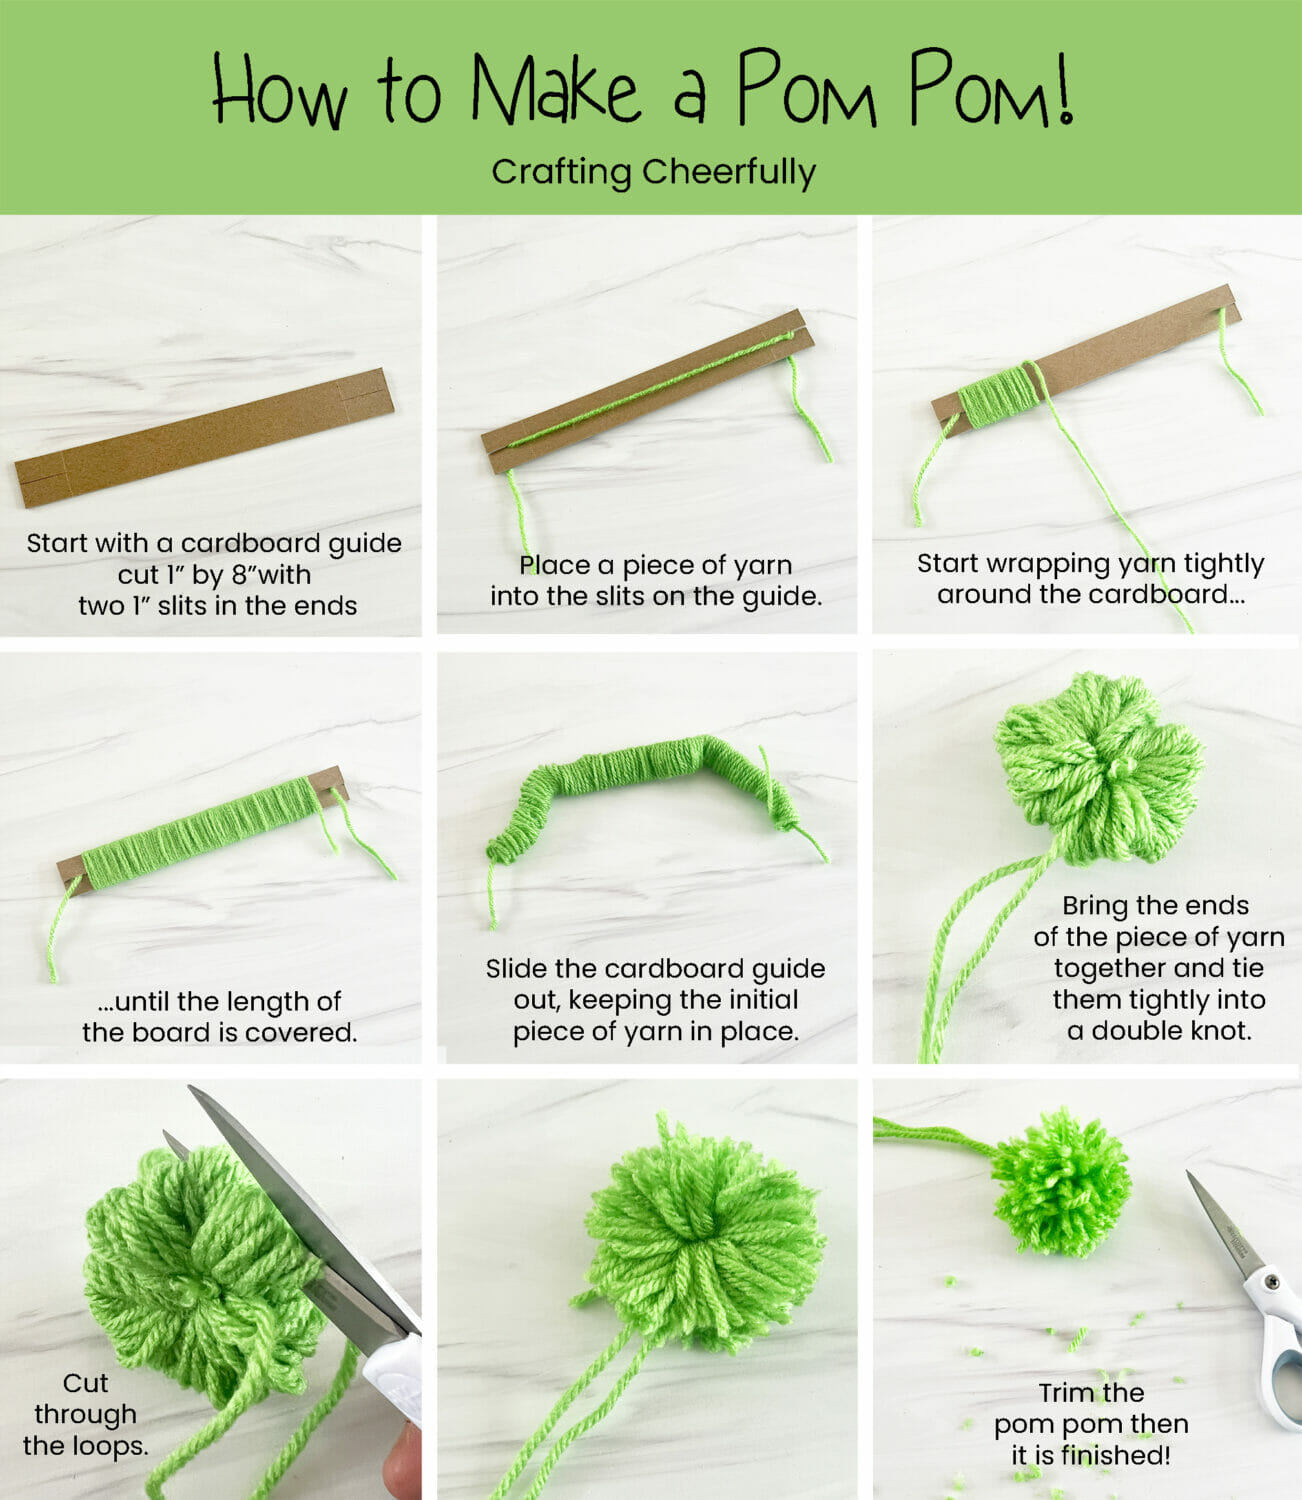
Step Five: Add a yarn pom pom to the top! You can add a pre-made yarn pom pom or make your own using a pom-pom maker or a piece of cardboard as I did.
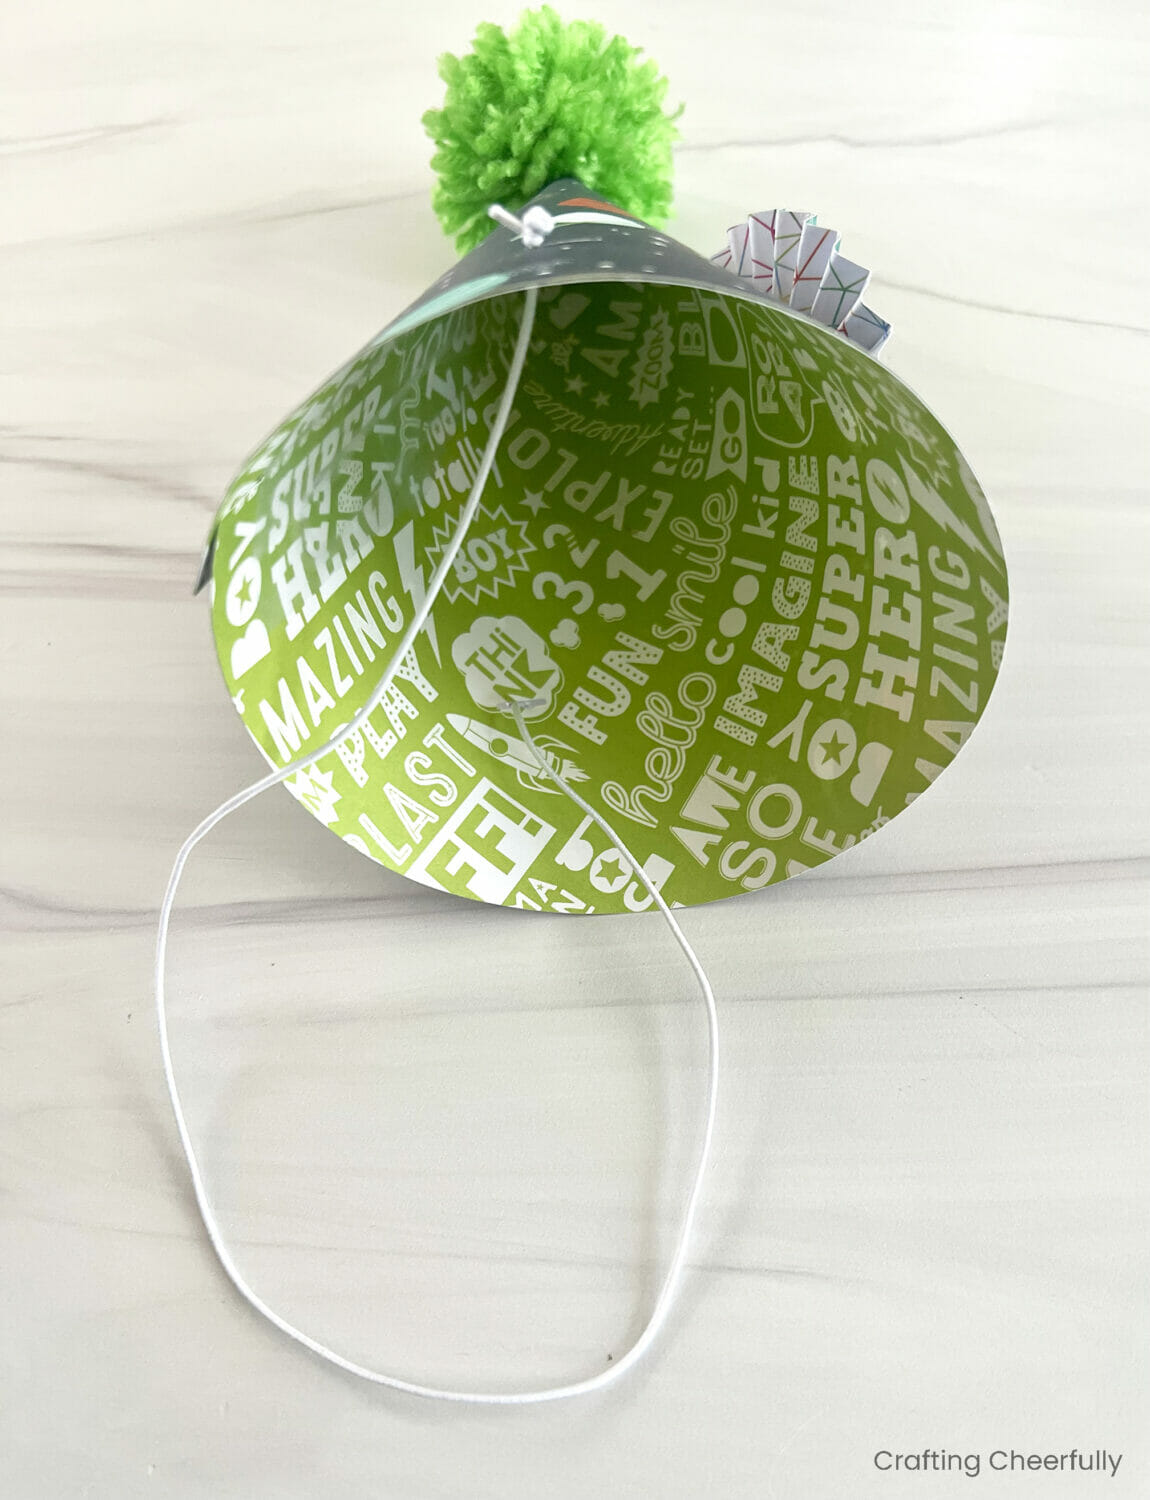
Step Six: Add a thin elastic neck strap. Thread the elastic through the notched holes keeping the knots on the outside of the hat.
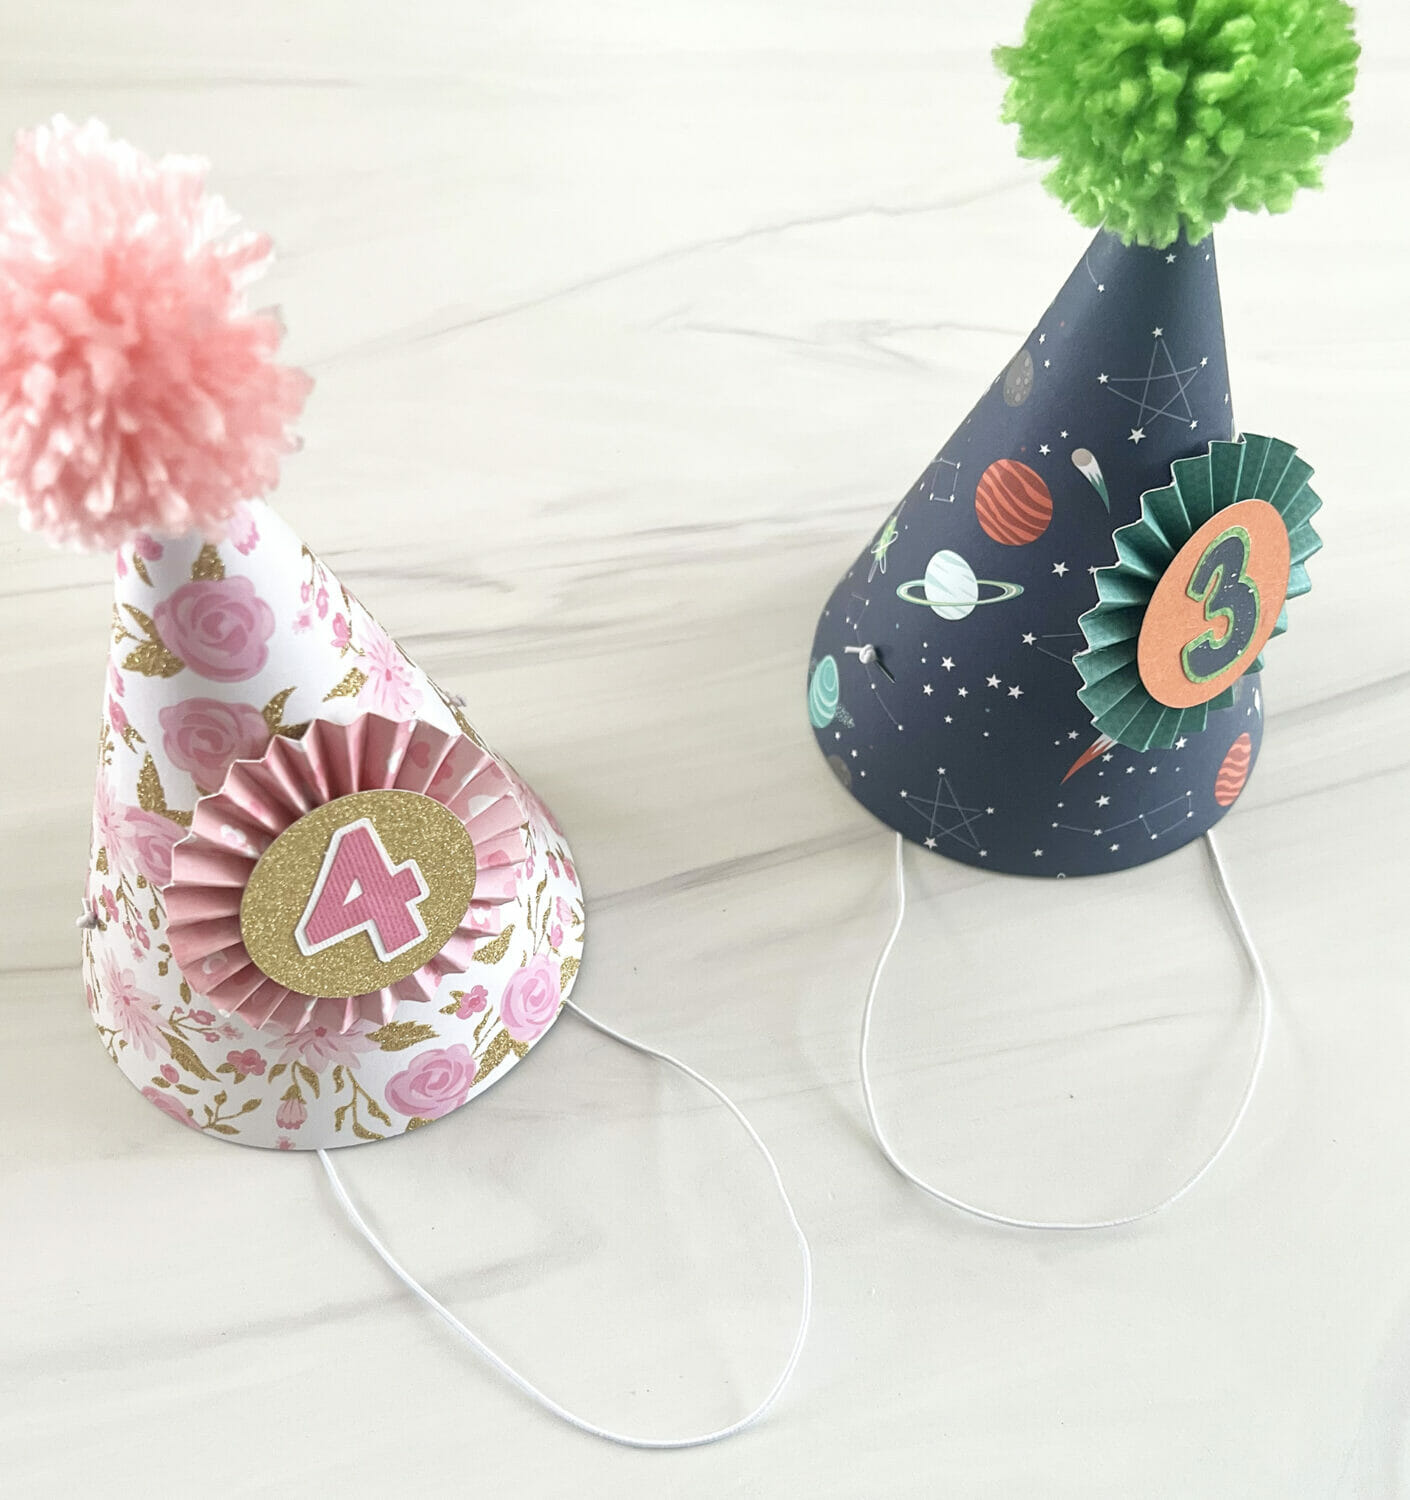
All finished!! Your hat will not match your party colors and theme perfectly! Party hats make any special occasion just a bit more festive, don’t you think?

Below you can see a few more hats I’ve made. I used cut the long strip of paper for my medallions with decorative edge scissors and added fabric trim to the bottom edges of the hats.


Get the Free Paper Birthday Hat Files!
Fill out the purple form below with your first name and email address! The free file will be sent straight to your inbox! If you have already filled out the form below, don’t worry – you won’t be added to my list twice! This freebie is for personal use only. I hope you enjoy crafting something special. Please let me know if you have any questions :)


This hat is adorable!!!
Also, your tutorial for the yarn pom pom is the best one I have seen!!! Well done!
Oh thank you! I’m glad the pom pom tutorial is helpful!