
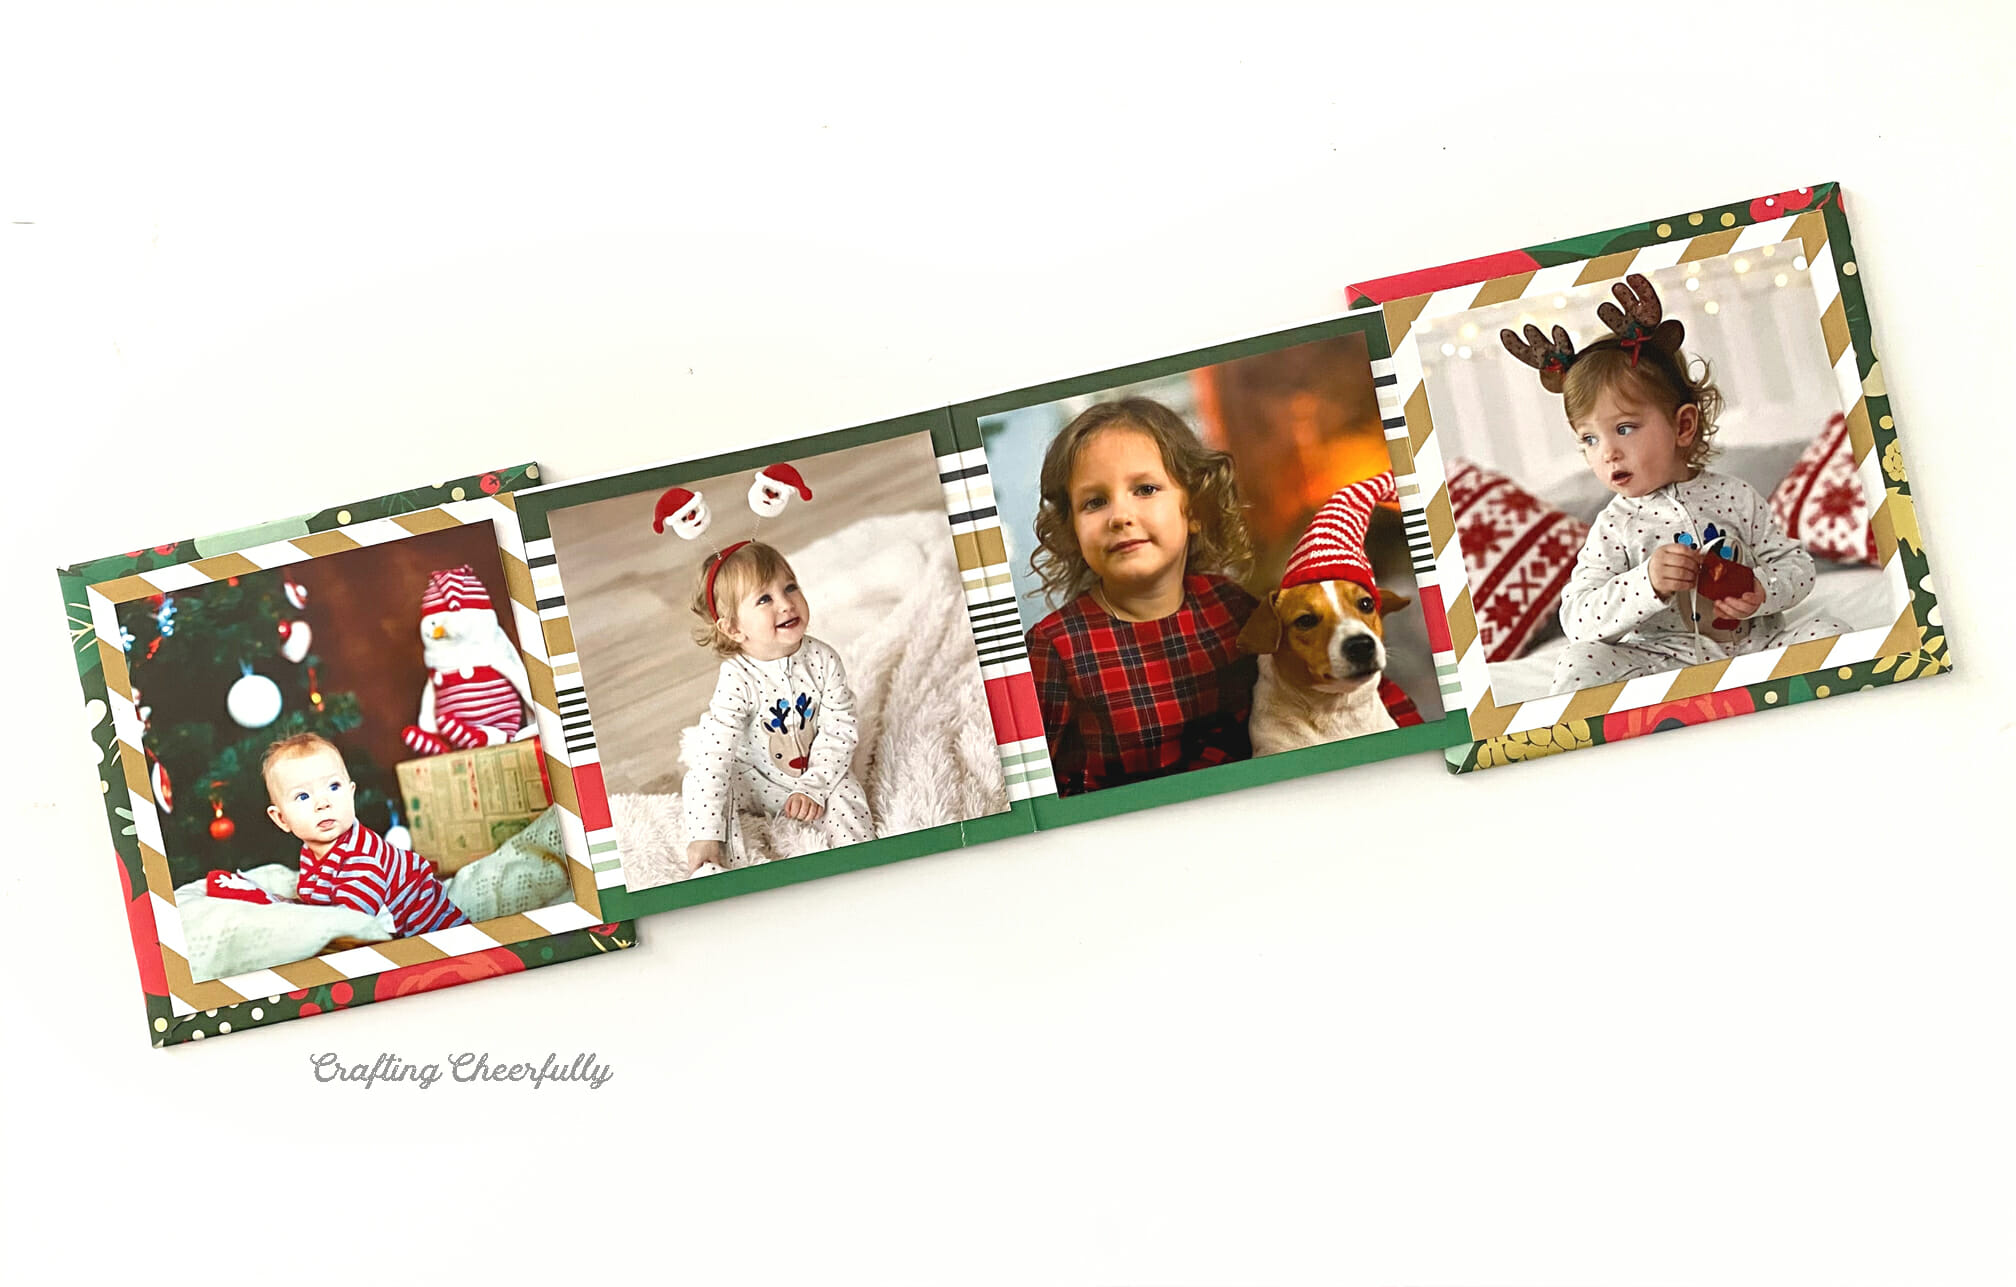
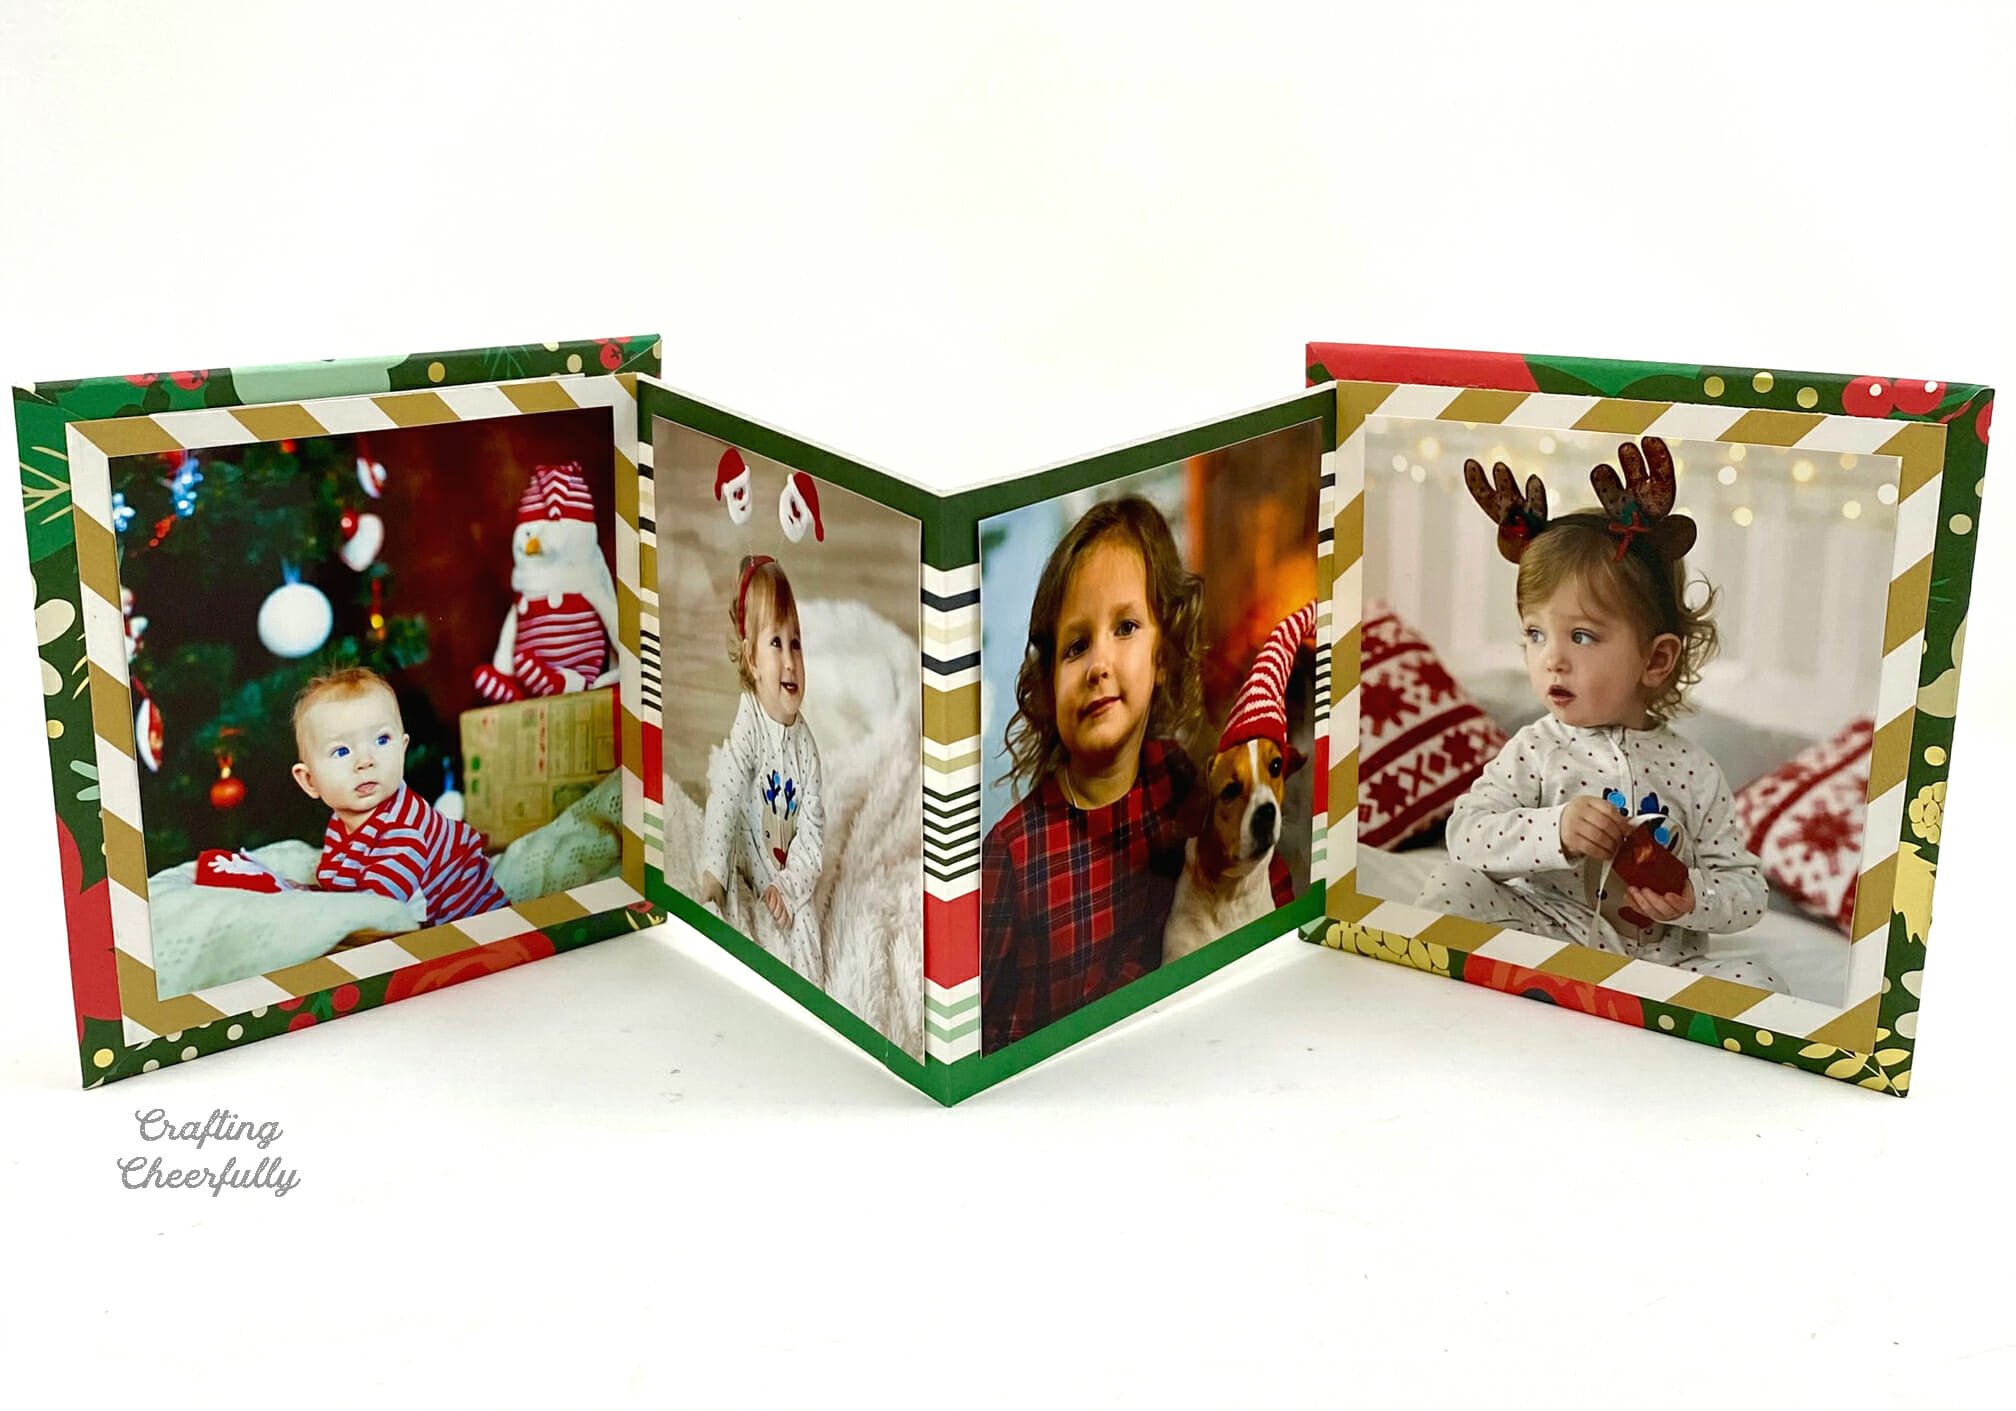
DIY Holiday Accordion Photo Album
Create a sweet accordion photo album for the holidays to showcase your favorite pictures. These make the best handmade gifts for Christmas!
 Yay! Christmas crafting is officially upon us and I am having so much fun this year! Over the next few weeks, I’ll be sharing a bunch of great DIY projects that are perfect for gifting, decorating your home and celebrating the holidays. To start things off, I have this fun holiday accordion photo album!
I love giving and creating gifts for family members that feature photos. Our kids are growing and changing so quickly it is nice to capture this time. Photo gifts are especially great for grandparents or for family members who don’t live nearby.

This holiday photo album is an easy project that only requires decorative paper, chipboard, adhesive and, of course, your photos! You can download my free pattern to make this even easier! I chose to make this album holiday-themed and showcase photos from winter and the holidays. You could easily make these work all year round with your choice of papers. I’ve made also a Mother’s Day accordion album that has a flower cut-out in the front!

I found double-sided paper works the best for this project, though standard colored cardstock would also work!

DIY Accordion Photo Album
Supplies Needed
- Free PDF paper pattern – Grab the free file by filling out the purple form at the end of this post.
- Decorative paper – 2 sheets preferably with a double-sided pattern
- Tagboard or chipboard
- Ruler
- Pencil
- Paper Trimmer and/or scissors
- X-Acto knife/box cutter with cutting matte
- Adhesive – tape runner or double-sided tape like 1/4″ Scor-Tape
- Optional: Scoring Board and stylus
- Photos!

Step by Step Tutorial
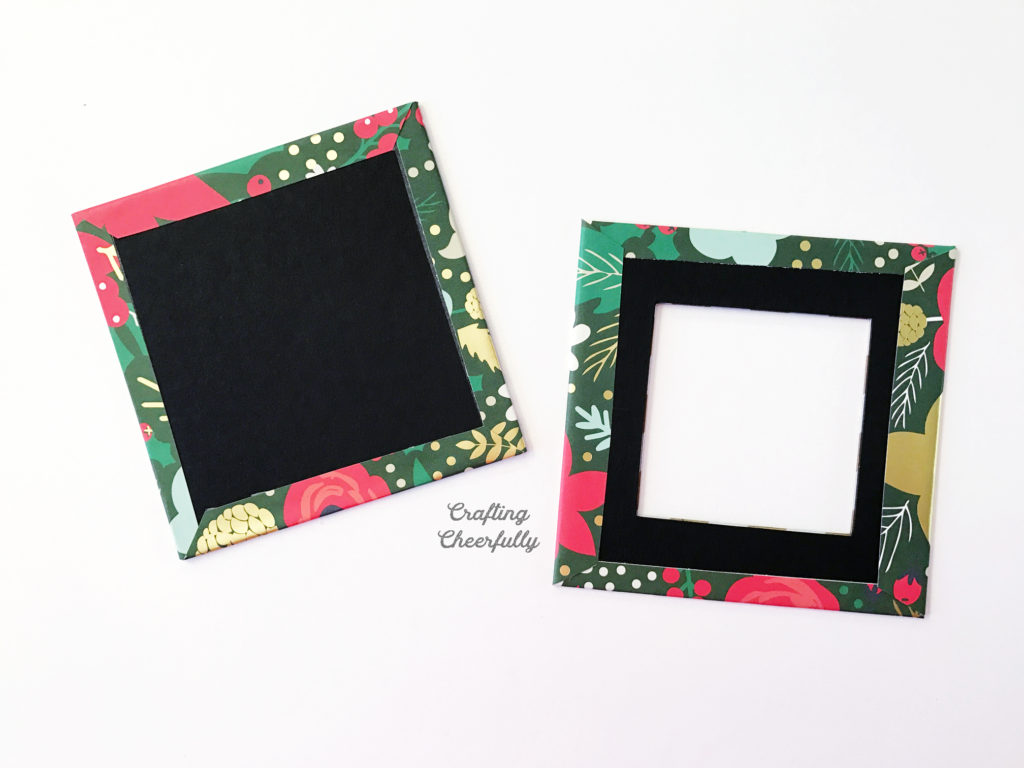
Step One: Cut the tagboard pieces for the album. Cut two pieces of tagboard or chipboard using the free printable pattern. Use an X-Acto knife or box cutter to do the cutting and use a ruler to keep your lines straight. One of these tagboard pieces is the front of the album, and the other is the back.
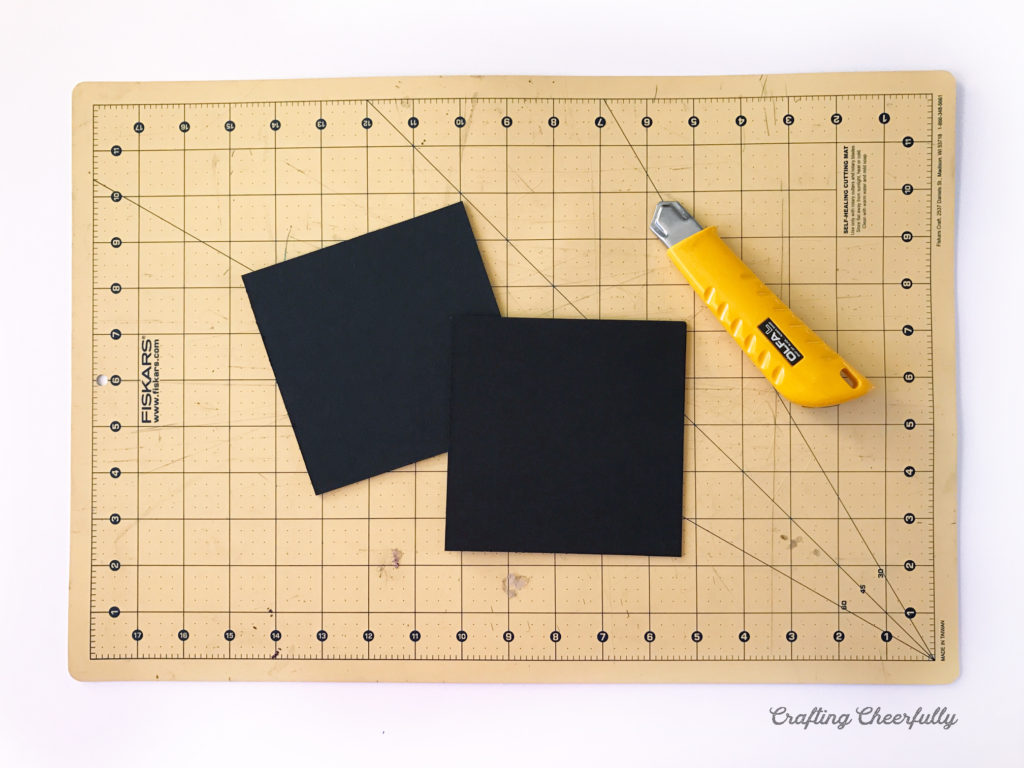
On the front album piece, carefully cut out the smaller square, creating a frame.

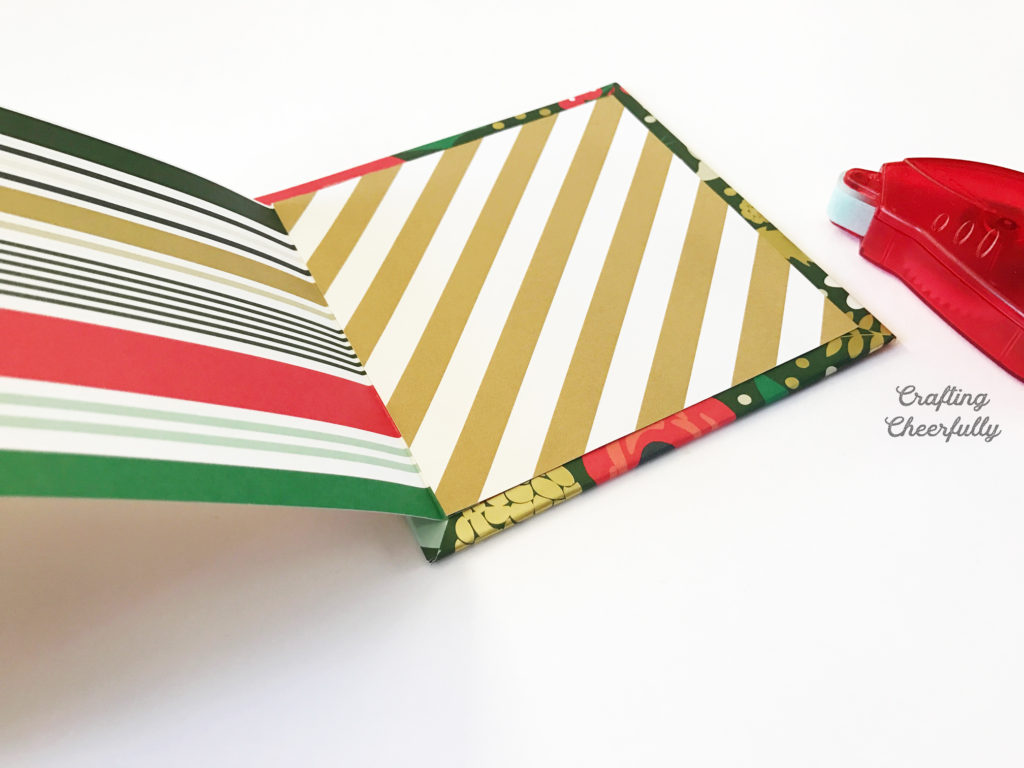
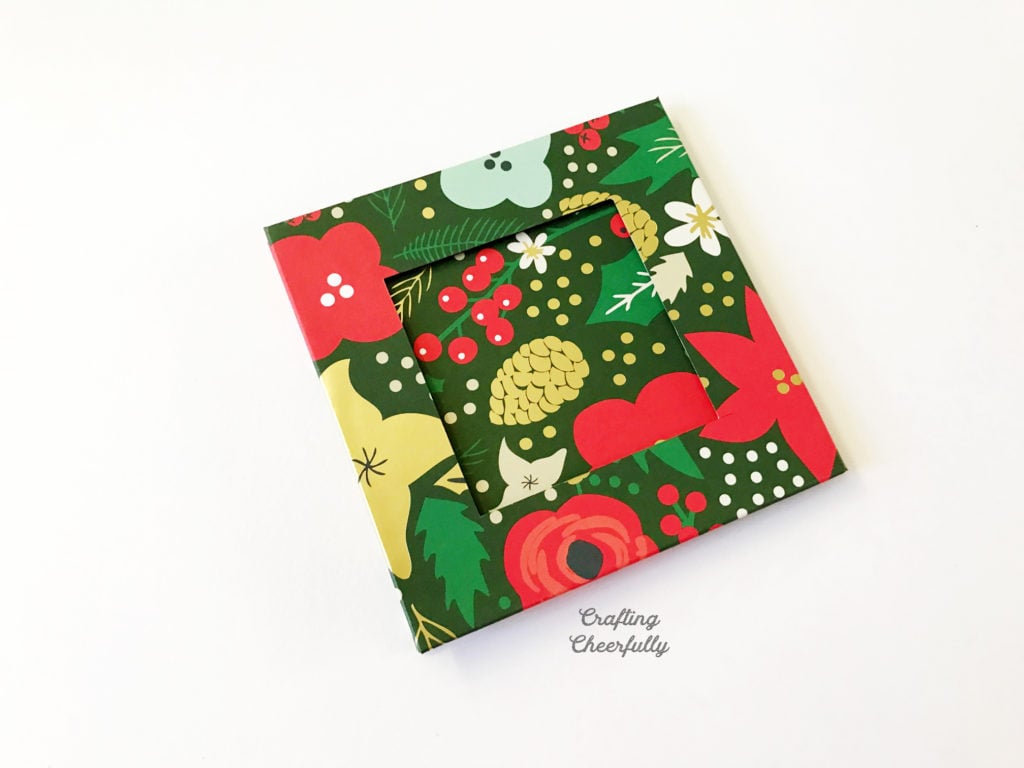
Step Two: Wrap the front and back album covers with decorative paper. Next, cut out the album front cover and album back cover from decorative paper to cover both the front and back album pieces made from tagboard.
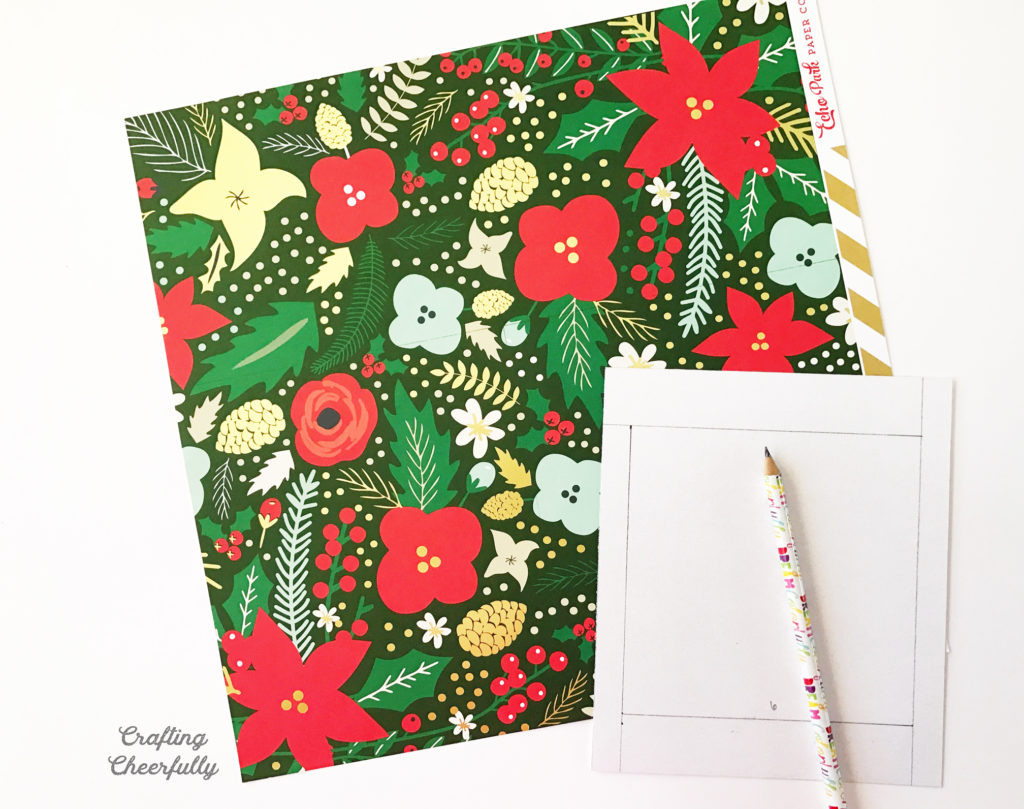
Once the two pieces are cut, center the tagboard pieces and trace around them onto the back side of the paper. Fold or score along these lines. For the front piece, trace inside the frame and cut the square out with an X-Acto knife.
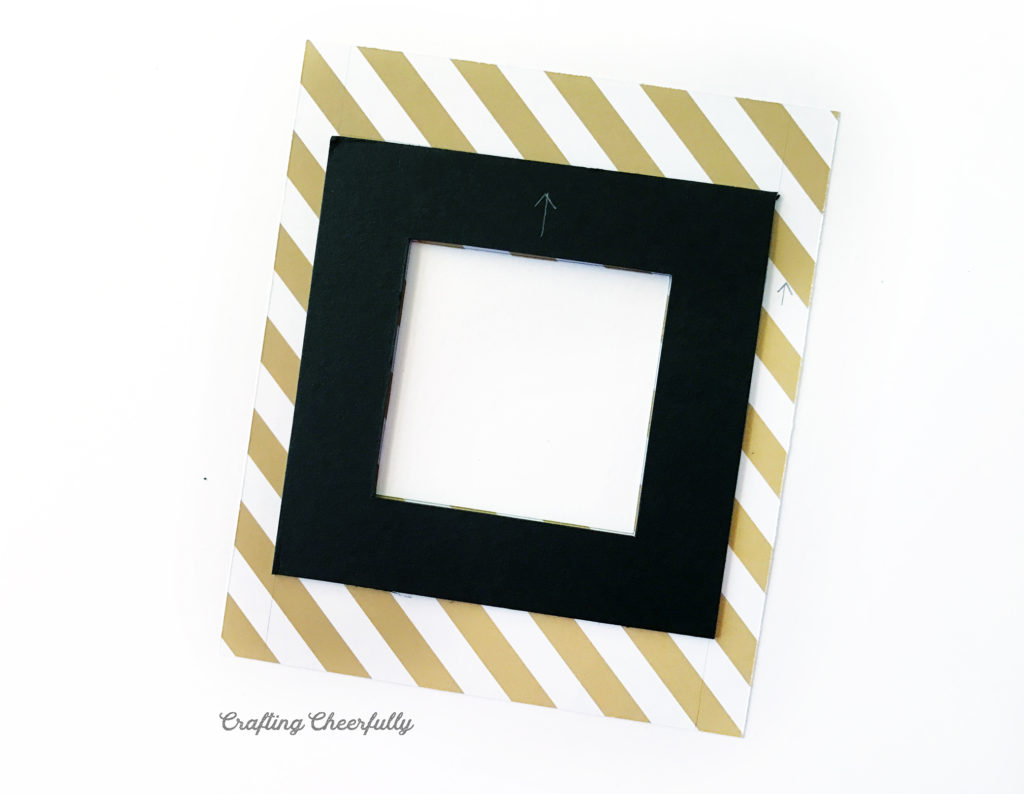

Wrap the paper around the tagboard and use adhesive to hold.
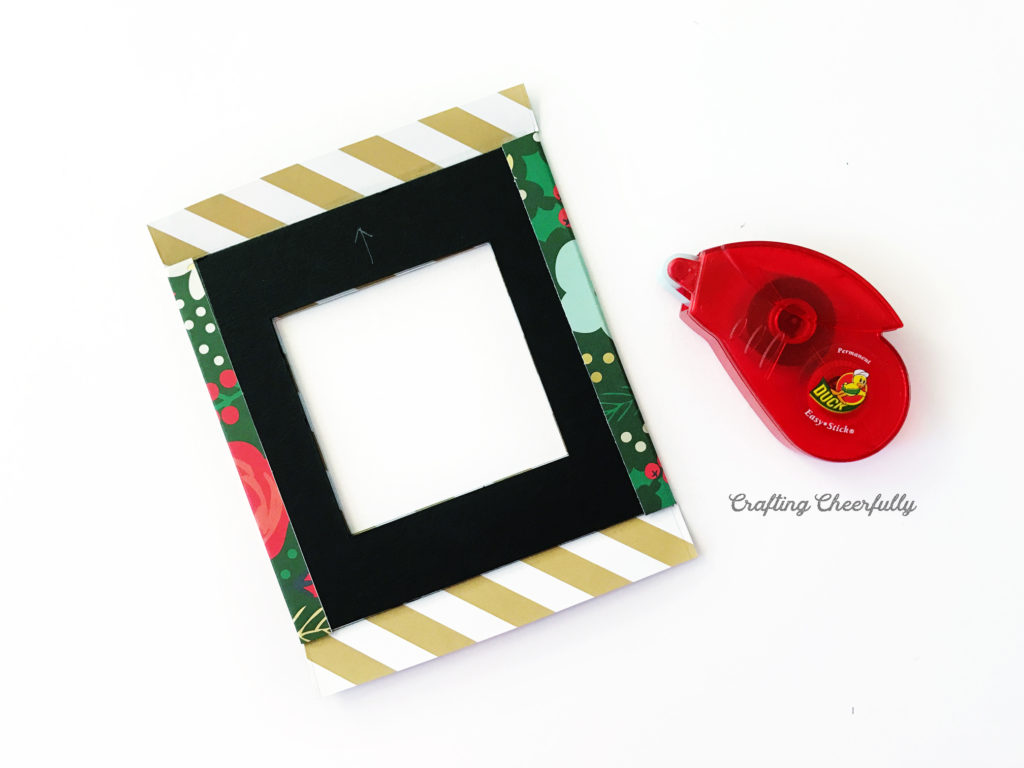
Step Three: Add the lining pieces. Cut out the lining pieces that will be used to cover the inside of the album covers. I used one piece of double-sided decorative paper for both the album covers and the lining and just reversed the paper for the lining!

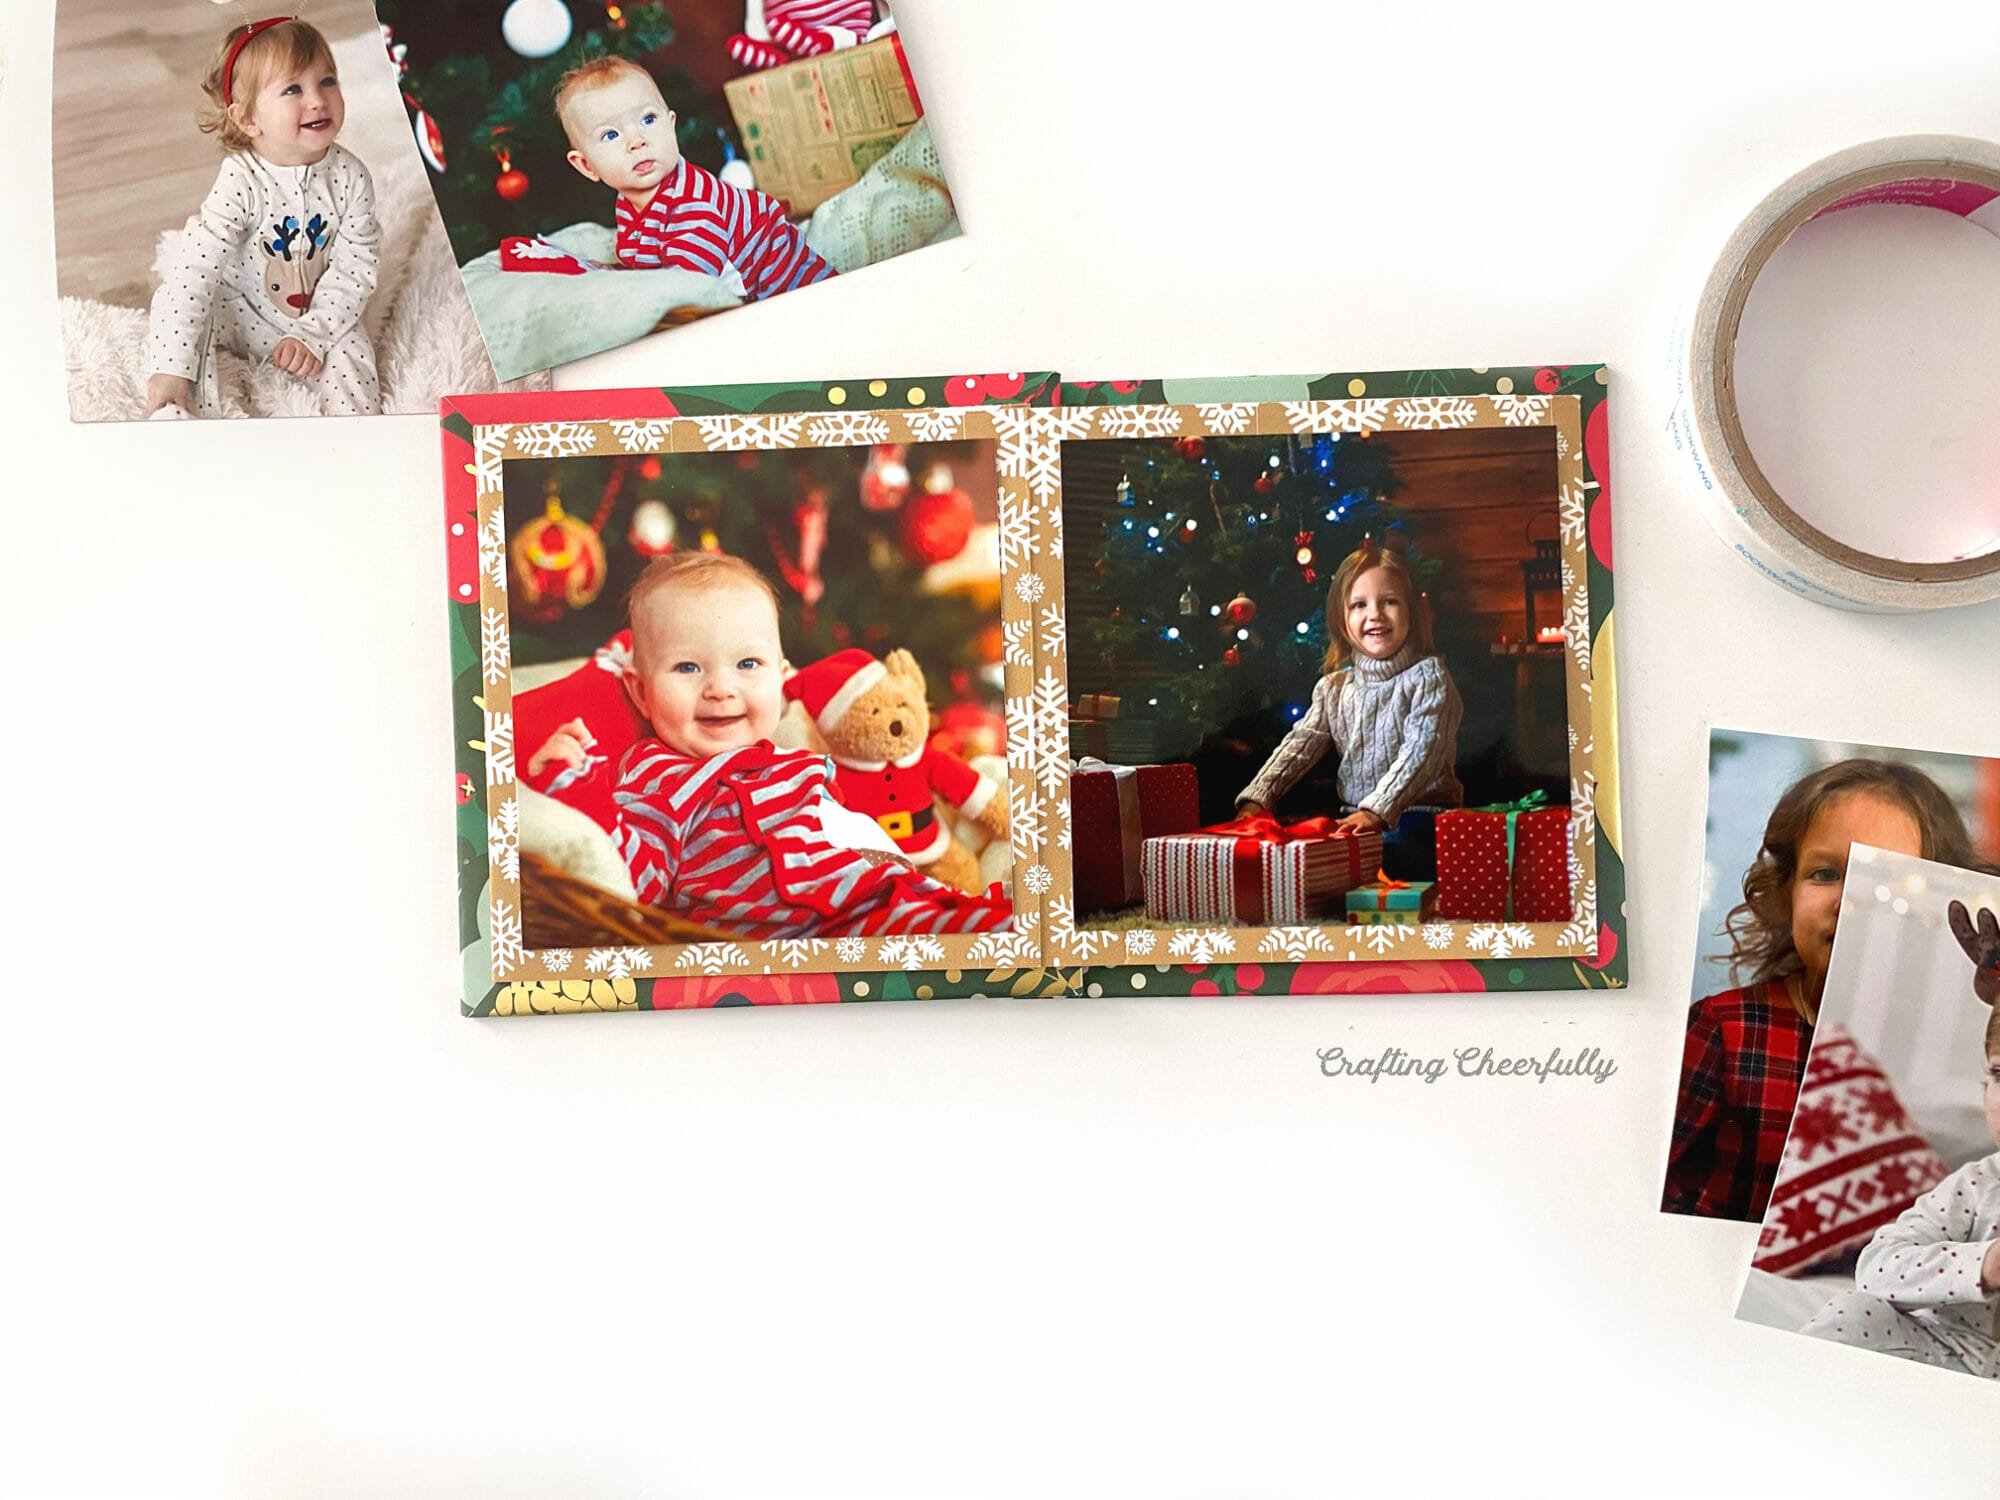
Step Four: Create the accordion center for the album. Cut the inside album piece from the second sheet of decorative paper. Mark the fold lines lightly with a pencil on the edge of the paper, then score and fold them.


To assemble the album, adhere the back lining piece to one end of the accordion-folded piece. Center the lining on the back of the back album cover and glue or tape it down. I used a tape runner for everything and it worked nicely and didn’t cause any bubbling. I also like using double-sided tape for paper projects.

Repeat the step above for the front of the album cover, but you will need to leave a spot to slip a photo in. I used one strip of tape from my tape runner along all three sides of the lining, leaving the top open. You could also add your cover photo permanently first, and then attach the front cover lining.

 Step Five: Add your photos! Once your photos are printed, cut them down to measure 4″x4″ and tape them into your album. I filled mine with our favorite winter and holiday themed photos. For this tutorial, I used photos from Freepik.com
 The album is finished!! :)
I love the way these albums turned out! They make such a sweet gift that can be displayed anywhere from at home on the coffee table to at work on your desk.
Check out my Mother’s Day version of this album made with a flower cut-out in the front!

Photos for this tutorial are from Freepik.com.
Get the Free Holiday Accordion Album Files!
Fill out the purple form below with your first name and email address! The free file will be sent straight to your inbox! If you have already filled out the form below, don’t worry – you won’t be added to my list twice! This freebie is for personal use only. I hope you enjoy crafting something special. Please let me know if you have any questions :)


One Comment