
DIY Halloween Treat Boxes with Free SVG Cut Files
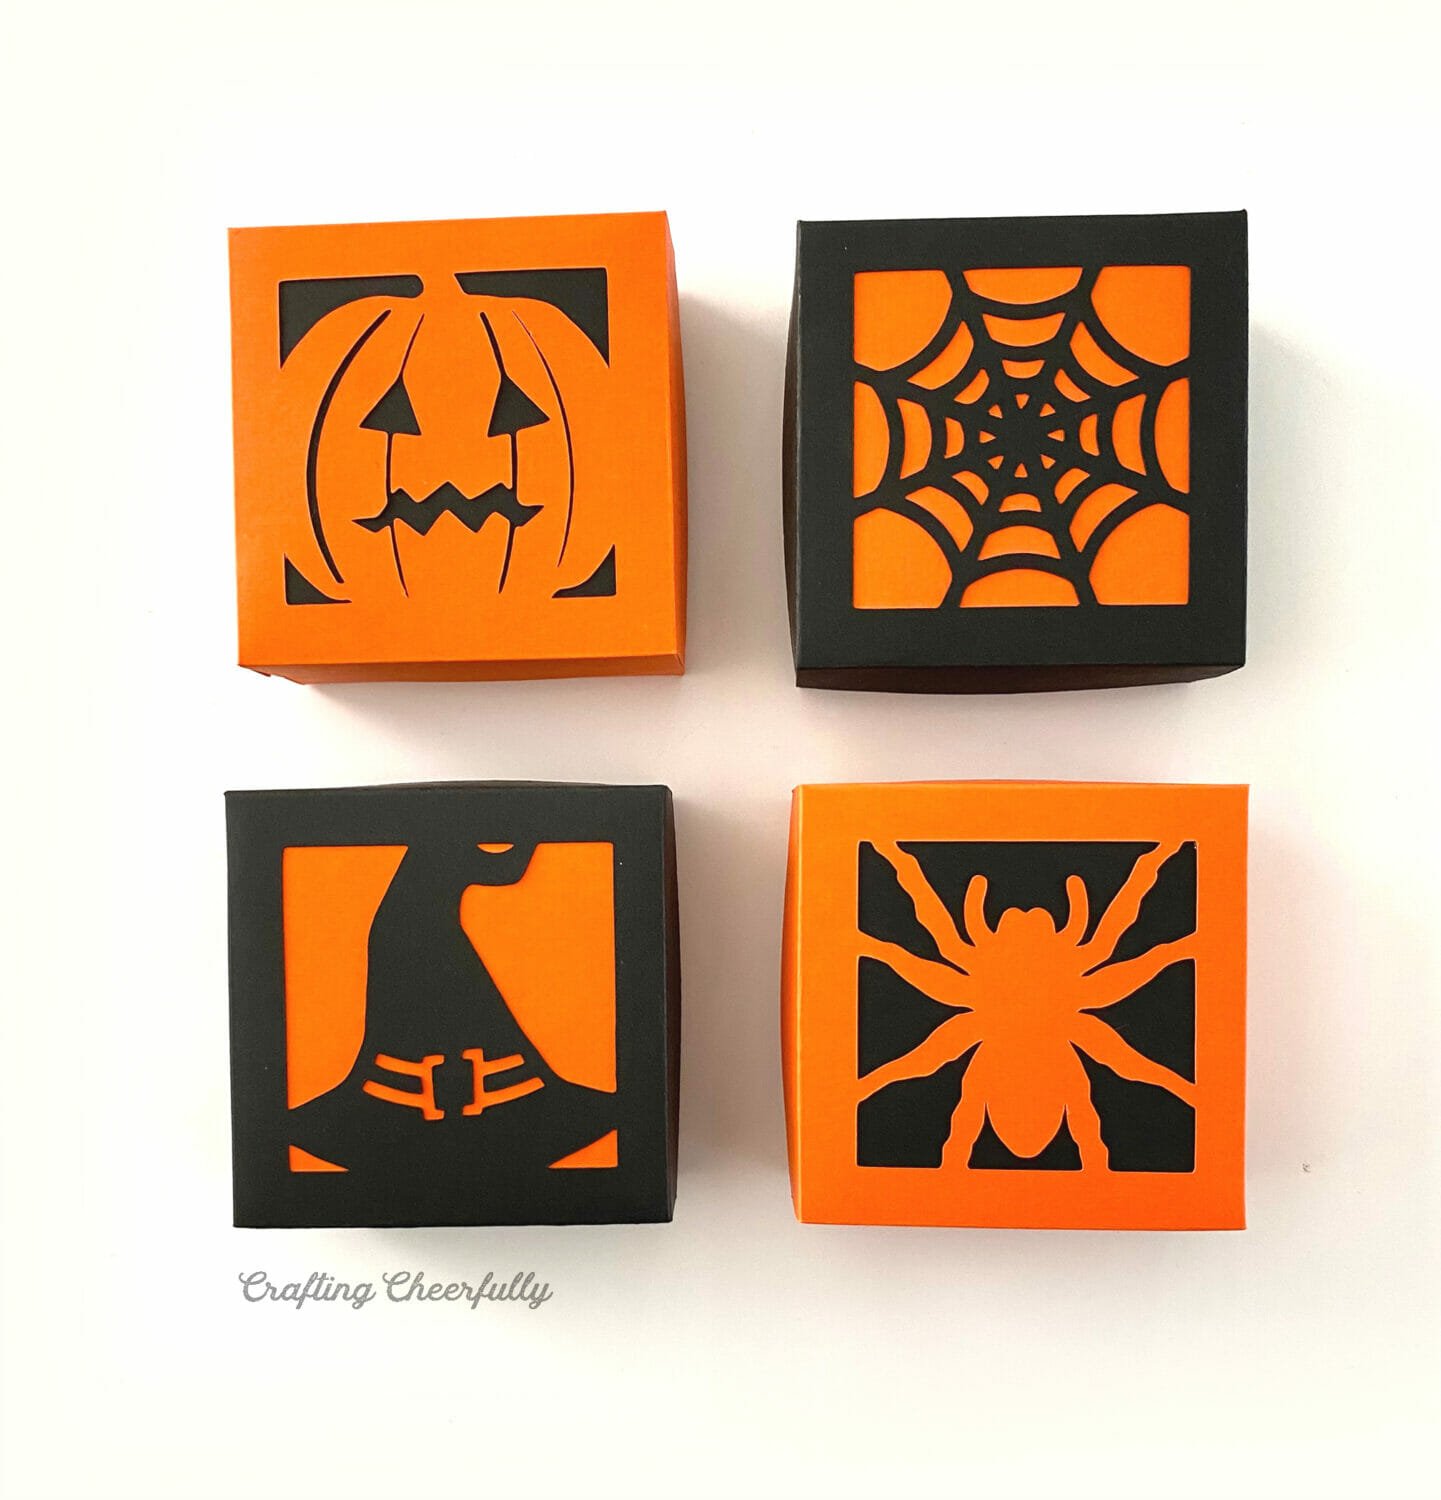
Learn how to create spooky DIY Halloween treat boxes using your cutting machine! These cute boxes are the perfect size for small treats and sweets! I’m sharing four free designs includes a witch’s hat, jack-o’-lantern, spider and spider web!

*This post and the cut files were updated October 2021. The cut files now include the box liner piece.
Hello and Happy October! Today I’m sharing the cut files for these DIY Halloween Boxes. I can’t believe it is already October and Halloween is coming up so fast! I’m just getting started on my kids’ Halloween costumes (they have some elaborate ideas this year!) and I’ve been enjoying some Halloween crafting, like these fun boxes. They are a great DIY craft for Halloween, and with the help of a cutting machine, they come together really quickly!
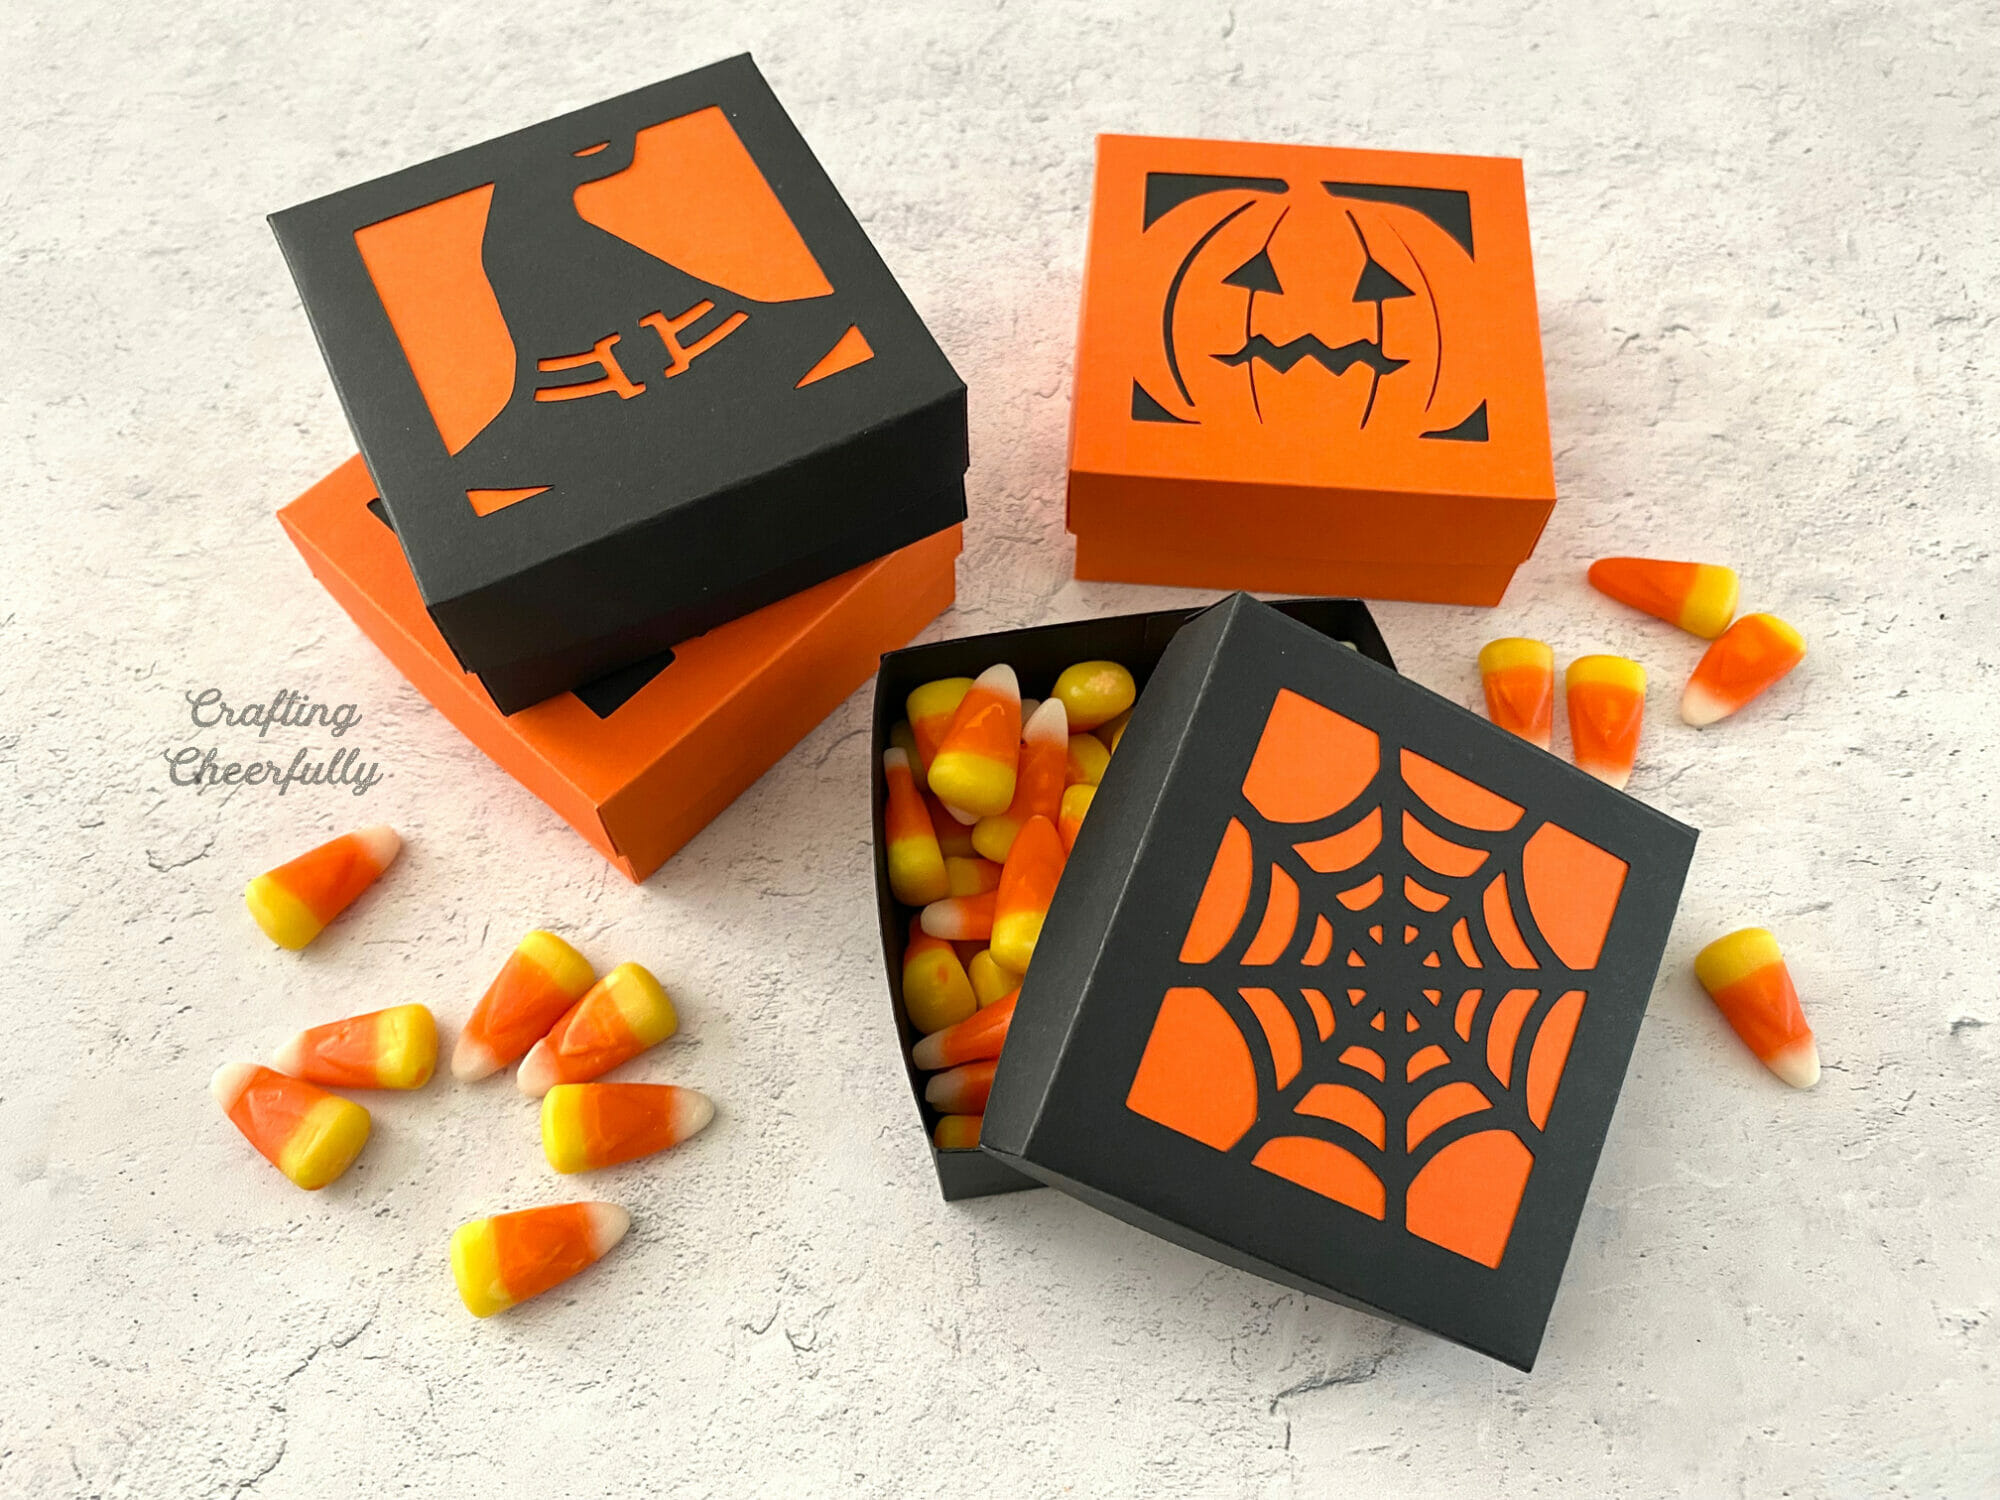
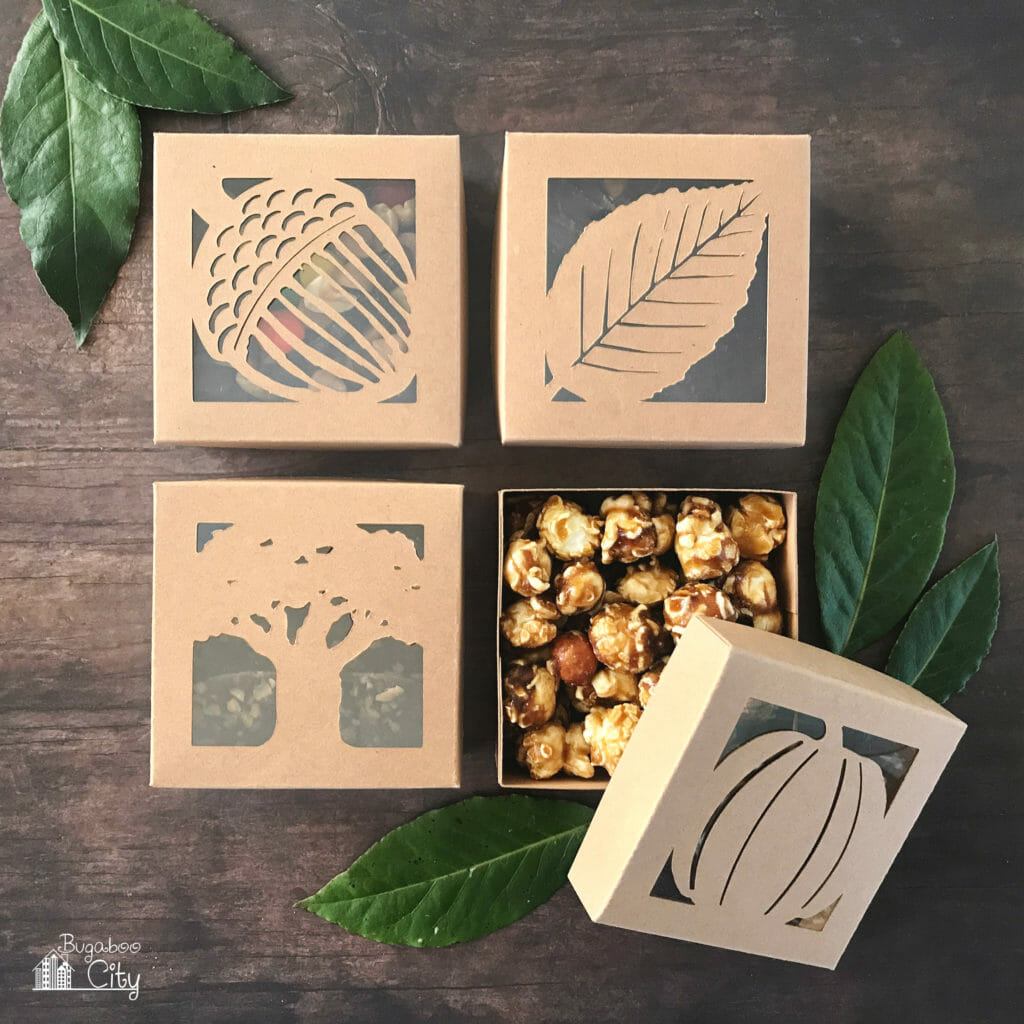
These boxes are a great size for holding small treats and Halloween candies. The lid of each box features a Halloween-themed designing including a witch hat, jack-o’-lantern, spider and spider web. You can choose to back the cut-out lid with solid cardstock as I did for these boxes, or use a clear craft plastic. These square boxes come together quickly and take just a couple supplies to make including cardstock and an adhesive.

I love making these cute square treat boxes and have created similar boxes for other events and holidays!
- Autumn Treat Boxes
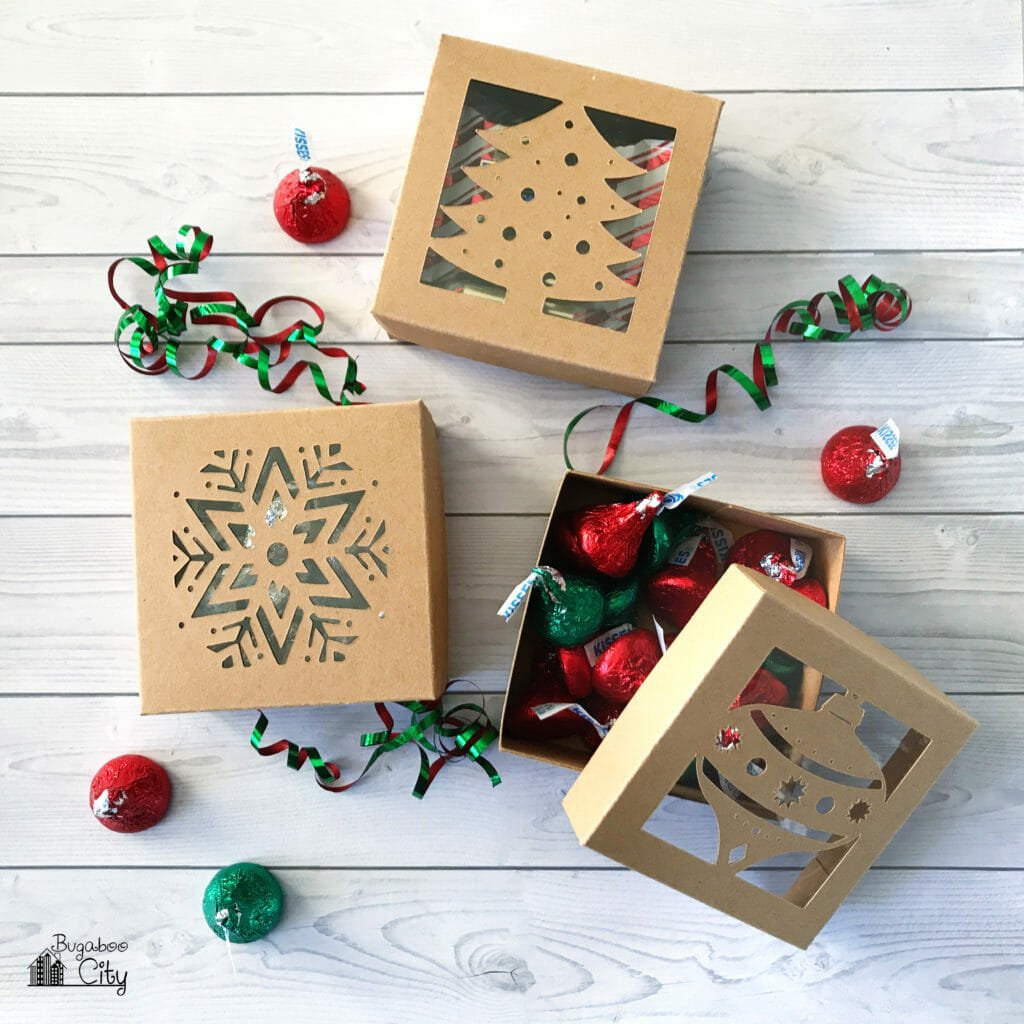
- Christmas Treat Boxes
- Rainbow Treat Boxes
- Fruit Treat Boxes
- Valentine’s Day Treat Boxes
Below is the tutorial for these fun Halloween boxes. They make adorable little boxes to give friends, family, coworkers and teachers.

Supplies Needed for DIY Halloween Treat Boxes:
- (1) 8.5″ x 11″ sheet of black or orange cardstock for each box
- Small piece of paper or Thin Clear Craft Plastic for lining the lid of the box
- Adhesive like double-sided tape – I used 1/8″ and 1/2″ Scor-Tape
- Glue Pen or Glue Stick (comes in handy for the pumpkin box)
- Cutting machine
- Cutting Mat and Cutting machine tools
- Scoring Stylus or if scoring by hand – Scoring Board and stylus
- Free SVG cut files – Located in my Resource Library. Directions for how to access the files are at the end of the post.

Step by Step Tutorial
Step One: Prepare the cut files. Use the free SVG files to cut out the boxes. The pink lines on each file are the scoring lines. If your machine does not have a scoring option, delete these layers and score the boxes by hand using a scoring board and stylus. There is a scoring guide included with the files.
Directions for Design Space: Start a new project and upload the SVG file for the box you are making. Change the two layers of pink lines from “Score” to “Cut”. You will need to attach the score lines to each part of the box. To do this you will need to “Ungroup” the project until each part of the file is separate. Once each part of the project is separate, highlight the score lines and the box lid they match with and hit “Attach”. You are ready to cut! Double check that the score lines appear on the box pieces when you go to cut.
Step Two: Cut the box. Place the 8.5″ x 11″ sheet of cardstock on your cutting mat the landscape way, so the width is 11″ and cut each box. Cut the lid liner from a contrasting color of cardstock or clear plastic.


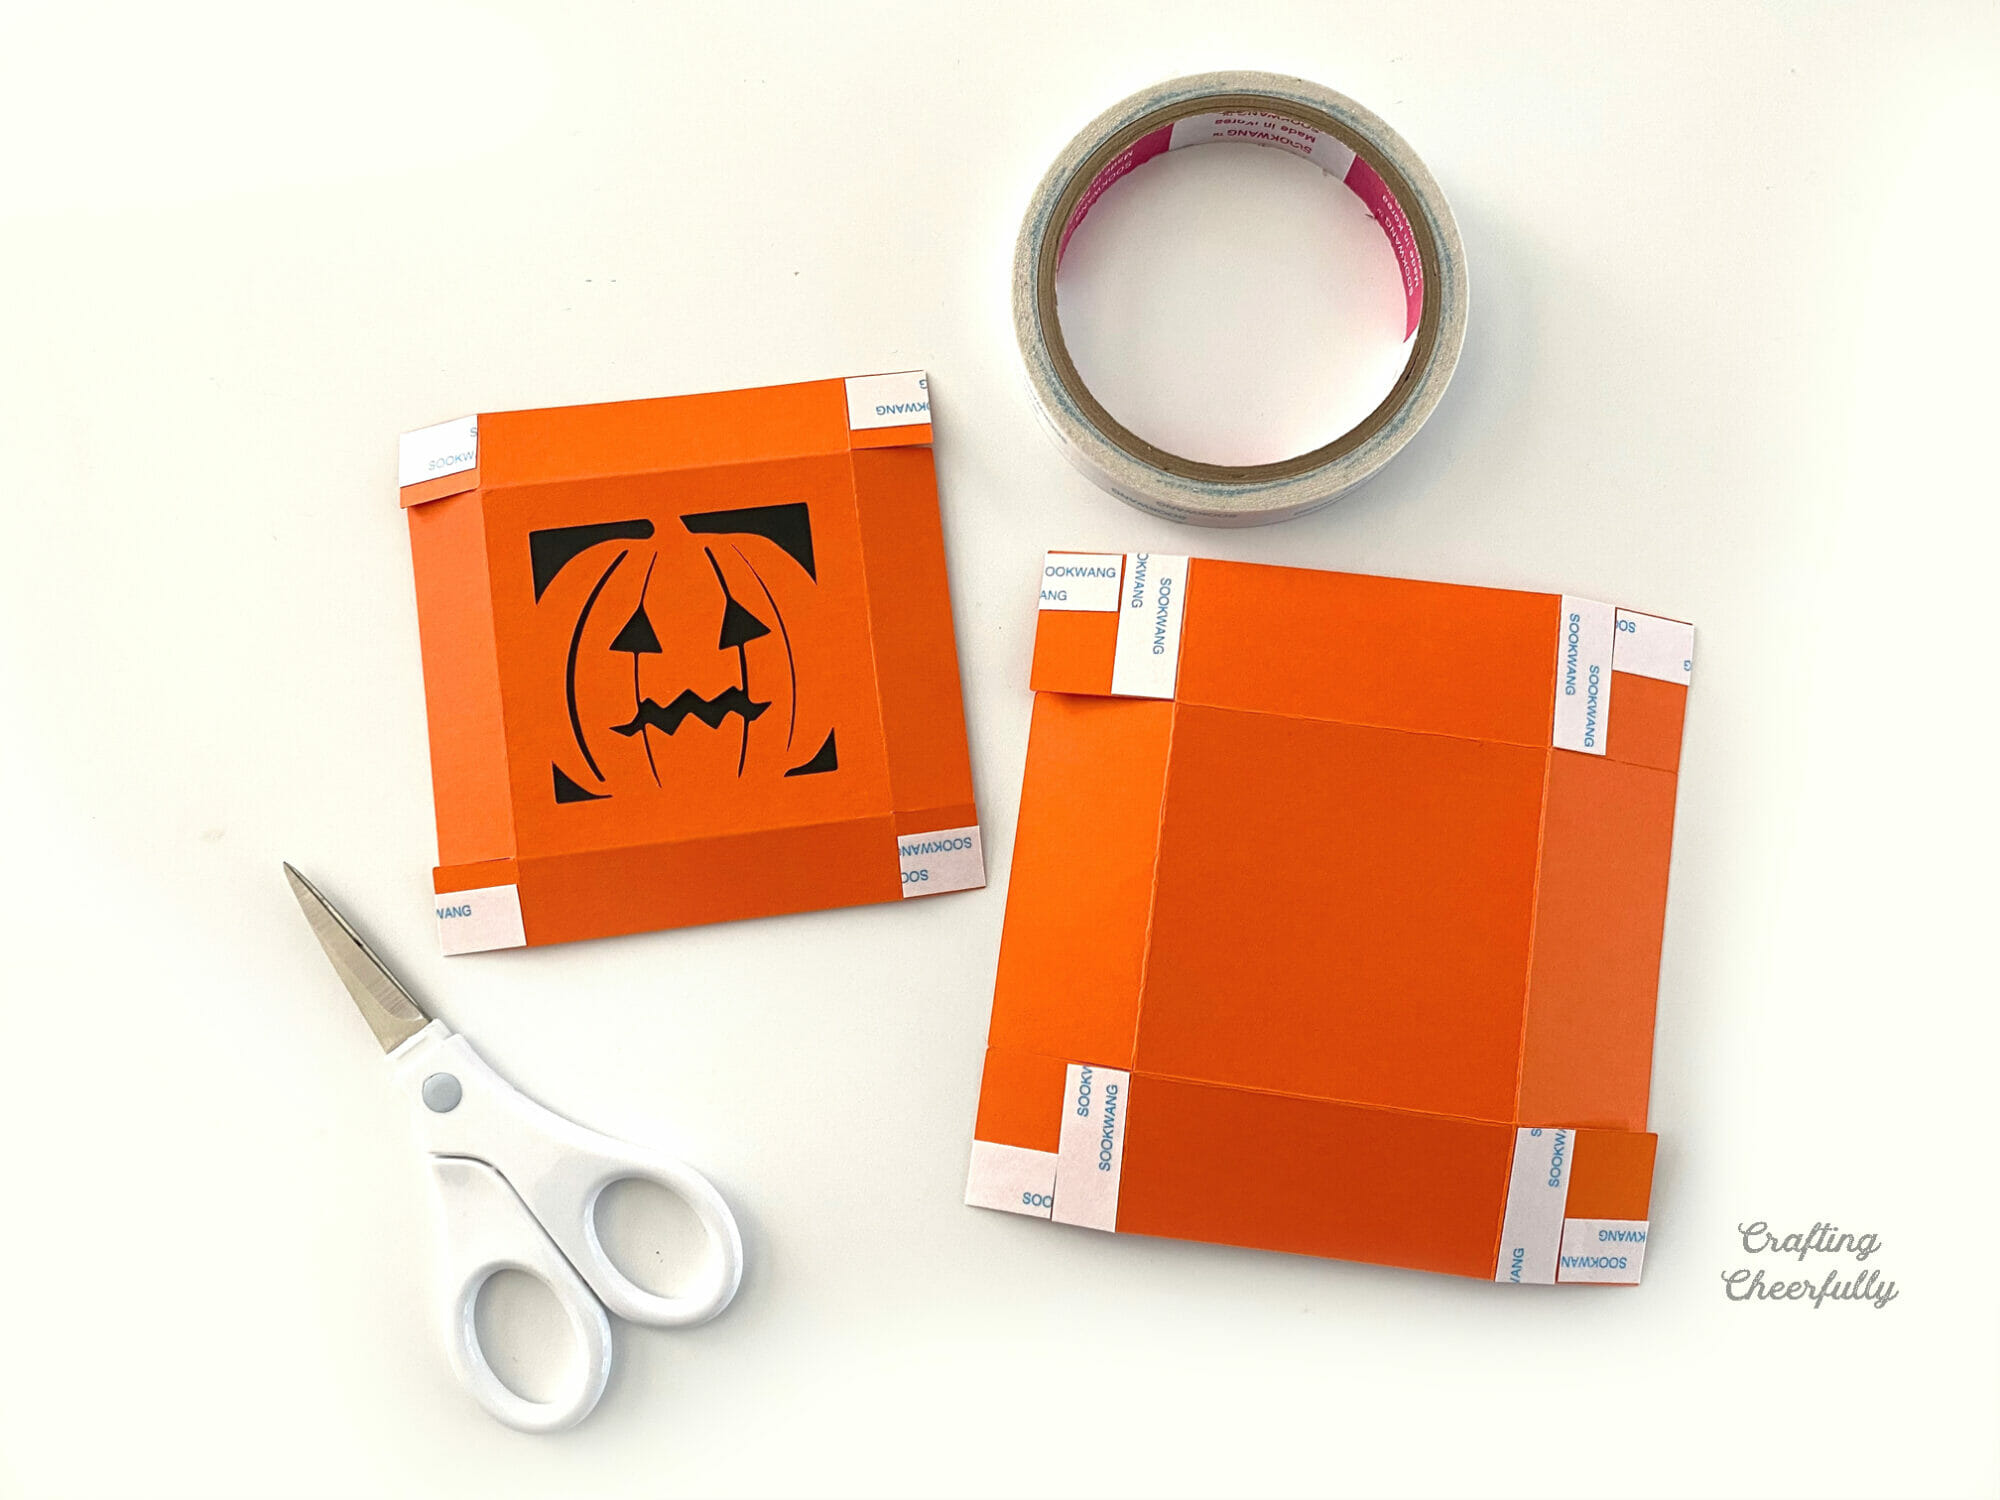
Step Three: Line the lid of the box with paper or clear craft plastic. After the boxes have been cut, fold along the score lines.

Adhere the lid liner to the back side of the lid. I used 1/8″ Scor-Tape. I used a little bit of glue to adhere the middle section of the pumpkin to the lid liner.


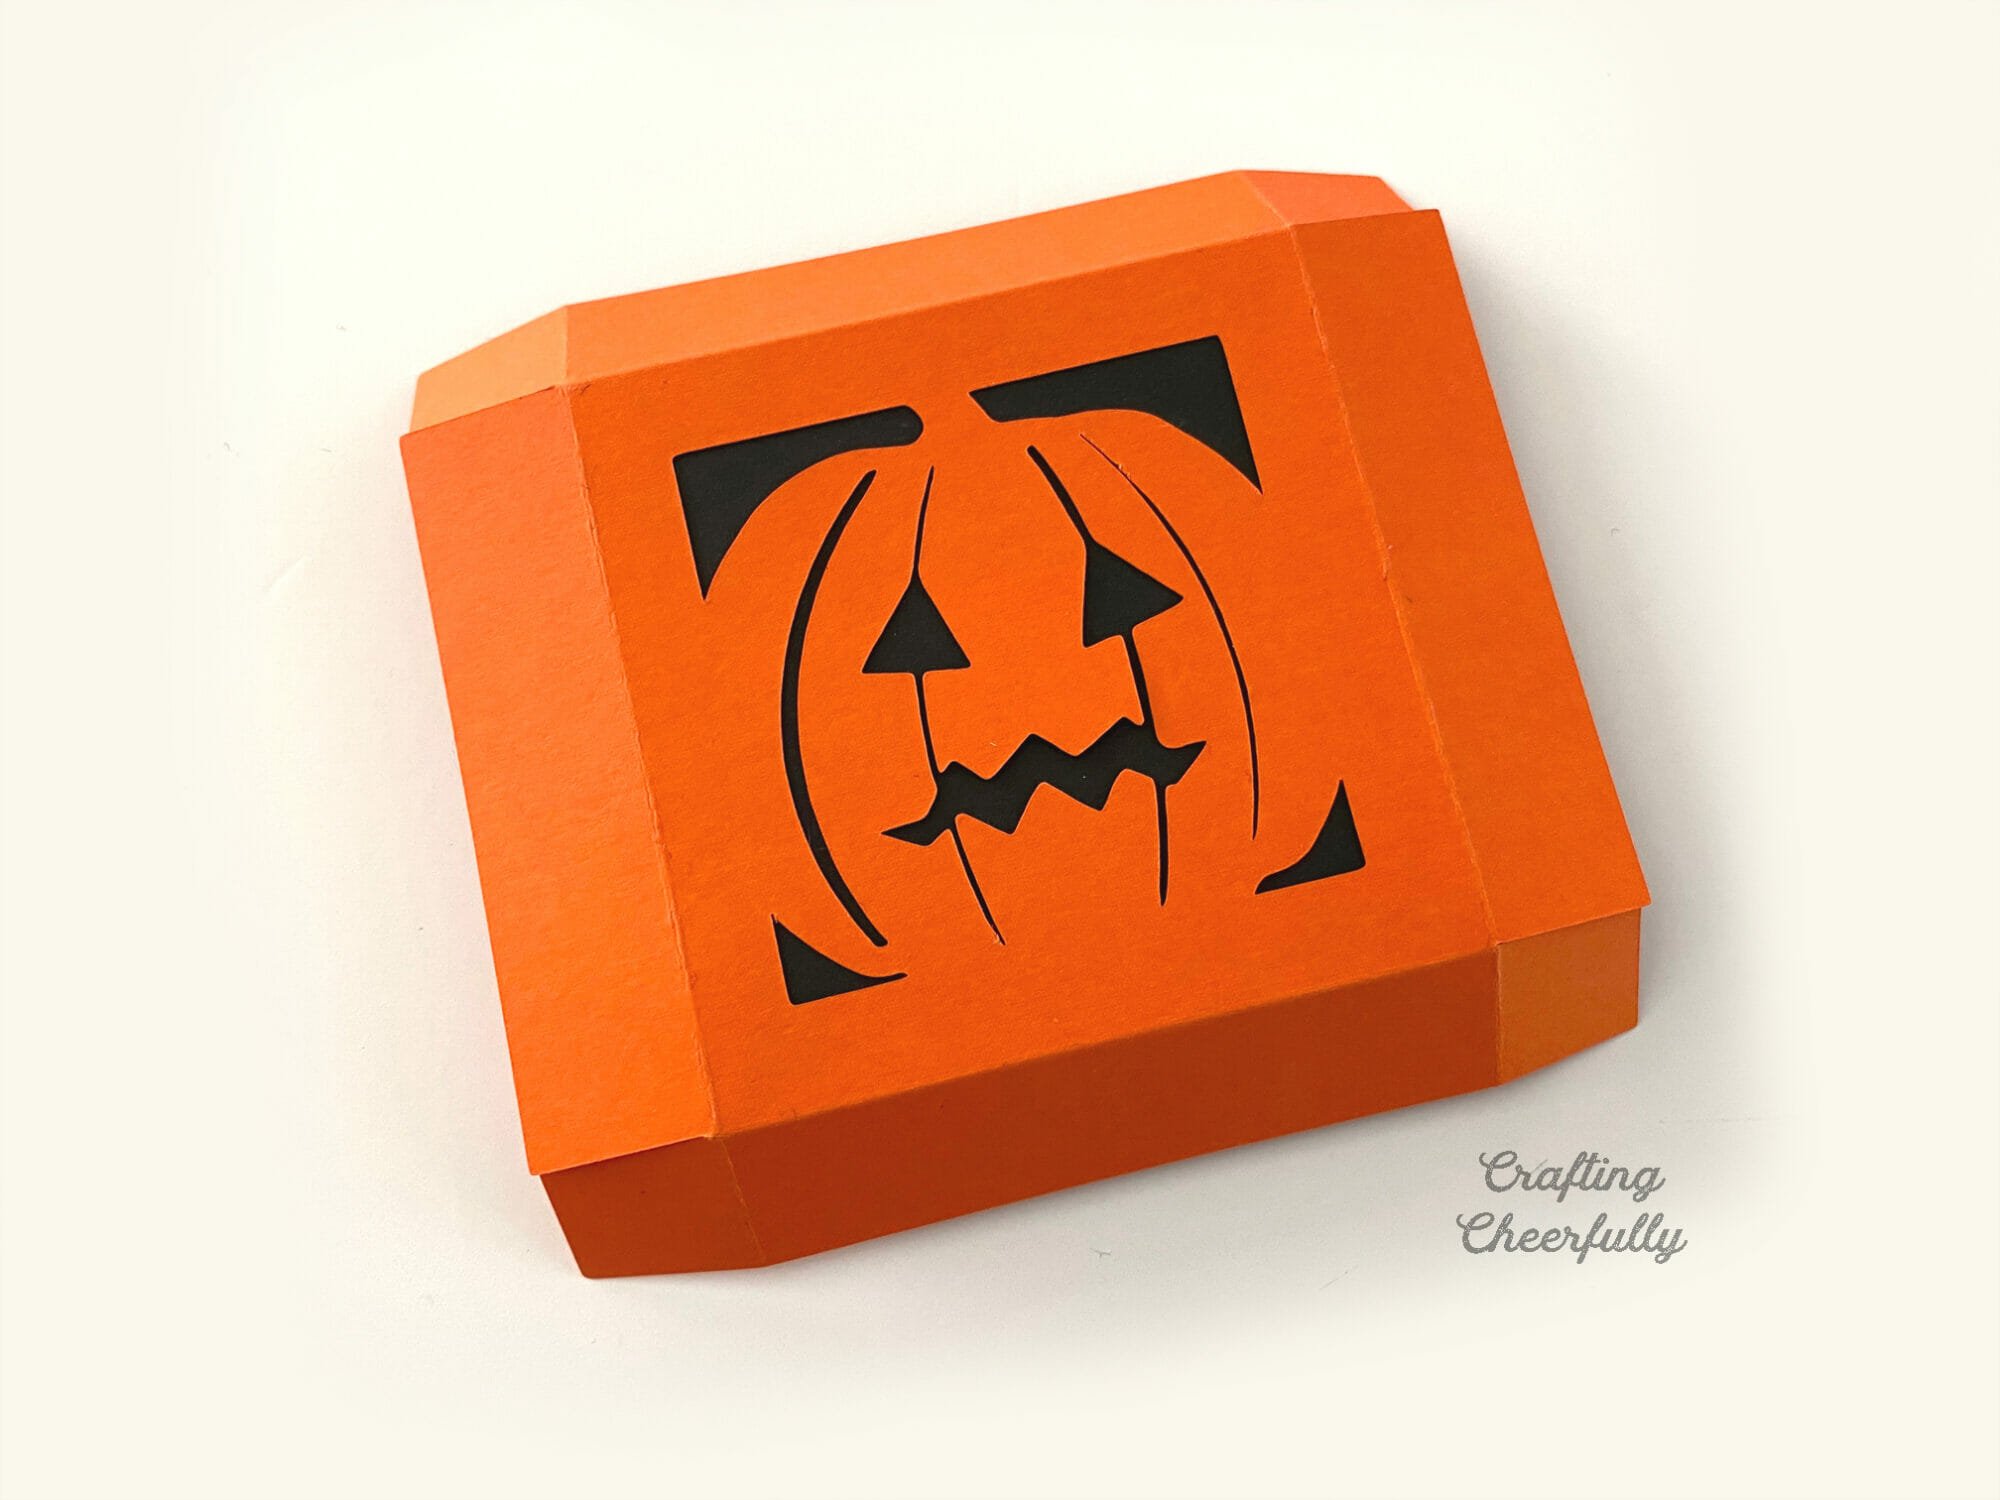
Step Four: Assemble the box. Turn both parts of the box so their right sides are facing up and apply Scor-Tape to the small tabs as shown below. I used my 1/2″ Scor-Tape for this. The lid of the box was created to be slightly larger than the bottom so they should fit together easily.

You can see below, I made one box with black cardstock behind the lid and the other with clear craft plastic.

The treat boxes are finished and ready to be filled with goodies! The paper you are using is most likely not “food-safe” so I’d recommend using wrapped candies or treats or putting candy in clear plastic baggies. I filled my boxes with candy corn for these pictures but I have gifted these boxes filled with wrapped candies like Candy Kisses and Starburst. I have also filled the with non-candy treats like Halloween mini erasers and skull and spider rings.
Check out these other treat boxes and save the ideas for Thanksgiving and Christmas!

Get the Free Halloween Cut Out Treat Box Files!
Fill out the purple form below with your first name and email address! The free file will be sent straight to your inbox! If you have already filled out the form below, don’t worry – you won’t be added to my list twice! This freebie is for personal use only. I hope you enjoy crafting something special. Please let me know if you have any questions :)


2 Comments