
DIY Waterproof Bib
Create a cute DIY waterproof bib for your little one! This step-by-step tutorial will walk you through how to make a bib using my free sewing pattern.

Hello Crafty Friends! Today I’m excited to share a tutorial with you on how to make your own DIY waterproof bib. On a recent trip to JoAnn Fabrics, I found waterproof fabric called PUL, or Polyurethane Laminate. PUL is a waterproof fabric that I see used for cloth diapers a lot but it can also be used to make other things like bibs. I made four bibs from the PUL fabric and absolutely love them!
I have been using these bibs for both my kiddos and have found the PUL fabric cleans easily and the bright whites don’t fade in the wash. I love these new bibs and I have become a big fan of the PUL fabric I bought. This post is not sponsored at all; I just happen to really love this fabric for bibs!
The tutorial below is for a waterproof bib. You can use my free pattern with PUL, cotton, terrycloth, or flannel to create a cute bib, even if it isn’t waterproof!

More Baby-Themed Sewing Projects
- How to Make a Cute Baby Tutu
- Make Curtains from a Baby Crib Sheet
- How to Add a Skirt to a Baby Bodysuit
- Harry Potter Baby Activity Cube
How to Make a DIY Waterproof Bib
Supplies Needed:
- Pattern: Create a pattern from a favorite bib you have at home or use my free bib pattern. Grab the free bib pattern by filling out the purple form at the end of this post.
- Fabric (I used patterned PUL for the front and back and solid PUL for bias tape)
- Update: It looks like Babyville Boutique, the company that made the PUL fabric I used, is not making it anymore. At the time of this update there are still some prints available on Amazon and from the online fabric store, Fabricville. It also looks like you can find it on Etsy or at some Walmart and Hobby Lobby stores.
- There is also a wide selection of PUL fabric from Nature’s Fabric. The prints look really fun!
- Velcro fasteners for closure
- Thread
- Fabric Scissors
- Pins

Step-by-Step Instructions for Baby Bib
Step One: Print the bib pattern. If you have an existing bib you like at home, you can trace it and make your own pattern. If you’d like to use my bib pattern, fill out the purple form at the end of this post and print the pattern. Tape the four pattern pieces together to create your bib pattern.
Step Two: Cut out the fabric. Cut the bib front, bib back, and bib pocket from your patterned waterproof PUL fabric.

Step 3: Make bias tape. The edges of the bib are finished with bias tape made from the PUL fabric so the entire bib is waterproof. You can measure the edges of the bib front piece to determine how much bias tape you need. I just made a whole bunch since I was making several bibs!

How to Make Your Own Bias Tape
To create your own bias tape, cut 1.5″ diagonal strips from the solid PUL fabric. Once you have the strips, you can sew them together. To do this, put right sides together and sew with 1/4″ seam allowance. I place my pins along the seam line so I can open it up and check the two strips of bias are lined up correctly before stitching. Keep attaching the pieces together until you have enough bias tape to go around the entire bib, plus some to go across the top of the pocket.

Step Four: Create the bib pocket. The steps you use to finish off the top edge of the pocket are the same you will use to finish the edges of the bib.
Use the bias tape to finish the top edge of the pocket. Start by pining the bias tape, right sides together, along the top edge of the pocket. Stitch with 1/4″ seam allowance. Press the seam with the seam allowance pointing up, then trim the seam allowance to 1/8″. Fold the bias tape over to the back side then fold it under again so there are no raw edges. Pin this in place, then stitch from the front of the bib with your needle following the seam line. This should catch the bias tape on the wrong side, this is called “stitching in the ditch”.


Position the pocket on the front of the bib piece and stitch around the bottom curve.

Step Five: Sew the Velcro closure on the bib straps. Stitch the rough side of the Velcro to the front bib piece and the soft side to the back bib piece – on the opposite side. Double-check that your bib will close properly before stitching the Velcro down.


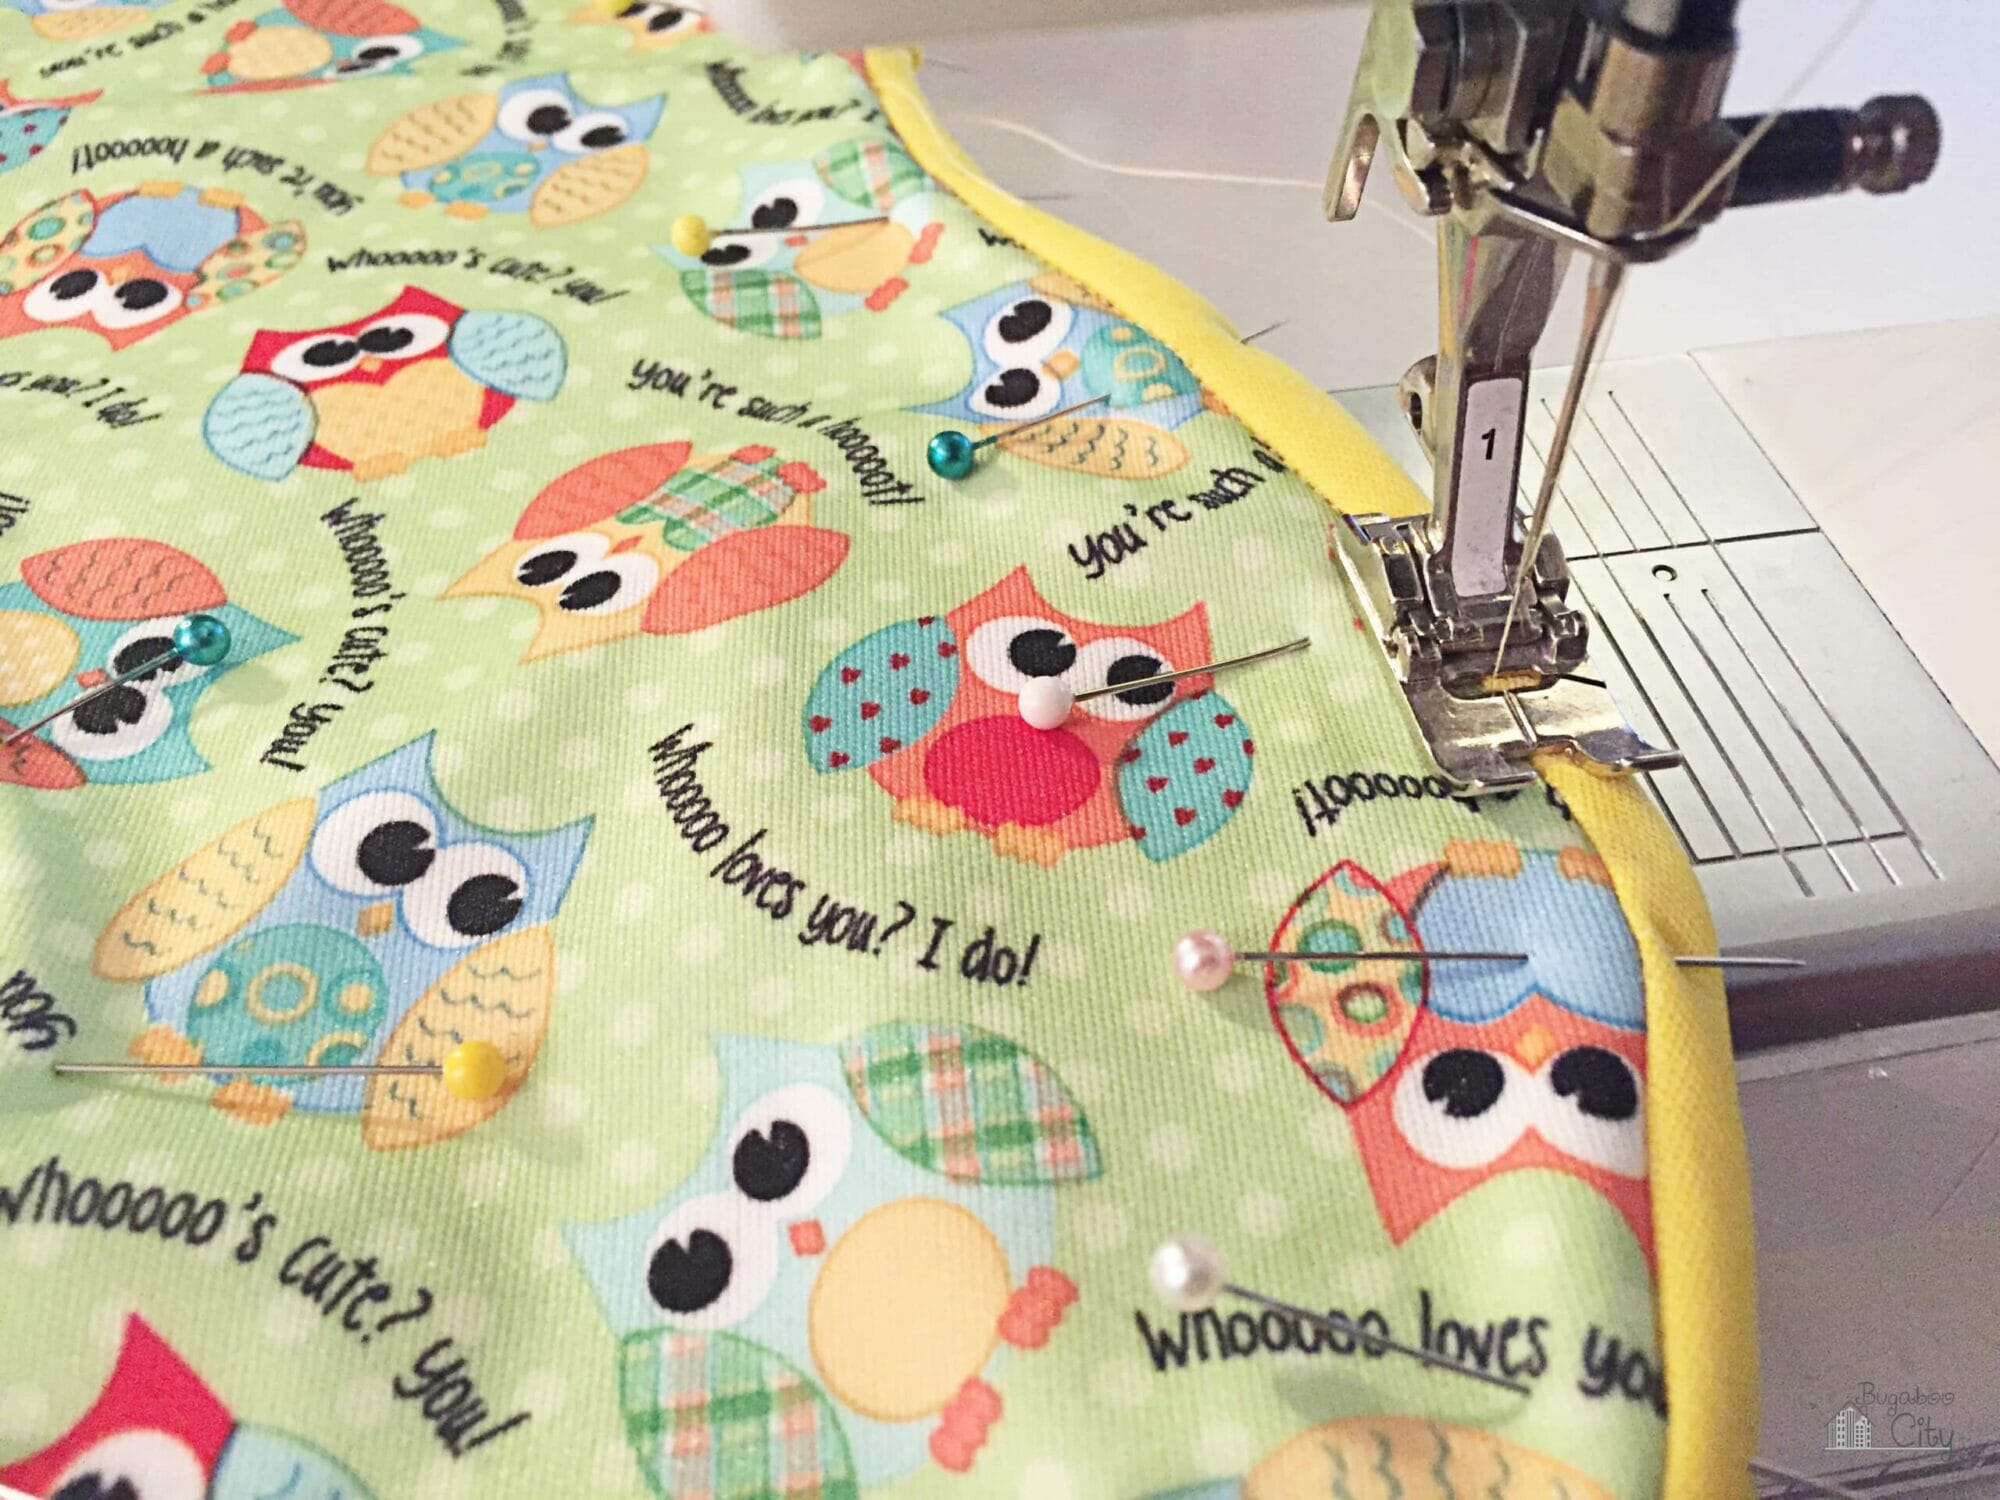
Step Six: Bind the entire bib with bias tape. First sew the front bib piece to the back bib piece, with wrong sides together. Stitch around the entire bib, going through both layers, keeping your stitching close to the edge. Stitching the two layers together before adding the bias tape, just helps to hold things together. Next add the bias tape the same way you did along the top edge of the pocket. Stitch the bias tape to the front of the bib, right sides together, with a 1/4″ seam allowance.

I stopped at the top of the bib to clip the bias tape so I could make the turn more easily.

Overlap the bias tape when you get to the place where you started.

Once you have sewn the bias tape around the entire bib, remove your pins and fold the bias tape over to the back side. Fold the bias tape under so there are no raw edges.

From the front side of the bib, you can “stitch in the ditch” again.

Give the entire bib a really good pressing and it is complete! Once you make one, the rest go fairly quickly. These are now our go-to bibs and I really love how crisp and new they look after months of use. The PUL fabric has been great and it comes in so many fun patterns that I think it makes the cutest bibs. I hope you enjoyed this tutorial for a DIY Waterproof Bib! You can view my other craft project for baby, for more DIY craft ideas.

Get the free Baby Bib Pattern!
Fill out the purple form below with your first name and email address! The free file will be sent straight to your inbox! If you have already filled out the form below, don’t worry – you won’t be added to my list twice! This freebie is for personal use only. I hope you enjoy crafting something special. Please let me know if you have any questions :)


How wide is the bias tape? Can regular fabric be used as bias tape? Can the bib be made with only one layer of fabric?
Hi! The bias tape was made with 1.5″ wide strips of fabric. I have used regular fabric for the bias tape but only when I have made these bibs from cotton that I covered in vinyl. On those bibs the regular fabric bias tape was fine, though it took longer to air-dry after I rinsed them off. I’ve only used the PUL fabric for bias tape when making the bibs out of PUL. It is nice this way because PUL fabric doesn’t shrink and washing the bib is very easy. I think the bib could be made with just one layer but may be best done with two. The back side of the PUL is the laminate side which becomes a bit sticky and slippery when wet. If the child wears the bib without a shirt, the bib will feel much better on their skin if the bib is doubled and the soft knit side is on the back as well. :)
Thanks for the tutorial. Very detailed and well explained. Love this bib, thank you for sharing.
Thank you!
Really fabulous tutorial with great results! thanks so much for sharing on craft schooling sunday!
Thank you! Also thank you for hosting Craft Schooling Sunday – so many great ideas!