DIY Children’s Calendar – Fabric Magnet Holder

Good morning! On Monday I shared the calendar I made for my little one, a magnetic board with lots of fun magnets to help him learn about the weather, the days of the week, and our daily activities. You can check out the tutorial for the calendar and download lots of free printables to make your own magnetic toddler calendar!
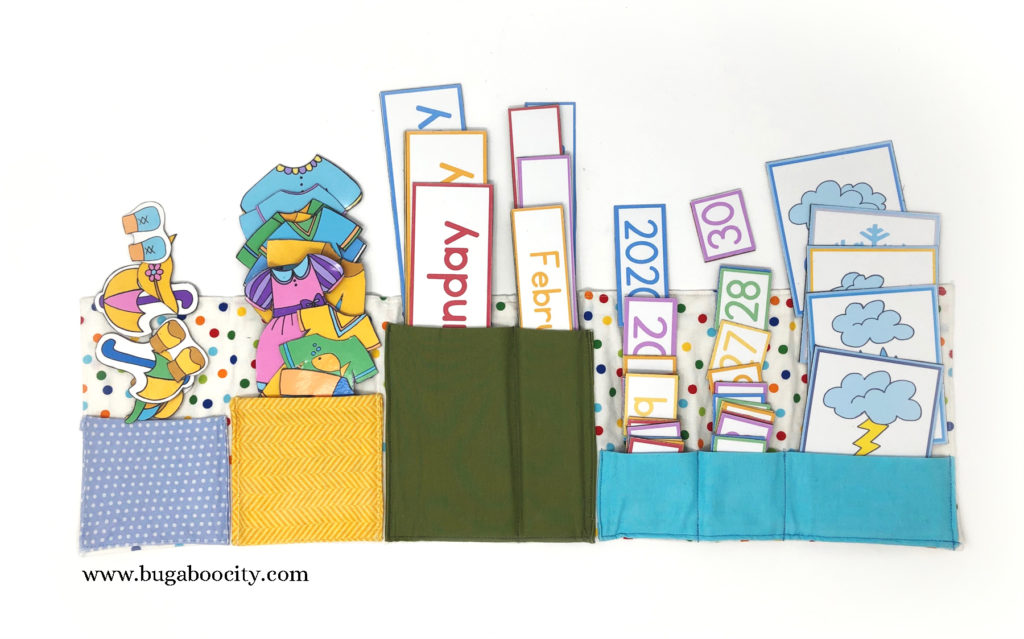
The board ended up having a lot of magnets when I was finished making it and I knew I was going to need to create something to hold them all. I could have easily put them all in a little box or a plastic baggie but I wanted something that would separate the magnets into their groups, making it easier for my son to pick out the day and month and so on. I decided to create pockets out of fabric that would hold everything and I made it so that it could be attached to the board or rolled up and kept separate.
Below is the tutorial for making the fabric magnet holder. If sewing isn’t your thing you could definitely make something similar with paper and envelopes. But if you are up for a quick sewing project, follow the steps below and you’ll be all set!


Fabric Magnet Holder for DIY Toddler Calendar
STEP 1: Cut the fabrics. Cut out your fabrics according to the measurements below. I chose to use four different pocket fabrics and two fabrics for the backing. Below are the sizes I cut my fabrics to. All measurements include the seam allowance. They are listed width by height. I have labeled them with the fabrics I used to help you know which pieces I’m referring to.
- Blue Polka Dot Pocket (for bunny clothes): 4 1/4″ x 6 3/4″ (includes 1/4″ seam allowance)
- Yellow Pocket (for weather): 4 1/2″ x 7 3/4″ (includes 1/4″ seam allowance)
- Green Pocket (for month and day of the week): 5 7/8″ x 11″ (includes 1/4″ seam allowance)
- Teal Pocket (for day, year, and daily activities): 9.5″ x 5″ (includes 1/4″ seam allowance)
- Rainbow Polka Dot (for backing front): 23″ x 7 1/4″ (includes 1/2″ seam allowance)
- White (for backing back): 23″x 7 1/4″ (includes 1/2″ seam allowance)
STEP 2: Sew the backing. Sew the backing front to the backing back with a 1/2″ seam allowance, right sides together. Sew around all four sides leaving a small opening for flipping it inside out. Clip the corners. Flip inside out through the small hole. Top stitch around all four sides about 1/8″ from the edge.


STEP 3: Sew the pockets. Each pocket will be sewn in the same way. First fold the sides under 1/4″. Then fold the pocket in half with the right sides together. Stitch the raw edges together with 1/4″ seam allowance. You now have a tube with the sides open.

 Flip the pocket inside out and you have a tube with each side open but no raw edges showing. Press pocket.

STEP 4: Attach the pockets to the backing using matching thread. Pin the pockets in place on the front side of the backing. Sew each pocket down along the sides and bottom, close to the edge. I drew in vertical lines to mark where the large pockets should be split into smaller pockets (in my case the green and teal pockets). I then topstitched along these lines in coordinating thread.


Your fabric magnet holder should be finished! It rolls up nicely which is how I am using mine right now. I can place it on top of a shelf and take it out every morning when it is “calendar time”. It is made to fit an 18″ by 22″ magnet board and can be attached to it.

Be sure to check out this week’s previous post on the DIY Children’s Calendar and download all the free printables to make your own! Have a wonderful weekend! I’ll be back Monday with another DIY tutorial – this time a fun craft to get ready for football season!
** UPDATE: We are still using this fabric magnet holder 3 years later and still love it!