DIY Felt Christmas Card Holder
Learn how to make your own Christmas card holder for the holidays! Using felt, heat transfer vinyl, and your Cricut cutting machine you can whip one up just in time for holiday mail!


Hello Crafty Friends! It’s the first day of my annual series “12 Days of Holiday Crafts” and today I’m sharing a tutorial for a DIY felt Christmas card holder! I made this Merry Mail pennant using felt and white Cricut Iron-On.
This card holder turned out so cute I ended up making two! One for each of my children to hang on their bedroom doors for the holiday season. Some of our relatives send our kids personalized mail and I thought this would be so cute! I’m sure they will use it for pretend play as well so it will get lots of use.
This card holder can be made as both a sewing and a no-sew project. I did a little bit of both, sewing with my machine and using adhesive to create mine. In my tutorial below I point out both ways to make it so you can do whatever works best for you!

DIY Merry Mail Holiday Card Holder
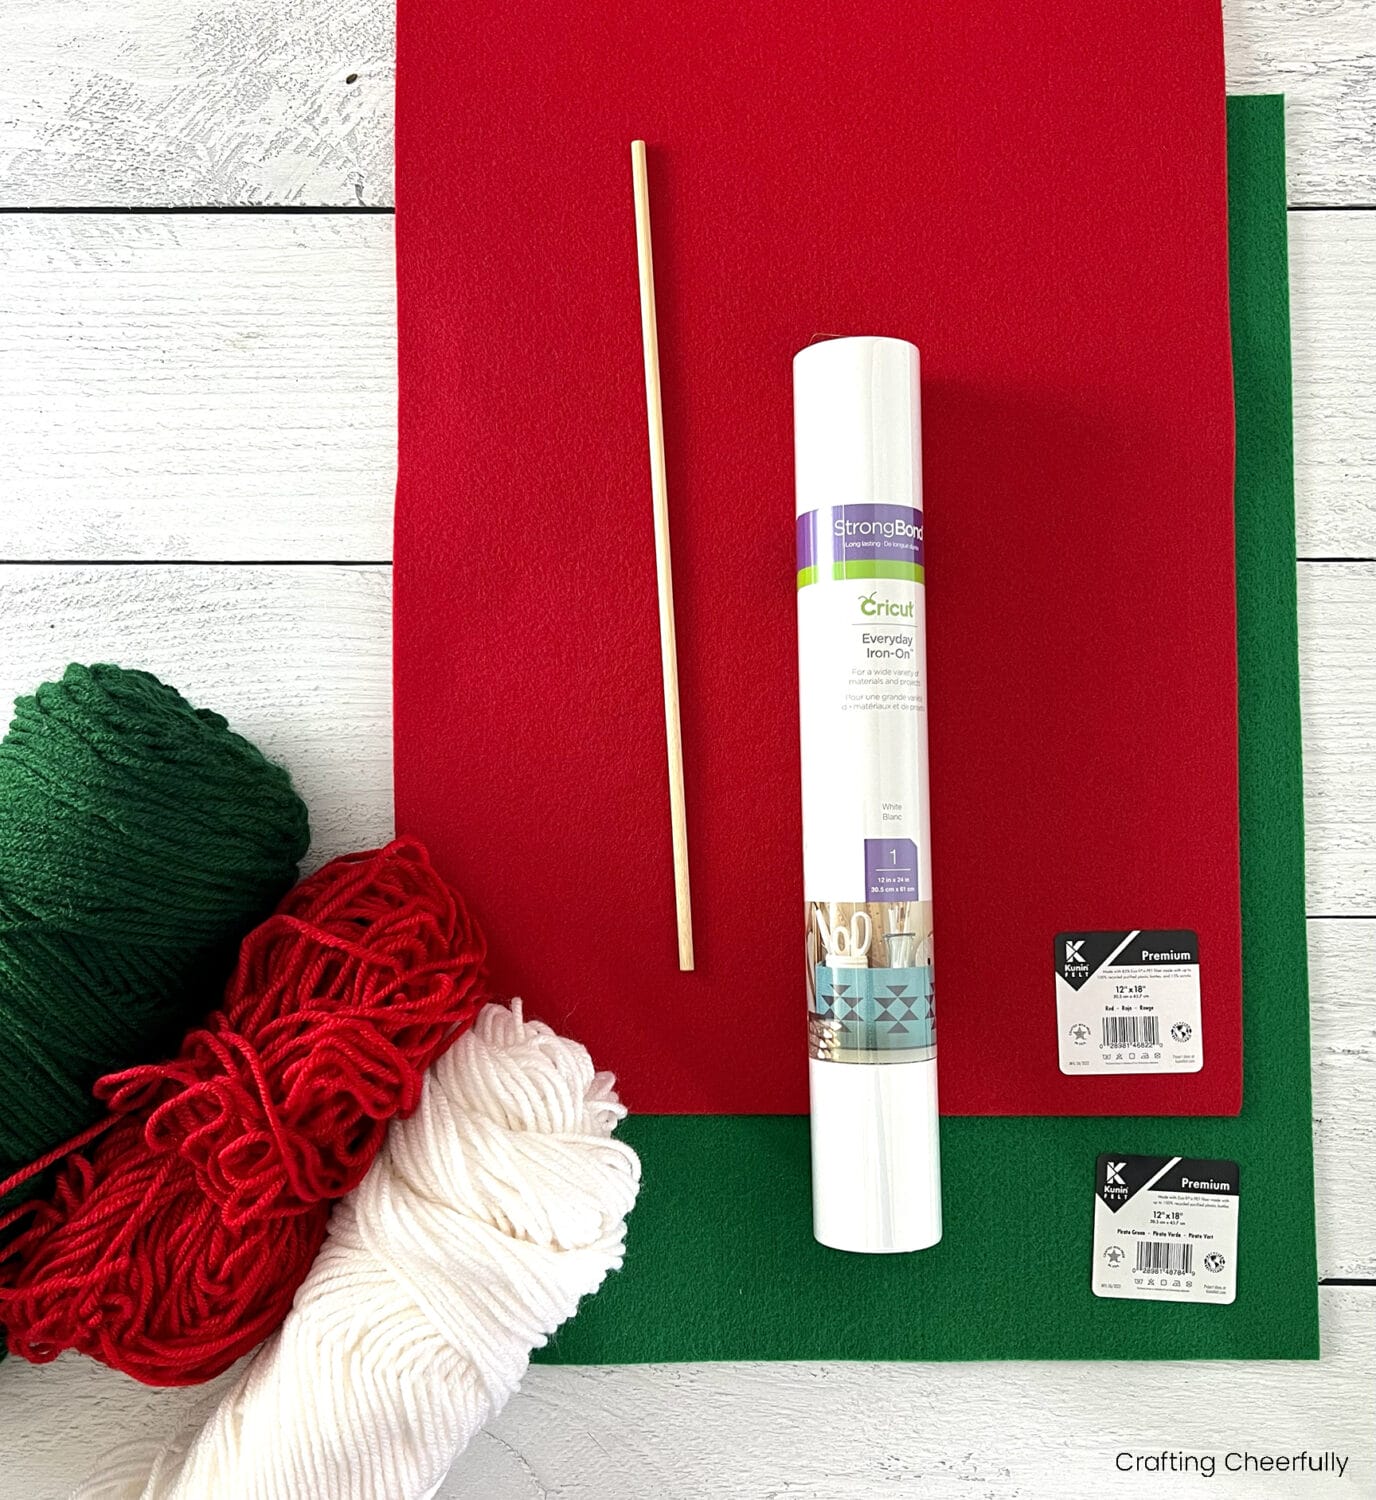
Supplies Needed
- Kunin Brand Premium Felt in Red
- 12″ x 18″ piece
- 4.5″ x 7.5″ piece
- Kunin Brand Premium Felt in Pirate Green
- 12″ x 18″ piece of green felt
- Heat N’ Bond Fusible Interfacing – This is for attaching the two layers of felt together – Choose Ultrahold for a no-sew option and Lite Sewable if you plan to sew the layers together.
- White Cricut Iron-On – 10″ x 14″
- 12″ Wooden Dowel
- Red, Green and White Yarn
- Red thread or Fabric Glue
- Ruler
- Cricut Explore
- Cricut Tools
- Extra Long Cricut Mat 12″ x 24″
- Cricut Design Space File – Free for Cricut Access Subscriber Members
Step by Step Tutorial
Step One: Start by cutting out the design from white HTV/Iron-On using your Cricut. I created the design in Cricut Design Space and you can use my exact design! It uses images included in the Cricut Access subscription. (If you do not have the subscription, be sure to delete the red piece since this can be cut by hand and then you won’t be charged for it!)

Before cutting, be sure to hide the two red pieces. I cut these pieces by hand but you could use your machine if if it can cut through felt. Use an extra long Cricut mat in order to cut the entire design as one piece.

Step Two: Cut out the red and green pieces of felt and adhere them together.
There are so many ways you can do this step. I chose to use Heat N’ Bond Ultrahold. You could also stitch the two layers together using Sewable Interfacing or stitch them together without any interfacing. Another option that could work is fabric glue.
The Ultrahold worked pretty well. It gives the project a little extra stiffness but there were two spots on my first one that kept wanting to peel up a bit. I think I needed to use a higher heat setting on my iron or iron the project for a longer length of time.
I started by drawing my pennant shape onto the paper side of the interfacing using a pencil and ruler. Start by creating a rectangle that measures 10″ wide and 11″ tall on each side. Next find the 5″ halfway point and draw a vertical center line that measures 15″. Connect the side ends of the rectangle to the point to form the pennant shape. It will look like an upside-down house.

Cut out the interfacing shape and iron it to the red felt on the wrong side. It helps to line it up with two straight edges. Once it has cooled, cut it out.


Peel the paper backing off of the red felt and iron it to the right side of the green felt leaving a 1/2″ border around the sides and bottom of the pennant. I used a ruler to help me position my felt then ironed it into place. After that I used my ruler again to mark 1/2″ around the other sides and cut it out.

Step Three: Add the HTV design to the felt pennant.
Weed the image cut from Iron-On/HTV using a weeding tool.

Carefully cut out the pocket design from the center of the pennant design leaving a small border around it.

Iron the designs onto the felt shapes. The design does not reach the top of the pennant since this edge will be folded over.

Step Four: Sew the pocket onto the pennant.
Line up the pocket with the end of the candy cane stripes and stitch the pocket to the pennant using red thread leaving the top open. You could also use fabric glue for this step and carefully glue the sides and bottom edge.
Step Five: Create a casing along the top of the pennant for the dowel.
Fold the top 1″ of the pennant over to the back side and stitch 1/2″ from the top creating a casing for the wooden dowel to slide into. You could again use fabric glue for this step but be careful to leave an opening large enough for the dowel to slide into.
I painted the ends of my wooden dowel white. I’m not sure it’s really necessary though because such a small part of the dowel ends up being visible on the finished pennant.


Step Five: Create a cute yarn tassel.
Start by cutting a piece of cardboard to measure 3″ x 6″. Wrap yarn around it about 20-25 times. I used a combination of white, red and green yarn and just wrapped them each around the cardboard about 6-8 times.

Use a small piece of yarn to secure the top of the tassel and remove the cardboard. Use another piece of yarn to tie around the tassel about 1″ from the top of the tassel. Trim the ends of the tassel so they are even then tie the tassel to one end of the dowel.


The felt Christmas card holder is finished! It turned out so cute! My kids have seen this and are really excited to hang it on their doors once we start decorating our house for the holidays.

I hope you enjoy making this and I’ll be back tomorrow for day 2 of “12 Days of Holiday Crafts“. Thank you for following along :)