DIY Keepsake Photo Frames for Teams and Troops
Create a unique keepsake photo frame perfect for teams, troops and more! This step-by-step tutorial will show you how to create this activity for your group of kids. Use my Cricut Design Space file, free SVG cut file or free PDF pattern to get started!
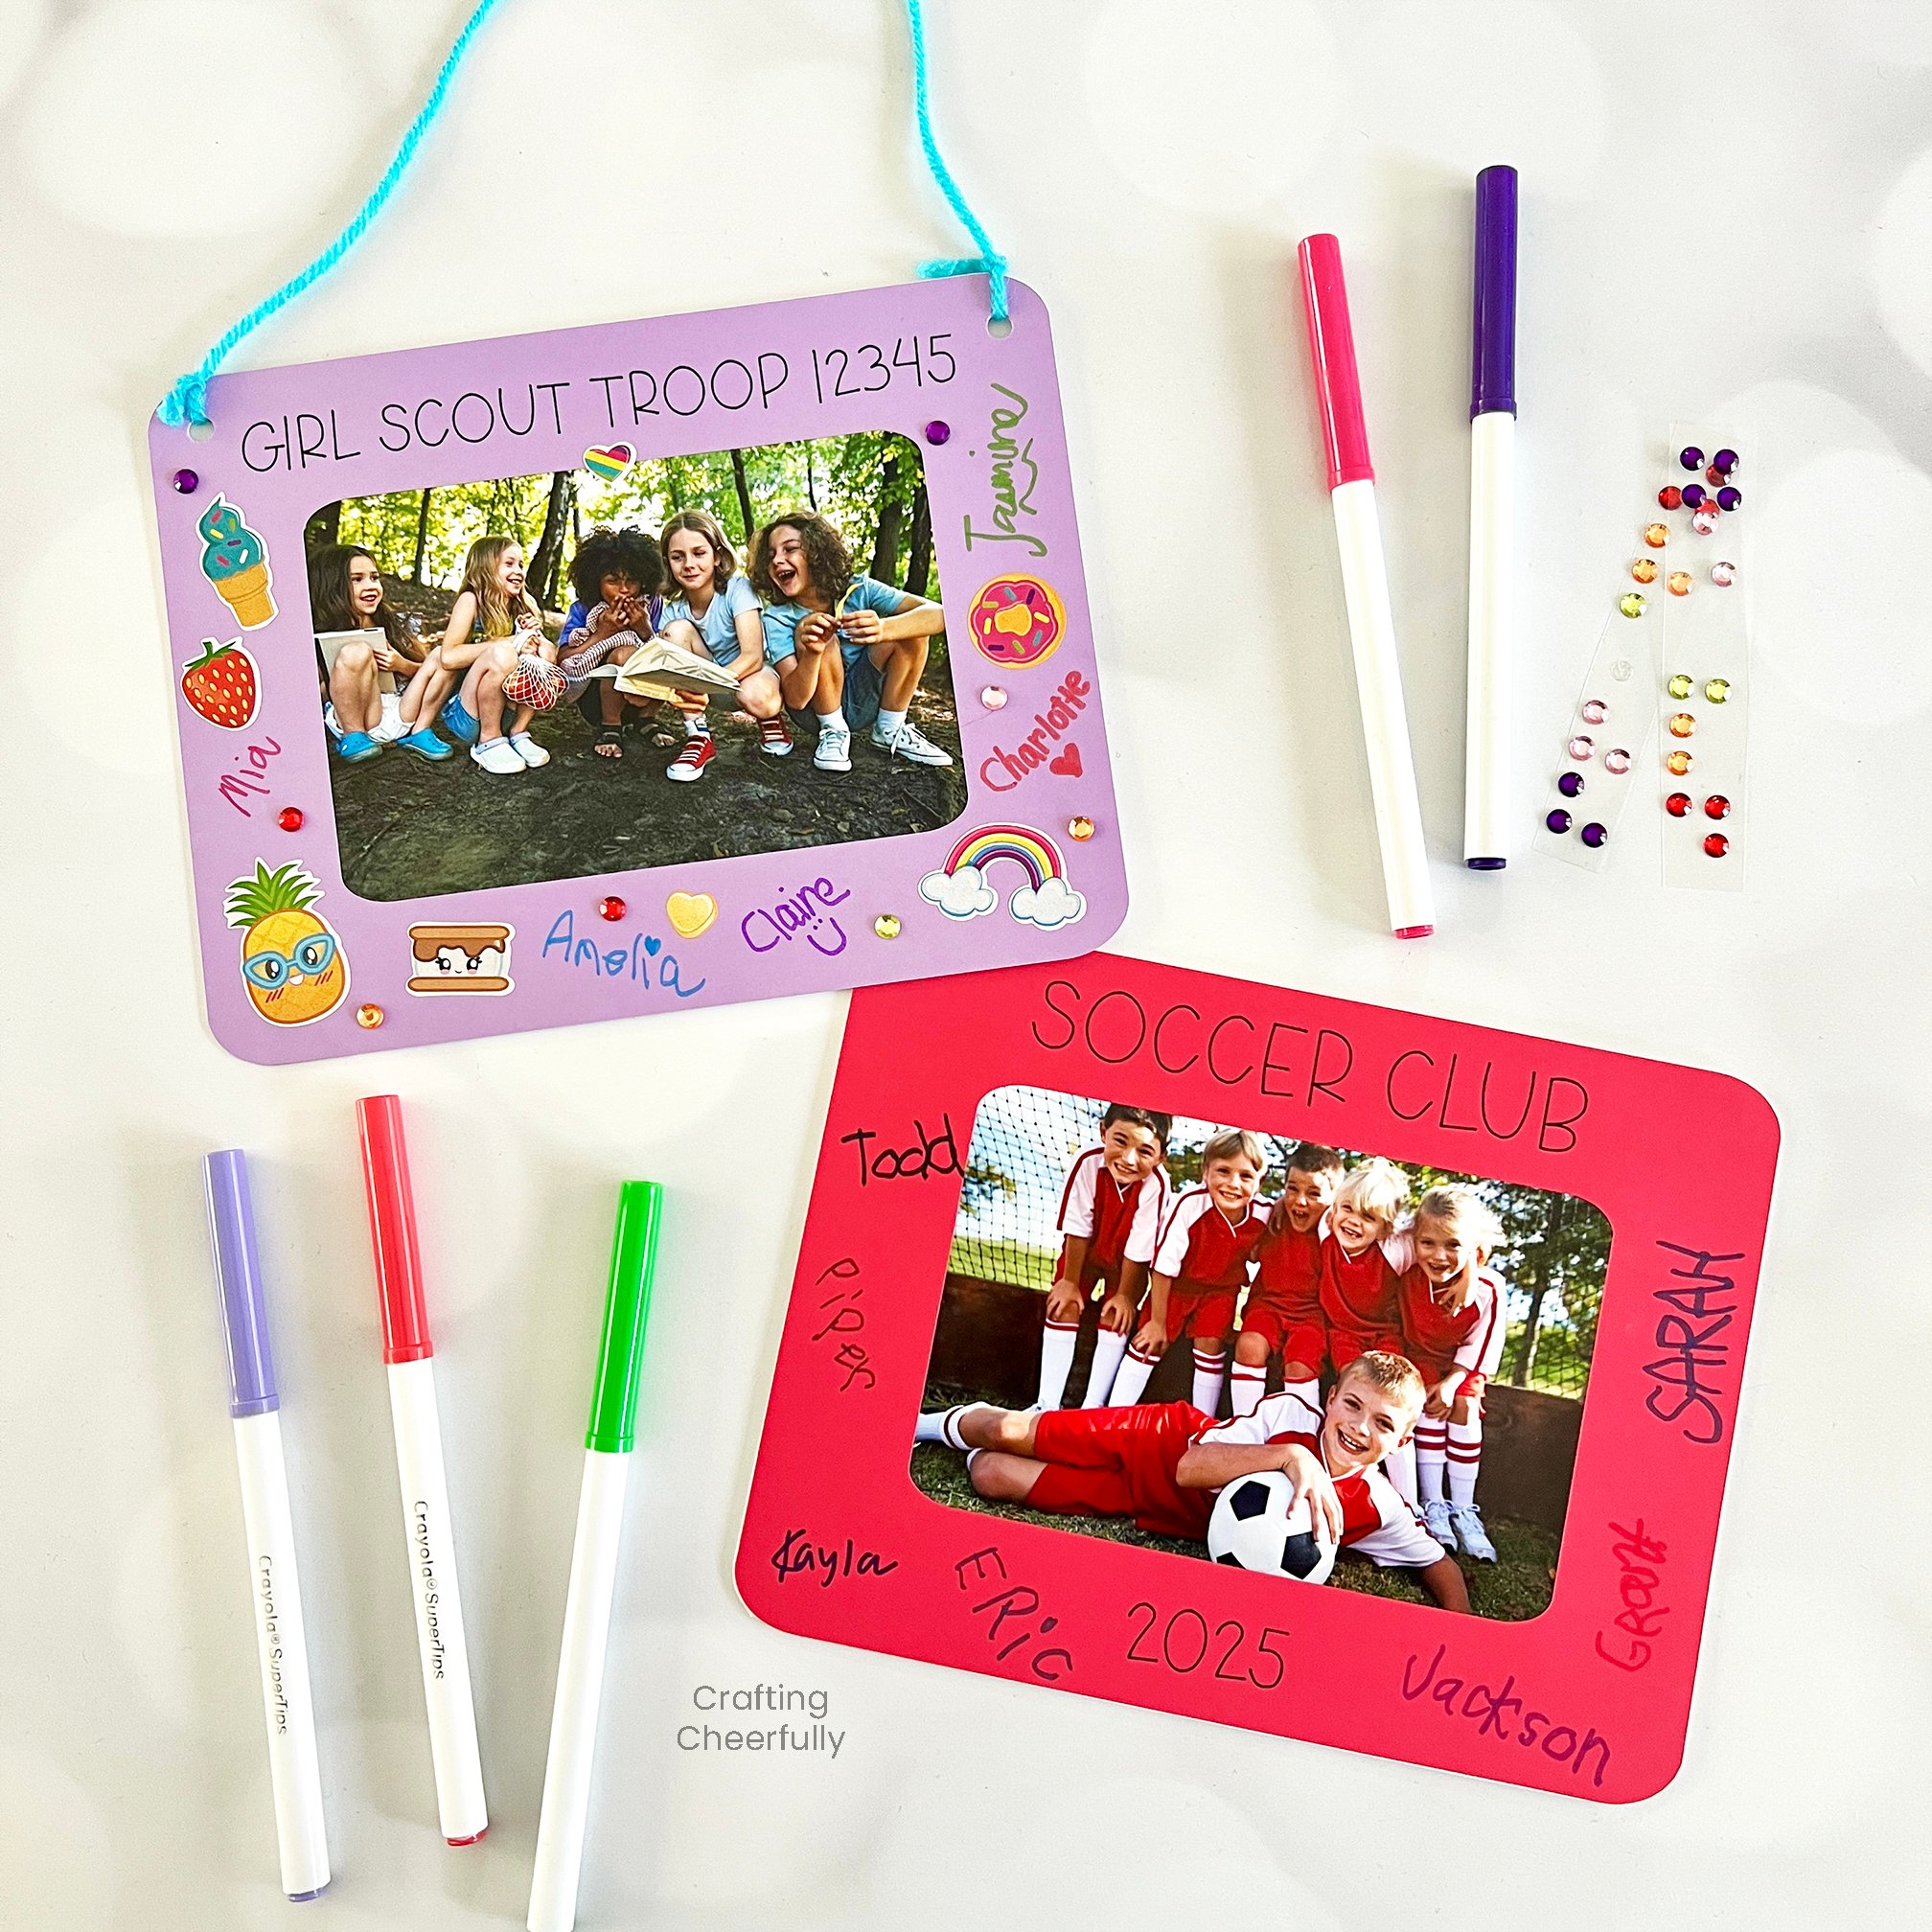
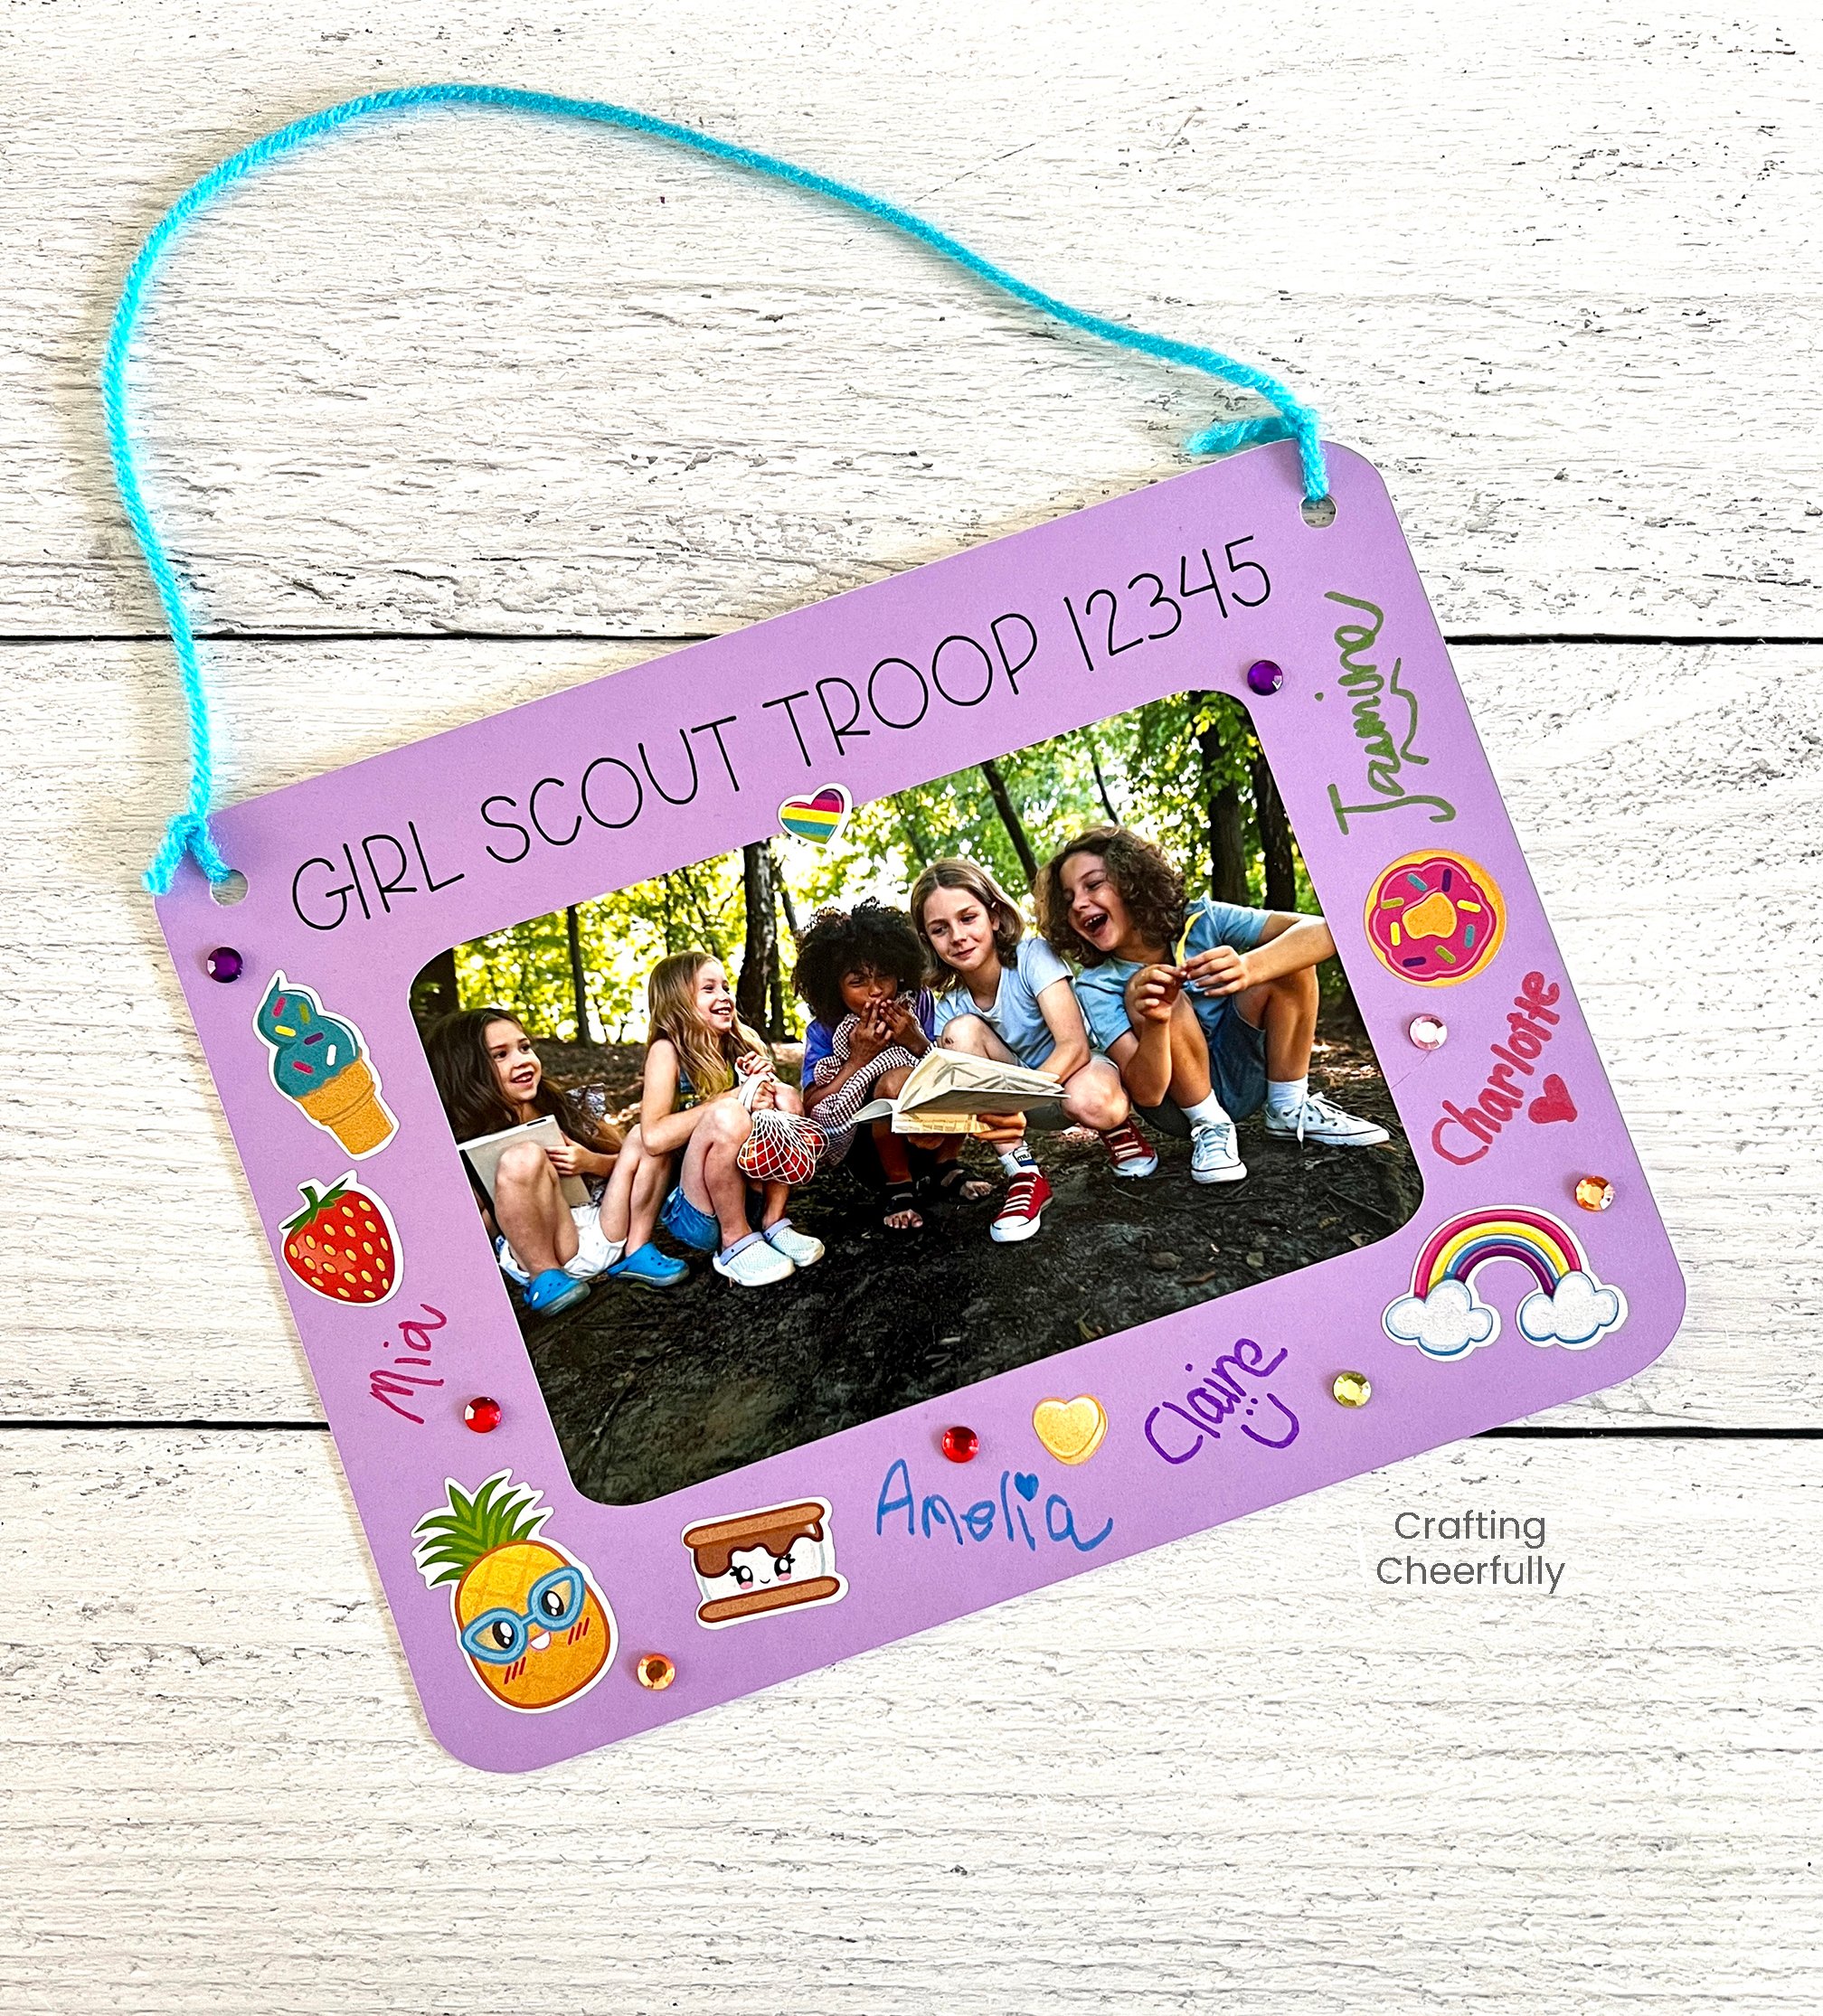
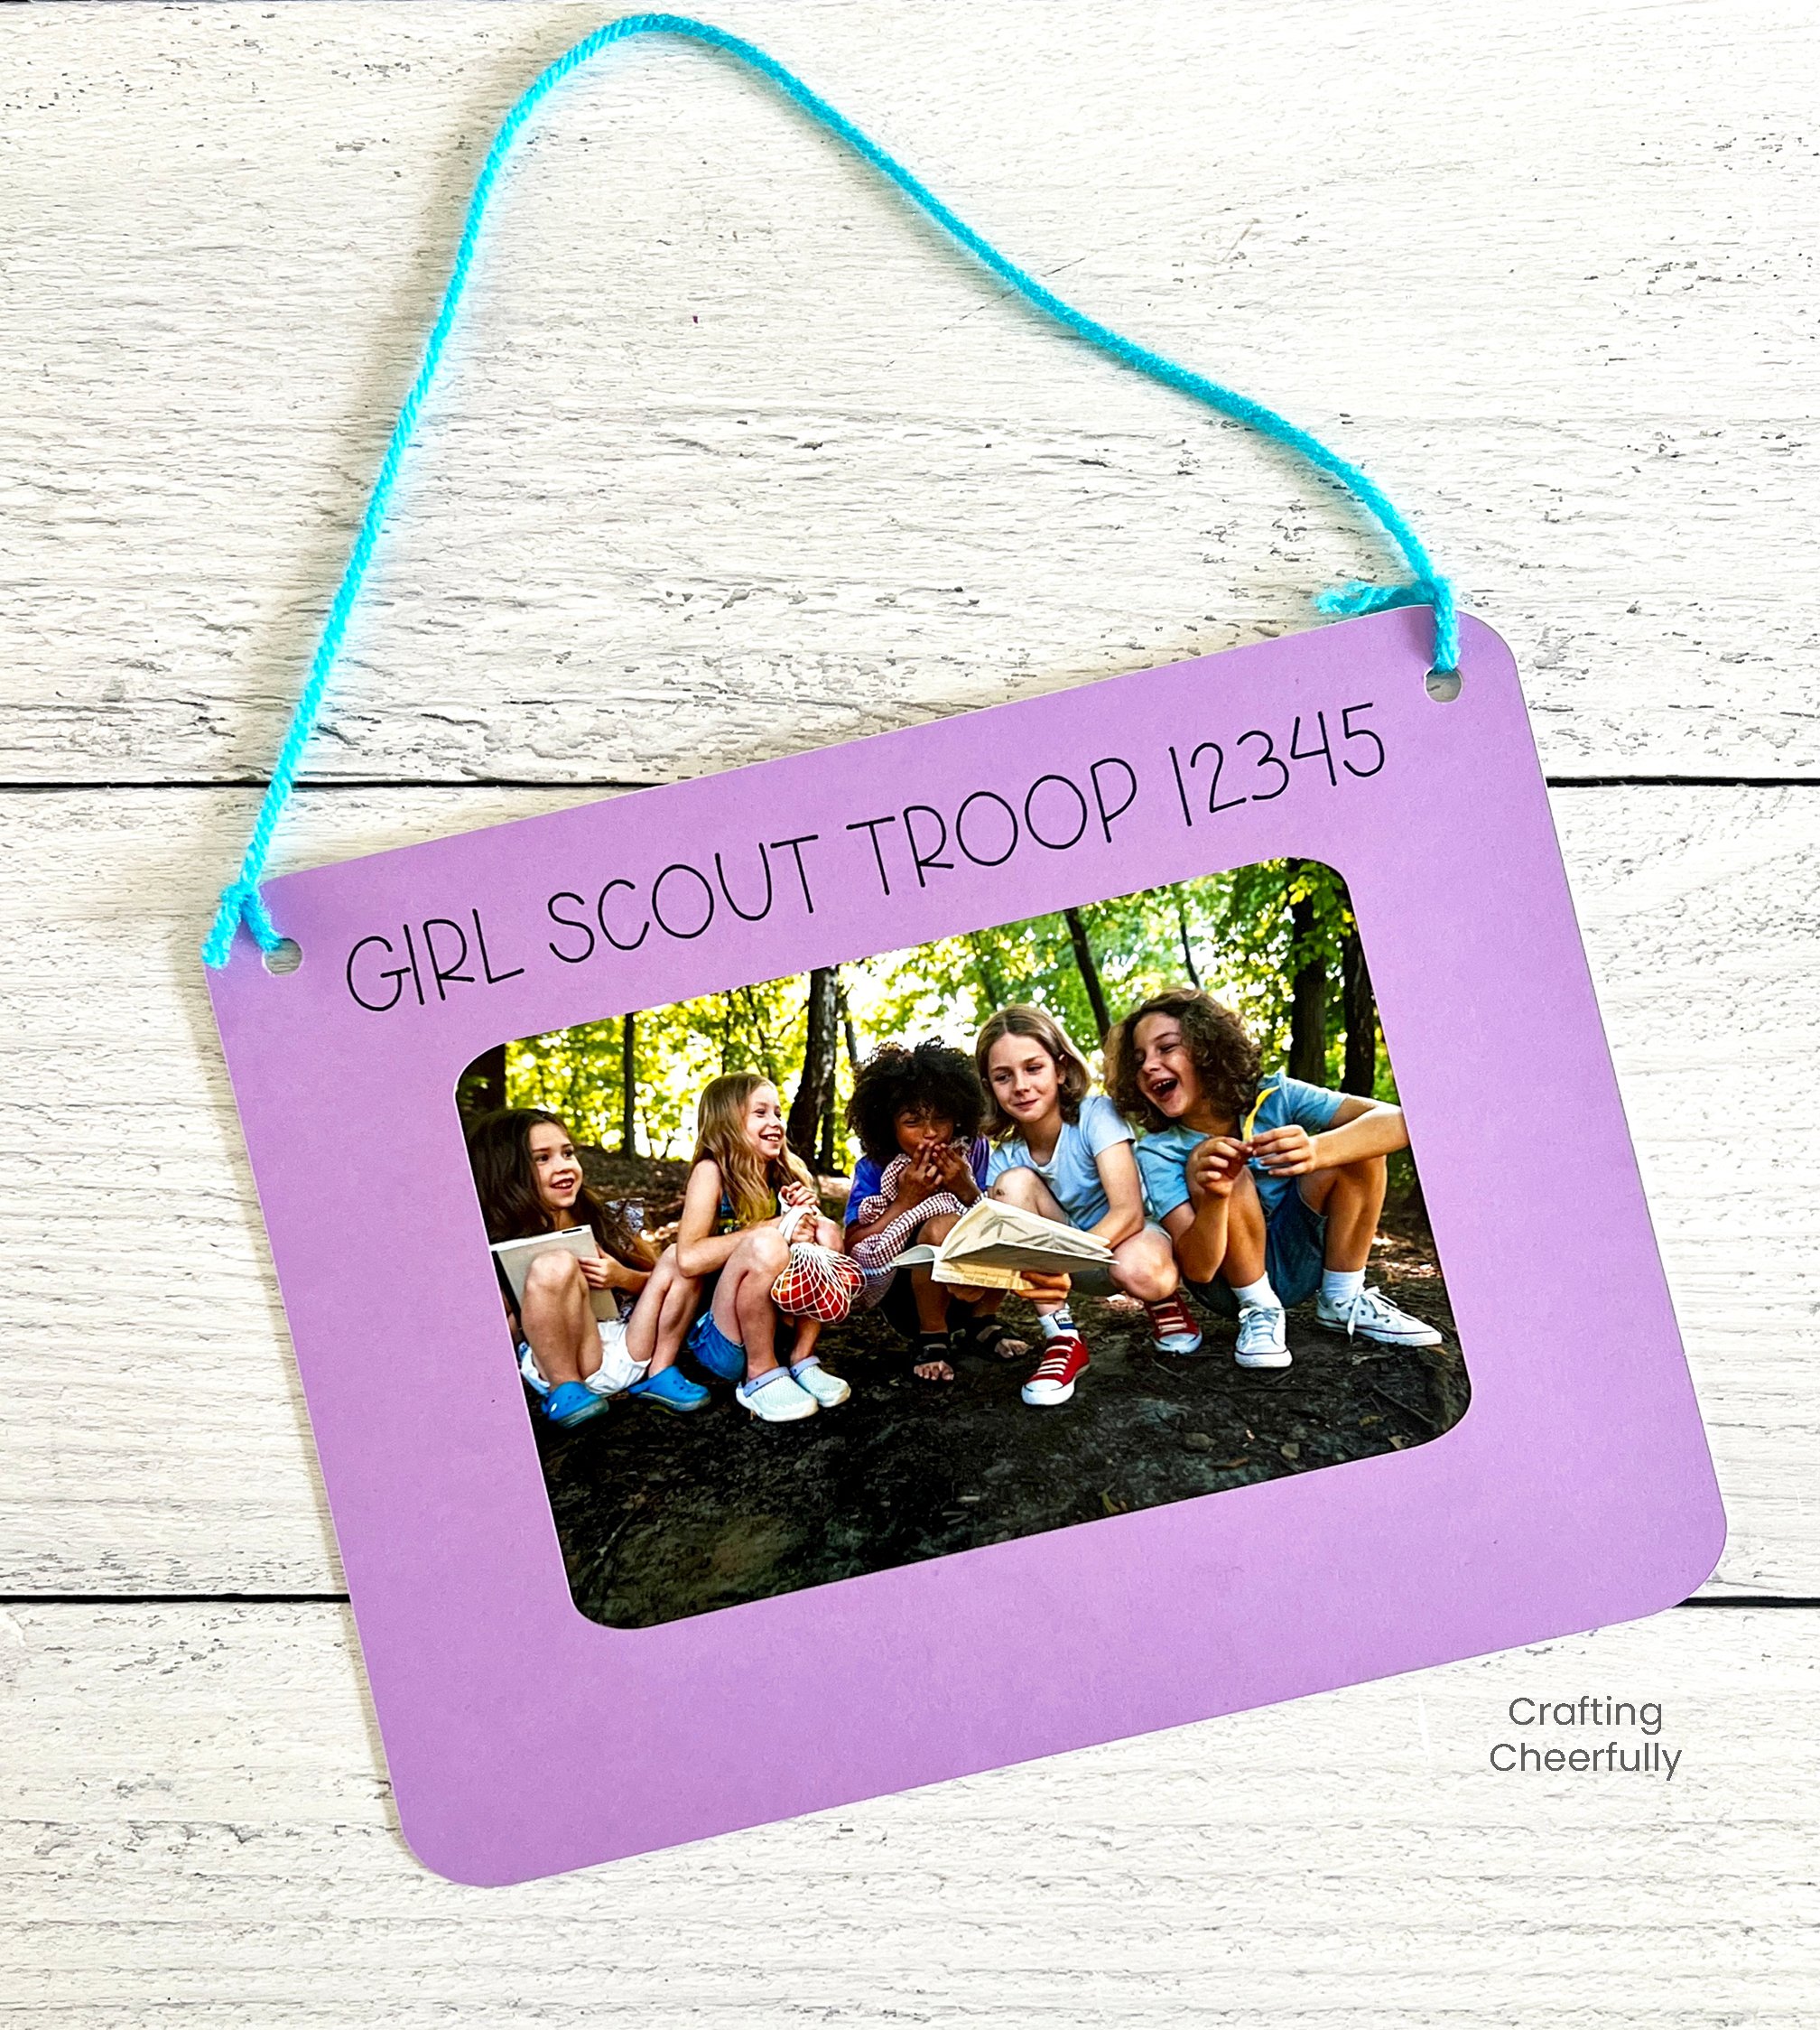
Hello Crafty Friends! Today I’m sharing a tutorial for making these fun keepsake frames that are perfect for teams, scouts and more! I have made these frames almost a dozen times over the years as keepsakes for the different activities my kids are involved in. We’ve used them for end-of-the-year Girl Scout activities, Girl Scout Camp keepsakes, and for robotics and team sports after a season or competition.
These frames make a great activity for a season party or a final team/troop/group meeting. I make a frame for each kid using a favorite photo of the group. You can choose to make all of the frames the same color (this eliminates fighting over a certain color) or you can make them in a variety of colors (which allows kids to pick their favorite).
Bring markers, pens and stickers and let the kids sign each other’s frames and decorate them. It’s a special keepsake to have everyone’s signature and to remember the group.
For one of my child’s teams we have actually done this every year and it has been fun to look back and see how much the kids have grown and to see old and new members. Make sure to add a date to the frame!
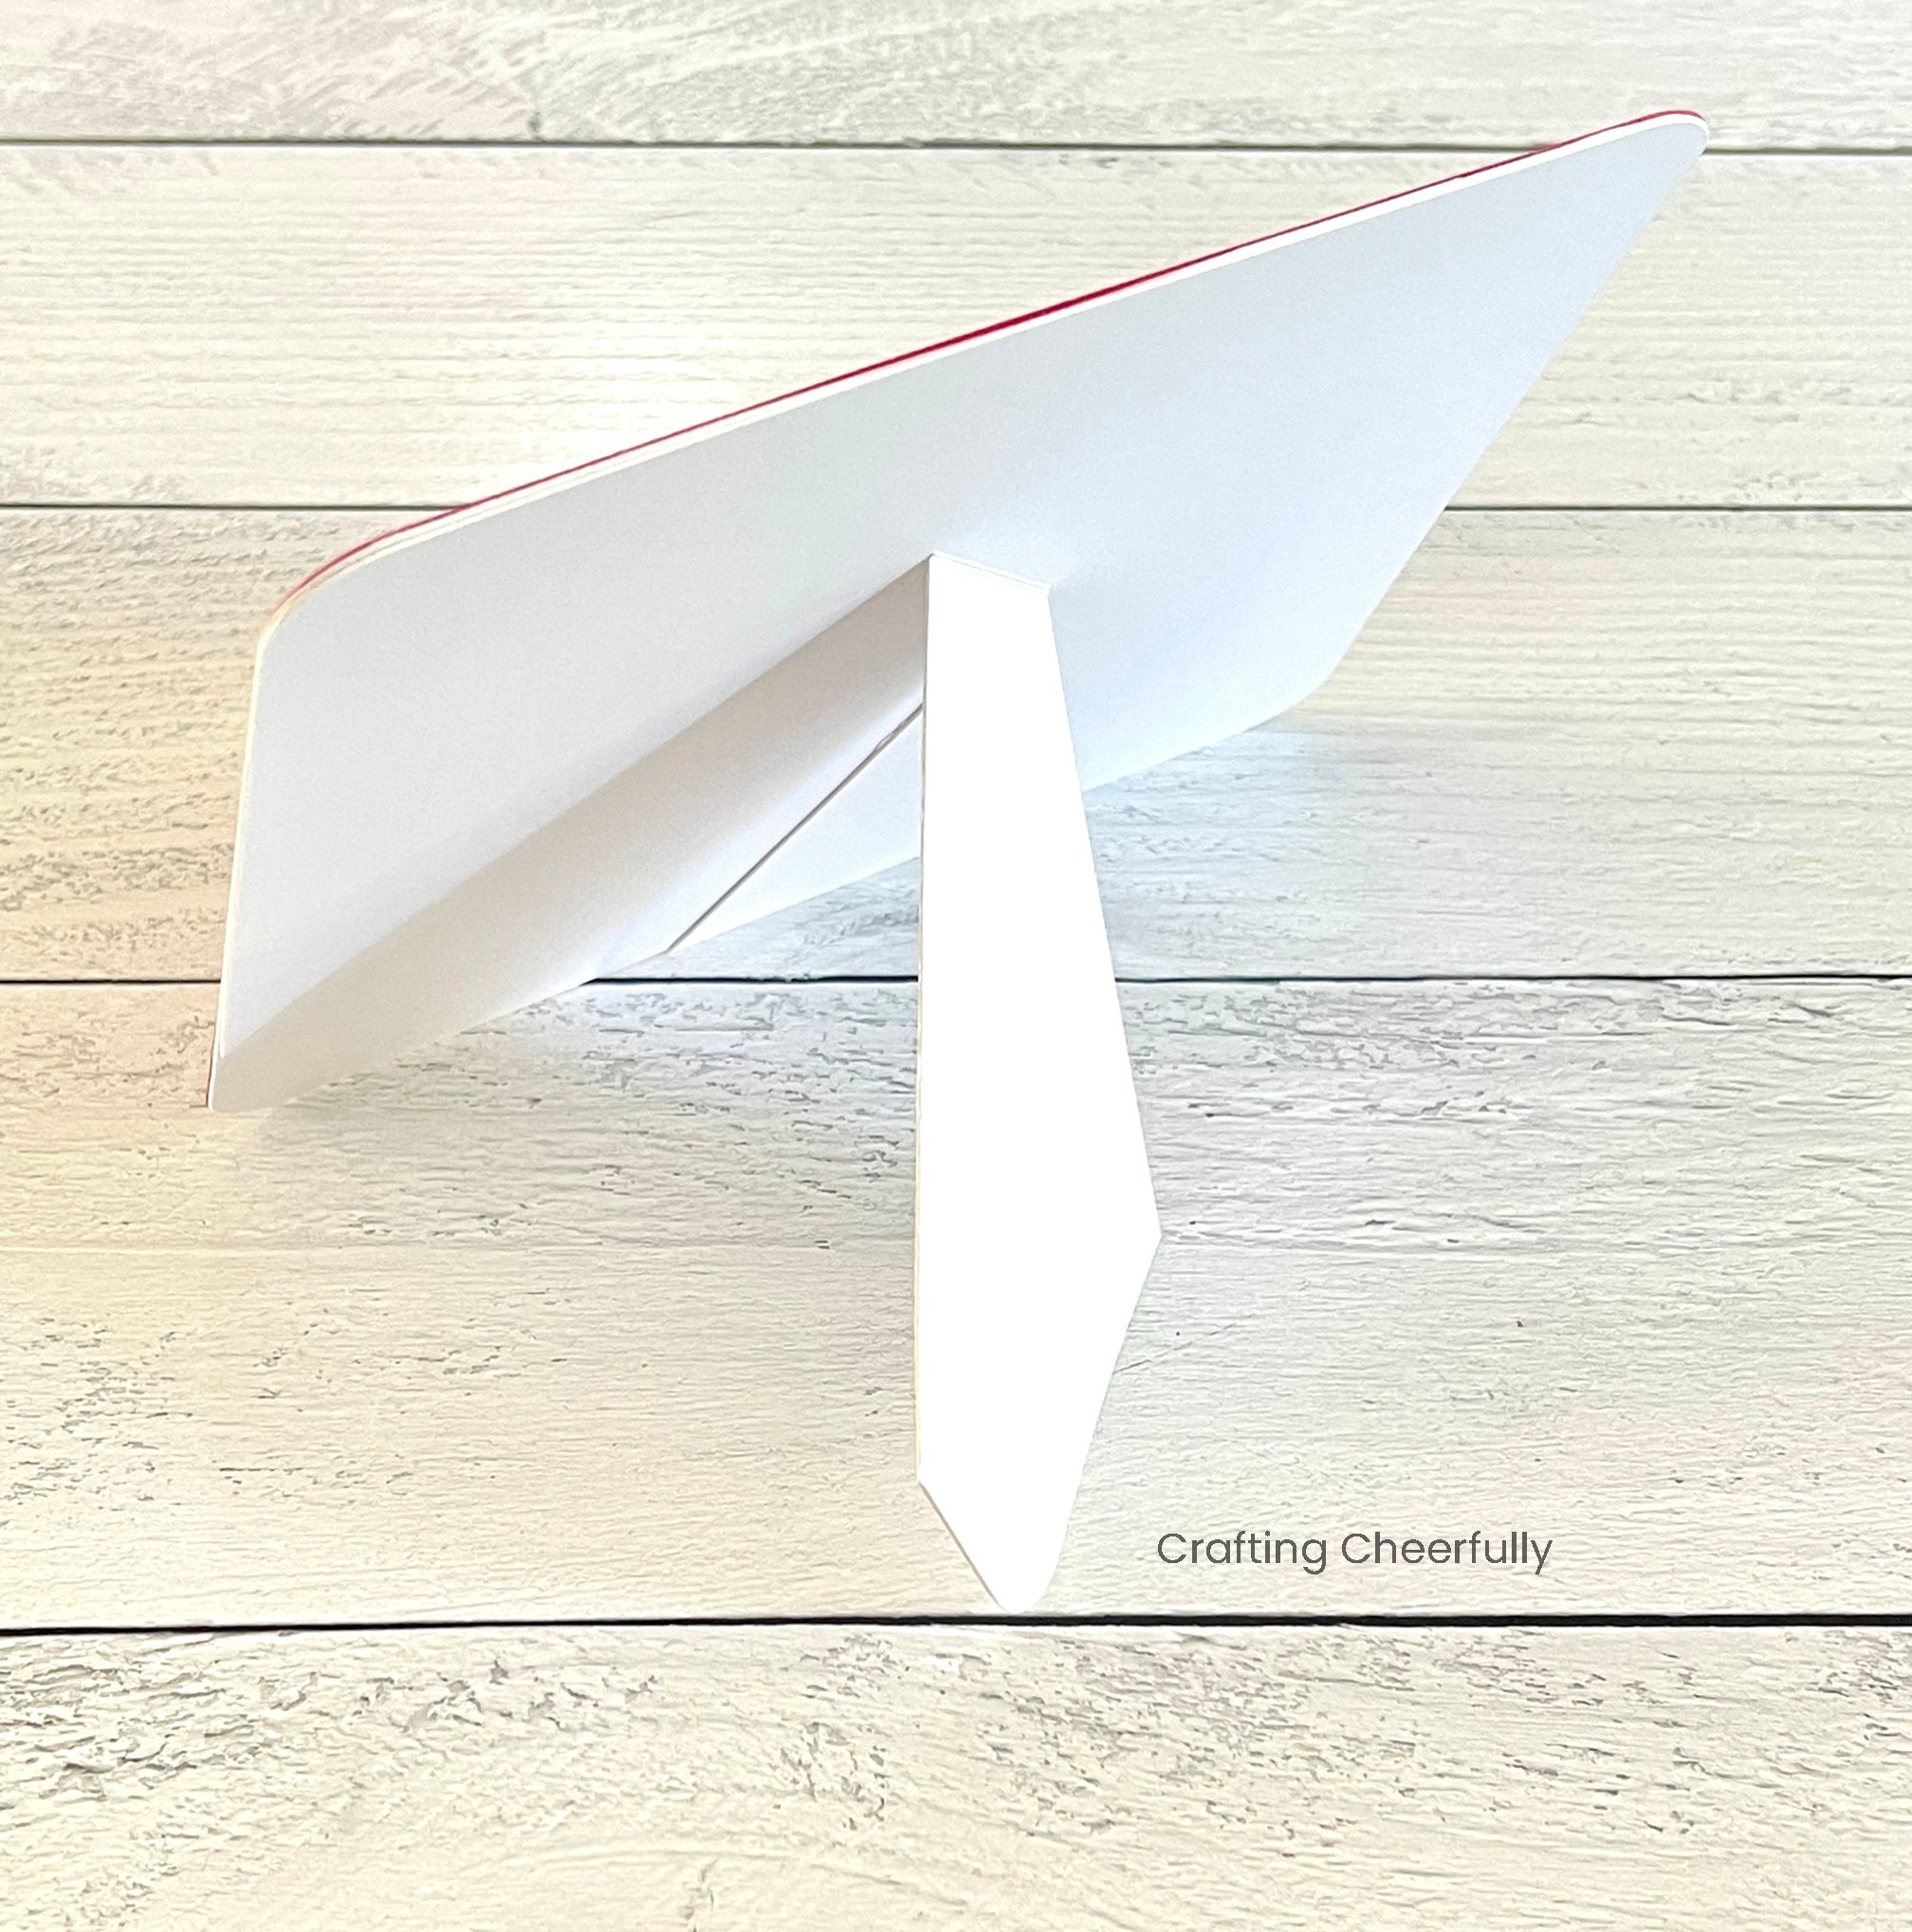
The frames are simple to make using your Cricut cutting machine but they can also be made without one. The files all come with a kickstand piece that can be added to the back of the frame to make it stand up.
I recently started making them without the kickstand, mostly because it’s quicker. You only need to cut and glue two pieces rather than three. When you are making these for an entire team, sometimes the quickest option is best! Plus, I’ve noticed kids love choosing their hanging yarn or ribbon. It’s another way for them to personalize their frames!
These frames are great for team and troop keepsakes but they can also be used as an activity any time of year. Ask kids to bring in a favorite photo and create them for a holiday to gift to someone special. Skip the signatures and let them decorate them with markers and stickers.
Below are the supplies needed and the step-by-step tutorial for creating your own keepsake photo frame!
DIY Keepsake Photo Frames
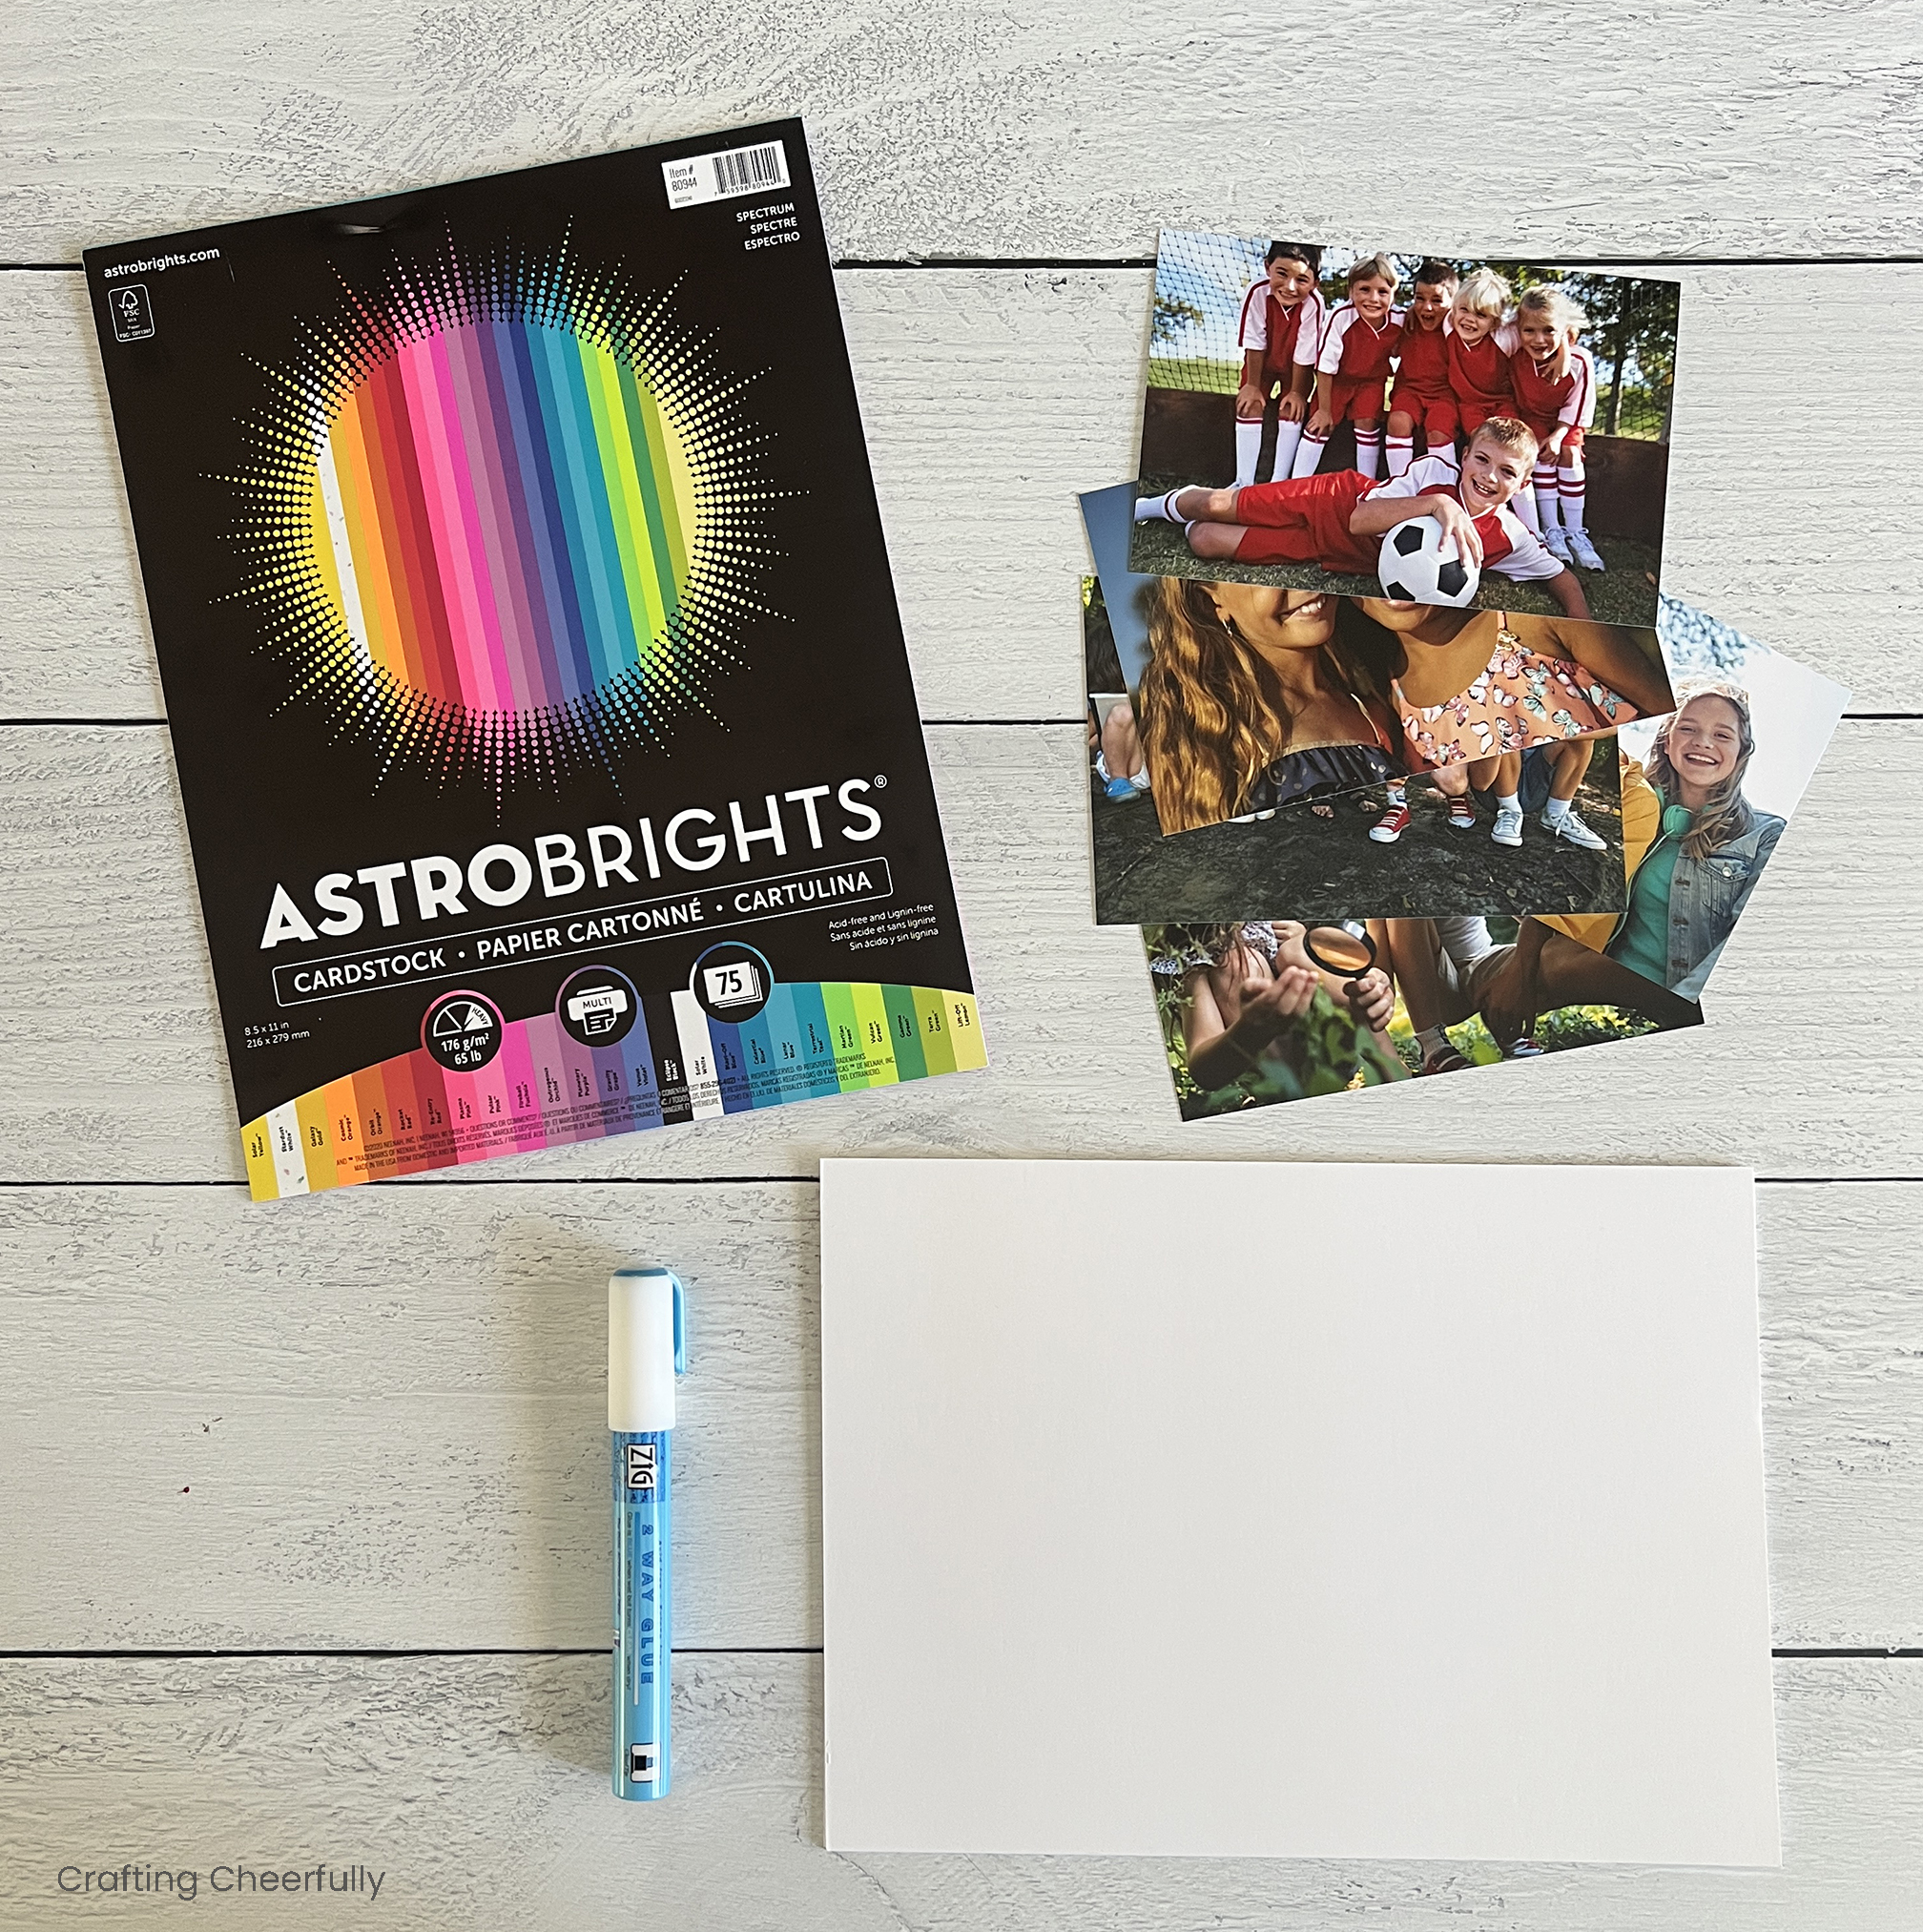
Supplies Needed:
- Free files:
- Cricut Design Space File
- Printable PDF pattern or SVG to use with a non-Cricut machine – fill out the purple form towards the bottom of this post.
- 4″ x 6″ photo
- AstroBrights Colorful Cardstock
- Comic Book Boards or chipboard
- Scissors and paper trimmer OR Cutting machine, cutting tools and cutting mat
- Cricut Pen
- Hole punch and yarn (if adding a hanging loop)
- Markers, gems, and stickers to decorate
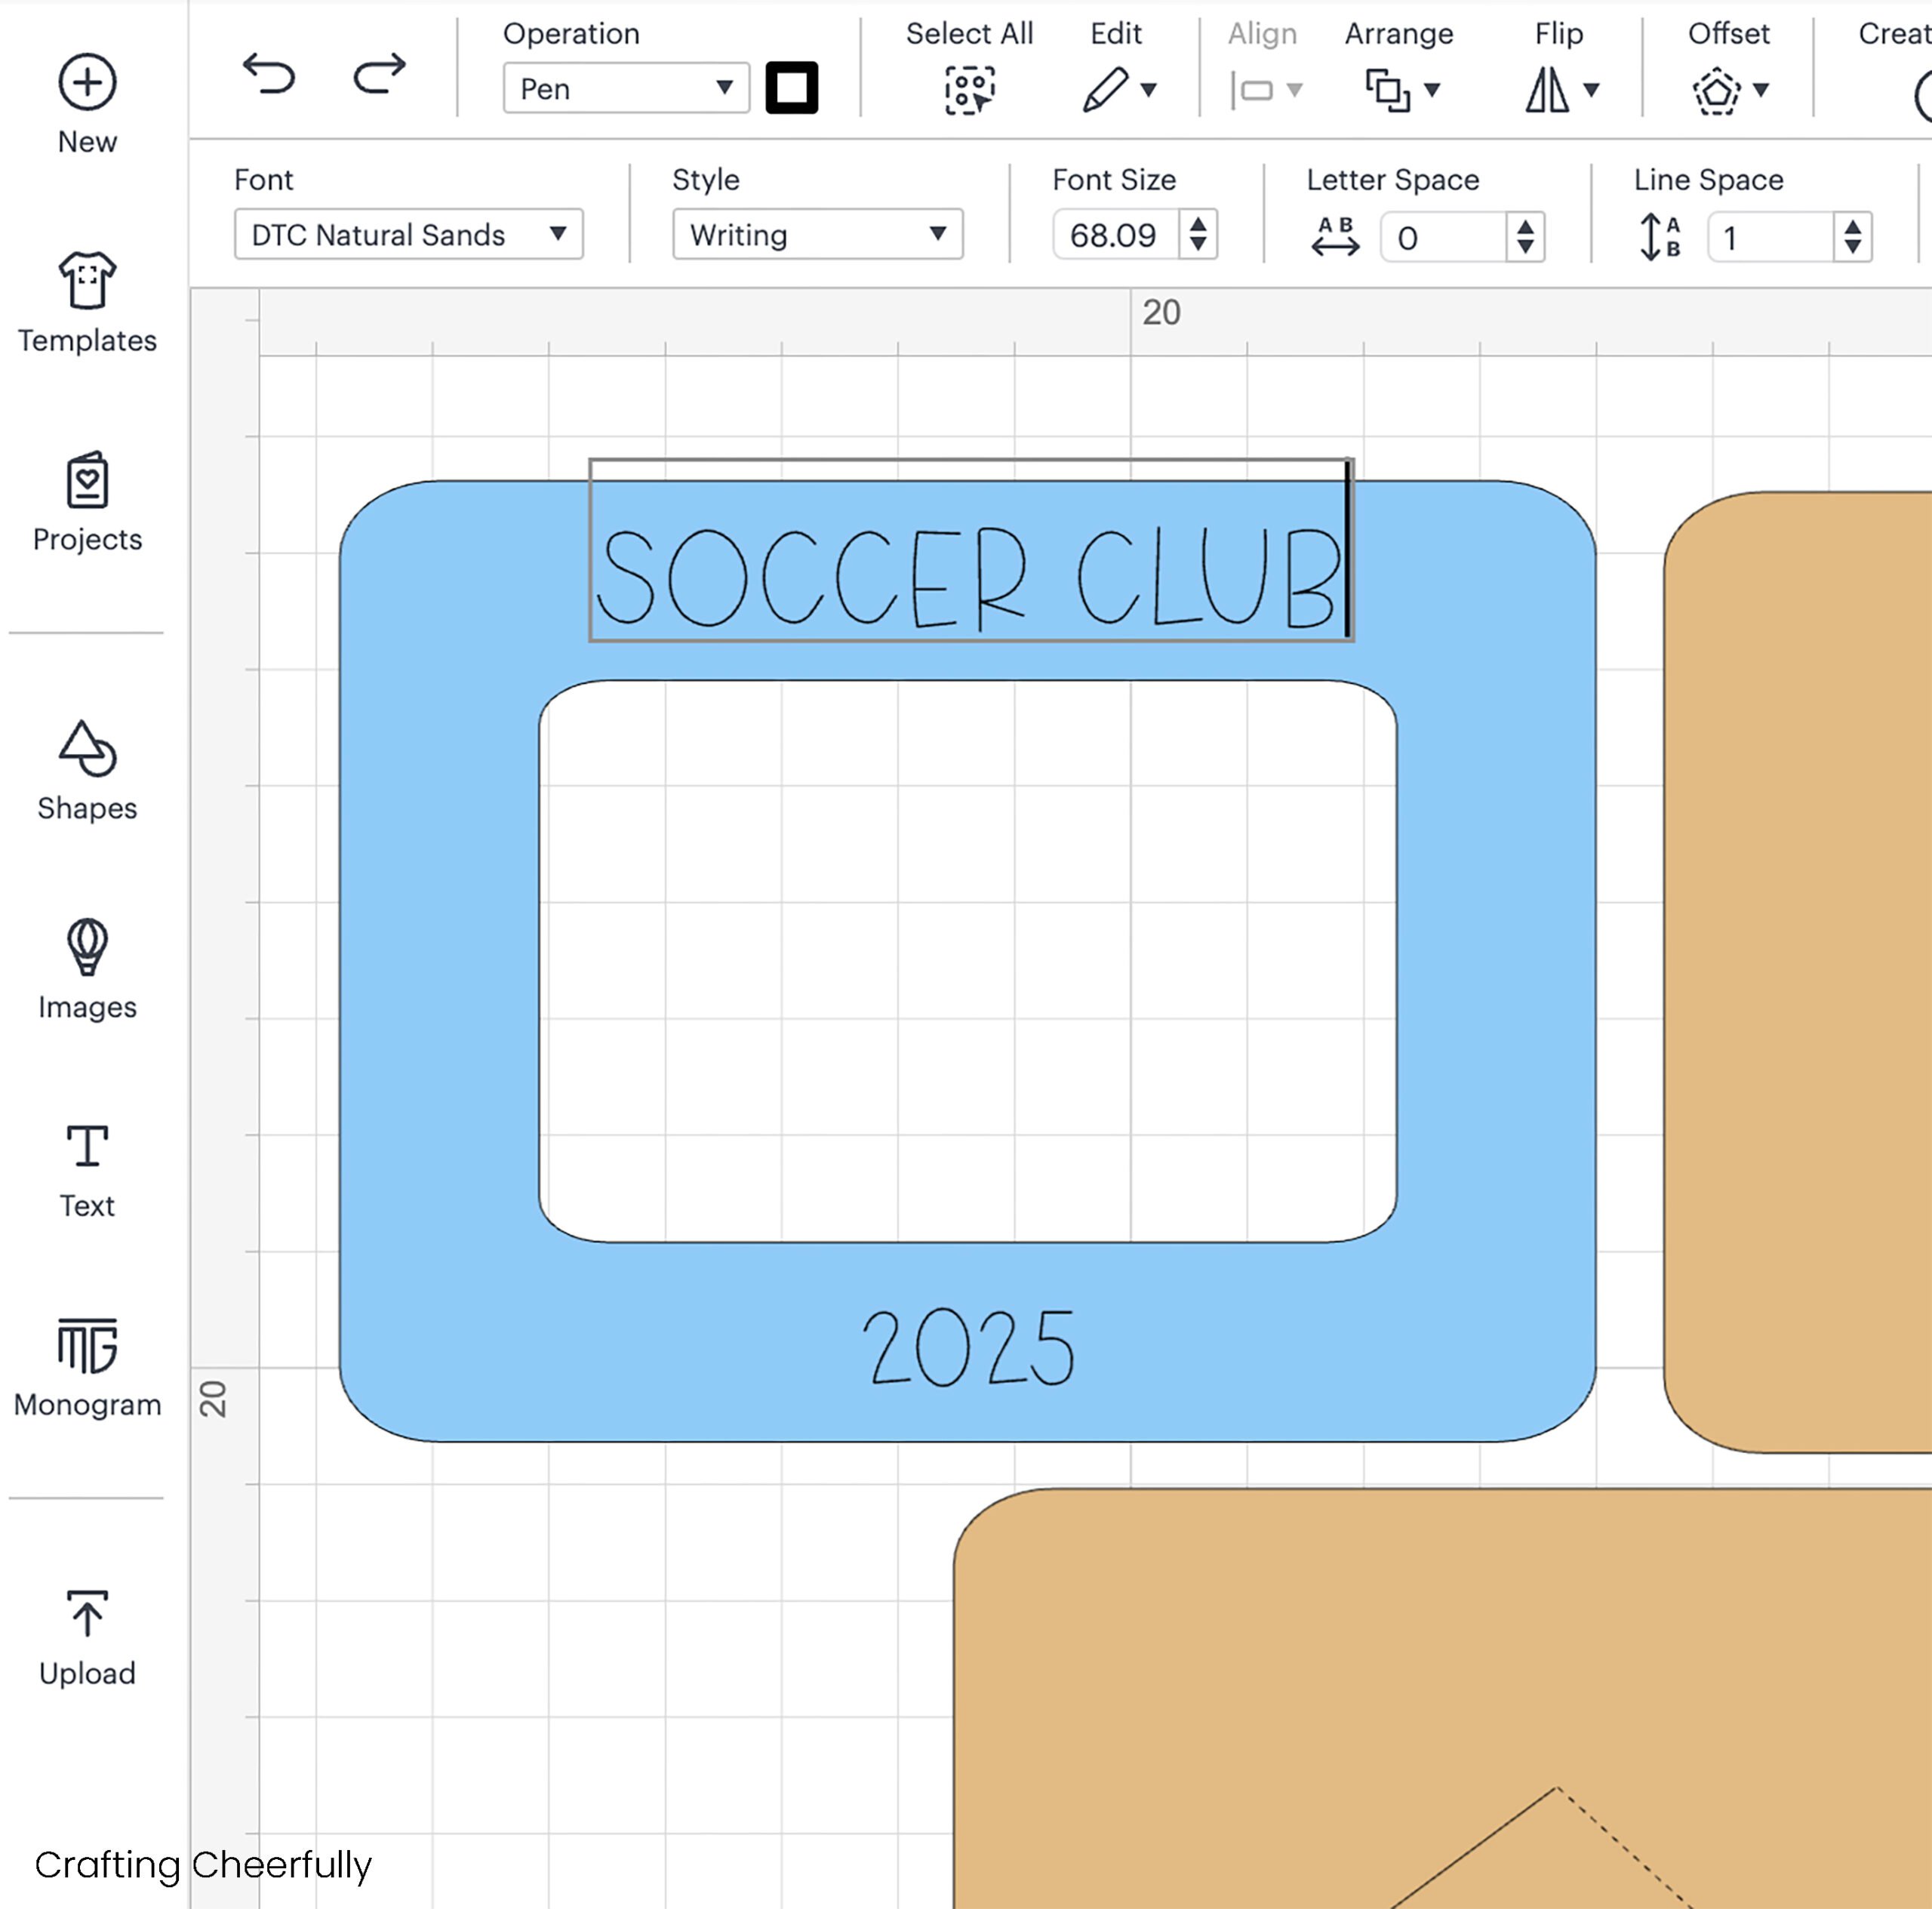
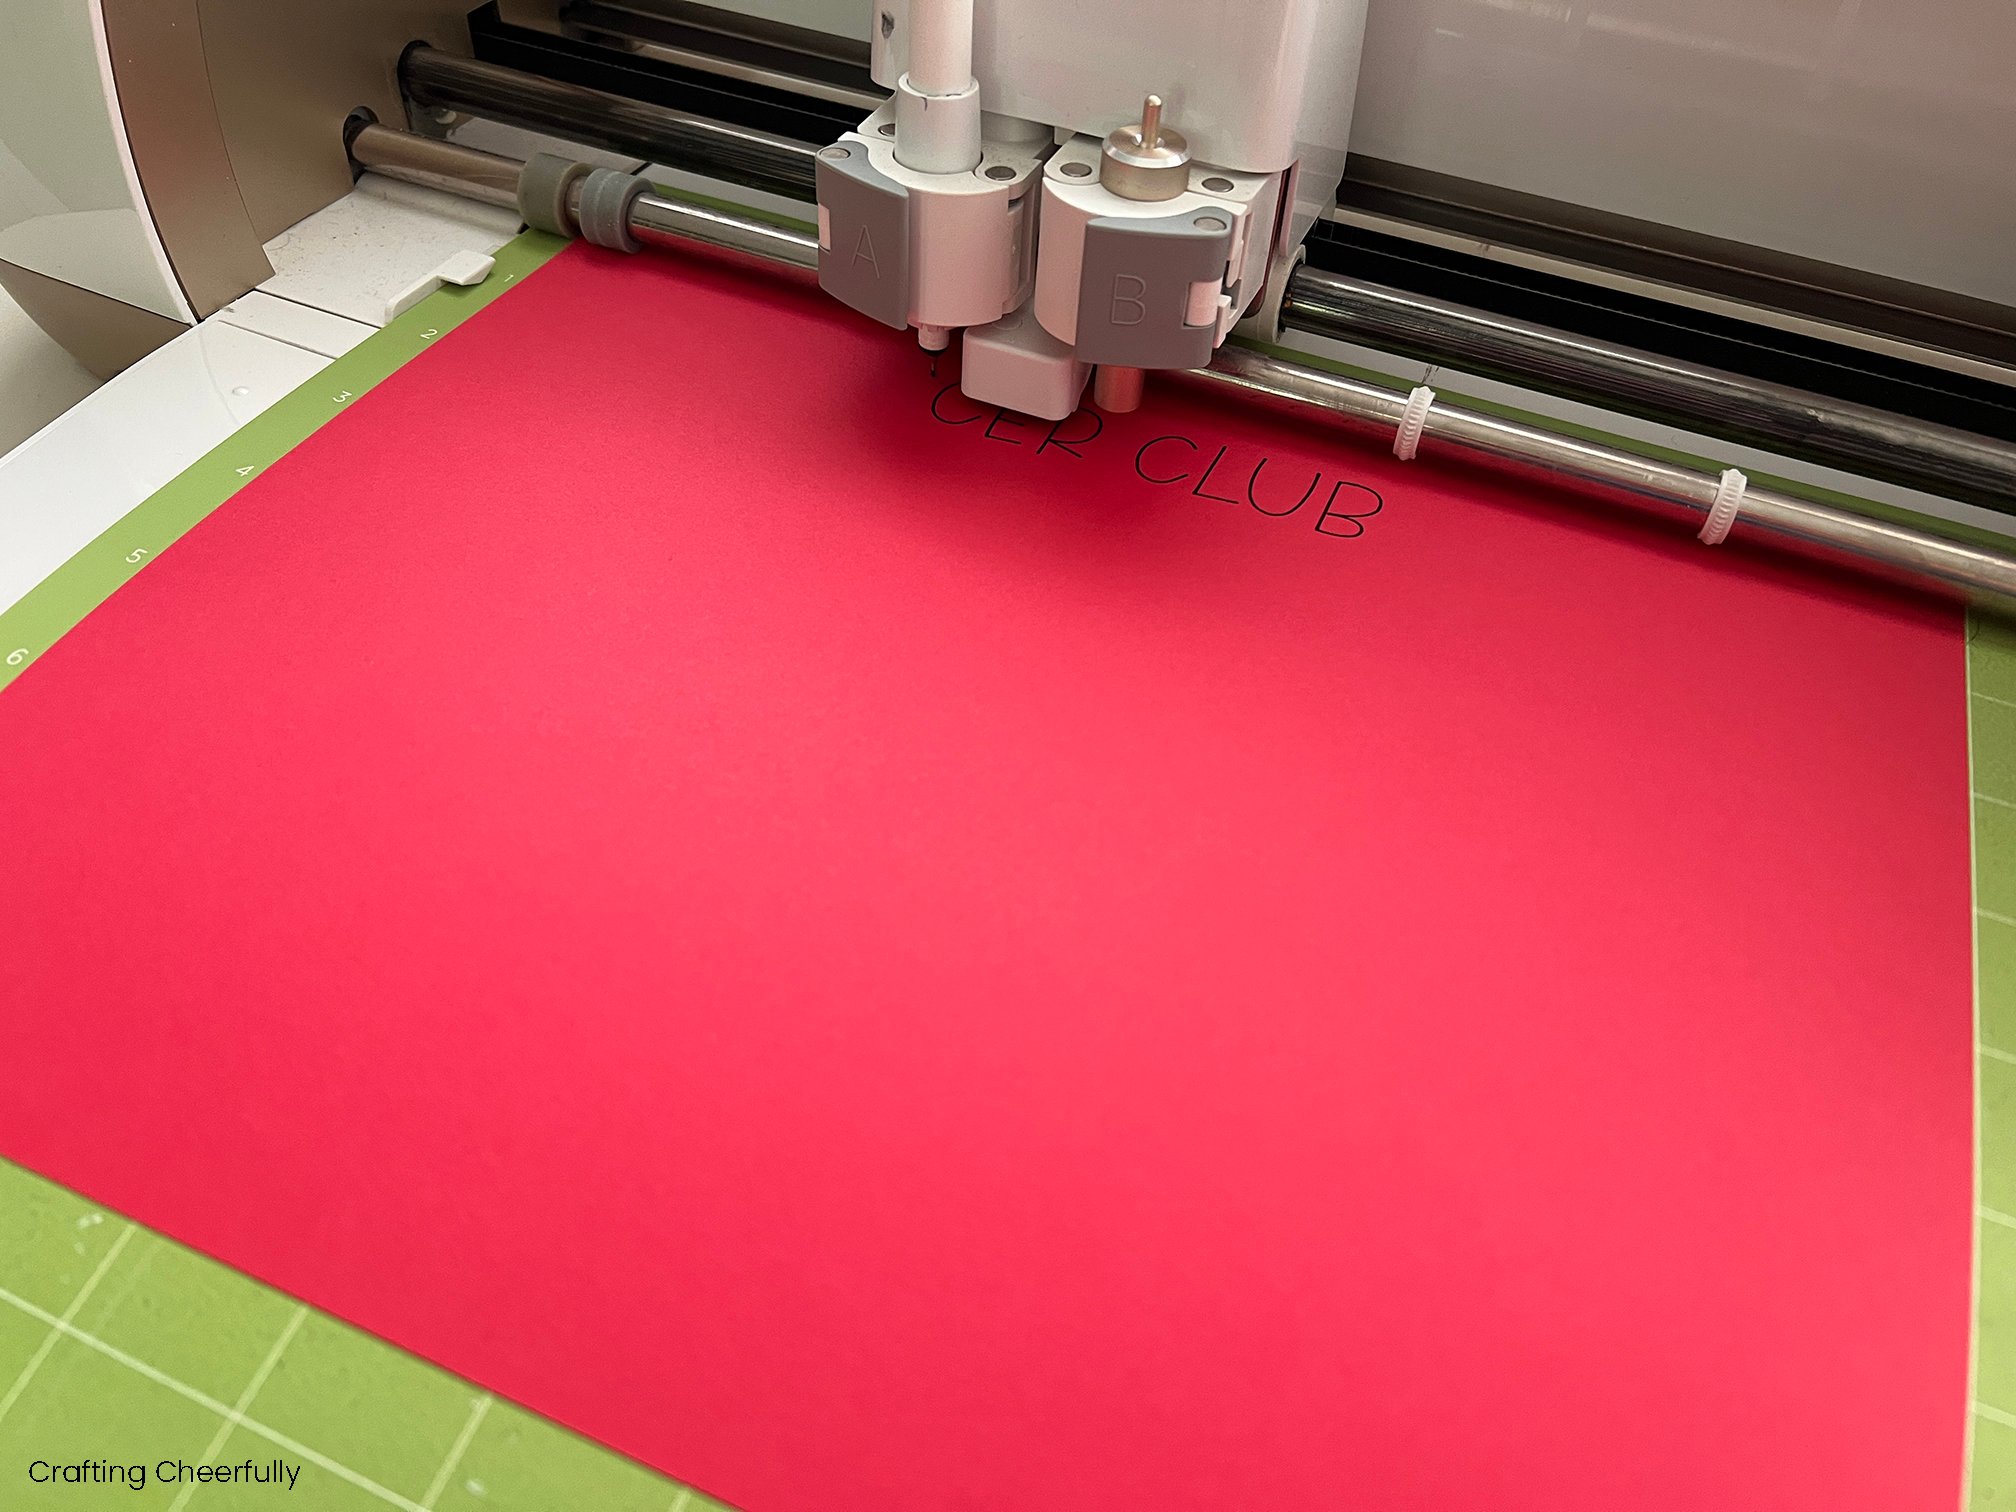
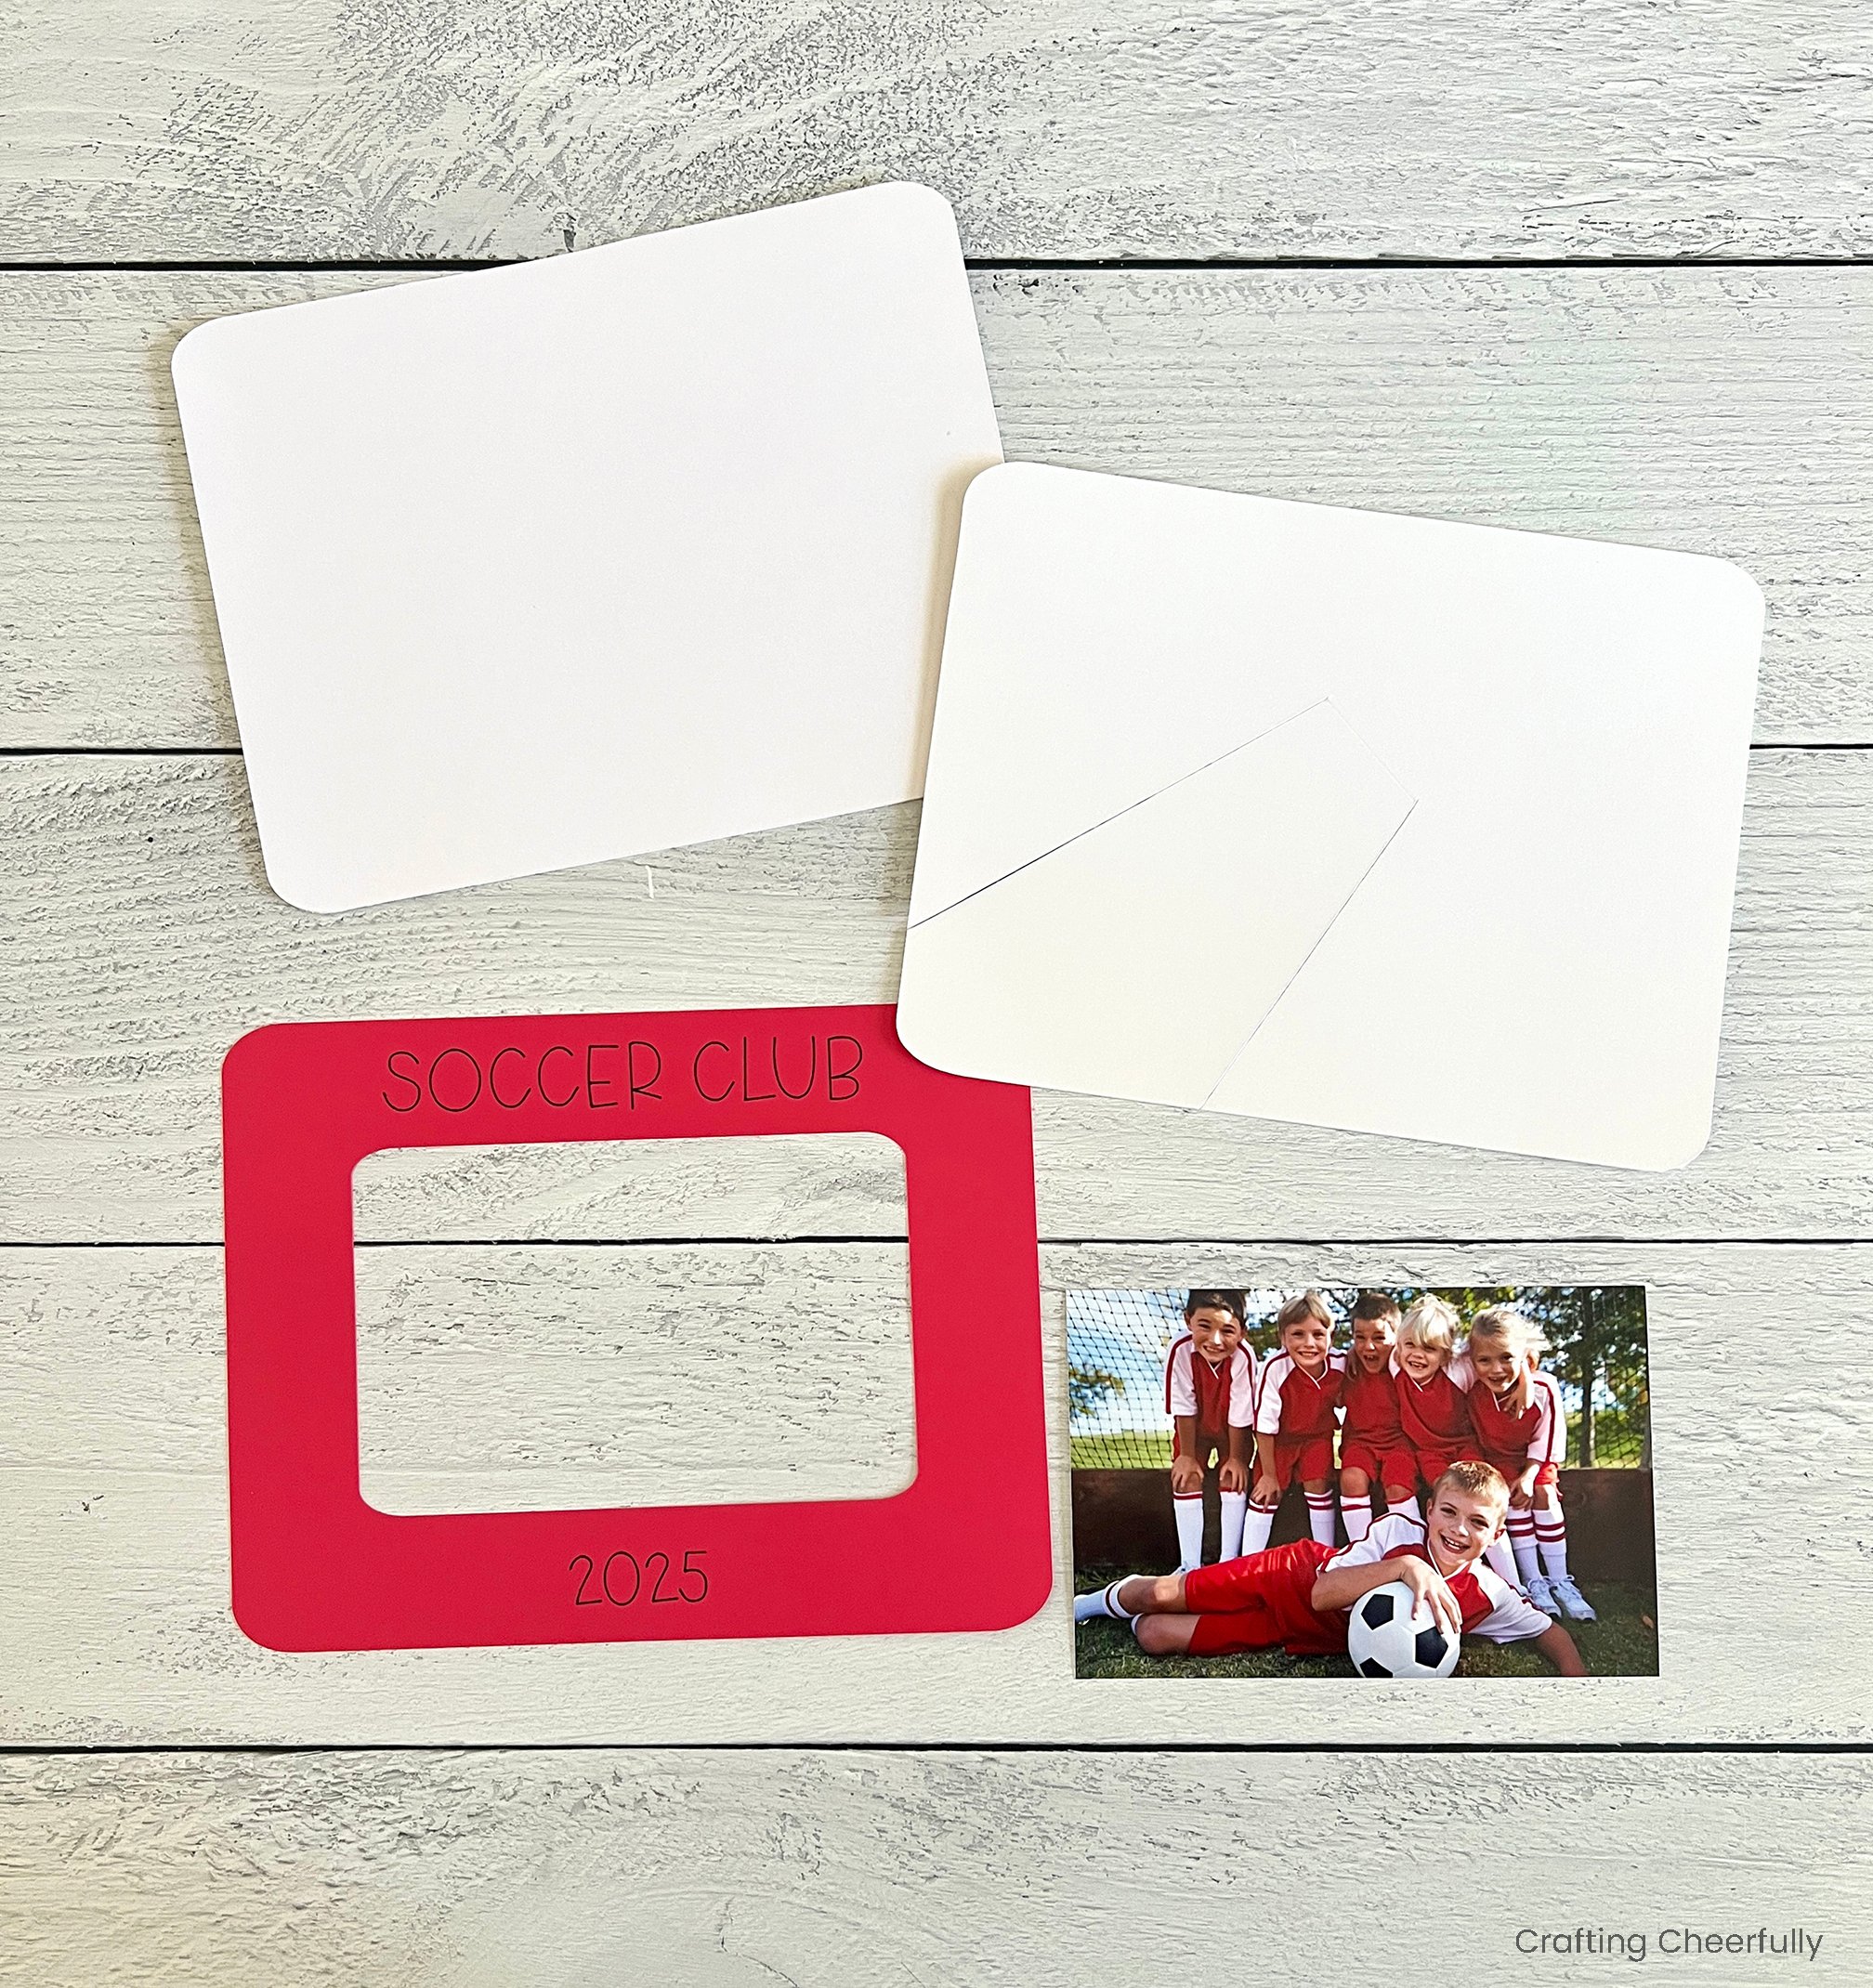
Step One: Cut the Frame
Cut the top layer of the frame, with the photo opening, out of colored cardstock. Cut the other pieces using chipboard. I love using white comic board. It’s the perfect weight. It’s sturdy enough to support the frame and thin enough that I can cut it out on my Cricut Explore with a standard blade.
If you are cutting out the pieces using a Cricut machine you can use my Cricut Design Space file and personalize the text. If you are cutting the pieces by hand, you can write something by hand on the frames after they are assembled or have the kids do it.
The frame can be made as a hanging frame or as a frame with a kickstand. If making the frame with a kickstand, you will need to cut an additional piece. If you are making the hanging frame you can ignore the third piece.
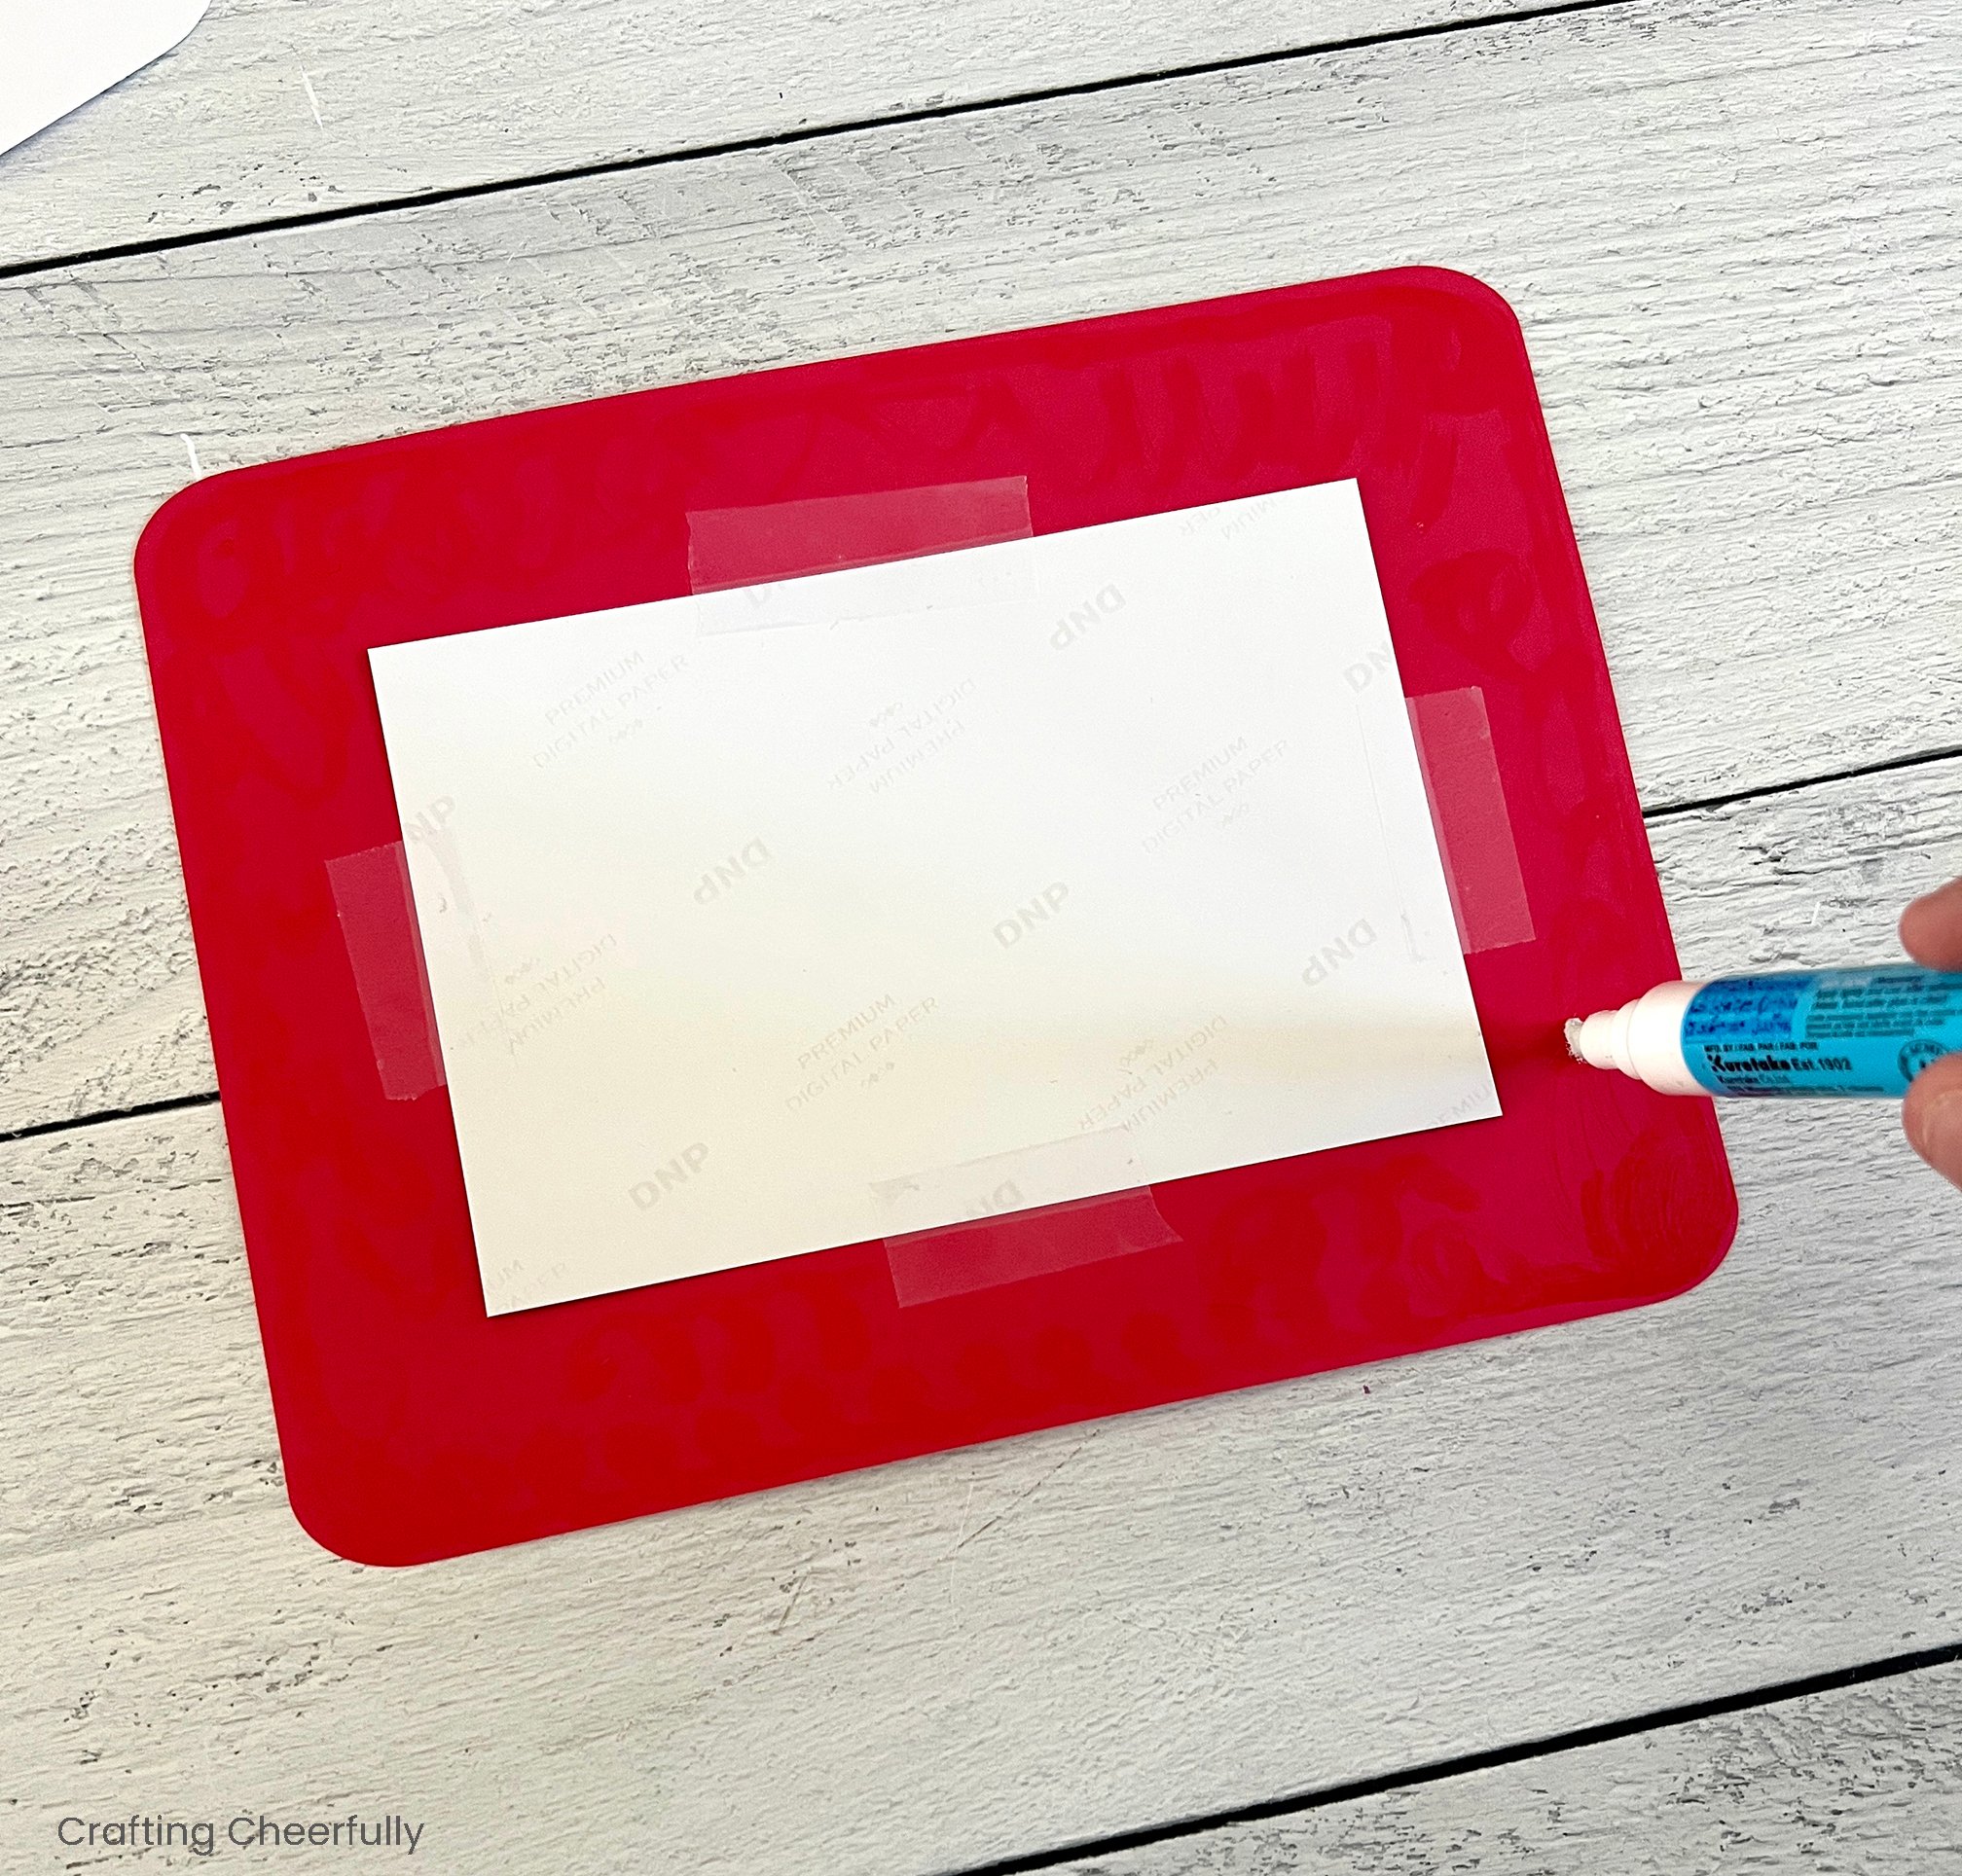
Step Two: Add the Photo
Tape the 4″ x 6″ photo to the back of the cardstock layer behind the opening. It is a close fit so the majority of the photo is showing.

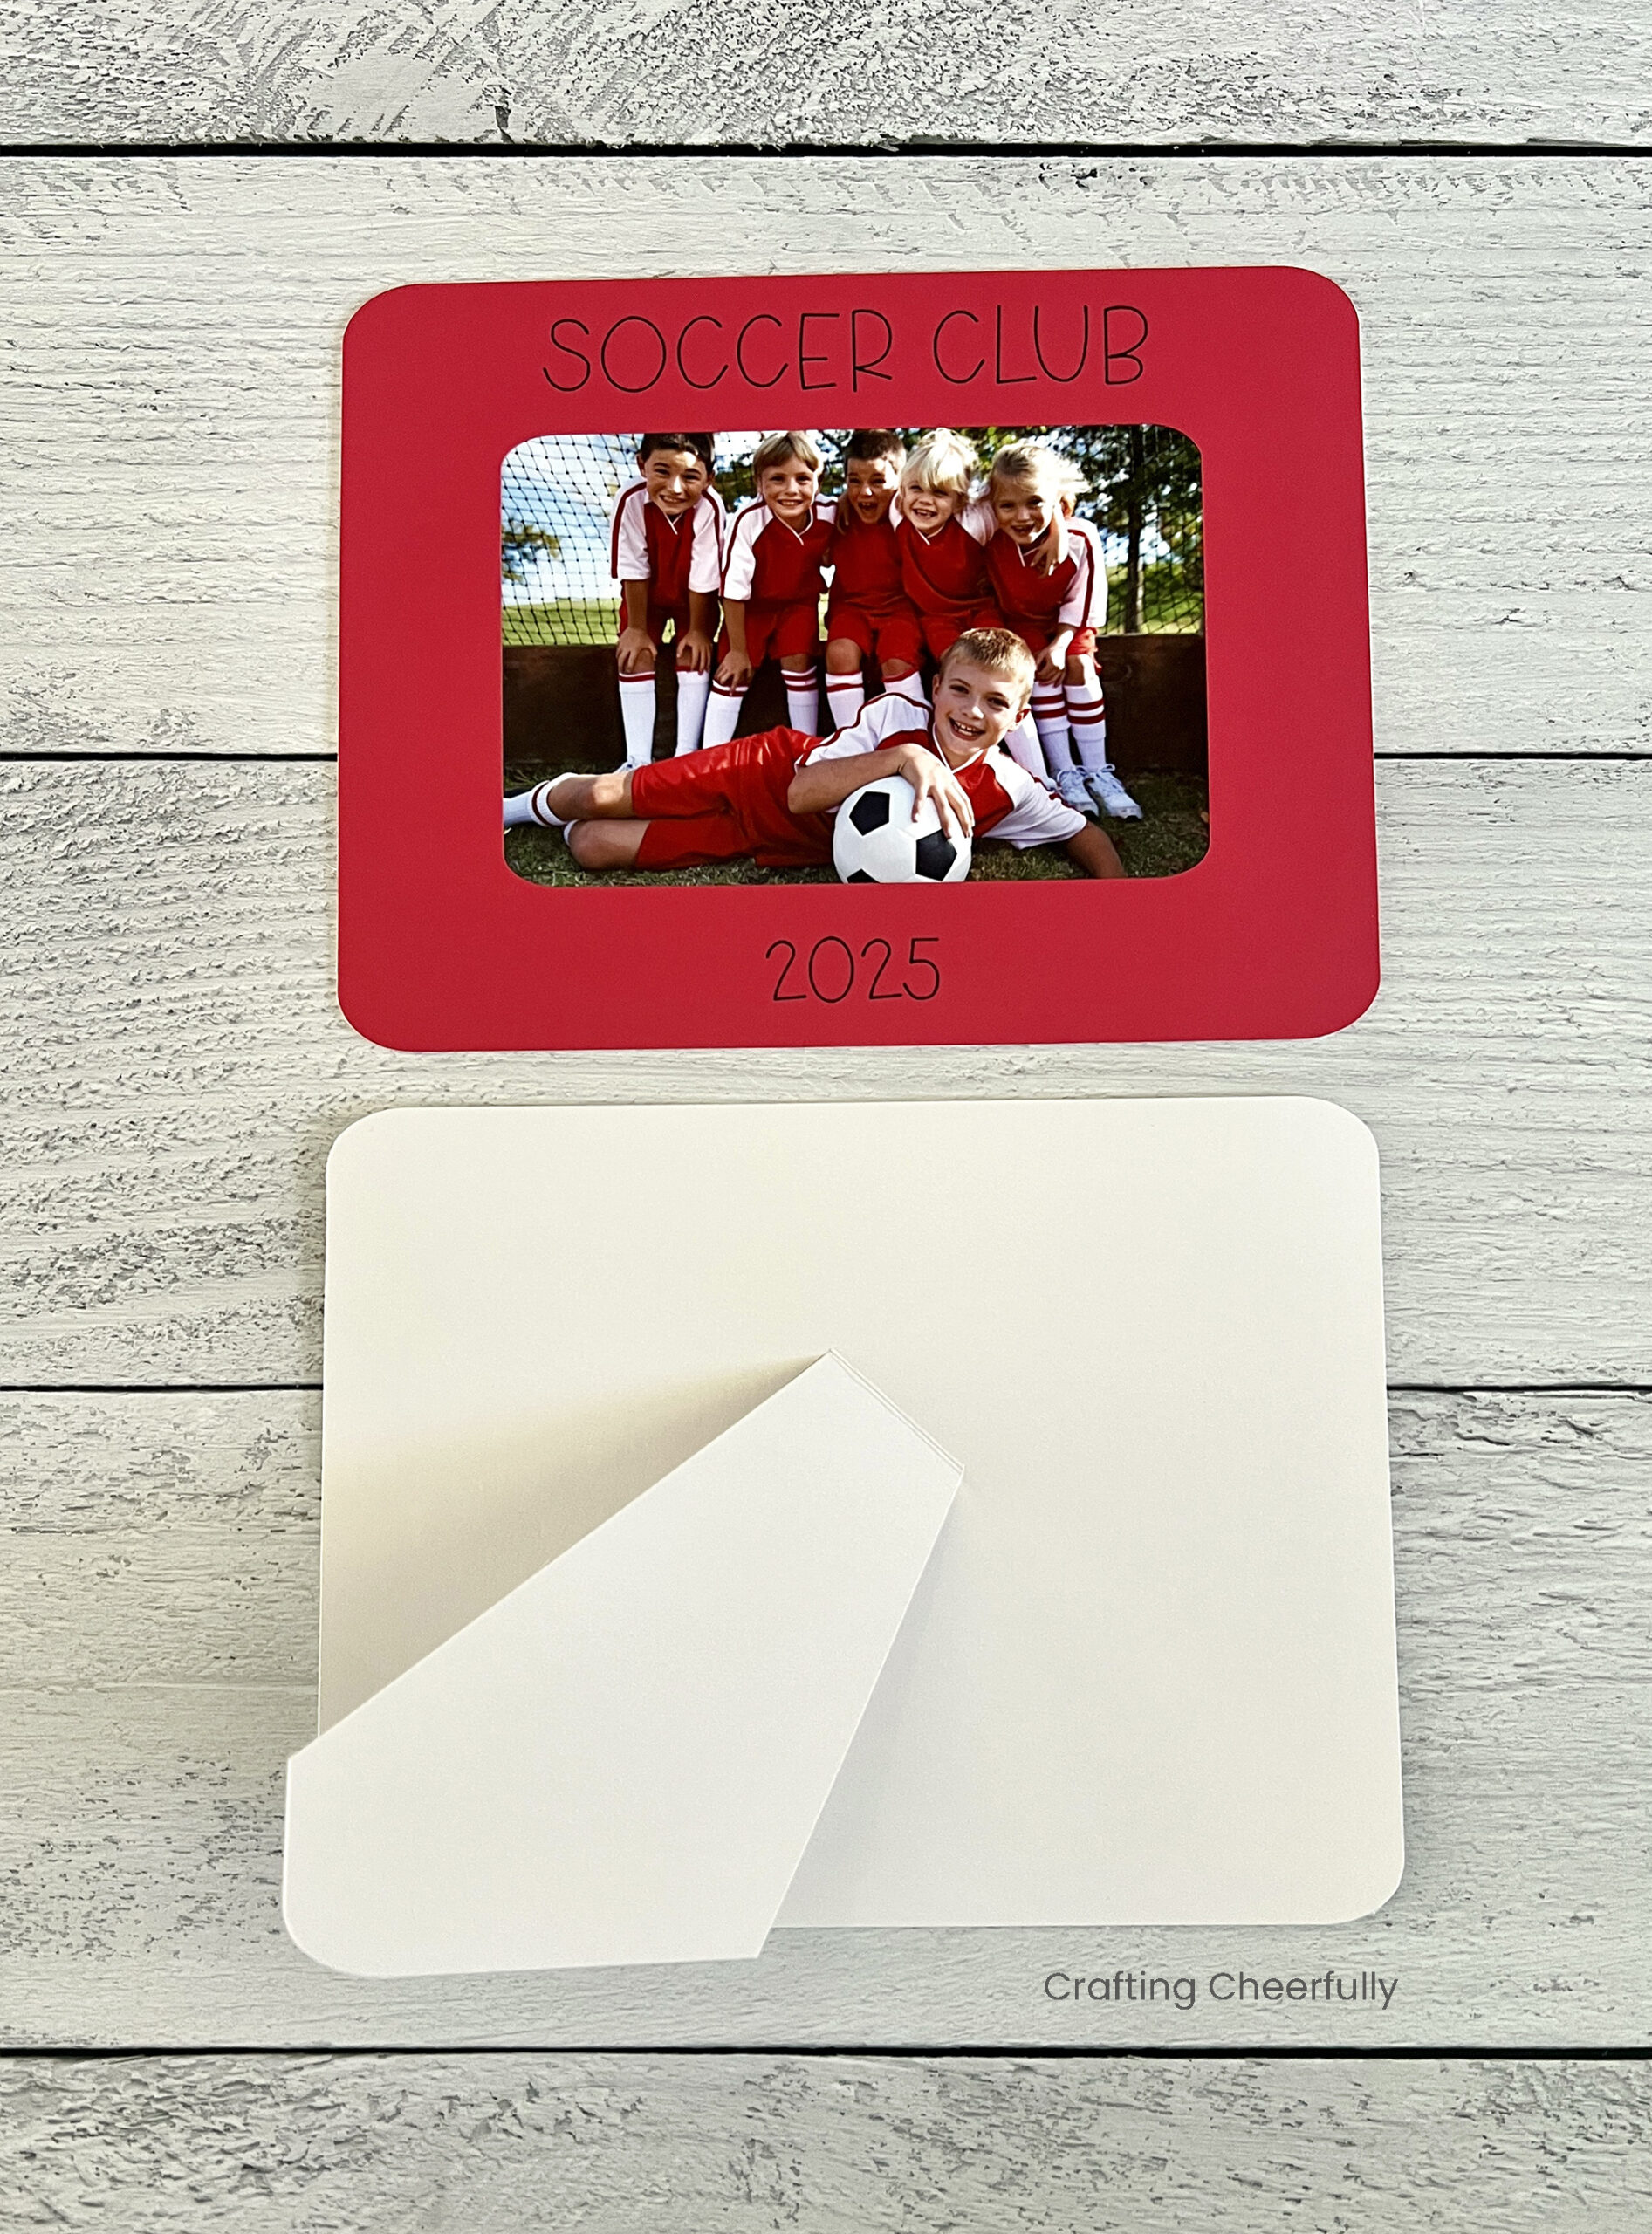
Step Three: Cover the back of the frame.
Use a glue pen, or another adhesive, to attach the back of the frame. This is the solid piece of chip board (or comic board) that does not have an opening.

Step Four: Add the kickstand.
If you are making the frame that can be displayed with the kickstand, you will now add that piece. Again, use your glue pen or adhesive, but be sure not to apply adhesive to the kickstand portion.
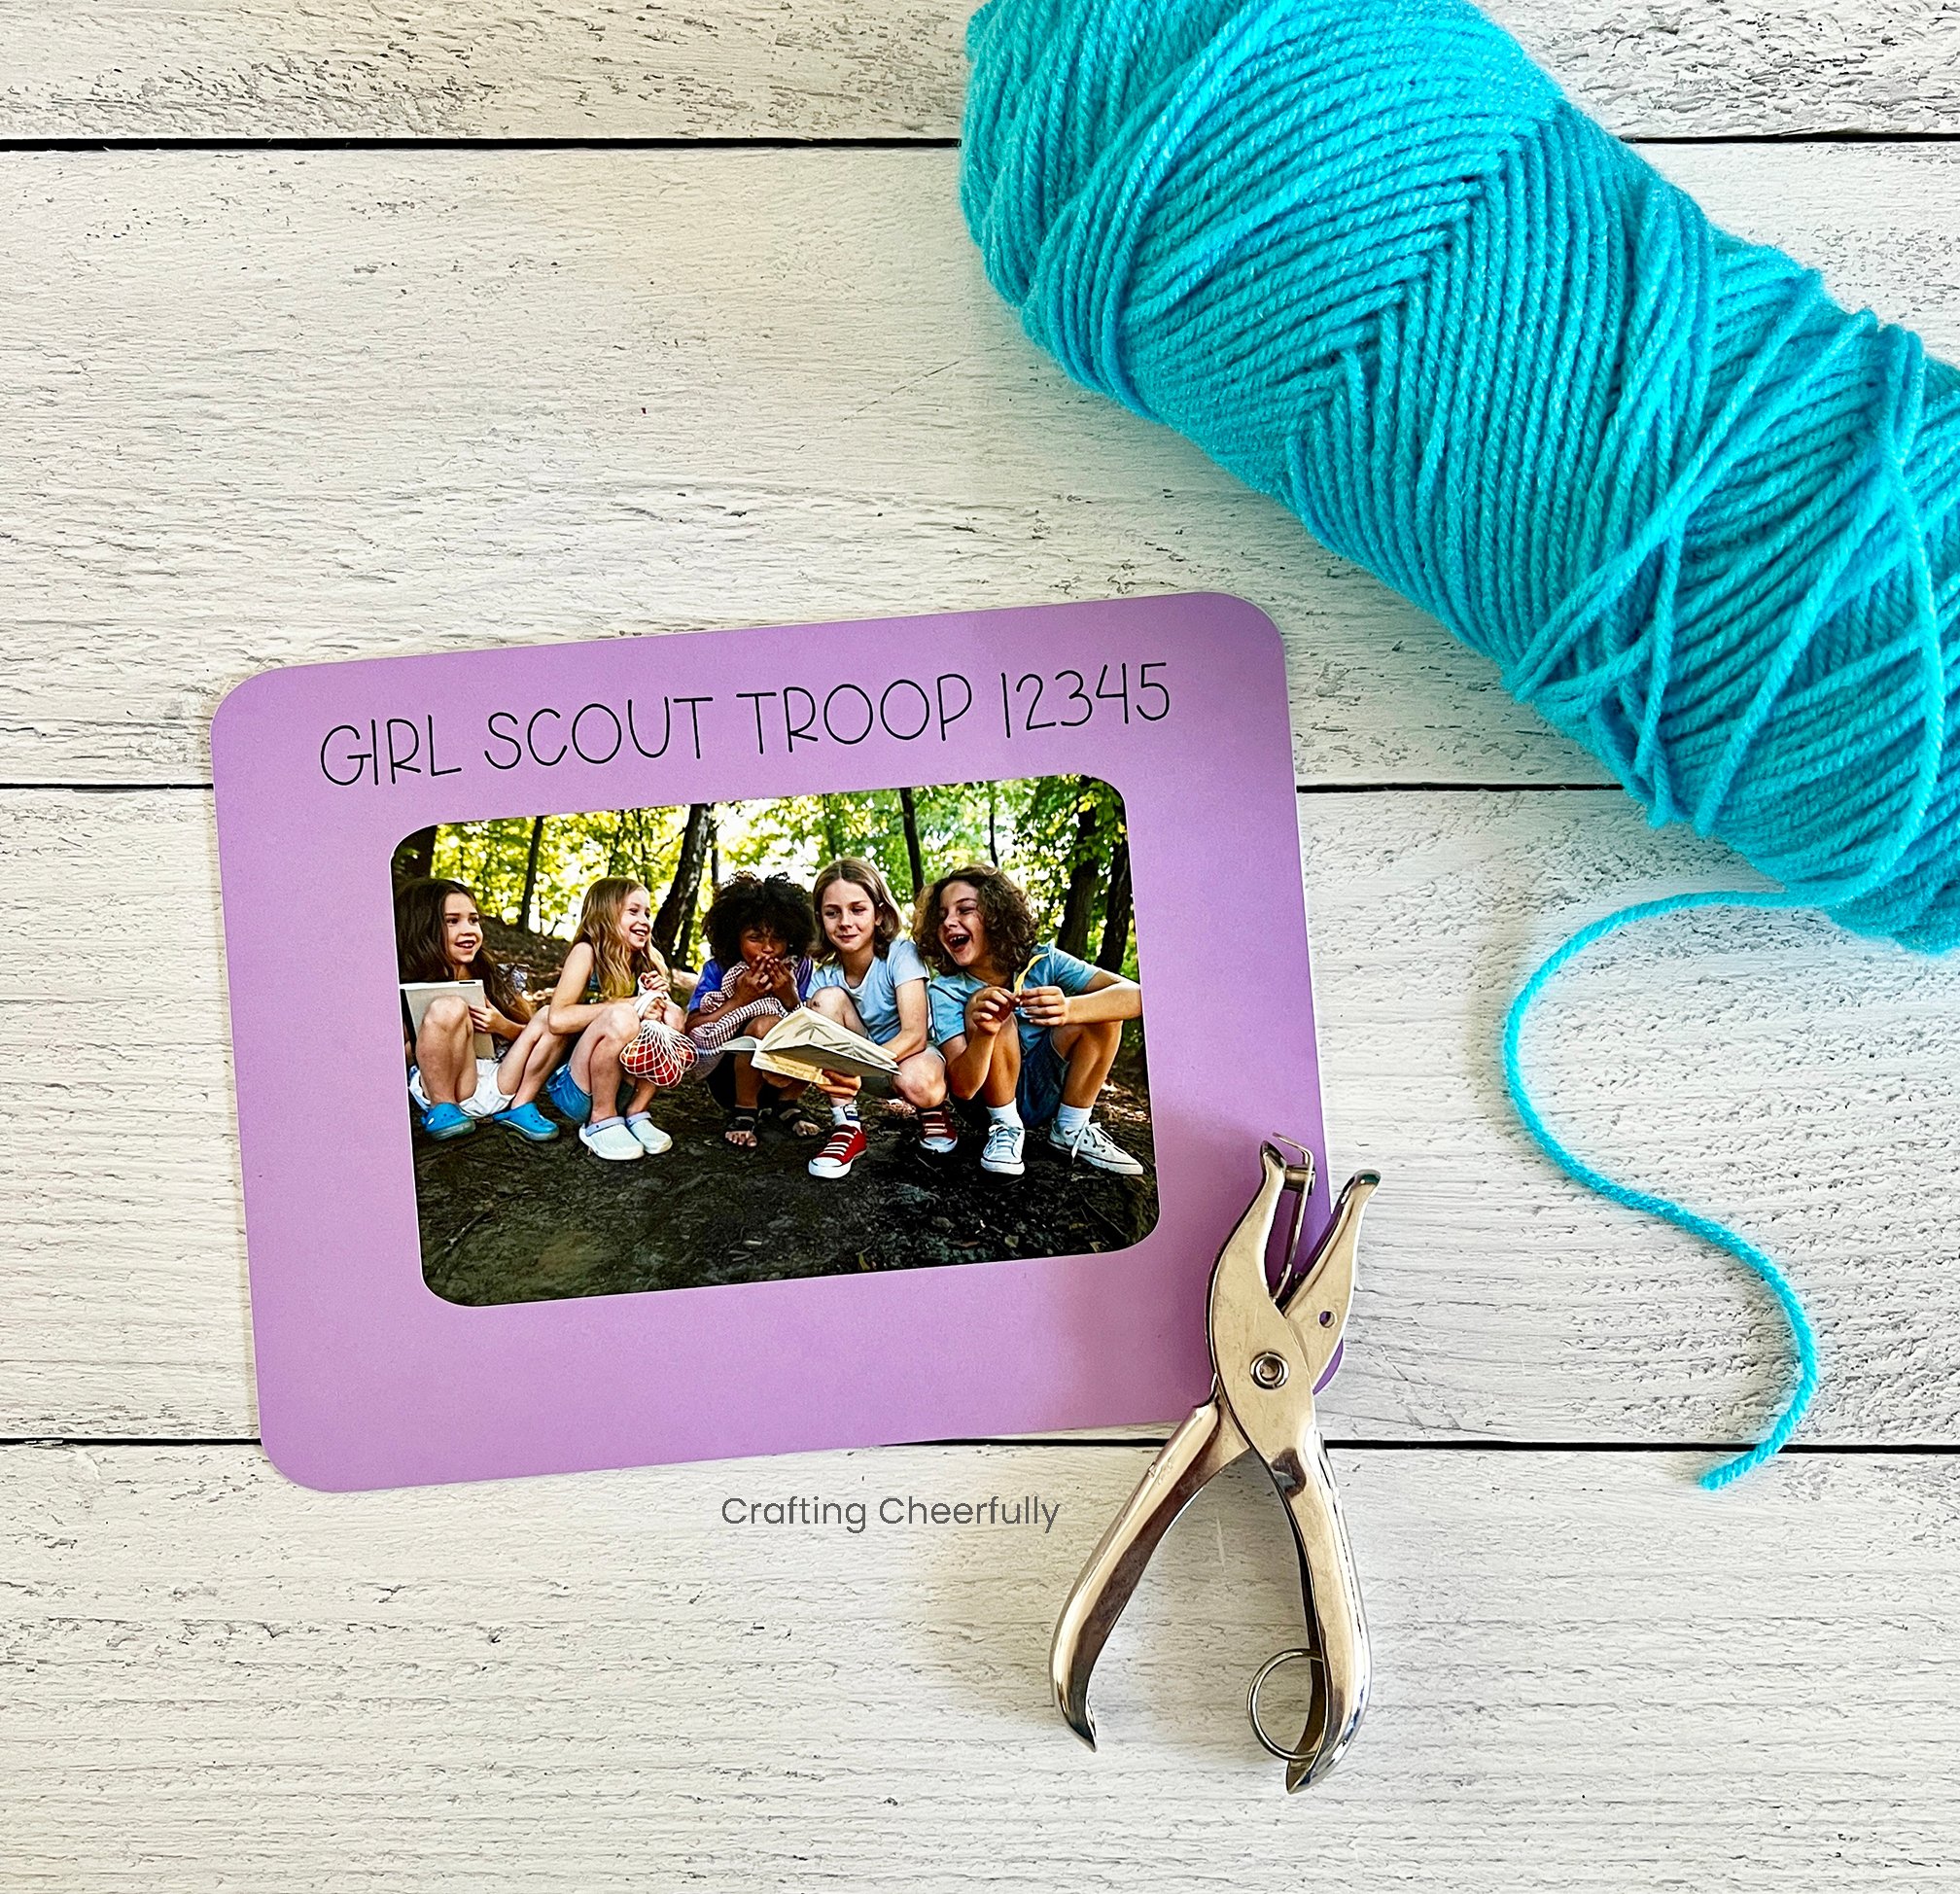
Step Five: Add a hanging loop.
If you would like to make the frame that hangs, you can use a hole punch to punch holes in the top corners of the frame. Cut a length of yarn or ribbon and attach it. I usually wait to add the hanging loop and let the kids do that. I cut a bunch of hanging loops from different colors of yarn or ribbon and let them choose. If your group is prone to arguing, you may want to make your hanging loops all the same color to avoid this!
Step Six: Let the kids sign and decorate their frames.
Bring pens, markers, stickers, gems – anything that is age appropriate and something you think your group of kids would enjoy using – and let them decorate their frames.
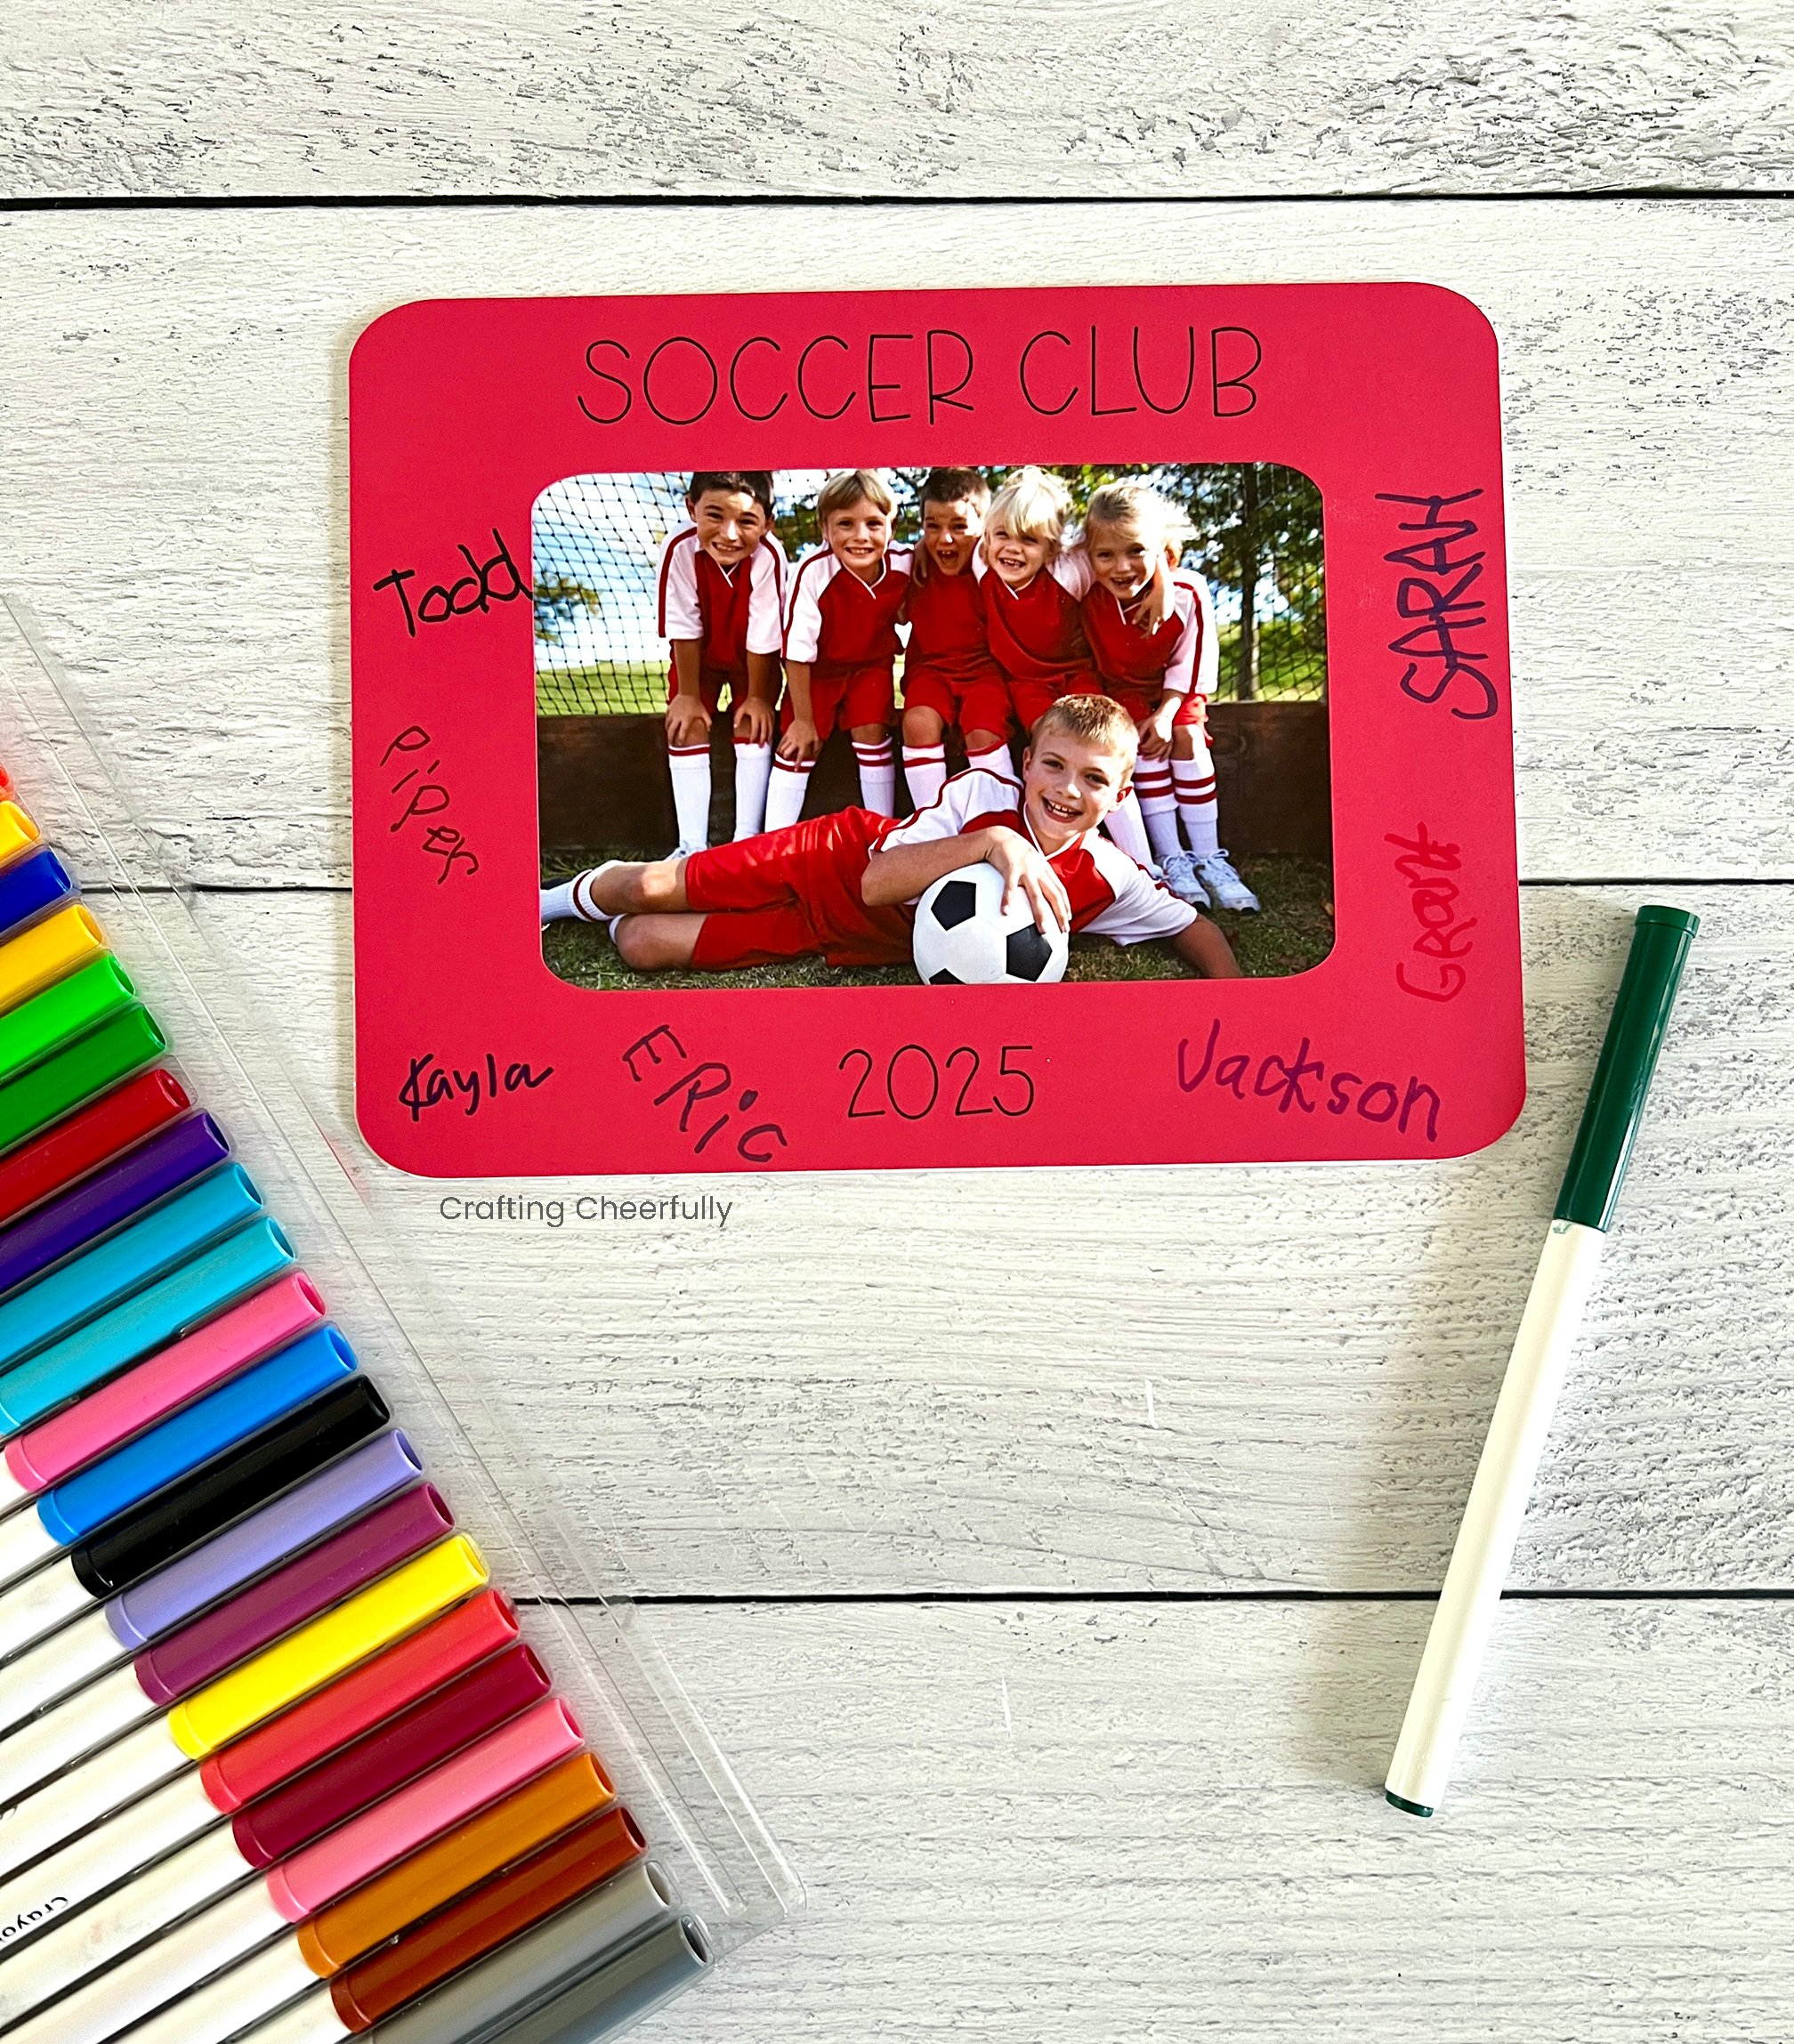
It’s fun to add stickers that match the activity or theme. With our Girl Scout troop it was fun to add in gems. Since the gems tend to be really popular I precut them into strips and handed them out so the girls each got there own.

I hope you enjoyed this fun keepsake craft! Be sure to check out my other fun Kids Crafts and Paper Crafts! My DIY Summer Journals are another great activity to do with a group and they can easily be turned into keepsake scrapbooks!

Get the Free SVG Cut File and PDF Pattern
Fill out the purple form below with your first name and email address! The free file will be sent straight to your inbox! If you have already filled out the form below, don’t worry – you won’t be added to my list twice! This freebie is for personal use only. I hope you enjoy crafting something special. Please let me know if you have any questions :)