DIY Sleeping Bag for 14.5″ Dolls
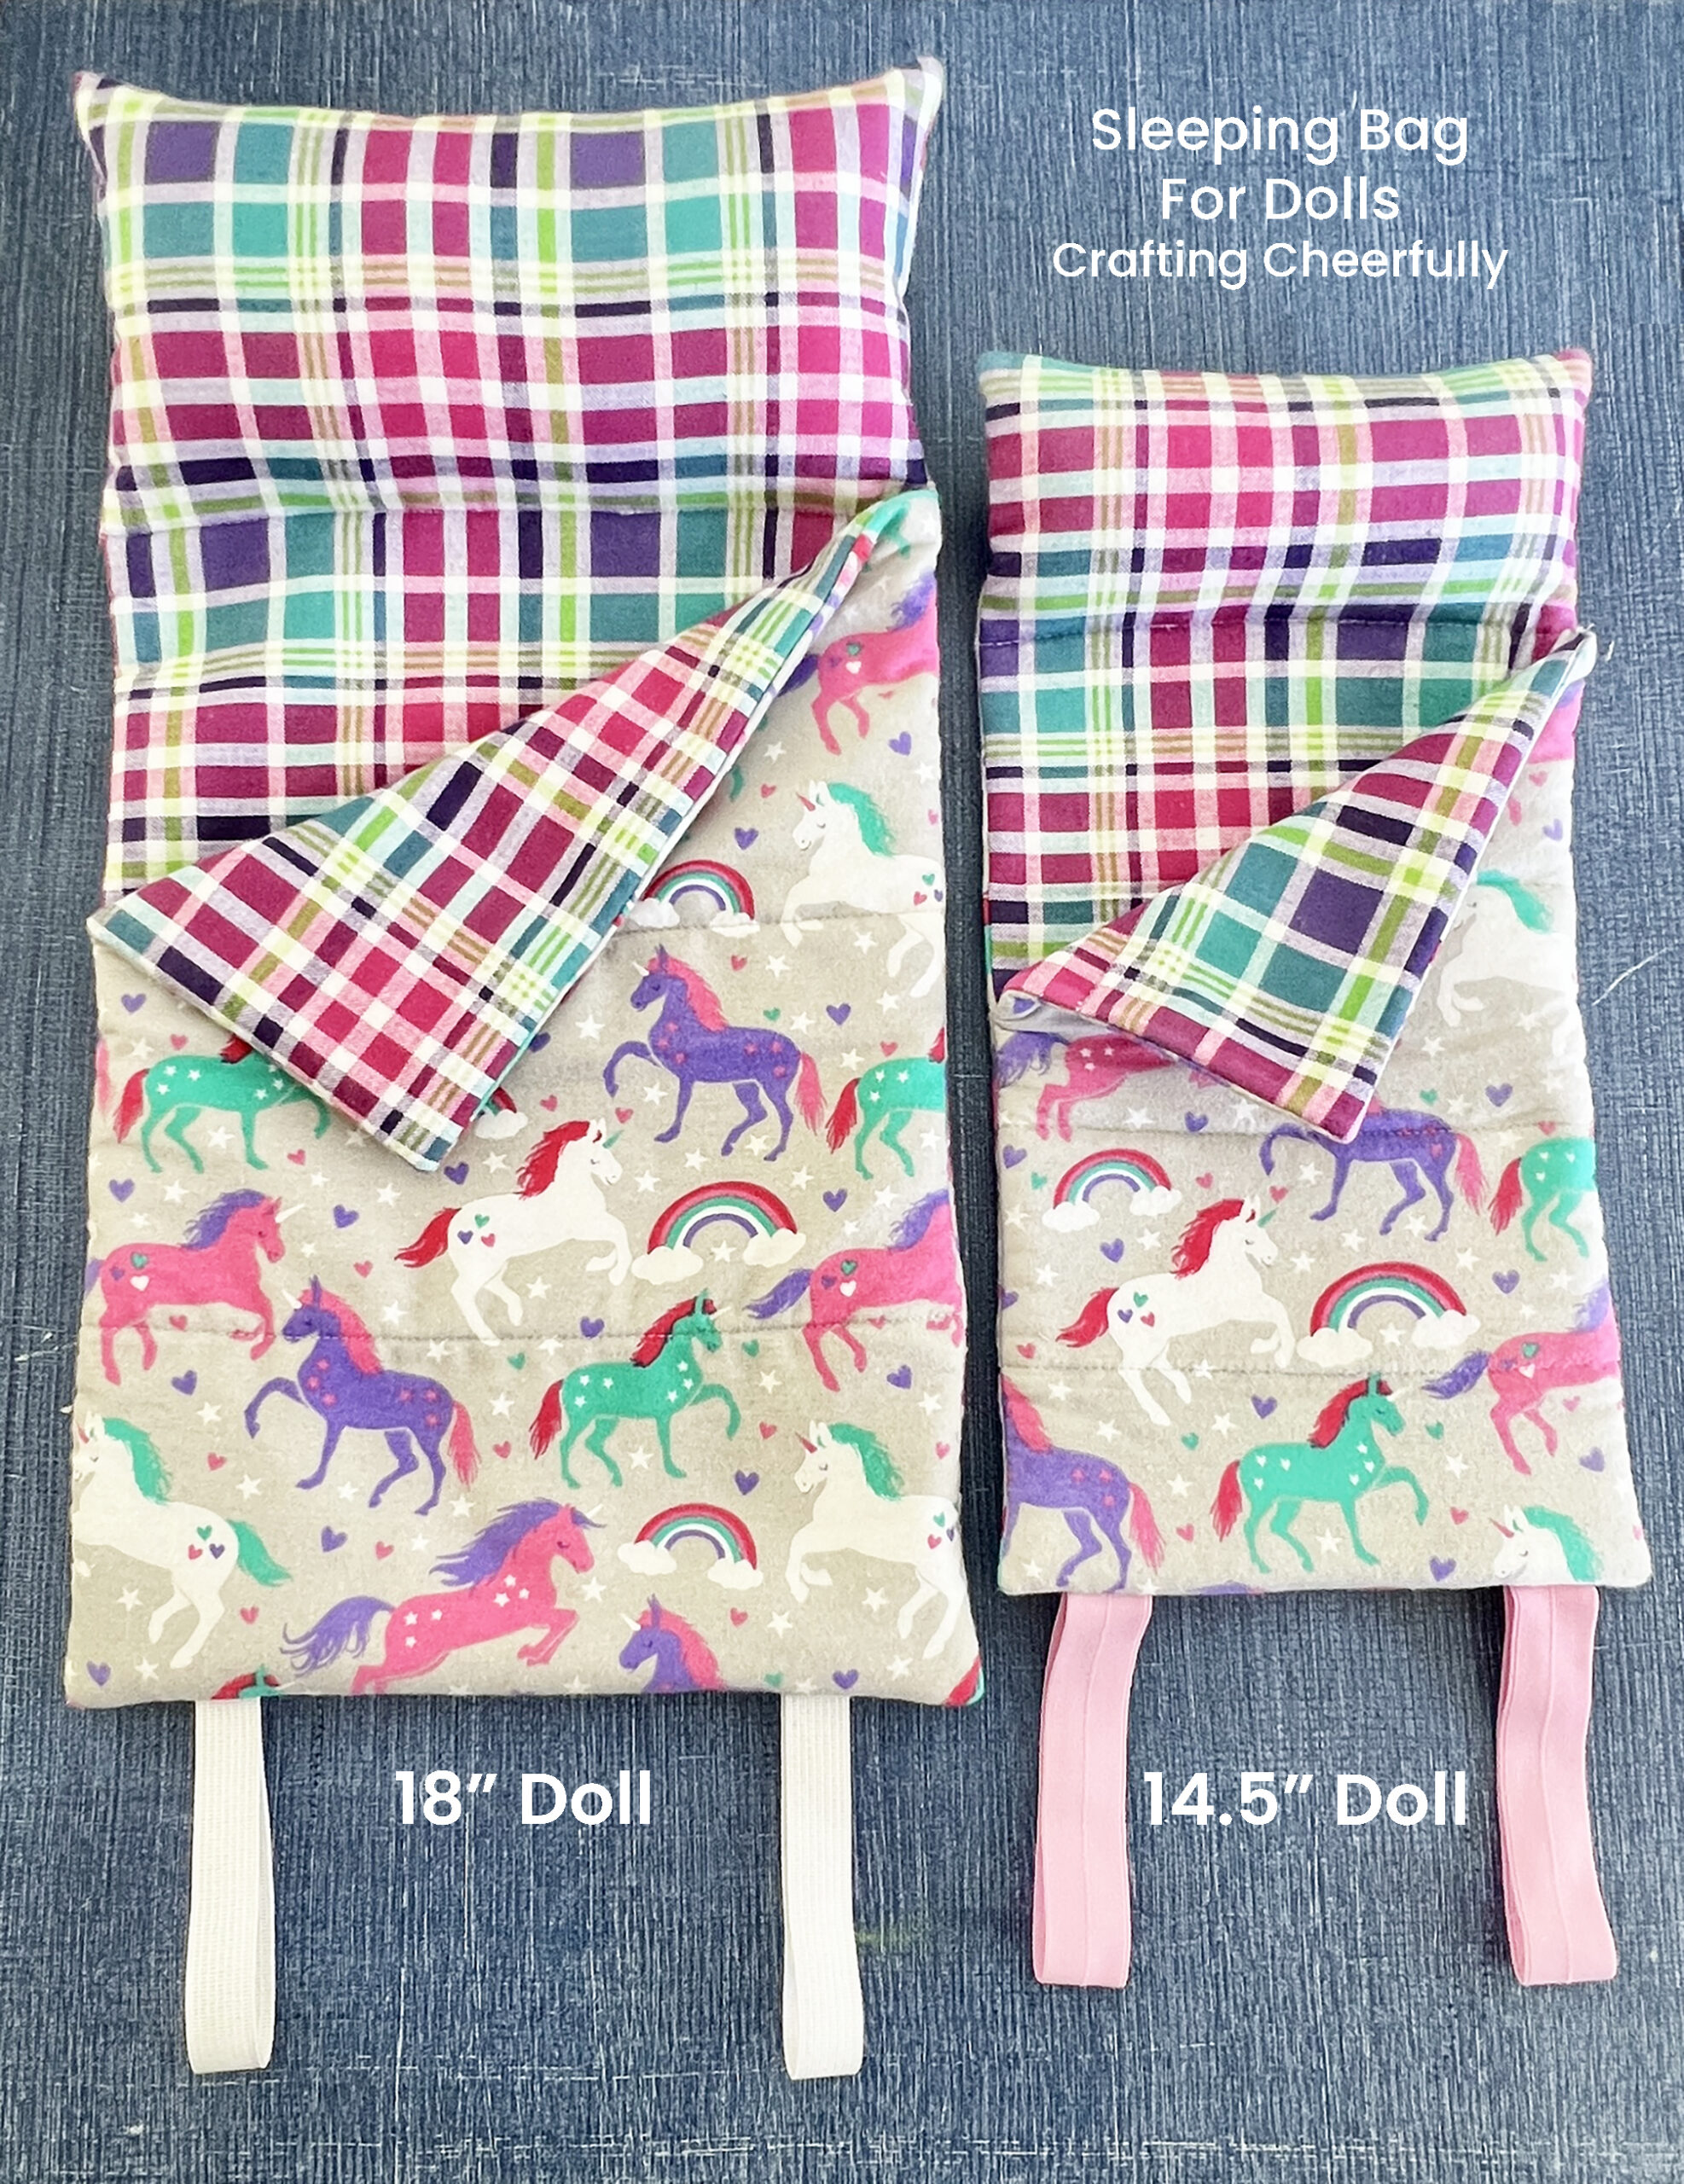
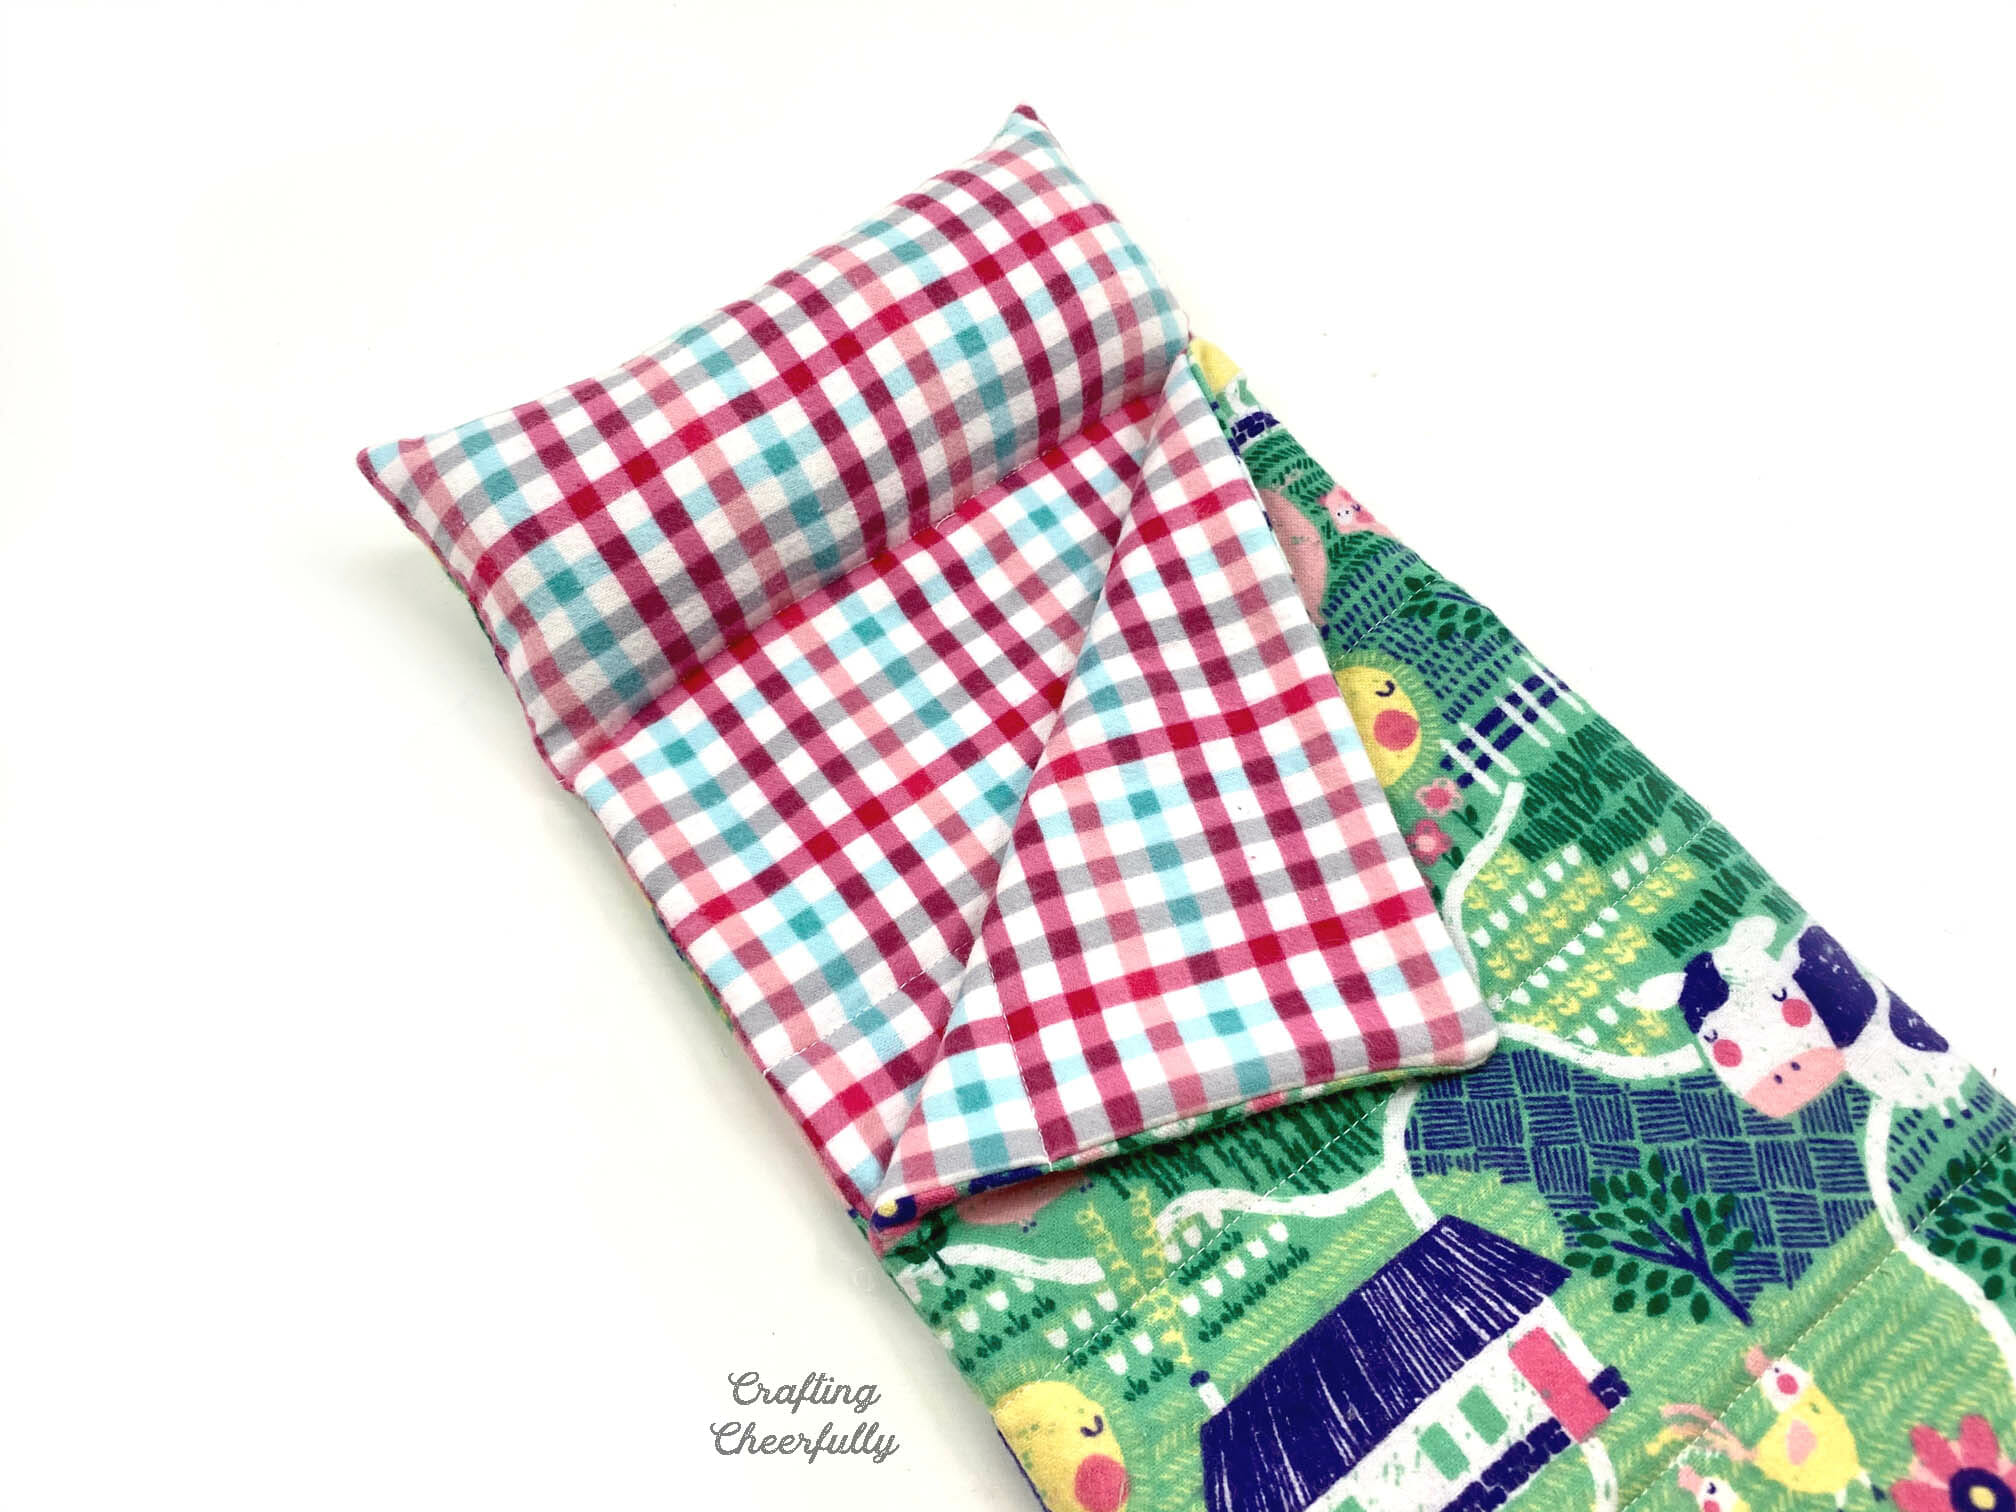
Create a cozy sleeping bag for your favorite 14.5″ doll! Made with soft flannel, this sleeping bag rolls up and has a built-in pillow!
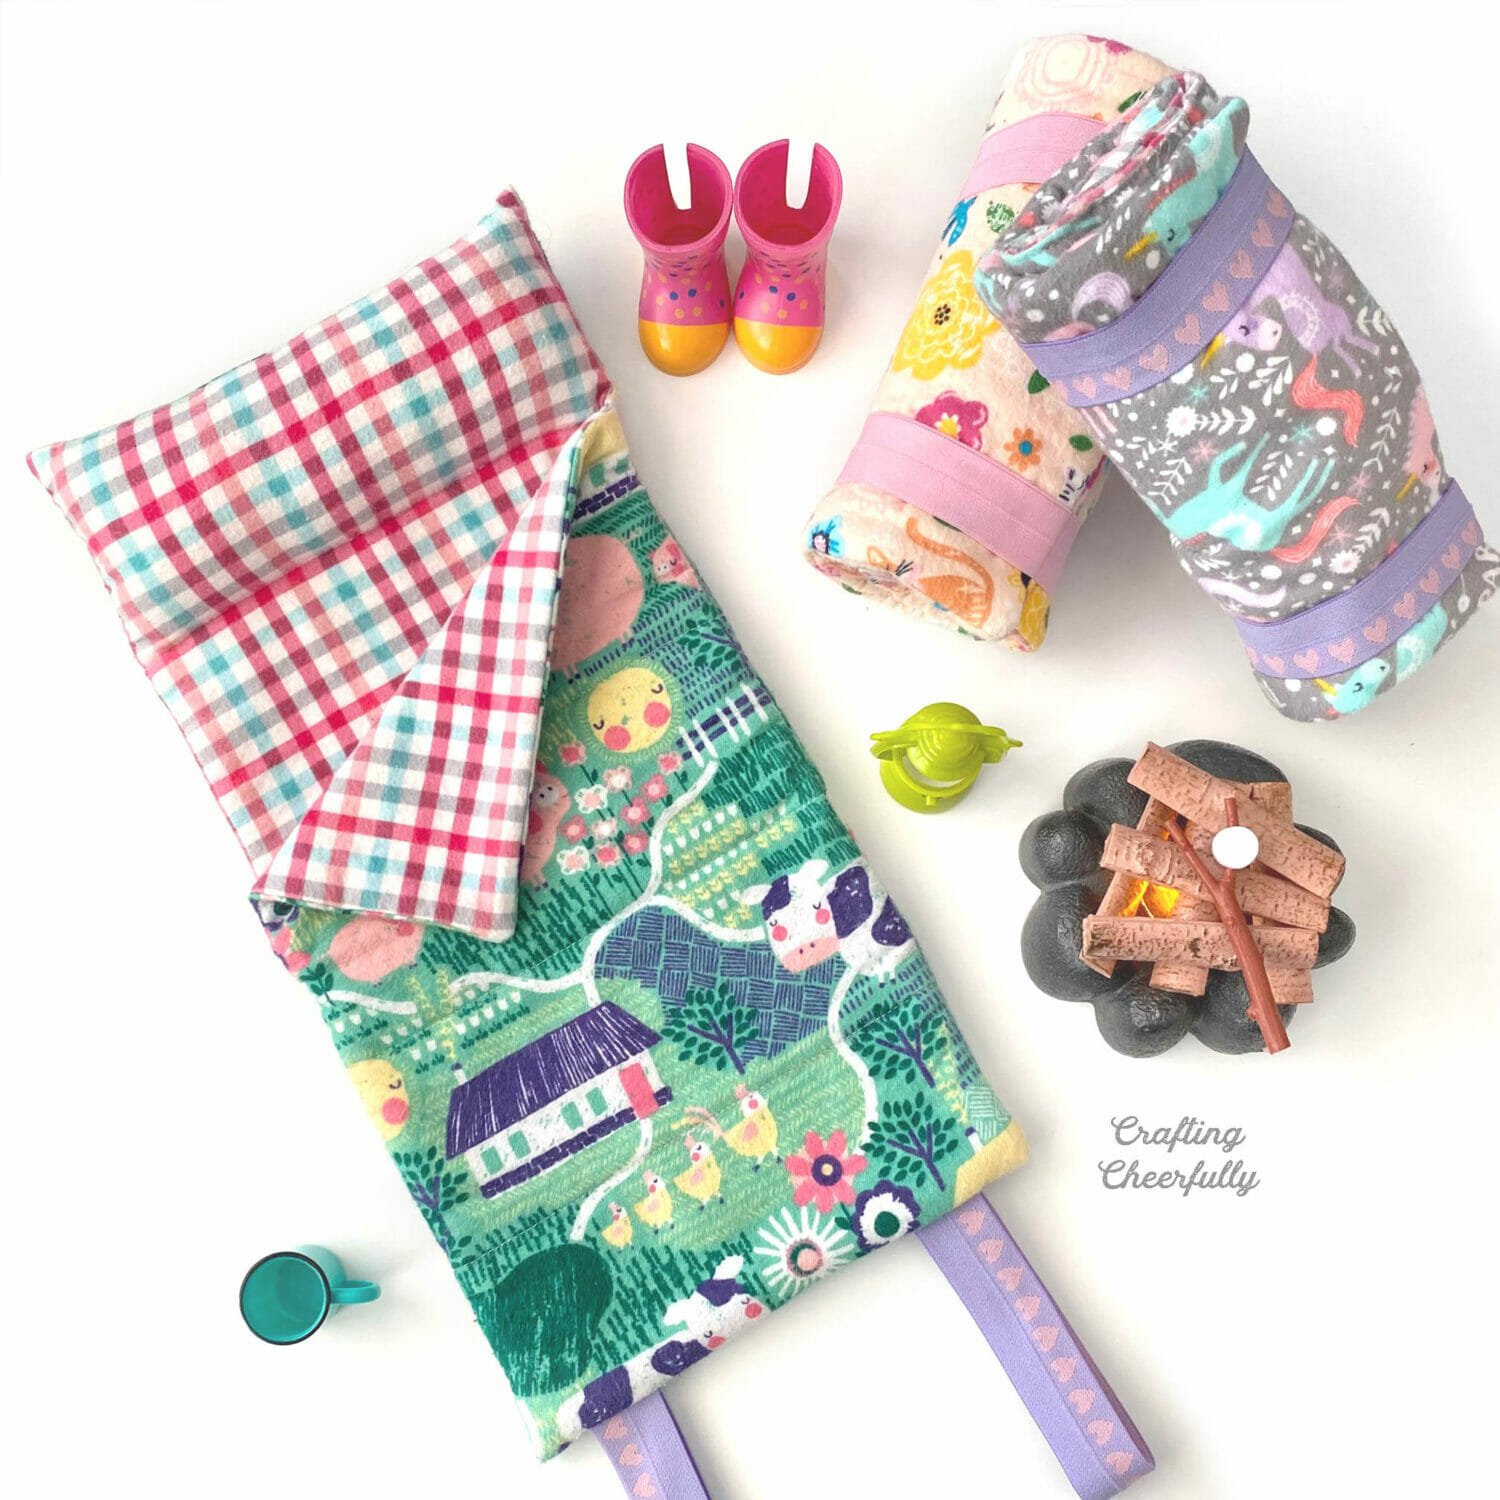
Today I’m excited to share with you a fun tutorial for making flannel sleeping bags for dolls. A few years ago, we gifted my daughter a camping tent for her dolls and I decided to make sleeping bags so her dolls could camp out. I used printed flannel and it is so soft and cozy! The inside of the sleeping bags is made with a pink plaid and each sleeping bag uses a different print on the outside.
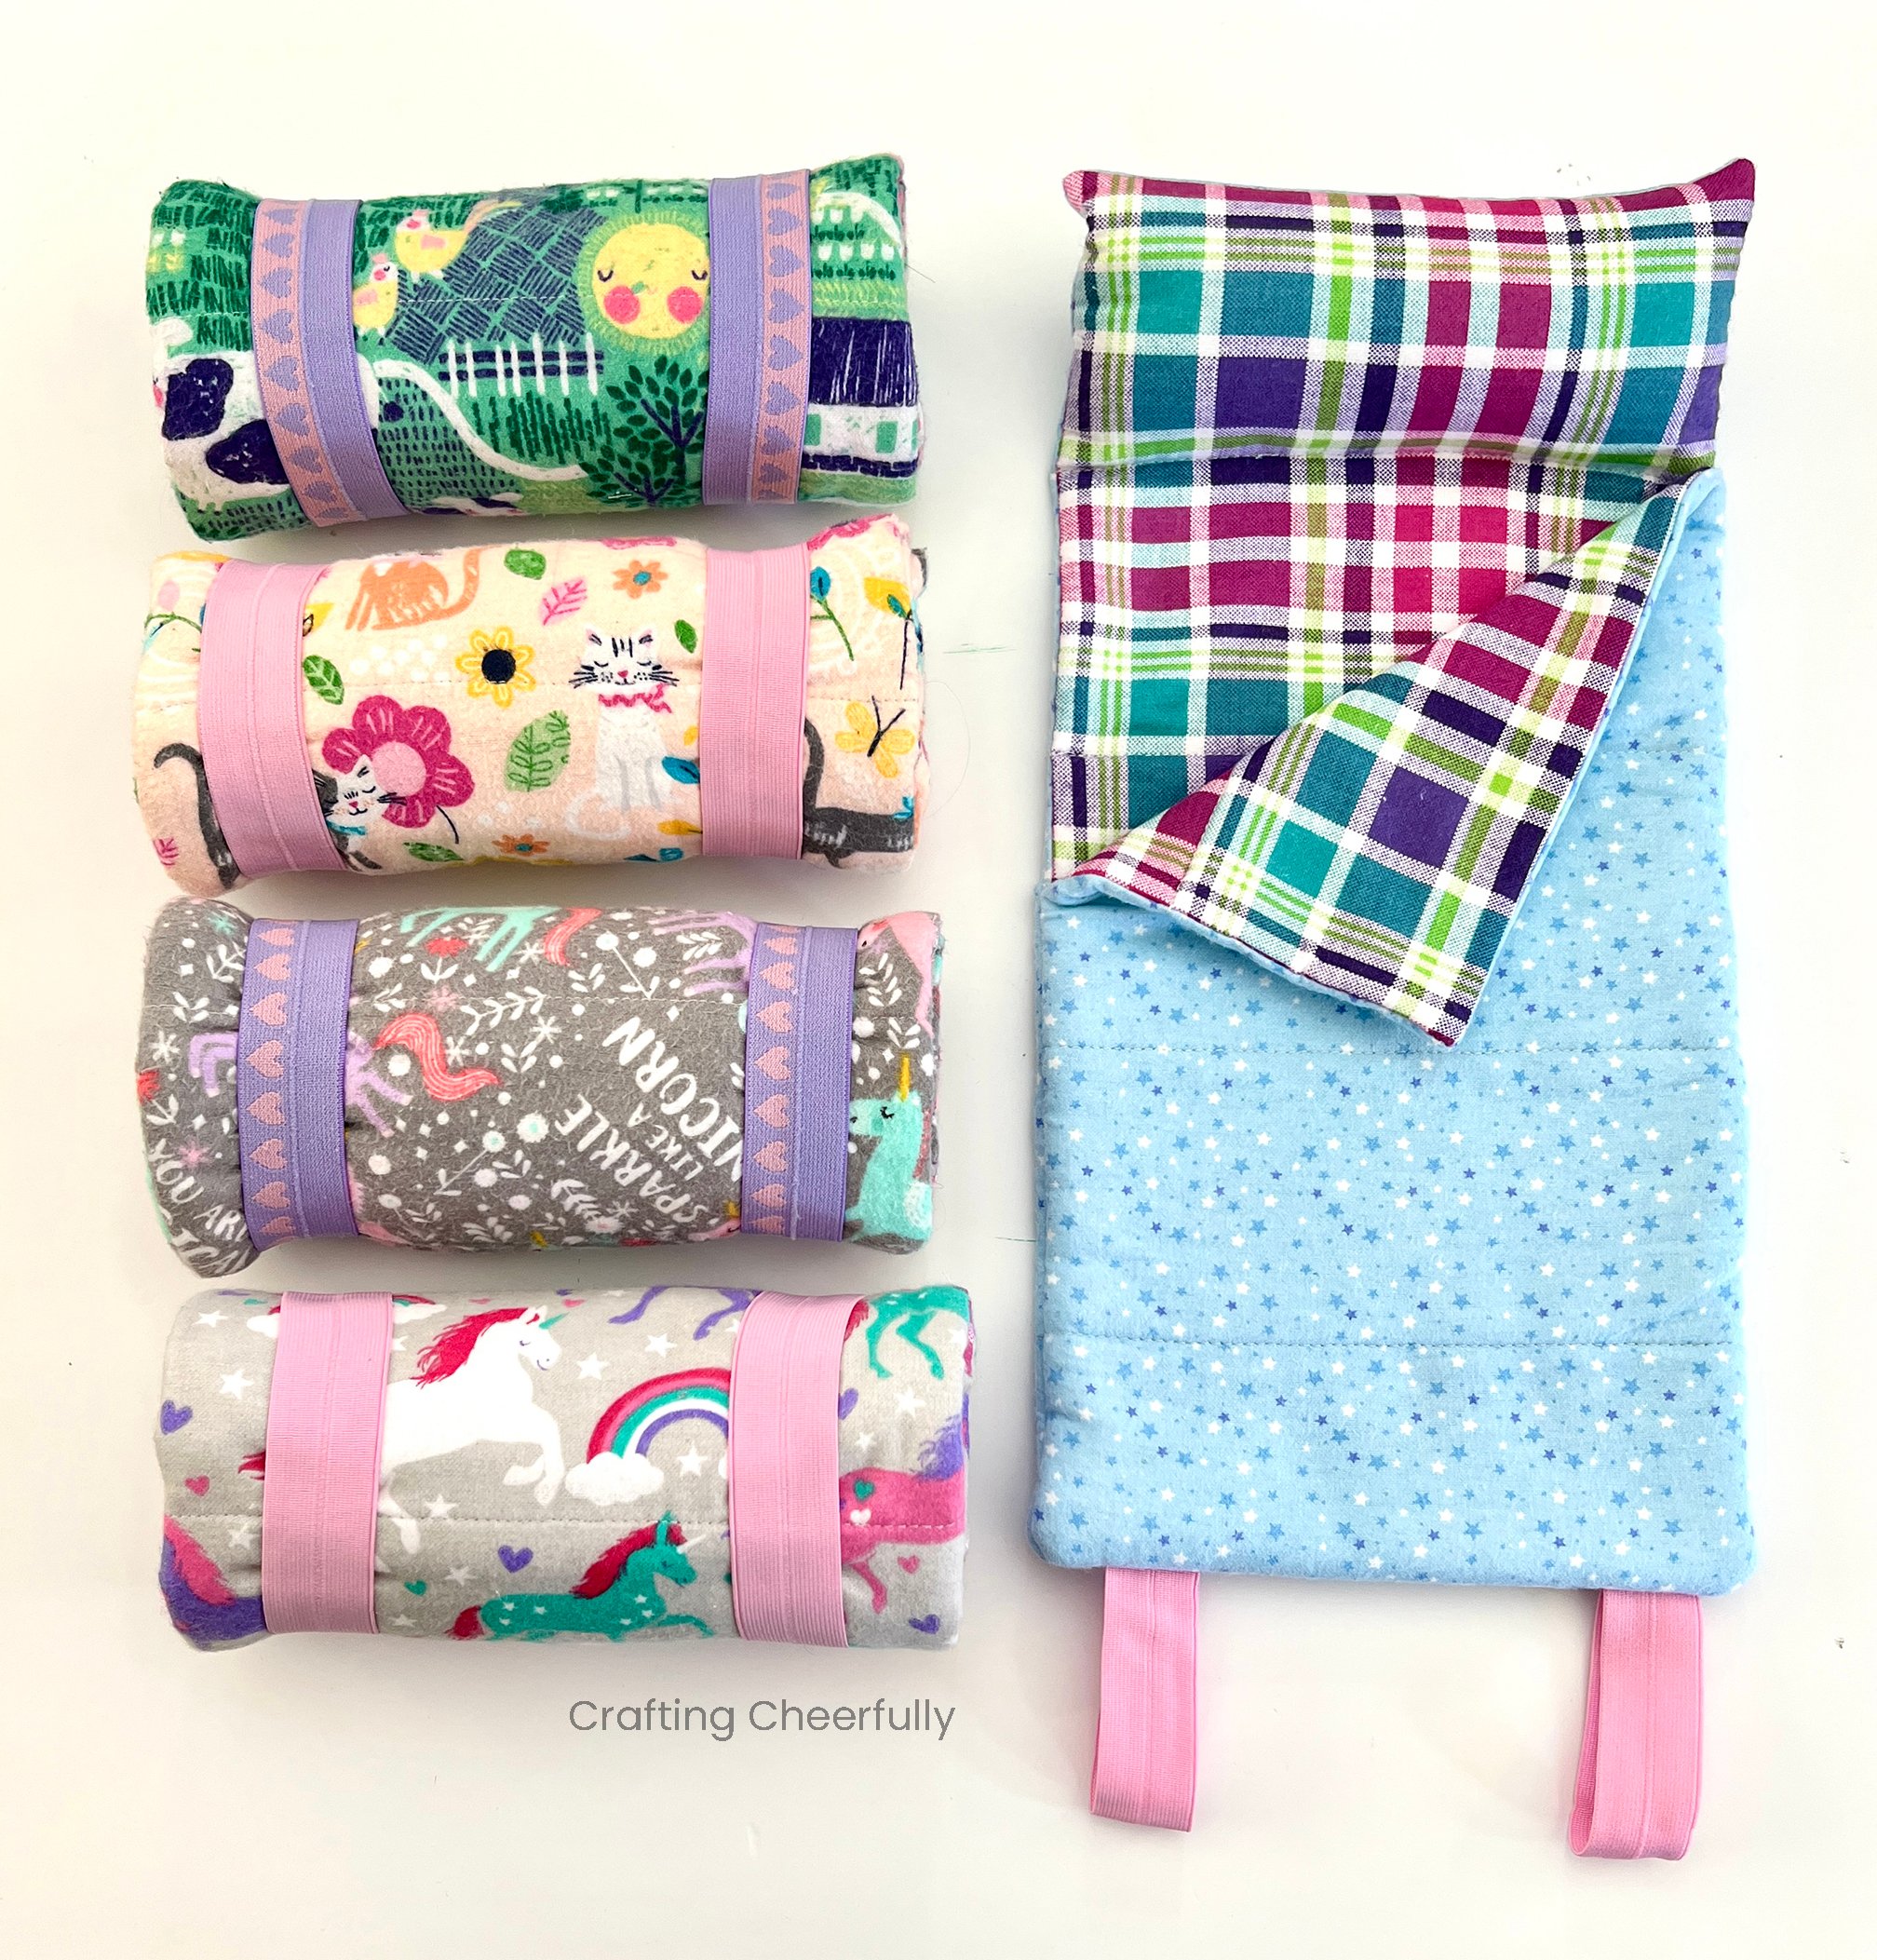
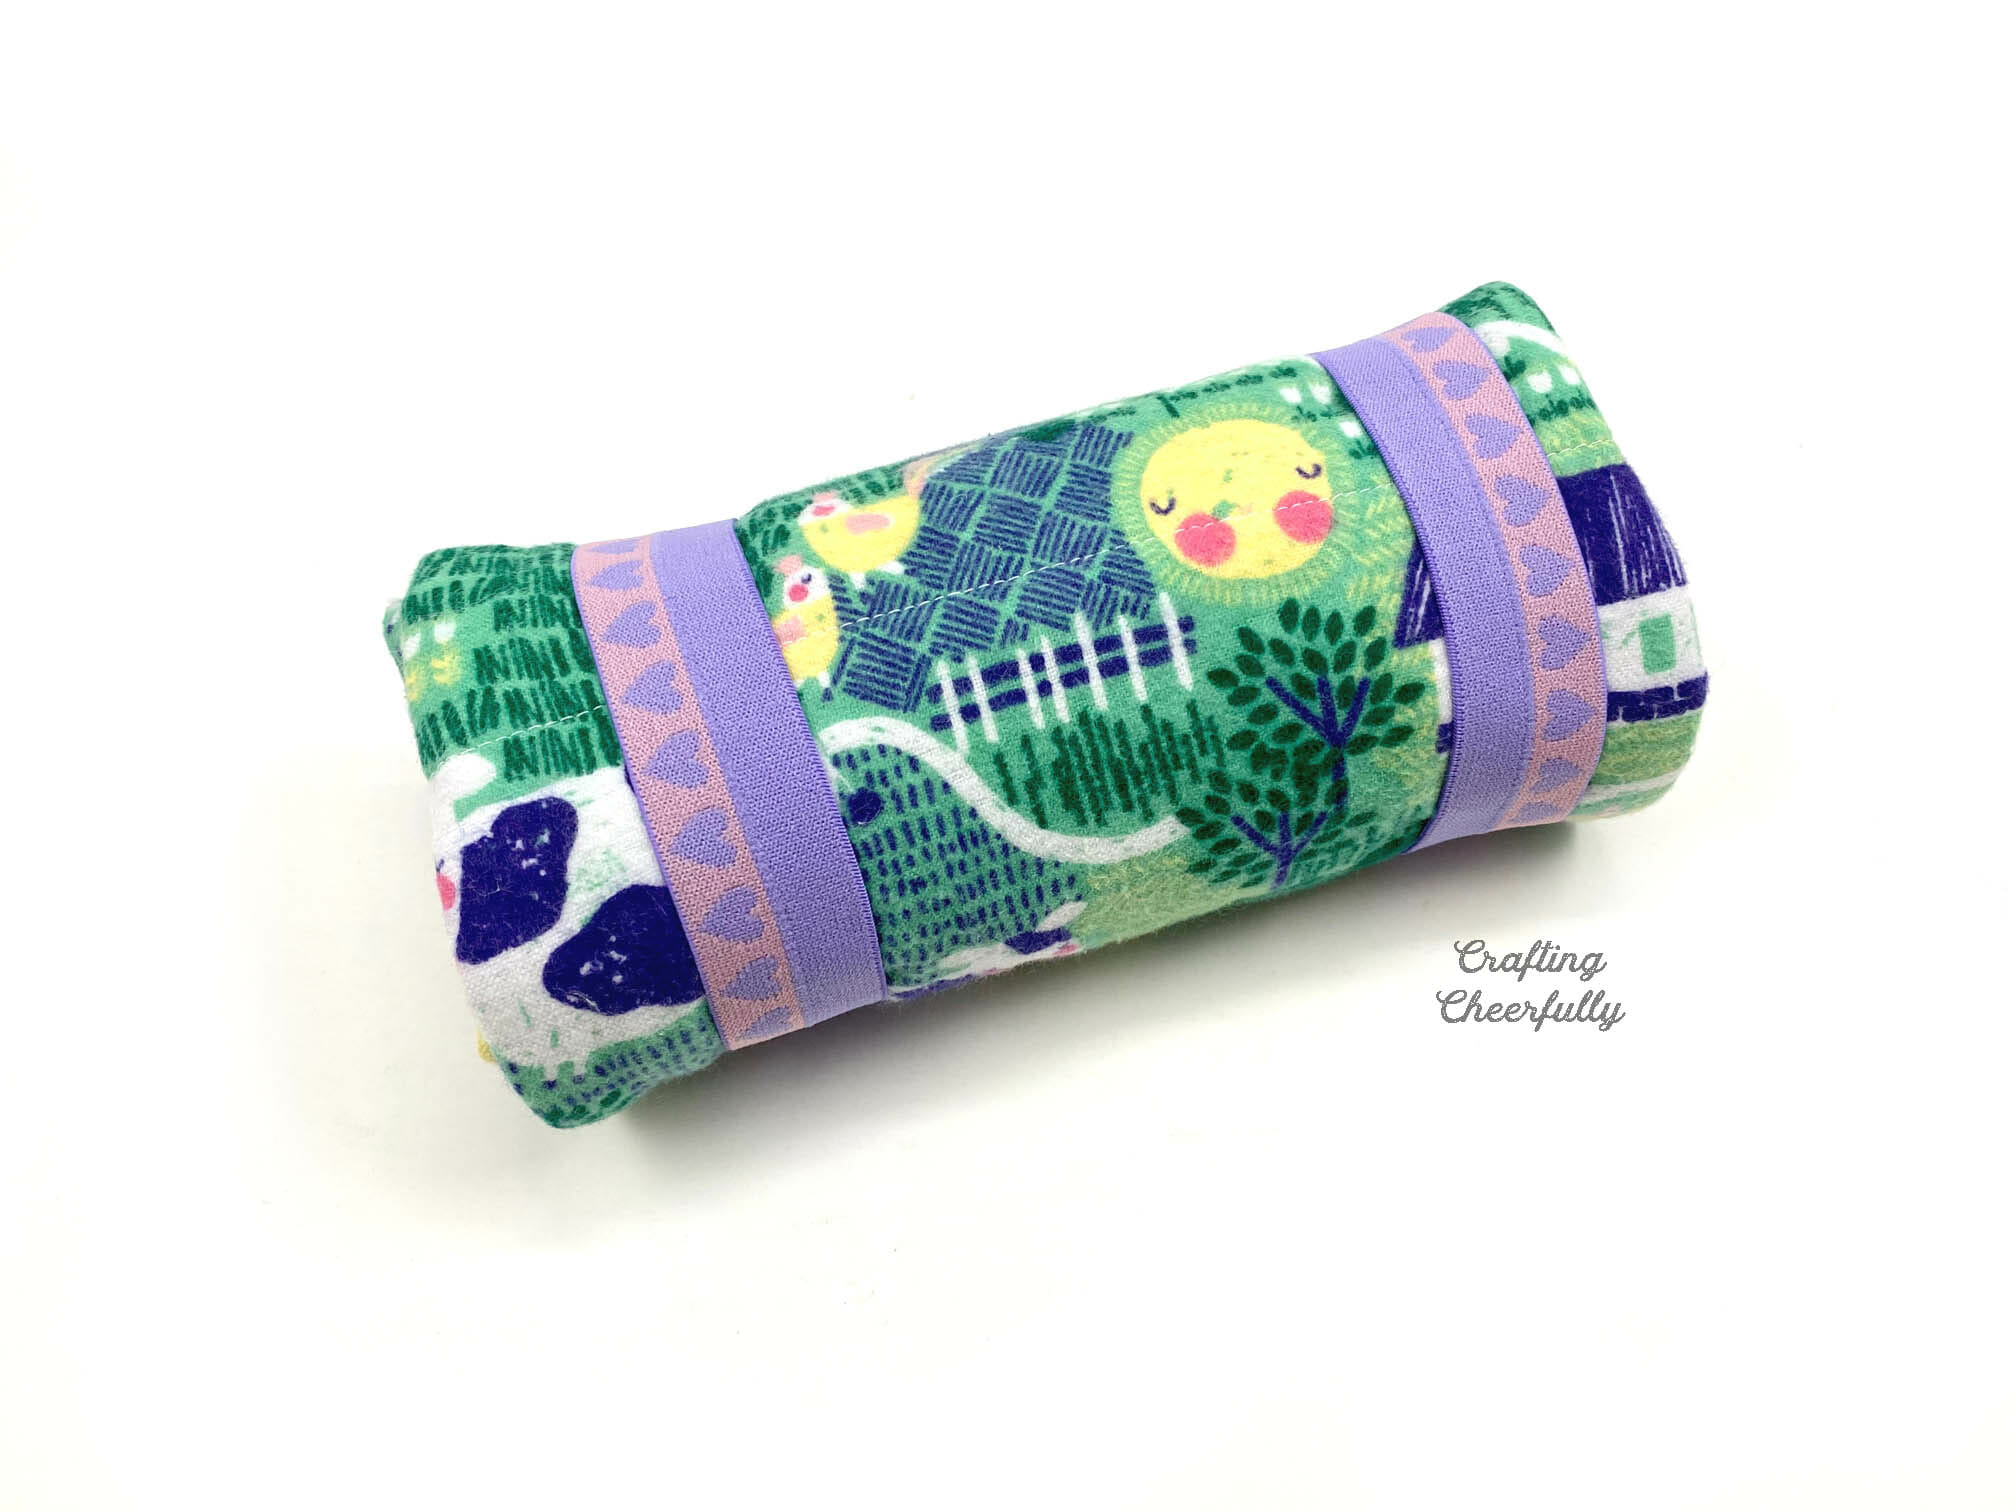
The sleeping bags have a built-in pillow and they roll up which is so handy. They stay closed with two built-in elastic loops. I used some of the cutest elastic by Babyville Boutique that I had purchased when my kids were babies. It is really soft, wide and has a cute print on it so it was perfect for these sleeping bags.

Below is the step-by-step picture tutorial for making the doll sleeping bag. This sleeping bag is designed for a 14.5″ doll. After creating these for my daughter’s Wellies, I created similar sleeping bags for her 18″ dolls. They are made the exact same way but the measurements are different. You can check out that tutorial by visiting “DIY Sleeping Bag for 18″ Dolls“.
How to Make a Sleeping Bag for 14.5″ Dolls
Supplies Needed:
- Free Pattern – Download the free pattern by filling out the purple form towards the bottom of this post.
- Flannel
- Fusible Fleece Interfacing (half yard) or regular fleece (read about the difference below). You could also use a thin batting.
- 20″ Elastic – I used Babyville Boutique Fold Over Elastic. This foldover elastic looks similar, but I have not tried it.
- Poly-Fil stuffing
- Sewing Notions: pins, clear ruler, point turner, and thread. fabric scissors.

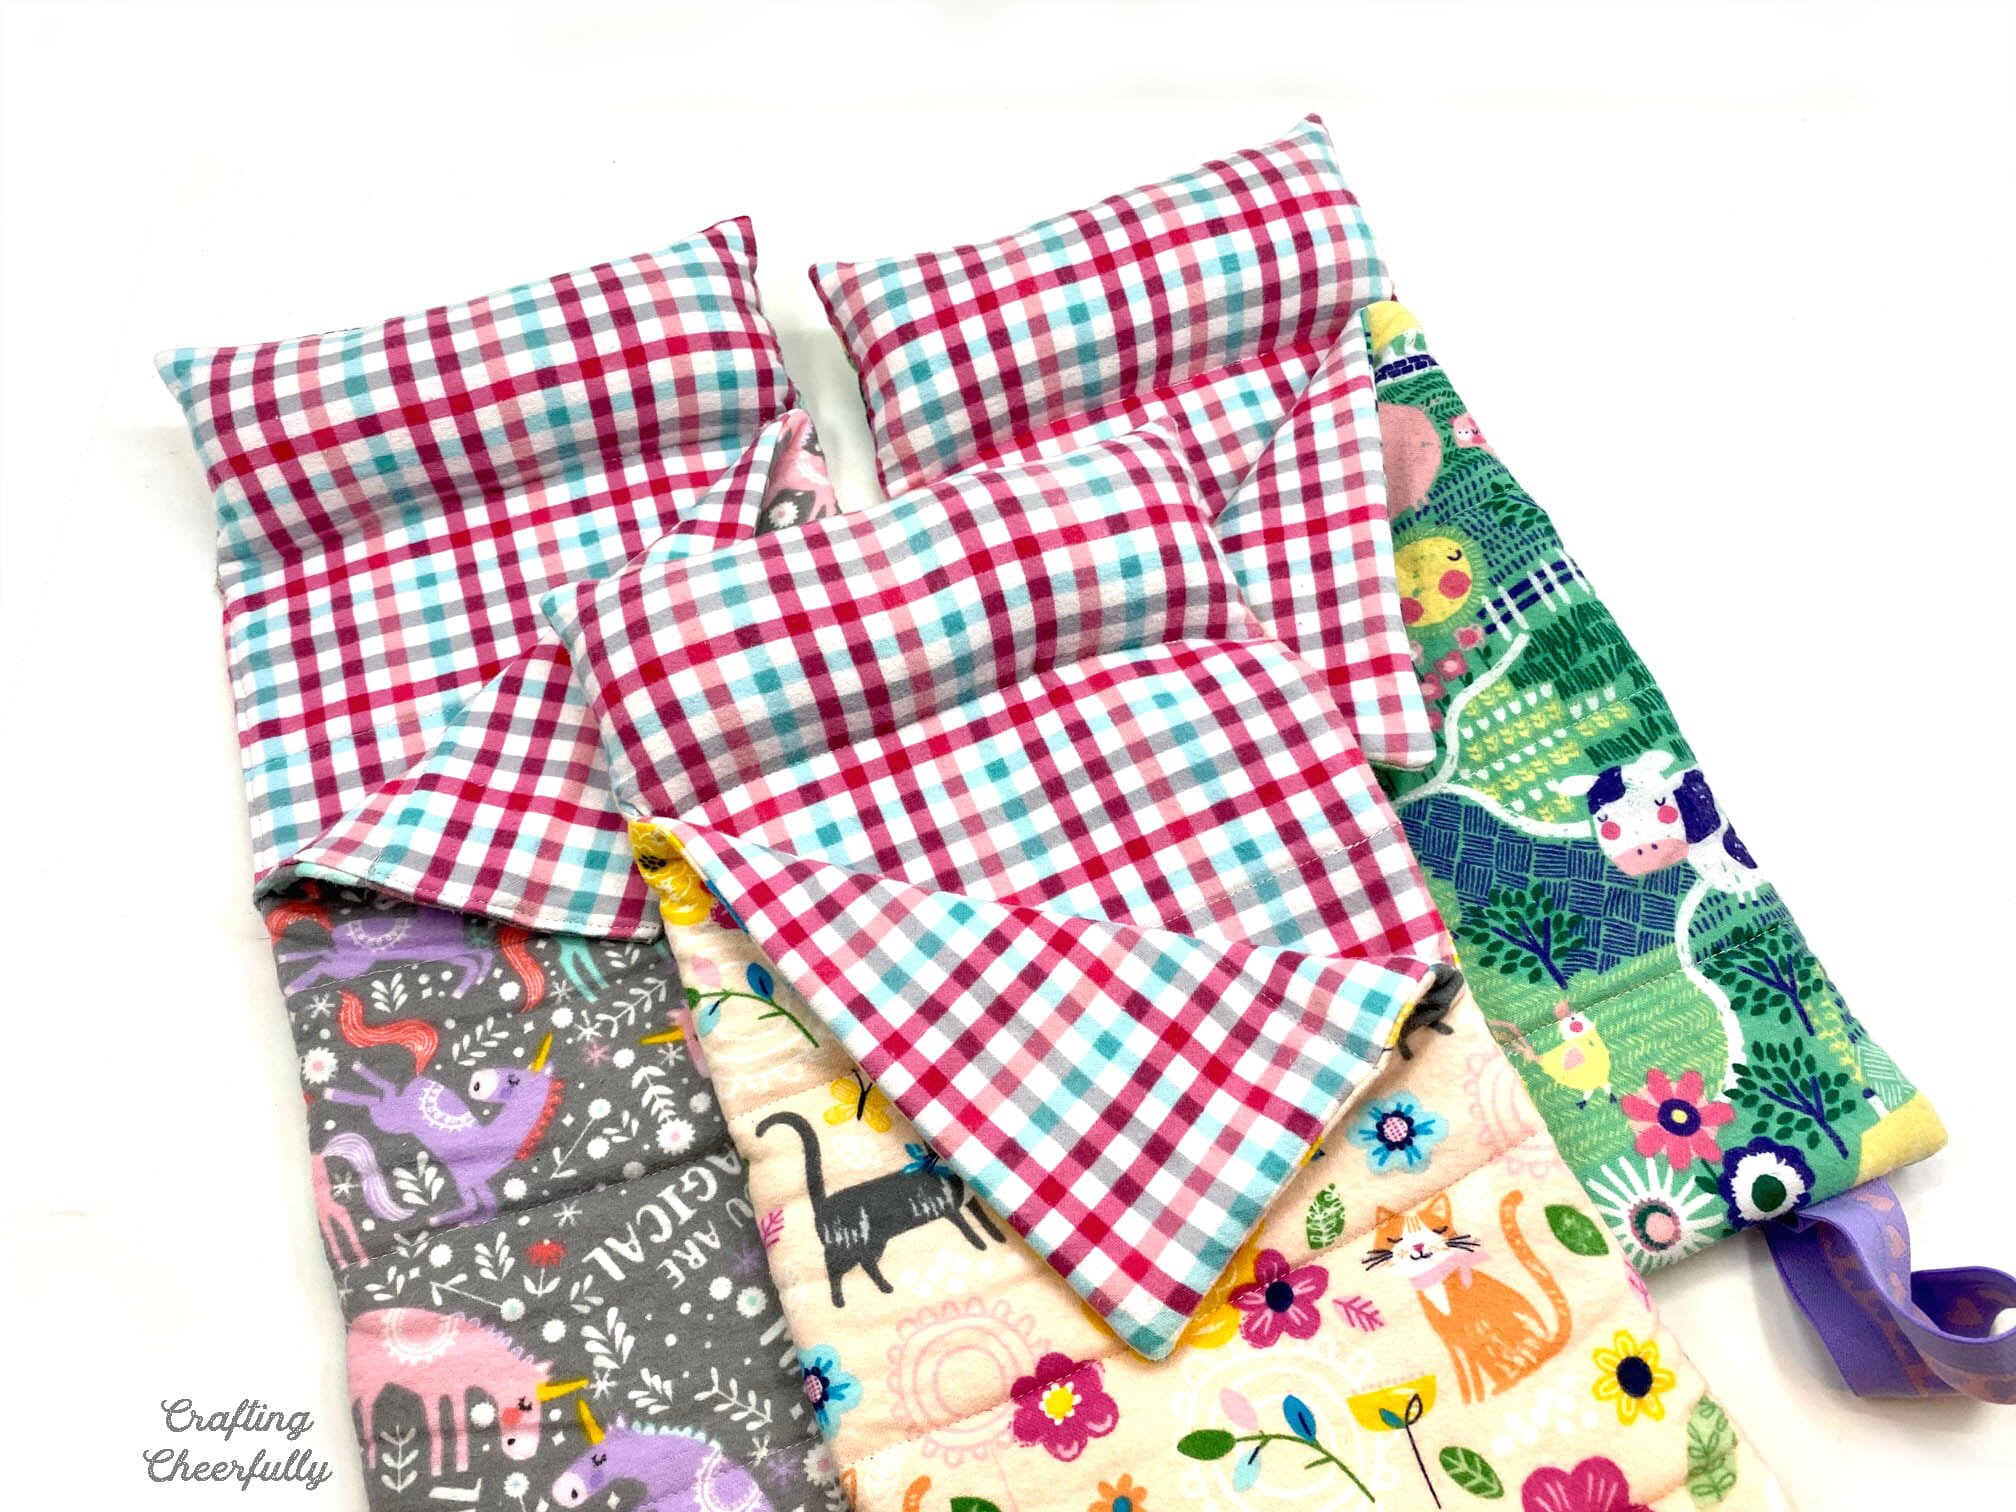
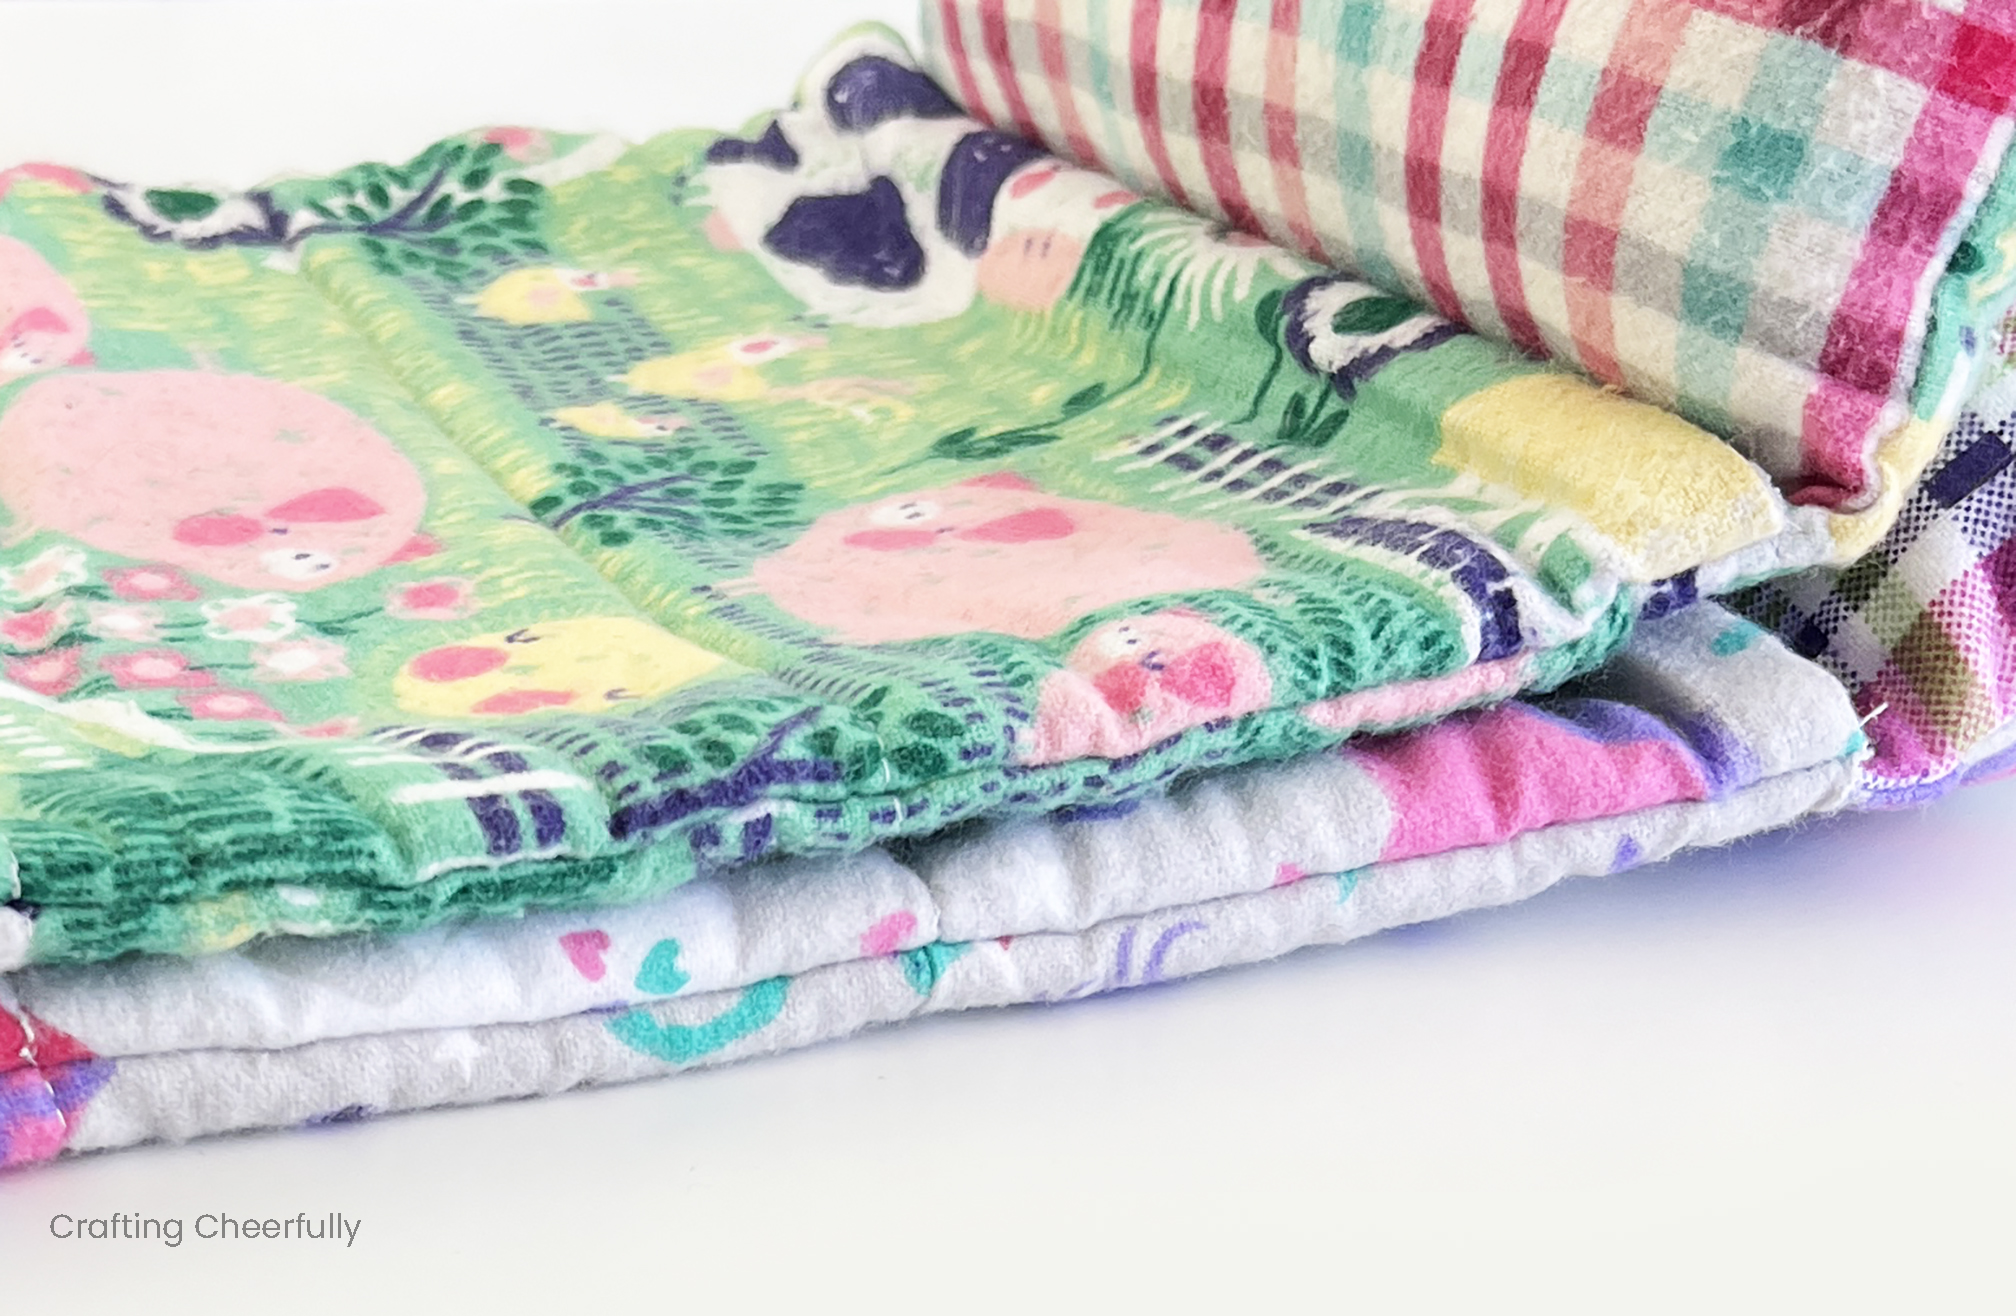
You can use fusible fleece interfacing or regular fleece between the layers of flannel for your sleeping bag. I tried both and preferred using a lightweight fleece interfacing as it was thinner than regular fleece.
The regular fleece makes the sleeping bags thicker, which is nice, but it is a little trickier to sew through all of the layers. When I used the fleece interfacing, I only lightly ironed it to the wrong side of the my inside flannel fabric – just enough to hold it in place. I did not fully adhere it since the sleeping bag is quilted to keep the layers together.
Below you can see two sleeping bags, the top one is made with fusible fleece interfacing and the bottom one is made with regular fleece. Both are nice!
Cutting the Fabric
Step One: Start by cutting your fabric! Use the free printable pattern to cut the pieces for the entire sleeping bag.
Making the Back of the Sleeping Bag
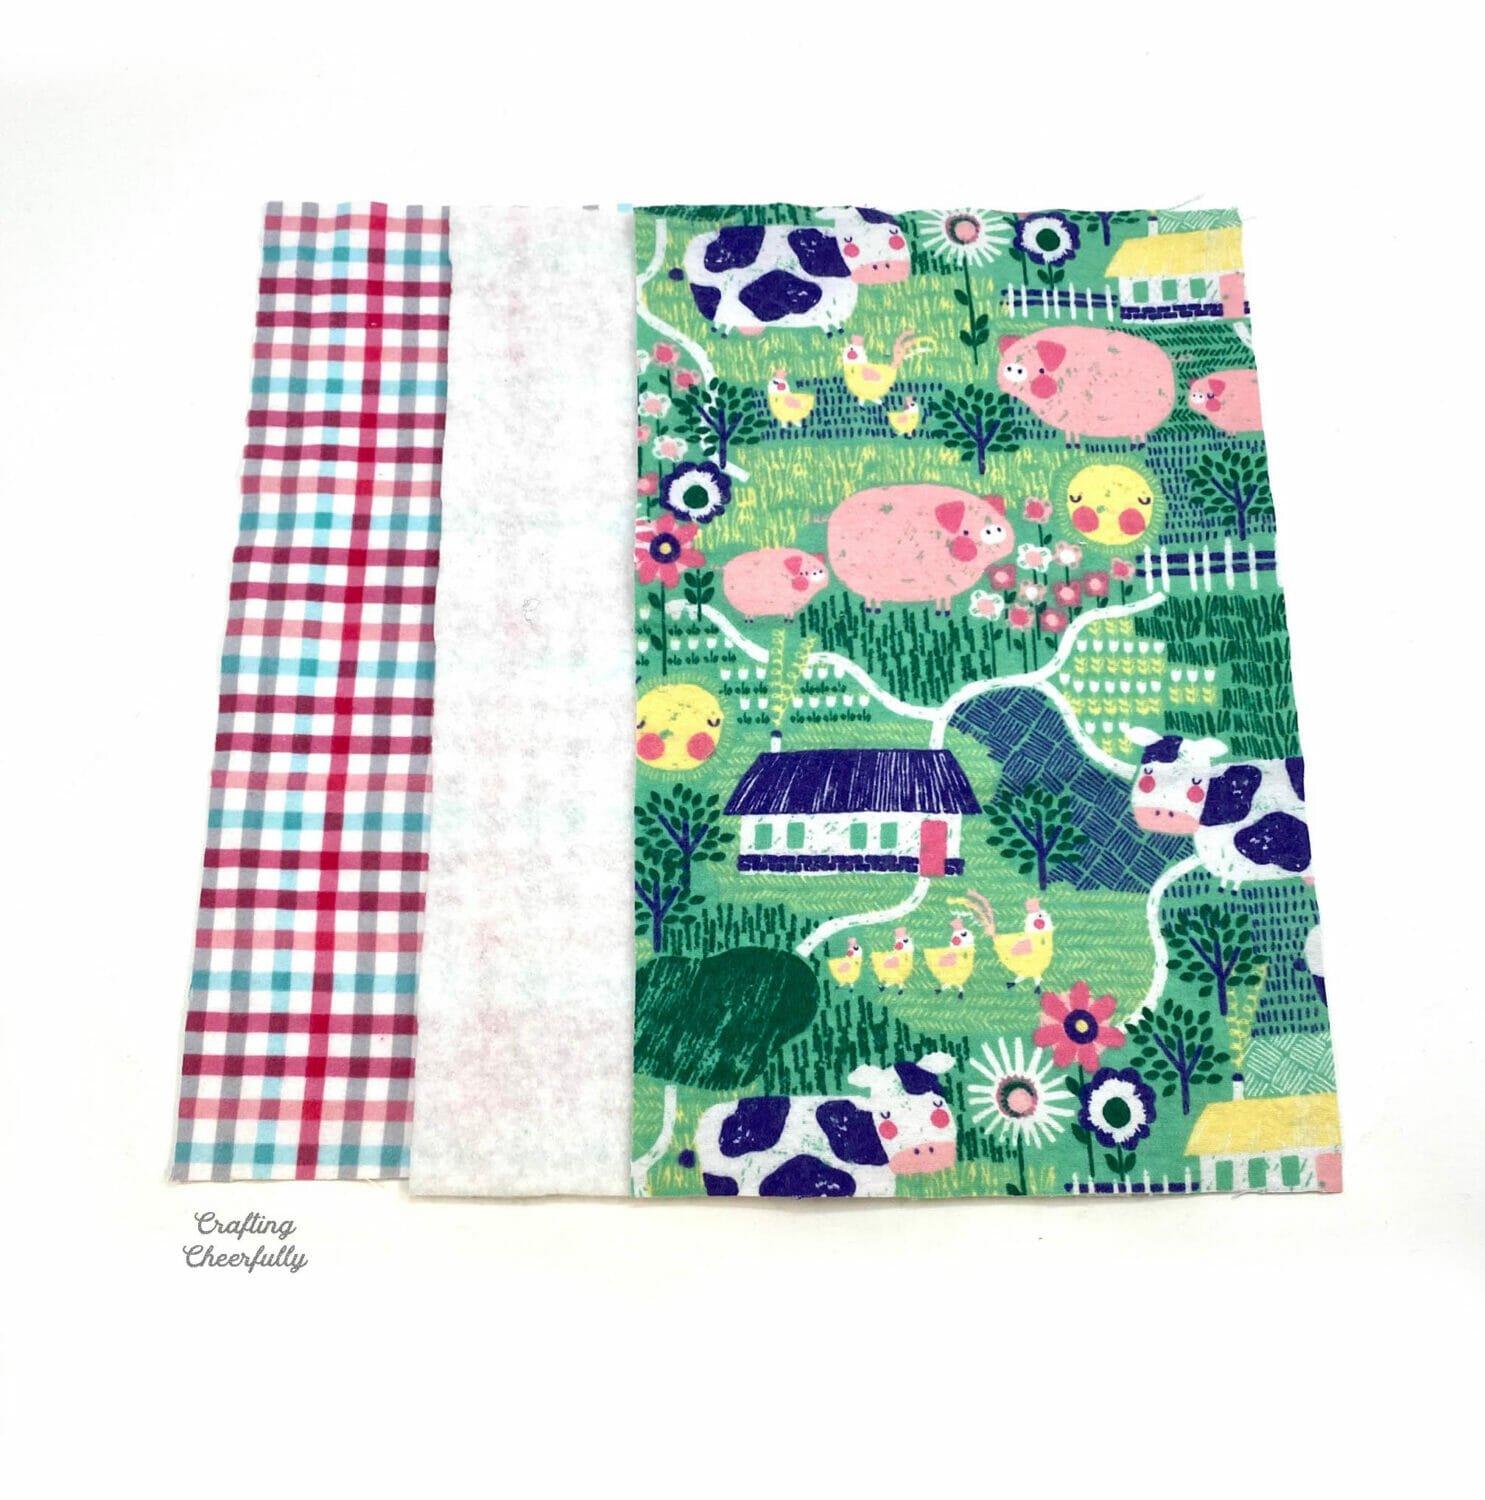
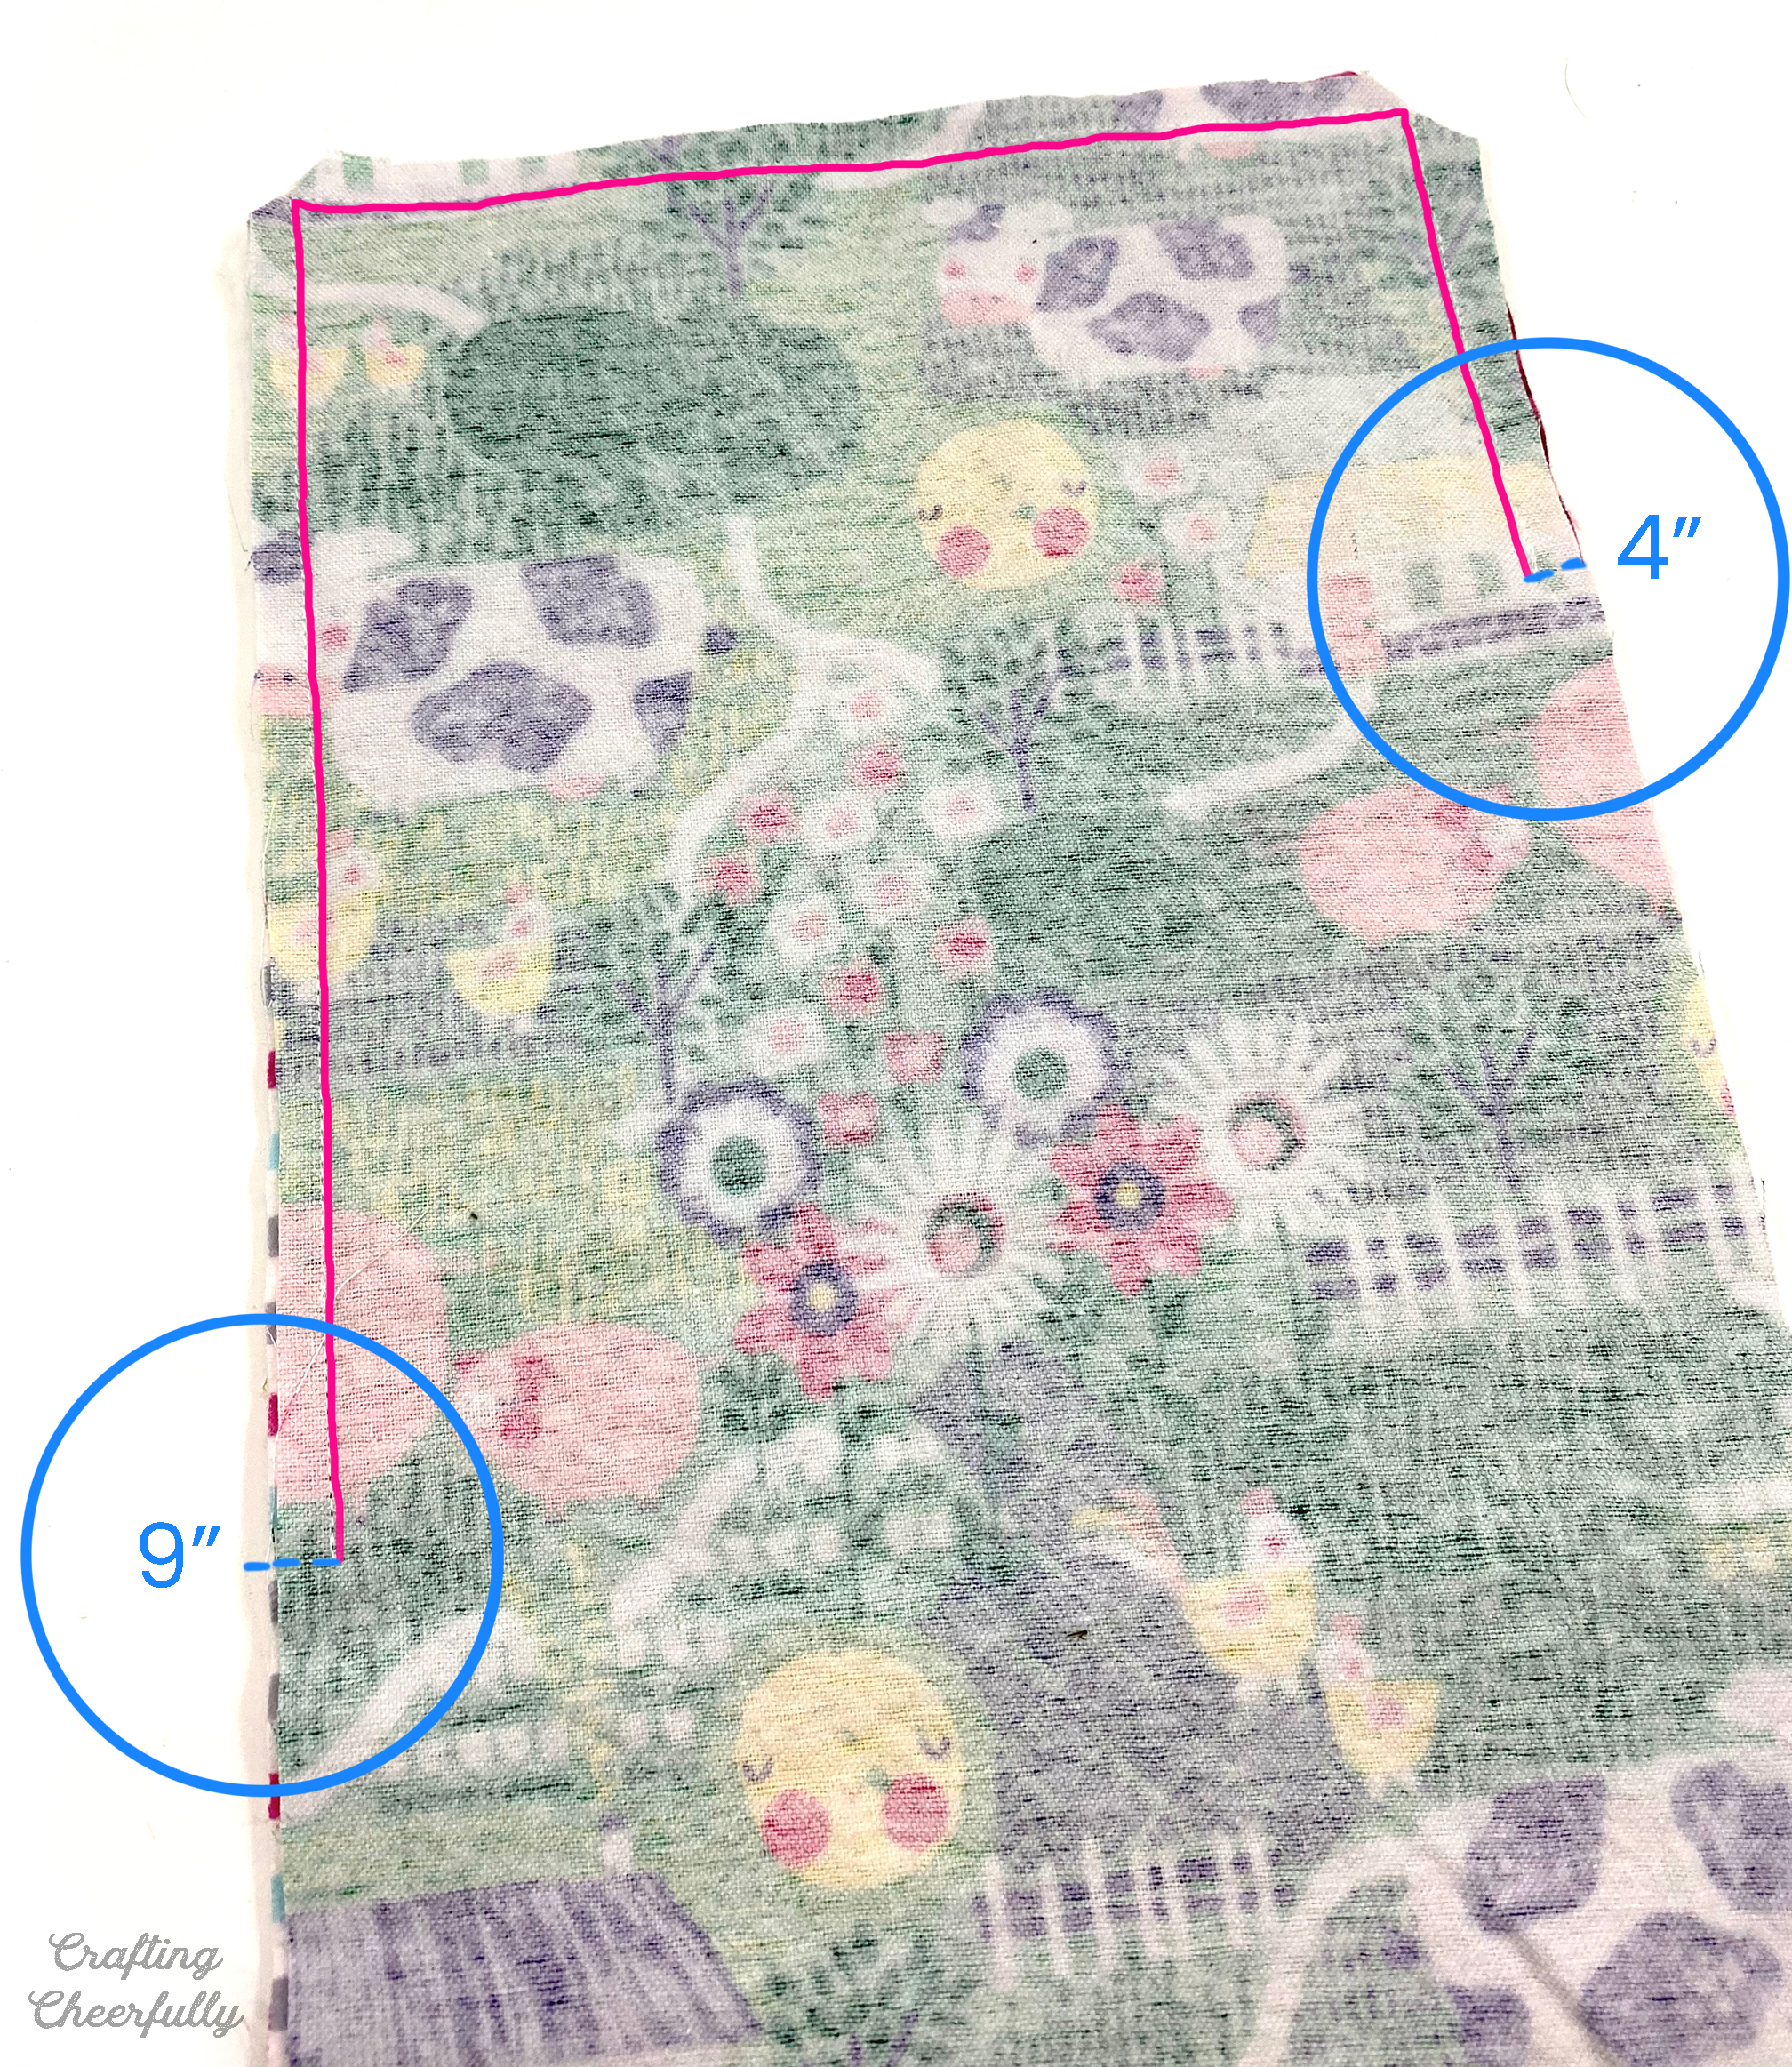
Step Two: Layer the 3 fabrics cut for the back of the sleeping bag together as shown below – printed flannel (farm print), inside flannel (plaid), interfacing. The printed flannel should be placed upside down so the two flannel fabrics have right sides together. Pin at 4″ from the top on the right side and pin 9″ from the top on the left side.
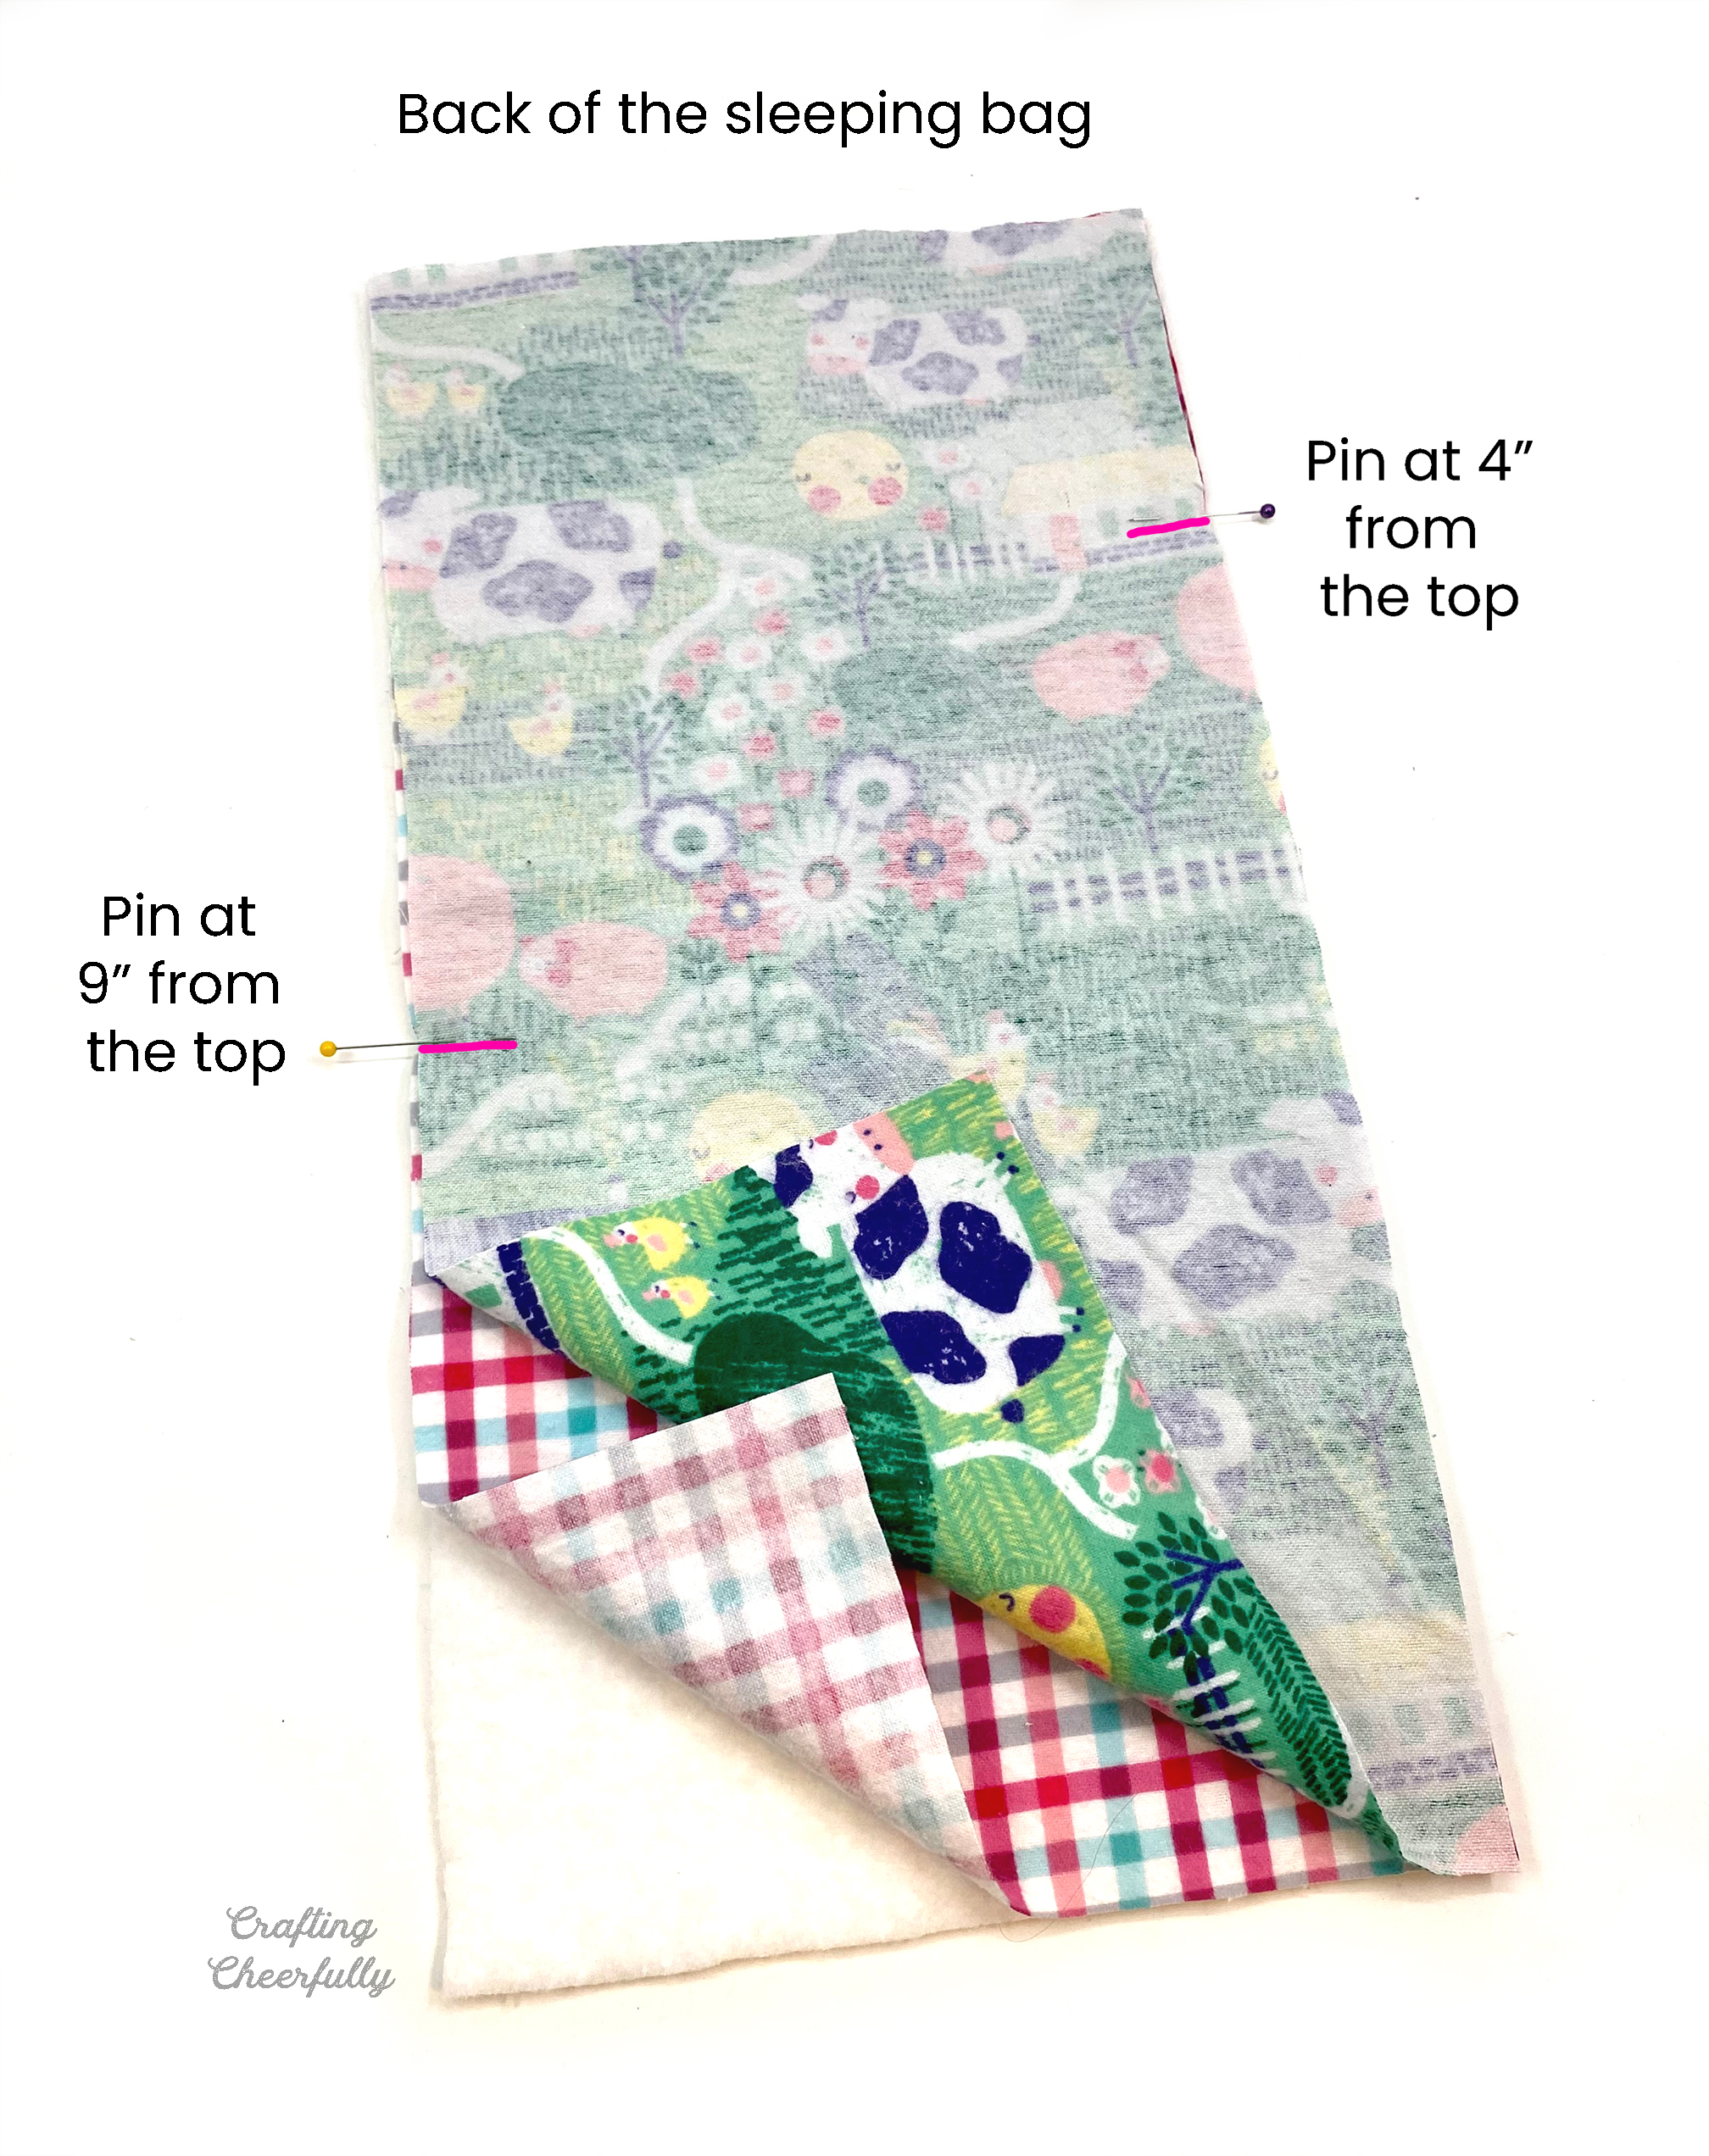
Stitch from pin to pin with a 1/2″ seam allowance. Clip the corners and clip into the seam allowance at both the 4″ mark and 9″ mark. Clip carefully to the seam line but not through it.
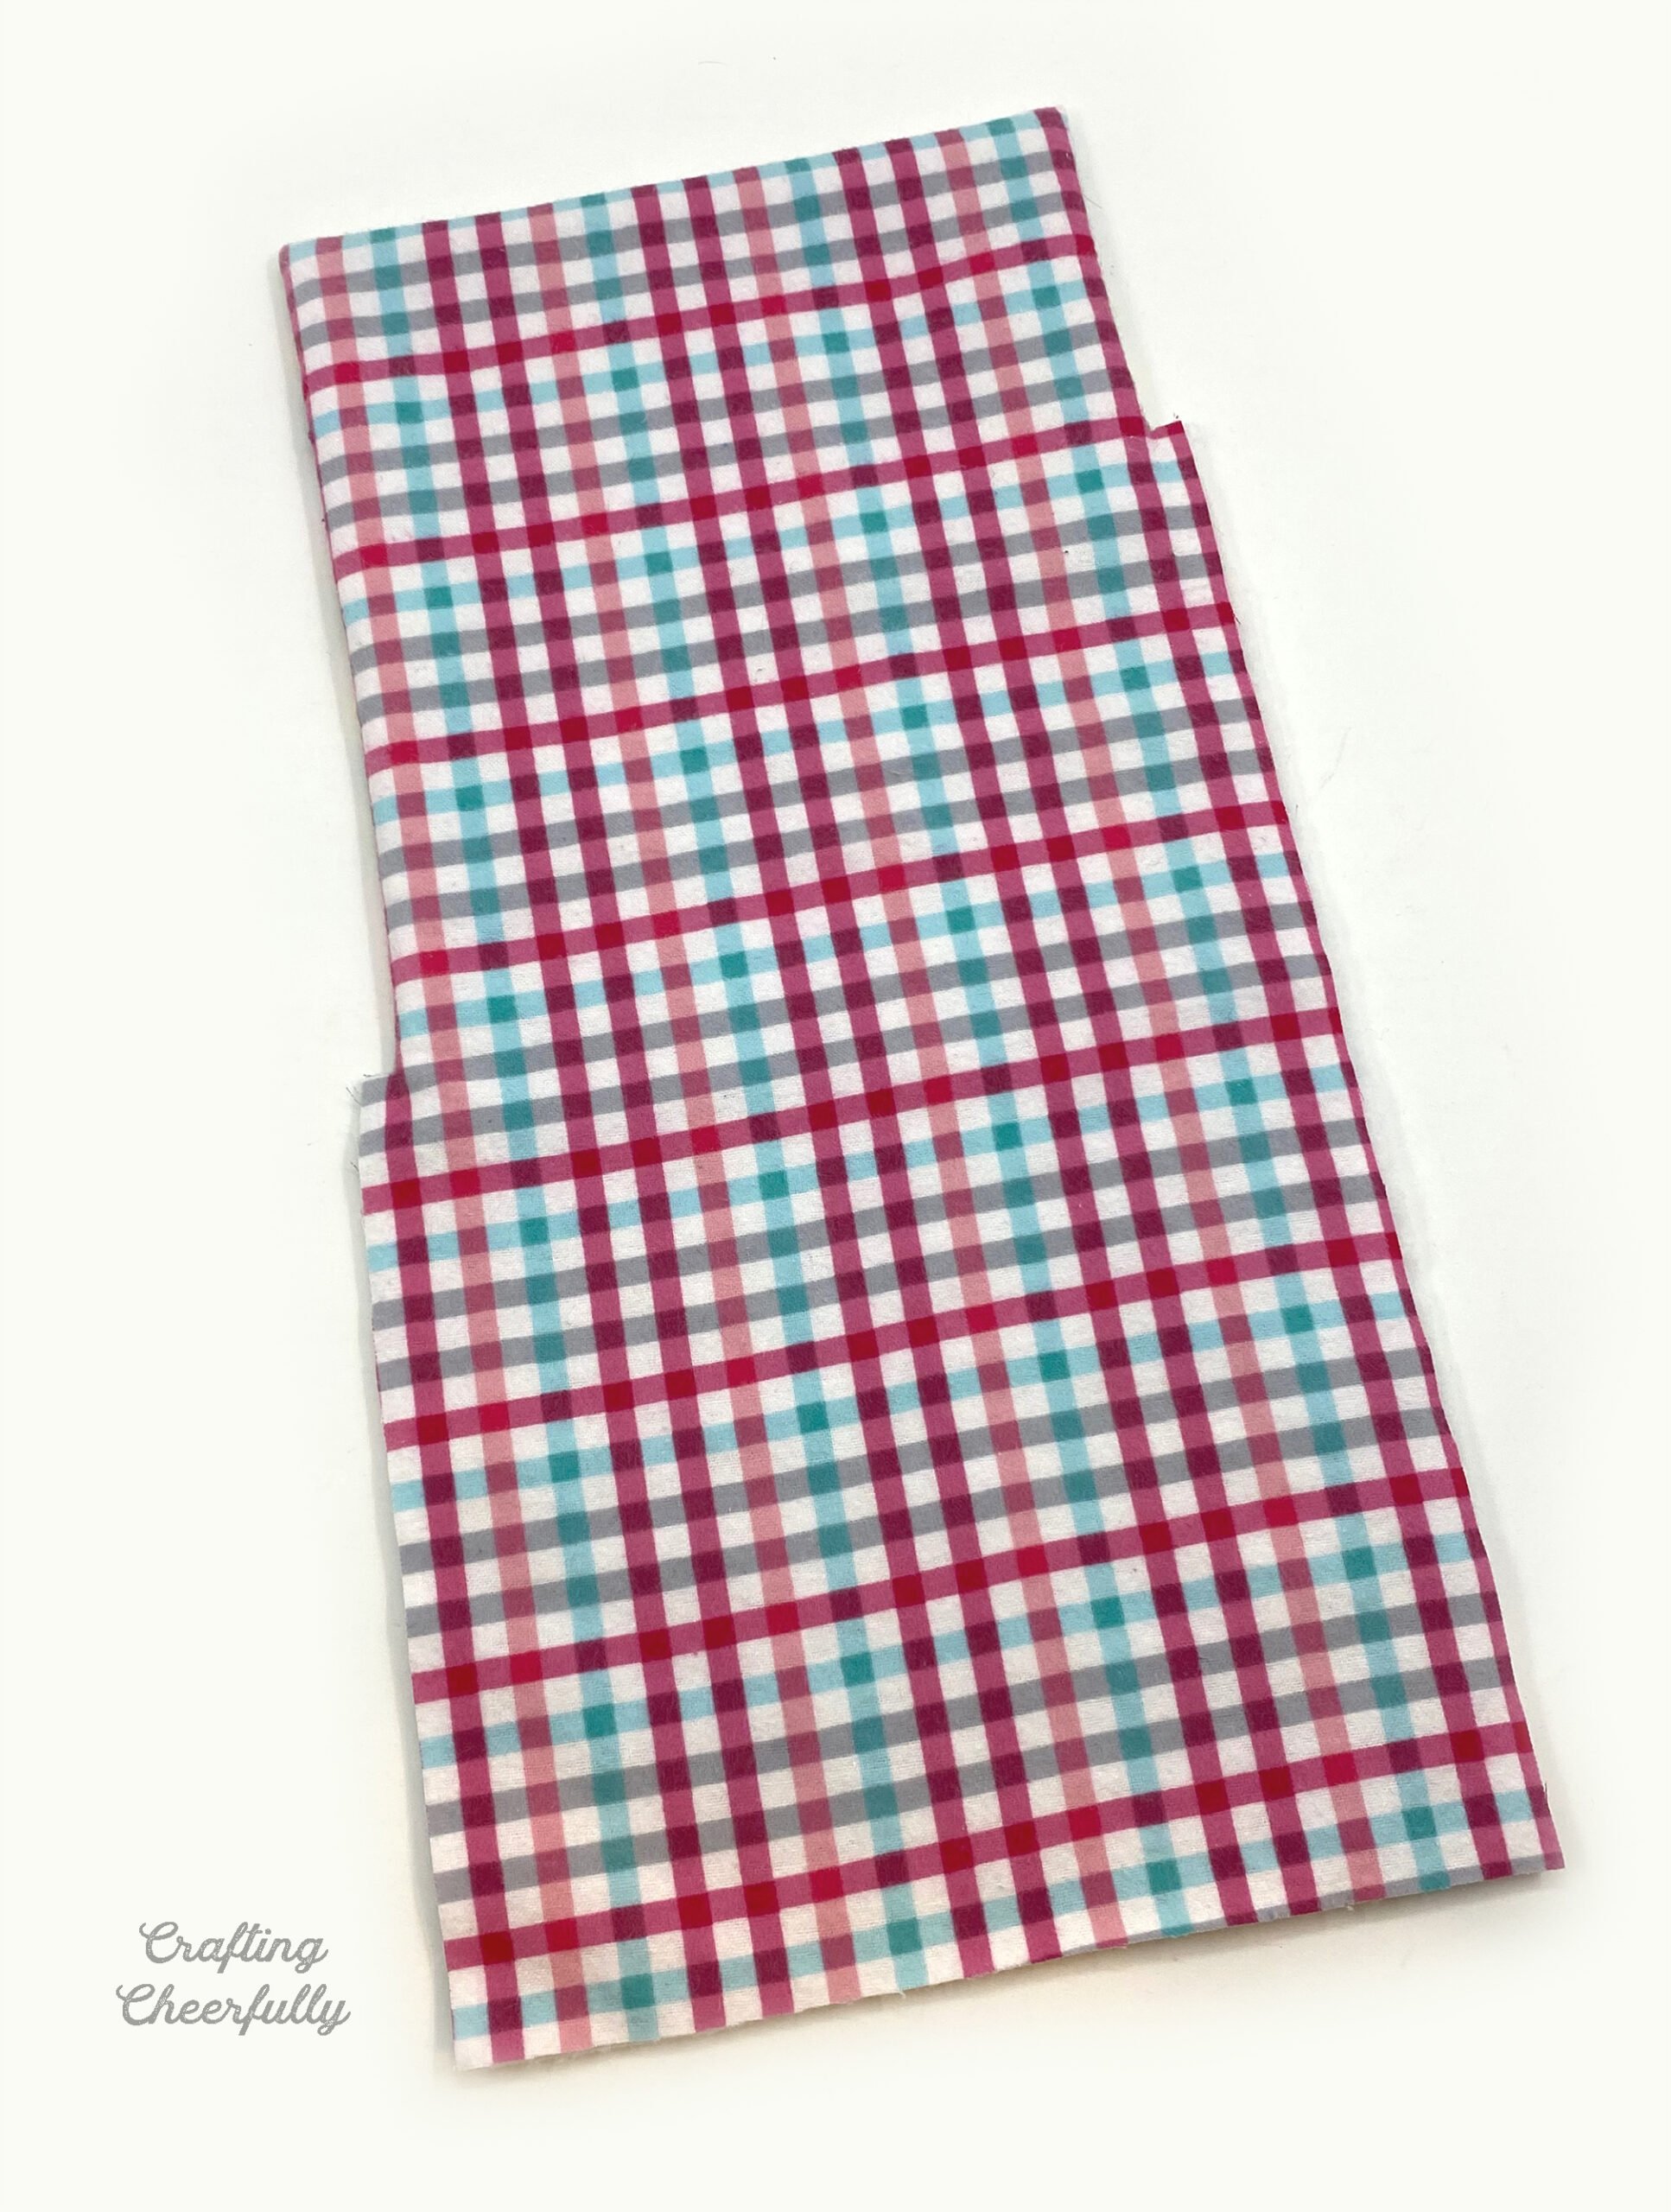
Turn the sleeping bag right side out and press. Use a point turner to help poke out the corners.
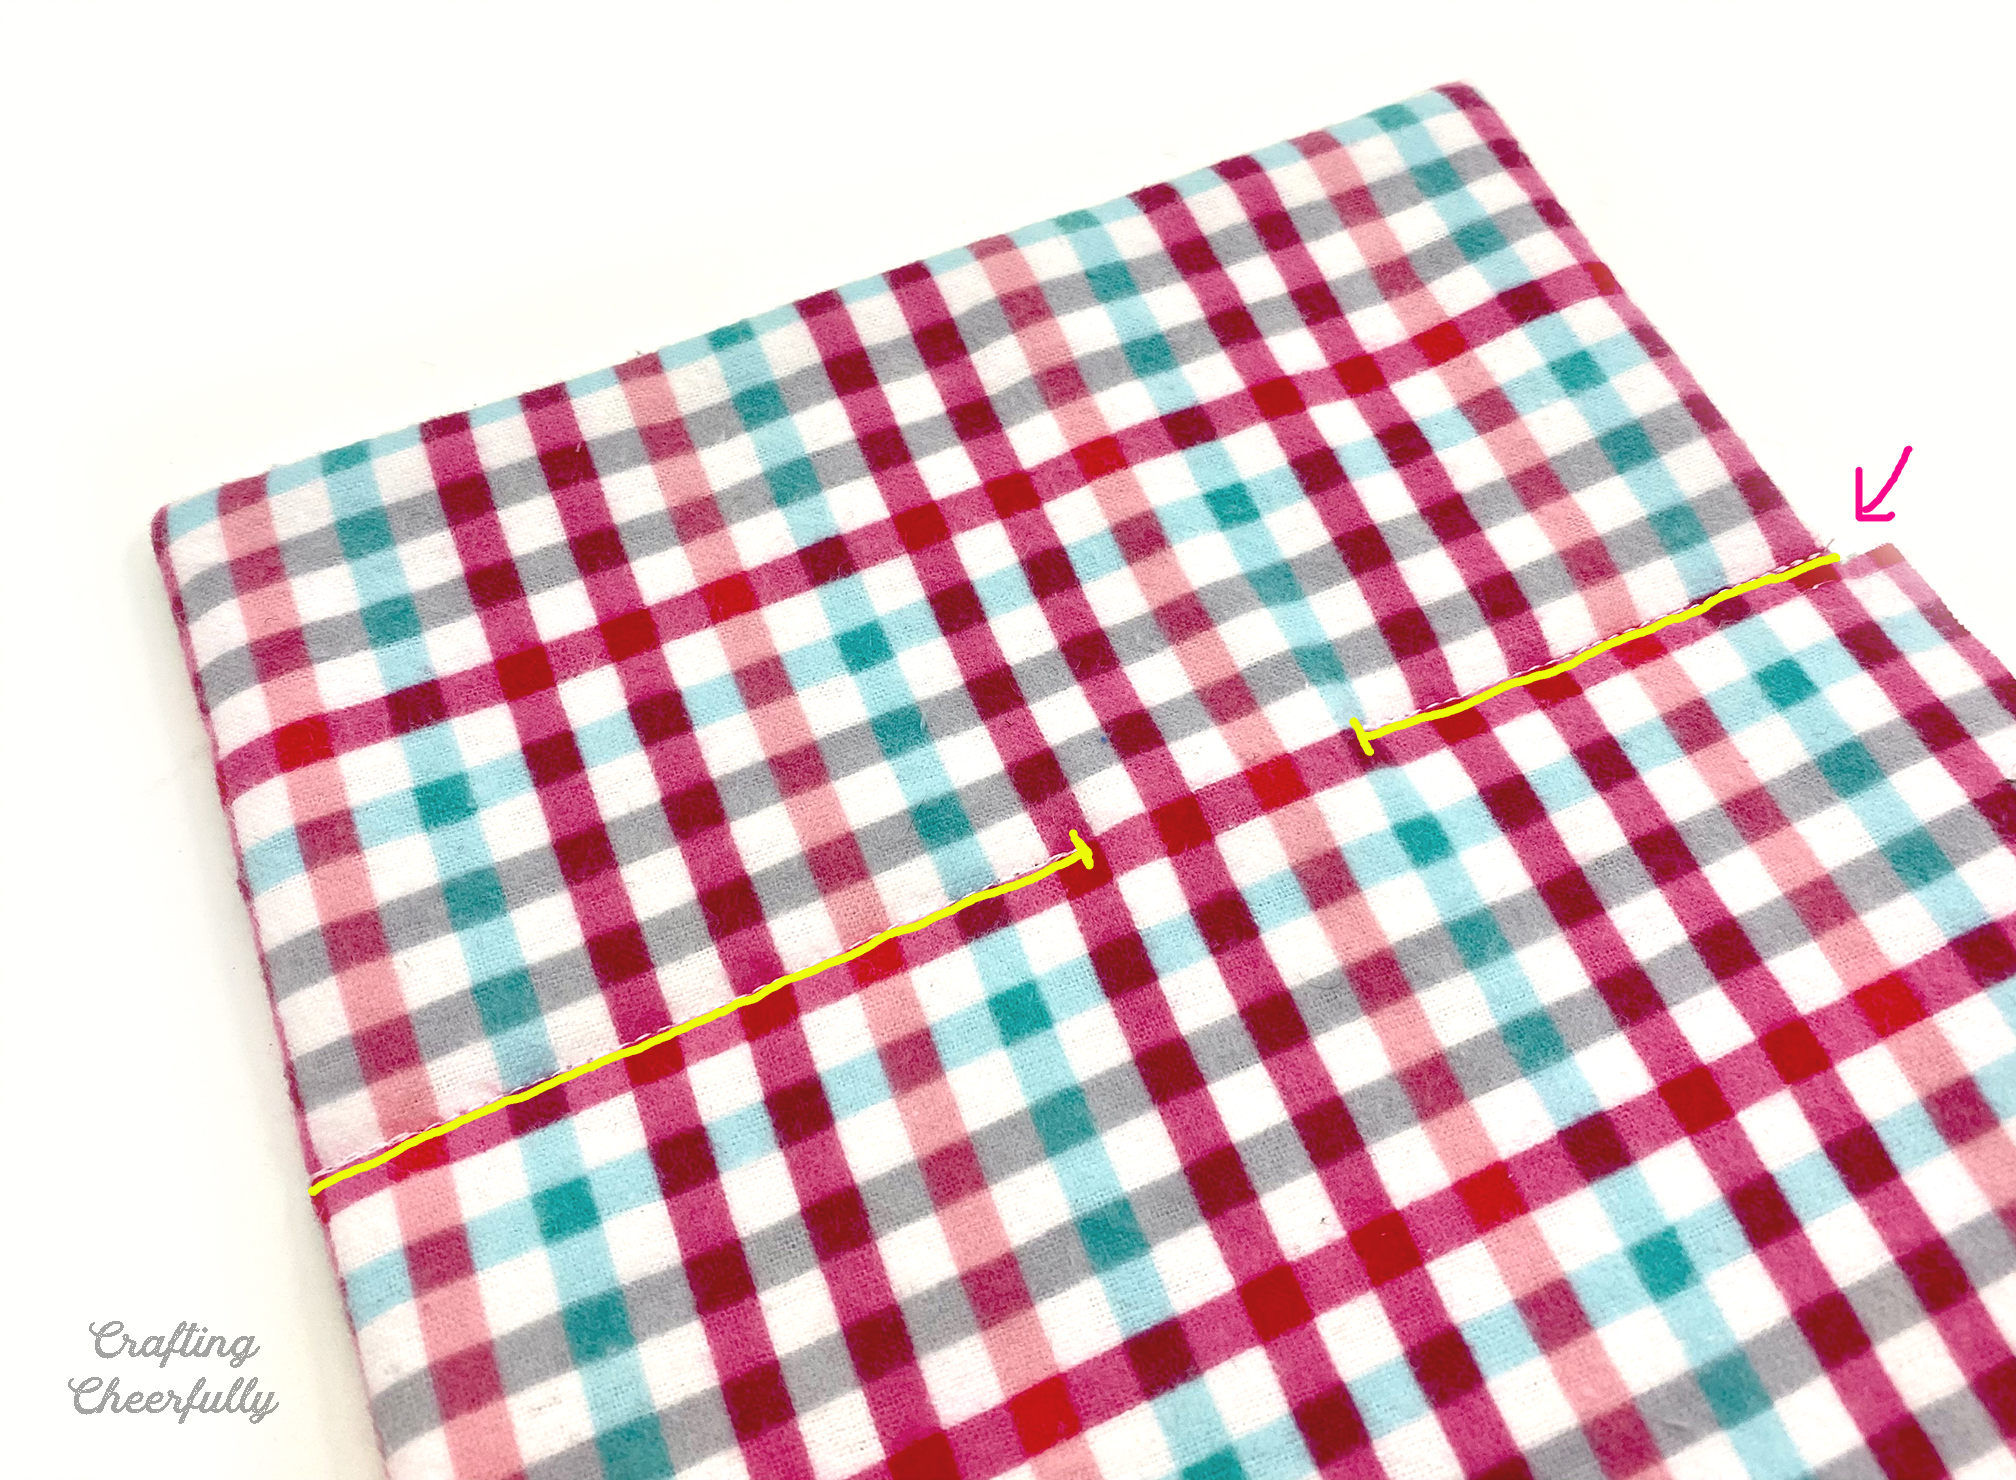
Step Three: Create the pillow! The pillow is built into the back of the sleeping bag. Stitch a horizontal line at the notch created from the 4″ mark, making sure to leave a hole in the middle to stuff the pillow. Use a ruler to lightly draw a straight line to follow while stitching. Since my fabric was plaid, I used the fabric lines.
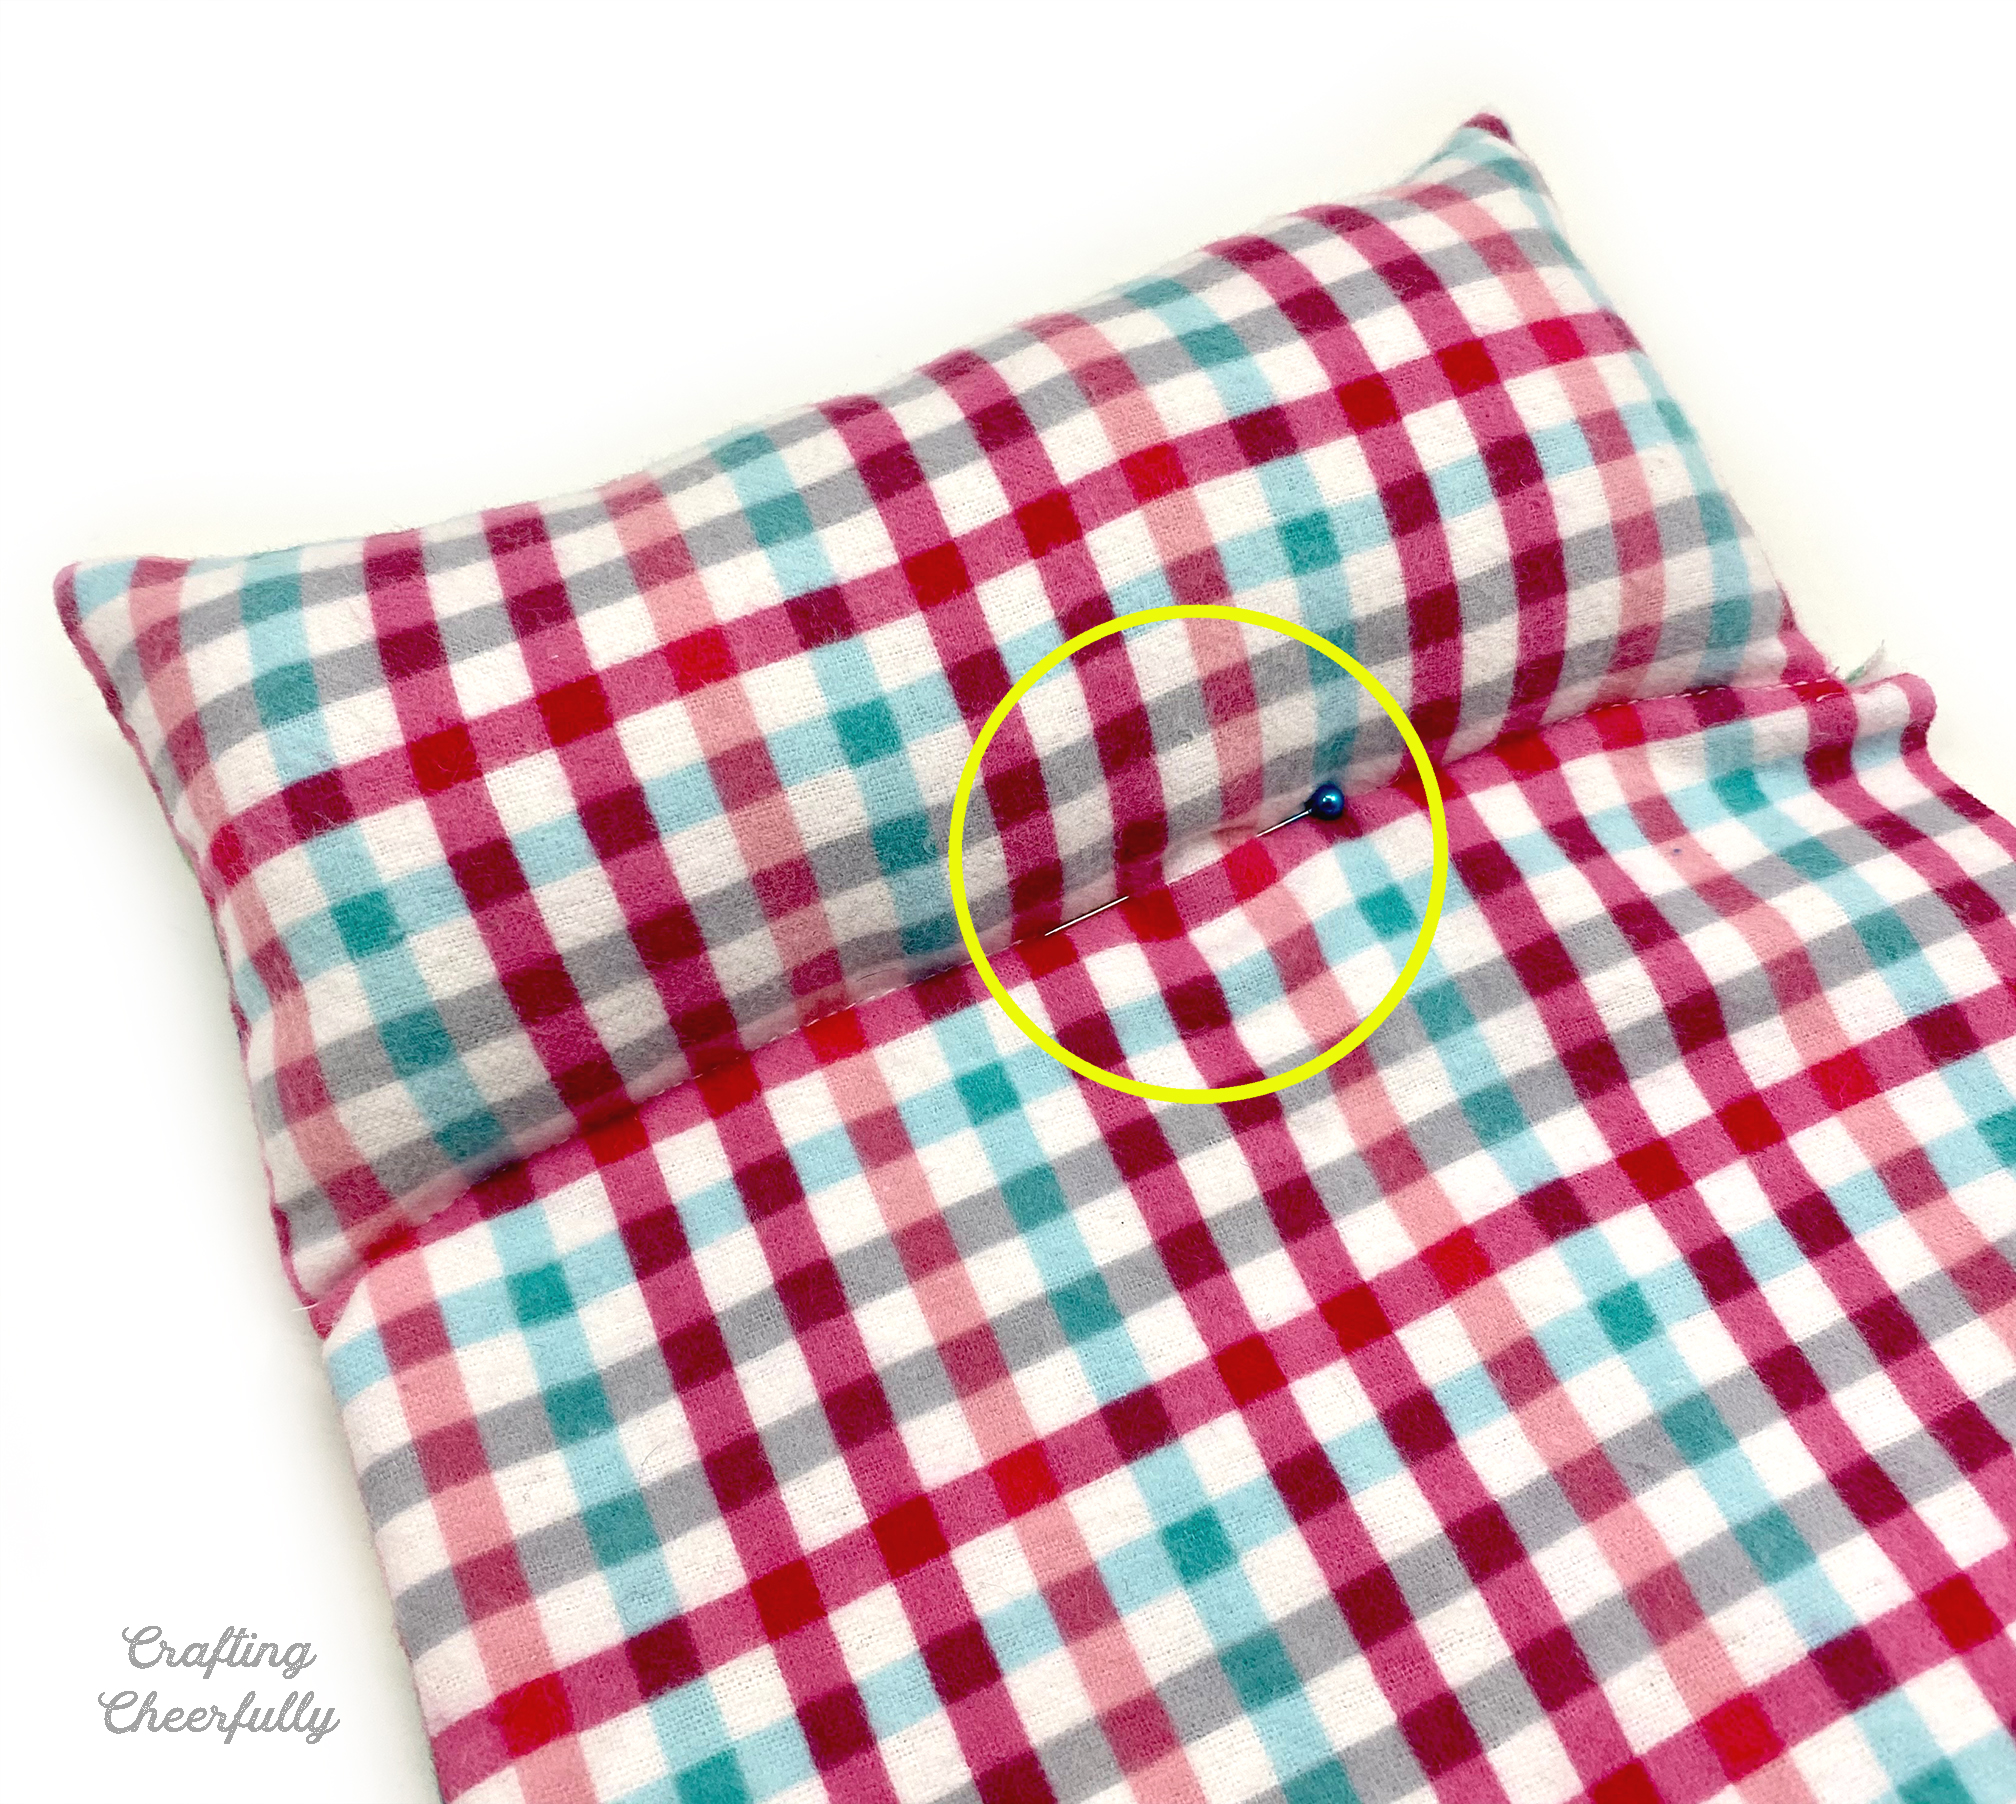
Stuff the pillow with Poly-fil stuffing and stitch the pillow closed. You can do this on your machine, just push the stuffing out of the way, or by hand using a backstitch.
Making the Front of the Sleeping Bag
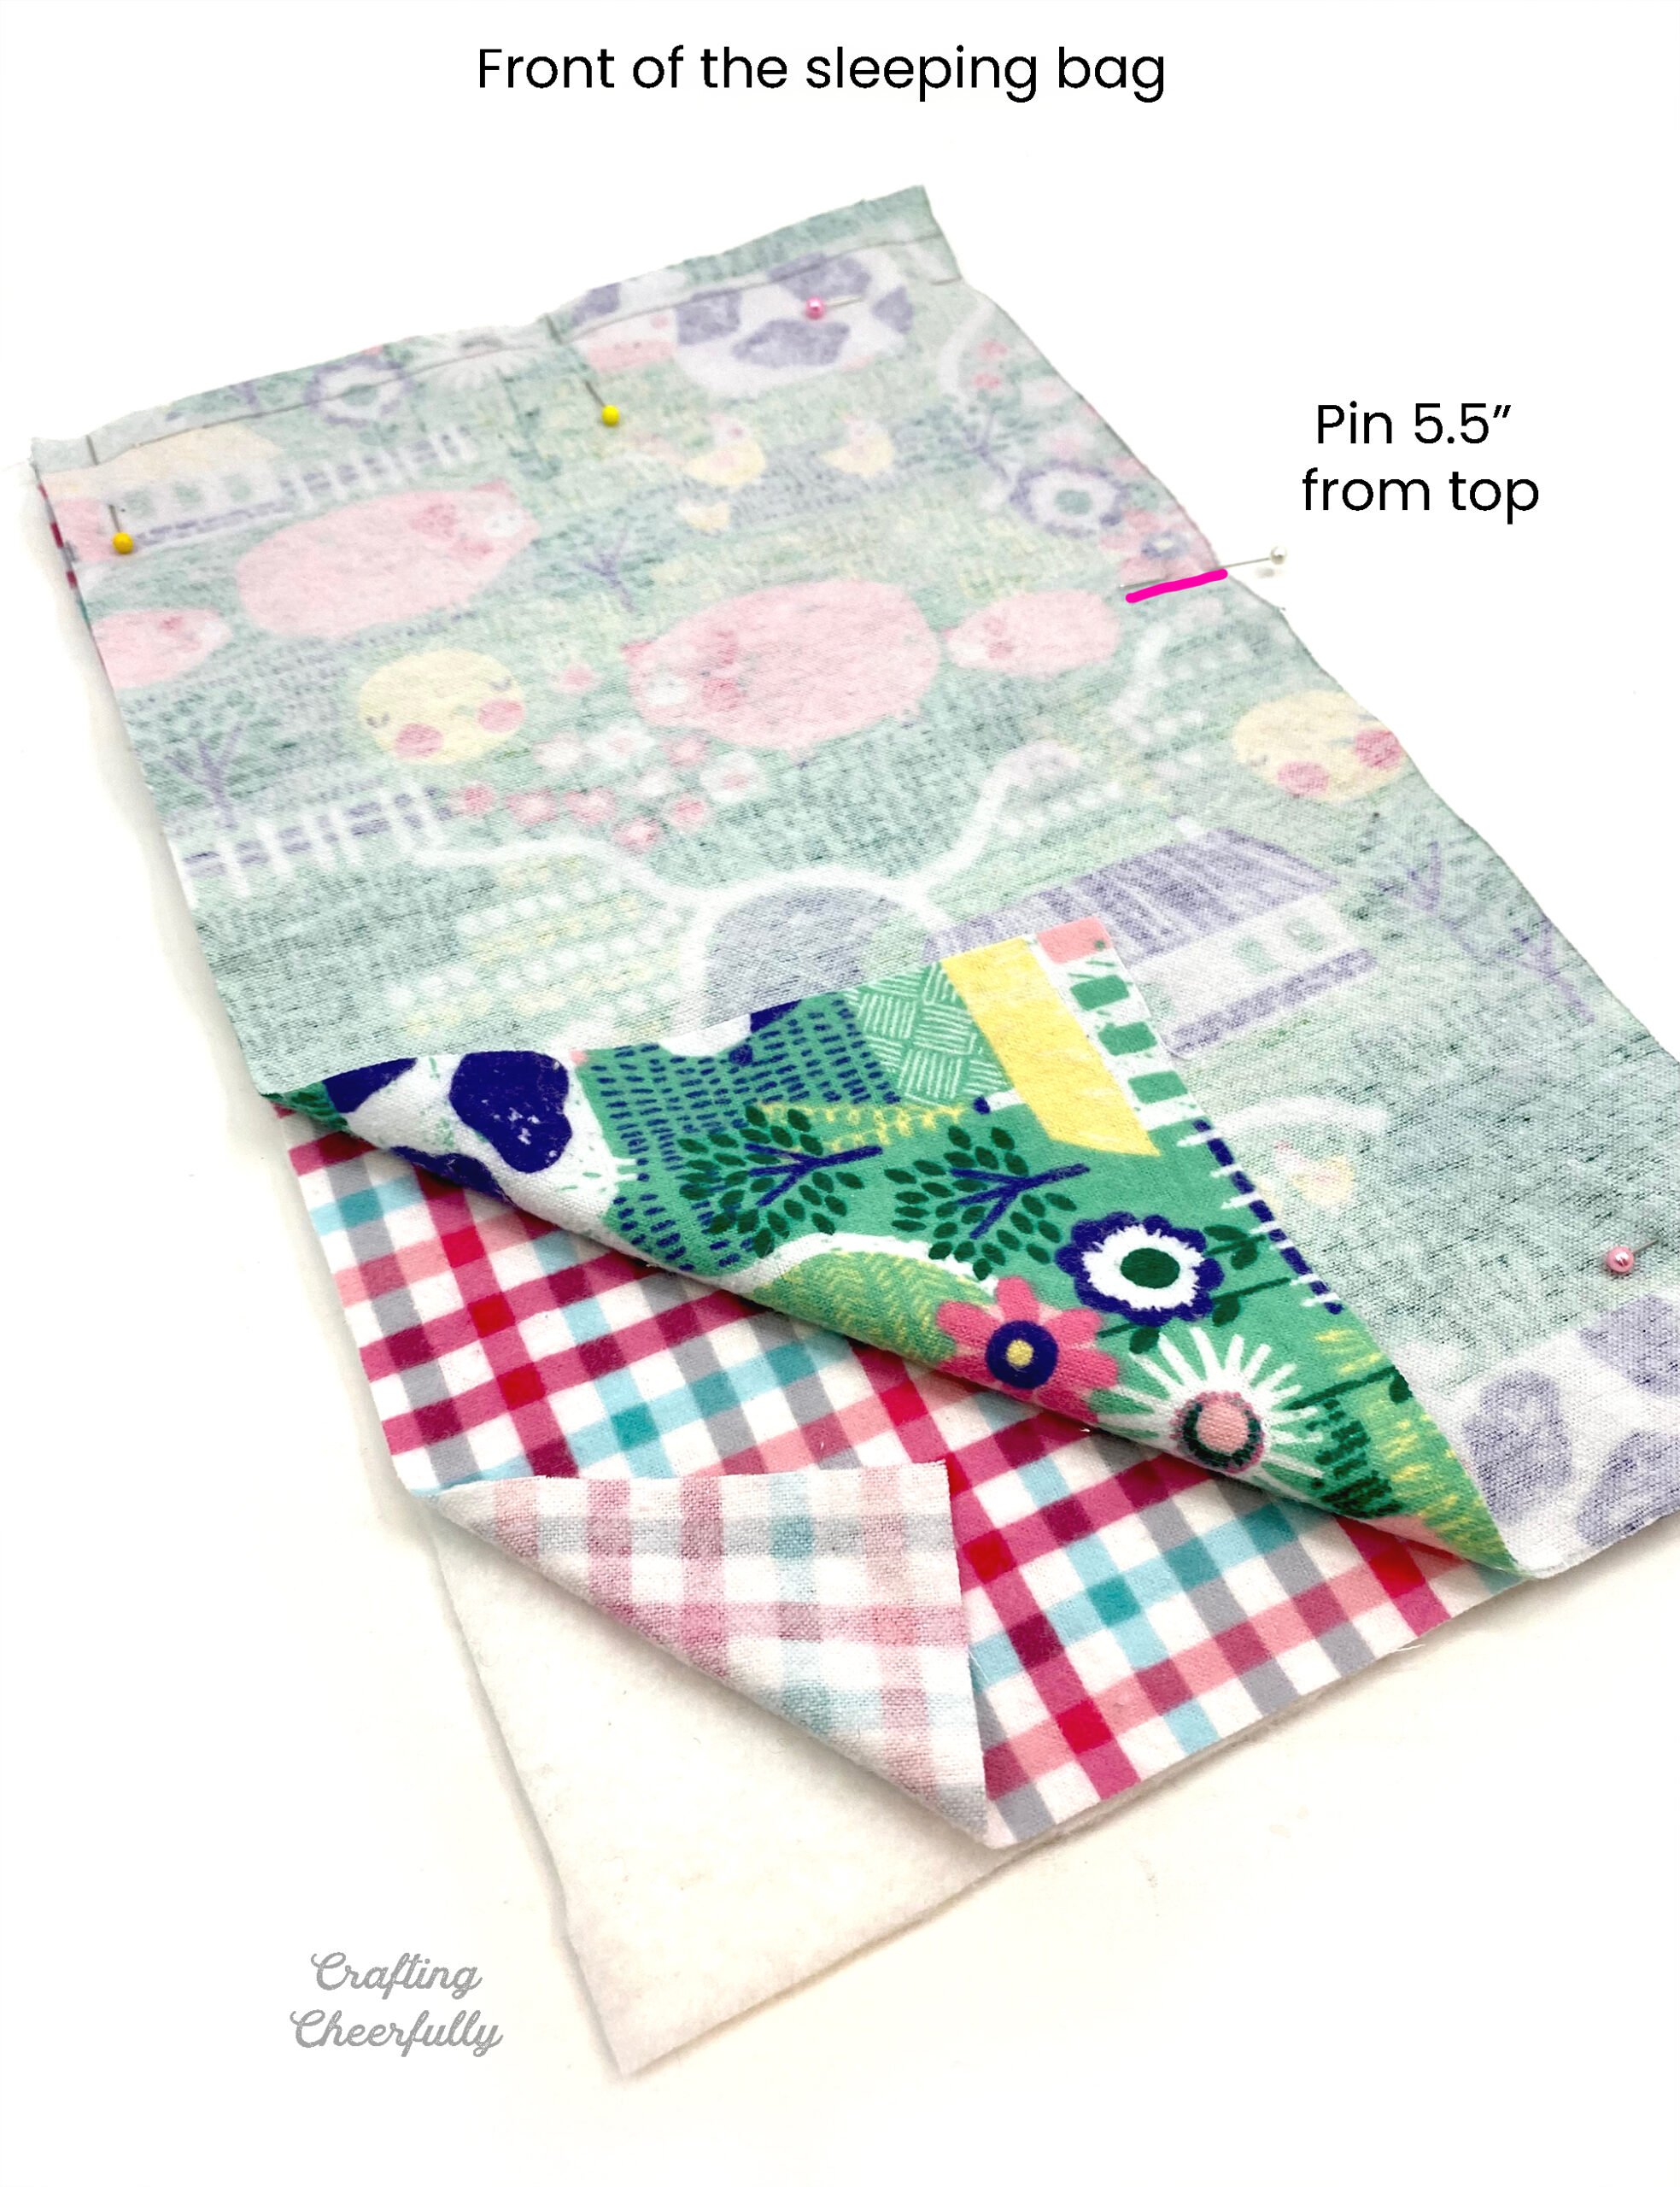
Step Four: Switch to the front of the sleeping bag and layer the fabrics as you did with the back side (printed flannel, inside flannel, interfacing – making sure to place the printed flannel upside down so the two flannel fabrics have right sides together. Pin at 5.5″ from the top on the right side.
Step Five: Stitch across the top of the layers and down the right side to the marked pin with a 1/2″ seam allowance. Clip the corner and clip into the seam allowance at the 5.5″ spot where you stopped stitching.
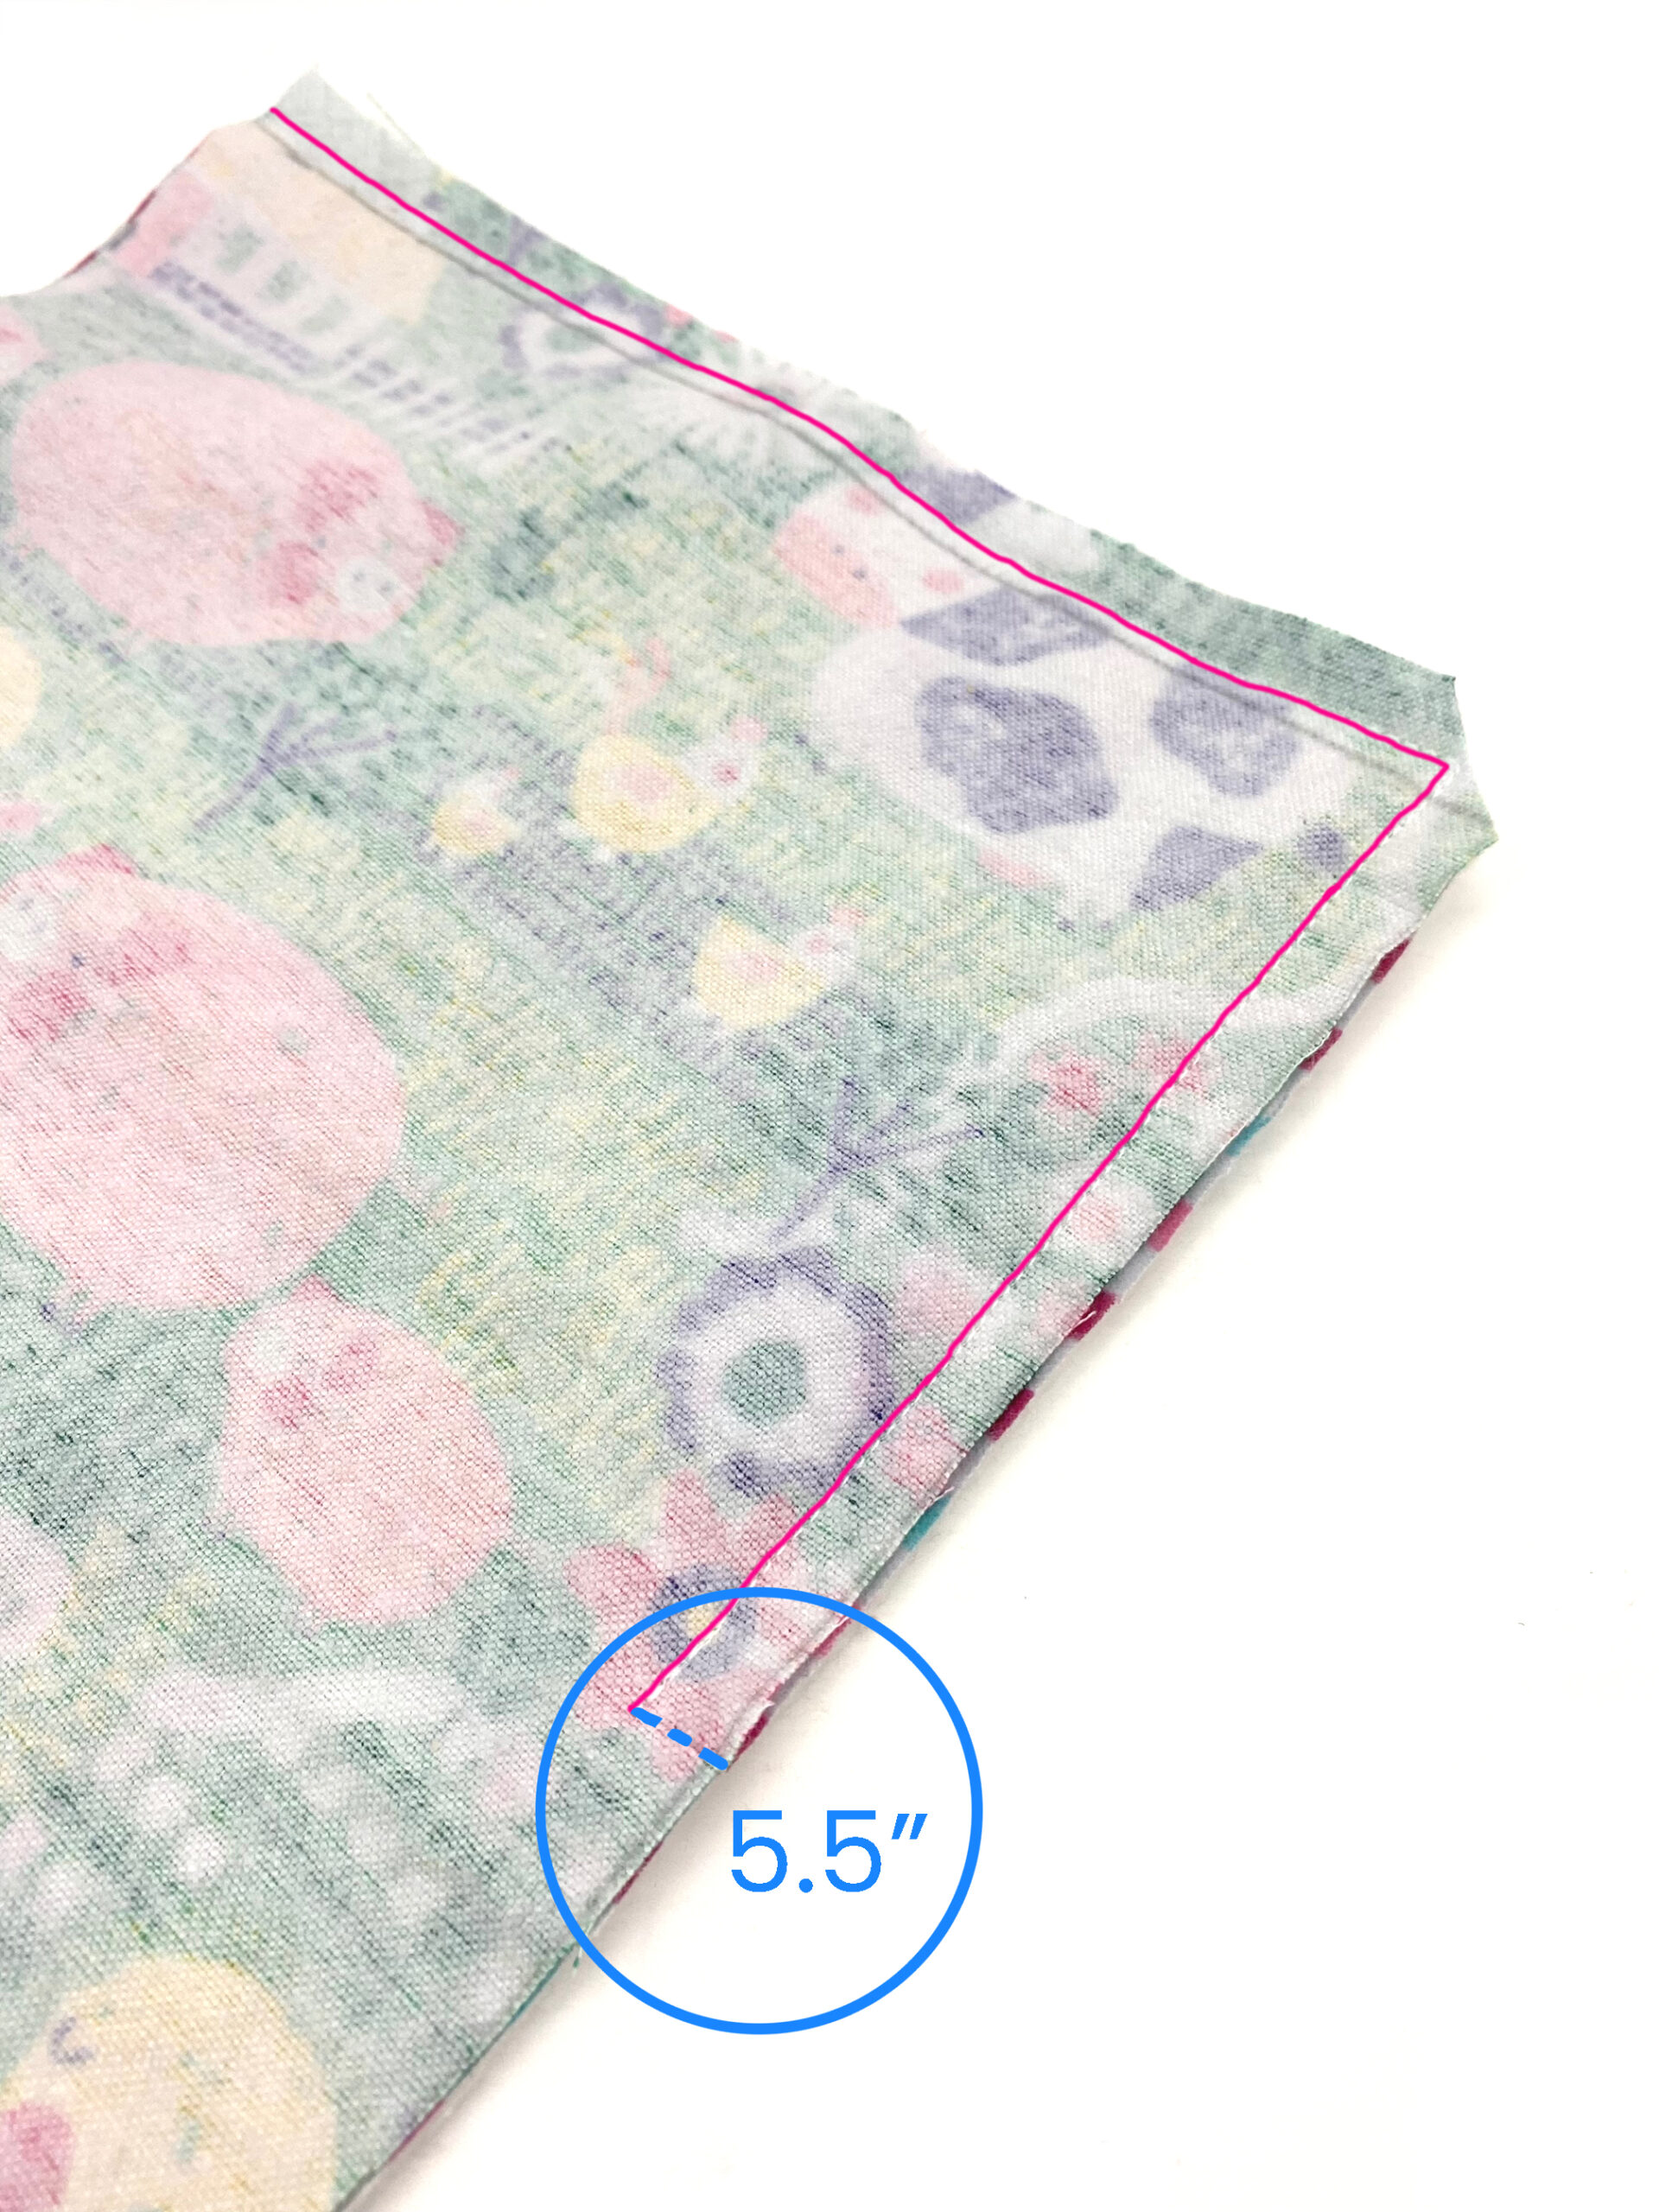
Turn the front of the sleeping bag right side out and press. Use a point turner to help poke out the corners.
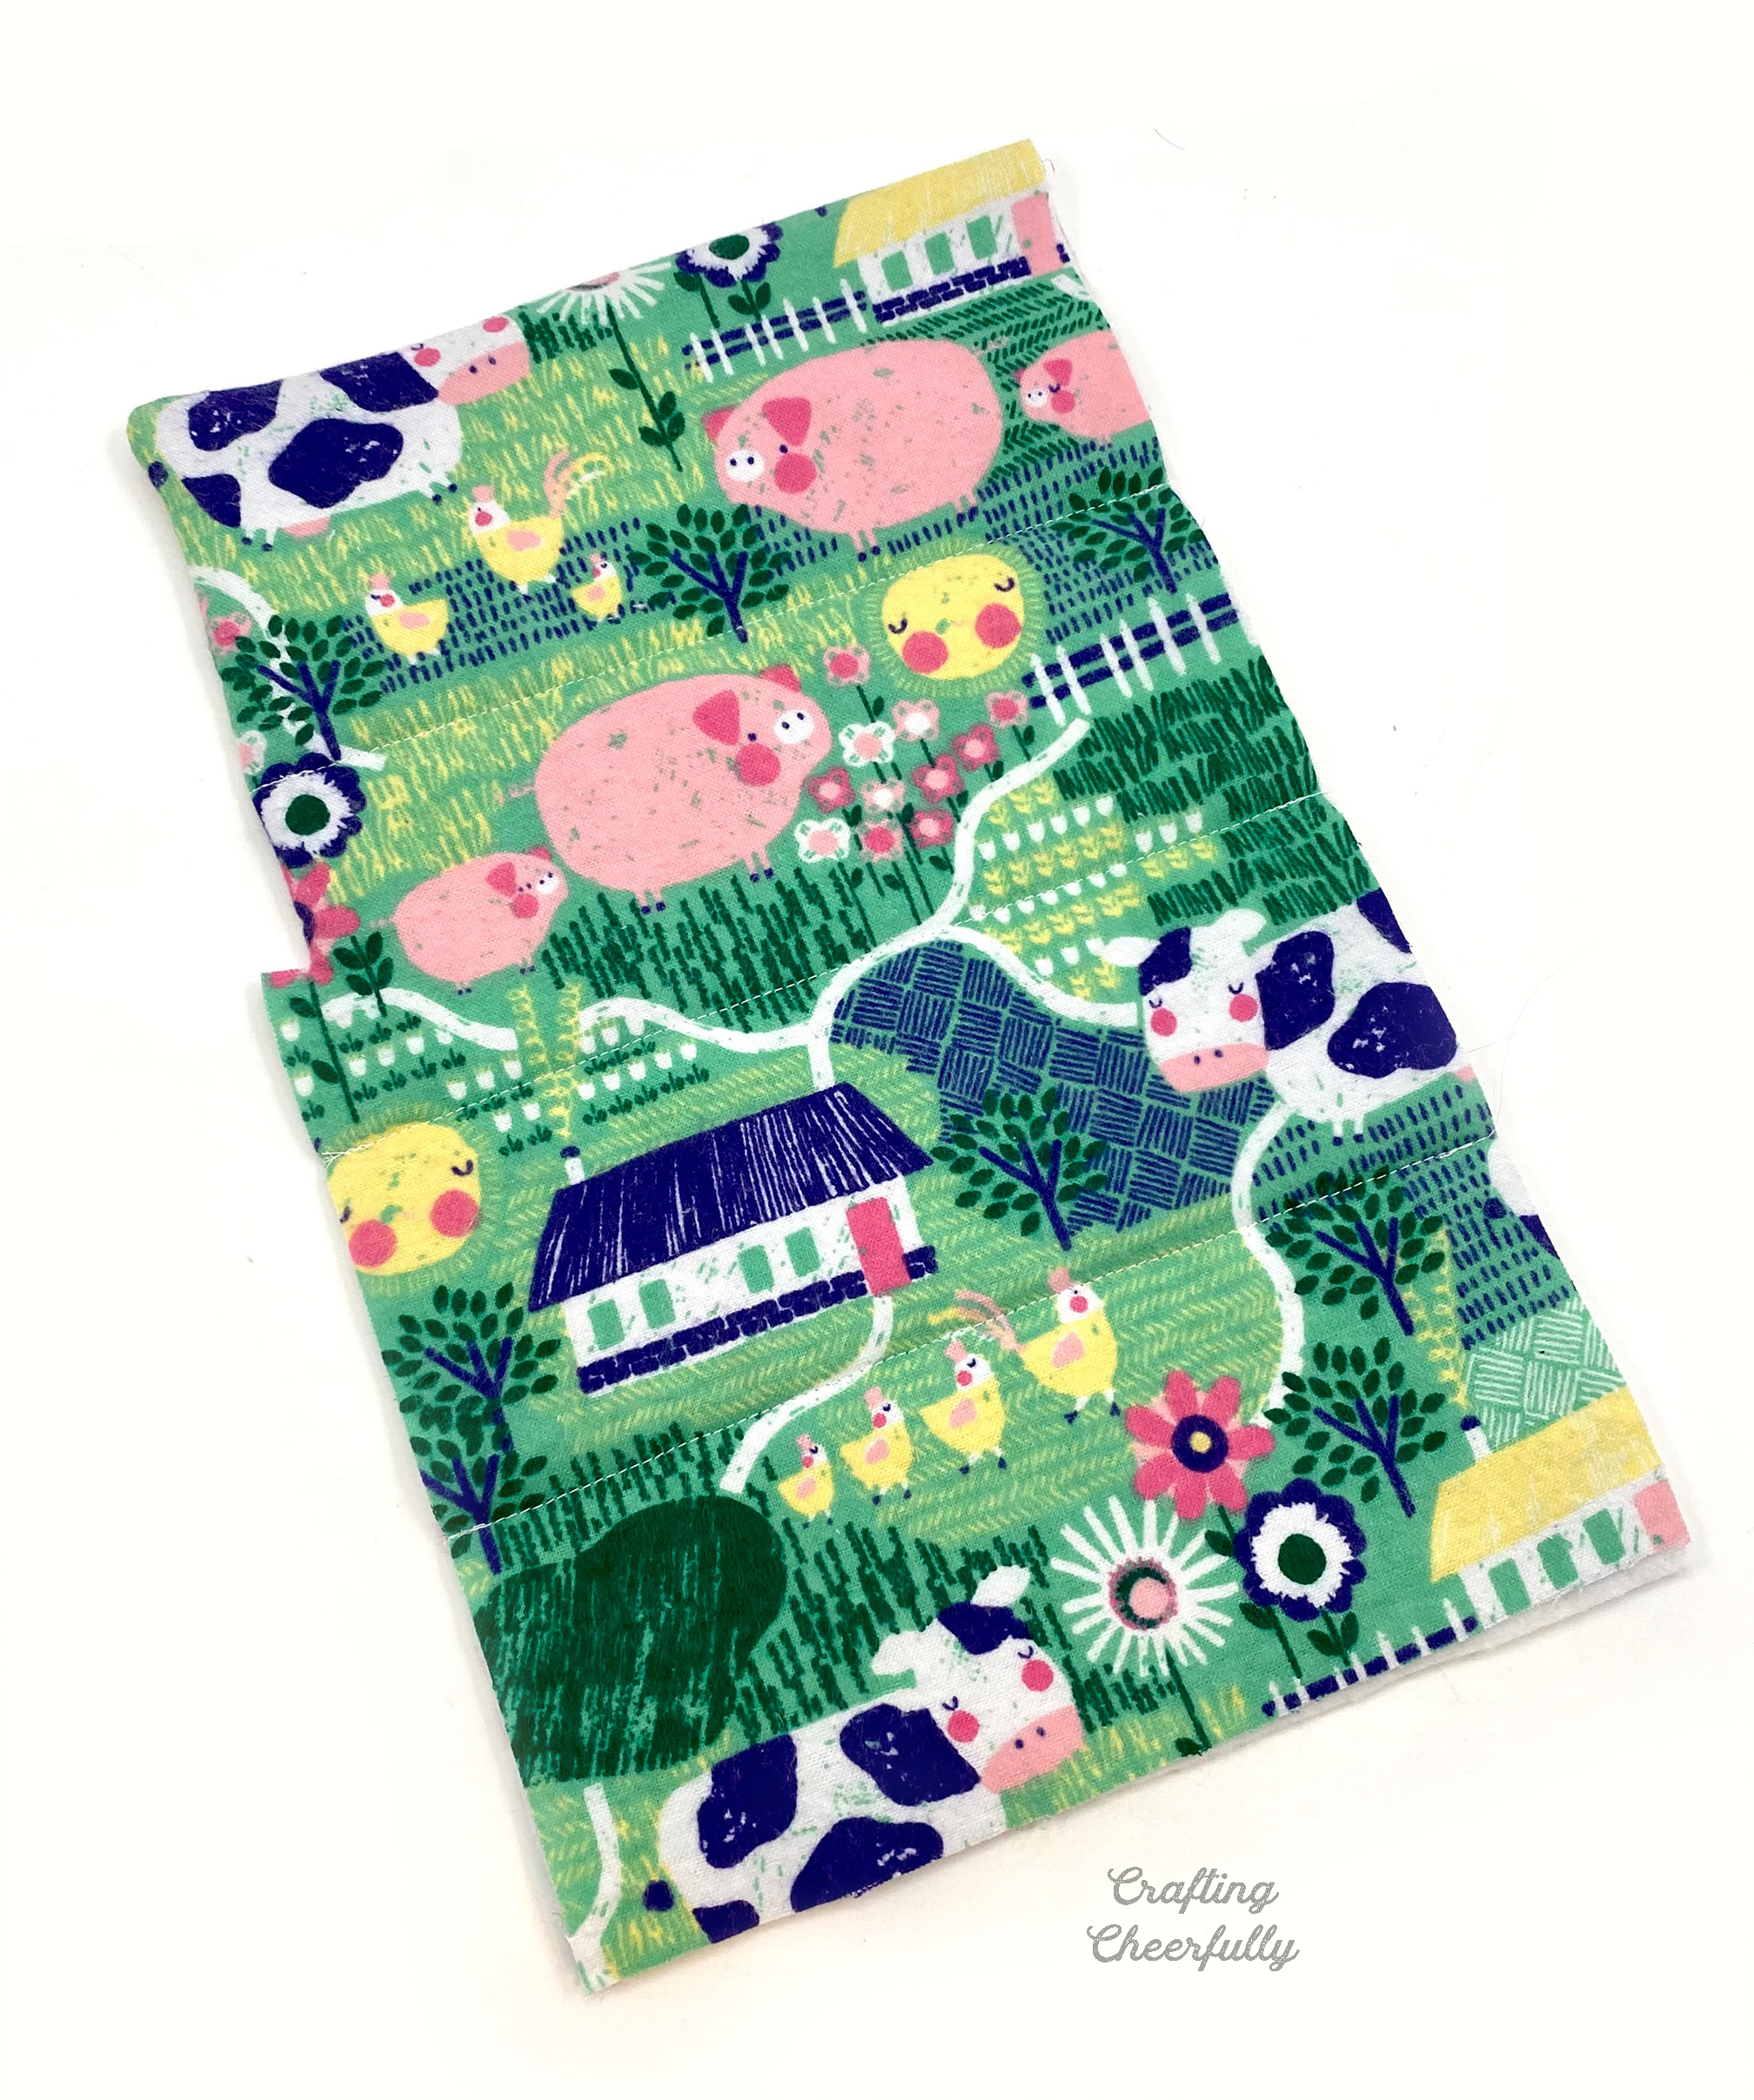
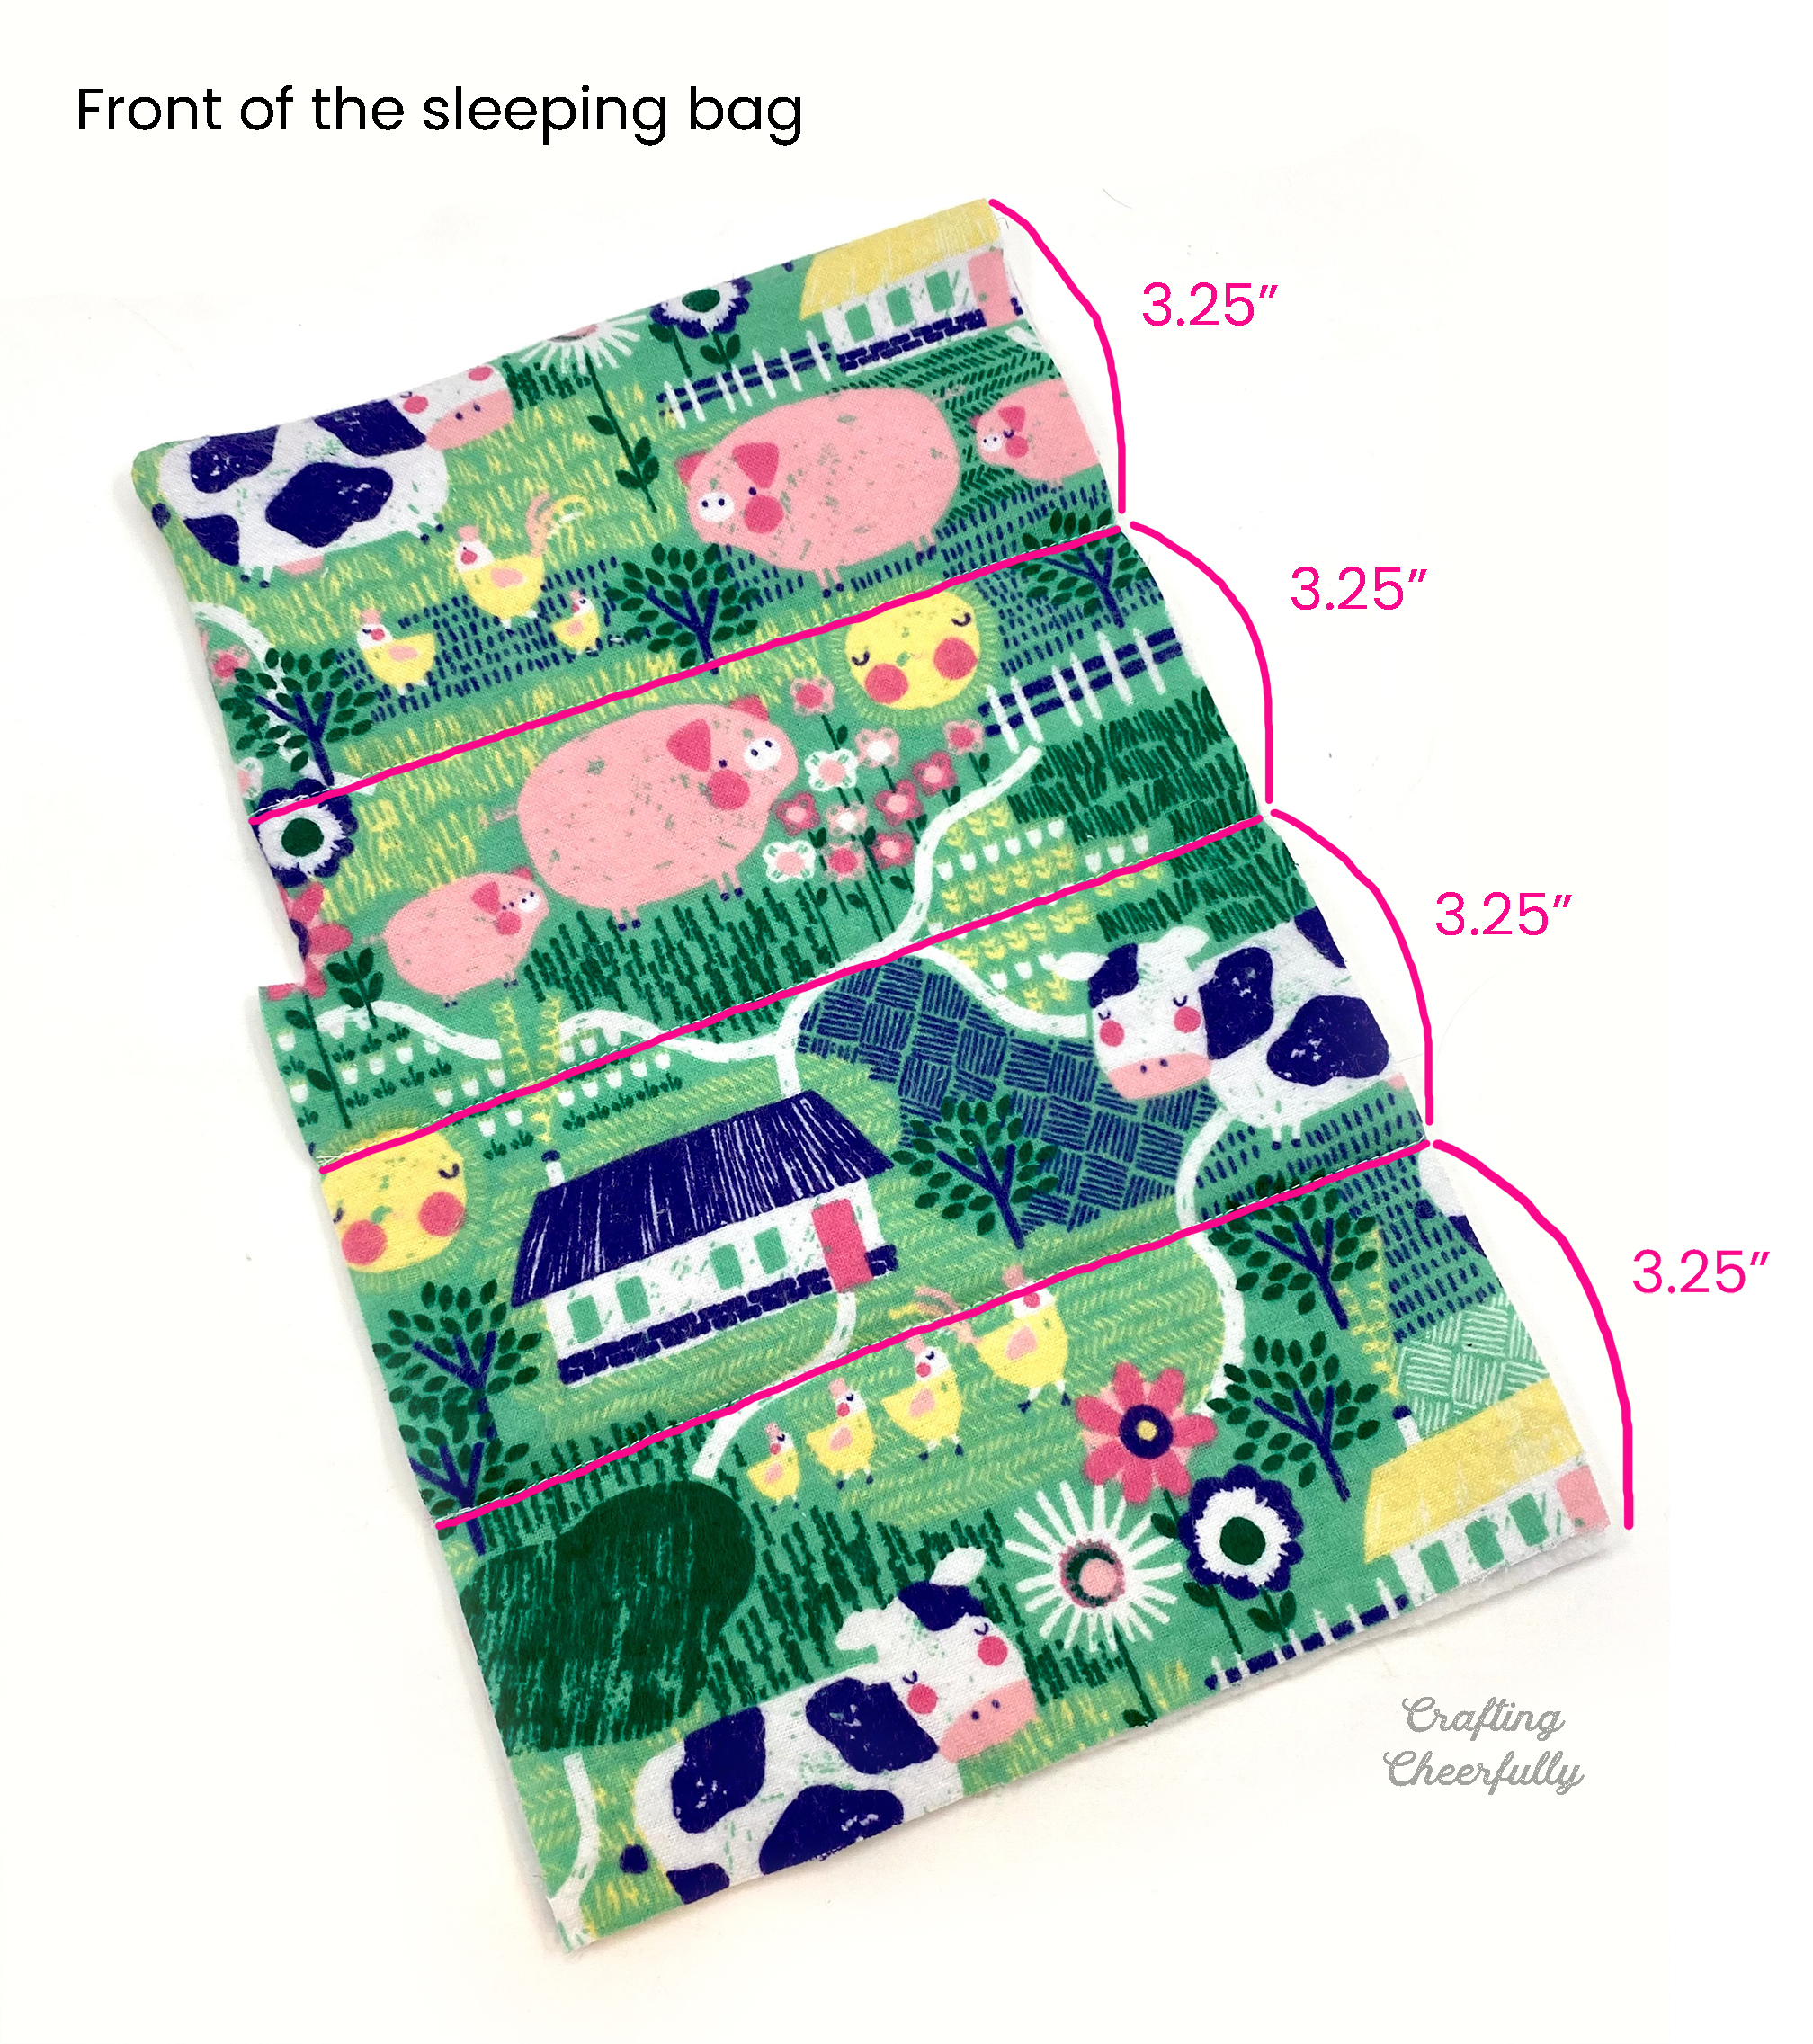
Quilting the Layers
Step Six: Both the front and back of the sleeping bag are “quilted” with horizontal lines of stitching. This keeps the layers together. Start by marking three horizontal lines on the front of the sleeping bag. I marked mine at 3.25″, 6.5″ and 9.75″ from the top. You can follow the plaid lines or lightly draw pencil lines. Stitch the layers of fabric together along the lines, starting with the line at the top and smoothing the fabric downward as you go.

Step Seven: Now it is time to add the same horizontal quilting lines to the bottom of the sleeping bag. Use the top one as a guide for where to place the horizontal lines. Lay the top of the sleeping bag on top of the bottom of the sleeping bag and mark where the quilting lines are with pins. Then stitch the horizontal lines on the bottom of the sleeping bag. Again, you can draw light pencil lines if needed or use the plaid fabric to sew straight lines.

Sewing the Front and Back Together
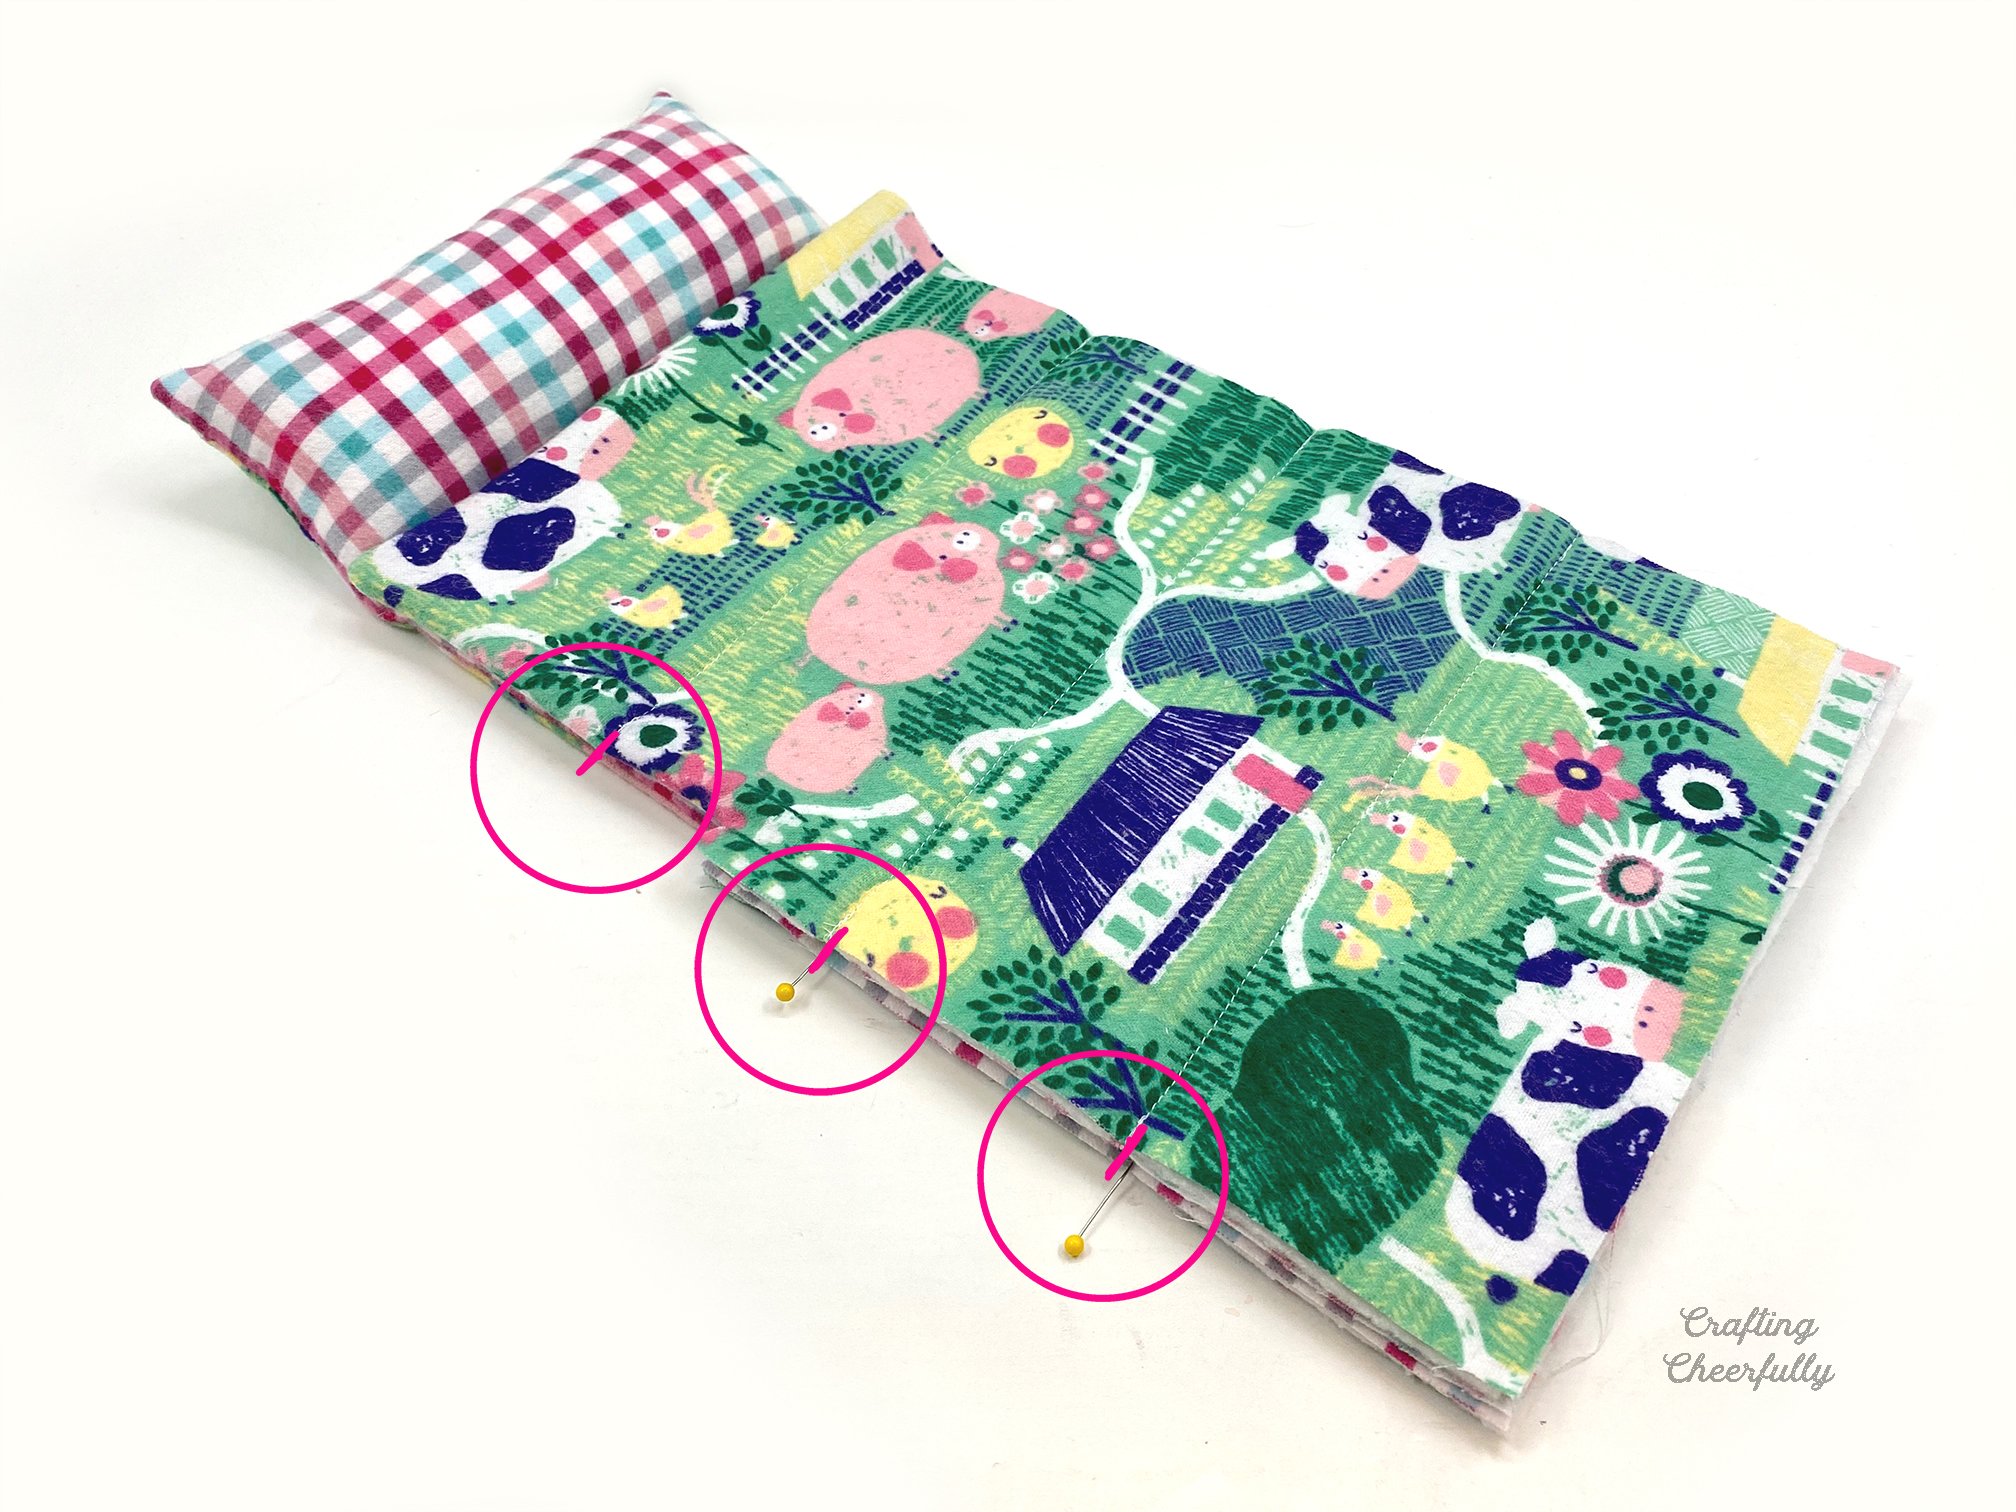
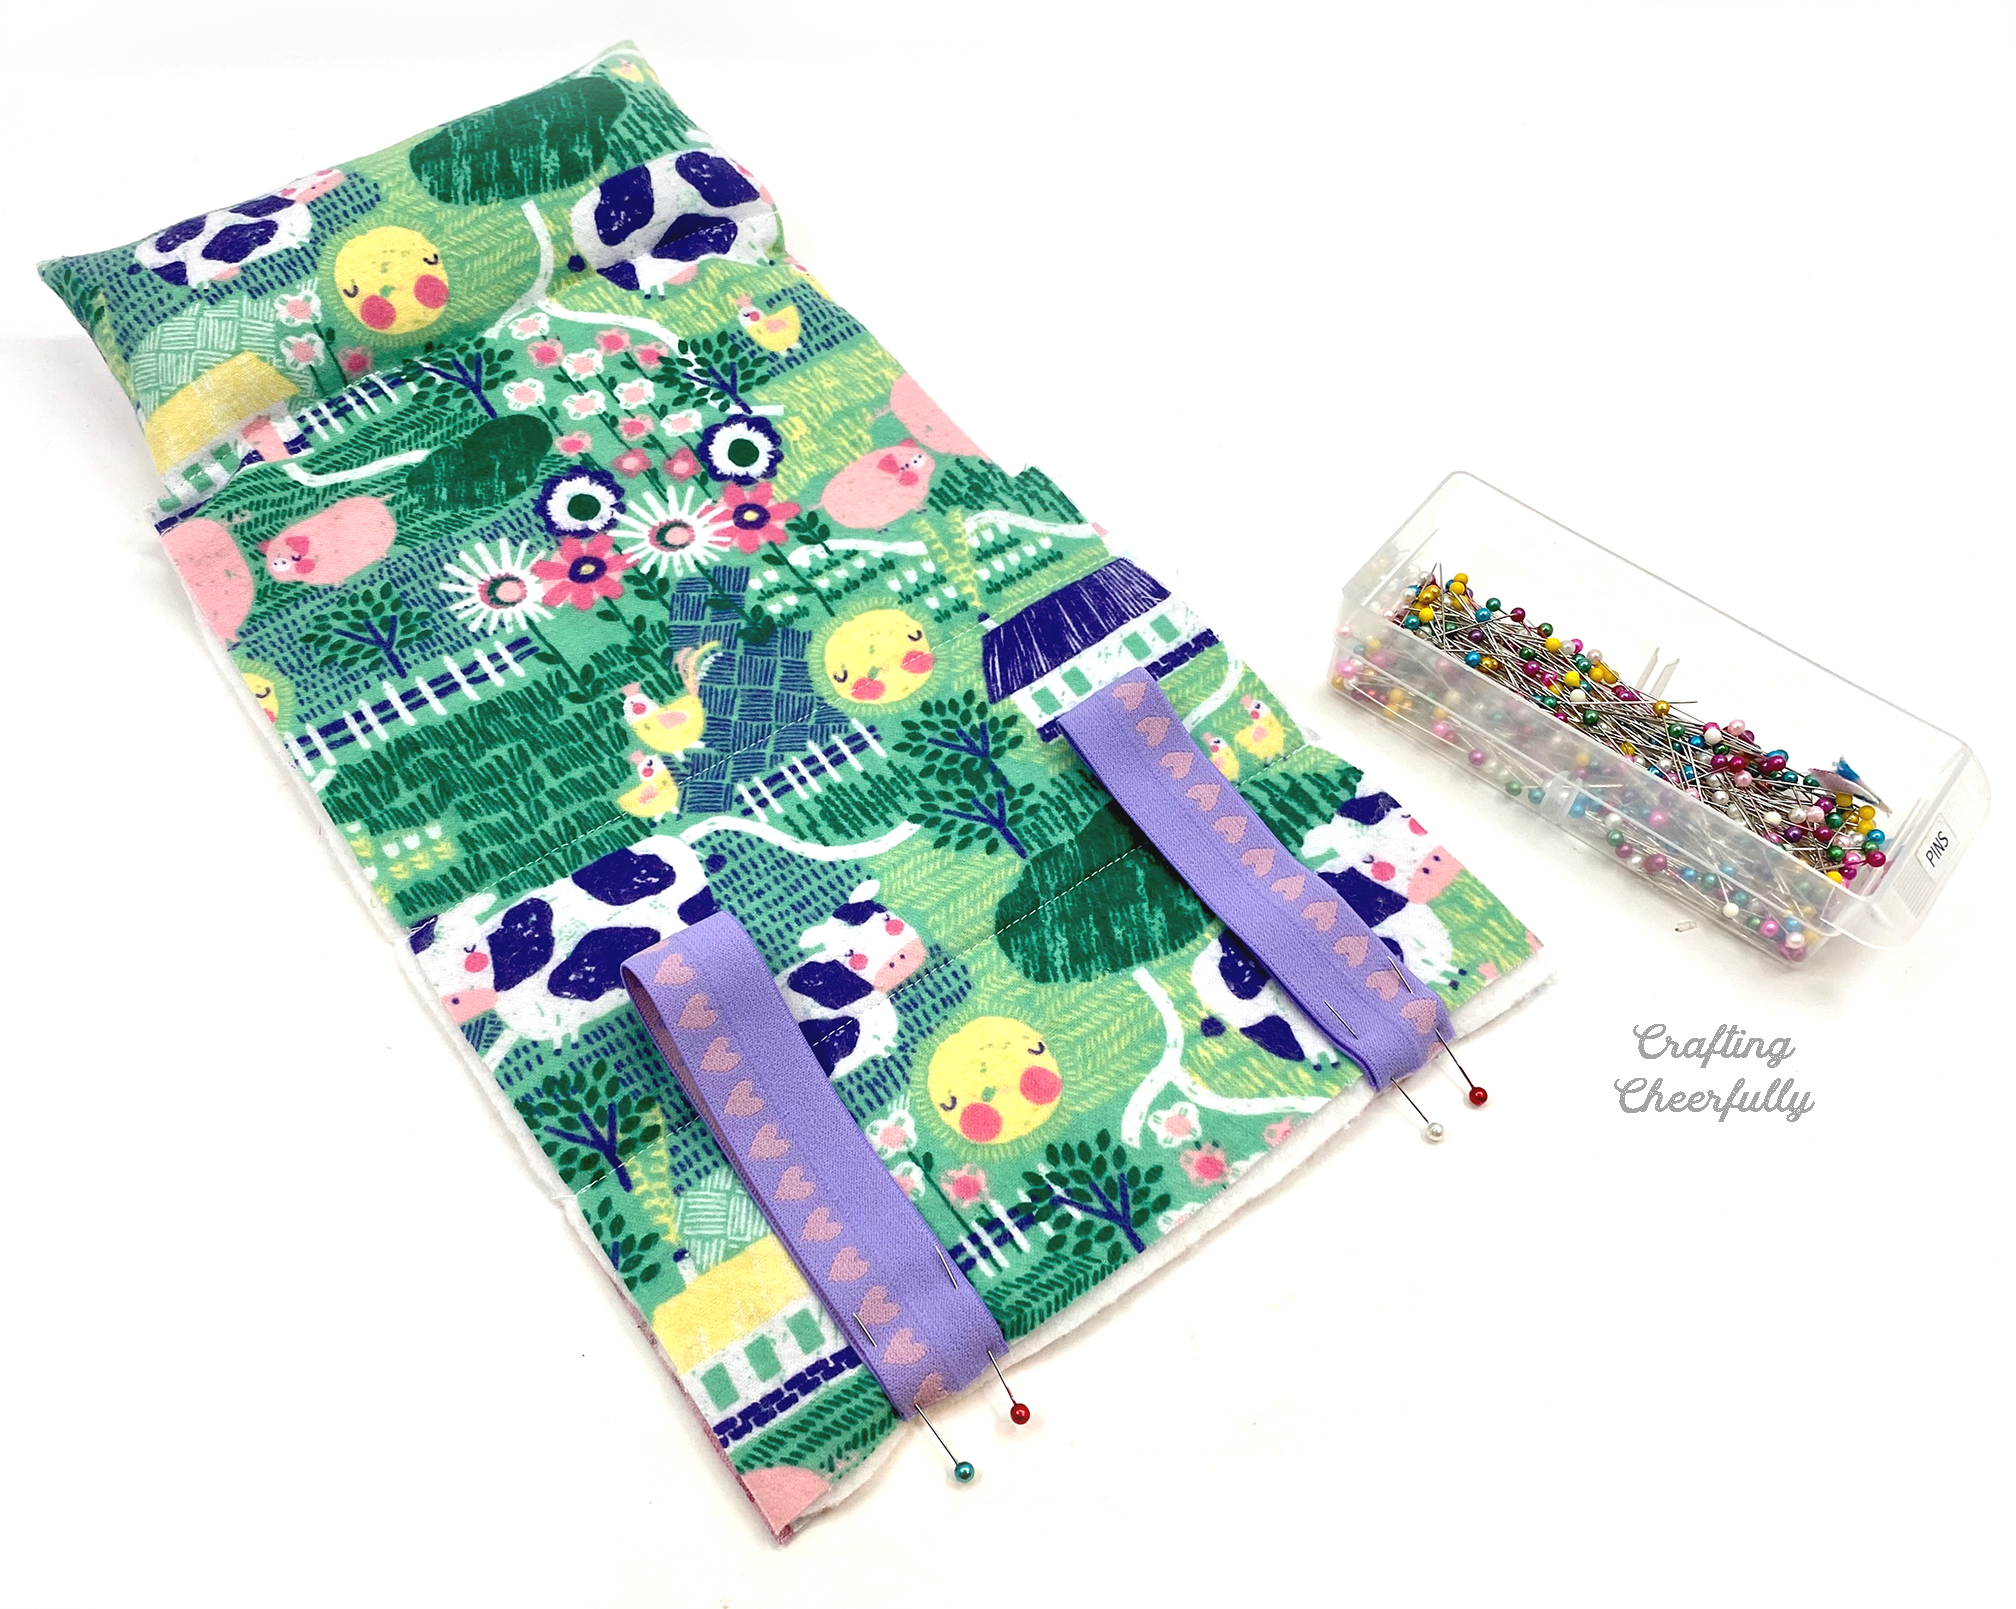
Step Eight: Time to sew the front and back pieces of the sleeping bag together. First, add the elastic loops to the back of the sleeping bag along the bottom edge. Use two 10″ long loops of elastic and pin them along the bottom (on the printed flannel side) about 1″ in from the sides. Pin them so they are laying upwards, towards the pillow.
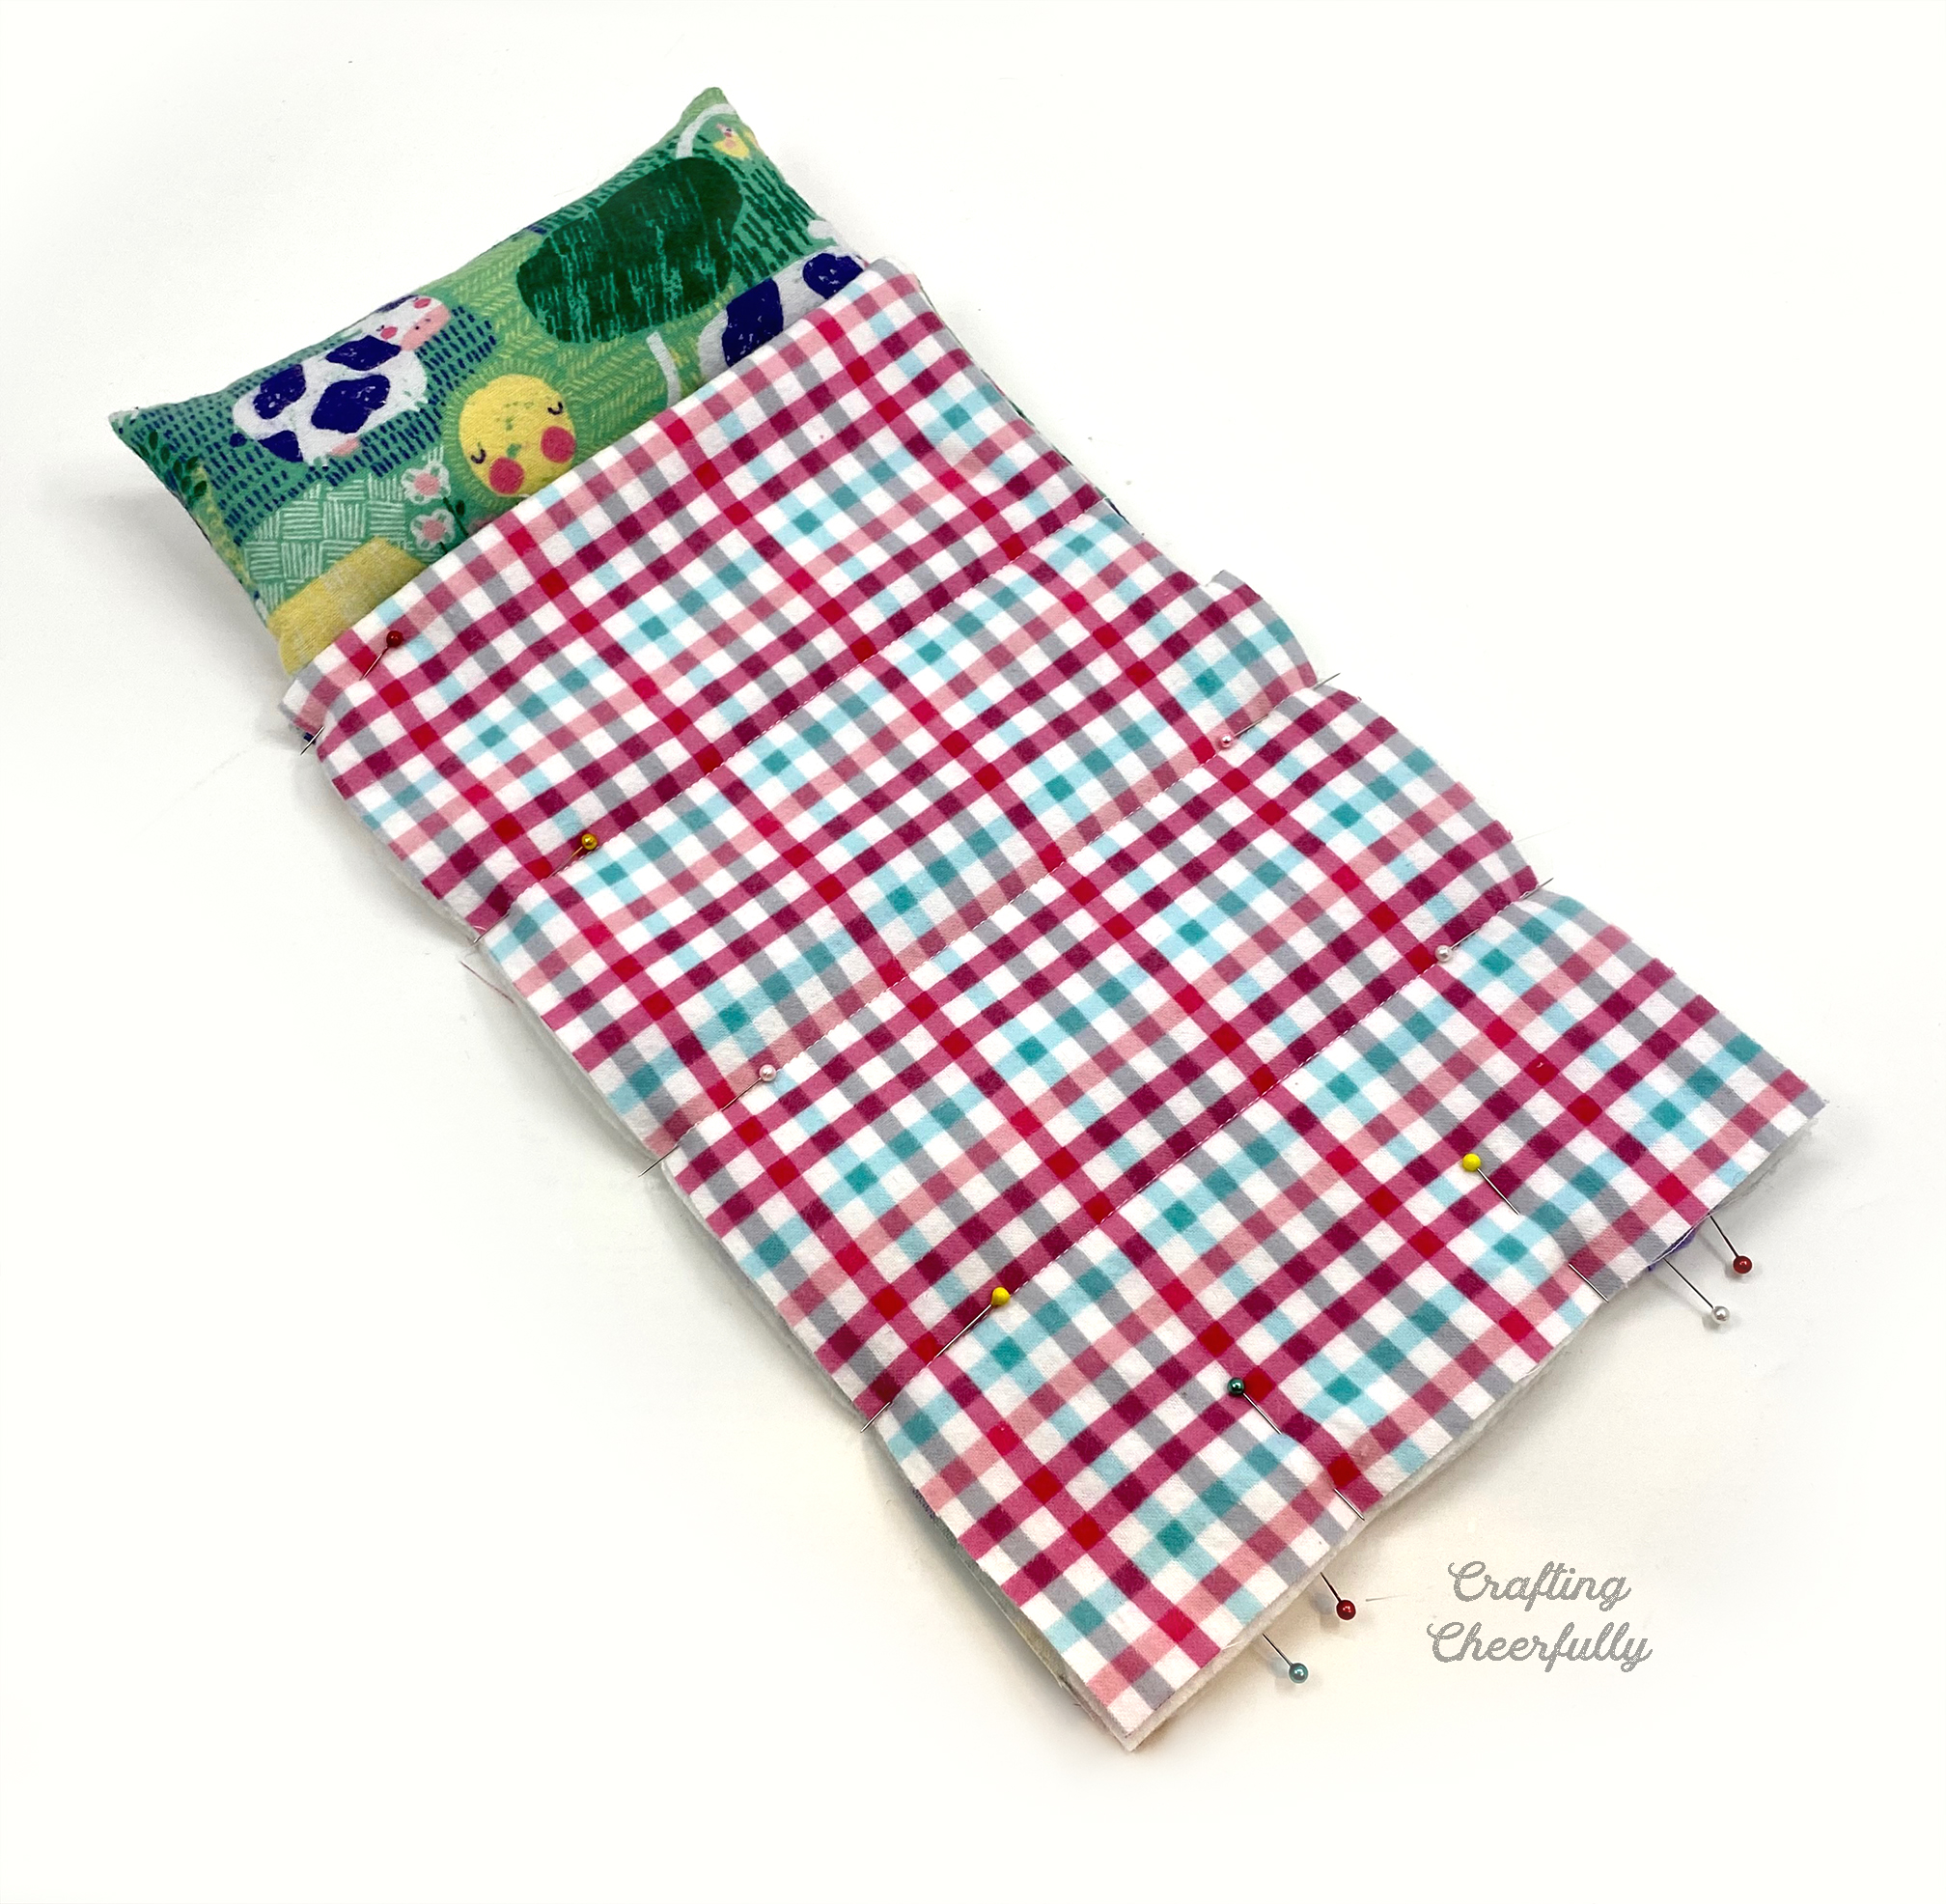
Step Nine: Lay the front of the sleeping bag on top of the back and pin in place matching the notches on the right side. Make sure right sides are together and the flannel meant for the inside of the sleeping bag is on the outside. The elastic will be sandwiched between the layers. Stitch the layers together starting at the notch. Make sure to backstitch well at the ends of your stitching.

Turn the sleeping bag right side out and give it a good pressing. The sleeping bag is finished!!
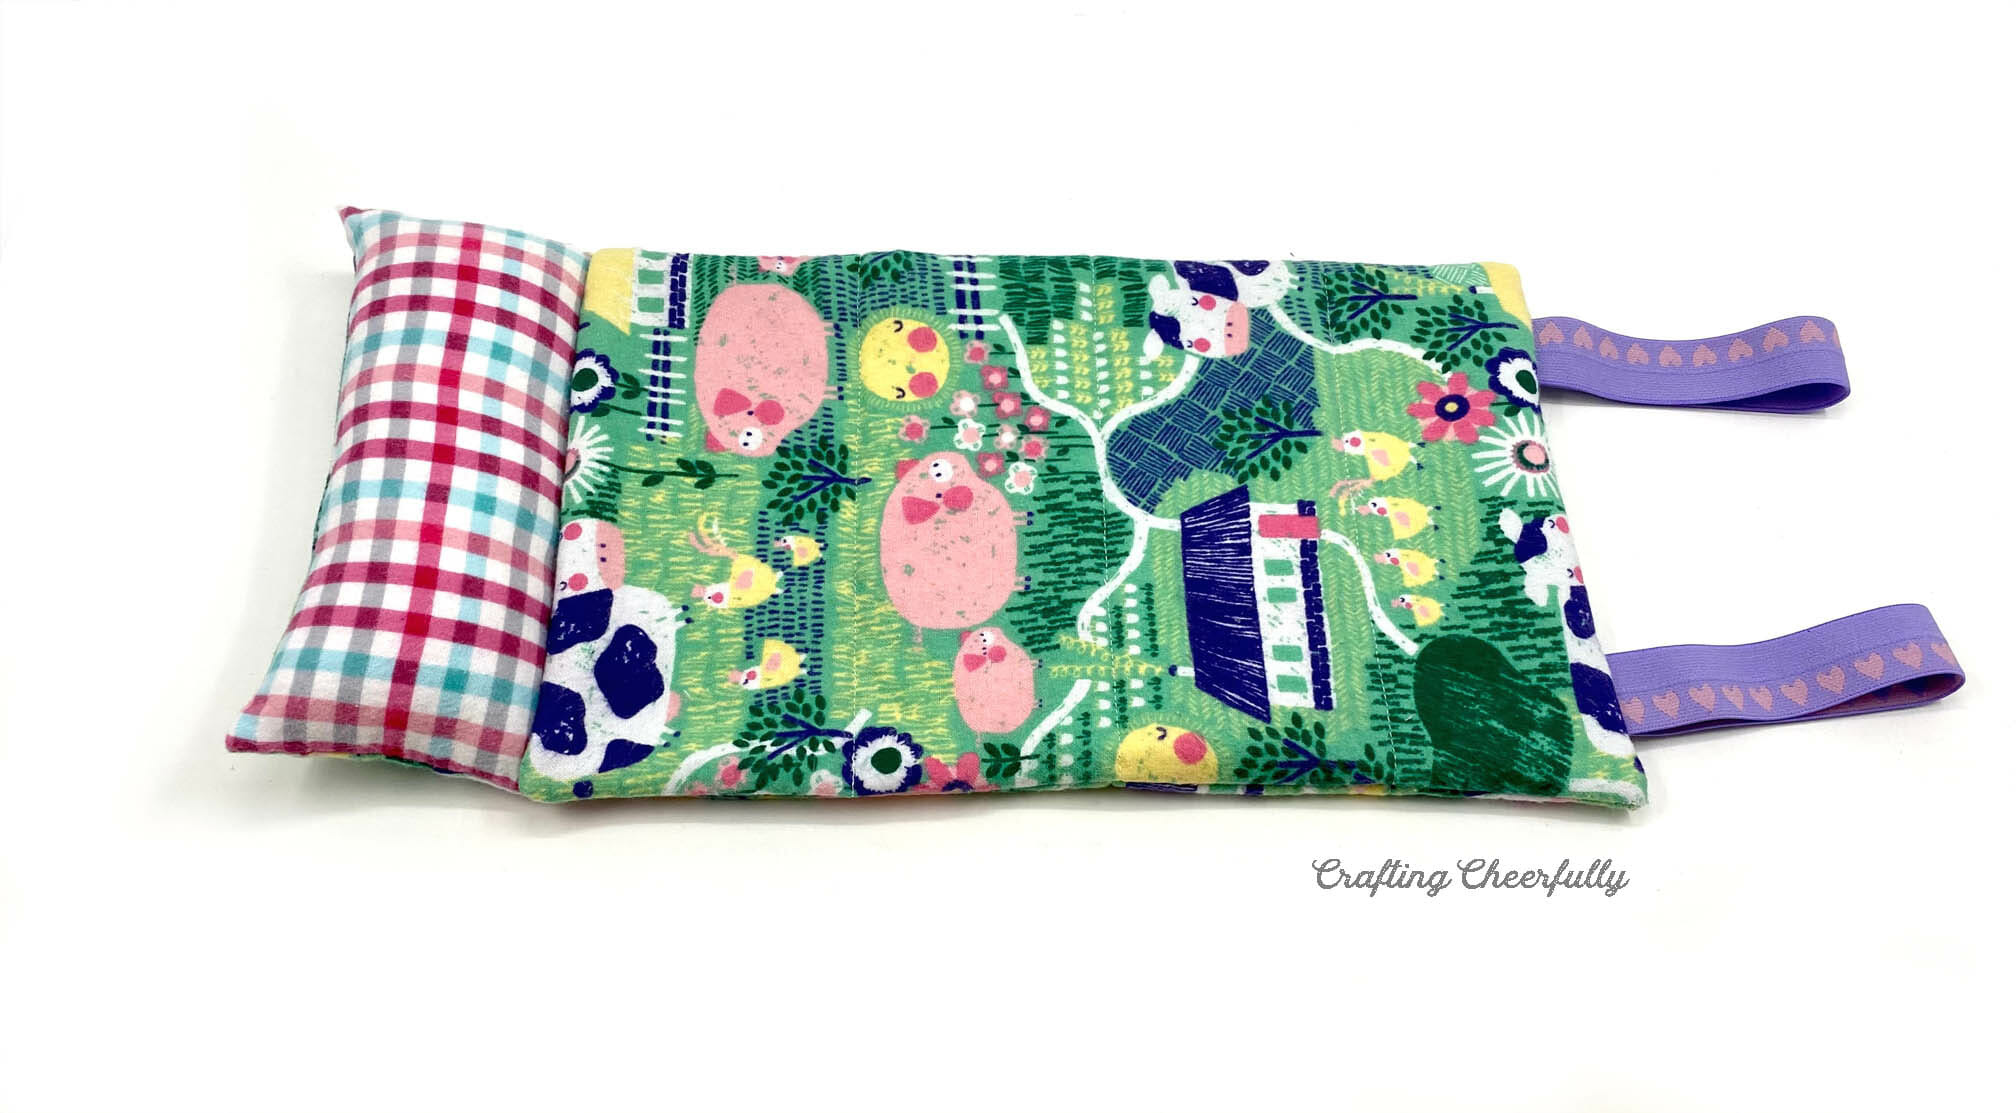
Open up the warm flannel layers and the doll will slide right in for a cozy night’s sleep!
Roll up the sleeping bag starting at the end with the pillow and use the elastic loops to secure it closed.
I made a sleeping bag for each doll using different flannel prints.
If you enjoyed this craft, be sure to check out my other doll crafts:
- DIY Wellie Wishers Book Box
- DIY Cardboard Christmas Fireplace for Dolls
- DIY Felt Doll Stockings
- DIY Sleeping Bag for 18″ Dolls
There are some adorable doll camping accessories available to go along with these cute sleeping bags. Unfortunately, the exact tent and camp accessories we purchased from Target a few years ago are no longer available, but I rounded up some excellent options below!
- Our Generation Doll Camping Tent
- Emily Rose Doll Camping Chairs
- Glitter Girls 14″ Doll Campfire Accessories
- Emily Rose 14″ Doll Pajama Outfit

Get the Free Sleeping Bag Pattern for 18″ Dolls
Fill out the purple form below with your first name and email address! The free file will be sent straight to your inbox! If you have already filled out the form below, don’t worry – you won’t be added to my list twice! This freebie is for personal use only. I hope you enjoy crafting something special. Please let me know if you have any questions :)