DIY Reversible Fleece Quilt – Free Quilt Pattern!
Create a cozy reversible fleece quilt using fleece yardage or two no-sew fleece blanket kits. This quilt is straightforward and can be made for in a wide range of colors or themes. Grab the free pattern to get started.

Hello Crafty Friends! Today I am excited to share my latest sewing project with you – a reversible fleece quilt! It’s super cozy and I love that it is reversible. This fleece quilt can be made with fleece yardage or no-sew fleece kits like the ones usually used to make no-sew tie blankets. I used two Star Wars-themed no-sew fleece kits to make this quilt. The large panels are perfect for the center of the quilt.
I created the quilt to be 65″ x 84.5″, about the size of a twin sized blanket. One side features a panel with Star Wars Droids and the other side features the Millennium Falcon. Both sides go really well with the Star Wars Pillows I made last year.

Since making this Star Wars fleece quilt I have made two more reversible fleece quilts following the same basic pattern. One was sports-themed with a football team on one side and a baseball team on the other. I used fleece yardage for this quilt and for the center panels chose fleece with the sports teams logos printed on them. I chose coordinating solid-colored fleece for the borders of the quilt.


DIY Fleece Quilt
The Quilt Pattern
You can download my quilt pattern for free by filling out the purple form at the end of this post. Below you can see the basic plan for the quilt. The dimensions are based off the size of the Star Wars panels that came with my kit. If your panels are a different size, you would need to adjust the measurements. I followed the same pattern for my sports quilt since the panel size didn’t matter.

Choosing the Fabric
I have made this quilt three times using fleece from Joann Fabrics. Fleece is a very forgiving and easy fabric to sew with. There is no need to finish the edges as the fleece will not fray. It can also be gently stretched and is a great beginner sewing fabric. Joann Fabrics also carries an insane amount of fleece in lots of different colors and patterns. I recommend waiting for a fleece sale before purchasing the fleece and paying attention to what the sale covers. Joann Fabrics carries different types of fleece and the anti-pill is more per yard and sometimes not included in the sale.
Star Wars Quilt: For the Star Wars quilt, I used two Star Wars No Sew Fleece Throw 48″ Kits from Joann Fabrics. Each kit came with the decorative panel featuring a Star Wars picture as well as a backing piece in blue fleece. I cut up the backing pieces to make the blue border pieces and purchased about 2 yards of gray fleece to make the other border pieces. The black squares in each corner of the quilt were leftover from the front panels, the dashed white lines are cutting lines to make the ties.
Sports Quilt: For the sports quilt, I purchased fleece yardage. The licensed fleece for the two sports teams costs more than the solid fleece so I waited for a sale and purchased just enough for the panels and the small squares in the corners. I chose two additional colors for the border pieces that coordinated with the team colors.

Supplies Needed
- Free Pattern – Grab the free file by filling out the form at the end of this post.
- Fleece – printable pattern goes into more detail but below are the basic fabric amounts needed for one side of the quilt. If making your quilt reversible, you will need to duplicate everything for the second side. Included in my amounts are a little extra to account for shrinking.
- Fabric Amounts listed are for 58″ non-directional solid fleece
- Border Fabrics
- Fabric 1 (dark blue) – 1 yard (1 1/4 yard to account for extra shrinking)
- Fabric 2 (gray) – 1 yard (1 1/4 yard to account for extra shrinking)
- Corner Fabrics
- Fabric 3 (black) – 1/2 yard (3/4 yard to account for extra shrinking)
- Panel Fabric
- Fabric 4 (light blue) – 1 3/4 yard if directional. If non directional, 1 yard of 58″ wide fleece
- Use the front of a 48″ Fleece No Sew Throw for the panel as I did with my Star Wars quilt :)
- Border Fabrics
- Fabric Amounts listed are for 58″ non-directional solid fleece
- Clear ruler
- Fabric scissors (I used my Ginghers)
- Straight pins
- Thread

Preparing and cutting the Fabric
Start by pre-washing all of your fleece fabric. Follow the pattern and cutting list to cut out all of the border pieces. All of the pieces include 1/2″ seam allowance. Below you can see how I cut my border pieces using solid-colored non-directional fleece.

The quilt corners feature a third fabric that is repeated twice in each corner of the quilt. For my Star Wars quilt I cut these pieces from the borders of my no-sew panels. Since the borders were not quite 8″ wide, I needed to piece them together. For my Sports quilt, I purchased an extra half-yard of each fleece I used for the panels.

Once the border pieces are cut, cut out the panels from either fleece yardage or from your no-sew blanket kits. Leave 1/2″ seam allowance around each panel piece. For my Star Wars quilt, I did leave a small border around the image that would be visible.
Sewing the Quilt
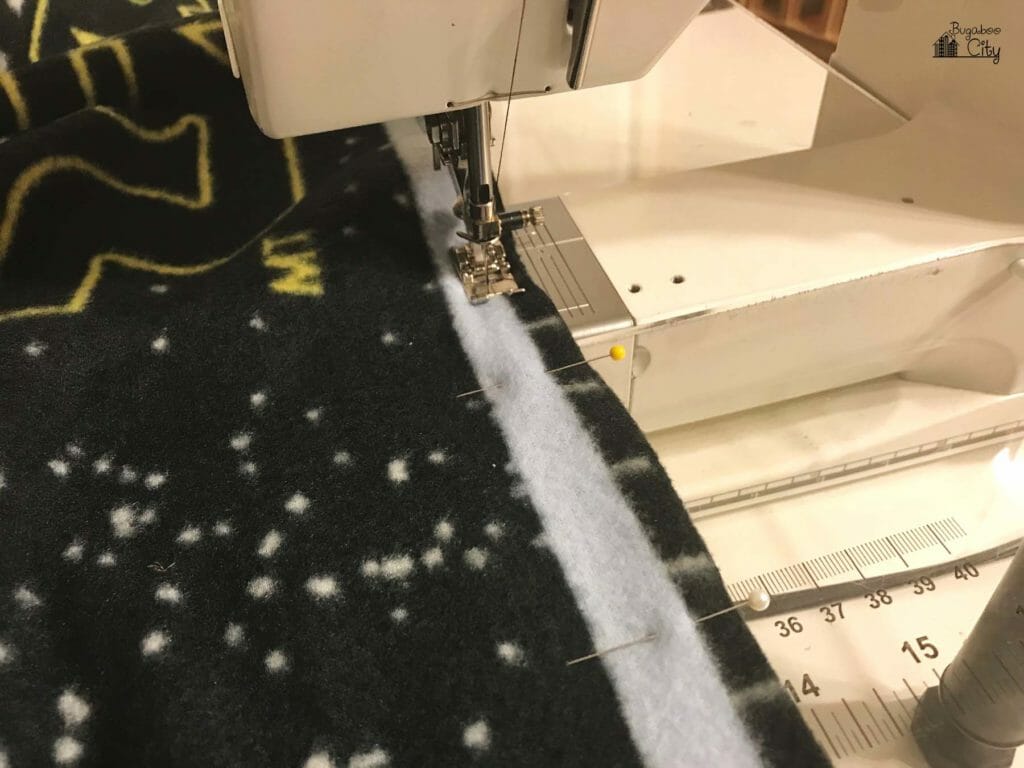
Once all of the pieces were cut and ready to go, I stitched all of the blue border pieces to the gray border pieces for all four sides of the quilt. I stitched these using a 1/2″ seam allowance and then went back and top-stitched on both sides of the seam to hold the seam allowance down. I stitched 1/4″ from the seam on both sides. This helped keep the seams flat and less bulky – plus, I thought it looked kind of cool! I top stitched in a coordinating thread color so there was a lot of thread switching.

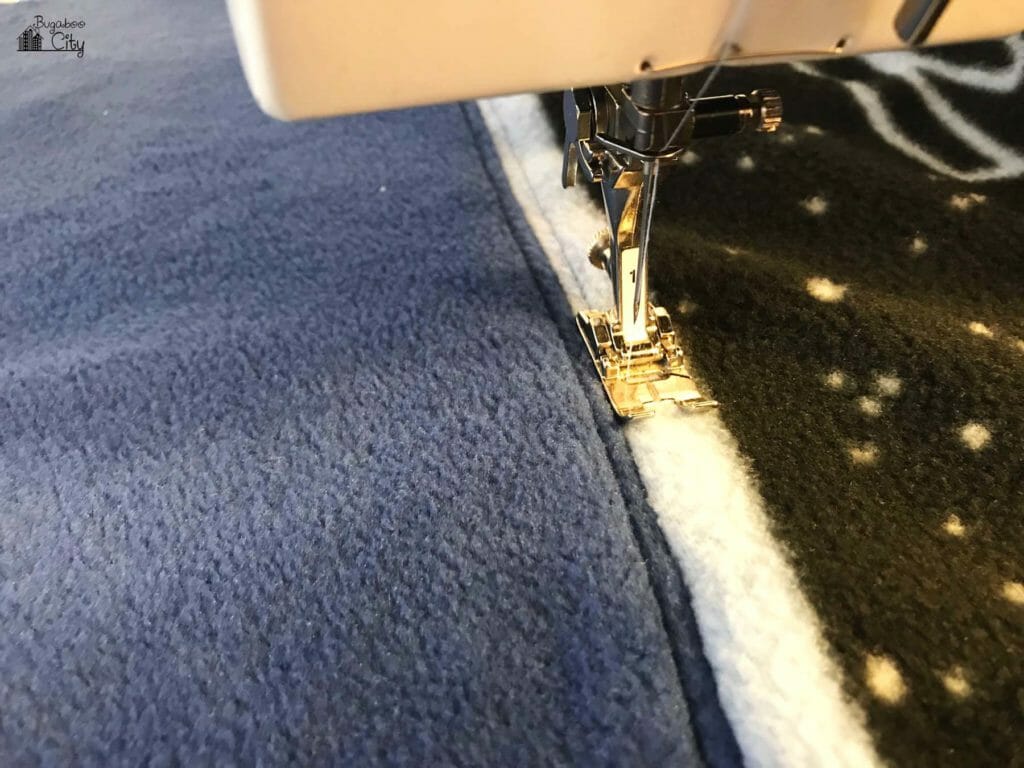
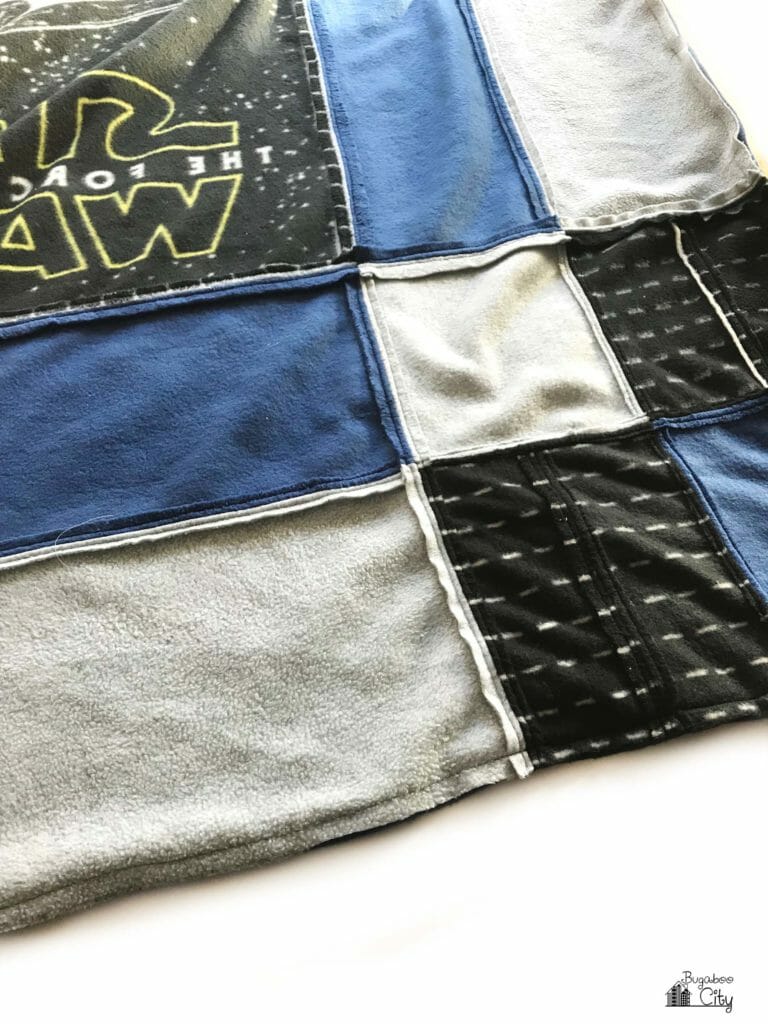
Once all of the blue and grey border pieces were stitched together, I attached the long sides to each large panel following my pattern. In the picture below, you can see that I stitched about 1/8″ inside the border that was all around the picture to ensure I didn’t have any black fleece showing from the seam allowance.
I pressed each seam open and top-stitched along each side of the seam at 1/4″. I did this from the right side of the fabric making sure my seam allowances were flat underneath. This is the process I used for every seam – so each seam was basically stitched three times.
Stitching the corner sections:
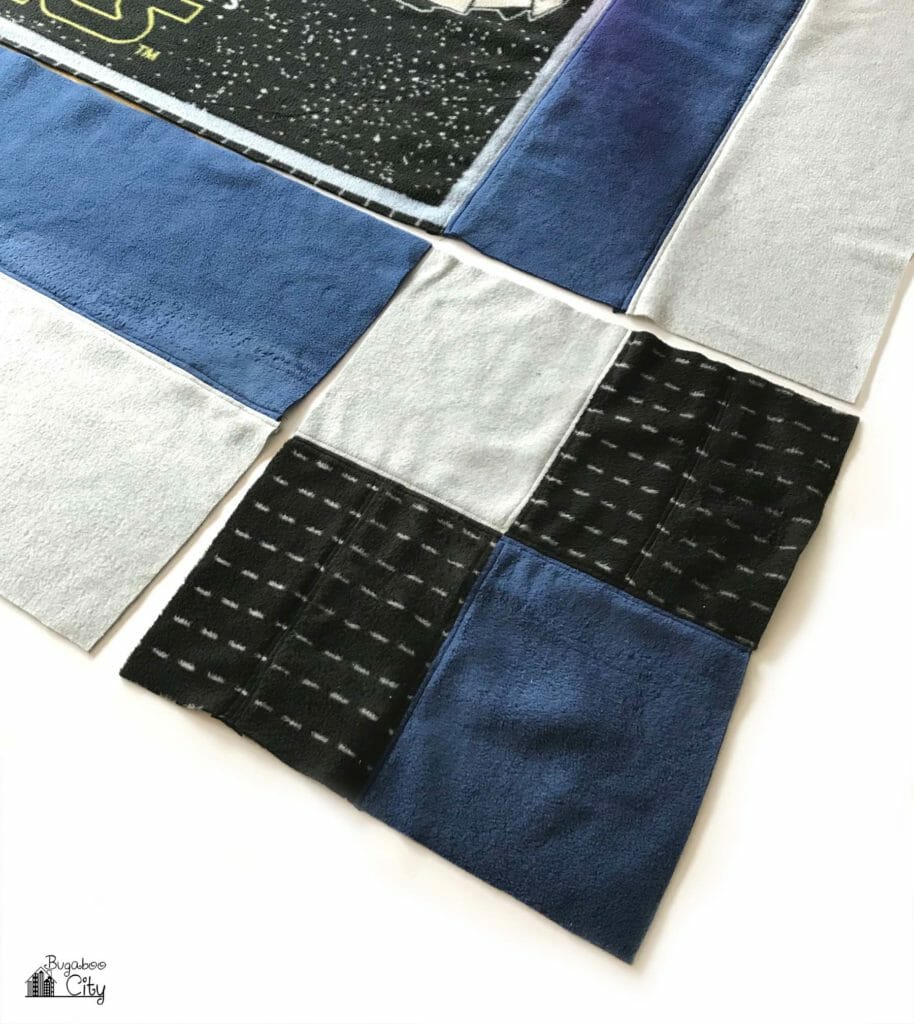
To create each of the corner sections, I stitched together four small squares using the same seam technique as I did above. You can see in the pictures how each of my black squares is made up of two pieces. I tried to line up the dashes the best I could when sewing these pieces together. If using fleece yardage you won’t have to worry about piecing anything together!

A few tips for sewing these corner sections –
- Make sure you have the pieces laid out correctly. I was making eight corner sections (four for each side of the quilt) and it got a little confusing at times. I used yellow pins for all of the sections made for the droid side and red pins for the Millennium Falcon side.
- Have your coordinating threads ready and bobbins made for each thread color. Since I was top-stitching each seam in matching thread, I needed to switch my threads and bobbins often.
- Use an assembly line! I found the most efficient way to do this was to sew all four pieces together with one color of thread for all eight corners sections – pressing the seams as I went. Then I top stitched all of the sections at one time by color of thread. So I threaded my machine with my grey thread and grey bobbin and top-stitched all of the grey squares for all eight corner sections, then switched to blue and did all of the blue squares and then black for all the black squares. This was much easier than if I completed each corner section by itself before moving on to the next.

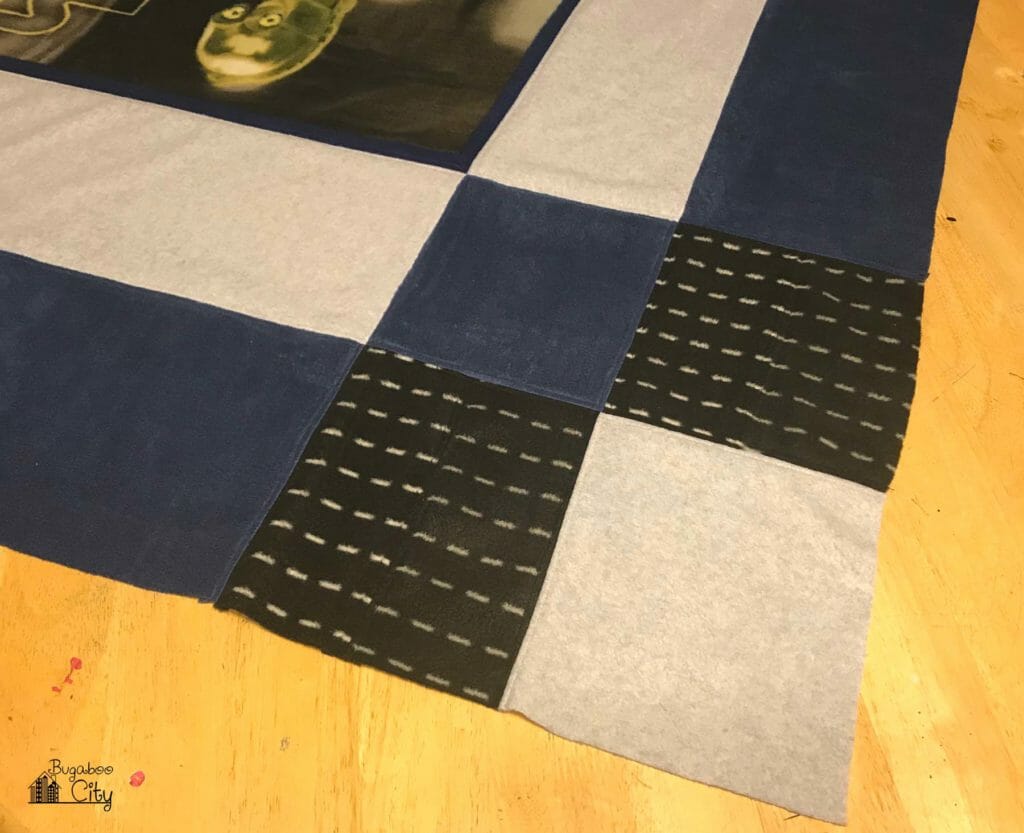
Once all 8 corner sections were completed, I was ready to attach them. I stitched each corner section to the top and bottom grey/blue sections that had not been attached to the panels yet. Then I stitched those onto the quilt, being mindful to match up my seams.
Sewing the Quilt Sides Together
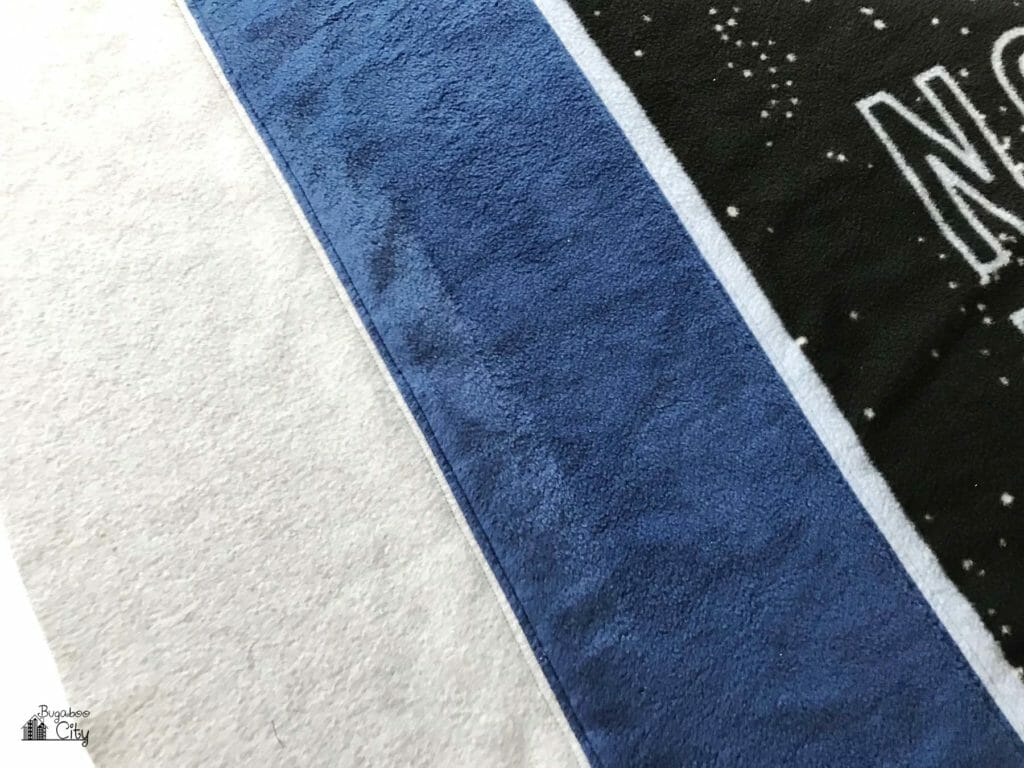
Next up is sewing the two quilt sides together. I laid the two quilt sides together, right sides touching, and then stitched around the edges using a 1/2″ seam allowance and matching up all of my seams. Leave a opening at the bottom of the quilt for turning it right side out.

After flipping the quilt right side out, I top stitched around the entire quilt about 3/8″ from the edge. Again, I had to switch my thread and bobbin colors as I sewed. I tried to do the top-stitching in sections to make it more efficient. For example, I started with grey thread and a blue bobbin and did every section that needed that thread combination, then went on from there. A bit putsy, but I’d gone through the work of top-stitching with matching thread for the whole quilt up until this point, so I didn’t want to stop now!

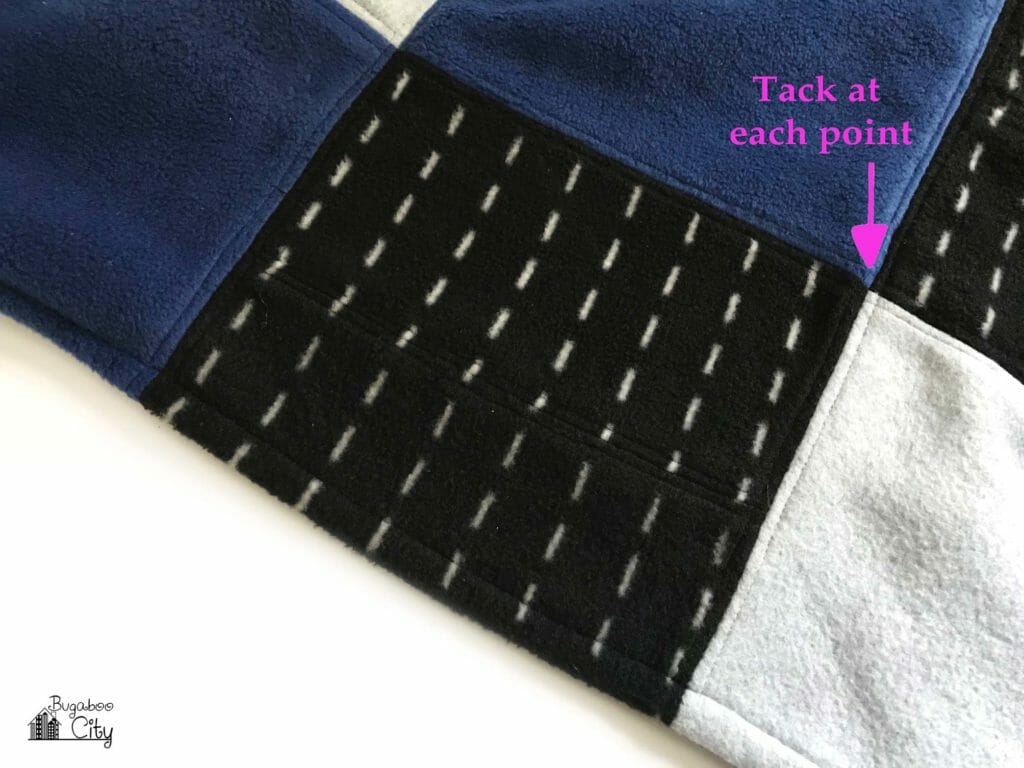
The final thing I did was to go back and tack the two quilt layers together in a few places. I tacked them using my machine and just stitched back and forth about a 1/2″ at each point and in the center of each side. It was a bit tricky because, again, I had to switch thread and bobbin colors, but I tried to do it along a seam line so it was hidden. You could also do this by hand for a bit more control.
I love how this fleece quilt turned out! The images that came with the no-sew fleece kits were so cool and I love that I was able to use them without all of the annoying fleece ties!


Get the Free Reversible Quilt Pattern!
Fill out the purple form below with your first name and email address! The free file will be sent straight to your inbox! If you have already filled out the form below, don’t worry – you won’t be added to my list twice! This freebie is for personal use only. I hope you enjoy crafting something special. Please let me know if you have any questions :)