
DIY XOXO Valentine’s Day Banner
Create a quick XOXO Valentine’s Day banner to decorate for the holiday! Grab some decorative paper and yarn to get started!

Hello Crafty Friends! Valentine’s Day is around the corner and I’m excited to share this quick DIY Valentine’s Day Banner you can create to decorate for the holiday!
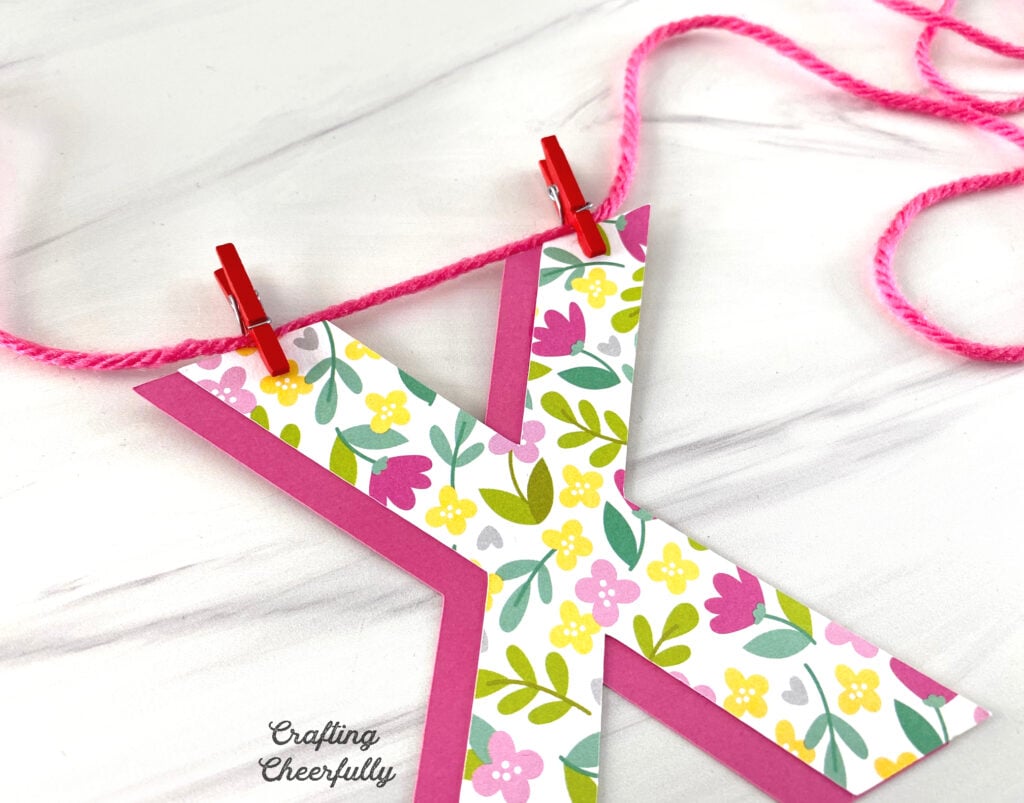
My trick to easy banners – mini clothespins! I love using mini clothespins for banners because it eliminates the need for using a hole punch and threading the pennants or letters on one-by-one. It also makes it super easy to rearrange or add more to your banner. Nothing is tied, glued or adhered permanently to the yarn or string you are using.
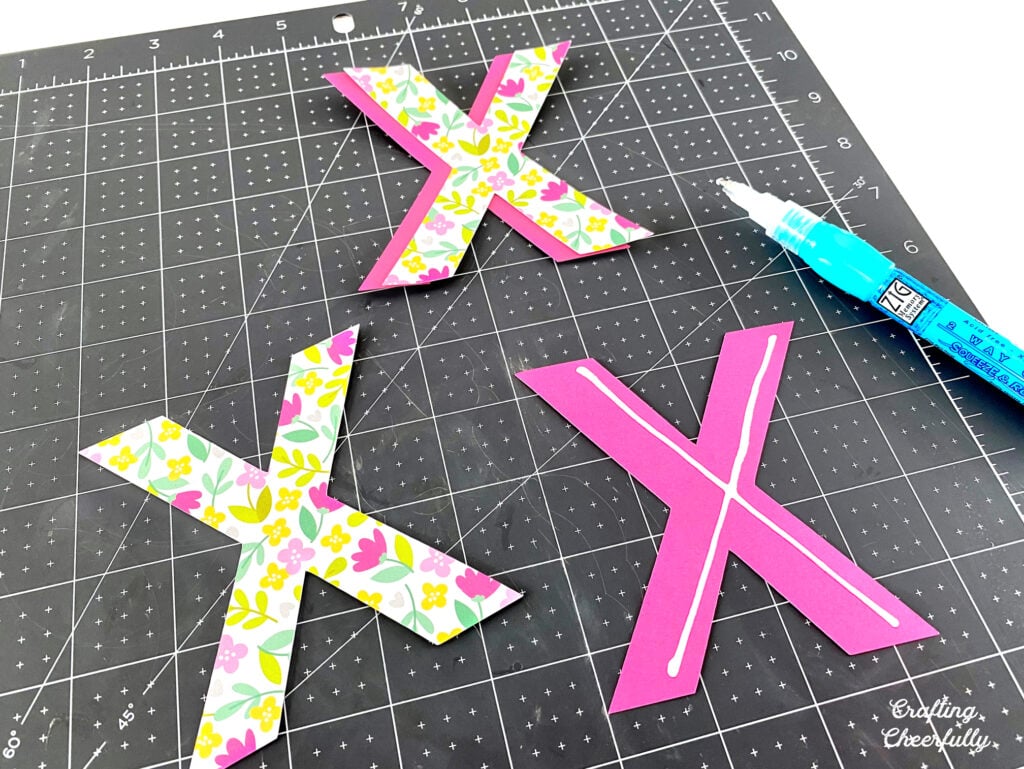
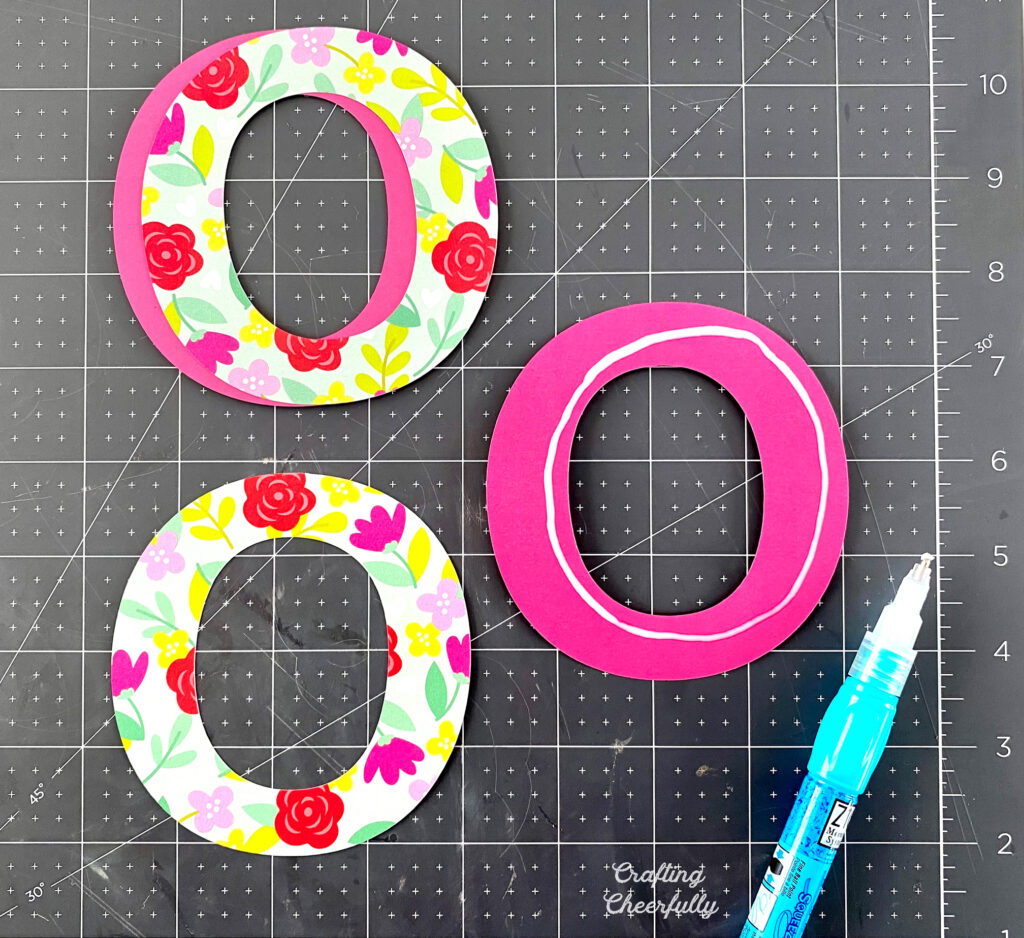
This hugs and kisses banner is created with X and O letters, plus some cute paper hearts. To give the letters a bit more dimension and thickness, I layered pieces of patterned floral paper over pieces of pink paper. You could skip this step, but it was quick and easy to layer the letters and I think it added a lot to the banner!

My floral paper is from the “Love Notes” collection by Doodlebug Designs. I love how sweet the floral patterns are while not being just pink and red.
Below is the tutorial for creating this banner! If you have a cutting machine this will go really fast, but even if you cut the letters by hand you can cut as many as you have time for. I made mine with just XOXO and then added a couple cute hearts on the ends.
DIY Valentine’s Day Banner
Supplies Needed
-
- Free template – Grab the free file by filling out the purple form at the end of this post
- Cricut Design Space File – Have a Cricut? Use my Design Space File!
- Decorative floral paper – I used paper from LOVE NOTES by Doodlebug Designs
- Solid pink paper
- I used 65lb Recollections paper – you can usually purchase it for much cheaper at Michaels Craft Store.
- I also love a heavier 80lb Park Lane Cardstock when cutting with my Cricut.
- Glue – my Zig Glue Pen was perfect for this
- Mini clothespins – You can also find these at Michaels or Joann Fabrics
- Pink Yarn
- Cutting machine
- Cricut cutting mat and Cricut Tools

Step by Step Tutorial
Step One: Cut out the X and O letter shapes.
Cut out the letter shapes making sure you cut out 2 for each letter pennant – one from floral paper and one from solid paper which will be the background or shadow. Skip the shadow pieces if you are short on time!
Cutting by hand: You can grab my free PDF template which includes the X, O and heart shapes written in the Adobe font, Acumin Pro. The letters are all 4″ tall.

Cutting with a Cricut: Use my Design Space File! The font is slightly different, instead of Acumin Pro this file uses the free font Cricut Sans. You can easily change the font in Design Space though as well as the height and size of each letter.
I used a cute heart image, (#M2E367BF1) but you can also use the free heart that comes in the Shapes panel on the left.

Step Two: Glue the floral letter on top of each solid pink letter!
Layer the letters so the bottom layer looks like a shadow by off-setting the background pieces lightly to the left by about 3/8″. Check the pictures below to see where I placed my glue on the Xs and Os. I didn’t need a lot!
After I glued the letters I placed them under a stack of books for a few minutes.

Once the letters were done I was ready to assemble the banner!

Step Three: Use mini-clothespins to attach the letters to a piece of yarn.
Use a piece of yarn or ribbon and attach the letters using mini-clothespins. Don’t open the mini-clothespins too much as they have a tendency to fall apart if you do. I used red and silver ones and alternated the color with each new letter.
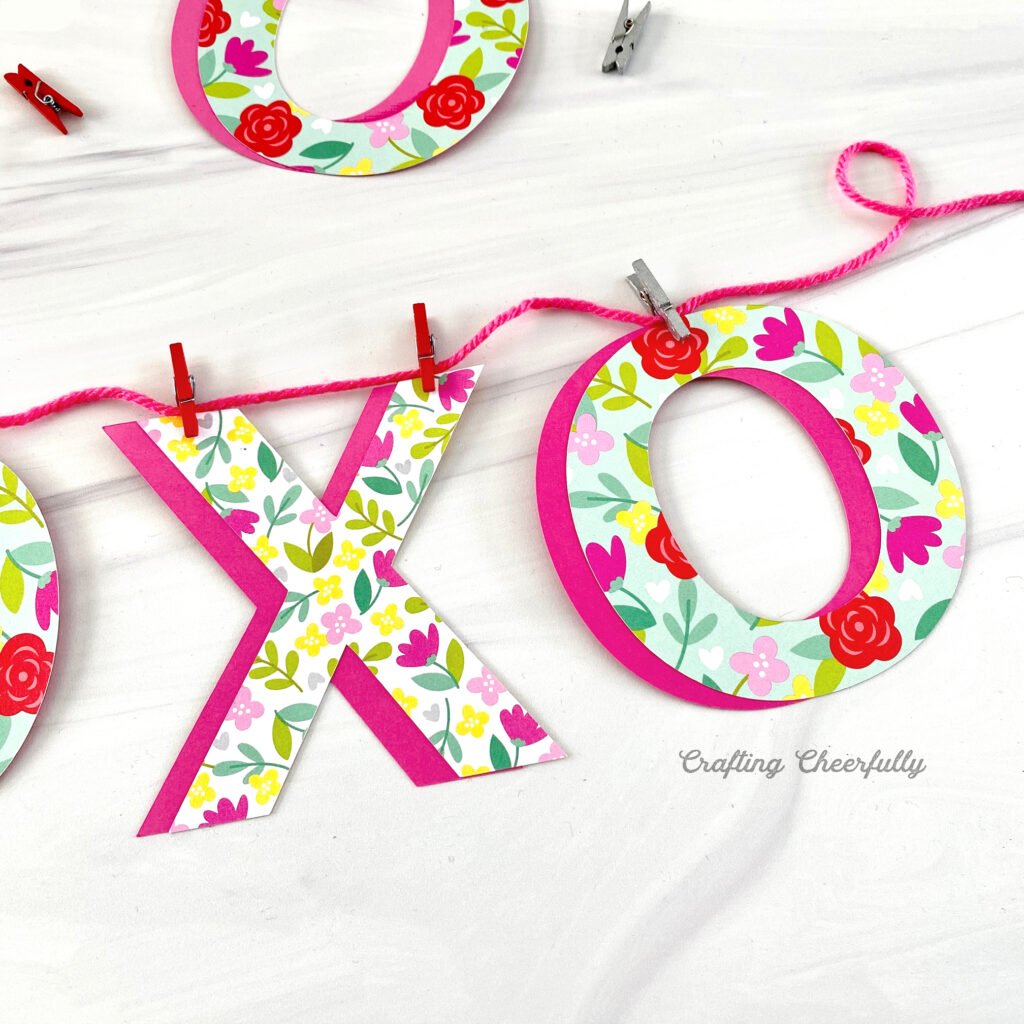
At first, I just used one clothespin for the O but when I hung it up I found two worked a little better :)

The banner is finished! Hang it up to celebrate the holiday! After Valentine’s Day when you take down the banner, save the letters for next year and return the mini clothespins to your craft stash so you can use them again for another fun banner! I have lots of DIY Banners on my site since I love making them for different occasions and holidays. They are a quick way to decorate and often only take a few supplies!

I’m excited to be sharing this crafts as part of the Creative Crafts Last Minute Valentine’s Projects! Be sure to click the link below and check out the other awesome projects shared. You can also enter to win a sweet craft stash in the raffle at the end of this post! Good luck!

Get the Free XOXO Banner Template!
Fill out the purple form below with your first name and email address! The free file will be sent straight to your inbox! If you have already filled out the form below, don’t worry – you won’t be added to my list twice! This freebie is for personal use only. I hope you enjoy crafting something special. Please let me know if you have any questions :)


I love how you created the shadow with the pink paper, Kimberly! Thanks for joining us for the Creative Crafts FUN!