DIY Thanksgiving Wood Sign
Create a DIY Thanksgiving wood sign for the holiday using adhesive foil. Edged with Ric-Rack to create the perfect pie crust, this sign makes wonderful Thanksgiving wall art!

Making pie at Thanksgiving is one of my favorite traditions! Since we are hosting Thanksgiving this year, I thought it would be fun to add some new Thanksgiving decorations to our home. This DIY Thanksgiving wood sign was simple to make and I was excited to try Adhesive Foil for the first time with my Cricut cutting machine.
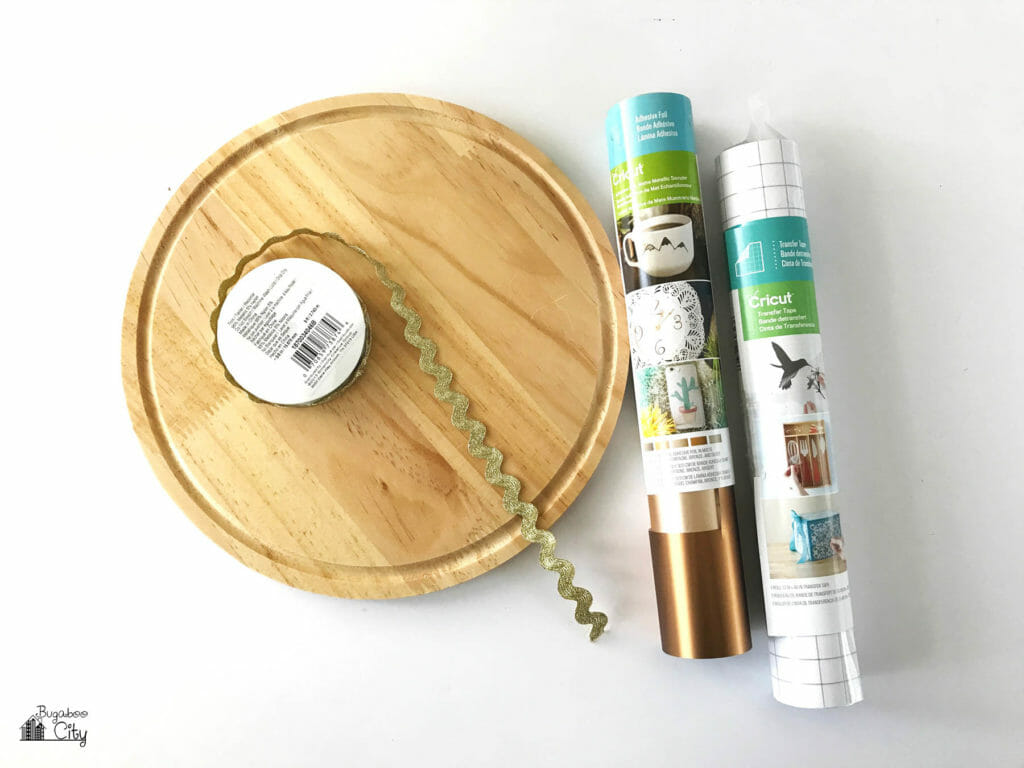
For this sign, I used a round wooden cheese board I found in the Target Dollar Spot. With a little Ric-Rack, I knew it would make the perfect pie! You could use any round wooden sign you find, including the ones at craft stores like Joann Fabrics and Michaels.
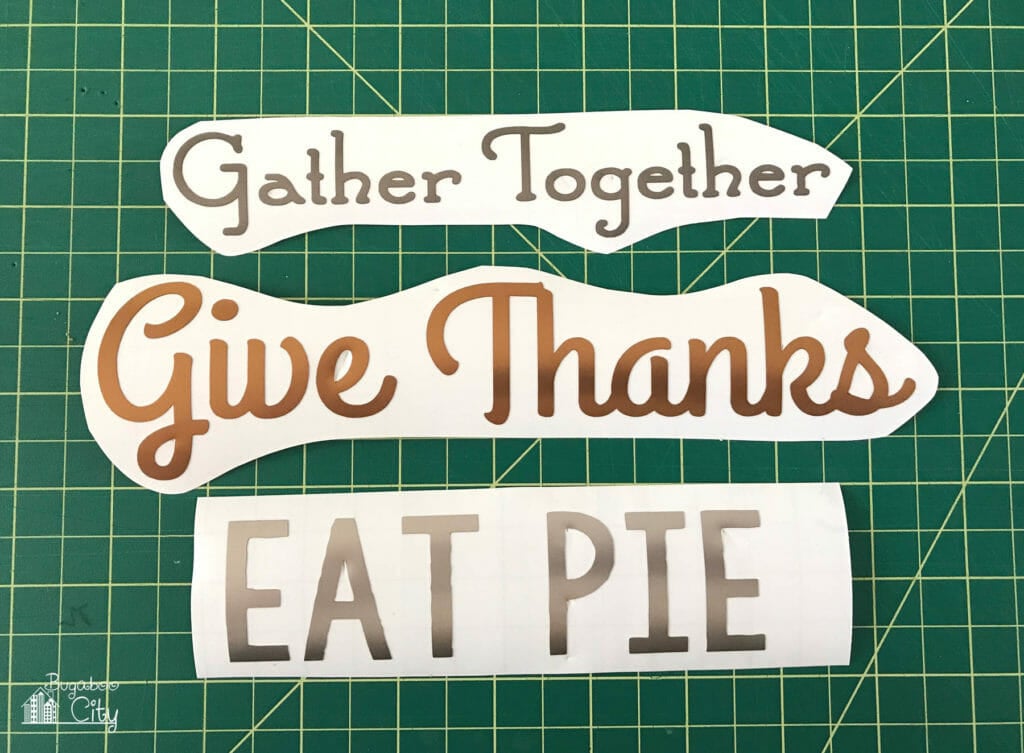
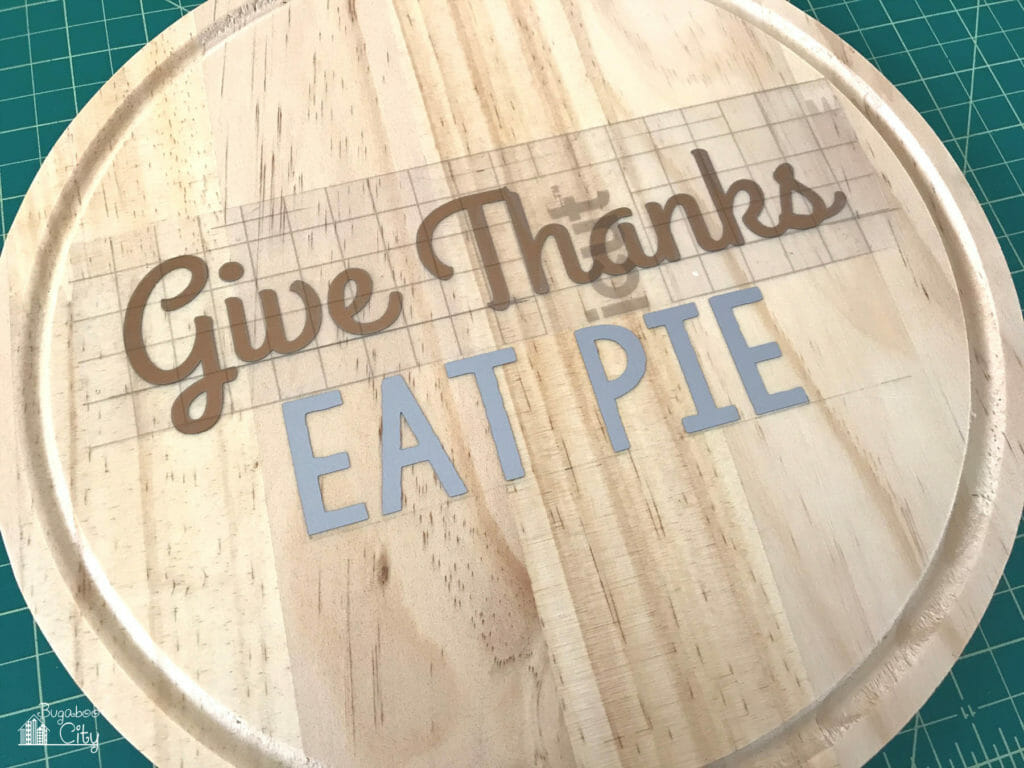
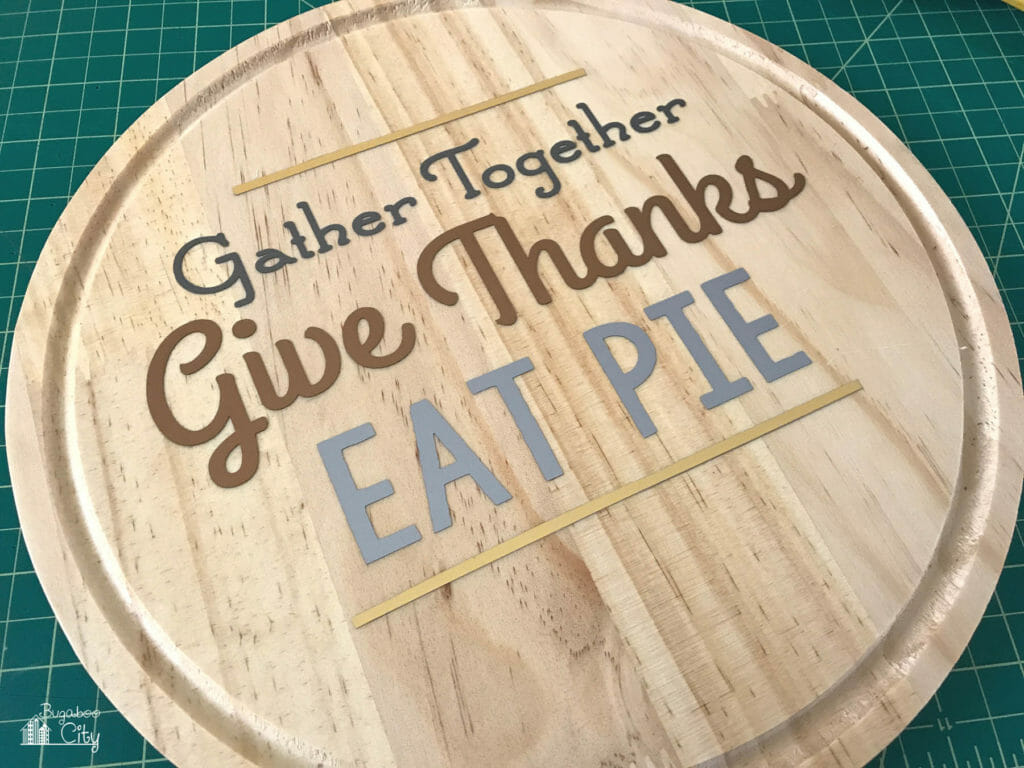
I chose to add the words “Gather Together, Give Thanks, Eat Pie” to my sign in three different fonts and three different colors of adhesive foil. The adhesive foil looks really beautiful on the sign. Depending on the angle you look at it, the foil takes on different shades.

Creating the Design
You can create the design for the pie sign in Photoshop or Cricut Design Space. Start by creating a circle shape that is the size of you wooden sign. Add the text to the sign. The circle will help you space the text, but can be hidden before cutting the file. I used the following fonts to create my sign.
- Gather Together – Font Santa’s Sleigh Full
- Give Thanks – Font Grand Hotel
- Eat Pie – Font KG All of Me (I filled in the holes of this text in Photoshop)
Supplies Needed For DIY Thanksgiving Wooden Pie Sign:
- Circular wooden sign – I used a wooden cheese plate from the Target Dollar Spot
- Cricut Matte Adhesive Foil Sampler Metallic (also available from Joann Fabrics)
- Transfer Tape
- 1/2″ Metallic Rick-Rack
- Hot glue
- Twine for hanging
- Cricut cutting machine – Cricut Explore, Cricut Maker or Cricut Joy
- Cricut tools, standard cutting mat and brayer
- Pencil
- Ruler
Assembling the Sign
Step One: Use your cutting machine to cut out each word from a different color of Adhesive Foil. The Metallic Sampler has really beautiful colors in it that are perfect for Thanksgiving. After the words are cut, carefully weed them.
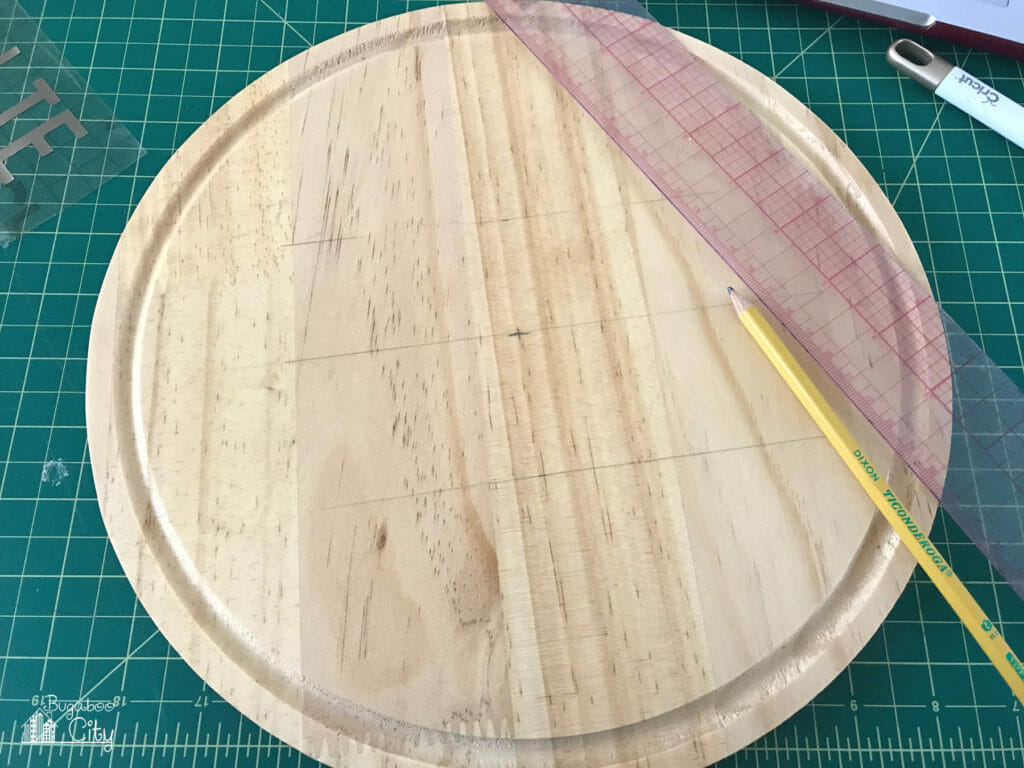
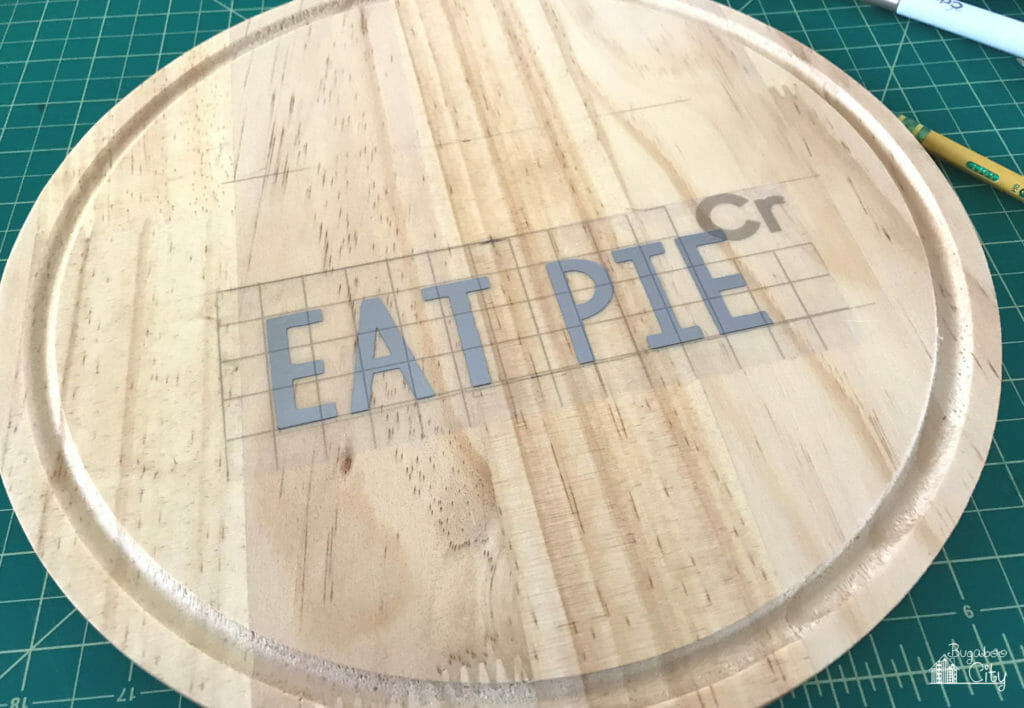
Step Two: I drew some light pencil lines on the cheese board to mark where the words should go. I did a little test first to make sure my pencil lines would easily erase.
Step Three: Use Transfer Tape to transfer the words to the wooden sign. The Transfer Tape comes with a grid. Line up the words on the grid to help when applying them to the board.


Apply the words starting with the bottom phrase, “Eat Pie”. The Vinyl Transfer Tape made this process really easy because I could see through it to my pencil line. I simply lined up the tape line with my pencil line and then my words were straight. I did make sure each phrase was centered by measuring on either side of it and adding little pencil marks as guidelines.
I added thin lines of Adhesive Foil to the top and bottom of my design to finish it off. These were cut with a paper trimmer from another color of the Metallic Sampler. You could of course cut these with your cutting machine as well.
Step Four: Add the Ric-Rack to finish off the sign. I found gold Ric-Rack at my local Joann Fabrics store and applied it using a hot glue gun. I applied my Ric-Rack so it hung over the edges of my board to look more like a pie crust.

The last thing I did was add a little twine to the back with hot glue so I could hang my sign up. Then it was all finished!

This was a fun project and I love the way it turned out! I like that the Rick-Rack sparkles and the Adhesive Foil has a nice sheen to it. Around this time of year, a lot of my decorations start to get a big sparkly with Christmas coming, so this sign fits in well with our other decor.
I’ll be back soon with another Thanksgiving DIY. Sometimes I want to skip right to Christmas, but I am always happy when I take the time to do a few Thanksgiving crafts this time of year. I can’t wait to bake my Thanksgiving pies this year! Maybe I’ll switch it up and try a new flavor! :)

![]()