Layered Paper Paw Print Dog Frame
Create a beautiful layer paper dog frame using cardstock and your Cricut cutting machine. This paw print frame makes a wonderful gift for pet owners! Learn how to make it and use the cut file I created!
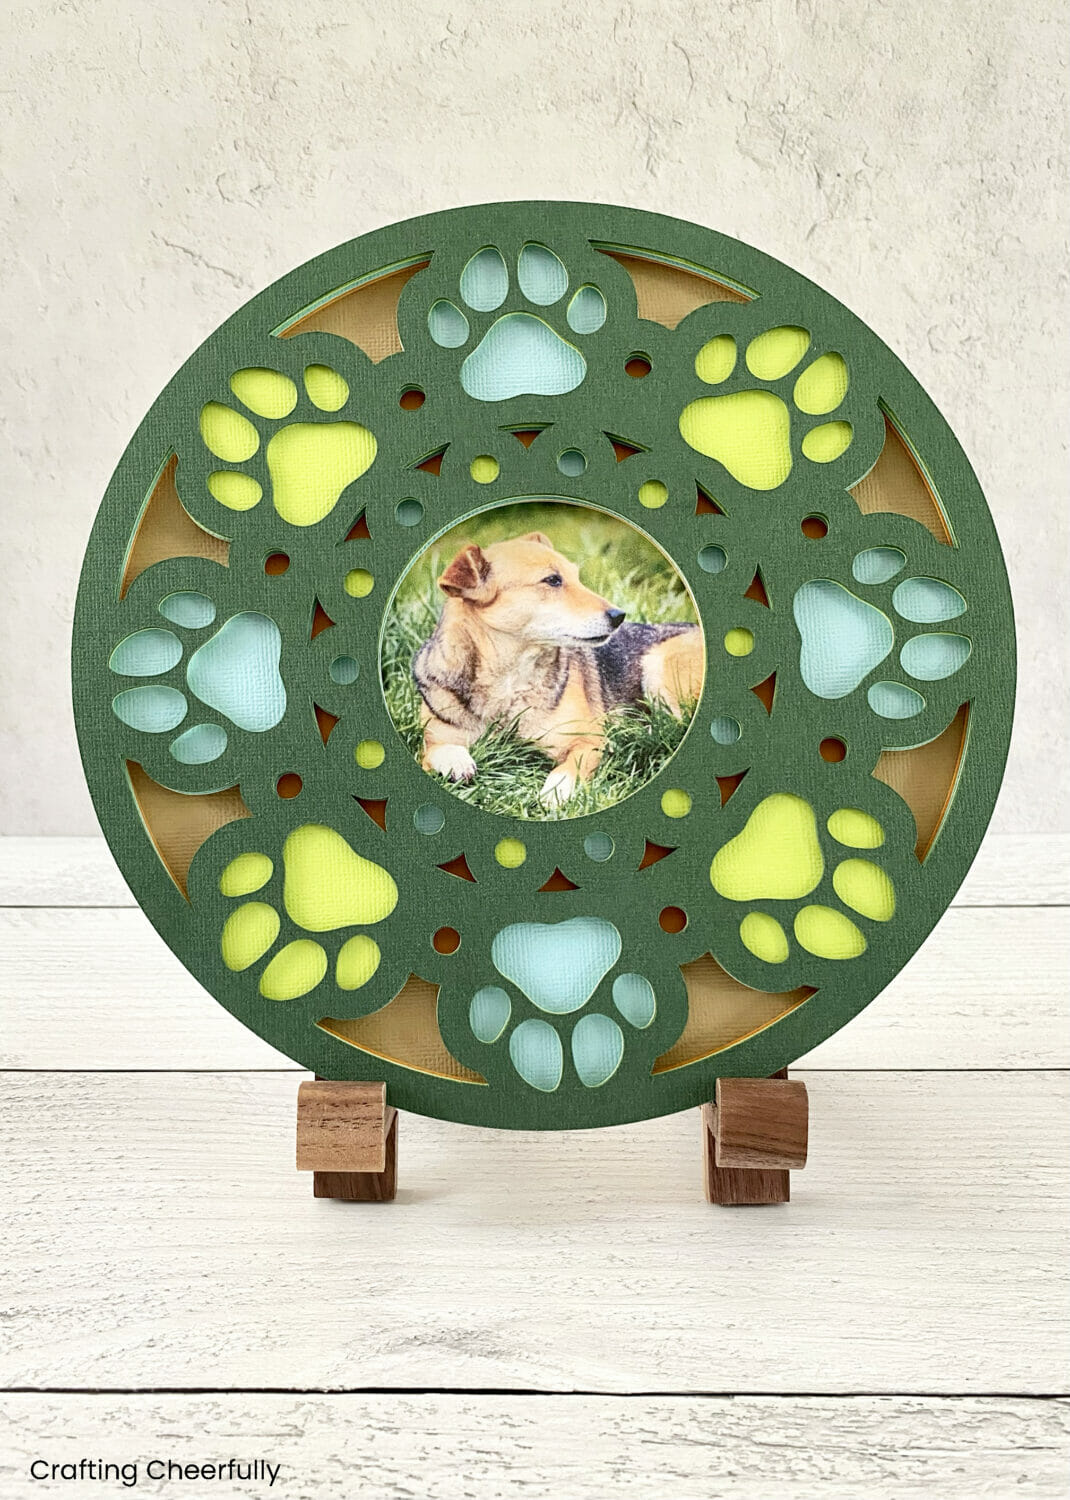
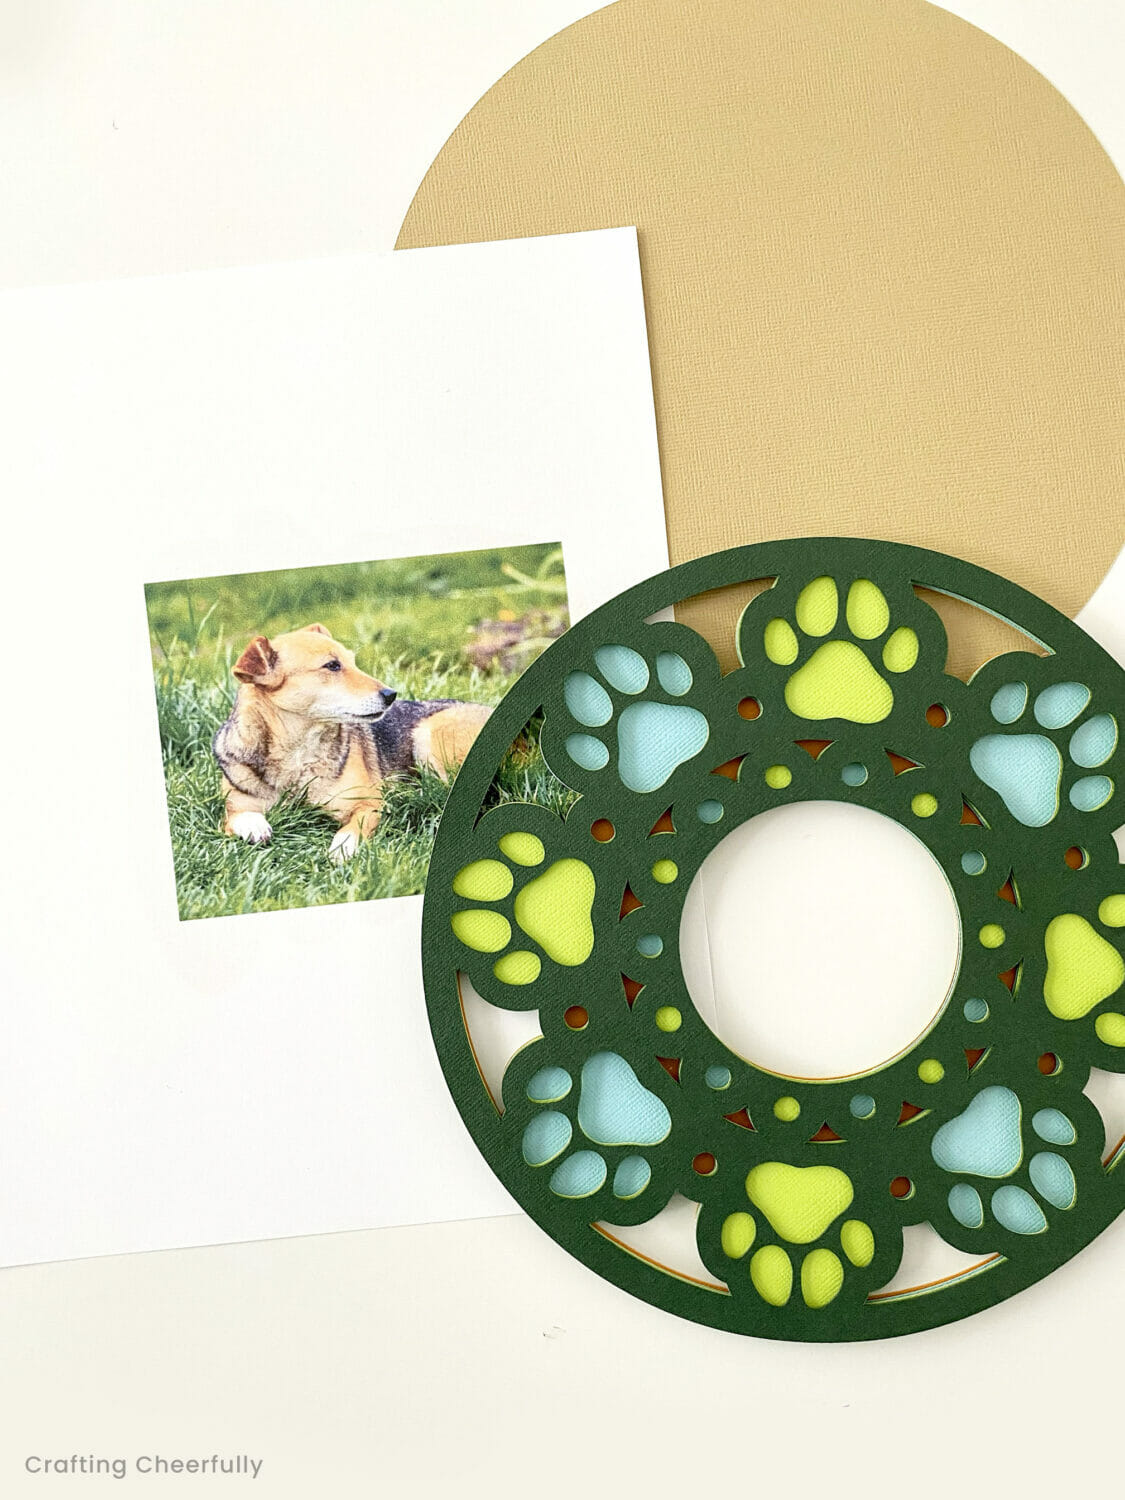
Hello Crafty Friends! Today I’m sharing how you can create a layered paper dog frame using only cardstock and foam tape! This craft is simple to make and the results are amazing! The frame is dimensional, colorful and can be placed on an easel for easy displaying.
It has been a craft goal of mine to try creating layered paper art using my Cricut, so I was really excited to make this frame. I created the paw print mandala frame in Cricut Design Space. You can use the file to create this craft. It will be free if you have Cricut Access!
Choose the same colored cardstock as I did, or switch it up and choose your own colors. I used paper from my American Crafts Tropical Cardstock pack. The texture on the paper is really lovely! Bazzill is another textured paper I love to use for layered mandalas.
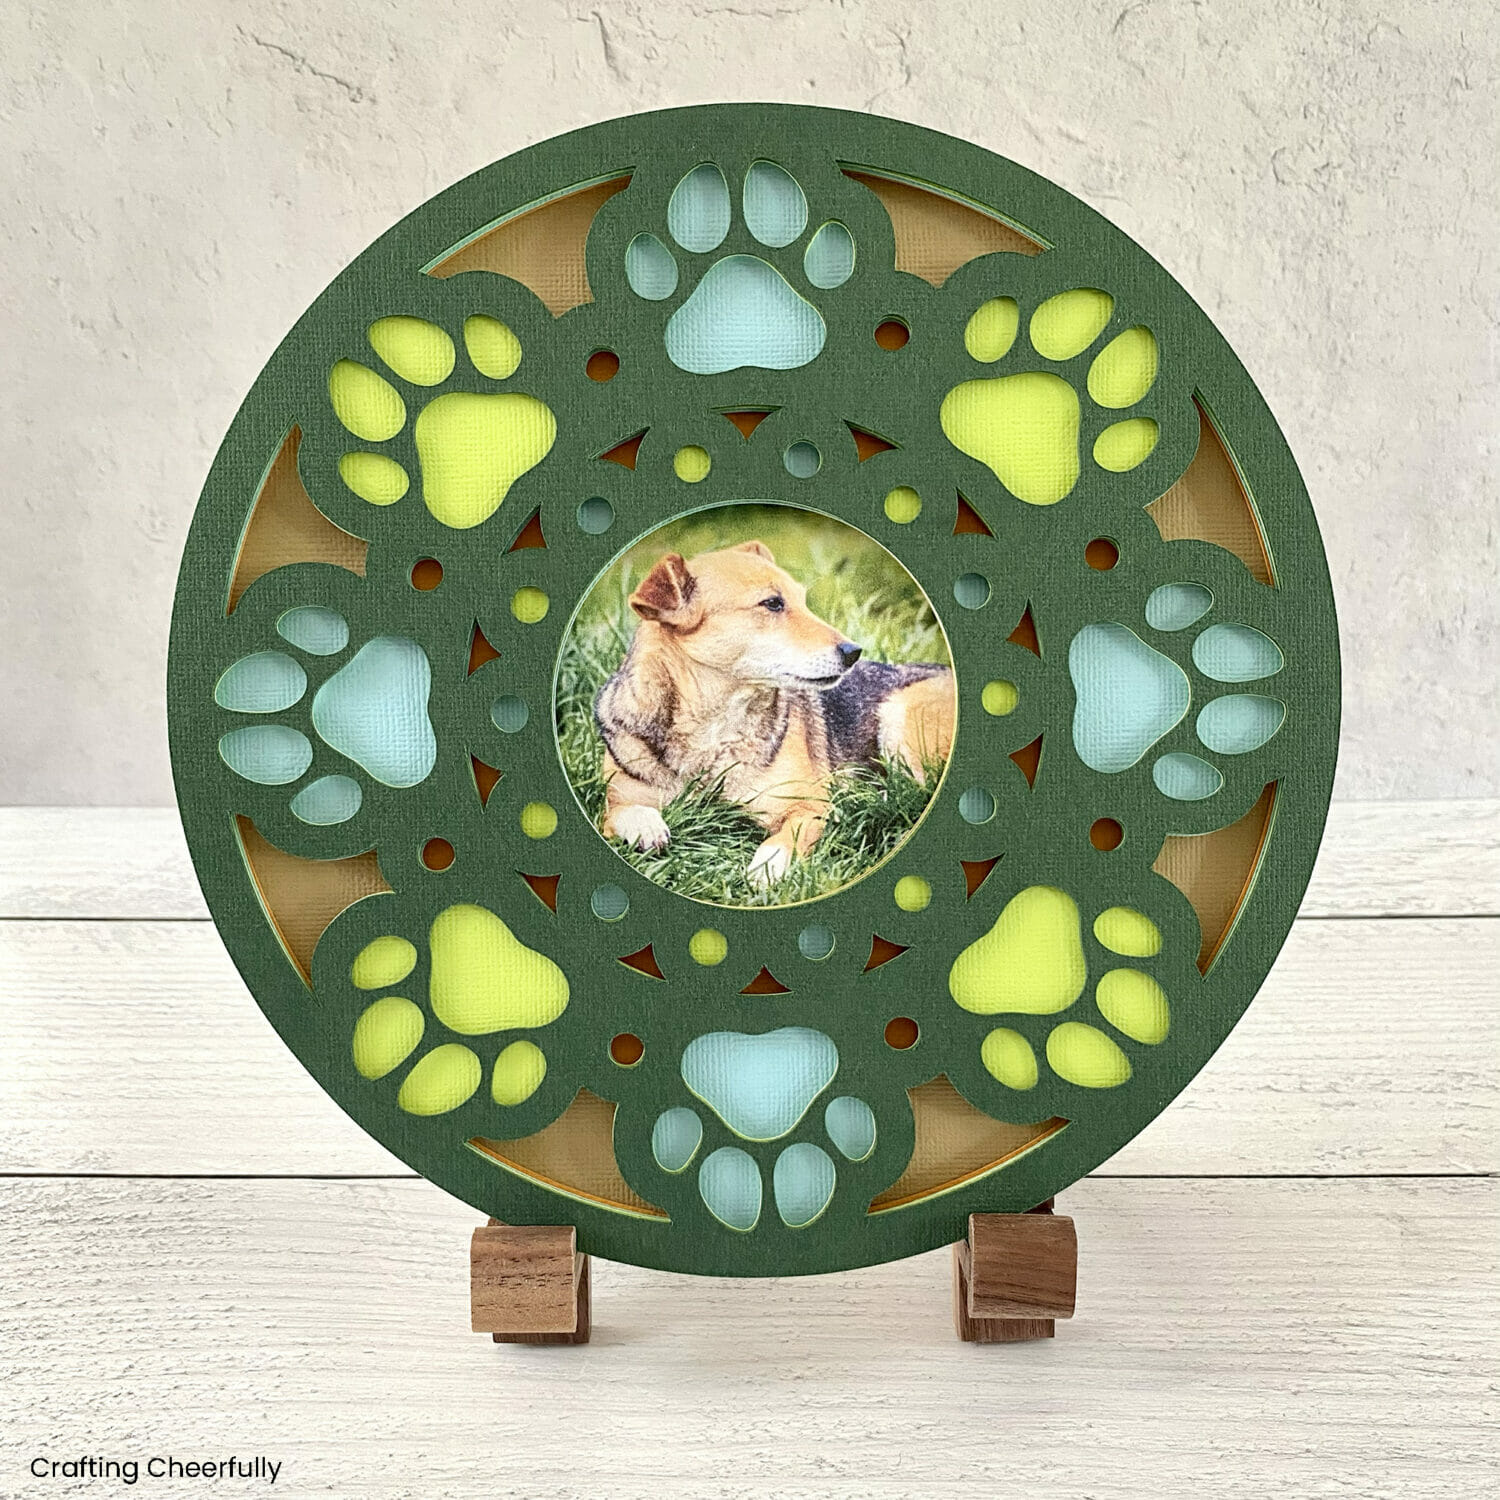
This paw print frame makes such a sweet gift idea for pet lovers and dog owners or a great decor item to make for your own home. It can be hung on the wall, leaned up against something or propped up in an easel. The dimensional paper looks like it is wood when displayed!
Check out my other layered paper creations you can make with your Cricut including my Mandala Frame, Layered Paper Christmas Ornament Frame and Layered Paper Hogwarts Castle!
How to Create a Layered Paper Dog Frame
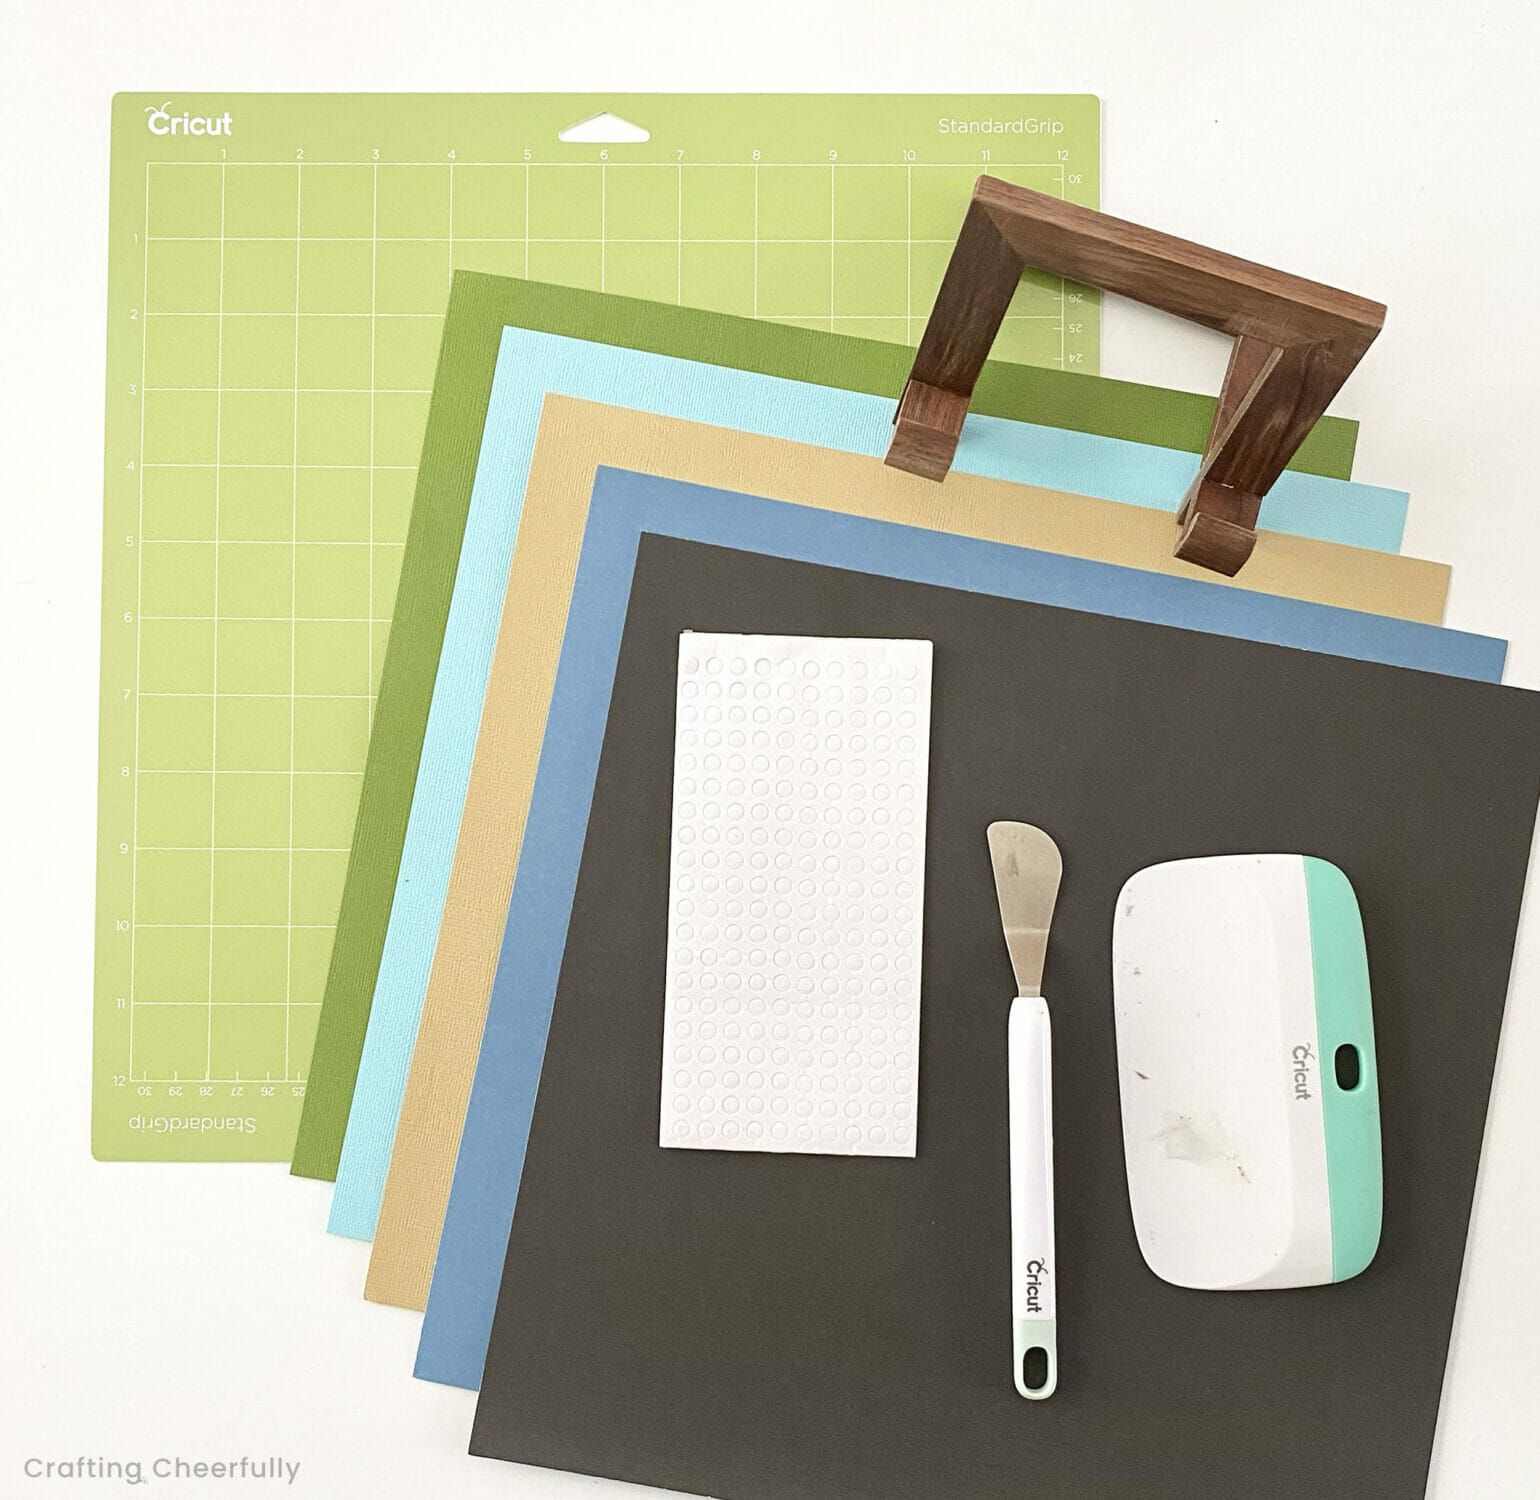
Supplies Needed:
- Cardstock – I used mostly American Crafts Tropical 80lb Cardstock
- Five colors needed:
- Dark Green – Bazzill Aspen
- Light Green – American Crafts Tropical Key Lime
- Light Blue – American Crafts Tropical Powder
- Orange – American Crafts Tropical Tangerine
- Tan – American Crafts Tropical Brown Sugar
- Five colors needed:
- Foam Adhesive Dots
- Cricut cutting machine
- Cricut Supplies: cutting mat, Cricut tools and Cricut scraper
- Wooden easel
- Cut File – you’ll find the cut file I designed in Cricut Design Space. It is free for Cricut Access.
- Chipboard (*see update below)
*Update: I found after a month of displaying my mandala frame in the easel, it started to curve backwards. To fix this, you can cut a bottom layer from chipboard and adhere that to the back of the mandala frame. If your mandala is hanging on the wall this shouldn’t be an issue. This only happened to the mandala frames where I used the foam adhesive dots rather than larger pieces of foam tape. I like how the foam dots look so I would use them again and just add a layer of chipboard in back.
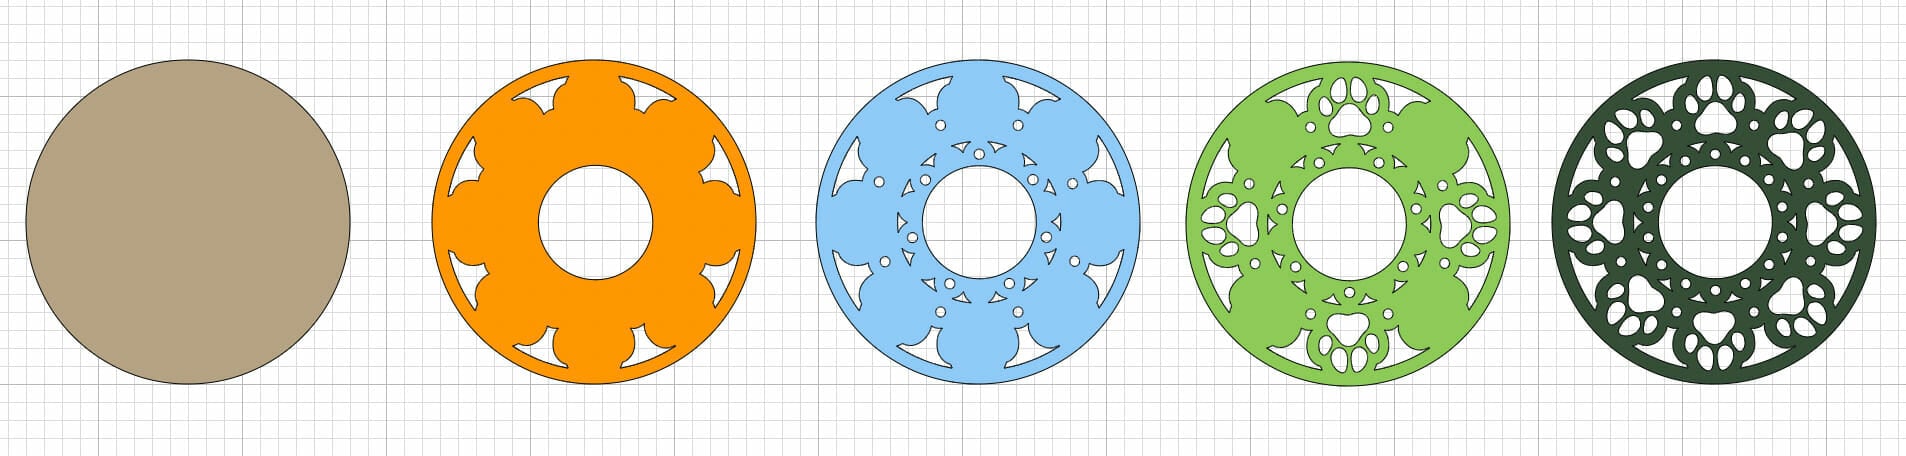
Cutting the Mandala
Step One: Cut the paw print mandala using your cutting machine. The paw print mandala file can be found in Cricut Design Space. You can play around with changing the color of the papers in Design Space before starting to cut the file.

One tip that I wish I would have realized sooner is to mark the top of each layer on the wrong side. Do this before lifting the paper entirely off the mat. The dog print image I used to create this frame from Design Space appears symmetrical but it is not. The papers need to line up a certain way for the design to fit perfectly. Marking the top will save you a lot of time trying to rotate the pieces to find the best fit.
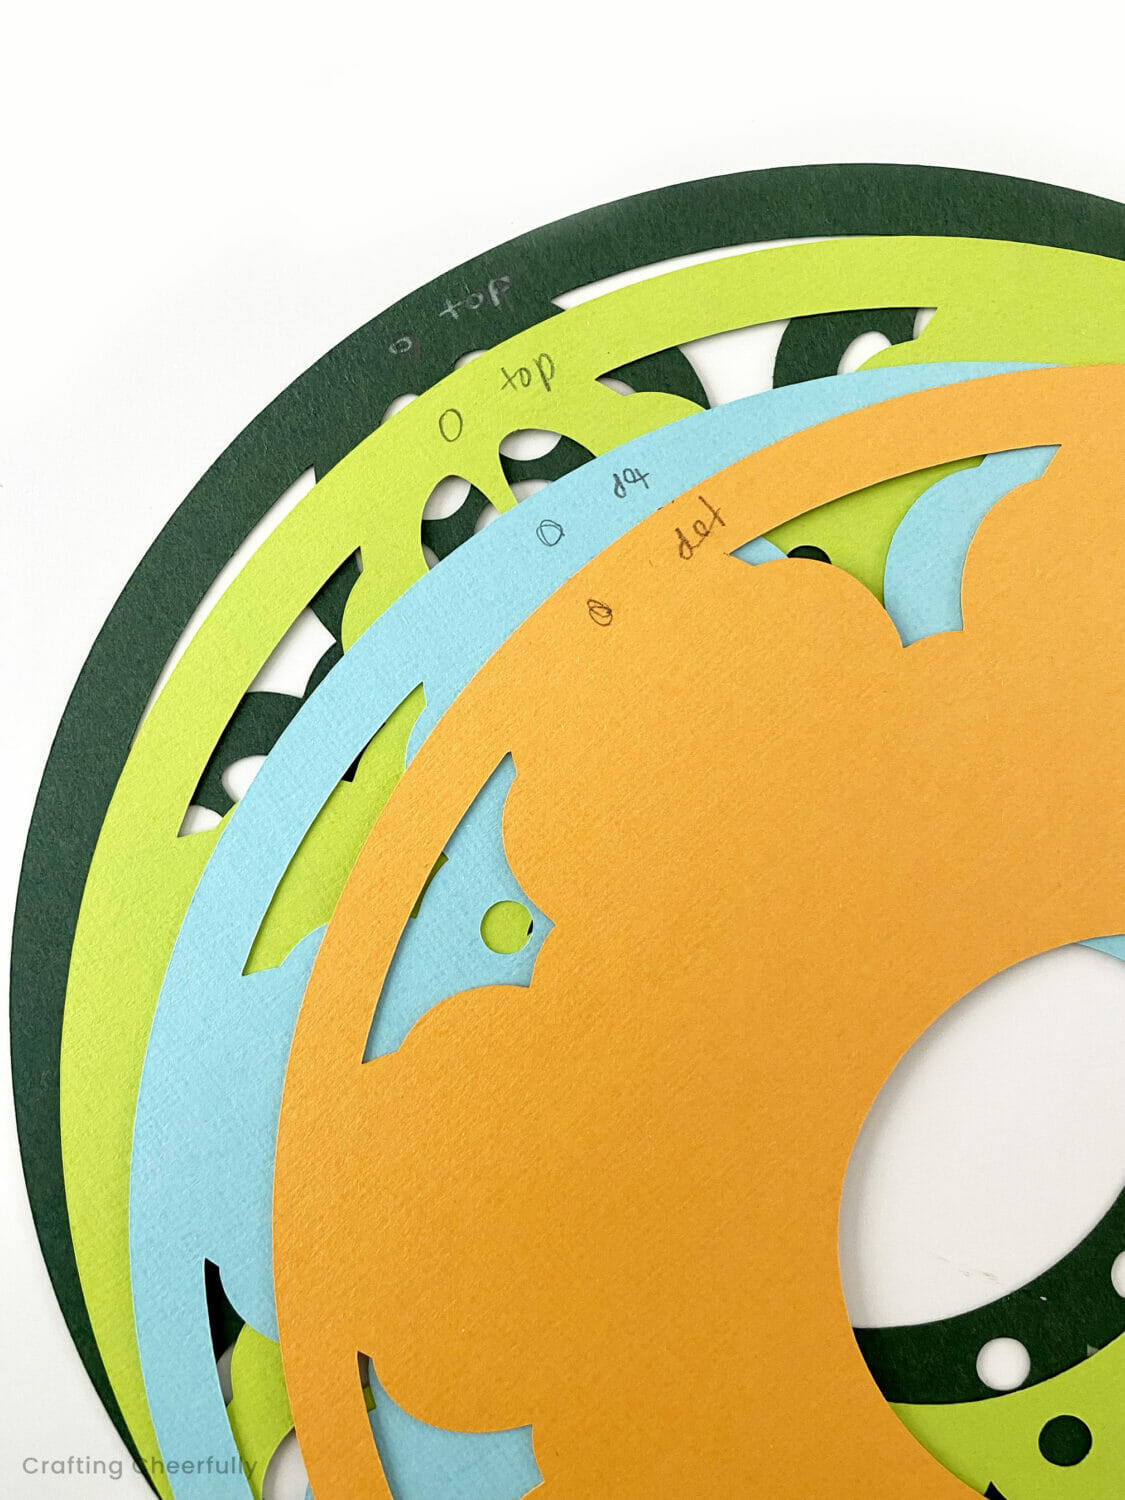
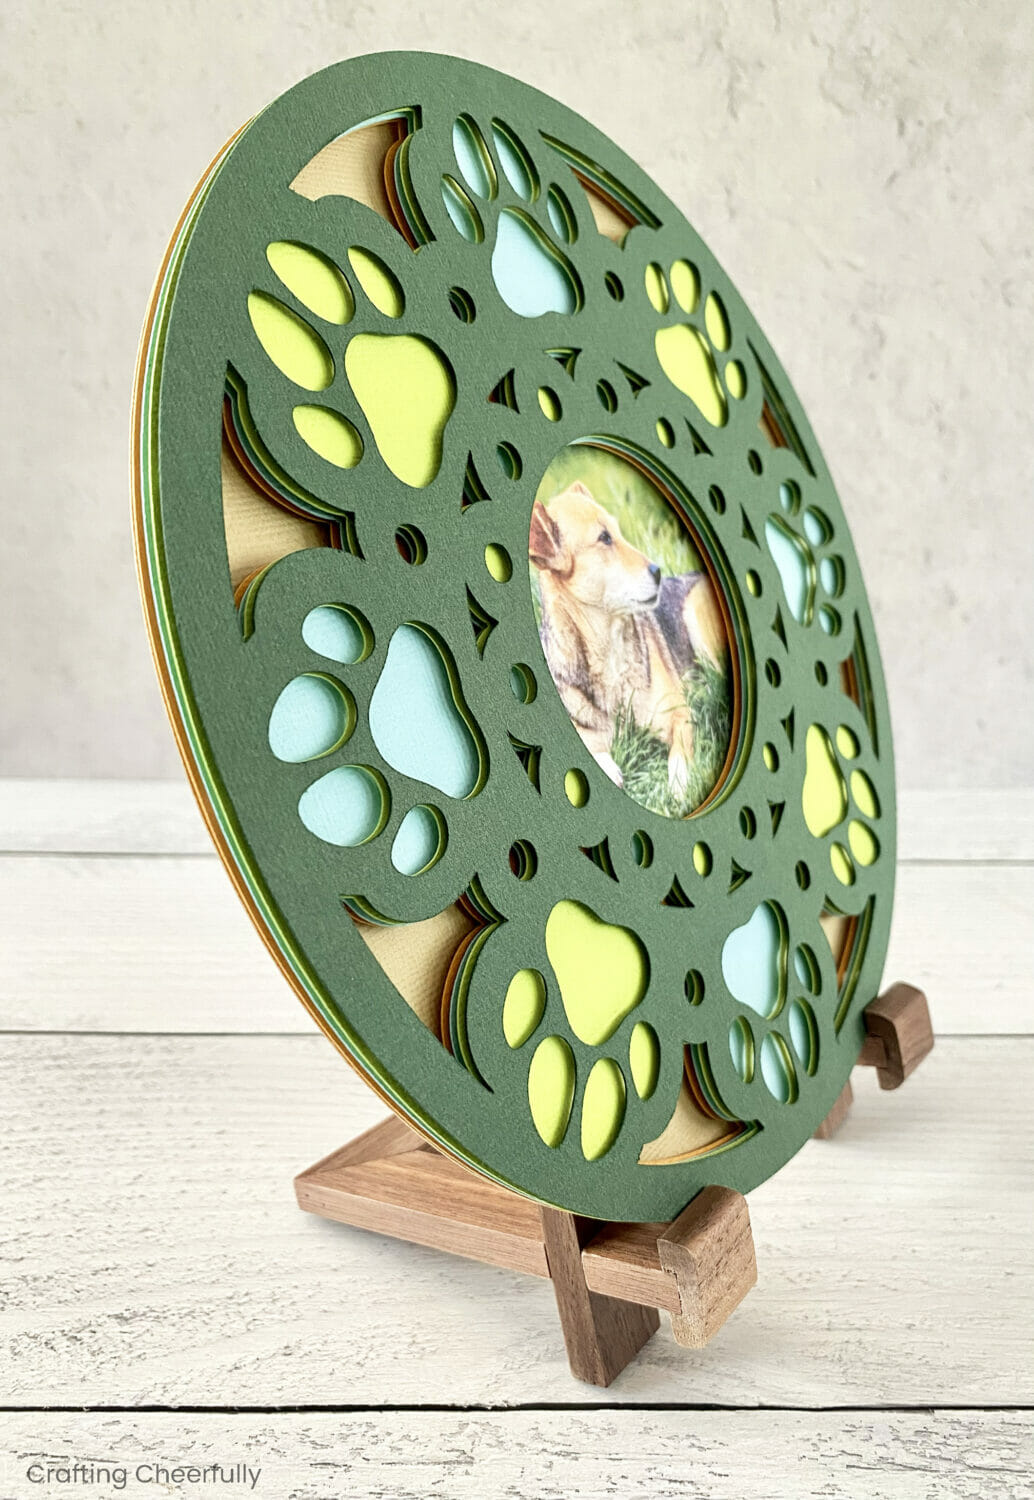
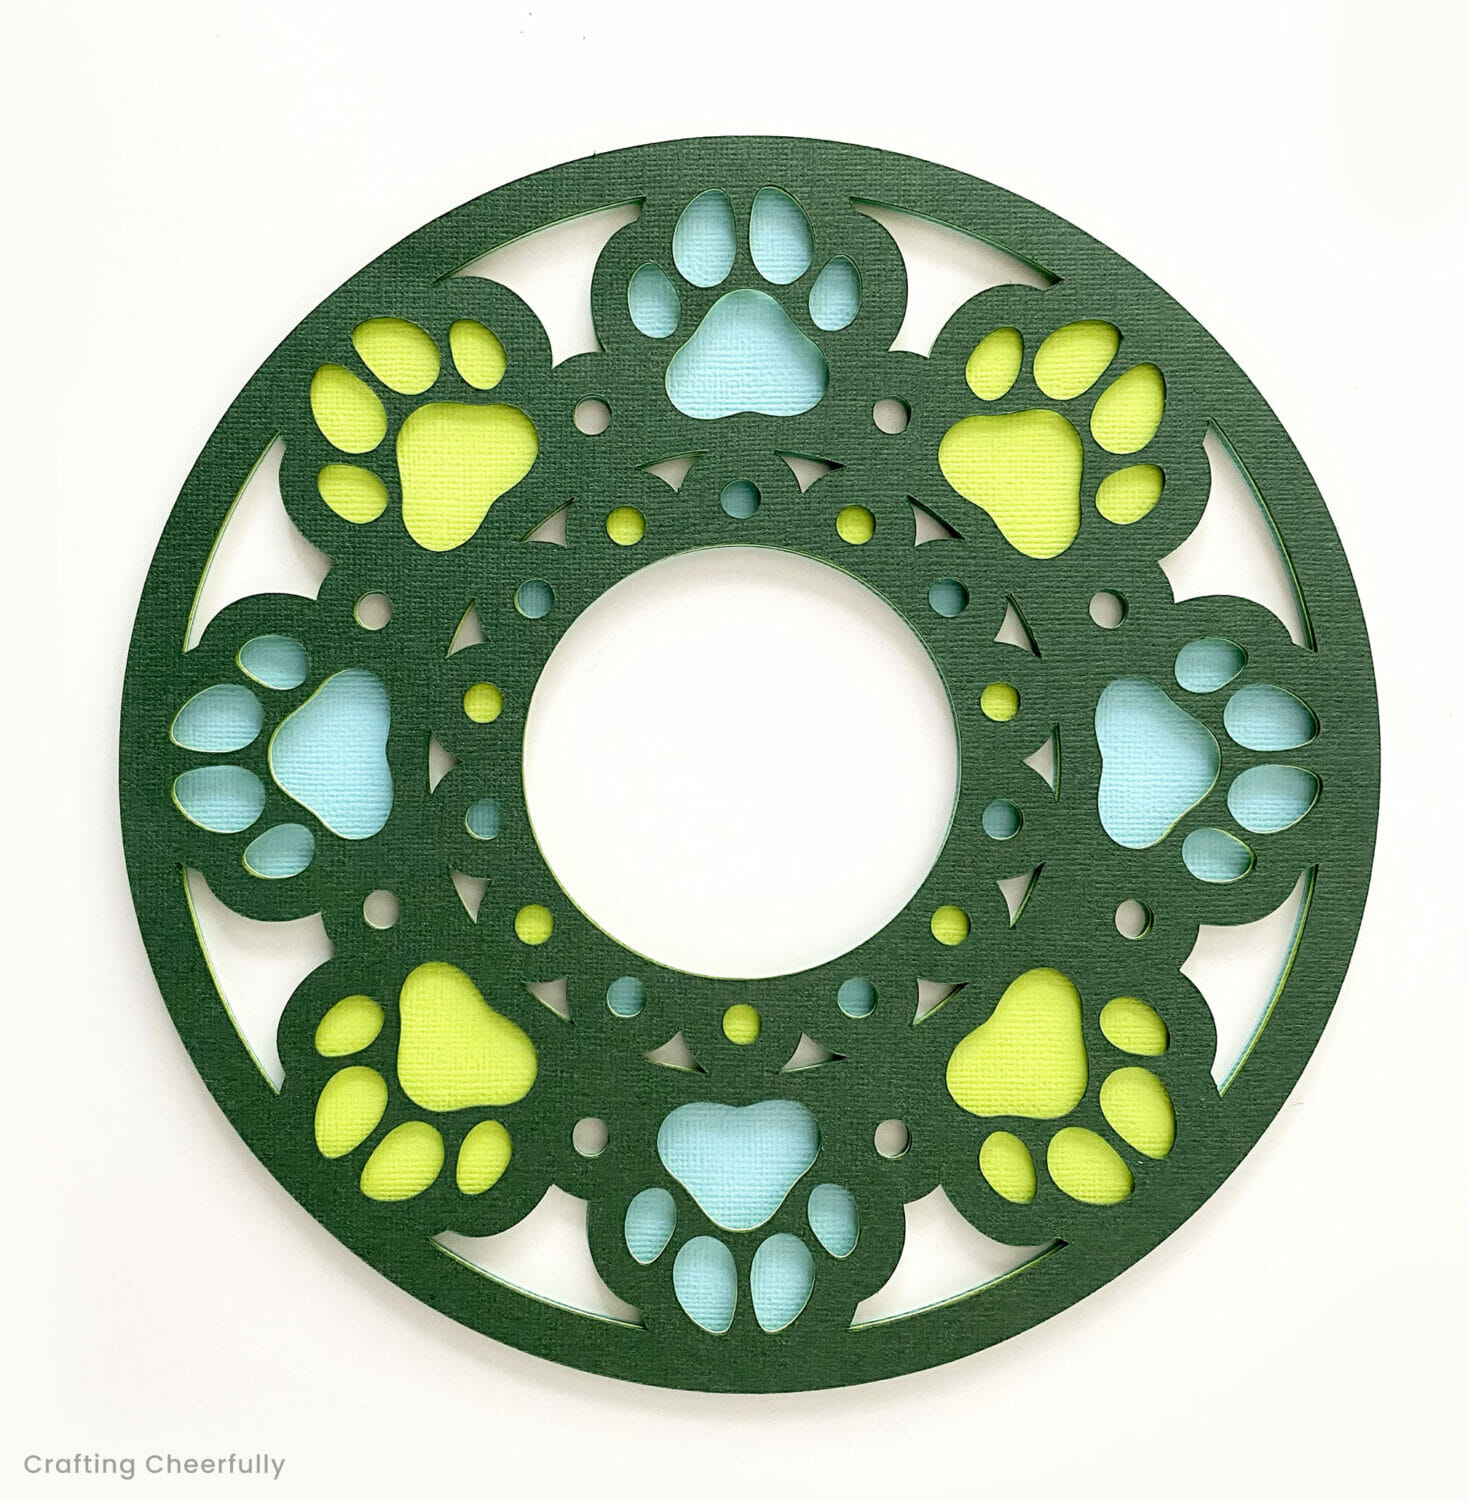
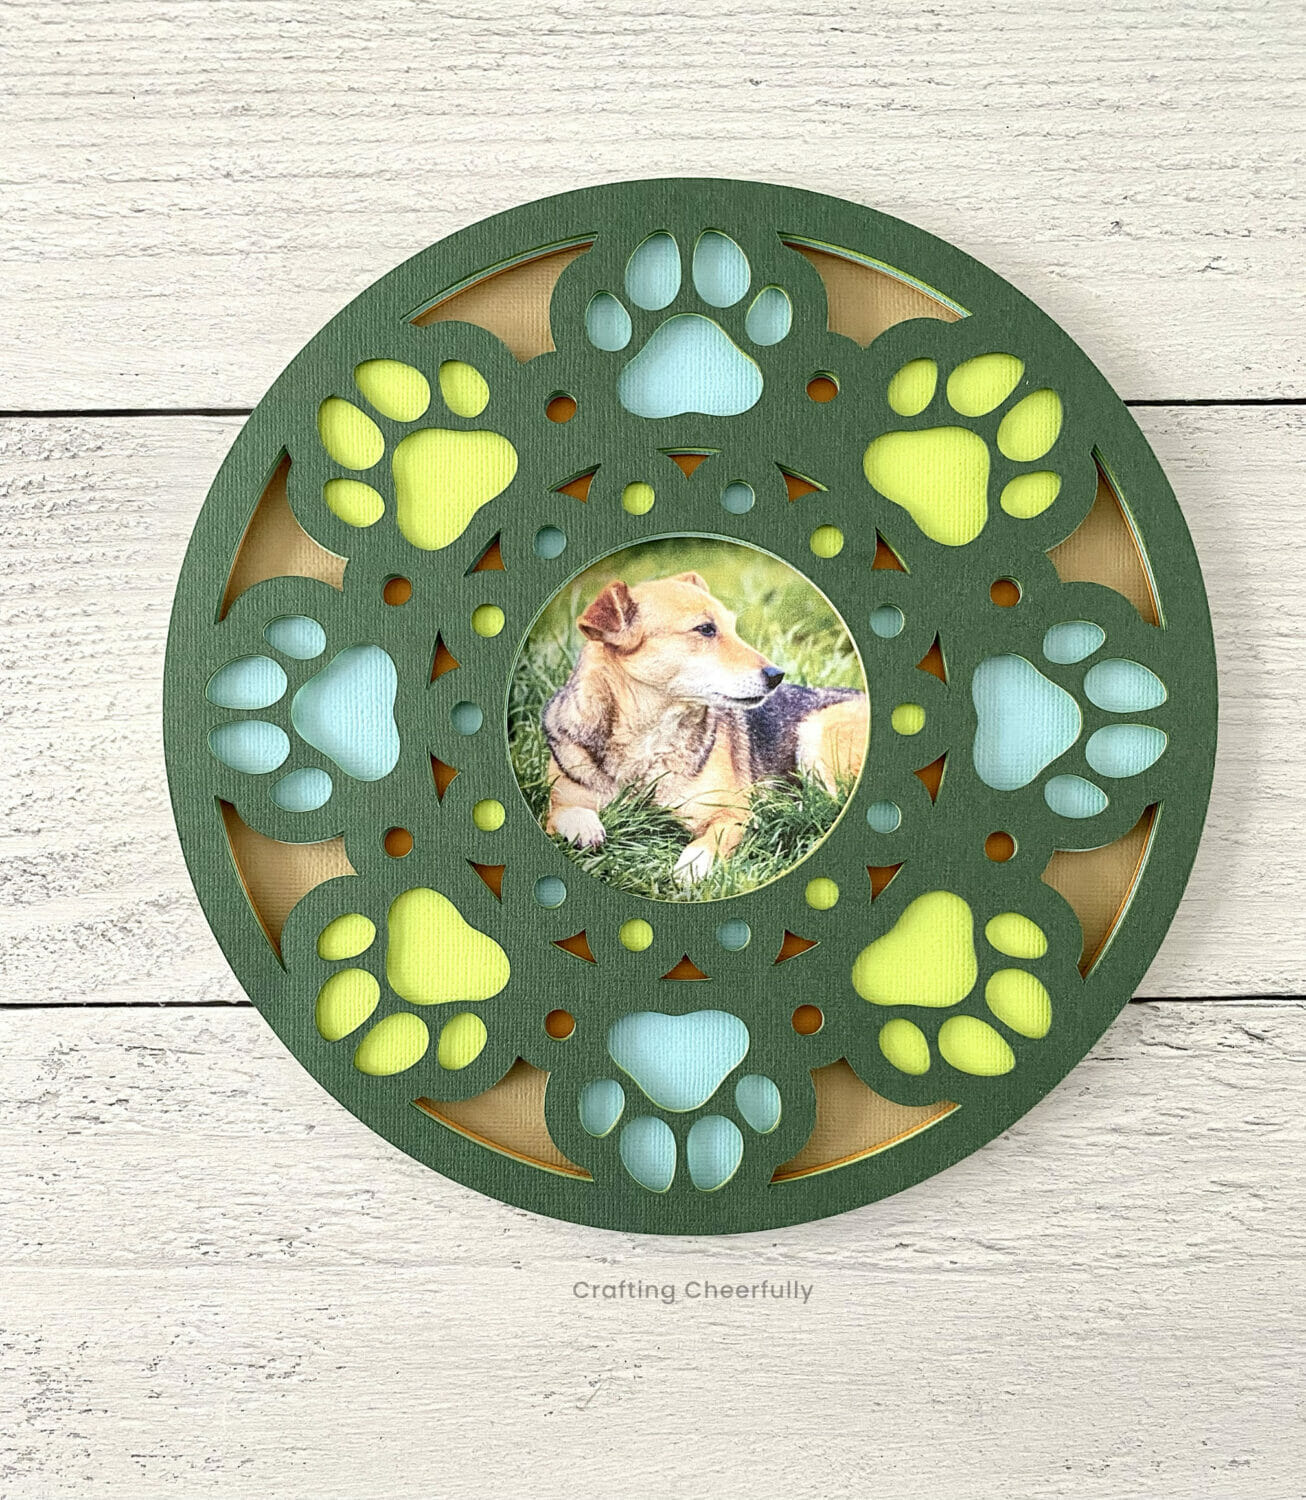
The paw print frame is made with five layers of paper. Below you can see my layers cut and ready to be assembled.

Assembling the Mandala
Step Two: Assemble the mandala by layering the paper together using foam tape. I used these cute tiny foam tape circles which worked really well for this project. The hook tool that came with my Cricut tools was really helpful for lifting the backing off of the adhesive dots.
Below is the order the paper should be stacked from bottom to top.
I worked backwards starting with the top layer and covered the back of it with small foam adhesive dots.

Carefully place the top layer on the second layer matching the edges. Tip: It helped me so much to use a little painters tape to hold the bottom layer to my work surface while I attached the top layer. Once they were attached I just removed the painters tape.

Repeat for the blue and orange layers. Add your foam dots in the same place on each layer.
Step Three: Add a photo of the dog to the center of the base layer. Use the layered mandala to figure out where to place the photograph, then adhere it to the base layer, which is the large solid circle, using glue or tape.
I used a little painters tape to help me get the placement, then removed it once the photo was adhered.

The layer paper dog frame is complete! I love the way the textured paper looks stacked together and the paw prints are so cute! The orange cardstock I used is so bright, but since is so far back in the mandala it looks darker in the shadows.
Display the Dog Print Mandala Frame
Step Four: Display the new mandala frame on an easel. I found a wooden one on Amazon that is a great size and compliments the colors in my mandala.
Below you can see the back of the paw print frame.


I hope you enjoyed this paper craft! I really had a lot of fun making it. For more paper crafts, check out my Paper Crafts Project Page! If you love creating layered paper art, check out my 3D Paper Hogwarts Castle and Layered Paper Mandala Frame.
More Pet-Themed Craft Projects
I created this paw print frame as part of the Team Creative Crafts edition of Pet Crafts! There are so many fun pet and animal-themed crafts being shared.
- Beth of Creatively Beth created a quick and easy DIY Personalized Pet Bandana with just two supplies!
- Lindsay of Artsy Fartsy mama made bright and colorful Paracord Dog Collars for your favorite pups!
- Laura of Me and My INKlings created an easy Recycled Water Bottle Dog Toy using Kunin felt!
- Liz of Liz on Call is sharing a fun Crazy Cat Lady cut file, she used it to create a Starbucks Cup!
- Ginger of Ginger Snap Crafts made a Personalized Dog Bandana using her Cricut cutting machine!
- Elise of Polka Dotted Blue Jay is sharing an adorable set of Puppy Party Cupcake Toppers made with her Silhouette!
- Heather of Homemade Heather is sharing how to make a Crocheted Dog Bed with Free Pattern.