
Layered Paper Christmas Ornament Frame


Hello Crafty Friends and welcome to Day #2 of my annual series “12 Days of Holiday Crafts”. Today I’m sharing a beautiful layered paper ornament frame. I love creating frames from layered paper mandalas using my Cricut Explore!
This paper ornament frame is made from six layers of paper separated with tiny foam dots which give it a lovely 3 dimensional look. I chose to use Bazzill cardstock in different shades of red, green and cream. The finial, the top of the ornament, is decorated with sparkly gold paper.

I love to display my paper ornament frames on easels, but they would also look nice hung on the wall. If you display in an easel, I recommend adding a layer of chipboard to the back of the ornament frame. This helps keep the frame sturdy and the paper will not warp or bend over time.
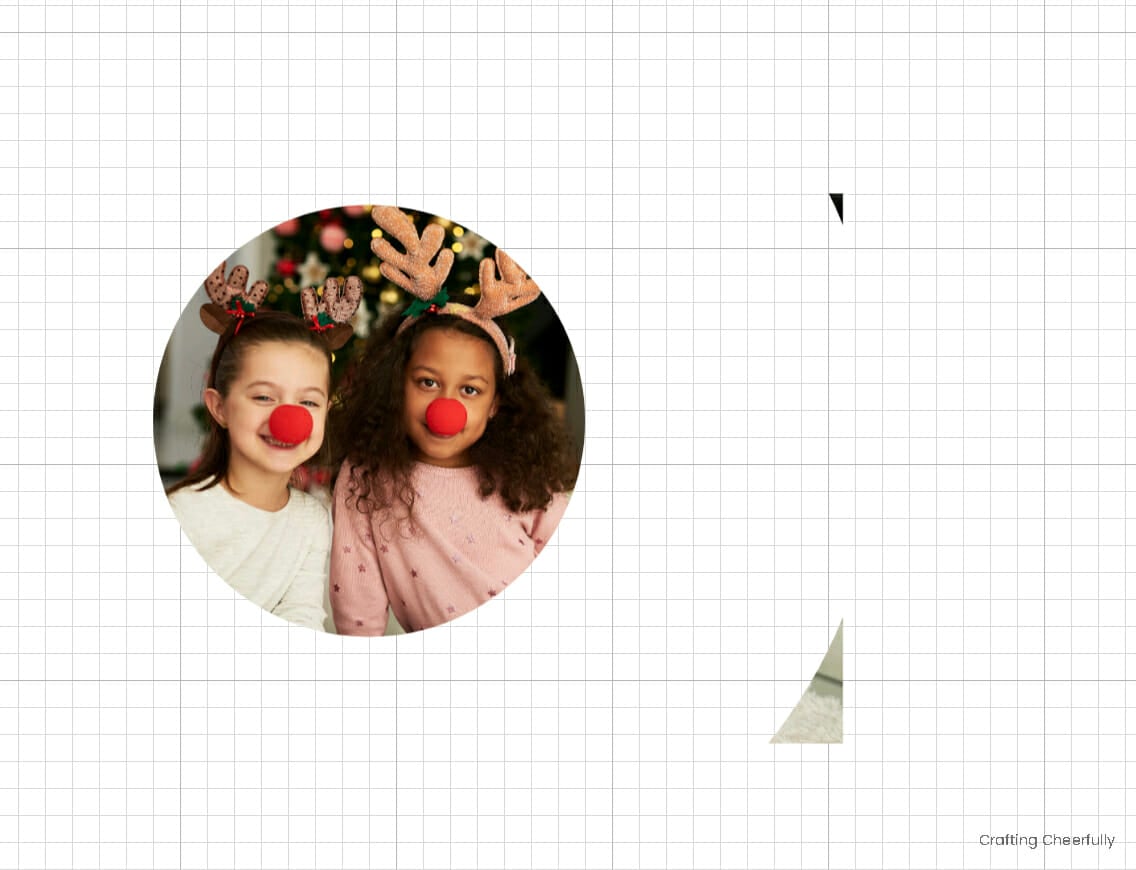
This paper ornament design was made using files from Cricut Design Space. You can use the file I created in Design Space and either use it as is, or adjust the size and color of the paper to fit your needs. My finished ornament measures 11″ tall by 9.5″ wide and is a nice size to feature a holiday photo in the center.

Below are the instructions for using my Cricut Design Space file and for assembling the layered paper ornament. If you love creating layered paper projects, be sure to check out my other Cricut Design Space files including my Paw Print Frame, Hogwarts Castle and my Mandala frame, which is perfect for any time of the year.
Layered Paper Ornament Frame
Choosing the Paper
For my layered paper projects, I like to choose a sturdy cardstock that is also solid core. Solid core means the paper is the same color on the outside as it is on the inside. White core, or printed cardstock, is paper that is colored on just the front and back and the inside is white. I find with the intricate cuts of the mandala design, that solid core cardstock gives a more polished look and there is no white visible that may distract from the design.
I used Bazzill textured cardstock that is 80lb. The sturdier cardstock will hold up better, especially if you display the ornament in an easel. I recommend using a layer of chipboard on the back of the ornament to give the frame even more structure and keep it from flopping over in an easel.
Supplies Needed:
- Cricut Design Space File
- Cardstock – I used Bazzill 80lb paper in Chiffon, Bazzill Red, Bankroll, Classic Green and Pomegranate.
- Chipboard – I used Medium Weight 0.057 chipboard but my Explore was not able to cut all the way through it so I used a scissors to finish cutting it.
- Gold glitter paper – this type is my favorite and doesn’t shed glitter!
- Foam Adhesive Dots
- Craft Glue
- Display stand
- Cricut Explore or Cricut Maker
- Cricut Tools
- Standard Cutting Mat
- Cricut Brayer

Preparing the File in Cricut Design Space
I designed this ornament frame in Cricut Design Space so that it measures 11″ tall by 9.5″ wide with a 4″ circular photo opening. You can resize the ornament or change the colors of the layers. There are two optional layers included, a Chipboard Layer and a Photo Slice Layer that can be used to cut a photo.
Using your Cricut to Cut a Photo to Size
If you would like to have your cutting machine cut the photo using the “Print then Cut” feature, you can use the optional layer to slice it. Start by uploading a photo into Cricut Design Space. Insert the photo and move it behind the Photo Slice Layer. You can play around with the sizing of your photo until you like the way it looks in the opening of the ornament.

Next, highlight both the photo layer and the Photo Slice Layer and choose the slice tool. This will create several new slice result layers at the top of the layers panel. Delete all of the layers except the one with your circular photo.


If there were parts of the photo that extended beyond the Photo Slice Layer, they will be left. To remove these little bits, add a square shape and cover them. Then highlight the square shape and the photo layer and slice again. Delete all of the layers again, except the circular photo layer.

The photo layer will then be ready for Cricut’s Print then Cut feature and can be cut using your Cricut!

Cutting the Paper Layers
Once the file is ready, cut out all of the layers of paper using your machine.
Preparing the Back of the Ornament
If you are using chipboard, which I recommend if you will be displaying it in an easel or on a stand, attach the bottom layer of cardstock to the chipboard using craft glue.

Adhere the photo to this bottom layer of paper. Use one of the layers with the hole cut out to lightly draw where the photo should go, then attach the photo using adhesive.


Layering the Paper Ornament
Start with the top layer and add foam adhesive dots to the back of the layer. I like to add quite a few dots around the outer edge and fill in at the points where the paper intersects. Once you have covered the back with adhesive, apply the top layer to the second layer.

Repeat for the second layer, adding adhesive dots to the back of the layer. I find it best to add my dots in the same place from layer to layer. It’s tricky getting the little dots out of the adhesive sheets, so I use my weeding tool to help remove the paper from each dot and also the dots themselves!


Continue adding layers until you reach the back layer with the photo on it.


Adding the Finial
The final step is to add the ornament finial on top. Adhere the two finial layers together, then adhere them to the top of the ornament.

The ornament is finished! Display the ornament frame in an easel as I did, or use ribbon and hang the ornament on the wall. This sweet craft makes a beautiful holiday decoration and a wonderful gift to family and friends!


I will be back tomorrow for day #3 in my series “12 Days of Holiday Crafts”!


