
DIY St. Patrick’s Day Treat Boxes – Free Pattern and Cut File
Create St. Patrick’s Day Treat Boxes with this free template and SVG cut file! The boxes feature a fun shamrock cut-out!

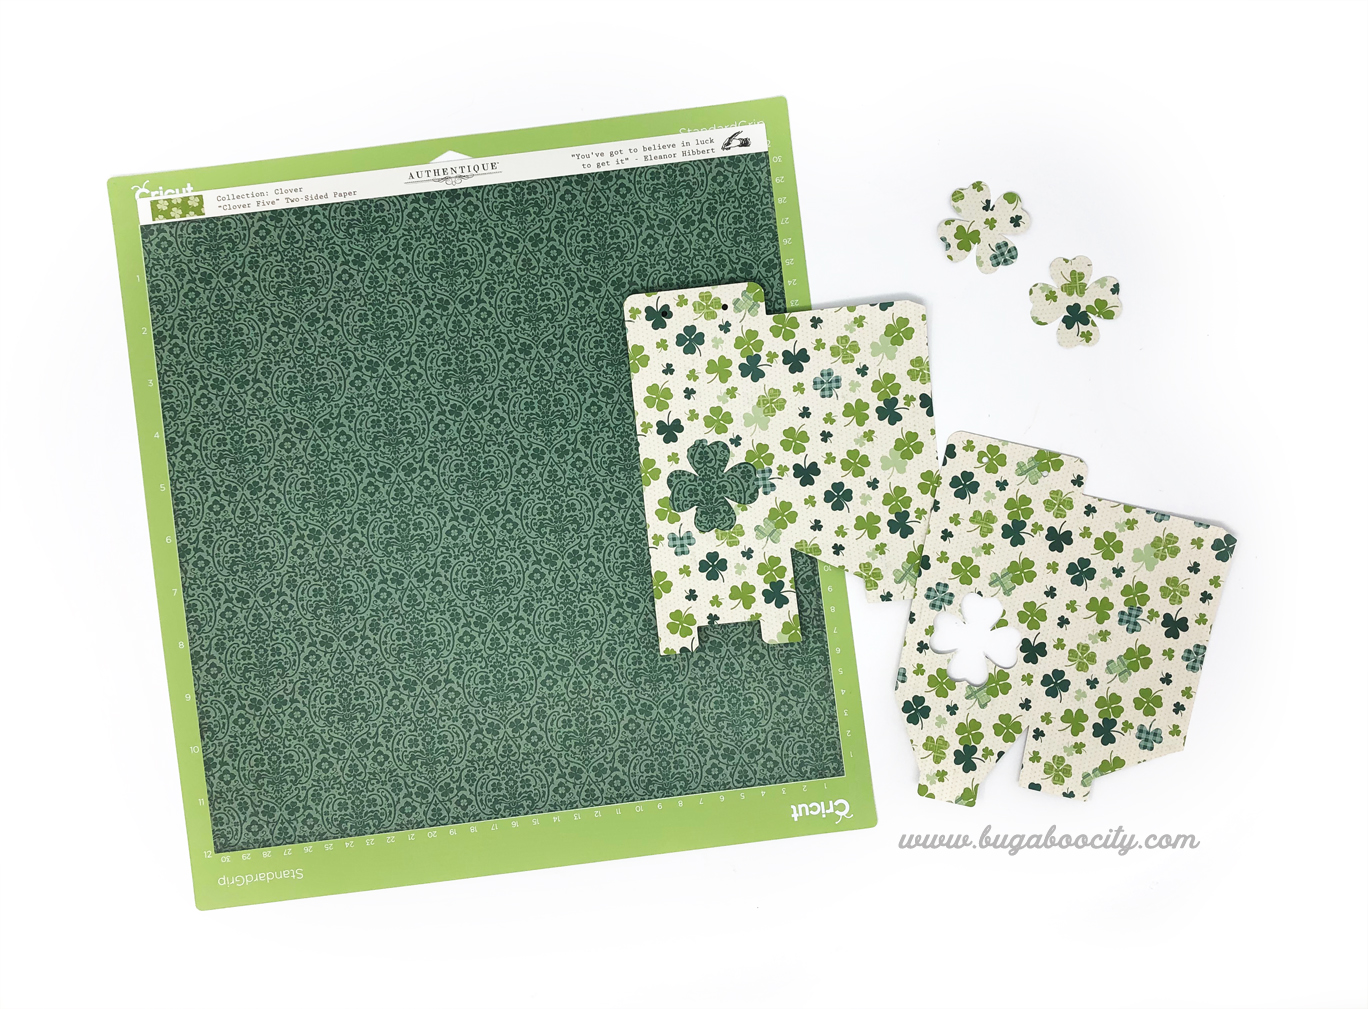
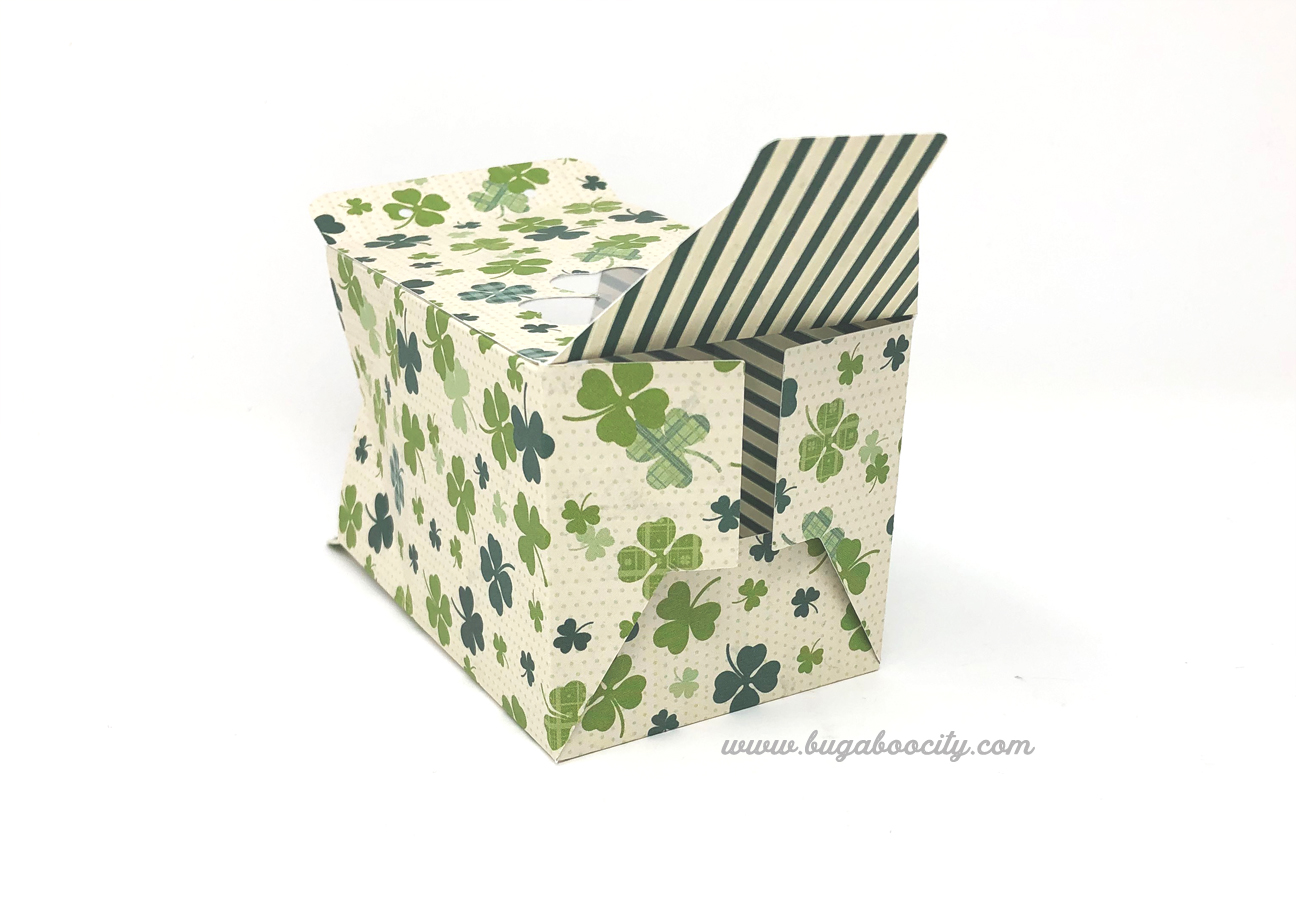
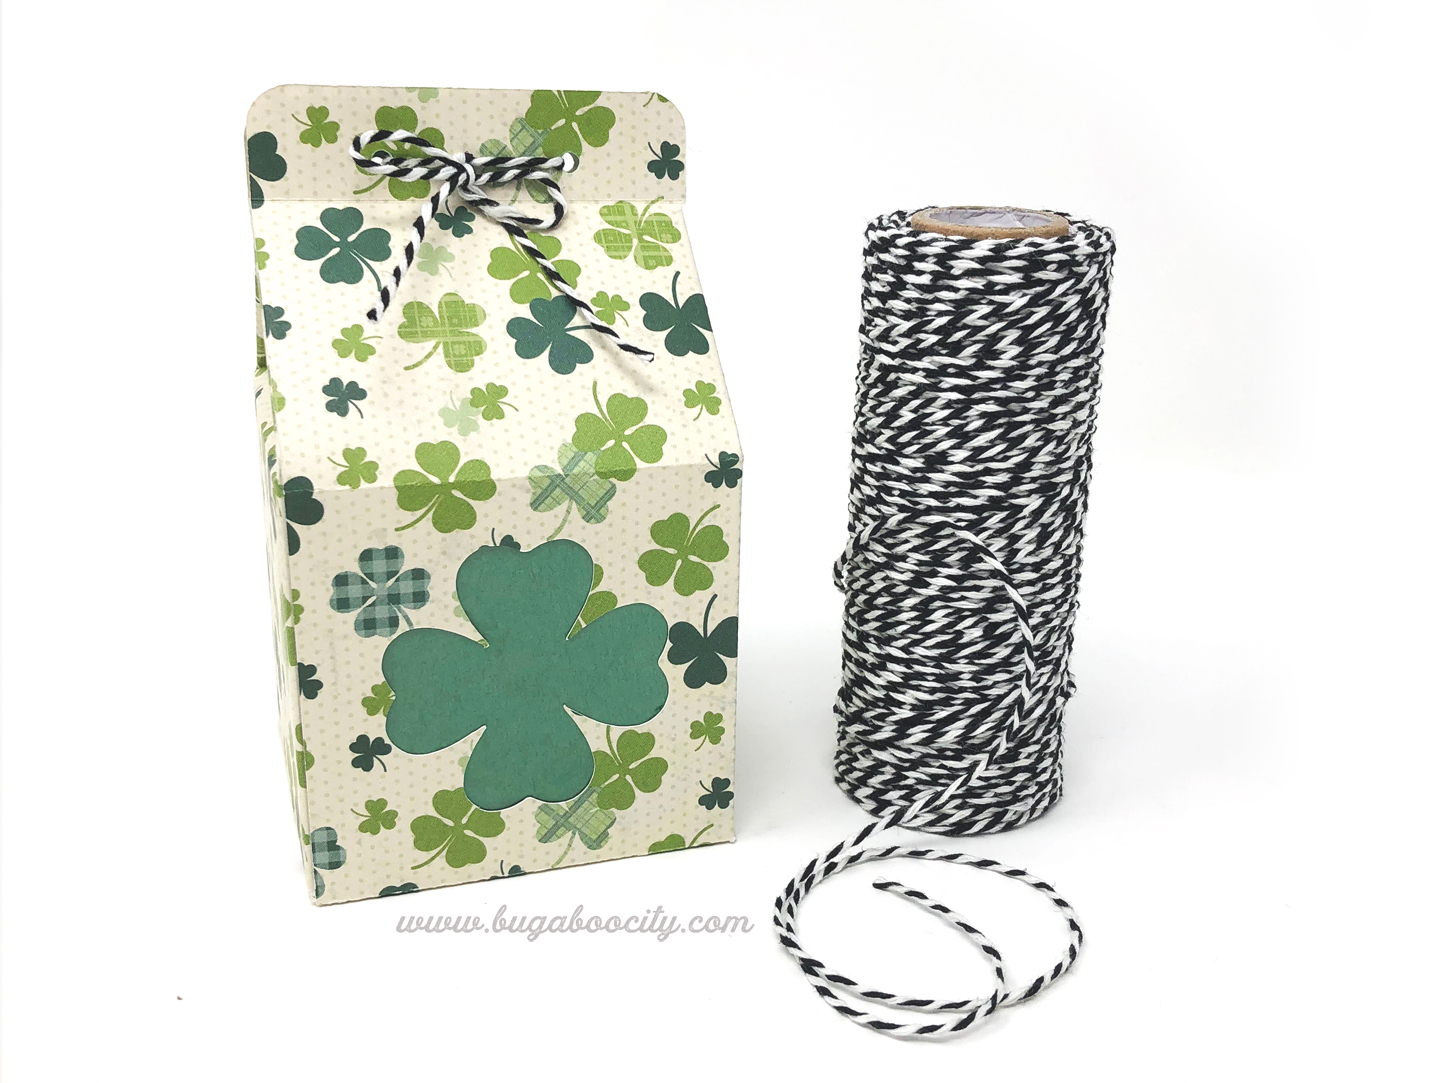
Hello crafty friends! Today I am sharing DIY St. Patrick’s Day Treat Boxes. These milk carton-style boxes are perfect for holding sweet treats and small gifts. I found these beautiful clover papers from Authentique Paper. These boxes are slightly smaller than my usual milk carton boxes. This way I can create each box from just one sheet of 12″ x 12″ paper. I love the peekaboo windows on the front and back of each box. You can fill the windows in with colored paper or use clear craft plastic so you can peek in.
I created two different box designs. One features a shamrock and the other a four-leaf clover. Below you’ll find the tutorial for assembling the boxes. You can download the free printable PDF pattern from my Resource Library or grab the free SVG cut files to create the boxes with your cutting machine!

DIY St. Patrick’s Day Crafts
I love crafting for this holiday and have some fun DIY projects on my blog!
- St. Patrick’s Day Rainbow Wreath
- Shamrock Pillow Boxes – Free Printables
- St. Patrick’s Day Rainbow Box
- DIY Fabric Shamrock Banner
- St. Patrick’s Day Pillow Wreath
St. Patrick’s Day Treat Boxes
Supplies Needed
- Free PDF pattern or SVG cut file – Grab the free files by filling out the purple form at the end of this post.
- Heavy weight decorative paper.
- I used double-sided paper from Authentique Paper’s Clover Collection. “Clover Four” and “Clover Five”
- Craft Plastic – I used Grafix Clear Craft Plastic .007 Thickness
- Adhesive – I used 1/4″ Scor-Tape
- Ribbon or Baker’s Twine
- Cutting machine
- If making it without a cutting machine you should have these supplies

Step by Step Tutorial St. Patrick’s Day Treat Boxes
Step One: Cut out the treat box pieces.
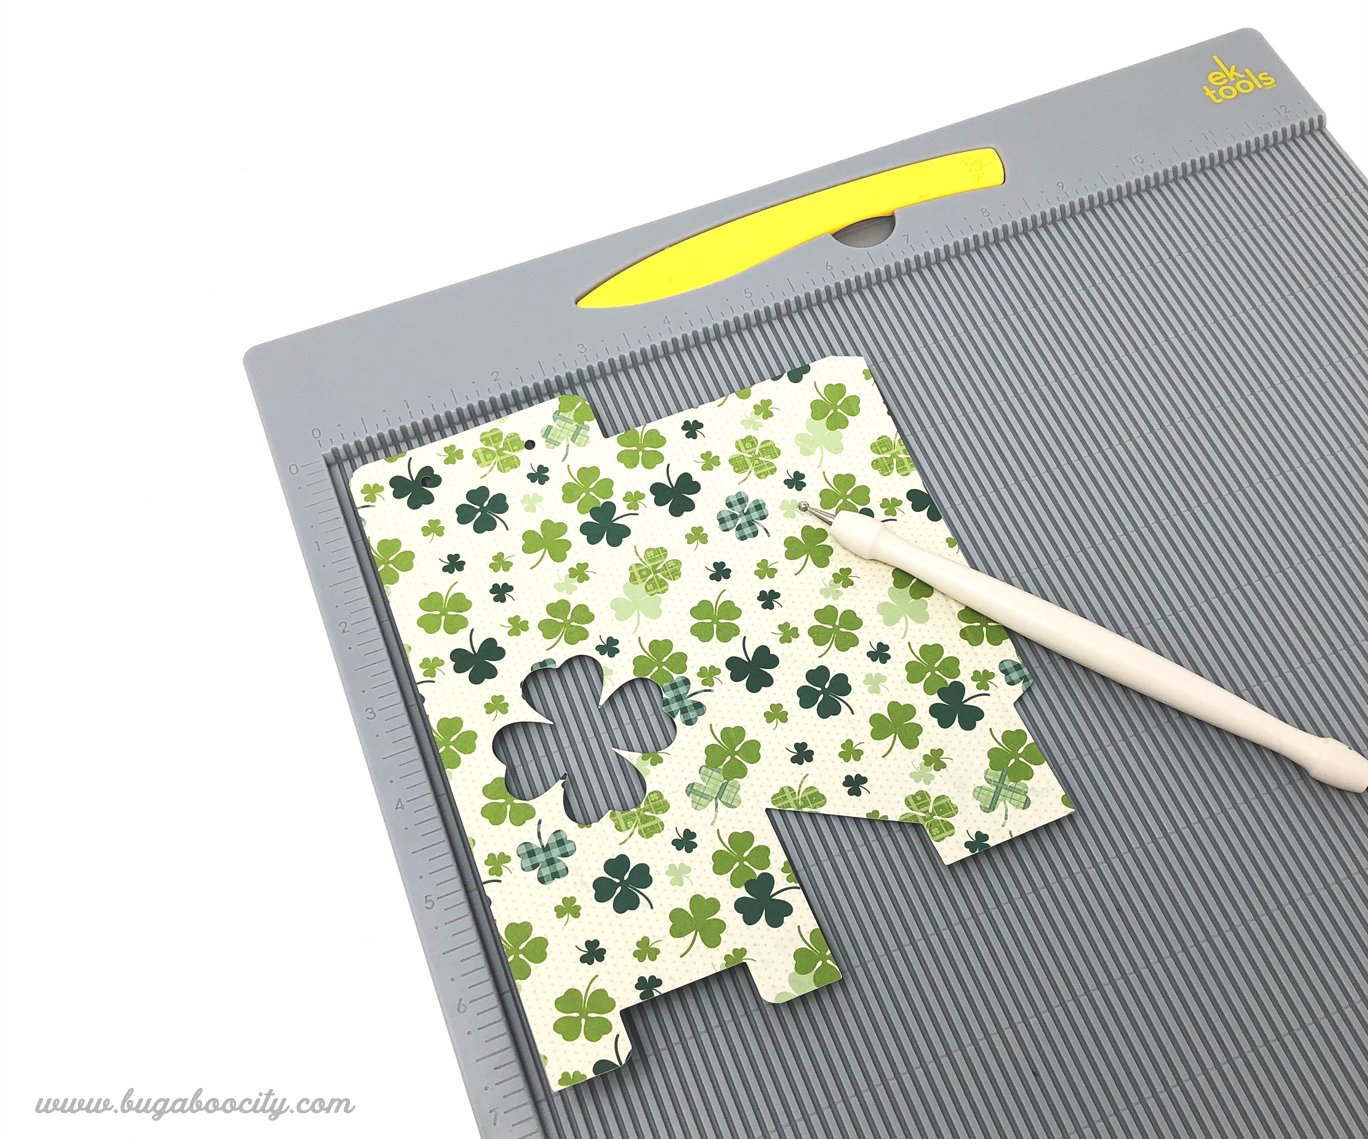
PDF Pattern: Download the free printable pattern or cut file. If you are using the PDF pattern, cut out the pattern pieces and trace them onto the backside of your decorative paper. Draw in the fold lines using a ruler and pencil. Carefully cut the peek-through window out using a craft knife and cutting mat. The curves of these shapes may be tricky with a craft knife, so you can always skip the window. The boxes are cute on their own, especially if you are using green or St. Patrick’s Day-themed papers.
SVG Cut File: Use the SVG cut file with your cutting machine. I created these boxes with a Cricut Explore, so the following directions are for Cricut Design Space, but they will be similar for other cutting machines!
Import the SVG file. This file comes with score lines. If your machine does not have the option to score, delete these. If your machine can score, change the cut lines to score lines. To do this, first select the entire project and “Ungroup”. Repeat this by ungrouping the two box pieces and ungrouping the score lines. If you ungroup the score line layers second, they will lay on top of everything, making it easier to see them. Change the lines from “cut” to “score”. Attach each set of score lines to the box layer it matches and you should be all ready to cut! Size the boxes to about 7″ tall to fit both parts of the box on one 12″x12″ sheet of paper. Don’t forget to add your scoring tool before cutting!
Step Two: Score the fold lines.
Score along the fold lines then fold. If your cutting machine has a scoring tool, like the Cricut Explore, it will do this step for you.
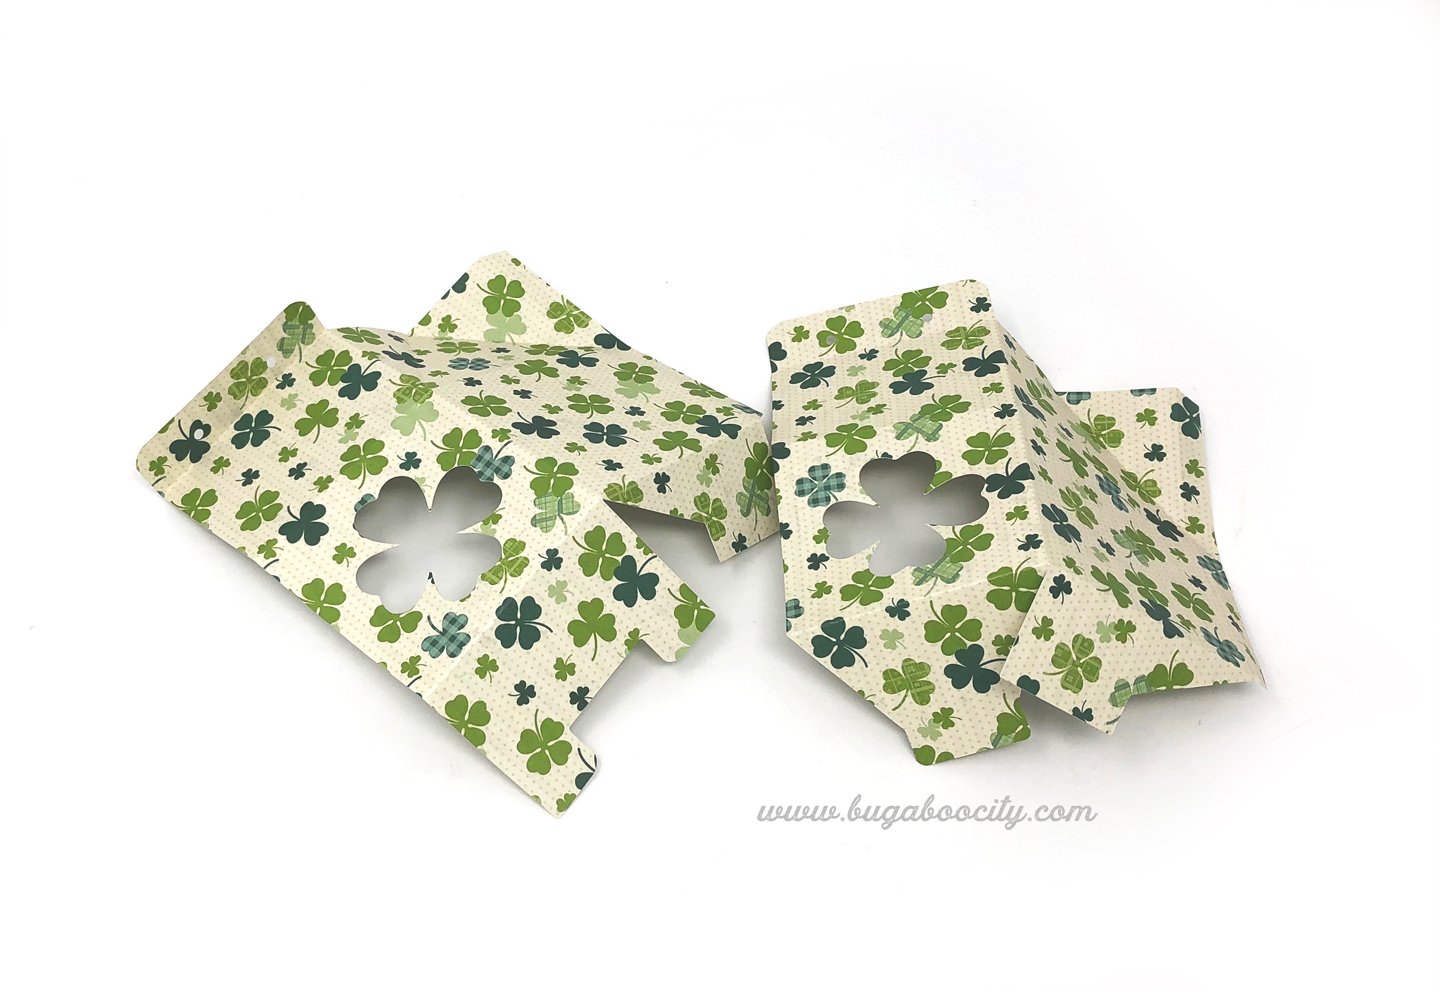
Step Three: Attach clear plastic (or colored paper) to the back of each shamrock or four-leaf clover window.
Adhere clear craft plastic behind the peek-through windows. I used thin craft plastic by Grafix, which works really well for treat boxes. Cut a square slightly larger than the shape but not too big that it will cover your fold lines. I attached mine with Scor-Tape around the edges of the craft plastic and added glue to the sharp points of the shamrock design so they wouldn’t stick up.


Step Four: Assemble the box.
Adhere the two pieces together using an adhesive on the tabs. Again, I used my 1/4″ Scor-Tape.


Fold in the bottom of the box as shown in the pictures below.


Step Five: Fill the box with sweet treats or special gifts.
You can wrap your items in colored tissue paper or let the treat be visible through the shamrock cut-outs. Tie the boxes closed with decorative ribbon or bakers twine! The boxes are finished!
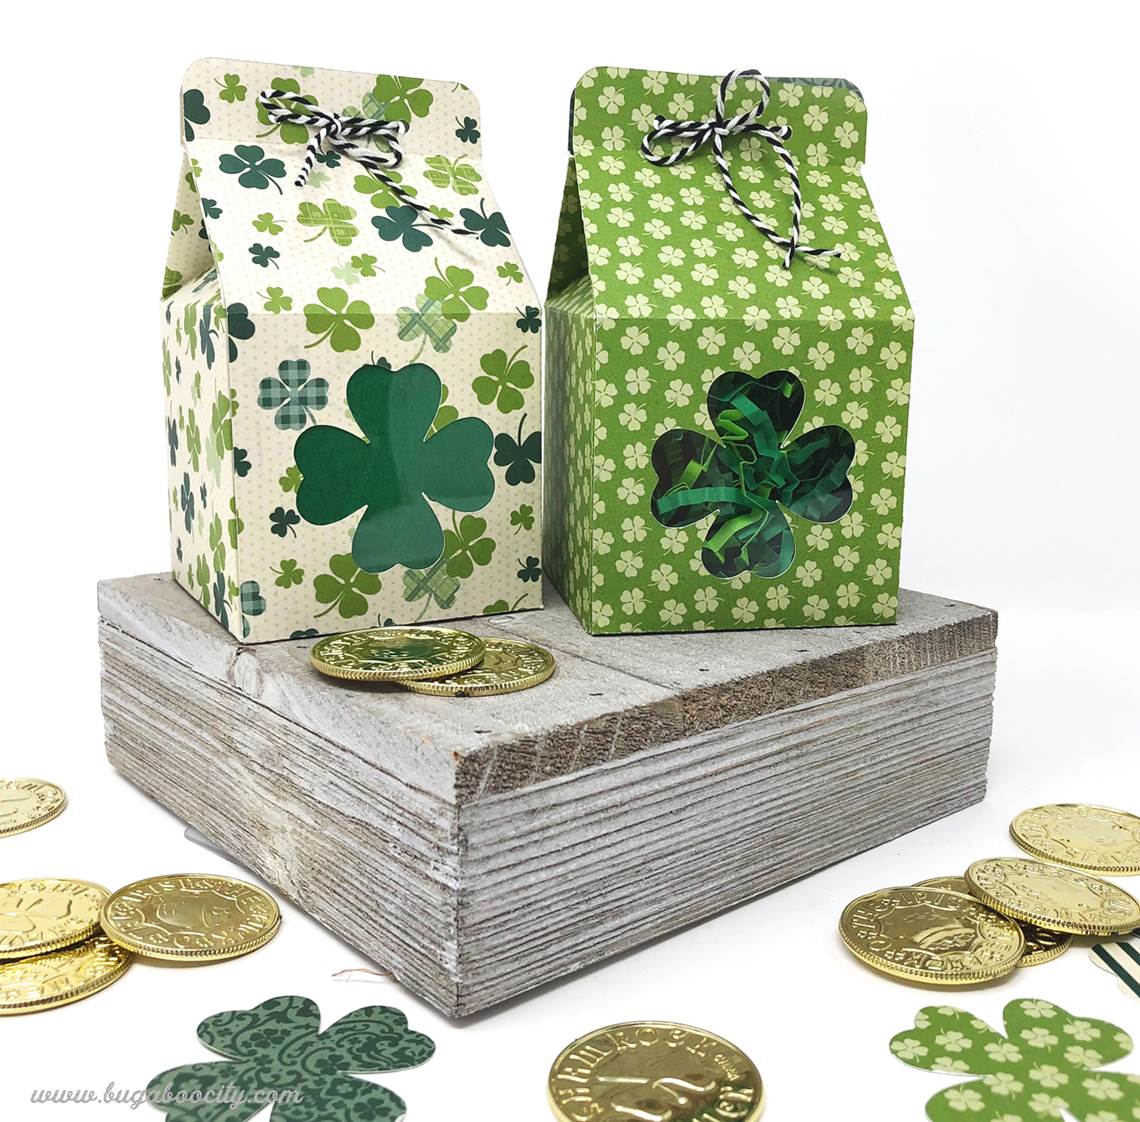
I love how cute these little boxes turned out! This is a great project for fun St. Patrick’s Day papers or even just beautiful green card stock! I’ll be back soon with another St. Patrick’s Day craft idea :)

Get the Free St. Patrick’s Day Treat Boxes!
Fill out the purple form below with your first name and email address! The free file will be sent straight to your inbox! If you have already filled out the form below, don’t worry – you won’t be added to my list twice! This freebie is for personal use only. I hope you enjoy crafting something special. Please let me know if you have any questions :)
![]()


I LOVE THE TREAT BOXES,
Thank you so much! I hope you give them a try and have fun making them! :)