DIY Easter Bunny Mason Jar Vase
Create a sweet Easter bunny mason jar vase this spring season with paint, cardstock and ribbon! Grab the free PDF pattern and SVG cut file to create this cute centerpiece or gift.
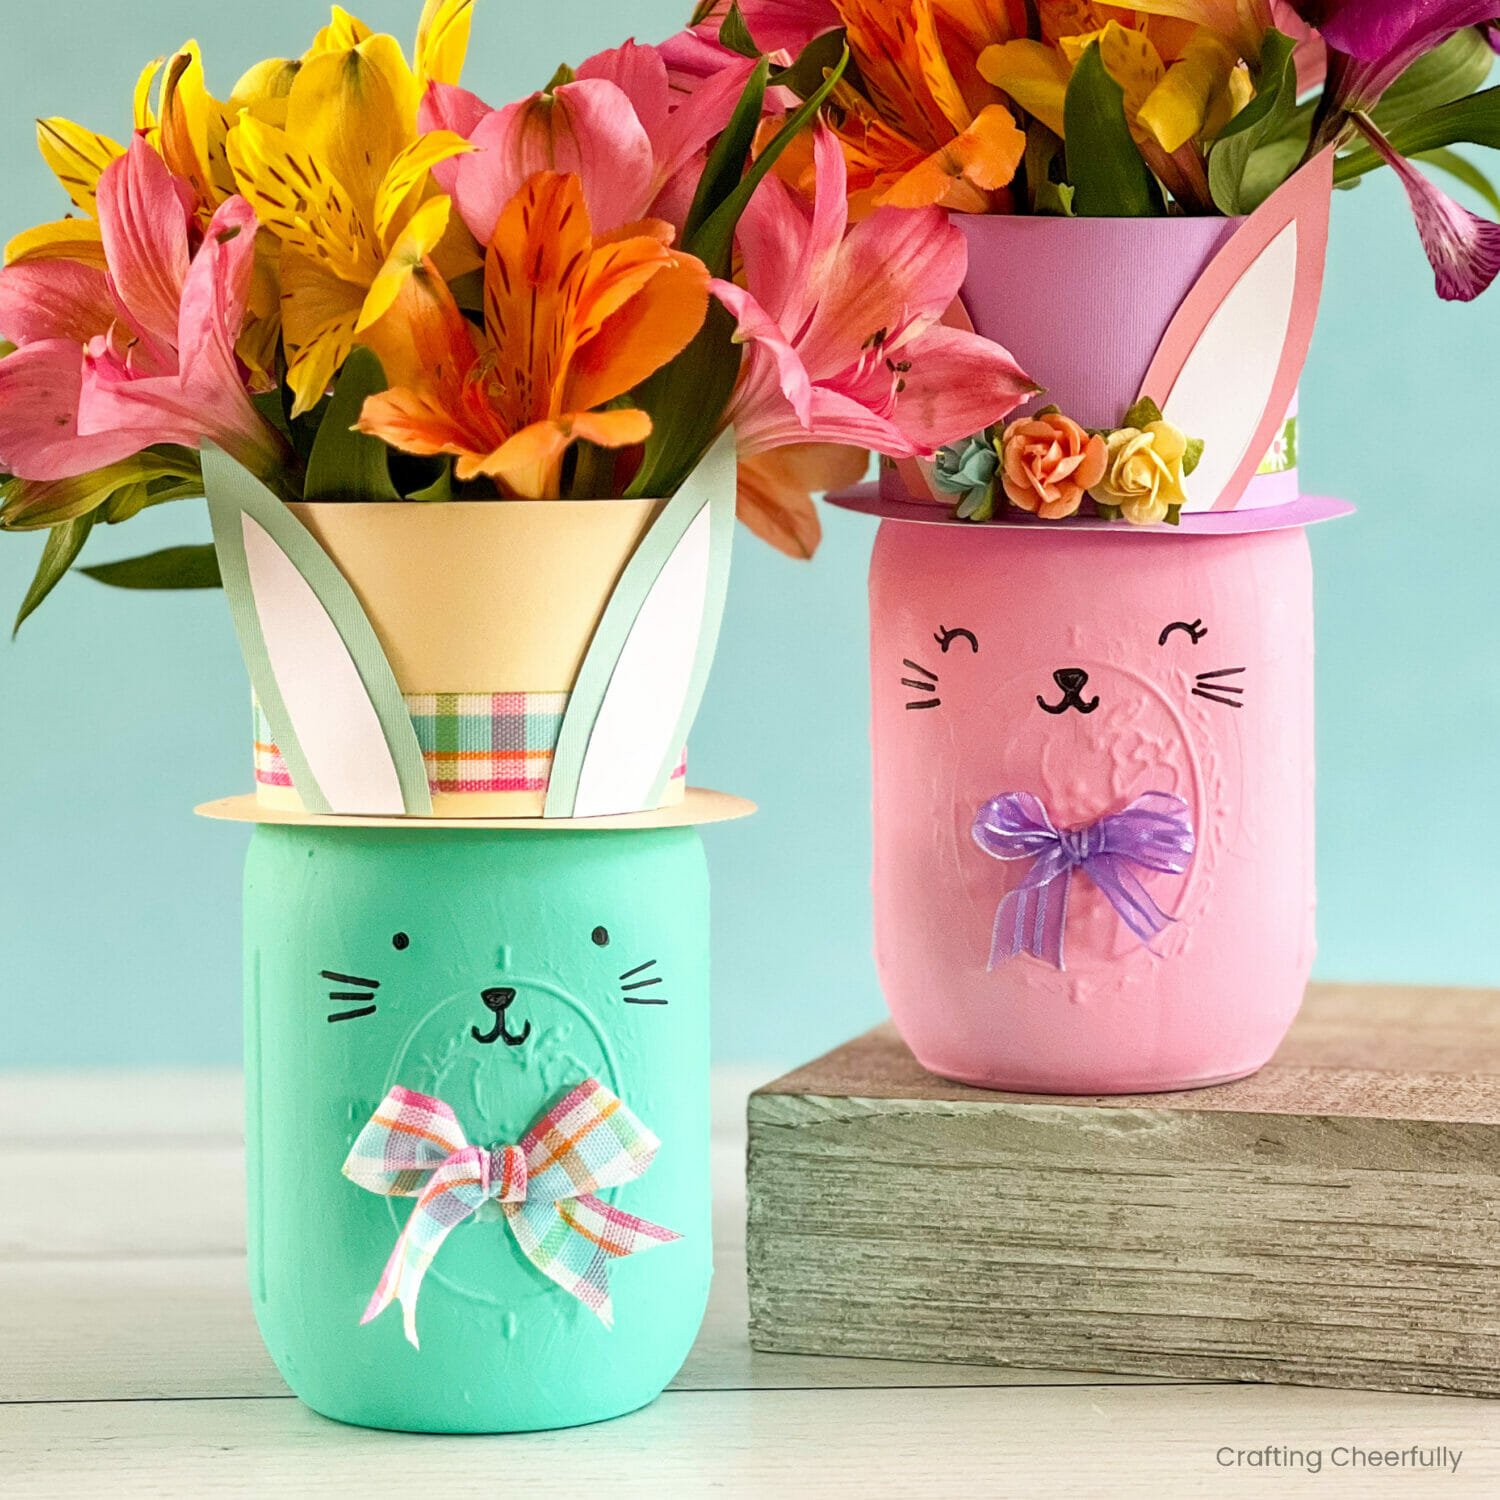
Hello Crafty Friends! I love a good mason jar craft so today I am excited to share these cute Easter bunny mason jar vases with you! Not only do these colorful bunnies make a sweet decoration for Easter and spring but they also make a great gift or centerpiece.
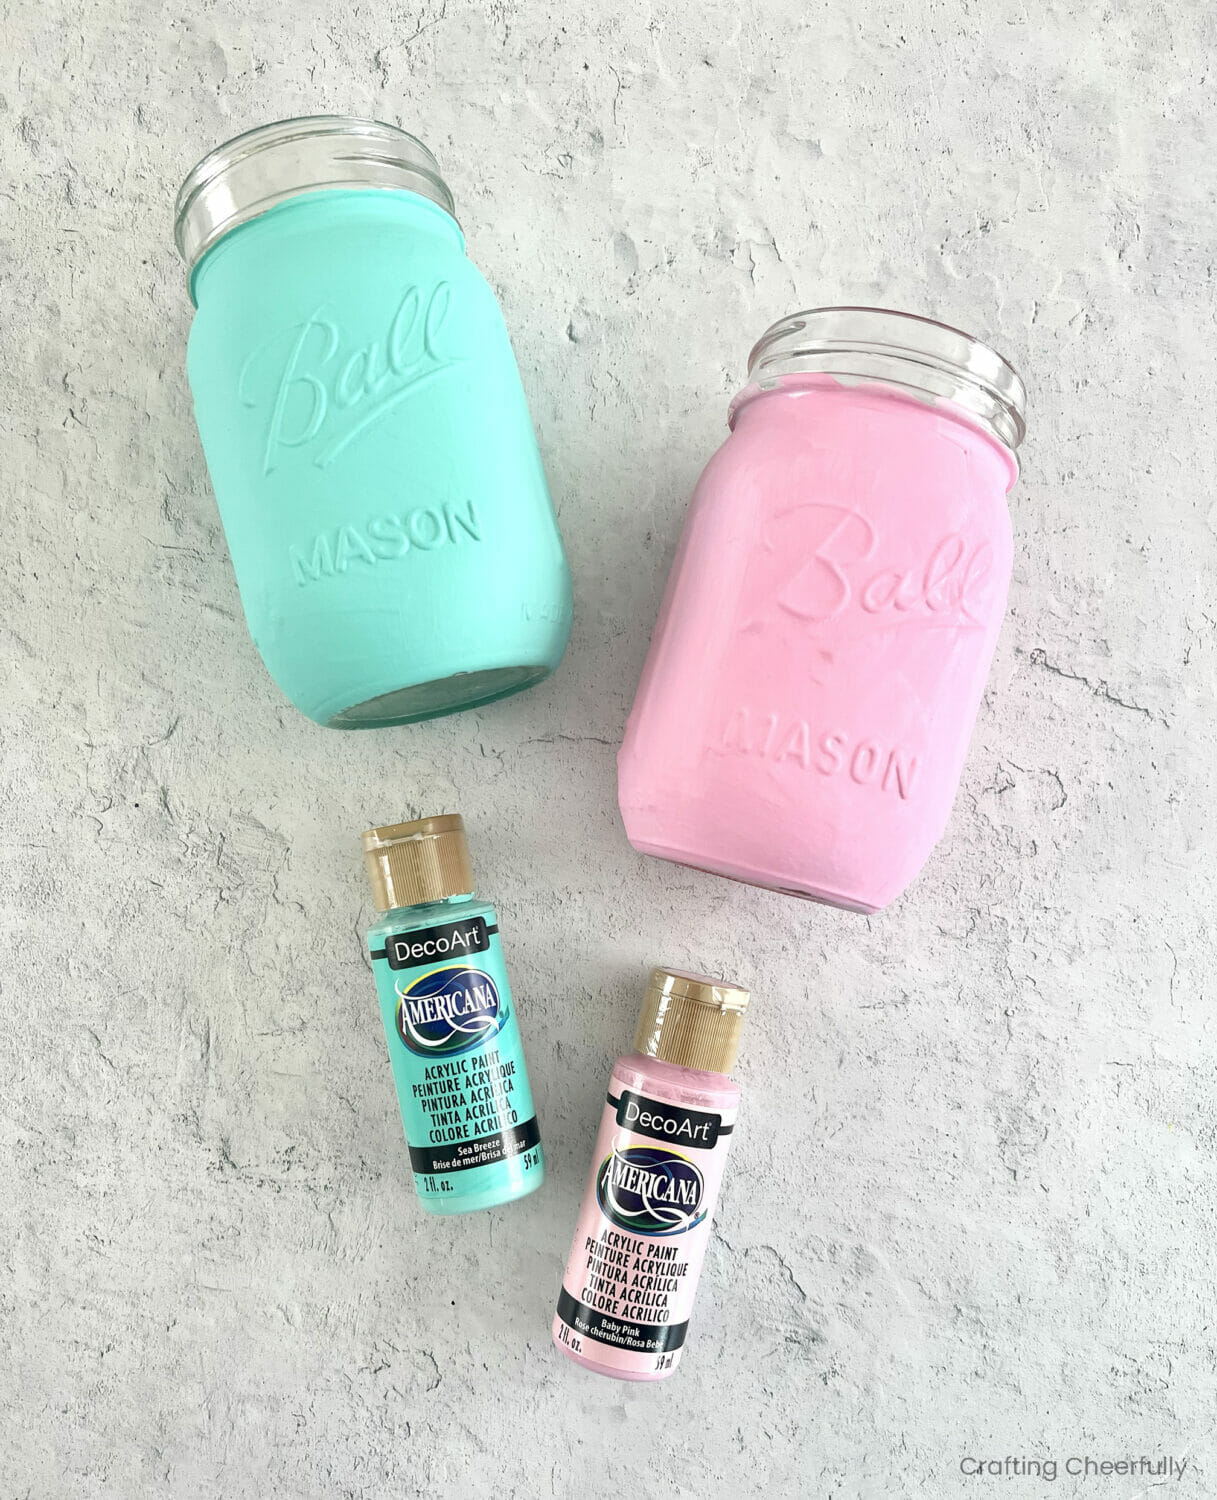
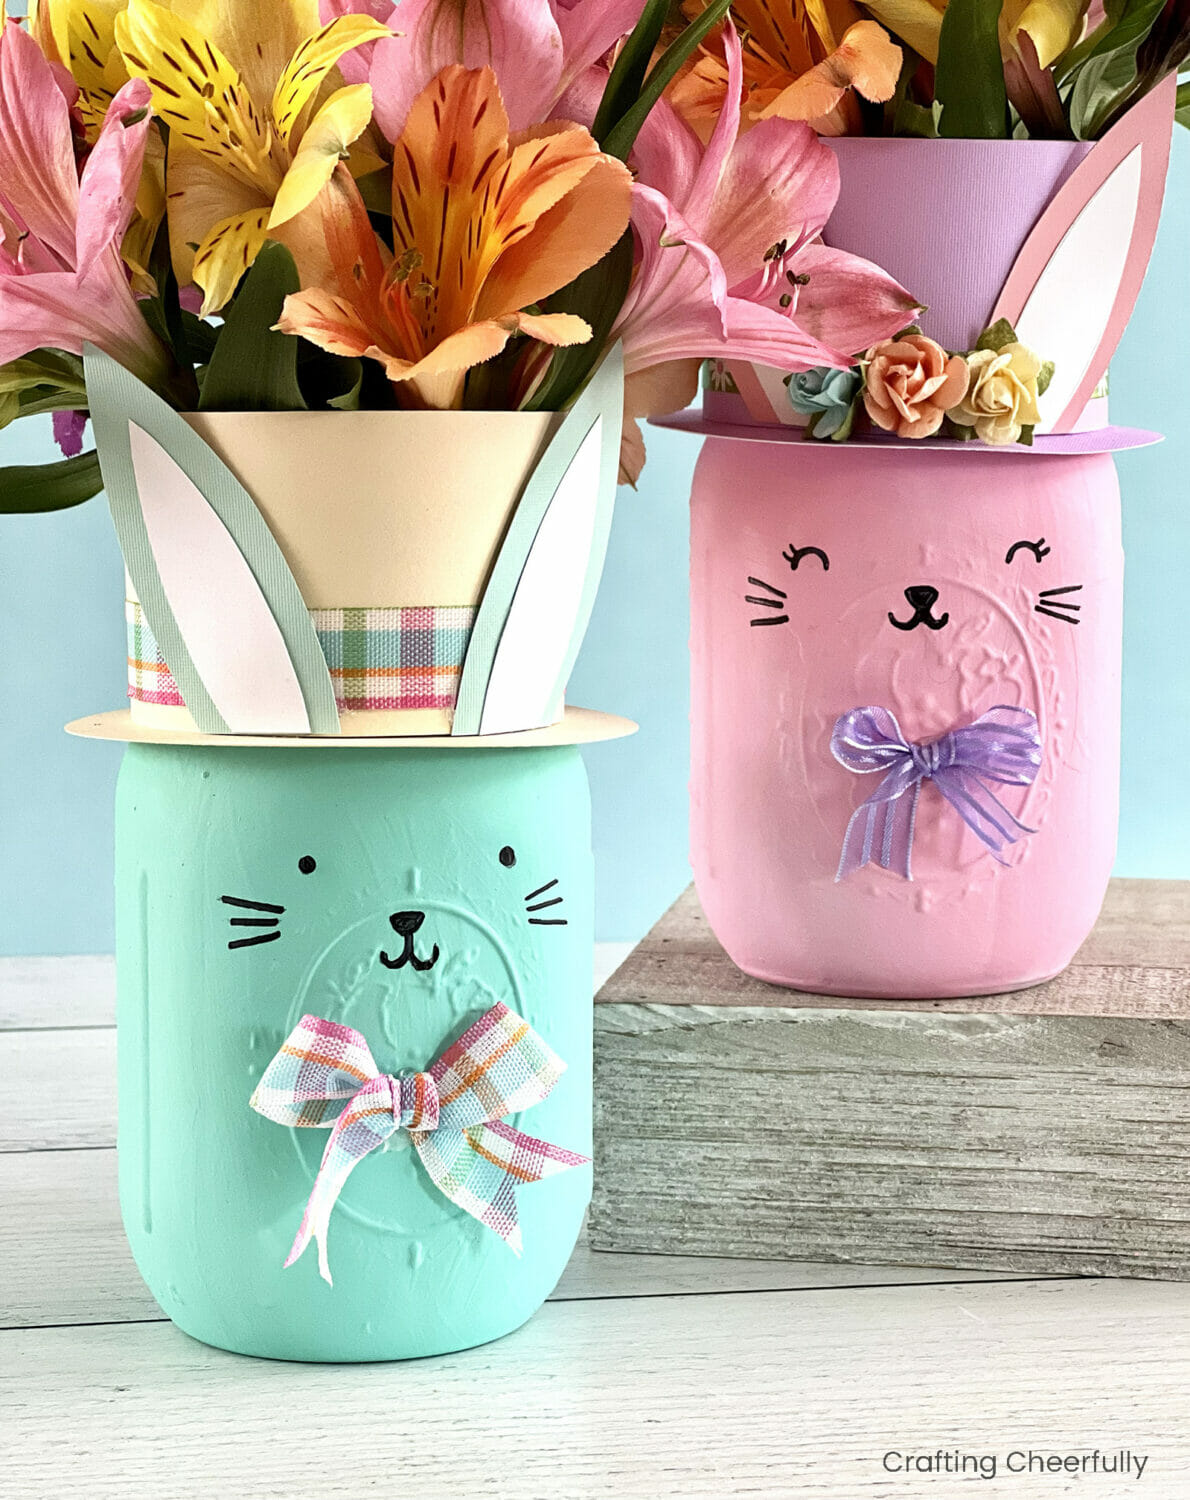
These bunny mason jars only take a few craft supplies including a jar, paint and cardstock. I chose to paint my bunnies teal and pink and made matching ears for each. Each bunny wears a paper hat that is open on top so beautiful spring flowers can pop out! You can paint your bunnies any color; they would also look sweet in natural bunny colors like white, gray or brown.

I really enjoy making vases and planters for different holidays and special occasions. They make such fun centerpieces and can be used year after year. These bunny vases were inspired by my larger, Easter Bunny Vase. These are a smaller size which makes gifting them easier. They would look cute at your office desk, at a party table, or as a centerpiece at Easter brunch!

Check out my other fun DIY vases and planters! Last month my St. Patrick’s Day Gnome Planters also used mason jars with paper top hats! Below is the tutorial for these cute Easter bunny mason jars. You can also grab the free PDF Pattern and SVG cut file by filling out the purple form at the end of this post.
Easter Bunny Mason Jars
Supplies Needed:
- Free PDF pattern and SVG cut file – Grab the free file by filling out the purple form at the end of this post.
- Mason jar – I used 16oz glass canning jars. The diameter of the opening at the top was 2.5″. You can also use plastic mason jars if crafting with kids as long as the flowers aren’t too heavy :)
- Acrylic paint or chalk paint – I used DecoArt Sea Breeze and Baby Pink.
- Cardstock – I used yellow, purple and a little bit of white for the ears
- Black Sharpie Marker
- Ribbon
- 1/4″ Scor-Tape and 1/2″ Scor-Tape, or another strong double-sided tape or glue.
- Gluestick
- Hot Glue
- Plants or flowers!
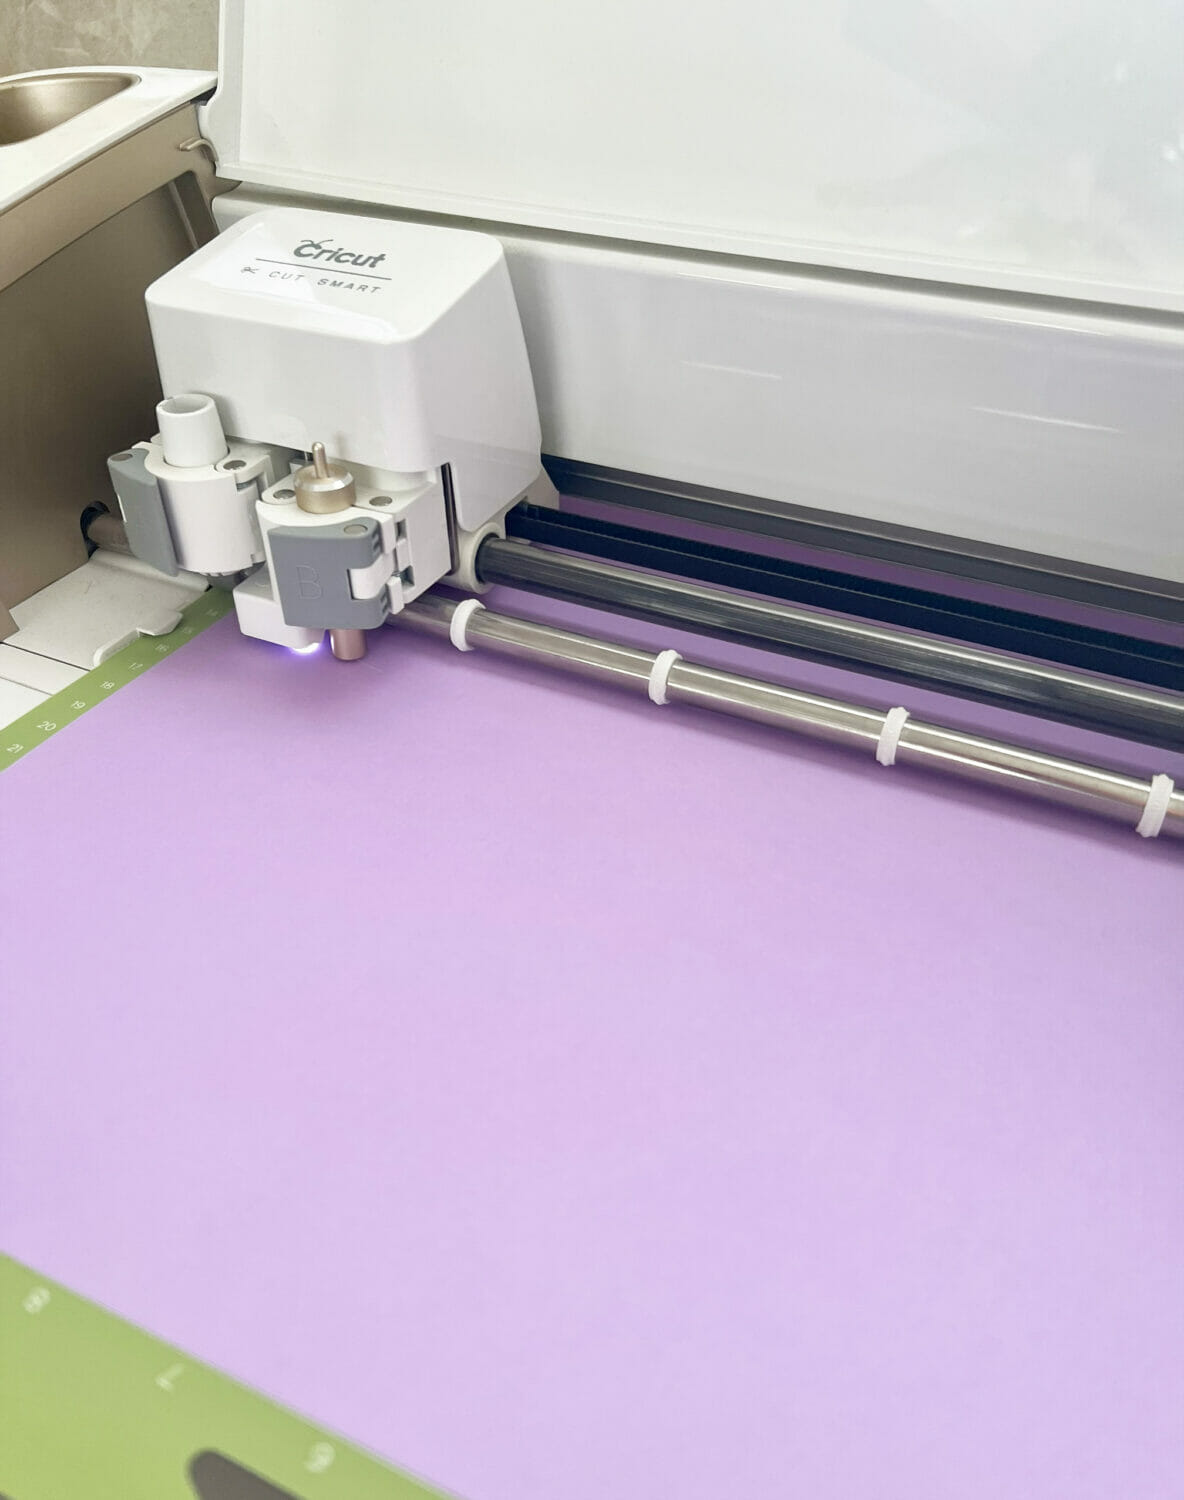
- If using the SVG cut file – Cricut Cutting Machine, Standard cutting mat and Cricut Tools
Paint the Mason Jars
Start by painting a mason jar. You can use acrylic paint, chalk paint or spray paint. I used what I had on hand which was DecoArt acrylic paint. It took me about 4 coats of the pink acrylic paint and just 3 coats of the teal to get the opaque color. If you use acrylic paint, using a coat of primer may help a lot. Chalk paint, which doesn’t require a primer at all, would also be a great option!
Adding the Bunny Face
Use a black Sharpie marker to draw a little bunny face to one side of the jar. You can draw it in pencil first, then go over it with the Black Sharpie. It was a little tricky drawing the mouth over the bumpy part of the jar, so go slow when drawing over that area.

Making the Bunny’s Hat
Use the free printable PDF pattern or SVG cut file to cut out the two pieces needed to make the hat (three if you would prefer to use paper instead of ribbon for the hat band) and the bunny ears. You can get the free files by filling out the purple form at the end of this post. I used my Cricut Explore to cut out the pieces.

Add ribbon to the long rectangle for the hat band. I placed my ribbon about 1/4″ from one edge. Layer the ear pieces using a glue stick. I made two small bows using ribbon to add to the front of each mason jar.

Place the brim of the hat on the jar. It may take a little gentle nudging to get it over the ridges of the jar, but then it will just fall into place and rest at the top of the jar. The brim is kept separate from the rest of the hat so you can remove the top hat portion if you need to.

Wrap the top hat around the jar and mark where it should be adhered. I made my hats just loose enough that they could easily slide on and off the jar.
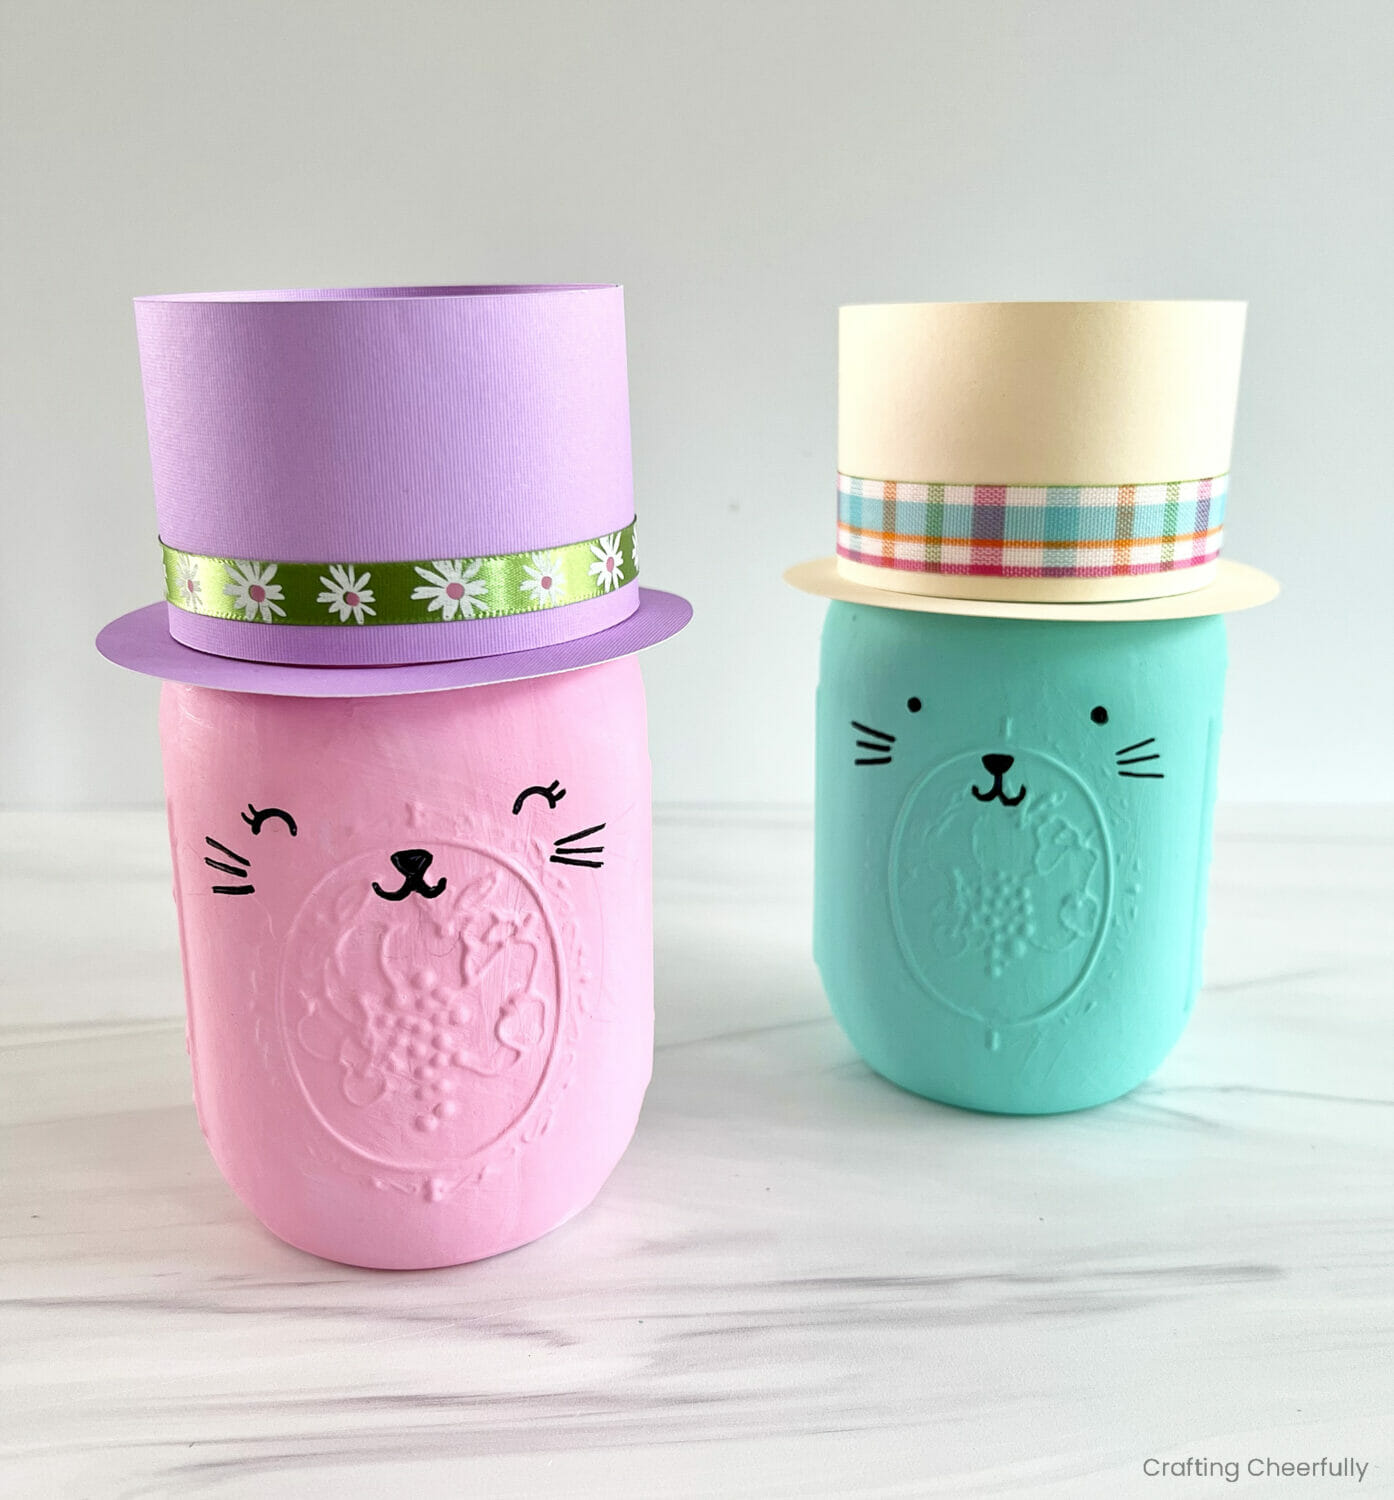
Decorate the hat with the ears and small paper flowers using hot glue. Add a small bow to the front of the mason jar again using hot glue.

Using the Bunny Mason Jars
The mason jar bunnies make the cutest vases and planters! I carefully filled one up with water and used it to hold colorful spring flowers I found at our local supermarket. Because the hats are made from paper, you do need to be careful with water, especially with refilling the vase. 
You can also use these bunny vases as planters! I used one of my St. Patrick’s Day gnome jars to plant a shamrock plant. I removed the top of the paper hat and filled the jar 3/4 of the way with potting soil. I then added the plant and watered it. Since the shamrock was a small plant, I was able to gather it up and slip the top hat over it. If that doesn’t work, you could also have someone hold the plant up while you wrap the paper hat around it and adhere it that way. I think it will depend a lot on your plant and it’s size! It will be easier to use these as vases rather than planters, but it is possible!


Get the Free Bunny Mason Jar Files!
Fill out the purple form below with your first name and email address! The free file will be sent straight to your inbox! If you have already filled out the form below, don’t worry – you won’t be added to my list twice! This freebie is for personal use only. I hope you enjoy crafting something special. Please let me know if you have any questions :)