
DIY Paper Easter Egg Banner
Use decorative scrapbook paper to create this sweet Easter egg banner! The layers of the banner are hand-stitched together using thin ribbon. A beautiful banner that can be hung up year after year to celebrate the holiday. Free template and cut file!
This post was originally posted April 7, 2017. It was updated February of 2022 with a new pattern and SVG cut file.
Hello Crafty Friends! I have finally started putting up my Easter decorations over the weekend and our house is feeling ready for spring! When I realized I didn’t have an Easter banner for our mantel, I created this paper banner using some of the pretty papers I had in my stash.
I am a big fan of banners! They have the ability to quickly and easily add seasonal decor to any space and they are usually inexpensive. This banner is made from just paper and ribbon – two things I already had plenty of!
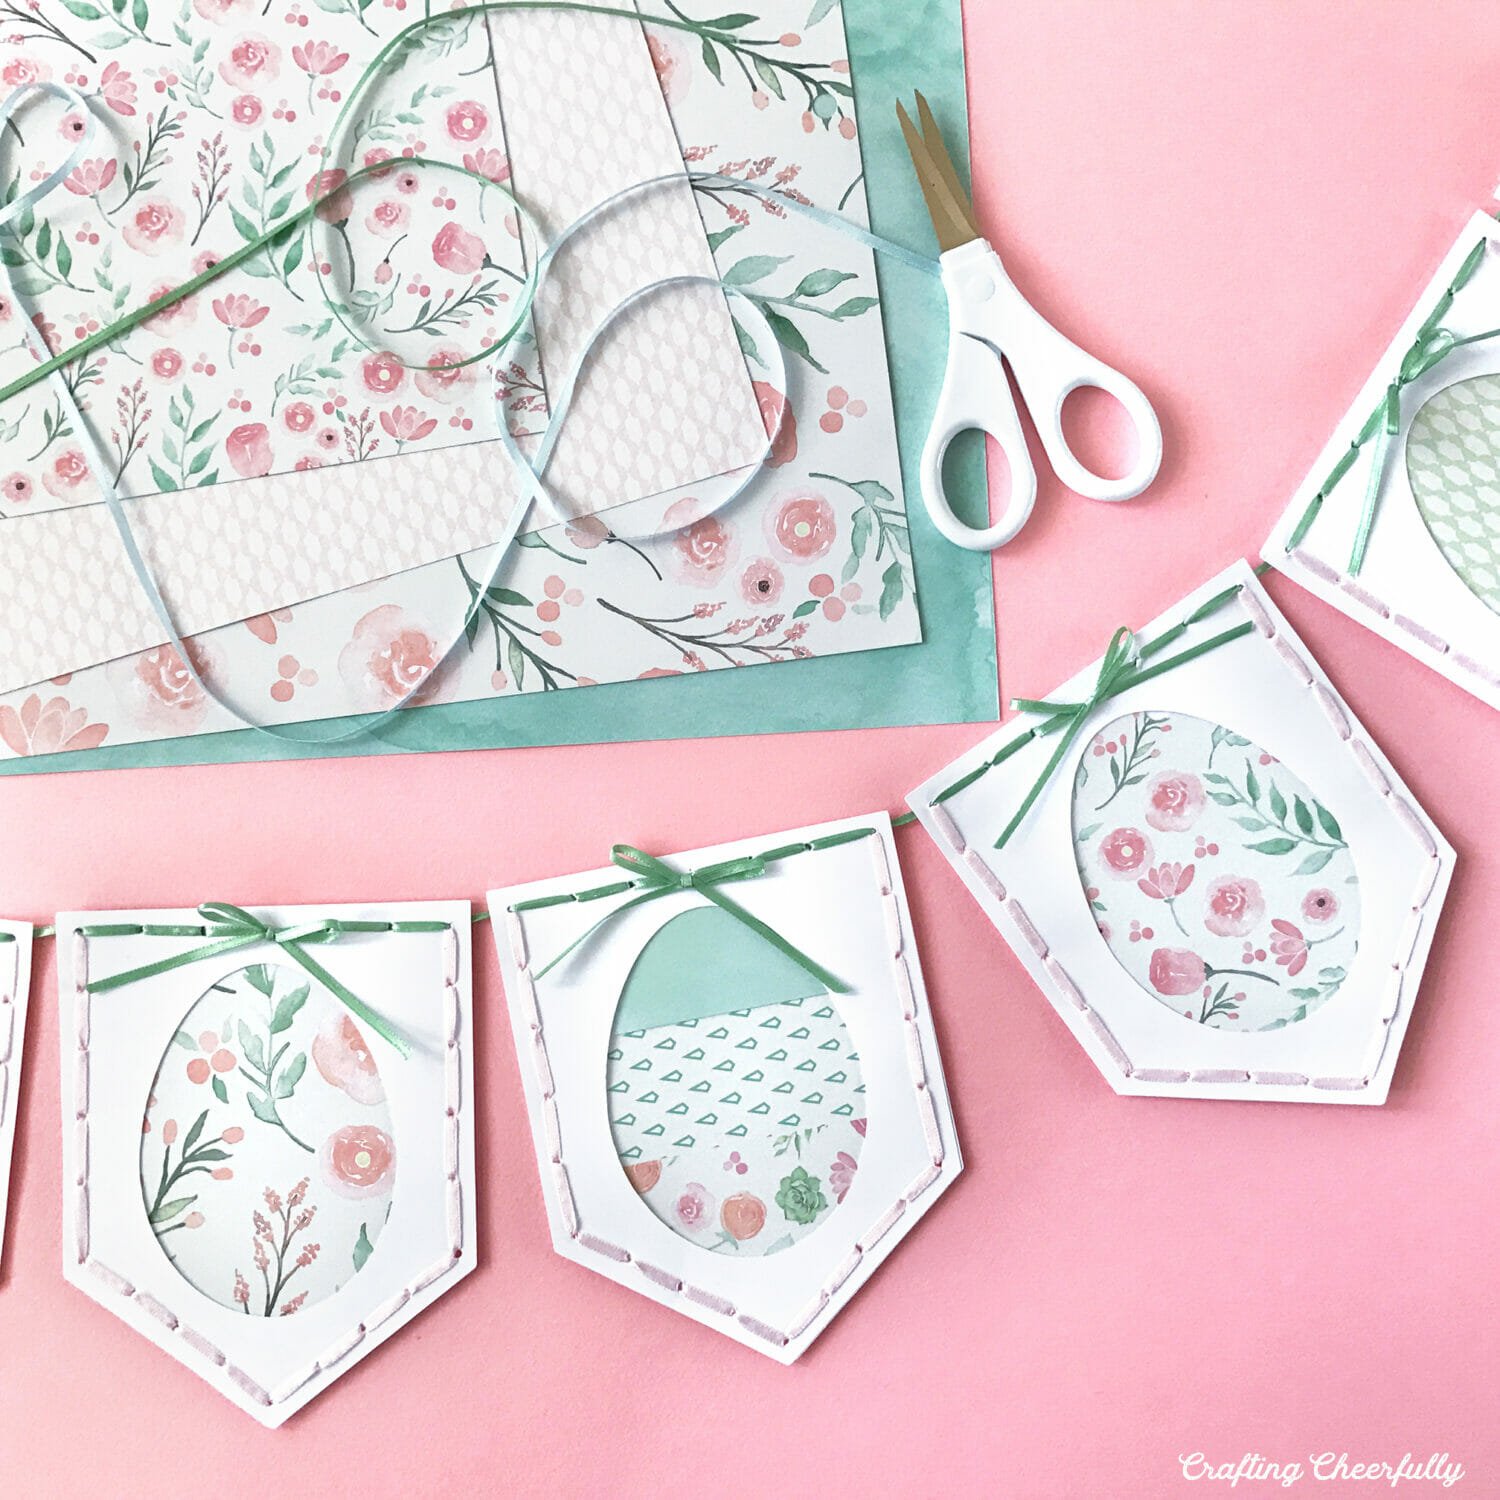
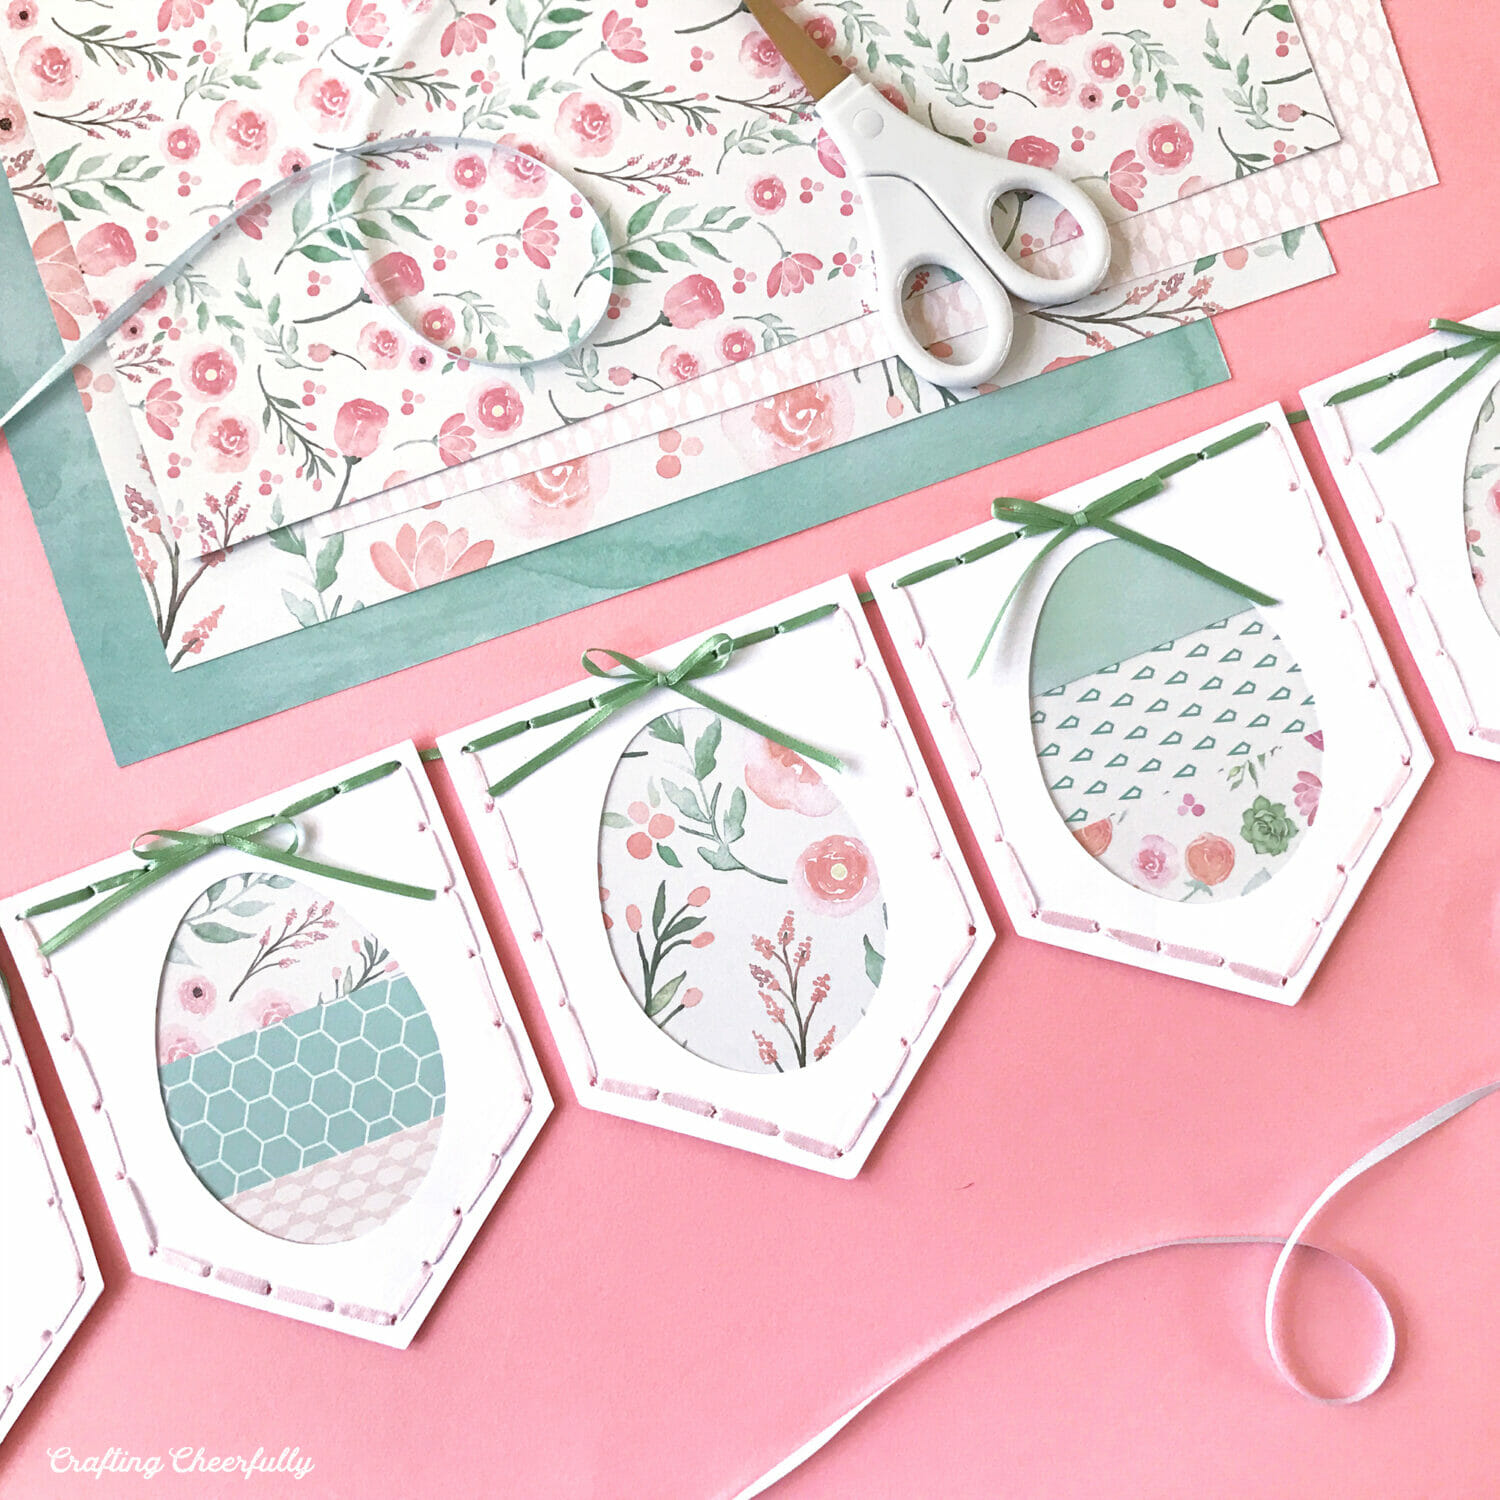
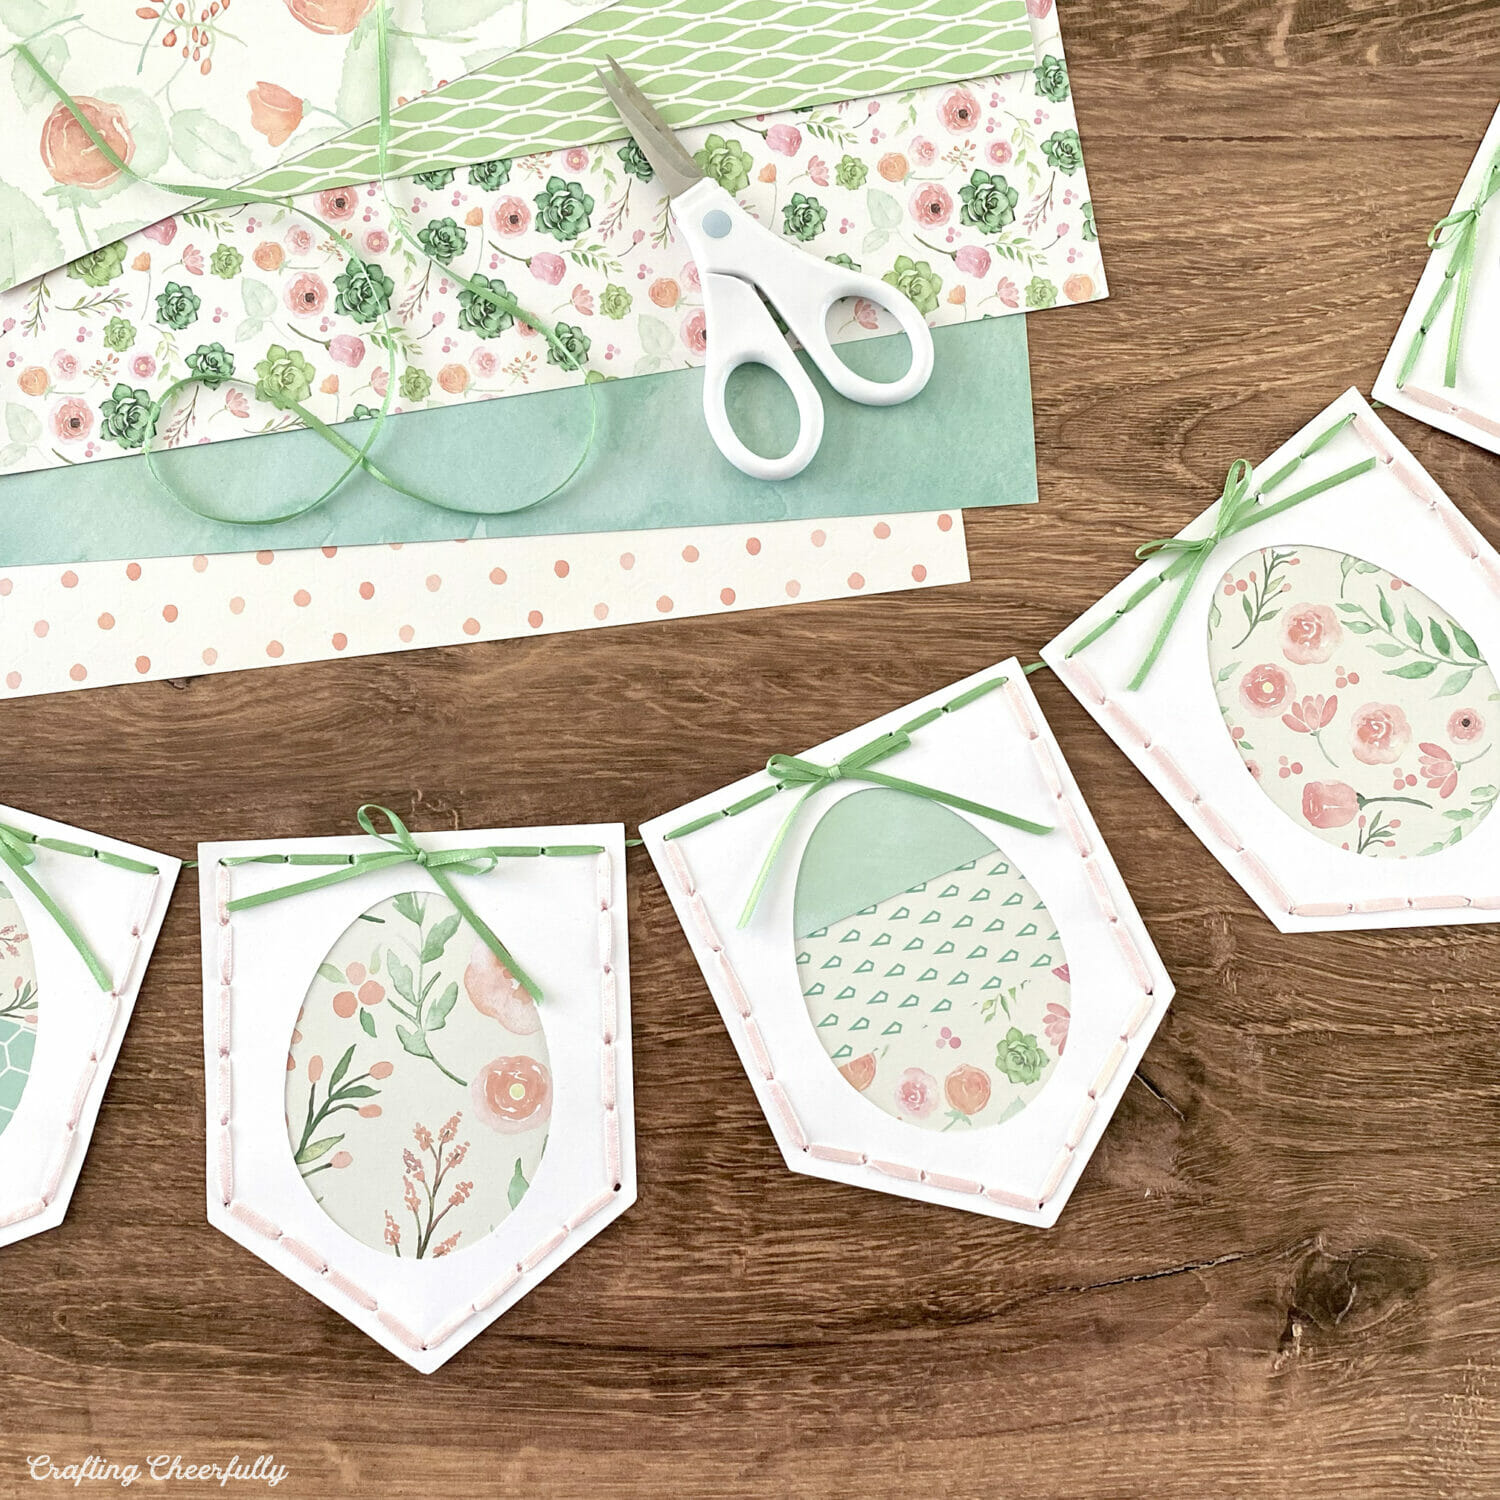
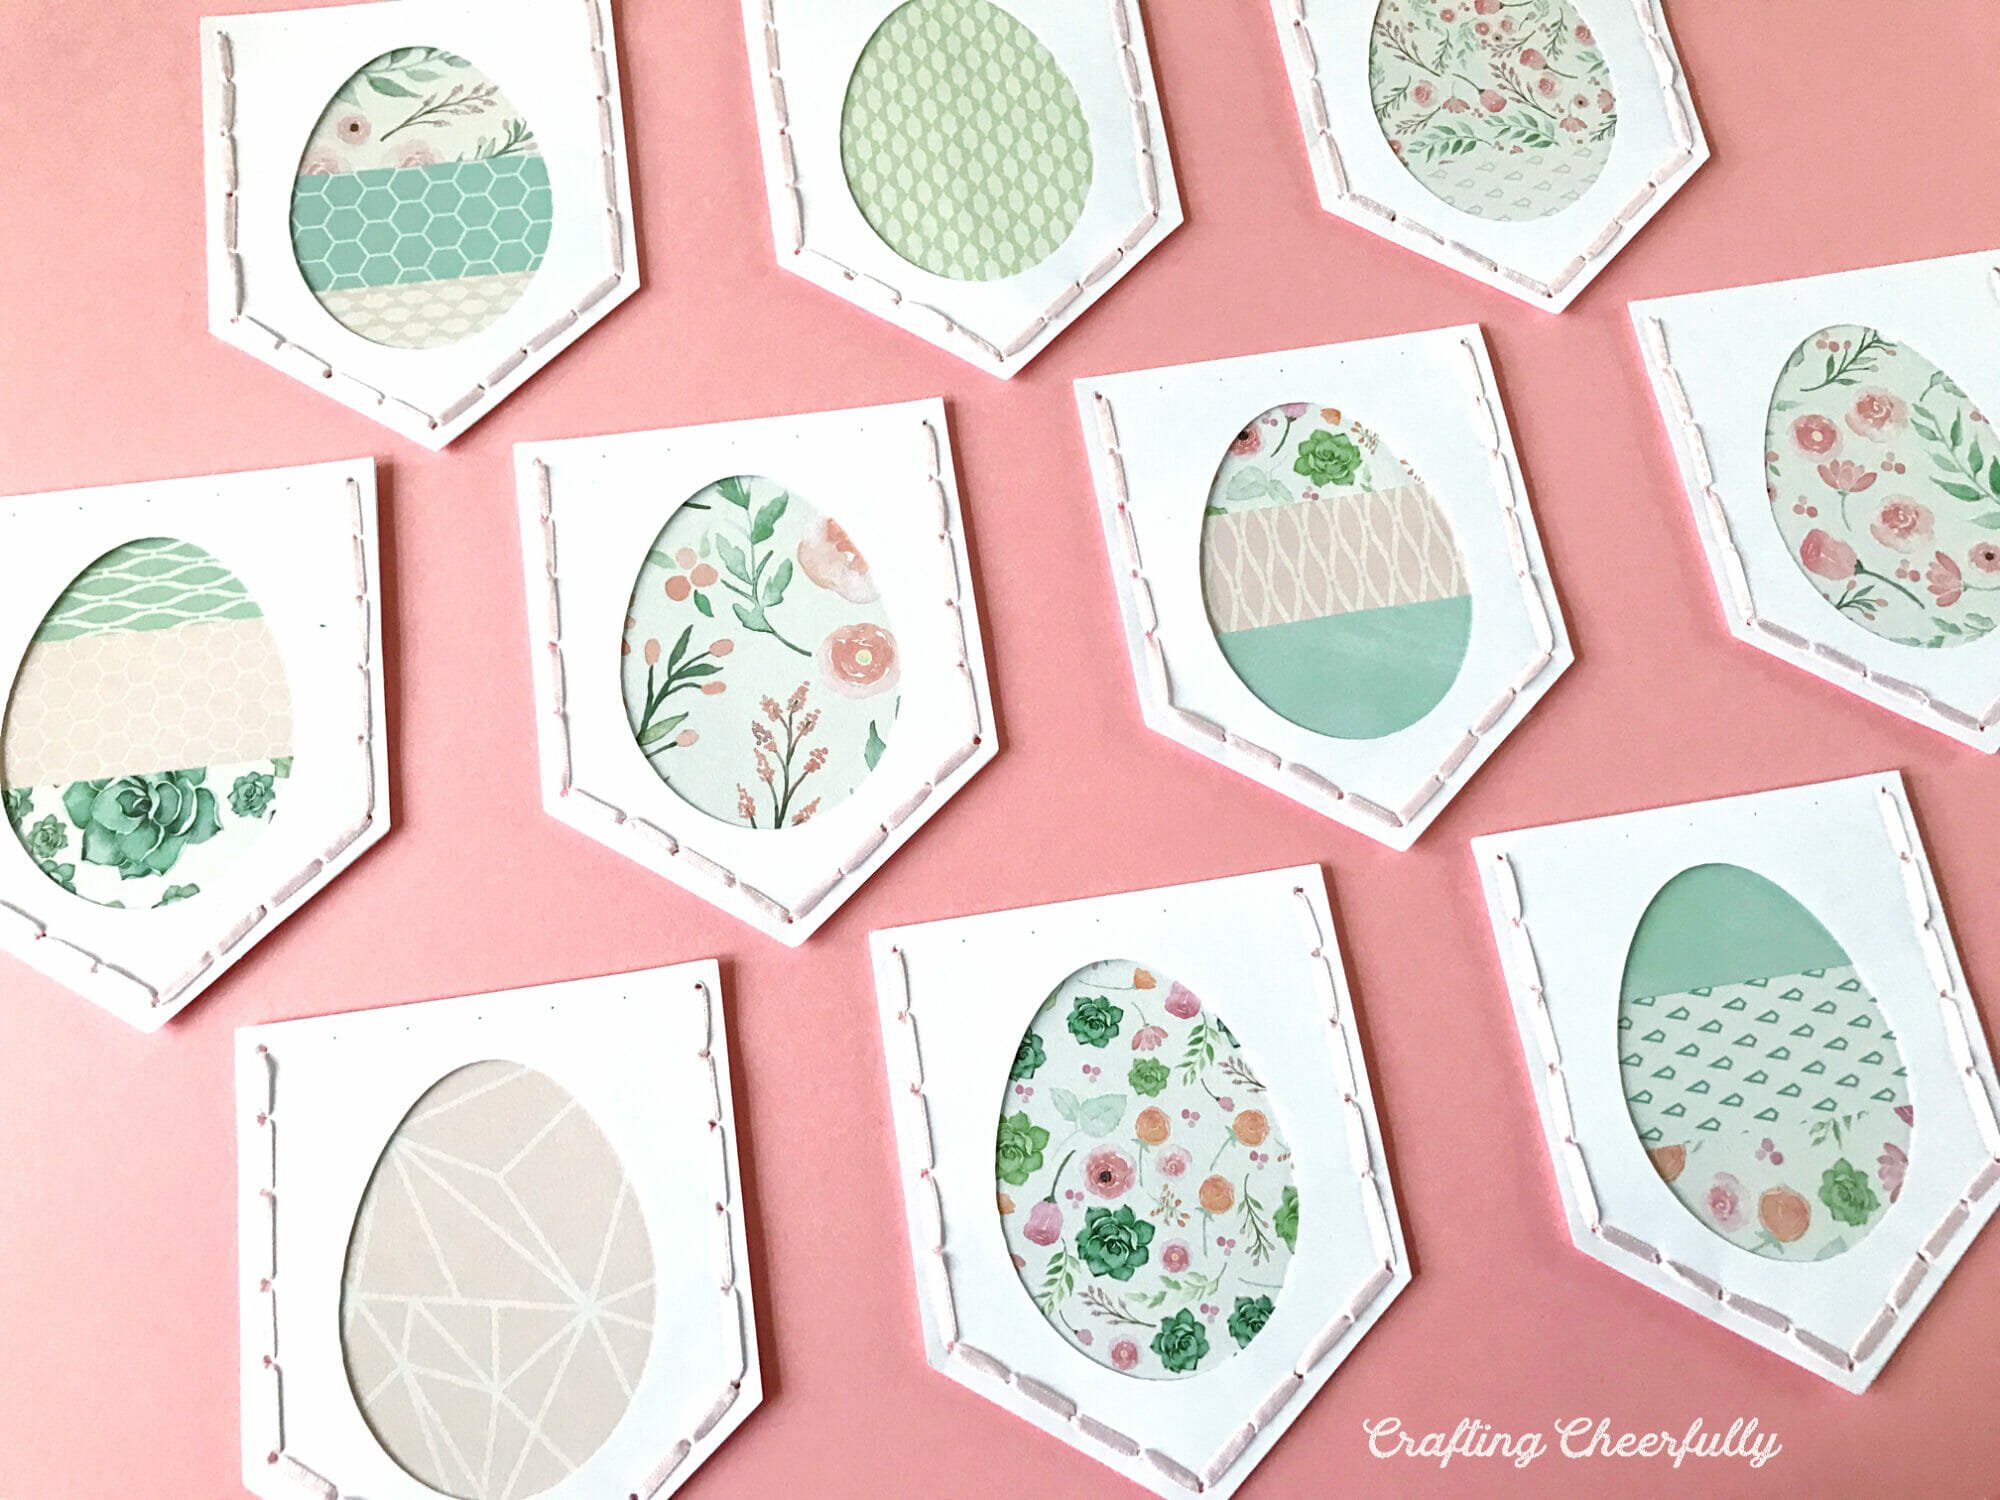
The banner is created by stitched the pennants together around the edges using ribbon. The middle layer is a fun collage layer where you can place patterned paper. My patterned paper came from a DCWV paperstack, Copper Luxury. Using a paperstack is great because it gives you lots of choices of patterned paper that all coordinate well together.

Below I’m sharing the tutorial along with a free pattern and cut file! You definitely don’t need a cutting machine to make this banner, but it will go a little quicker and punch the holes for you. I always find round shapes a bit tricky to cut with my craft knife, so it was nice to use my Cricut to do all the cutting.

DIY Easter Egg Banner
Supplies Needed
- PDF and SVG patterns – Grab the free files by filling out the purple form at the end of this post.
- White cardstock – I used 110lb white paper which works with my printer.
- Patterned cardstock – I used paper from the DCWV paperstack “Copper Luxury”
- Cutting machine or cut by hand using a paper trimmer, craft knife and cutting mat
- Gluestick or a tape runner
- Tape
- 1/8″ wide Ribbon
- 1/8″ Hole punch to poke holes
Assembly Tutorial
Step One: Use the freebies to cut out the banner.
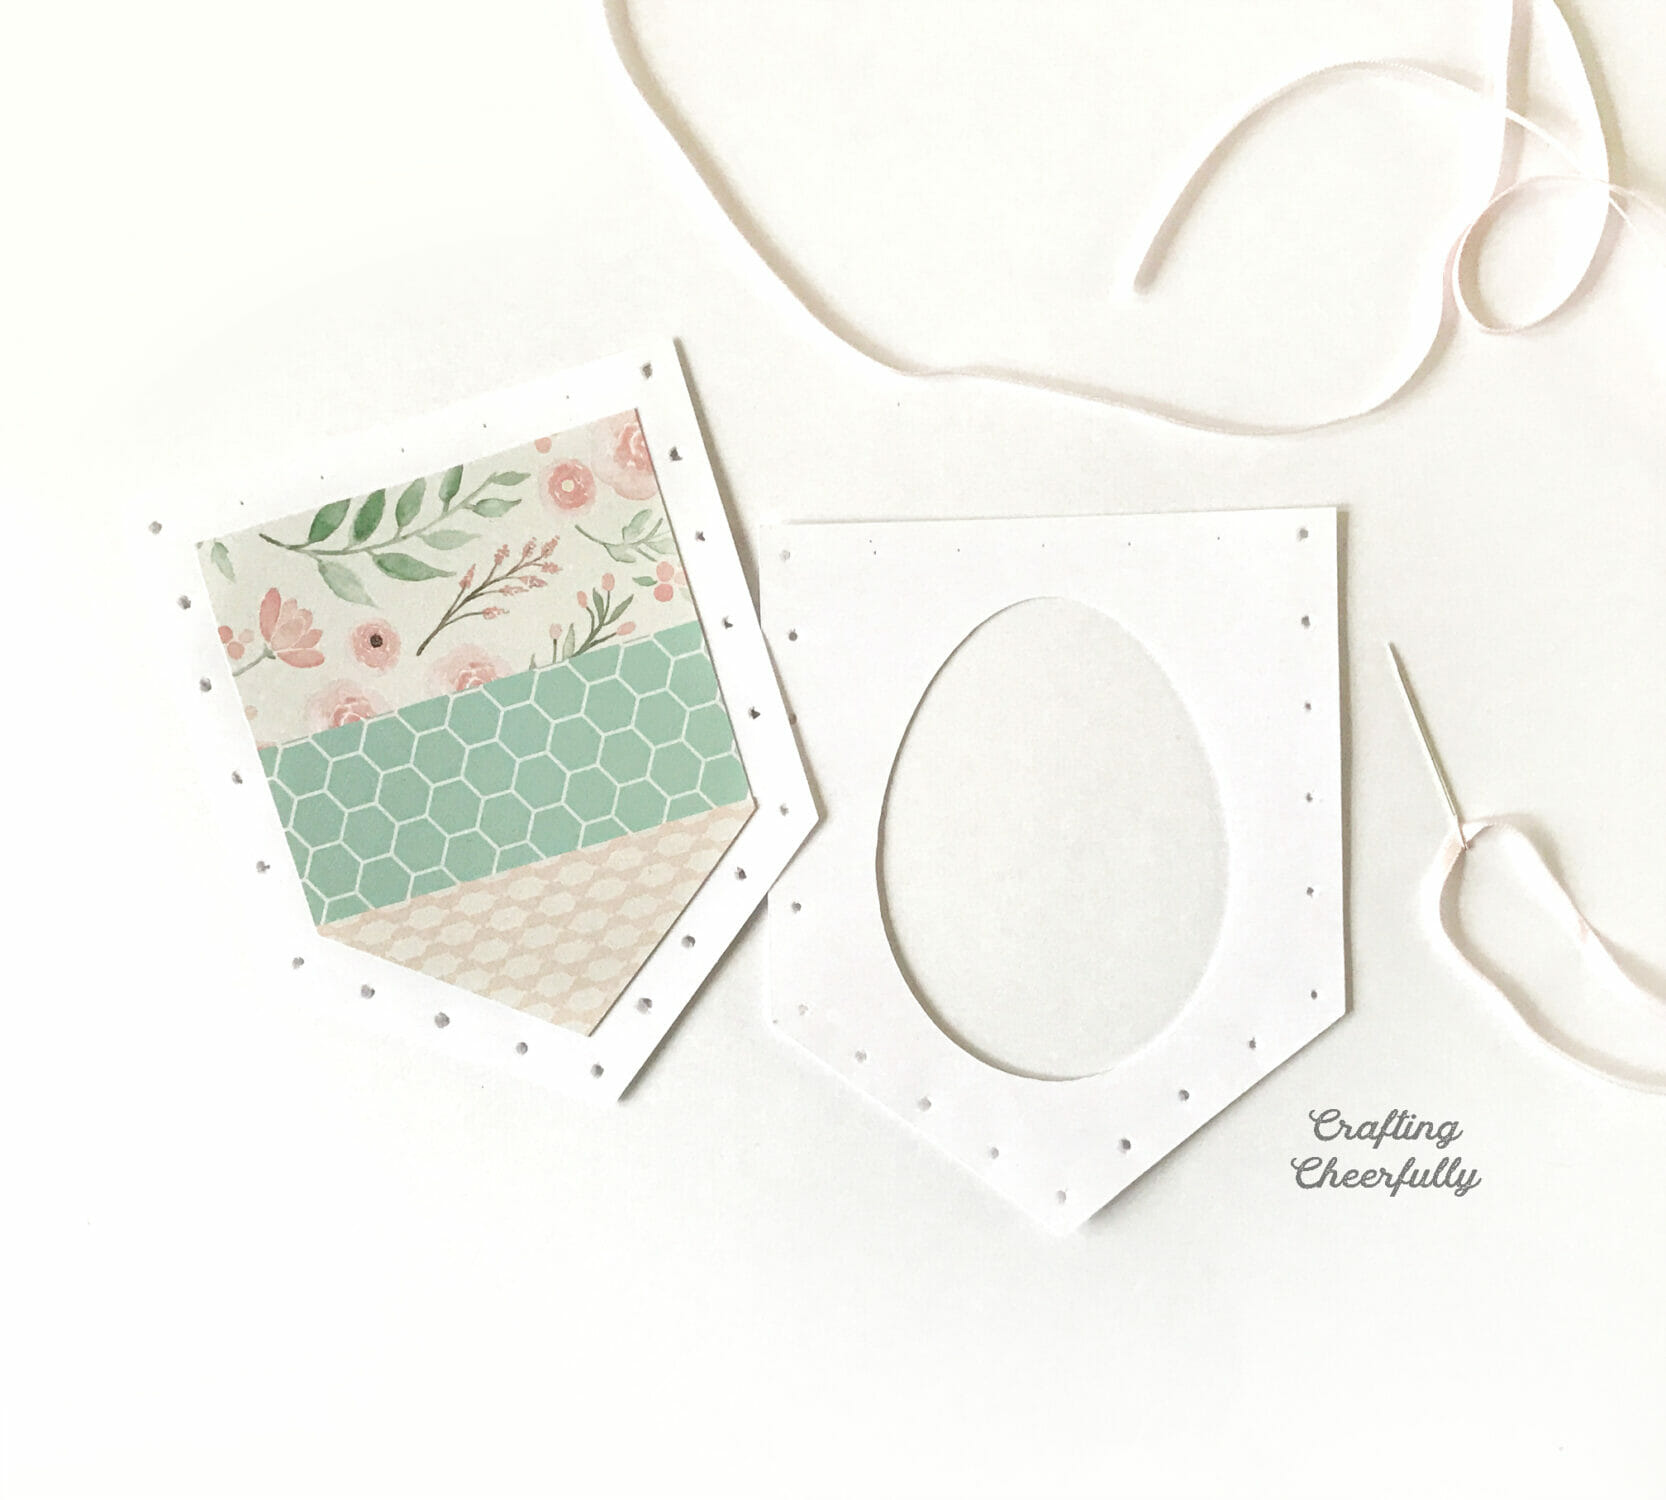
Use the PDF pattern or SVG cut file to cut the pennants. Each pennant has two pieces cut from white cardstock, the top piece with the egg cut out, and the back piece. There is a second smaller pennant that is a guide for cutting the middle layer. You can cut one and use it as a template or cut one for each pennant and layer your strips of patterned paper directly on it. These pennants can be made without stitching them together, just use the pennant cut files that don’t have punched holes or skip the punching step if using the PDF.

If you are using the PDF pattern, use a craft knife to carefully cut the center egg out of each top pennant piece.
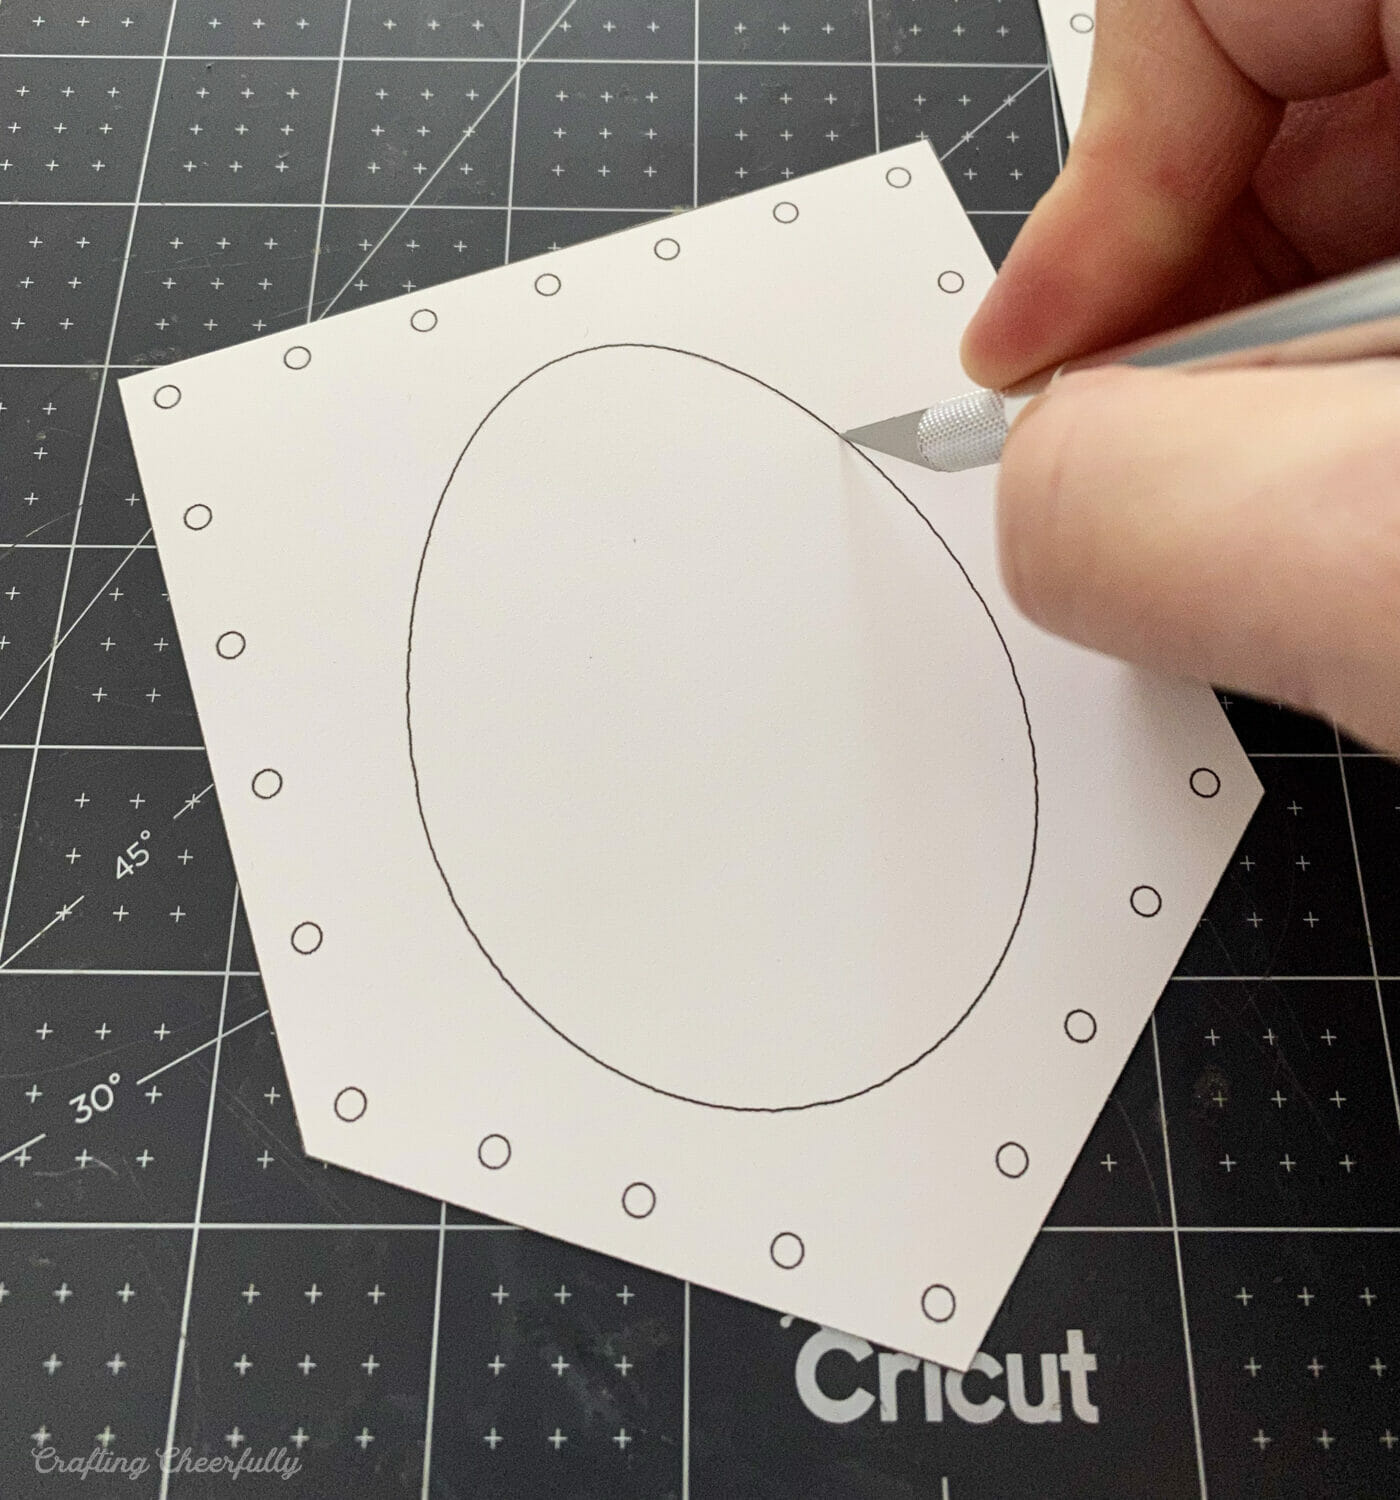
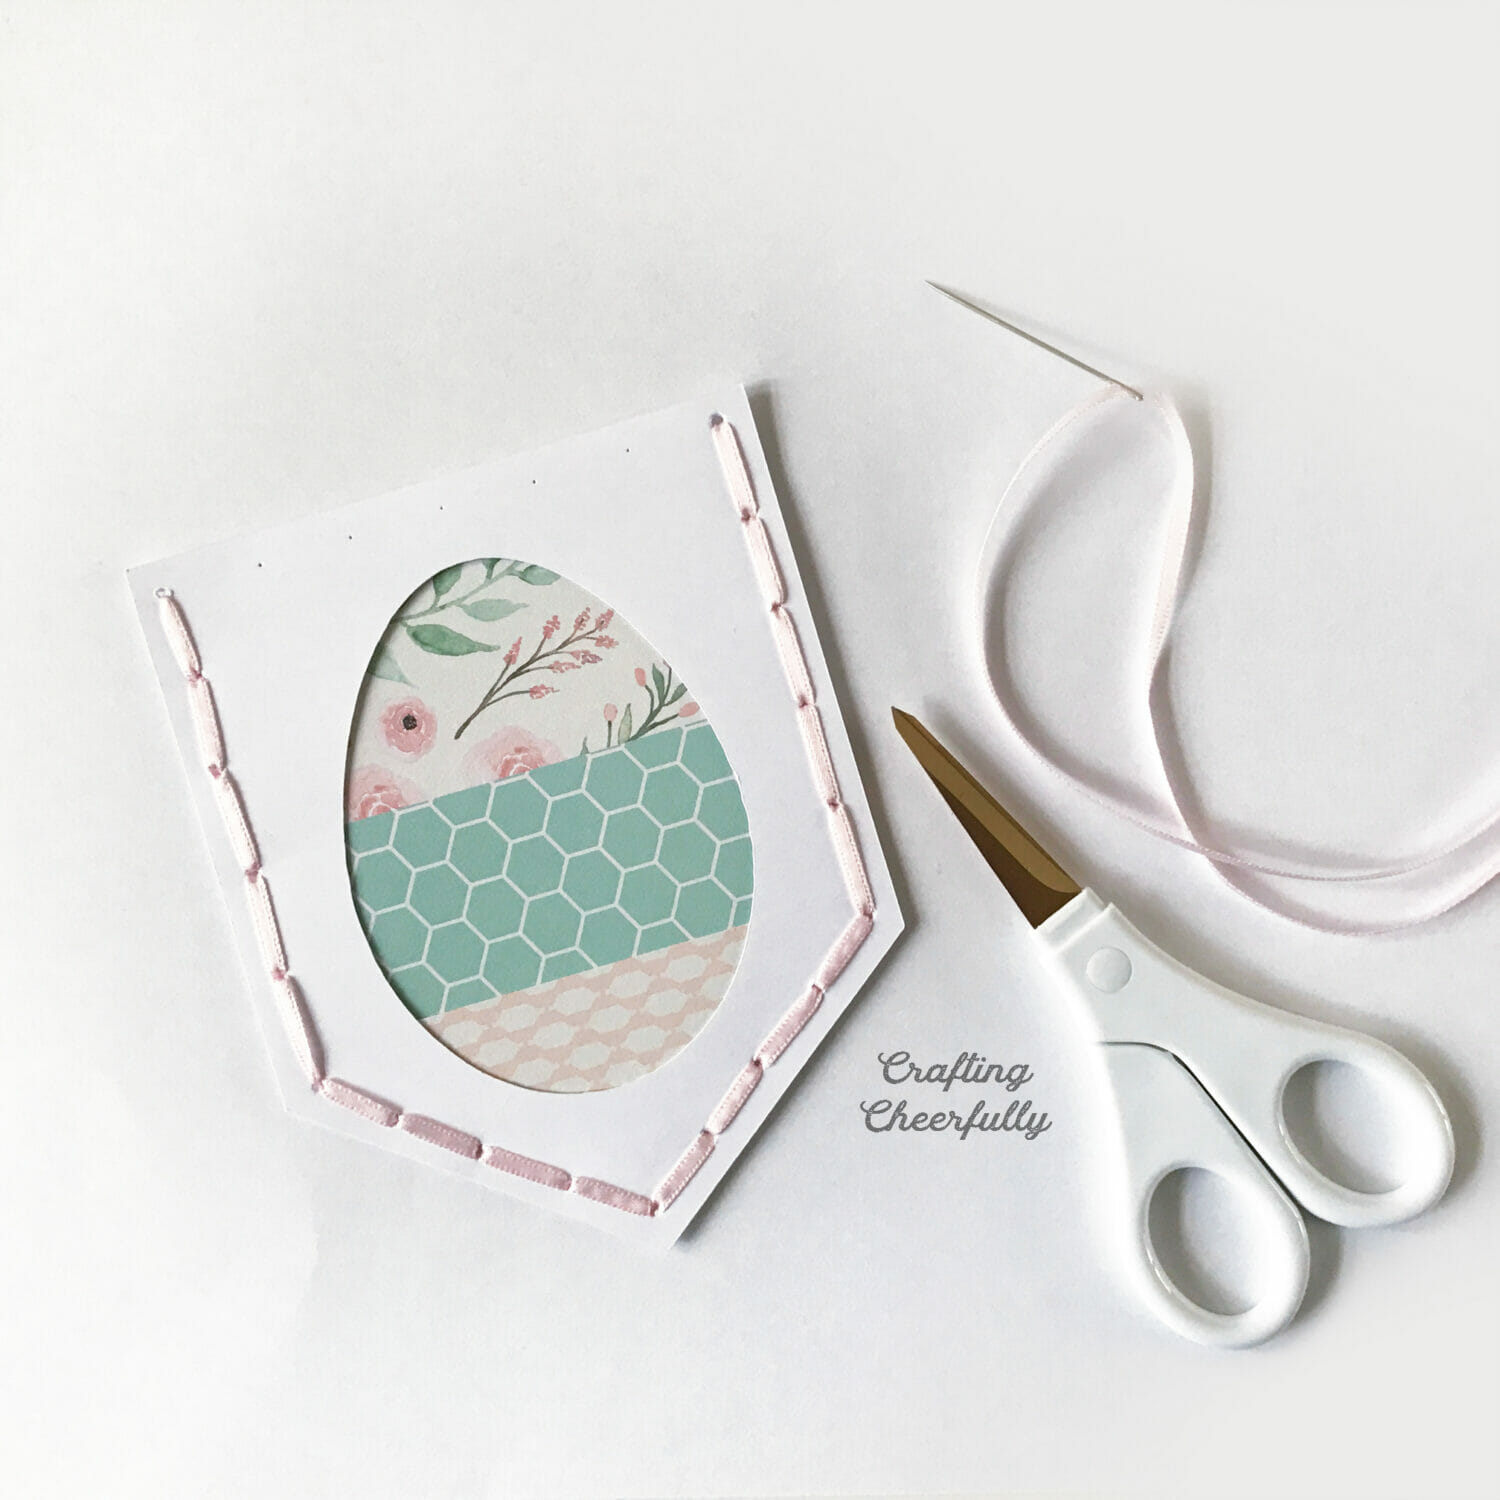
Step Two: Poke your stitching holes.
If you are using the SVG cut file, the holes will already be cut out for you. If you are using the PDF pattern, layer the two pennants together and punch out the holes using a hole punch. I like to turn turn my top layer over so it doesn’t show the holes, then punch from the back with the holes from the back layer visible to follow as a guide. When I first made this banner, I used a stylus to poke the holes instead of a hole punch because I didn’t have an 1/8″ hole punch. If you do, it’s perfect for punching small holes.

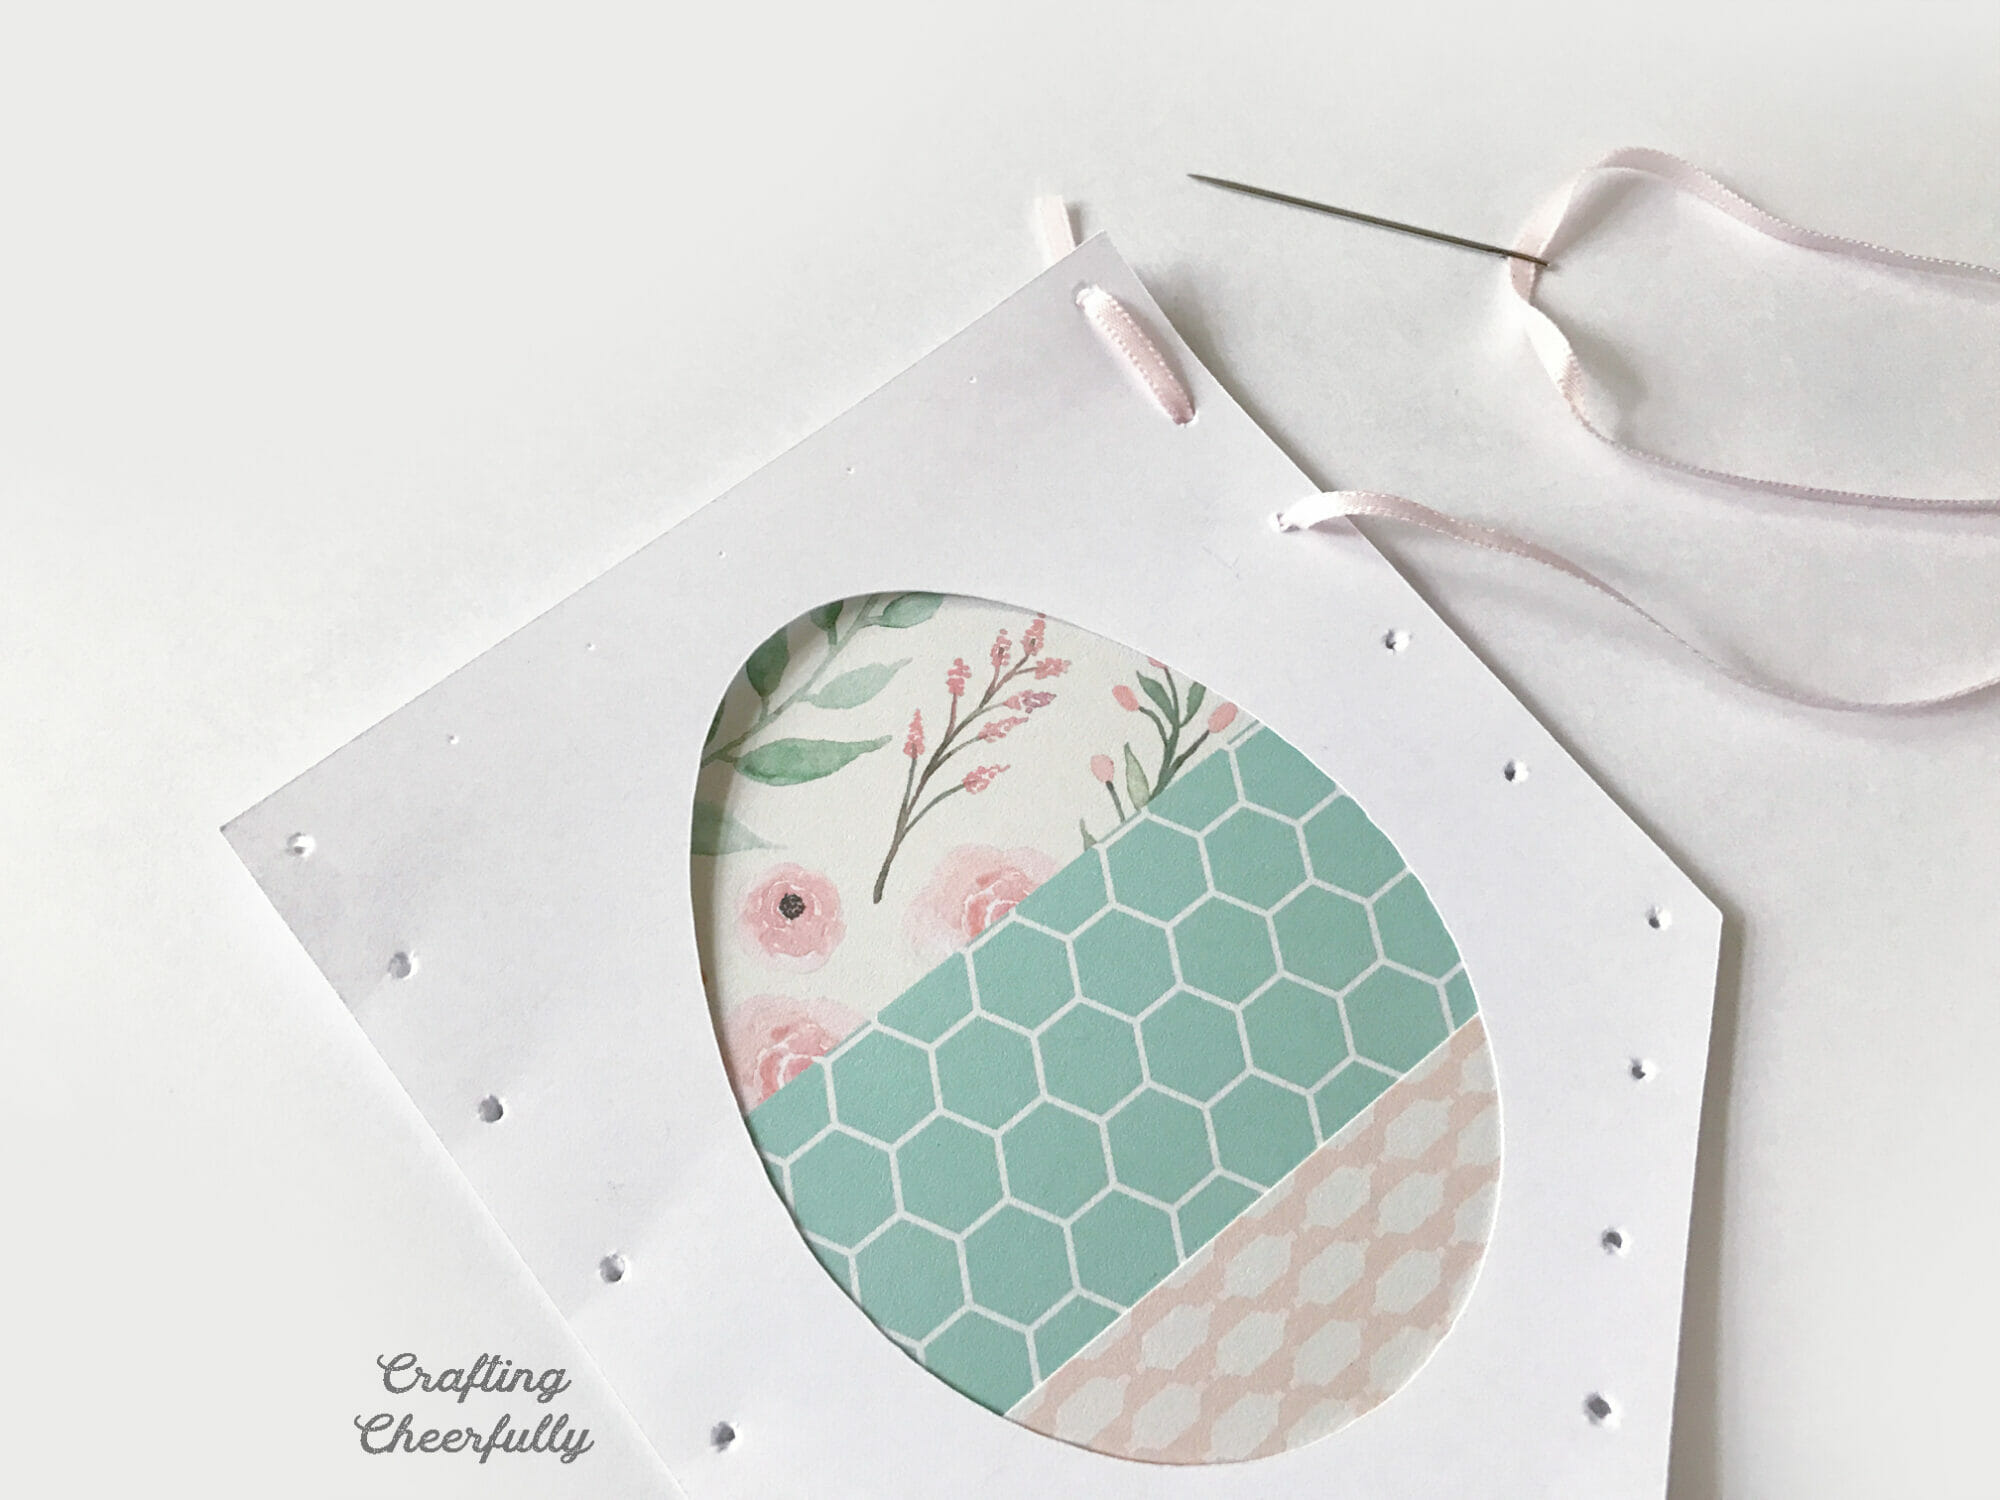
Step Three: Create the middle layer!
The middle layer will be sandwiched between the two white layers. You can use multiple pieces of patterned cardstock or just one piece. When this layer is finished, center it on the back piece and adhere it using glue or a tape runner.
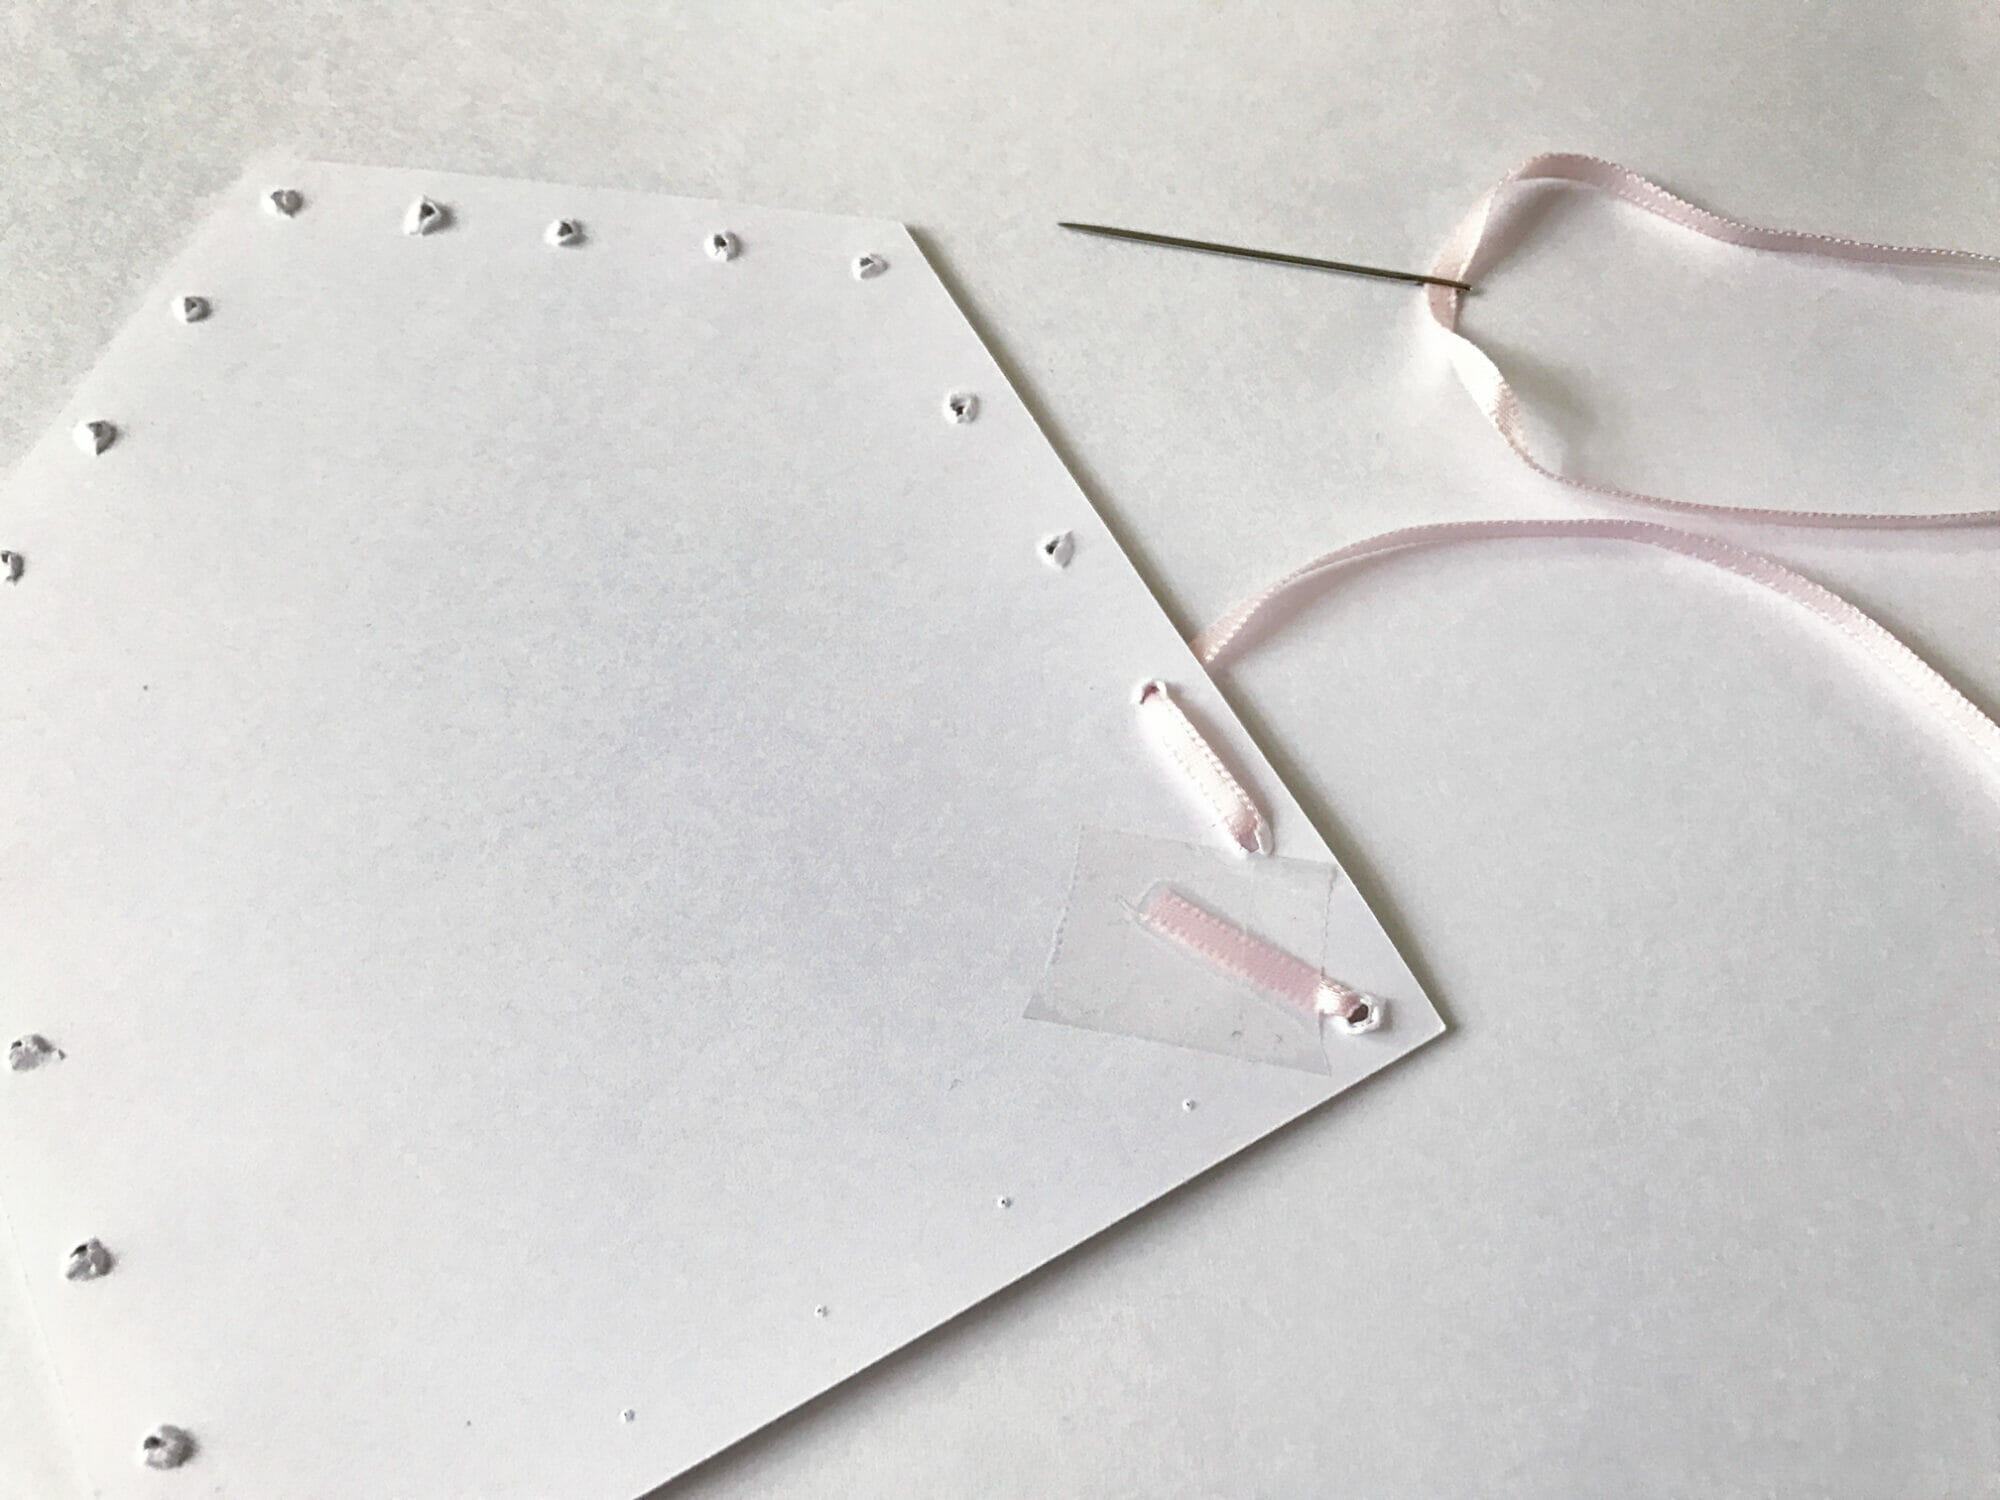
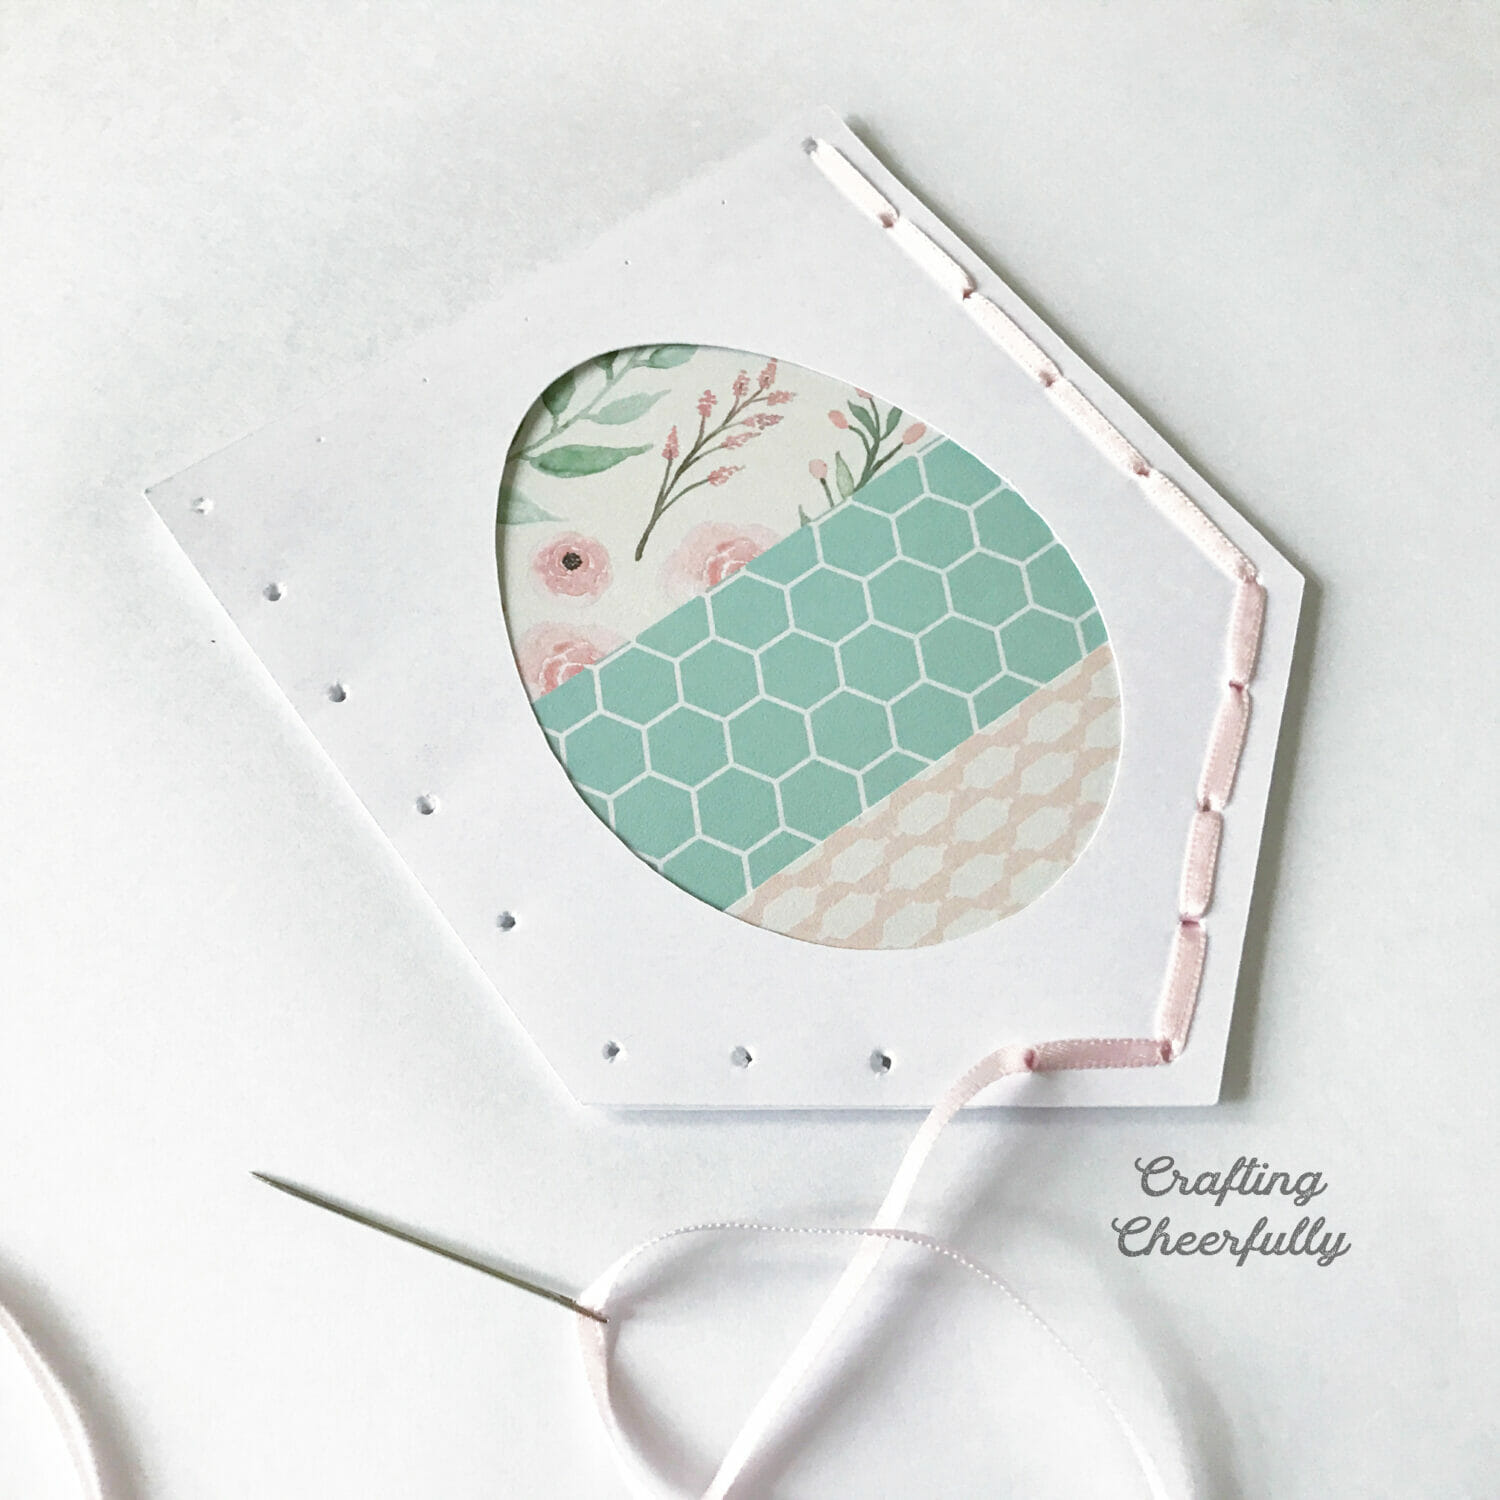
Step Four: Stitch the banner pennants.
Layer the pennant pieces together and stitch them together around the bottom four edges. I used an embroidery needle with a large eye and 1/8″ ribbon. You can tape down the ends of the ribbon on the back side and use a simple backstitch. This step took the longest because I had to make sure my ribbon wasn’t twisting. On a few of them, I ignored what the back looked like and just focused on the front since I knew my banner would be against our mantel or a wall.
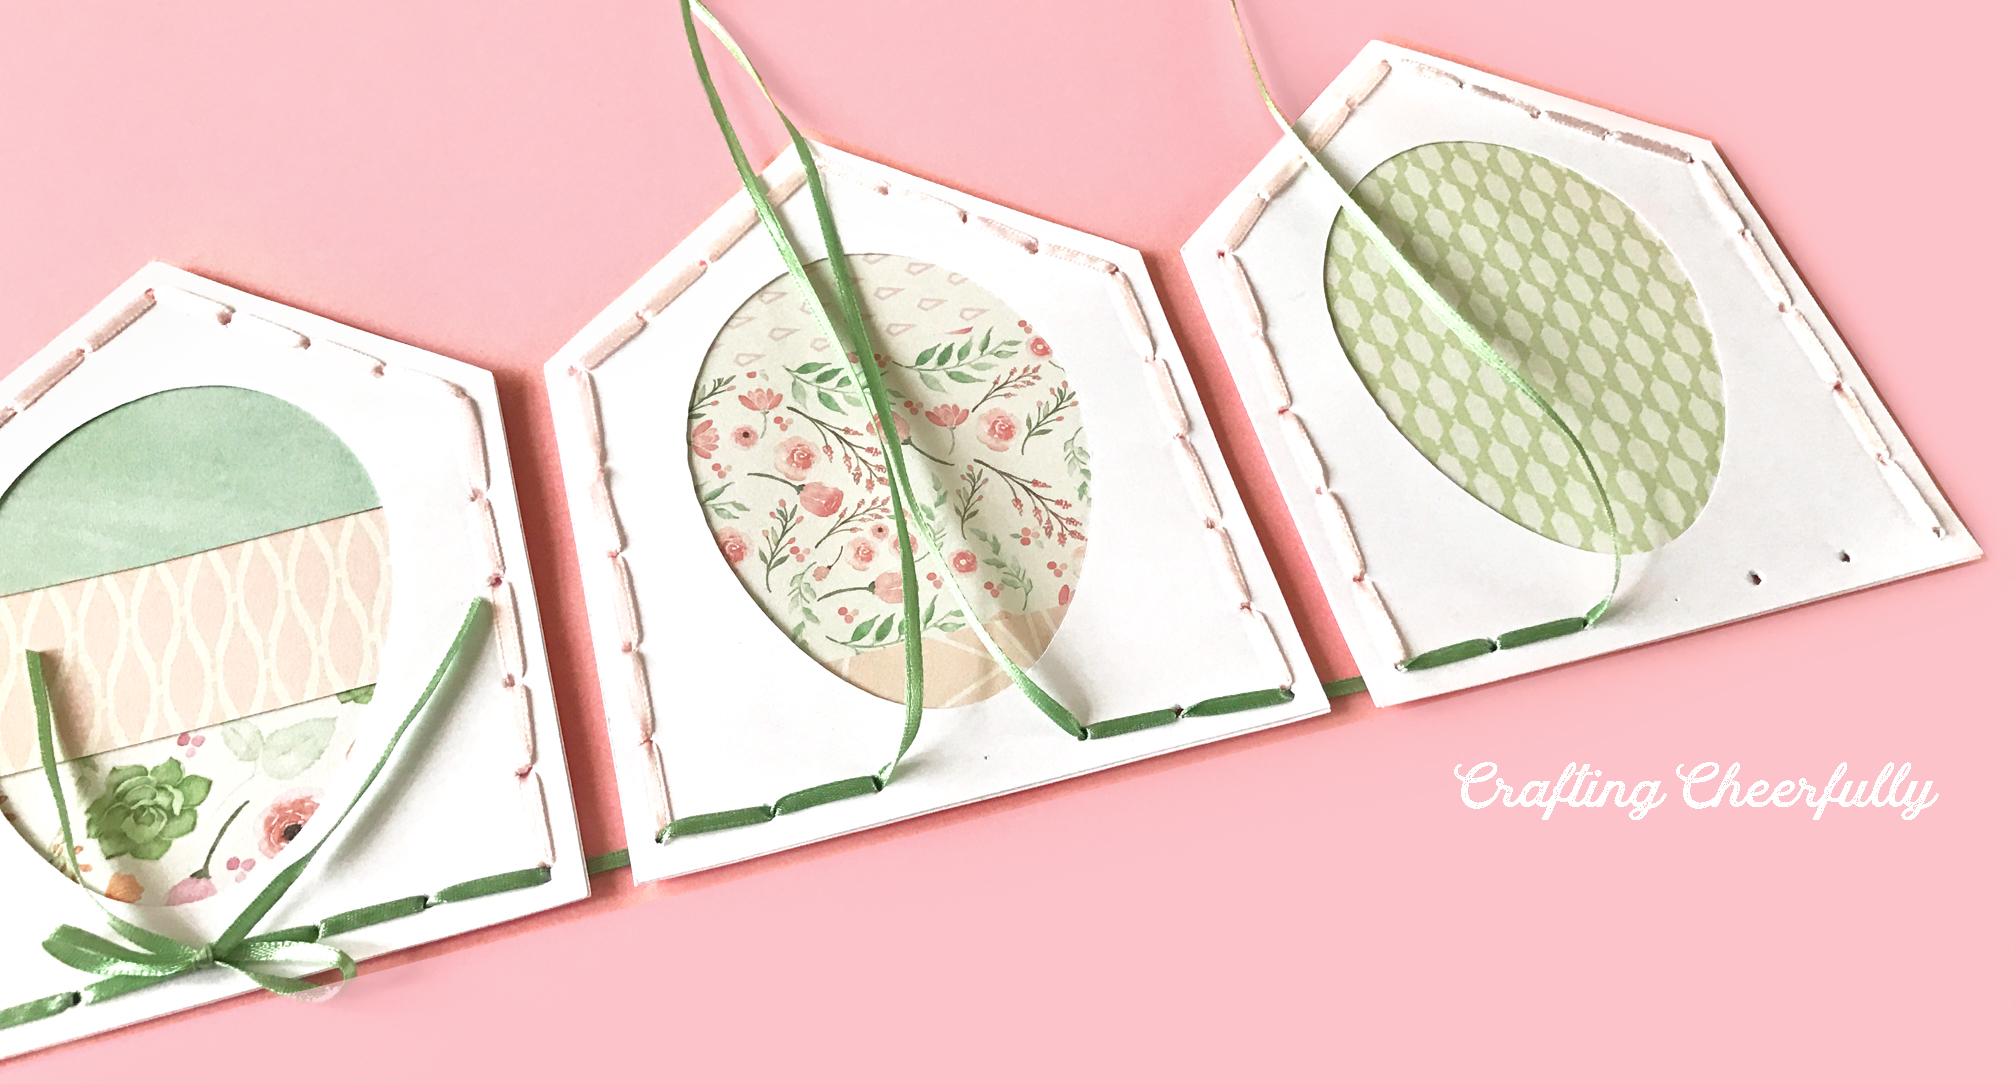
Step Five: String the egg pennants together to form a banner.
String the banner pieces together using the holes along the top of the pennants. I chose to lace the ribbon through the top with a small bow on each banner piece. If you do it this way, you will be using small lengths of ribbon instead of one long strand.
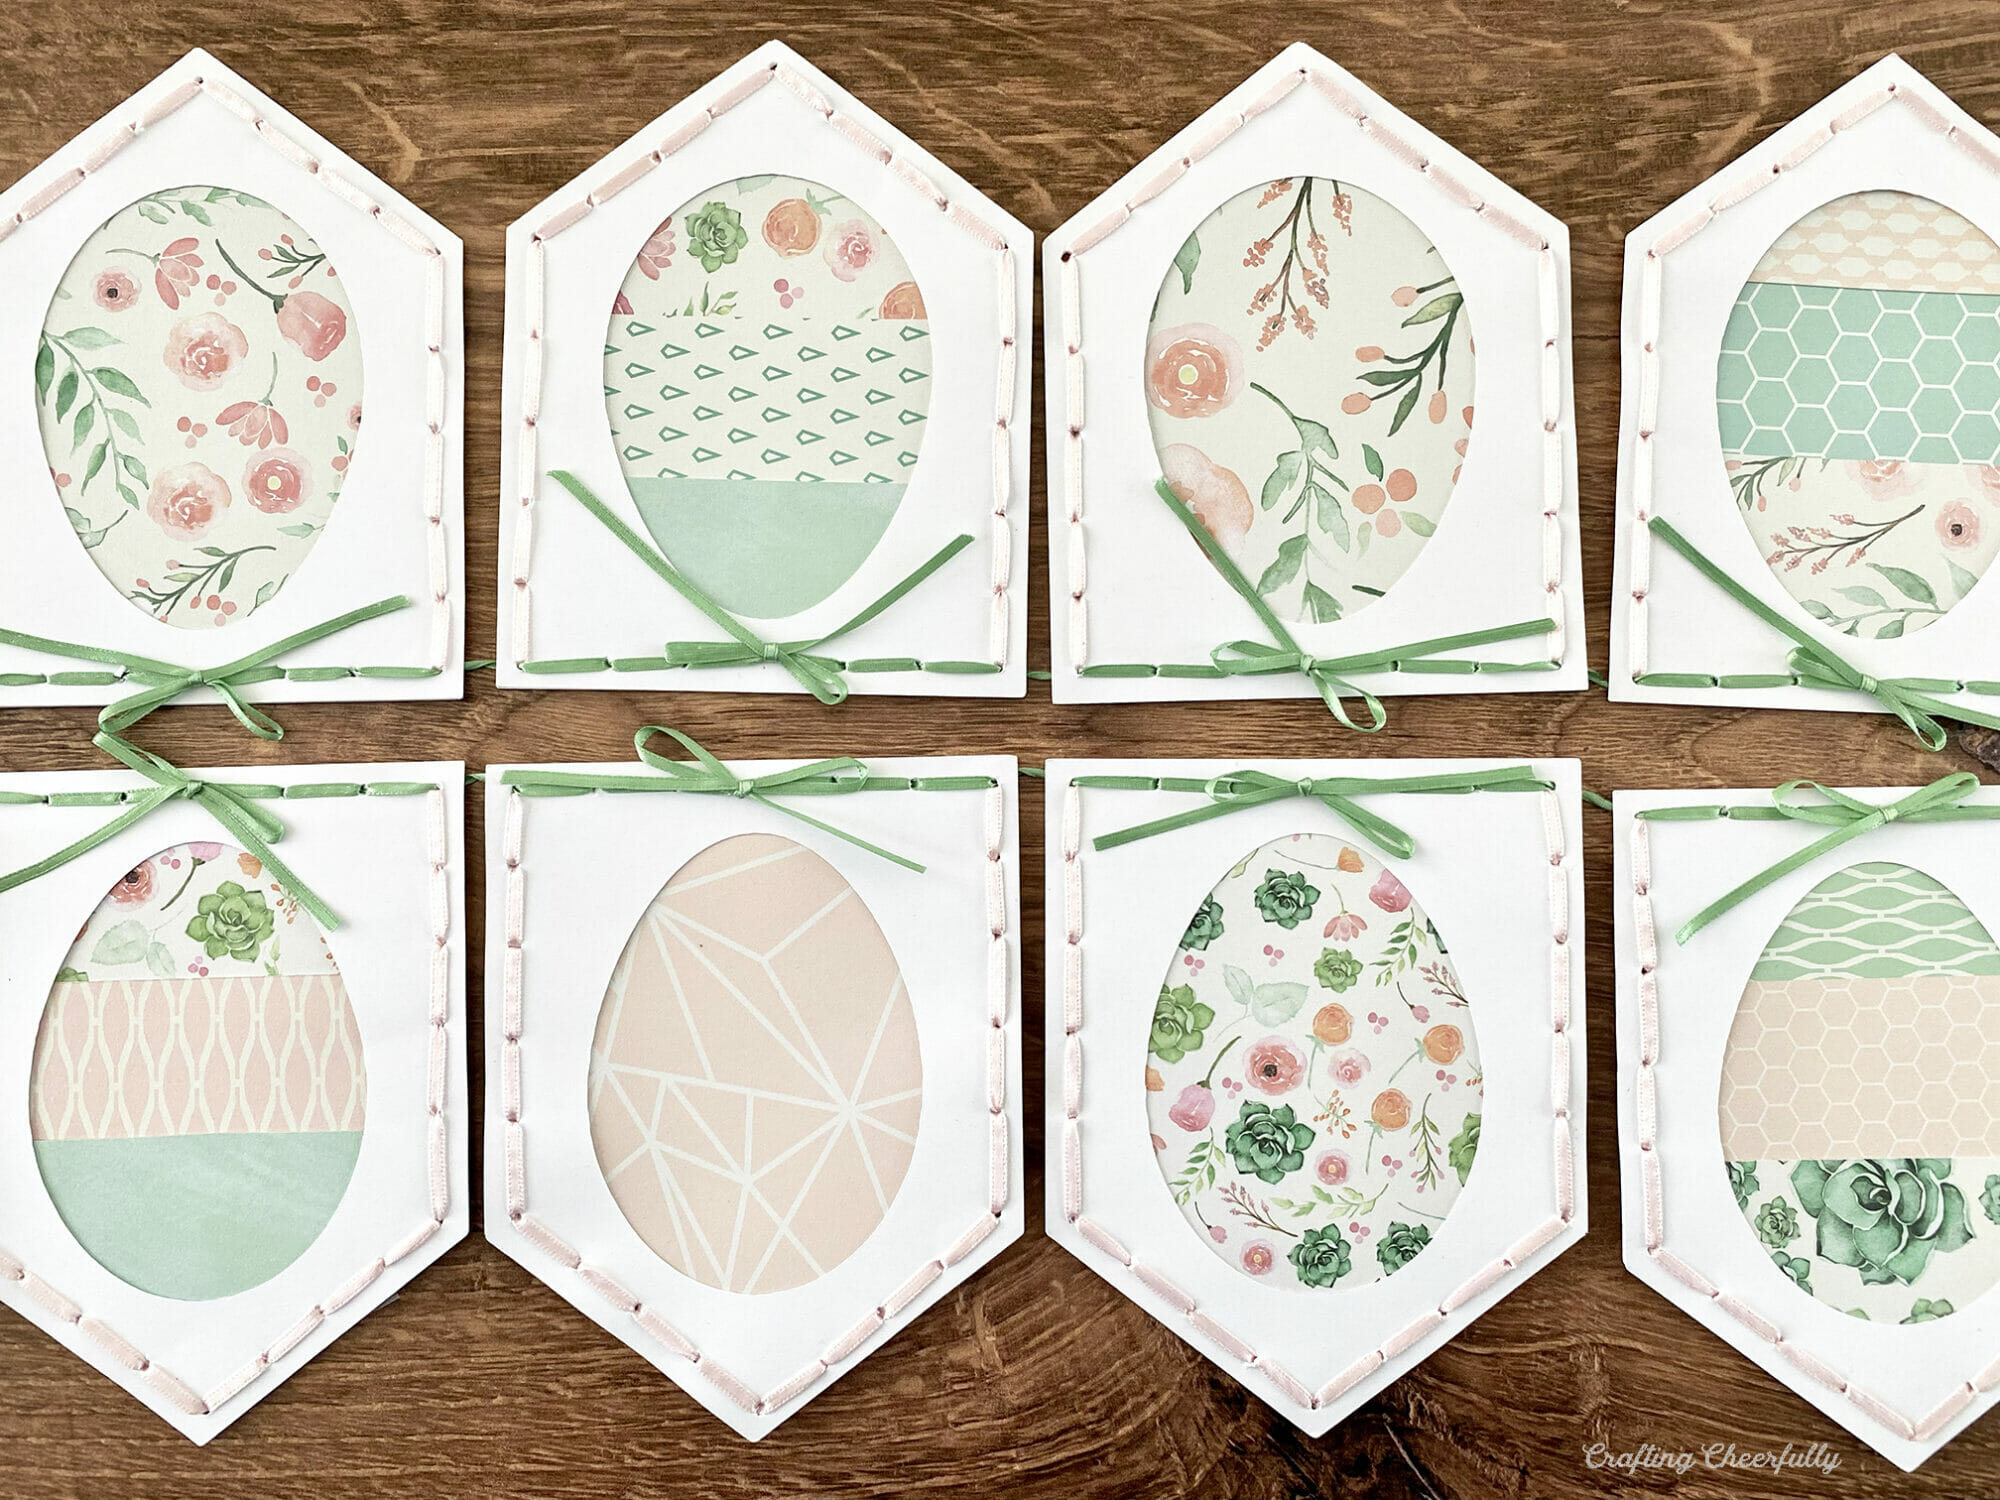
The banner is finished! This banner is so sweet and full of springtime cheer. It felt so good to take down my winter decorations! Along with this banner I put up my other handmade Easter decorations! You can check out the tutorials for each below.

Get the Free Easter Egg Banner Files!
Fill out the purple form below with your first name and email address! The free file will be sent straight to your inbox! If you have already filled out the form below, don’t worry – you won’t be added to my list twice! This freebie is for personal use only. I hope you enjoy crafting something special. Please let me know if you have any questions :)


Awesome. Love your projects.
Thank you! That is so nice to hear!! :)
SO cute!! I Love this & am going to make some this morn for my Dr.’s office!! Thank You
Thank you so much! What a nice idea for a Doctor’s office! Have fun crafting! :)