
DIY Tie-Dye Chalkboard Signs
Create a colorful bedroom door sign using chalkboards and watercolor paint to create a cool tie-dye effect! A great craft to do with kids that is simple to set up and lots of fun to make!

Hello Crafty Friends! Today I have a cute tie-dye-inspired craft to share with you – making DIY bedroom door signs. This craft is both a fun craft for adults as well as a great craft to do with kids. Create a tie-dye effect using watercolor paint! No need to use expensive dye kits – a palette of Crayola watercolor paint is all you’ll need!
Bedroom door signs can be so much for kids, especially when they are chalkboards. It gives them a fun place to write their name or add messages and doodles. If you’d like to create this sign with a permanent name, simply use acrylic paint instead of chalk. The paint will look fun against the black chalkboard.
For our chalkboard signs we also tie-dyed ribbon using watercolor paint. It was simple to do and the tie-dye ribbon adds a sweet touch, both as a handle and for an accent bow.

Below is the tutorial on how to create your own bedroom door signs using a mini chalkboard and watercolor paint. This is a great craft to do with a group of kids or for Girl Scouts, just remember to allow about 24 hours of drying time.
How to Make Bedroom Door Chalkboard Signs
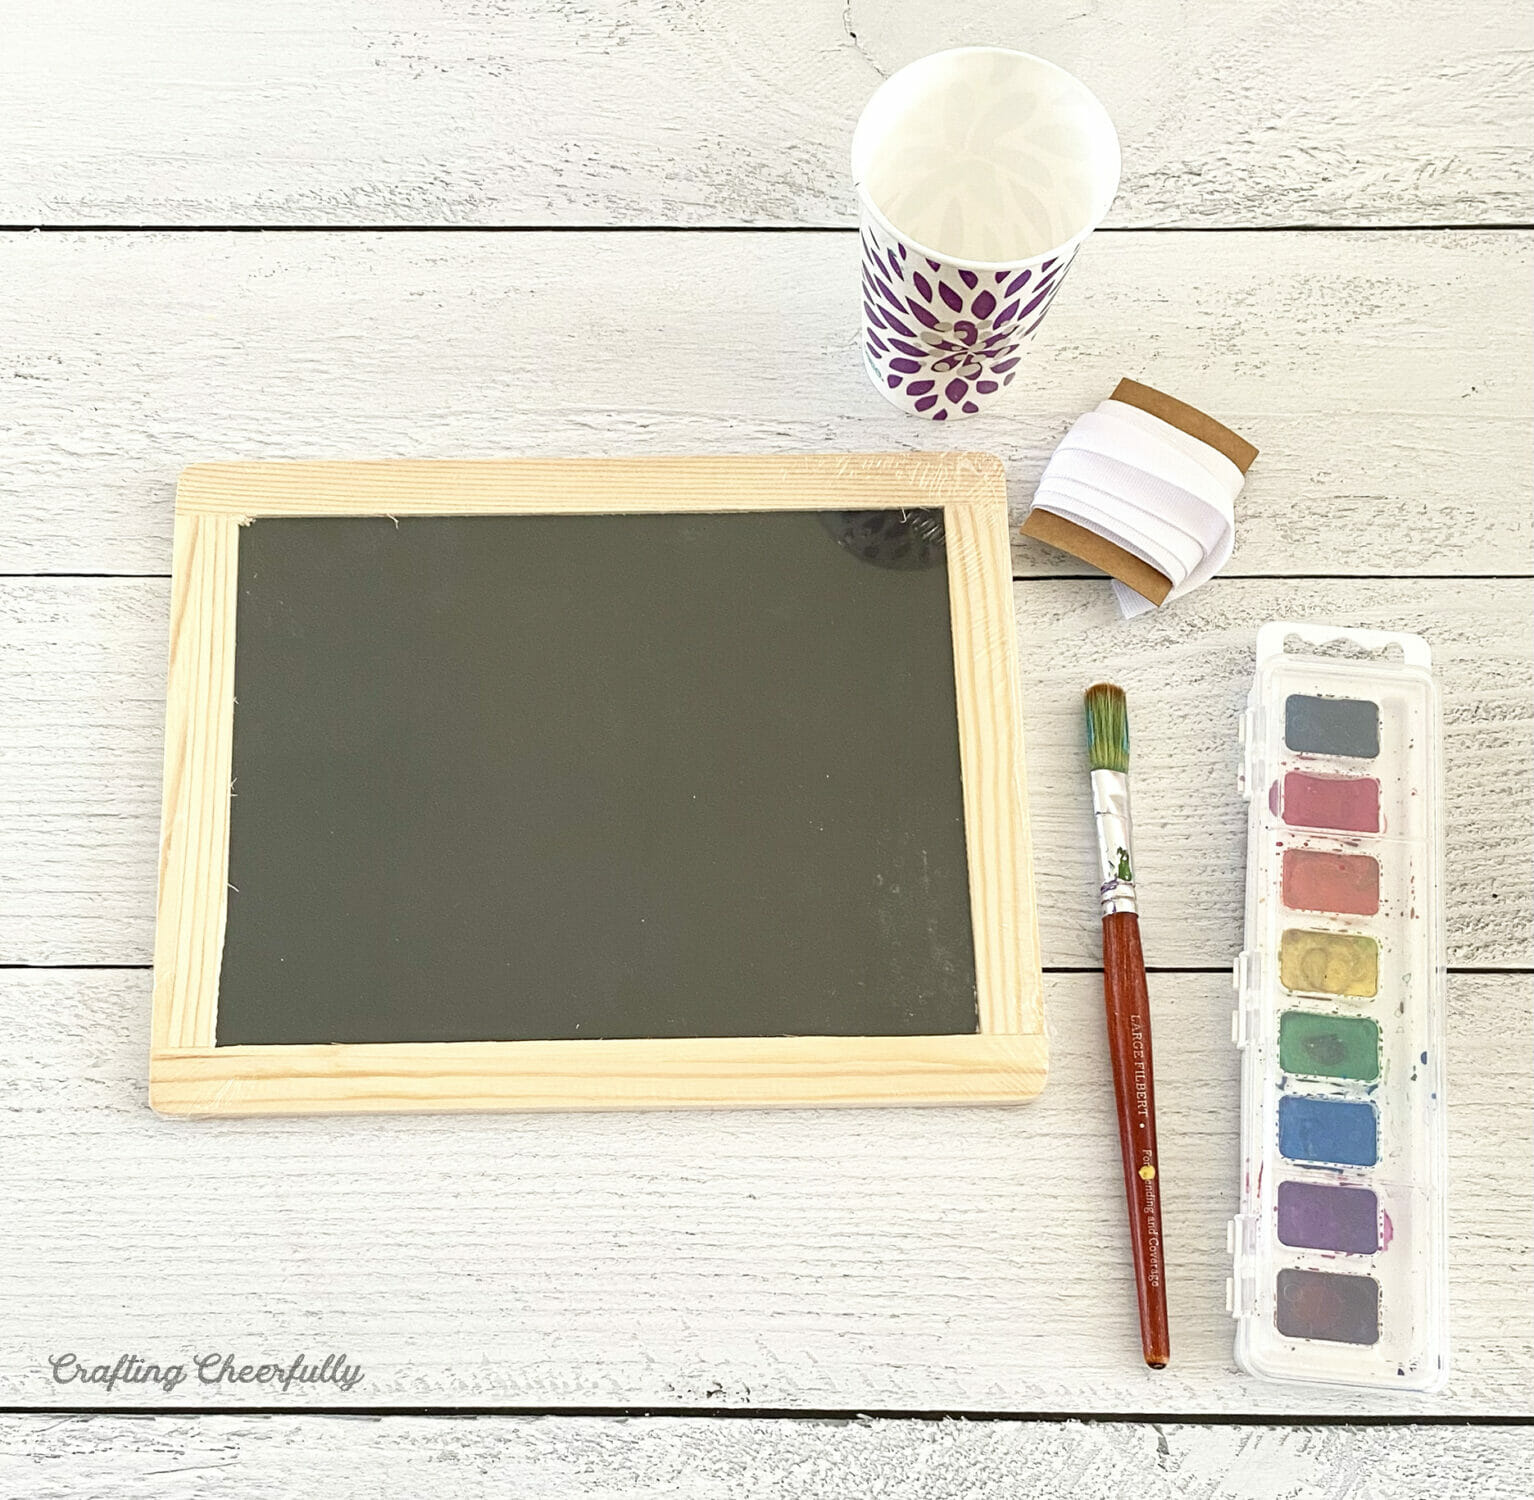
Supplies Needed:
- Chalkboards about 8.5″ x 11″
- Watercolor paint
- Cup for water
- Large round watercolor paint brush
- White grosgrain ribbon
- Adhesive – strong double-sided tape or hot glue.
Creating the Tie-Dye Effect
Start by setting up a workspace for painting. We used a self-healing cutting mat as our work surface, which was easy to wipe up after we were done.
Use a large paintbrush to cover the wooden frame of the chalkboard with a layer of water. This can be repeated so the frame is wet enough that when we add watercolor, the color will bleed. Wet the watercolor palette so the paint pods are wet, then add watercolor paint to the wooden frame in small patches of color around the chalkboard. Use water to make the paint on the frame bleed more.

Tips for Getting a Great Tie-Dye Effect
- The paint will spread so be sure to use colors next to each other that will look nice when mixed.
- Some colors may need more than one layer of paint to show up.
- Press your paint brush into the paint palette a little harder than you usually would to grab more pigment from the pods.
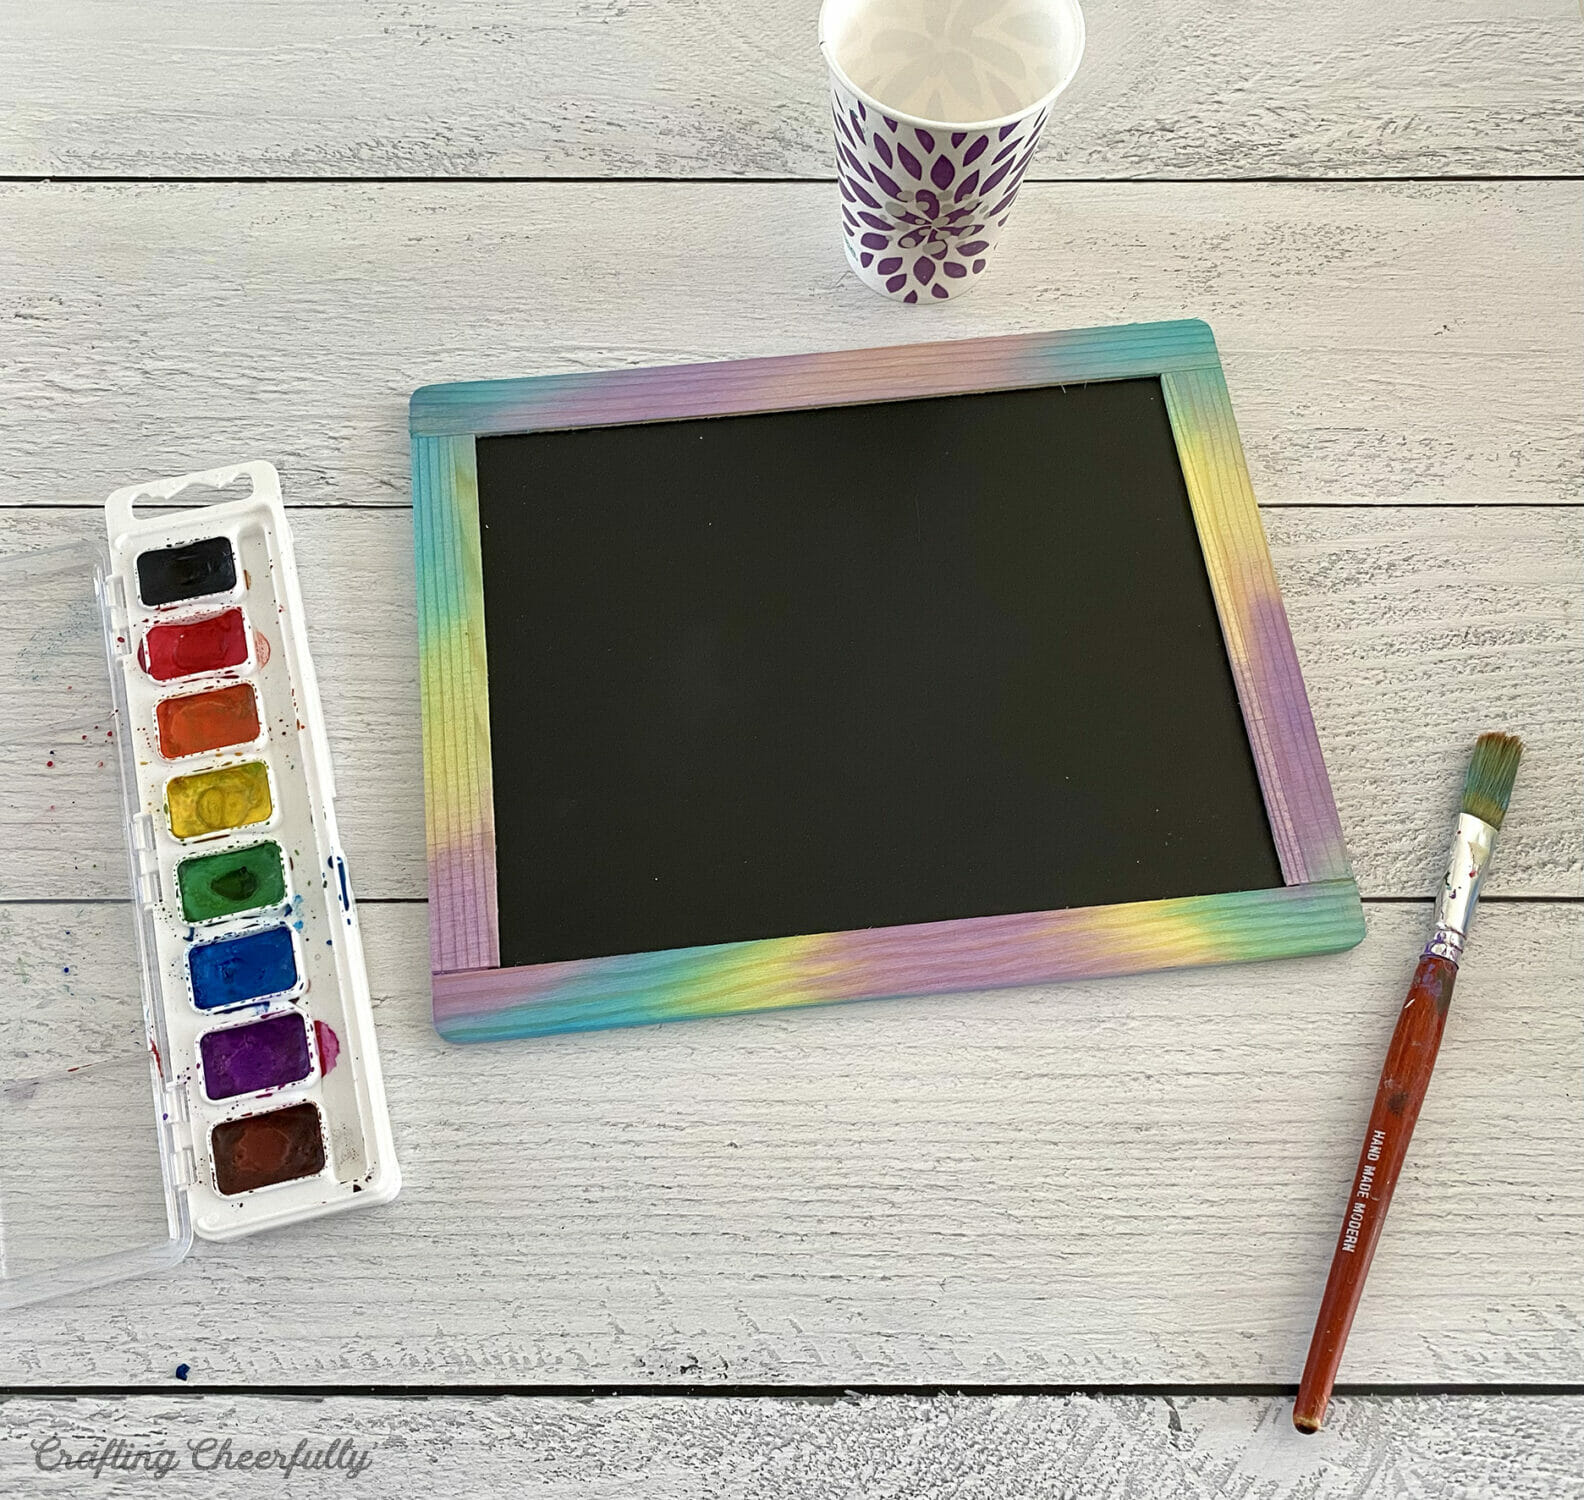
Let the chalkboard door sign dry for about 24 hours.

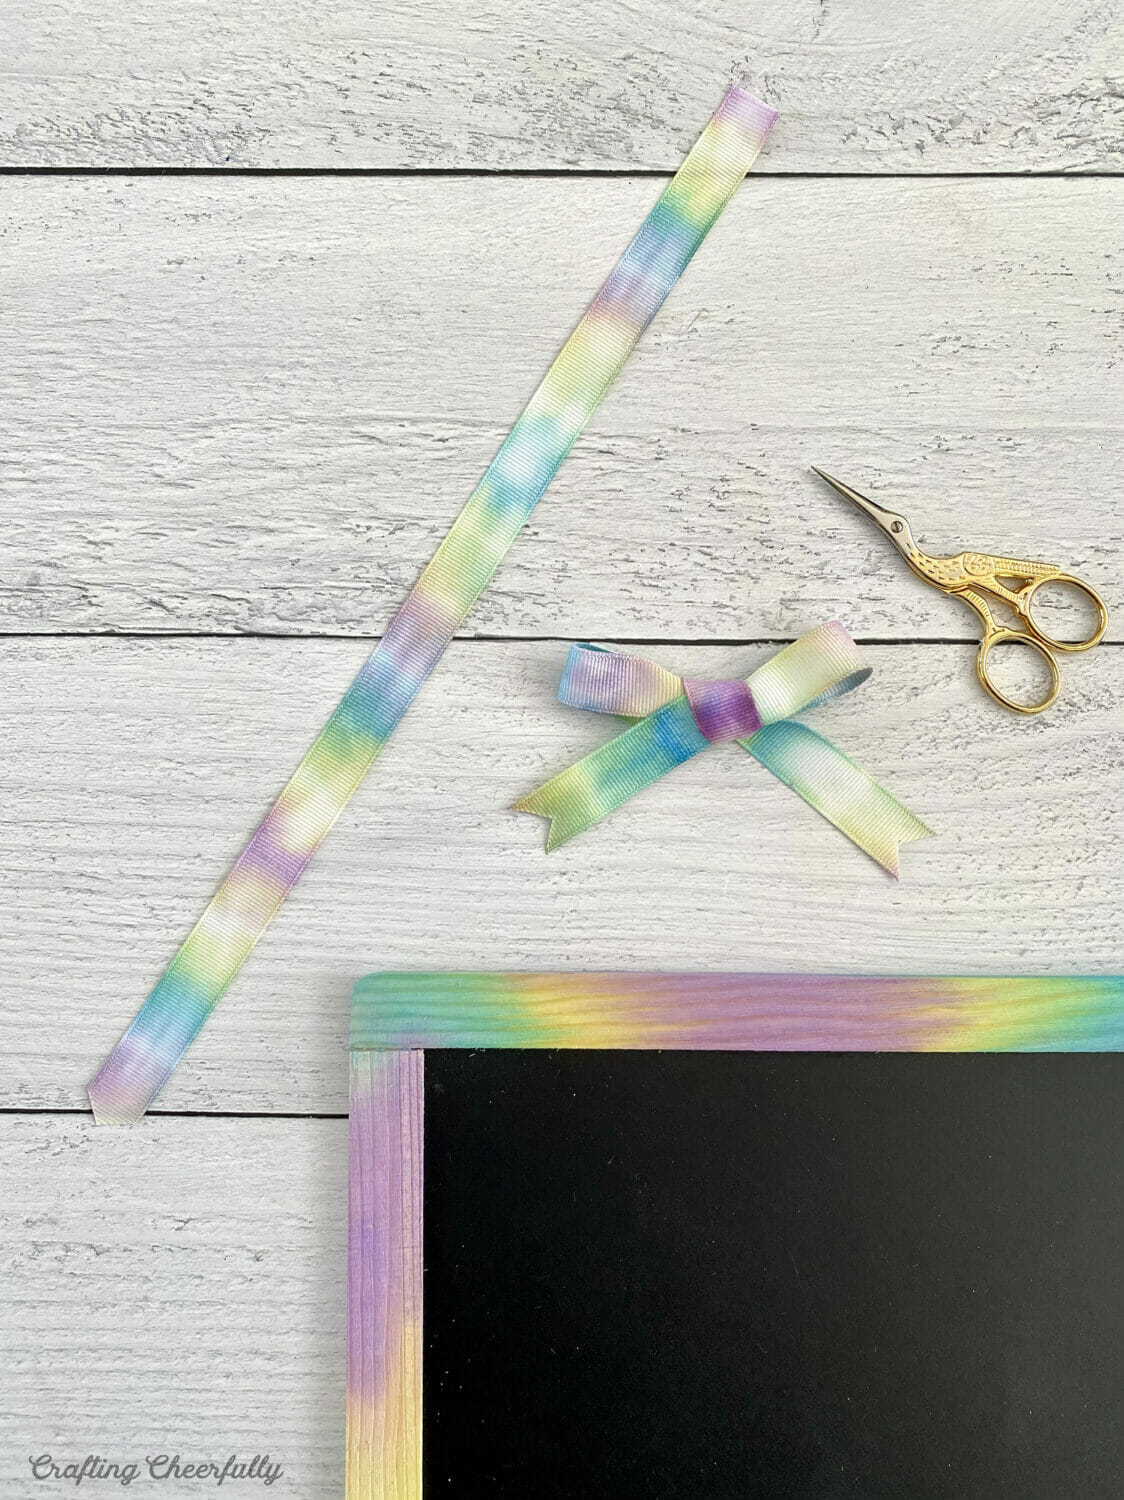
How to Create Tie-Dye Ribbon
While the chalkboard is drying, create your own tie-dye ribbon! I used white grosgrain ribbon, but you can use any type of white ribbon as long a sit can absorb the watercolor paint and not repel it. Fold the ribbon several times so the bundle of ribbon is about 4-6″ long. Wrap rubber bands tightly around the ribbon bundle, then dip the ribbon into a cup of water and paint the ribbon with watercolor paint. Use a different color between each set of rubber bands.
I painted the outside of the ribbon and then set it on its side and pushed my paintbrush down in-between the layers of ribbon to try to get the paint to reach all layers. Let the ribbon dry for 24 hours and then unwrap it. The outer layers of the ribbon will be darker than the inner layers but there should be a cool tie-dye effect on the ribbon!

Use the ribbon to create a hanging loop and fun bow accents.
Attach the hanging loop to the back of the chalkboard using strong double-sided tape (I used 1/2″ Scor-Tape) or use hot glue. Add a bow to the bottom corner for a cute detail!
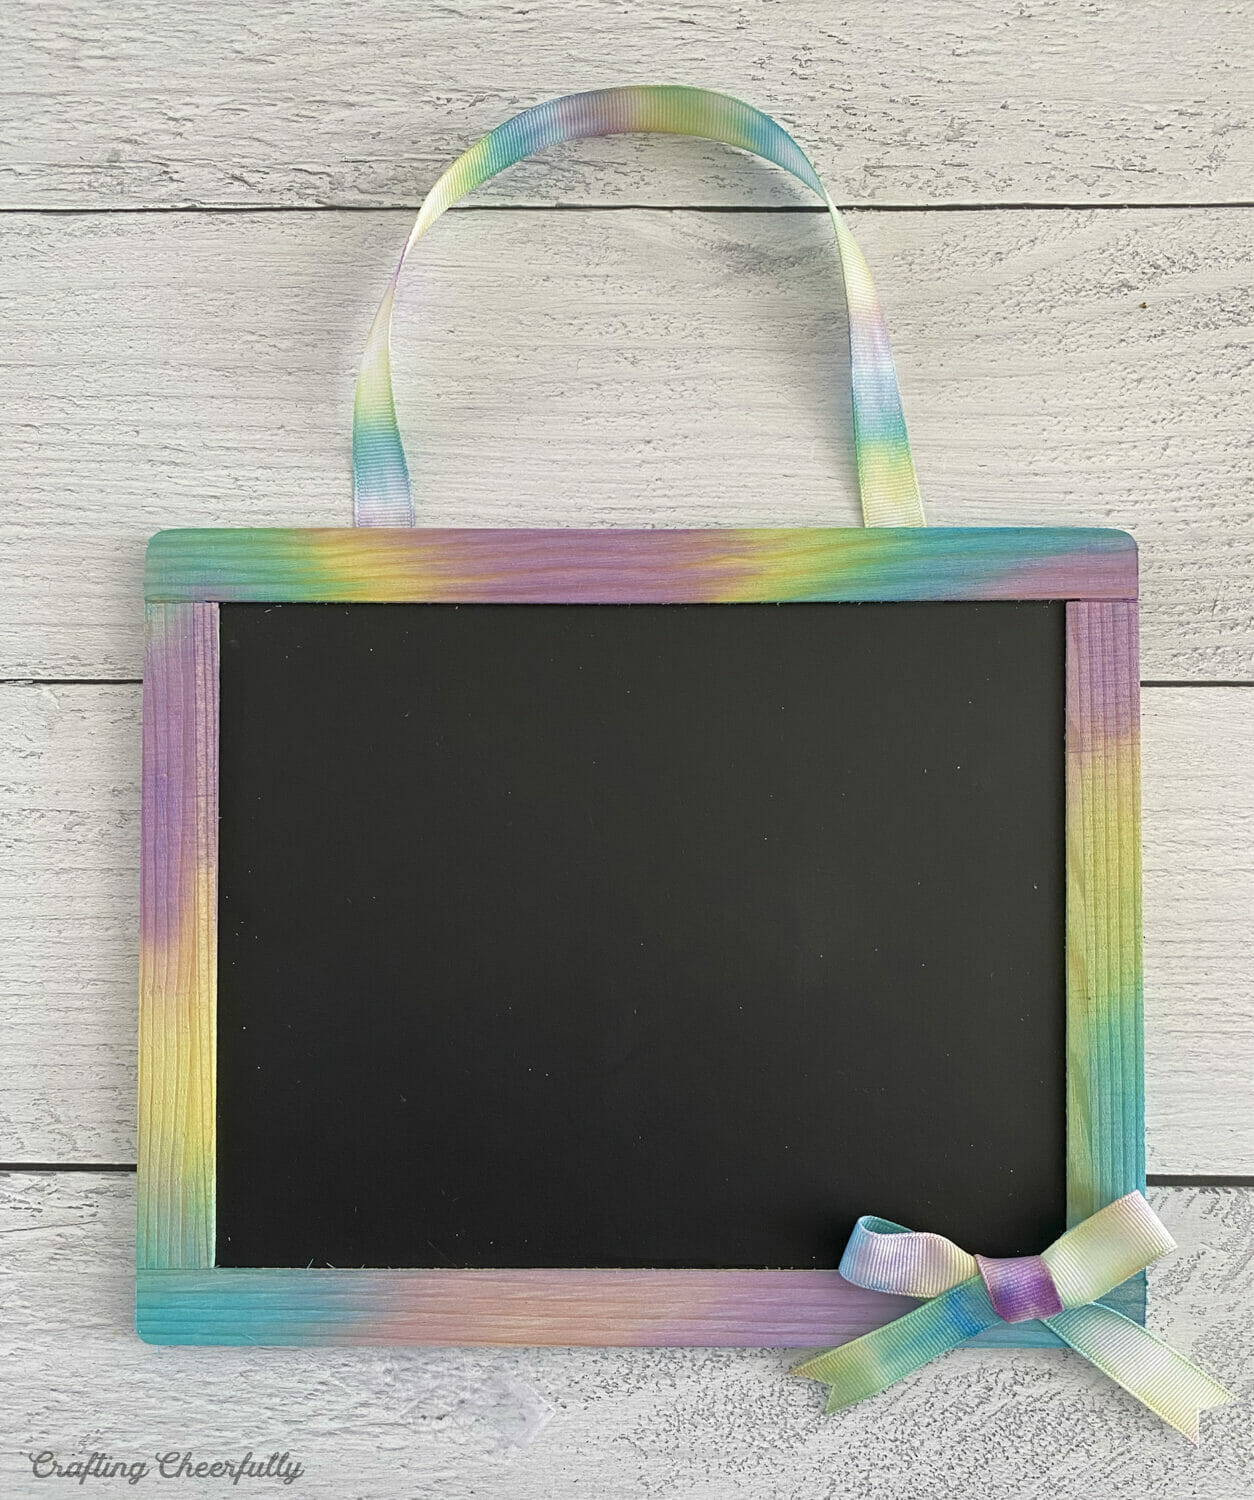

You can skip the tie-dye ribbon and just use colorful ribbon to add a hanging loop.

The chalkboard bedroom door sign is finished! It turned out so cute and is a fun tie-dye project that doesn’t involve dye! The watercolor paint, if using Crayola, is washable so it is easy for kids to work with. Be sure not to wash the ribbon after painting it with the watercolor paint as it may not stay in!


I hope you enjoyed this cute tie-dye craft! You can check out my other Crafts for Kids for more fun ideas!
I’m sharing this craft as part of Creative Crafts Tie-Dye edition. Below you’ll find links to all of the amazing tie-dye crafts being shared – everything from tie-dye shirts and shoes to tie-dye banners and gift bags!

- Beth with Creatively Beth is sharing How to Tie Dye Paper with Markers to make a Unicorn Wand
- Lindsay from Artsy Fartsy Mama has created a gorgeous and colorful Ice Tie Dye Hoodie
- Liz from Liz on Call is sharing a set of groovy Tie Dye Stickers created with her cutting machine
- Ginger from Ginger Snap Crafts is sharing a super cute pair of Tie Dye Sneakers for Summer fun
- Elise from Polka Dotted Blue Jay has created a Tie Dye Gift Bag, perfect for all the groovy gifts
- Heather from Homemade Heather is sharing the recipe for yummy Tie Dye Fruity Pebble Bars
- Laura from Me and My INKlings has created a bright and colorful Rainbow Tie Dye Tote Bag
- Smitha from Smiling Colors is sharing How to Throw a Tie Dye Party, perfect for Summer
- Shani from Sunshine and Munchkins has created a rainbow Tie Dye Banner
- Laura from Laura’s Crafty Life has a full tutorial on How to Tie Dye Tote Bags
- Justine from Little Dove has created a reusable Tie Dye Fabric Wrapping Paper
- Erica from 5 Little Monsters is sharing Shibori Inspired Tie Dye Swaddle Blankets
- Kelsey from Poofy Cheeks has created a Tie Dye Sublimation Tumbler for Mom


