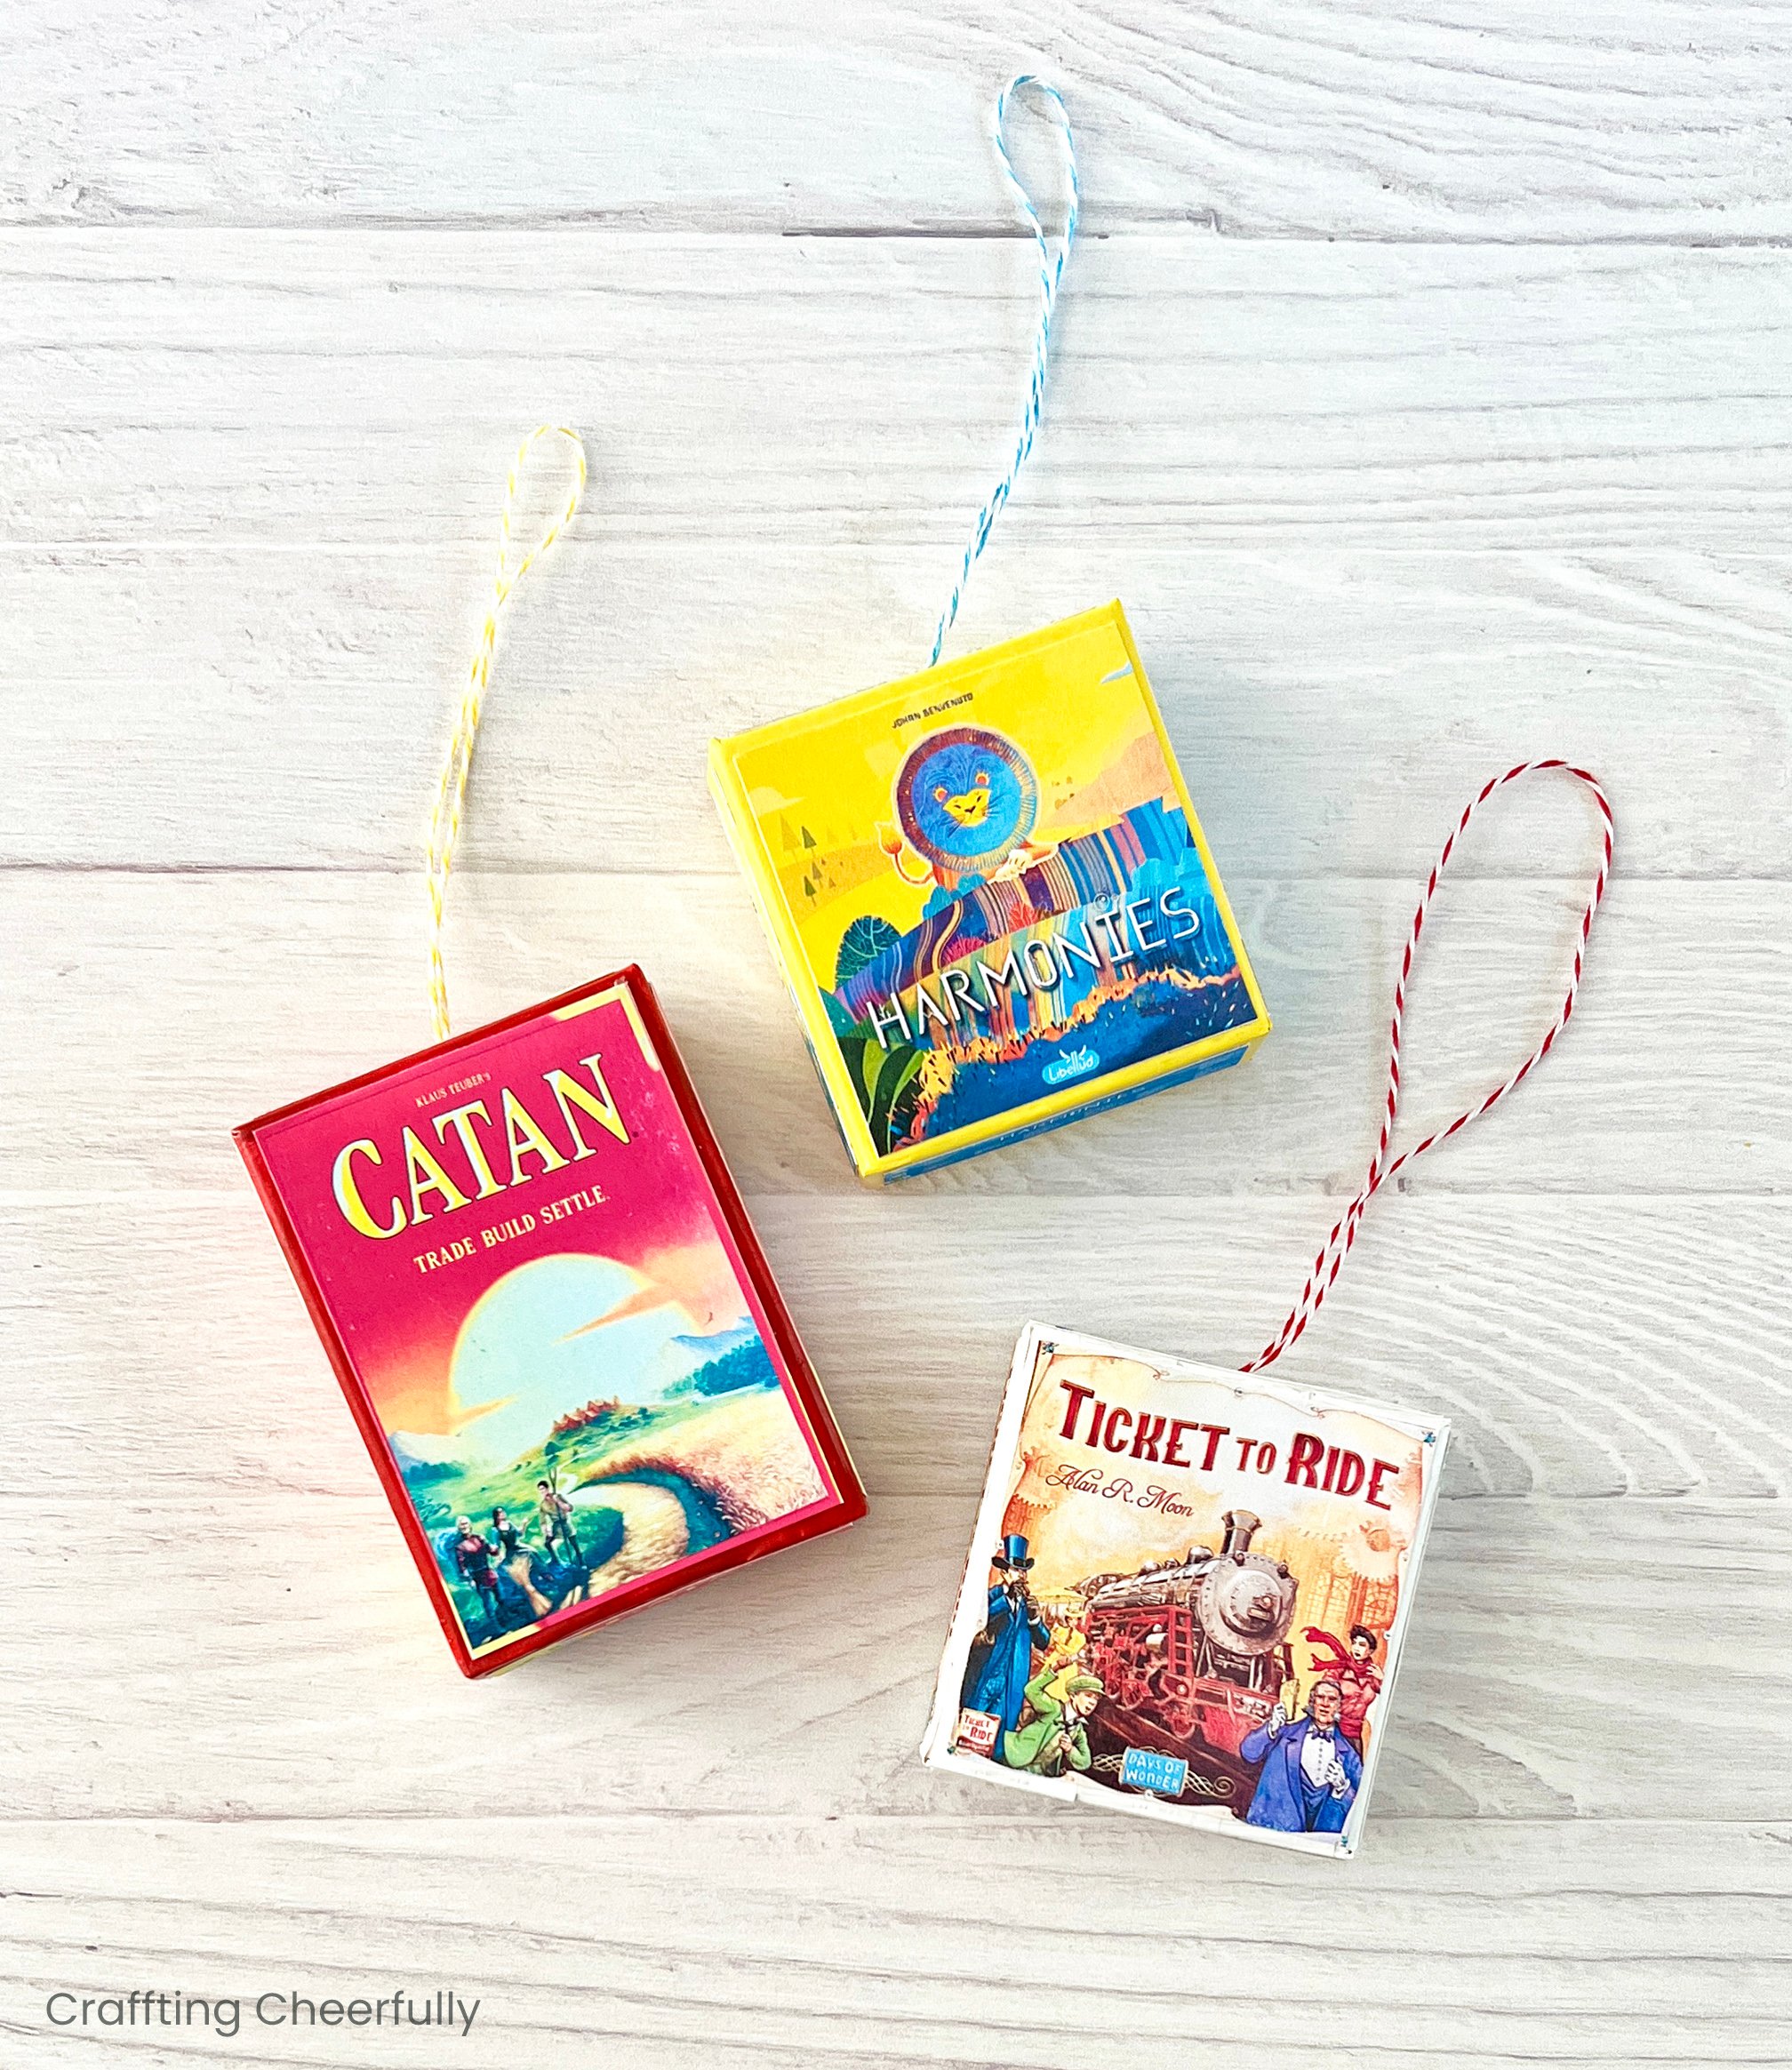
DIY Board Game Ornaments
Create a unique board game ornament for your holiday tree or for your favorite board game enthusiast!

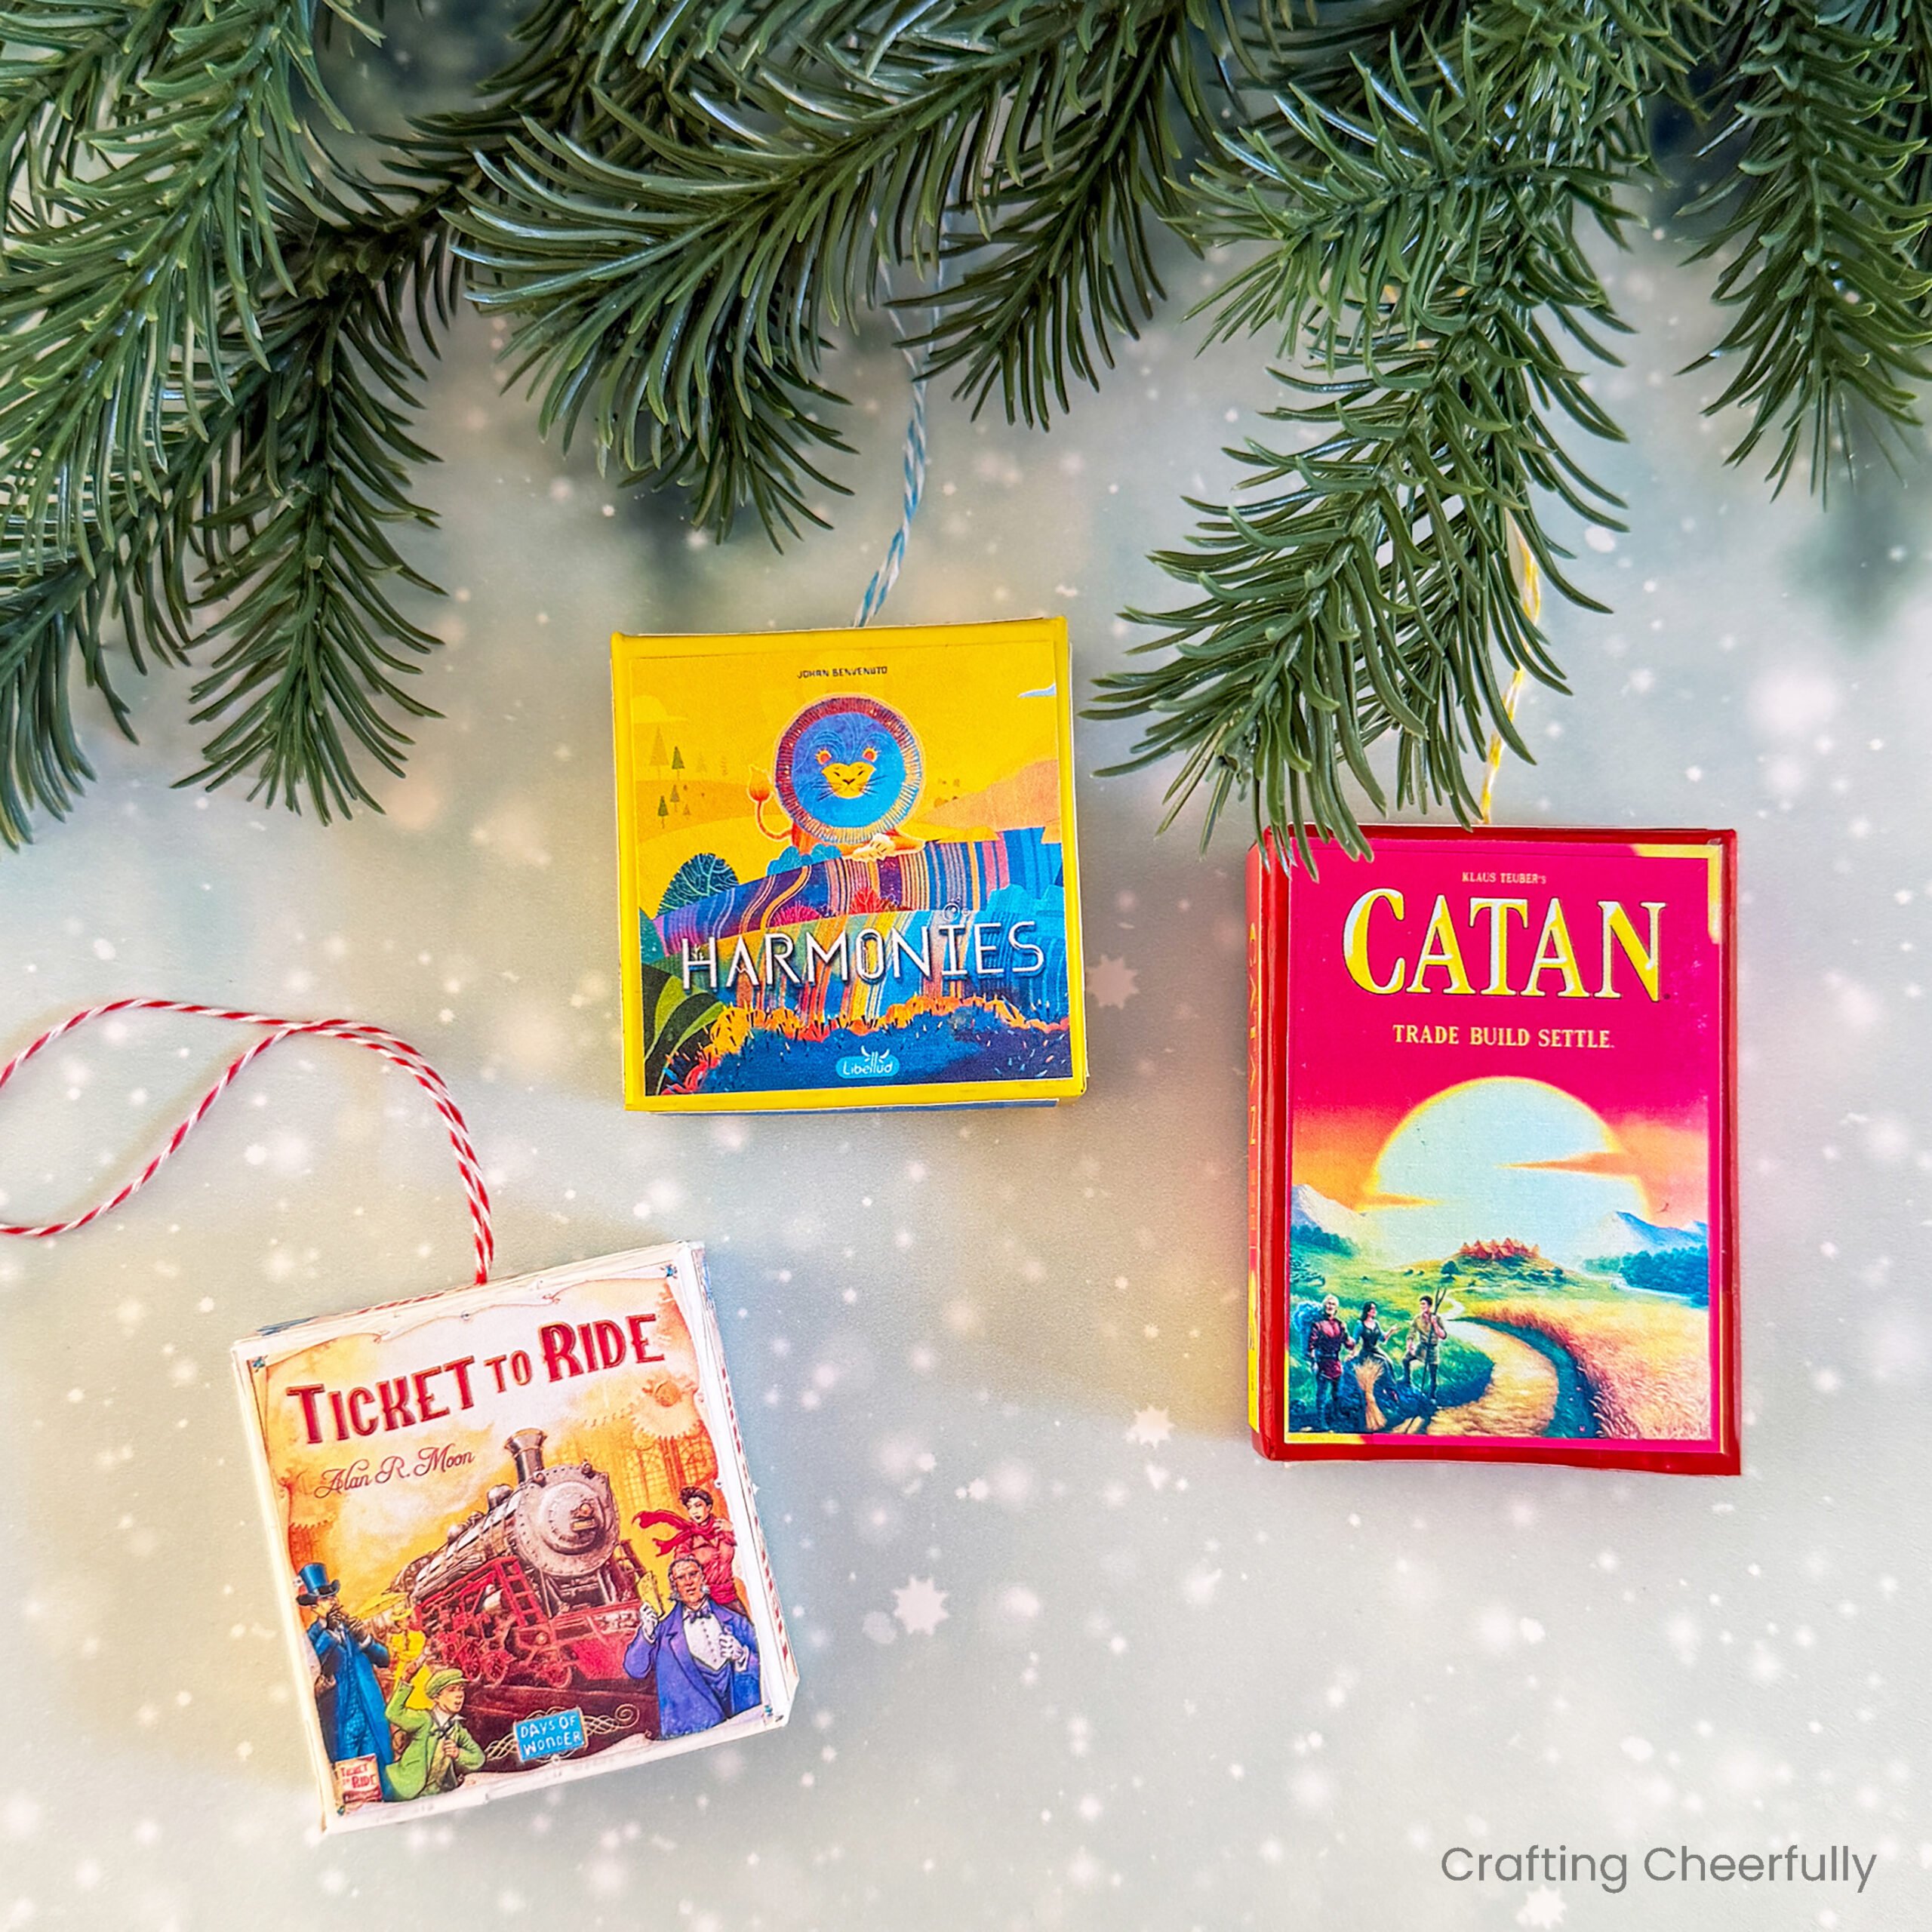
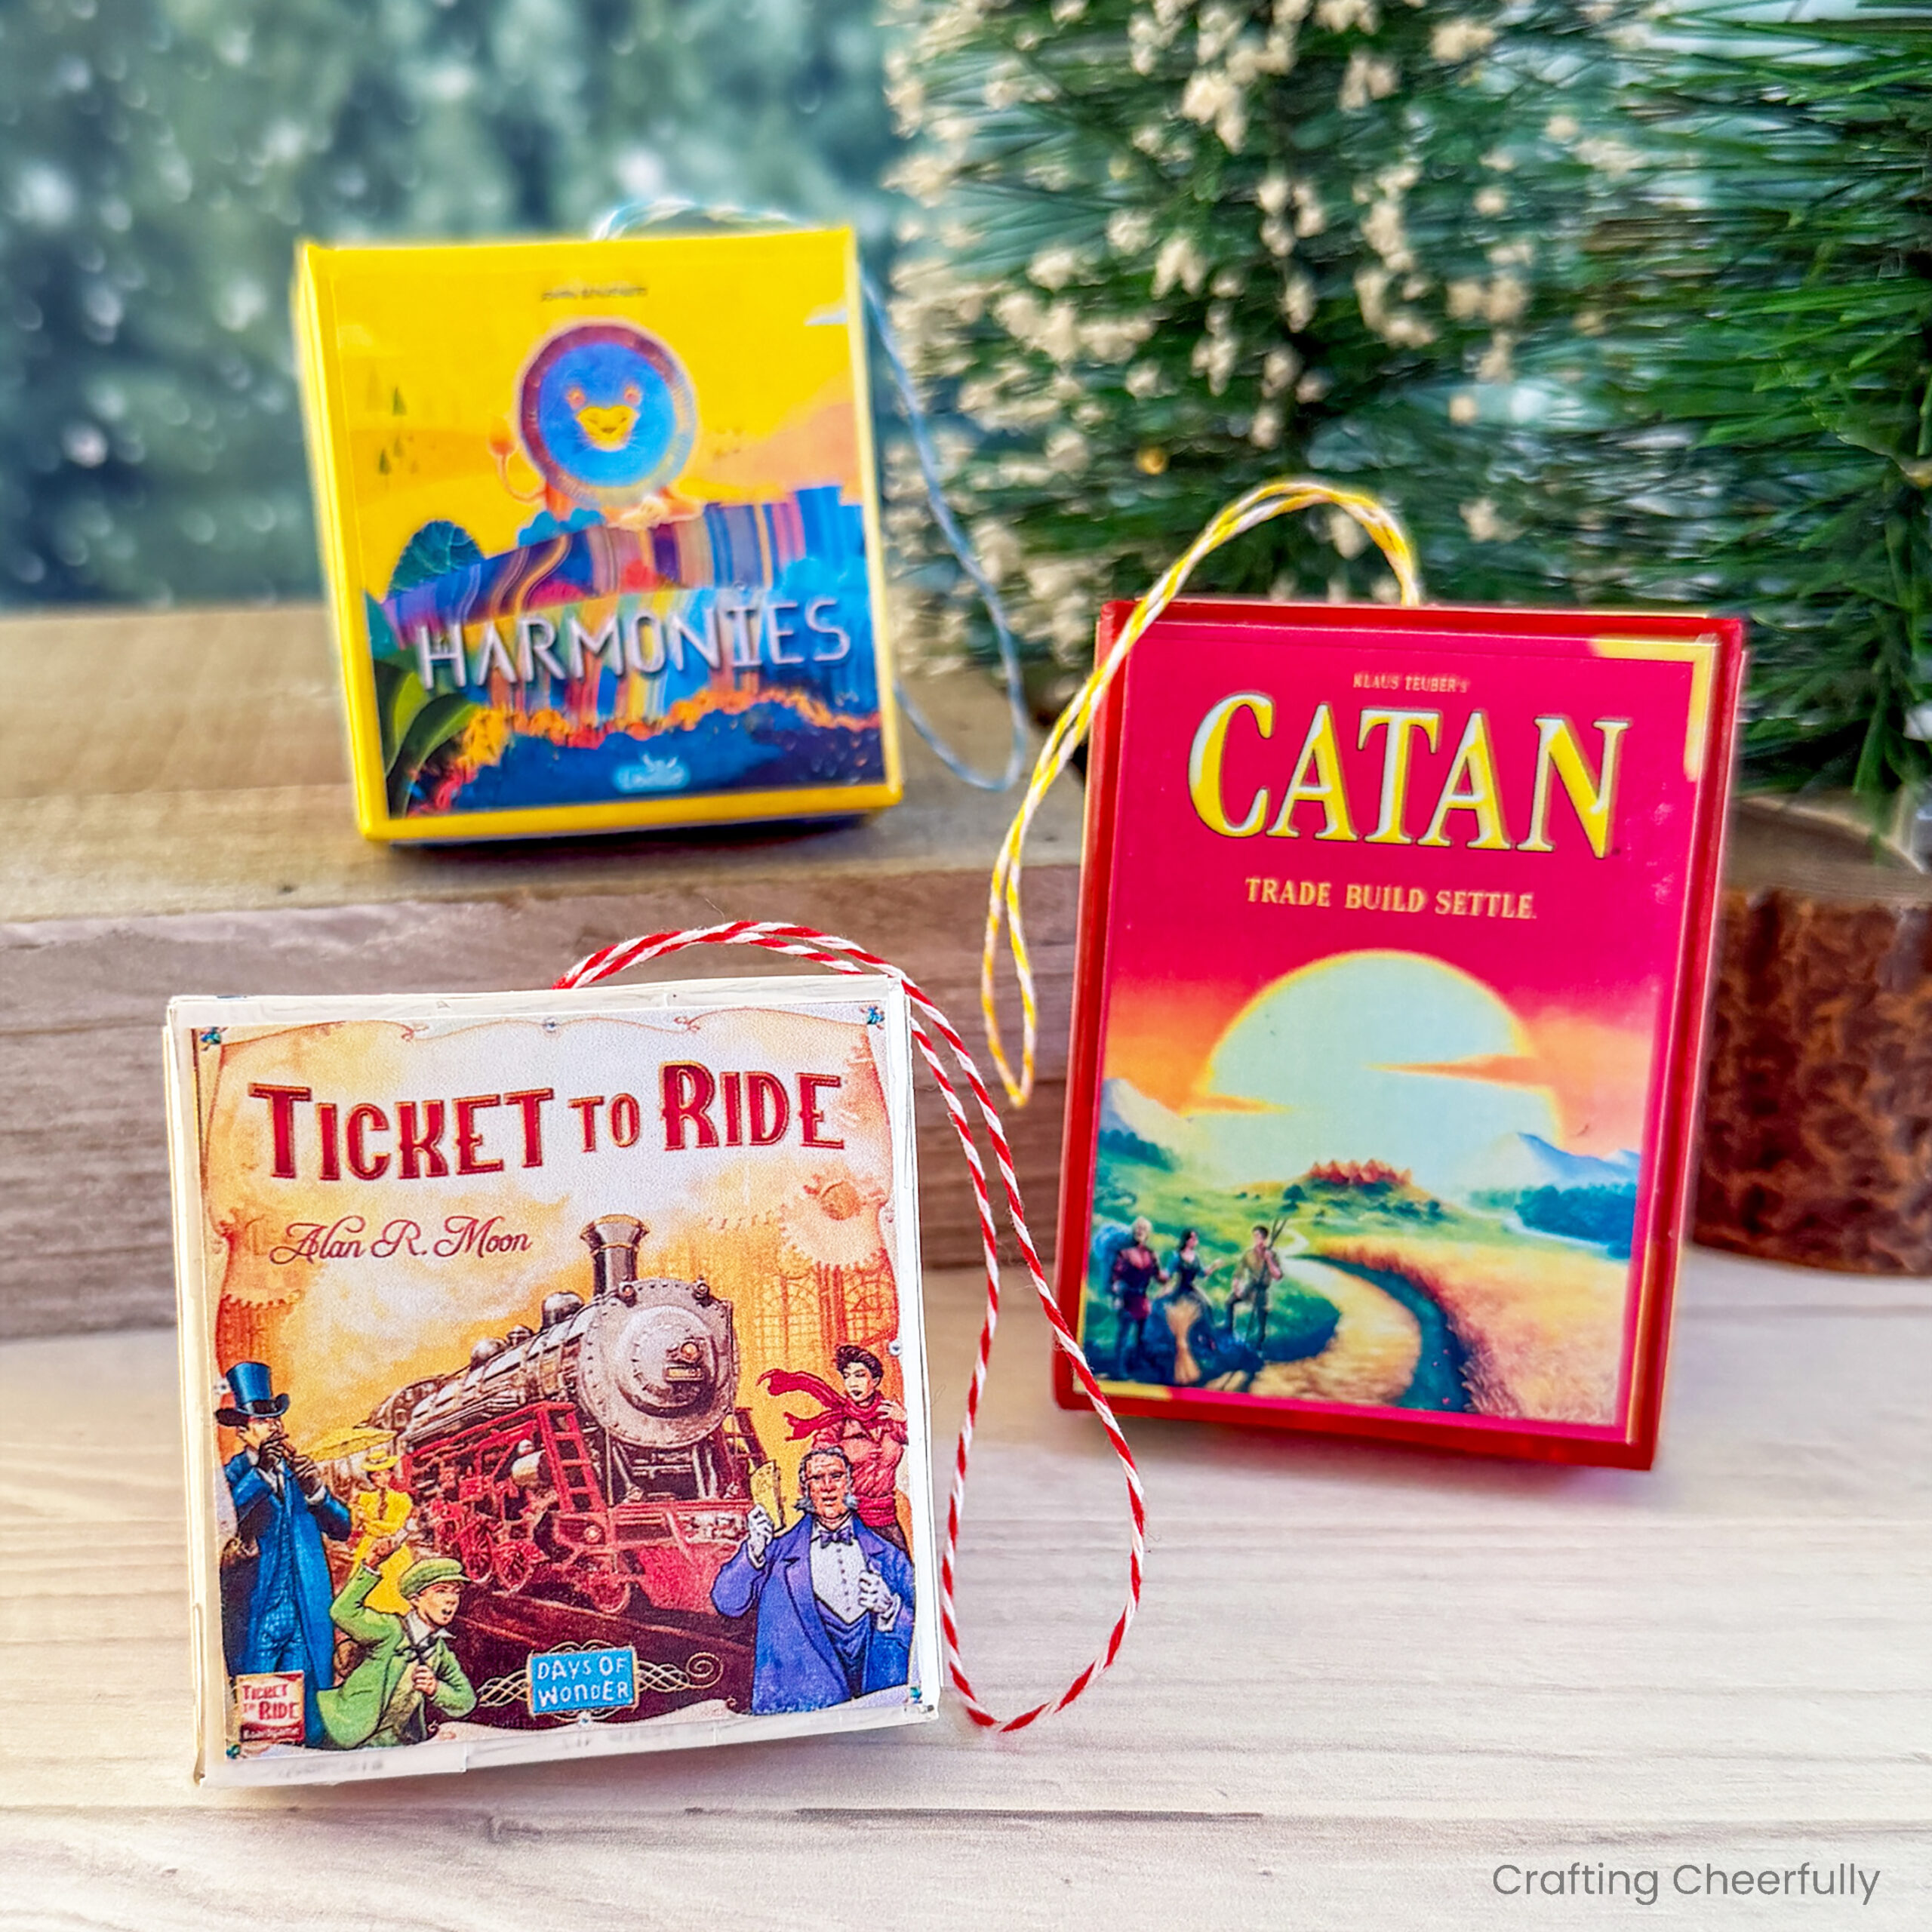
Hello Crafty Friends! I’m back for the third day of my series “12 Days of Holiday Crafts” with a new tutorial for handmade board game ornaments! Playing board games is by far my family’s favorite activity – especially on holiday breaks. My son has asked for a new Catan game every year for the past five Christmases, so last year it was only fitting that I created a Catan ornament for him. It turned out so well I wanted to share how I made it!
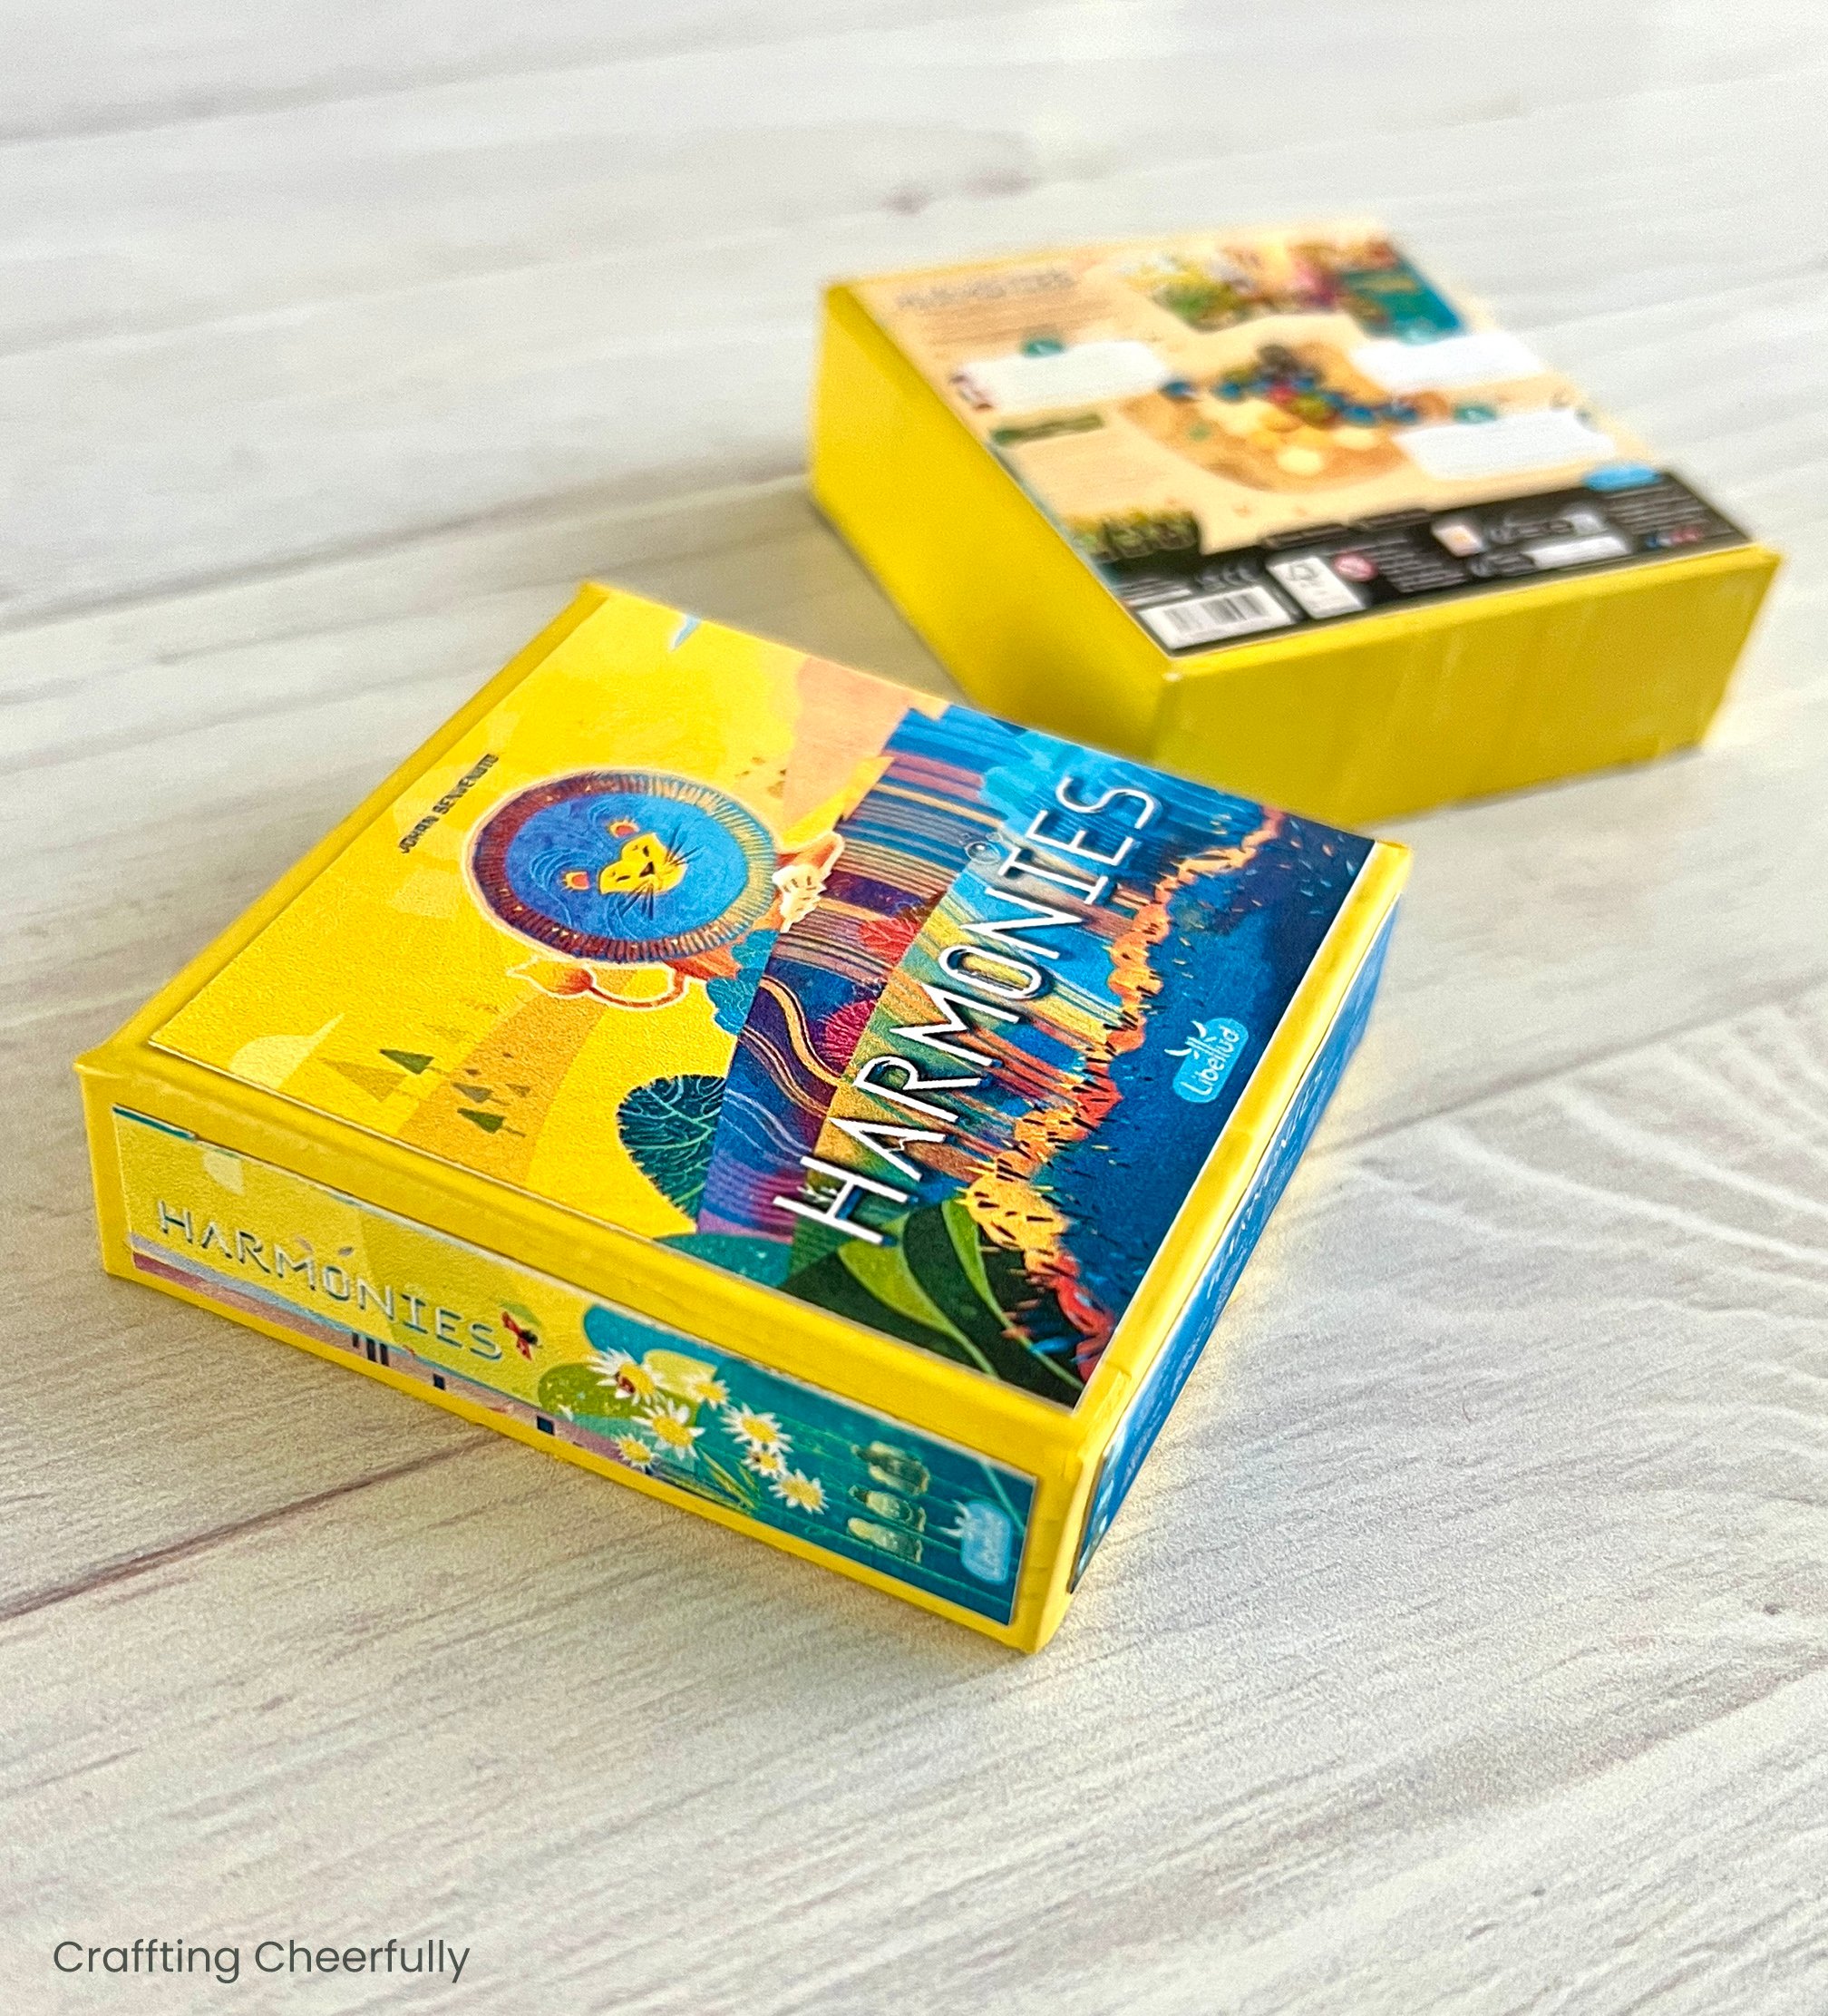
These ornaments are perfect for adding some personality to your tree and they also make wonderful gifts, especially when paired with a new board game or a gift card to your favorite local game store. It’s so fun perusing a game store to find something new that could become a favorite. My current favorite game is Harmonies which is why I had to make an ornament of it!
For this craft it will work best if you own the board game you are trying to make the ornament of. This will allow you to snap a picture of each side of the box which is necessary to create the most realistic ornament. Below is the tutorial, including information on how to edit the photos to turn them into an ornament.
Handmade Board Game Ornaments
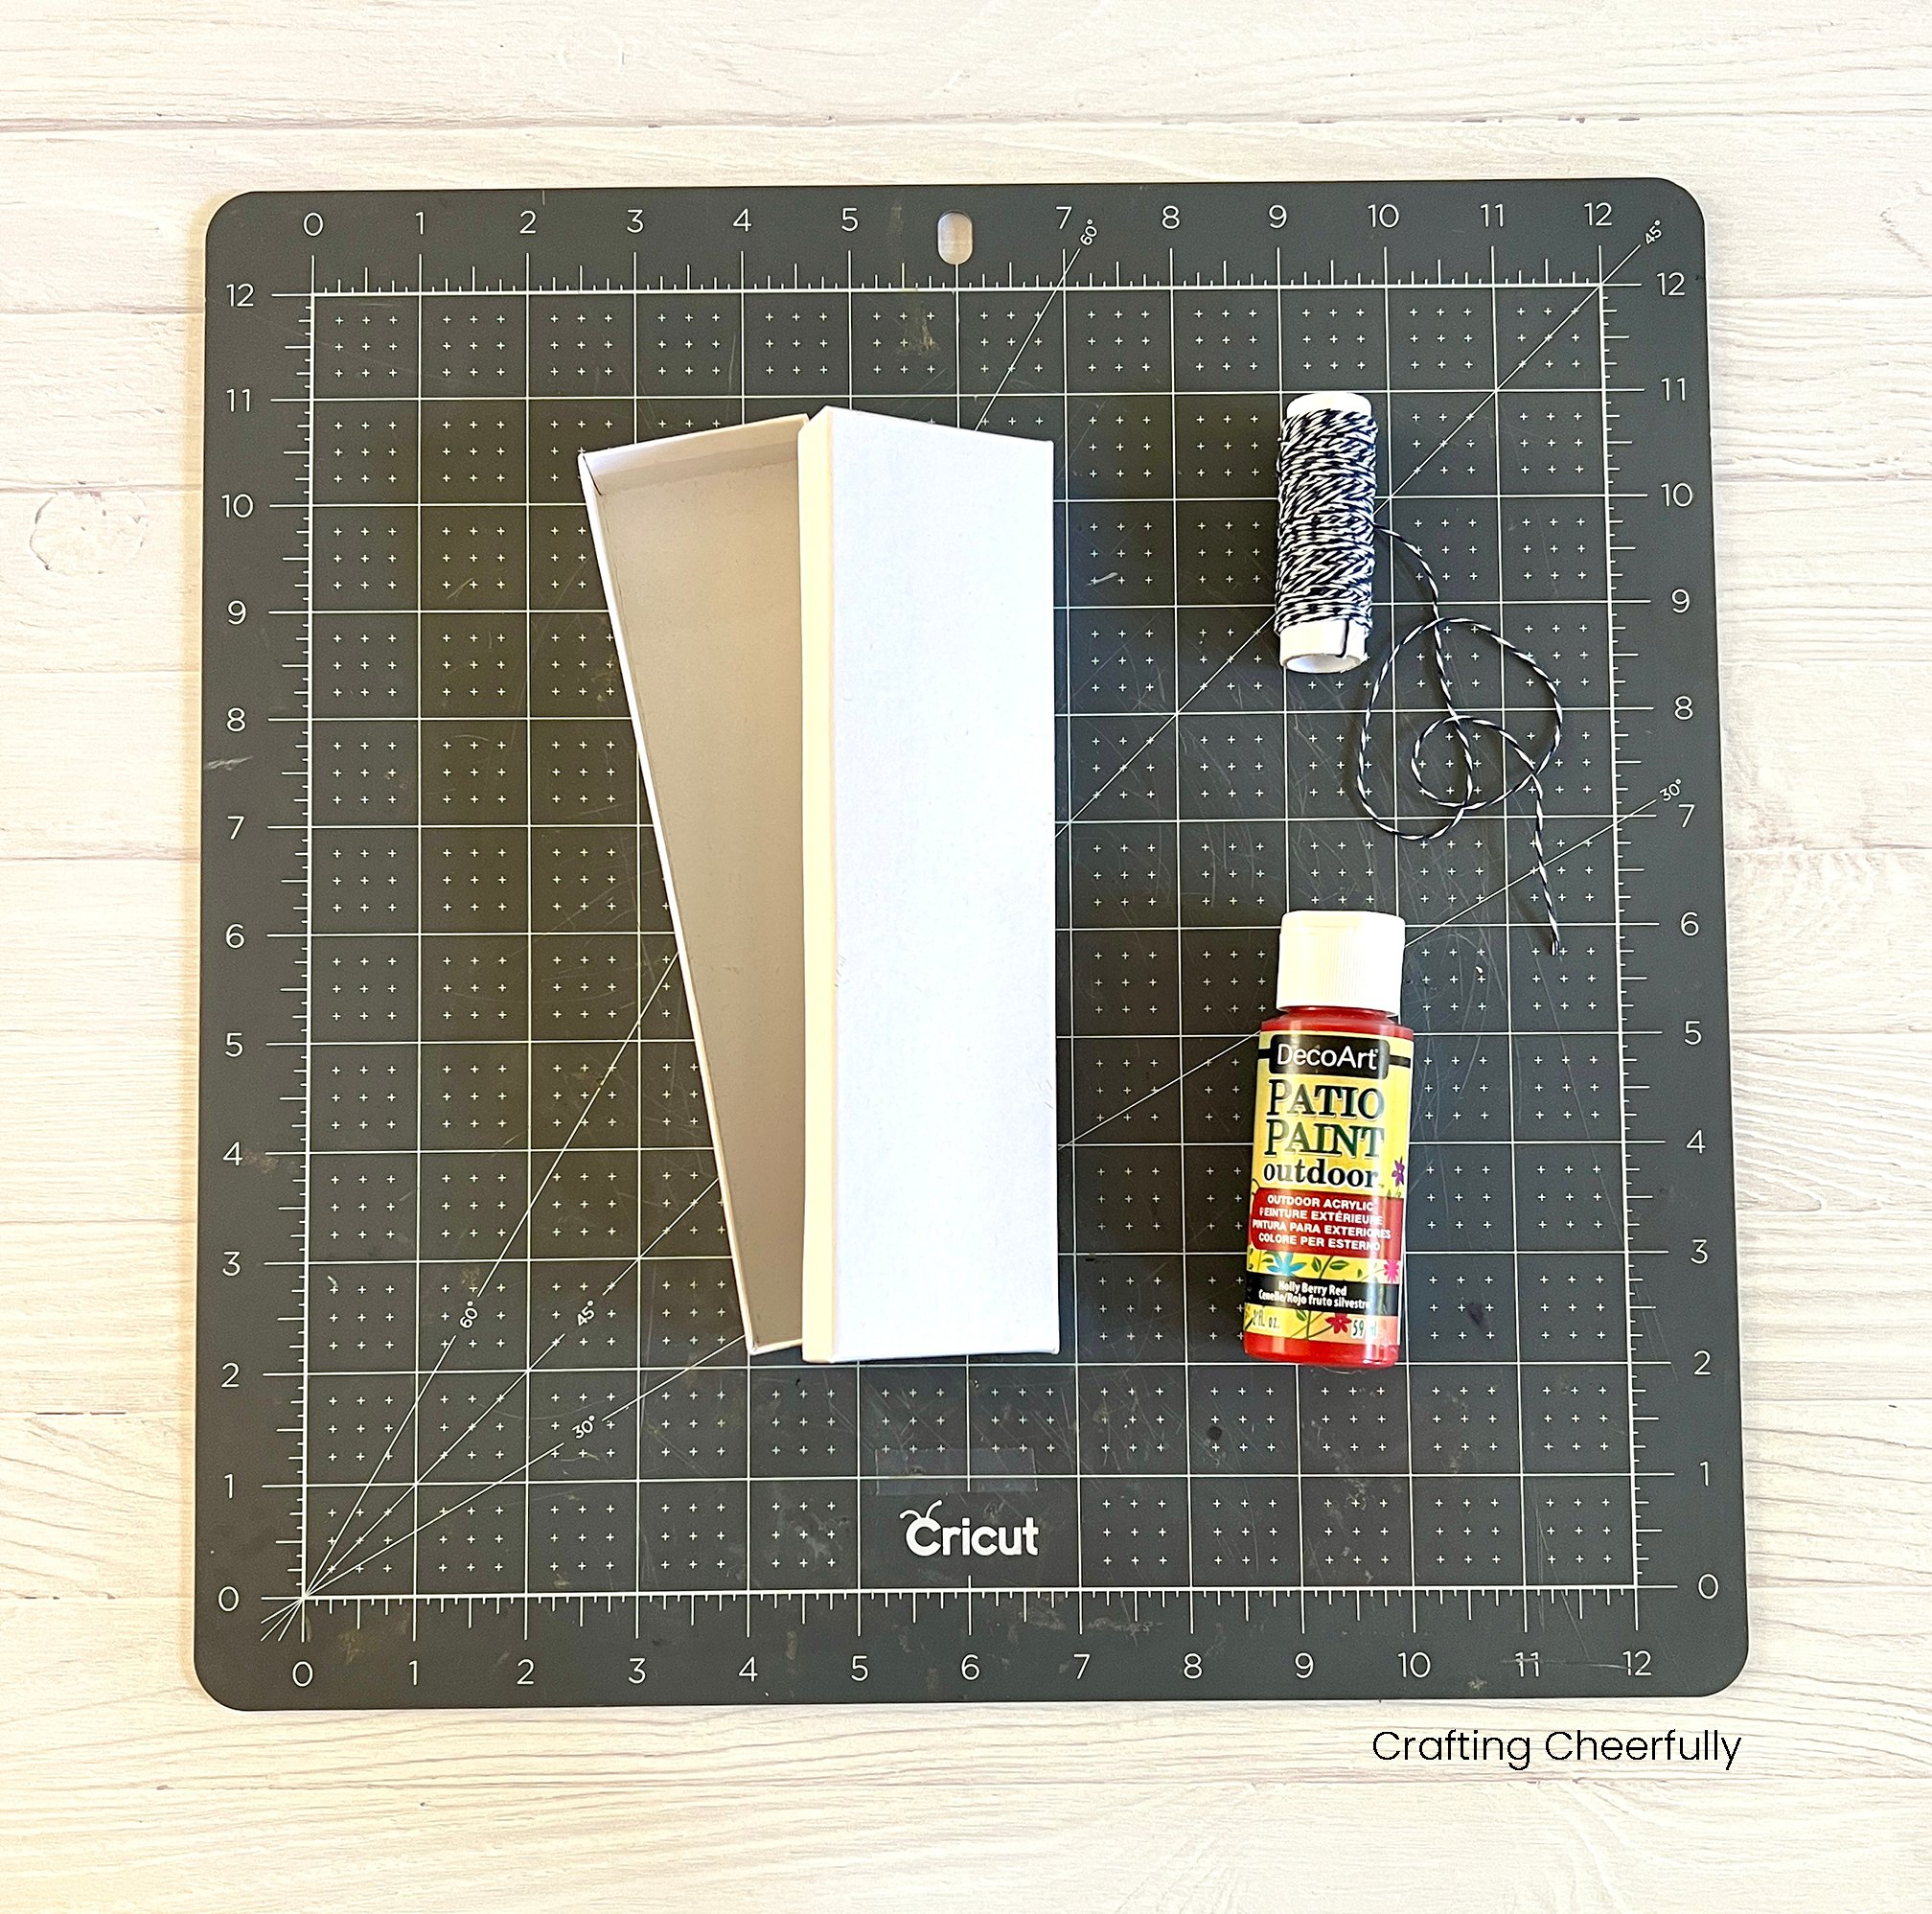
Supplies Needed:
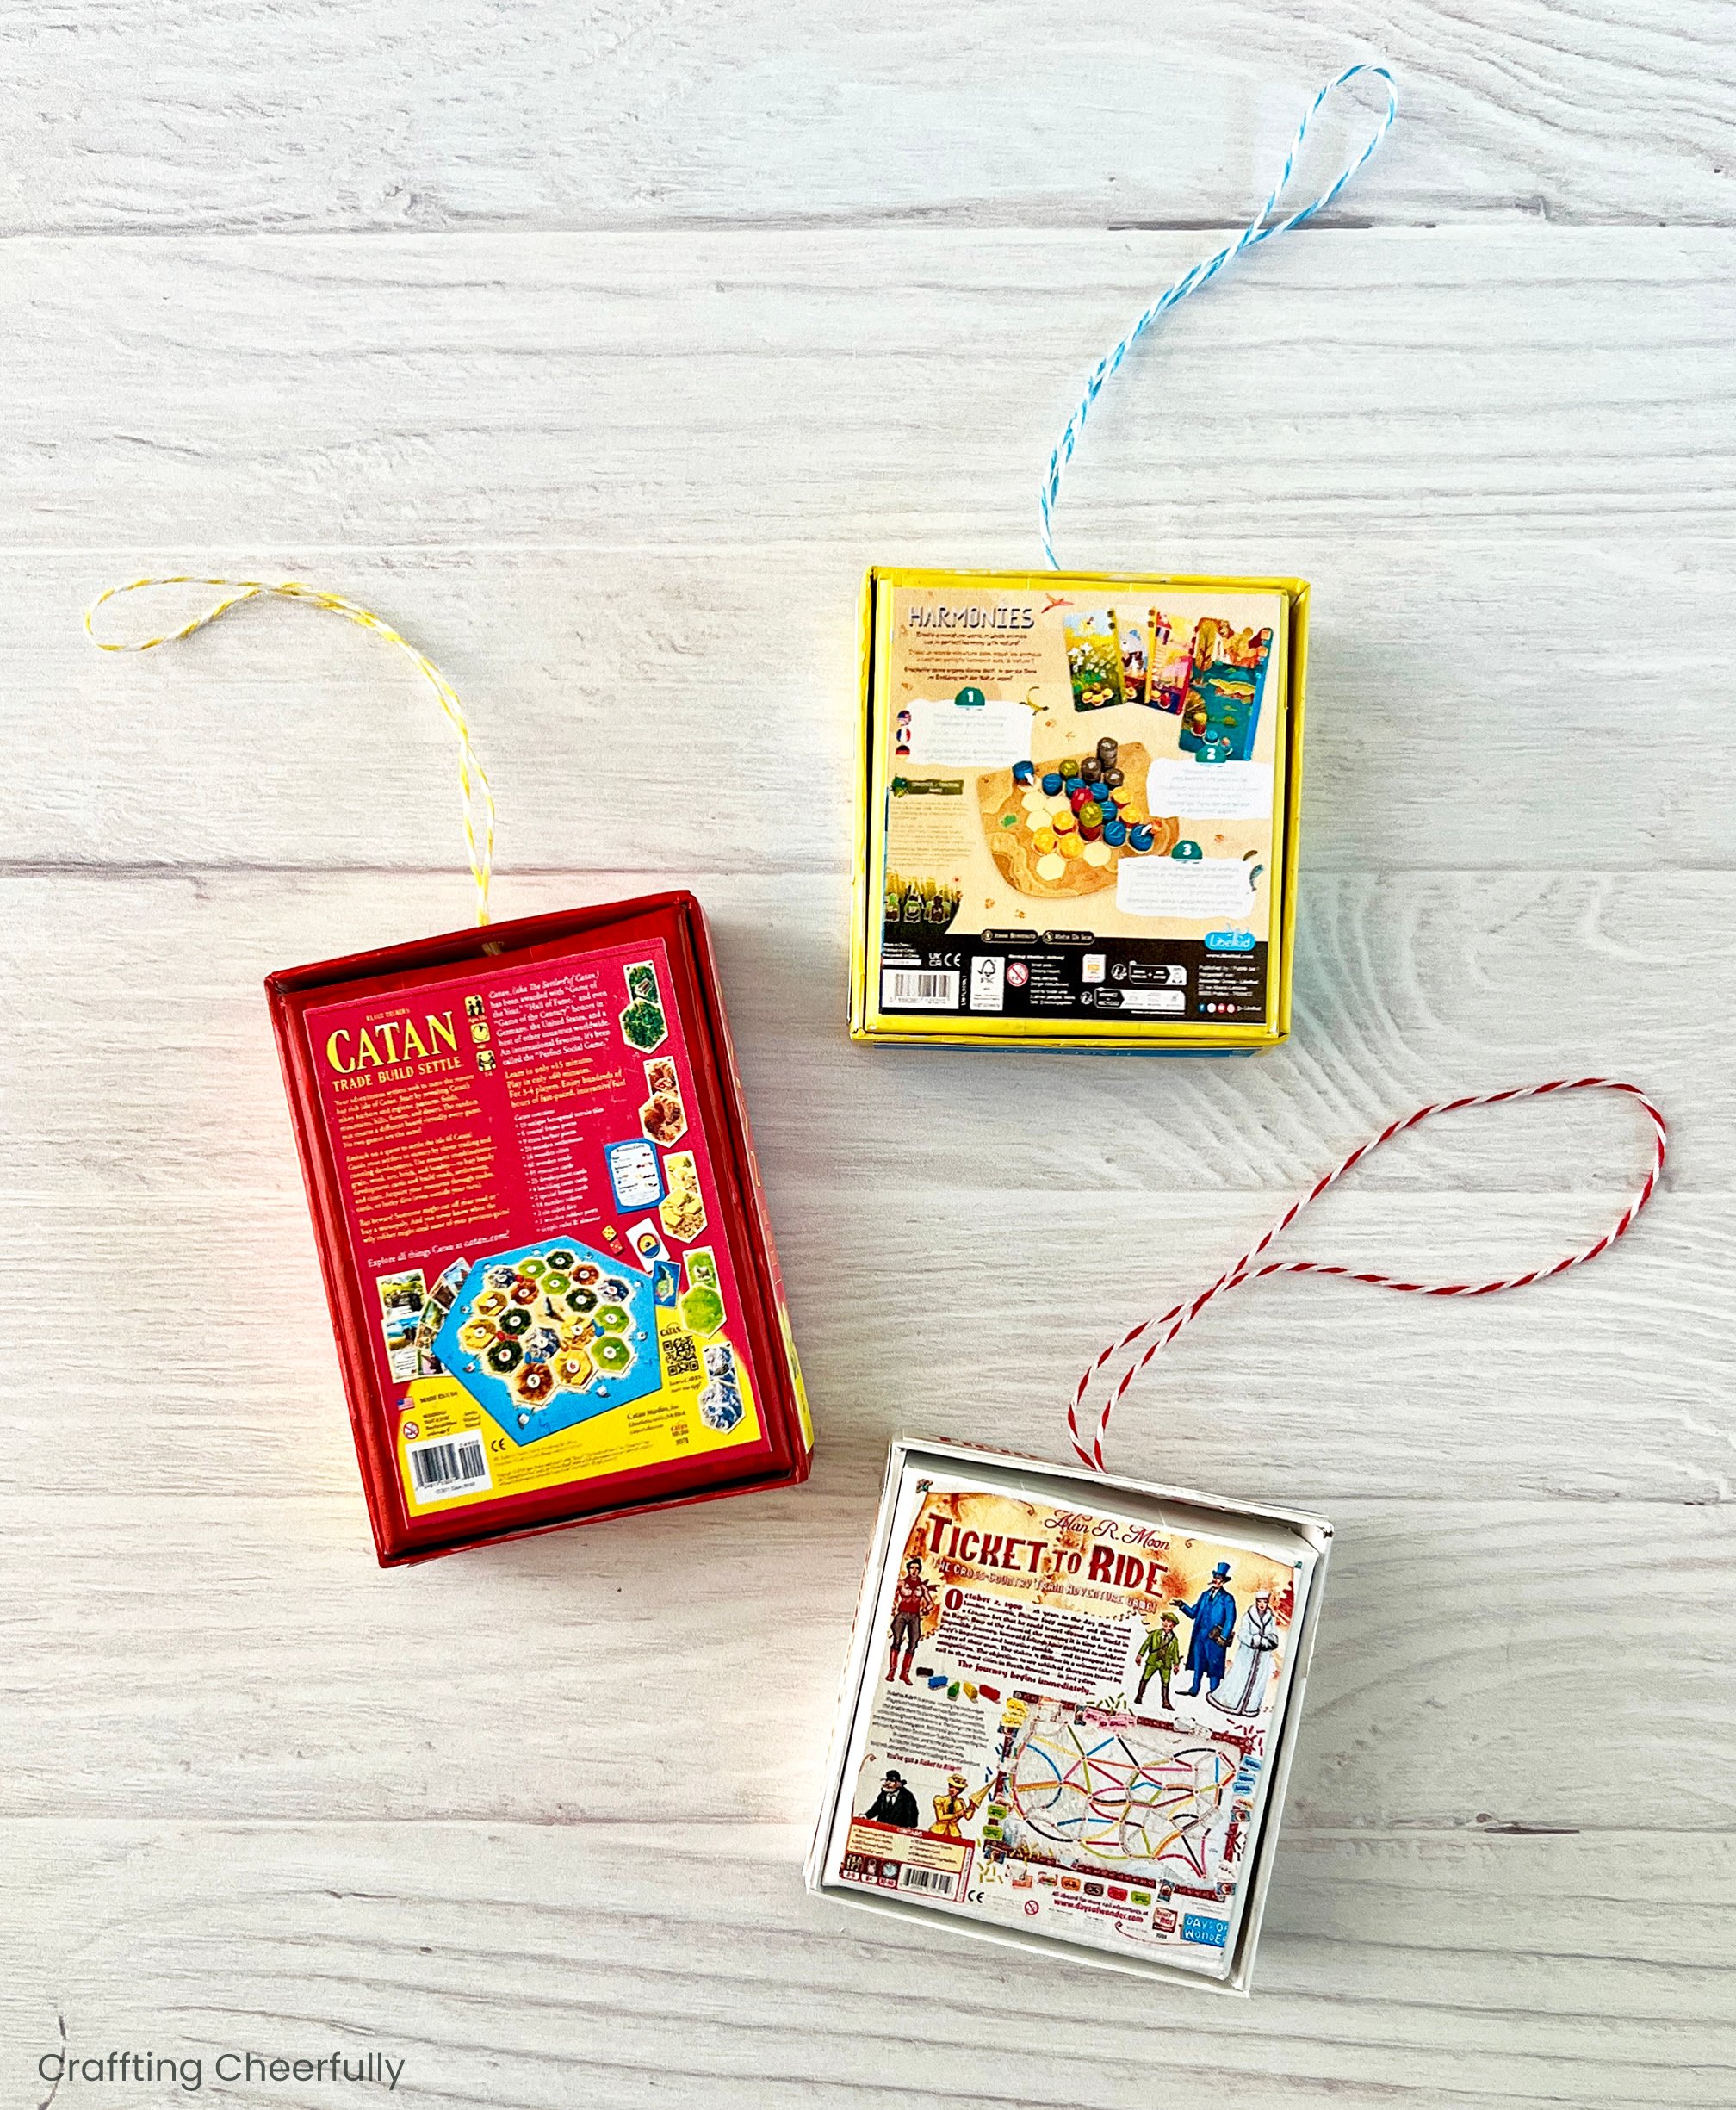
- The board game you are making an ornament of. For this tutorial I used Catan, Harmonies and Ticket to Ride. Check out the bottom of this post for a list of our current favorite board games!
- Small boxes
- Acrylic paint
- Matte Photo Paper
- Camera to take pictures of board games
- 1/8″ Hole punch
- Baker’s Twine
For reference, my finished Catan ornament is 3.2″ tall x 2.5″ wide and the Harmonies and Ticket to Ride ornaments are 2.5″ tall x 2.5″ wide.
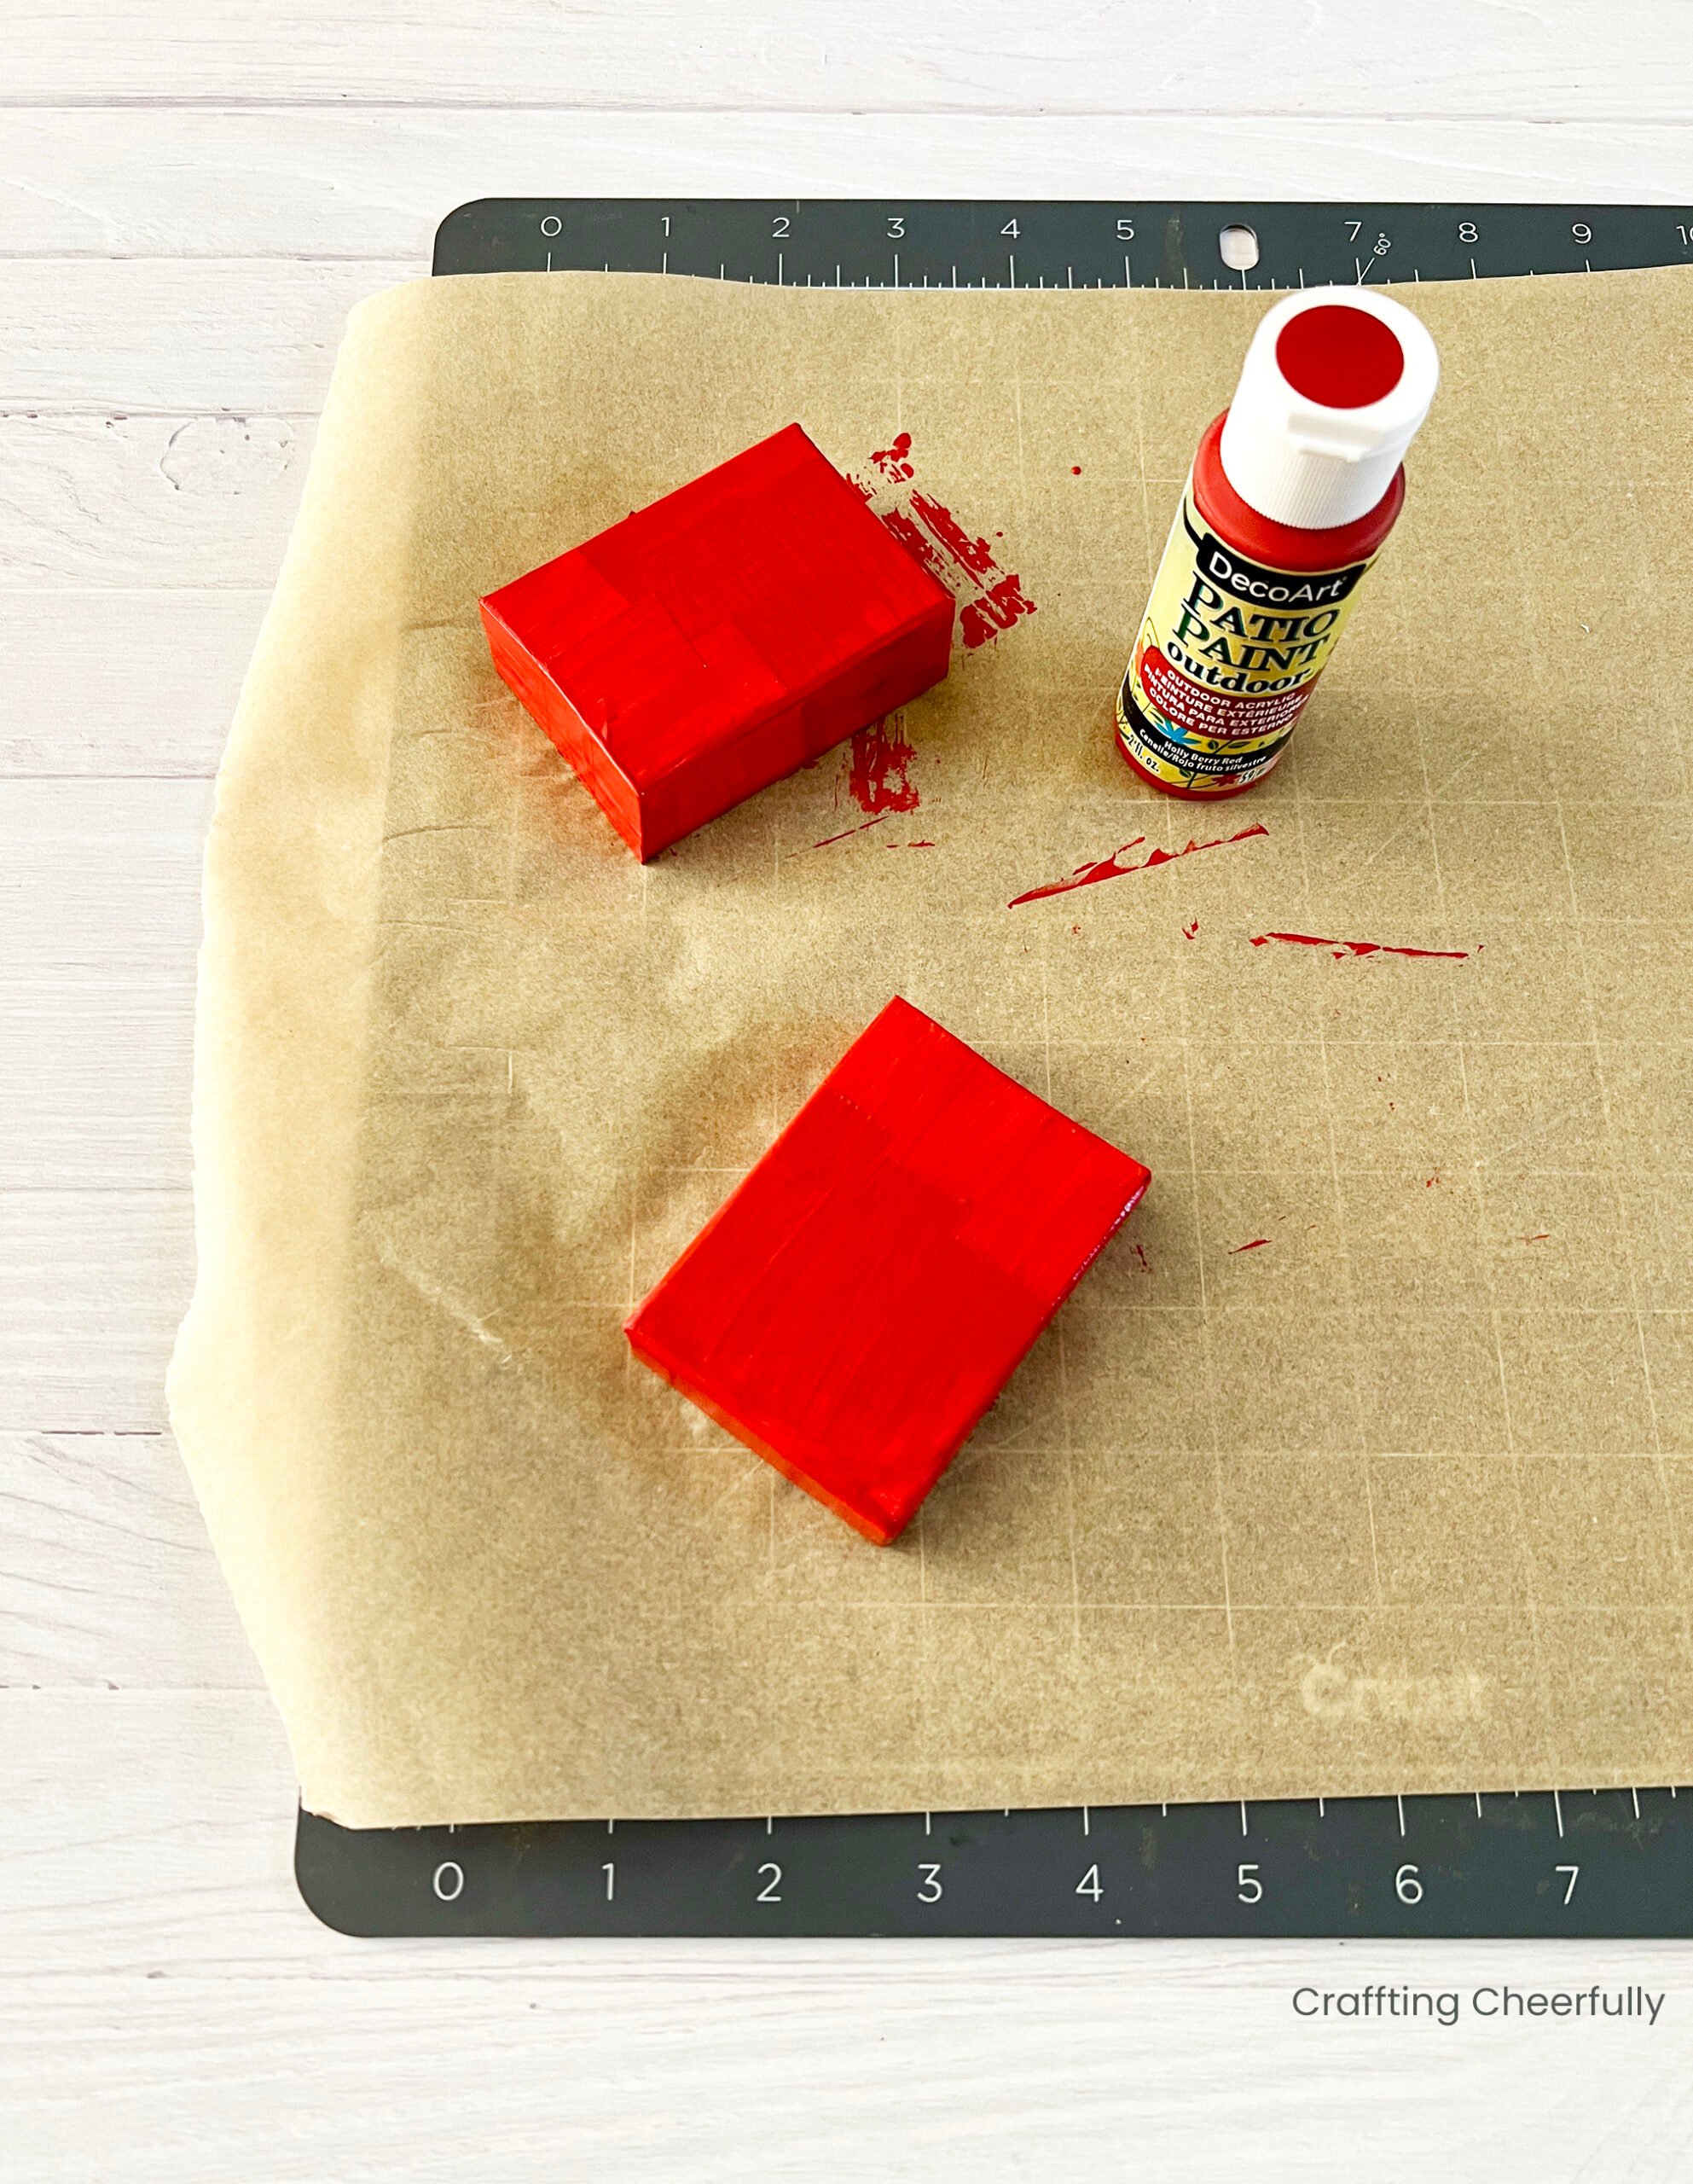
Preparing and Painting the Boxes
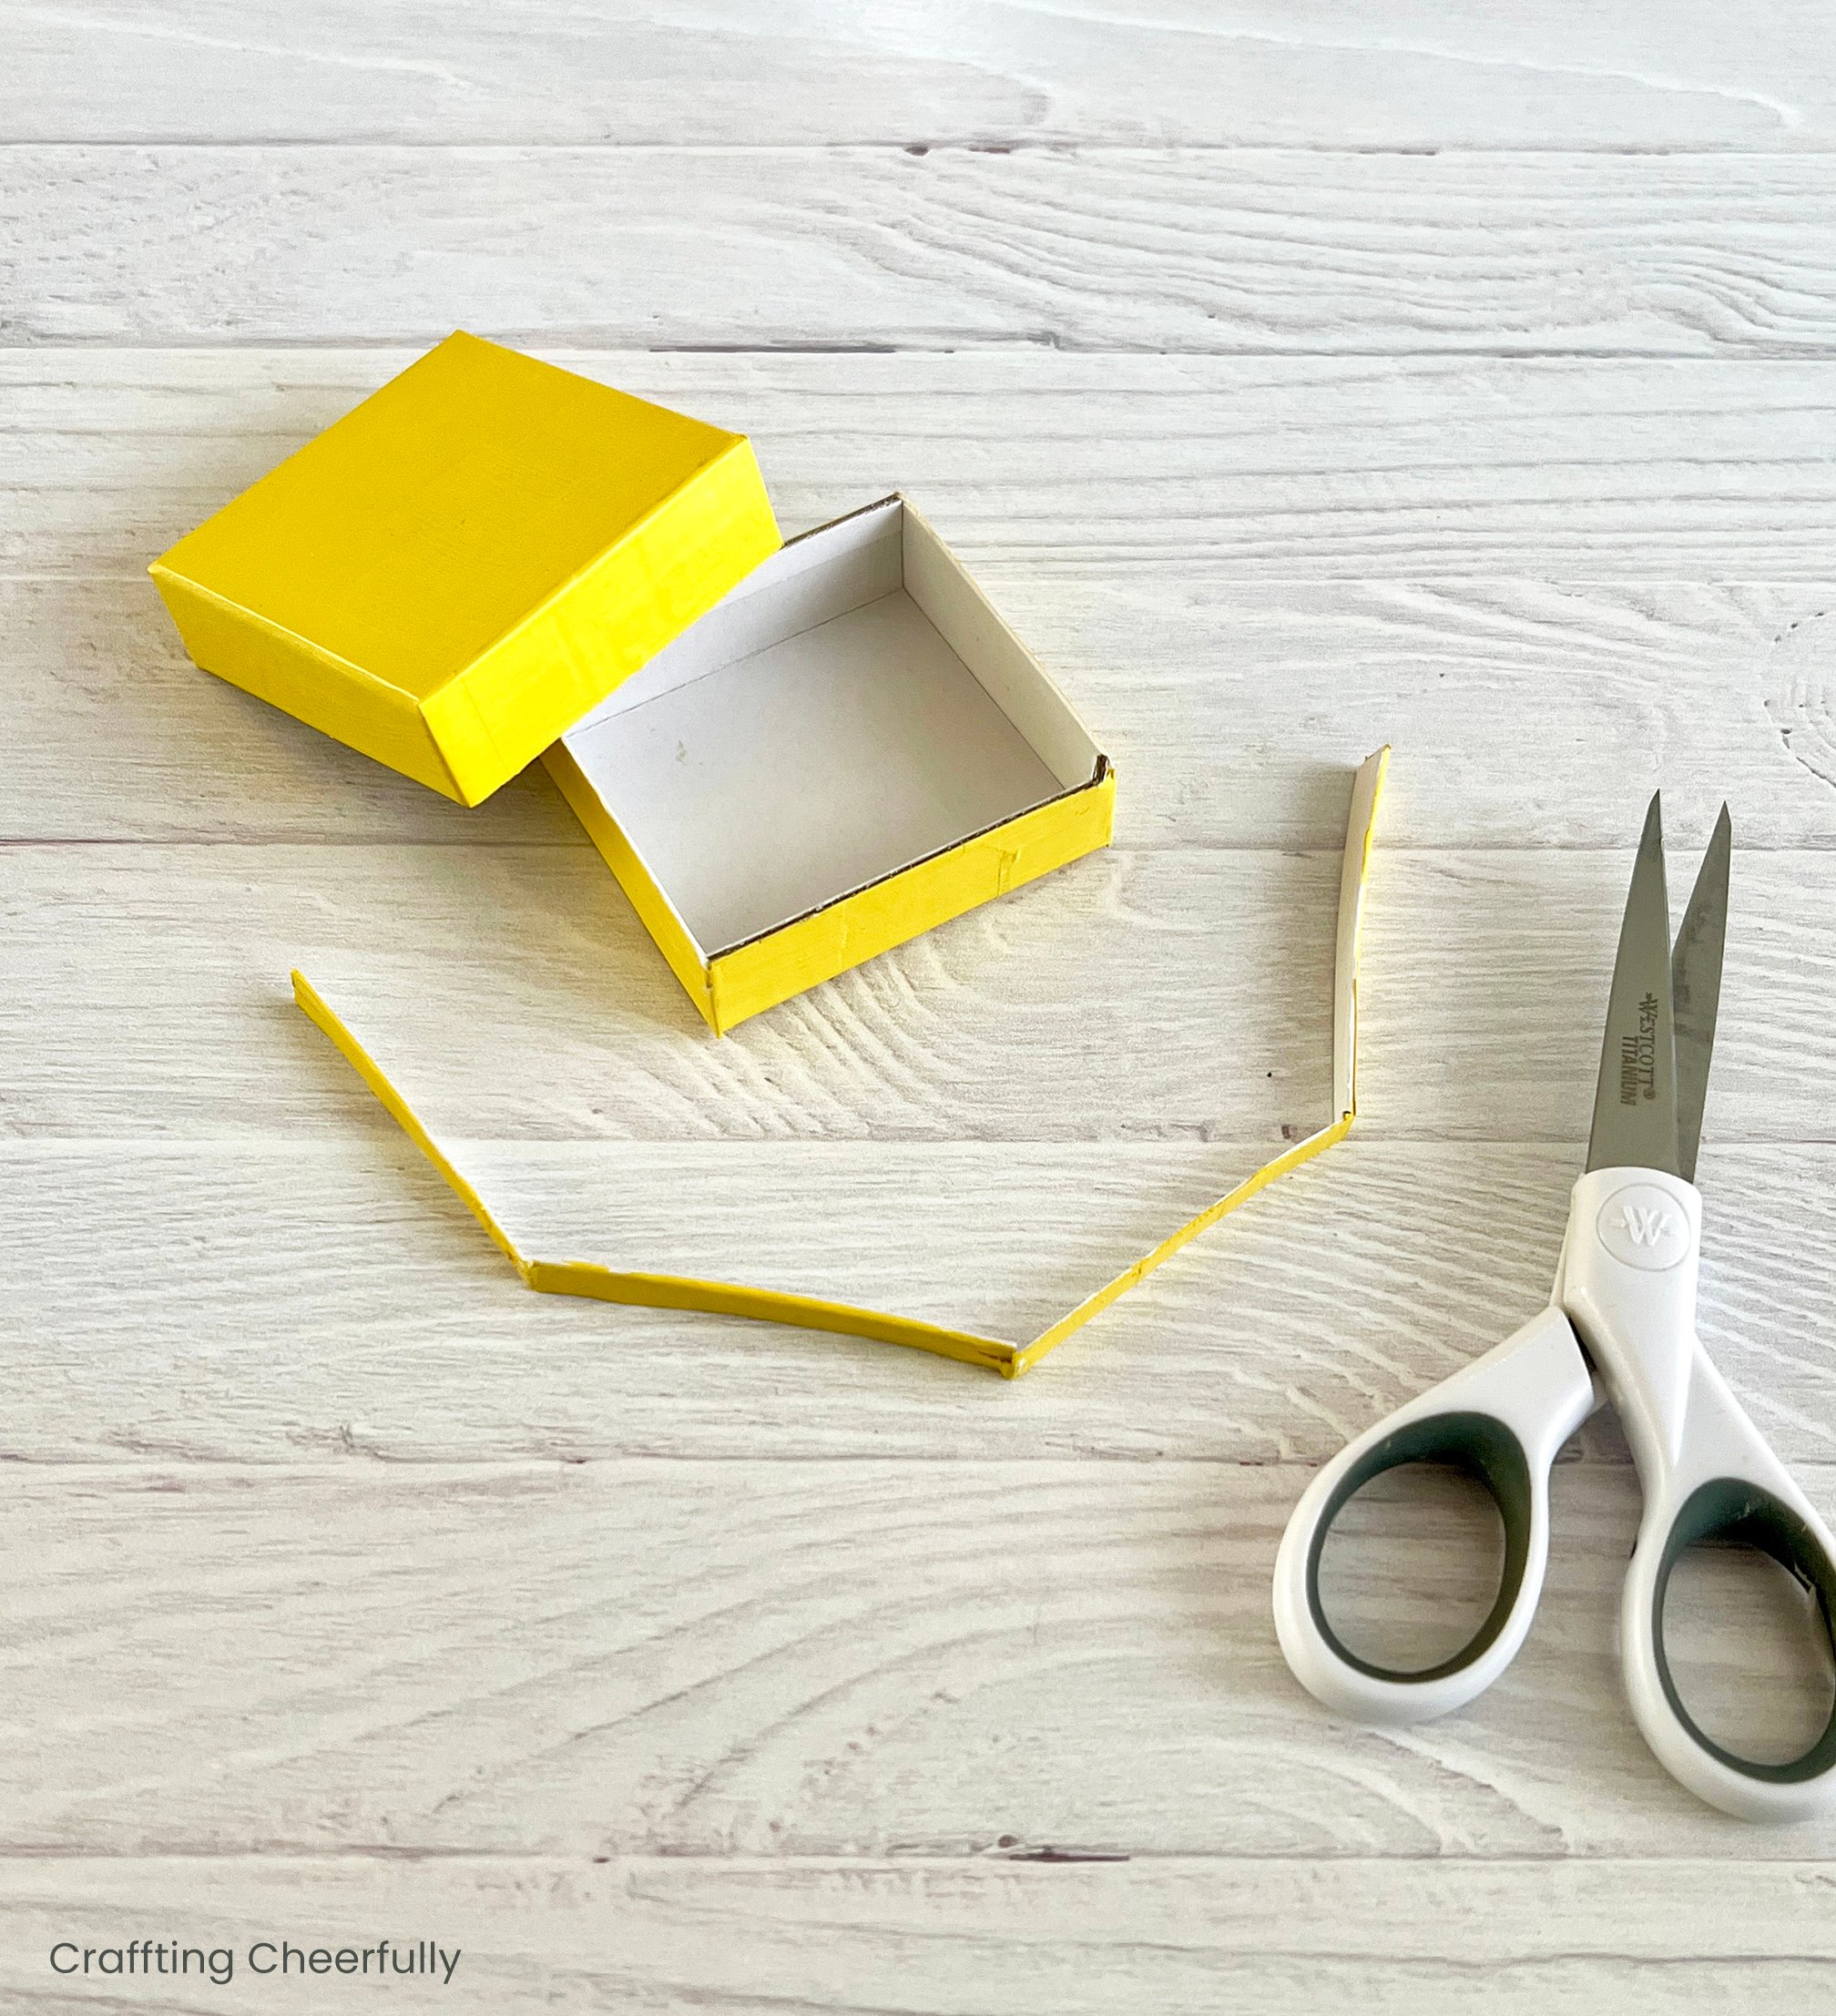
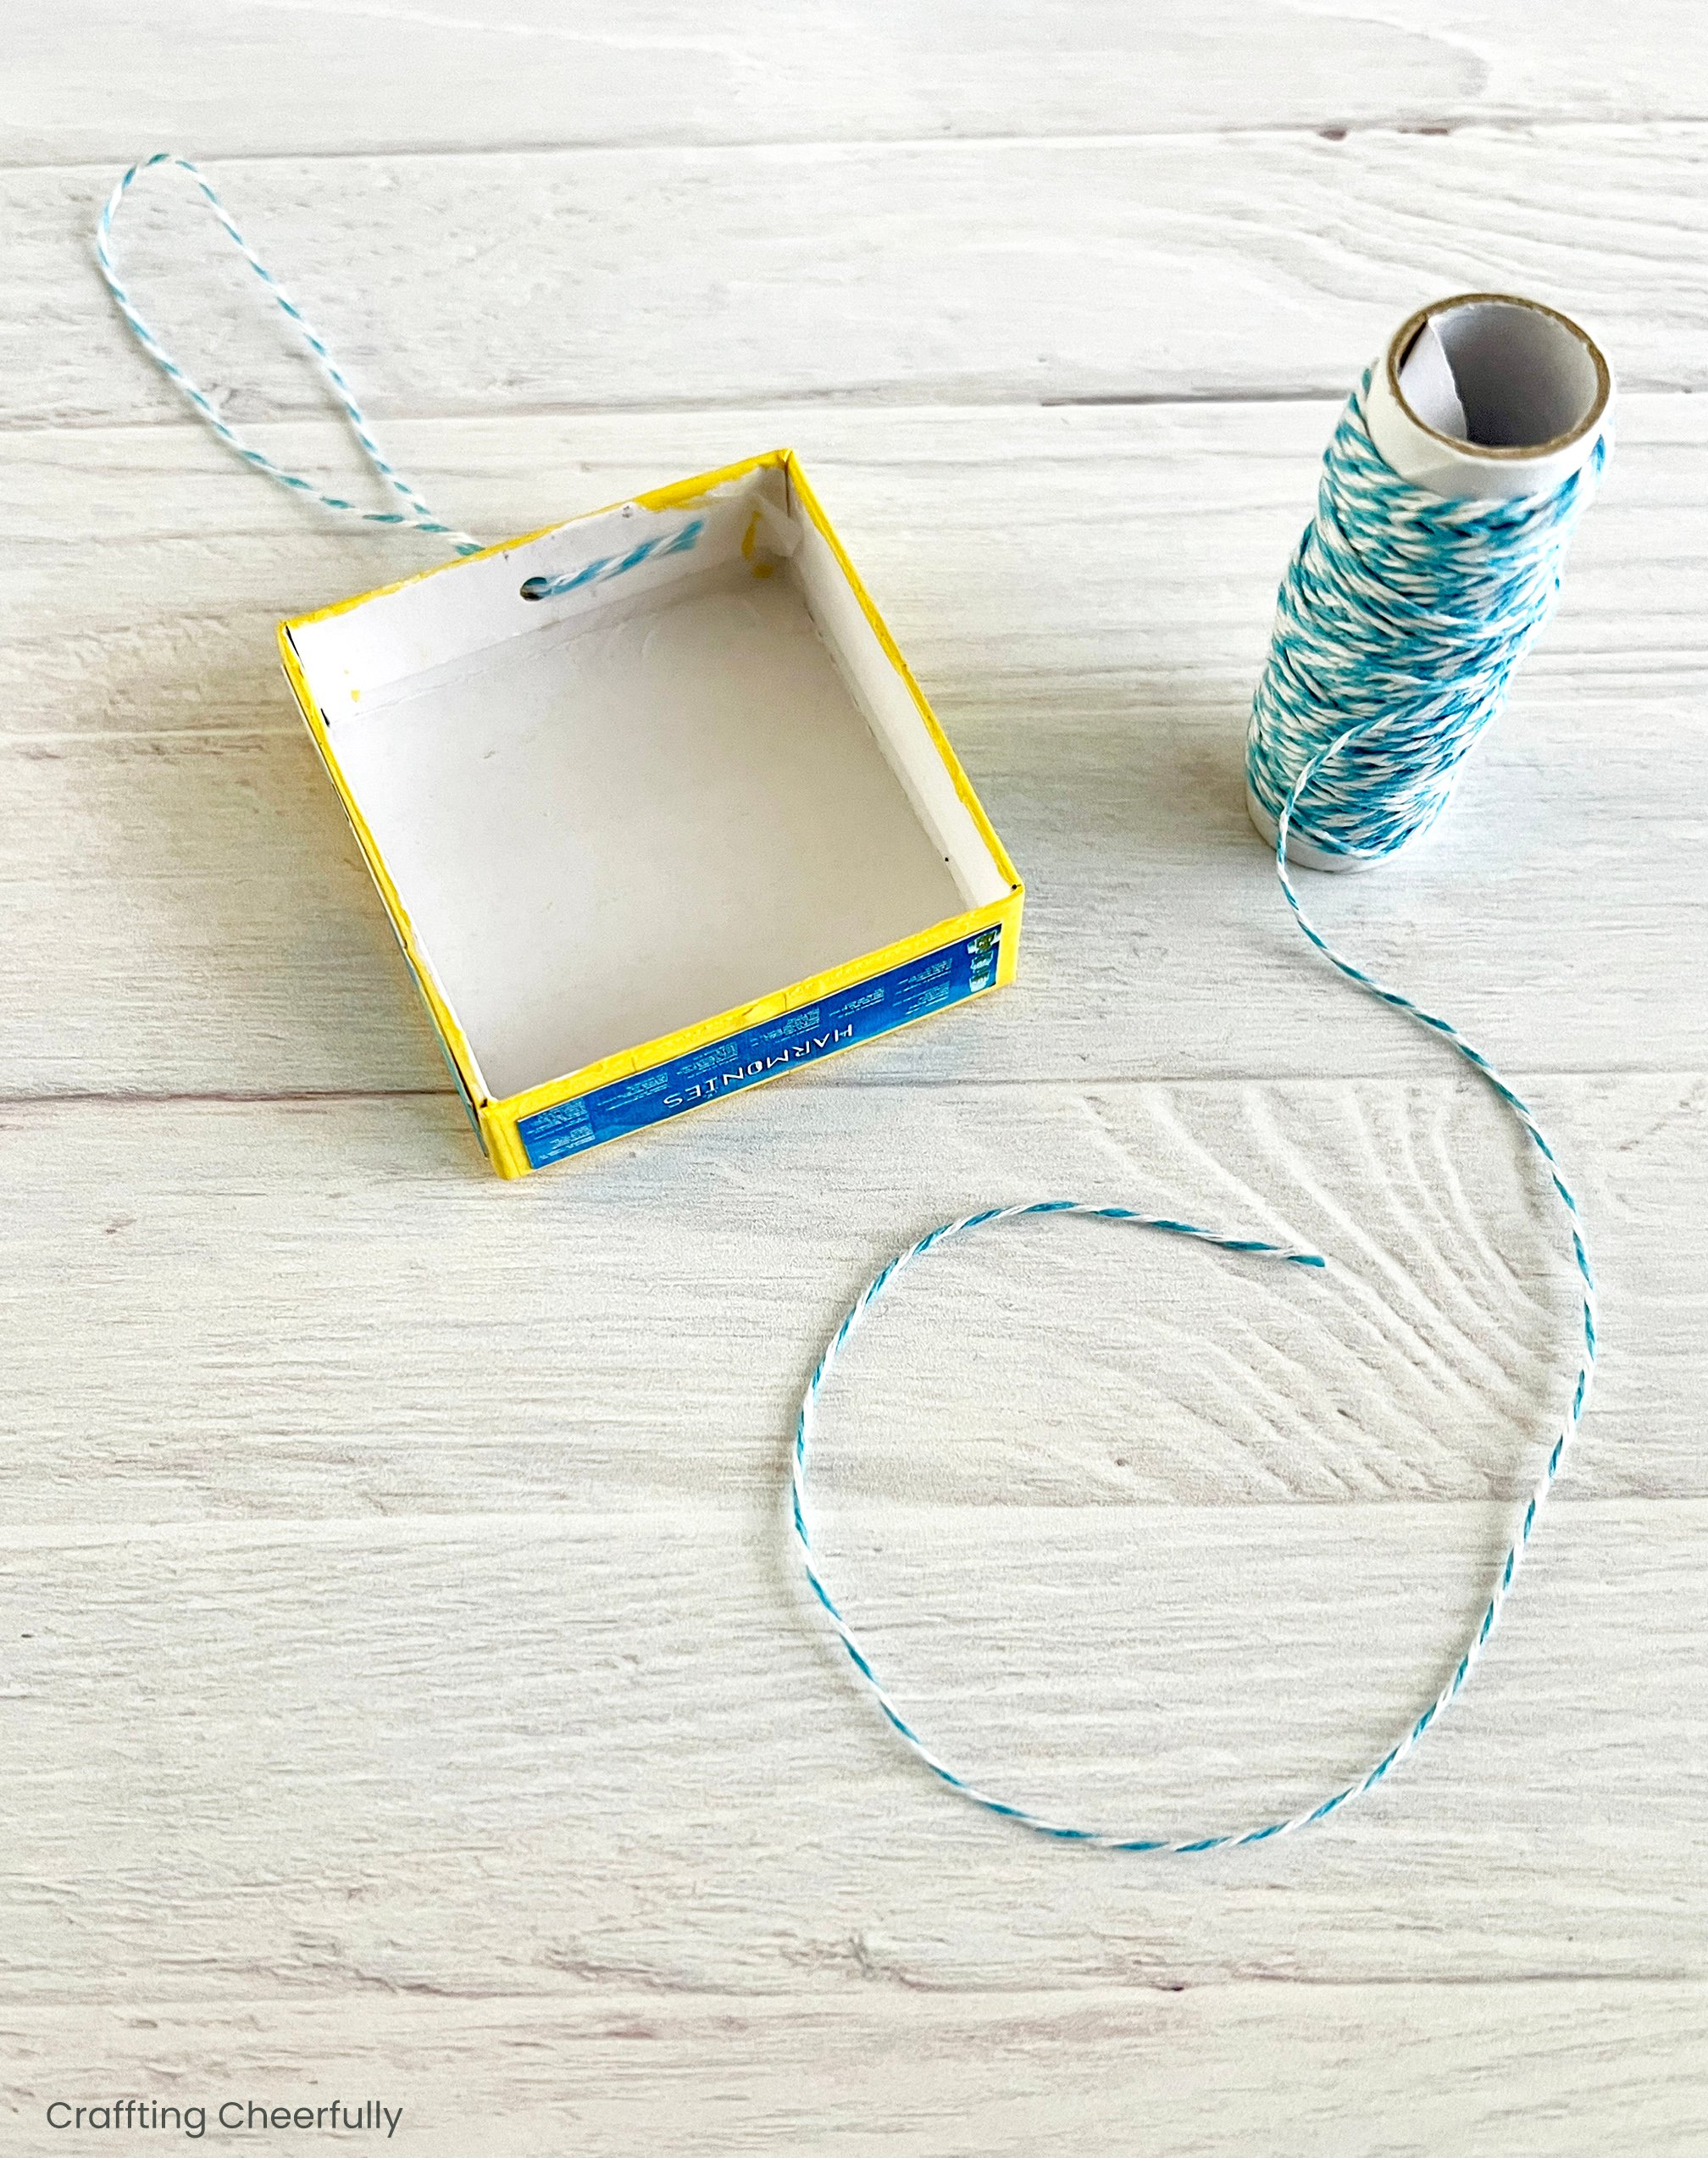
Step One: Find a small box that matches the shape of the board game you are making. I had to modify an existing box, a long jewelry box from Michaels, by cutting and remaking some of the sides. I was able to turn that one long box into three smaller boxes to make three ornaments, each one 2.5″ wide. Once you are happy with the box shape, paint it to match the board game.

Even after painting my boxes, I still found I had to make a few modifications. I wanted the box cover to overlap the bottom of the box completely, closer to the how the actual board game box works, so I trimmed the bottom of the box.
Designing the Board Game Graphics
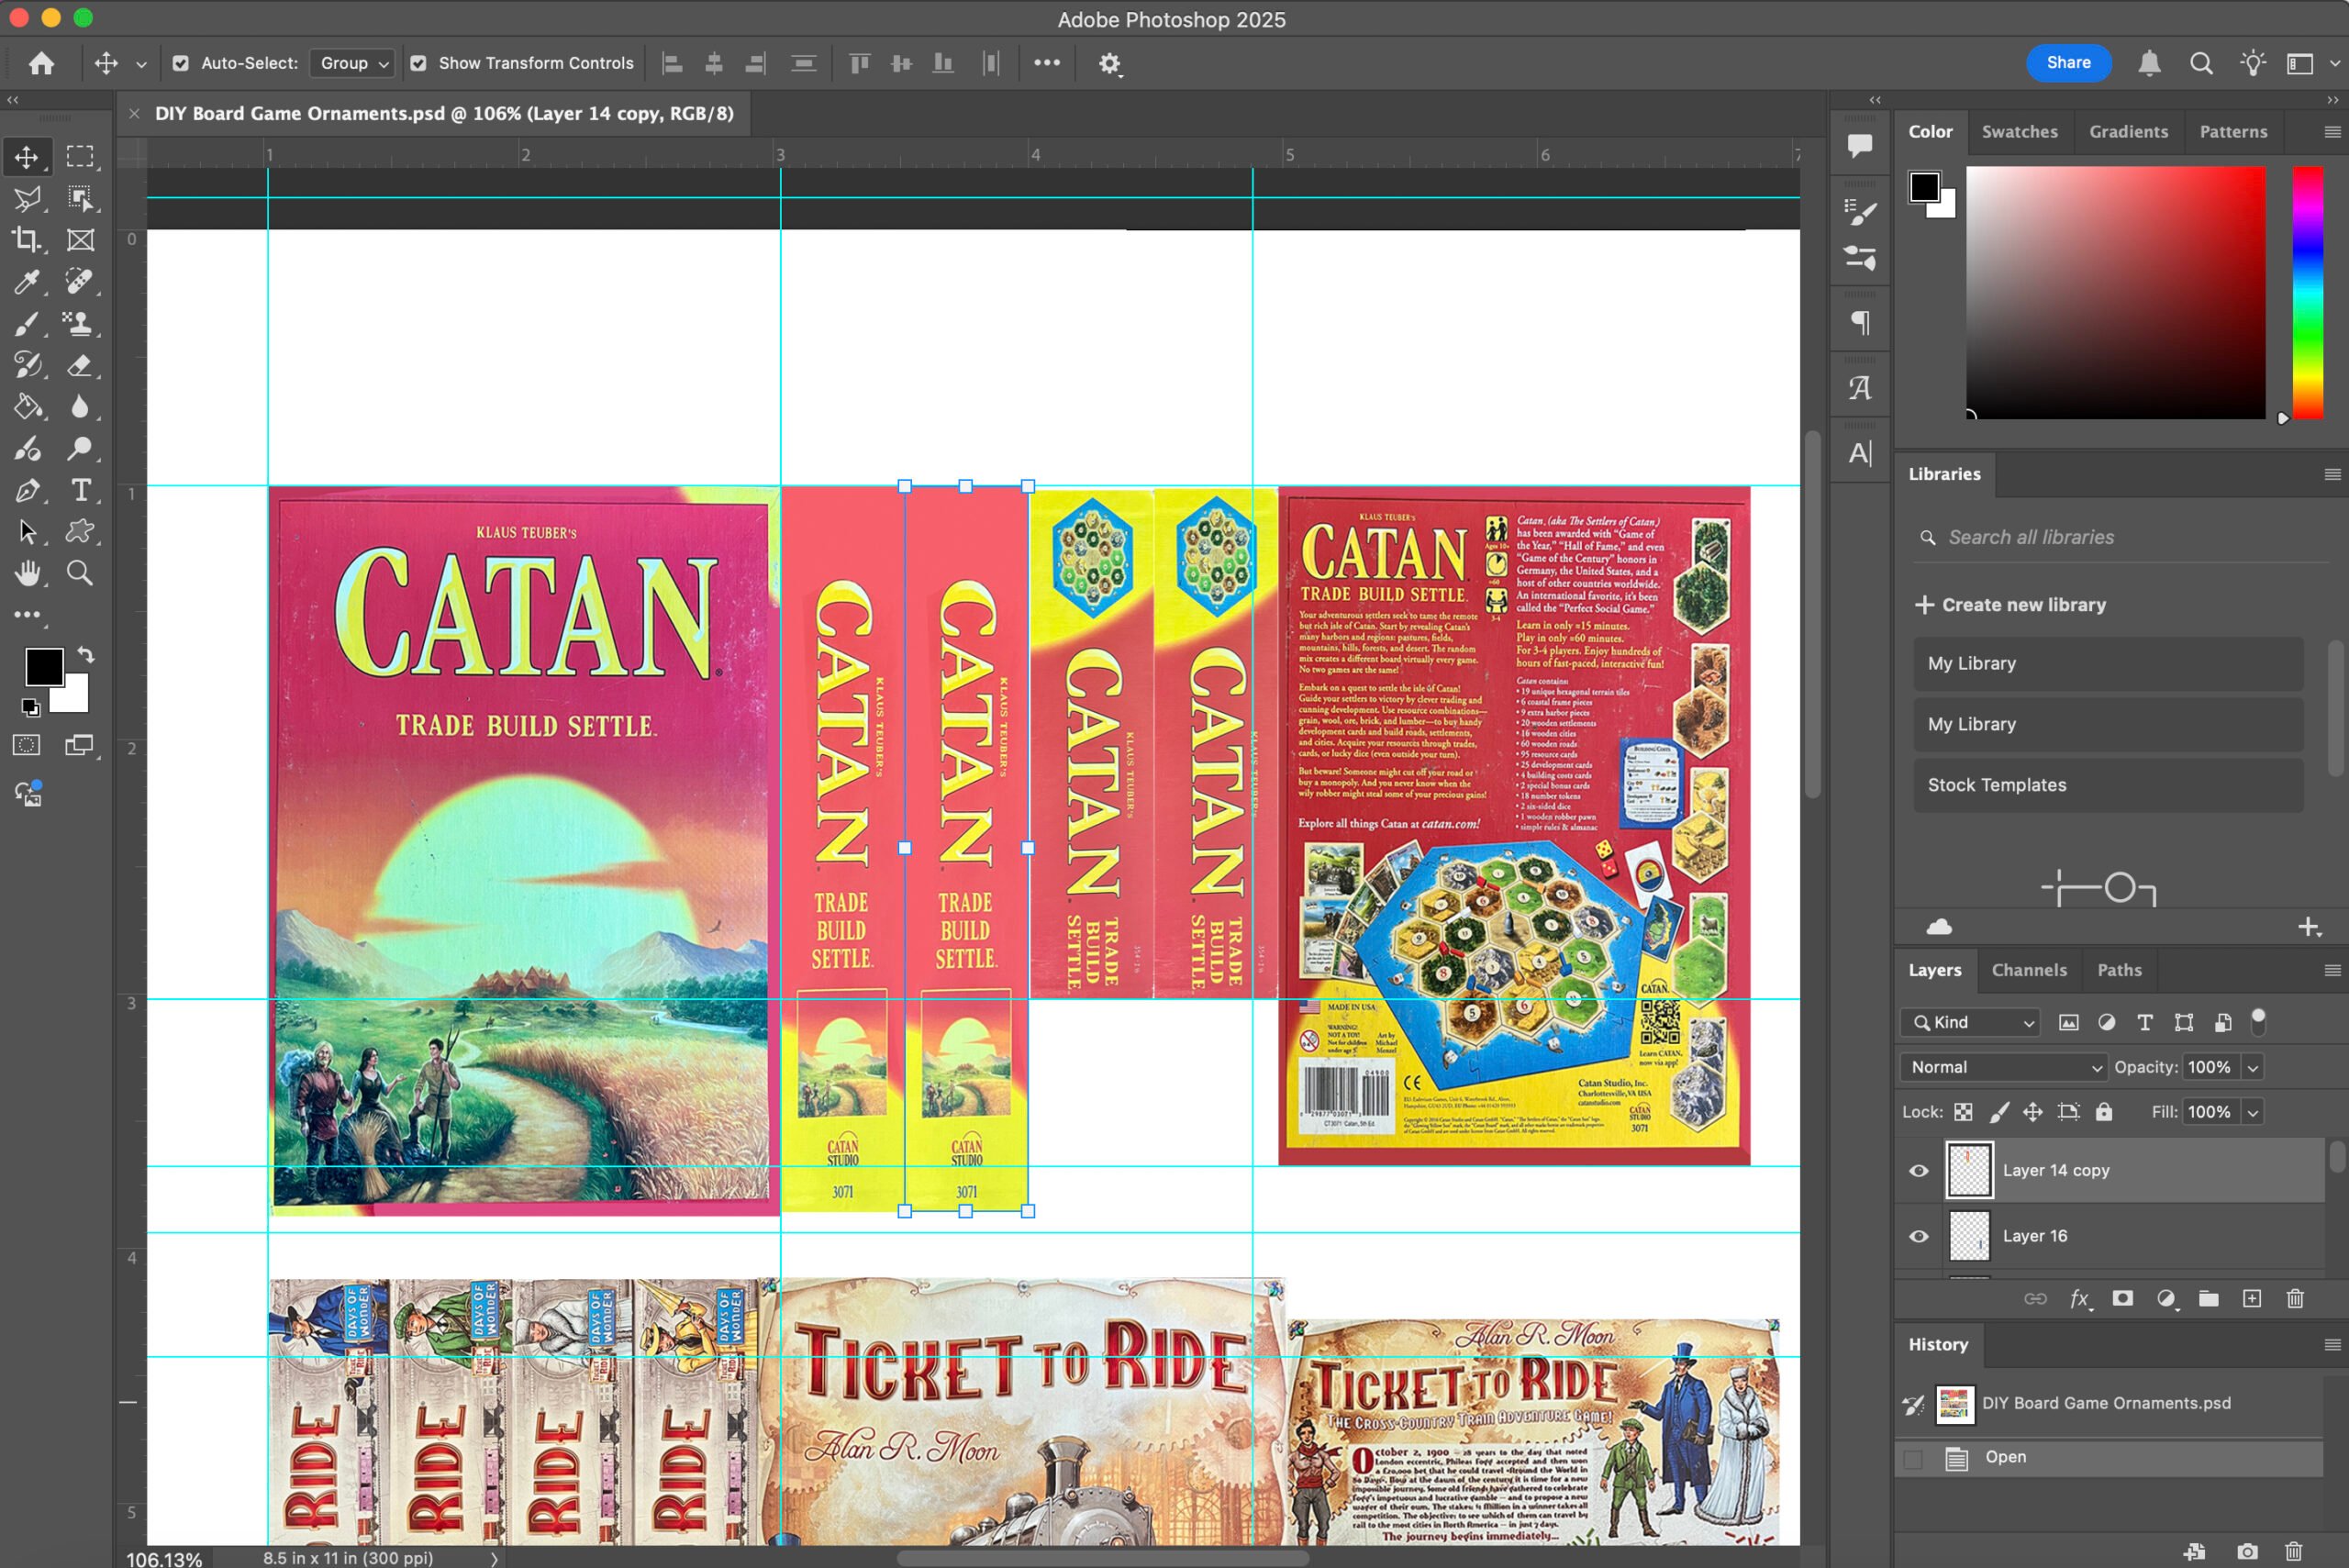
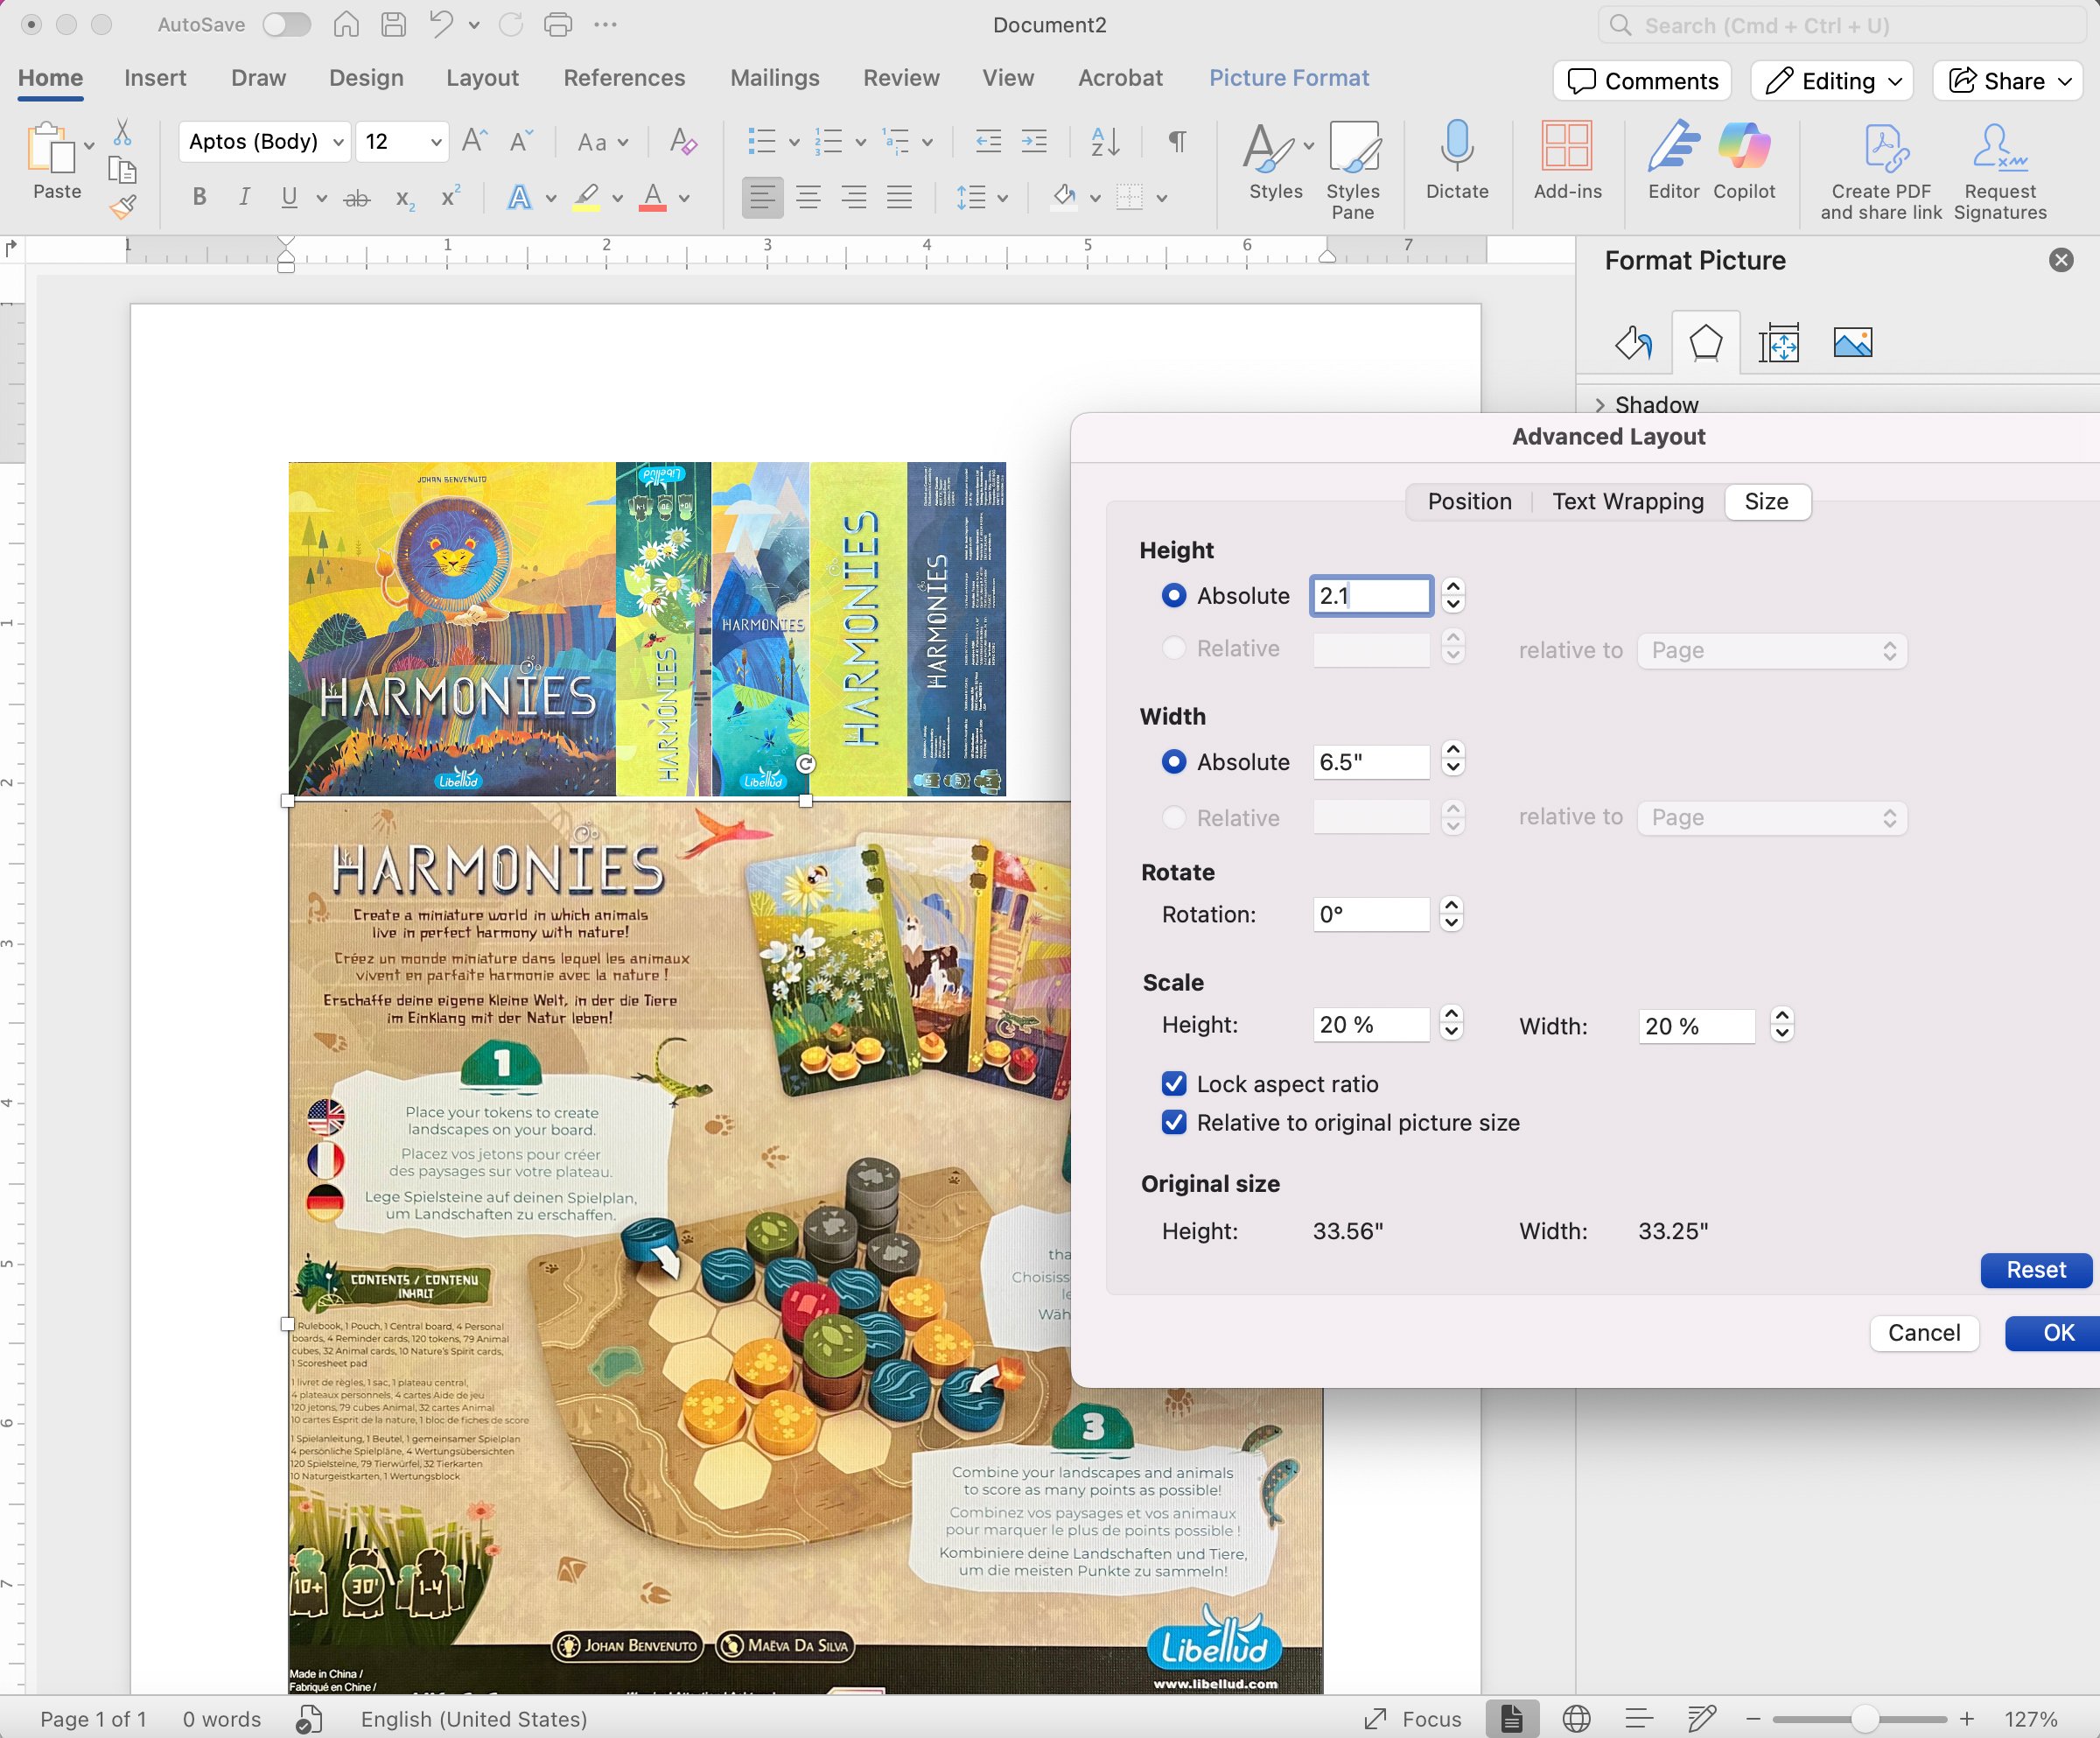
Step Two: Take pictures of the board game making sure to get the cover, backside and all four sides. Crop the pictures and resize them to match the size of your box. I cropped the photos on my phone and used Photoshop to resize the images. I also tested this with Microsoft Word and was able to resize the images, so lots of applications can work, you just need a way to crop and size the images.
For example, my Catan box measures about 3.2″ tall so I made the printables 2.8″ tall. For the square boxes that measured 2.5″ wide and tall, I made the printables 2.1″.
Adhere the Graphics to the Box
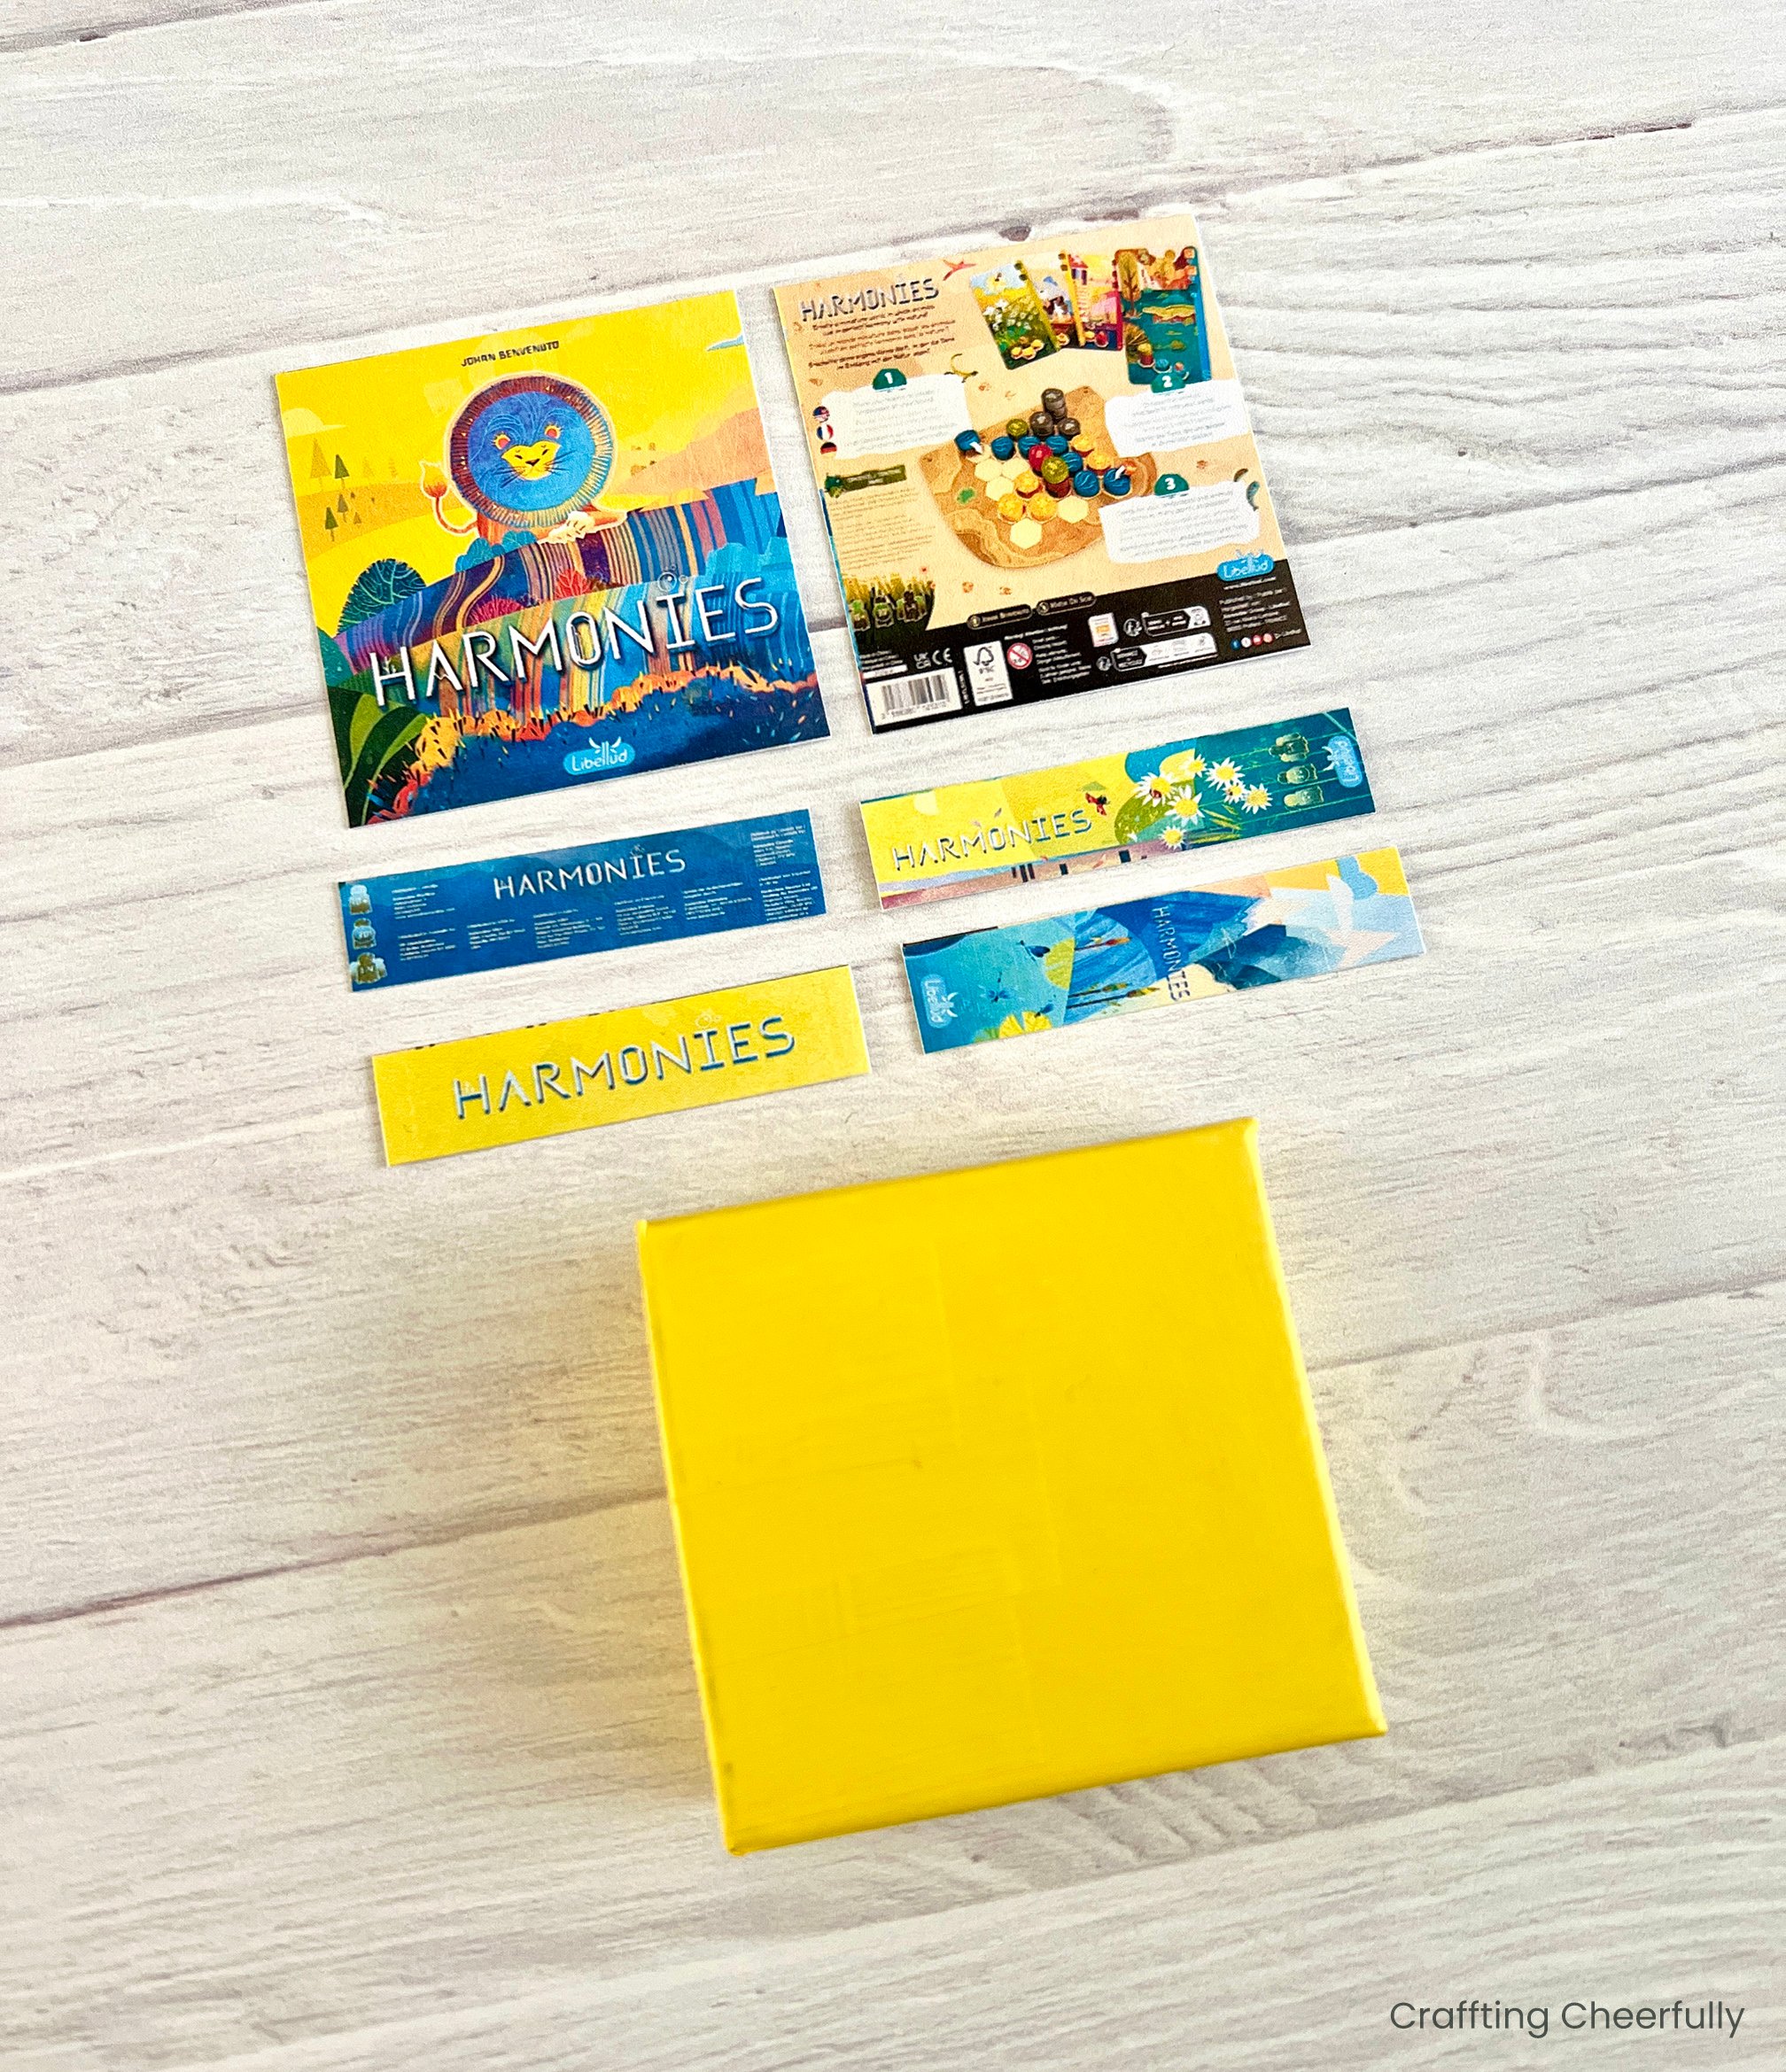
Step Three: Print the graphics on photo paper and cut them out using a paper trimmer.
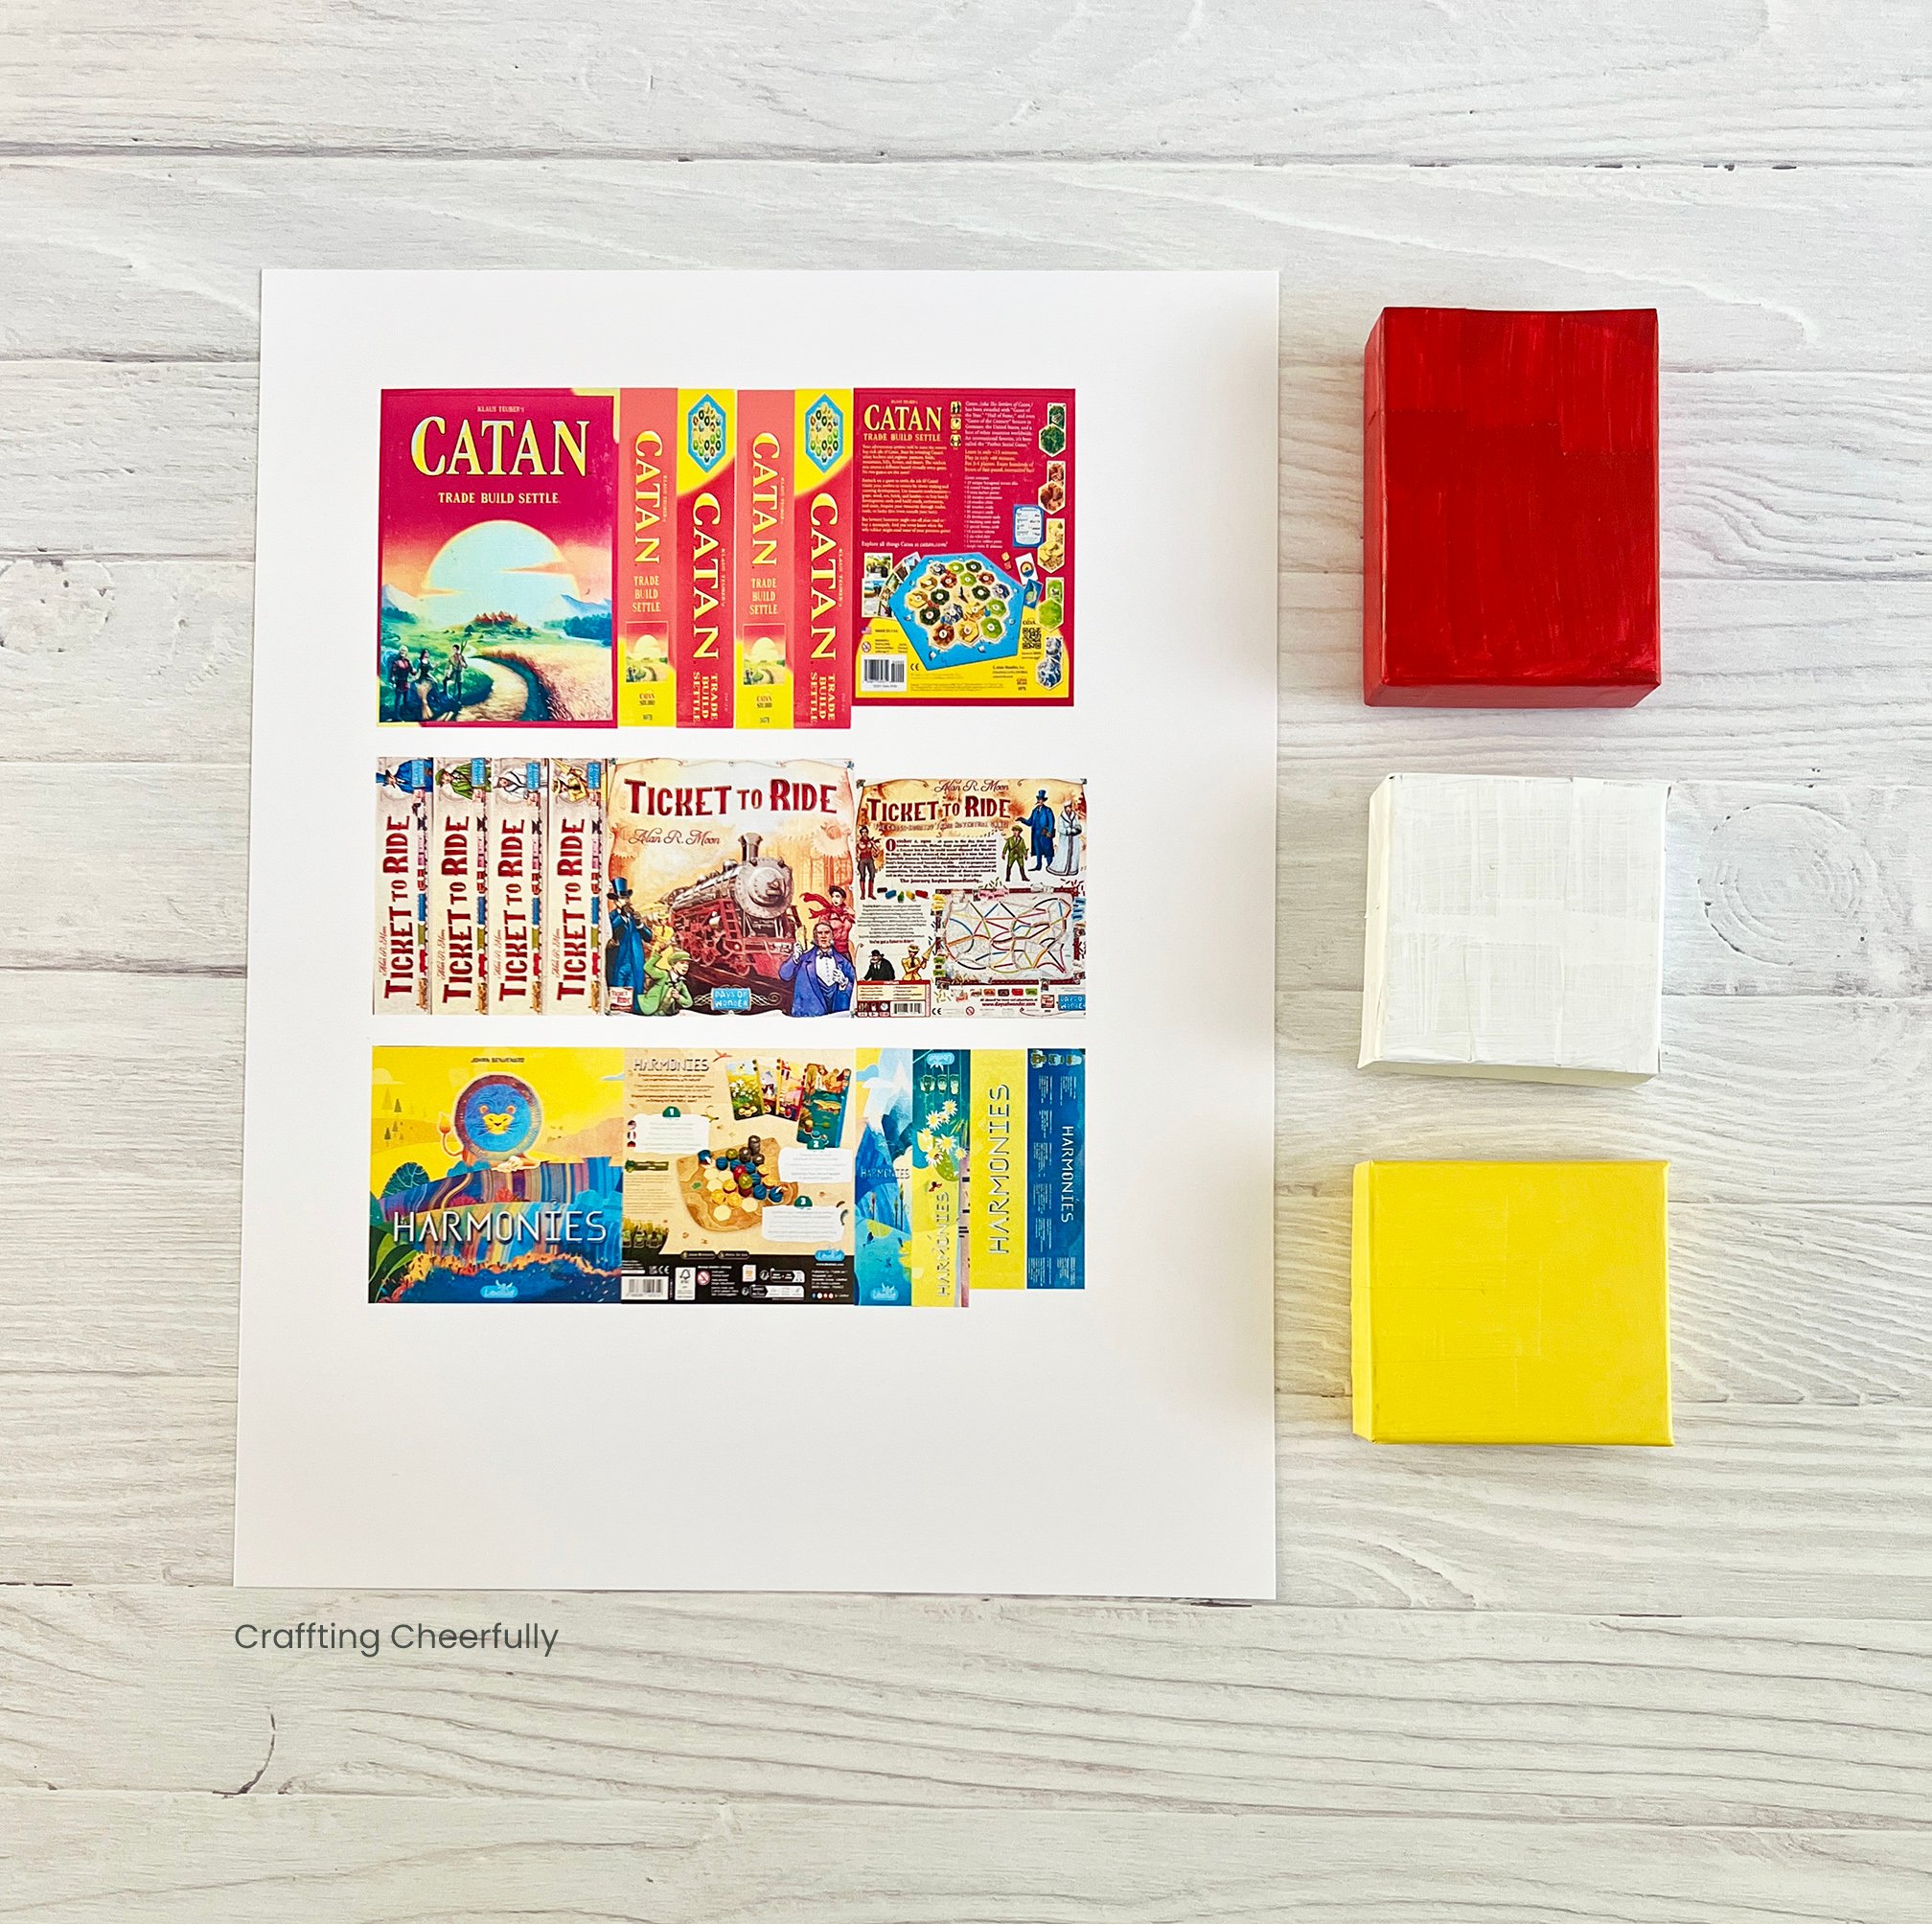
Step Four: Use double-sided tape or glue to adhere the printed pieces to the painted box.
Adding the Ornament Hanging Loop
Step Five: Use a 1/8″ hole punch to punch a hole through both the top of the lid and bottom of the board game ornament.

Use Baker’s twine to create a hanging loop and pull it through the top of the board game cover, taping the ends to the inside of the cover. Place the bottom of the box inside the lid and the ornament is finished! If the fit is not tight enough to keep them together, use a bit of adhesive to keep the box lid and bottom together.
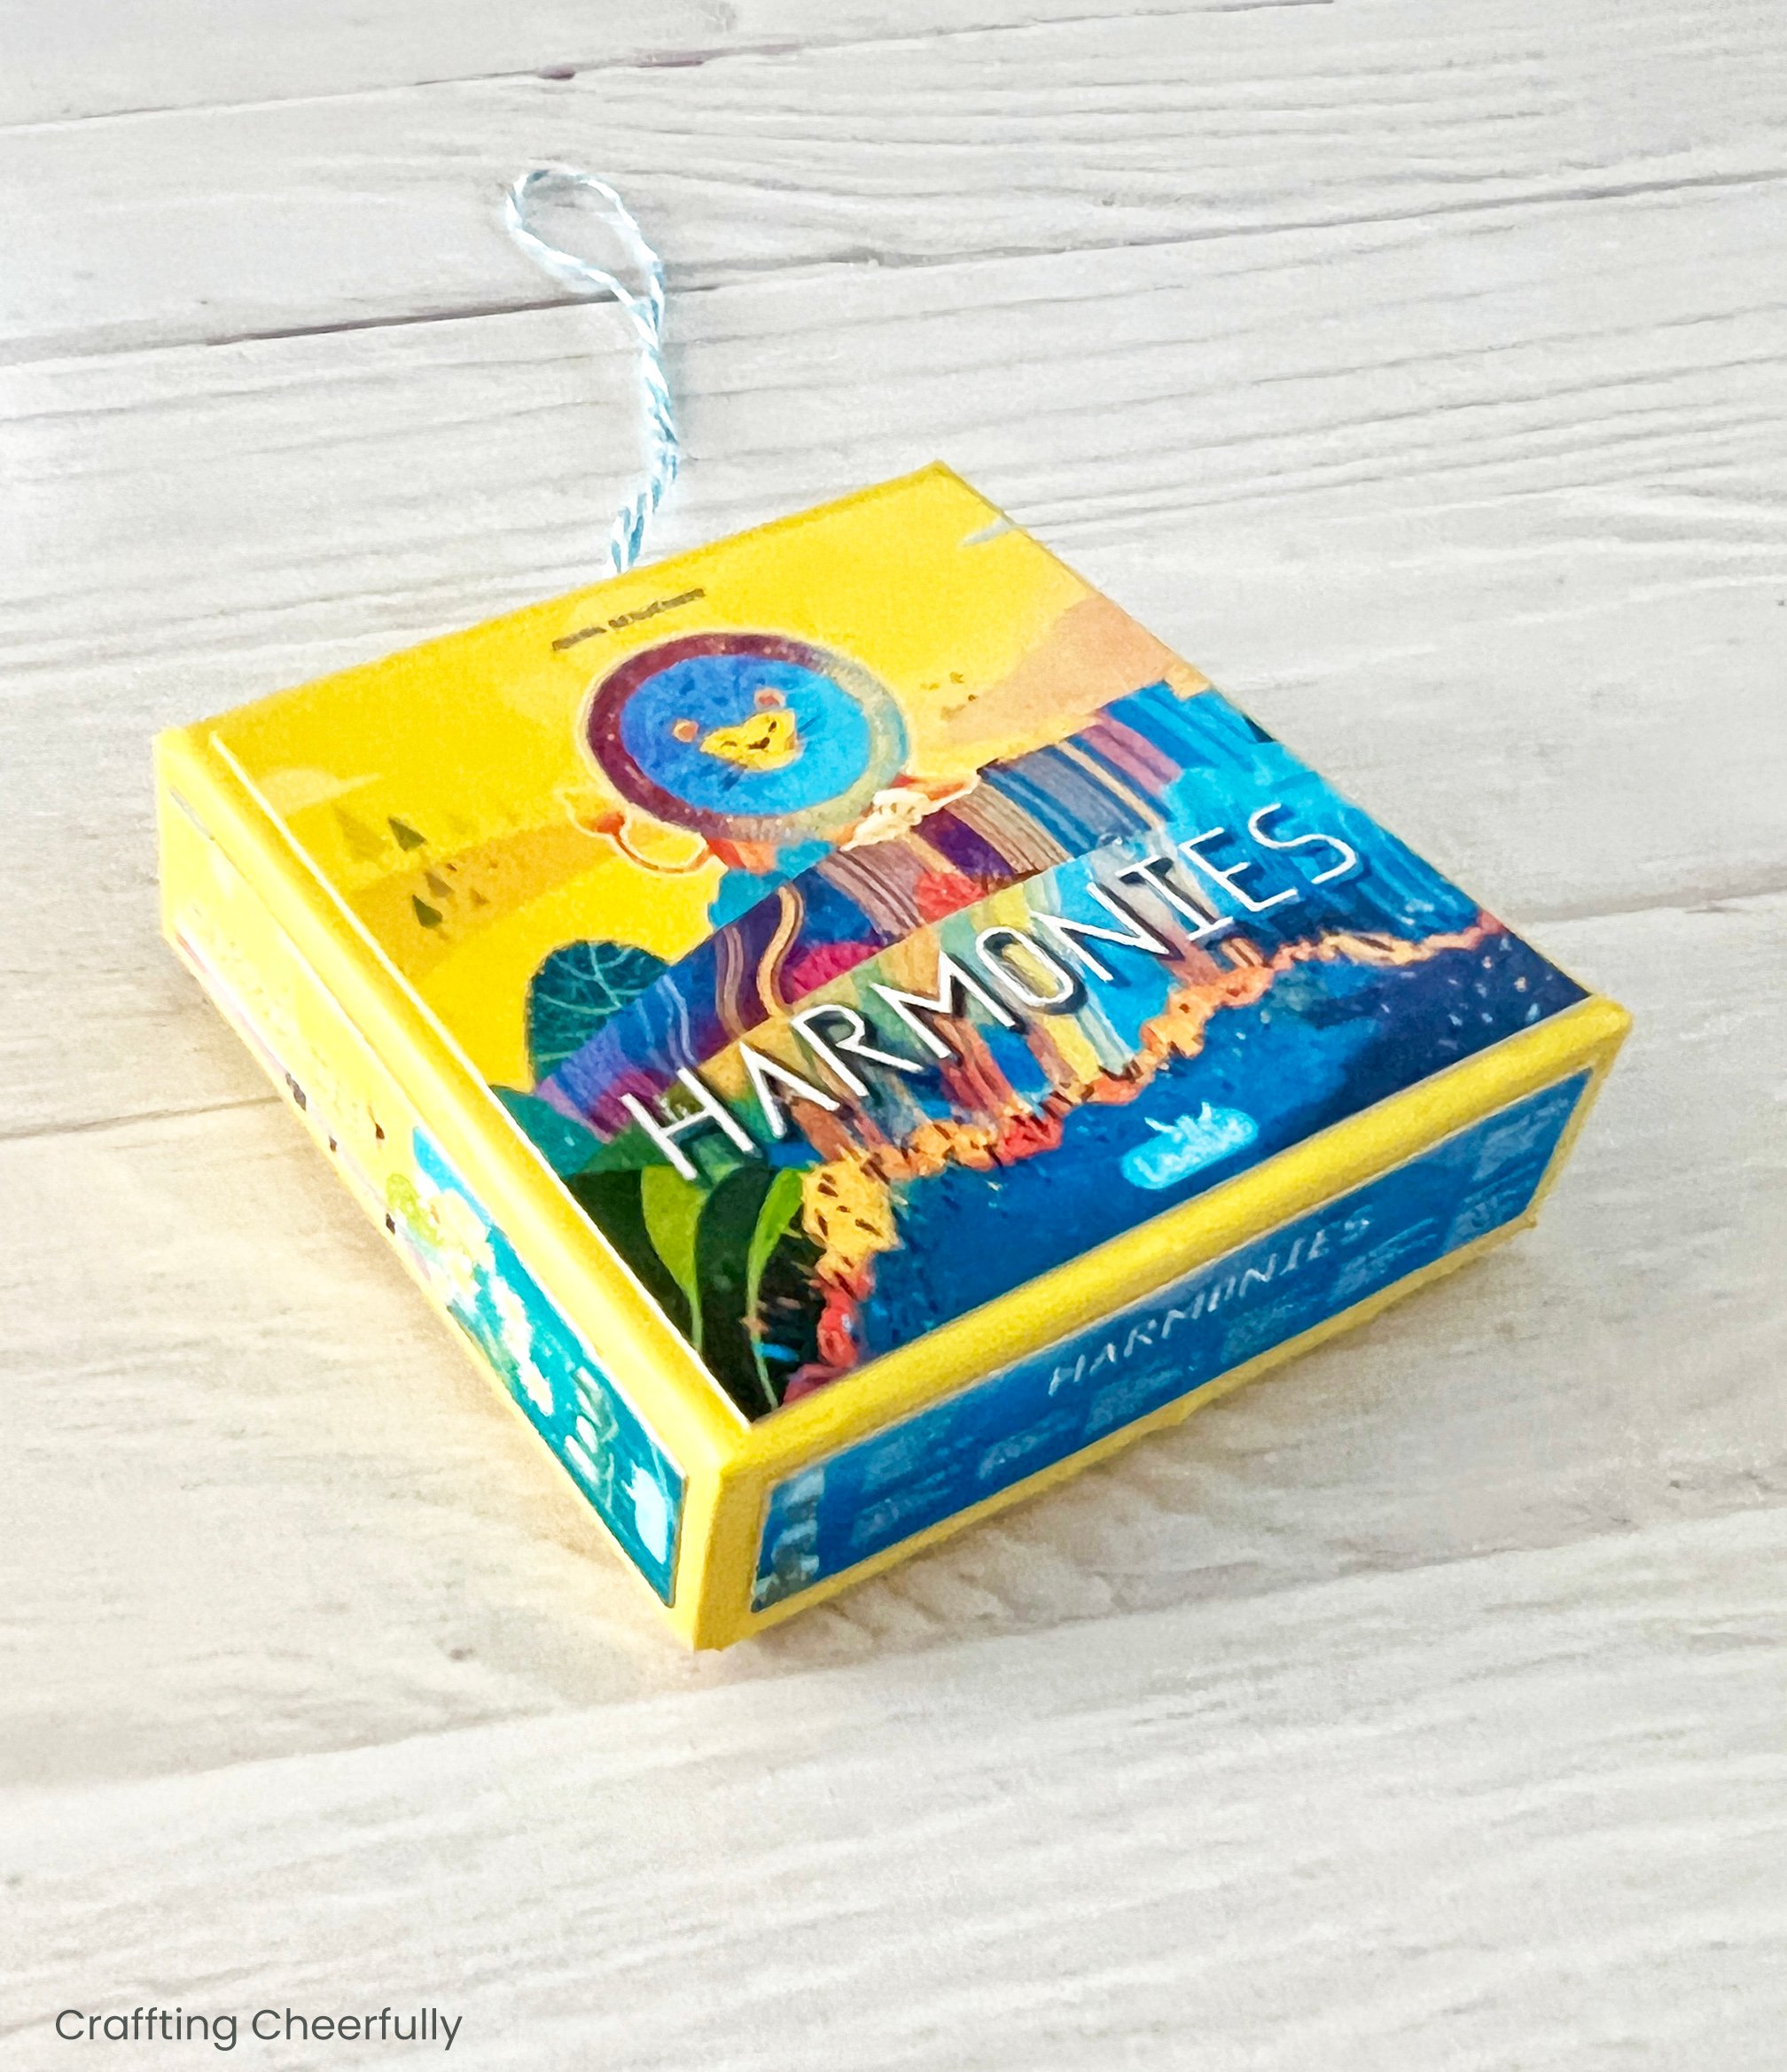
Create these cute board game ornaments for your favorite games!
These ornaments make awesome gifts especially when paired with another board game-related gift. For example, you could gift the Catan ornament with custom Catan piece holders for the ultimate gift for the Catan super fan. A gift card to your local board game store would also make an amazing compliment to one of these ornaments so the board game fun can continue even after the holidays!
Favorite Board Games (right now!)
Here are few of our favorite board games. I had to add the “right now” since we are always discovering new games! Maybe you will see one on the list below you want to give a try! :)
- Harmonies – Strategic tile placement game with gorgeous illustrations.
- Azul – We like the Travel version and have played it in the airport several times.
- Power Hungry Pets – Quick to learn and quick to play!
- Five Crowns – One of our favorite holiday games with extended family.
- Flourish – Beautiful card-drafting game where you can play cooperatively or competitively.
- Catan – We have played most of the expansions but Seafarers is my favorite. I especially like Seafarers Scenarios Hawaii and Legend of the Sea Robbers.
- Splendor Duel – My current favorite two person game.
I hope you enjoyed this handmade ornament craft! I’ll be back tomorrow for the 4th day of my series “12 Days of Holiday Crafts“. In the meantime, check out the last ten years of handmade crafts! There is a little bit of everything :)