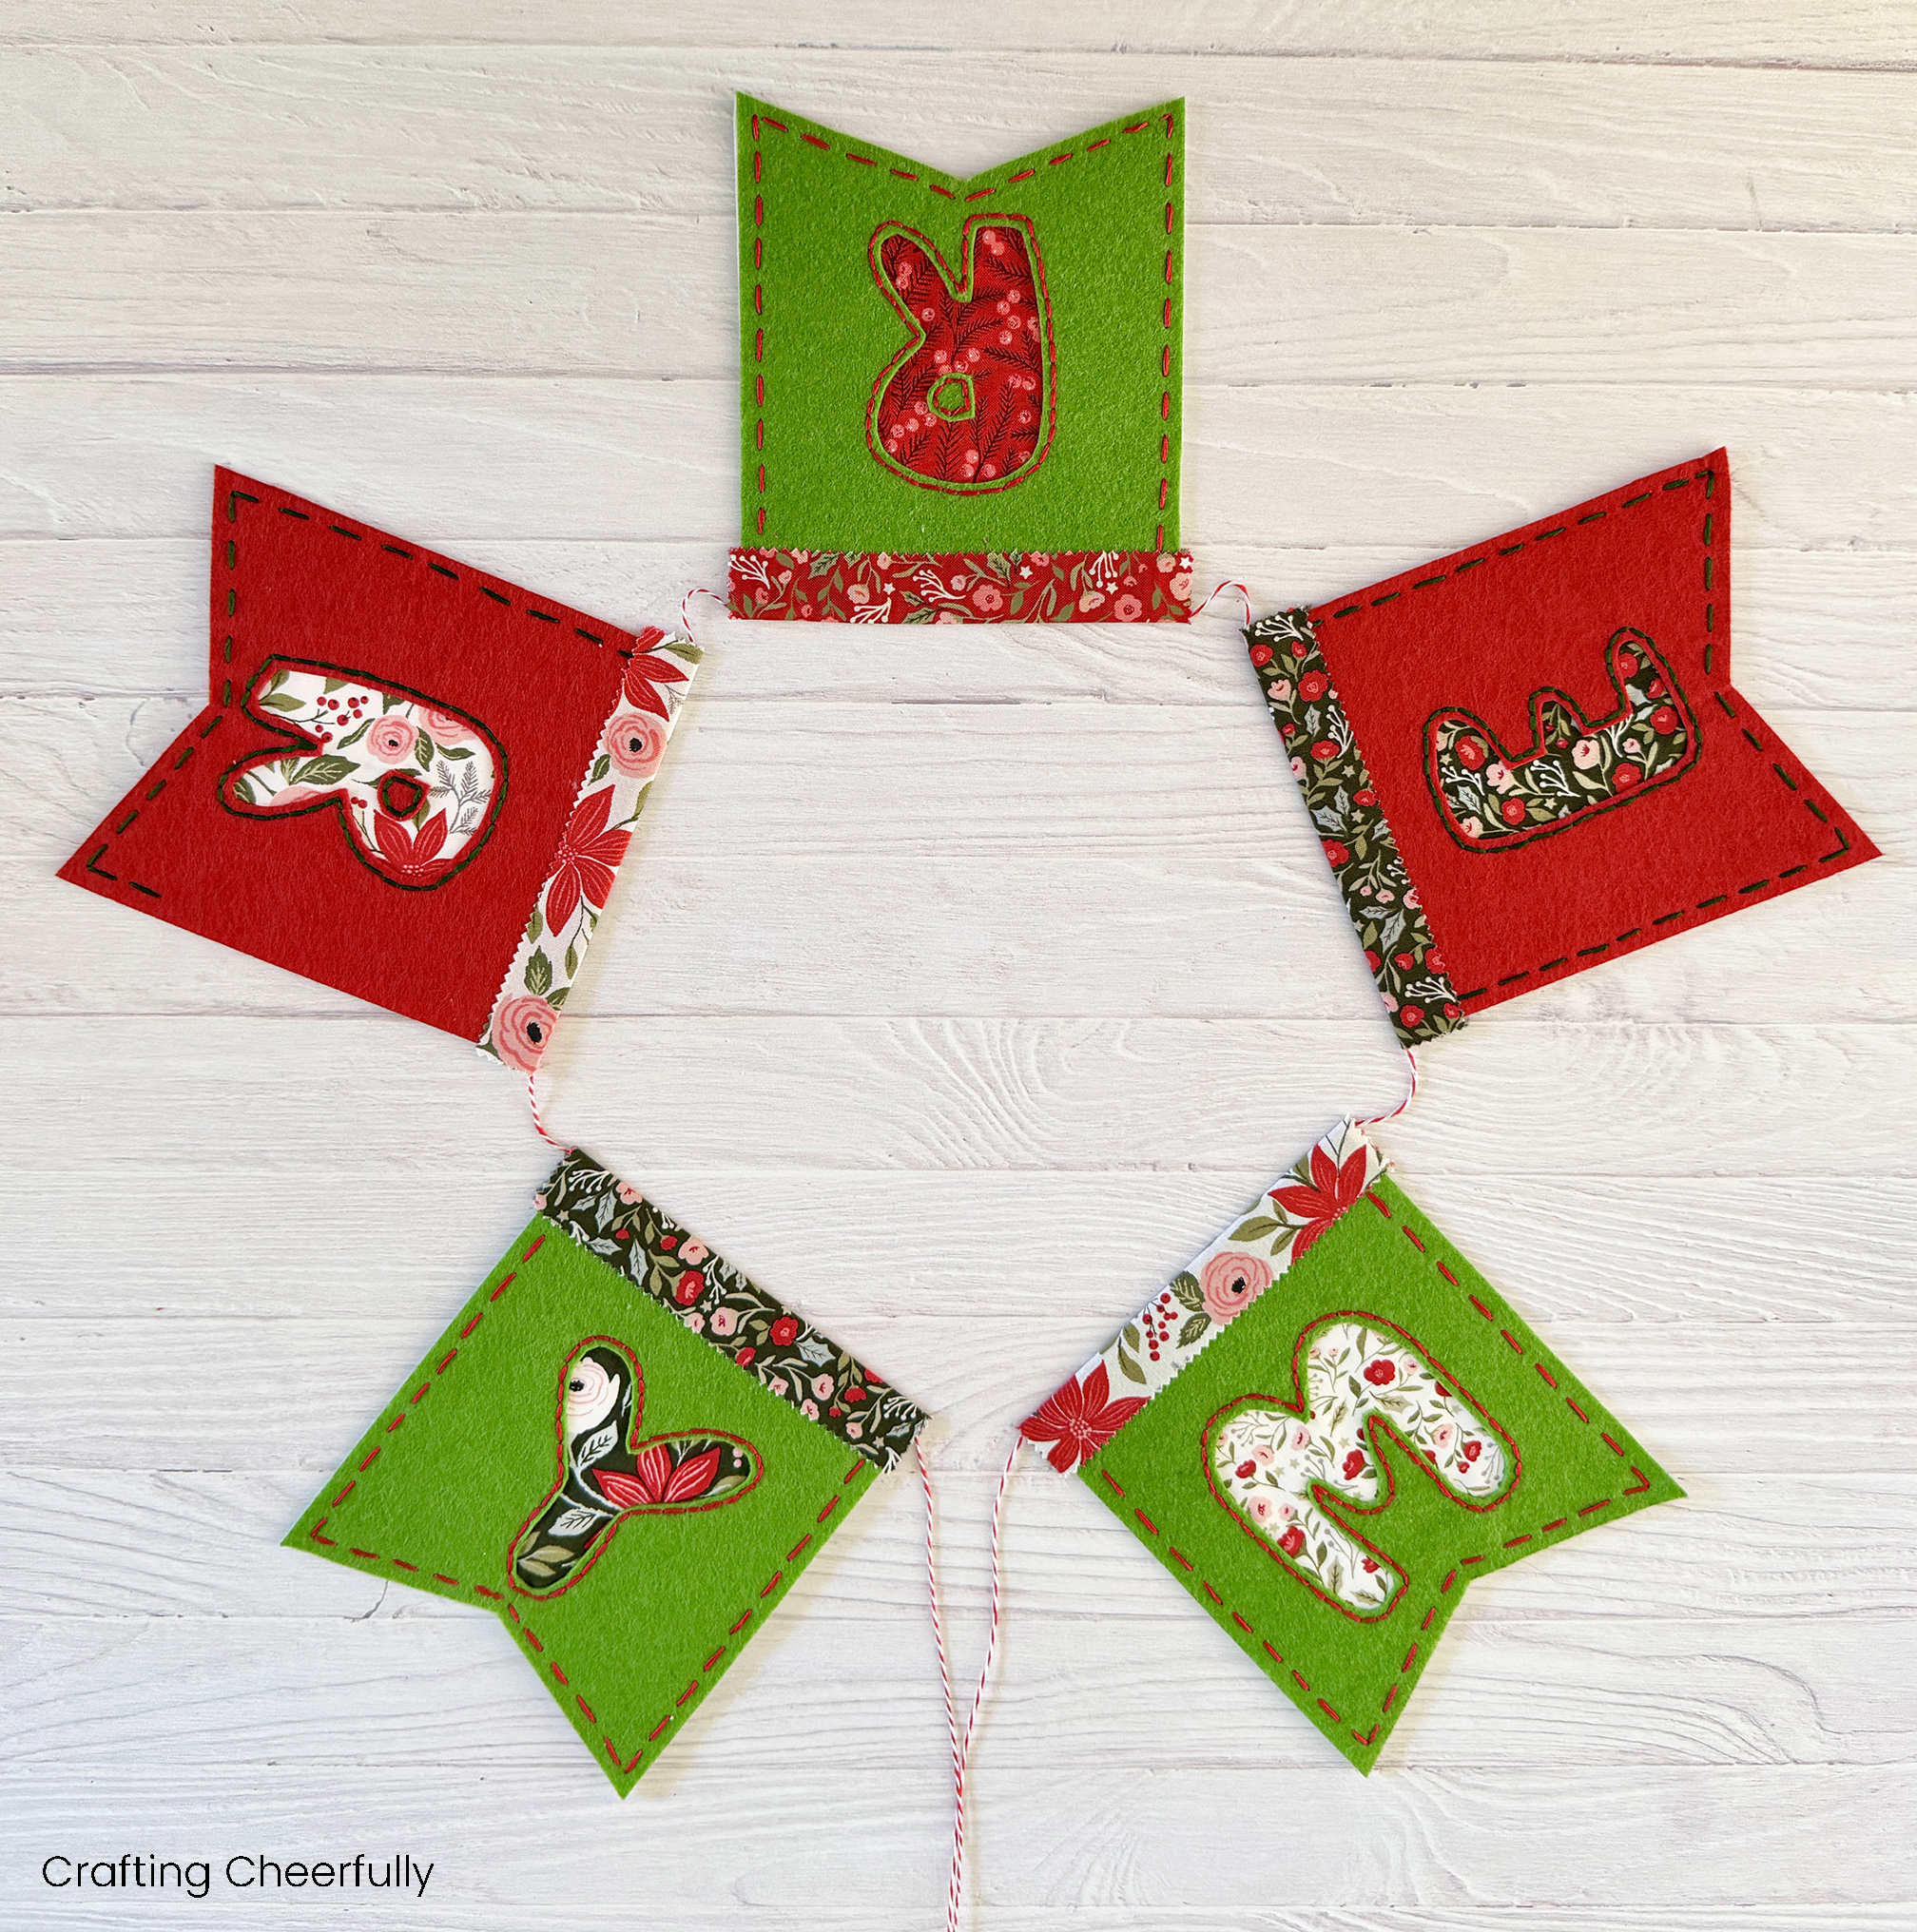
Reverse Appliqué Christmas Banner
Create a festive, reverse appliqué banner using fabric and felt! This craft is charm pack friendly and is also a great way to use fabric scraps. Download the free template to get started!

Hello Crafty Friends! I’m here with day four of my series “12 Days of Holiday Crafts” and I’m excited to share this reverse appliqué banner with you! I have been seeing reverse appliqué a lot and couldn’t wait to give it a try. It is so much fun and I really enjoyed using it to spell out the word MERRY to create a new holiday banner.
Banners are one of my favorite things to make for the holiday including both paper banners and fabric banners. They are a great way to instantly transform a space for any special occasion. I also love that they are easy to hang up, store, and they can be used year after year!
Felt Charm Pack Christmas Banner
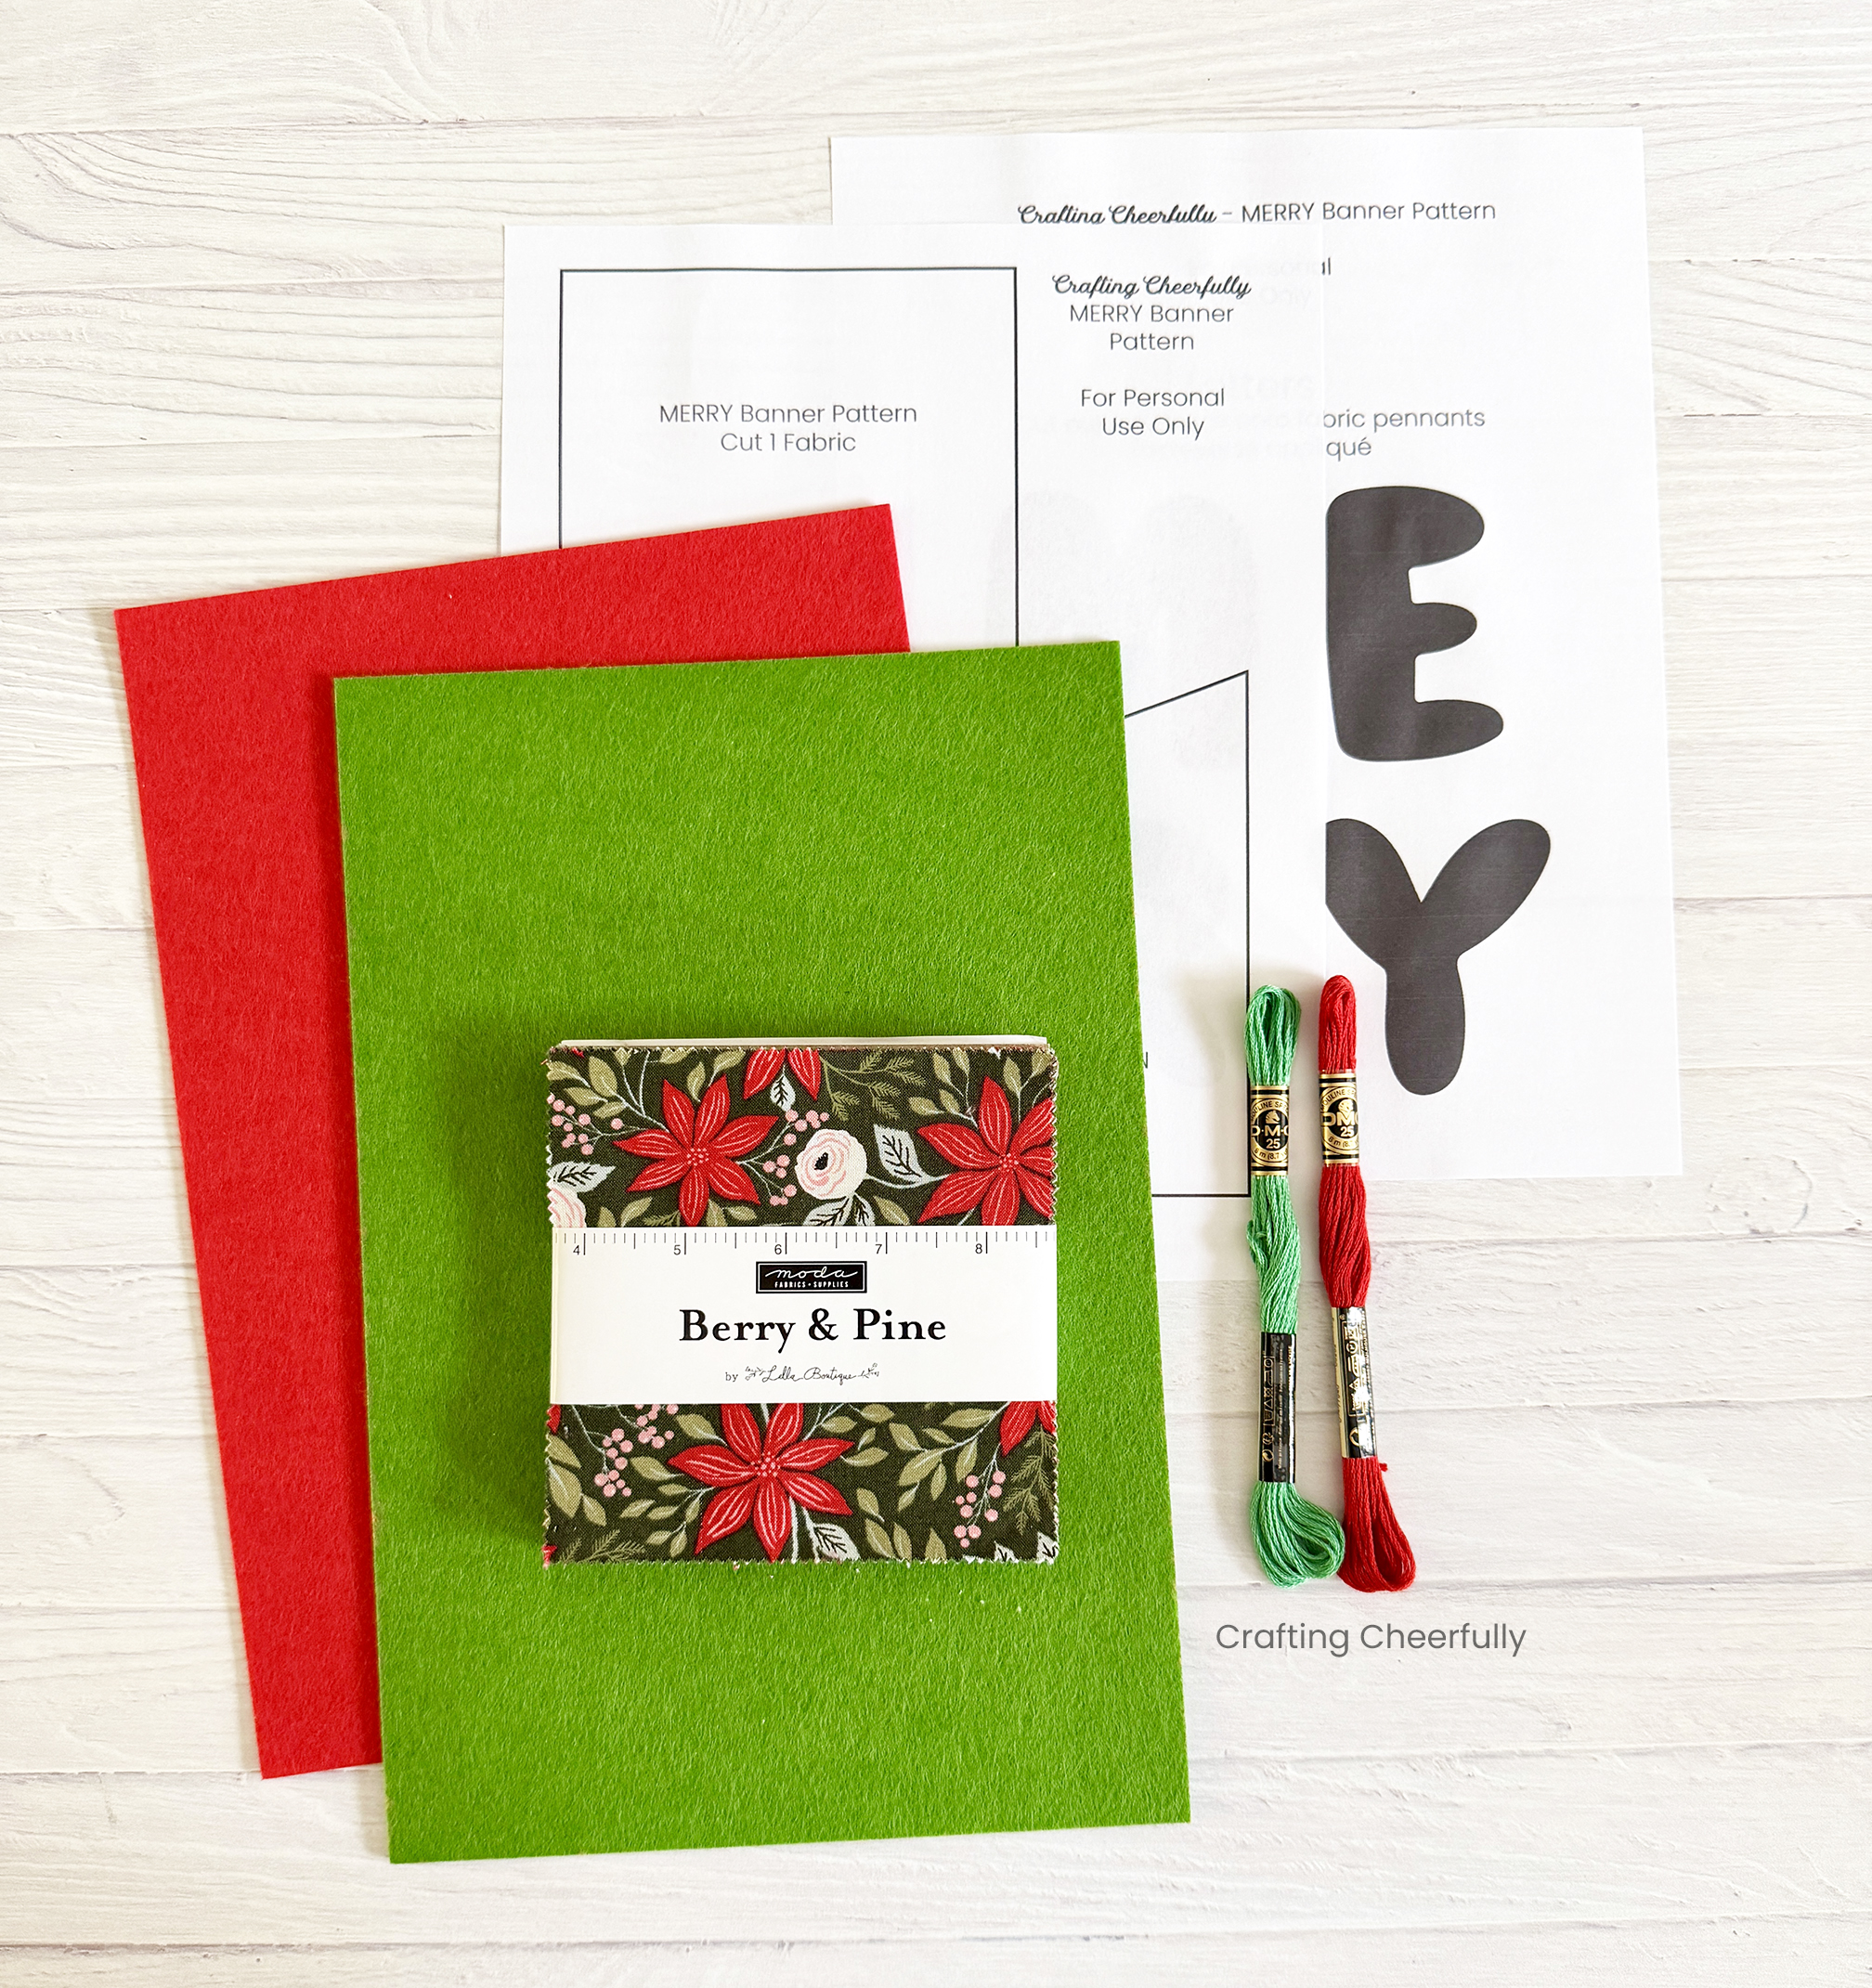
Supplies Needed:
- Free template – Grab the free template by filling out the purple form toward the end of this post.
- Stiffened Felt
- Scraps of holiday fabric or a charm pack – I used the charm pack Berry and Pine by Lella Boutique by Moda Fabrics.
- Embroidery floss
- Fusible Interfacing, Heat n’ Bond Sewable Lite
- Small, sharp embroidery Scissors
- Fabric Scissors
- Ruler and pencil
- Twine, string or yarn
Choosing the Fabric
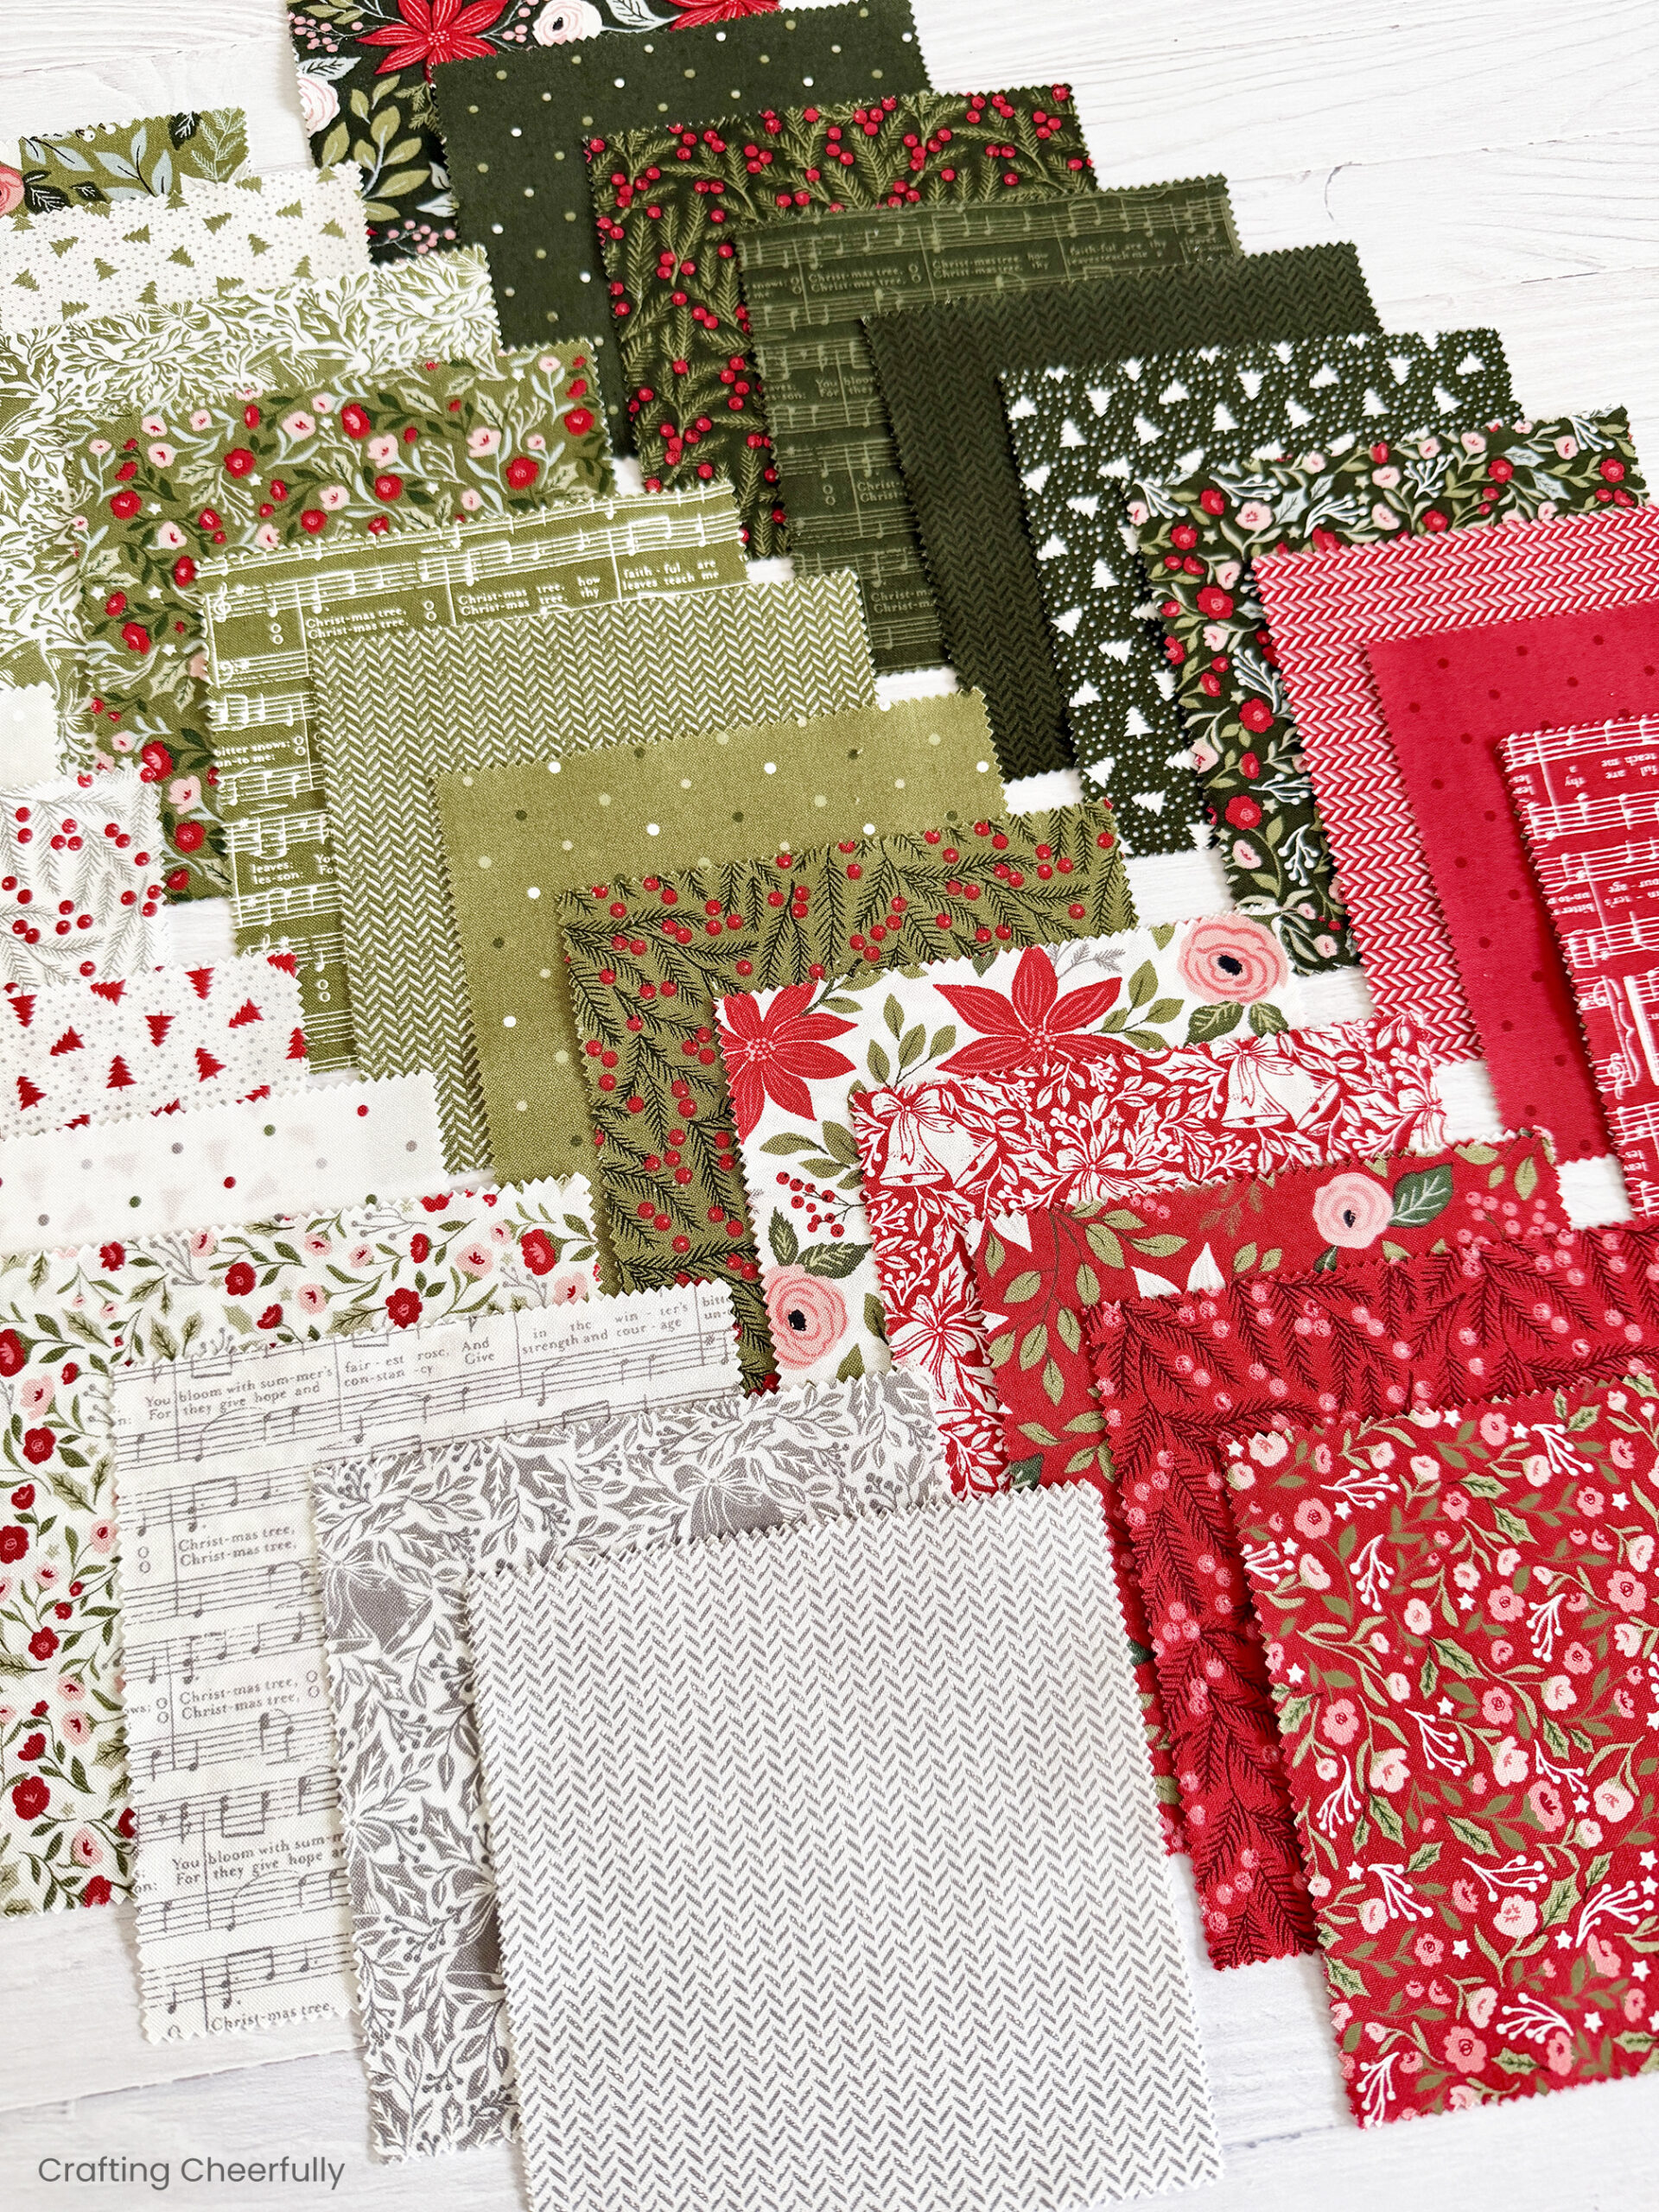
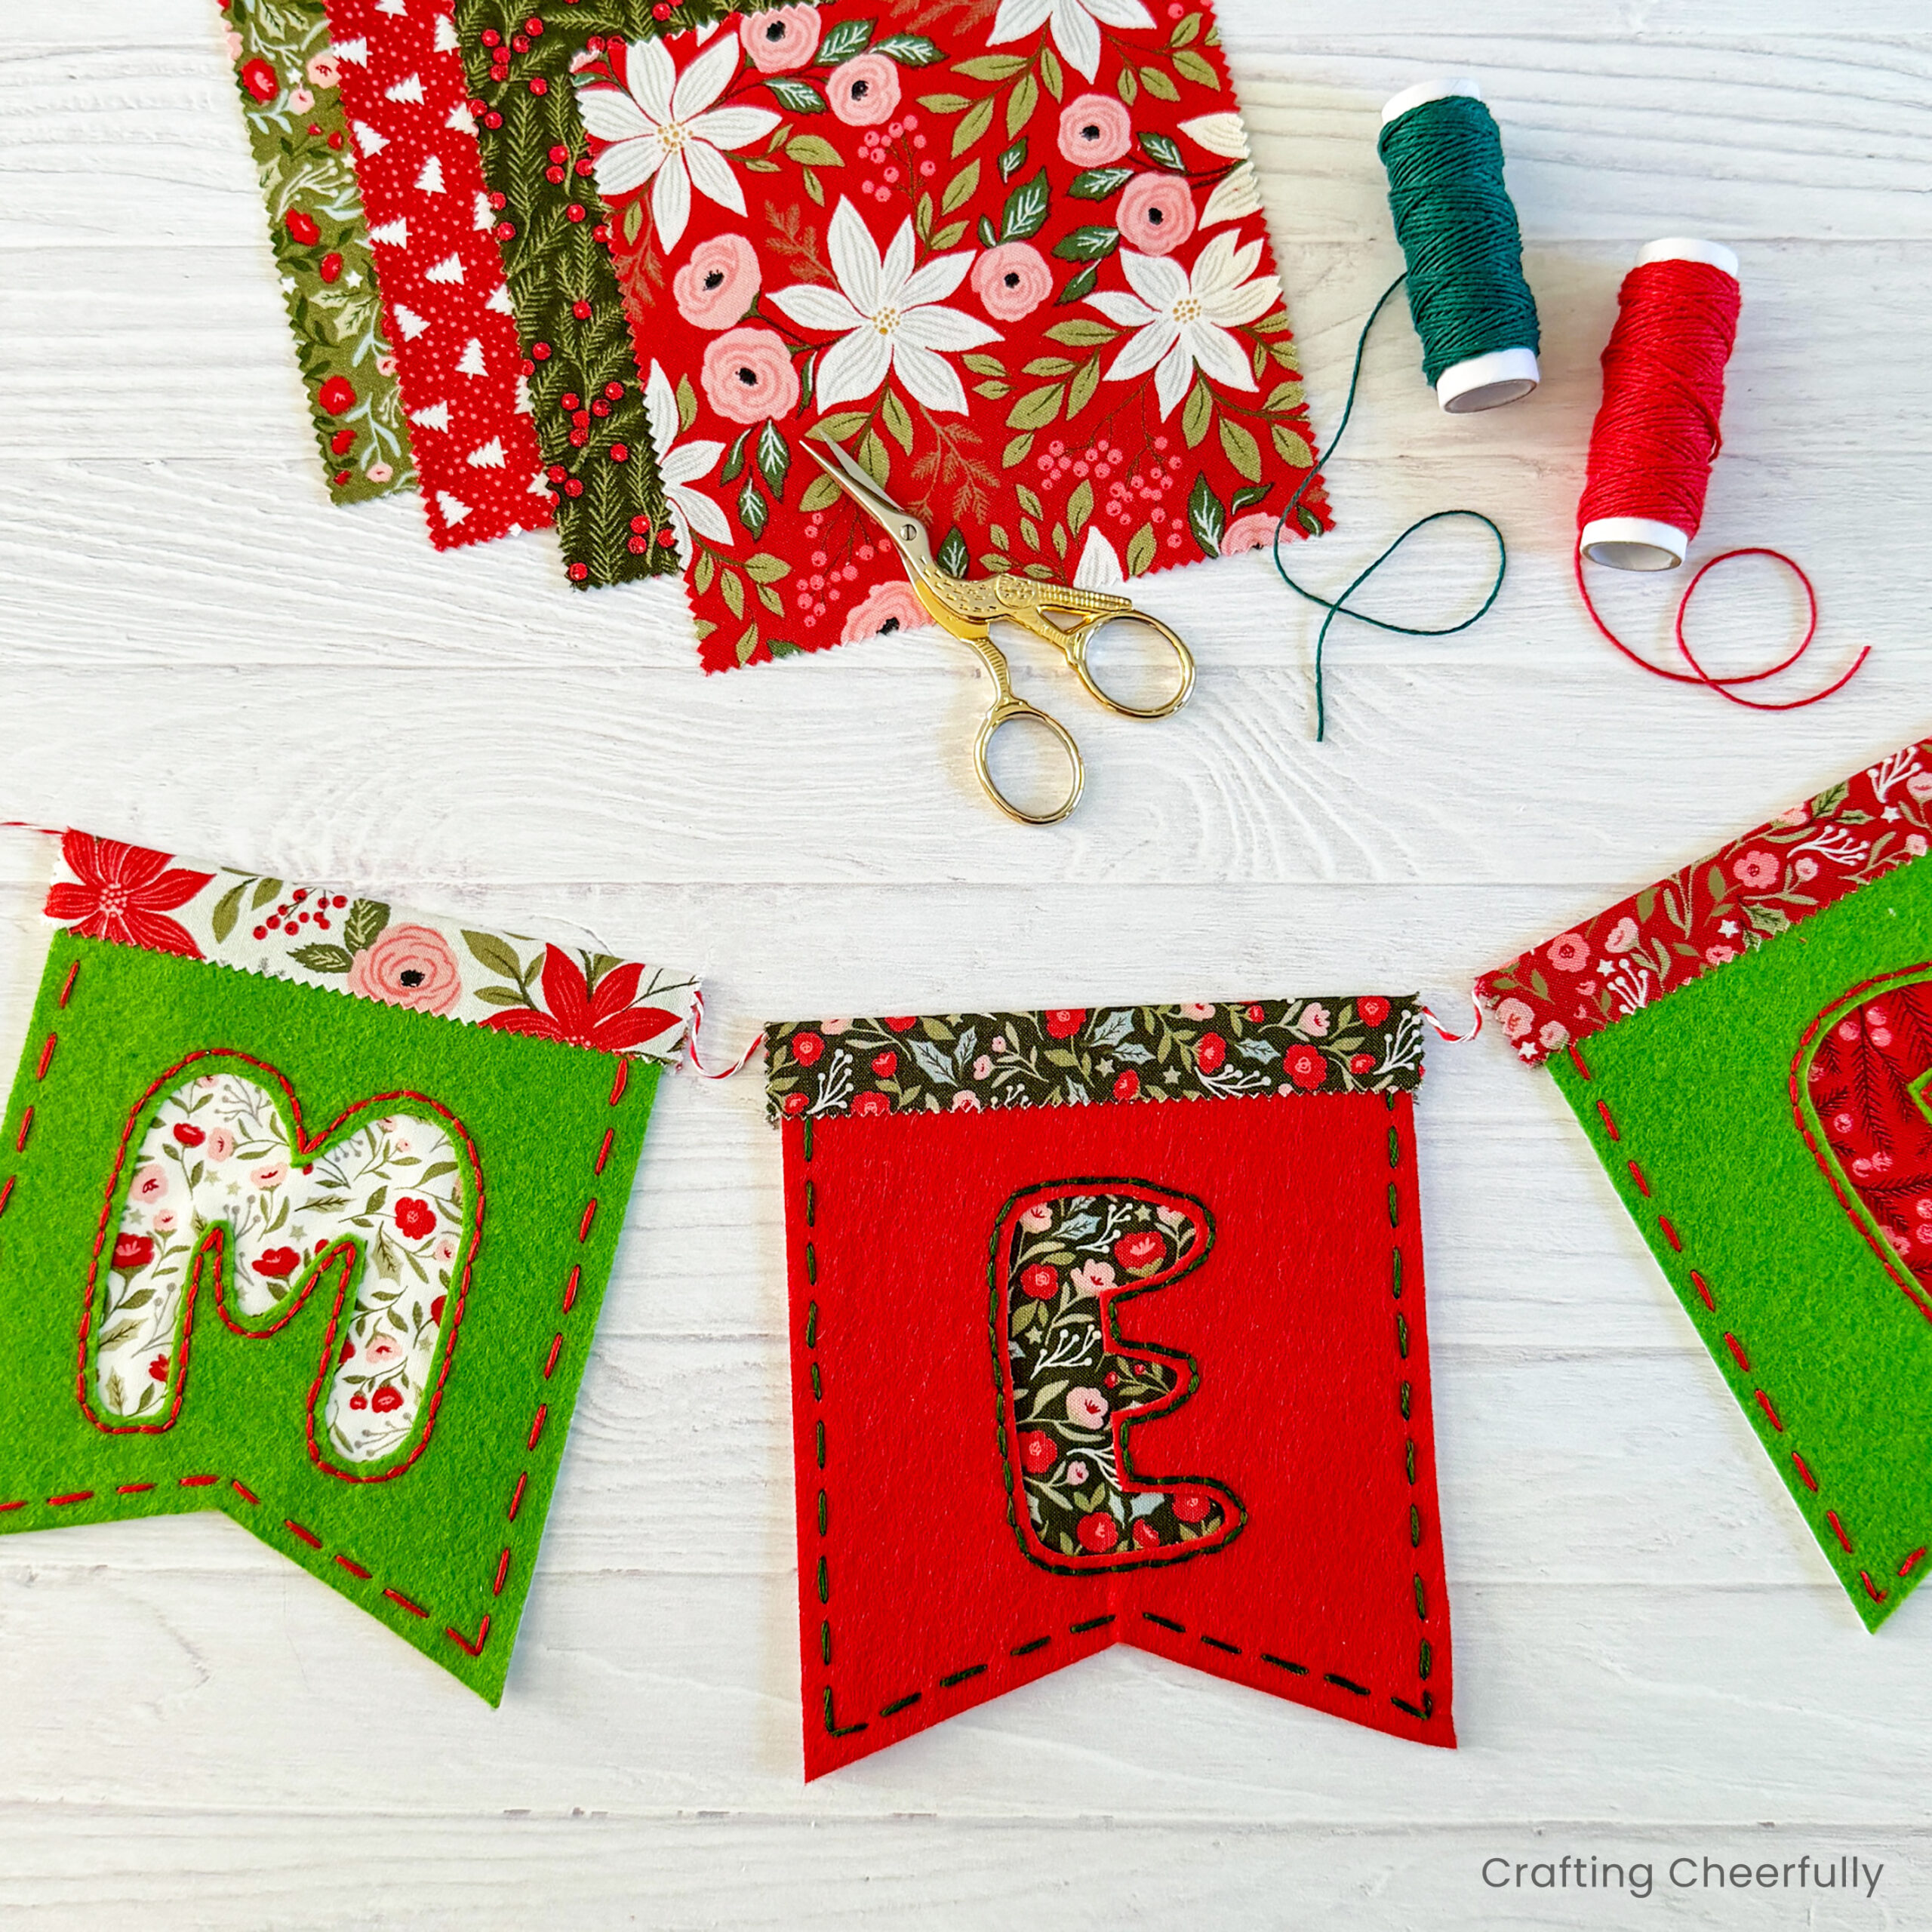
For this banner, I chose to use a charm pack called “Berry and Pine” by Lella Boutique for Moda Fabrics. It has so many lovely prints it was actually very tricky only choosing a few for this banner. I have quite a few leftover that I am excited to use for a different project. This banner is charm pack-friendly but can also be made with scraps of fabric from your stash.
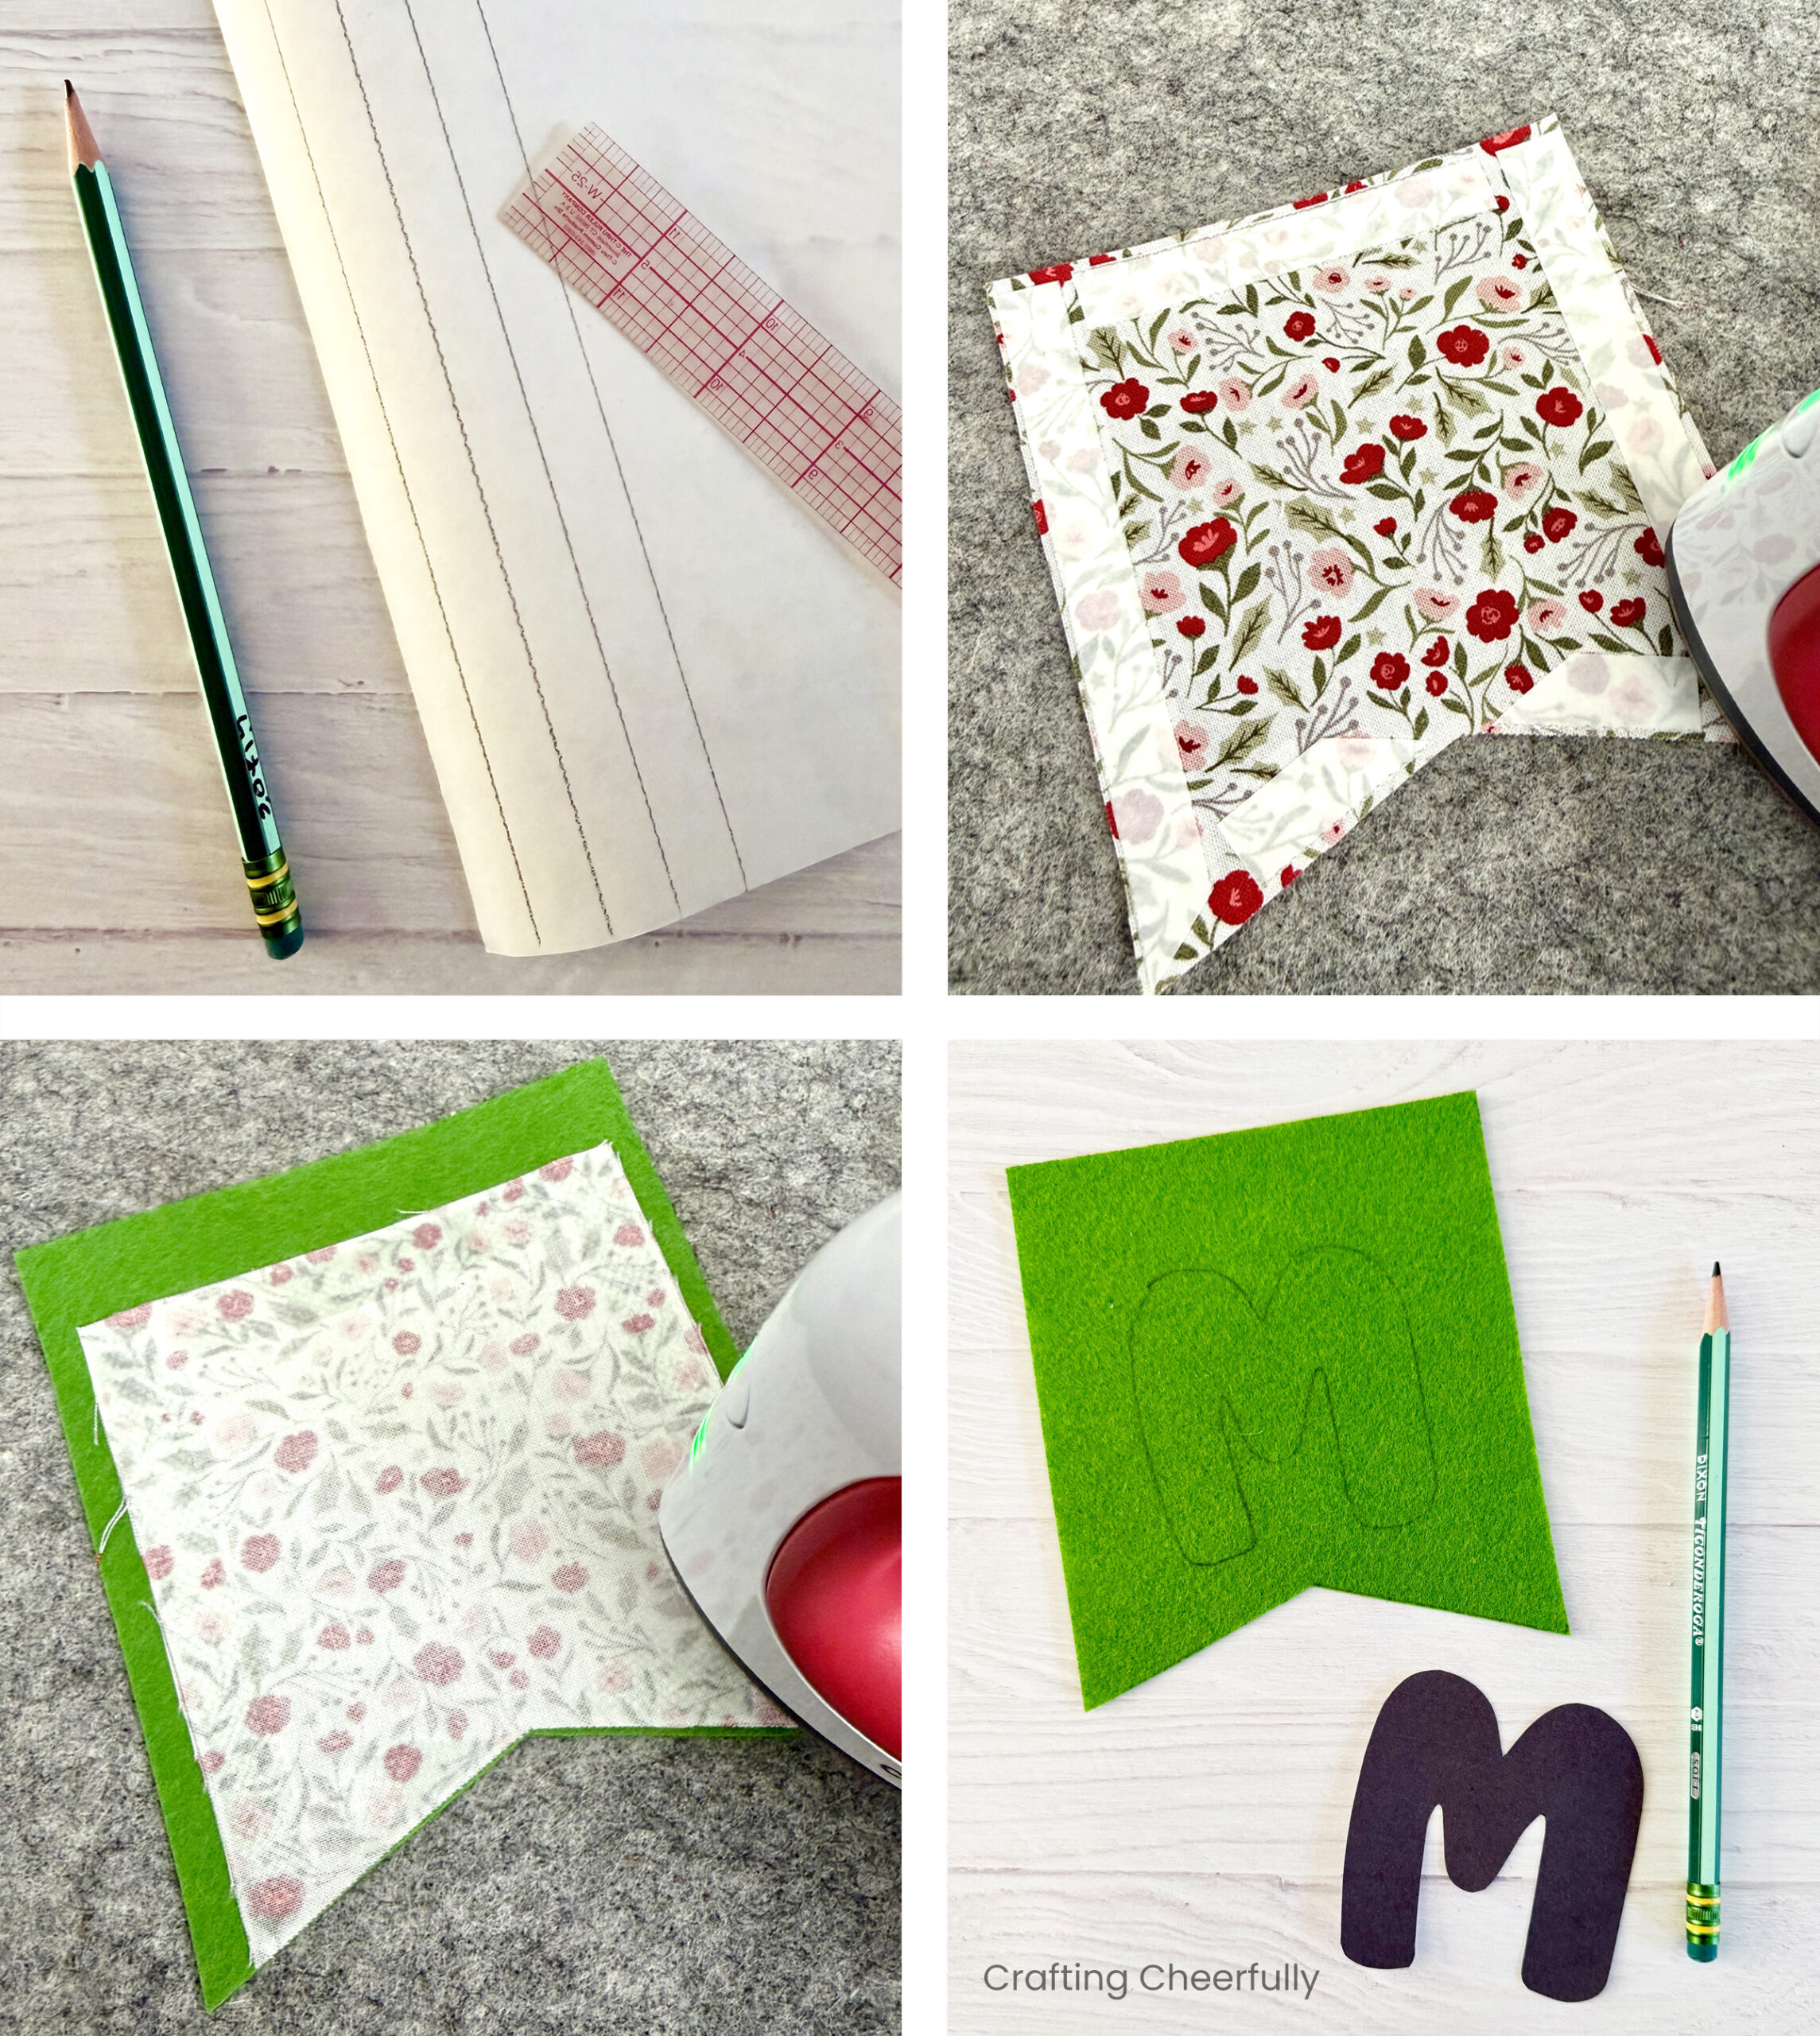
Cutting the Pieces
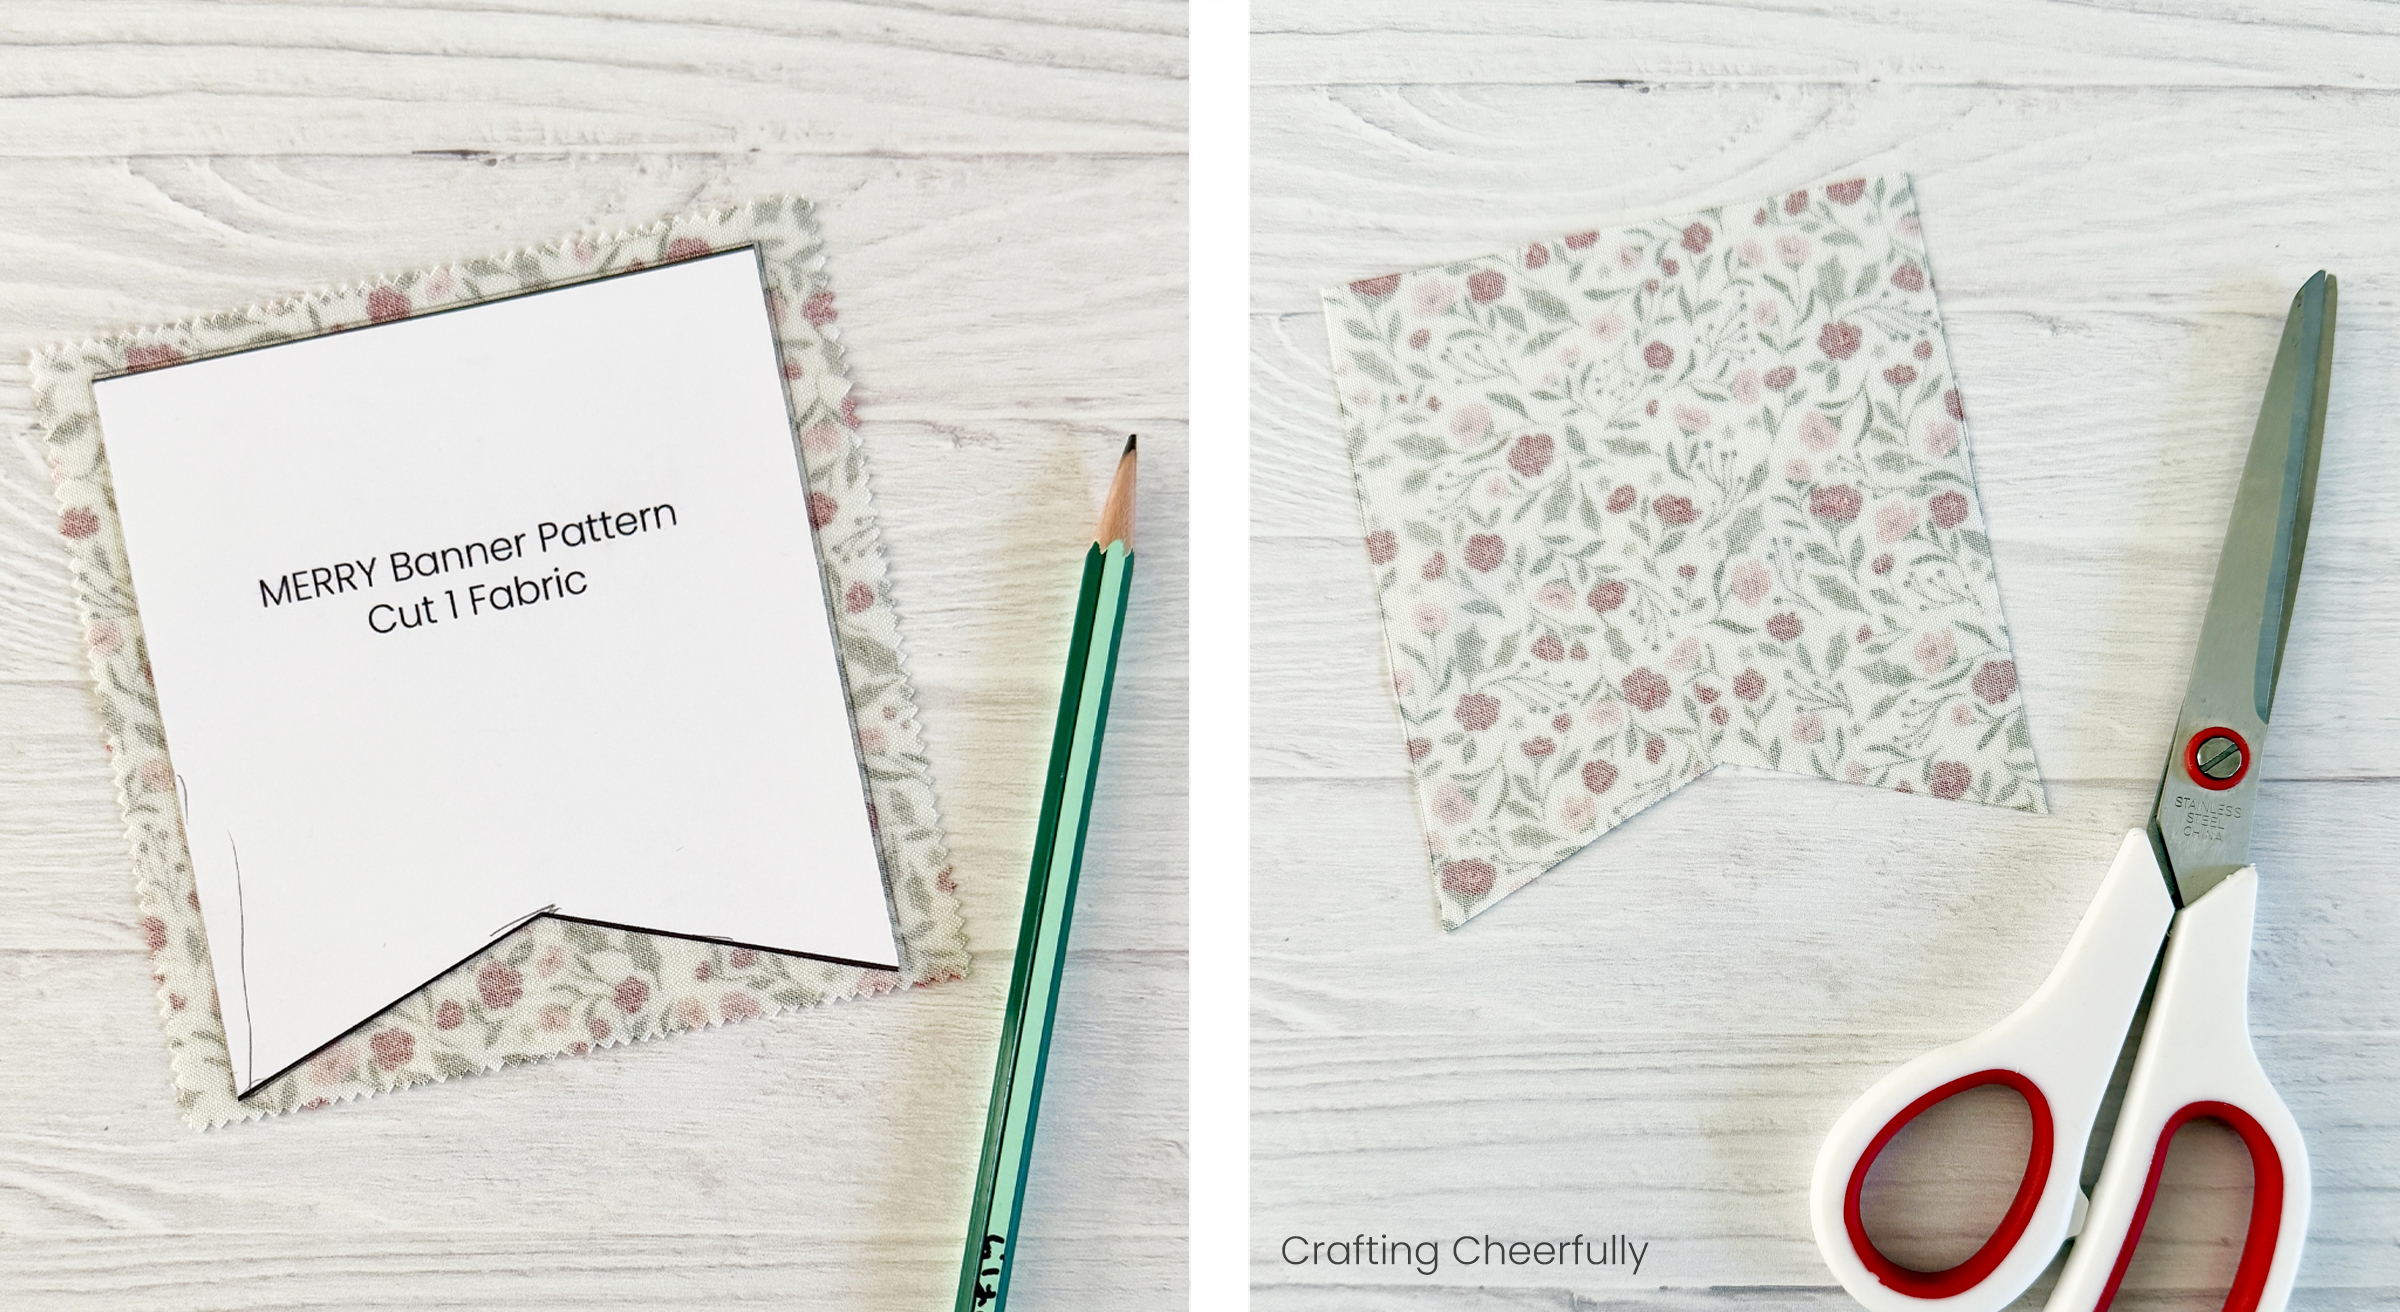
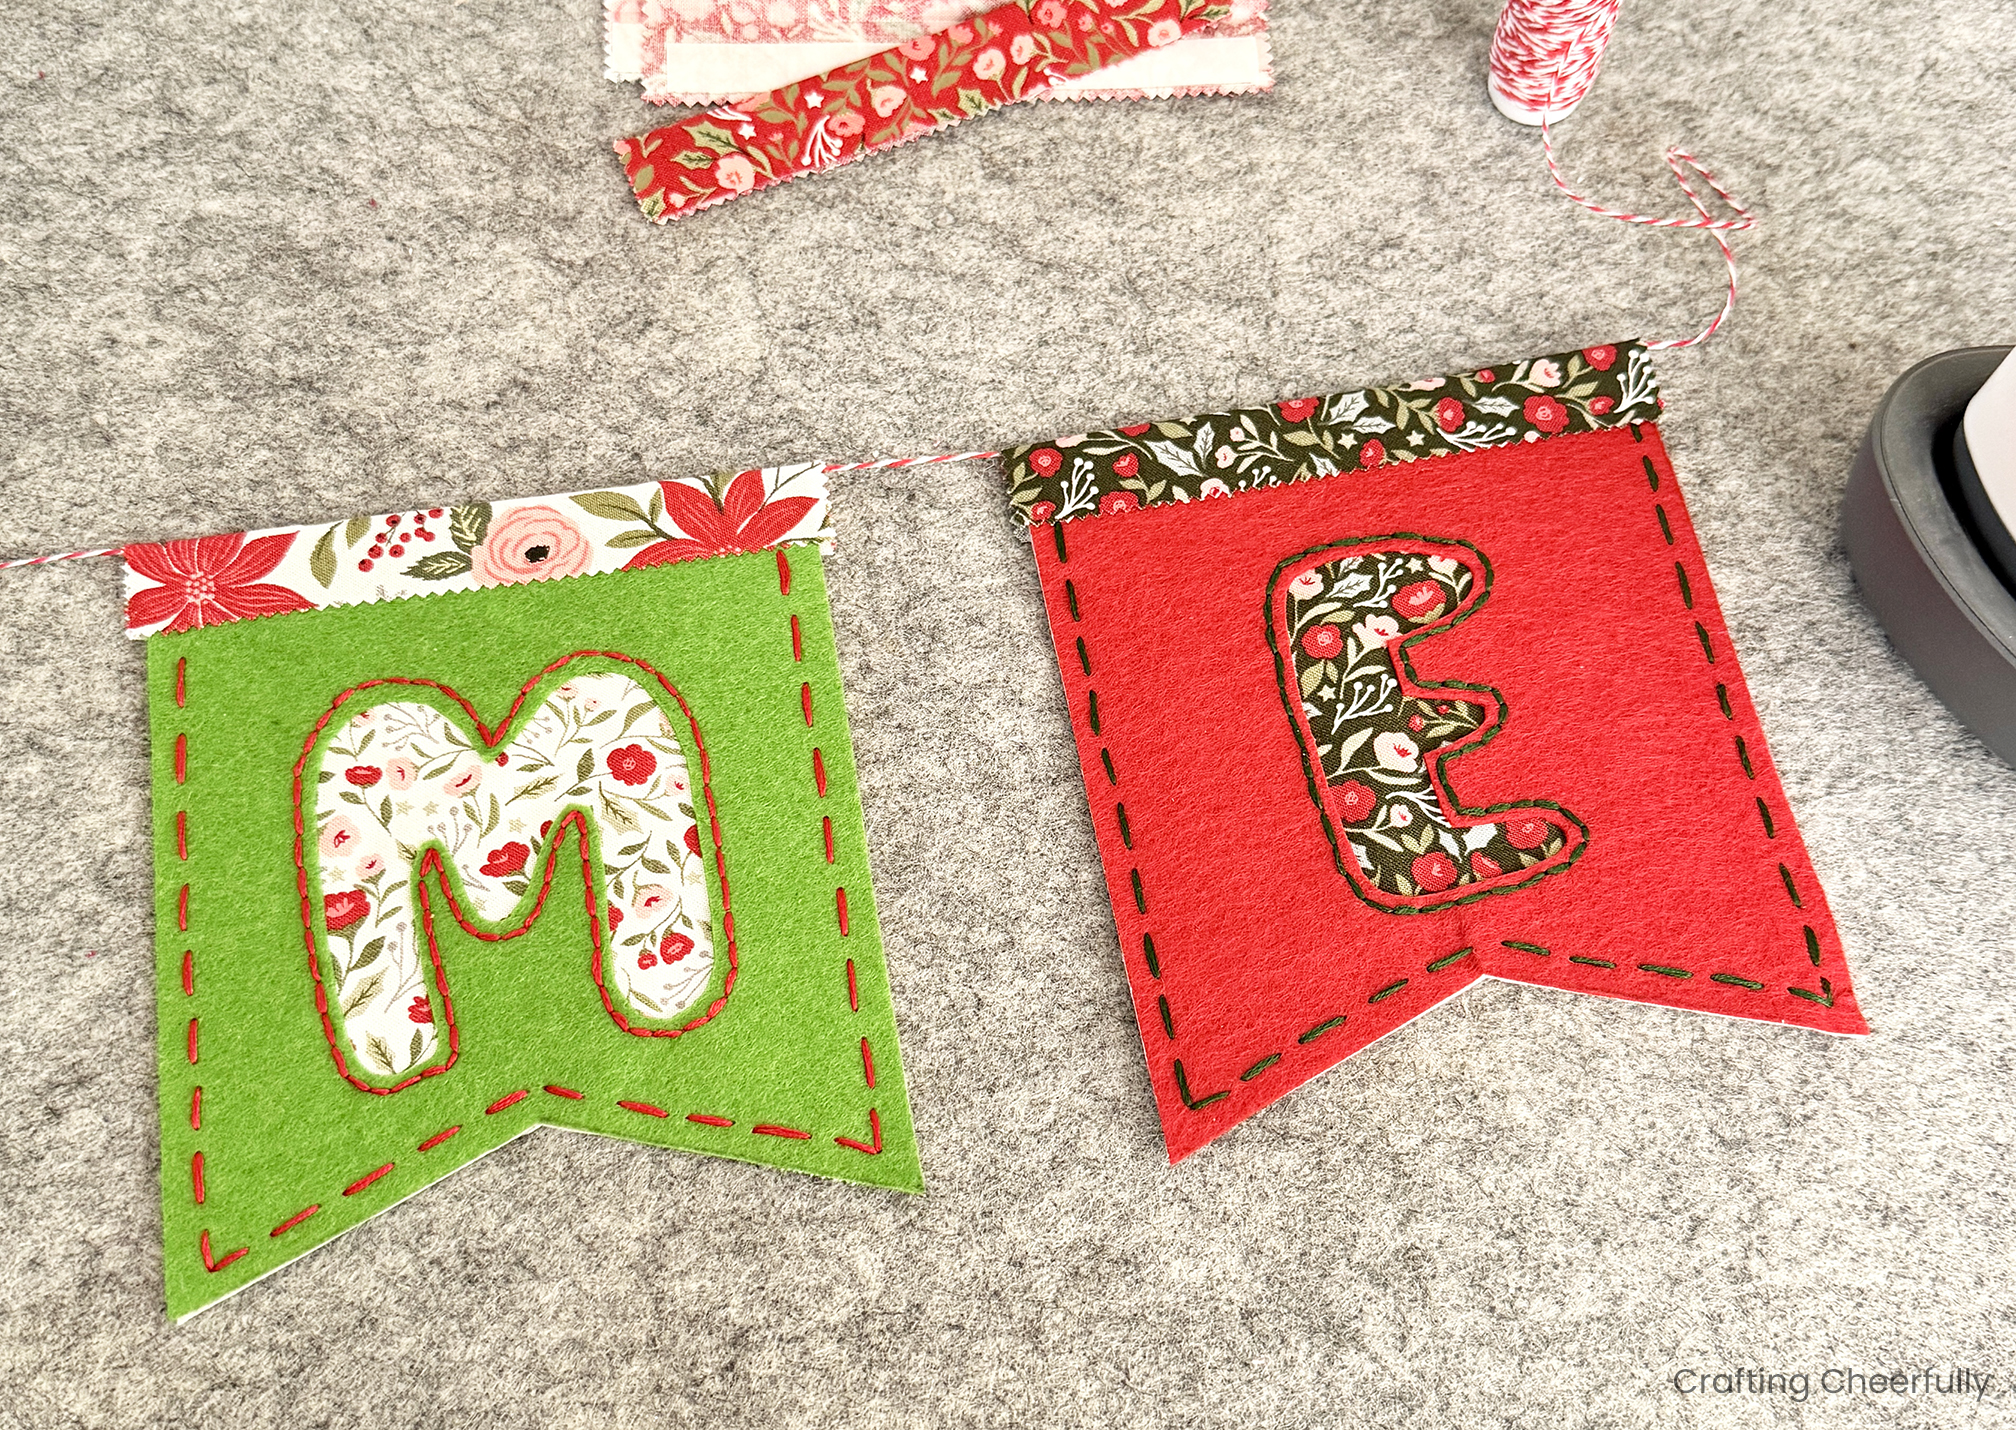
Step One: Download and print the pattern pieces and cut out the two pennants plus the letters for the word MERRY.
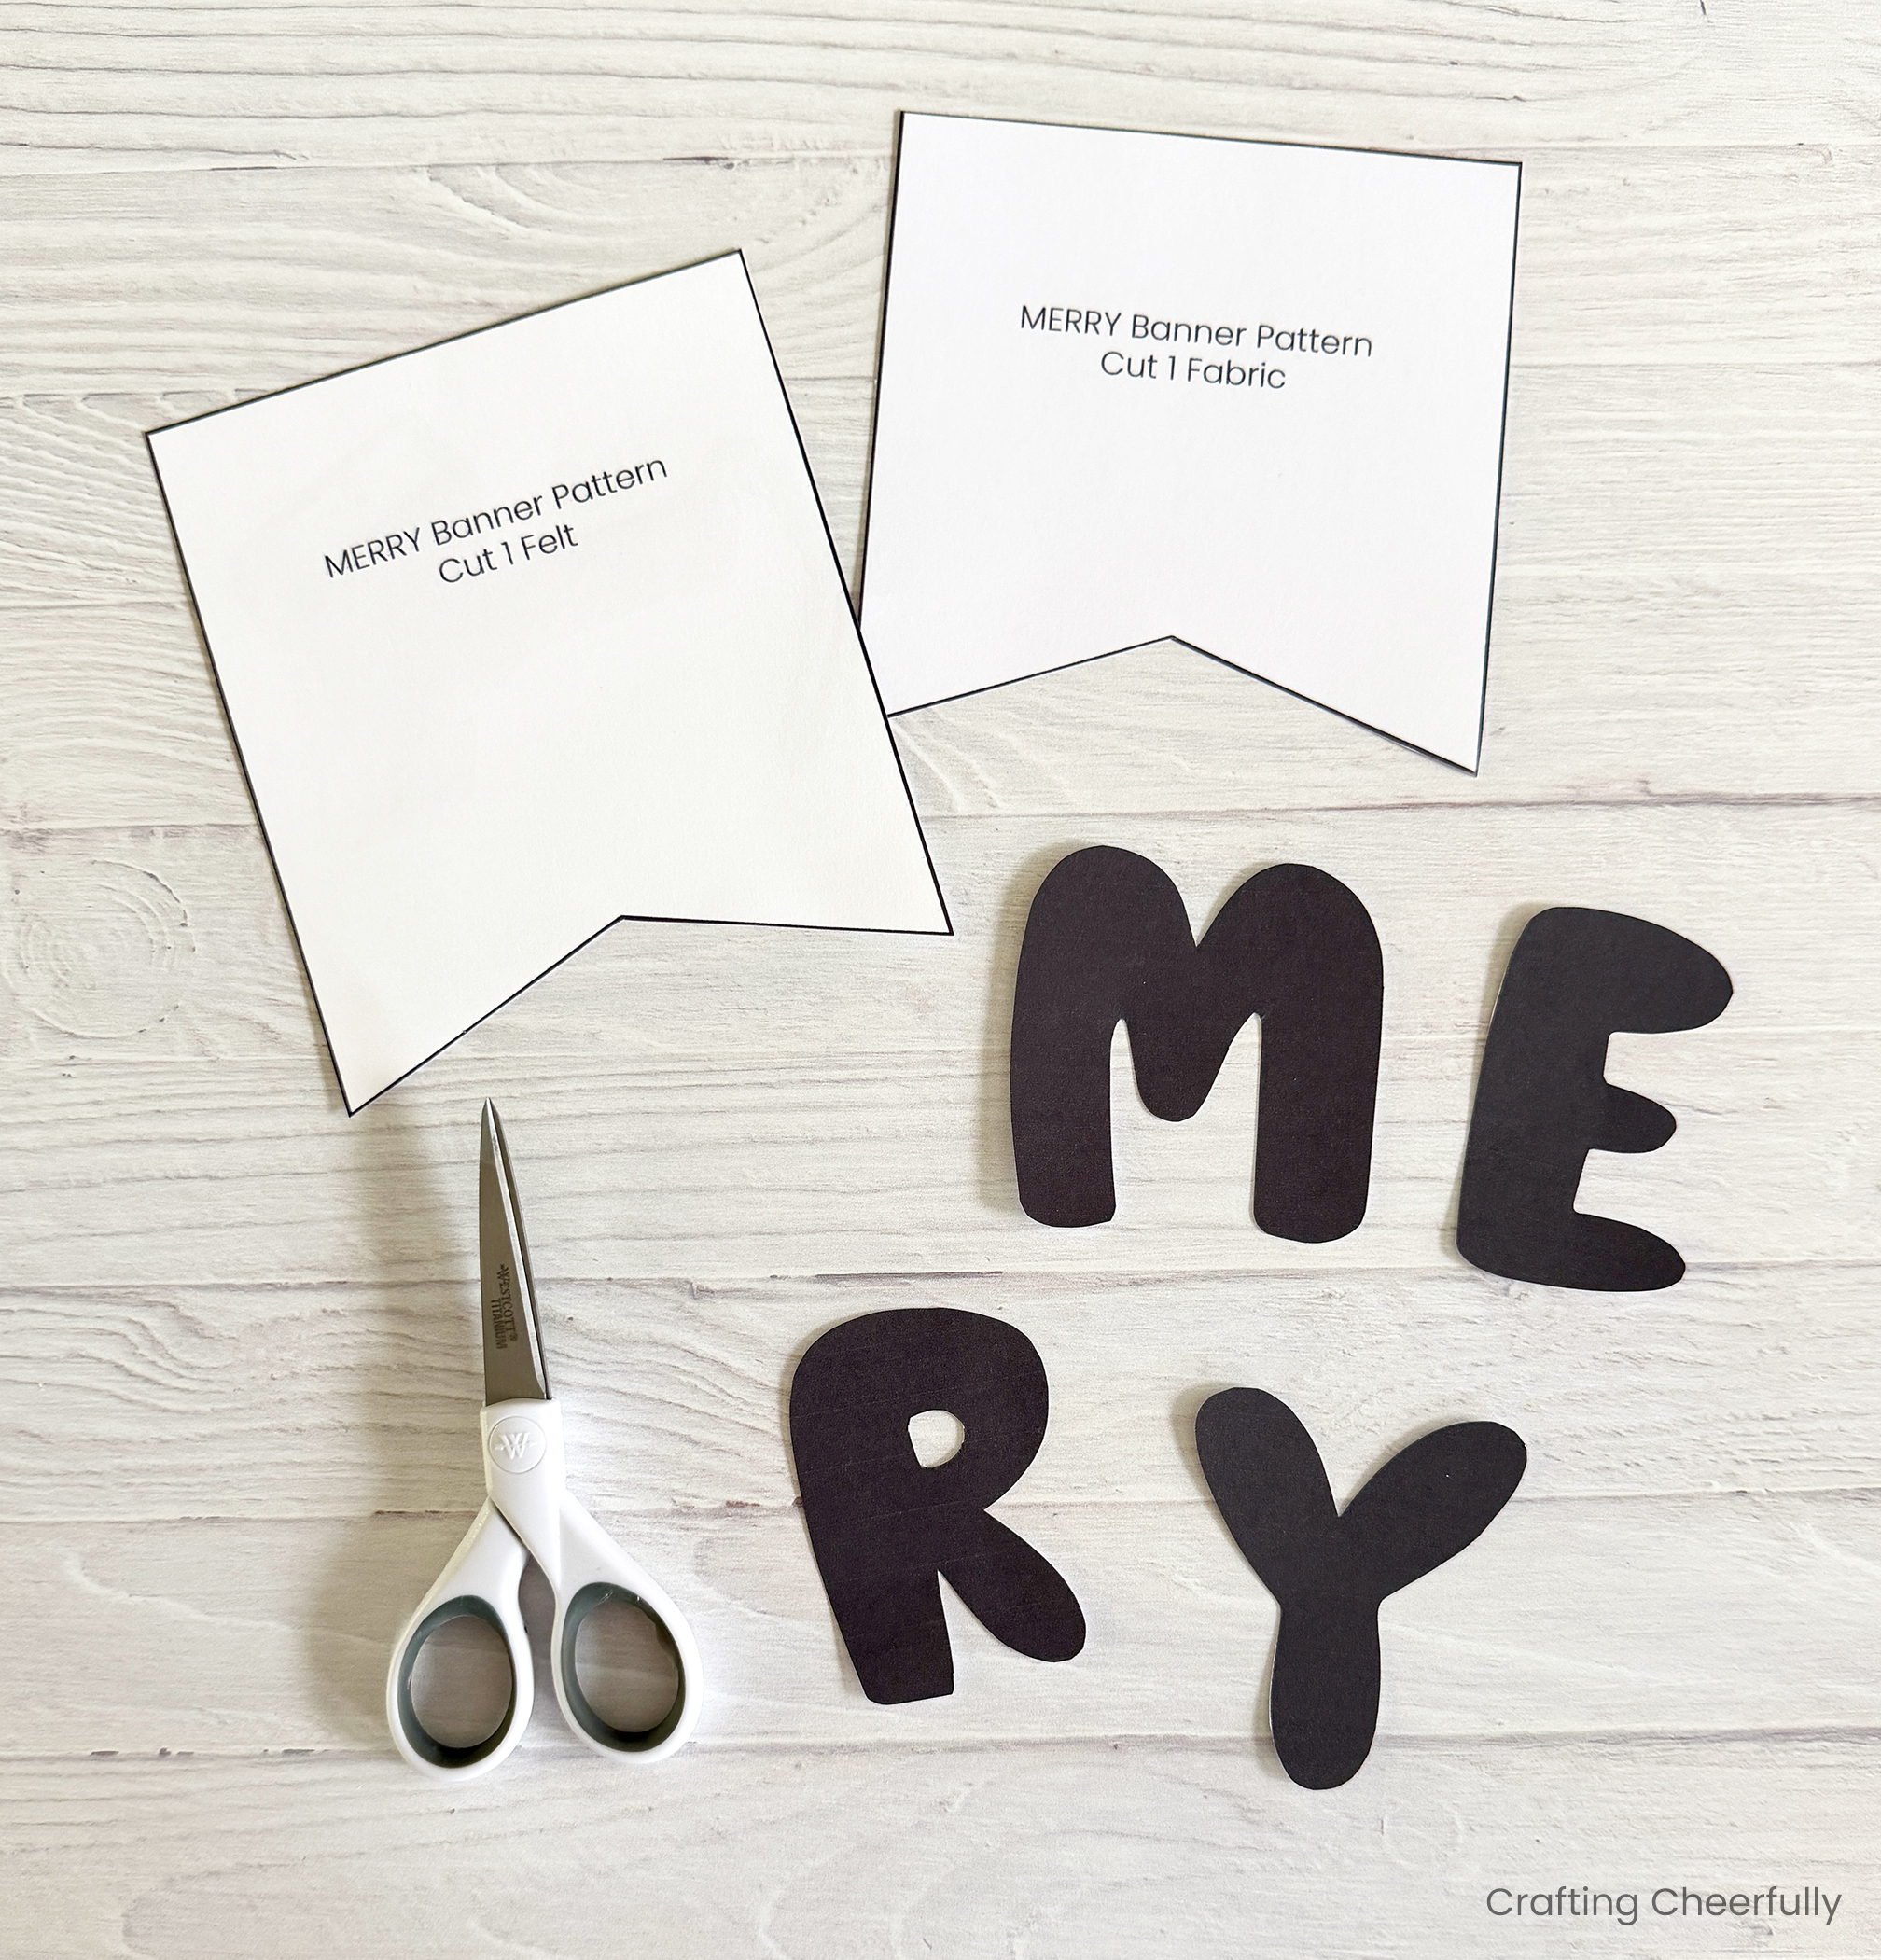
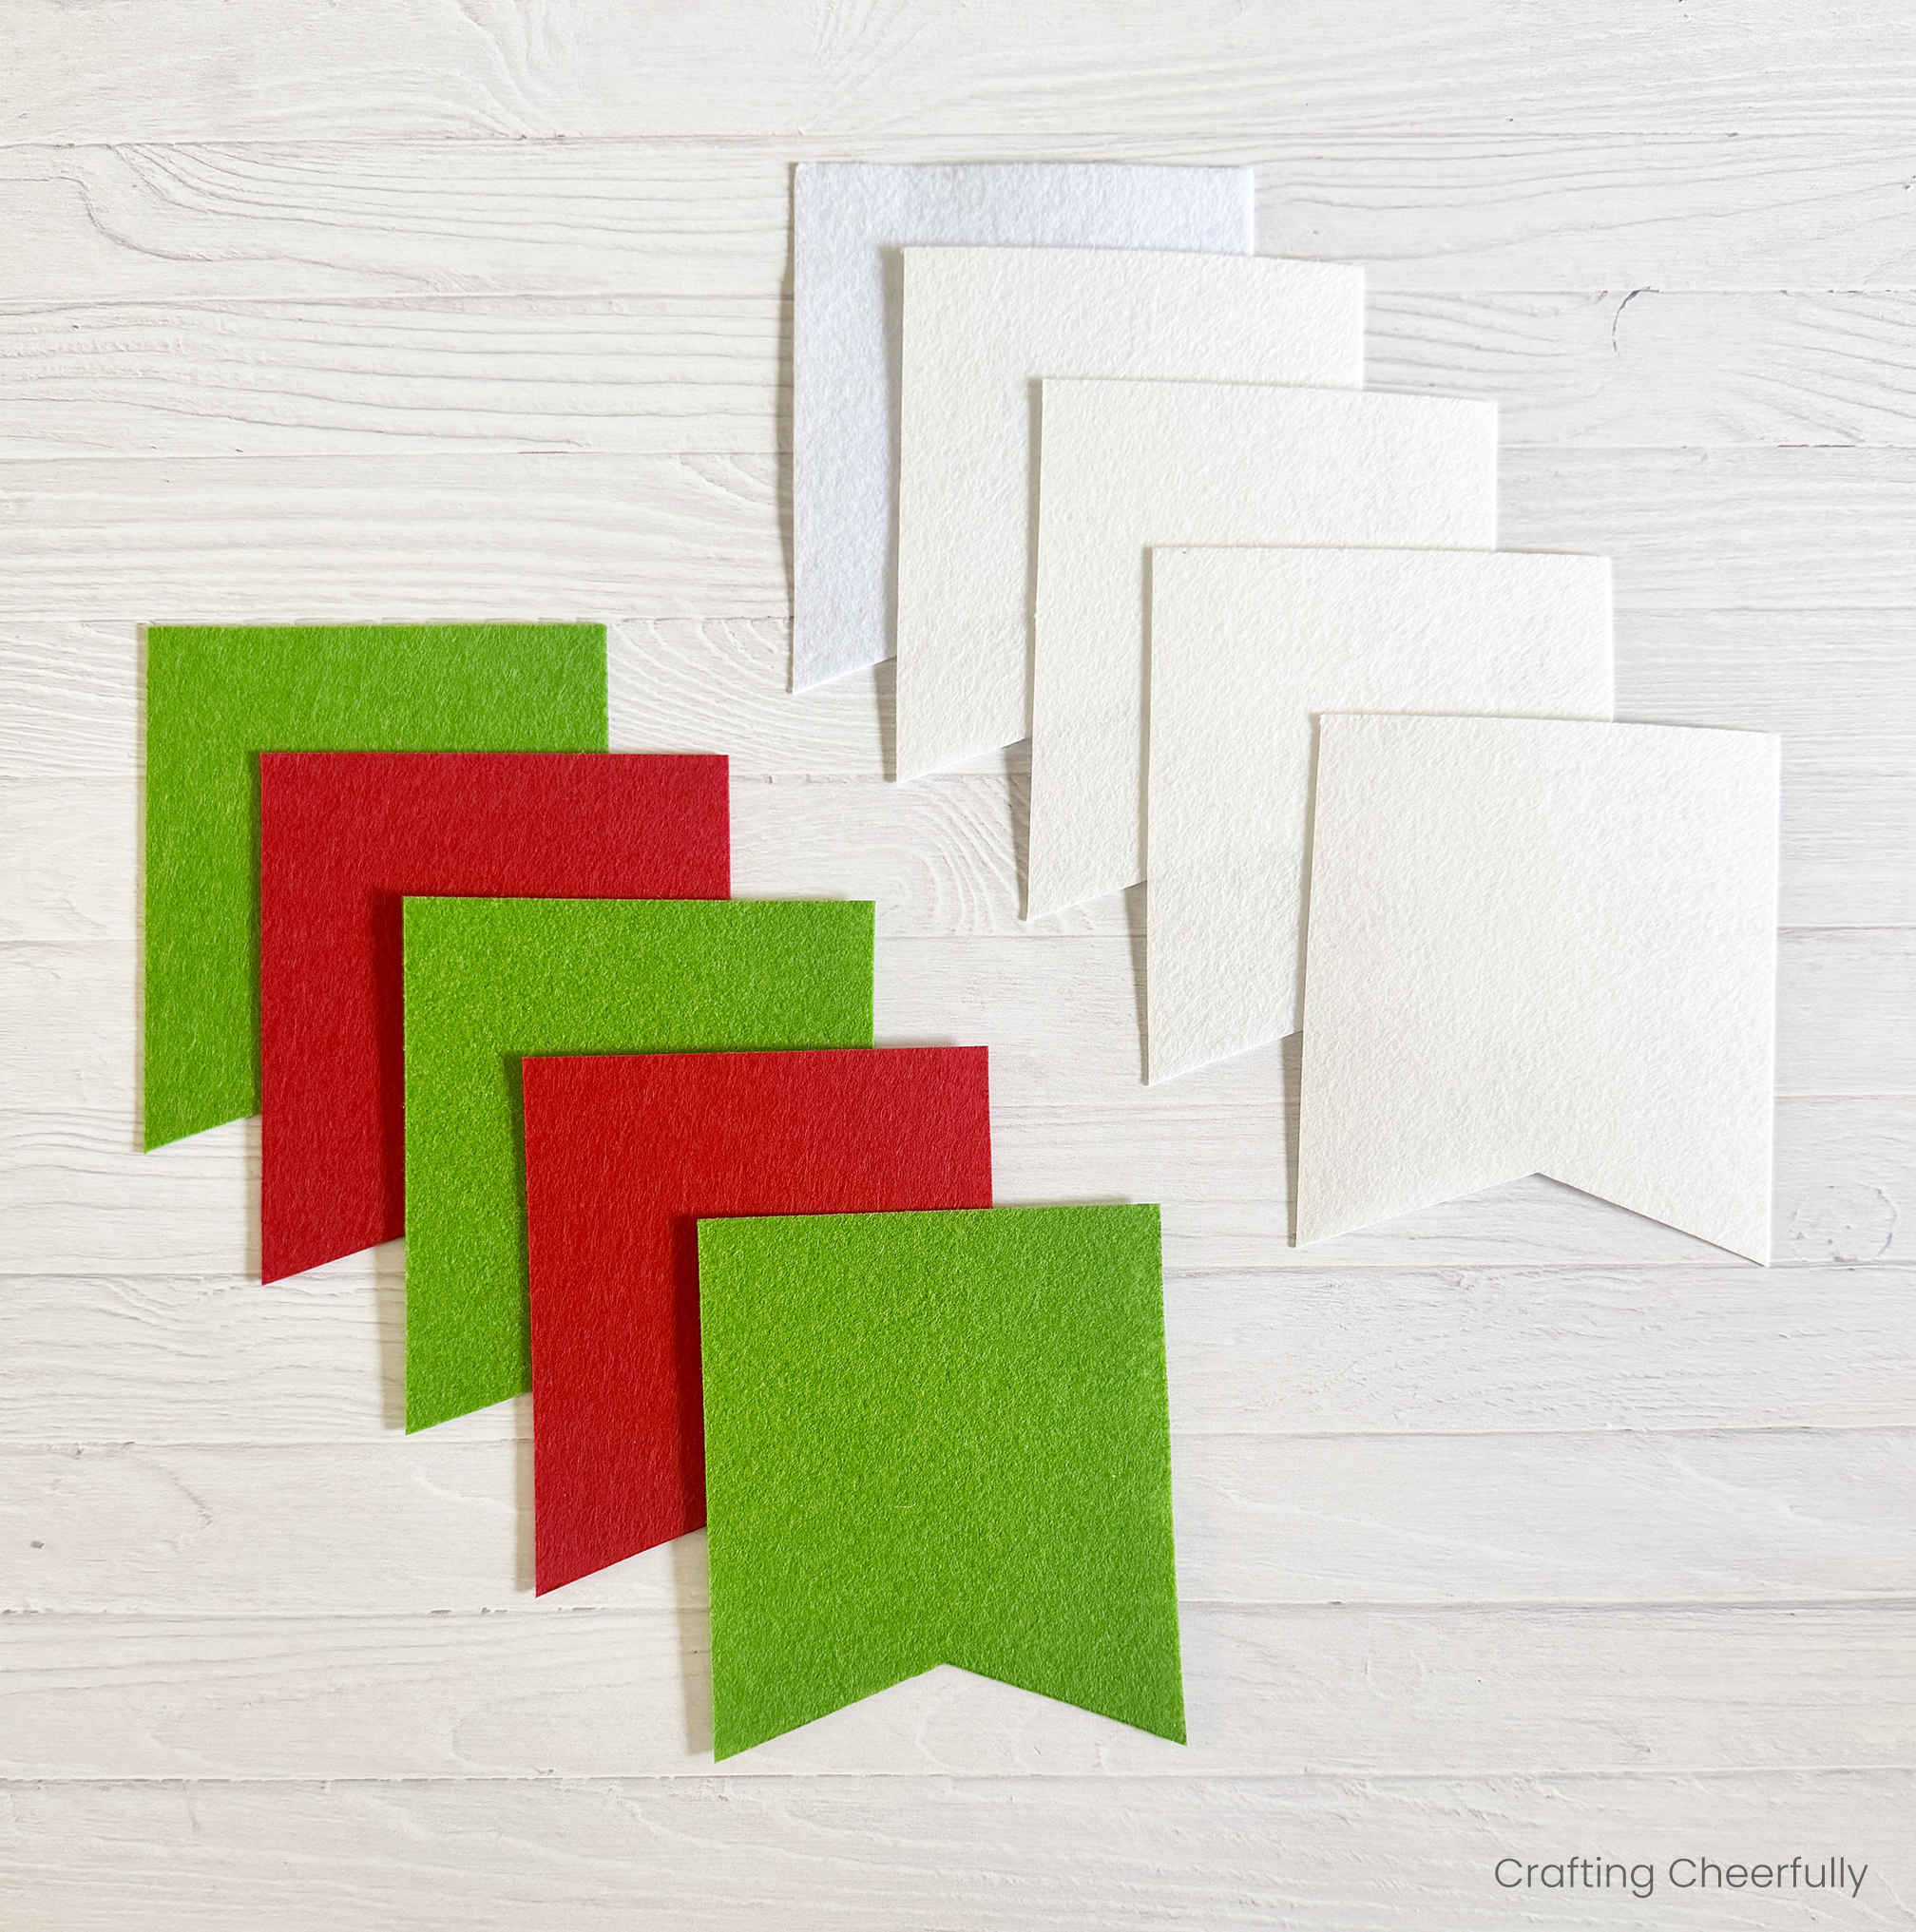
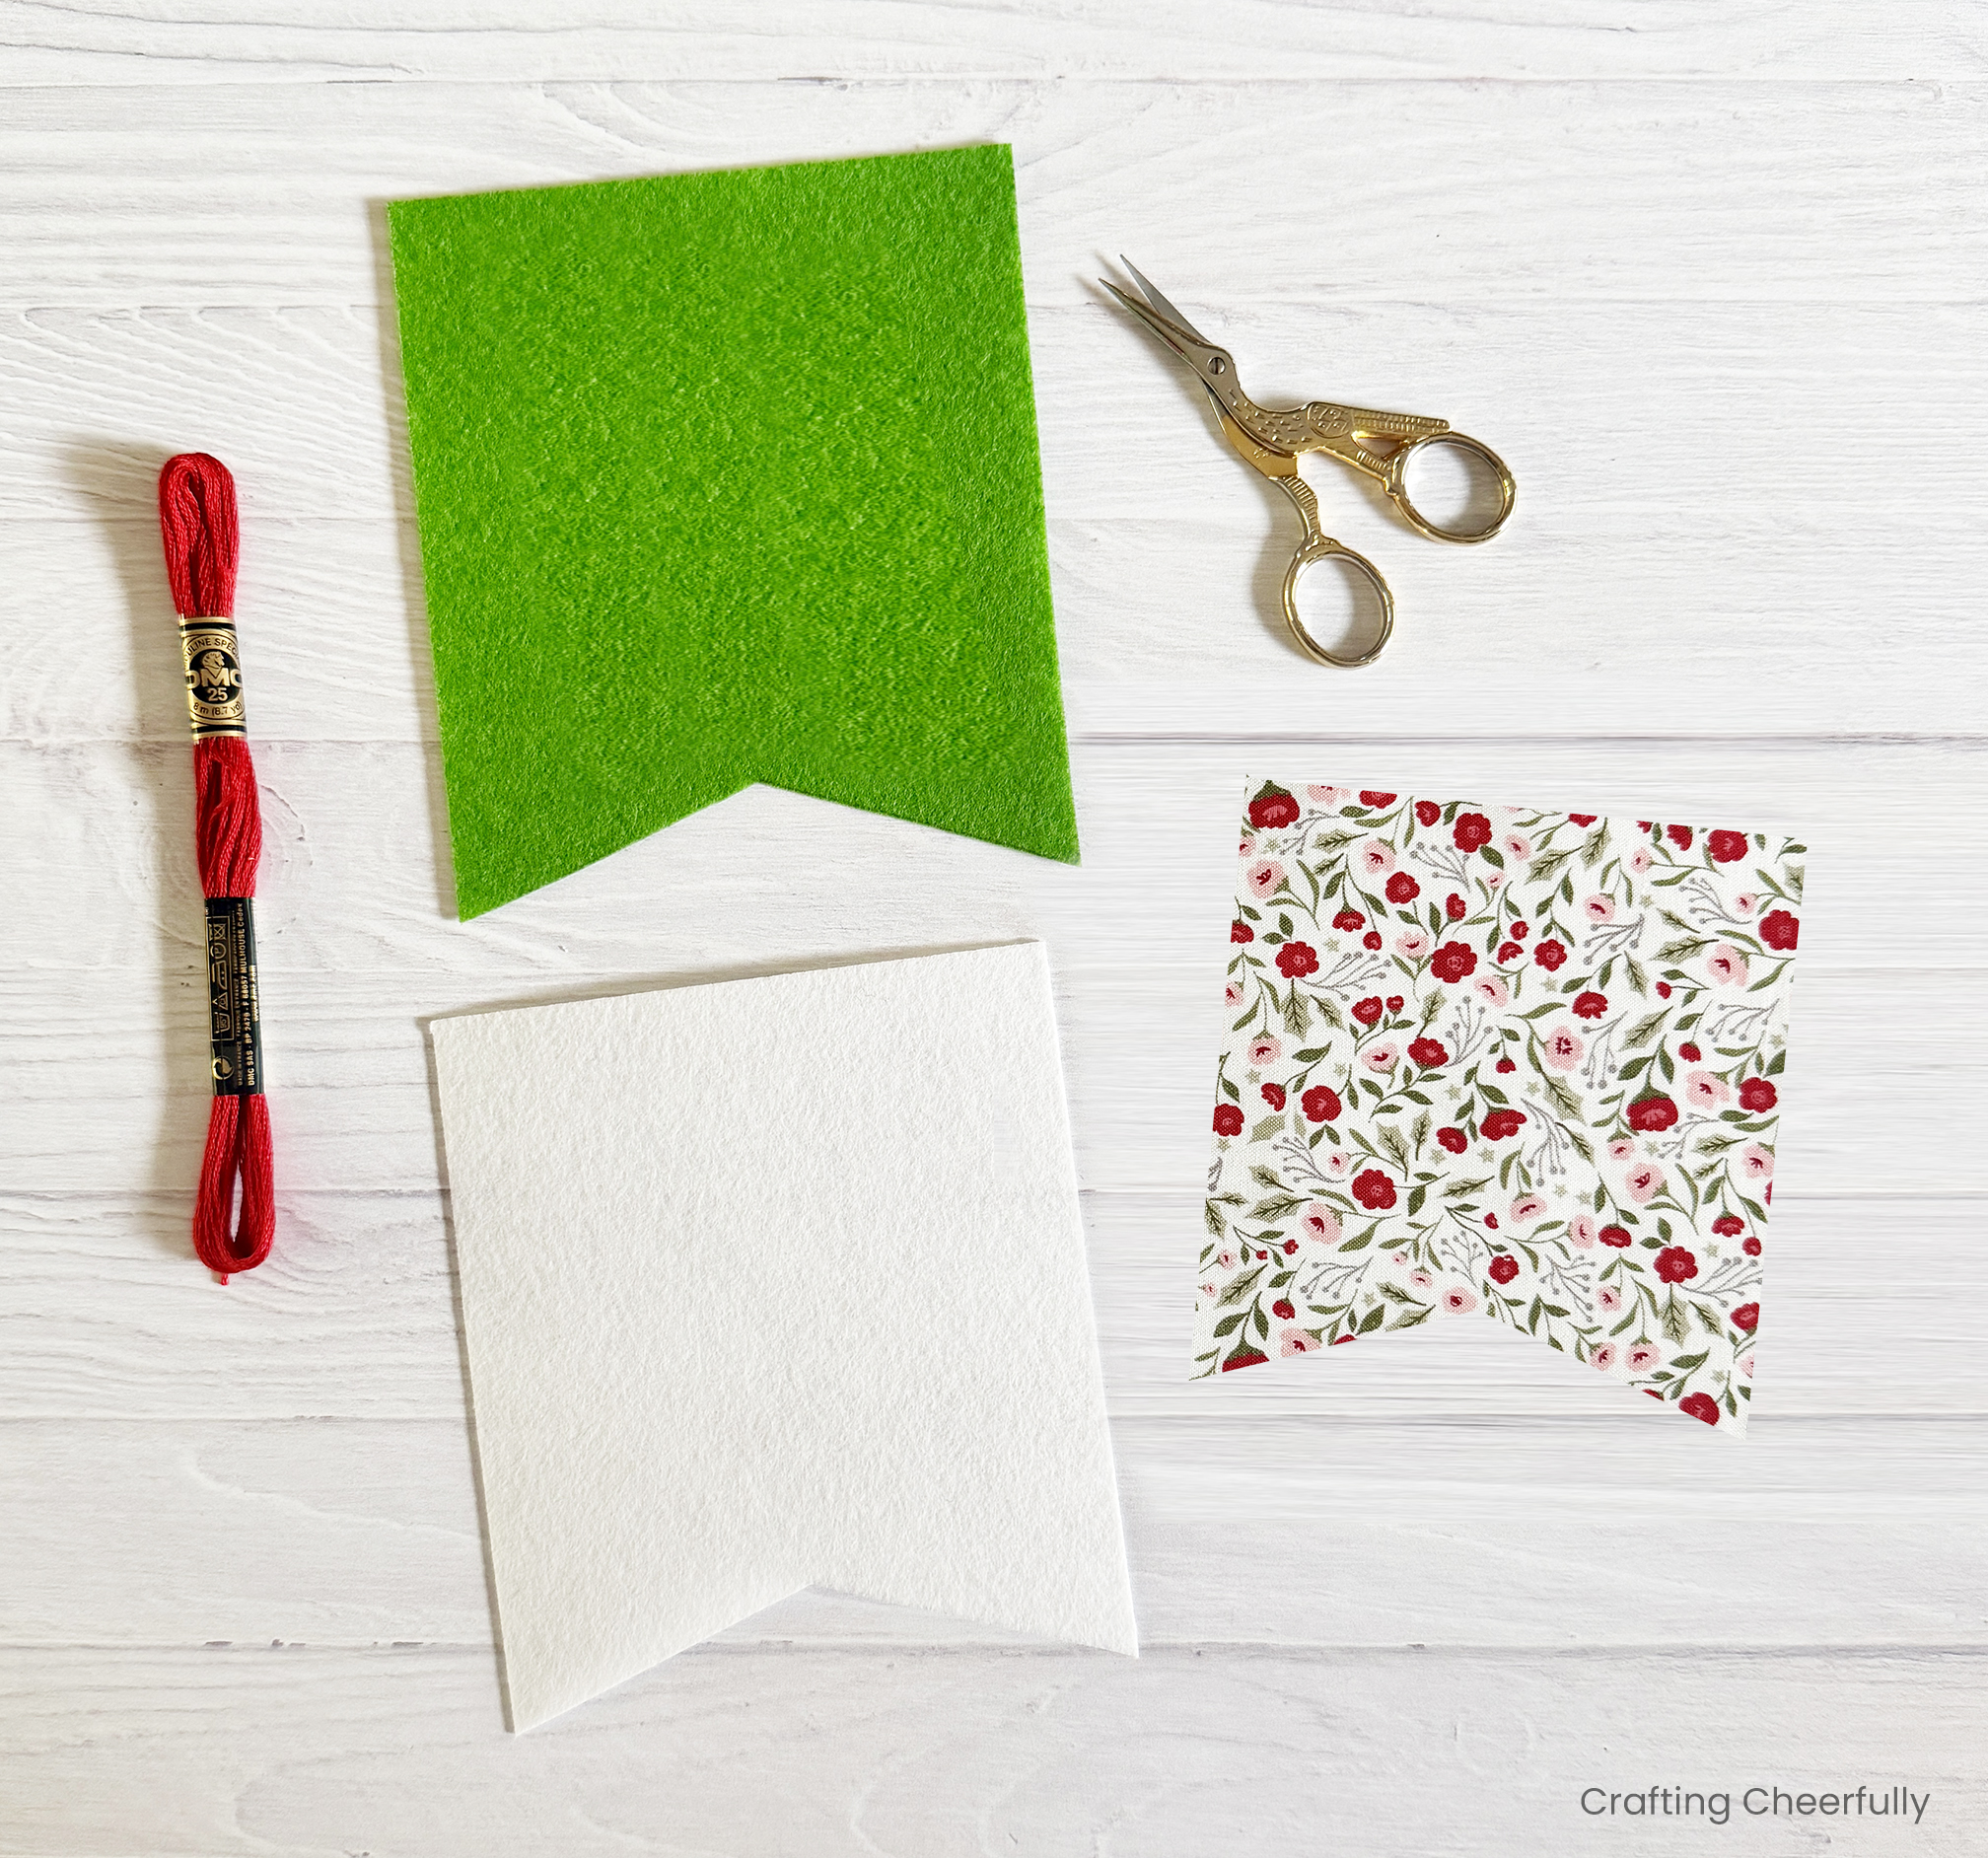
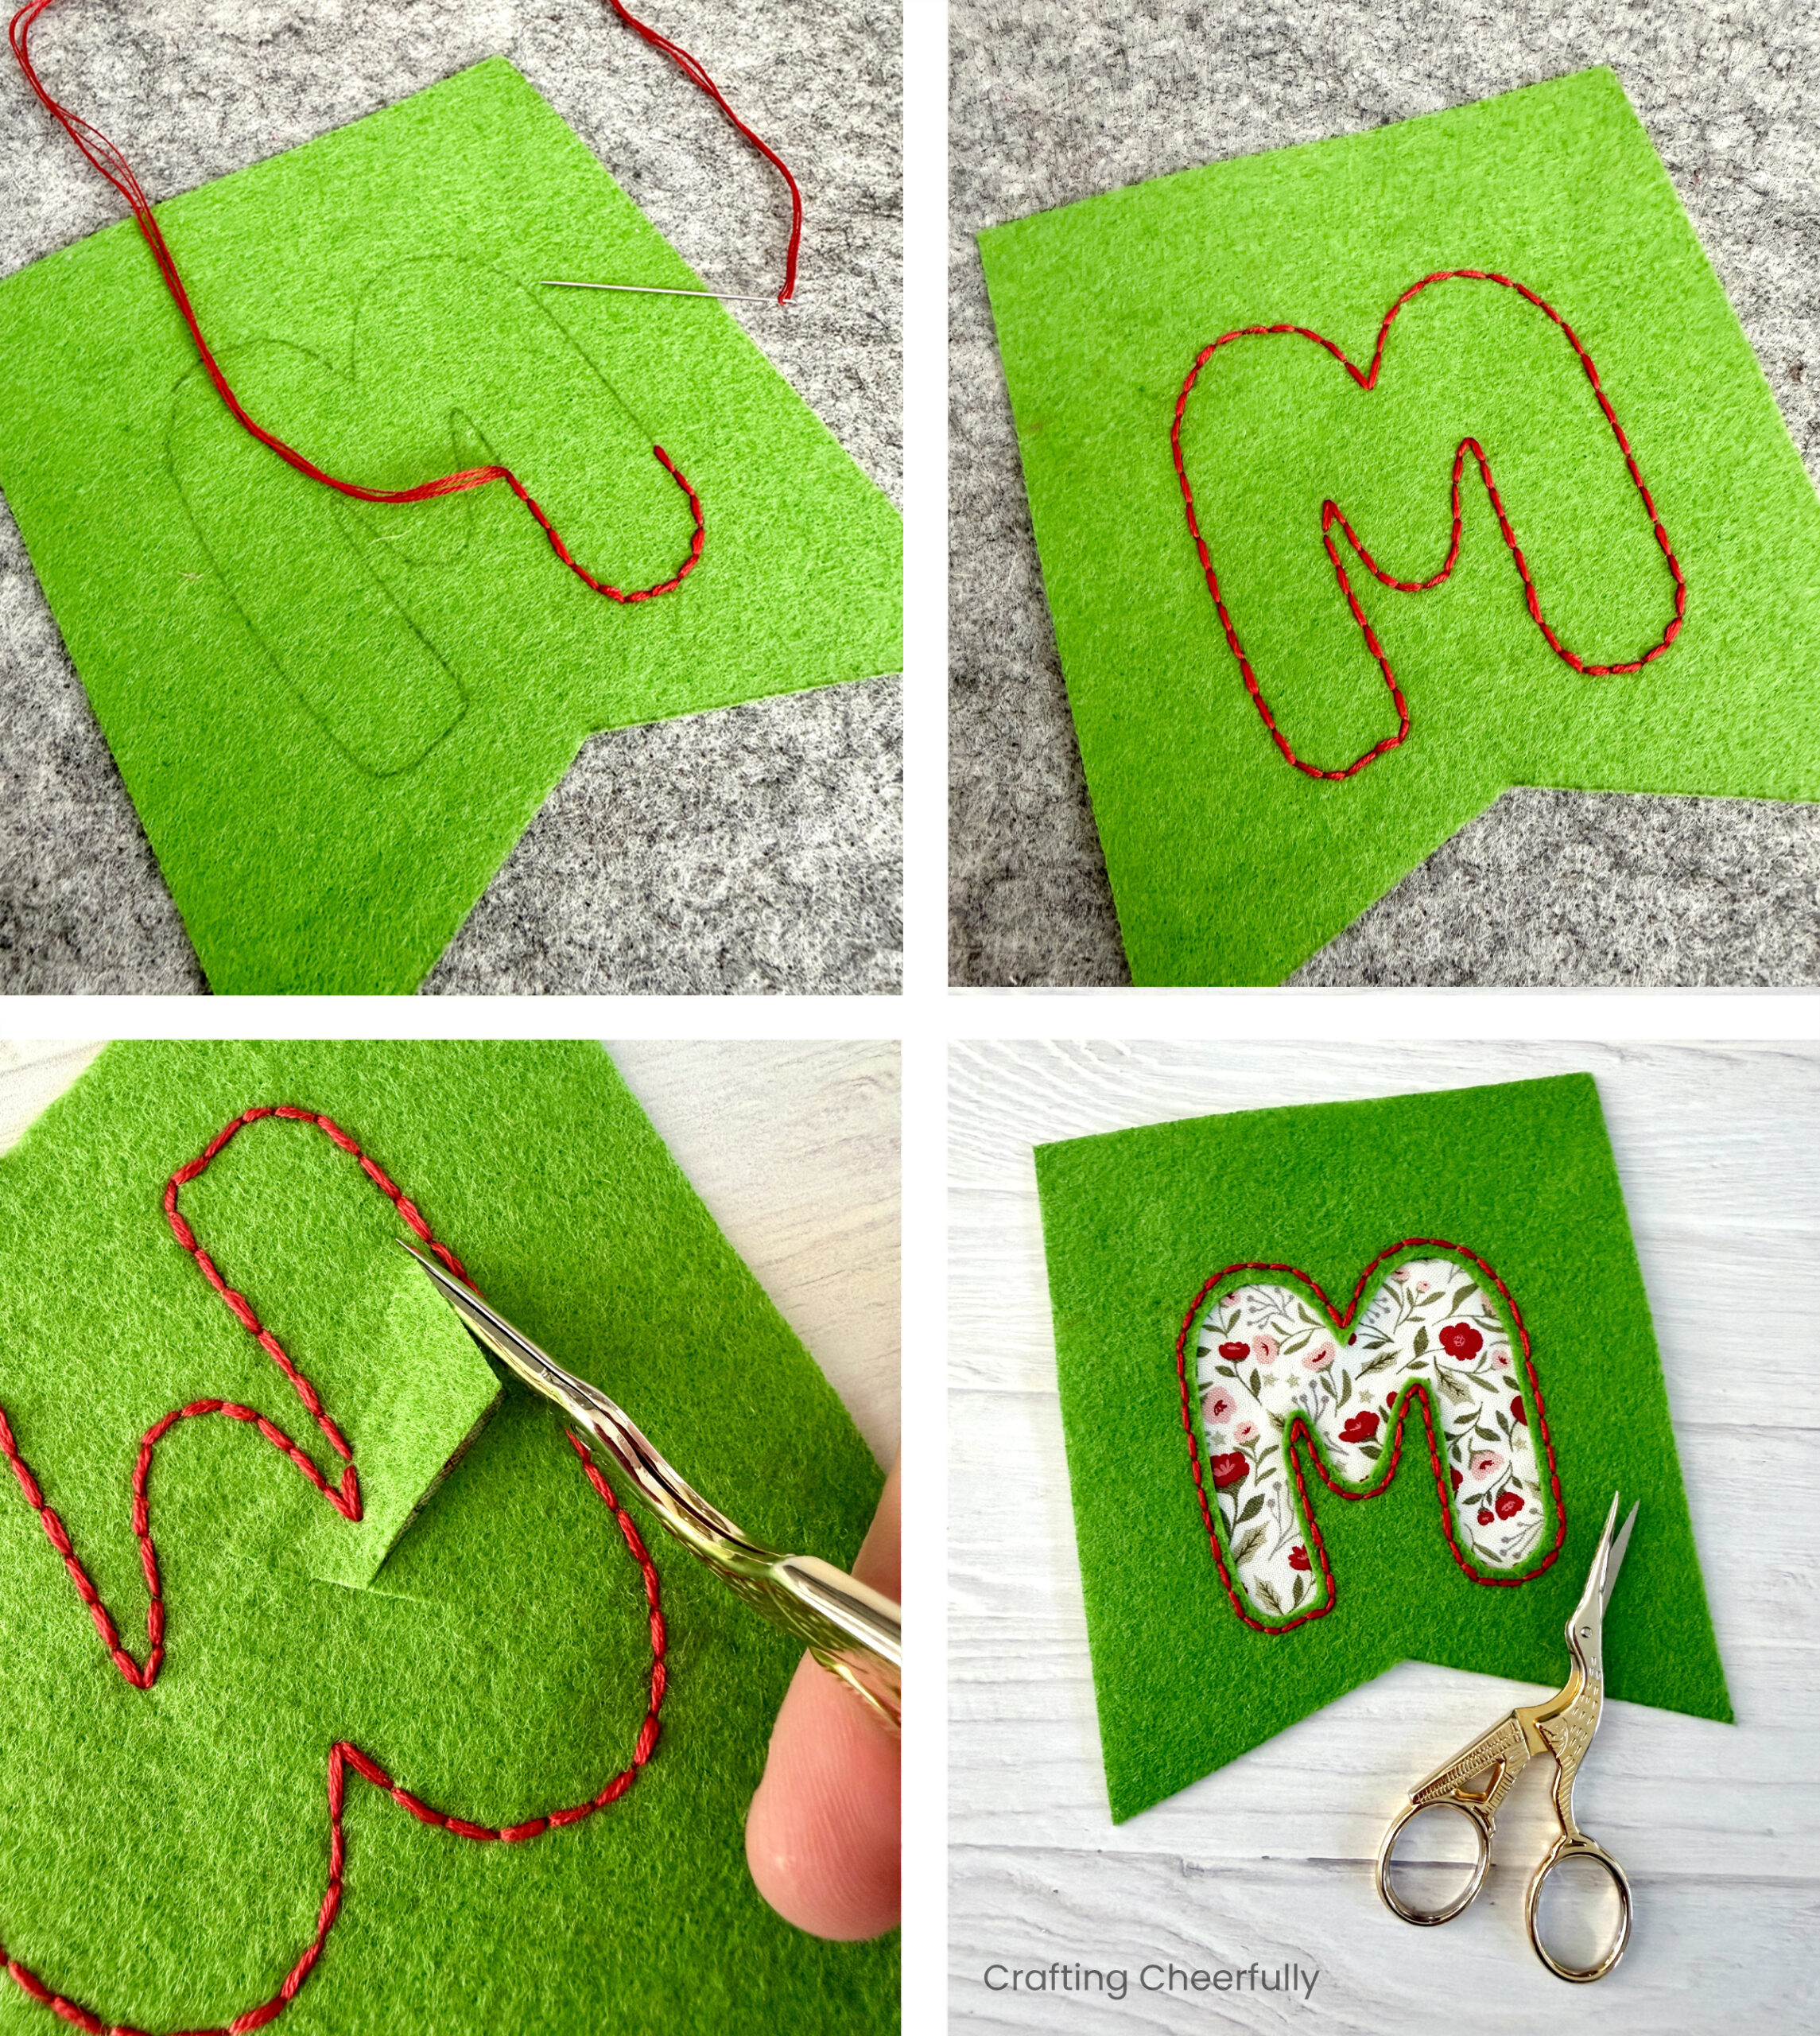
Step Two: Use the pattern pieces to cut out the pieces needed for the banner from felt and fabric. For each pennant, you will need to cut a colored piece of felt for the top and a white piece of felt for the bottom, using the larger pattern piece. You will also need to cut a piece of fabric using the smaller pattern piece that will get sandwiched between
Layering the Pennant Pieces
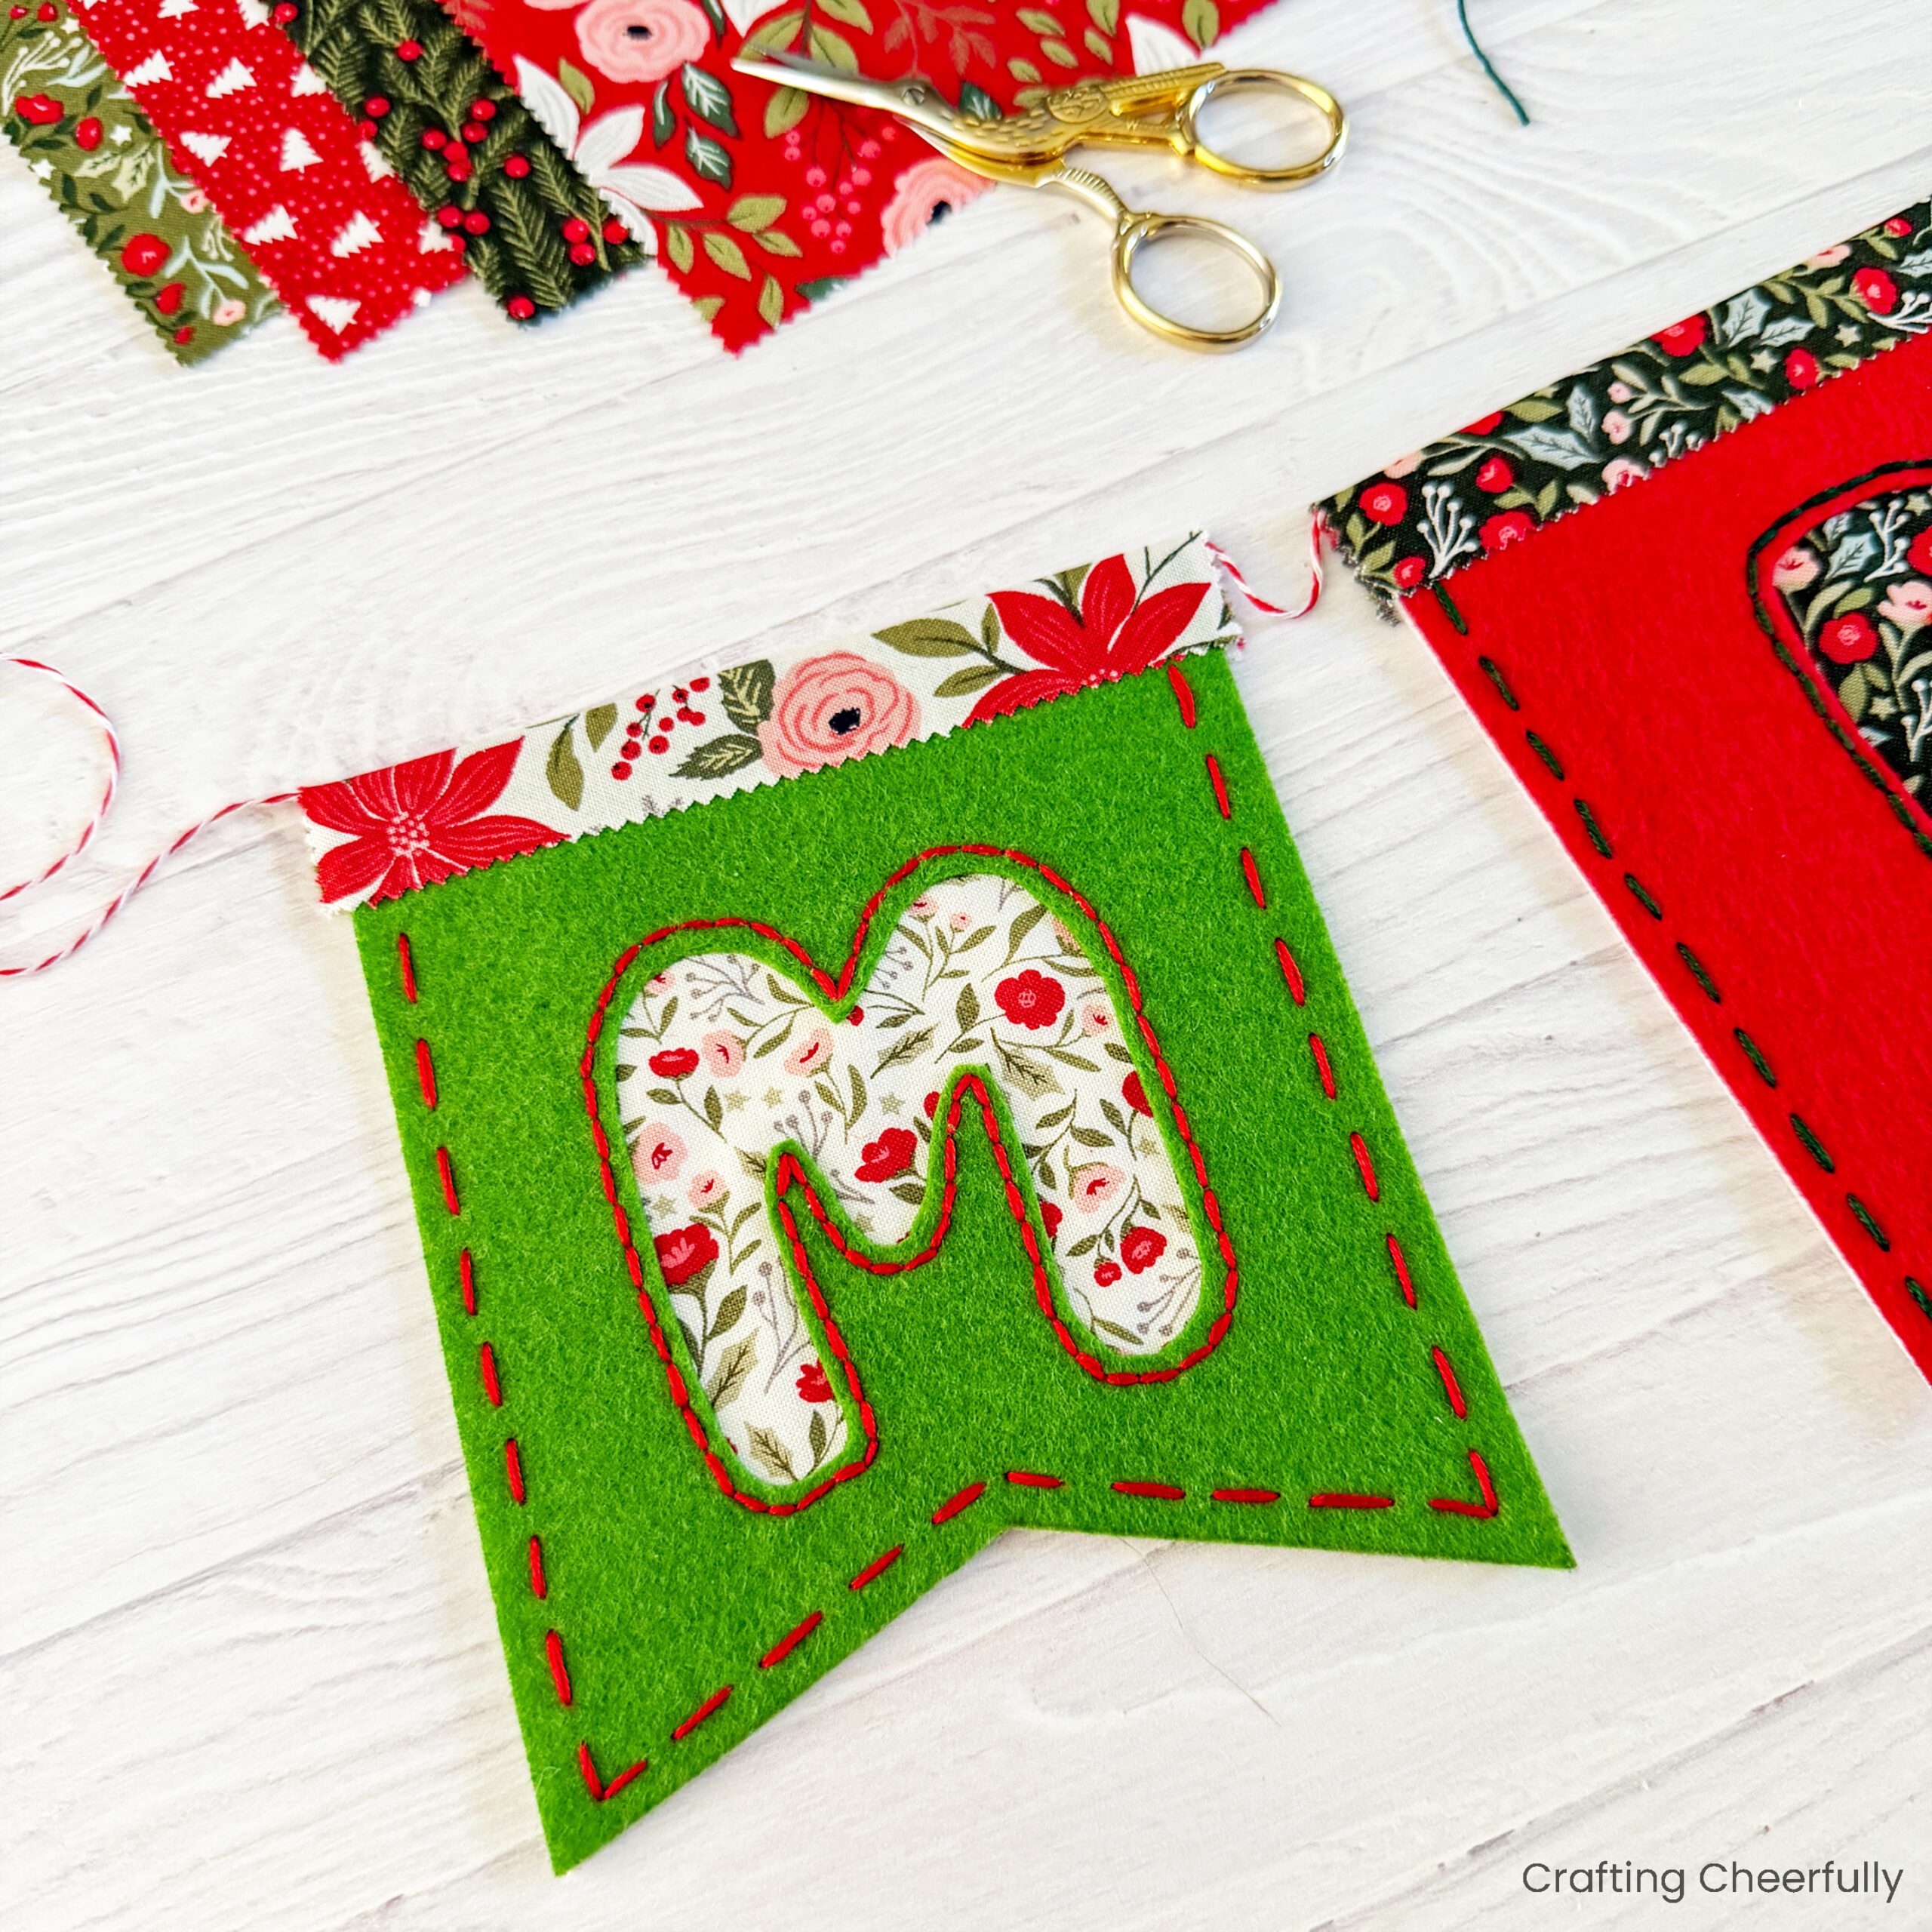
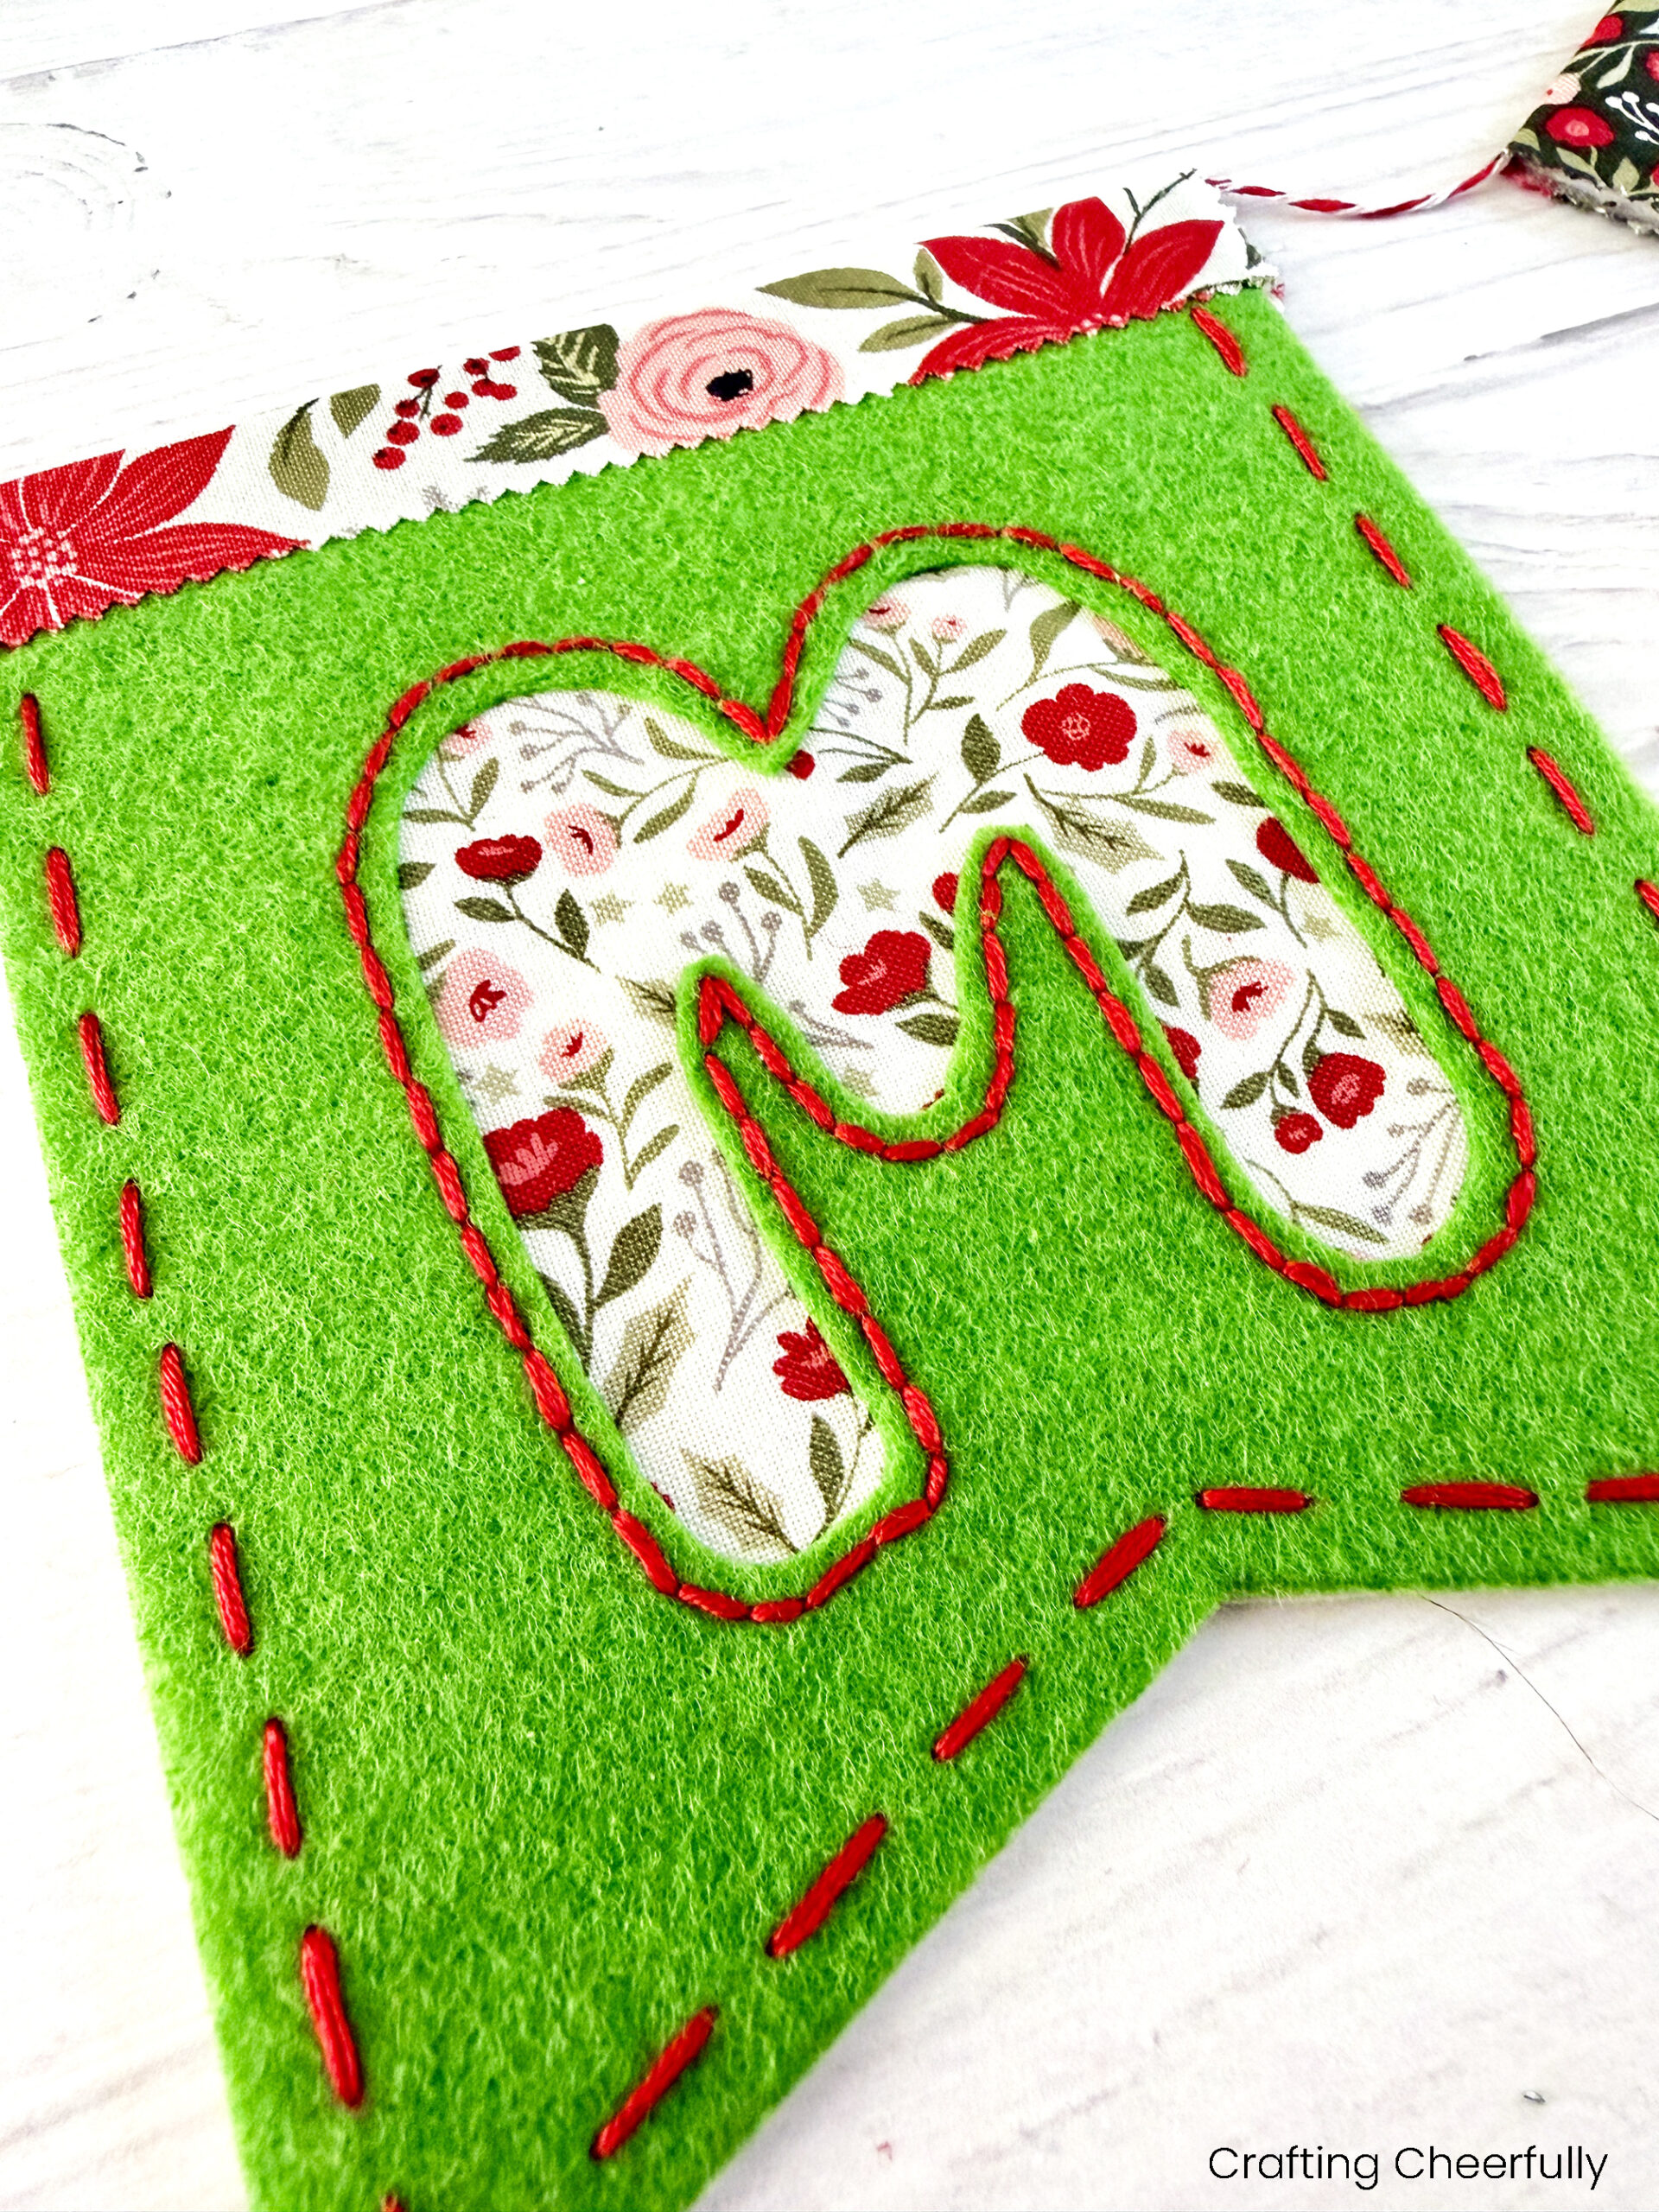
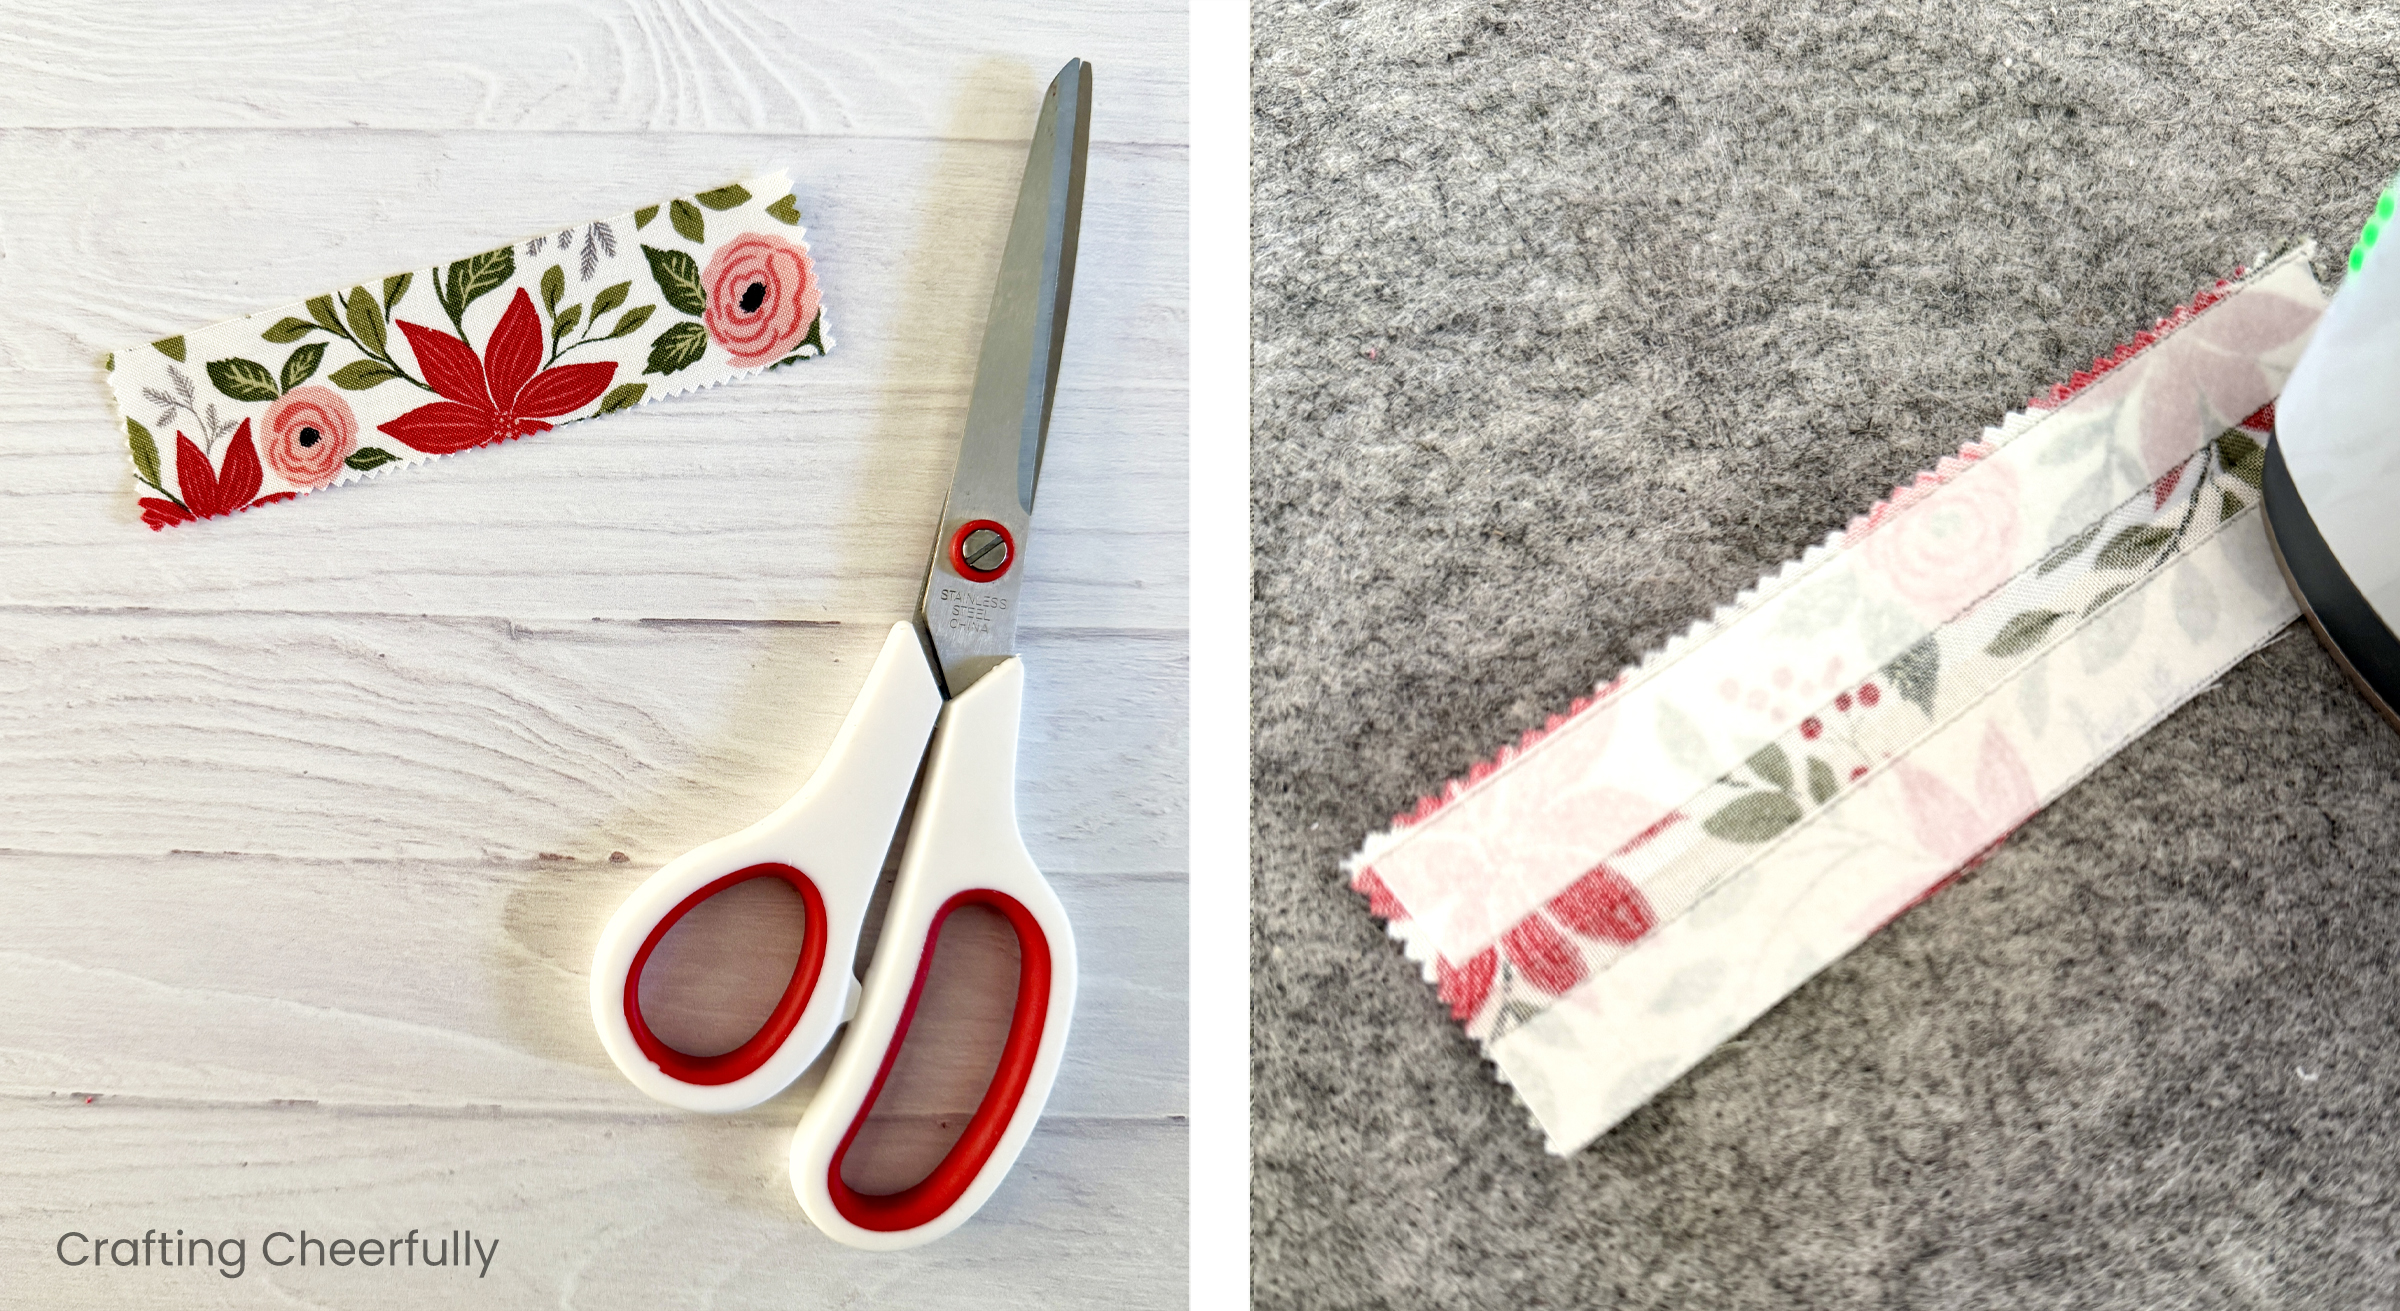
Step Two: Adhere the fabric to the back of the colored felt pennants. Use a ruler to cut 1/2″ strips of fusible interfacing and iron them to the front side of the fabric pennant. Let the fabric cool, then peel paper off the interfacing pieces and adhere the fabric to the back of the felt pennant. Repeat for each pennant piece. For the MERRY banner you will need to make 5. Next, trace each letter on the front of the pennant, positioning them closer to the bottom of the pennant than the top.
Embroidery the Pennants
Step Three: Use contrasting embroidery floss and a small backstitch to embroider the traced letters. You will be stitching through both the layers. Once the letter is completely outlined with stitching, use a small and sharp embroidery scissors to cut out the felt inside the letter. Trim close to the embroidery but not too close that you will cut into it. This is the best part – the holiday fabric is now revealed underneath the felt!
Stringing the Pennants into a Banner
Step Four: Cut a strip of fabric that is 5″ wide and about 1.5″ tall and iron it in half lengthwise. I cut mine so one of the edges would be the pinked edge from the charm pack. Iron two strips of fusible interfacing to the top and bottom edges of the fabric.
Place the twine along the center crease of the fabric strip and peel the paper off the fusible interfacing. Position one of the pennants in the center of the fabric, fold the fabric over, and iron the fabric so it wraps around the top of the pennant. The Baker’s twine should end up along the top of the pennant.
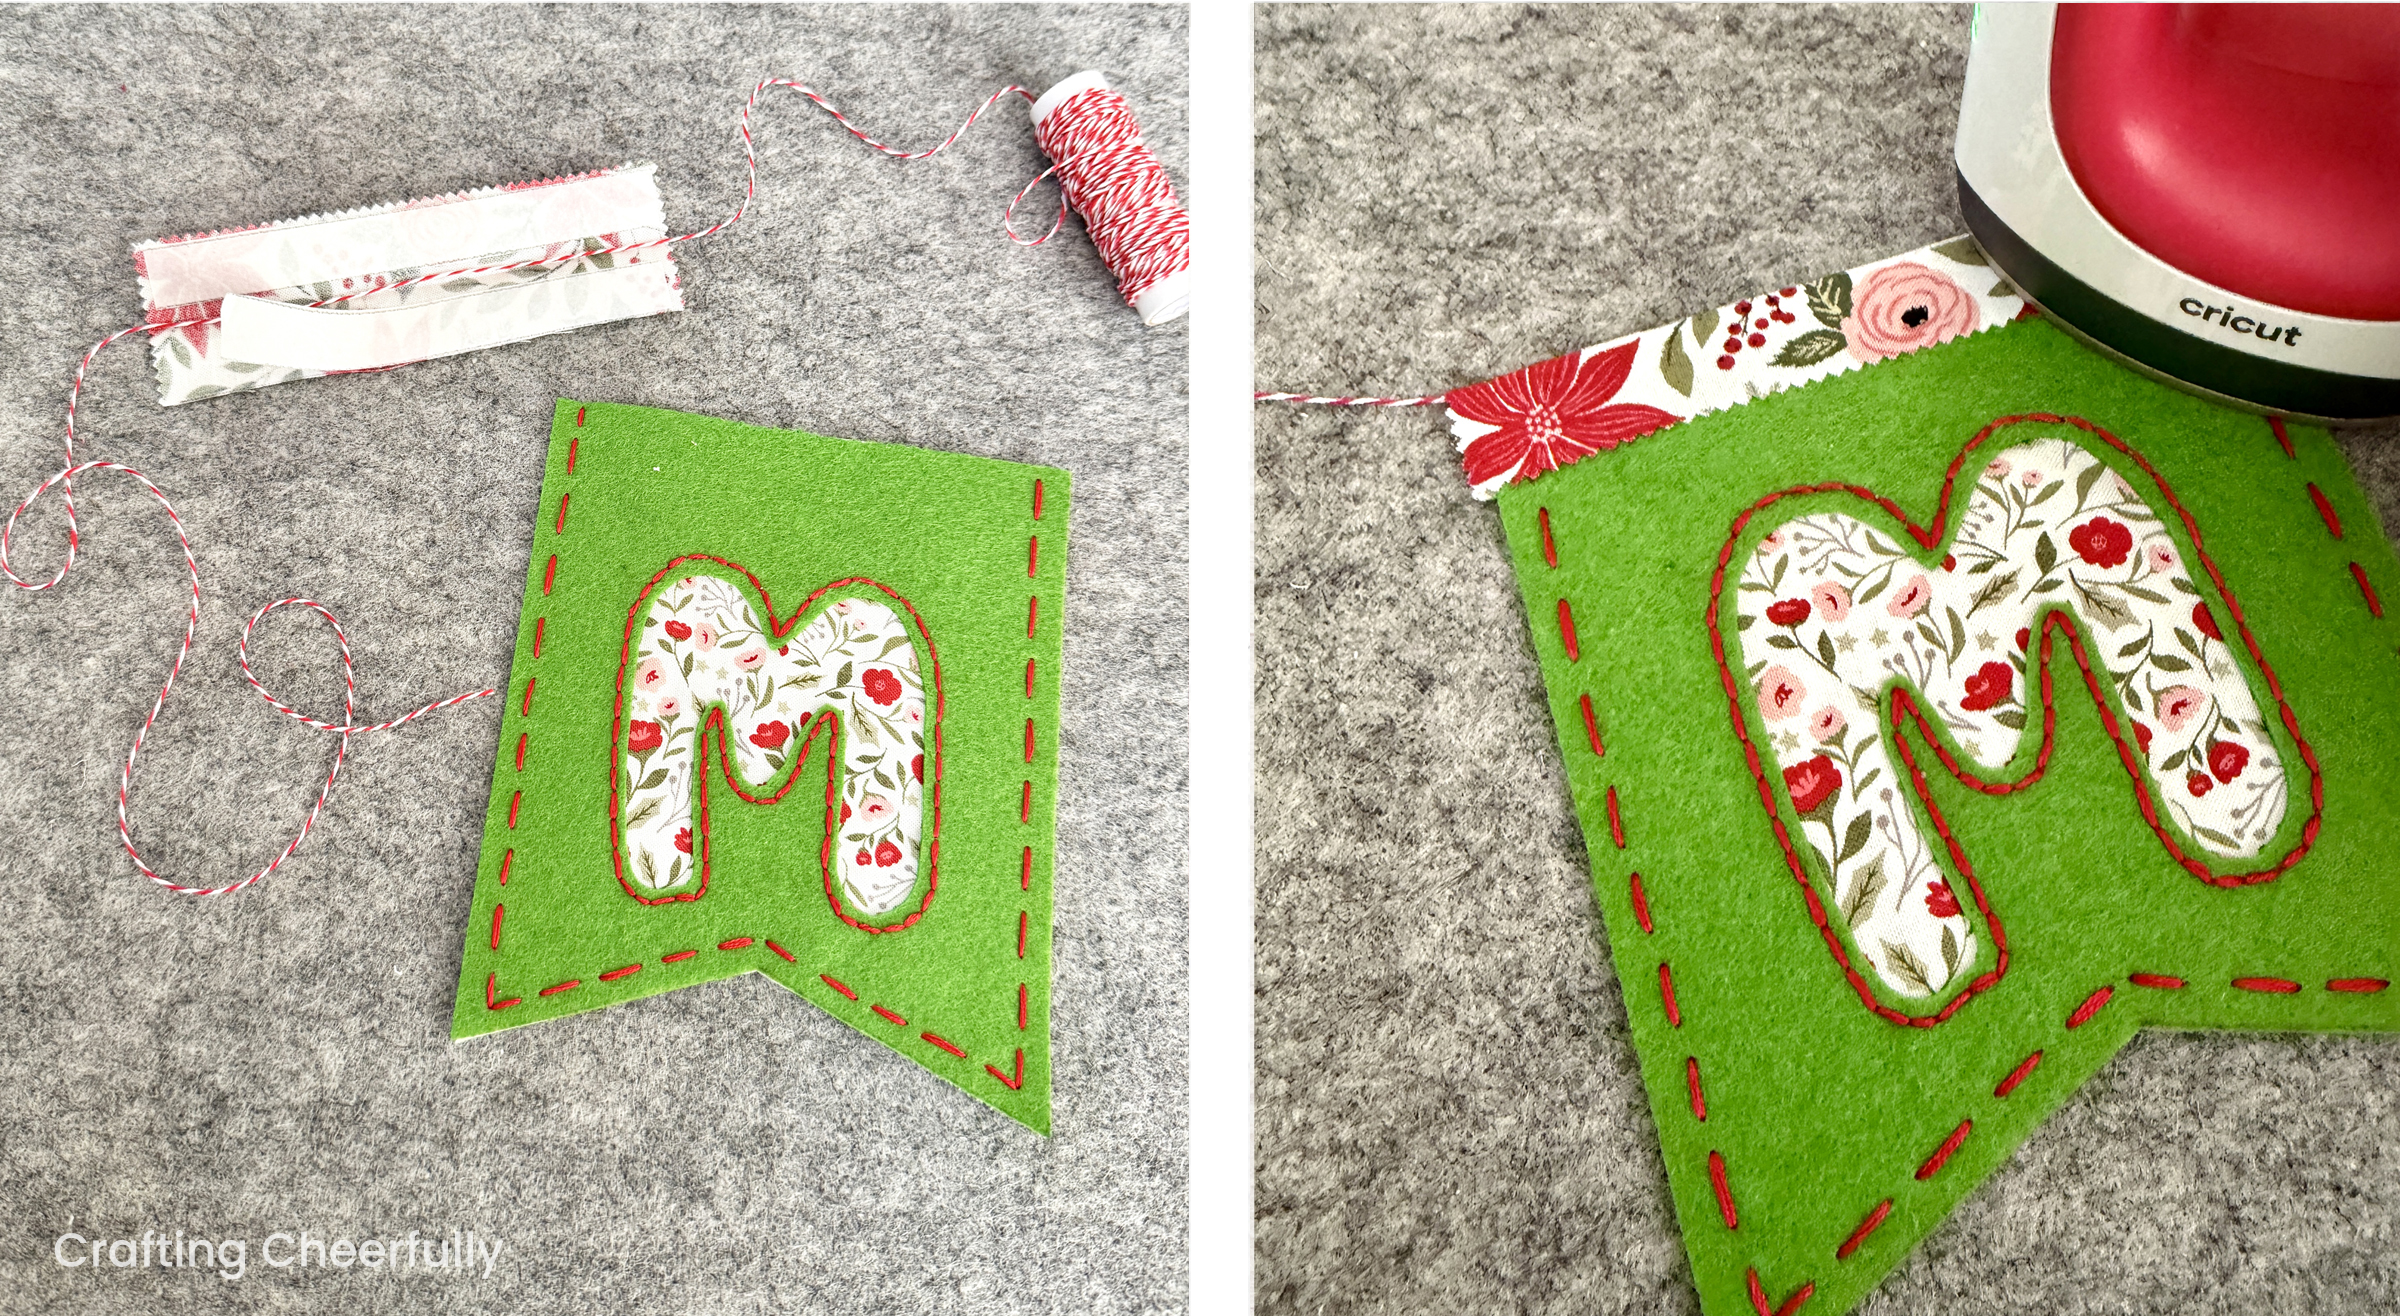
Repeat for each pennant, lining them up on the twine to spell out the word MERRY. Leave about 3/4″ to 1″ between each pennant.
The banner is complete!
I hope you enjoyed this reverse appliqué banner! You could use this same technique to spell out any word you’d like or to create shapes like a simple Christmas tree or star.
I’ll be back tomorrow with the next day in my series, “12 Days of Holiday Crafts“. In the meantime, be sure to visit my Christmas craft ideas for over 100 Christmas DIY projects!

Get the Free Reverse Appliqué Banner Template
Fill out the purple form below with your first name and email address! The free file will be sent straight to your inbox! If you have already filled out the form below, don’t worry – you won’t be added to my list twice! This freebie is for personal use only. I hope you enjoy crafting something special. Please let me know if you have any questions :)