DIY Holiday Mailbox Card
Create a festive Holiday Mailbox Card with your cutting machine and my new SVG cut file. This interactive card includes a cute letter surprise tucked inside the mailbox!

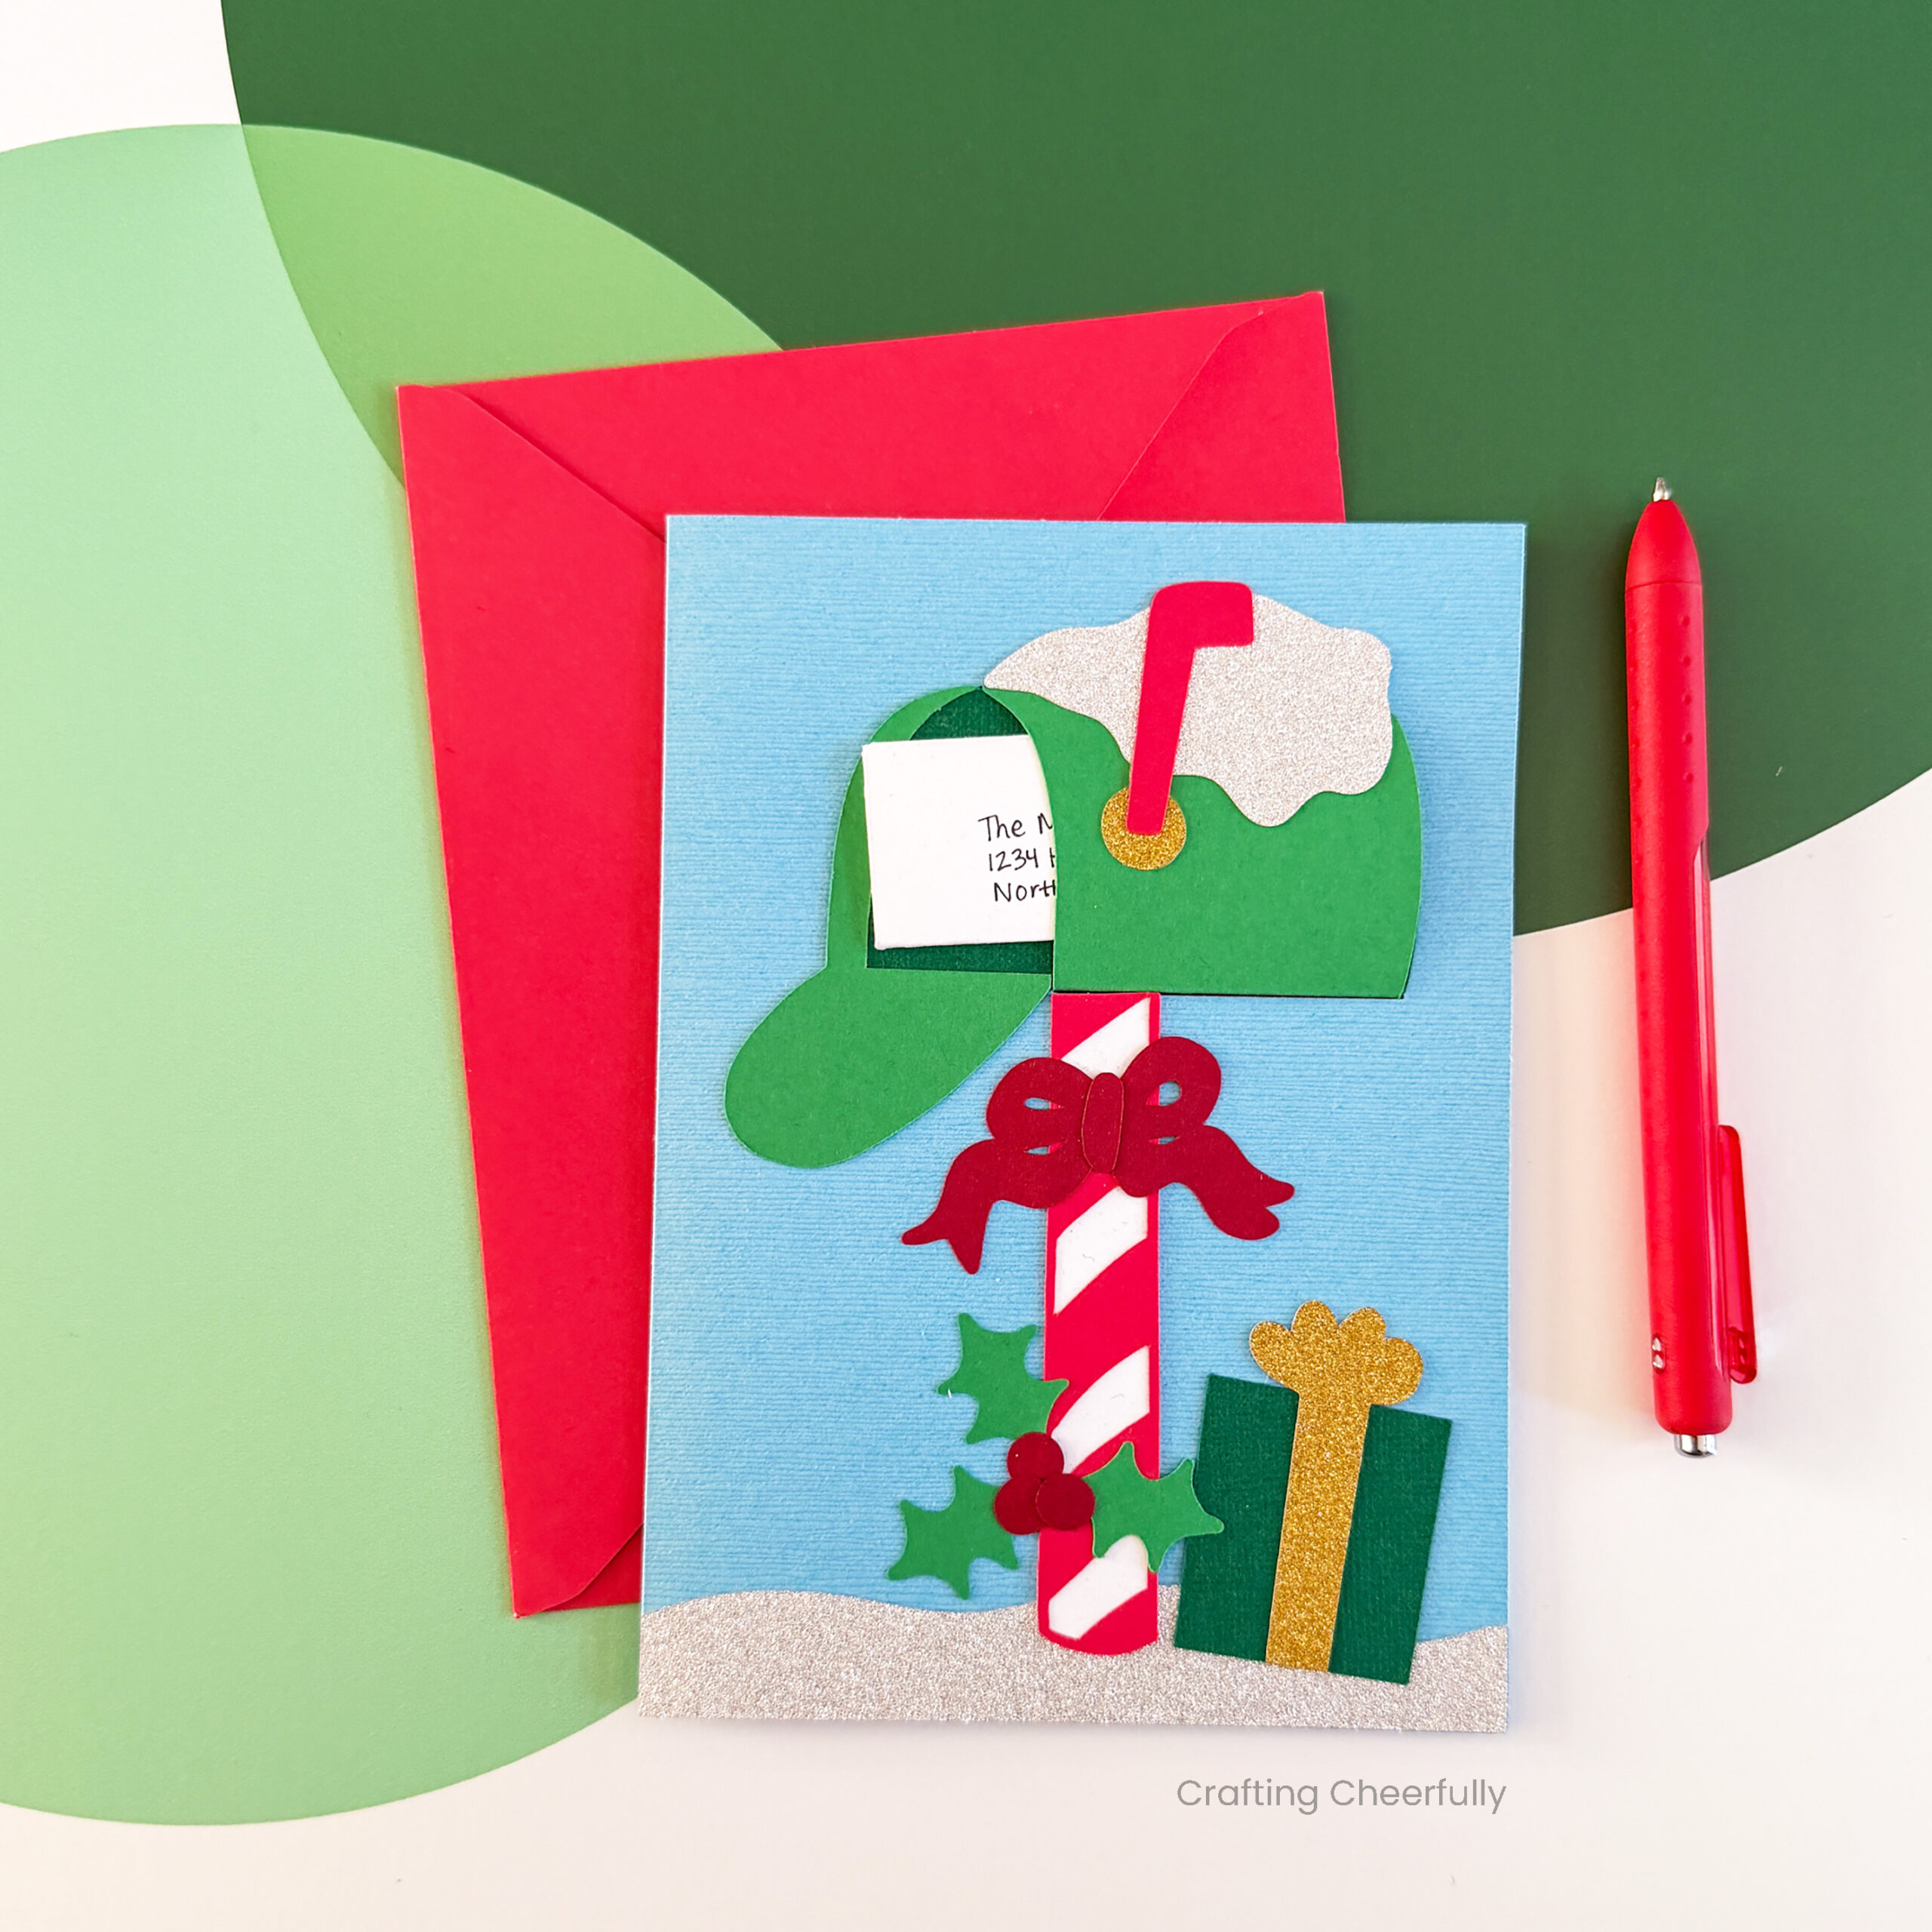
Hello Crafty Friends! Today is day ten of my series “12 Days of Holiday Crafts” and today I’m sharing a new interactive card, a holiday mailbox card! I love creating interactive cards, especially for the holidays. This card is so cute and festive and includes a cute surprise – the letter can really slide out from the mailbox and be opened to reveal a holiday greeting.
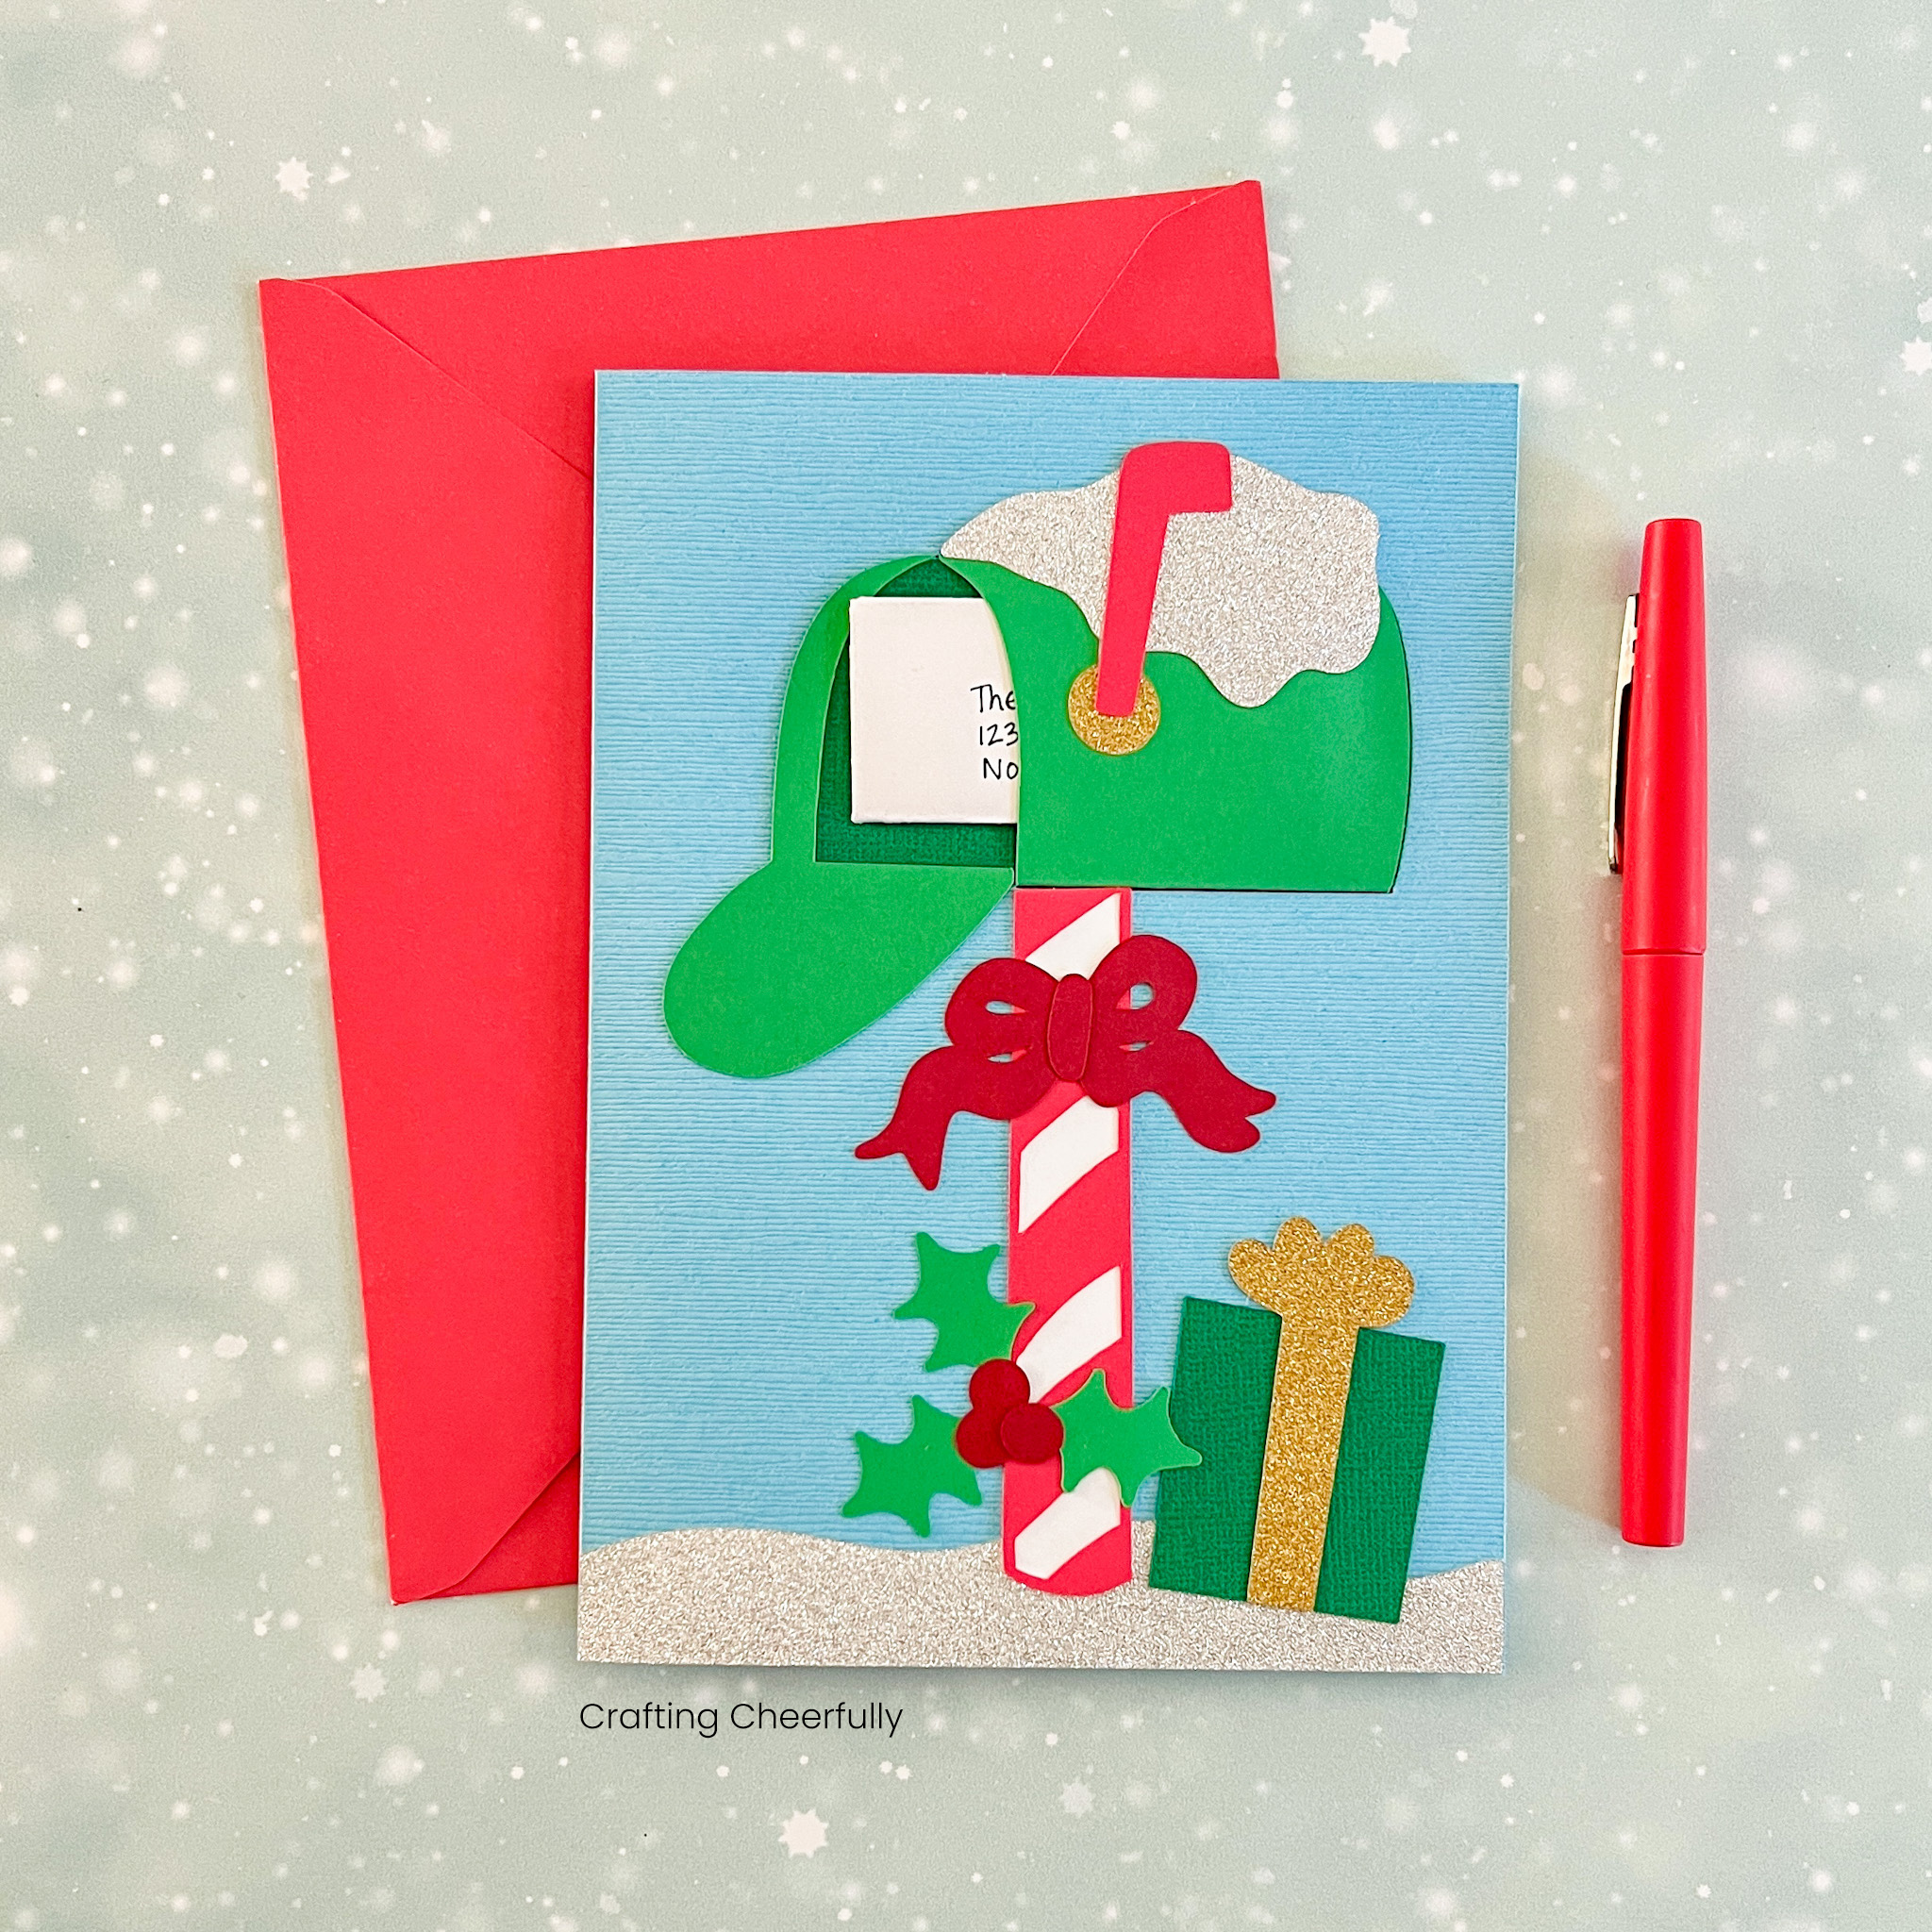
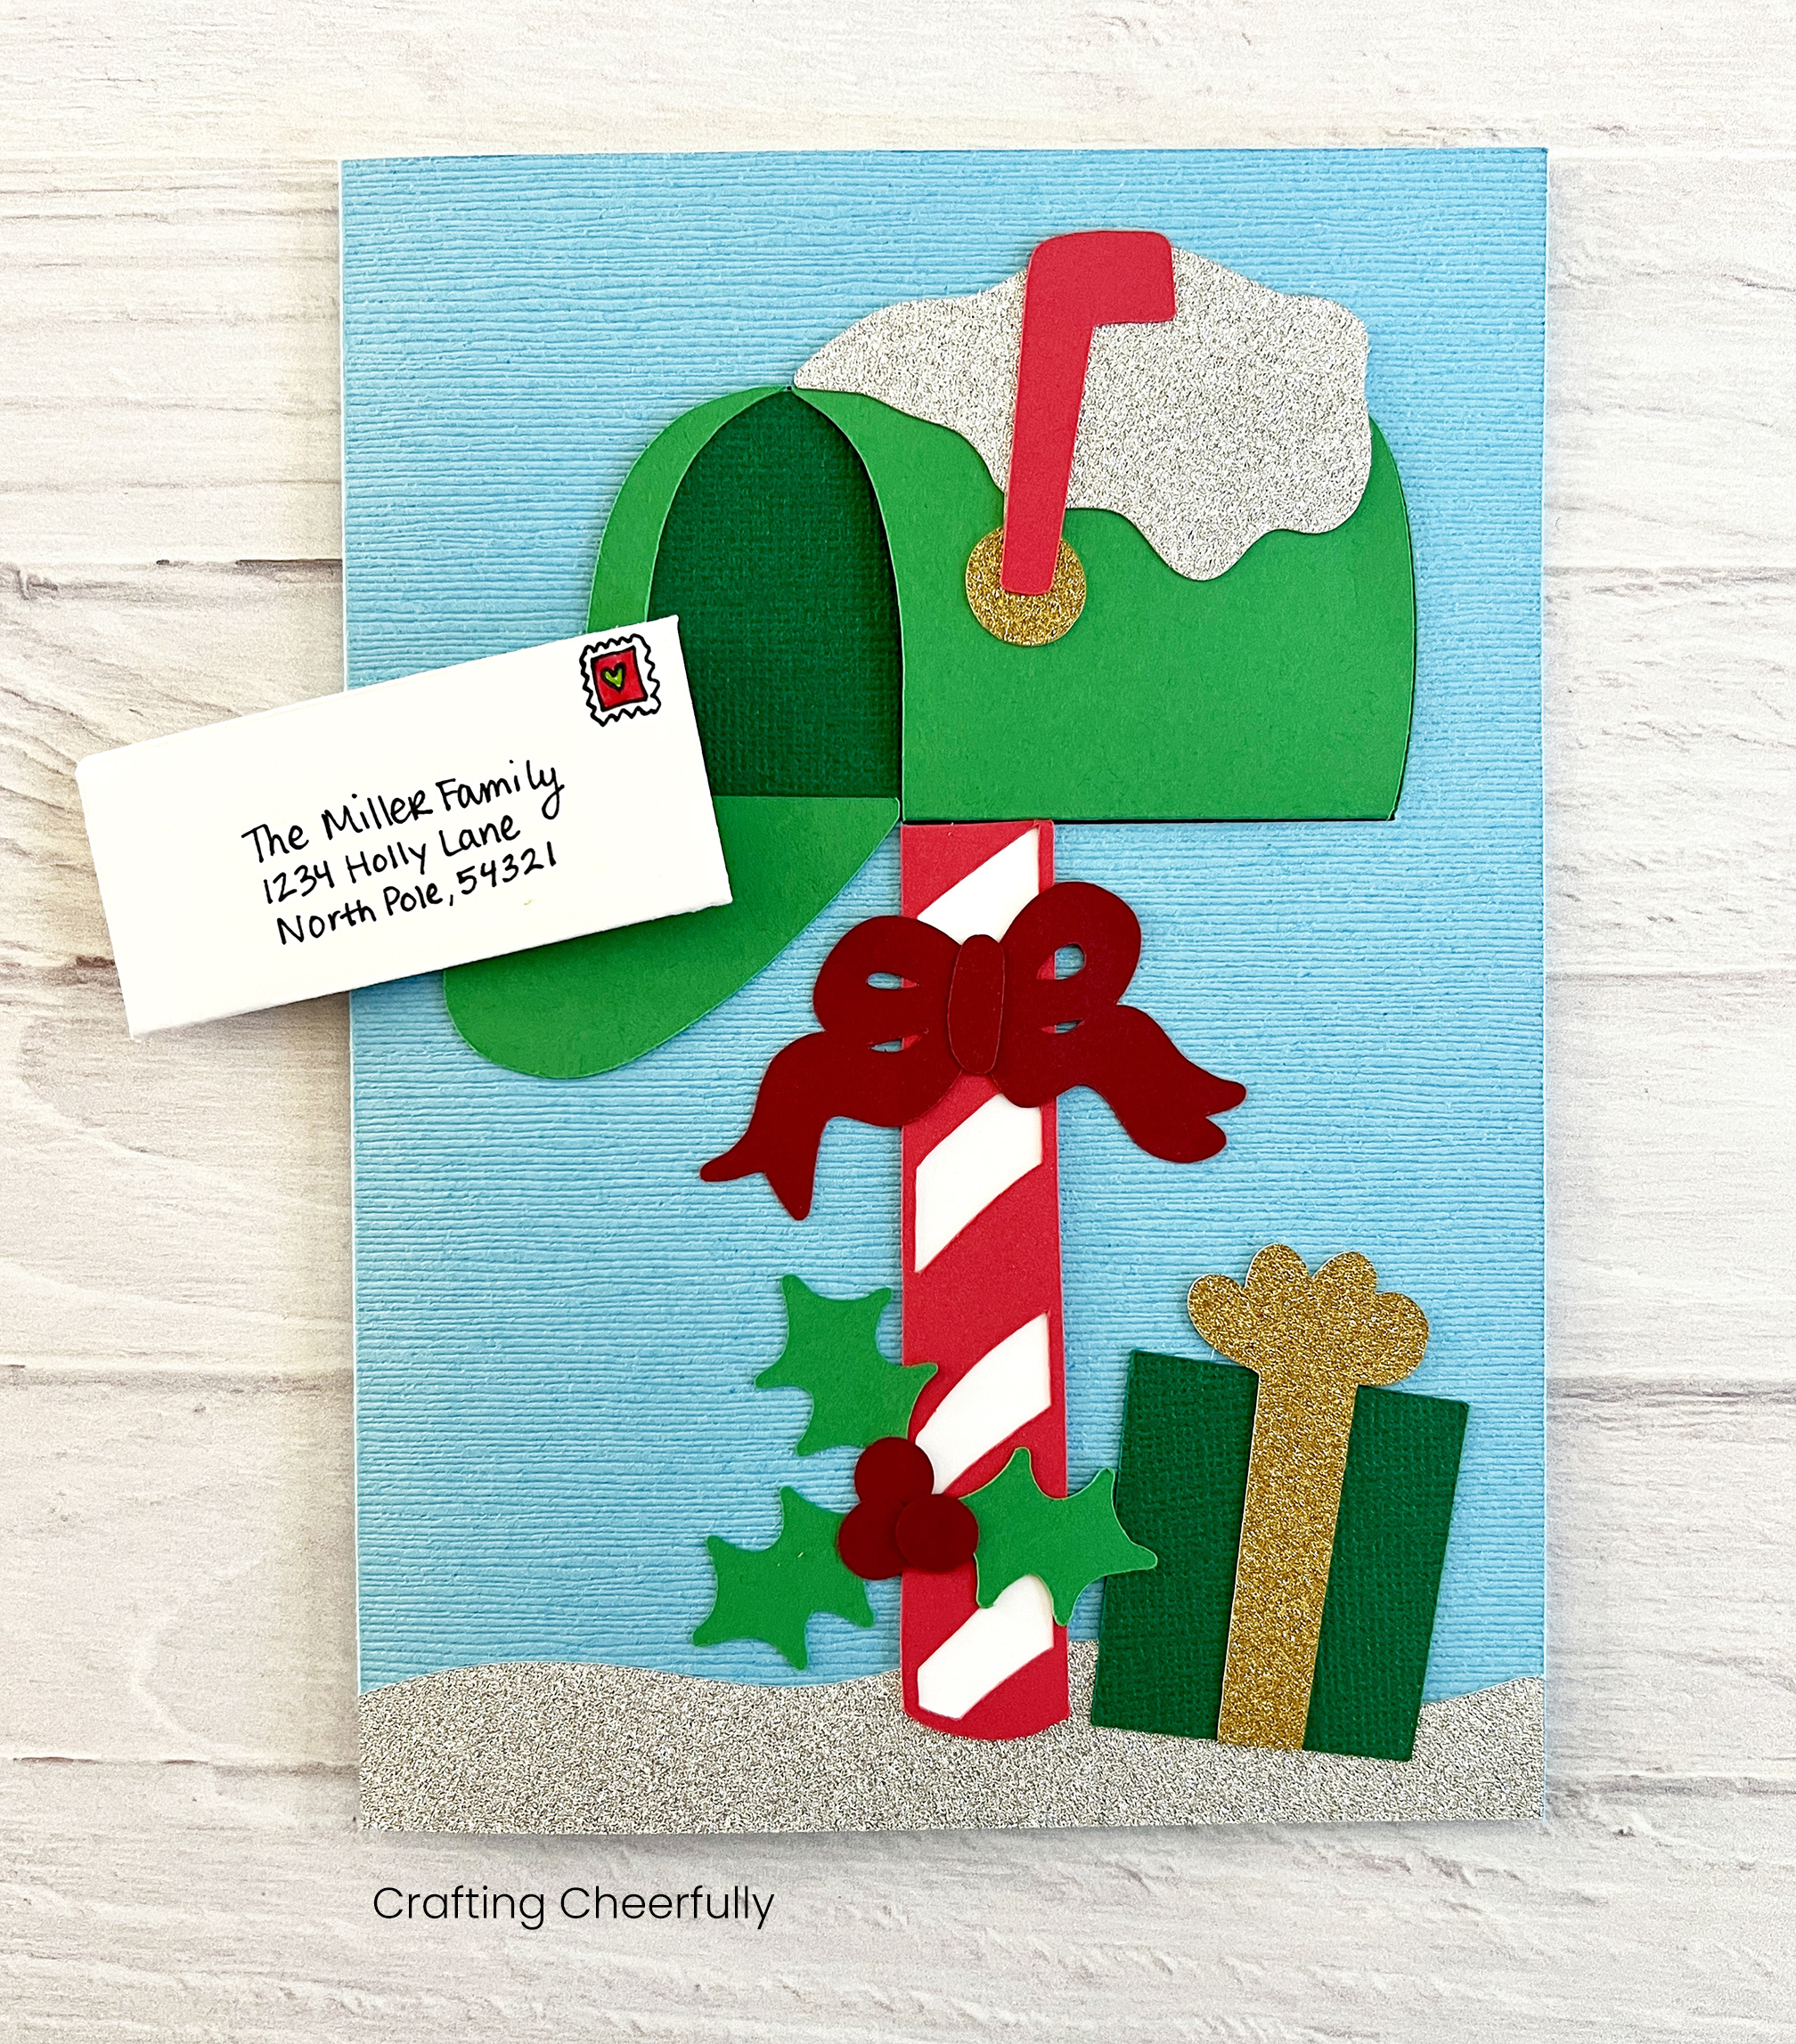
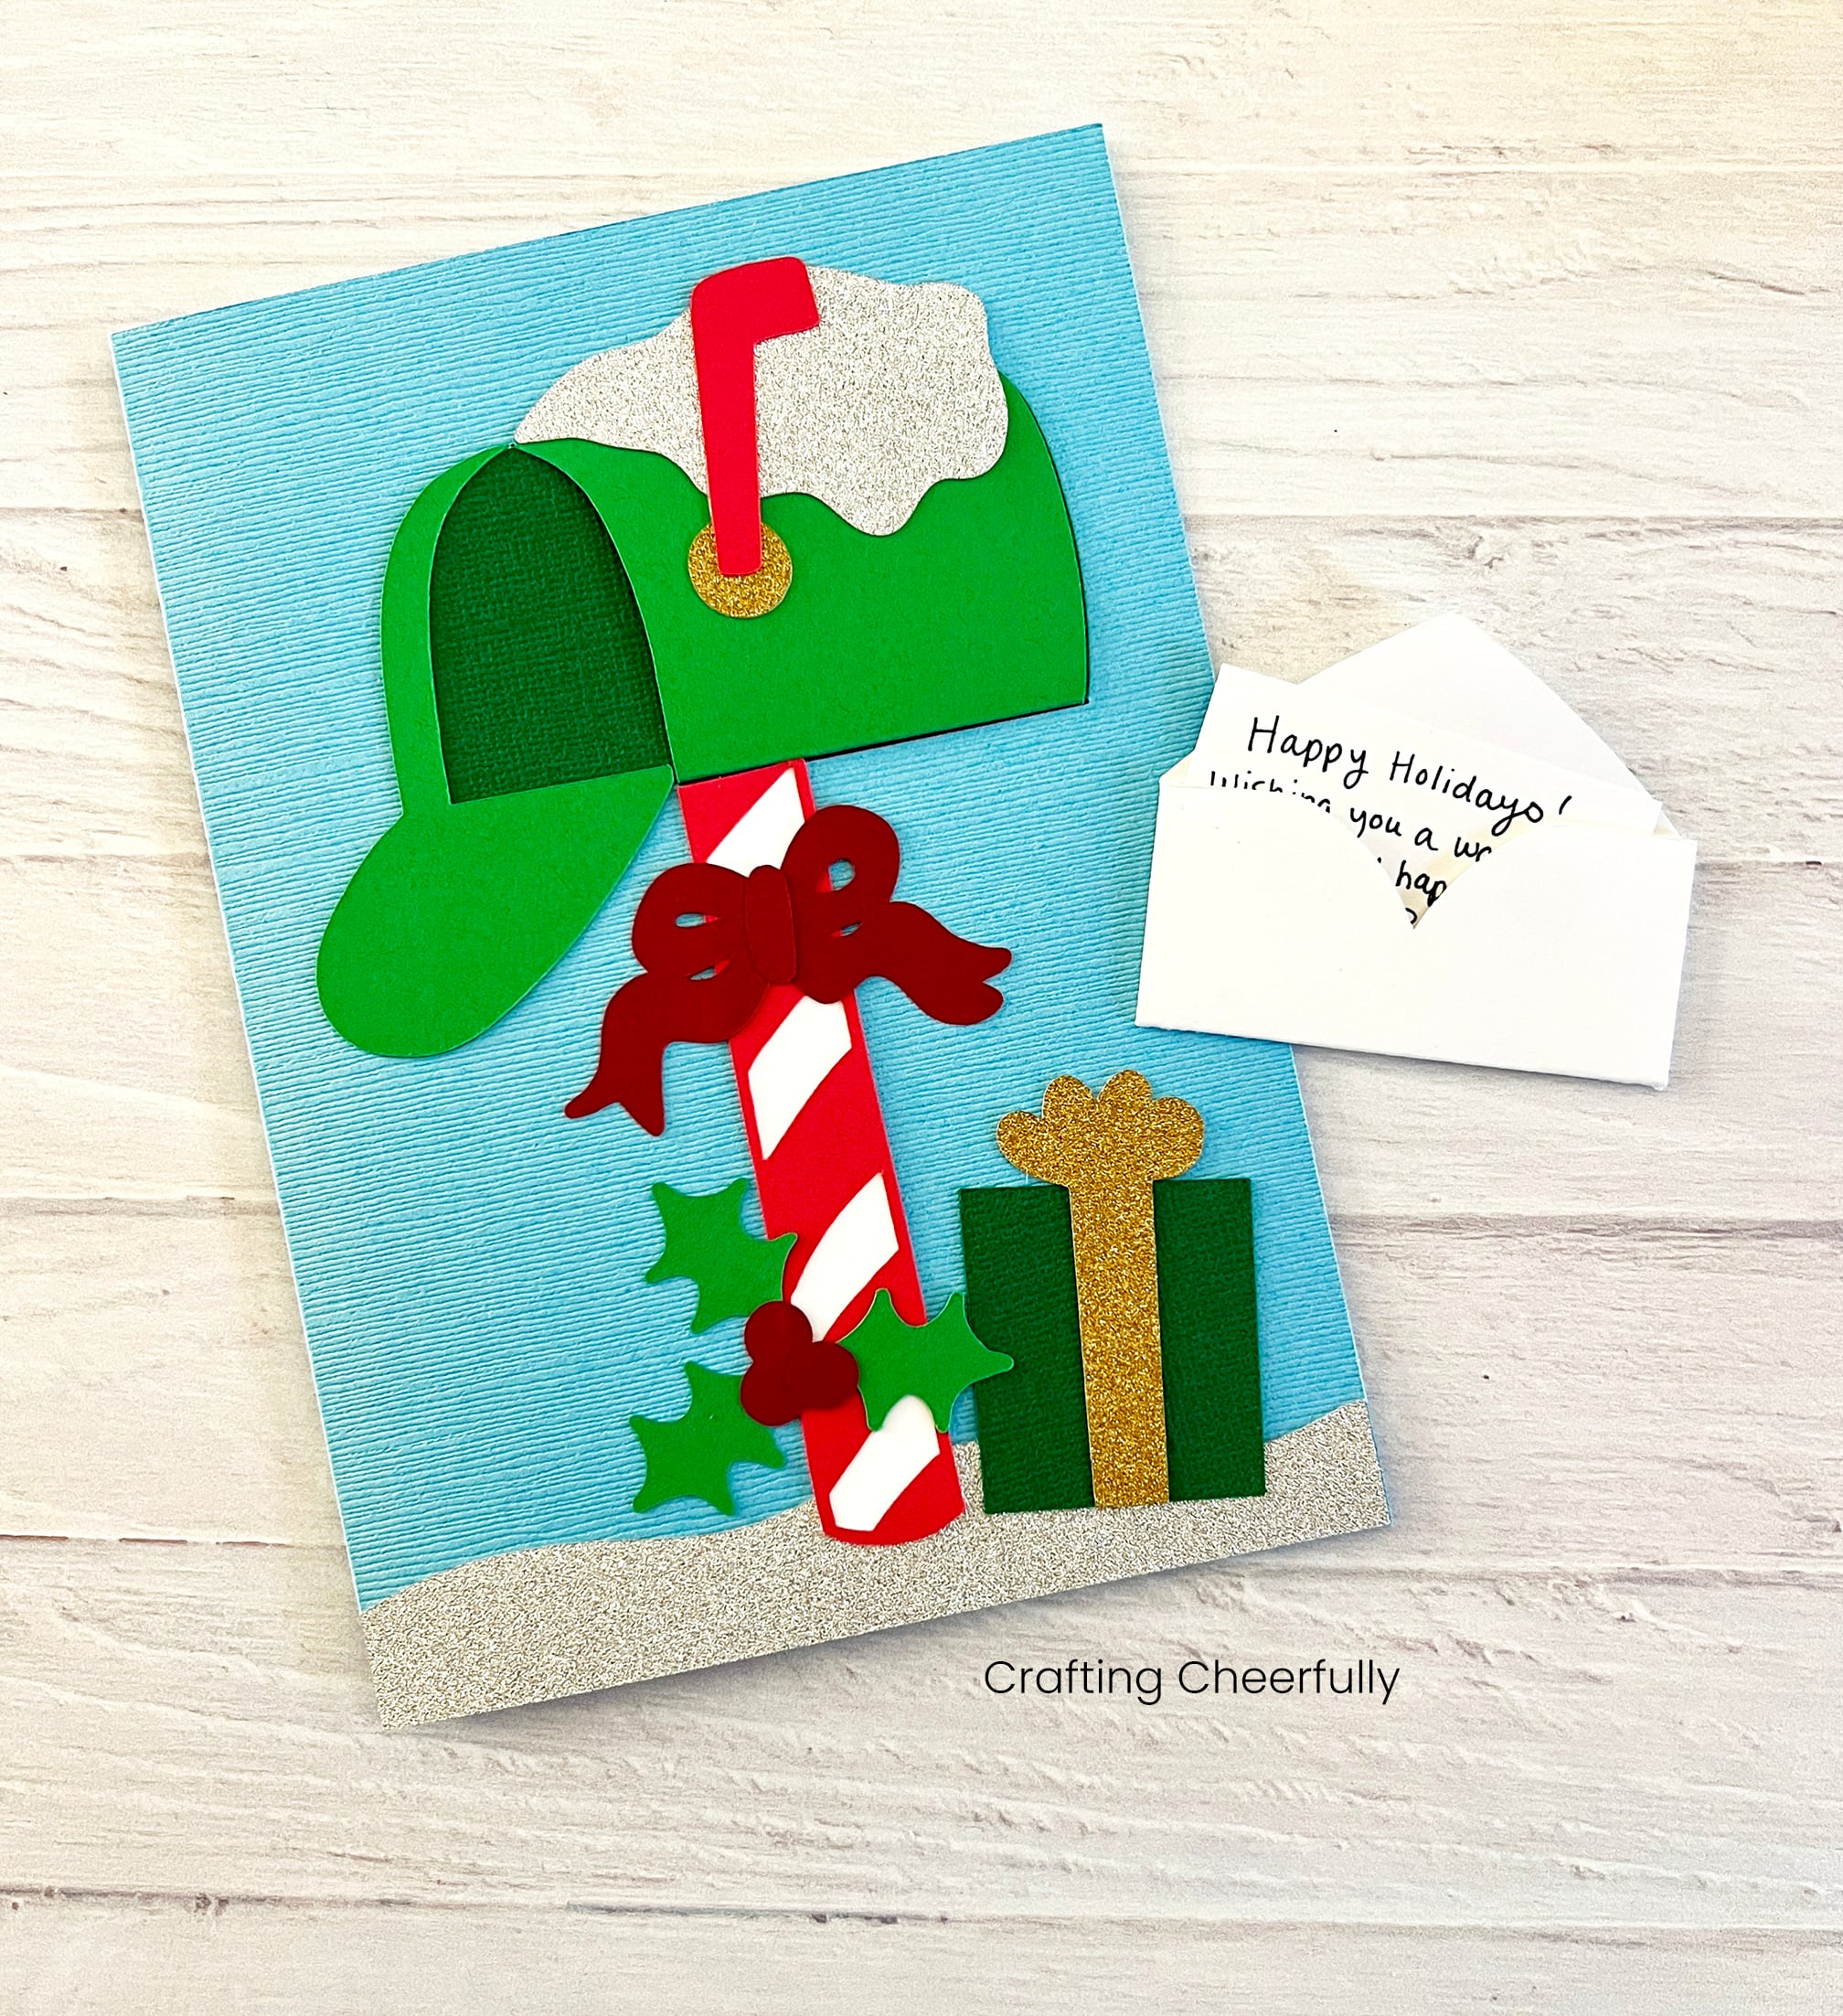
The little envelope opens up and a tiny card can be pulled out! Add a special greeting to the card and address the front of the envelope with the card recipient’s name.
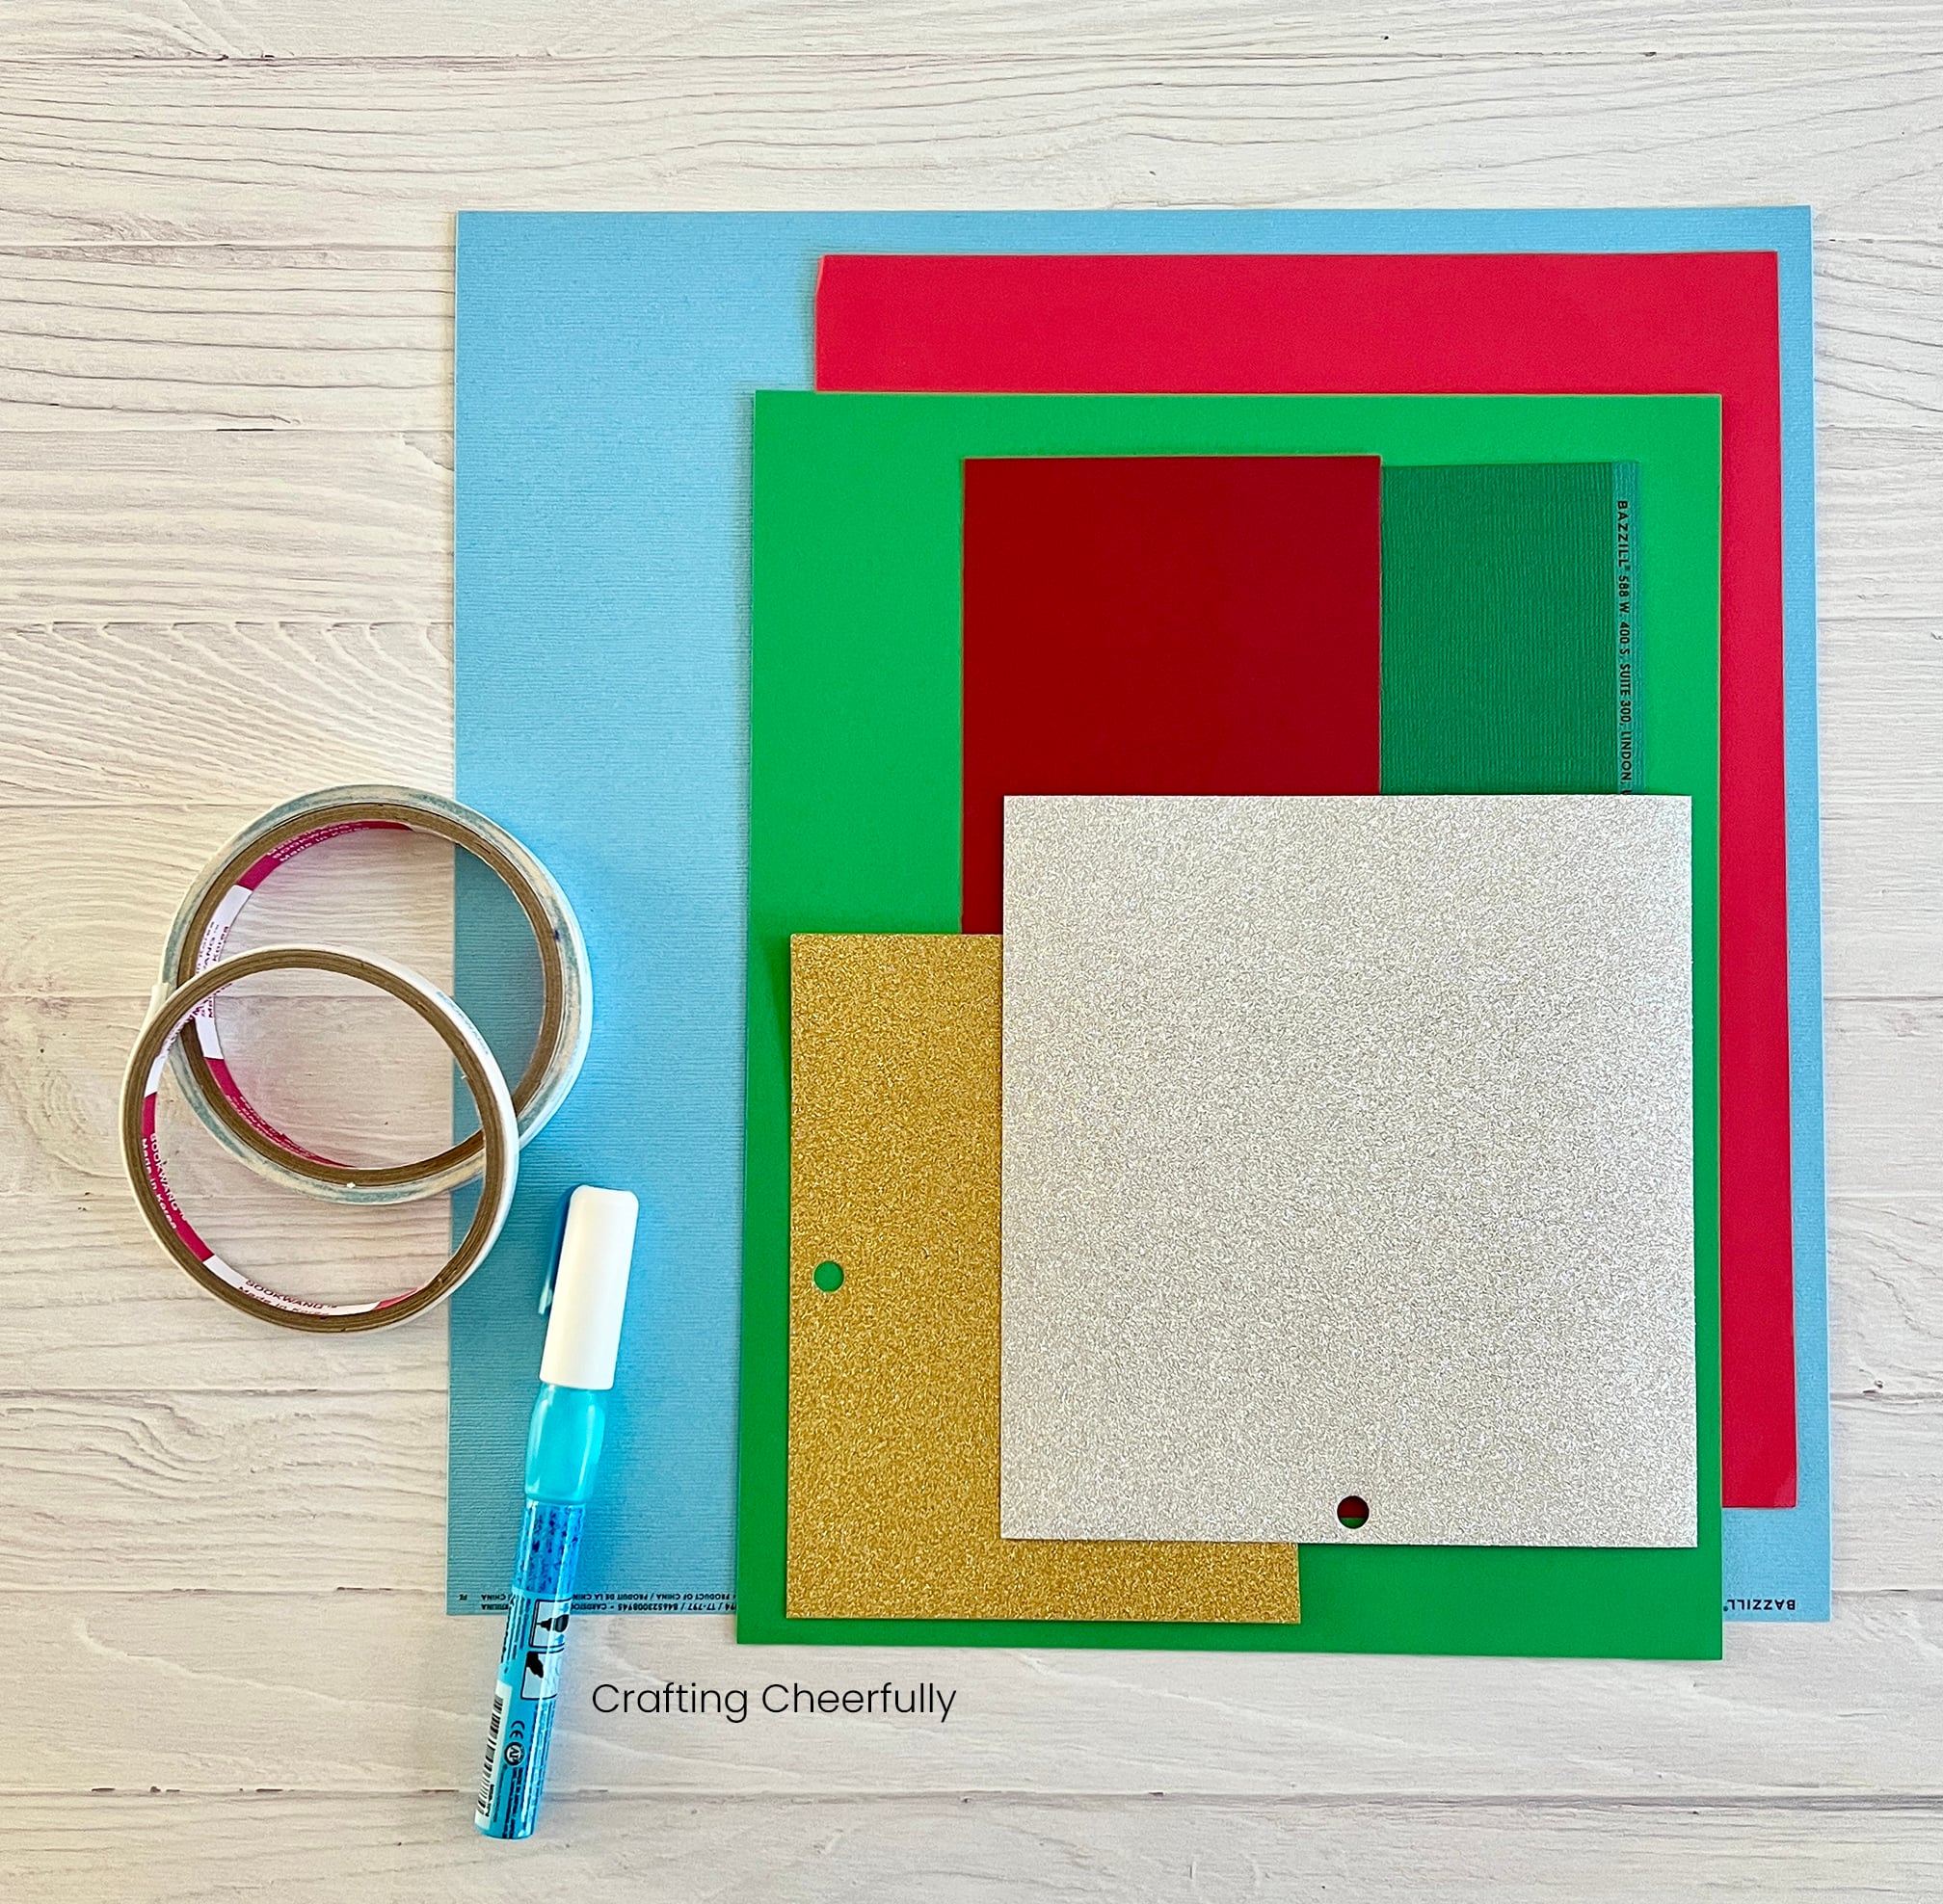
This card can be made with just a few supplies – cardstock and adhesive! I used my Cricut Explore to cut the pieces and I’ve included a step-by-step tutorial below. The SVG cut file I designed is available in my Etsy shop – thank you for supporting my small business! In addition to the SVG cut file, you will also receive a PDF packet with an ad-free step-by-step tutorial that can easily be printed if you prefer.
How to Make a Mailbox Holiday Card
Supplies Needed:
- SVG Cut File can be purchased from my Etsy shop – Thank you for supporting my small business!
- Cardstock in blue, white, green, dark green, red, dark red, and gold
- Double-sided tape – I used 1/4″ Scor-Tape
- Adhesive – Bearly Art Glue or Zig Glue Pen
- Cricut Cutting Machine
- Cricut Standard Mat
- Cricut Tools
- Cricut Brayer
Cutting the Card Pieces
Use the SVG cut file and cut the pieces using your cutting machine. The PDF that comes with the SVG includes specific directions for setting up the file in Cricut Design Space.
Assembling the Card
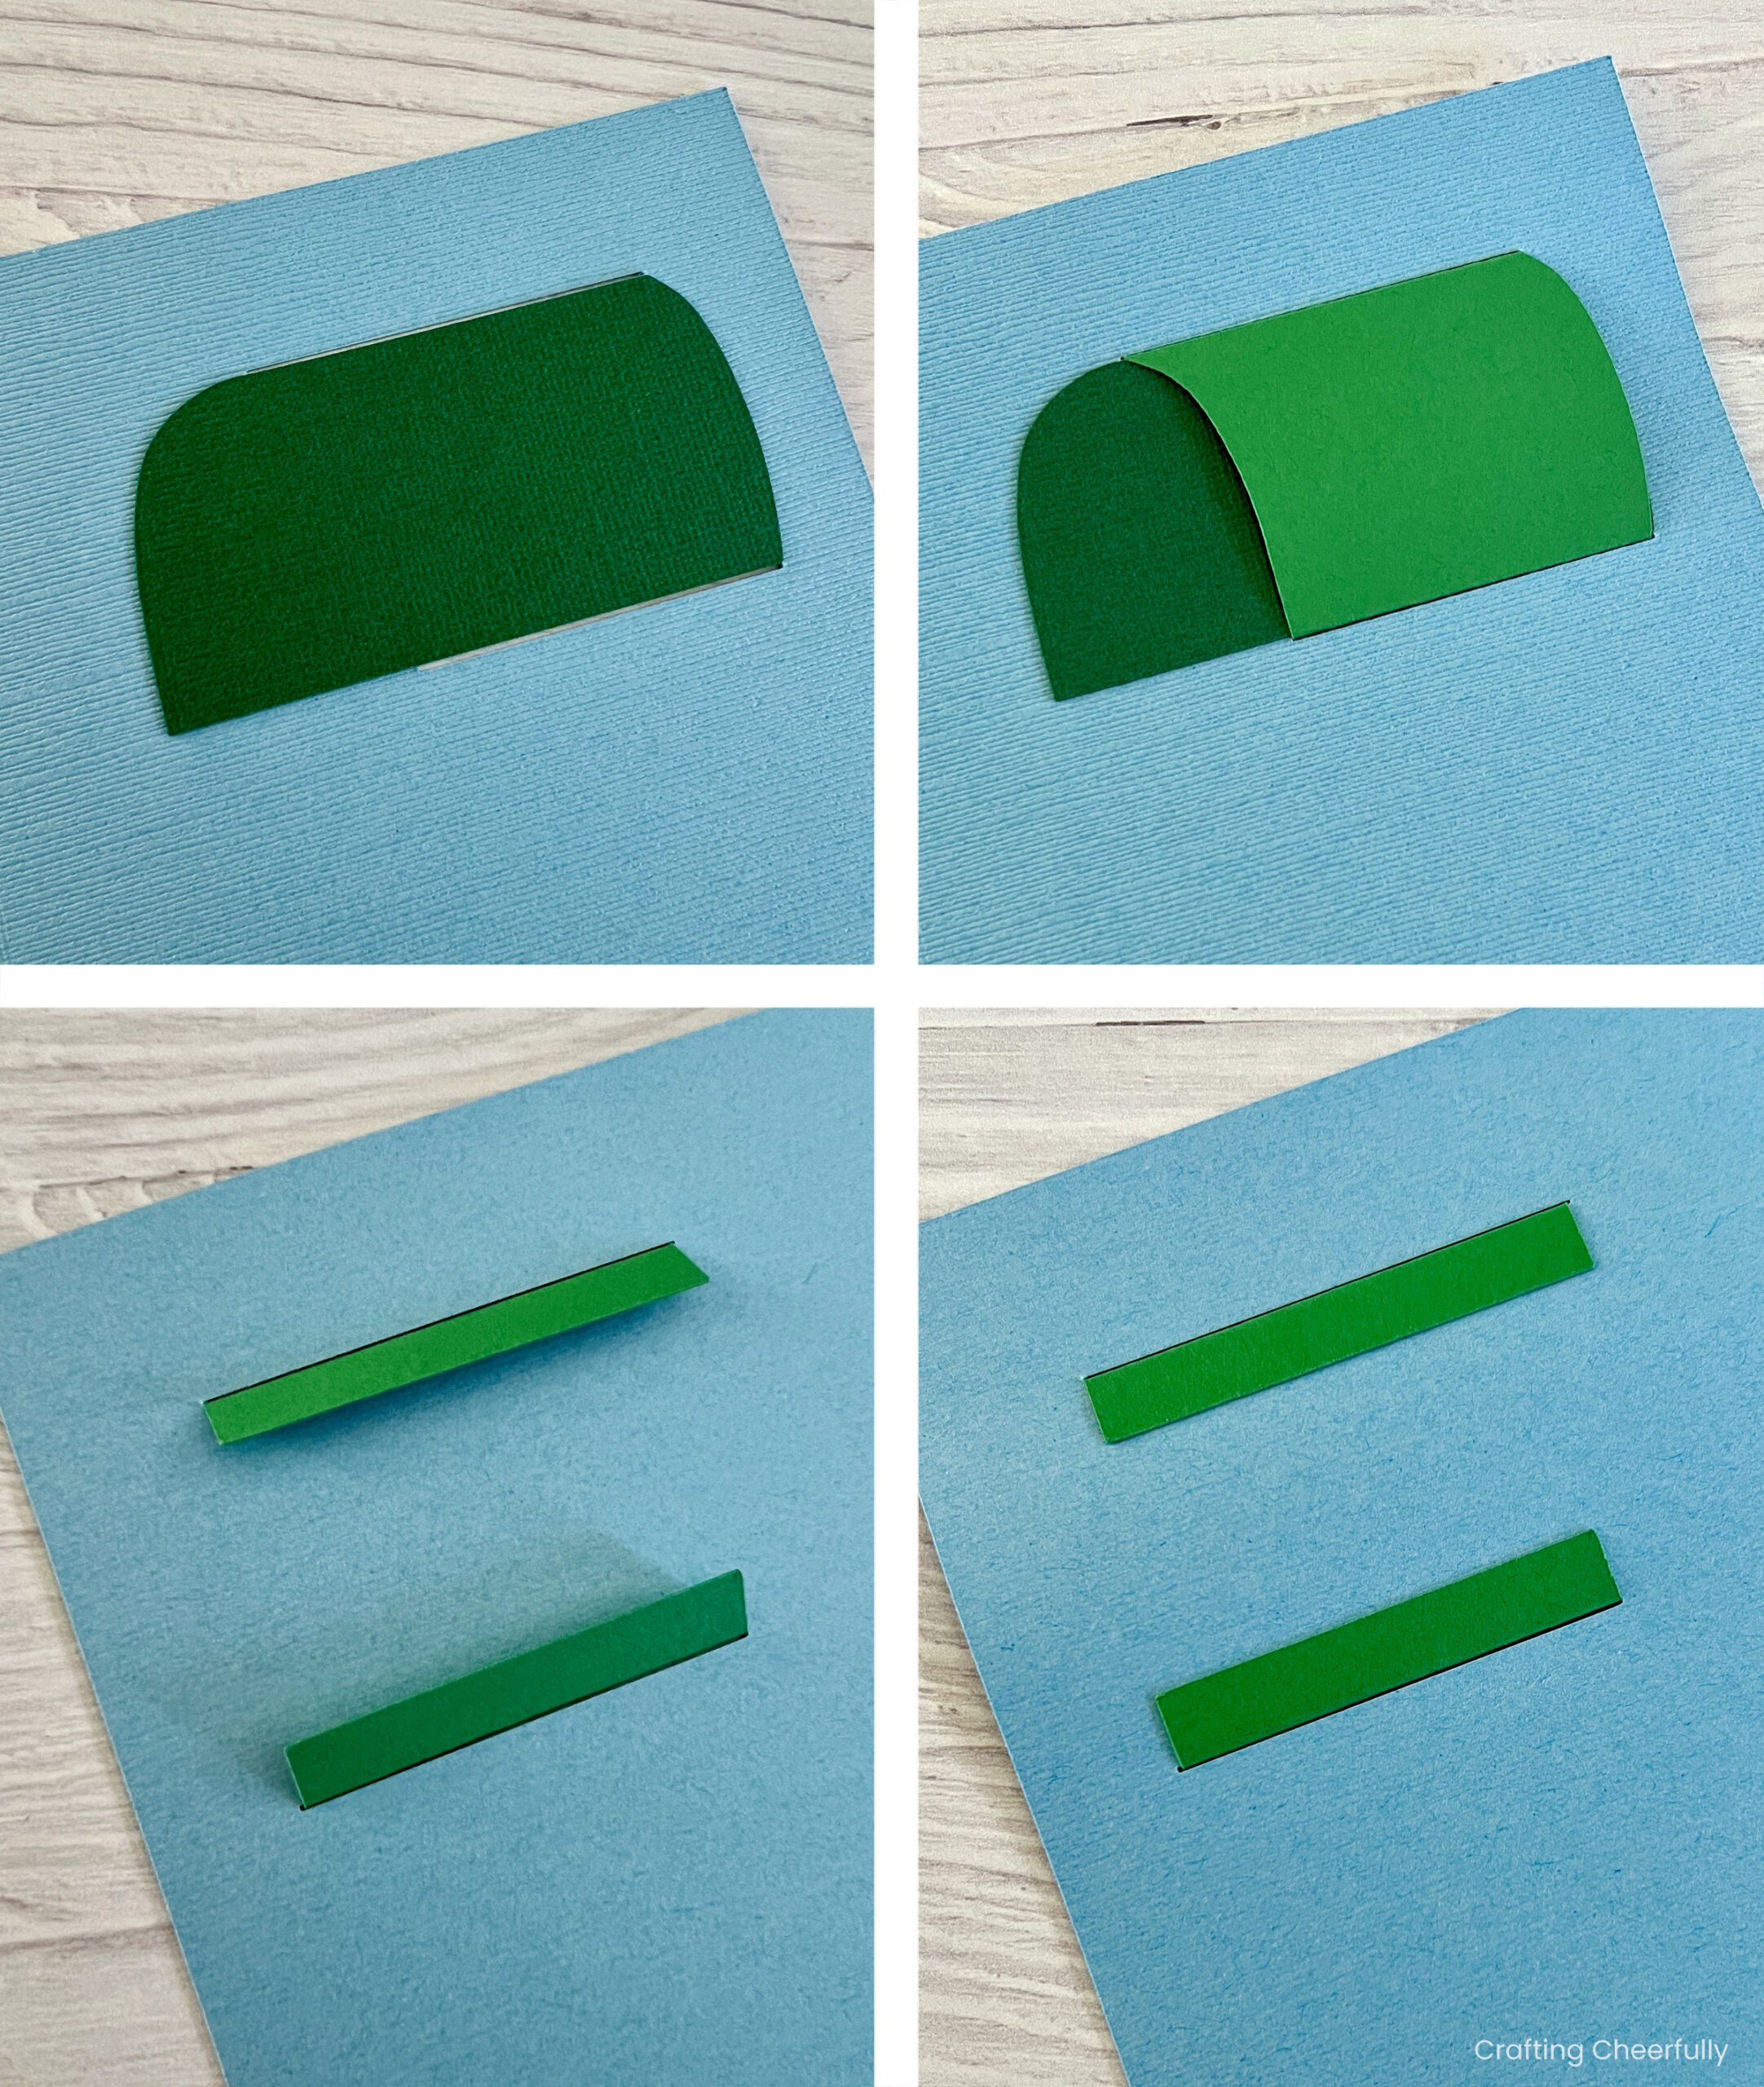
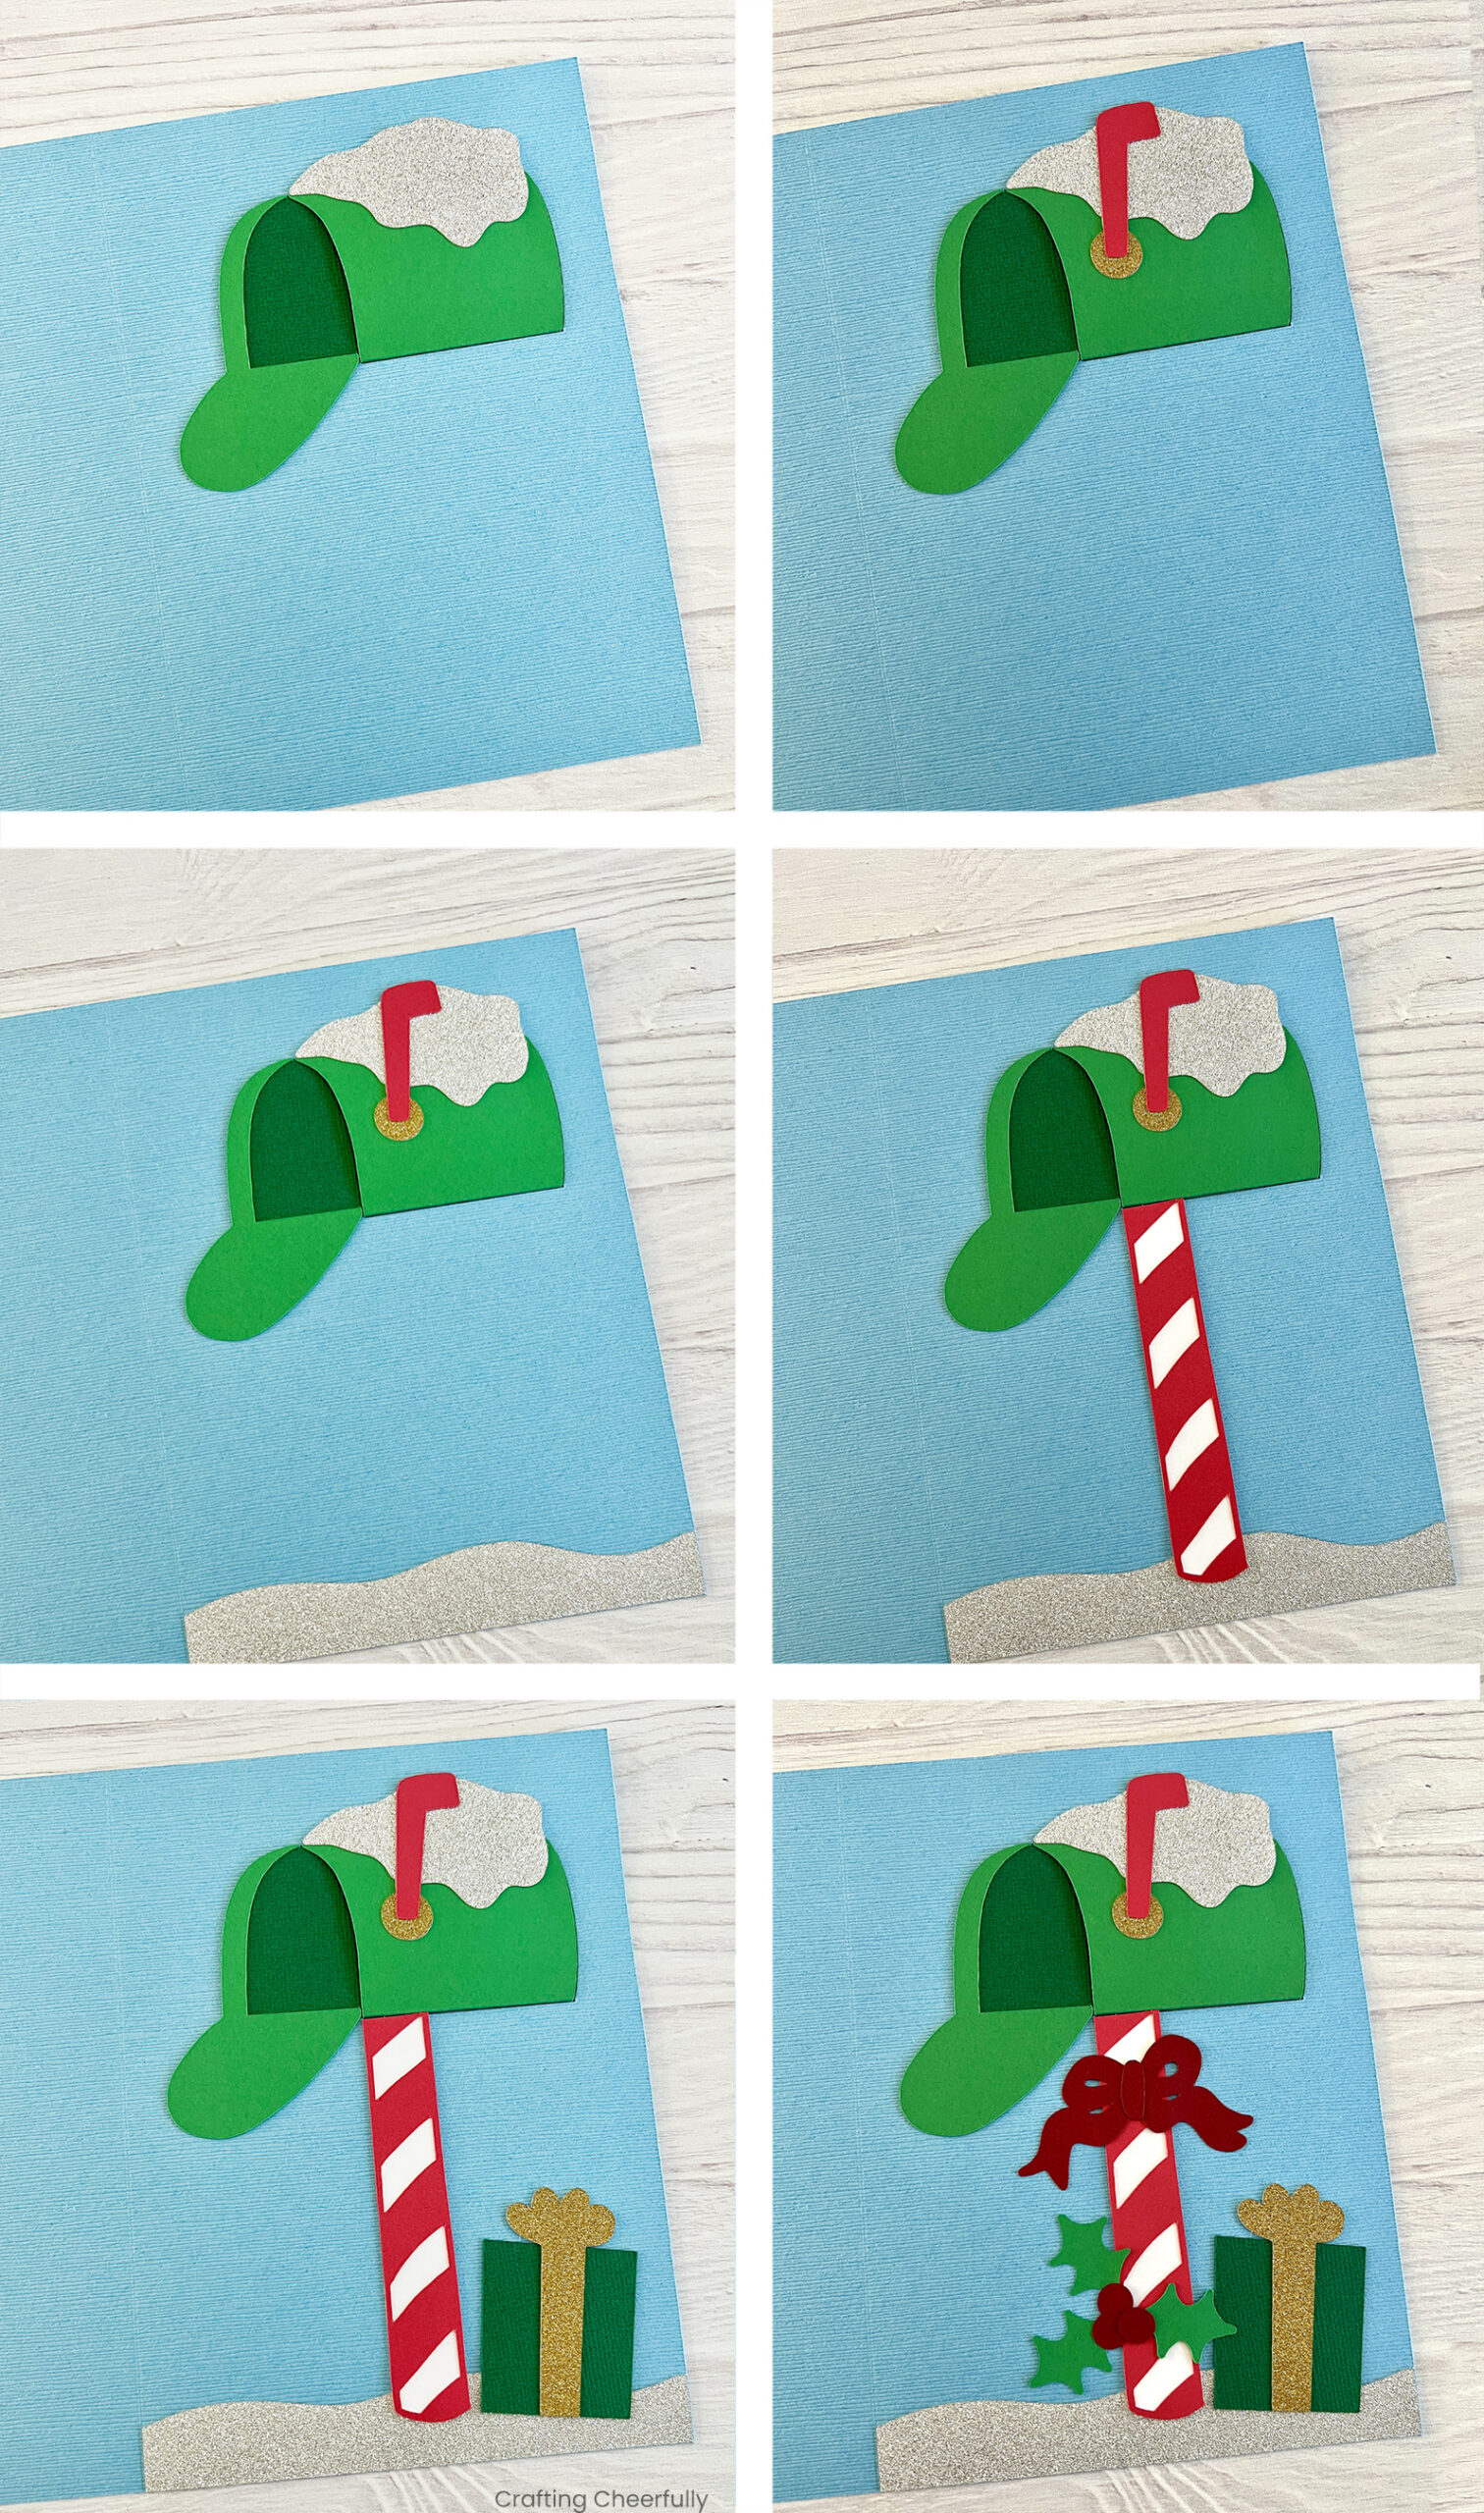
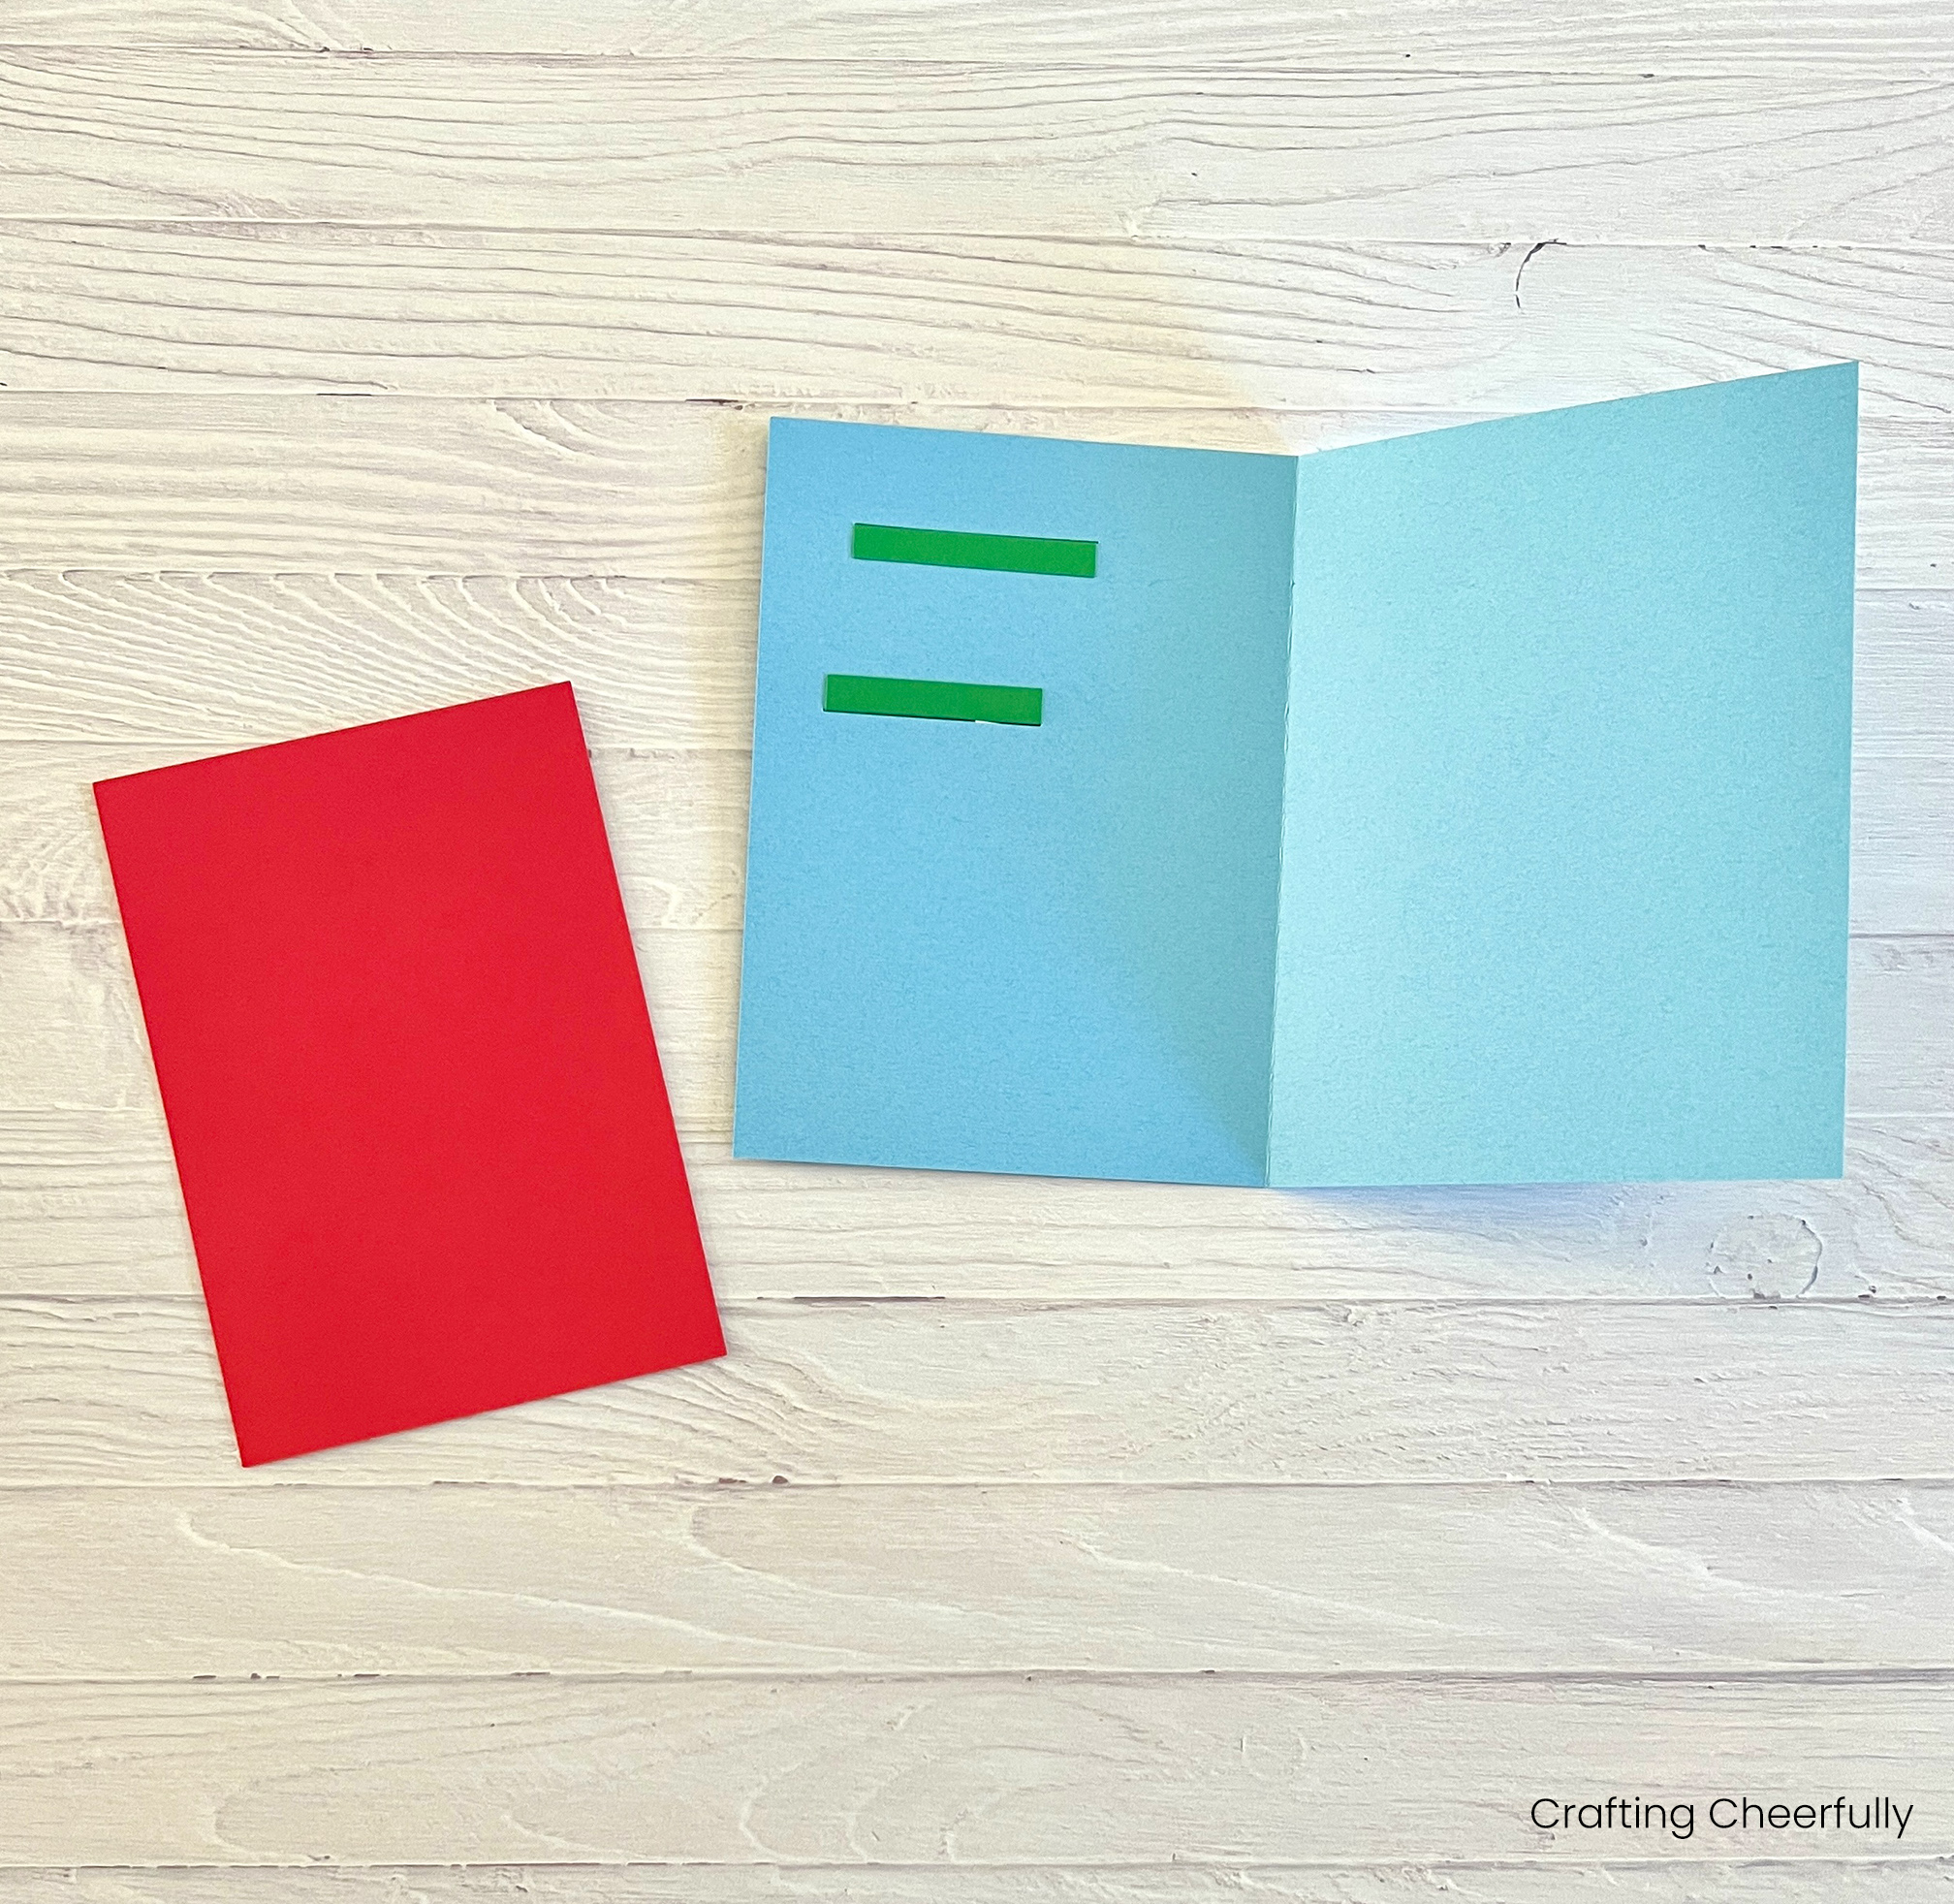
Step One: Create the mailbox. Adhere the dark green mailbox base to the front of the card. It should fit between the two horizontal notches that are cut out of the card. The right corners of the mailbox base will line up with the right edges of the horizontal notches.
Next, attach the mailbox cover, the lighter green piece, by sliding the top edges through the notches in the card. Fold the ends that slide to the back side and adhere them in place.
Step Two: Next, assemble the candy cane pole and present. Use adhesive to layer the white and red pieces together to create the candy cane pole and attach the gold ribbon and bow to the gift box.

Step Three: Decorate the mailbox. Add the other pieces to the mailbox in the following order: green door, mailbox snow, gold circle, red flag, ground snow, candy cane pole, gift, bow and holly.
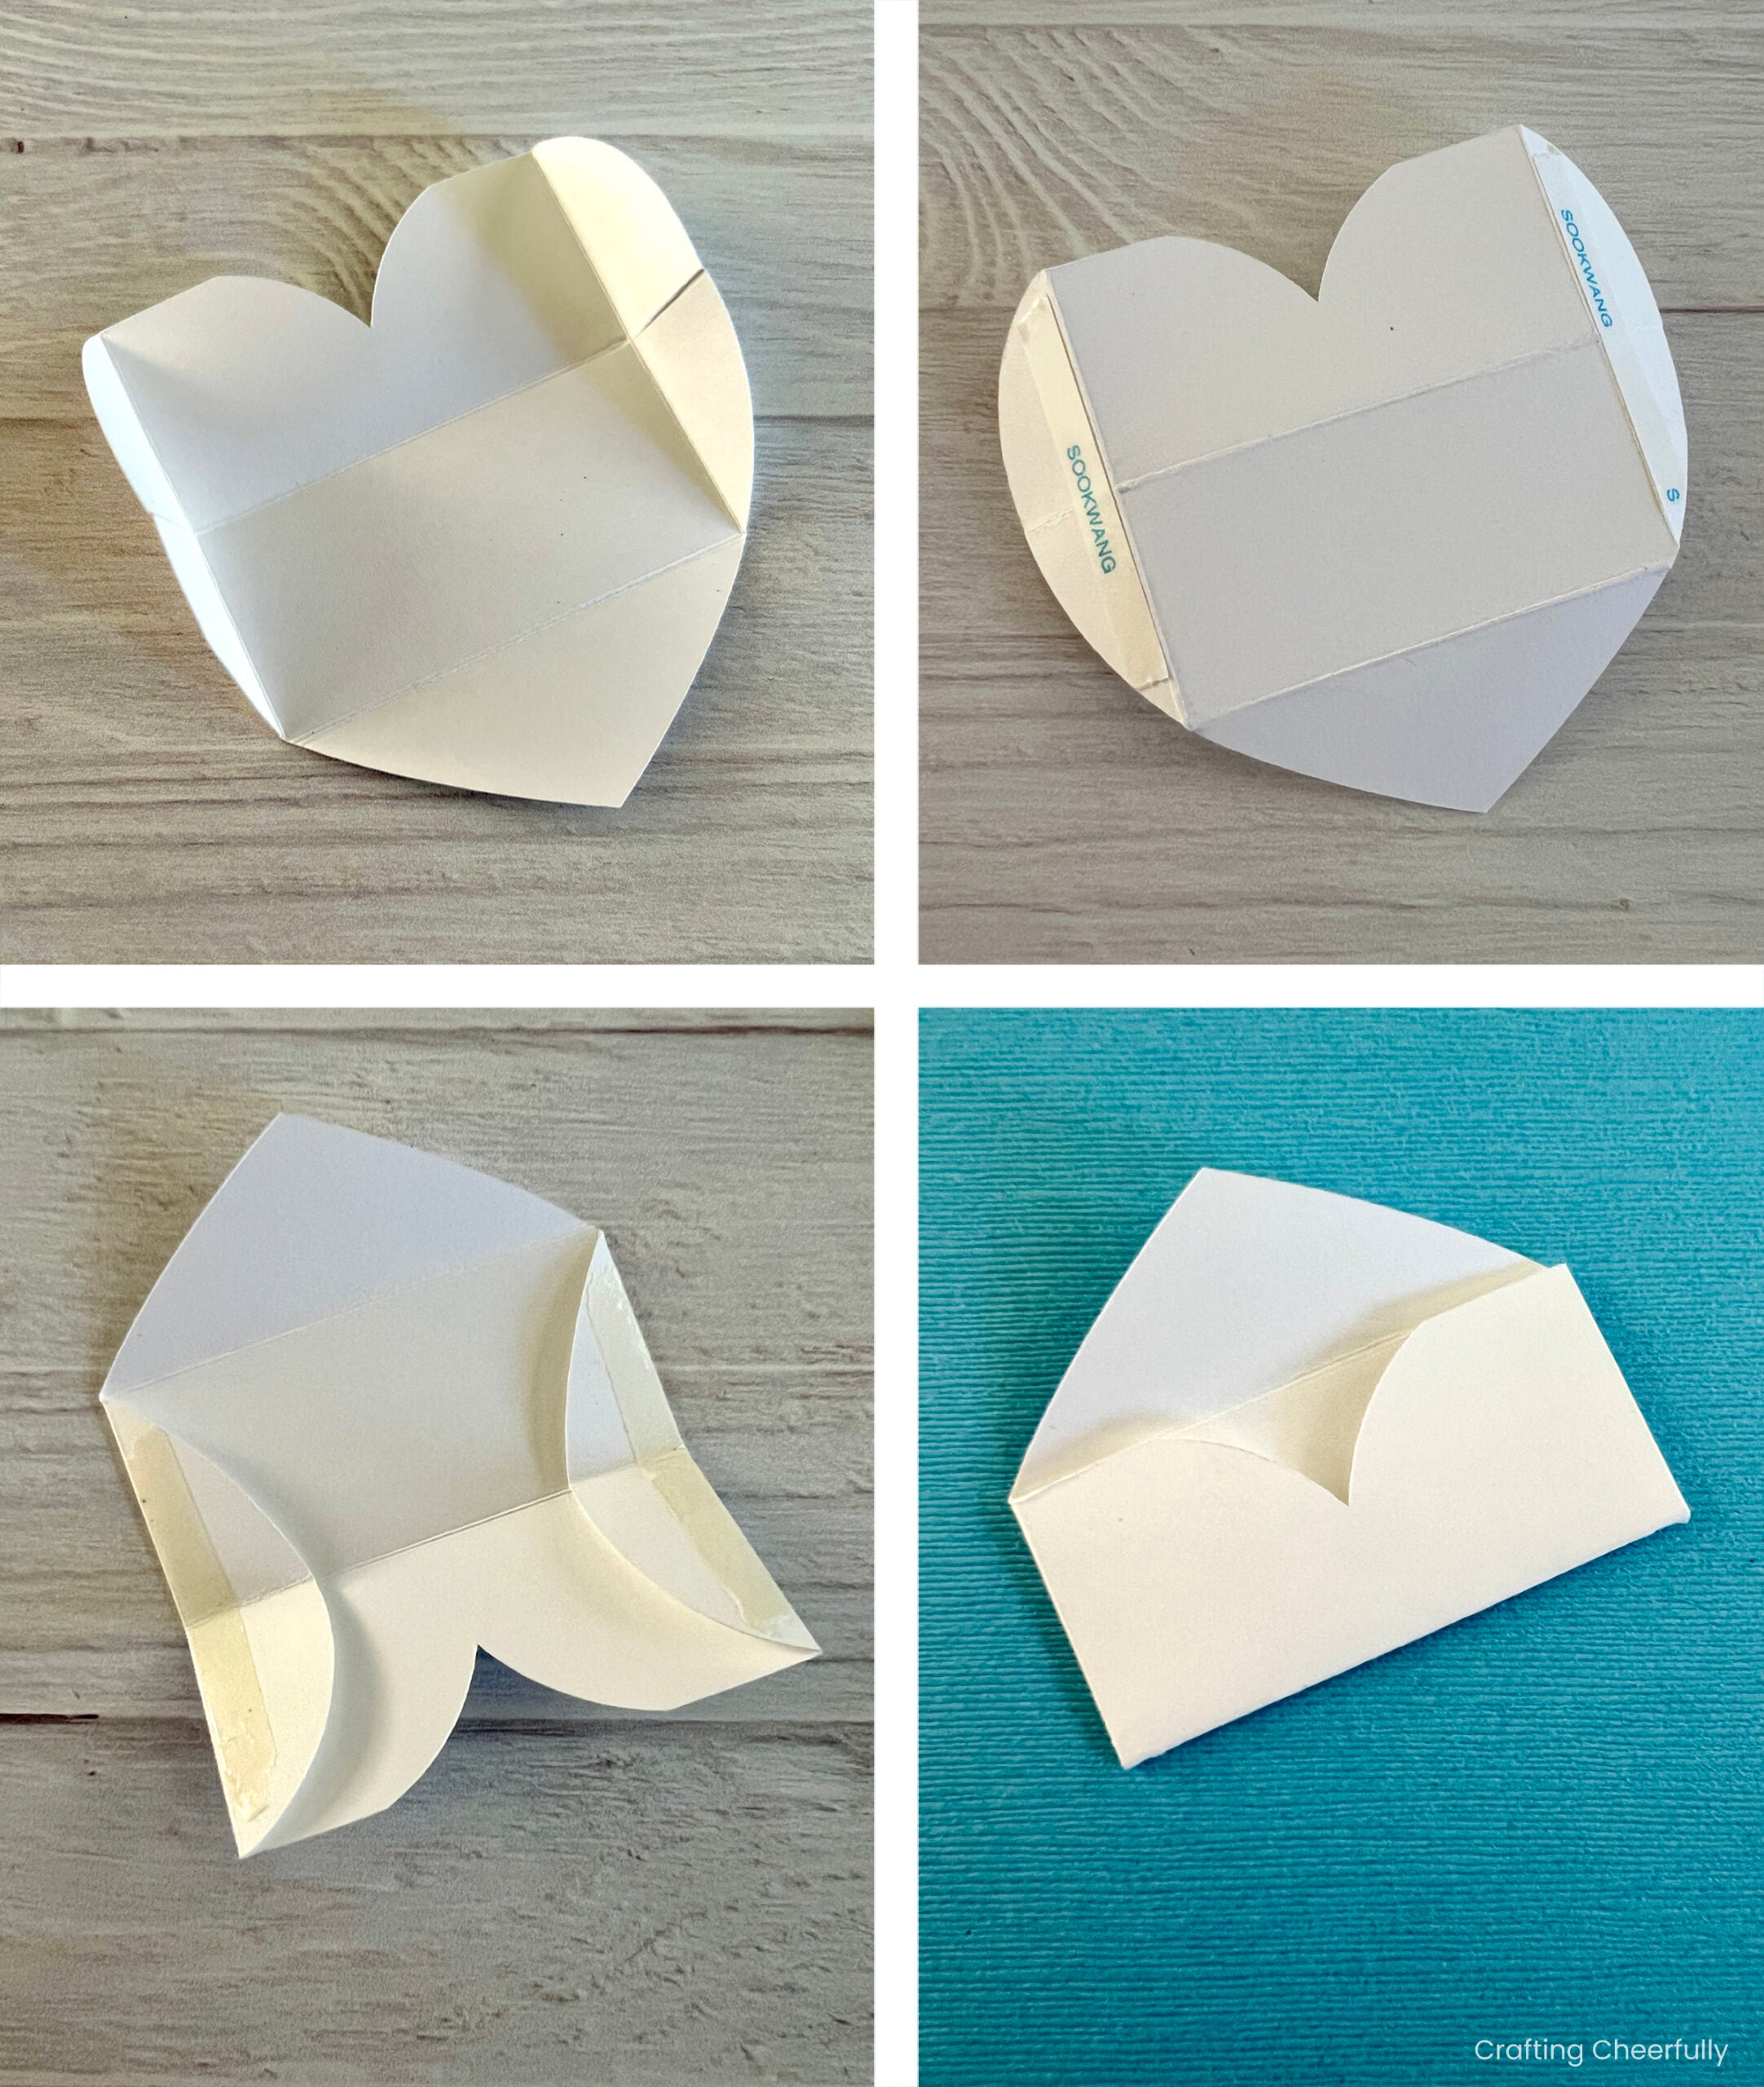
Step Four: Create the Envelope. Fold the heart shape along the fold lines. Add adhesive to the back of the heart along the side flaps. Fold the side flaps in followed by the top of the heart to form the envelope.
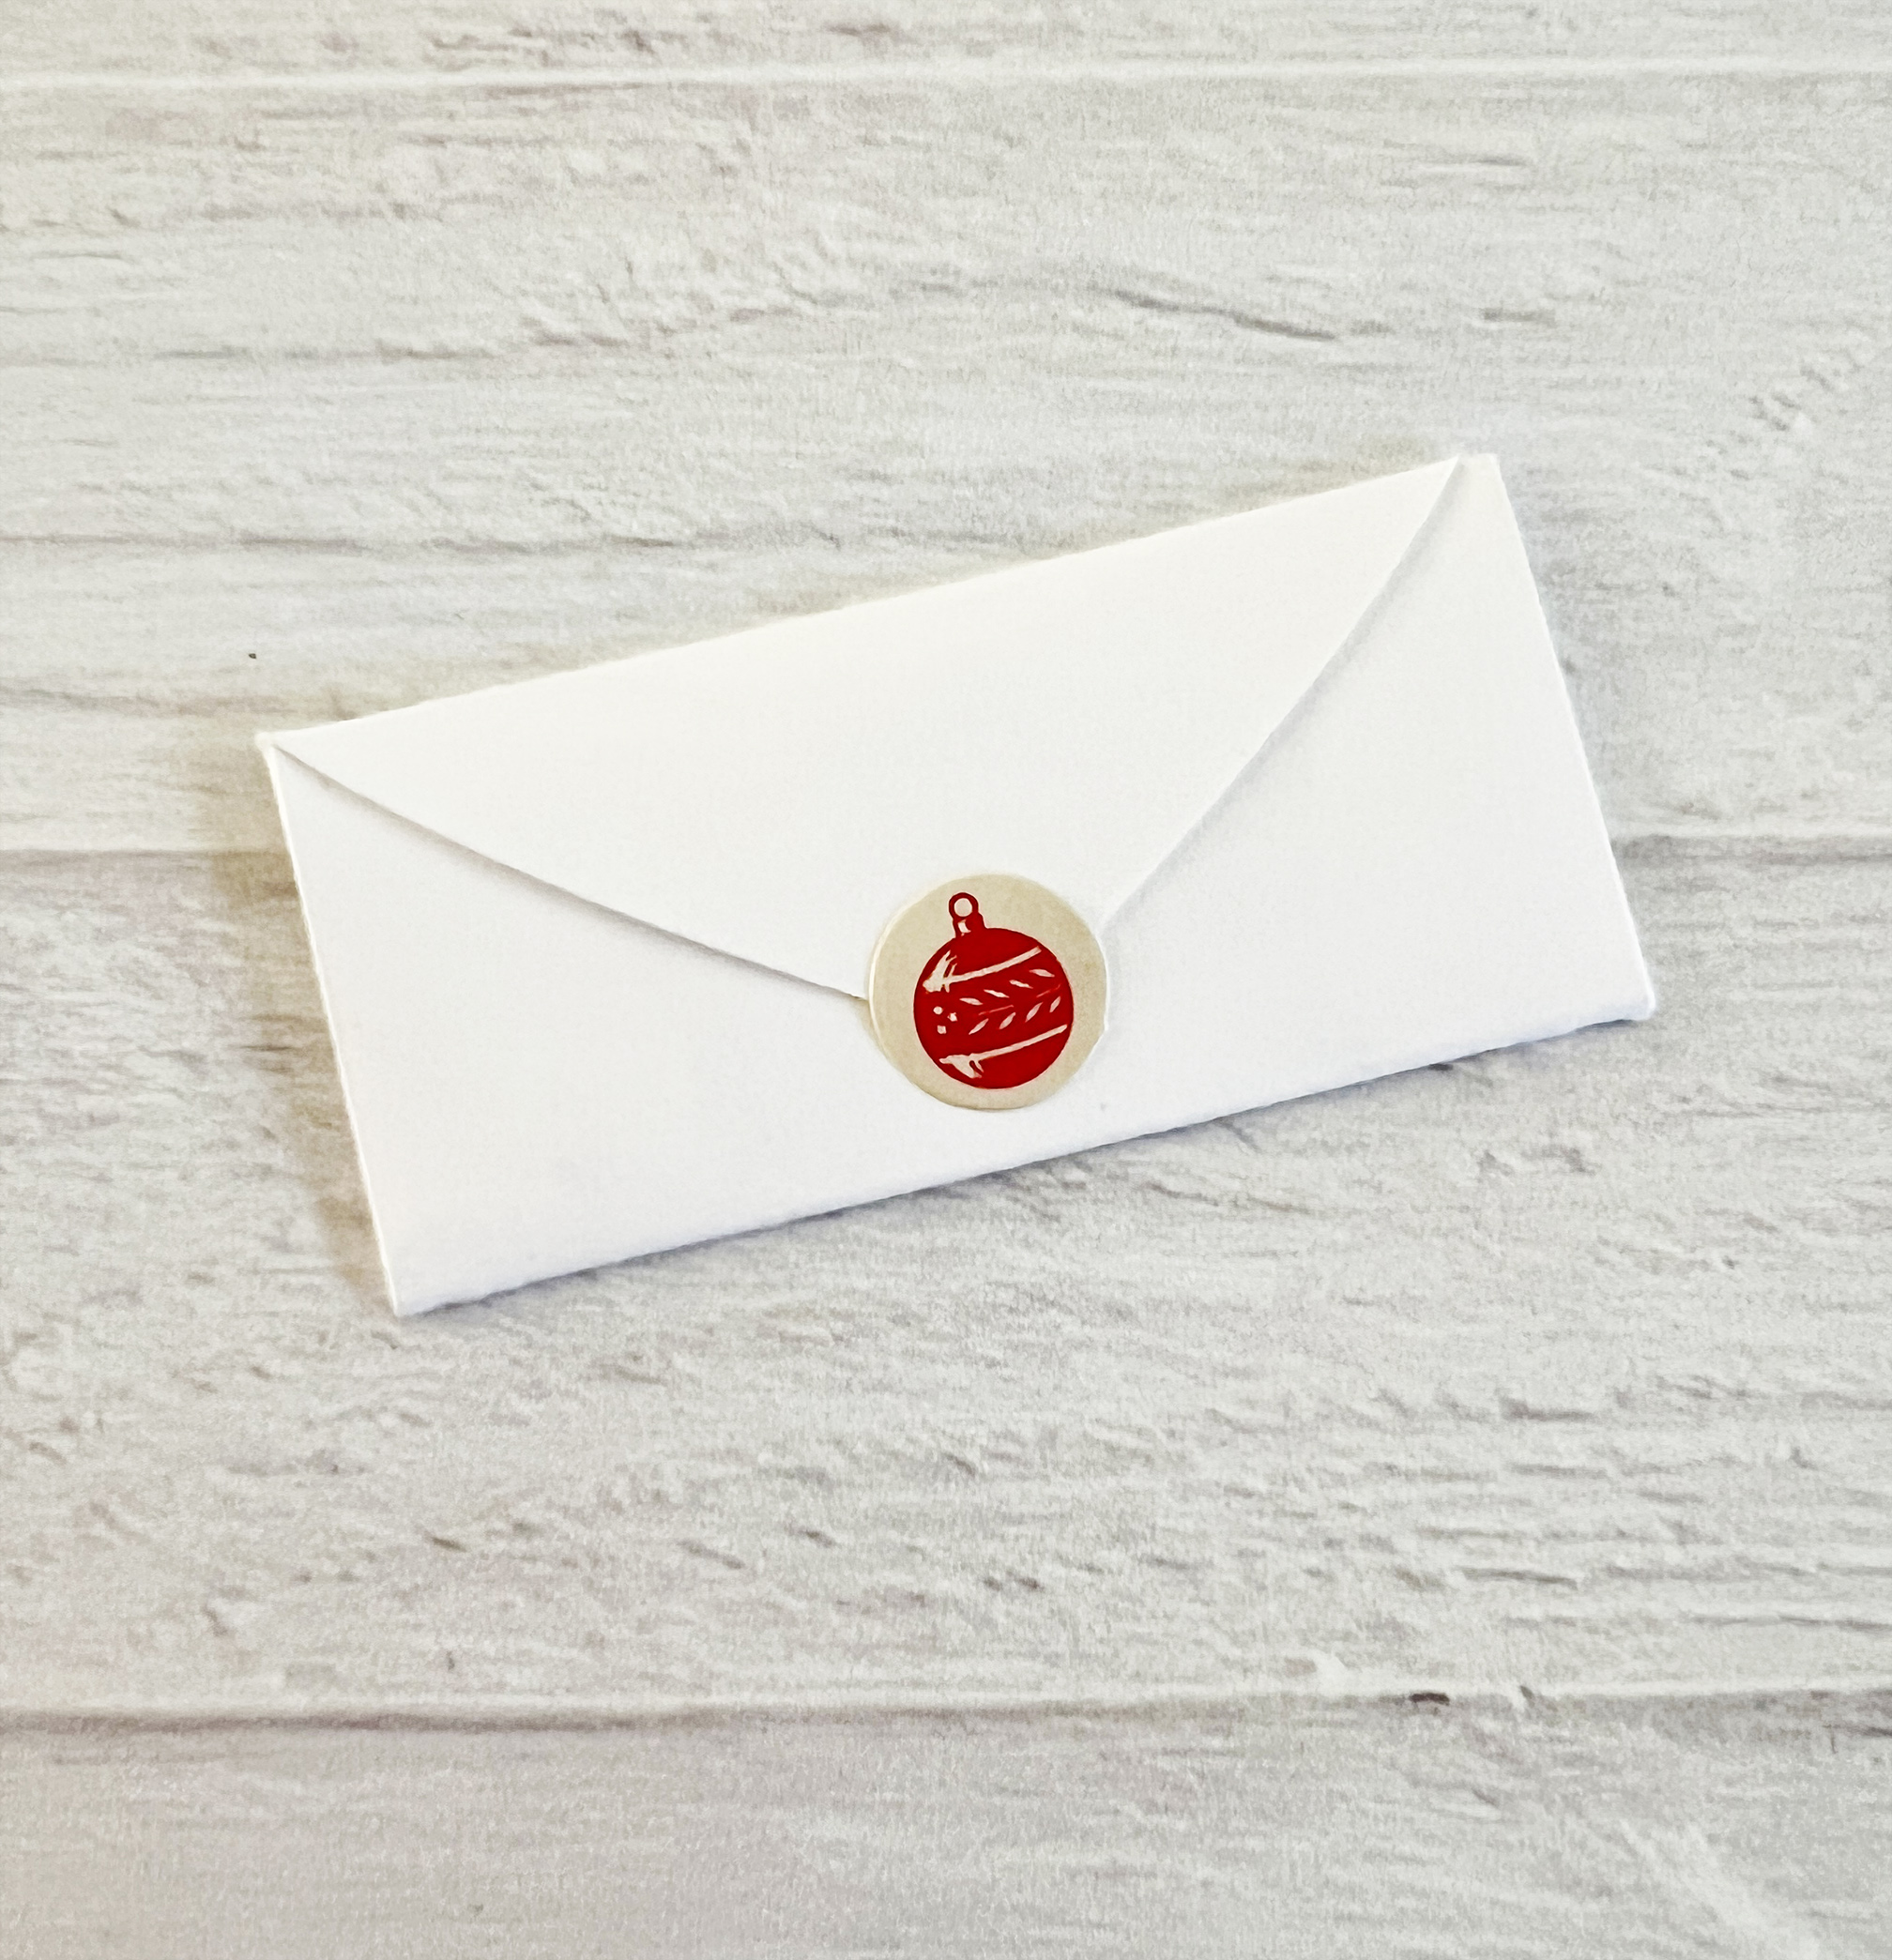
Cut a piece of paper that measures 1″ x 2.25″ and add a cute message. Slip inside the envelope. Address the front of the envelope and add a sticker to the keep the envelope closed.
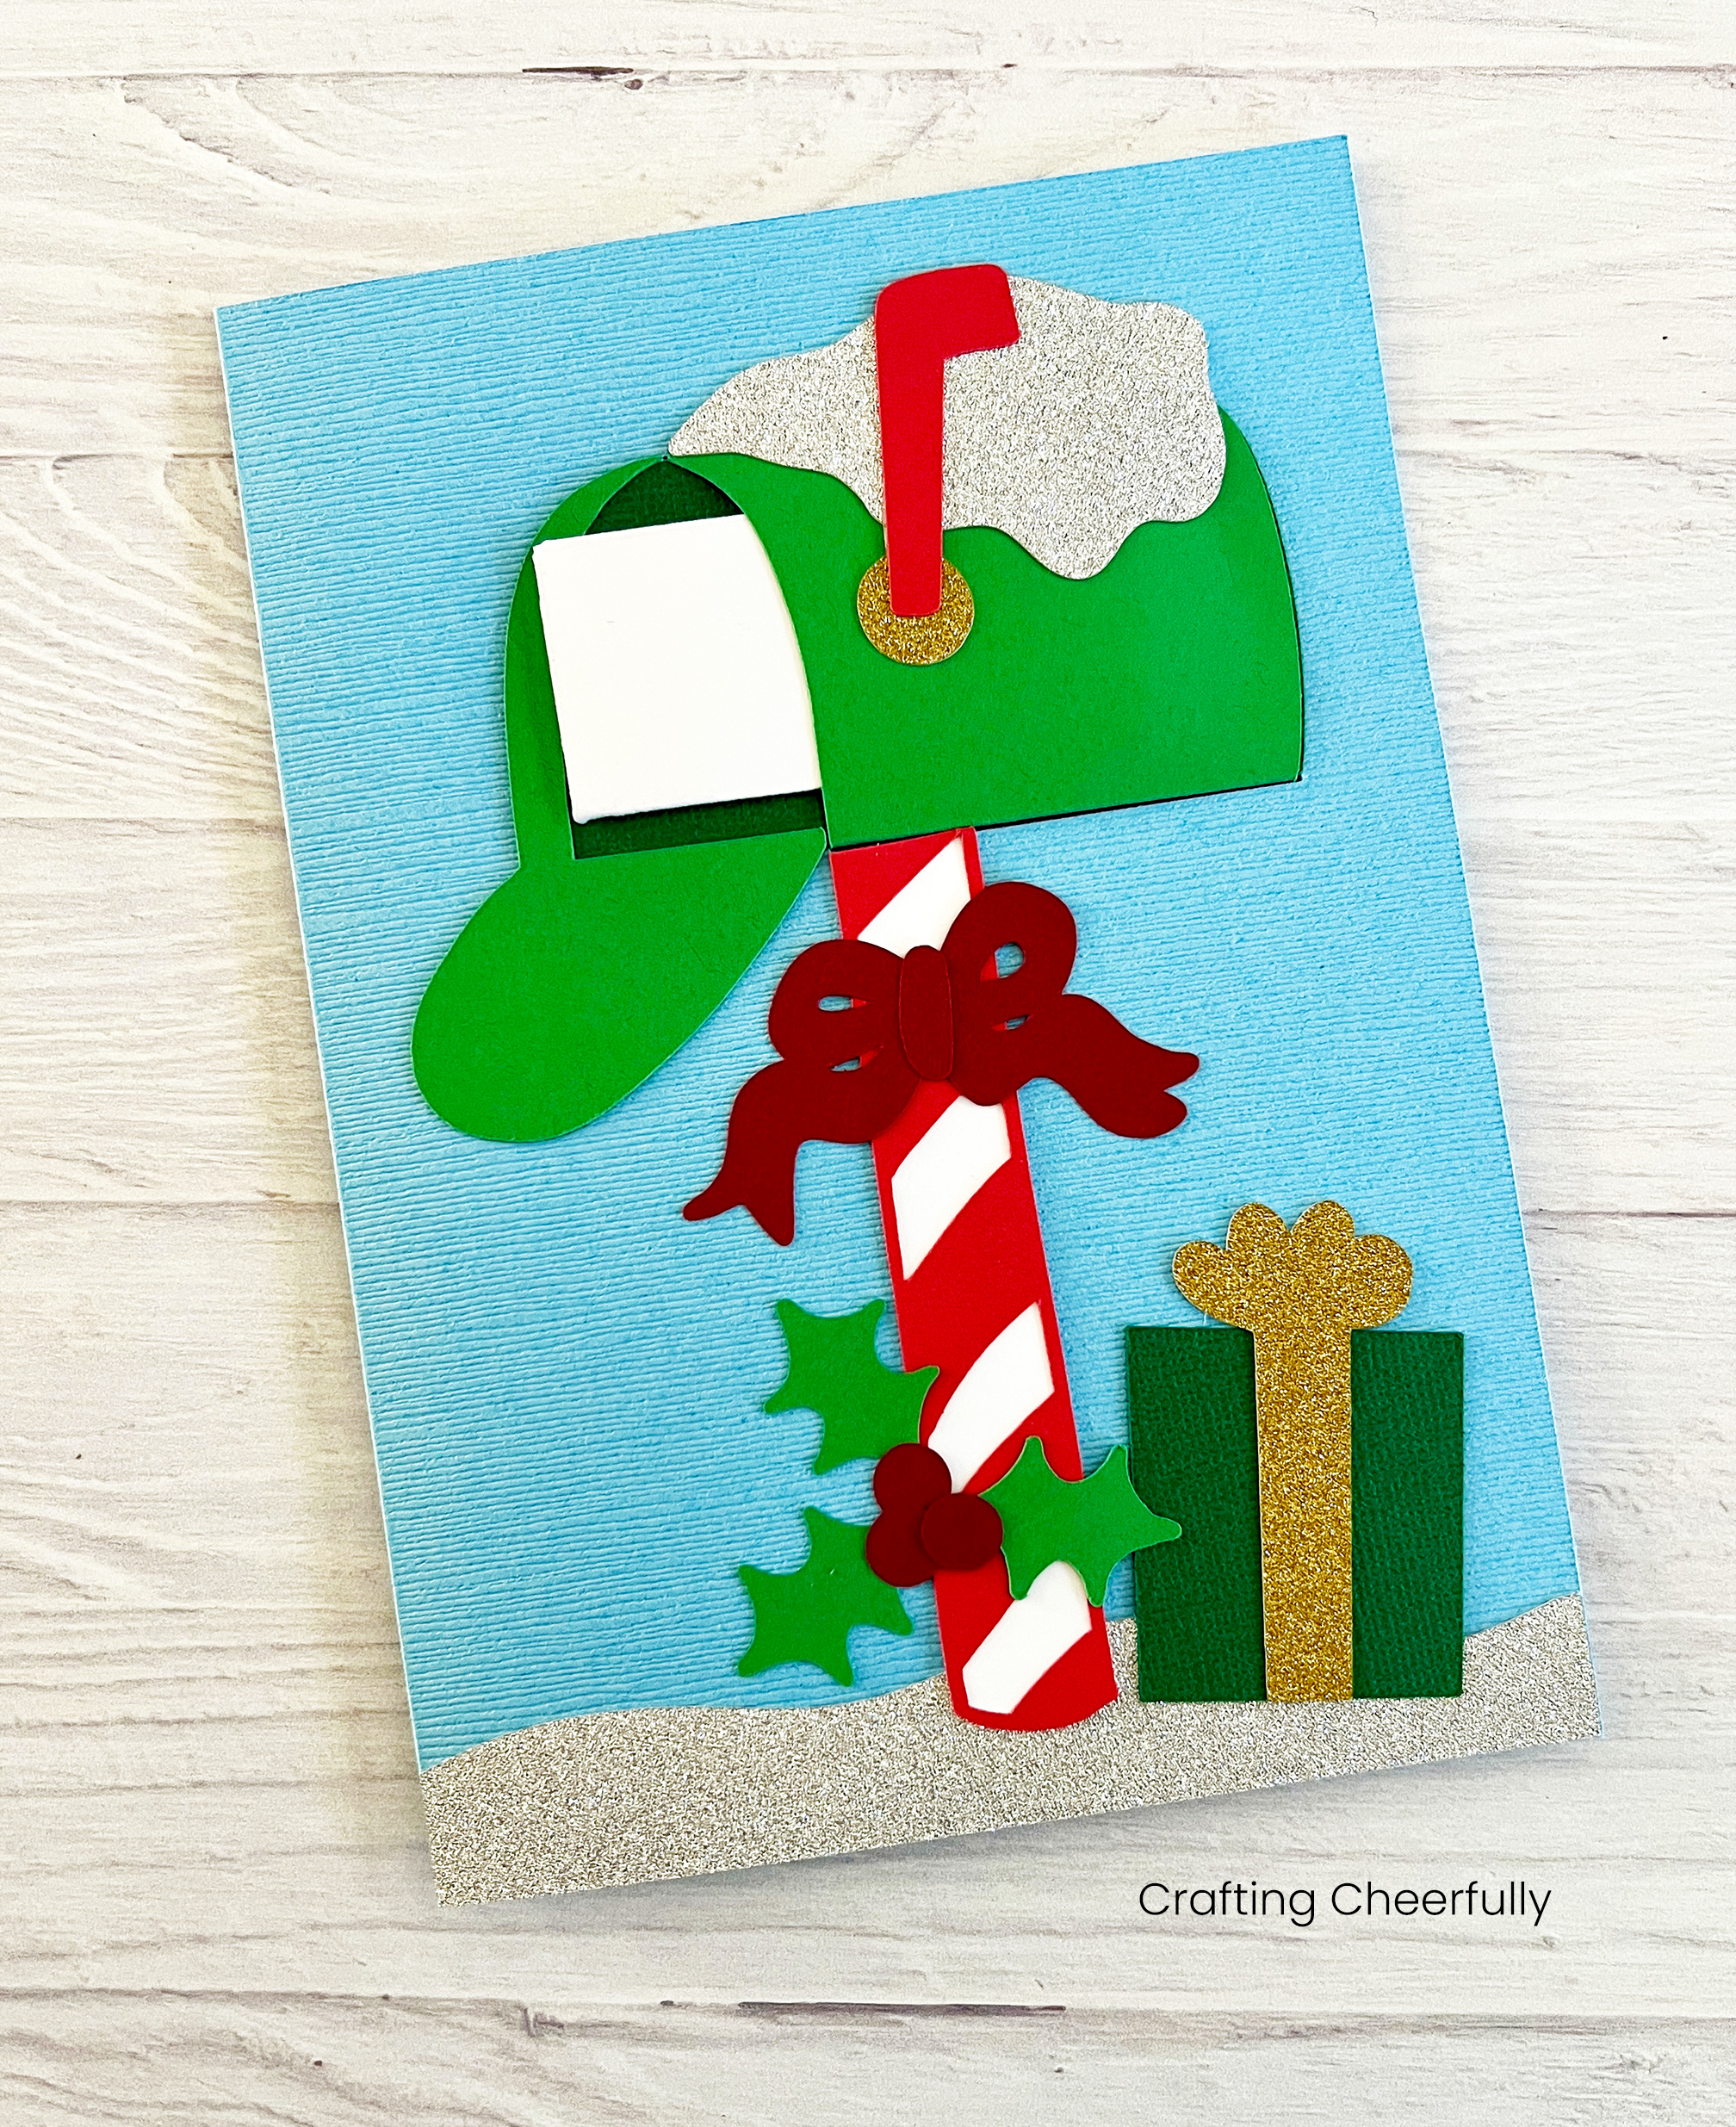
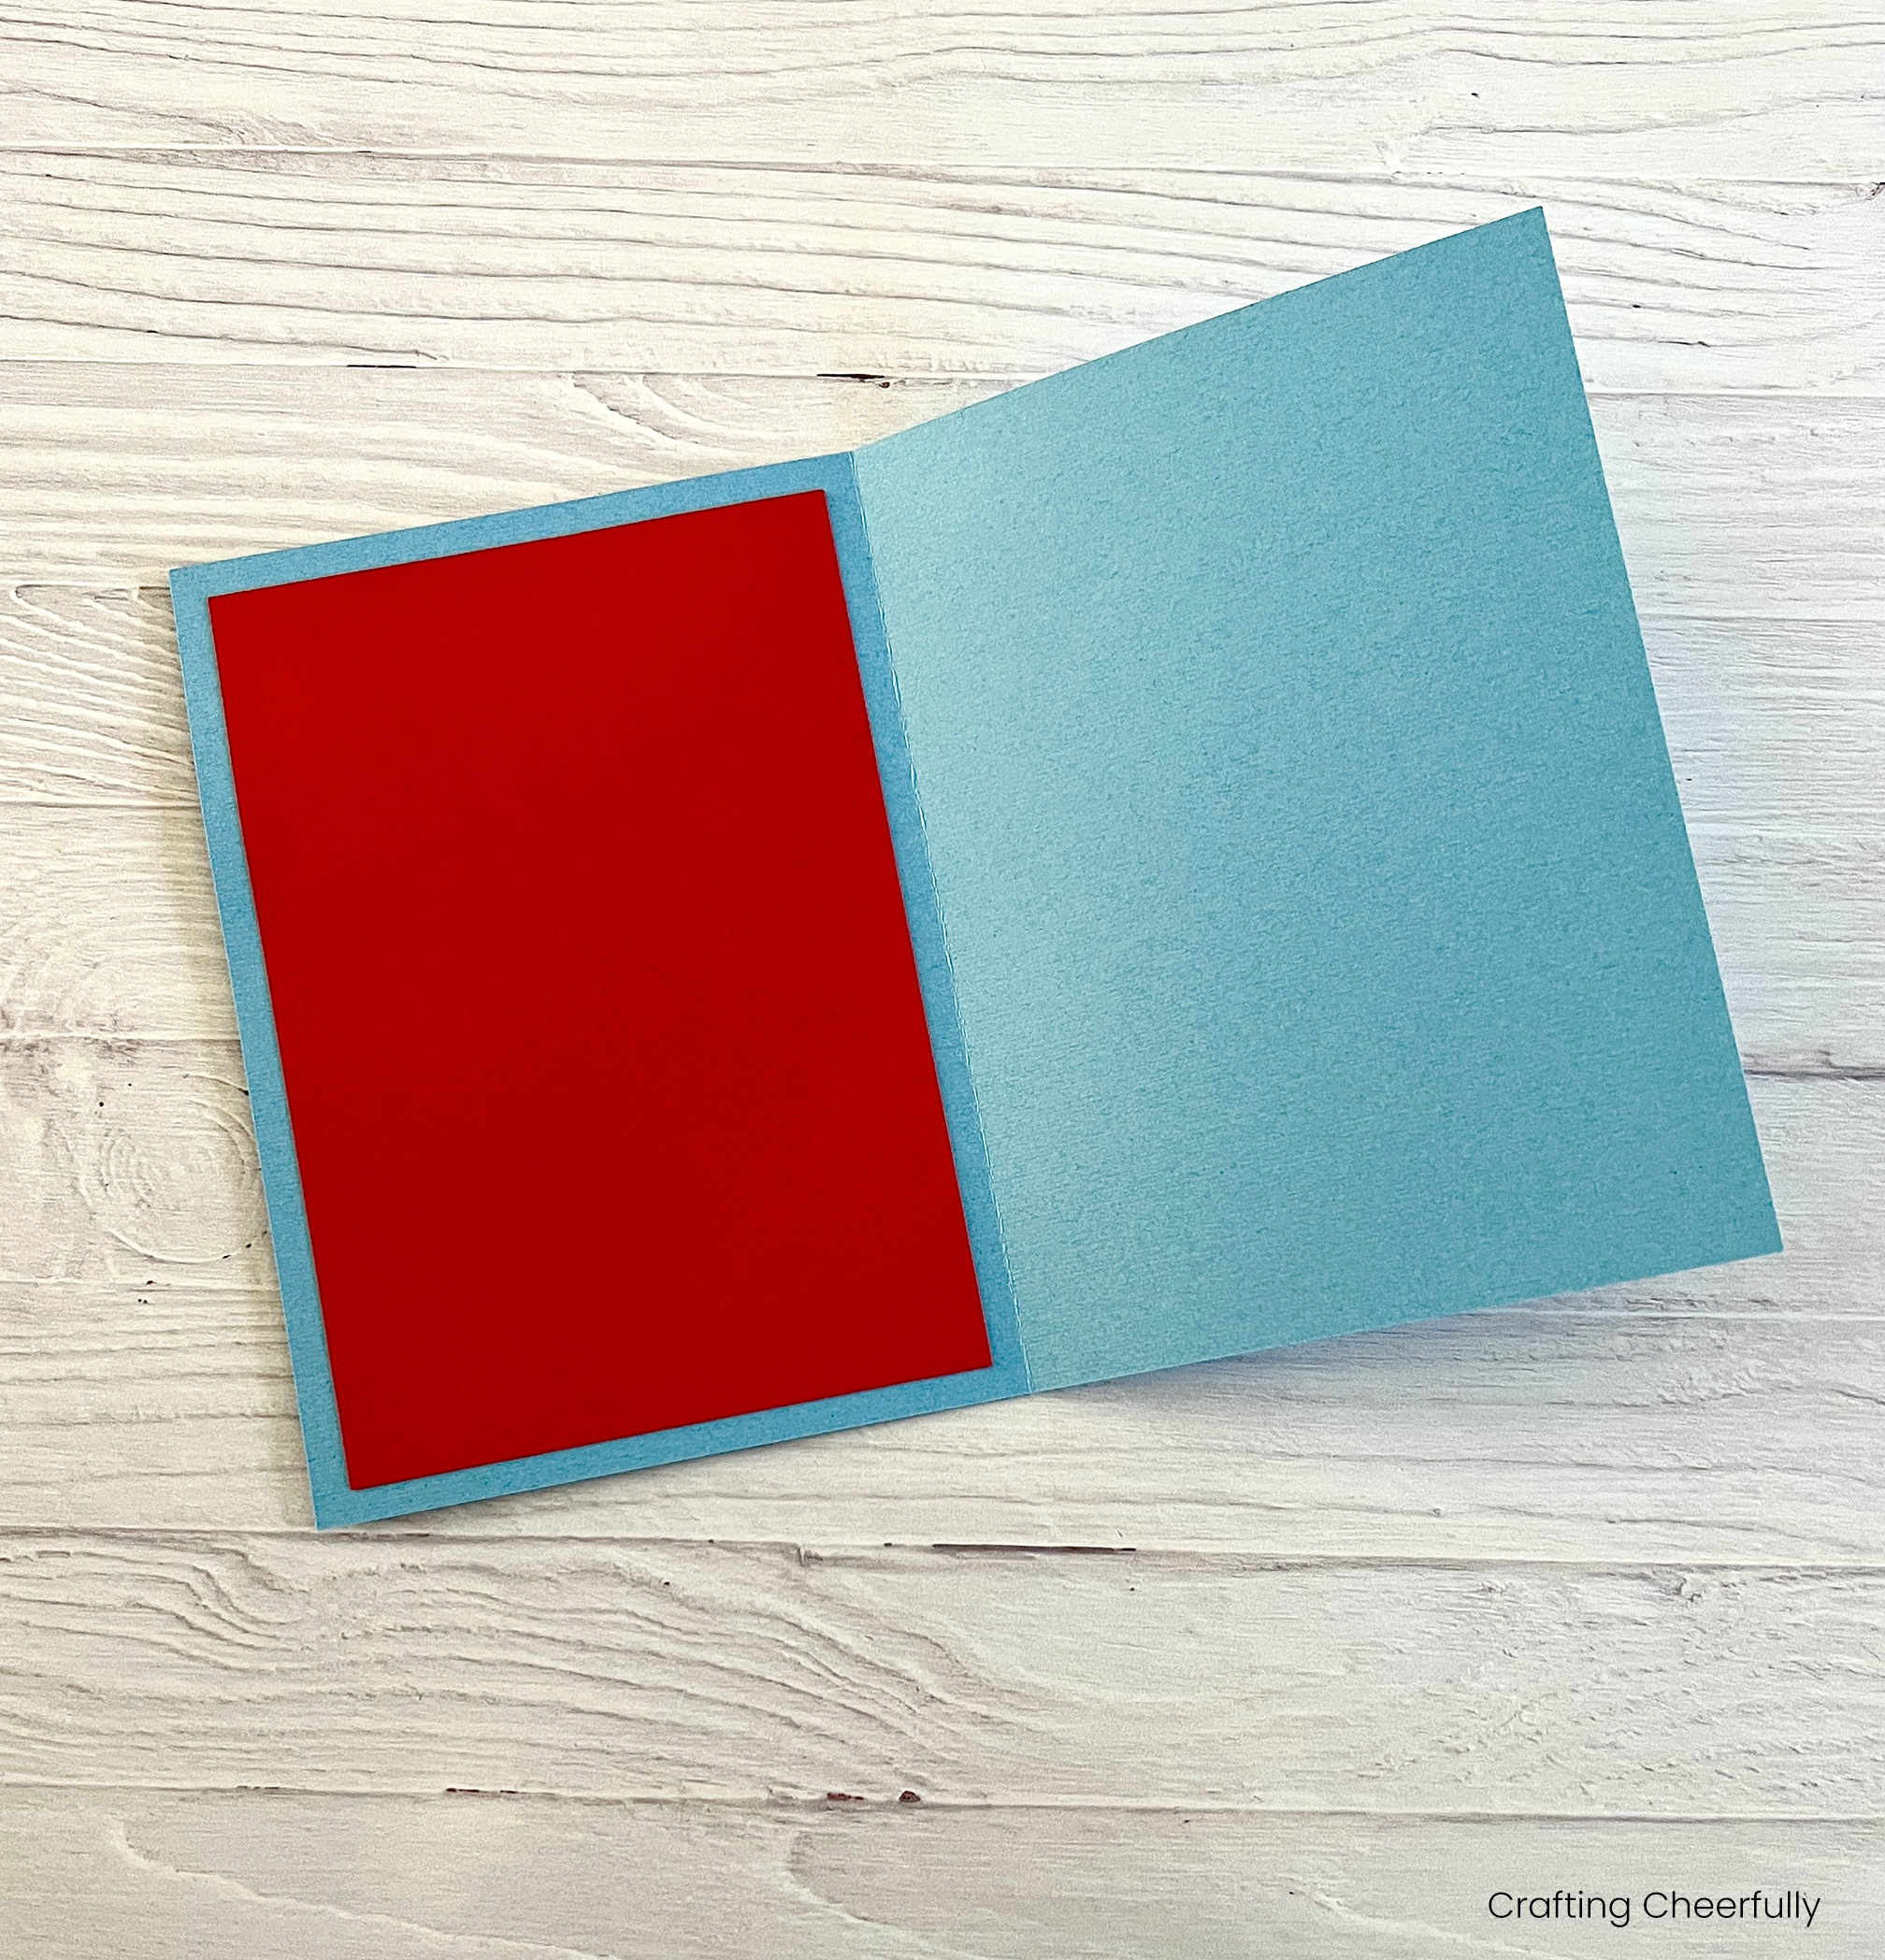
Step Four: Cover the backside of the card front. Adhere the red rectangle to cover up the green mailbox tabs that are showing on the inside of the card.
The mailbox card is complete and adorable!
I hope you enjoyed this tutorial! I’ll be back tomorrow for day eleven of my series “12 Days of Holiday Crafts”! If you love making handmade cards, be sure to check out my DIY holiday card page. A few of my favorites include my interactive Christmas cards like my Christmas Tree Pull Card, Interactive Christmas Coloring Card, and Christmas Cottage Pull Card.

The SVG cut file can be found in my Etsy Shop, Designing Cheerfully. Thank you so much for supporting my small business!