DIY Silhouette Ornament
Create a beautiful keepsake ornament for the holidays with this silhouette ornament tutorial. Learn how to create a silhouette in Cricut Design Space and how to turn that into a special ornament using paper and ribbon.

Hello Crafty Friends! It’s day nine already of my series “12 Days of Holiday Crafts” and today I’m back with a new ornament tutorial on how to create a silhouette ornament for Christmas! I made a set of silhouette ornaments when my kids were little and I’ve loved placing them on our tree each year. Their darling silhouettes are so fun to look back on.
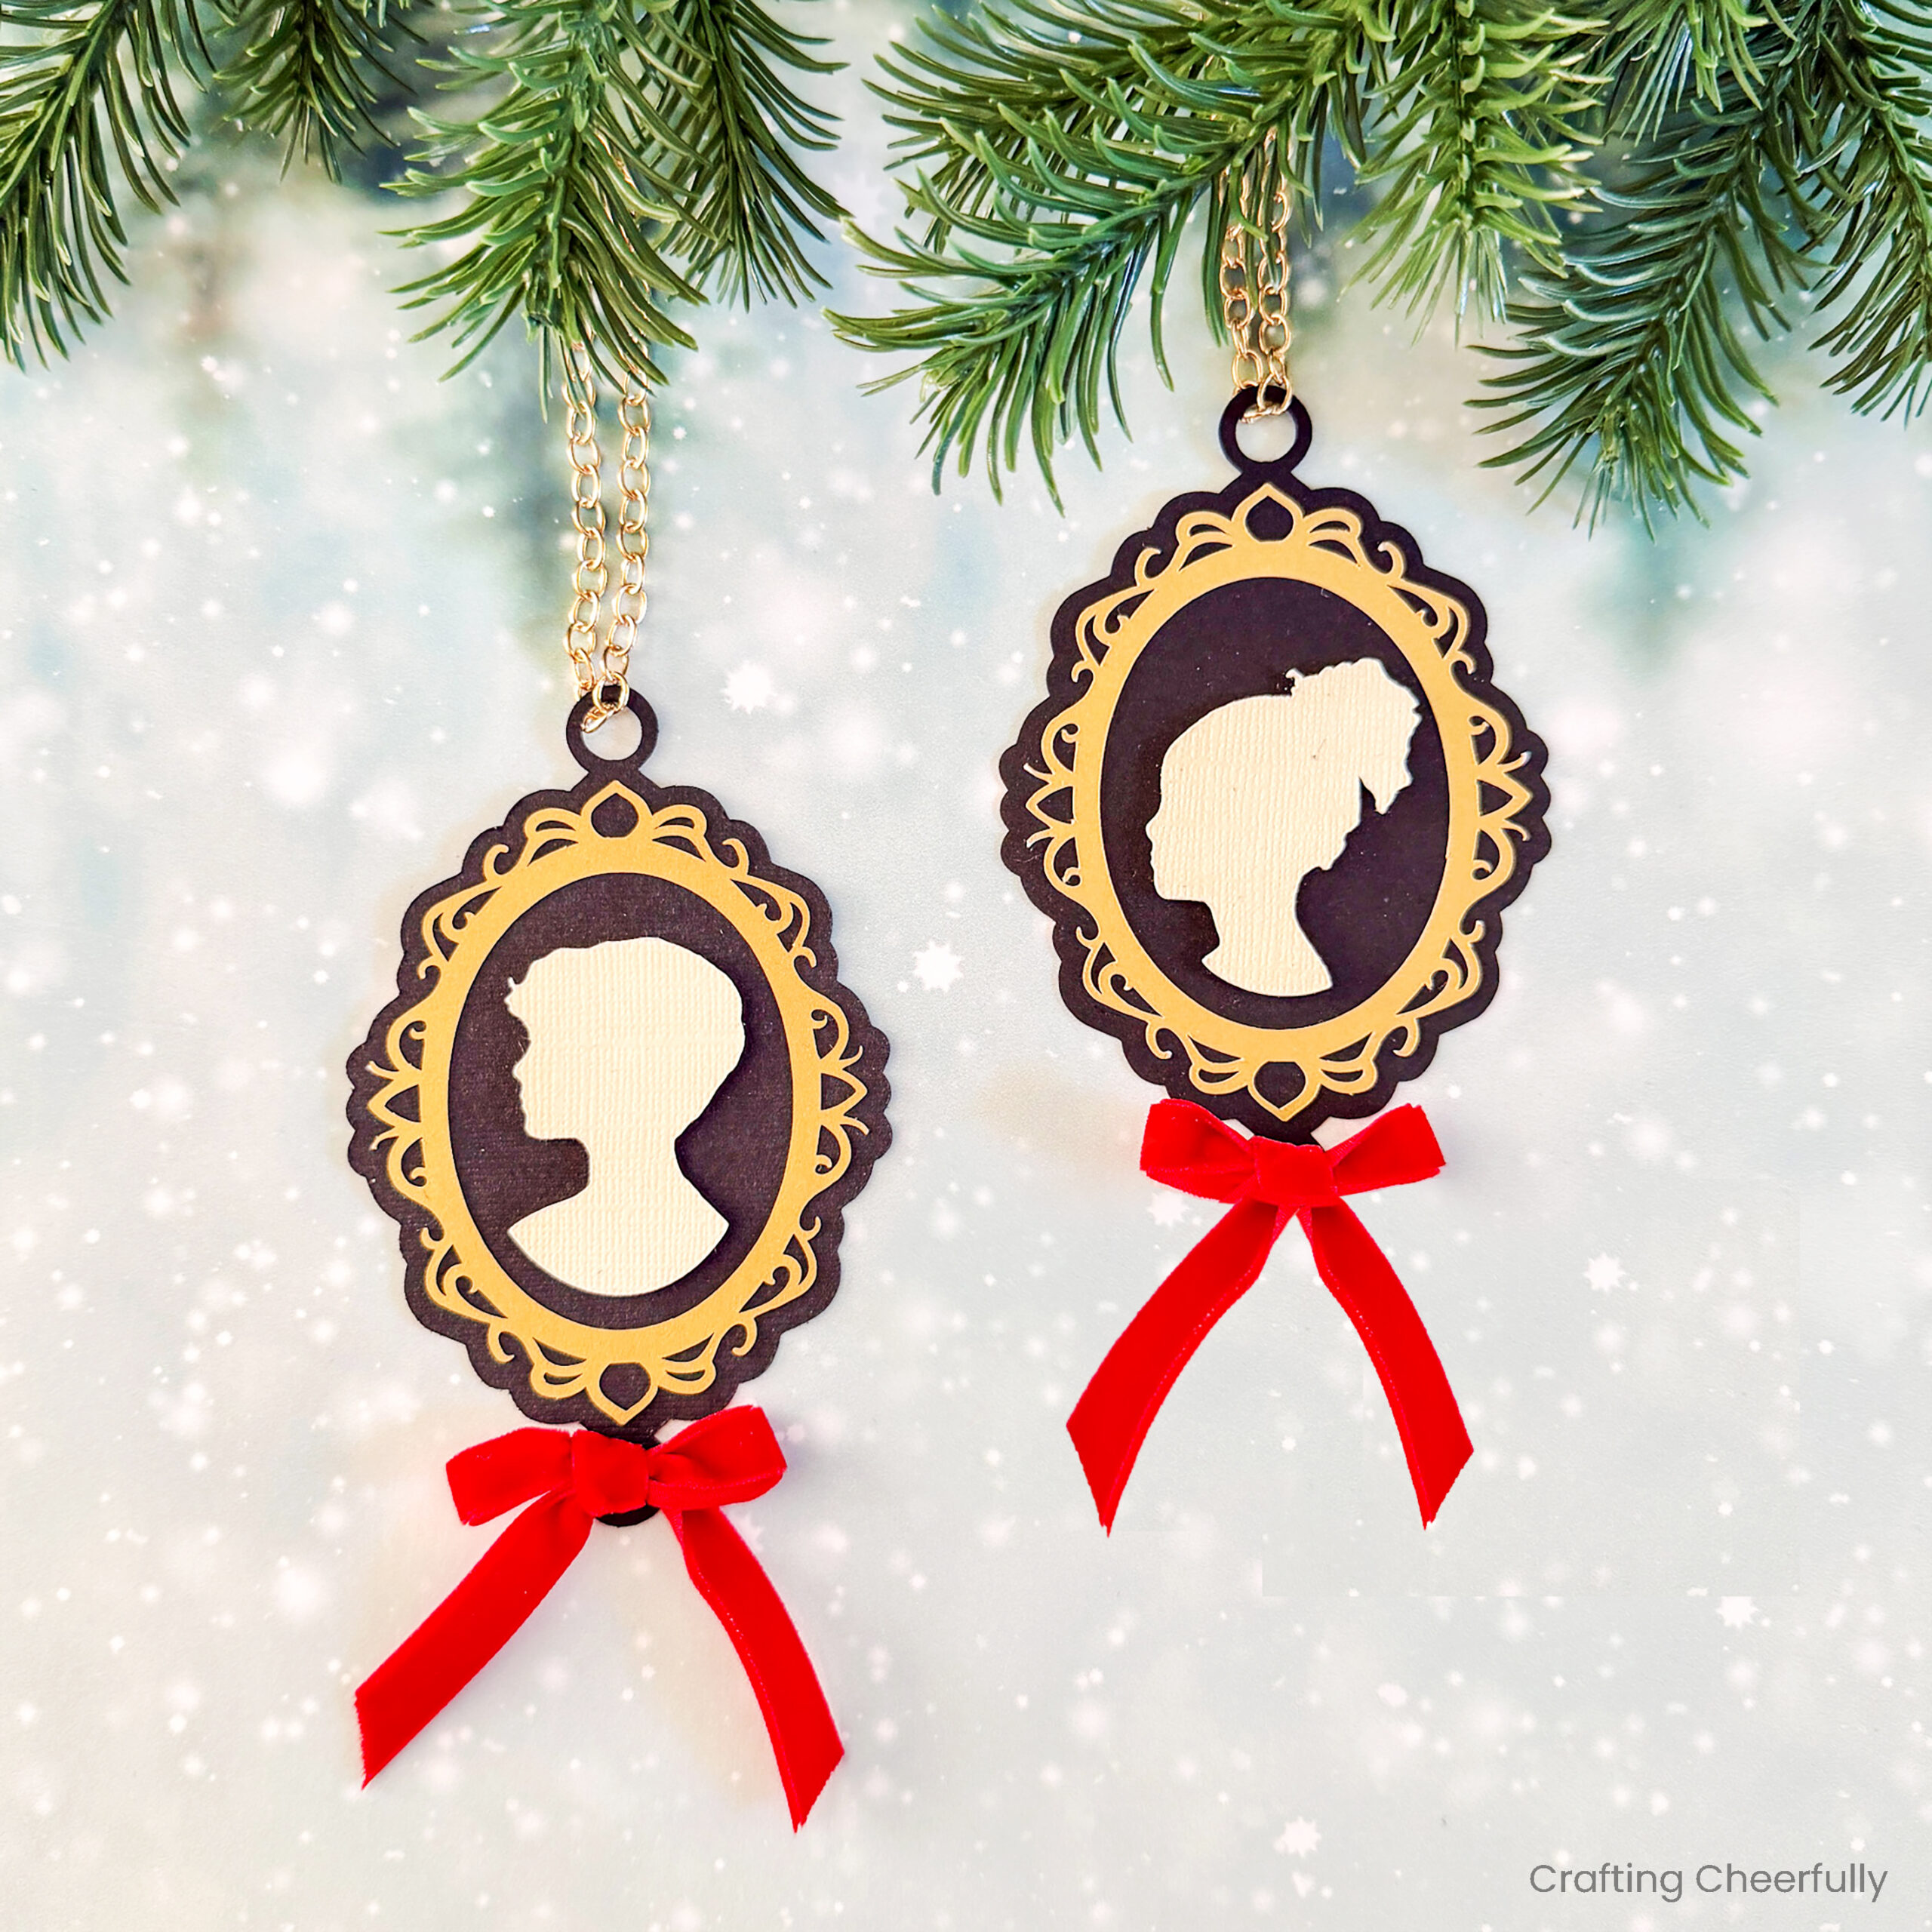
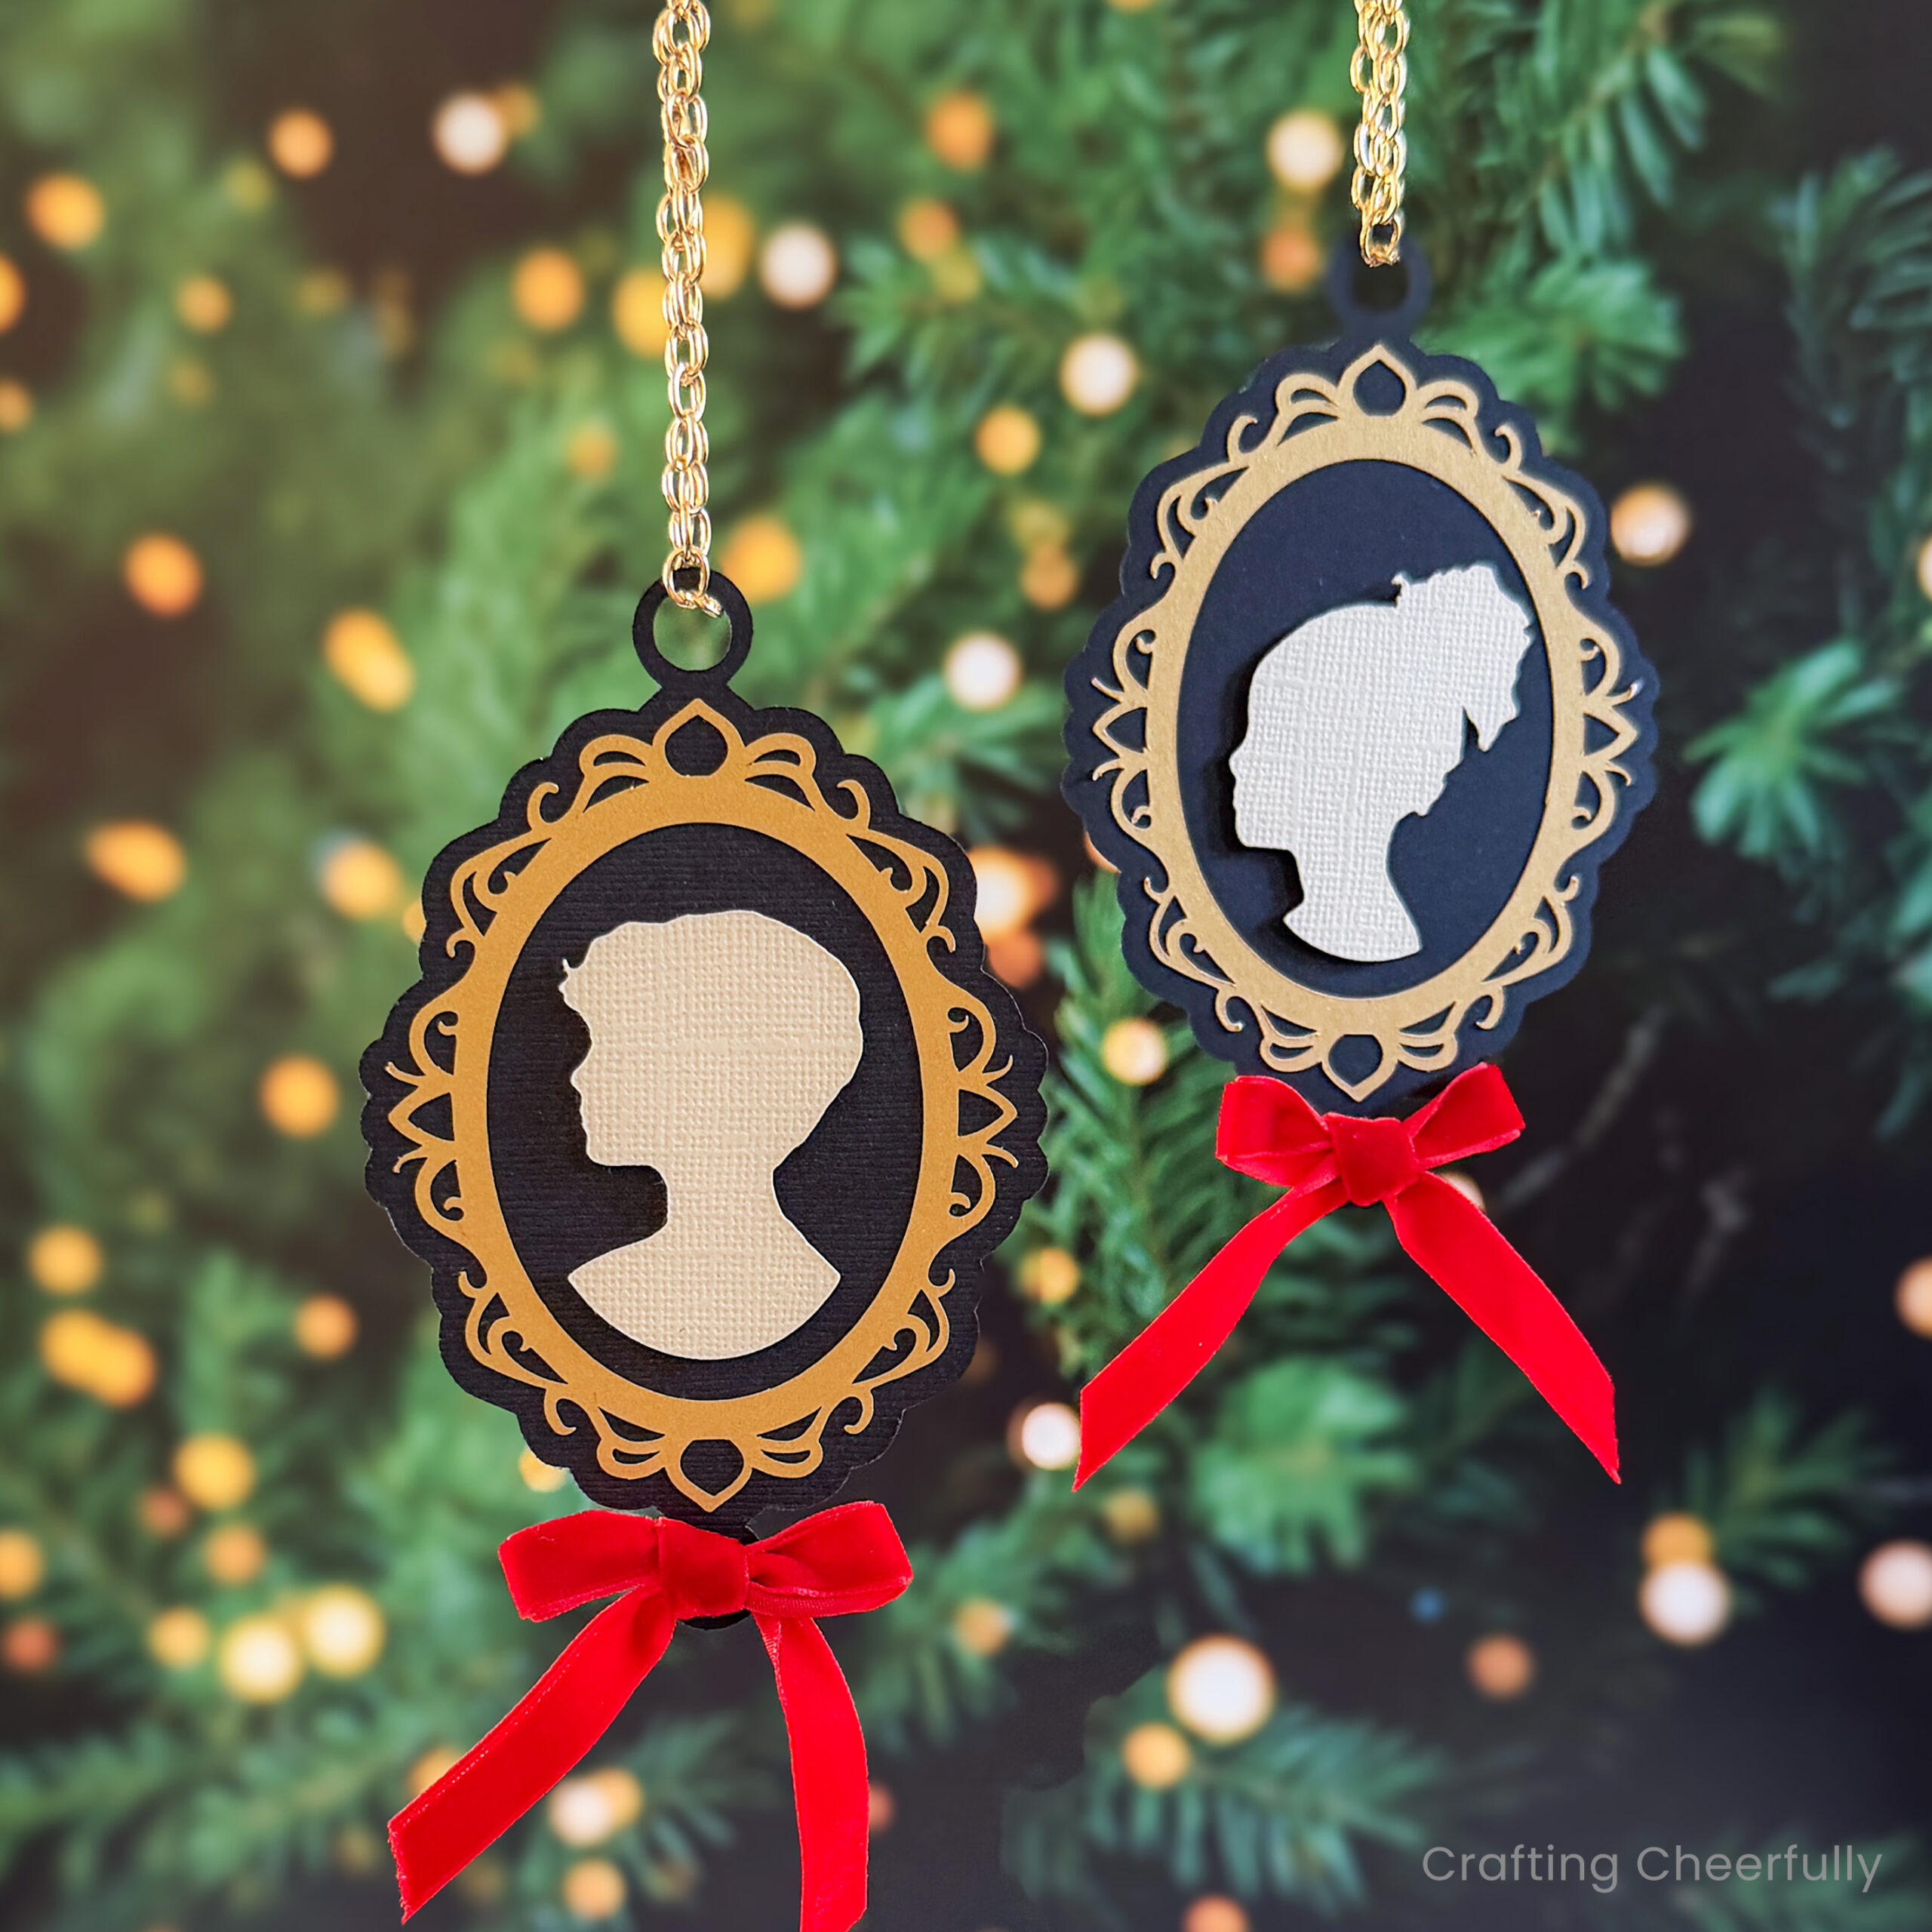
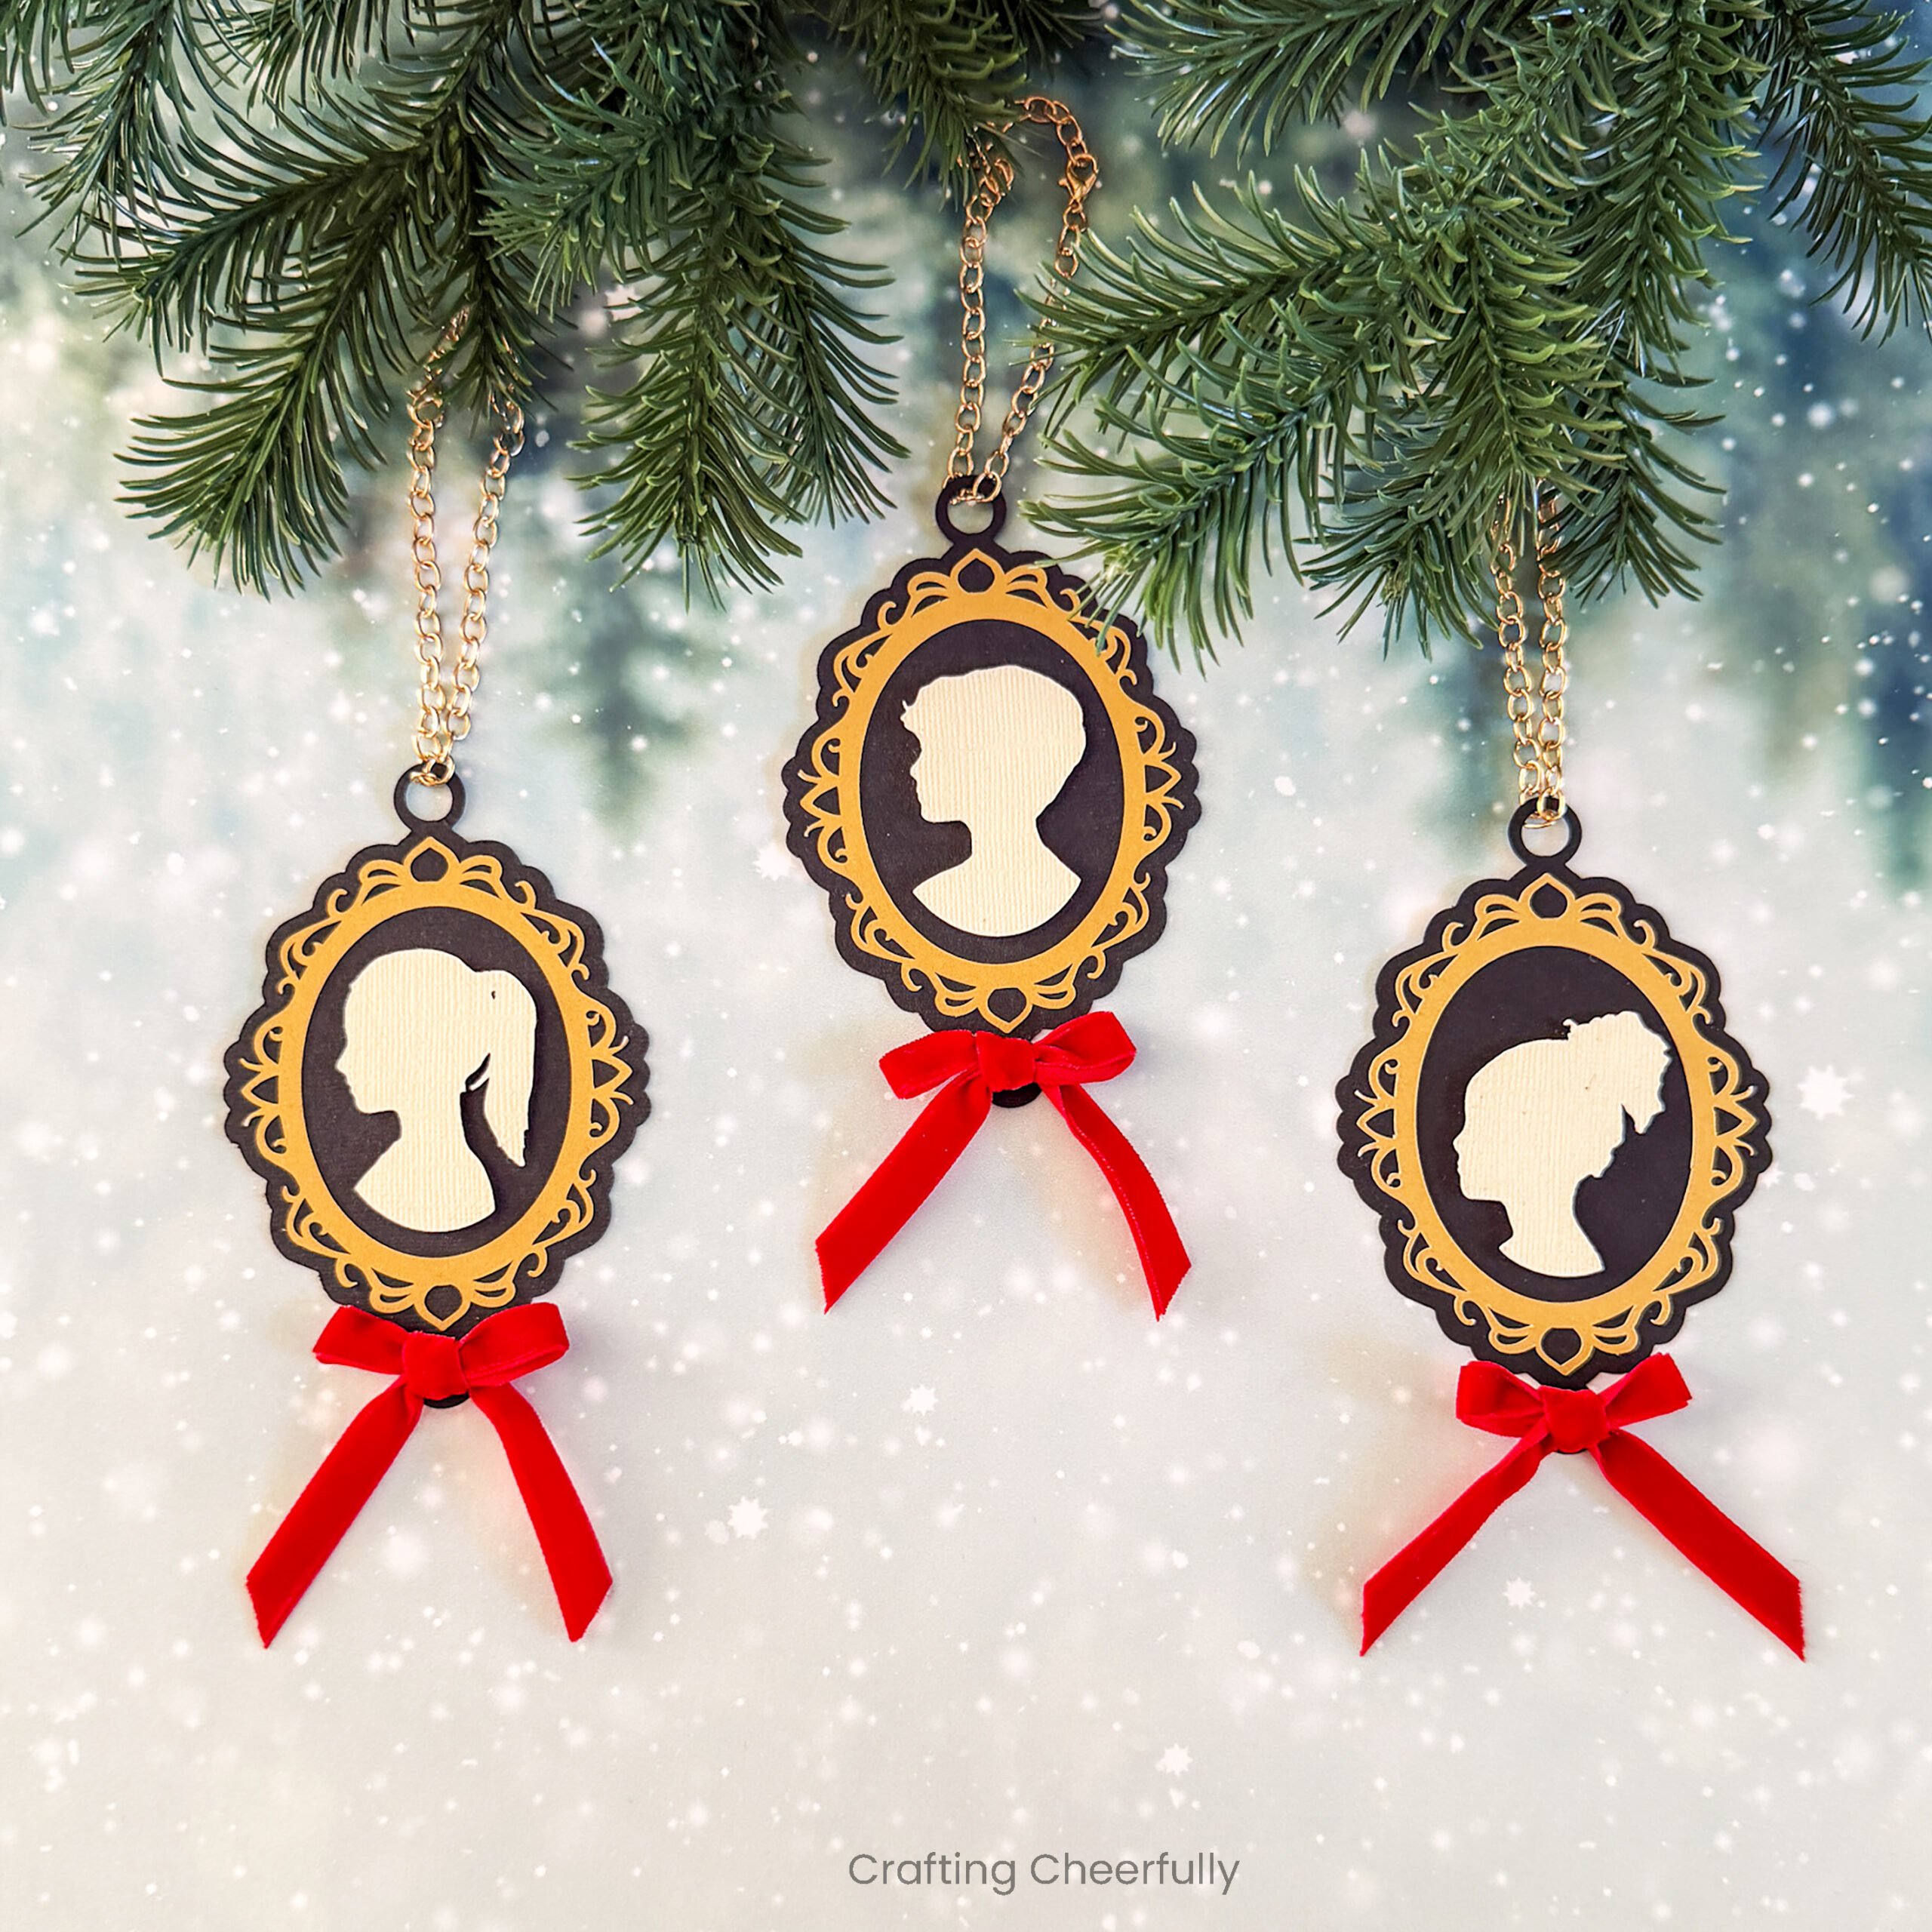
These silhouette ornaments are designed to look like vintage silhouette necklaces or cameo necklaces worn back in the day. They are a great craft to do with your cutting machine since it allows you to get the delicate cuts quickly and easily. Plus, using your cutting machine makes these a great ornament to make multiples of! I was so excited when I found the little gold chain bracelets on Amazon to use to hang them and the red velvet ribbon just feels like the perfect addition.
Below is a tutorial for creating the silhouette cut file in Cricut Design Space and a step-by-step picture tutorial for assembling the ornaments. You can also use my Cricut Design Space file to get the exact same background I used, or you can add the silhouette to a wooden or glass ornament for a different look.
How to Make a Silhouette Ornament
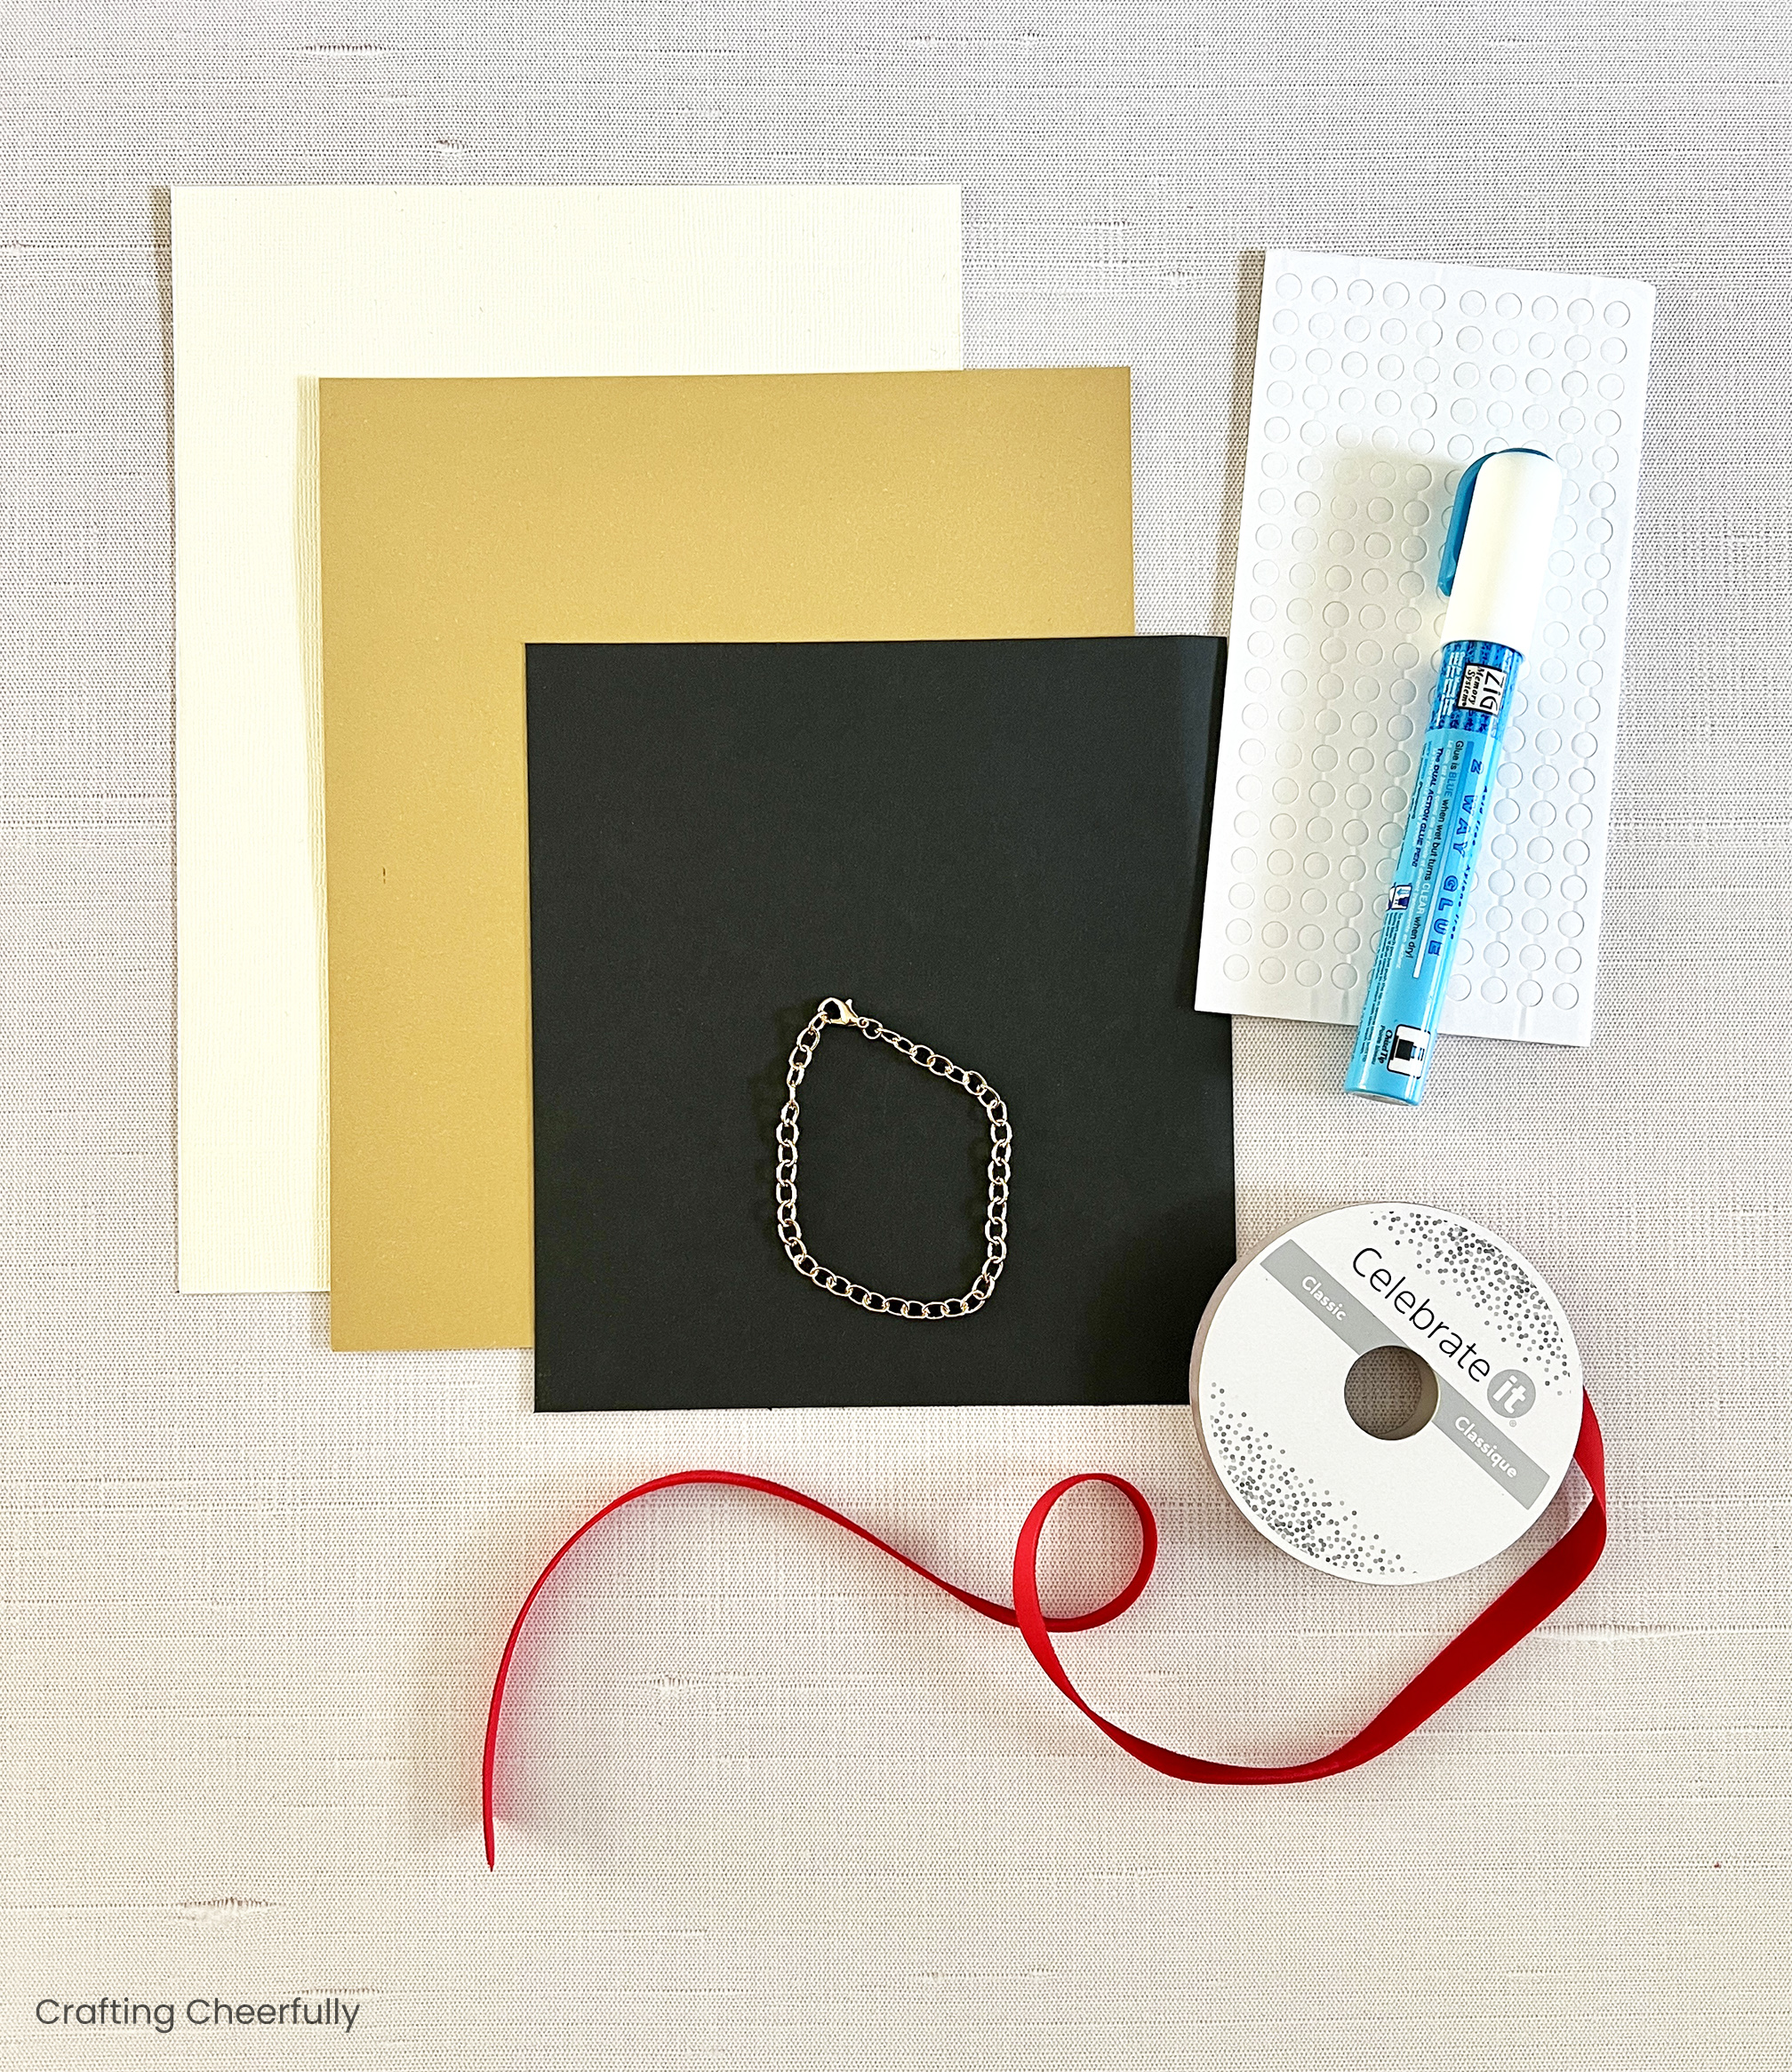
Supplies Needed
- Cricut Design Space File
- Black, Cream, and Gold Cardstock
- 3/8″ Red velvet ribbon
- Gold bracelet chain
- Foam Dots
- Adhesive – Bearly Art Glue or Zig Glue Pen
- Cricut Cutting Machine
- Cricut Standard Mat
- Cricut Tools
- Cricut Brayer
Setting up the File in Cricut Design Space
Step One: Open the Cricut Design Space file.

Step Two: Upload the picture into Cricut Design Space. Use the “Remove Background” tool to remove the background of the photo. If possible, try to use a picture with a solid background, or take a special picture of the child in front of a plain wall.

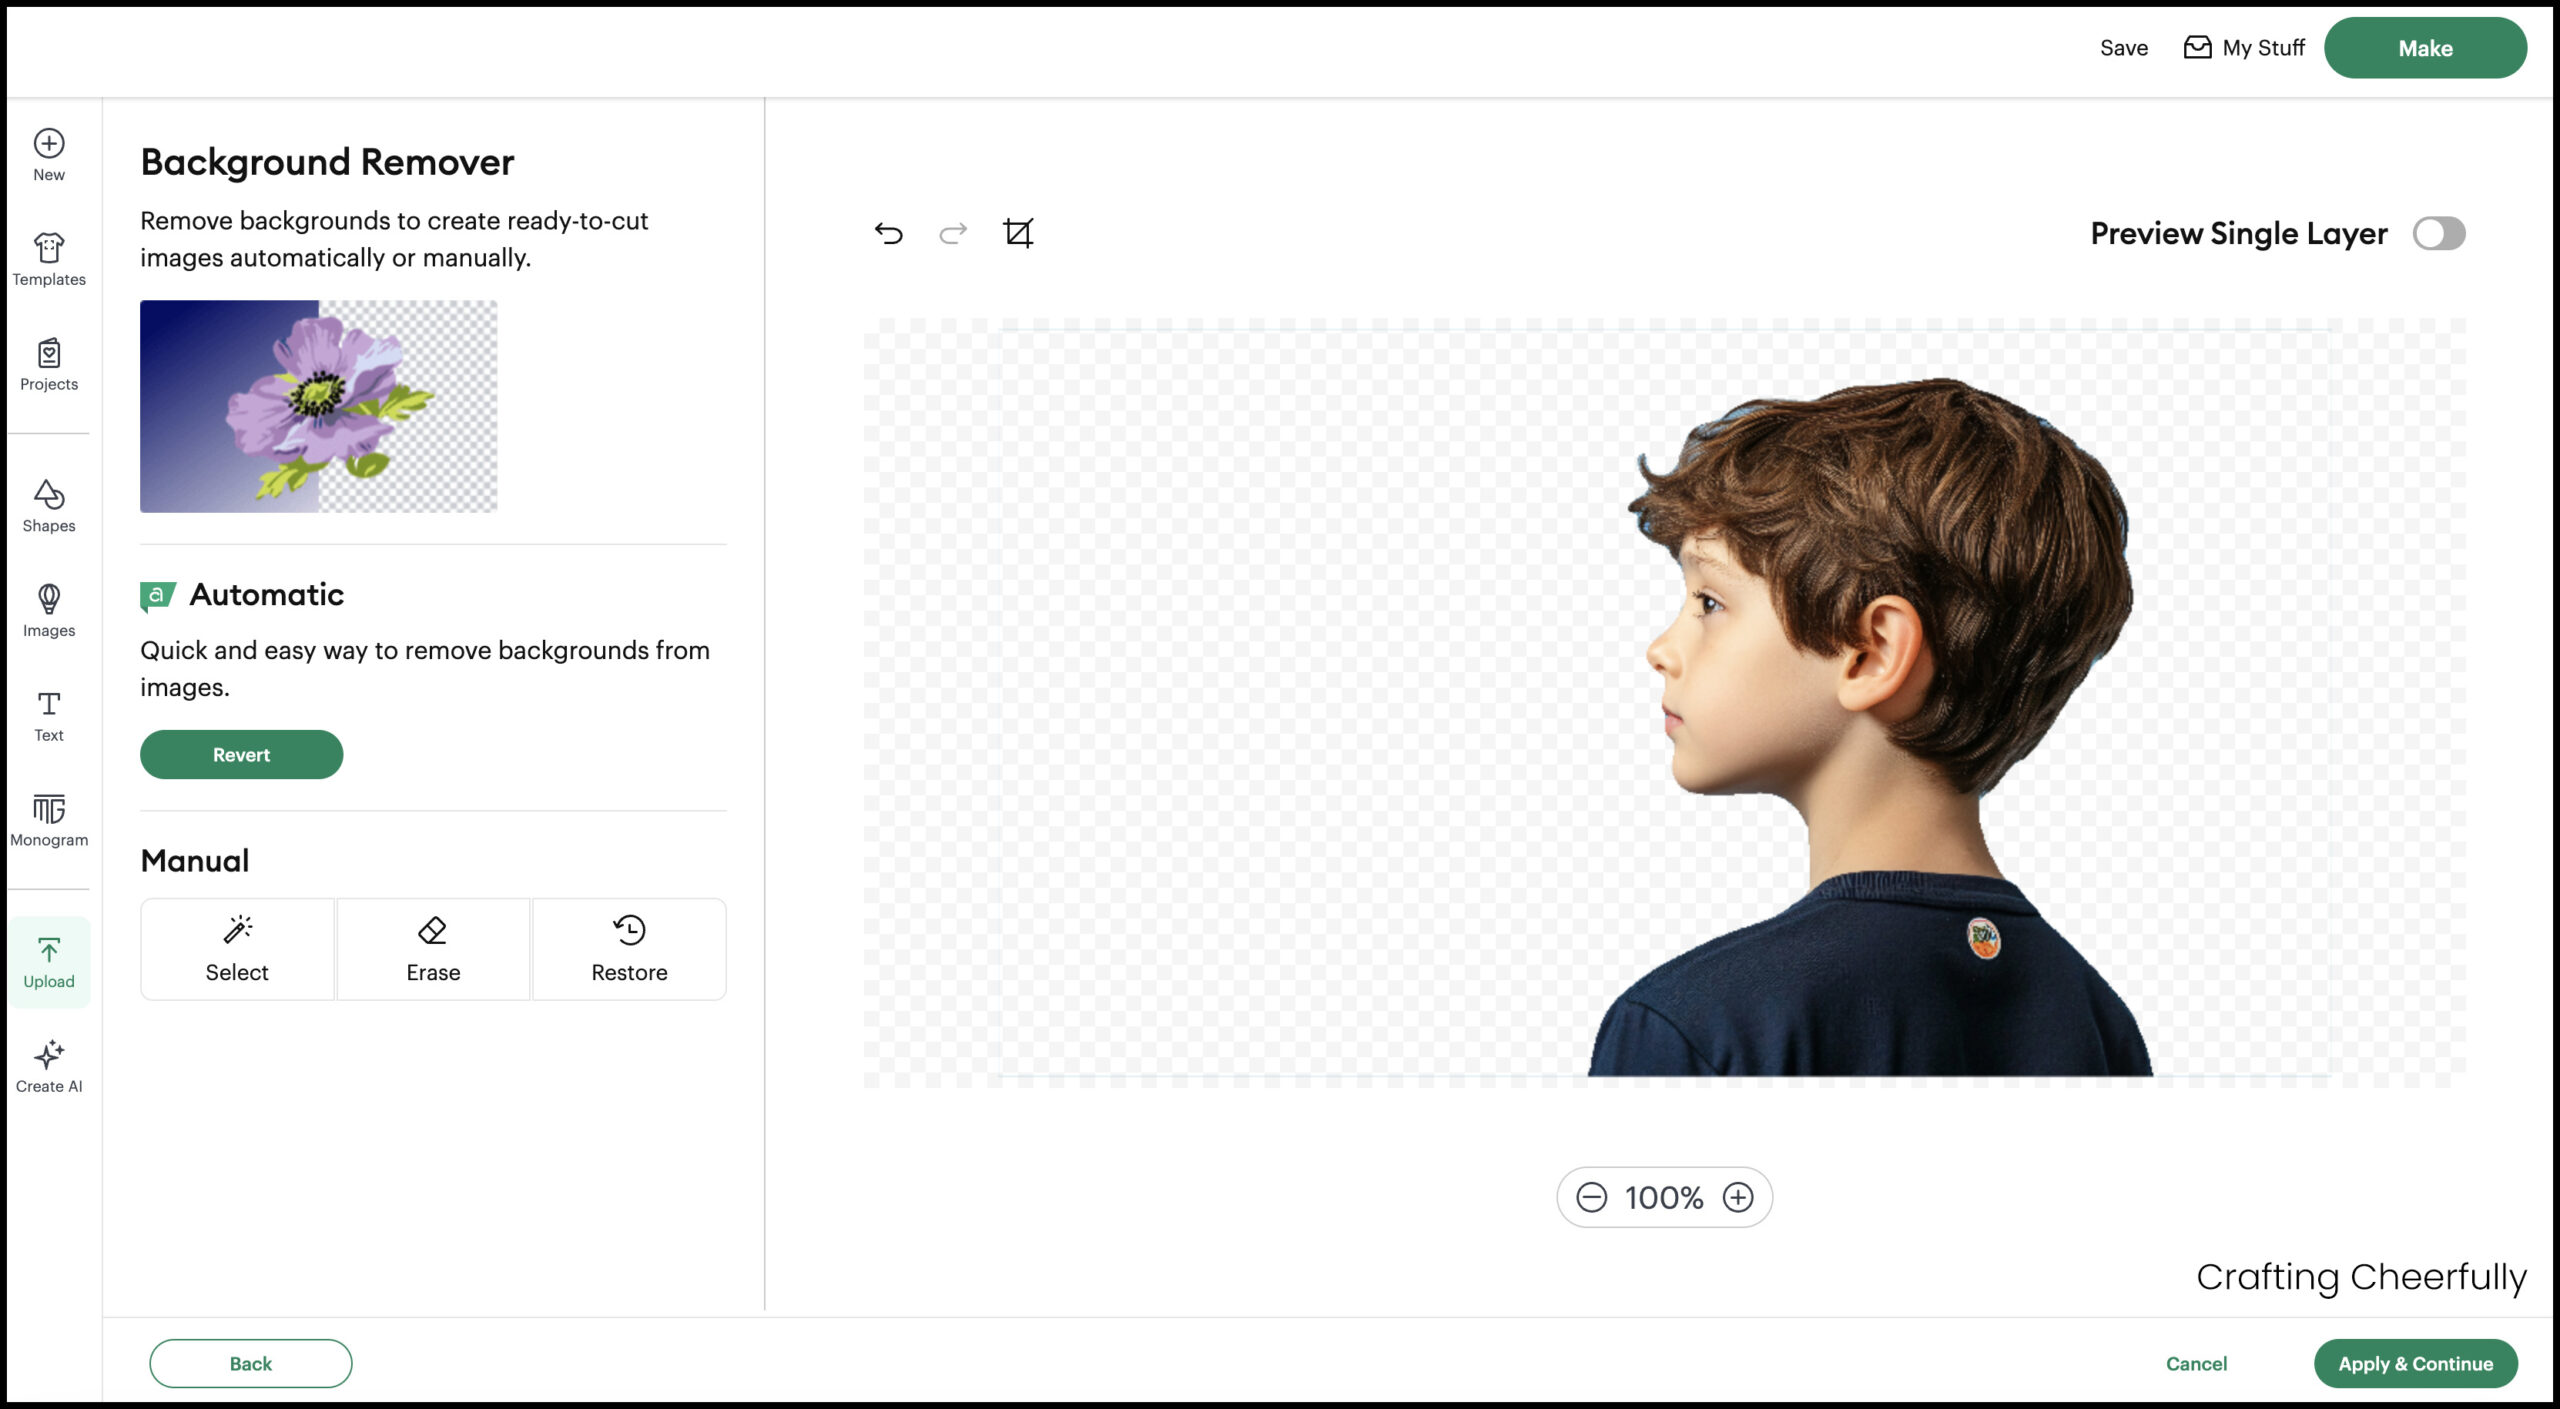
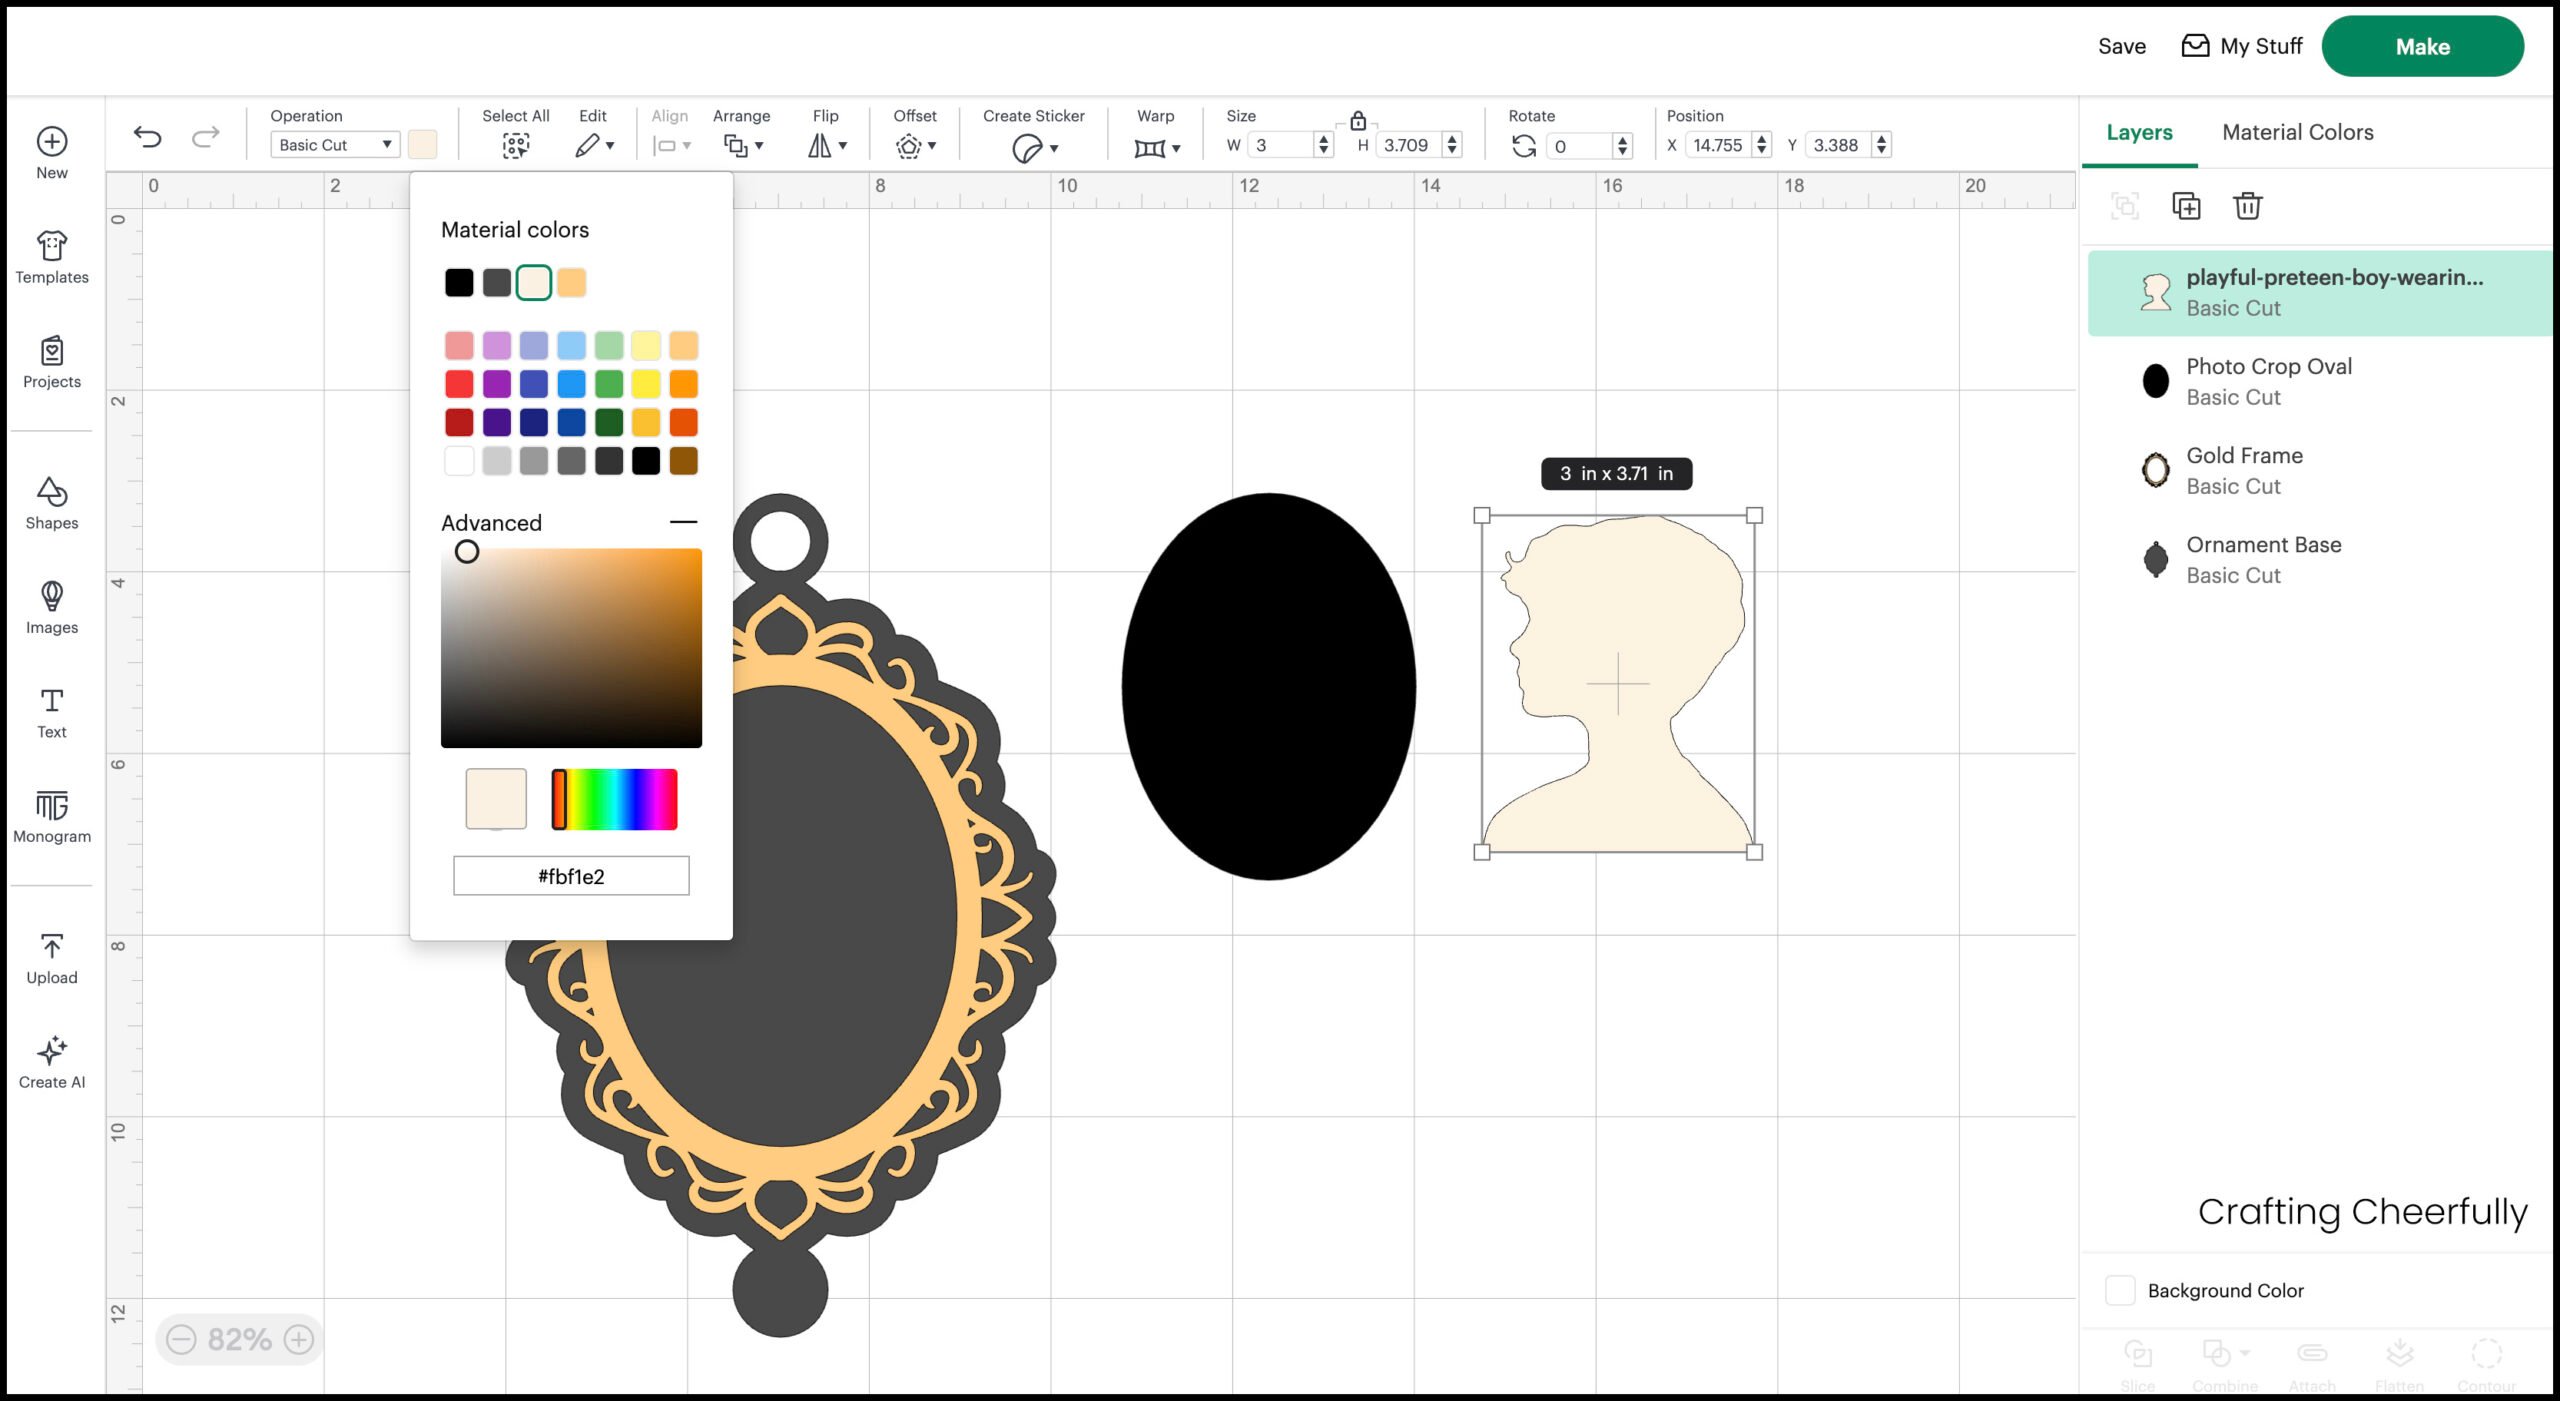
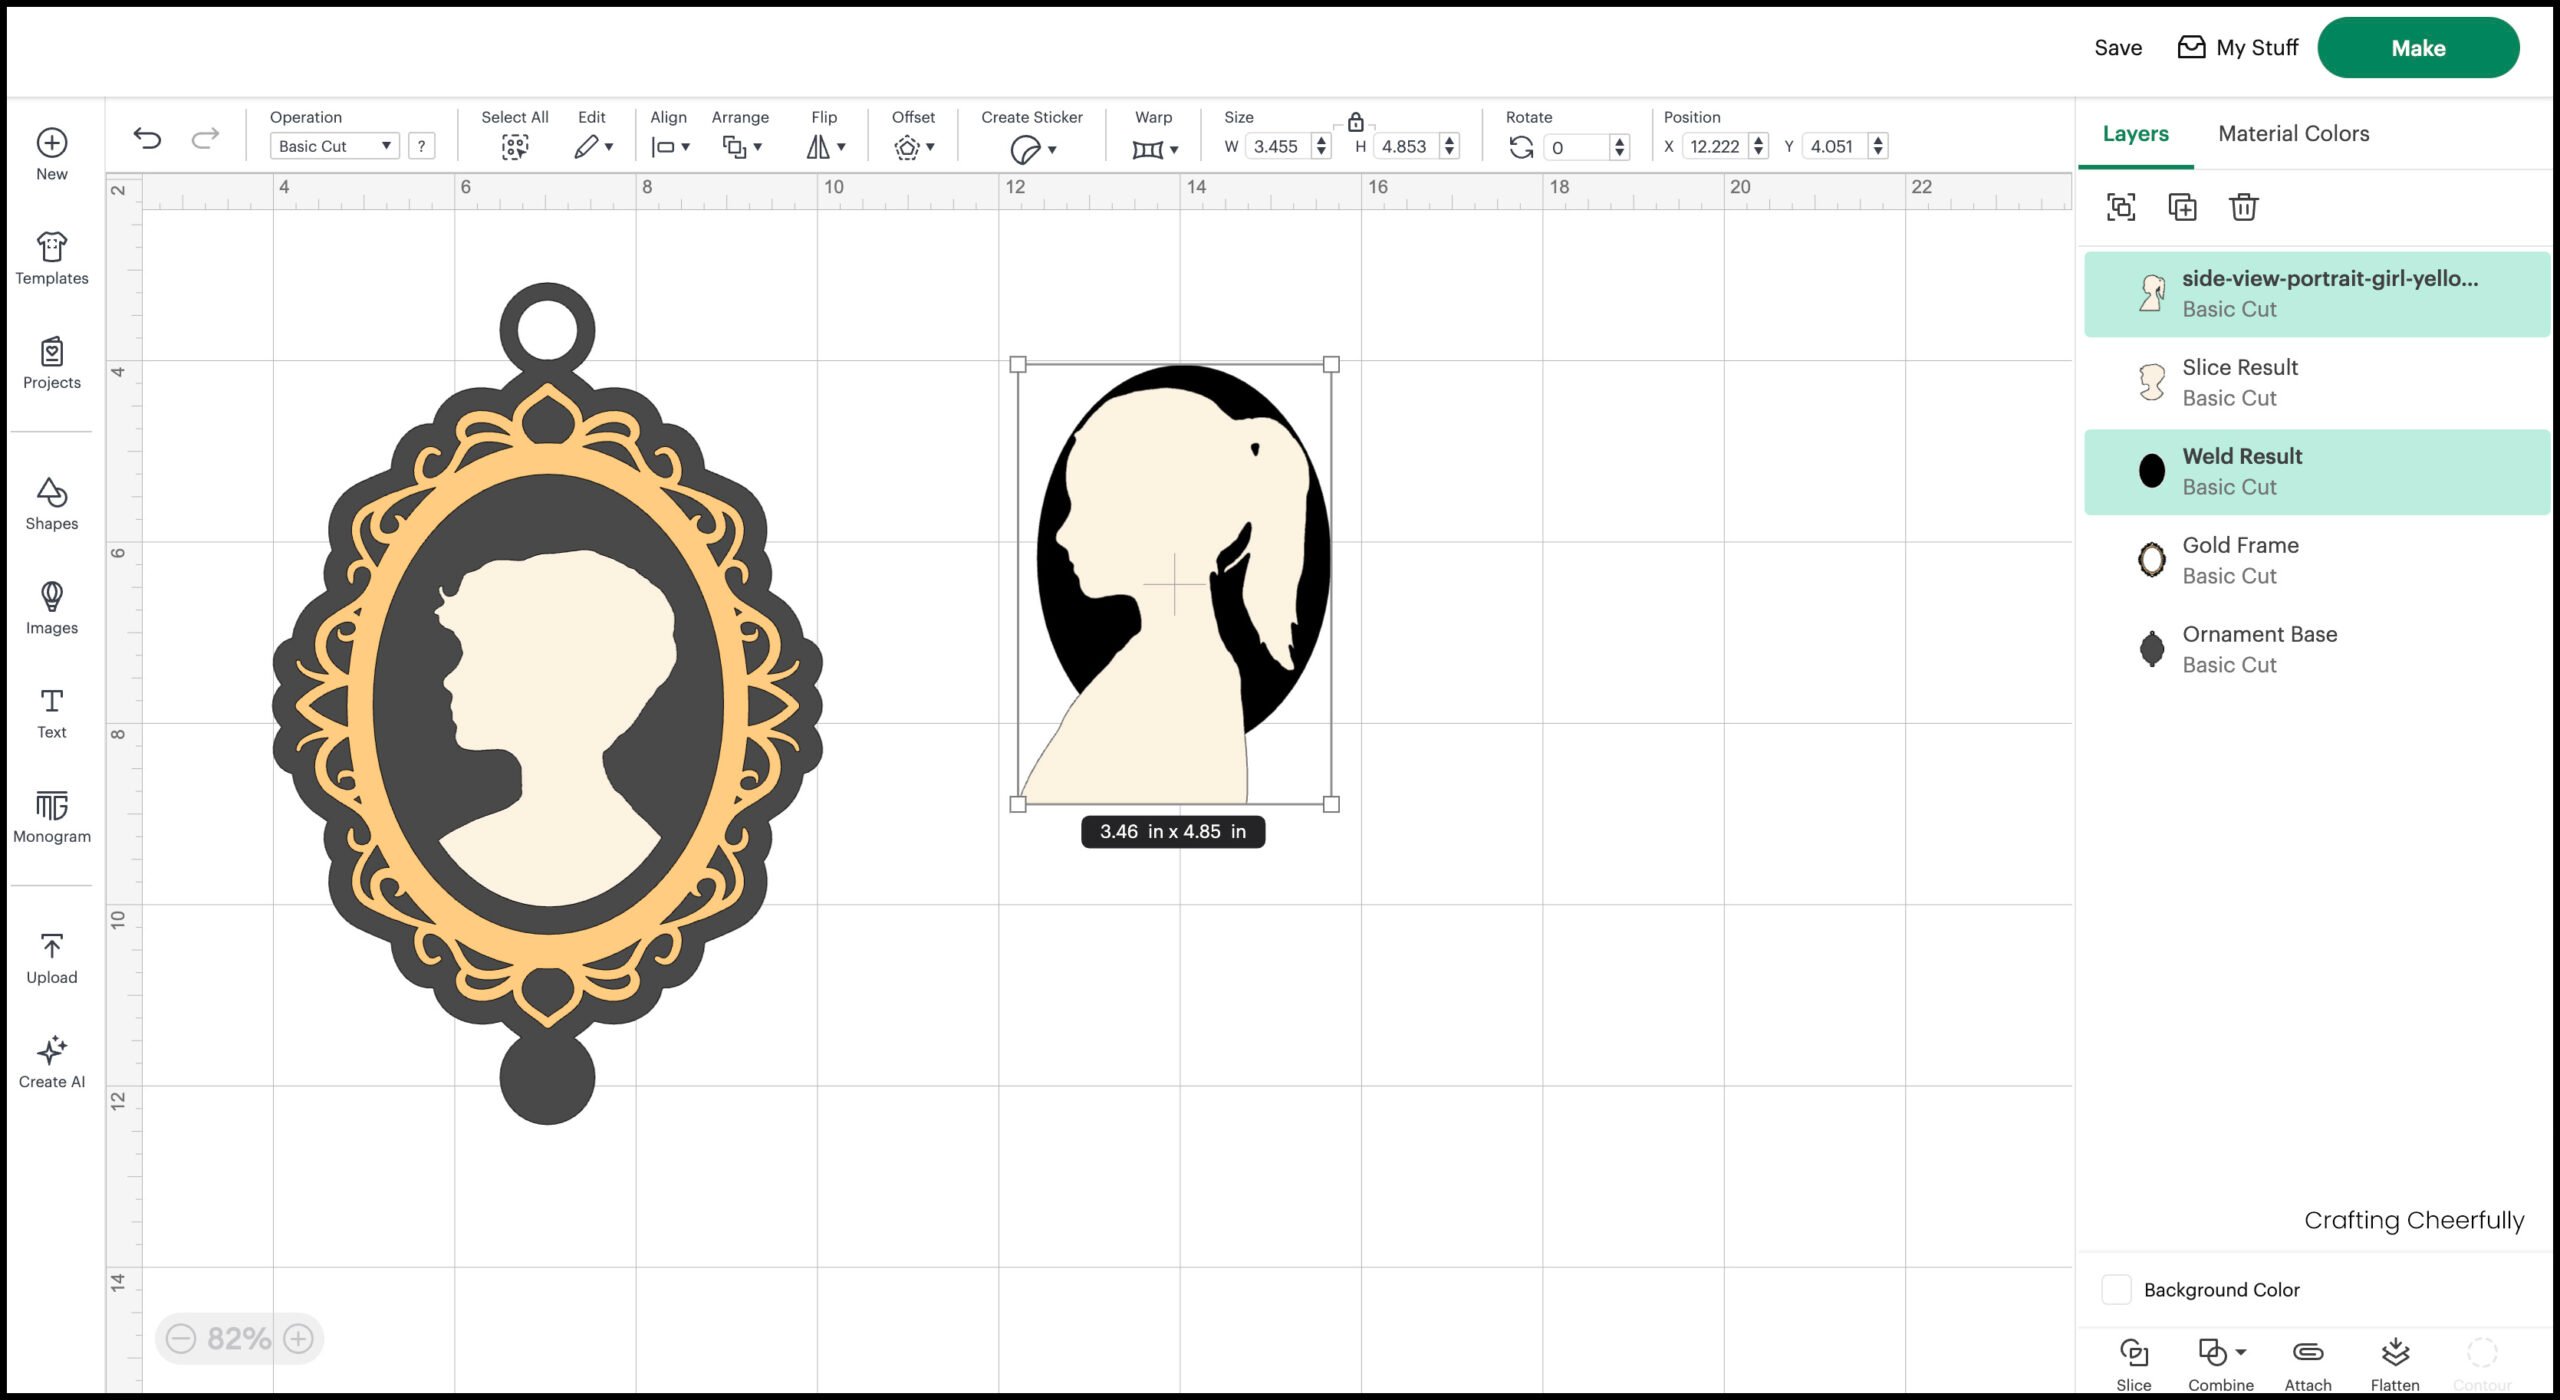
Step Three: After the background is removed, save the image as a “Single Layer” so it will become a silhouette. Insert the image onto your canvas. Adjust the size to 3″ tall and change the color to a light cream.

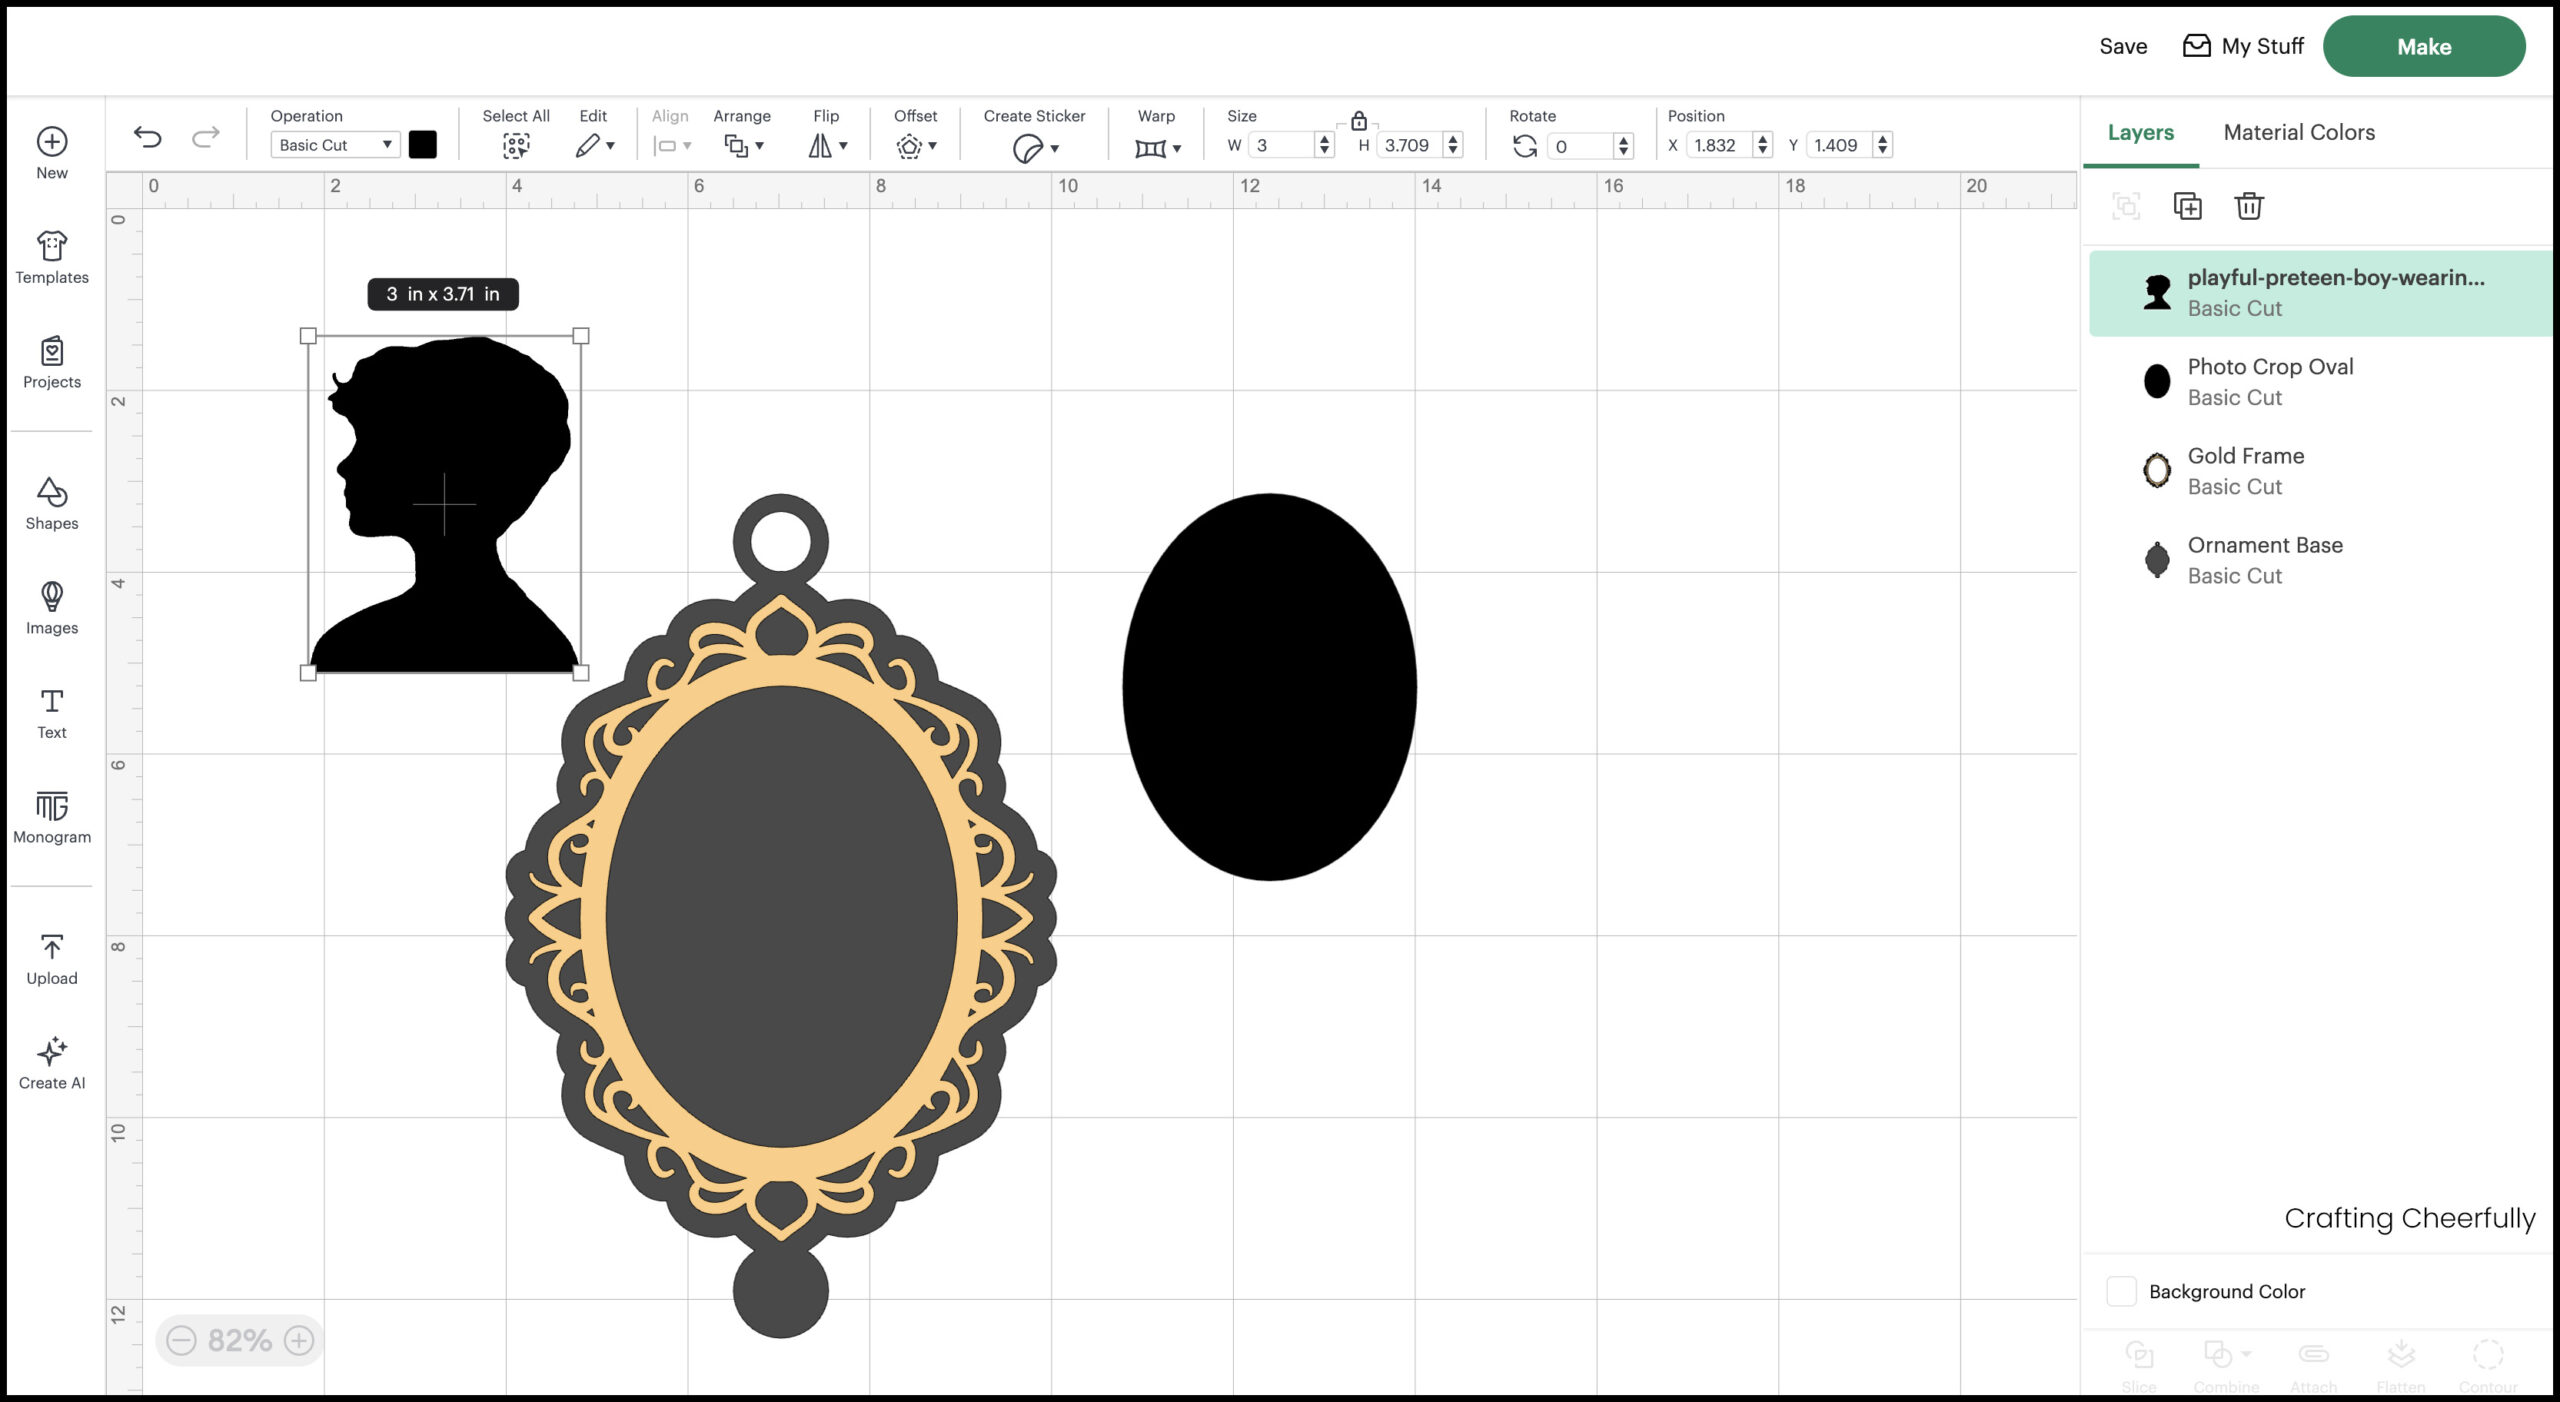
Step Four: Crop the silhouette photo using the black oval masking layer. Place the silhouette on top of the oval, placing the silhouette as far up on the oval as you can while not still keeping it within the oval shape.
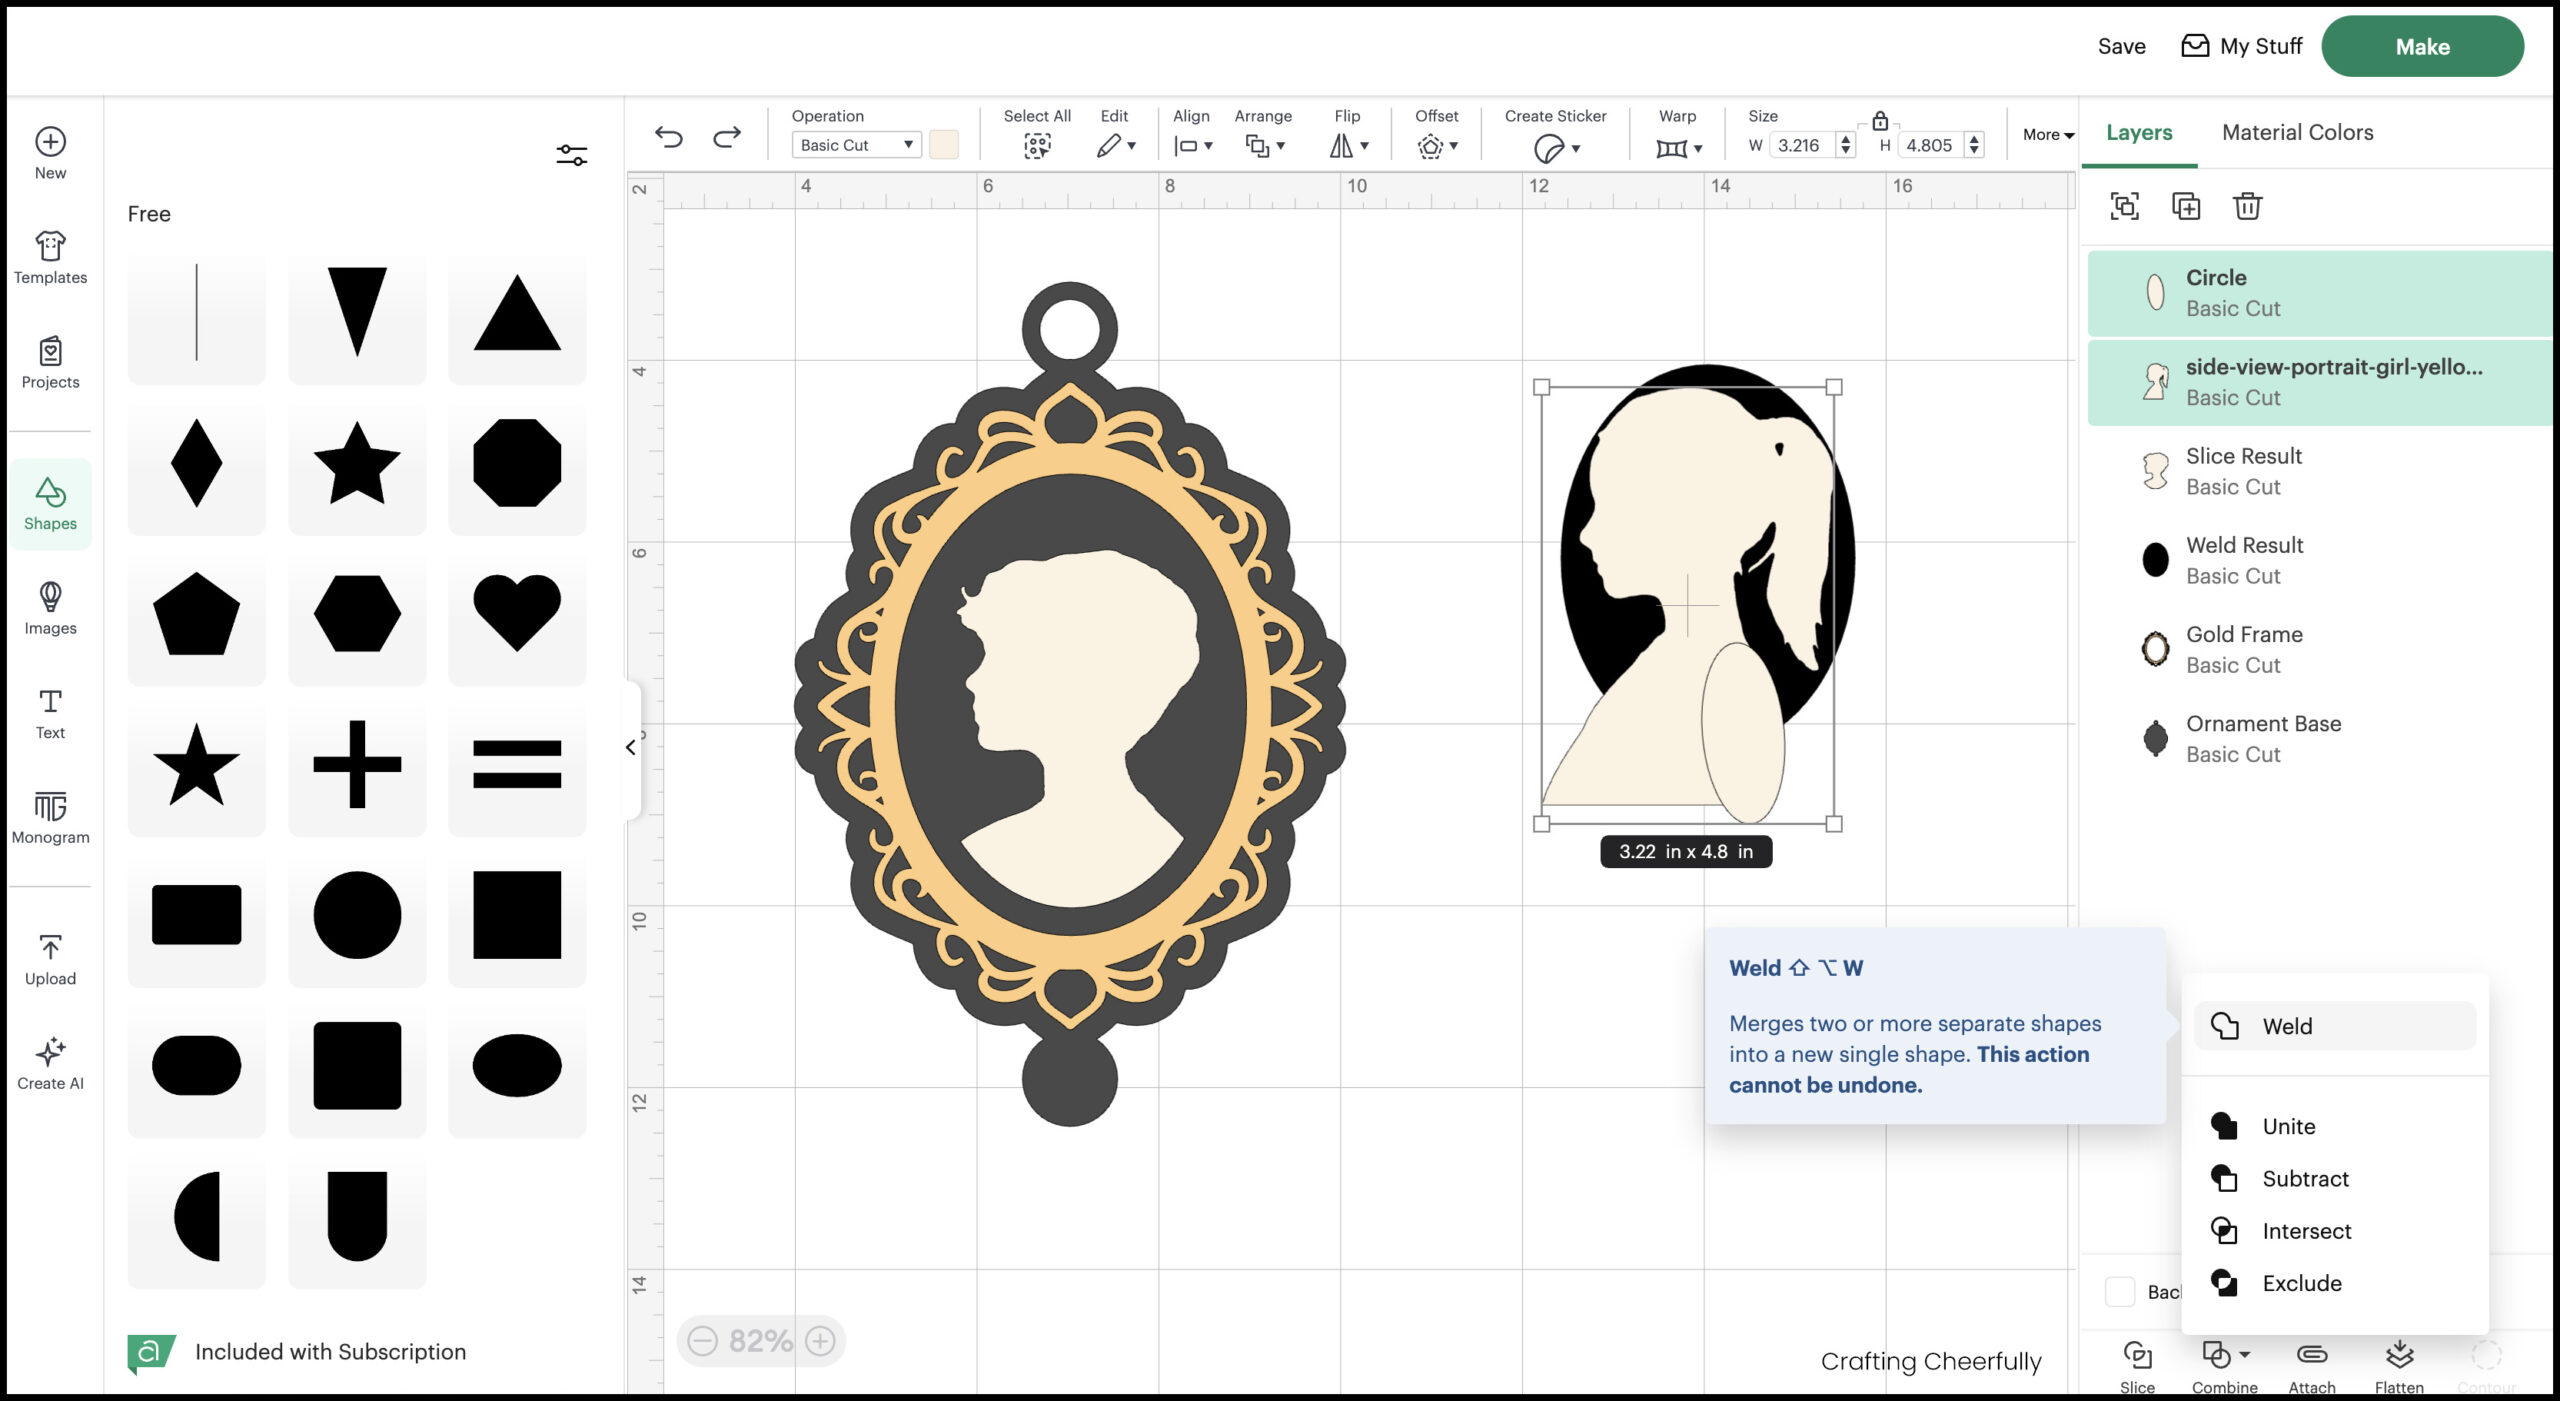
Fill in any space between the bottom of the silhouette and the edges of the black oval. For this boy’s silhouette, I added an oval to the bottom and then welded the two shapes together using the welding tool in the bottom right menu.
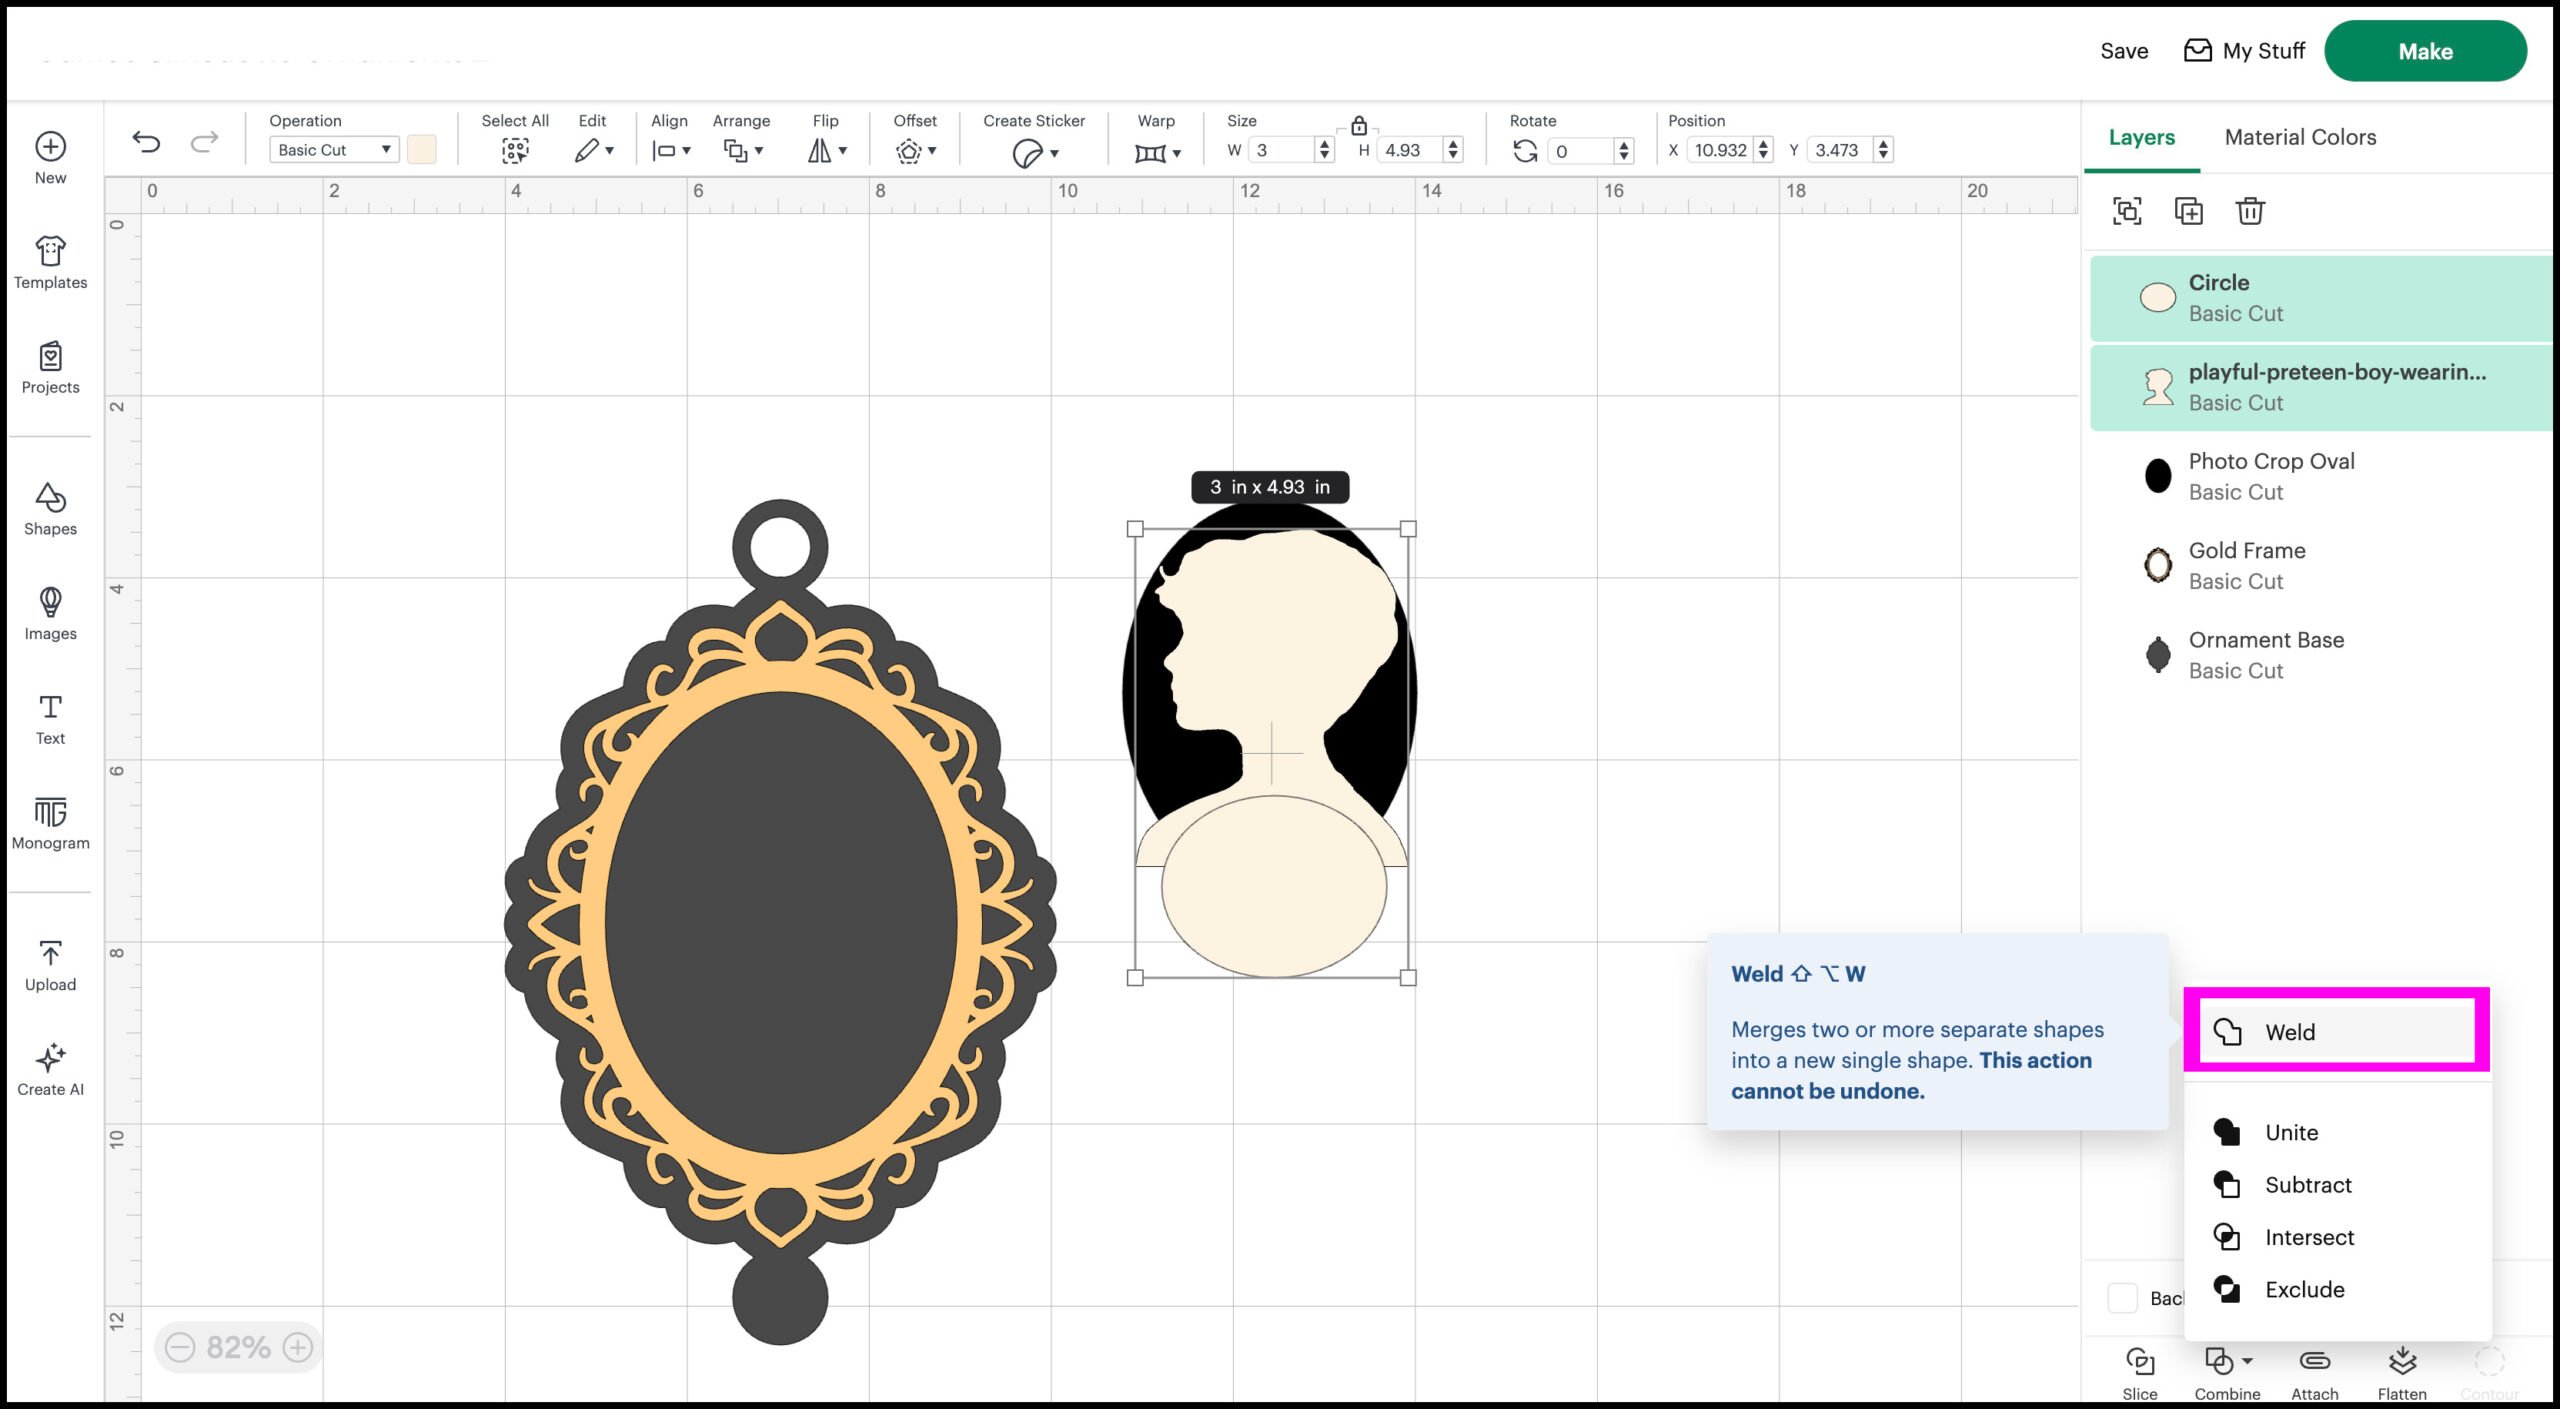
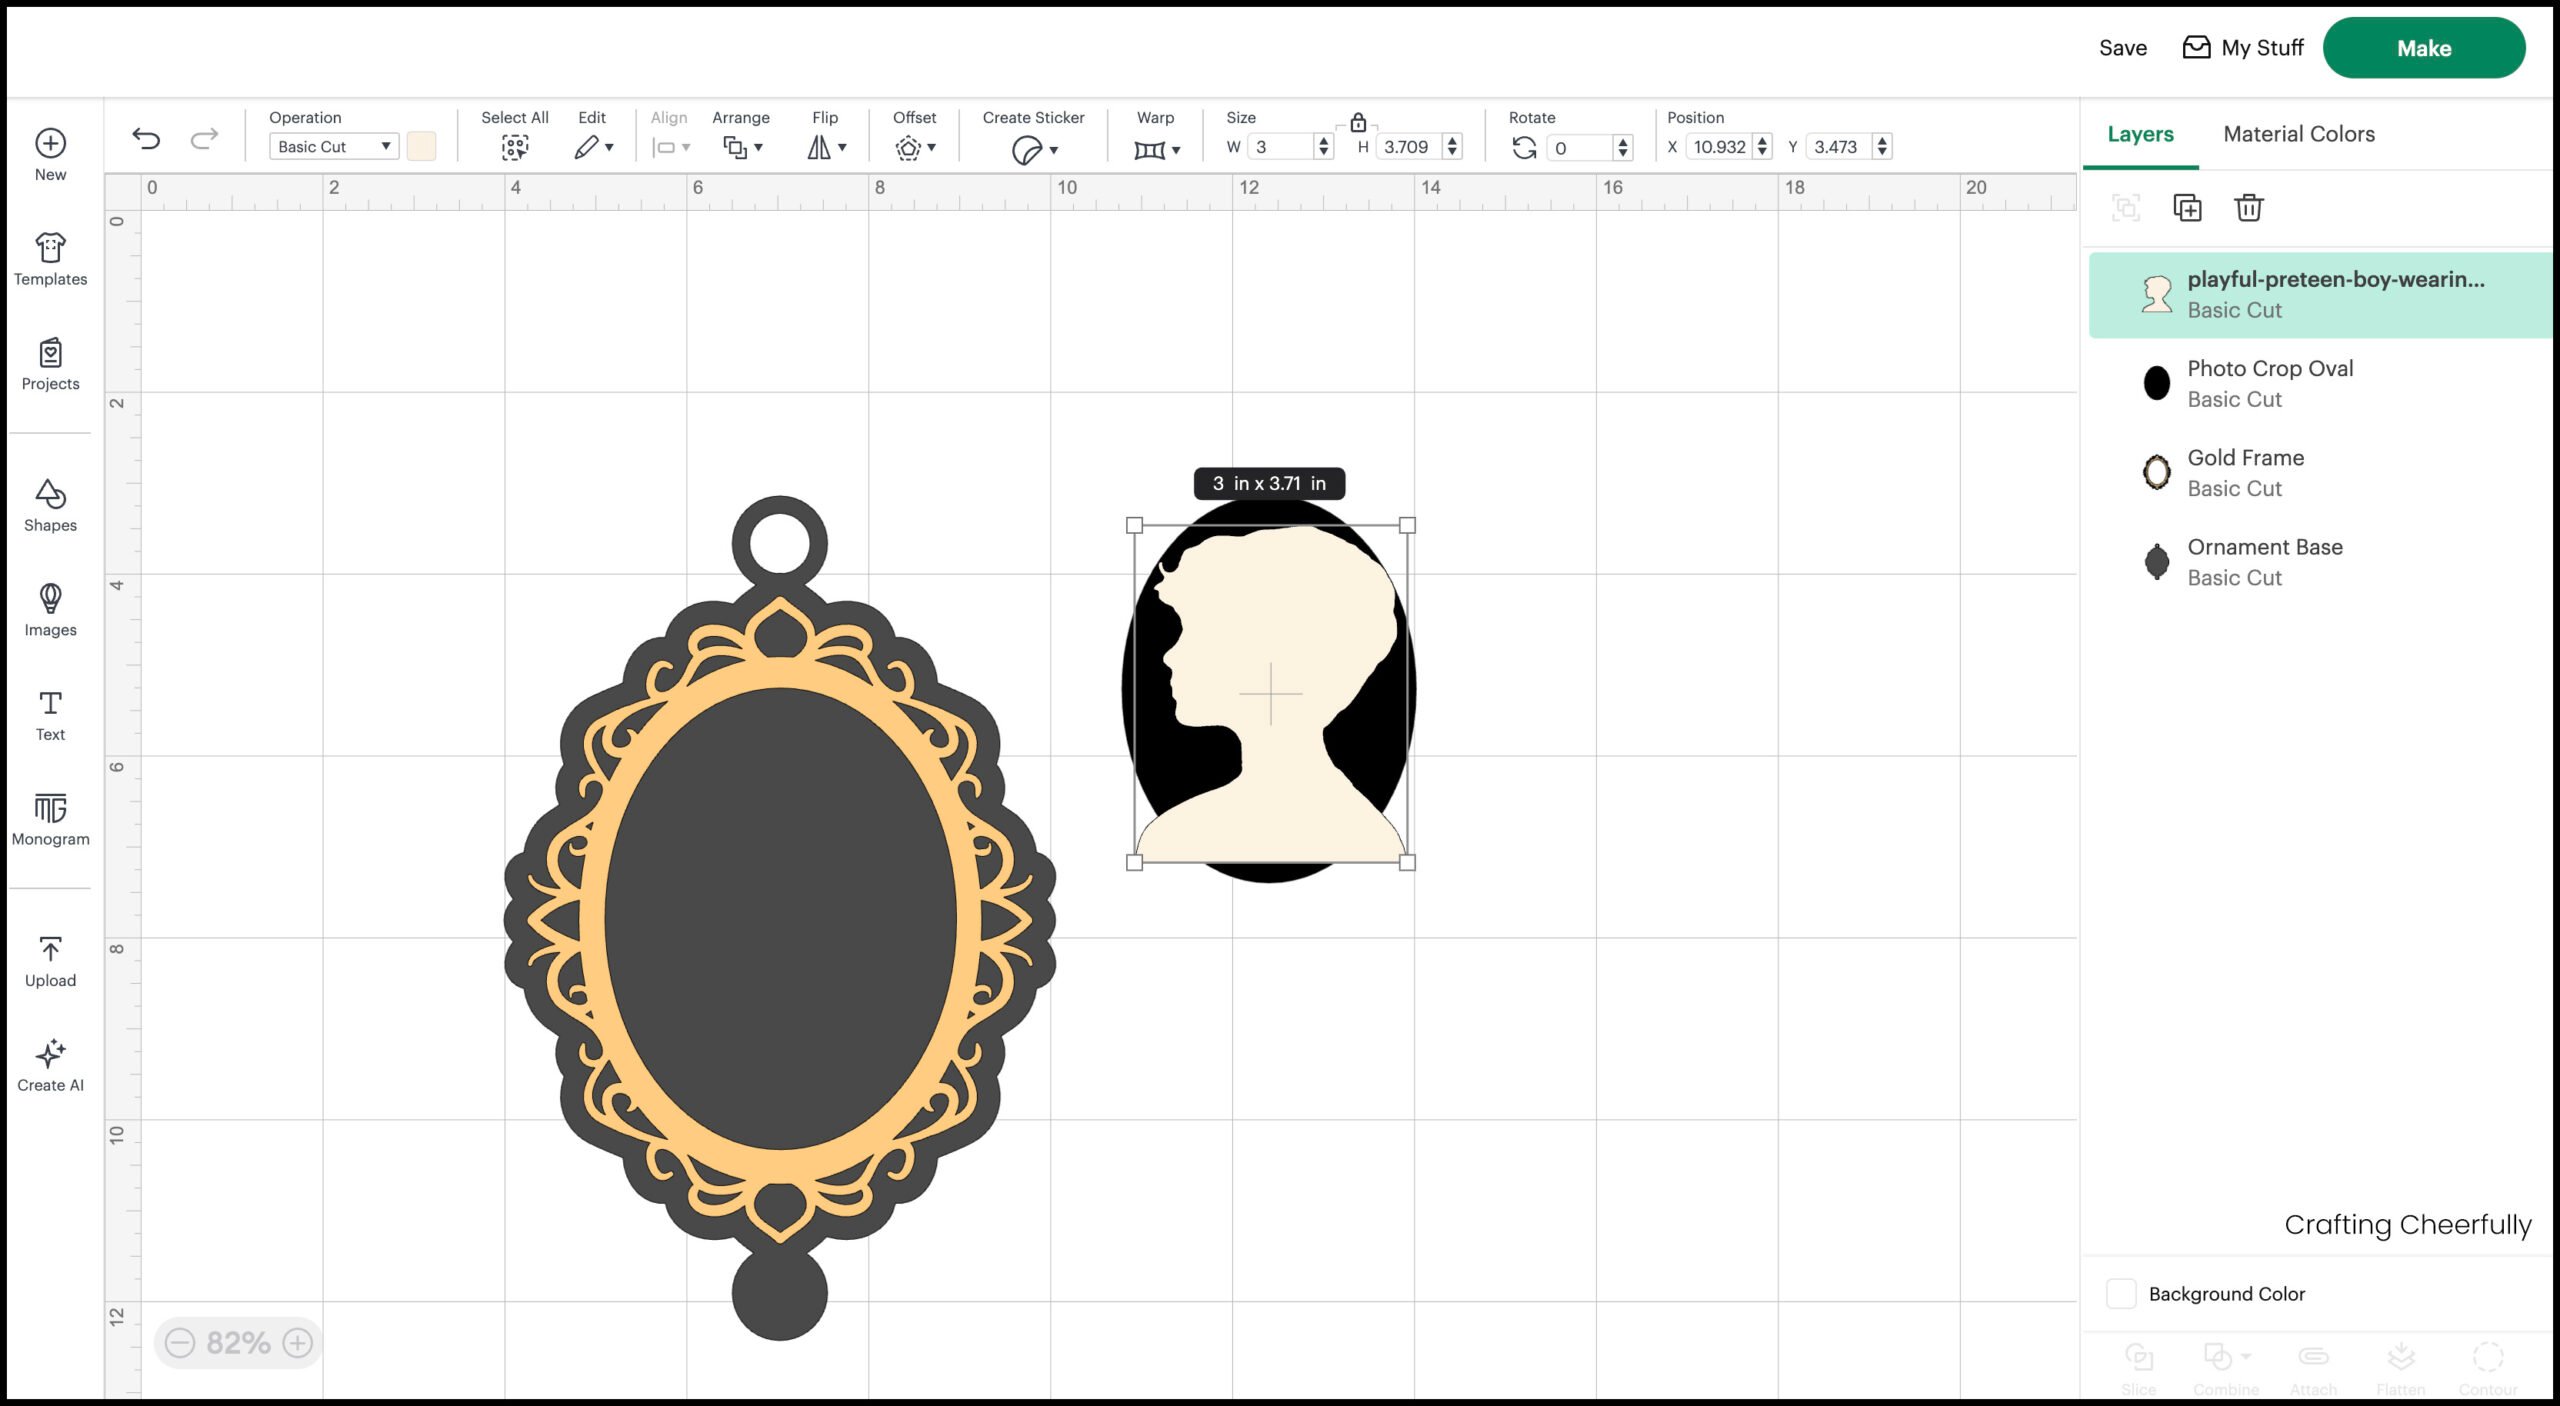
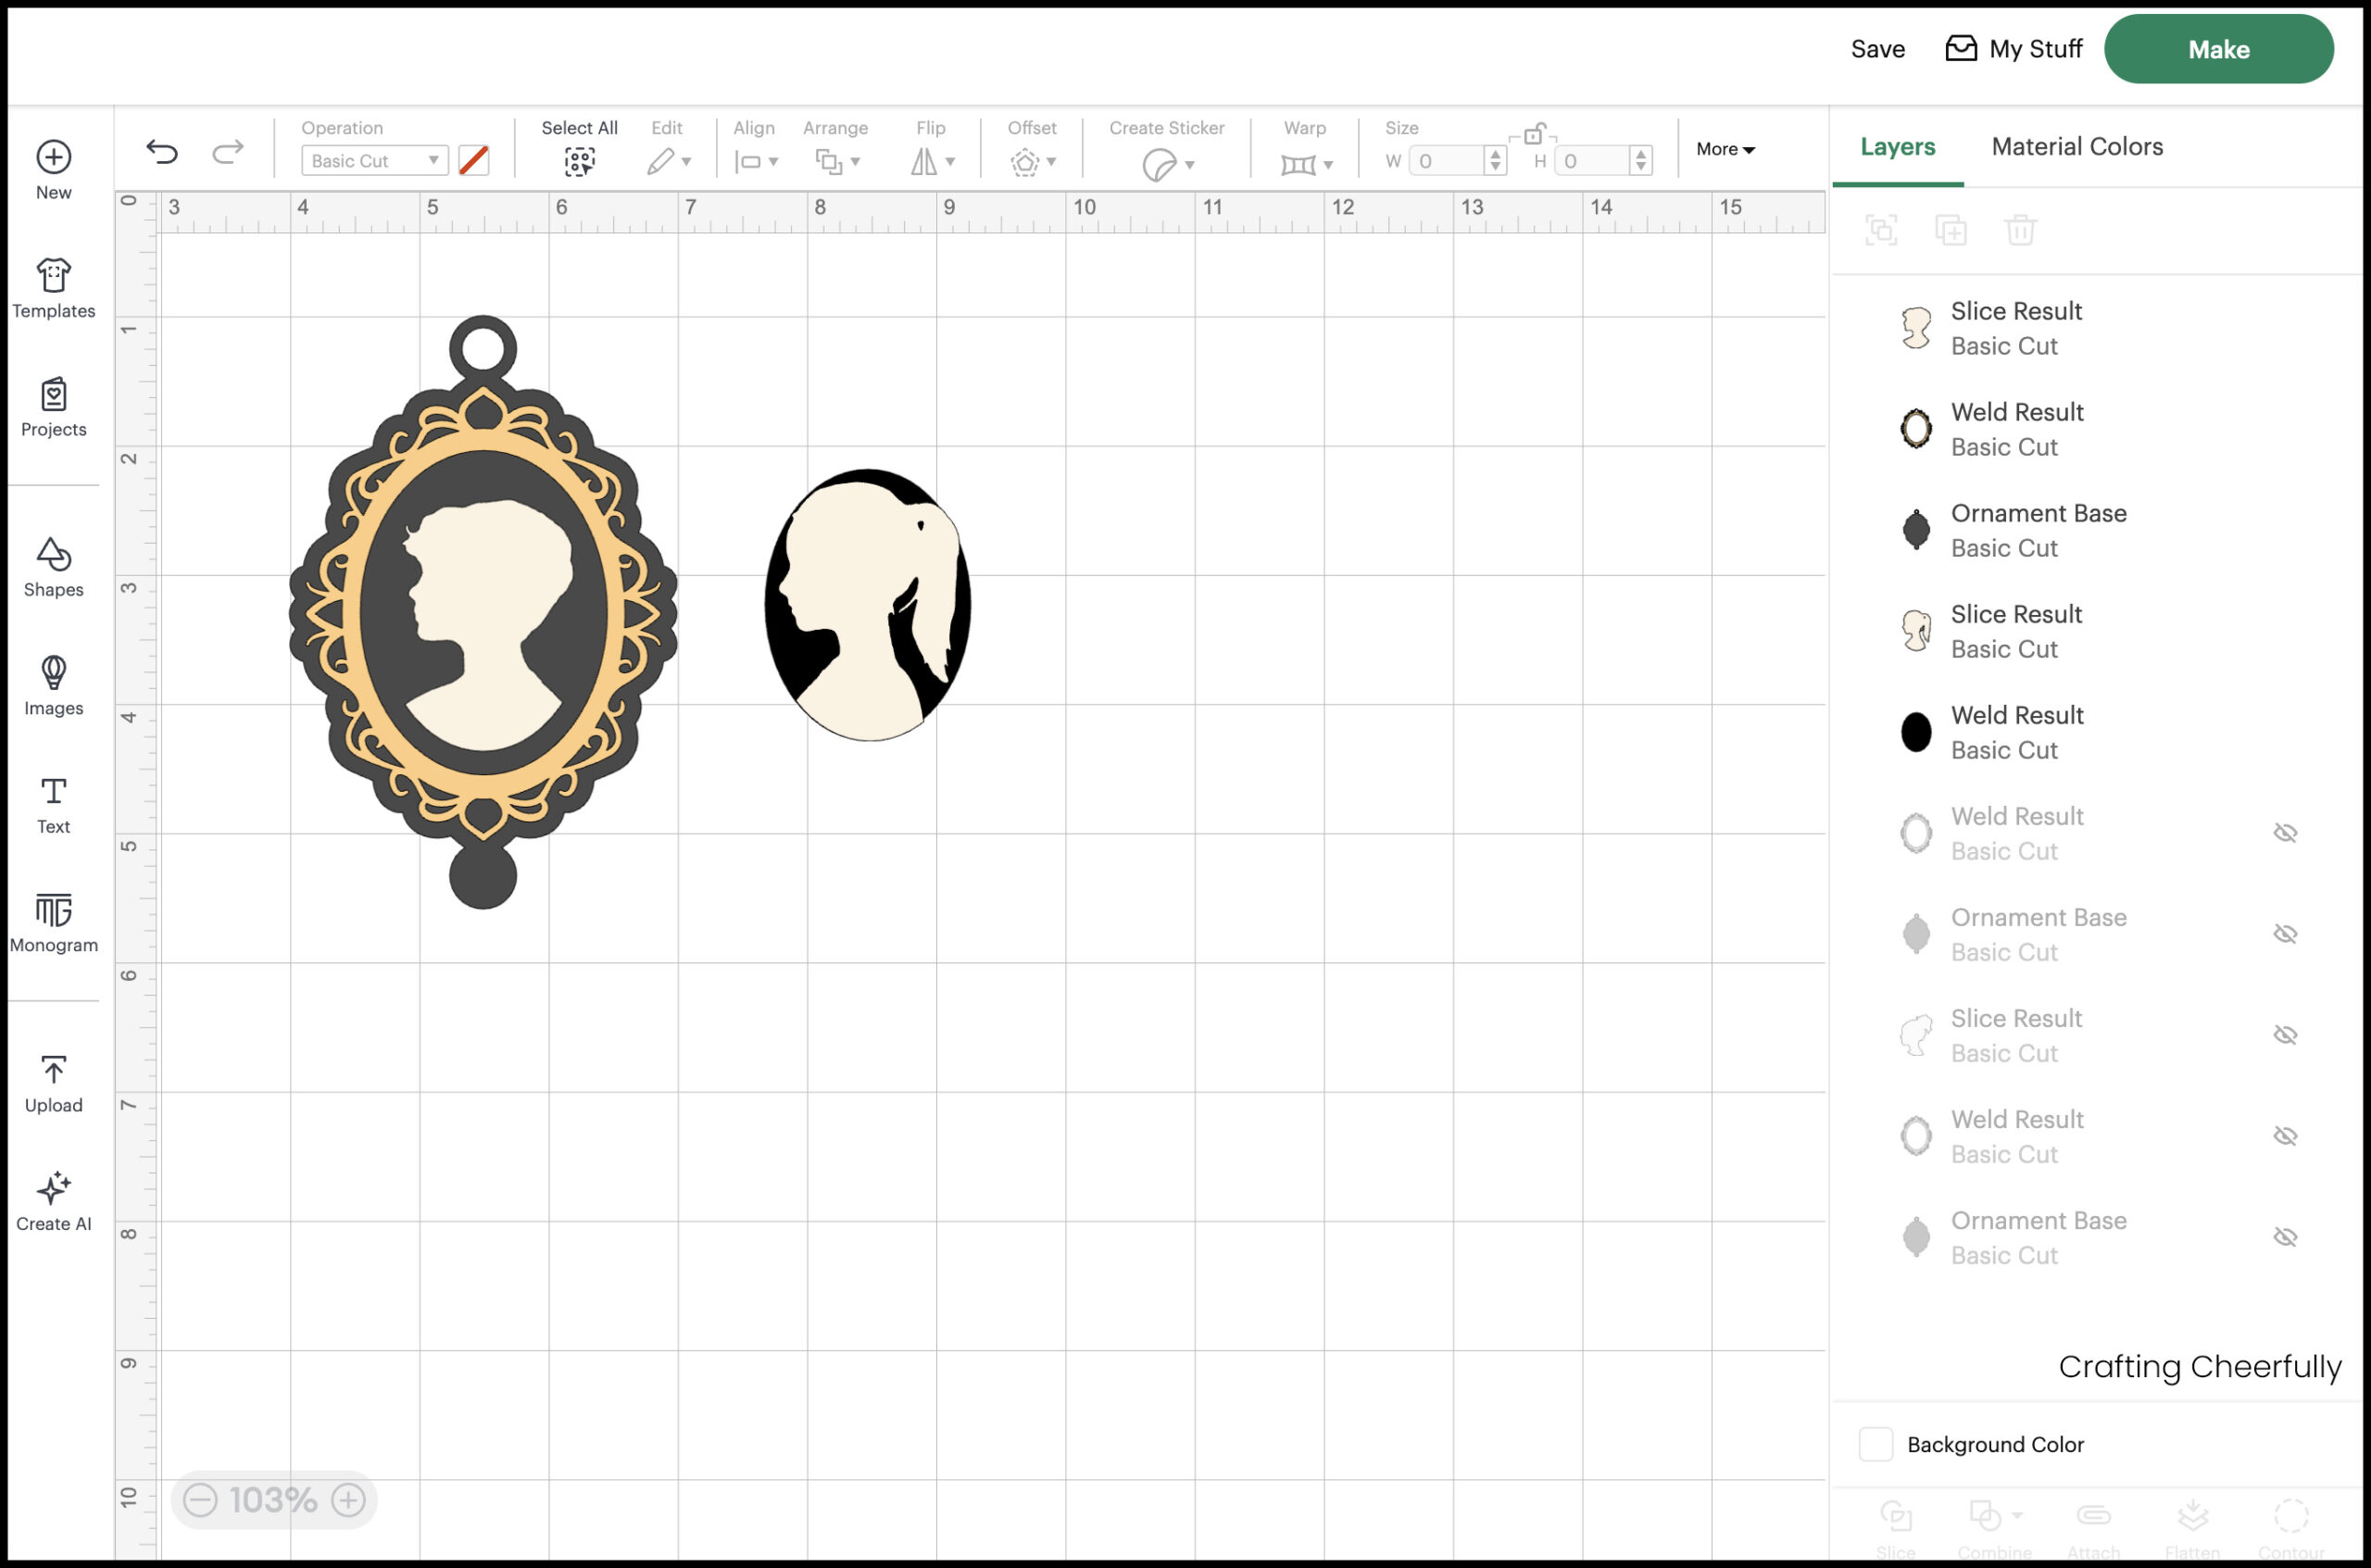
Step Five: Select the newly welded silhouette shape and the black masking oval, then select the slice tool from the bottom right menu. This will shape the bottom of the silhouette in a curve that lines up with the curve of the oval opening in the ornament.
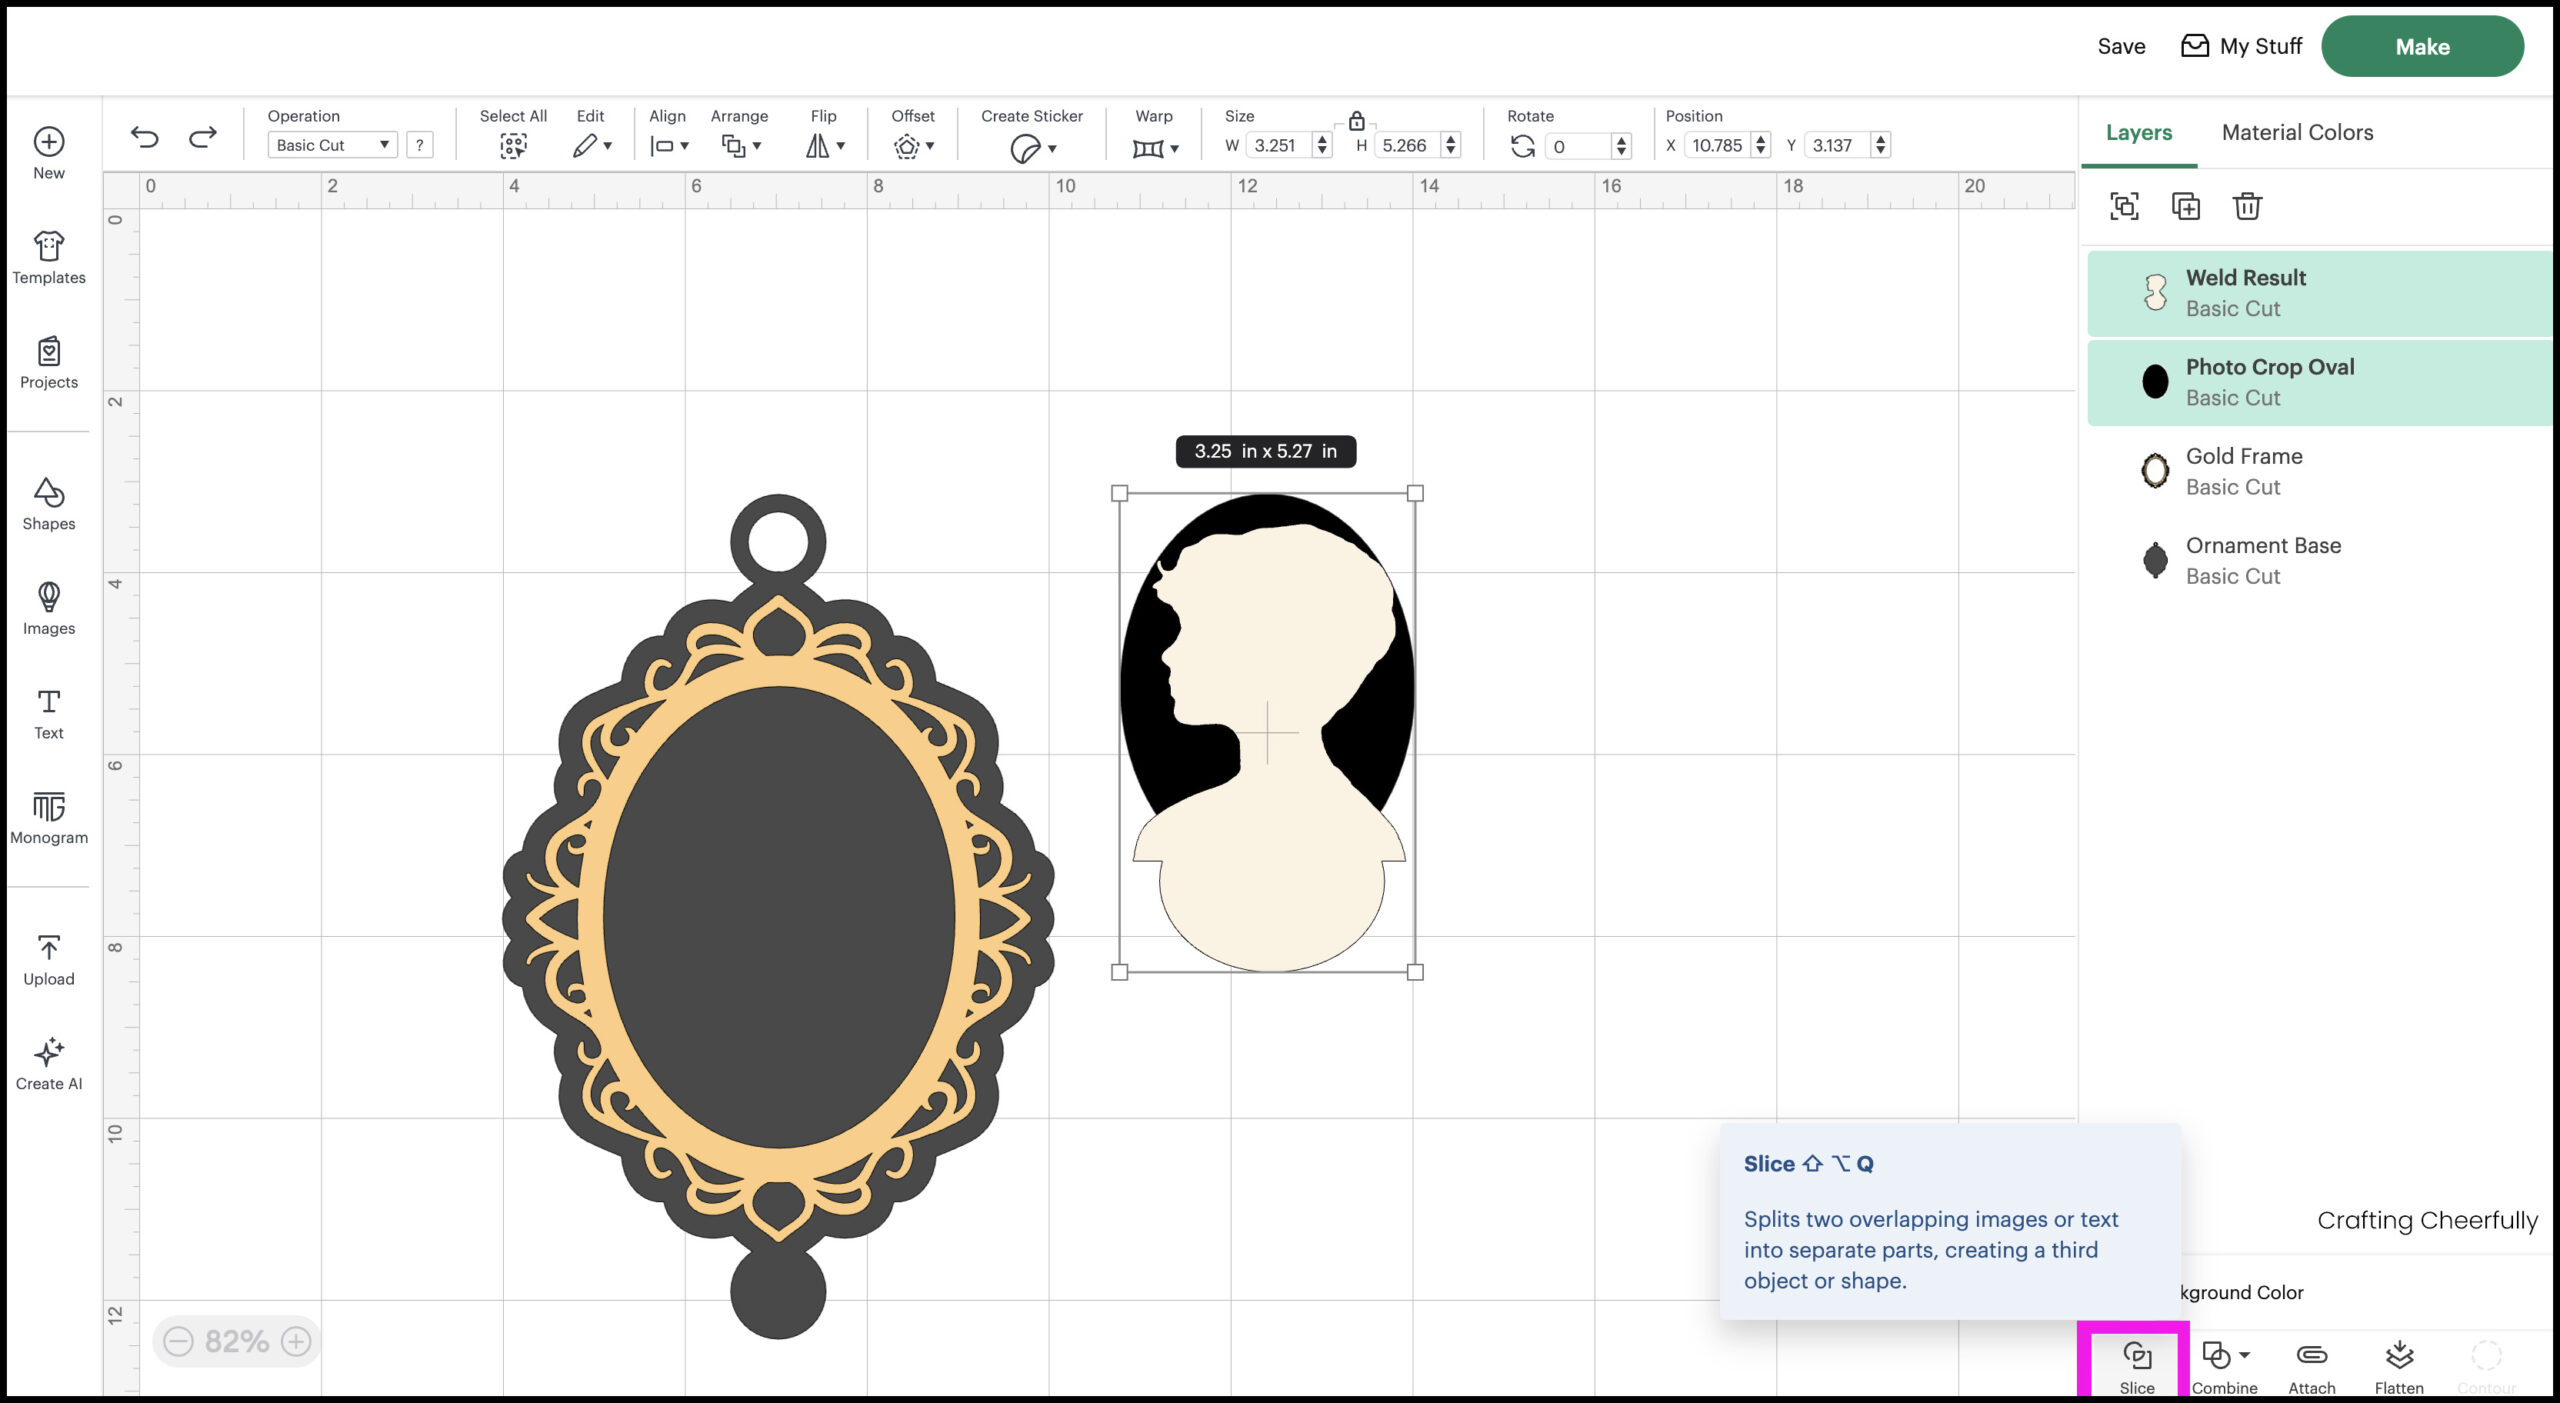
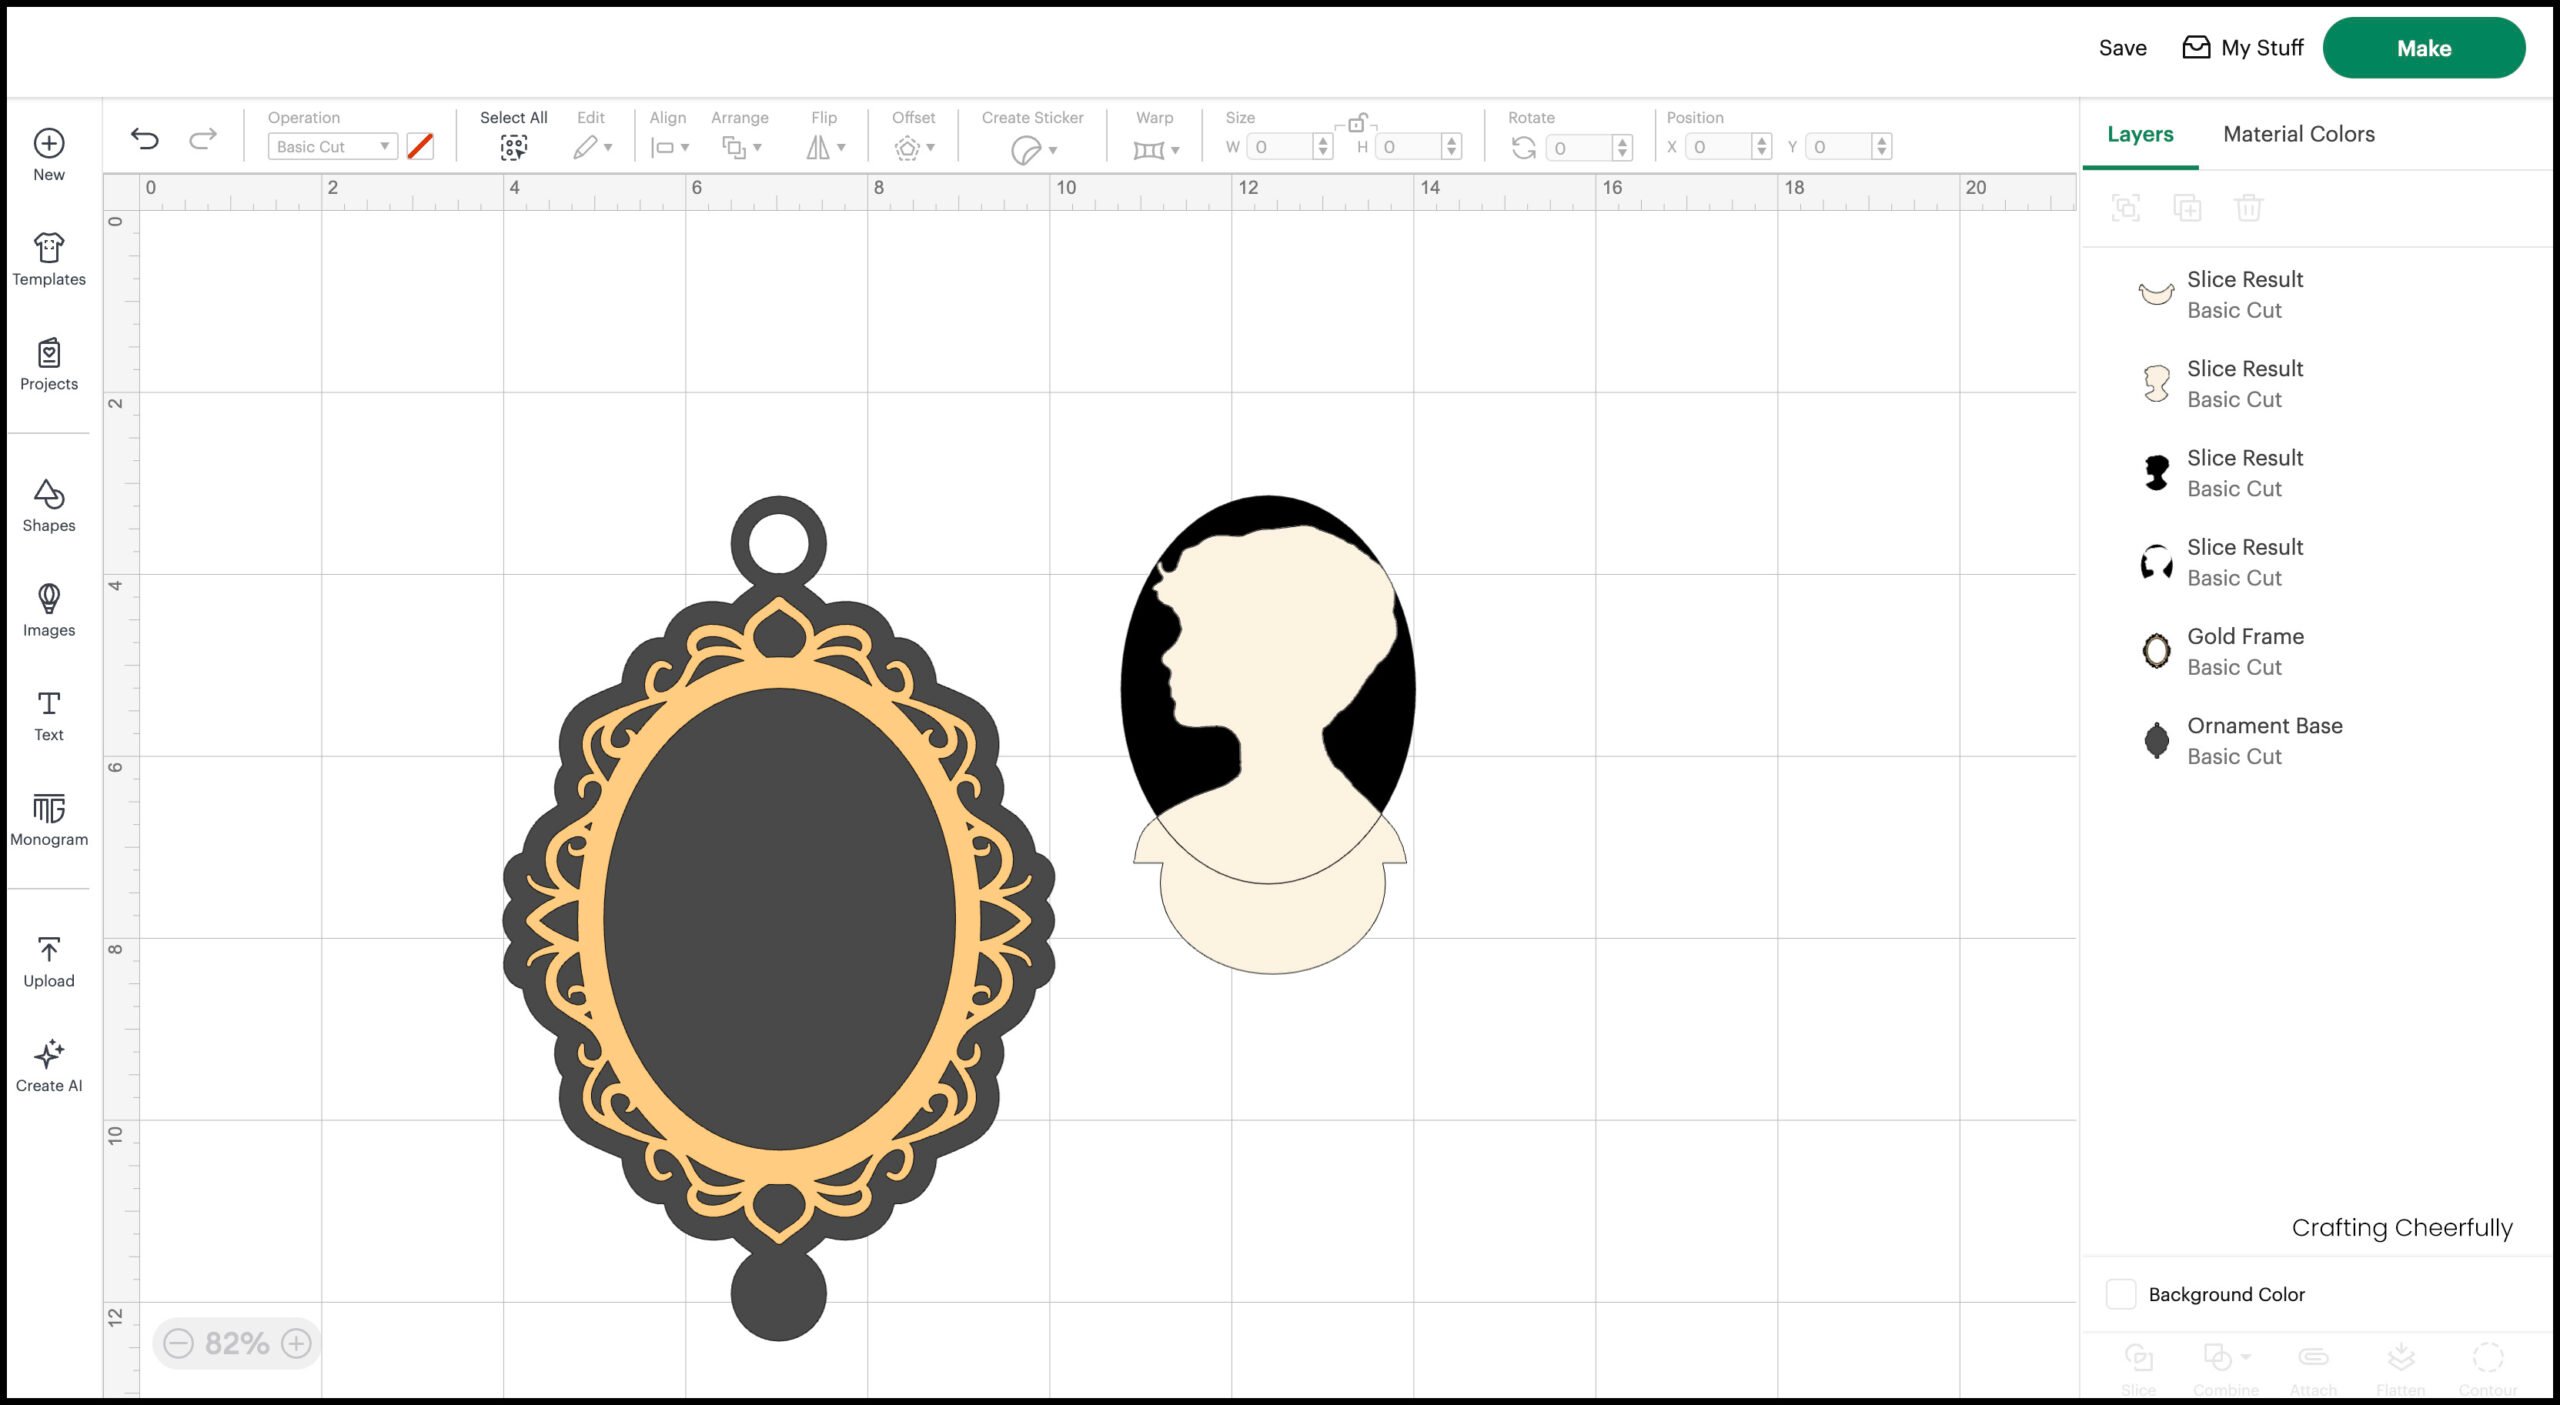
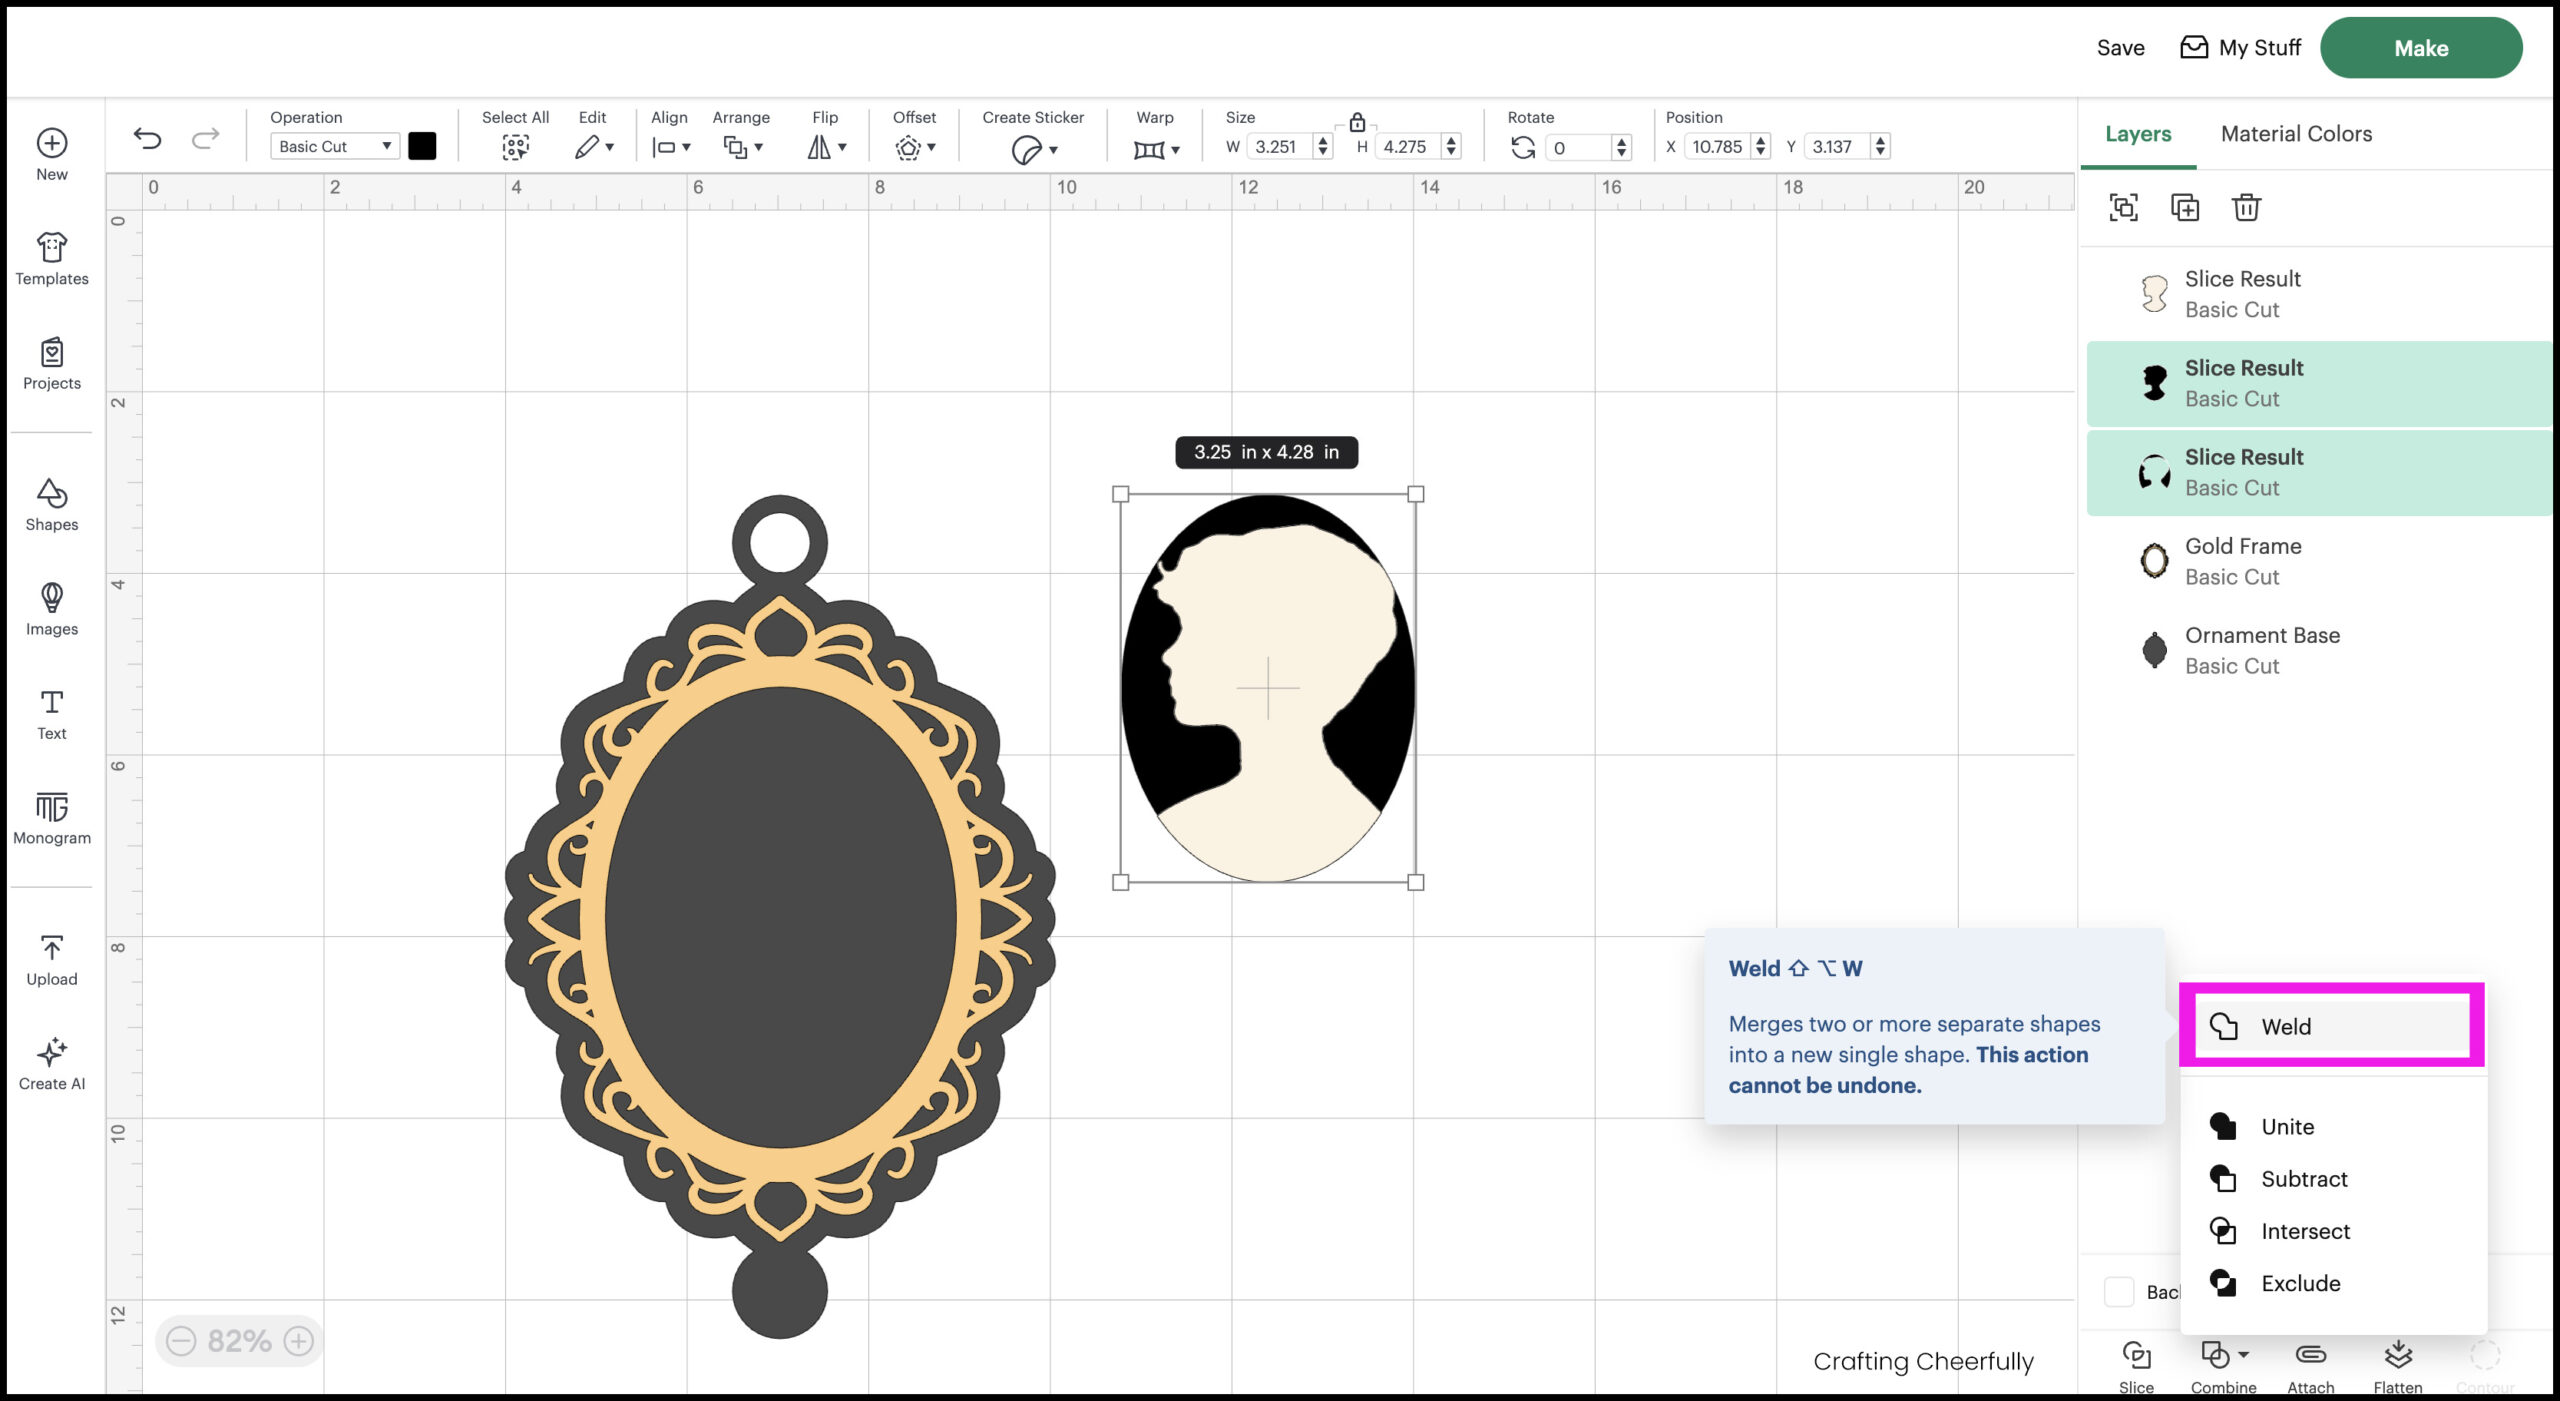
Delete the leftover cream slice and re-weld the two black slices together so the oval can be used again.
Step Six: Move the silhouette on top of the ornament to check the sizing. If you are happy with the size of the silhouette it is time to cut!

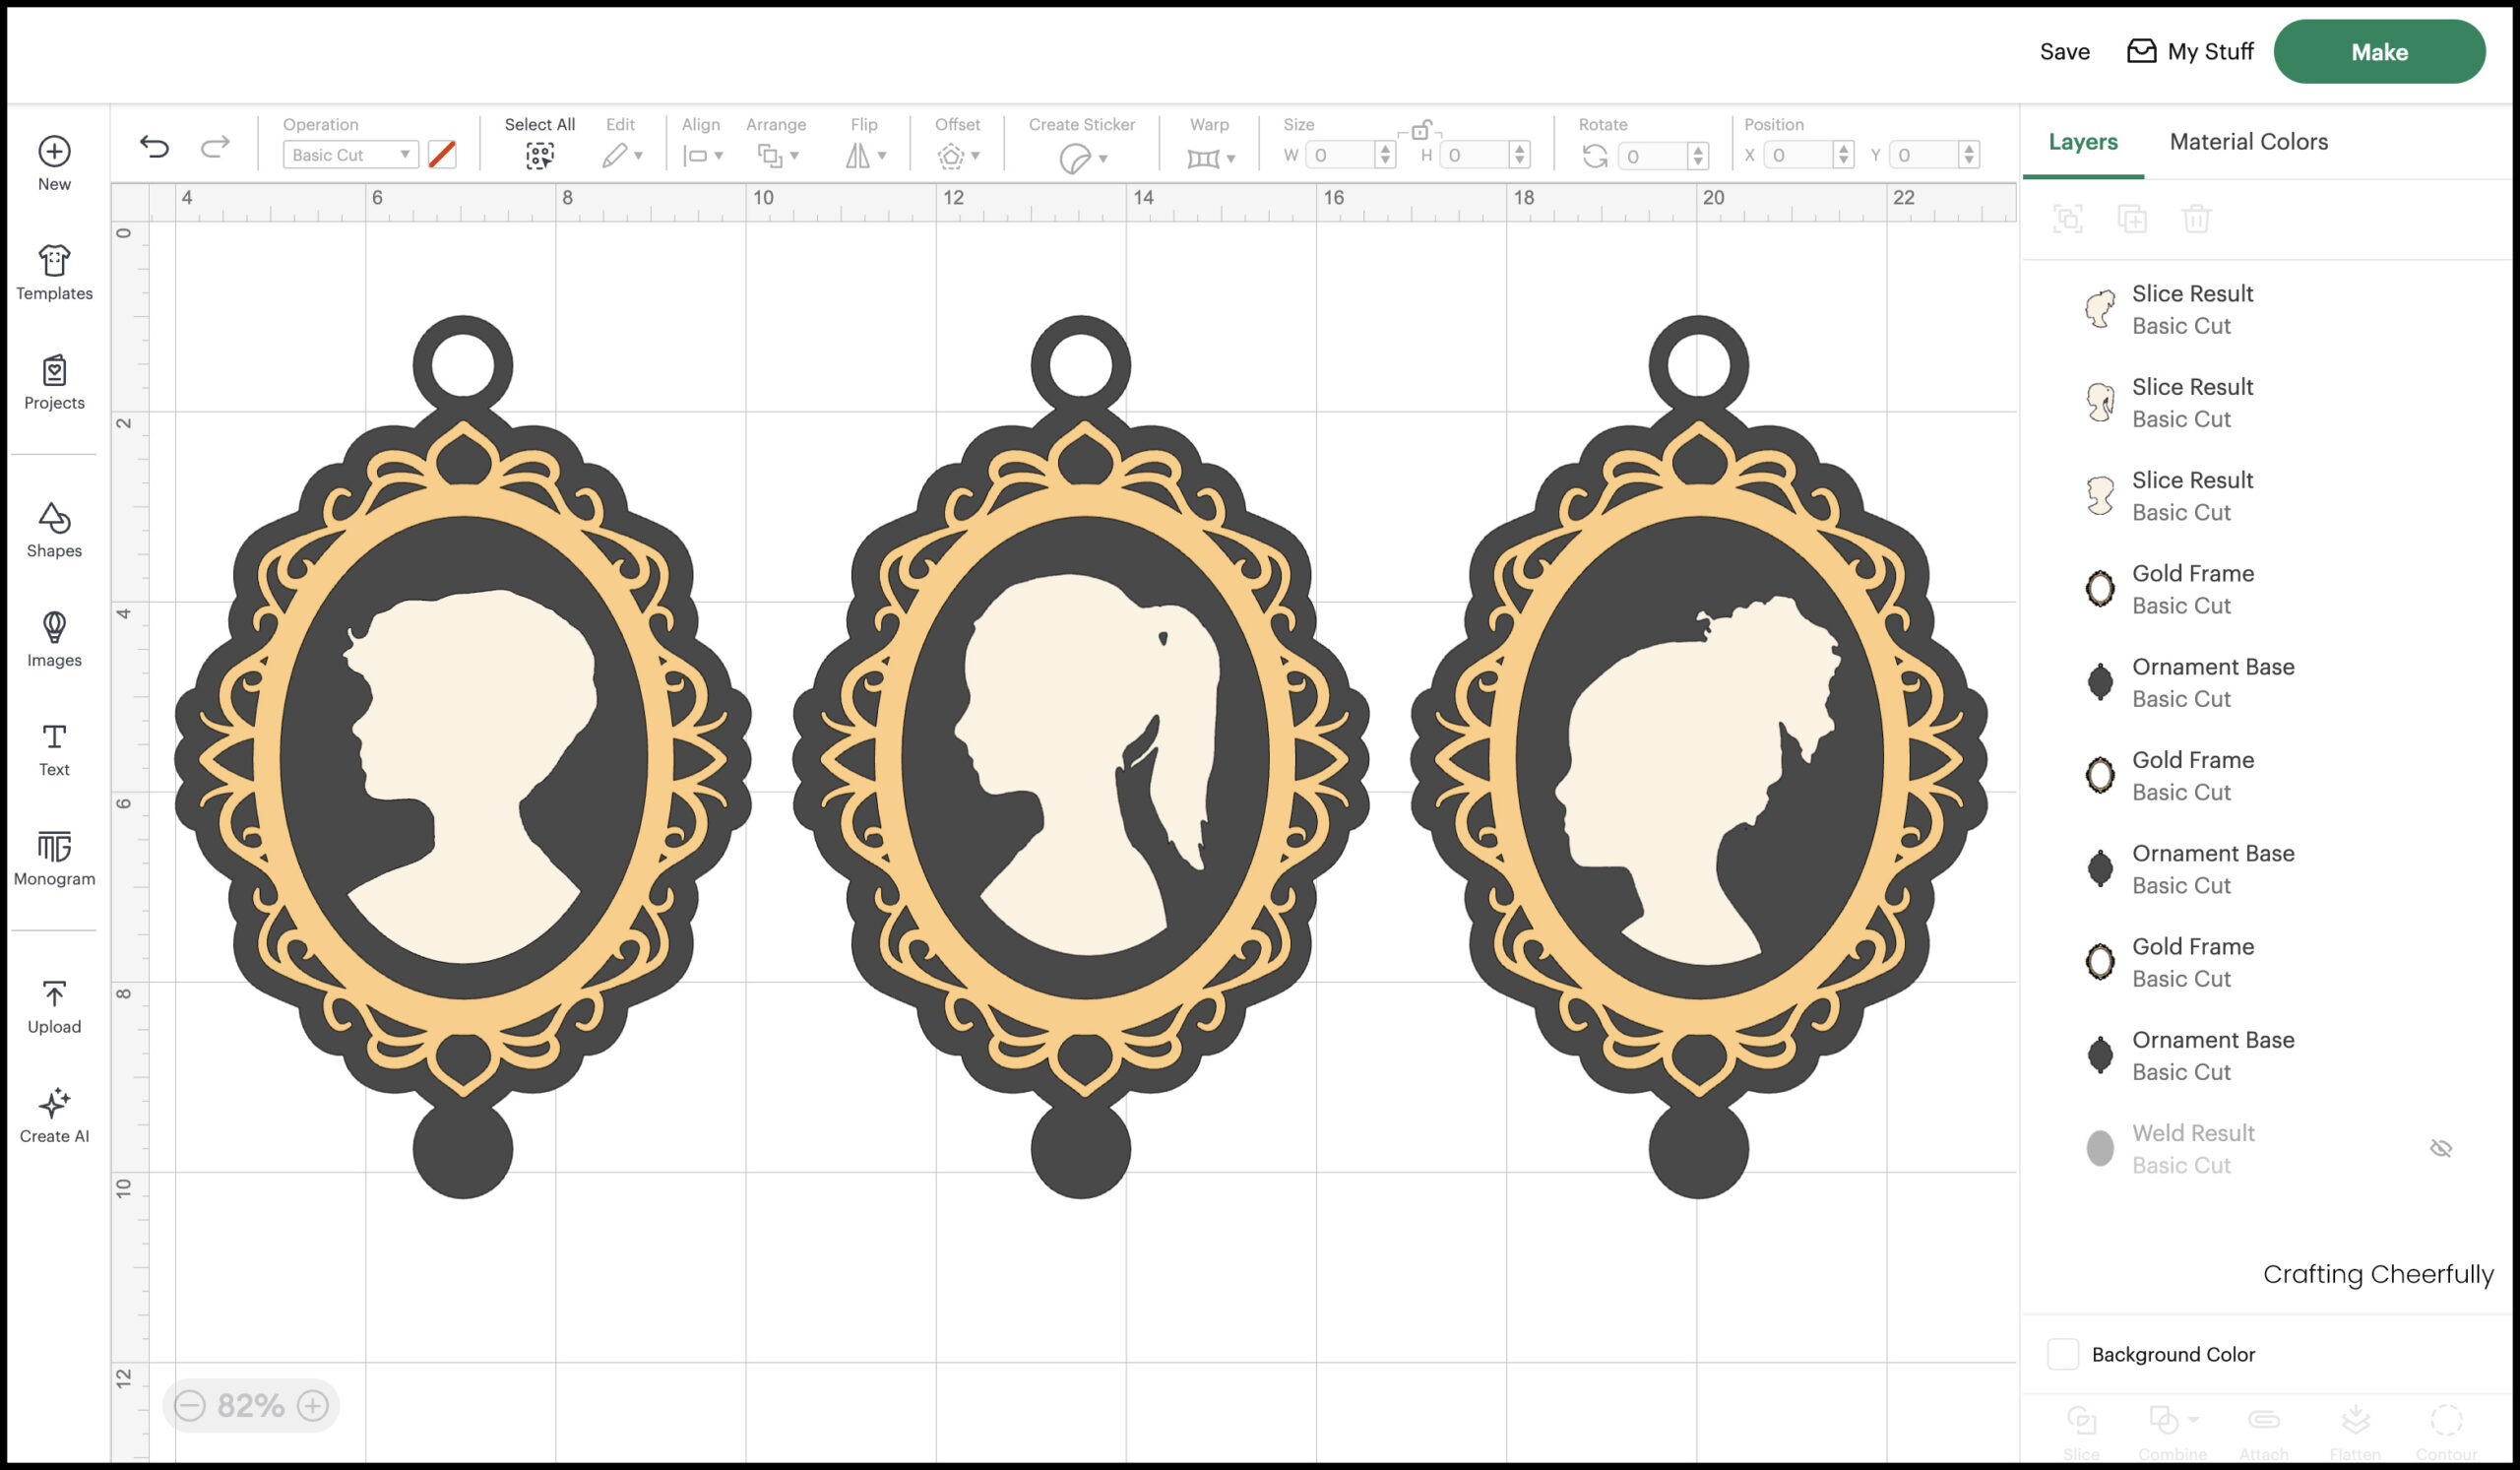
Repeat these steps to make more silhouette ornaments! Below is another example of adding shapes to the silhouette to fill in the area between the silhouette and the black masking oval.
Cutting the Silhouettte Christmas Ornaments
Step Seven: Cut the ornament from cardstock using your Cricut Cutting Machine.
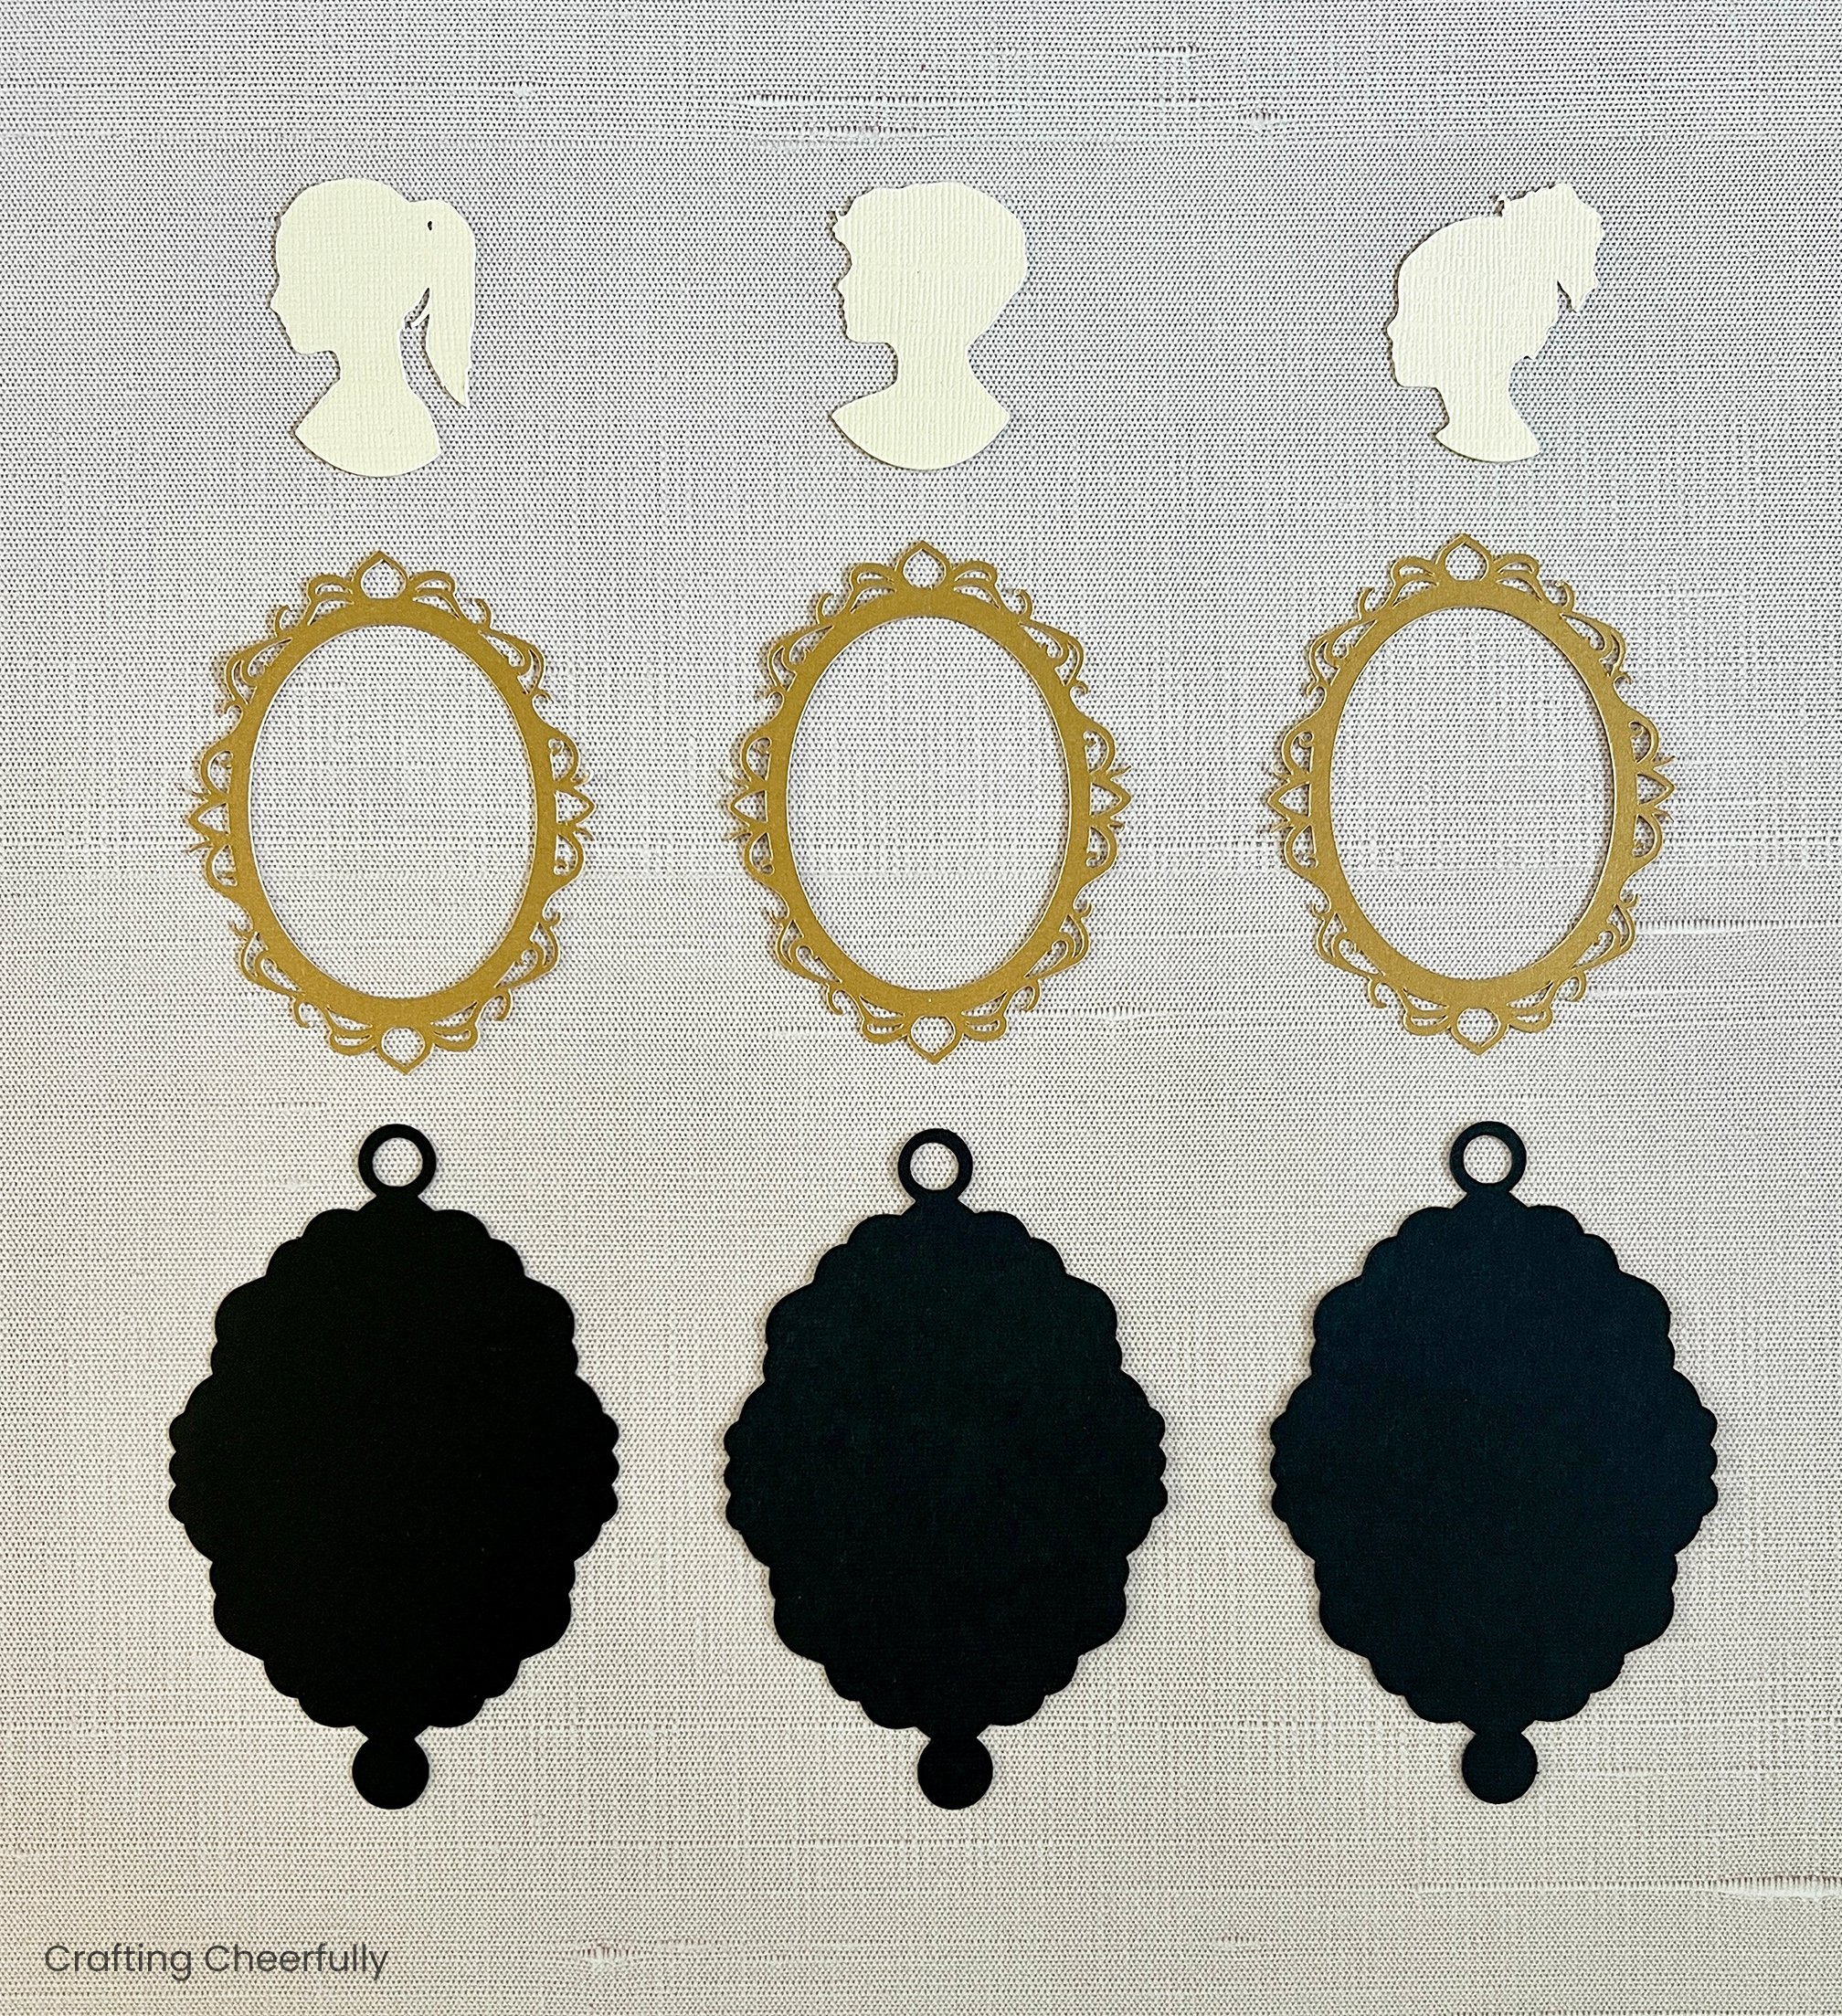
Assembling the Silhouette Christmas Ornaments
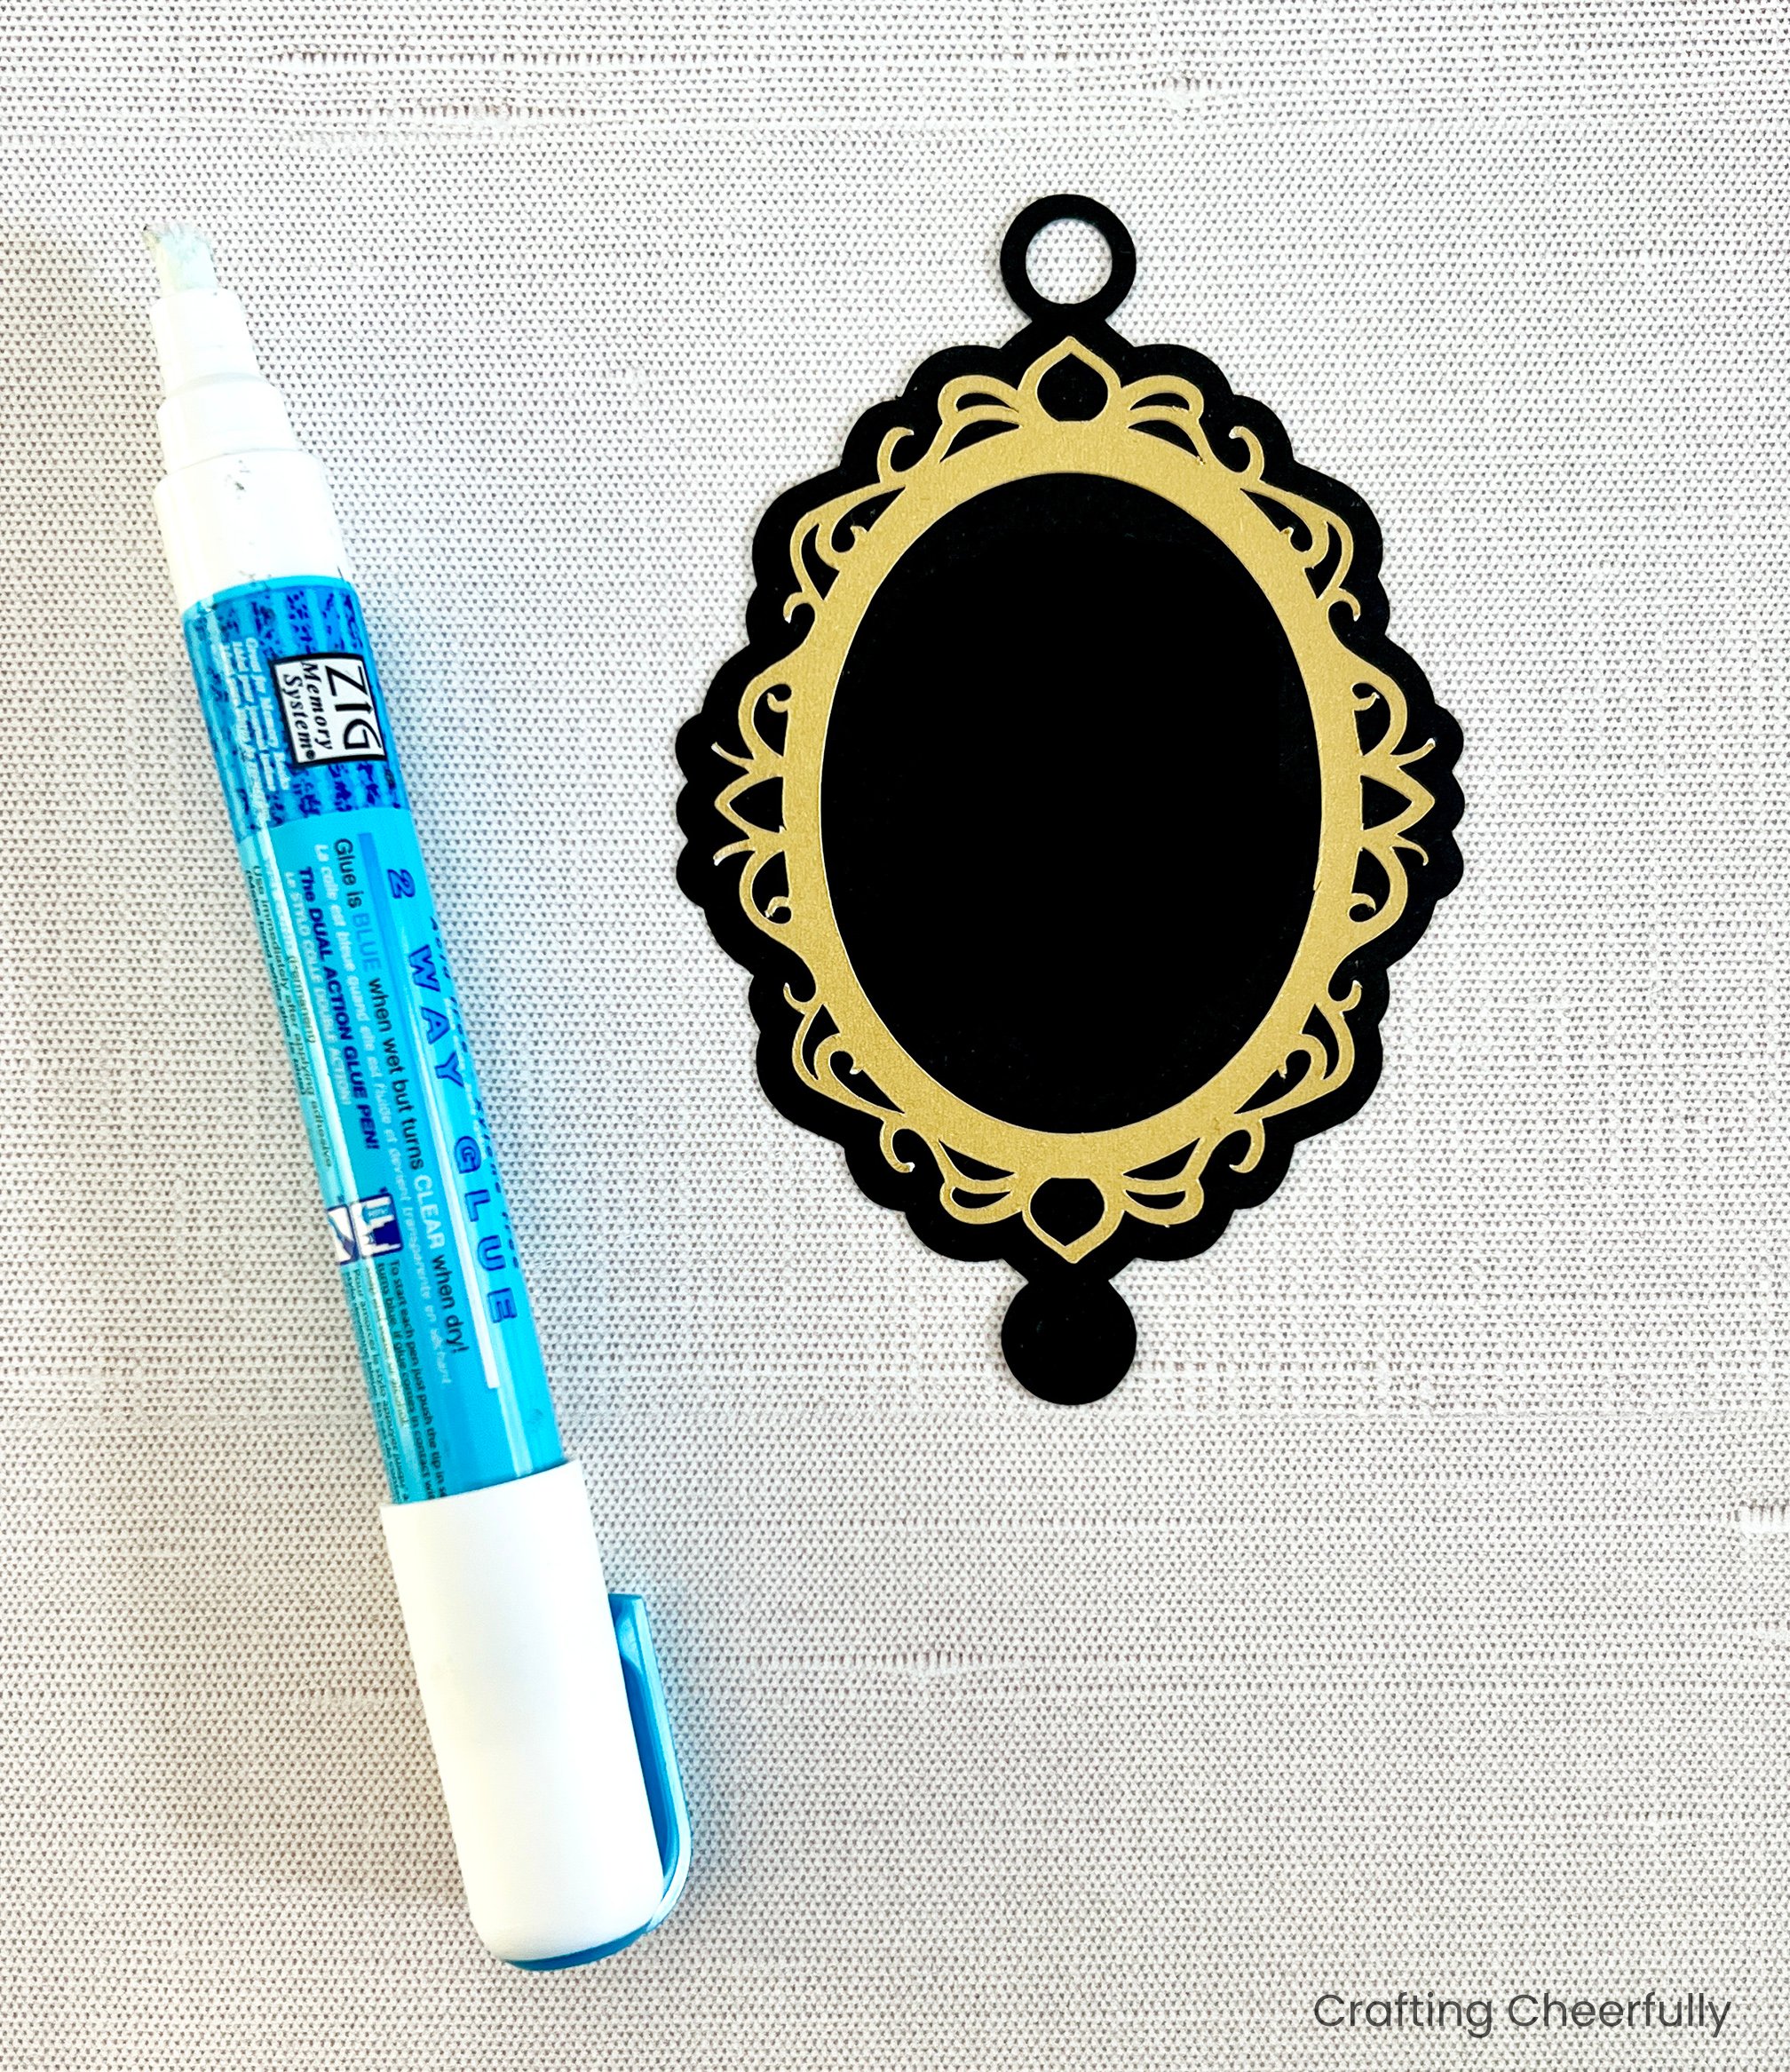
Step Eight: Start by adhering the gold frame layer to the black base of the ornament using a glue pen.
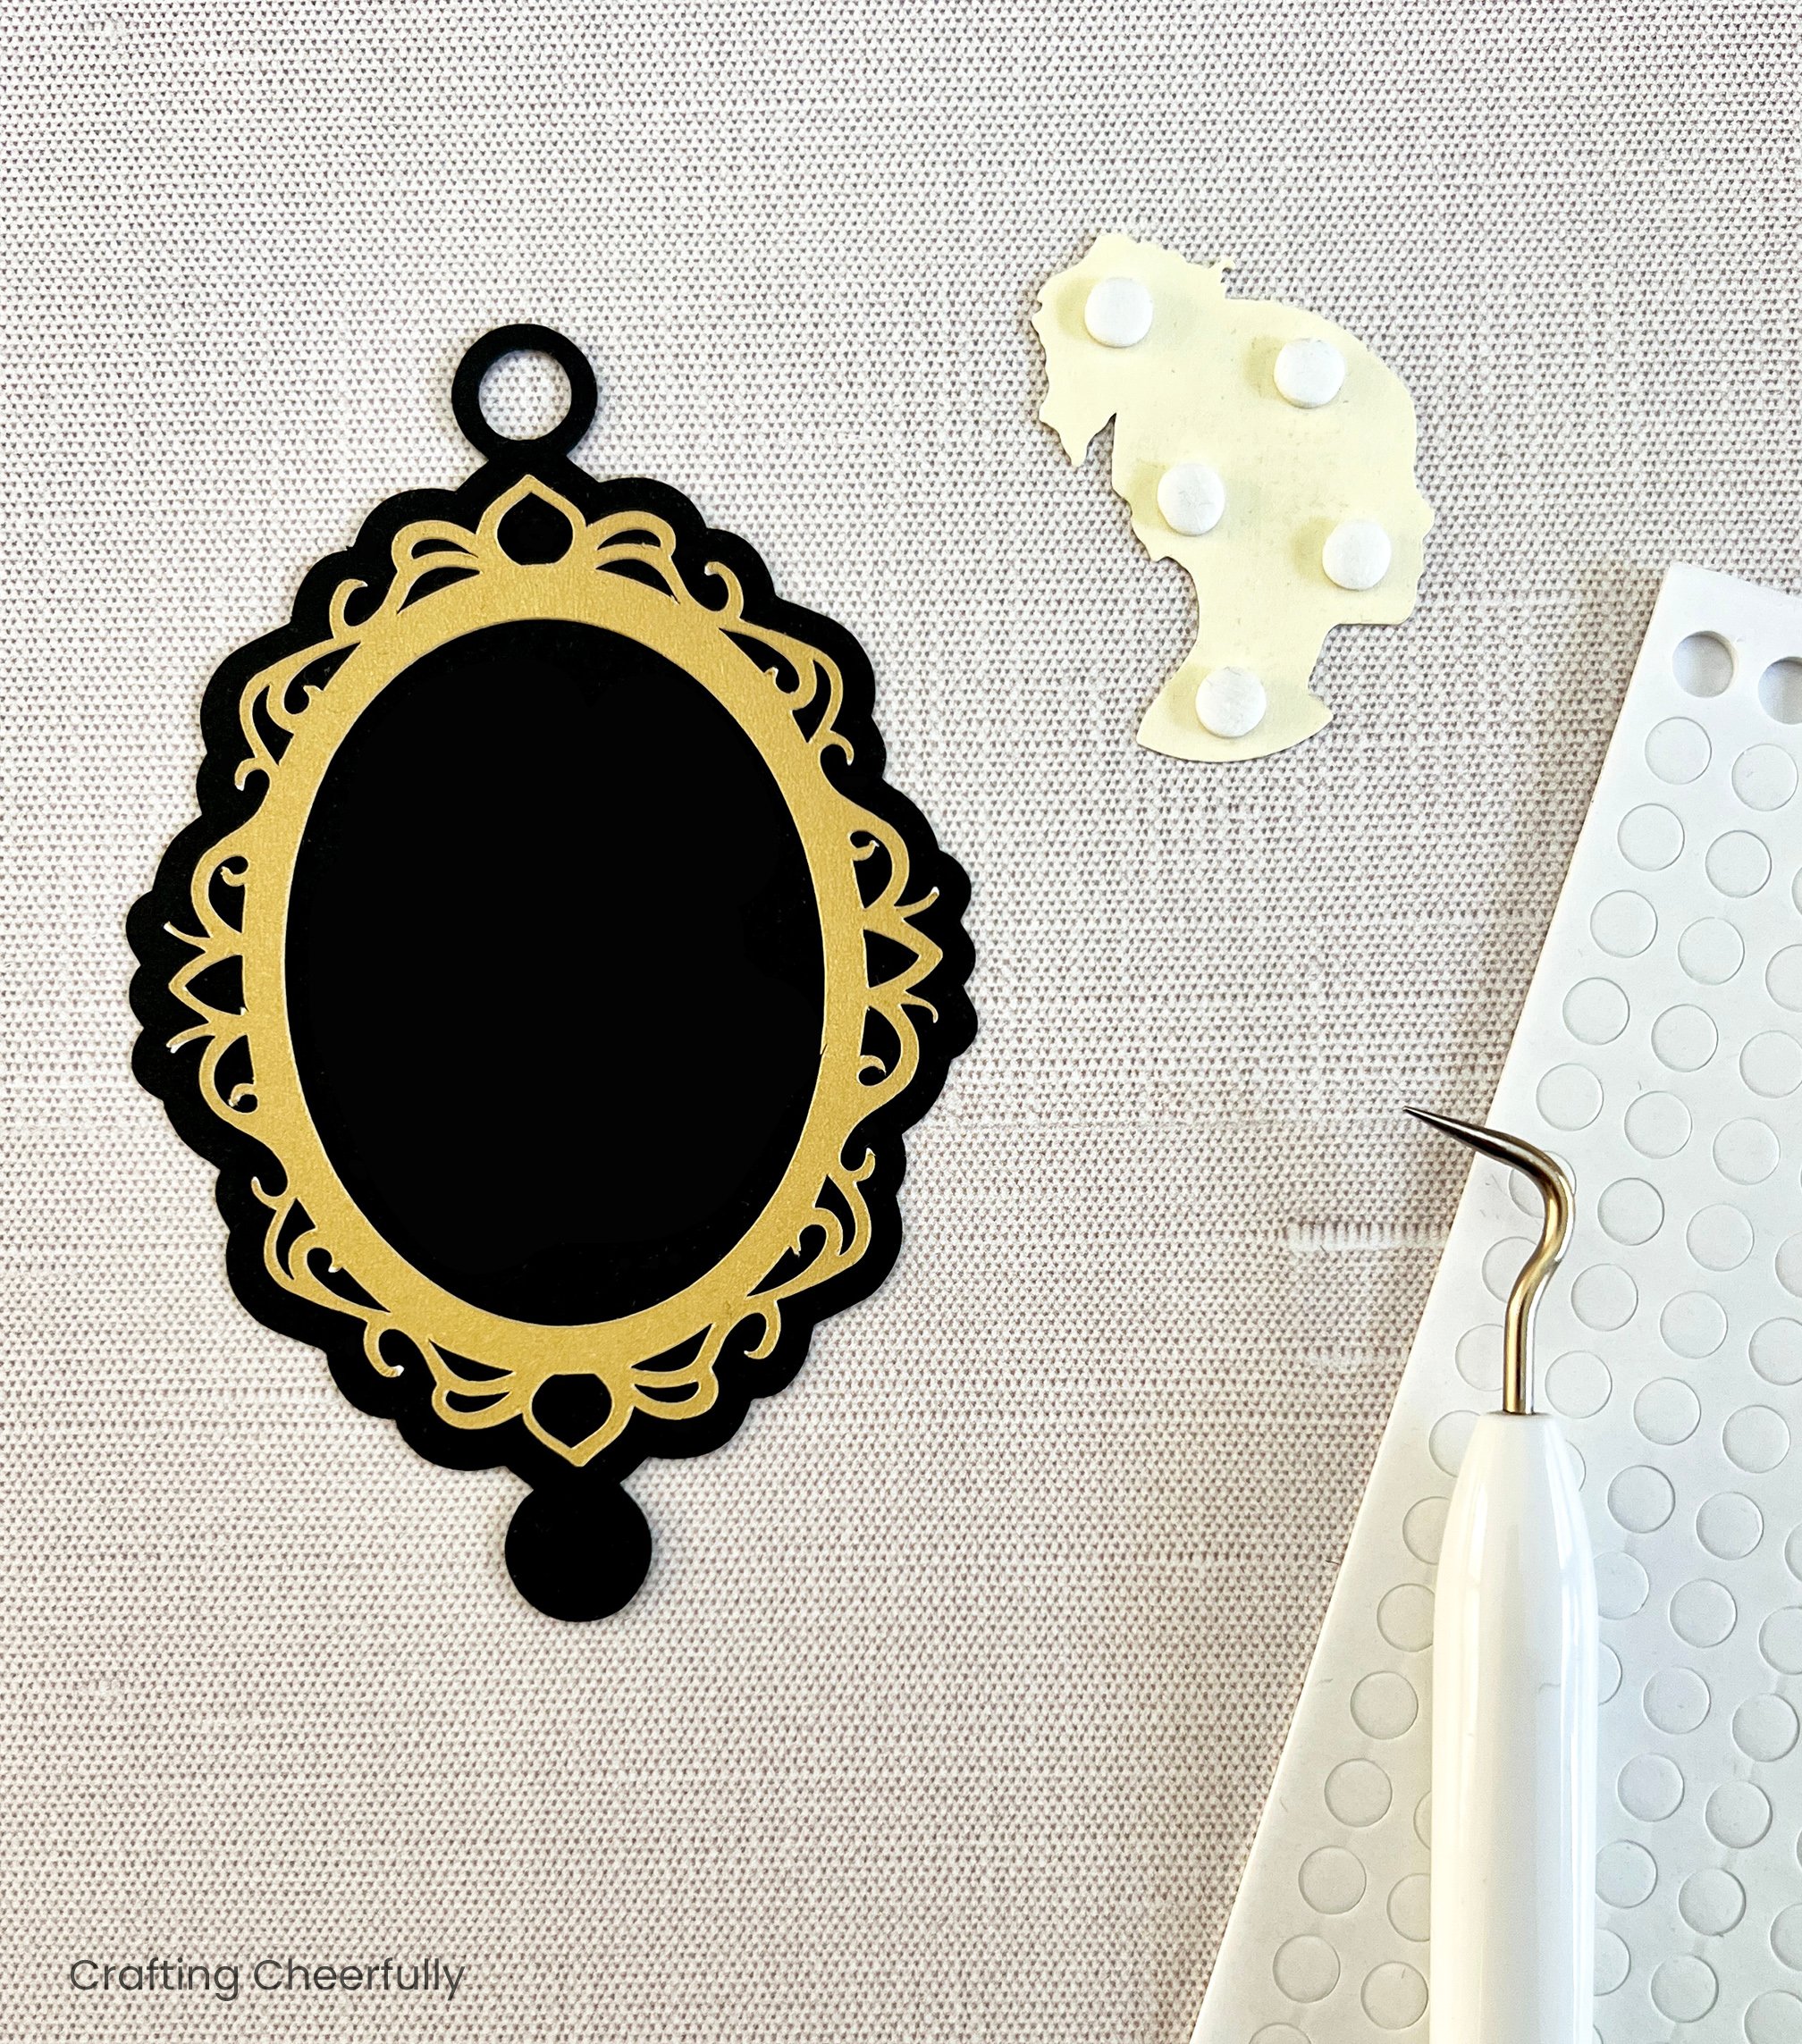
Use small foam adhesive dots to attach the silhouette to the base, centered in the middle of the gold frame. The foam dots add a bit of dimension which is nice!
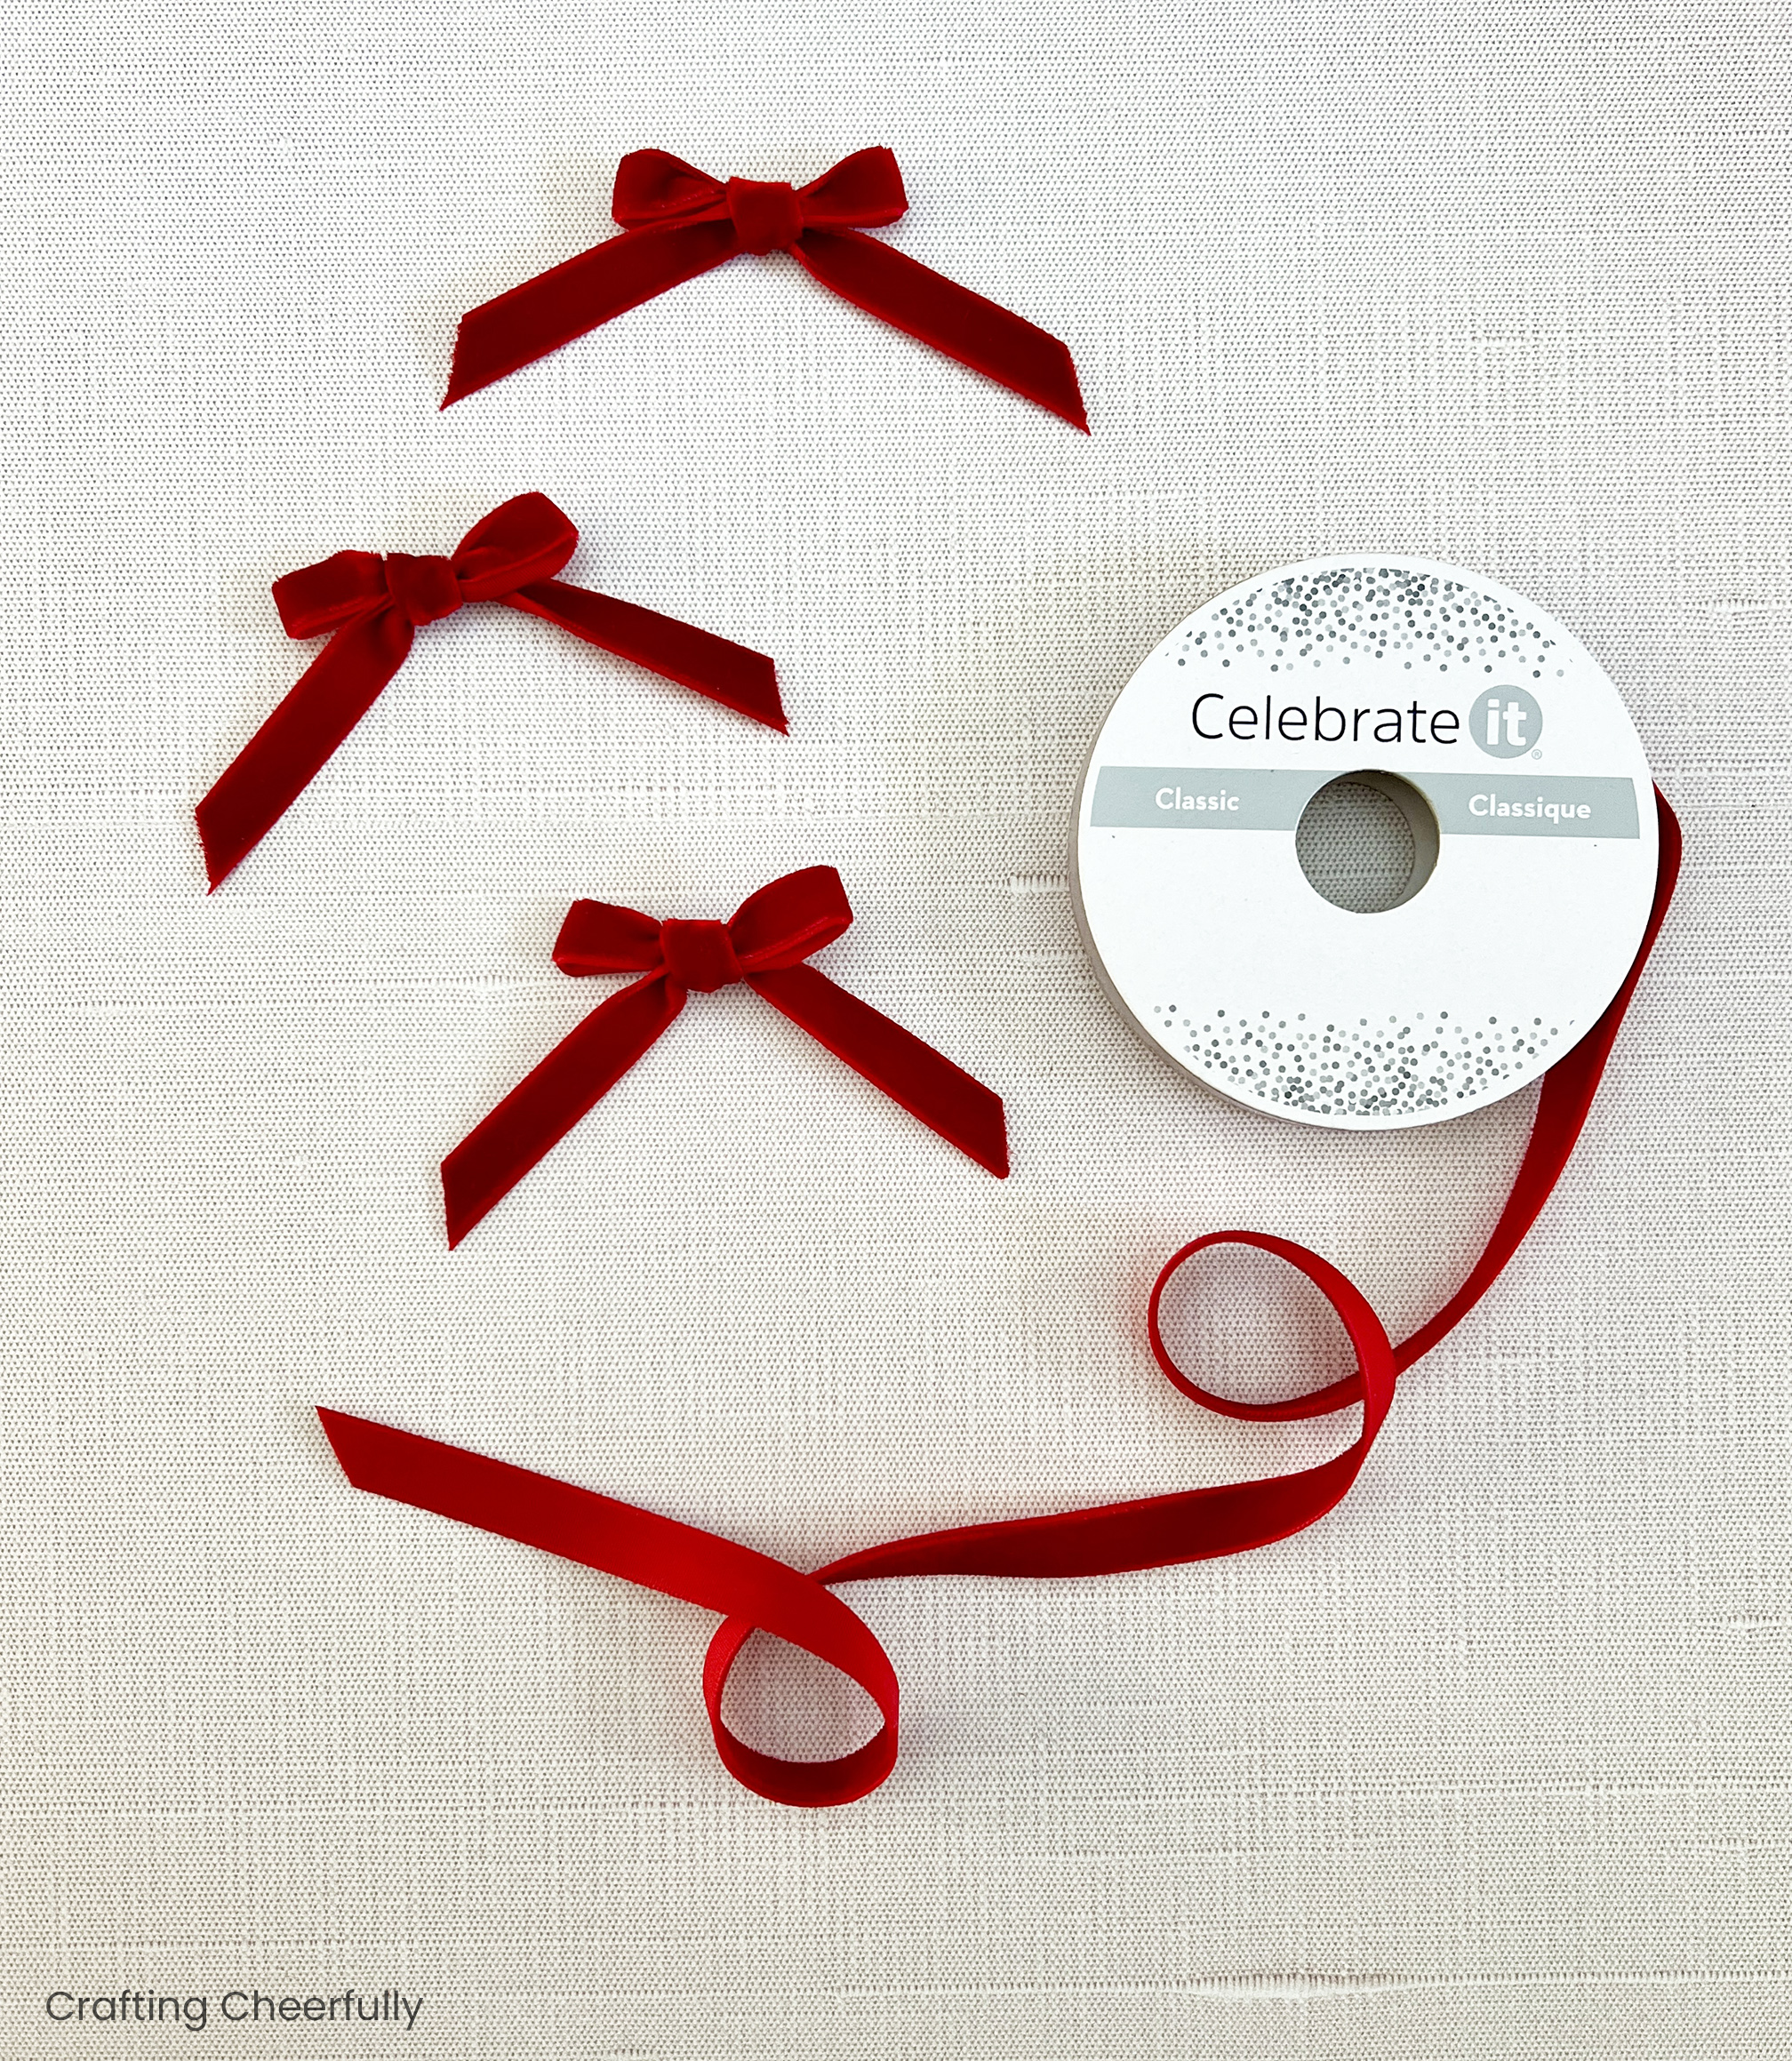
Step Nine: Add a red velvet bow to the bottom of the ornament using glue or an adhesive foam dot.
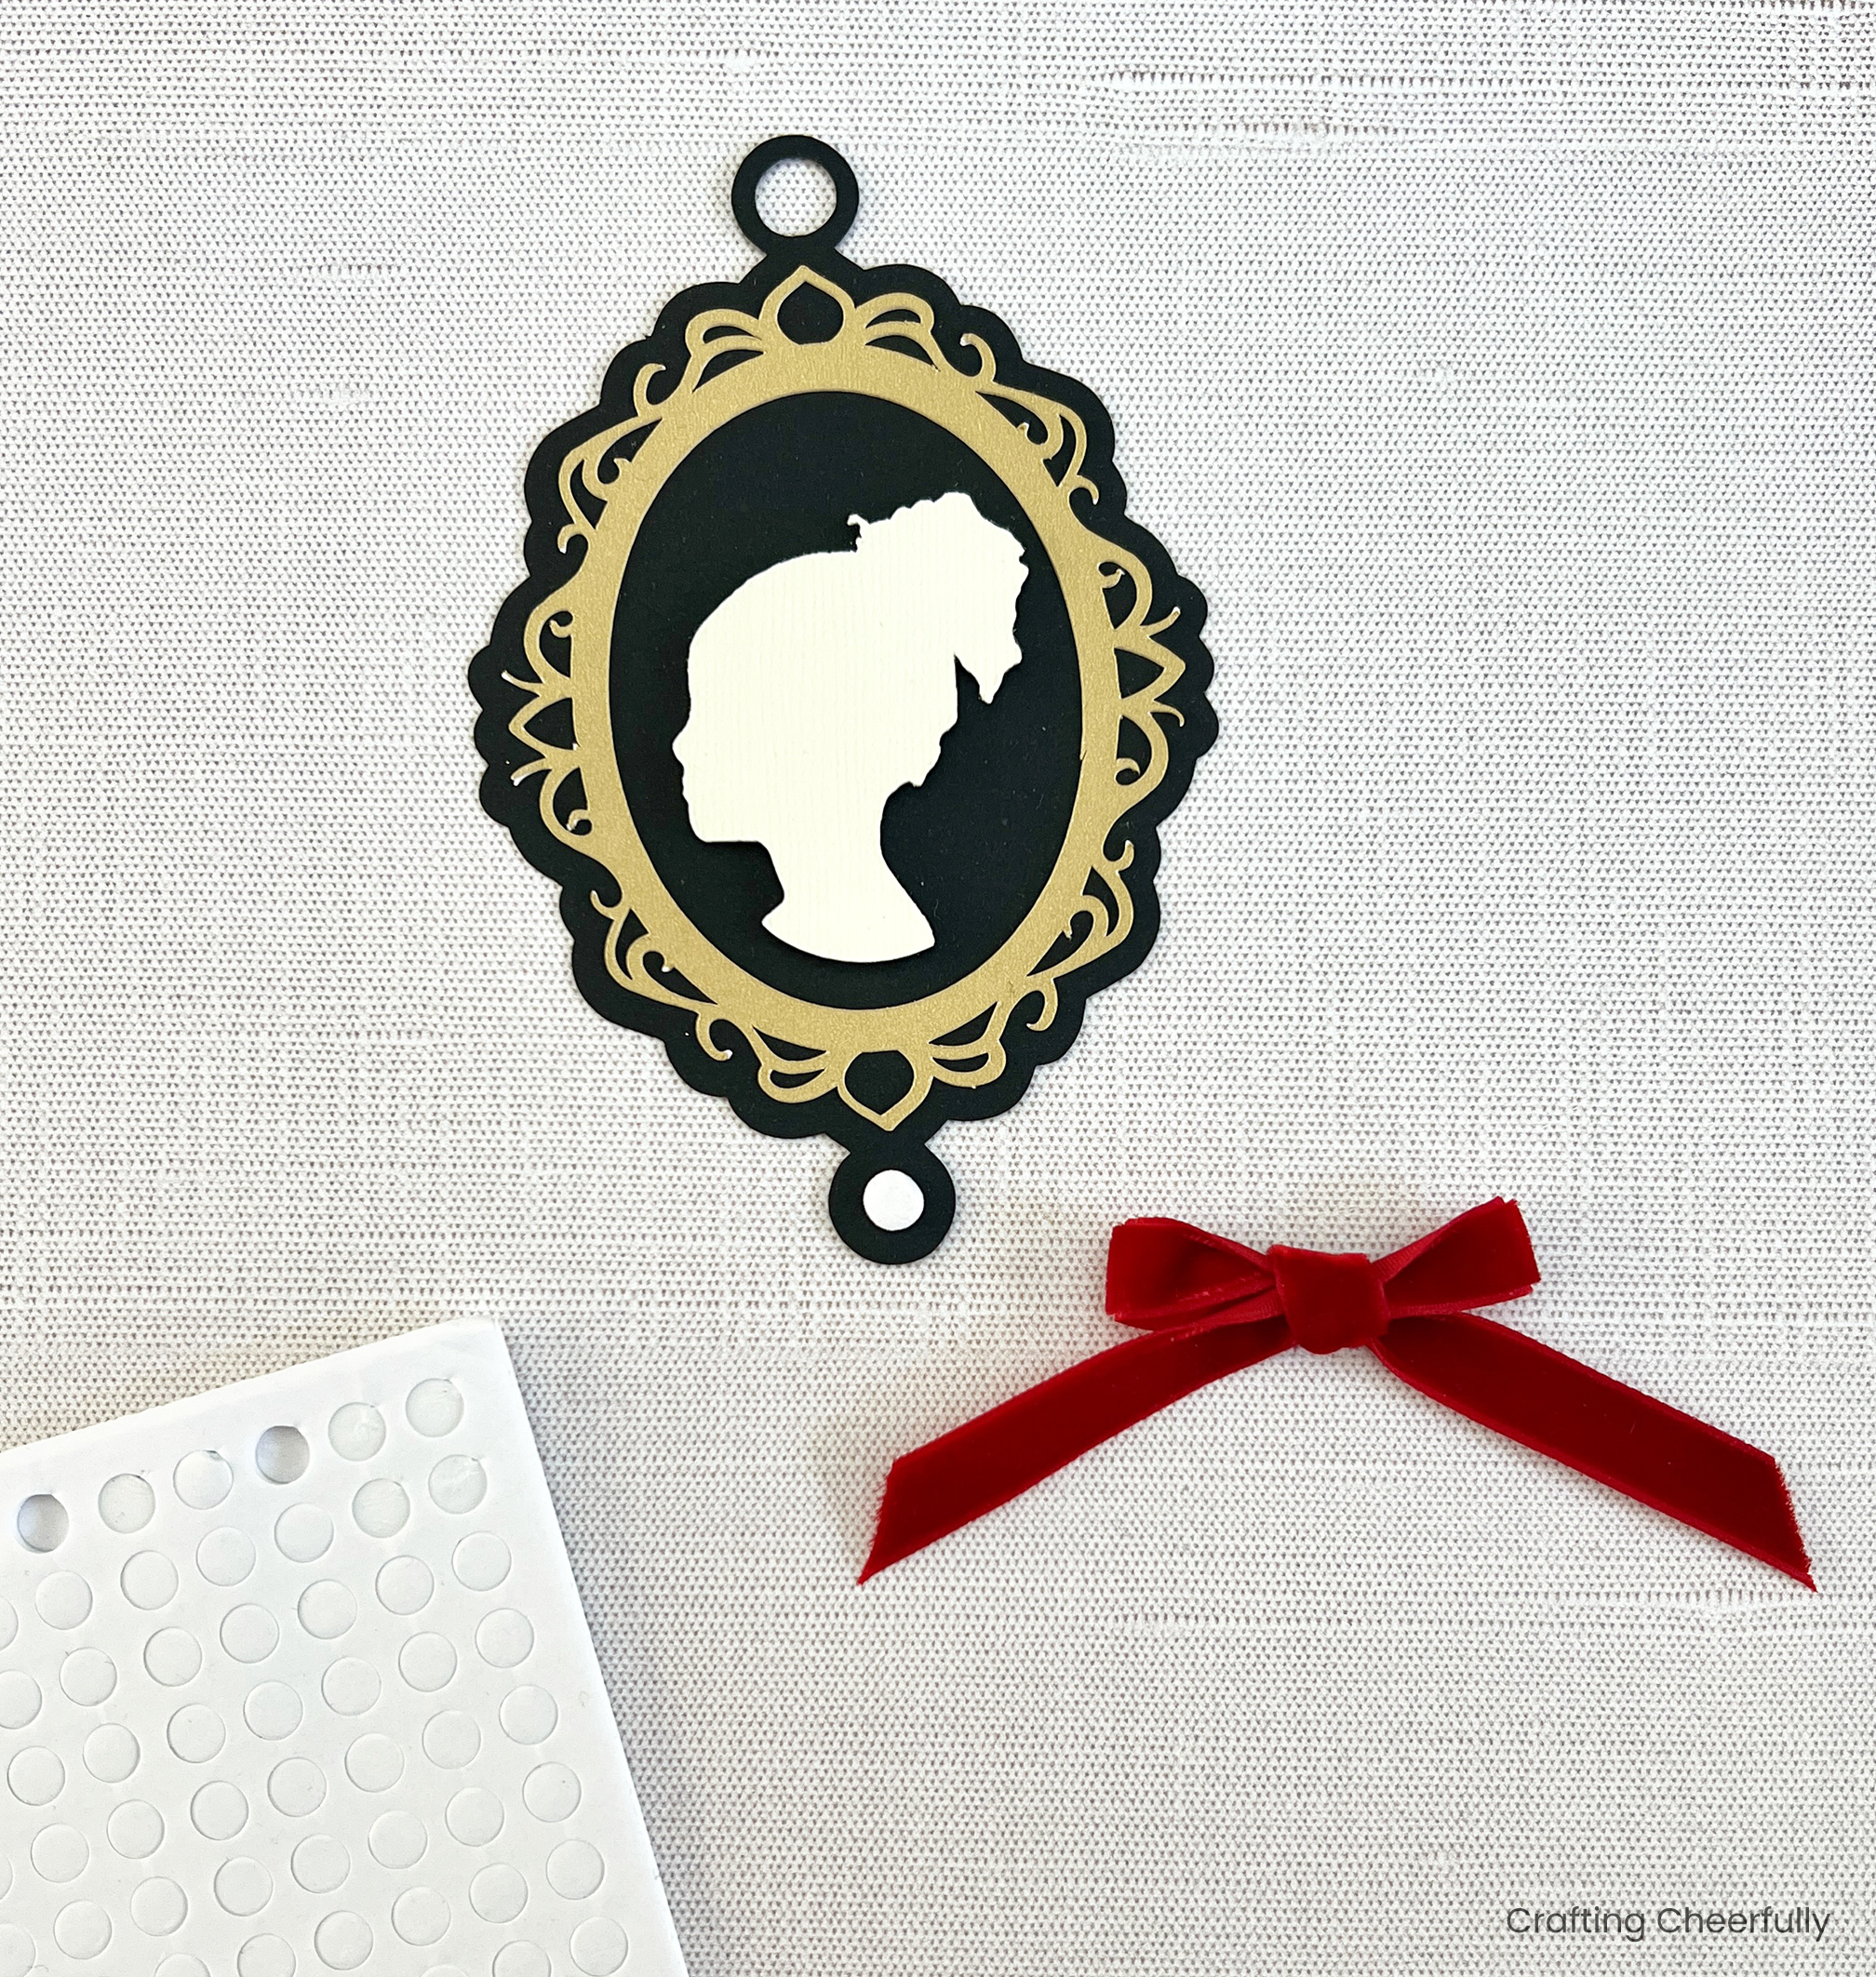
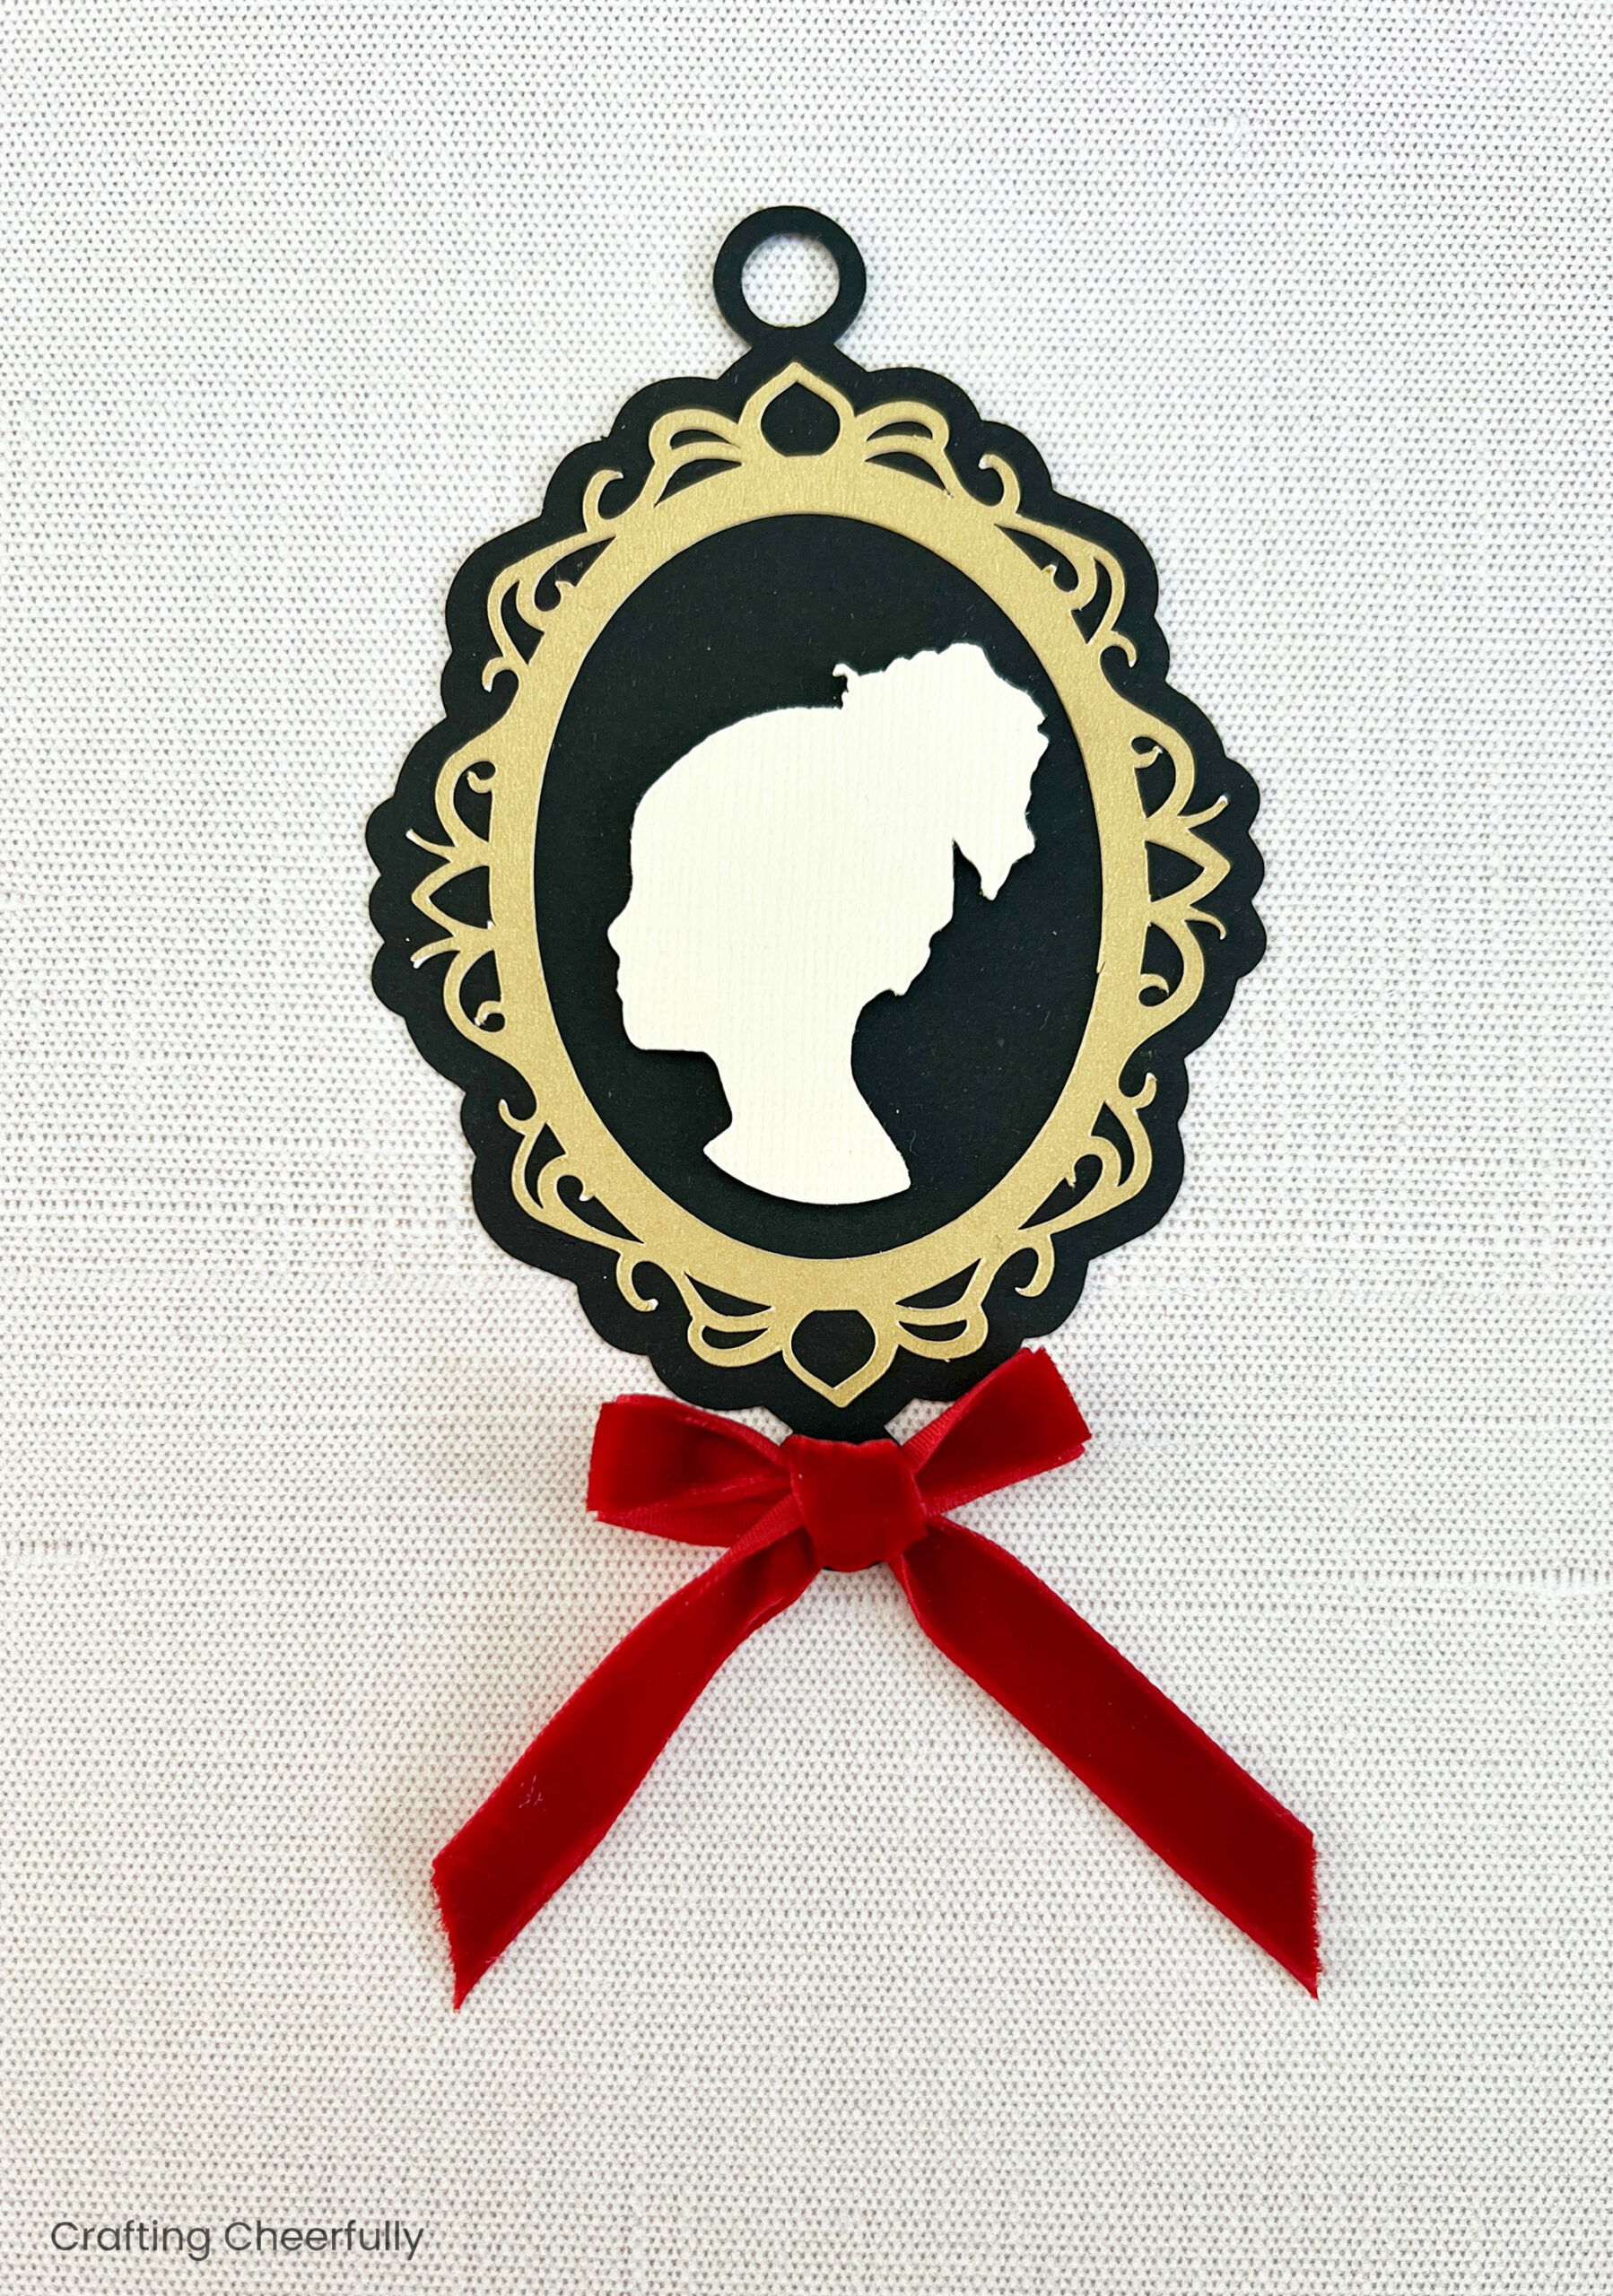
Step Ten: Add a hanging loop to the top of the ornament. For a really special touch, use a gold bracelet chain to mimic a silhouette necklace.
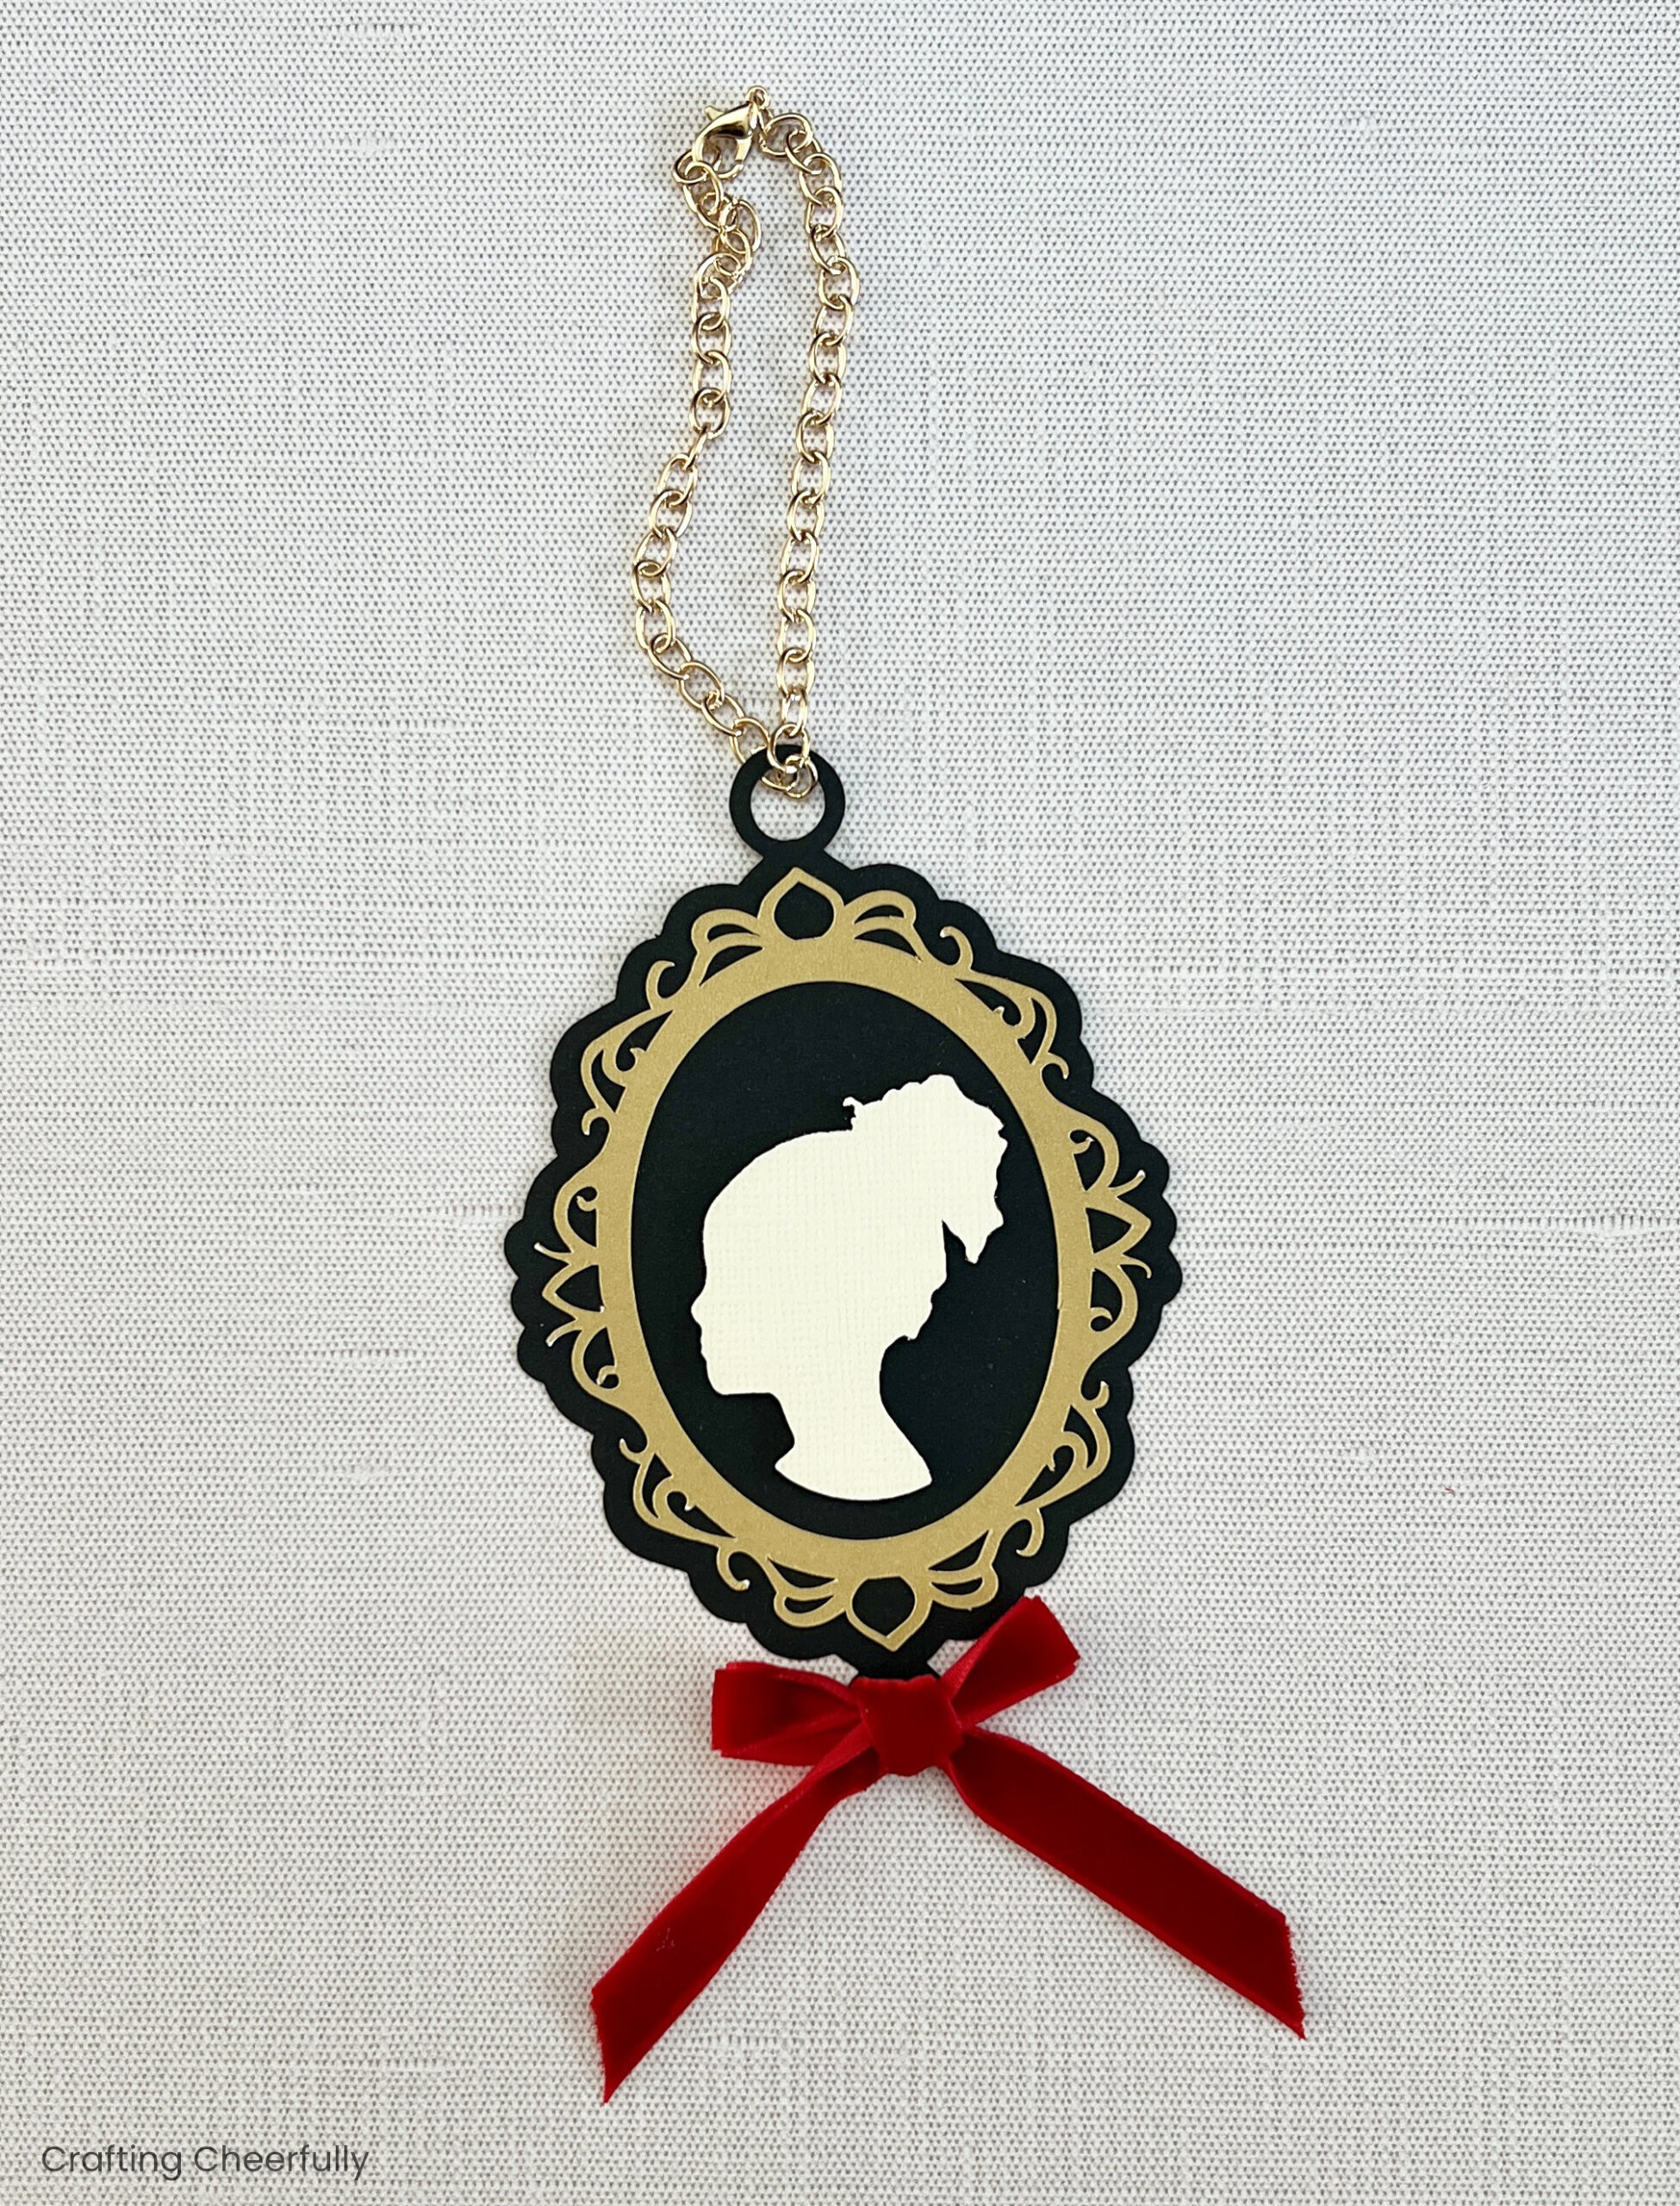
The ornament is finished! Be sure to add a date to the back to complete this special keepsake orament.
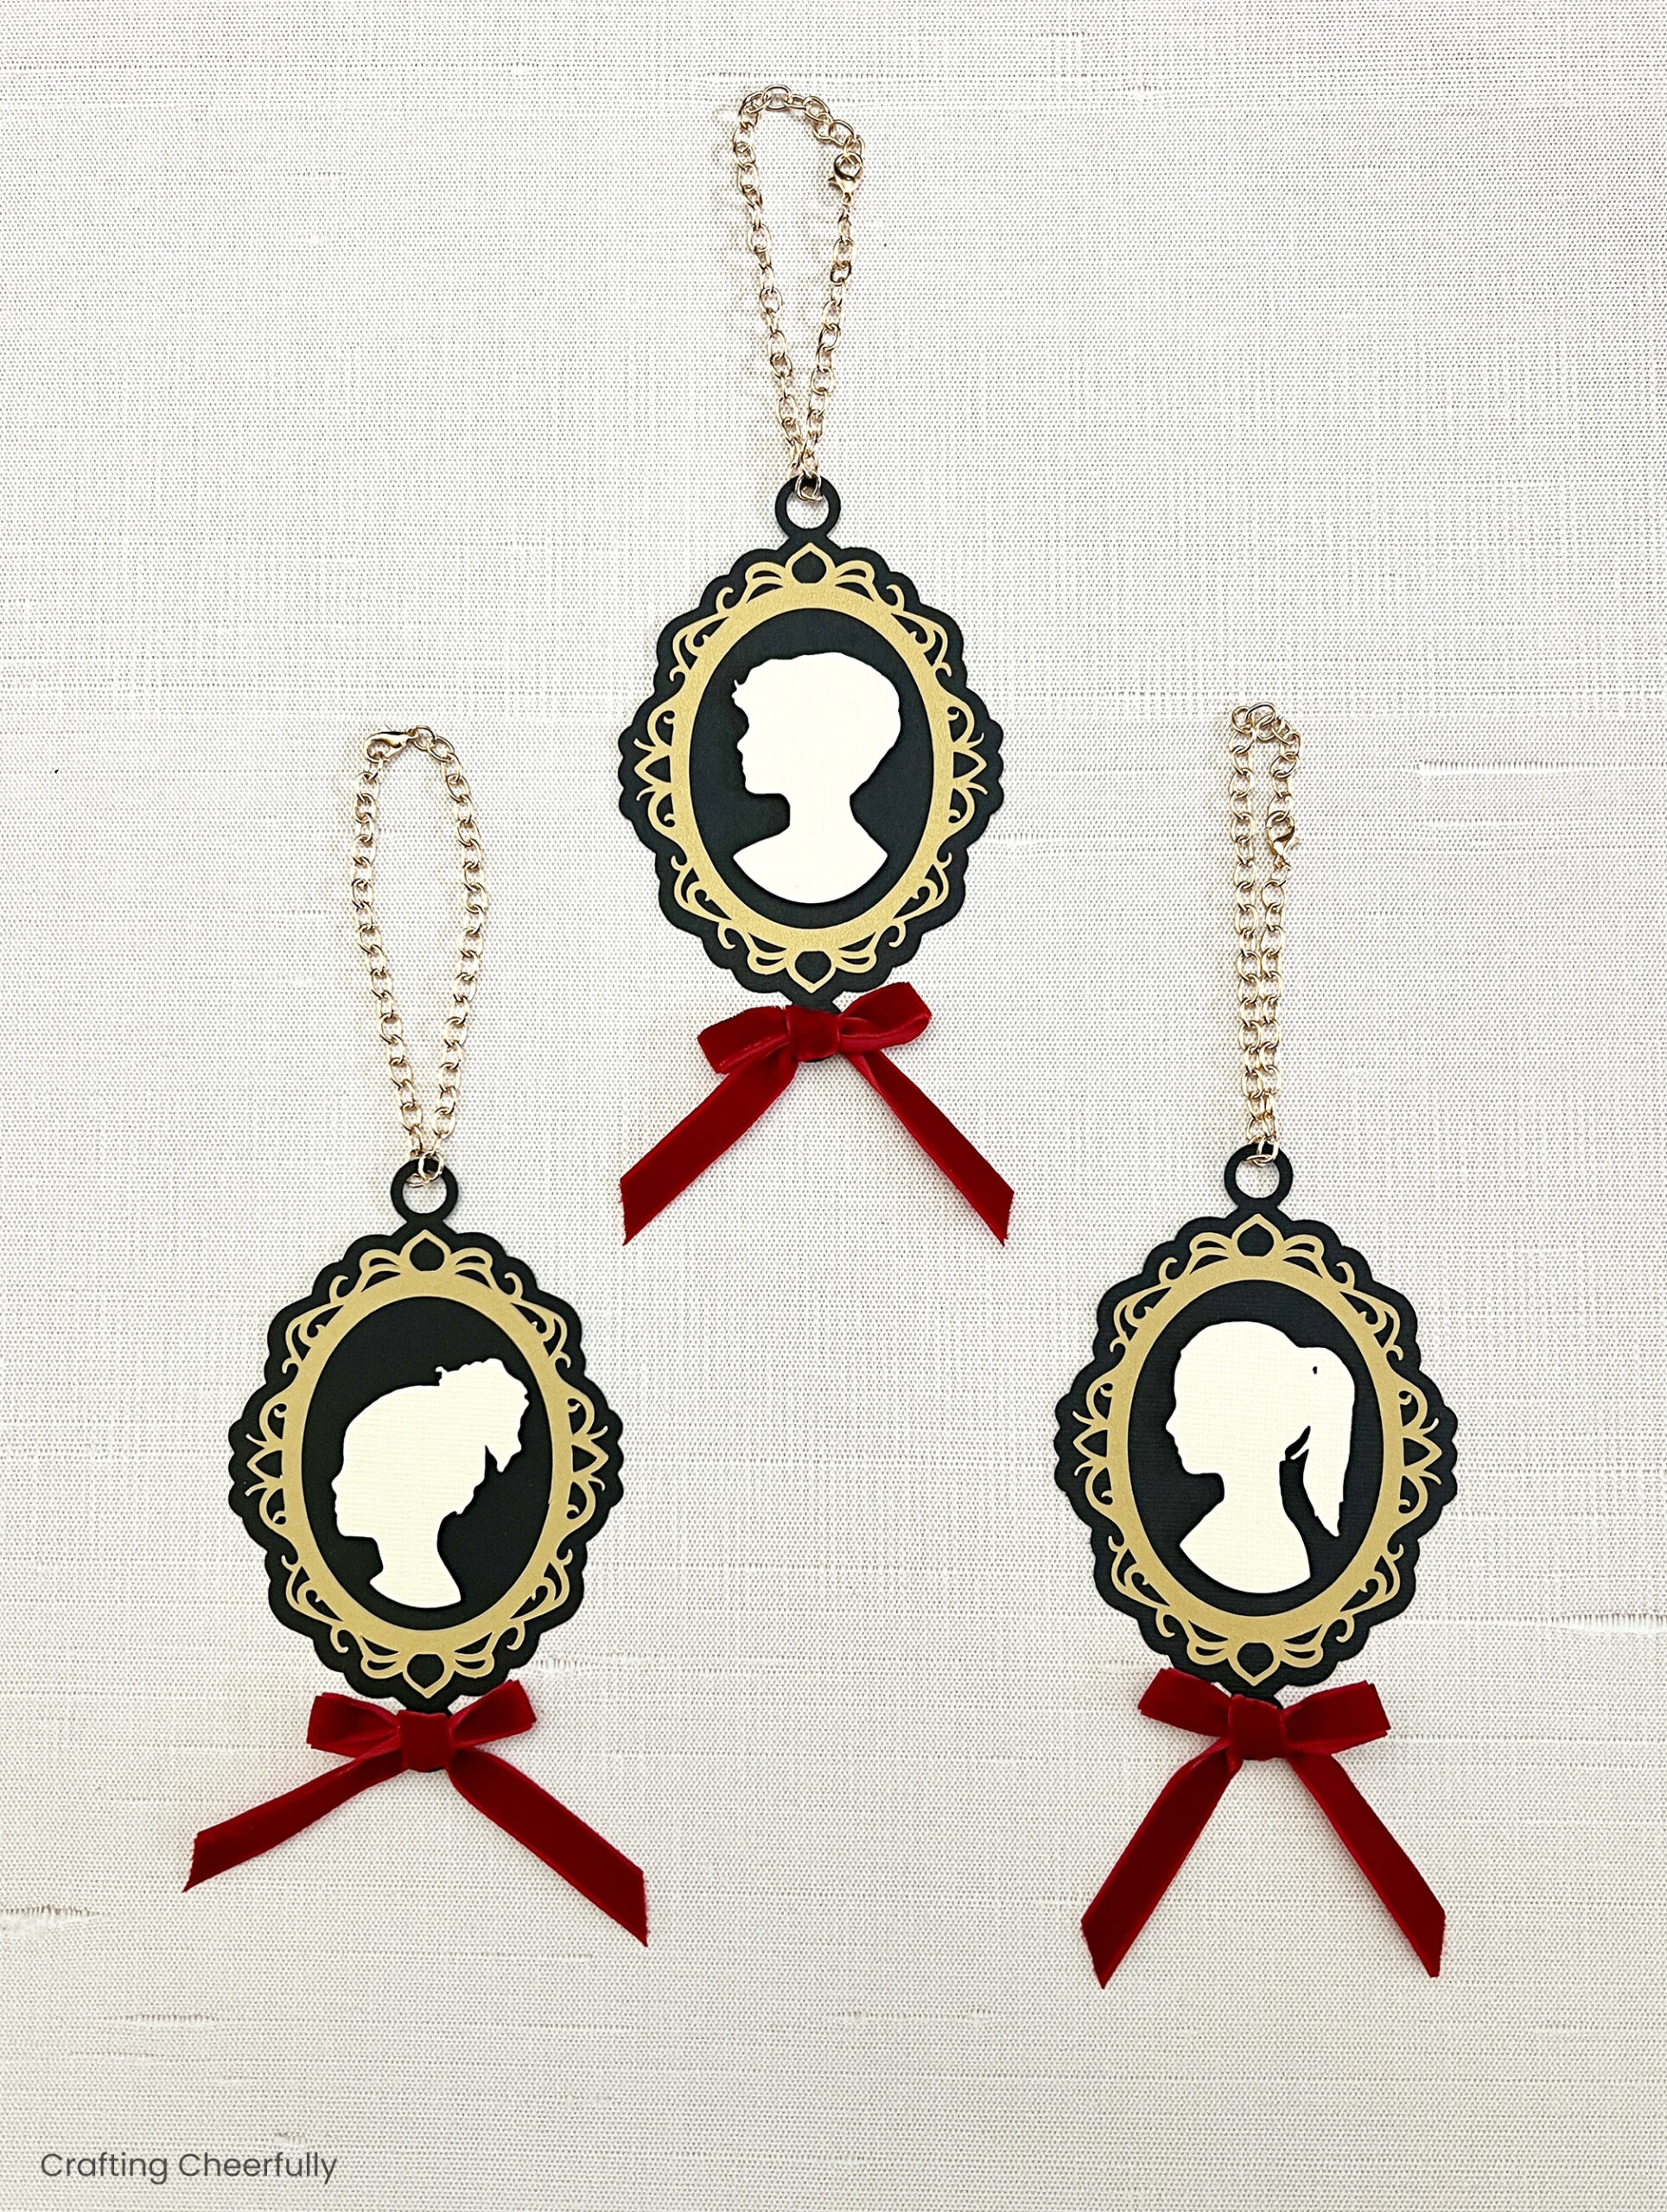
I hope you enjoyed this tutorial for making silhouette ornaments! They are a really amazing keepsake, especially for capturing a child’s unique profile at a specific age. There are just three more days left of my series “12 Days of Holiday Crafts” but I’ve saved some great craft projects for the end! In the meantime, check out my other Christmas Crafts for more crafty inspiration!