DIY Glitter Apple Teacher Ornament
Create a cute ornament gift for teachers! These apple glitter ornaments are fun to make using clear ornaments, glitter and your cutting machine.
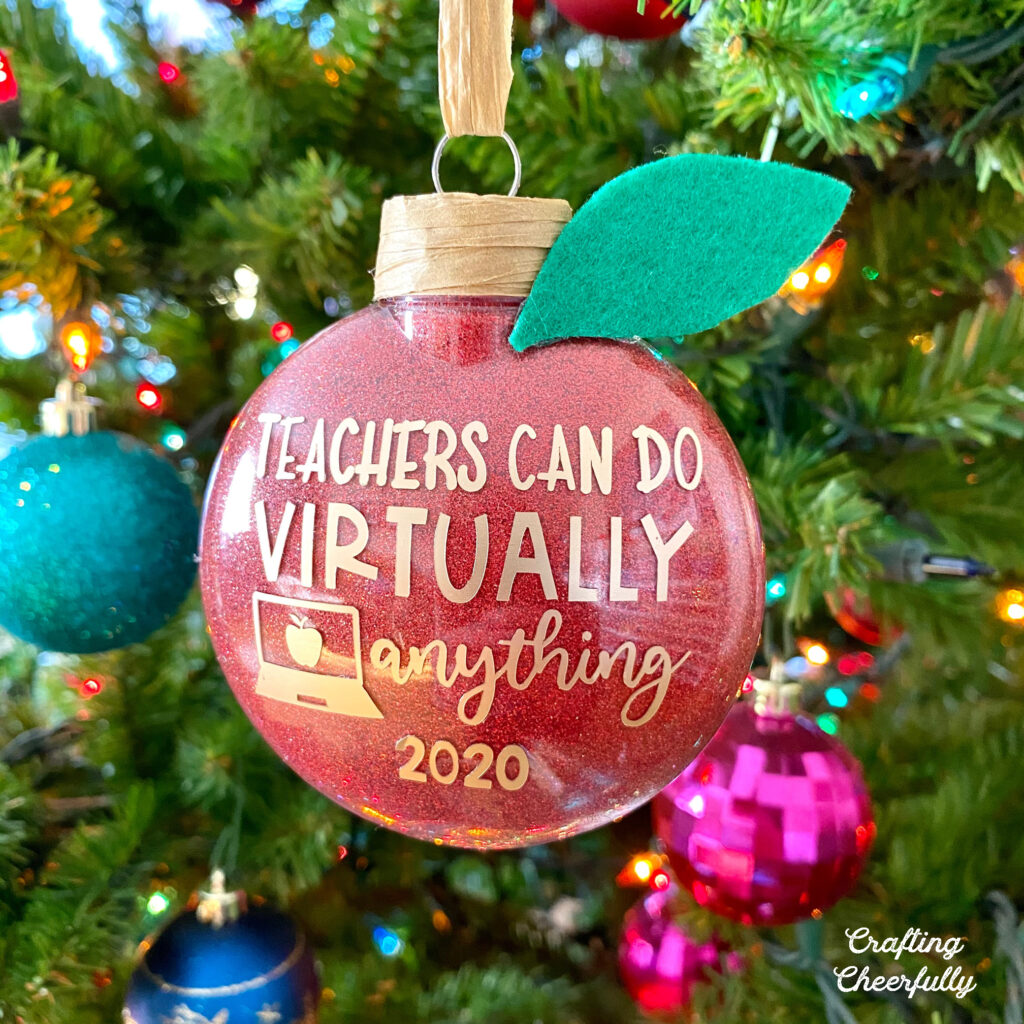
We are so thankful for our amazing teachers this year! Whether teaching virtually, in-person or a hybrid of both, teachers have been tasked with an incredibly difficult year. We wanted to make a fun ornament to commemorate this most bizarre year of learning so we made these sweet apple glitter ornaments as a fun holiday gift.
This was my first time trying glitter ornaments and I’m so excited with how they turned out! It was easier than I thought and less messy than I had imagined! My first one turned out a little spotty as I got the hang of rotating the ornament.
DIY Teacher Ornament
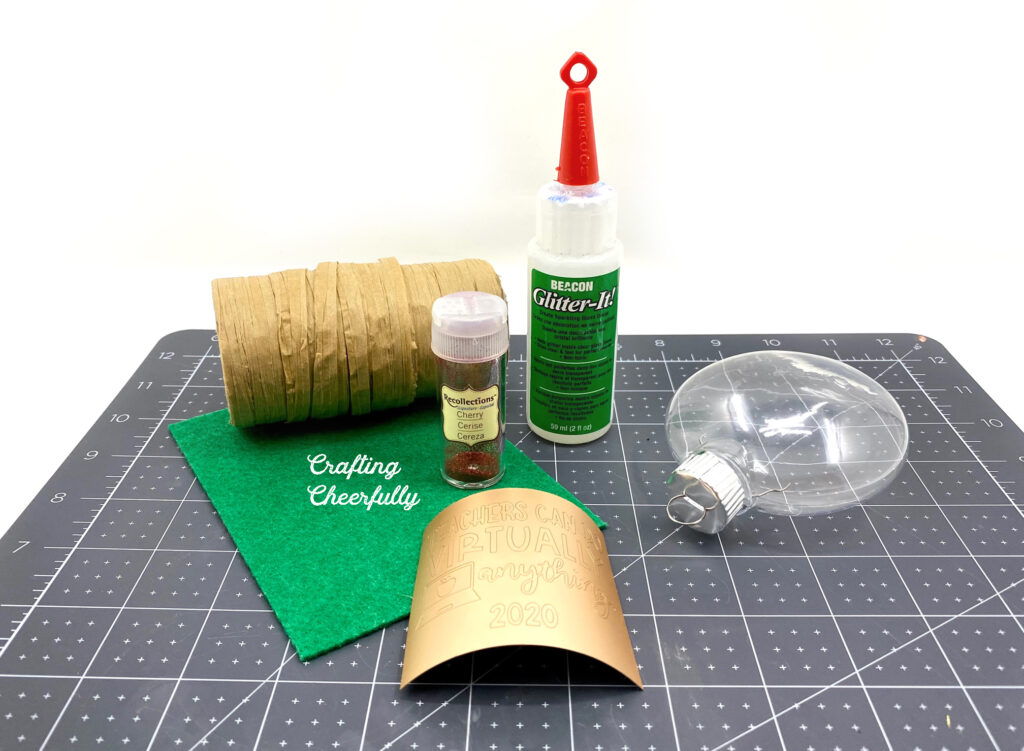
Supplies Needed:
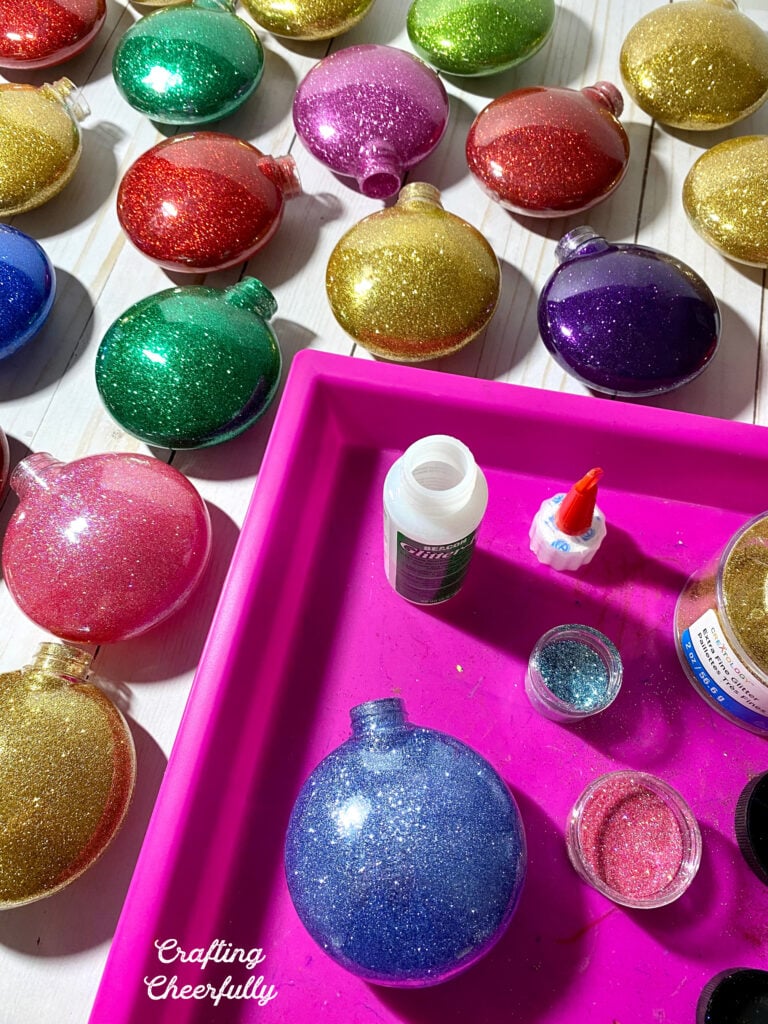
- Clear disc ornament – I found mine at Michaels
- Beacon Glitter-It
- Red Glitter
- Gold Cricut Adhesive Foil or Permanent Vinyl
- Cut file – I used one from the Etsy Shop: Calligraphy Supply
- Green Stiff Felt
- Brown Raffia ribbon
Step by Step Instructions for DIY Teacher Ornament
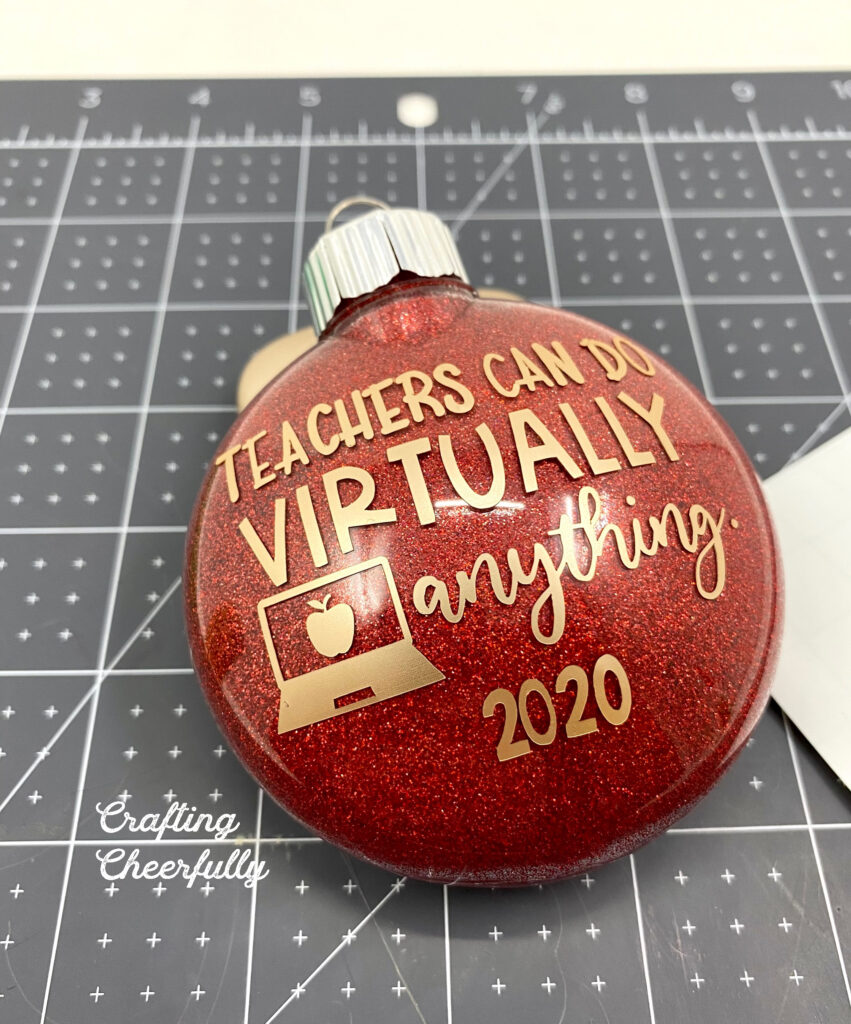
Step One: Glitter the inside of the ornament.
Follow the directions for Glitter-it. Clean out the ornament with water and vinegar and let dry completely. Coat the inside of the ornament with the Glitter-it by pouring a little in and rotating the ornament around until the inside is completely coated. Pour out any excess. I set my ornament upside down and let any excess drip out.
Next, pour the red glitter inside the ornament and again rotate the ornament around to cover the inside with glitter. Pour out the excess glitter and let dry.

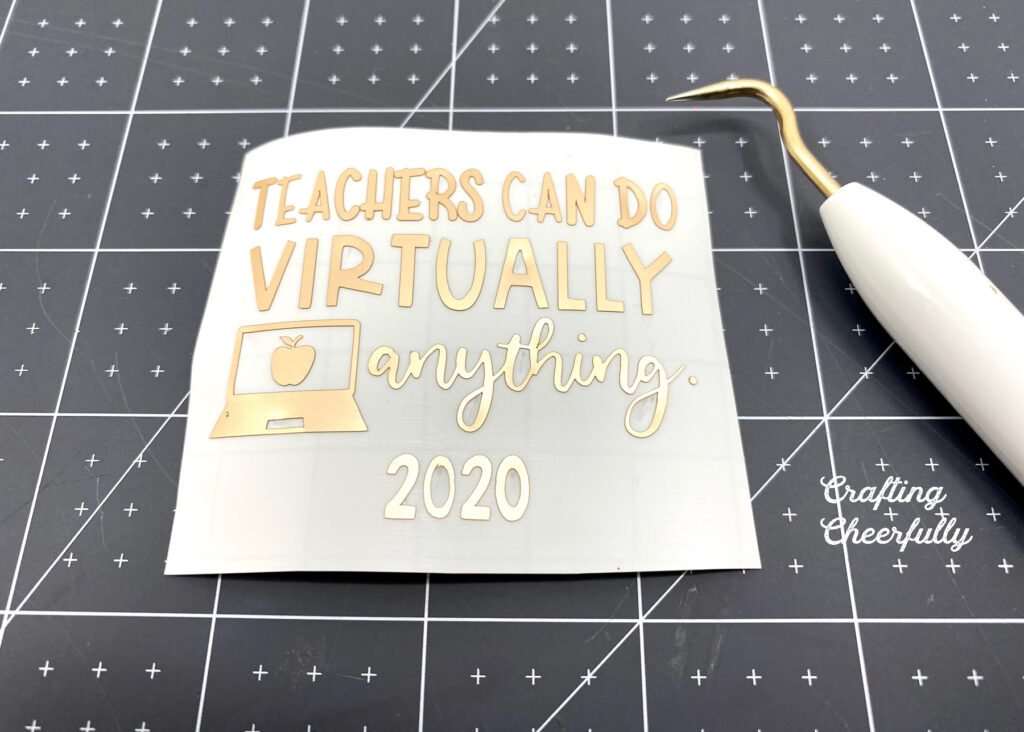
Step Two: Add the vinyl message to the front of the ornament.
There are so many great cut files available online, some free and some you can buy. I found the perfect cut file for our virtual teachers on Etsy from the shop Calligraphy Supply! Cut it using permanent vinyl or adhesive foil. To fit my ornaments, I sized the design to 2.5″ wide by 2″ tall.
Tip: Since I cut the design so small, I had a hard time weeding the little keys. To fix this, I created a rectangle shape in Cricut Design Space to cover the keyboard. I then welded the two together so the keys would not cut! If you are able to use the keys, I definitely would. They are a great part of the design!
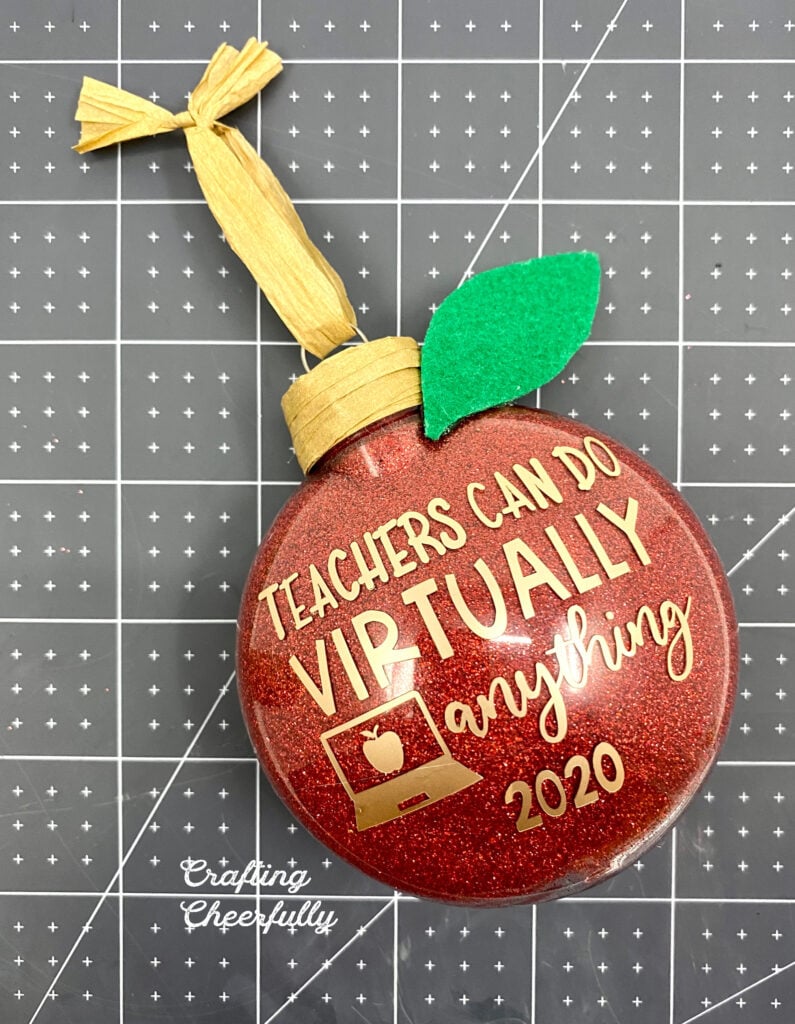
Step Three: Create a stem and leaf for the apple ornament.
Finish the apple by creating a stem and leaf. Cover the ornament cap with brown raffia using hot glue. Next, add a green leaf from stiffened felt.
Finally, add a hanging loop with the brown raffia and the ornament is finished!
I hope you enjoyed this fun ornament craft! Hopefully, I’ll be sharing a couple more I made using glitter ornaments!
Check out these other fun ornament crafts for more DIY craft ideas!


![]()
![]()

![]()