
DIY Vintage Clown Pumpkins
Learn how to create vintage clown pumpkins using paper and paint! They are creepy and fun and a great alternative to carving pumpkins!

Hello Crafty Friends! Today I’m excited to share these fun DIY vintage clown pumpkins with you. These clown pumpkins are a great way to decorate pumpkins without carving. They are a little bit creepy (especially for those who don’t like clowns) but also fun and playful. They only take a few supplies to decorate – acrylic paint and cardstock!
For these clown pumpkins, I recommend using fake white pumpkins in various sizes. Vintage clowns used white makeup so starting with a white or cream colored pumpkin is helpful.

If you aren’t able to find fake white pumpkins you can paint them using acrylic paint or spray paint. I don’t recommend using real pumpkins for this project, since once the pumpkins are painted they can’t be left outside to decompose. Plus – using fake pumpkins means you can enjoy them year to year!
How to Make Clown Pumpkins
Supplies Needed
- Fake white/cream pumpkins. I used two 9″ cream pumpkins and a 6.5″ cream pumpkin.
- Orange and Black Acrylic Paint
- Cardstock in orange, black and white plus some fun patterns like stripes and polkadots
- Black buttons
- Orange and White Yarn to make pom-poms or large purchased pom-poms
- Scissors, tape, hot glue
- Ribbon

Clown Pumpkin Paper Hats
To create the clown accessories like the hats, I used paper which was both economical and had the vintage feel I was going for. I made things up as I went trying to figure out new ways to manipulate the paper to look like ruffs and bows.
For the hats I cut a half circle and used it to form a cone, using tape to secure it. I added a yarn pom-pom to the top and buttons down the front. Pleating a thin strip of paper worked well to add to the bottom of the hat using hot glue. Use black buttons and paper to decorate the hats and add pattern and color.


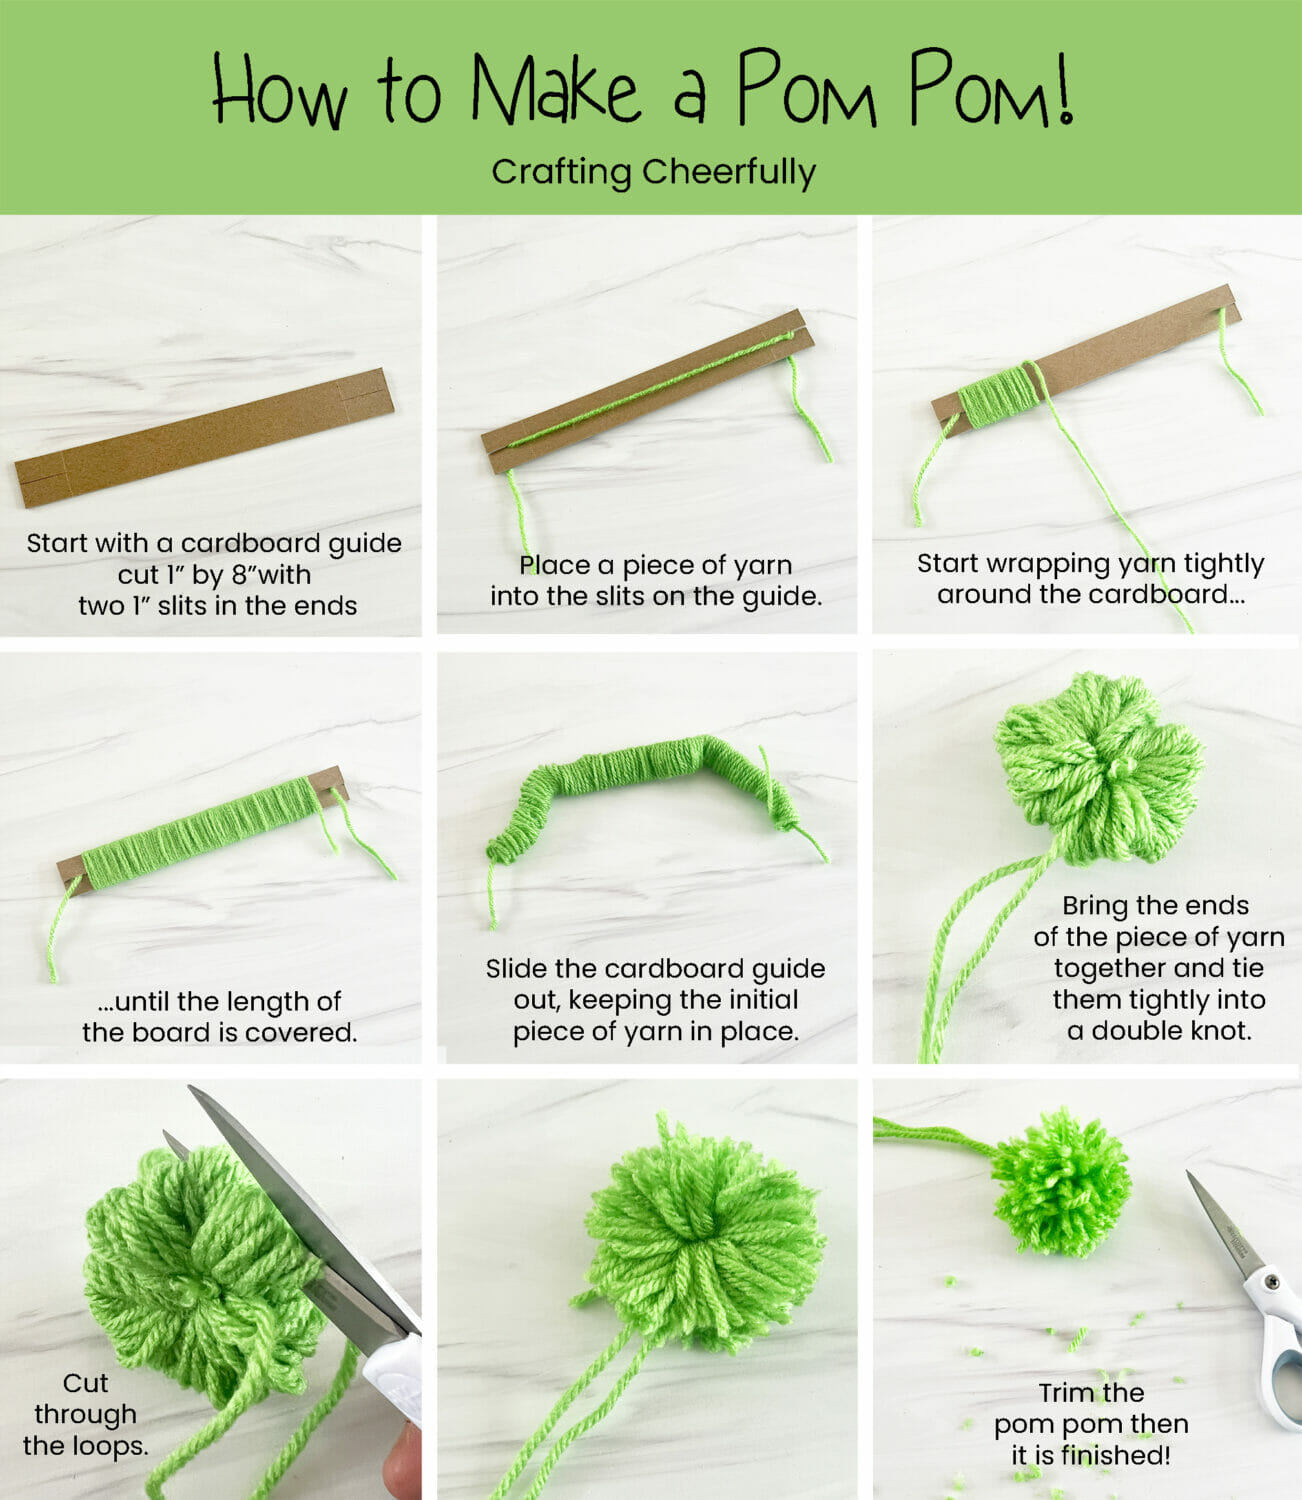
You can check out my paper hat tutorial for more details on creating a cone-style hat from paper plus grab a free template. Below is a helpful guide on how to create a pom pom for the top of the hat!
Clown Pumpkin Paper Ruffs
Two of my clowns have paper ruffs created two different ways. The first was made with accordion-folded paper. I cut strips of black and orange polka-dot paper, then accordion folded them. I layered them together to create a large circle ruff the pumpkin could sit inside of.

My smaller pumpkin’s ruff was created using small loops of paper. I cut a large cardstock circle slightly larger than my pumpkin. Next, I cut strips of black-and-white striped paper about 1″ wide for the bottom layer. For the top layer I cut strips of orange polka dot paper about 3/4″ wide
To create the two layers of ruff, I taped the strips of paper around the cardstock circle, looping the strips of paper as I taped them down. When finished, the pumpkin head could sit right inside the ruff!

Painting the Clown Faces
Once I had the paper accessories created, I painted clown faces on the front of the pumpkins using orange and black acrylic paint. I searched online for old pictures of vintage clowns for ideas on how they did their face paint and makeup.


Assembling the Clown Pumpkins
After the faces are painted, it’s time to add the paper accessories you created earlier. I chose not to glue my paper accessories onto the white pumpkins so I could reuse the pumpkins at Thanksgiving. Since the clown faces are only painted on one side of the pumpkin they can easily be hidden if the pumpkins are placed against a wall. If you plan to keep these pumpkins just for Halloween, use hot glue to adhere the paper accessories to each pumpkin.


To vary the height of the pumpkins and create a Halloween display, turn a planter over and set one of the clown pumpkins on top. I did this with one of my pumpkins and added a large exaggerated collar and tie made from paper.
I hope you enjoyed these fun clown pumpkins! Visit my Halloween Project Page for more craft tutorials for the Halloween season!


4 Comments