
Pumpkin Medallion DIY Halloween Banner
Looking for a fun DIY Halloween banner? Learn how to create this cute pumpkin medallion banner using cardstock and yarn! A fun way to decorate for the Halloween season!
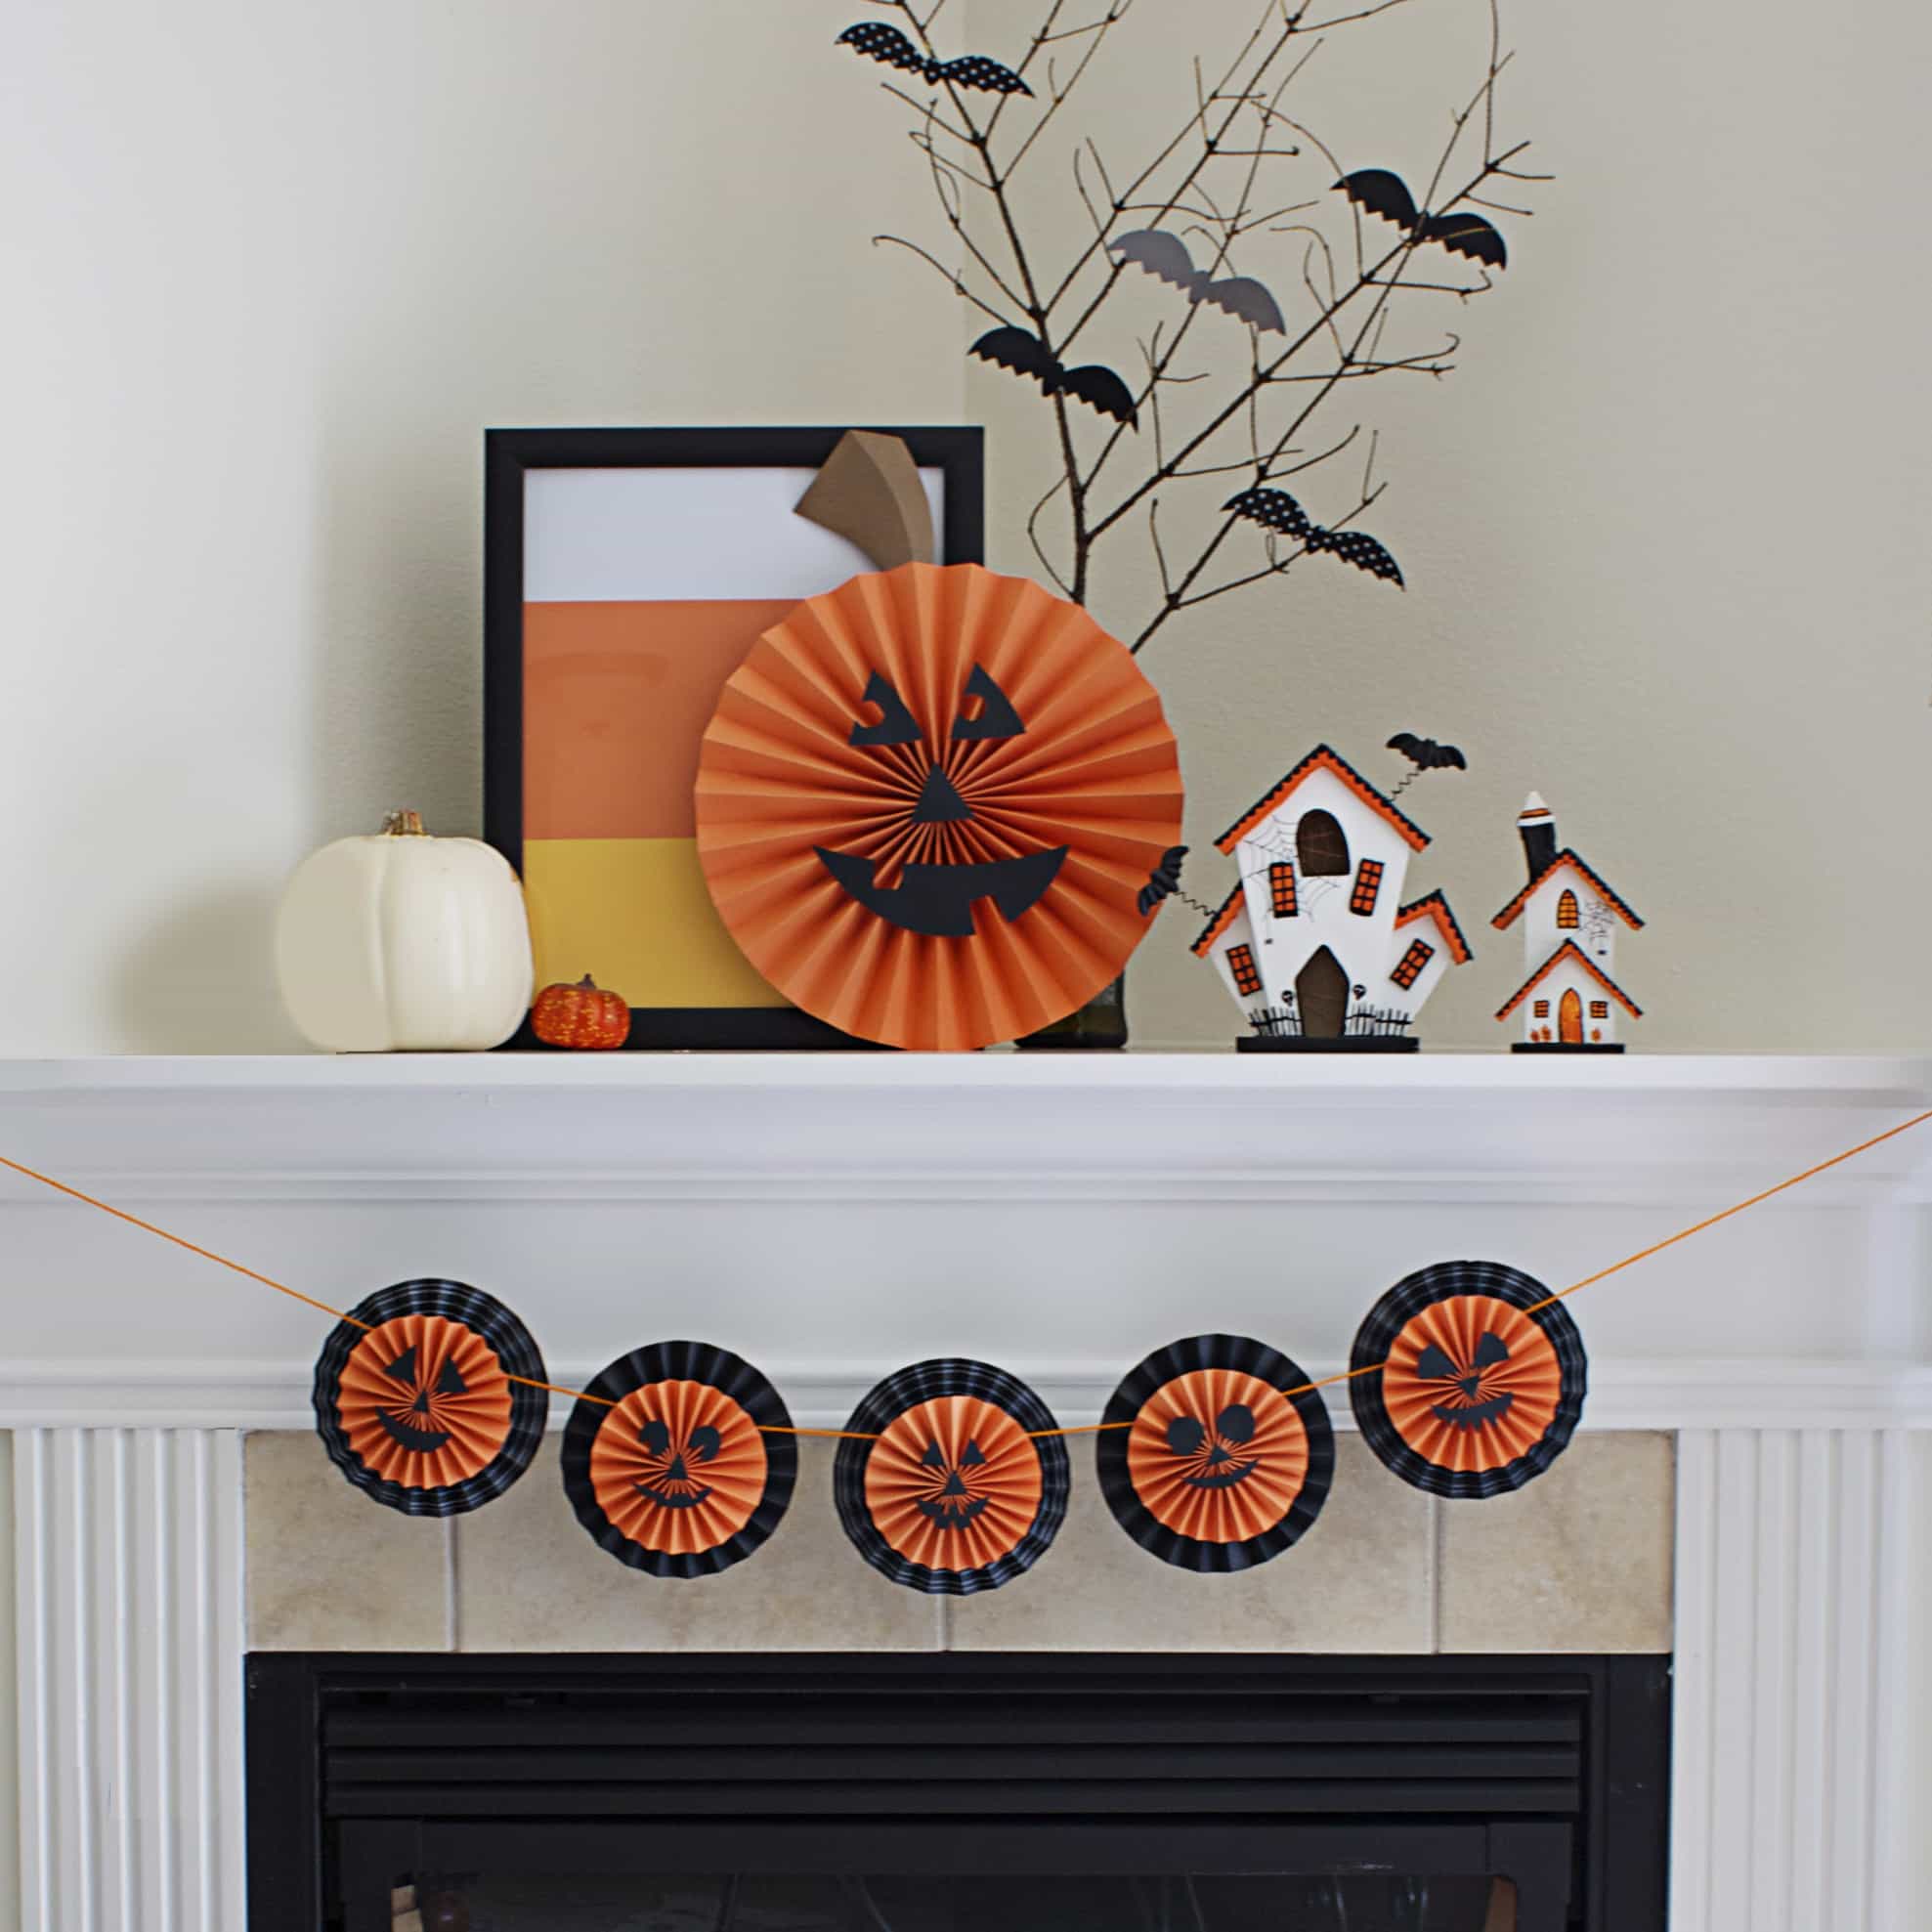
Hello Crafty Friends! Today I have a fun Halloween project to share with you – a DIY Halloween banner made from paper pumpkin medallions! I love creating paper medallions and thought it would be cute to turn some into little smiling pumpkins. They are easy and inexpensive to make, plus they are incredibly festive! Banners are such a fun and easy way to decorate for the holidays! This paper pumpkin banner is perfect for teh Halloween season!
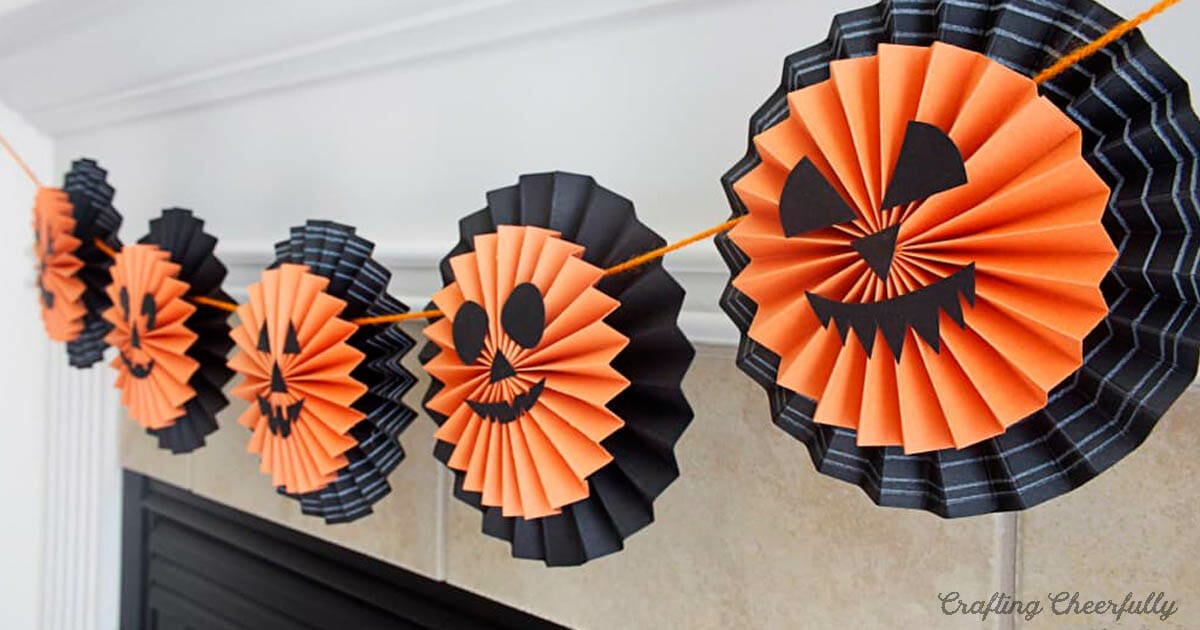
These cute little pumpkins are easy to make and the entire garland only uses a few supplies including paper and yarn. The paper medallions are created by folding card stock back and forth like an accordion. A scoring board is an amazing tool that makes accordion folding really easy. While you don’t need a scoring board to make this project, it will help! It’s also a fun tool to have on hand for other projects.

My banner is made with five pumpkins but you can create as many pumpkins as you want for your banner. It is fun to add different faces to each pumpkin using black cardstock. They are all strung together on a piece of orange yarn. You can use yarn, string, Baker’s Twine or ribbon to hang your pumpkins.
How to Make a Pumpkin Paper Banner
Supplies Needed
*This post was updated. Some of the tools pictured are no longer available so I’ve linked to tools I currently use that will work well for this project! :)
- Orange and black cardstock – this paper kit includes both colors!
- Tacky glue, hot glue or strong double-sided tape like 1/2″ Scor-Tape. (Tacky glue is pictured, but I ended up using hot glue for my medallions)
- Paper Trimmer or scissors
- Hole Punch
- Scoring Board and Stylus
- Black and White Bakers Twine, string, yarn, or ribbon to hang your banner

Step by Step Tutorial
Step One: Cut and score strips of orange paper. Each pumpkin medallion is made from strips of paper that are 2″ wide. The length and how many strips each pumpkin use depends on how full you want the medallion to be. I used two strips of paper that were 2″ x 12″ for each of my medallions.
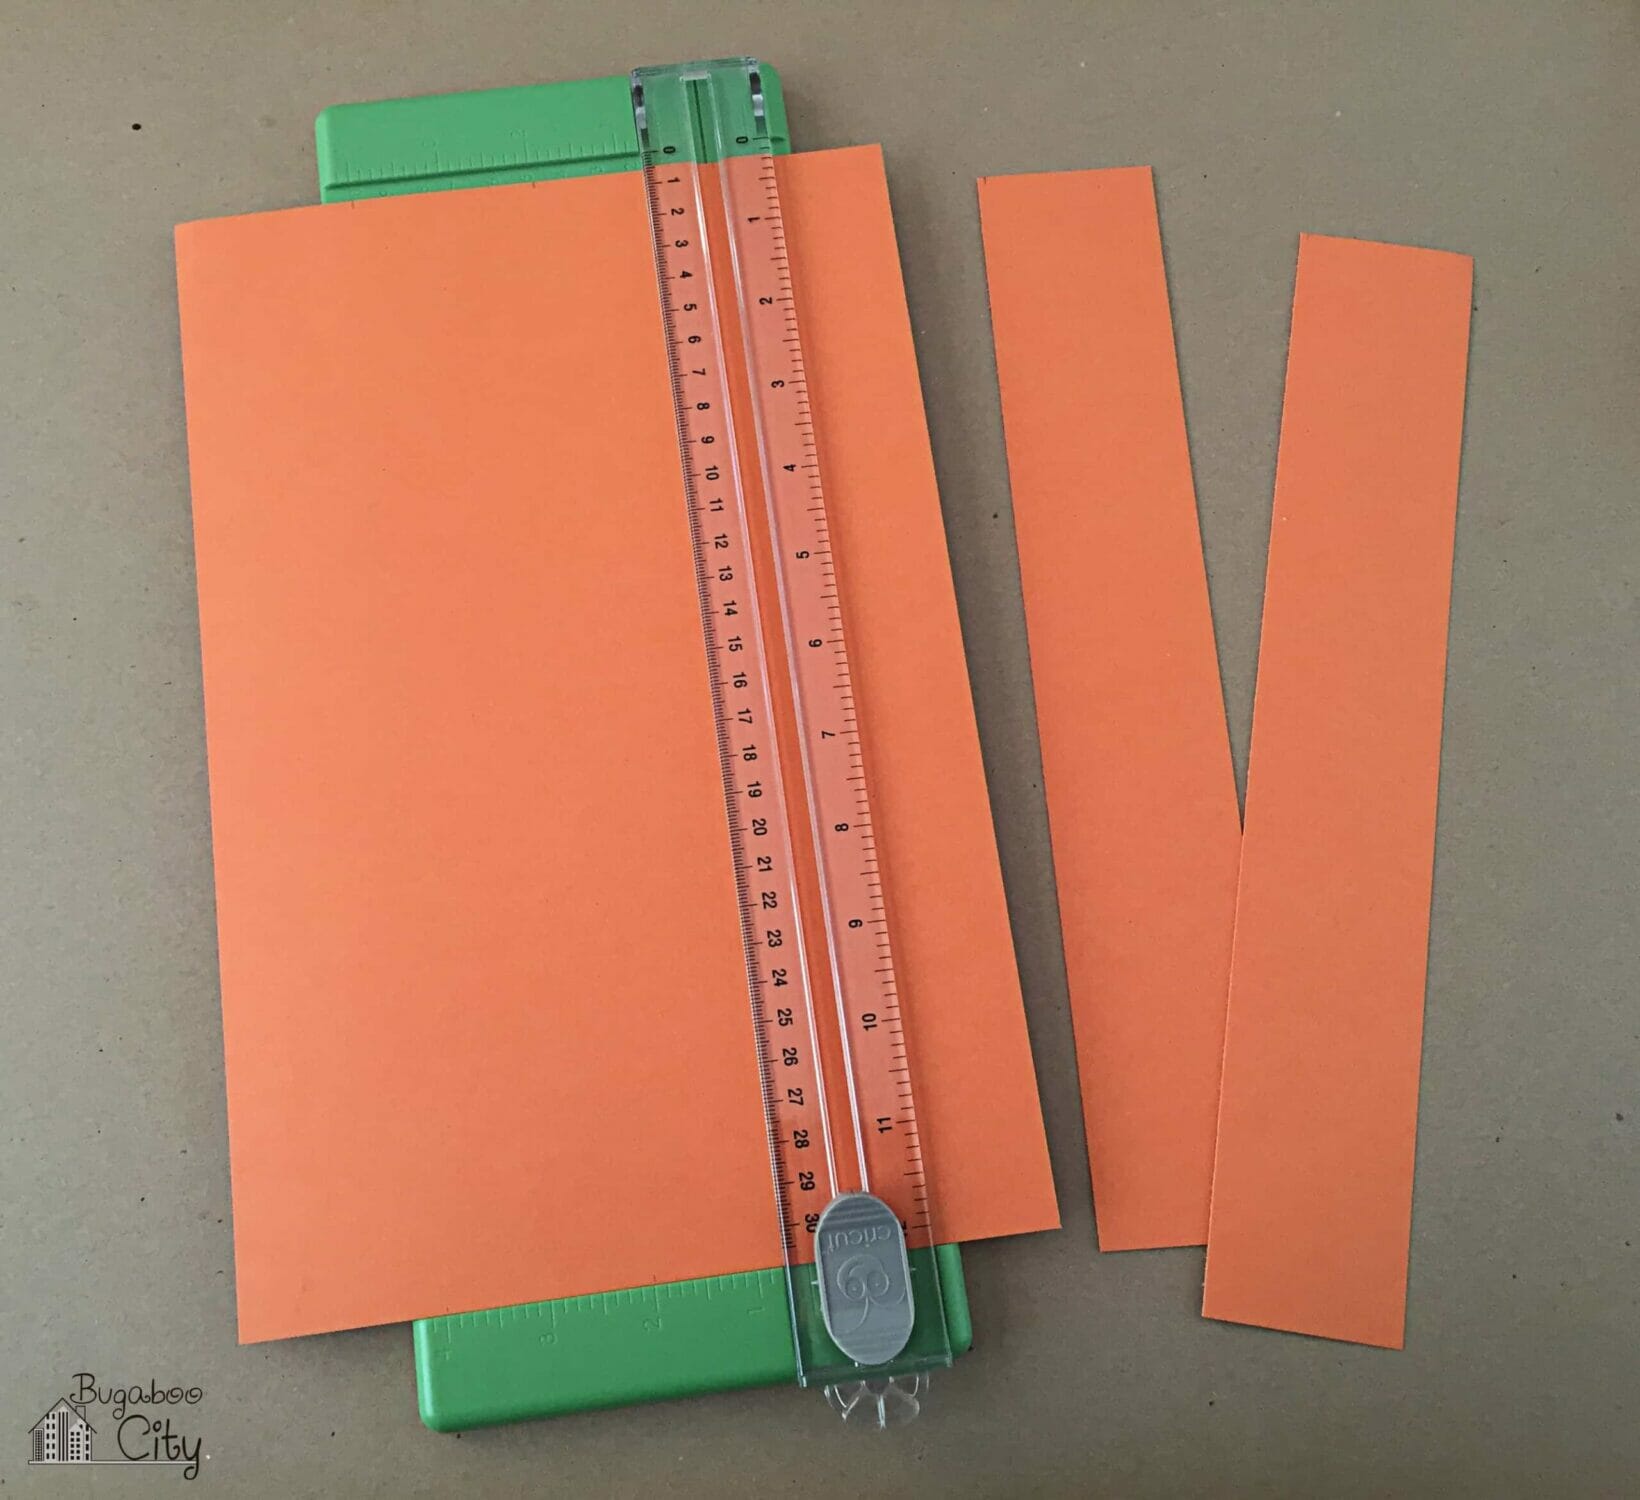
Score the paper strips every 1/2″. I used a scoring board and stylus to do this, but you can create these medallions without these tools. Before purchasing a scoring board, I a used a pen (either a dried out pen or a ball point pen with the pen tip in) and ran that through the groove of my paper trimmer.

Step Two: Accordion fold the strips of paper along the score lines.

Step Three: Form a medallion with the strips of paper.
Attach two strips of orange paper together to make a tube. You can use tacky glue, hot glue, or double-sided tape. I started with tacky glue but was too impatient to wait for it to dry so I switched to hot glue and double-sided tape. If you use hot glue, you don’t need a lot, just a thin strip.
Cut a small square of paper to use on the back of the medallion. Put a blob of glue on the small square and position the folded tube around it. Push the top of the folded tube down towards the center of itself positioning the center of the medallion on top of the small square of paper. Hold until the glue dries. I switched to hot glue for this step as well and found it worked really well!


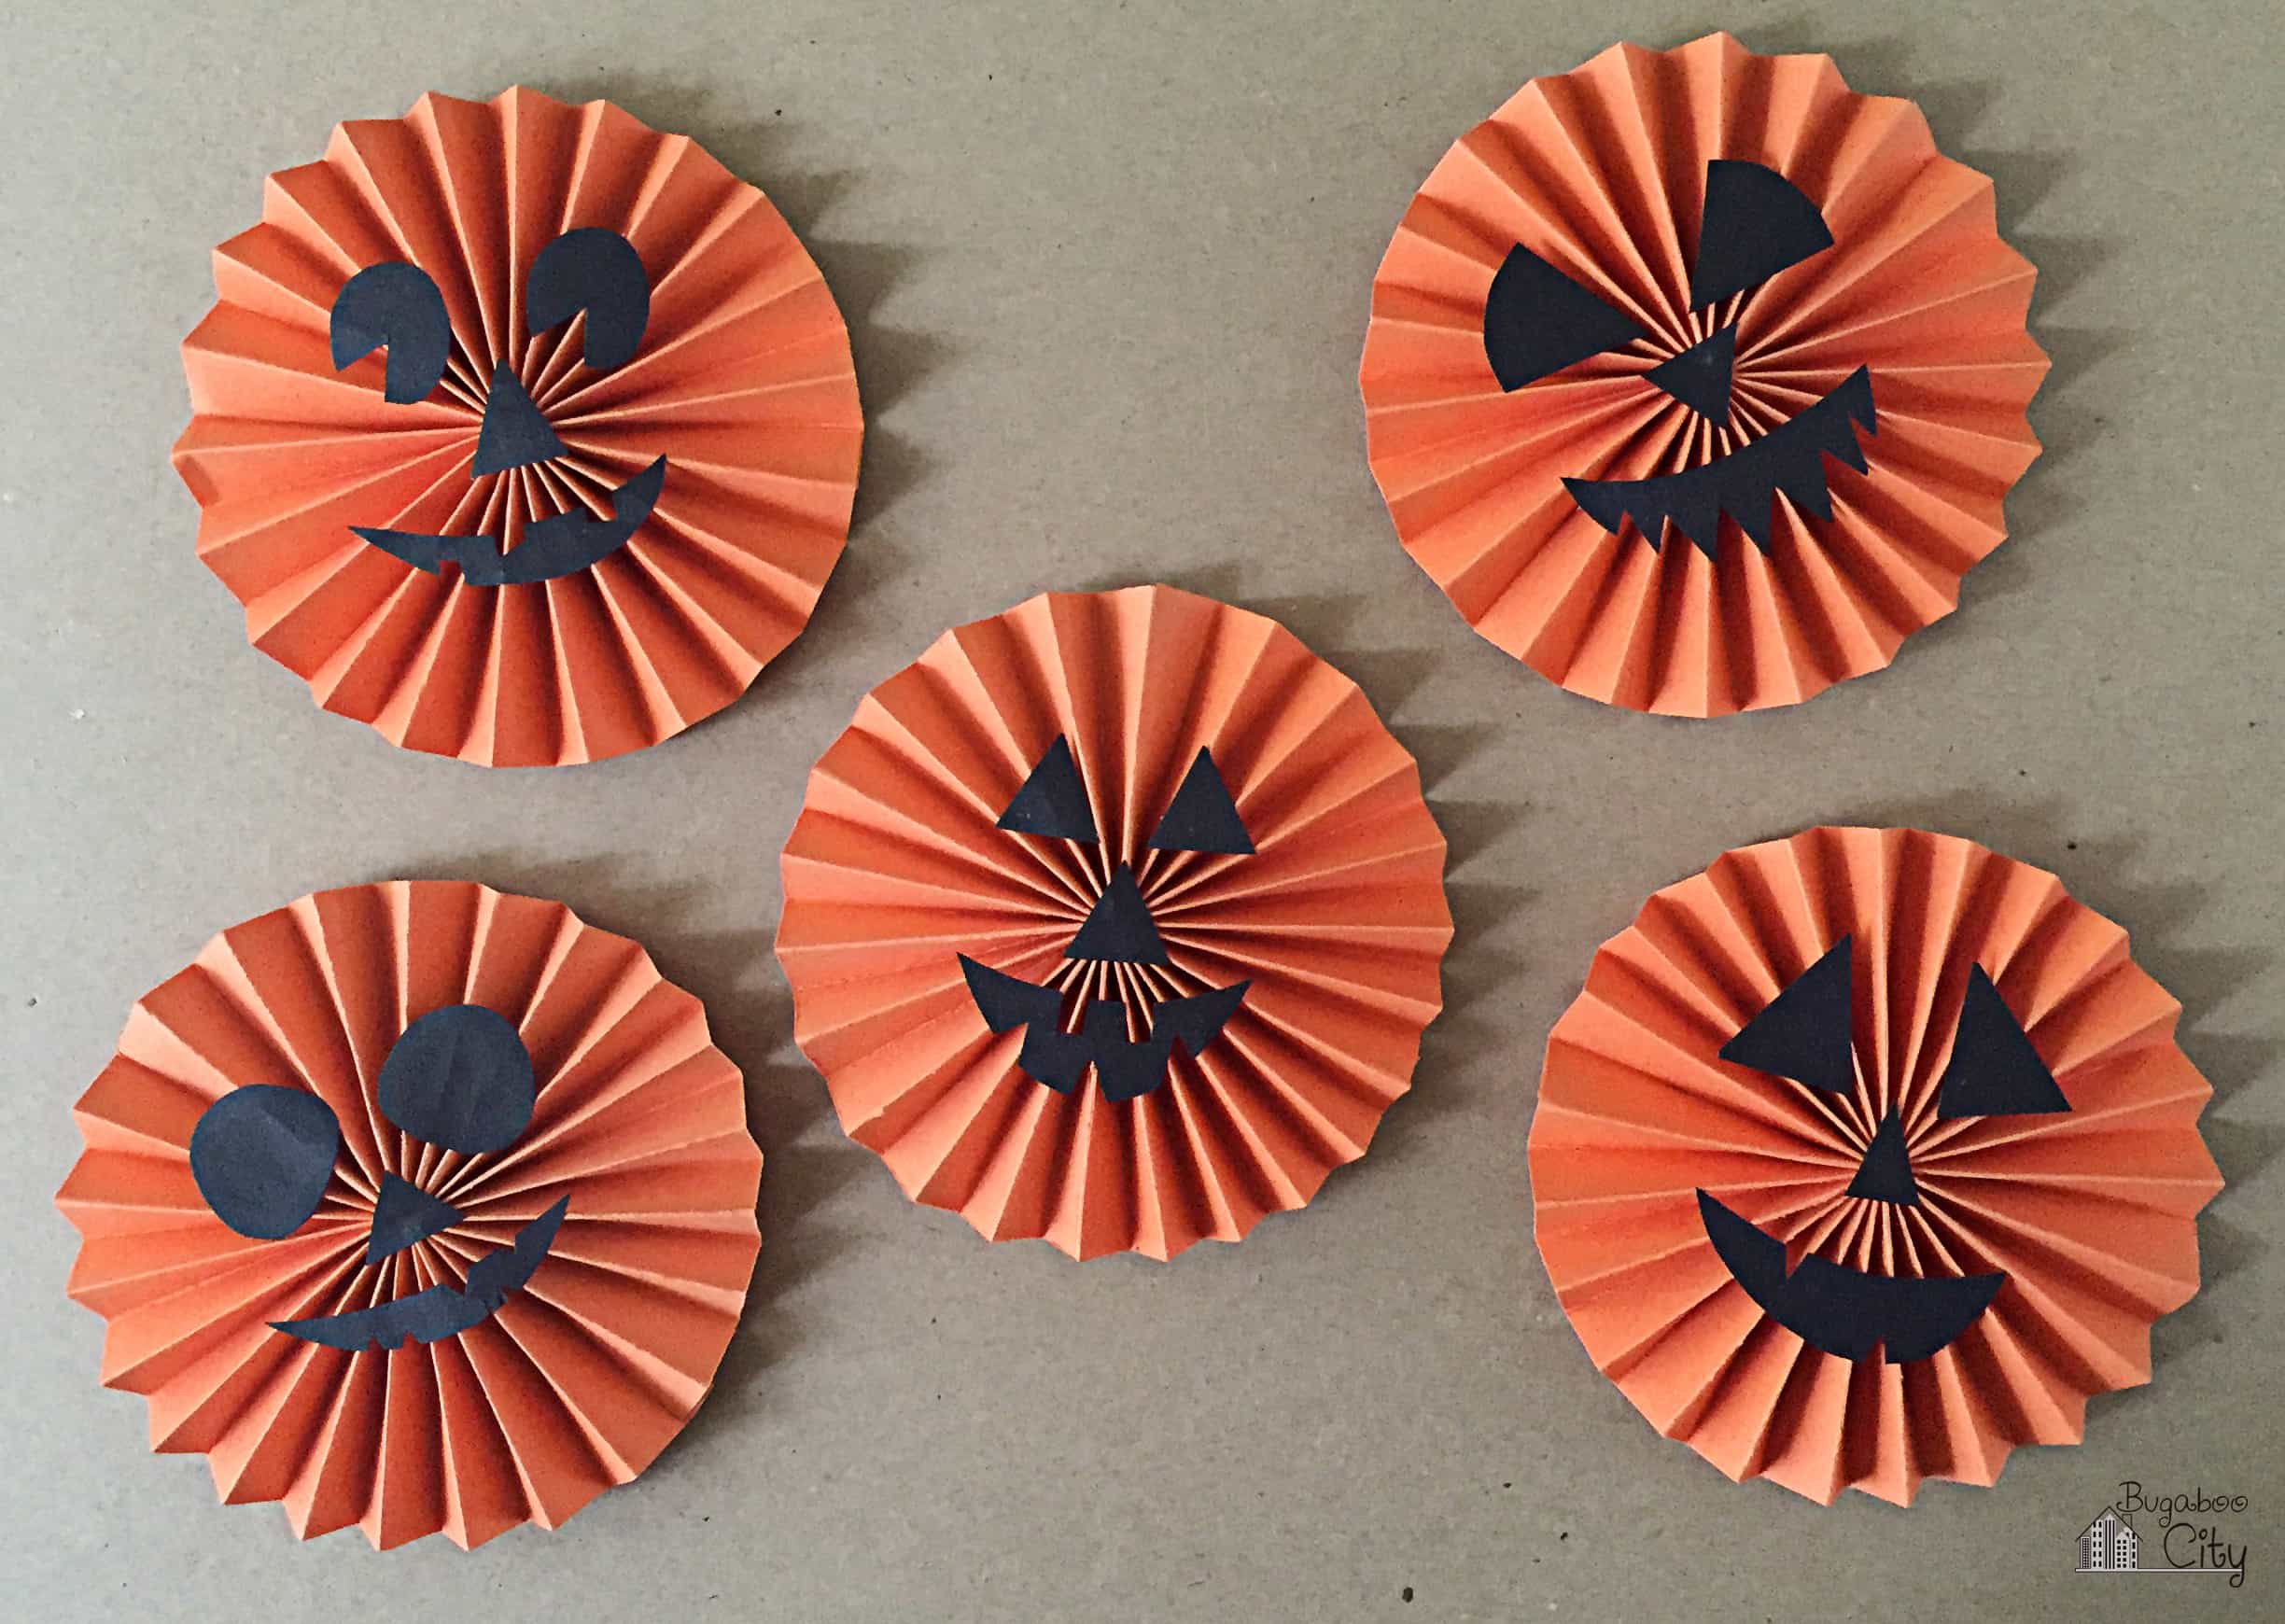
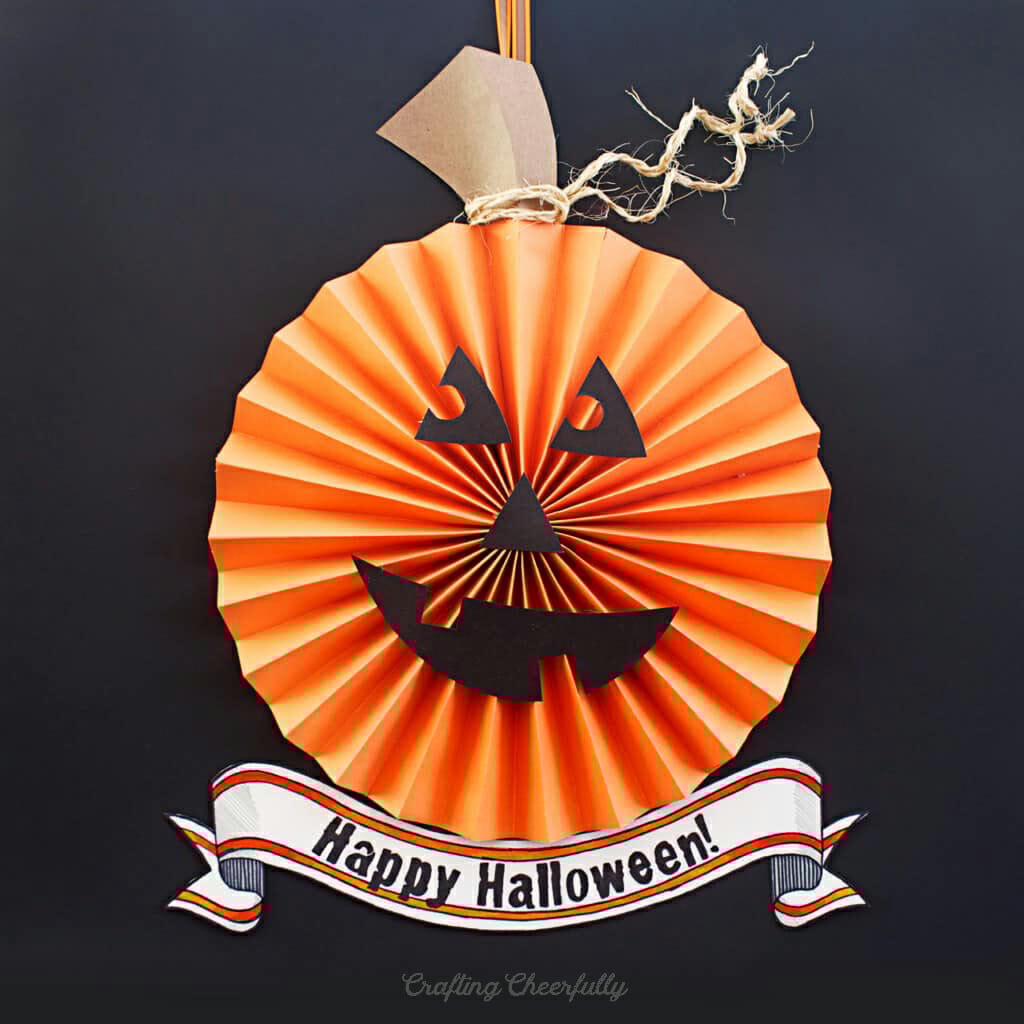
Step Four: Add cute pumpkin faces to the orange medallions to turn them into jack-o’-lanterns!
Cut eyes, noses, and mouths from black cardstock and glue them to the medallions. I put the noses on the center of the medallion to hide the center point.
Step Five: Create larger black medallions to layer underneath the pumpkin medallions.
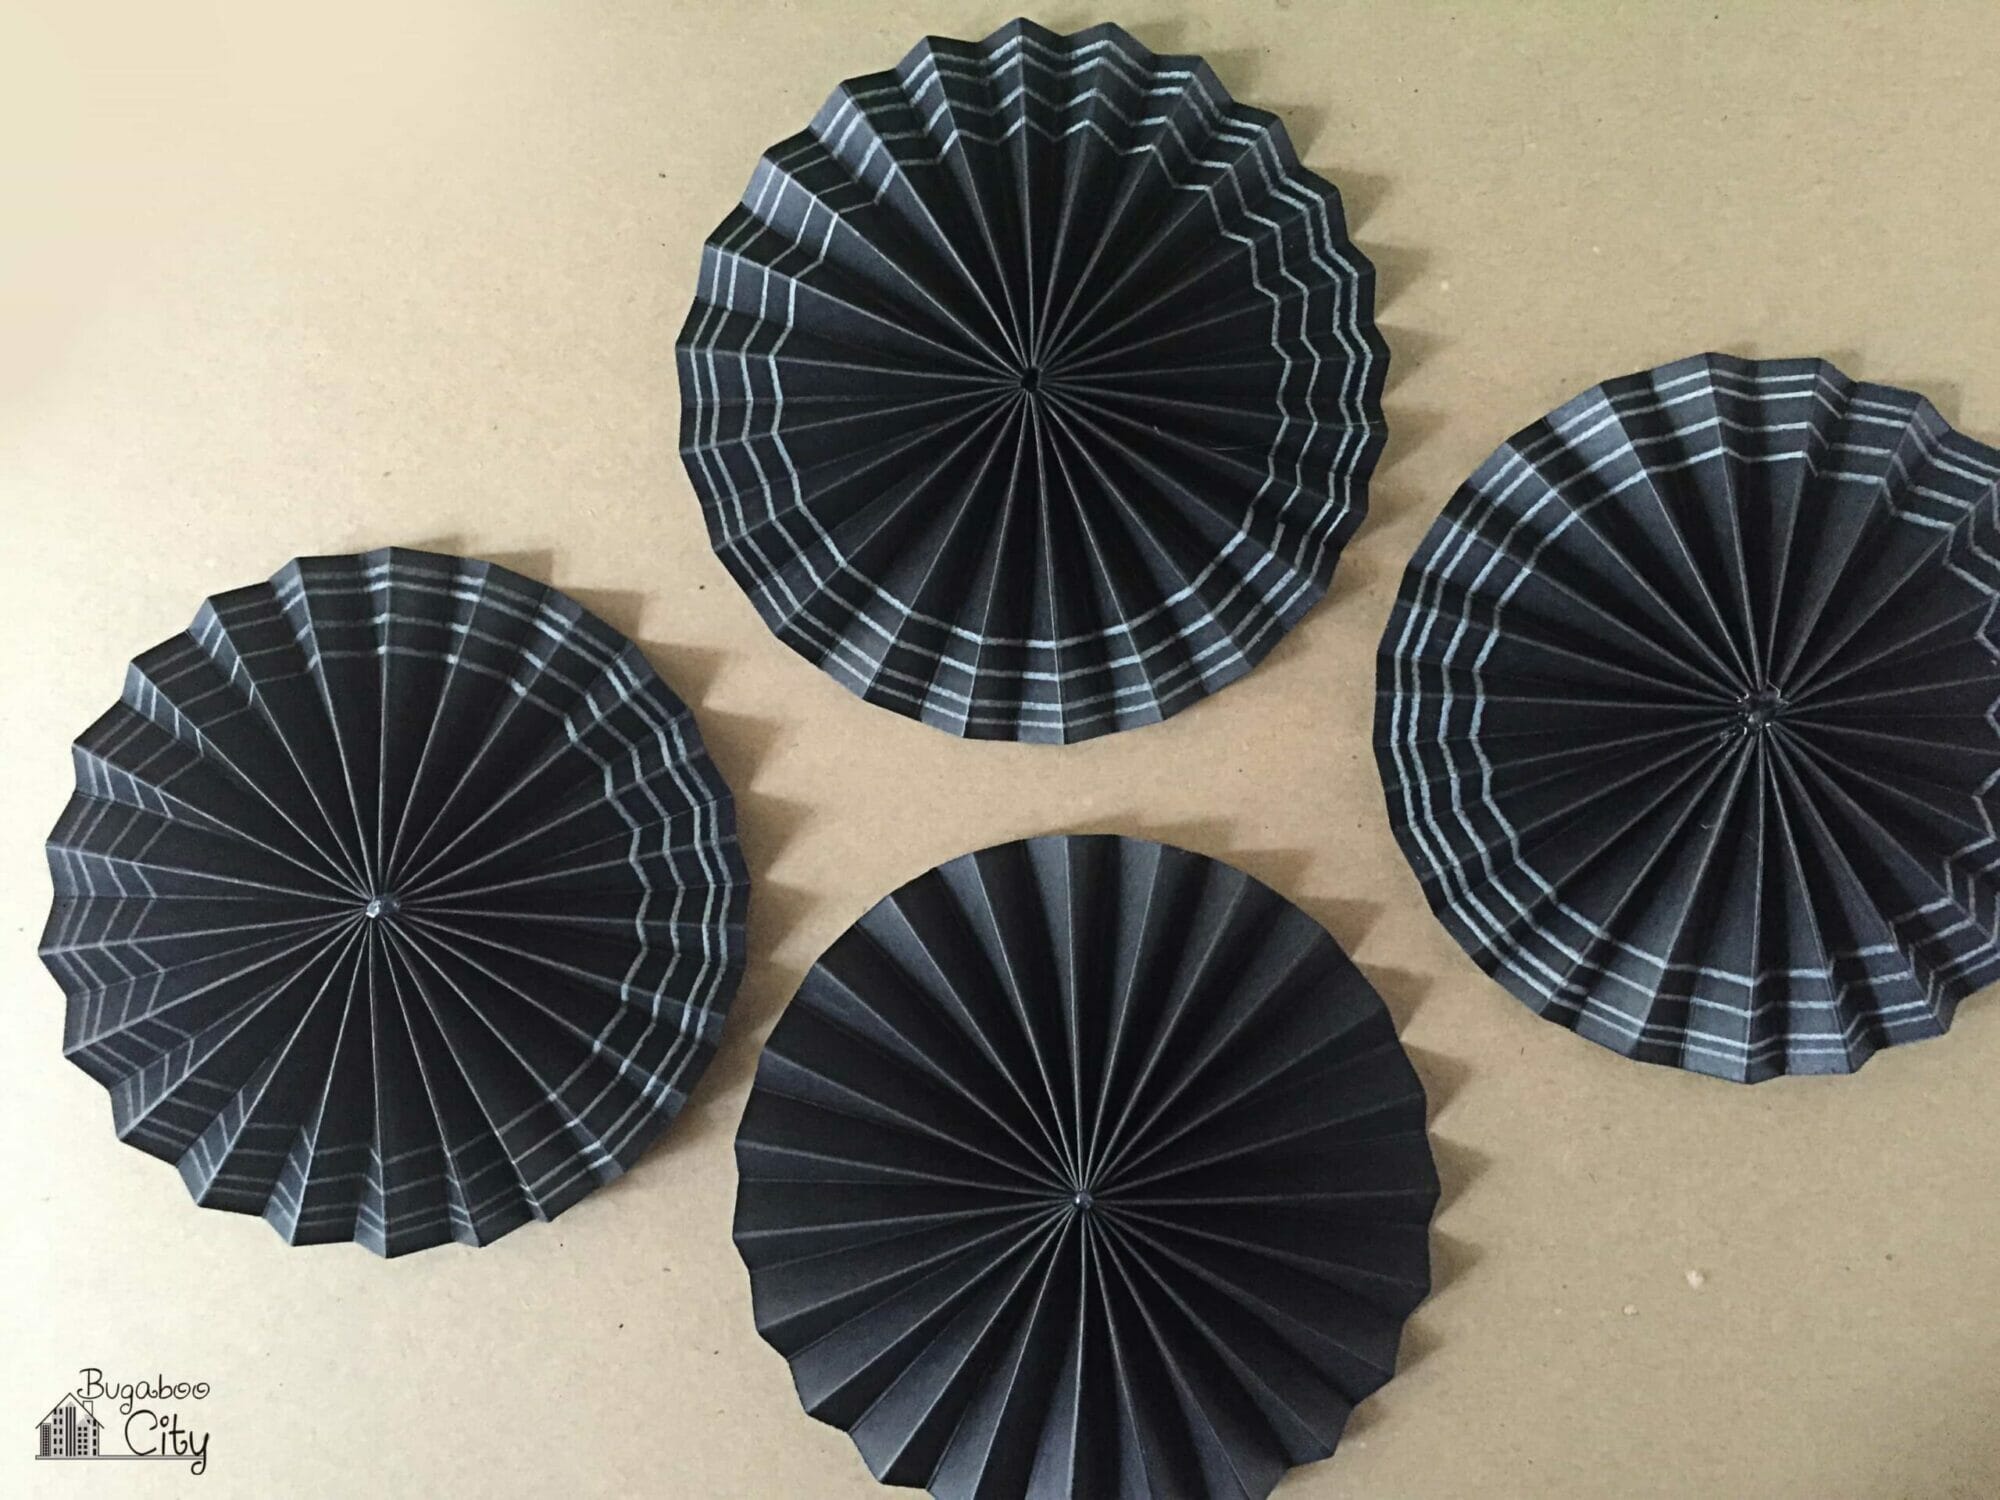
Repeat the same steps used to create the orange medallions to create larger black medallions. This time, instead of cutting strips of paper that are 2″ wide, cut strips that measure 2.75″ wide. I used two strips of black paper that measured 2.75″ x 12″ for each of my black medallions. Before scoring and folding the paper, I used a white colored pencil and ruler and drew three lines along one side of each strip.

Step Six: String the banner together.
String the pumpkin medallions together using yarn. Start by poking two holes in each black paper medallion about 1.5″ in from the edges. Thread the yarn through the medallions.


Next, glue the orange pumpkin medallions on top of the black medallions using hot glue. Keep the hot glue in the center of the medallions so it doesn’t touch the yarn. This way the medallions can still slide along the yarn.

The Halloween Garland is complete!

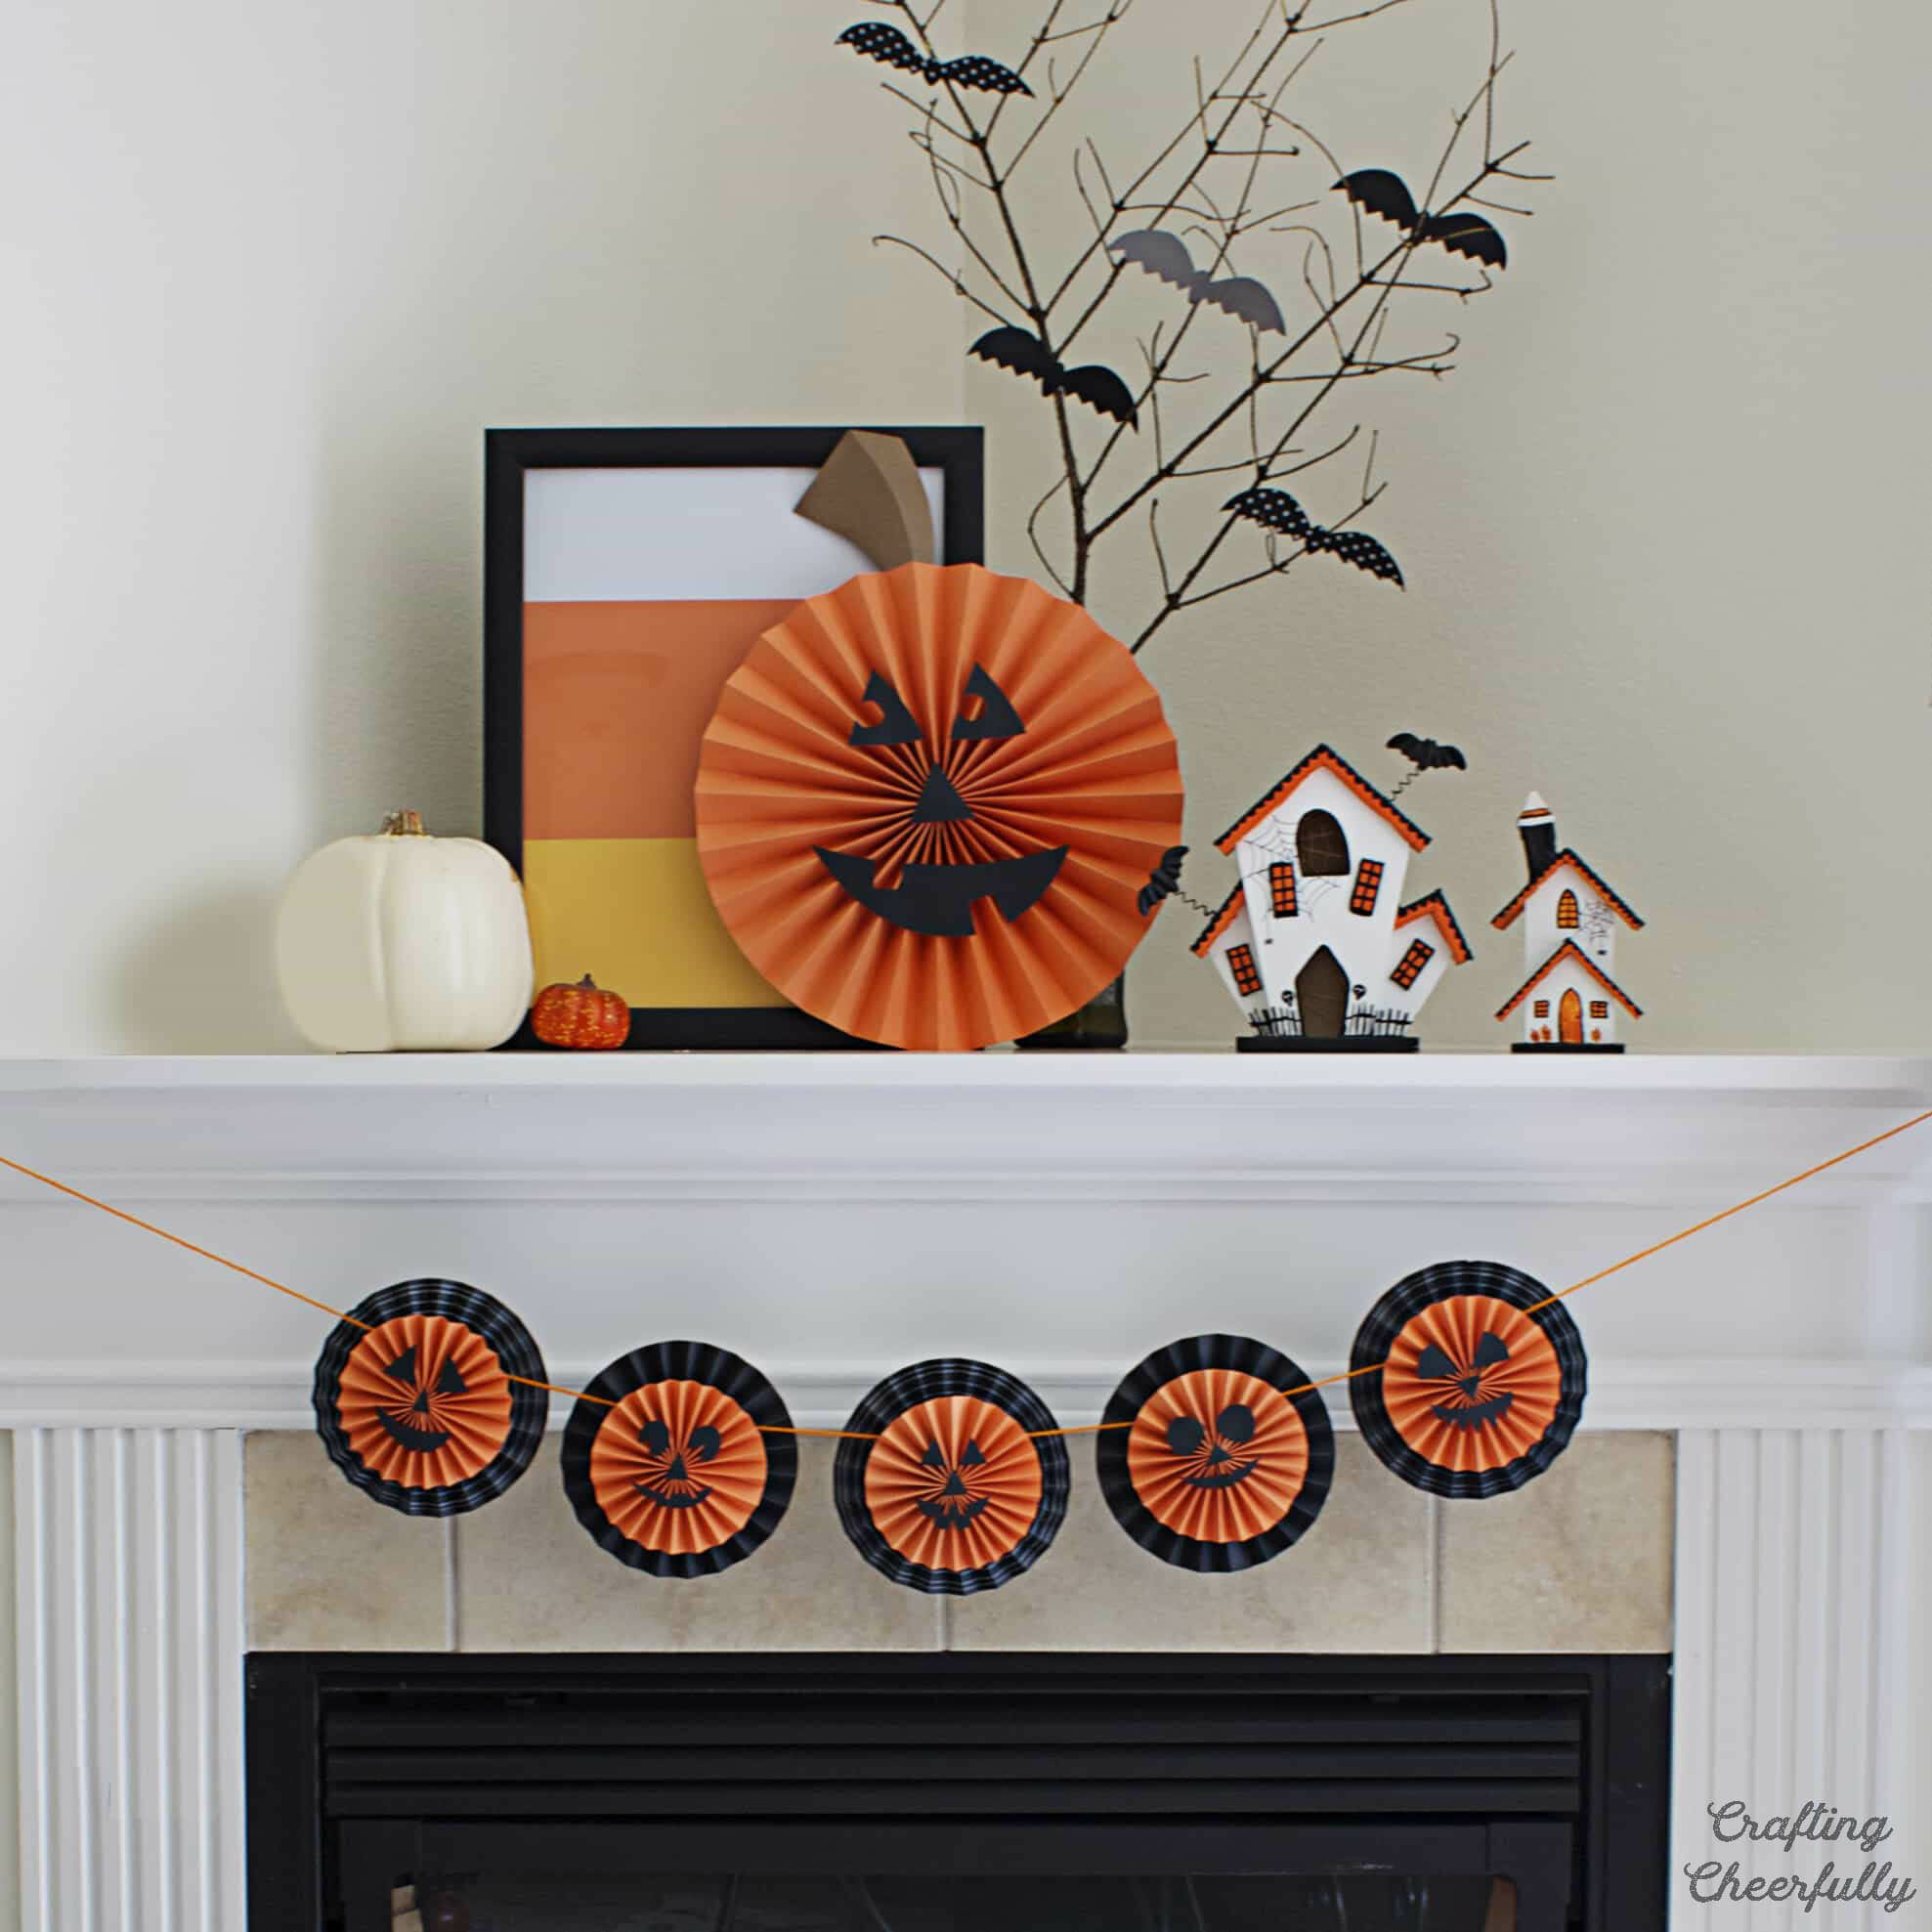
I love the pumpkin medallions! They turned out so nicely I decided to create one giant one for a DIY Paper Pumpkin Wreath, pictured on the mantel, that I plan to hang on our door. I have a few more Halloween crafts coming up over the next few weeks, so be sure to stop back again!


This is so cute! I love using the paper medallions for all kinds of holidays and special occasion decor. Thanks for linking up with Merry Monday!
Thank you!! :) And thank you for hosting a great party!