
DIY Paper Pumpkin Wreath for Halloween
Learn how to create a paper pumpkin wreath for Halloween! This fun paper craft is perfect for the October and Halloween season.
Happy first Monday of October! This past weekend we put up our Halloween decorations, including this fun DIY paper pumpkin wreath! This is definitely not a typical wreath, but I love how cute this wreath is and how easy it was to make!
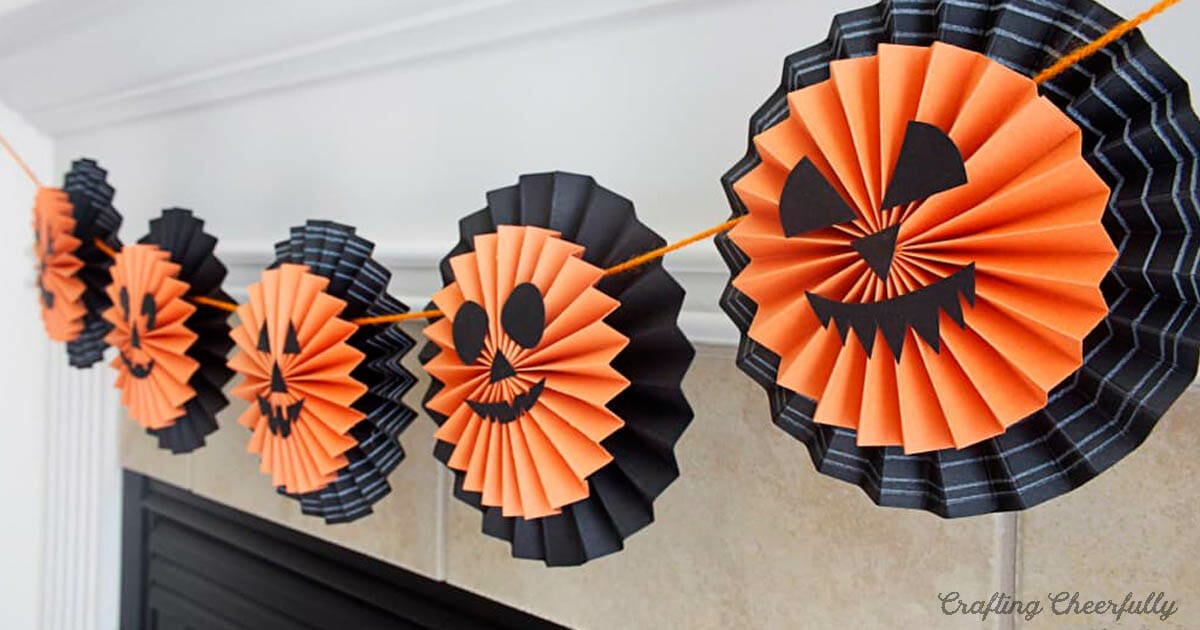
Paper medallions are simple to make and can be turned into so many fun things. I made a pumpkin medallion banner with lots of small paper pumpkins and thought it was so cute I wanted to make a giant one! The first one I made I used as decoration on the mantle, you can see it below.

For the second giant pumpkin I made, I added a banner to the bottom and turned into a wreath! My banner reads Happy Halloween but you could also change the words to “Trick or Treat” or anything Halloween-themed!

How to Make a Paper Pumpkin Wreath
Supplies Needed
- Free Template – Grab the free file by filling out the purple form at the end of this post.
- Orange paper (I used 3 sheets of 12″x12″ paper)
- Black paper
- Brown paper
- White paper
- Markers – orange, black, and gray
- Twine
- Thin wire
- Ribbon
- Hot glue
- Scoring Board
- Paper Trimmer or scissors

Step By Step Tutorial
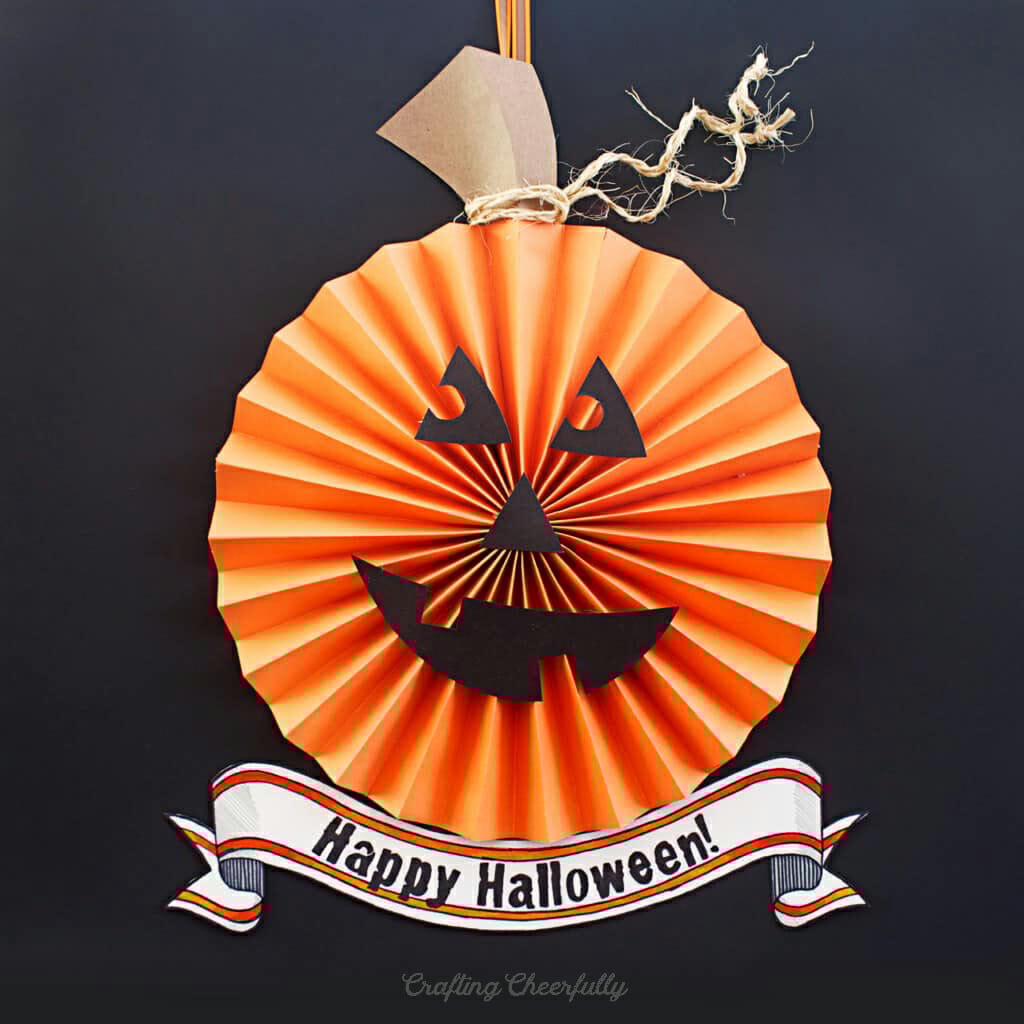
Step One: Create the pumpkin medallion from the orange scrapbook paper.
Cut three sheets of orange 12″x12″ paper in half, so you have six sheets of paper measuring 6″x12″. Score the paper every 1″ then accordion pleat each strip of paper.
Hot glue the strips of paper together, end to end, to form a tube. I ended up using five strips of paper, but you could use all six or even just four depending on the look you like.
Next, cut a small square of paper ,about 2″ x 2″, and put a little pile of hot glue in the center of it. Press the accordion tube in on itself so it flattens on top of the paper square. The center of the medallion should be positioned in the hot glue. Hold in place until the medallion is secured.
For more detailed step-by-step instructions on creating the pumpkin medallion, visit my Halloween Pumpkin Medallion Banner and follow the steps using the dimensions listed above!

STEP 2: Add the pumpkin’s face! Cut a face out of black paper. You can create your own or use my pattern. Hot glue them to the top of your medallion, placing the nose on the center of the pumpkin medallion. If you plan to add the banner to the bottom, you could wait to glue the face until after the banner is in place. This way your pumpkin face won’t end up crooked!
*If you want to use the pumpkin as decoration without the banner, as I did for my mantle decorations, skip to Step Five!

STEP 3: Create the “Happy Halloween” banner for underneath the pumpkin. Trace the banner that comes with the banner onto white paper. I used a light box to do this since I made this in the evening, but you could do this using a window in the daylight. Color in the letters with a black Sharpie or marker. I chose to color in the lines of the banner orange. By using three different colors of orange, I was able to shade the lines. I added a bit of grey to the white part of the banner to give it some dimension.
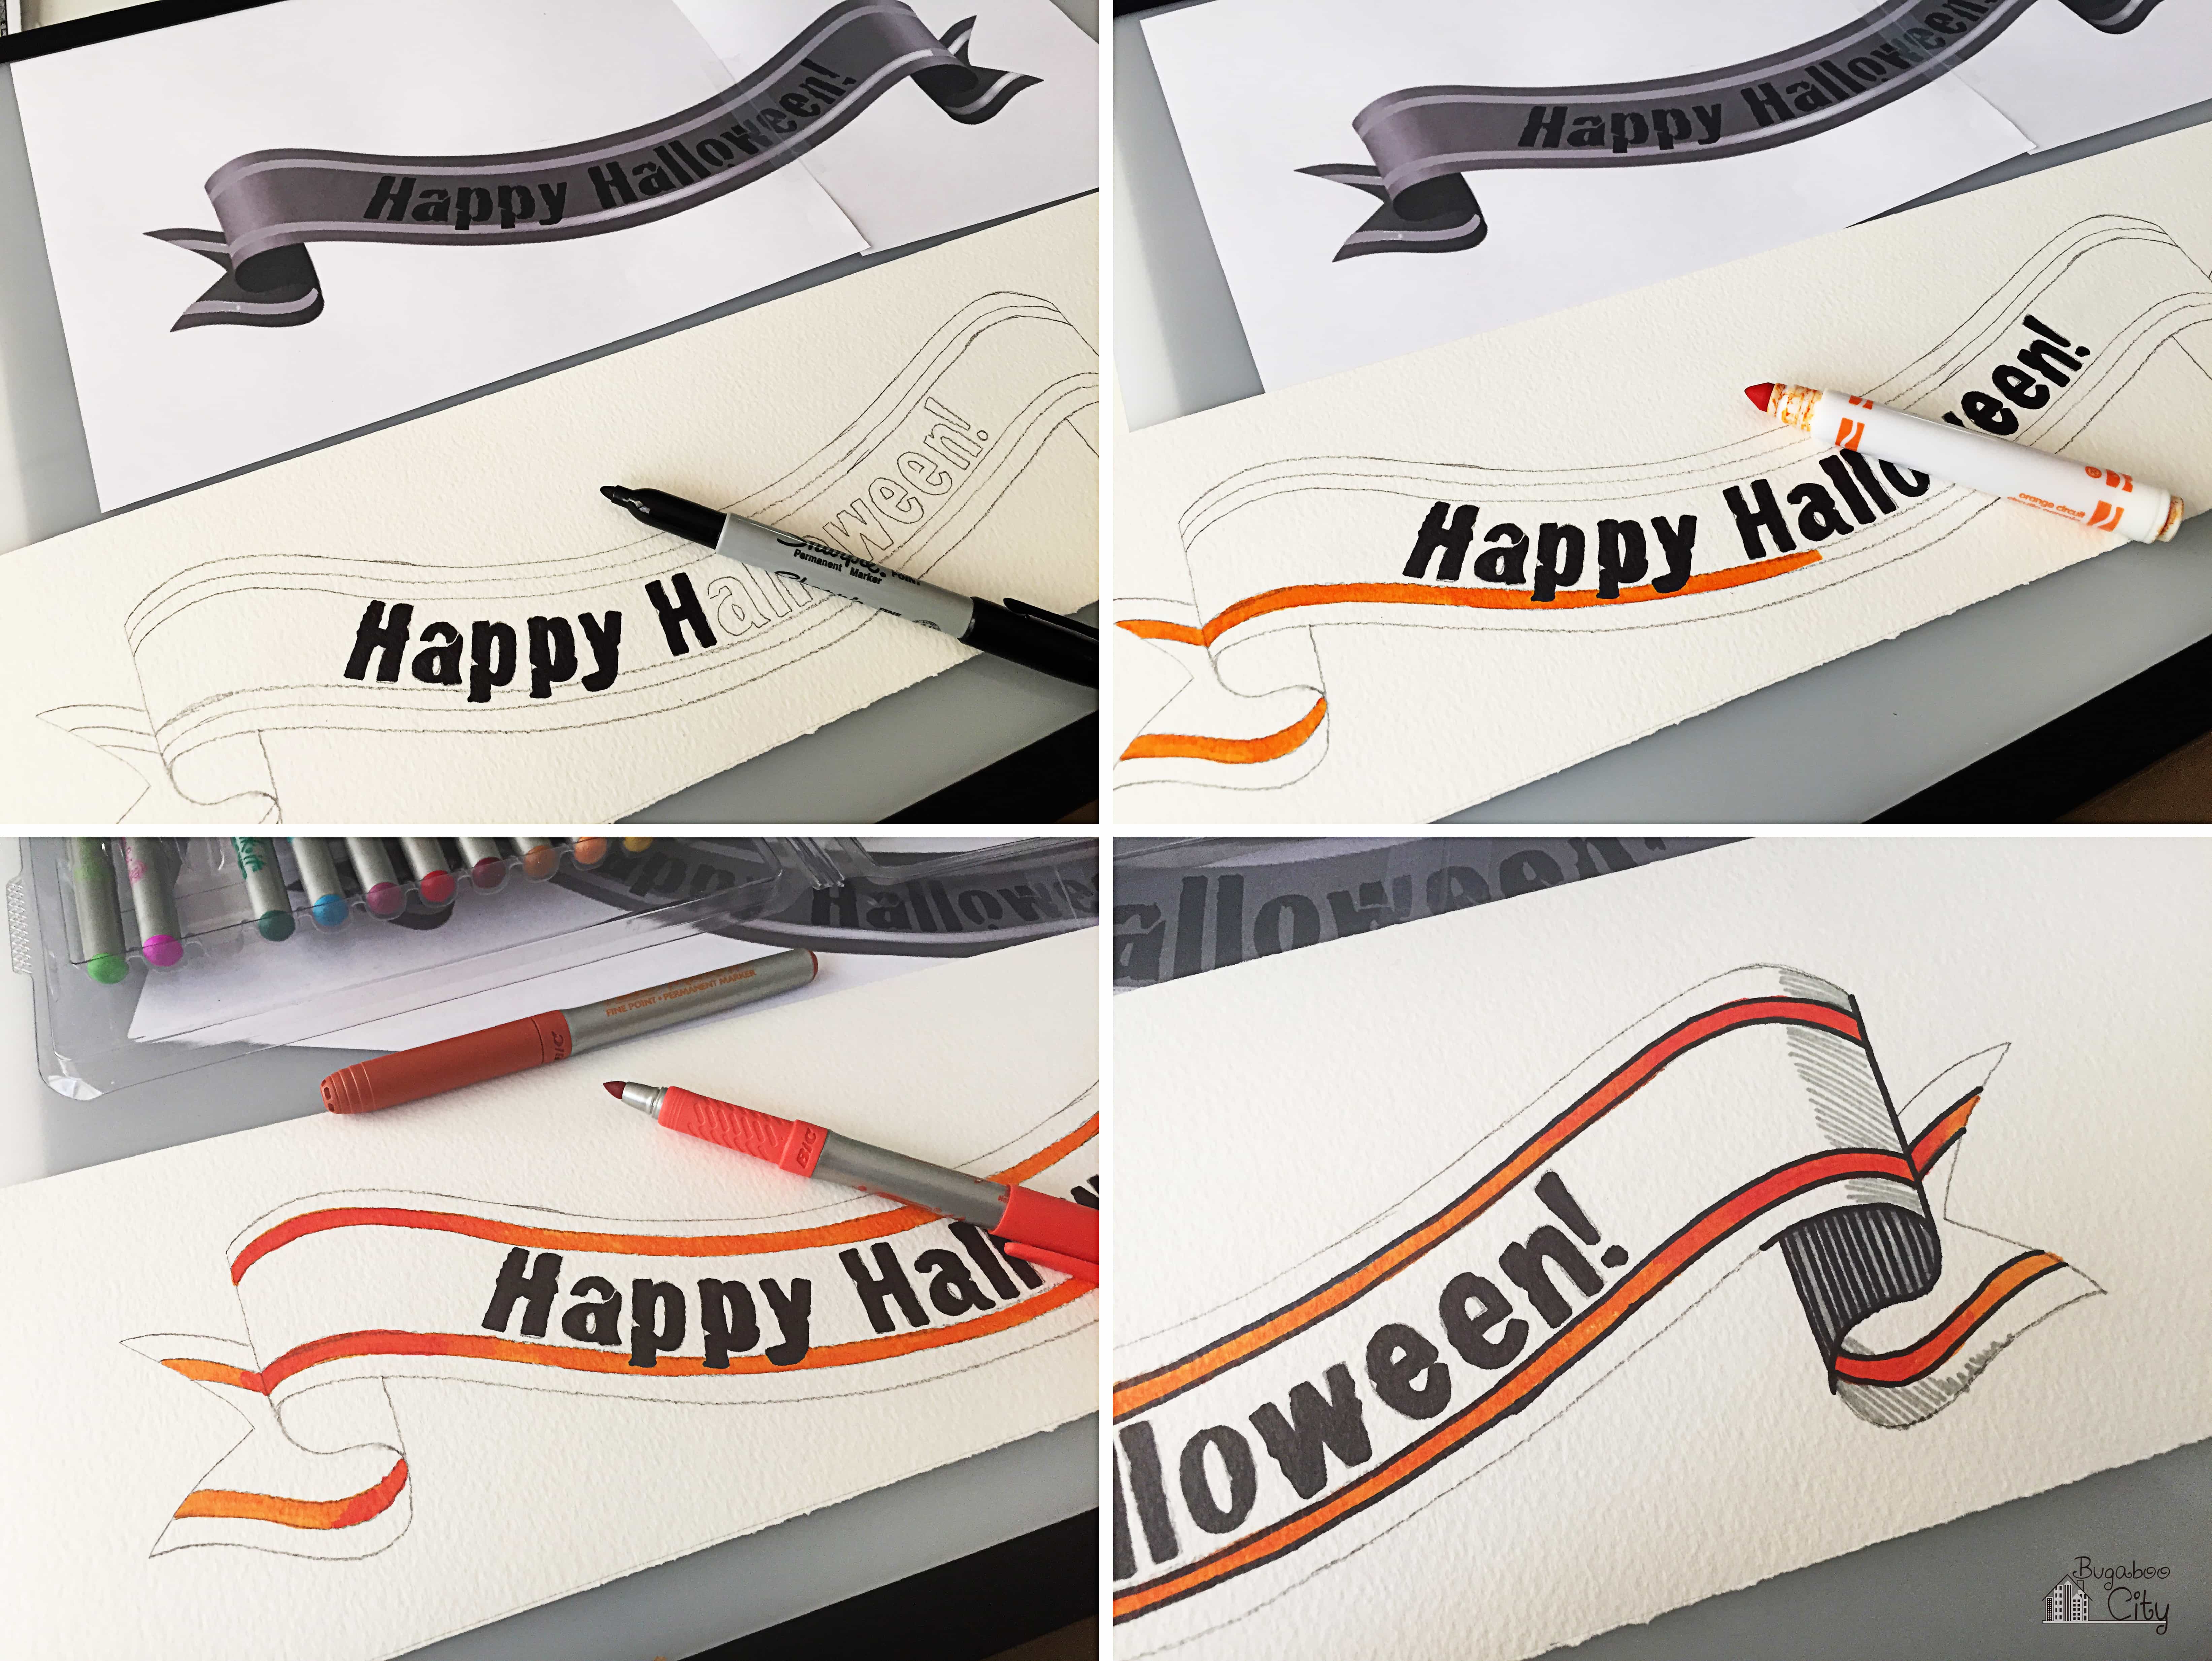
Cut the banner out but leave a strip of paper at the top of the banner as pictured below. This will give you a place to adhere the pumpkin to. Color it orange so it will blend in with the pumpkin.

STEP 4: Hot glue the banner to the pumpkin. Center the banner under one of the accordion pleats.

STEP 5: Add the stem and twine. Use the pattern provided to cut out the stem from brown paper. Fold it gently along the curved inner line and glue to the top of the pumpkin. I braided wire with twine and then wrapped it around my finger to curl it. Hot glue it to the stem of your pumpkin.


STEP 6: Add a loop of ribbon to the back of the stem for hanging.

Your paper pumpkin wreath is done and ready to be hung up and enjoyed! I have Autumn wreaths on two of my doors, so it is fun to have something a little different on the third. If you had fun making this huge pumpkin medallion, make a matching pumpkin medallion banner!

Get the Free Halloween Pumpkin Wreath Template!
Fill out the purple form below with your first name and email address! The free file will be sent straight to your inbox! If you have already filled out the form below, don’t worry – you won’t be added to my list twice! This freebie is for personal use only. I hope you enjoy crafting something special. Please let me know if you have any questions :)


2 Comments