
DIY Paper Purse Treat Box – Free SVG Cut File!
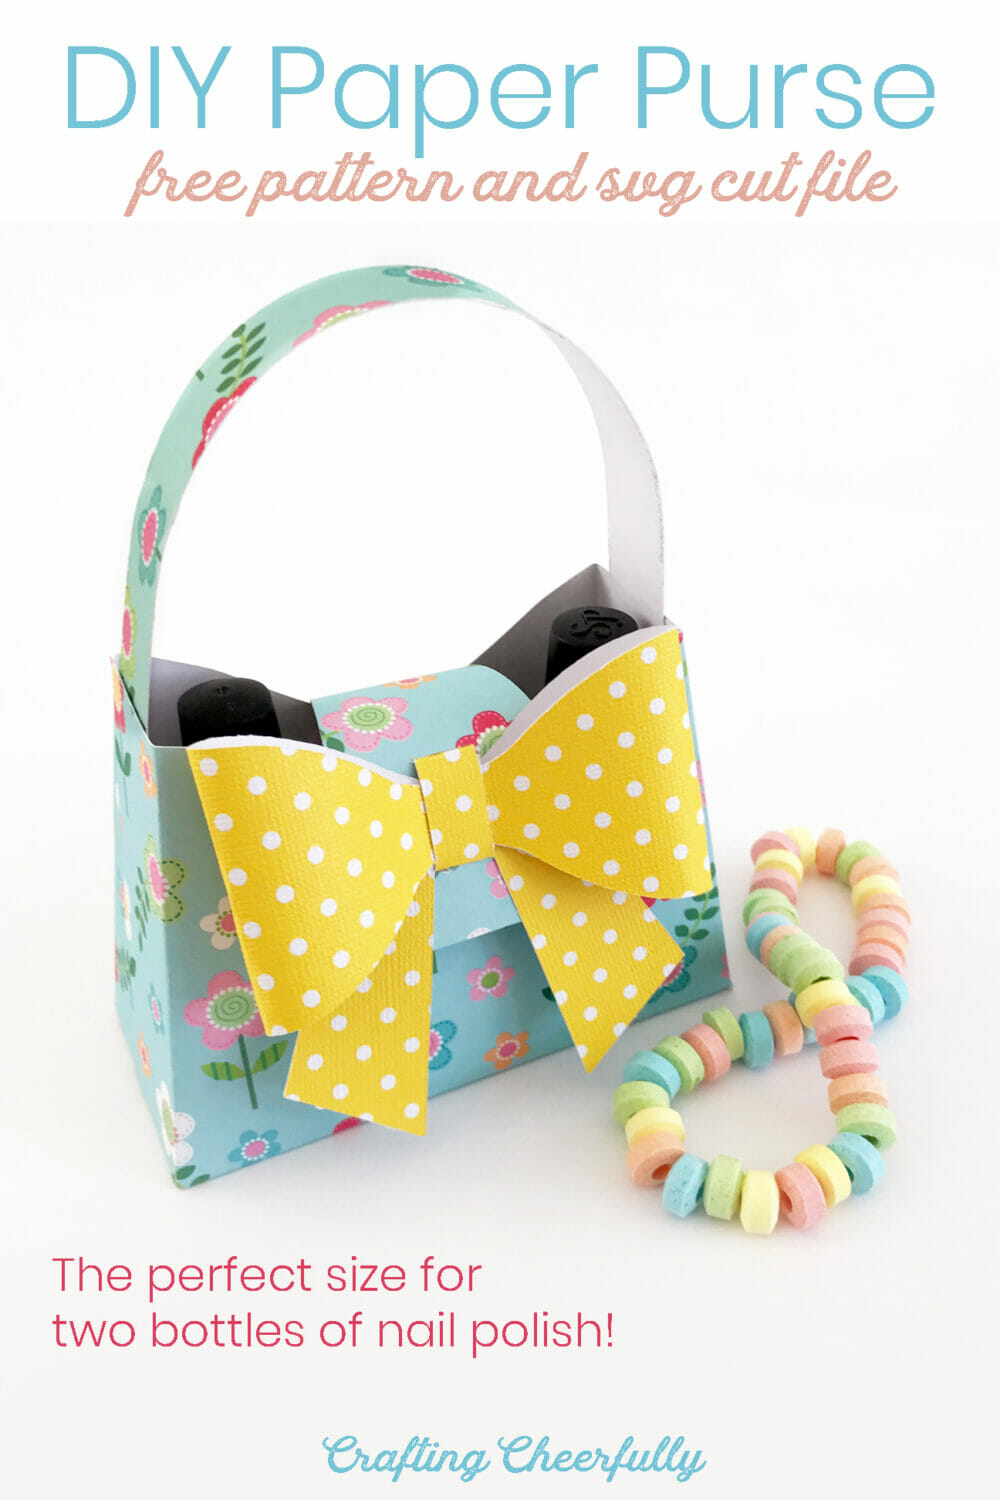
Create these sweet paper purses with the free pattern or SVG cut file. These purses hold two nail polishes making them great for bridal shower favors, birthday parties, or spa-themed parties.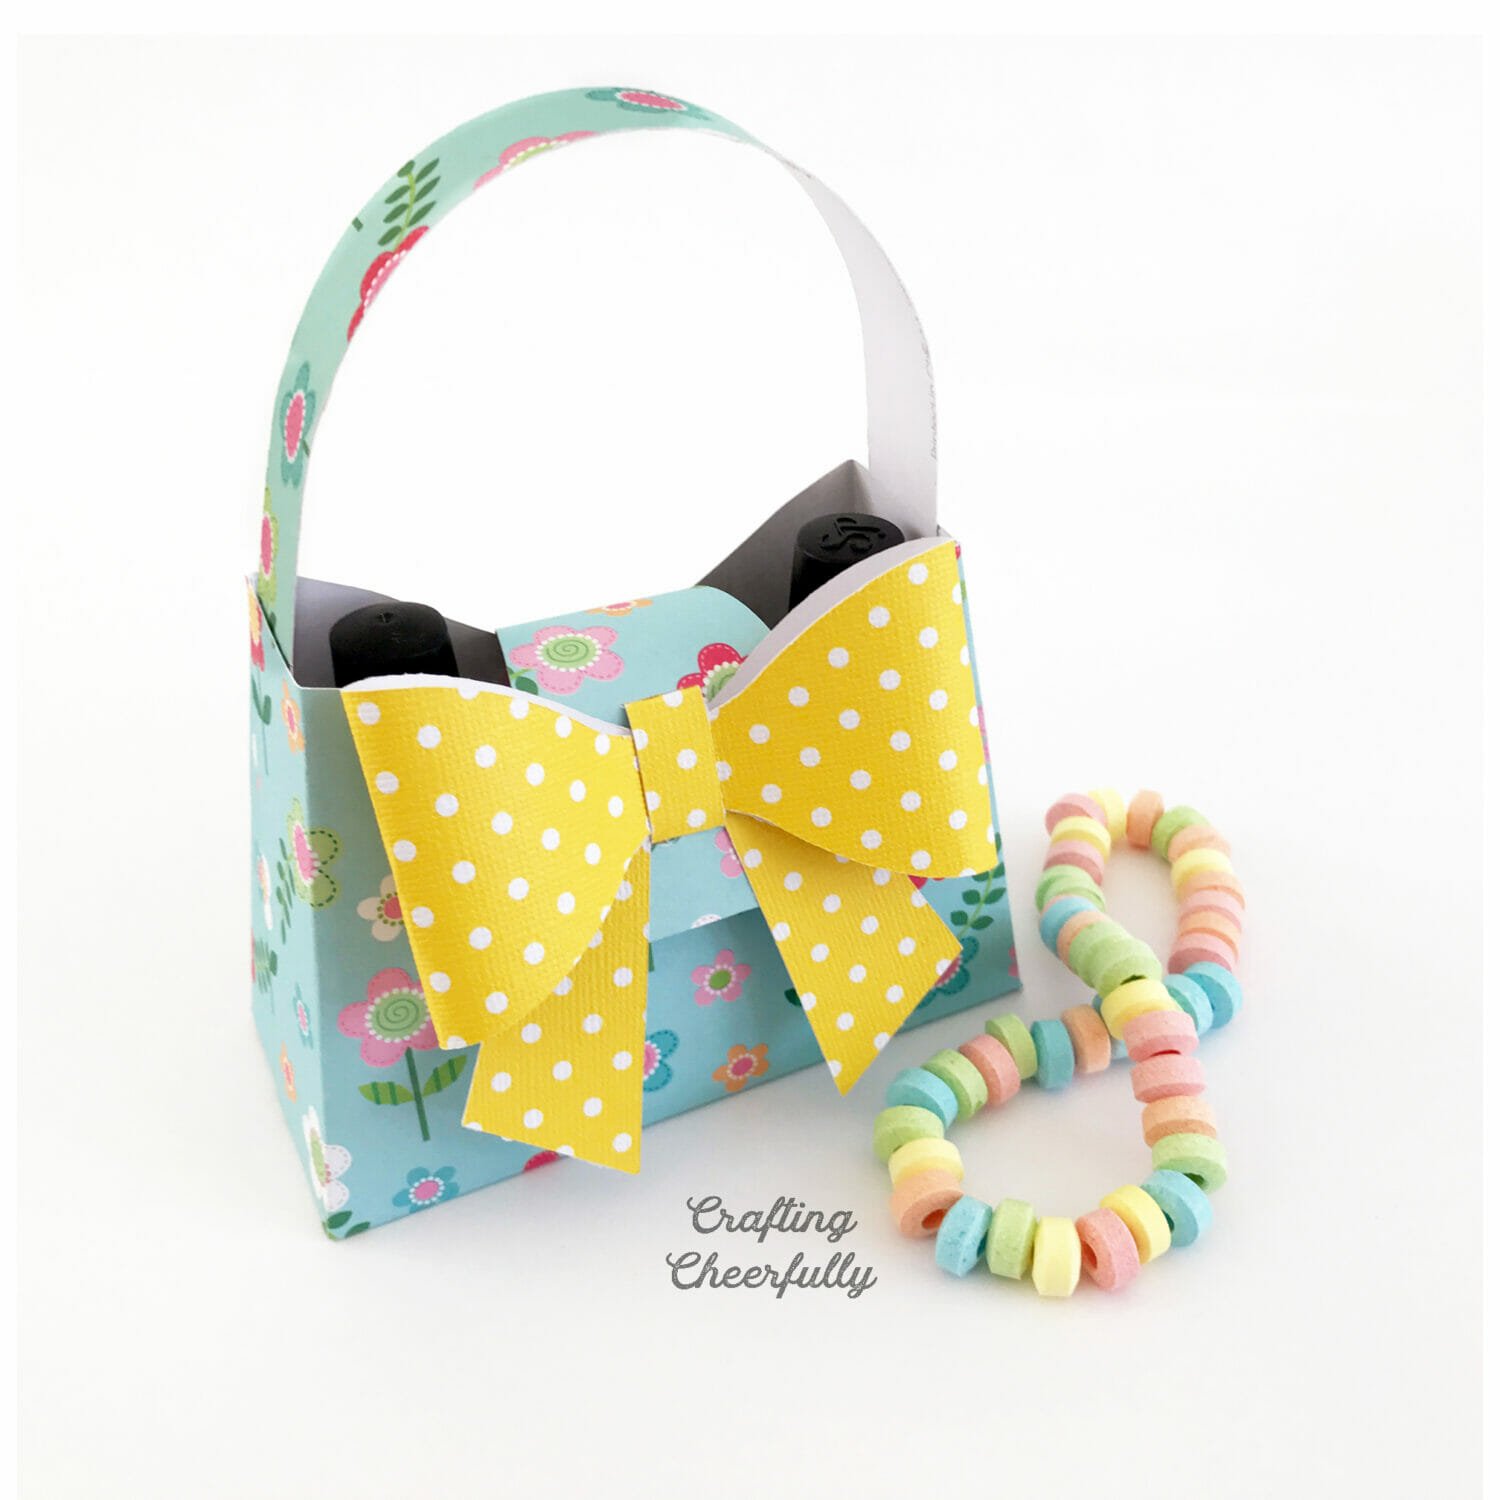
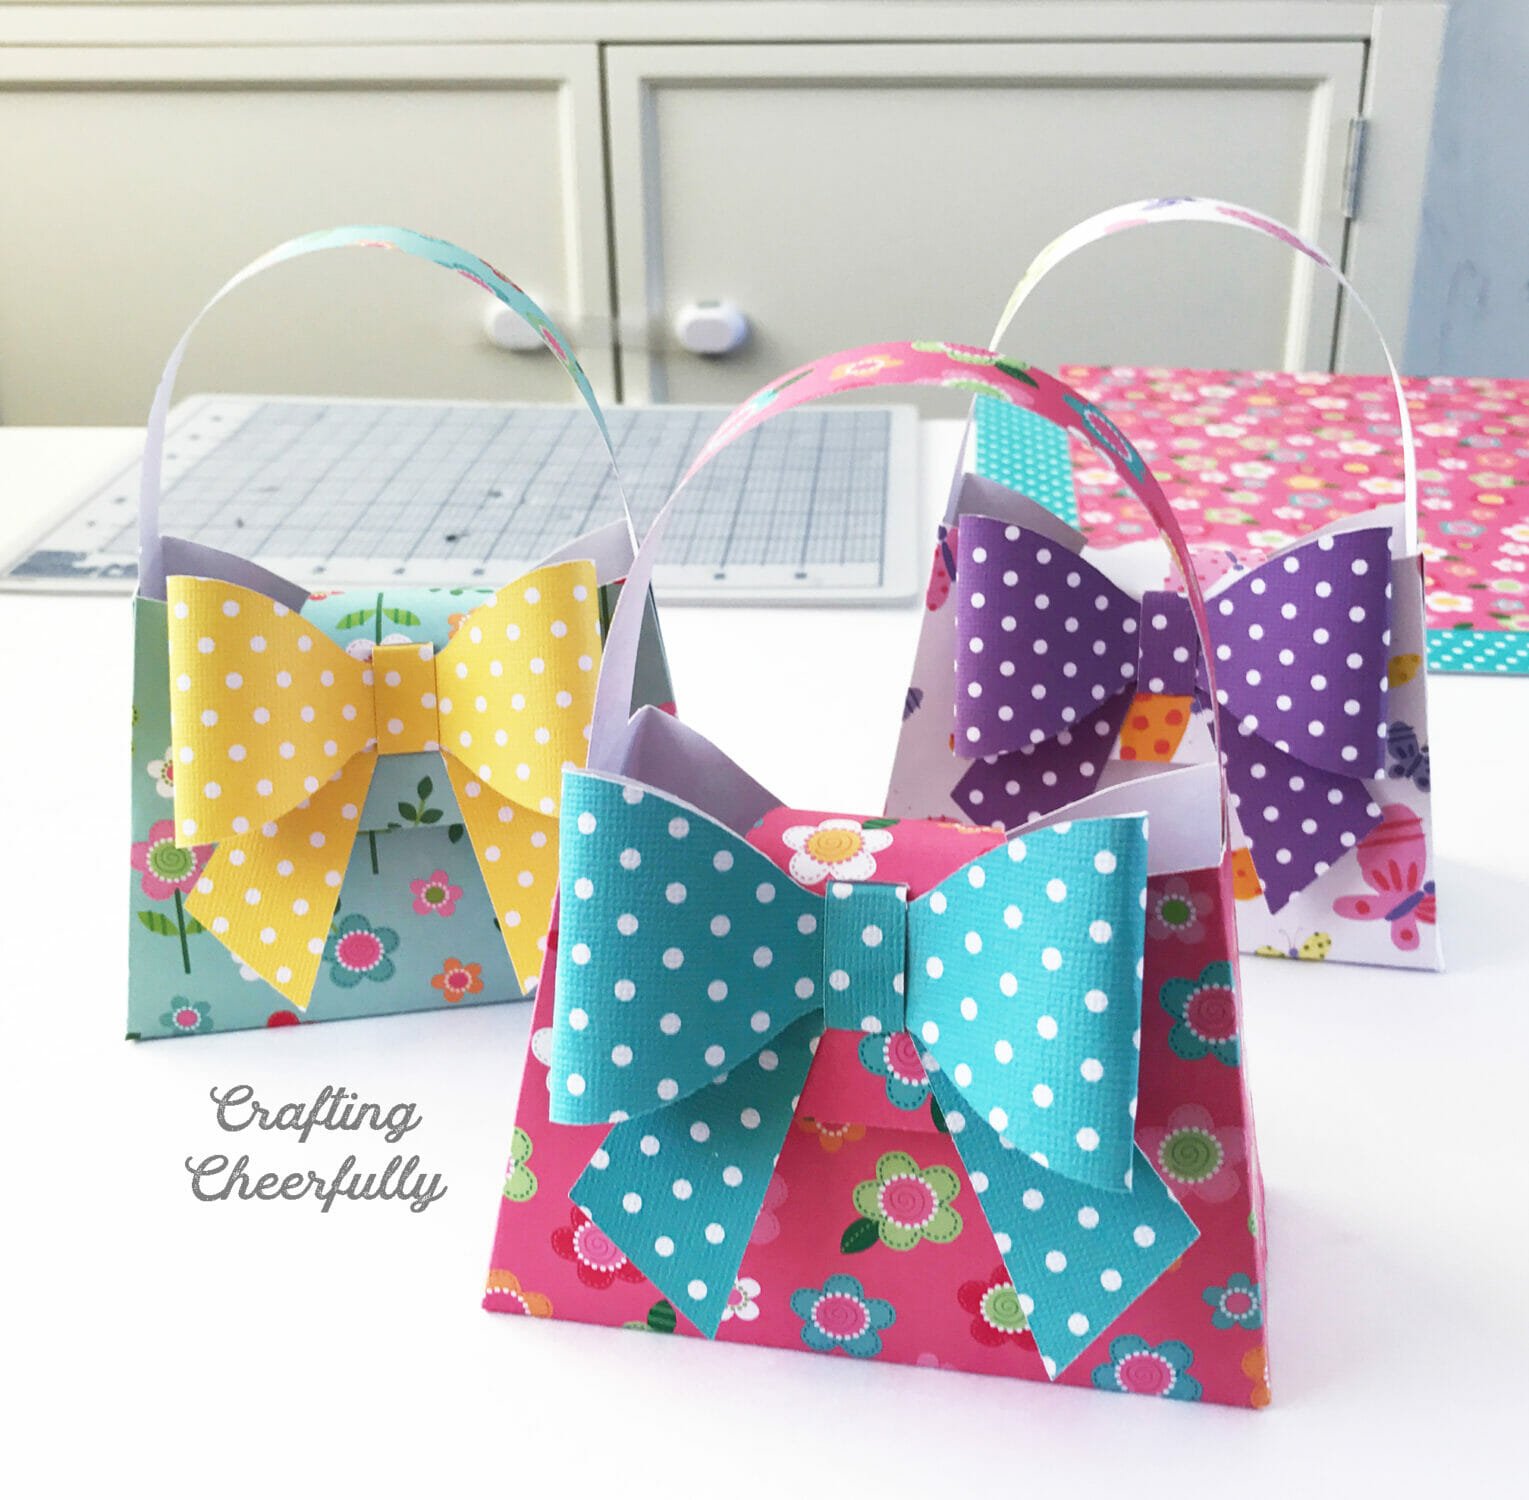
Hello Crafty Friends! Today I am excited to share an update to one of my most popular patterns – my DIY paper purse! I originally created these paper purses as bachelorette party favors, but they are so cute and versatile, they can be used for any occasion or event.
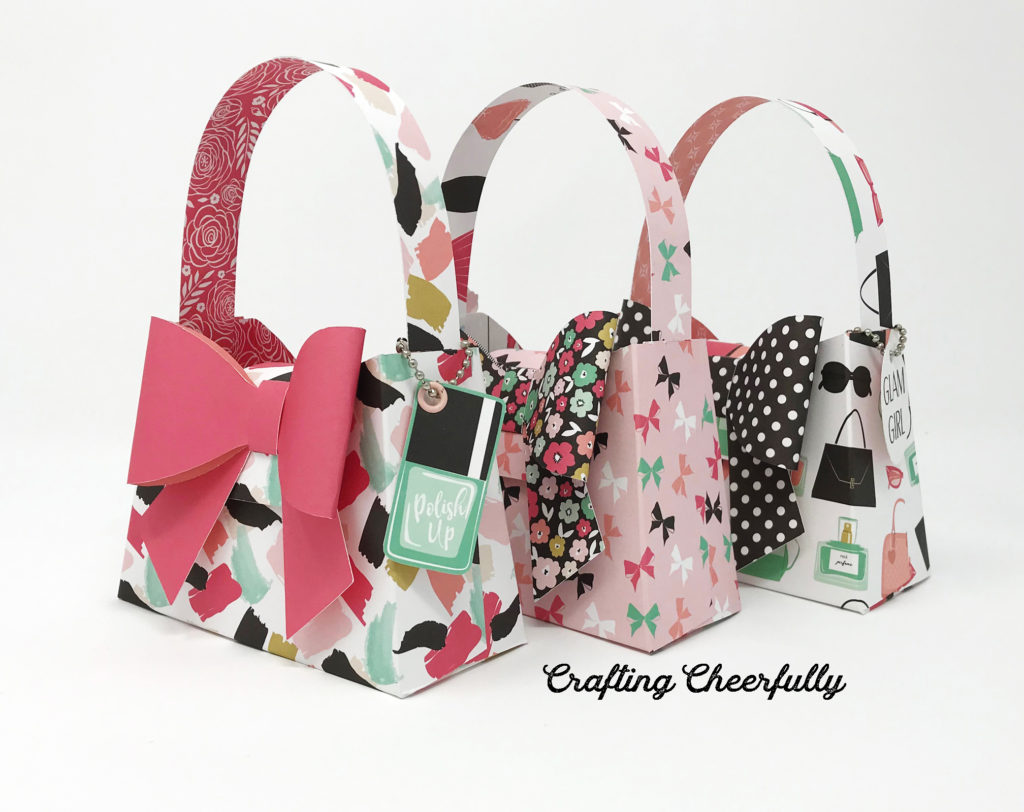
For this tutorial, I made my paper purses in fun florals, butterflies and polka dots using my new, updated pattern that is available in both PDF as well as an SVG cut file.
You do not need a cutting machine to make these. I have always made them by hand up until now, but the cutting machine definitely speeds things up! If you’d like to view my tutorial for creating these without a cutting machine using my printable PDF pattern, please visit my DIY Paper Purse Party Favor post.
The purses are simple to make and don’t require a lot of supplies. Thin fasteners, by Velcro brand, hold the purses shut. They are the perfect size for holding two nail polish bottles as well as sweets and treats. Below is the tutorial, plus the new, updated pattern! What occasion would you make these for?
DIY Paper Purses
Supplies Needed for Paper Purse
- Free Purse Treat Box Files – Grab the free files by filling out the purple form at the bottom of this post.
- Don’t have a cutting machine? Follow this tutorial DIY Paper Purse Party Favor.
- Decorative paper – two different sheets, one for the purse, one for the bow
- Cutting machine, Cricut Tools and Cricut Mat
- Velcro 3/8″ Thin Clear Fasteners *I’ve started using Velcro Brand Removable Mounting Circles 3/8″ – the pictures in the tutorial show the 5/8″ size, but I recommend the smaller 3/8″ size :)
- Tape runner, glue stick, or double-sided tape – I used 1/4″ Scor-Tape
*Update: I’ve started making these purses using Scor-Tape – a great adhesive for paper crafting that is smooth and strong. I’ve also started using Velcro Brand 3/8″ Thin Clear Fasteners. They are smaller and gentler on the paper so the paper won’t tear when opening the purses)

Preparing the File in Cricut Design Space
In Cricut Design Space, upload the paper purse treat box SVG file and insert it into a new project. The SVG includes score lines for the main purse piece in bright pink. If you are using a cutting machine that is not capable of scoring, delete these layers and score by hand using the PDF template as a guide.
If your machine will be scoring the purse, you will need to attach the score lines to the purse. Start by ungrouping the entire project.

Select the score line layer that is bright pink and change the operation from “basic cut” to “score”. The lines will change from pink lines to dashed lines.

Next, attach the score lines to the main purse piece. You can do this by selecting the score line layer and the purse piece and using the “attach” tool located in the bottom right. The attached pieces will move to the top of the layers panel.

You are ready to cut the paper purse! Double-check your mat to make sure the score lines are attached to the main purse piece. The dashed lines will appear on top of the piece and “score” will be listed as well as “basic cut” on the left for that mat. Don’t forget to insert your scoring tool.

Step by Step Tutorial
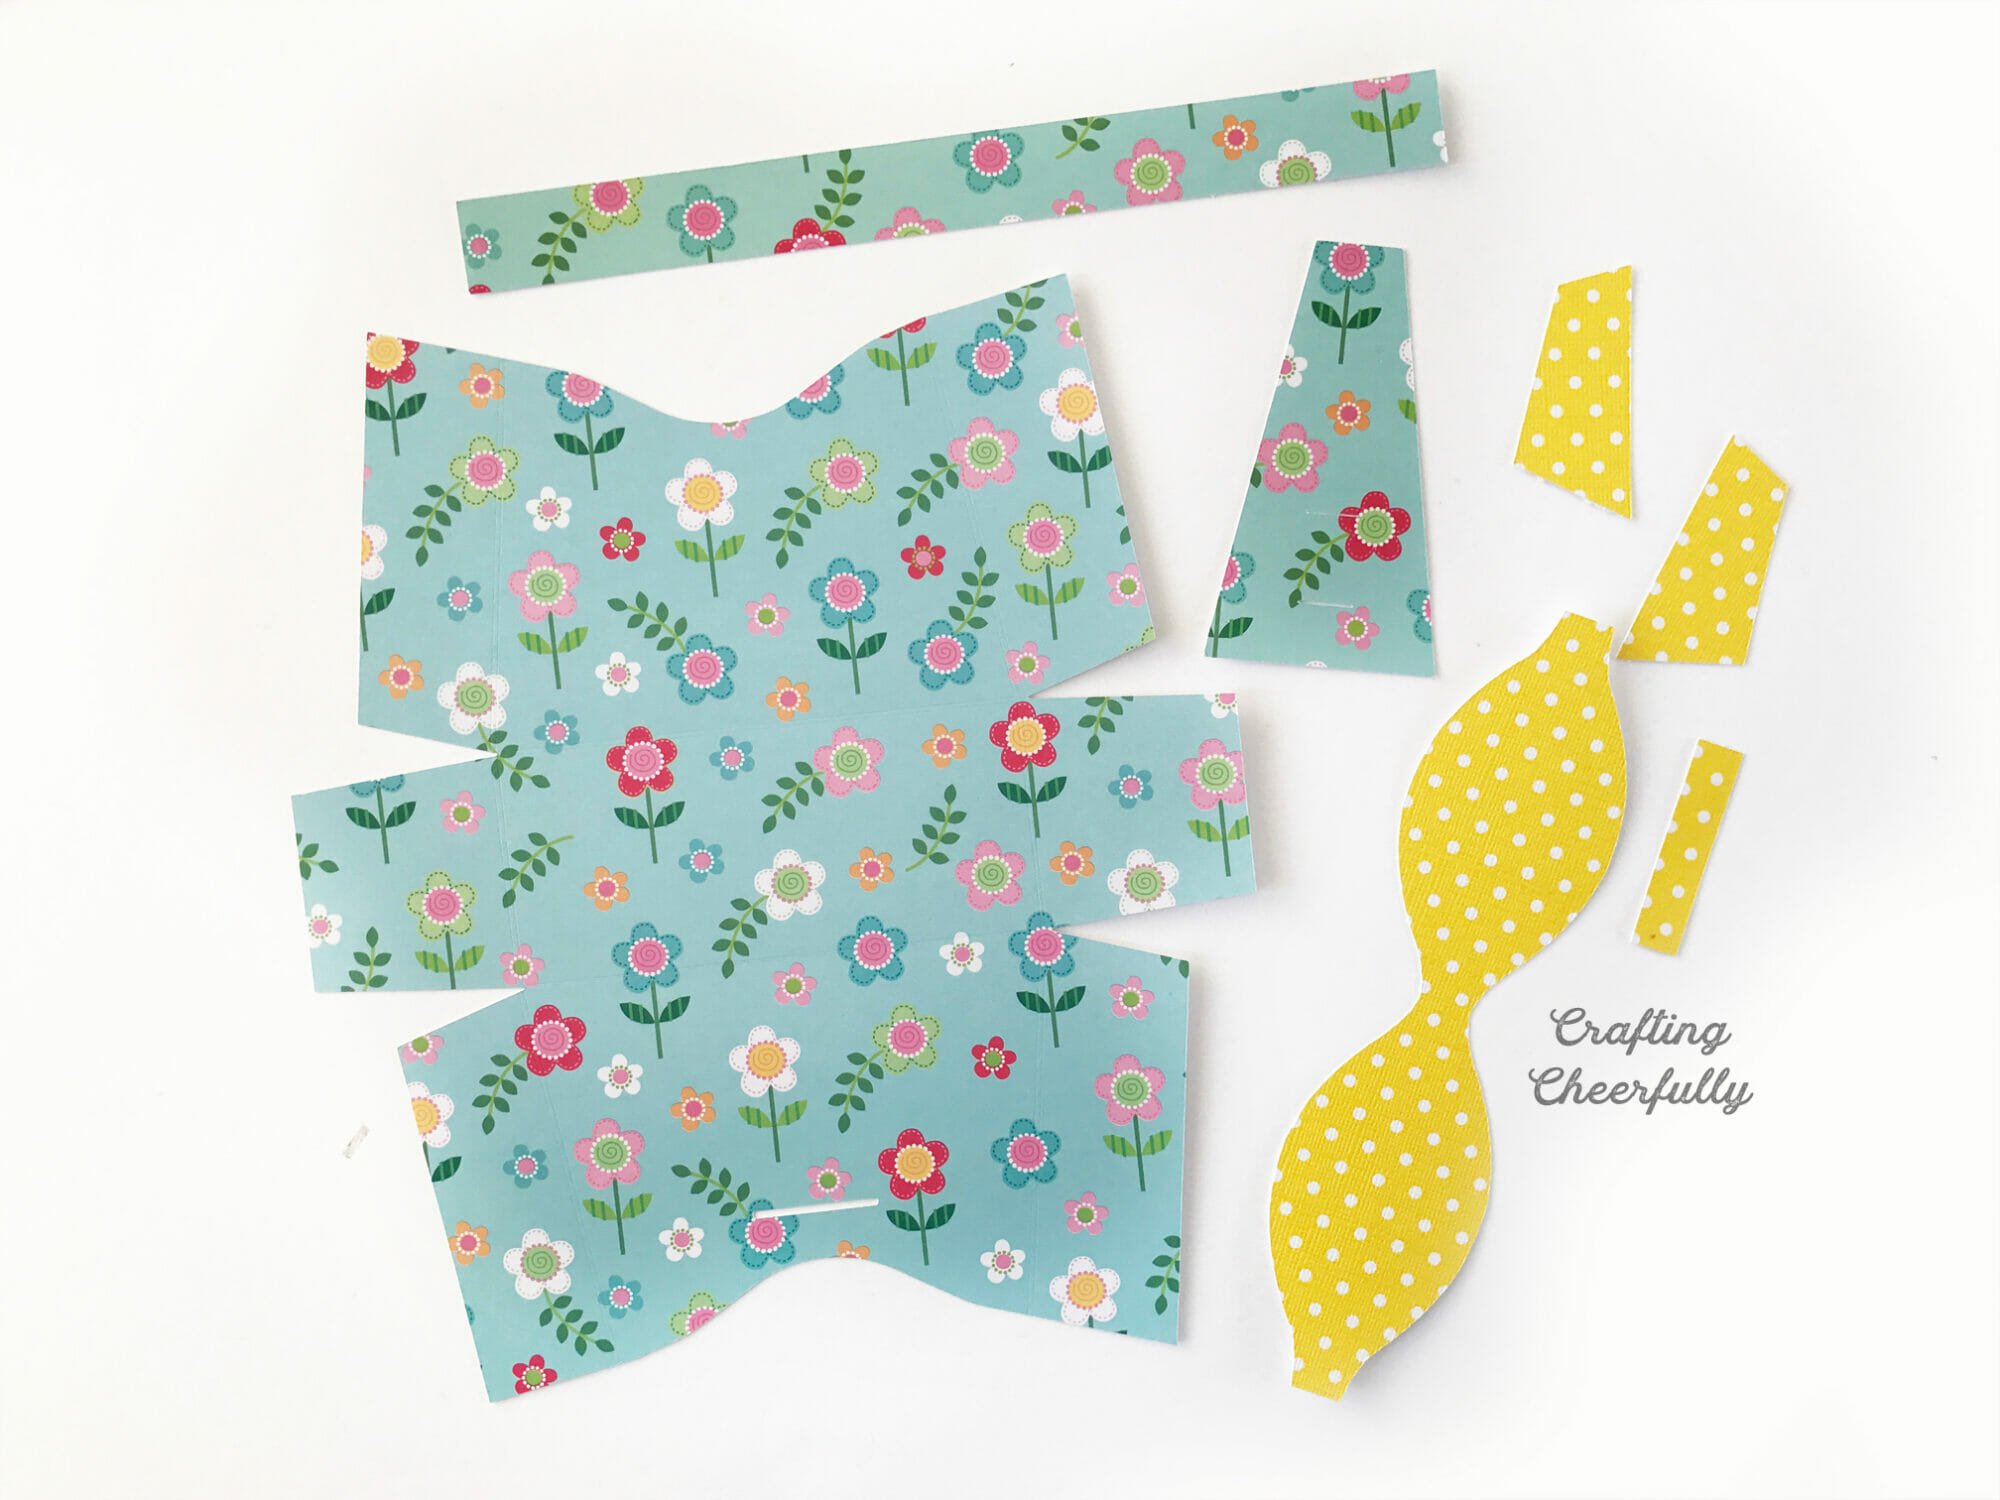
Step One: Print and cut out the pattern.
Use your cutting machine to cut the 7 pieces needed to make the paper purse. If you aren’t using a cutting machine, use the PDF pattern found in this post: DIY Paper Purse Party Favor. If your paper is directional make sure you place it on your mat with the top of the pattern at the top of the mat.
Step Two: Score along the fold lines.
If using a cutting machine with a scoring tool, this will be taken care of when you cut the purse. If you don’t have a cutting machine with a scoring took, you can also do this by hand using a scoring board and stylus.

Step Three: Assemble the purse and attach the handle.
Adhere the purse together on the sides. Keep the side piece coming from the front of the purse on top so the seam is less visible. Measure and mark 1″ in from either end of the purse handle and attach the handle at these marks.


Step Four: Assemble the bow!
First fold the bow piece in and use a narrow piece of tape or double sided tape to secure the center of the bow.

Lay the bow on top of the purse latch piece, centering it in between the two slits. Use the thin rectangle bow piece to secure the bow to the purse latch. You can tape this on the back, or a tape runner works well for this too.


Add the two bow ends with your glue stick or tape runner.

Step Five: Add the purse latch and closure to the paper purse.
Mark 3/4″ in from the skinny end of the purse latch, opposite the bow, as shown below.

This piece will insert into the slit on the back of the purse. Slide it in until the marked line is even with the slit. Tape or glue in place.


Apply the rough side of a Velcro Dot to the underside of the purse latch. Close the purse and mark where the soft Velcro Dot should be placed; then attach it to the front of the purse. I’ve started using 3/8″ clear Velcro Dots as they are less strong and easier on the paper. I found sometimes the larger Velcro Dots were too strong and tore the paper.


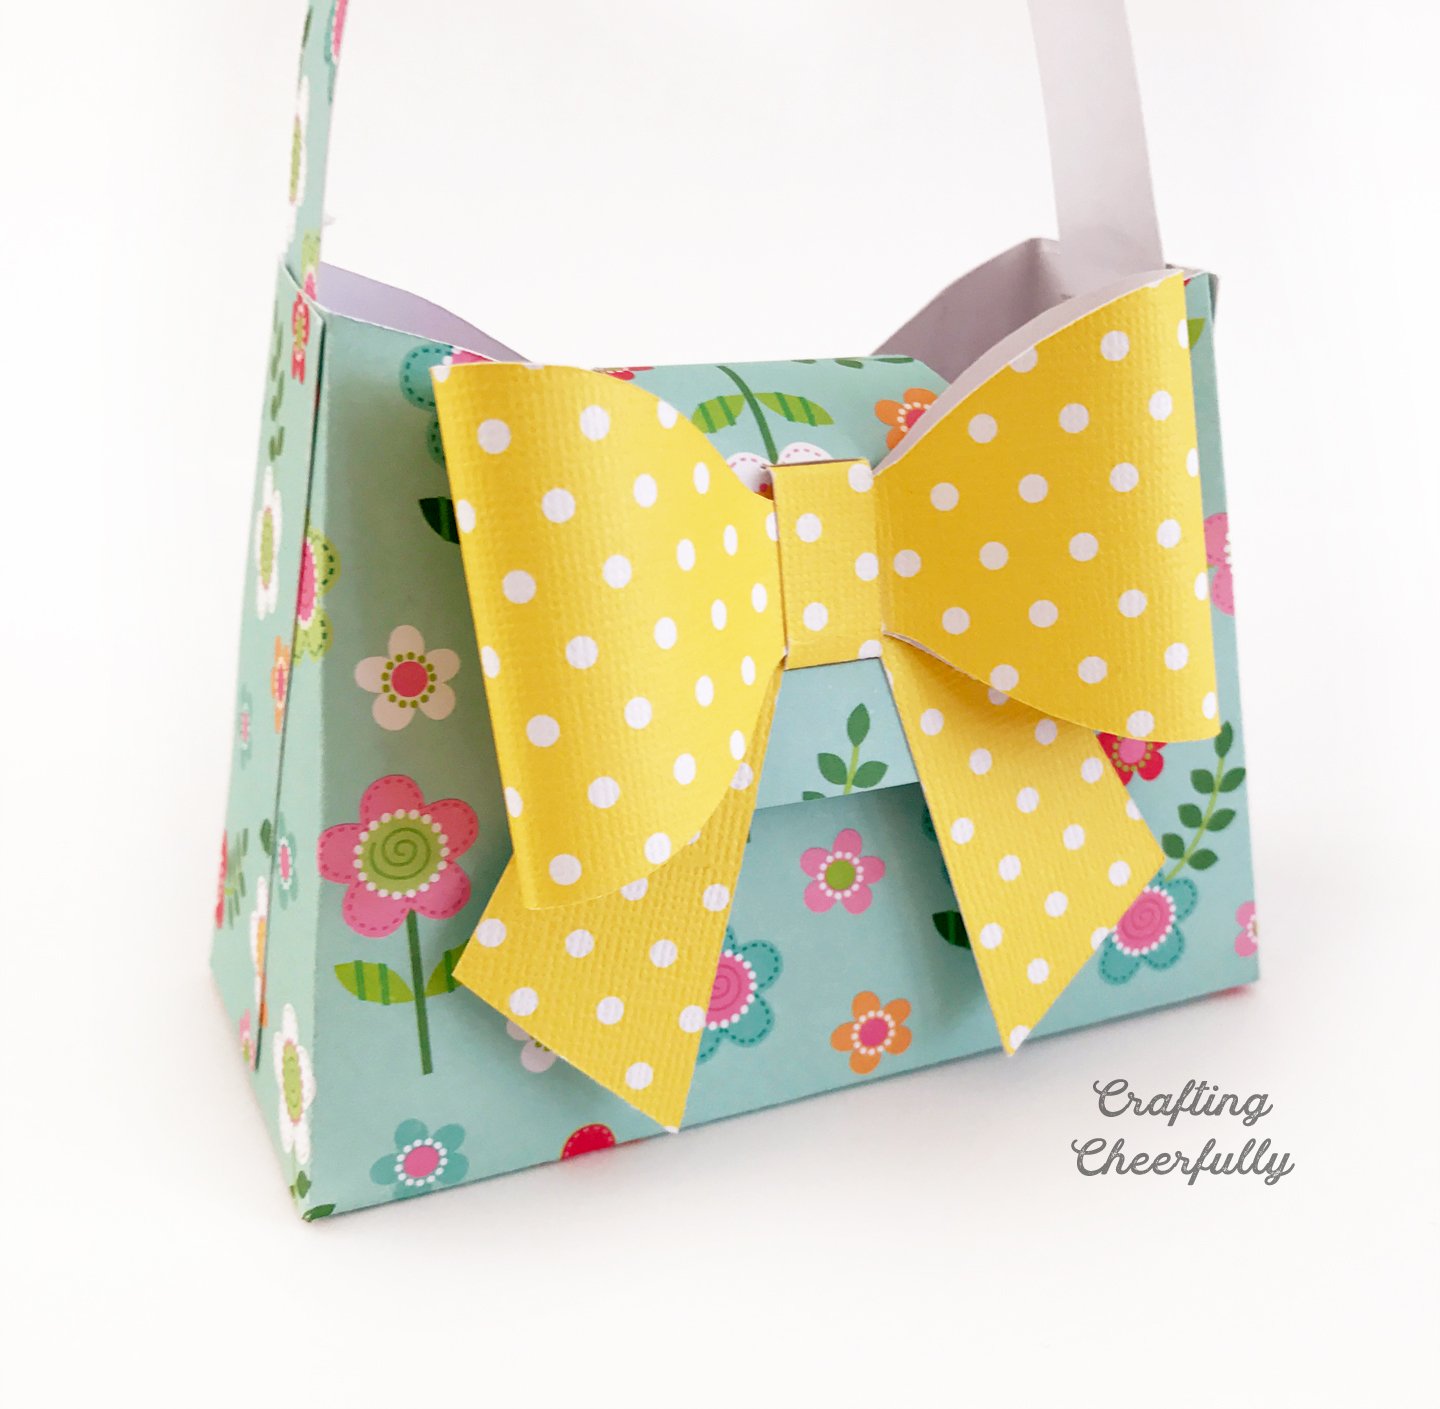
The paper purse is complete!! After making one or two, they really start to go together quickly!

When I am making a lot of these at once, I do everything in stages, cutting all of them at once, then making the bows all at once, etc. They’d also work well in an assembly line if you can grab some helpers!
They make great party favors, prizes, treat boxes and can be used for any occasion, depending on the two pieces of decorative paper you choose! I created these purses again using the fun paper collection, Fashionista by Echo Park Paper! I added cute little keychains to jazz them up.
Thanks for visiting me here at Crafting Cheerfully! If you create any of my projects, I’d love to see them! Use #craftingcheerfully!

Get the Free Purse Treat Box Files!
Fill out the purple form below with your first name and email address! The free file will be sent straight to your inbox! If you have already filled out the form below, don’t worry – you won’t be added to my list twice! This freebie is for personal use only. I hope you enjoy crafting something special. Please let me know if you have any questions :)


What weight of paper do you use? Thanks
Hi! I’ve made these purses with paper weights that vary from 65lbs to 110lbs. You’ll want to be careful of really thick papers or paper with heavy glitter as these will crack when you fold them. The purses can be made with lighter paper to hold lightweight items like gift cards, but if you plan to put treats or nail polish bottles inside, aim for 65lbs and more. The paper that comes in the DCWV paperstacks is a great weight, as is American Crafts 80lb paper. I’ve also used Echo Park Paper Co., Bazzill, and DoodleBug Design paper for these purses and they all worked well. I hope this helps! Have fun crafting! :)
i cant download it. the link is not working. I see this :[download id=”9146″]
Hi! I’m sorry the download wasn’t working! All of my free patterns and cut files are now available in my Free Resource Library – I missed removing the old download link. Thank you for letting me know, I’ve updated the post to include a link to the library. If you have any trouble finding the pattern in the library, please send me an email at kimberly@craftingcheerfully.com and I’d be happy to send it to you :)