How to Turn a Dress into a Skirt
Learn how to turn a girl’s dress into a cute skirt. This is a simple way to extend the life of a dress that is still in great condition!
Hello Crafty Friends! Today I’m sharing a sewing tutorial for turning a girl’s dress into a skirt. My daughter grows so quickly, I’m always looking for ways to be more eco-friendly with her clothing. A lot of times the dress still fits, but it has become too short with the waistline too high. When the dress is in great condition and still a favorite, I like to get crafty and turn the dress into a simple, but super cute, skirt.
This is a quick sewing project since we aren’t making the skirt from scratch and the hem is already finished. I have made a lot of skirts this way, usually with dresses that already have a gathered waistline. I just cut the dress in half and create an elastic waistband. This only takes a few supplies, including elastic and sewing notions like thread, a ruler and a sewing machine.

I love repurposing old clothing! In the past I’ve made lots of fun things from old clothing including tote bags, hooped wall art, a t-shirt wall hanging, and even a wreath! You can also check out how I turned a dress into two matching skirts for a girl and her doll.
How to Turn a Dress into a Skirt
Supplies Needed
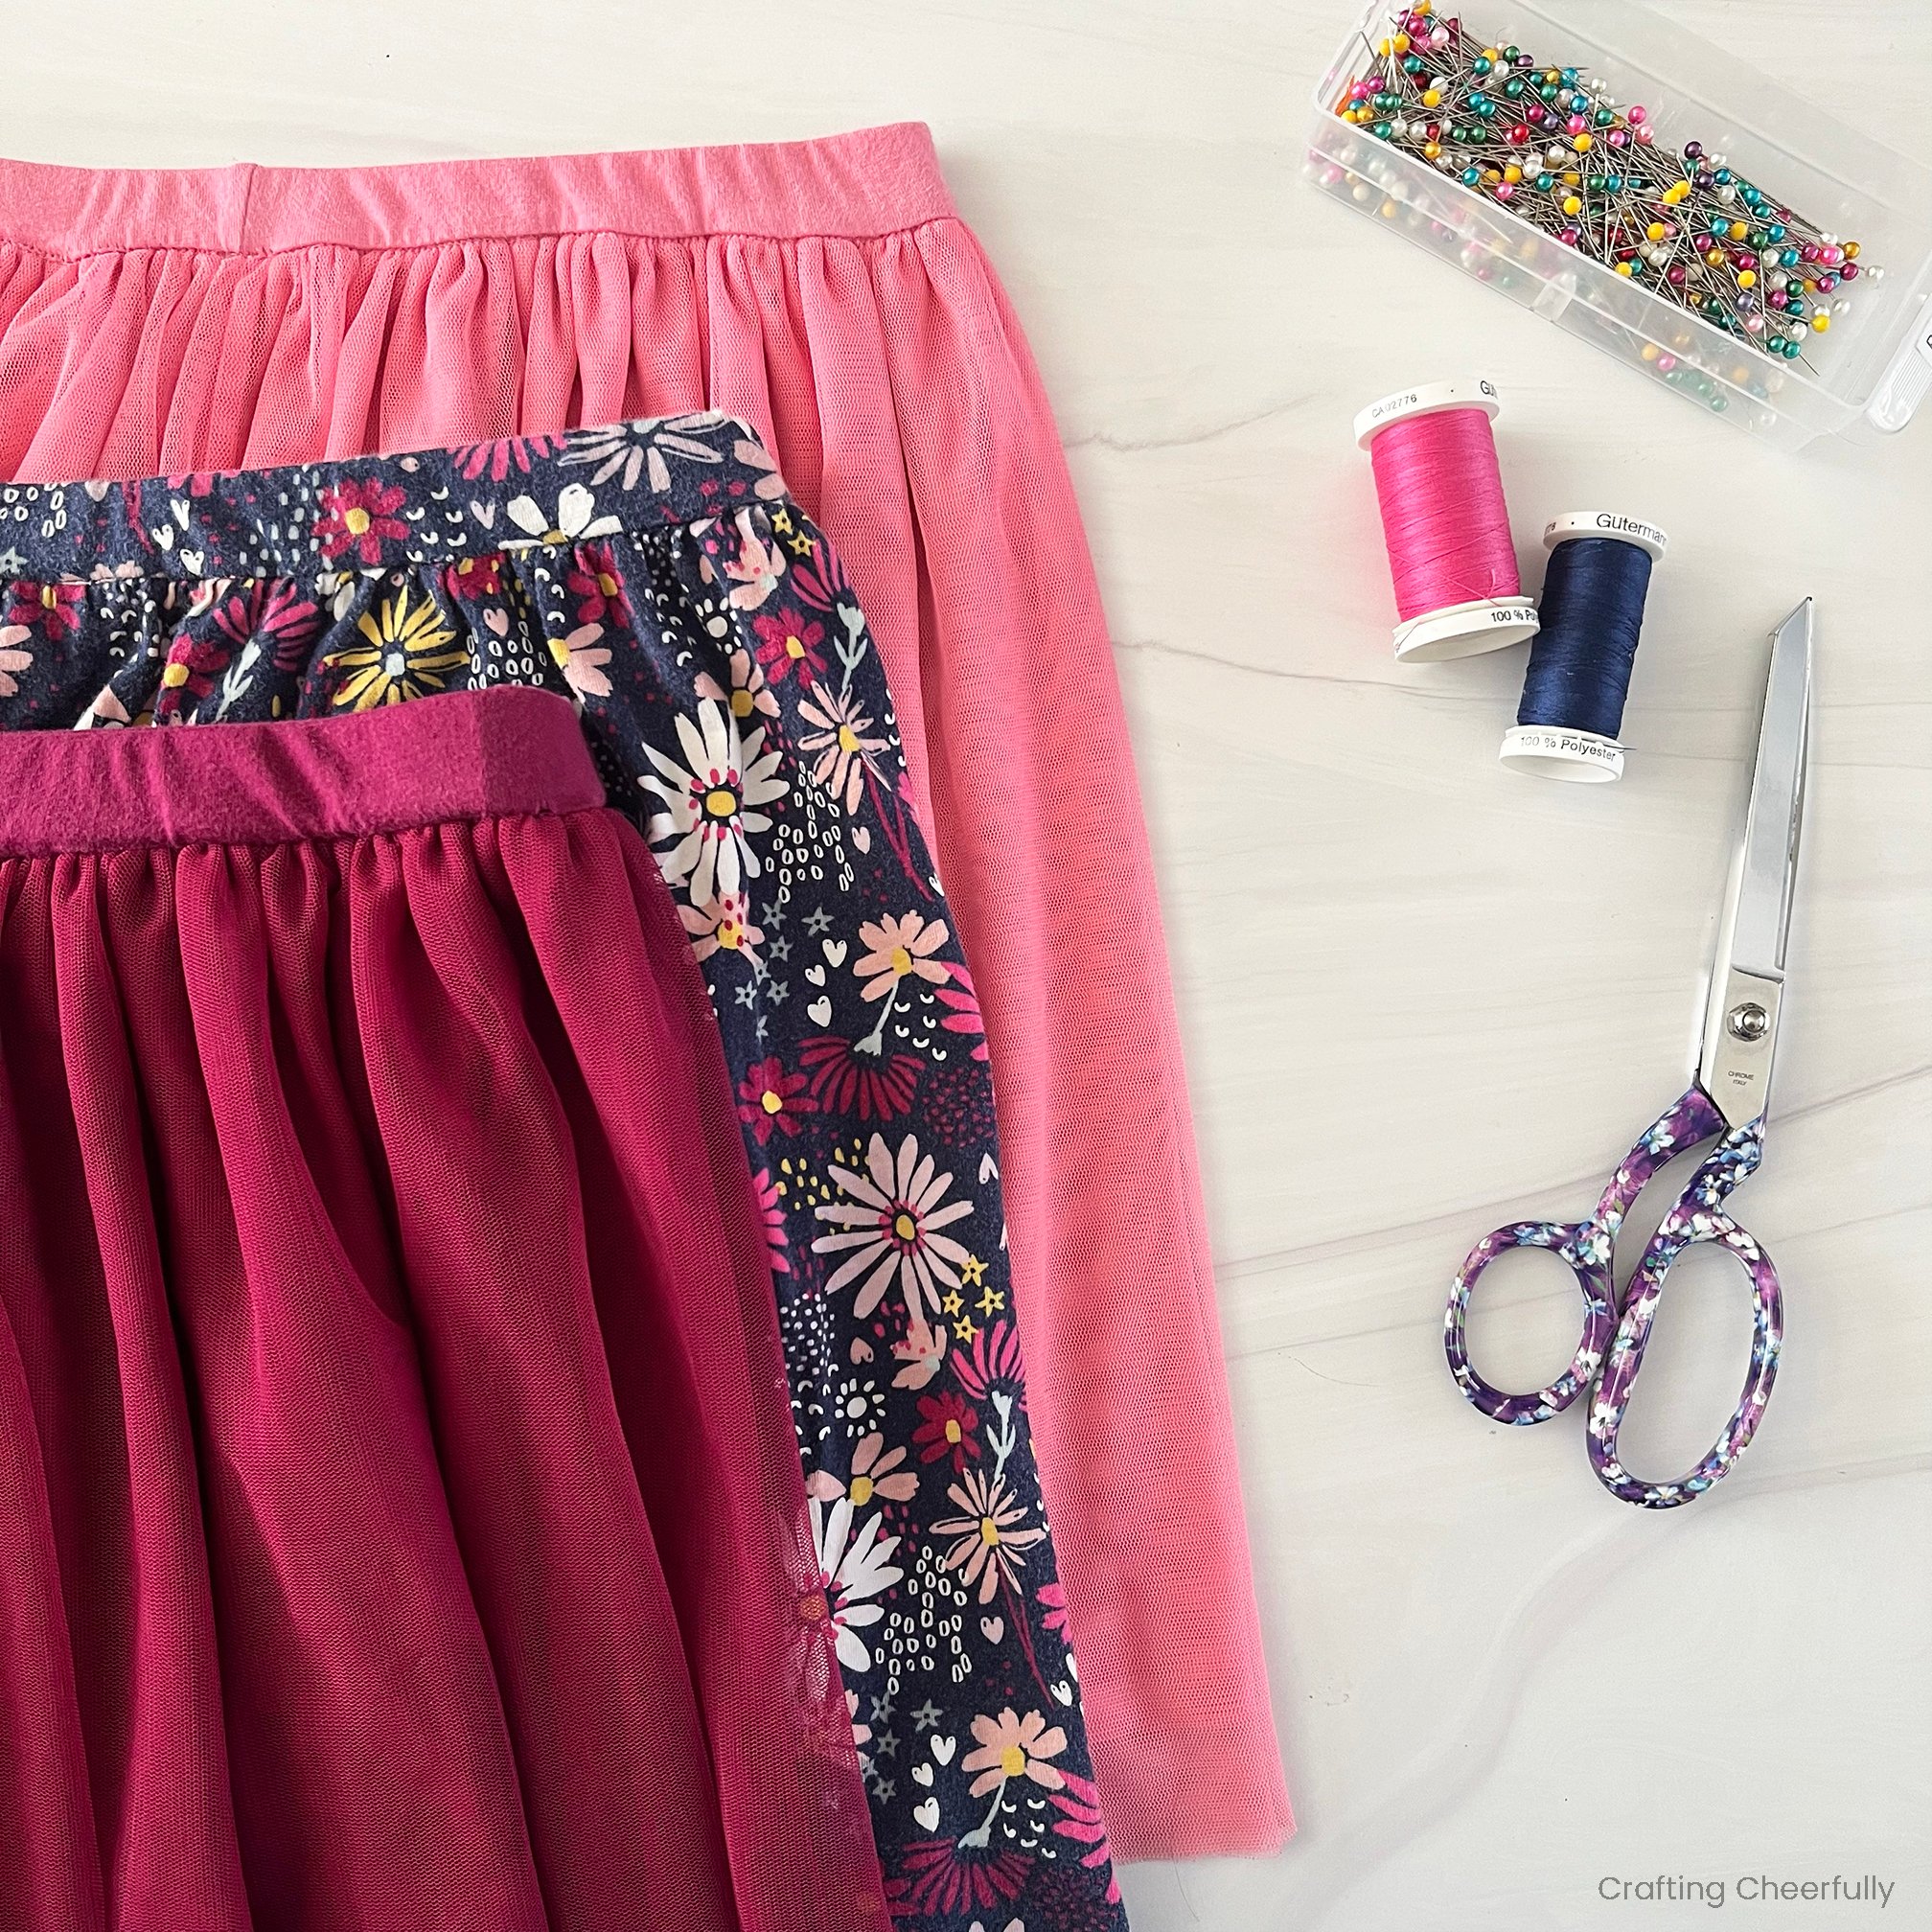
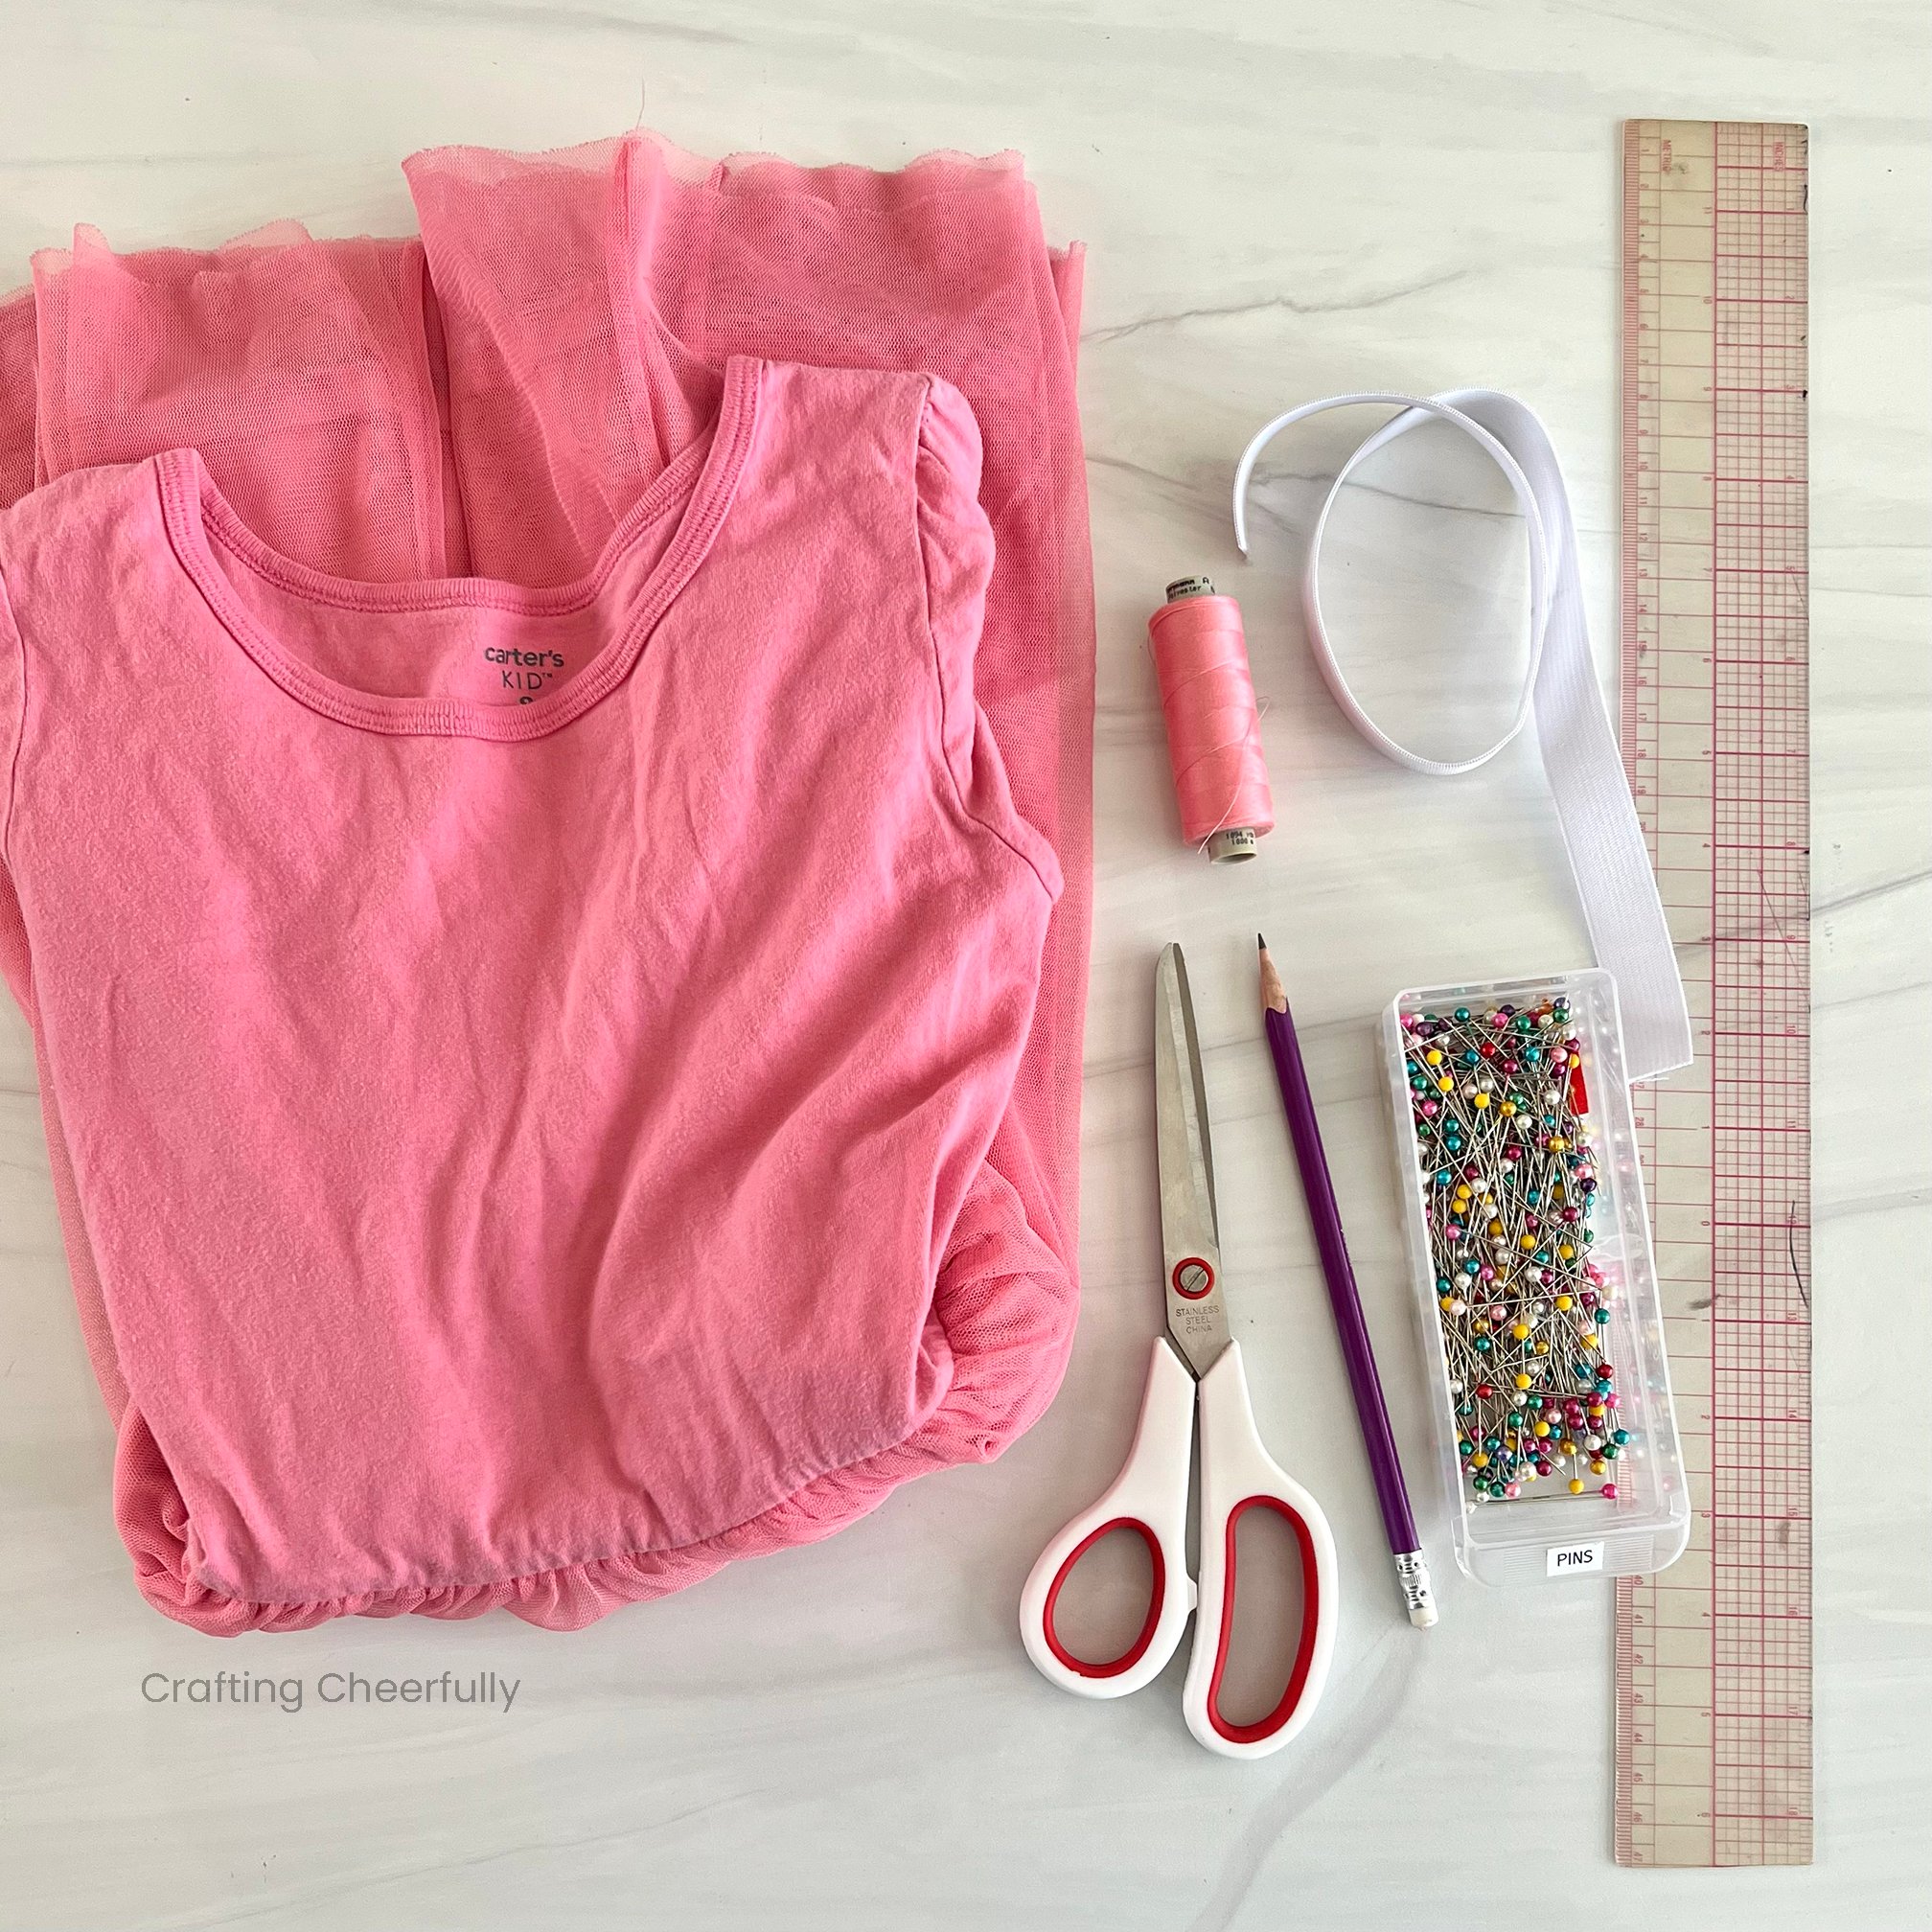
- A used dress with a gathered waistline that still fits (I’m using a Carter’s size 8 dress)
- 3/4″ Elastic
- Matching thread
- Sewing notions like fabric scissors, straight pins, clear ruler, and a seam gauge is also helpful.
- Sewing machine – I have a Bernina 1001

Making the Skirt
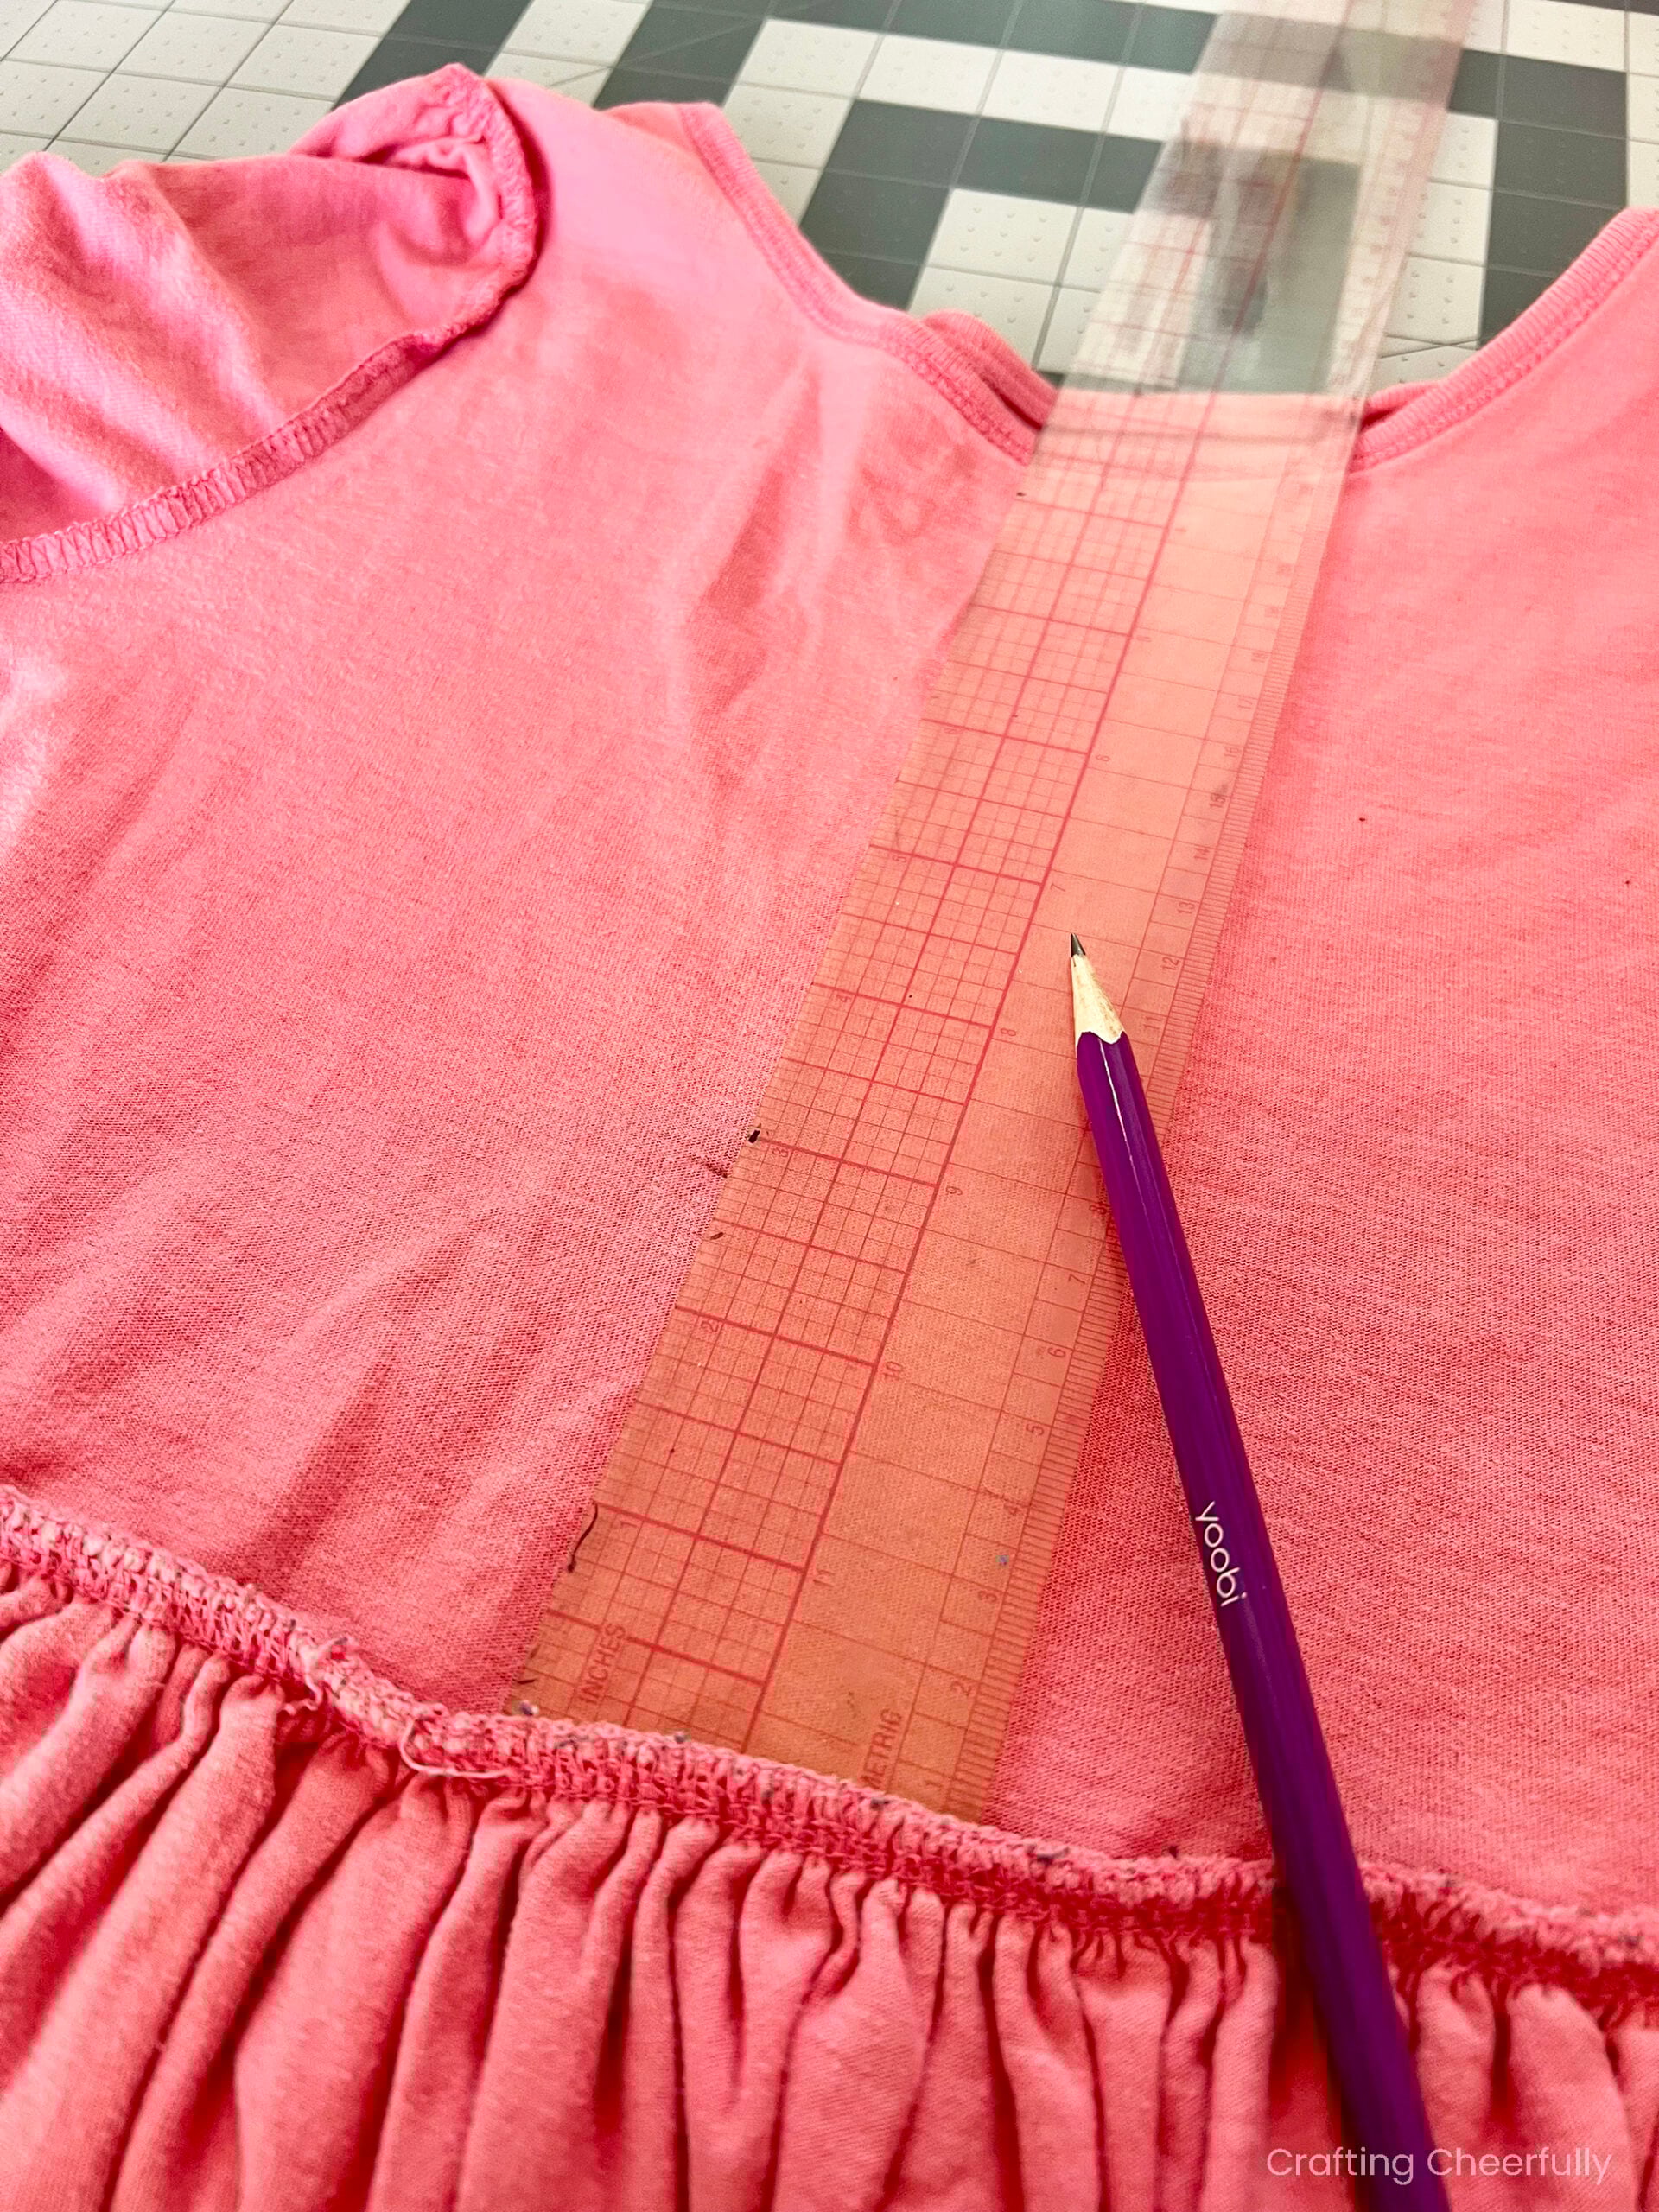
Step One: Cut out the fabric.
Turn the dress inside out and mark 2.75″ above the gathered waistline using a ruler. I mark this every few inches and then connect my marks with a straight line I can follow while cutting. Cut the dress along this marked line, separating the skirt from the bodice.

Step Two: Create the Waistband Casing.
The hem of this skirt is already finished so we just need to create a new finished waistband. Fold the edge you just cut 1/2″ to the wrong side and press. I like to use a seam gauge!

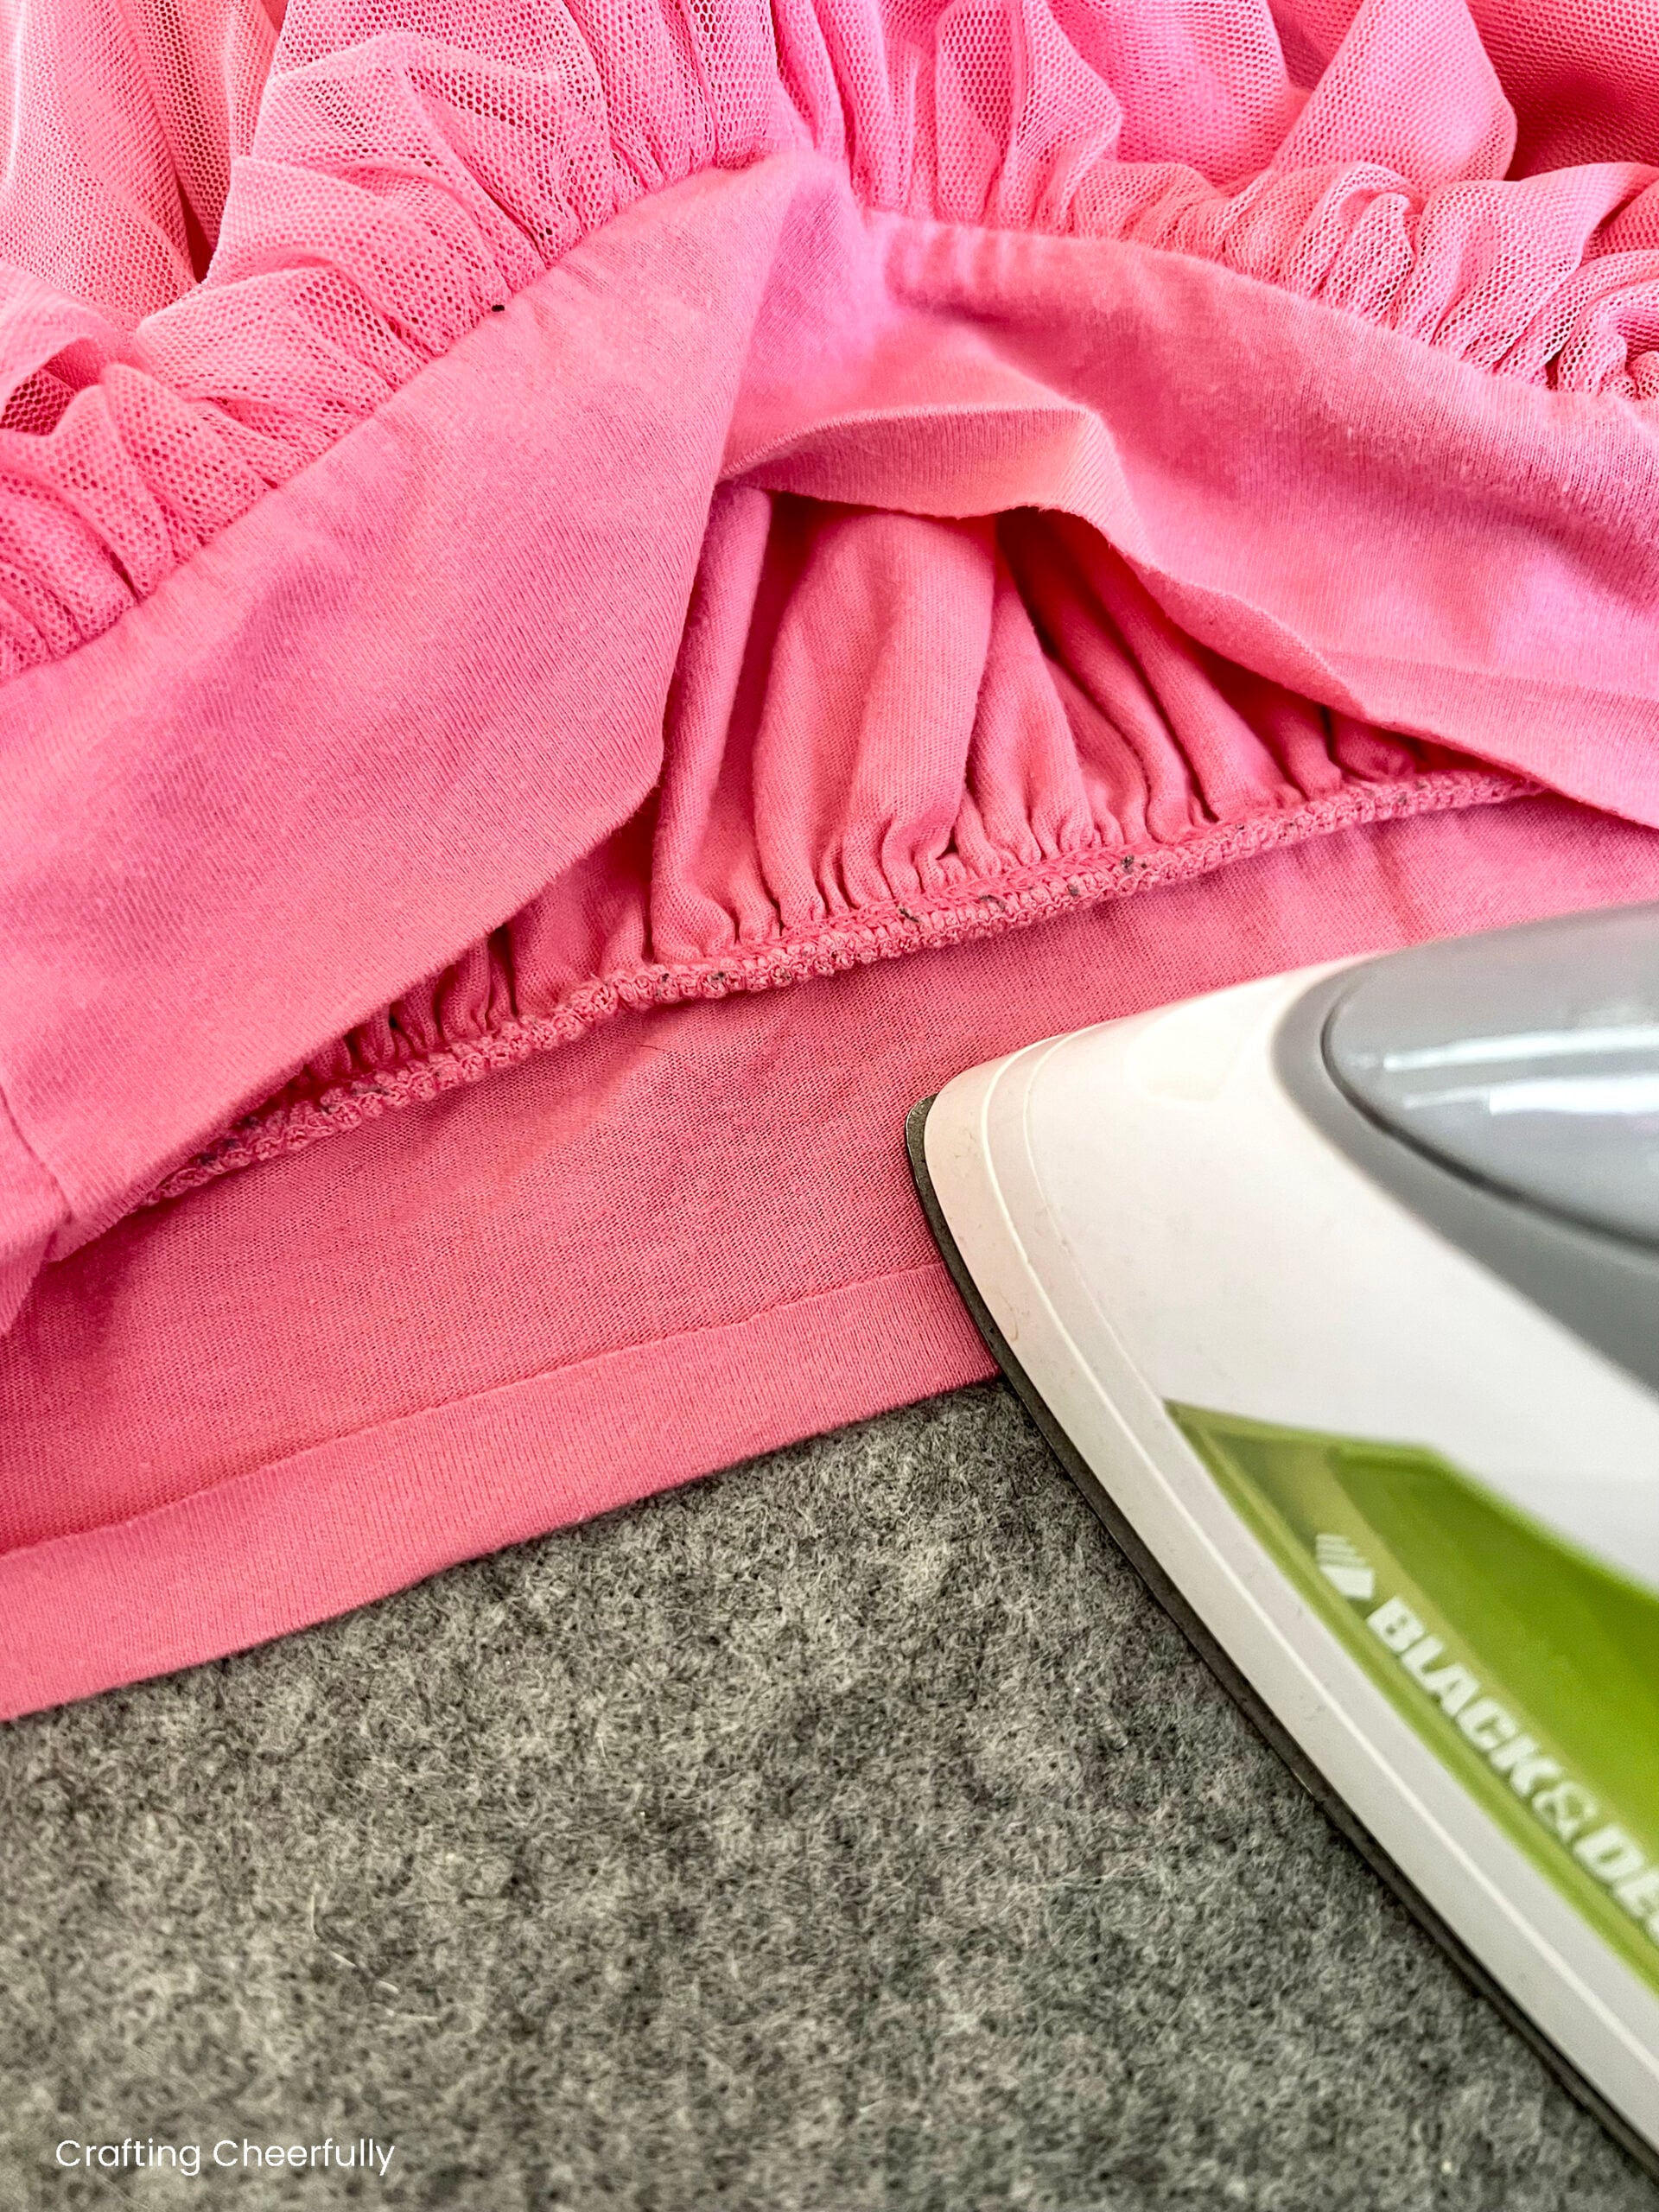
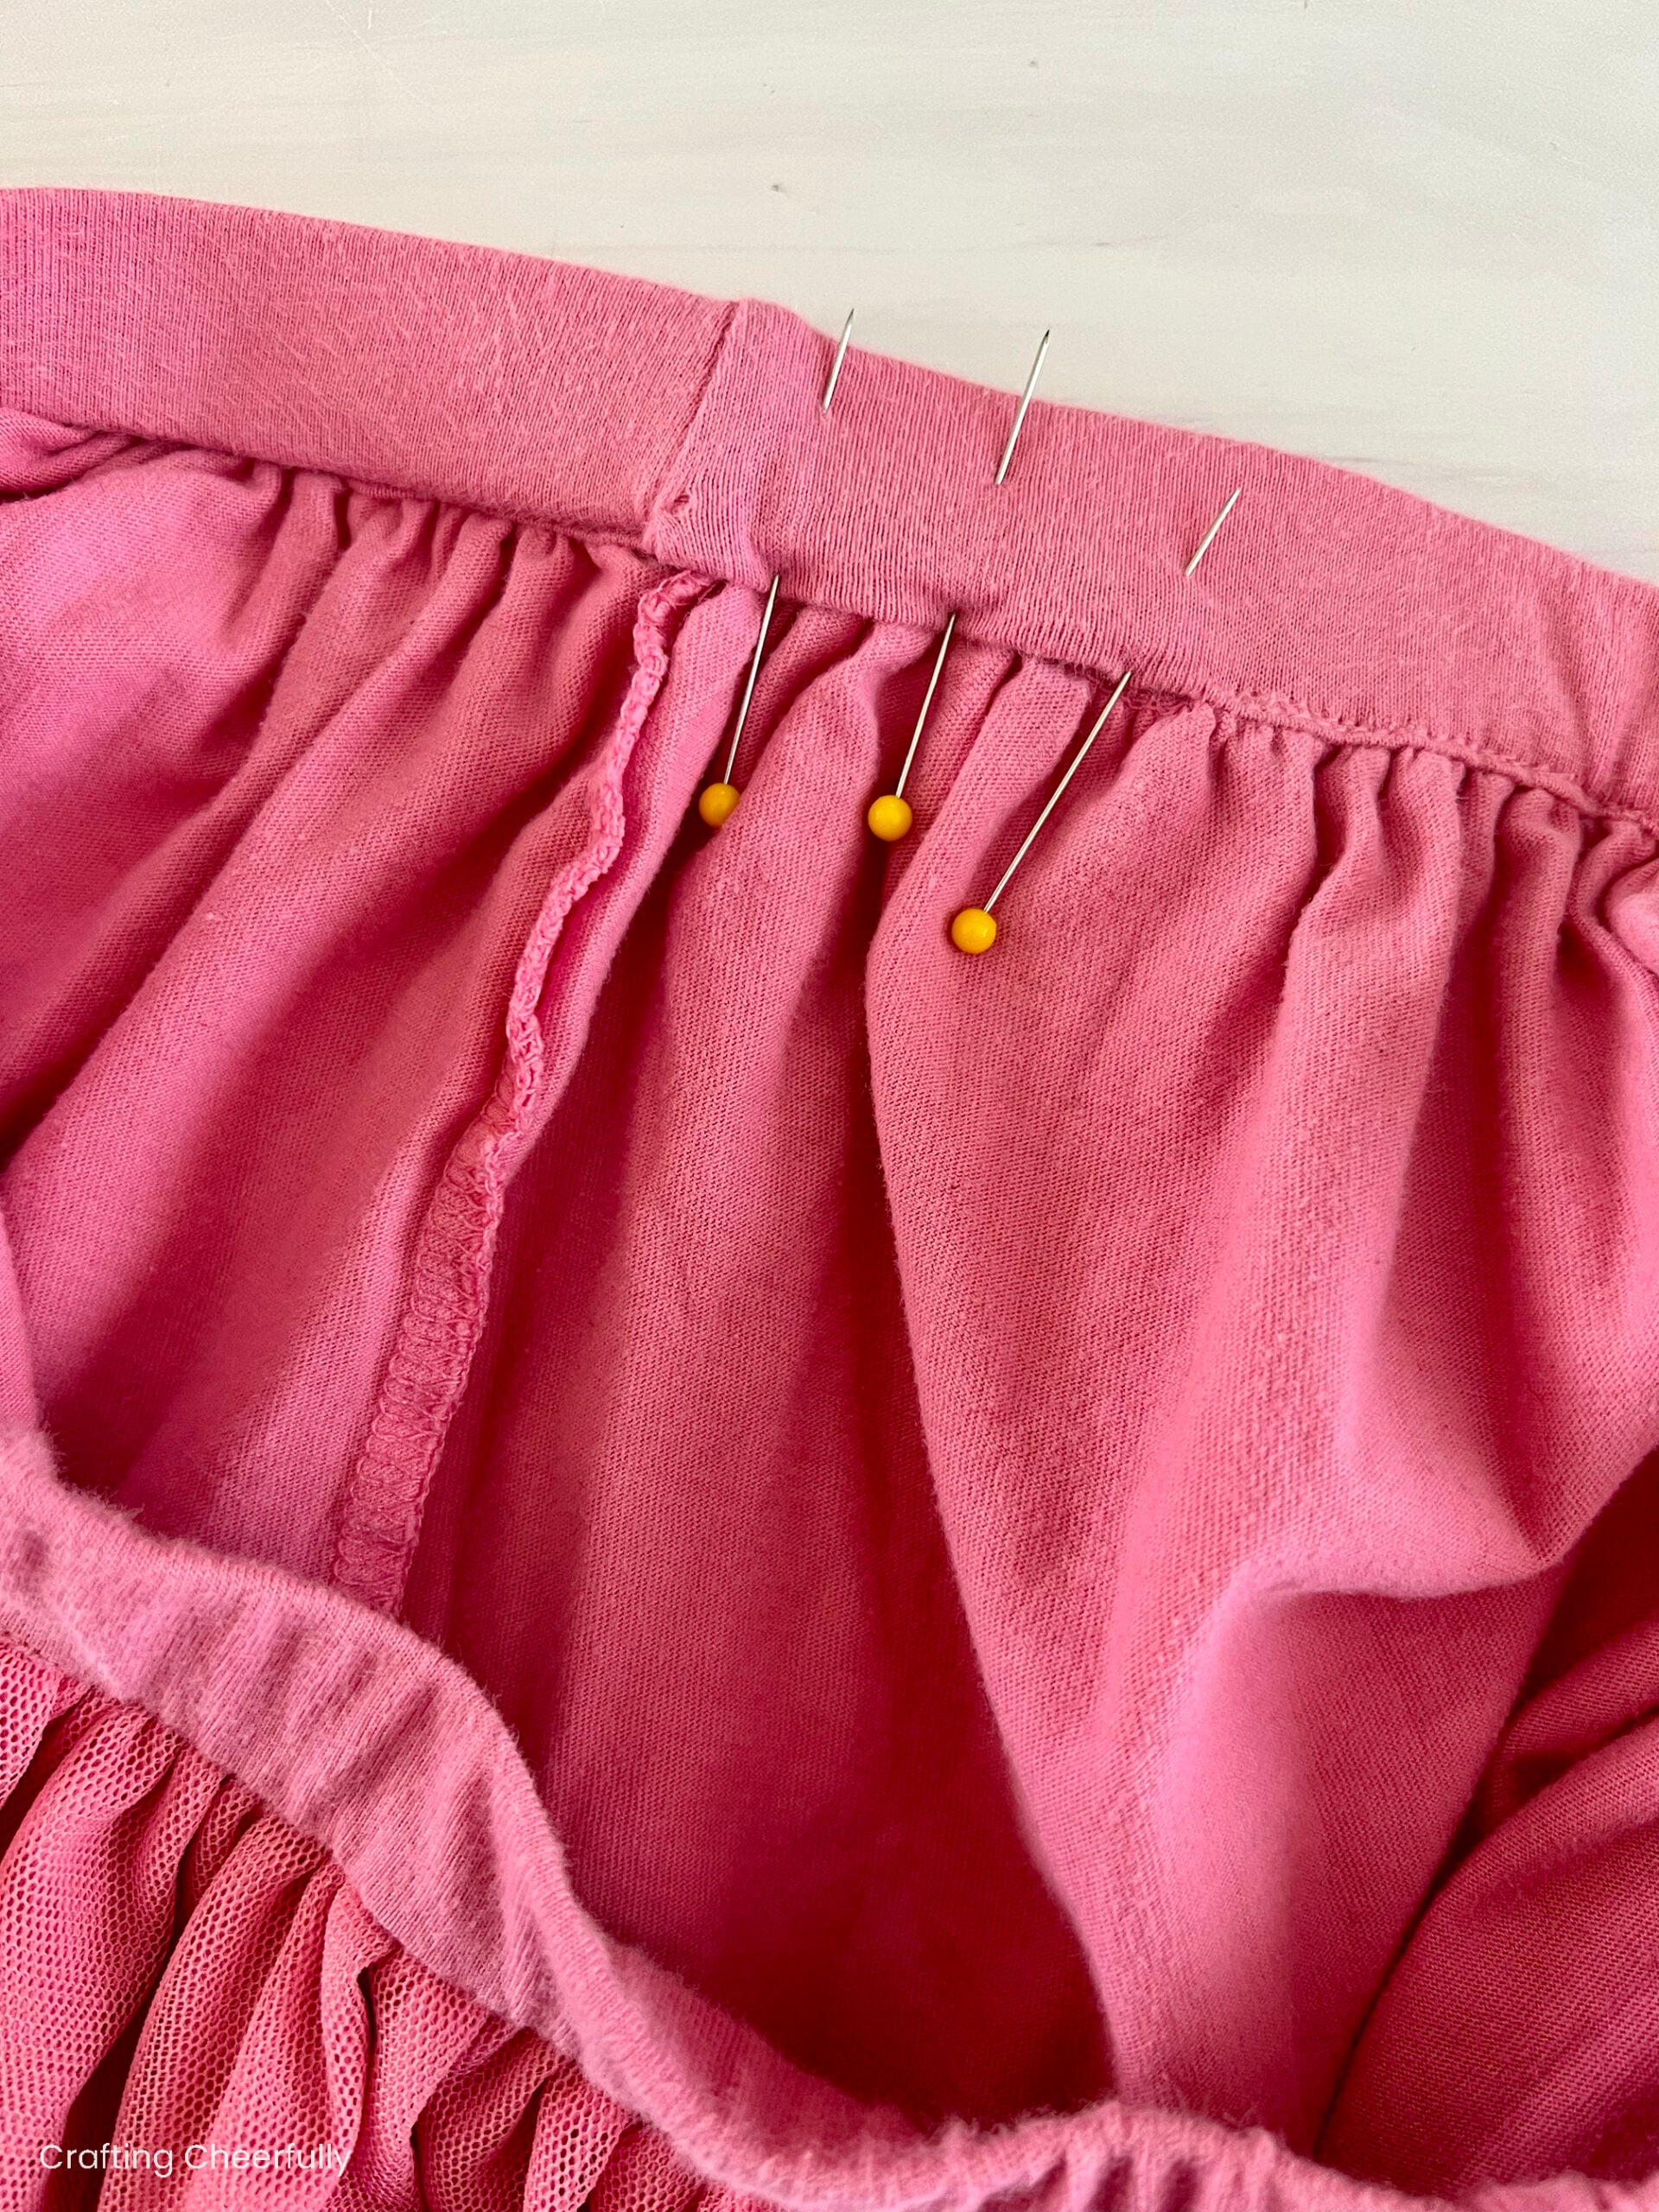
Next, fold the waistband down so the pressed edge slightly (around 1/4″) overlaps the dress’s waistline. For most of my daughter’s dresses, the waistline was serged on the inside. I ironed the surged seam upwards before folding over my new waistband. Pin the waistband in place. (**Note – Most people will position their pins so the sharp edge is pointing down towards the inside of the garment. This will make it easier to remove your pins as you are stitching and you won’t accidentally poke yourself. For some strange reason I do the opposite and can’t seem to break the habit!)

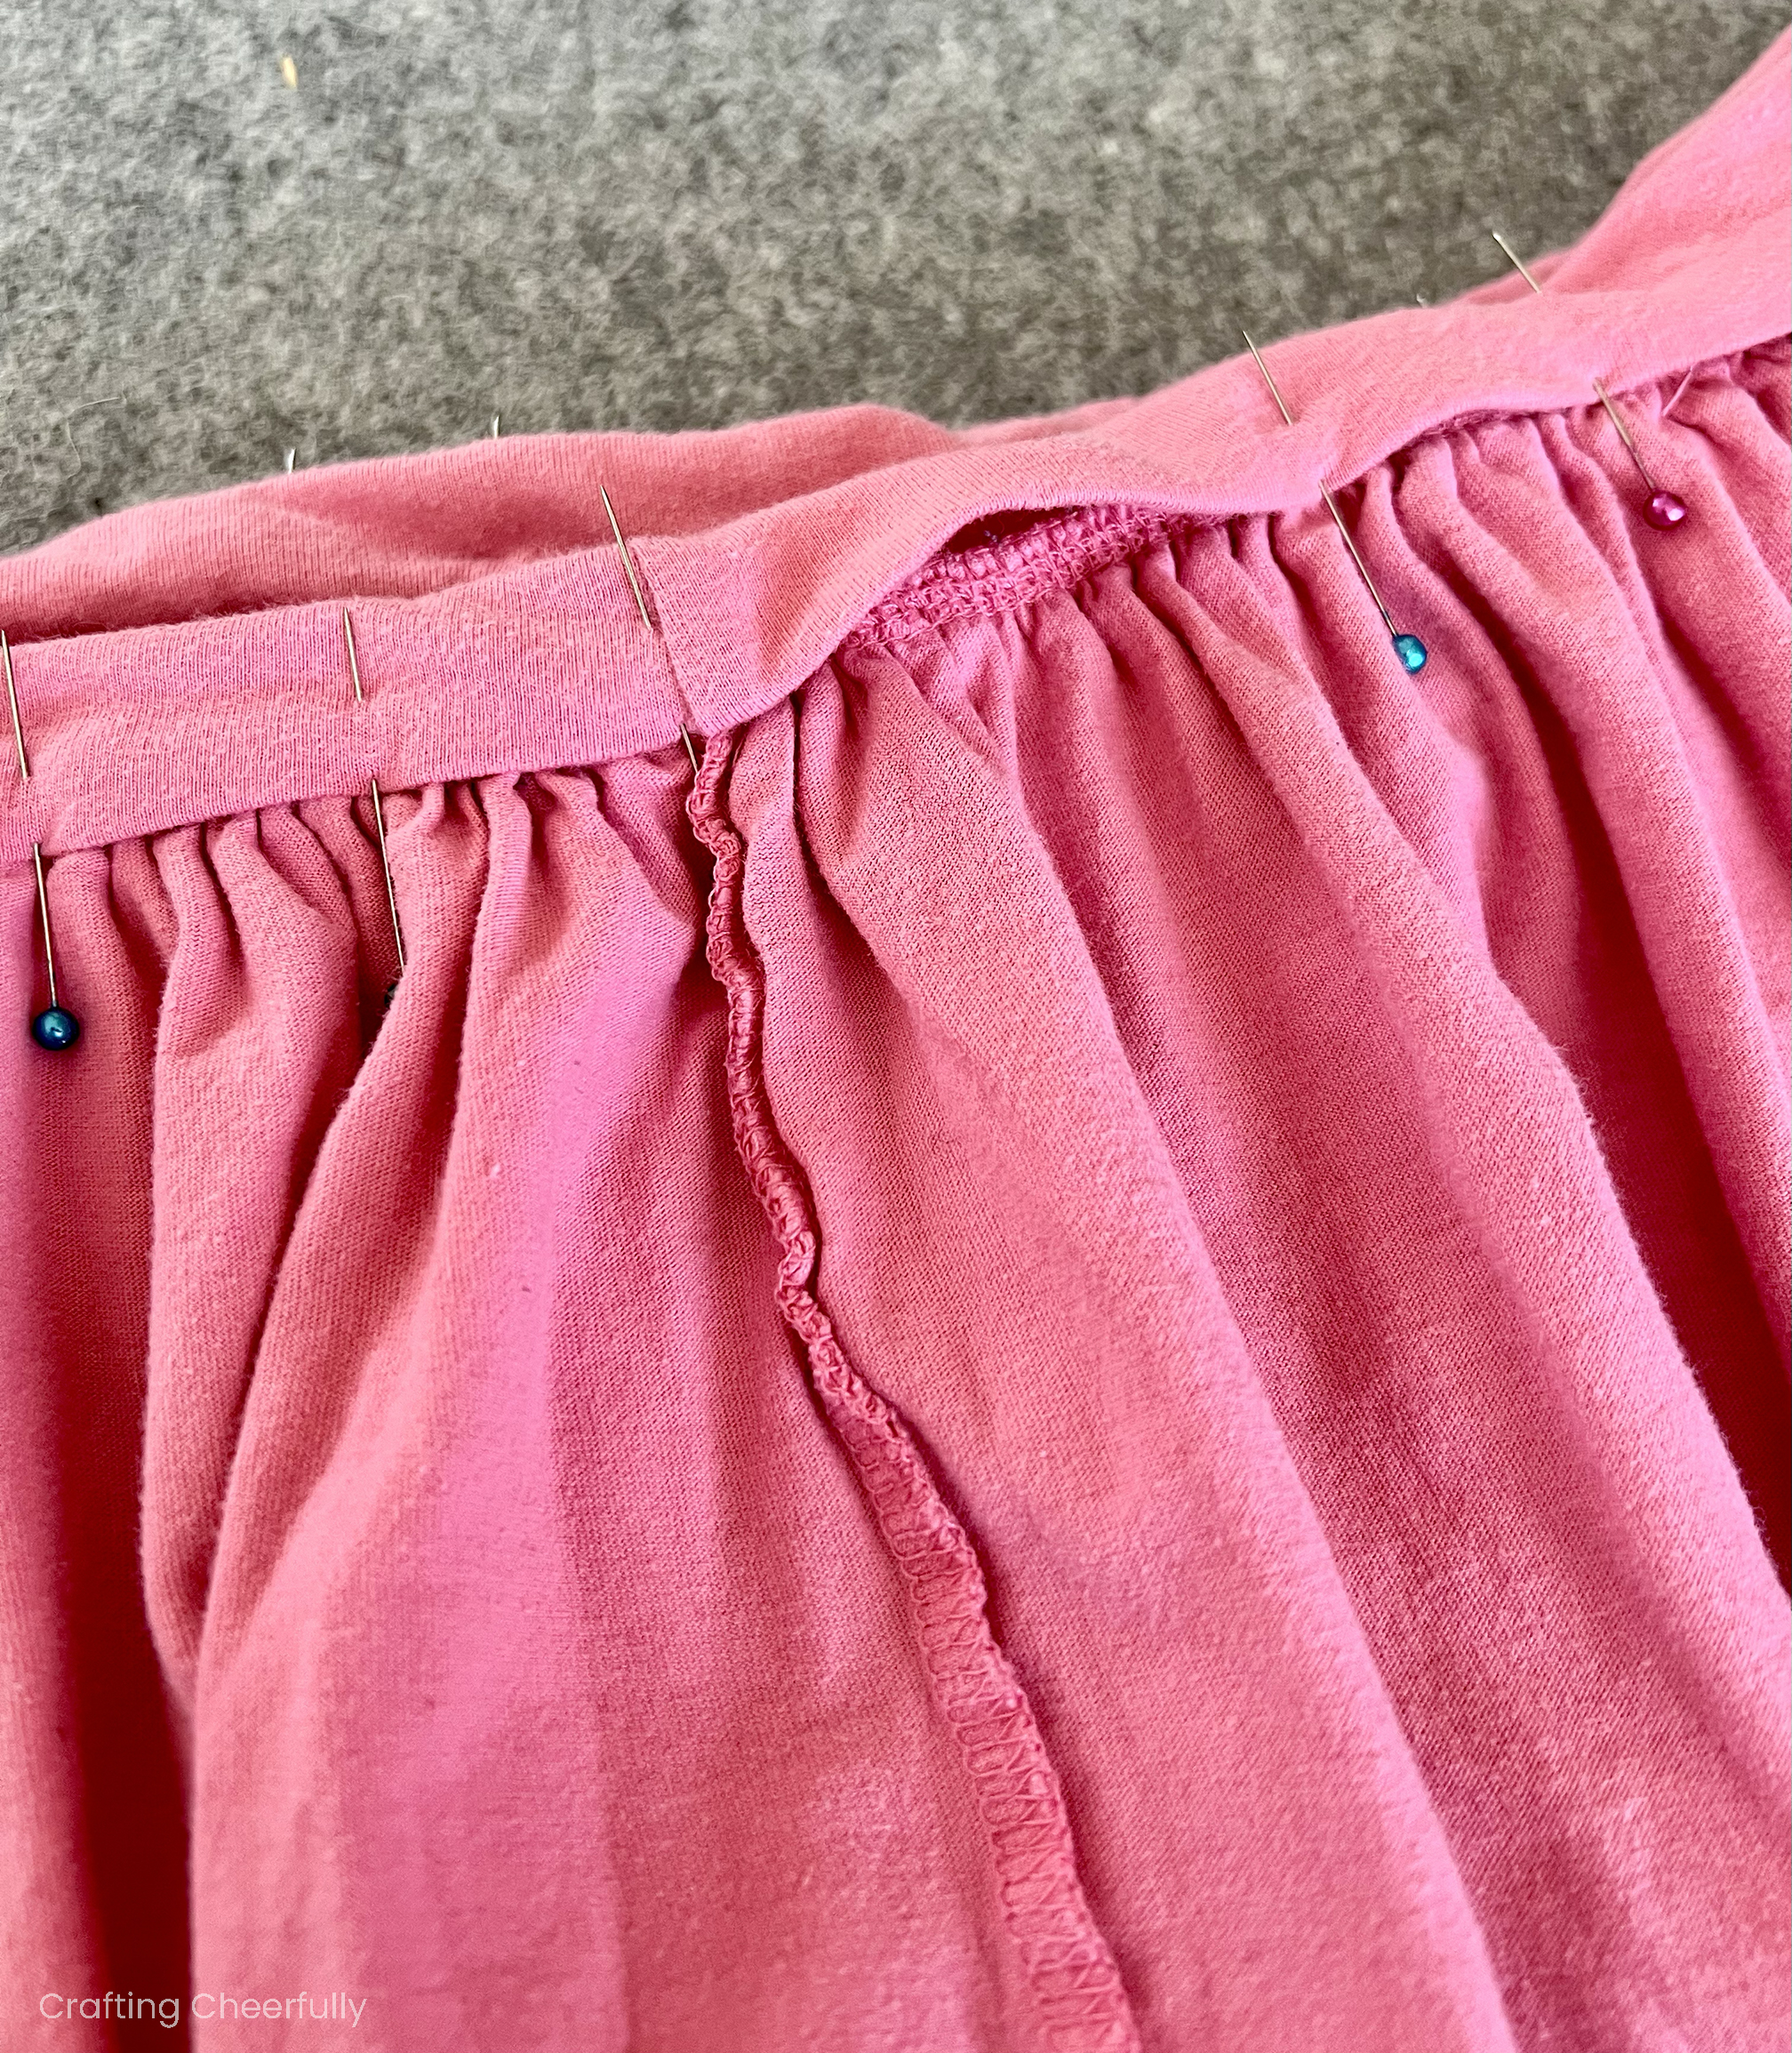
Stitch the waistband down leaving a small gap at one of the side seams to insert the elastic. I like to stitch from the front of the garment by “stitching in the ditch”. “Stitching in the ditch” means lining up your needle with an already sewn seam so your new stitch line is hidden inside the old one. Since we overlapped the waistband while pinning, we can stitch along the waist seam and our stitching should catch the edge of our waistband on the inside as we sew. Stitching in the ditch is nice because we aren’t adding a new visible stitch line on the front of the garment.
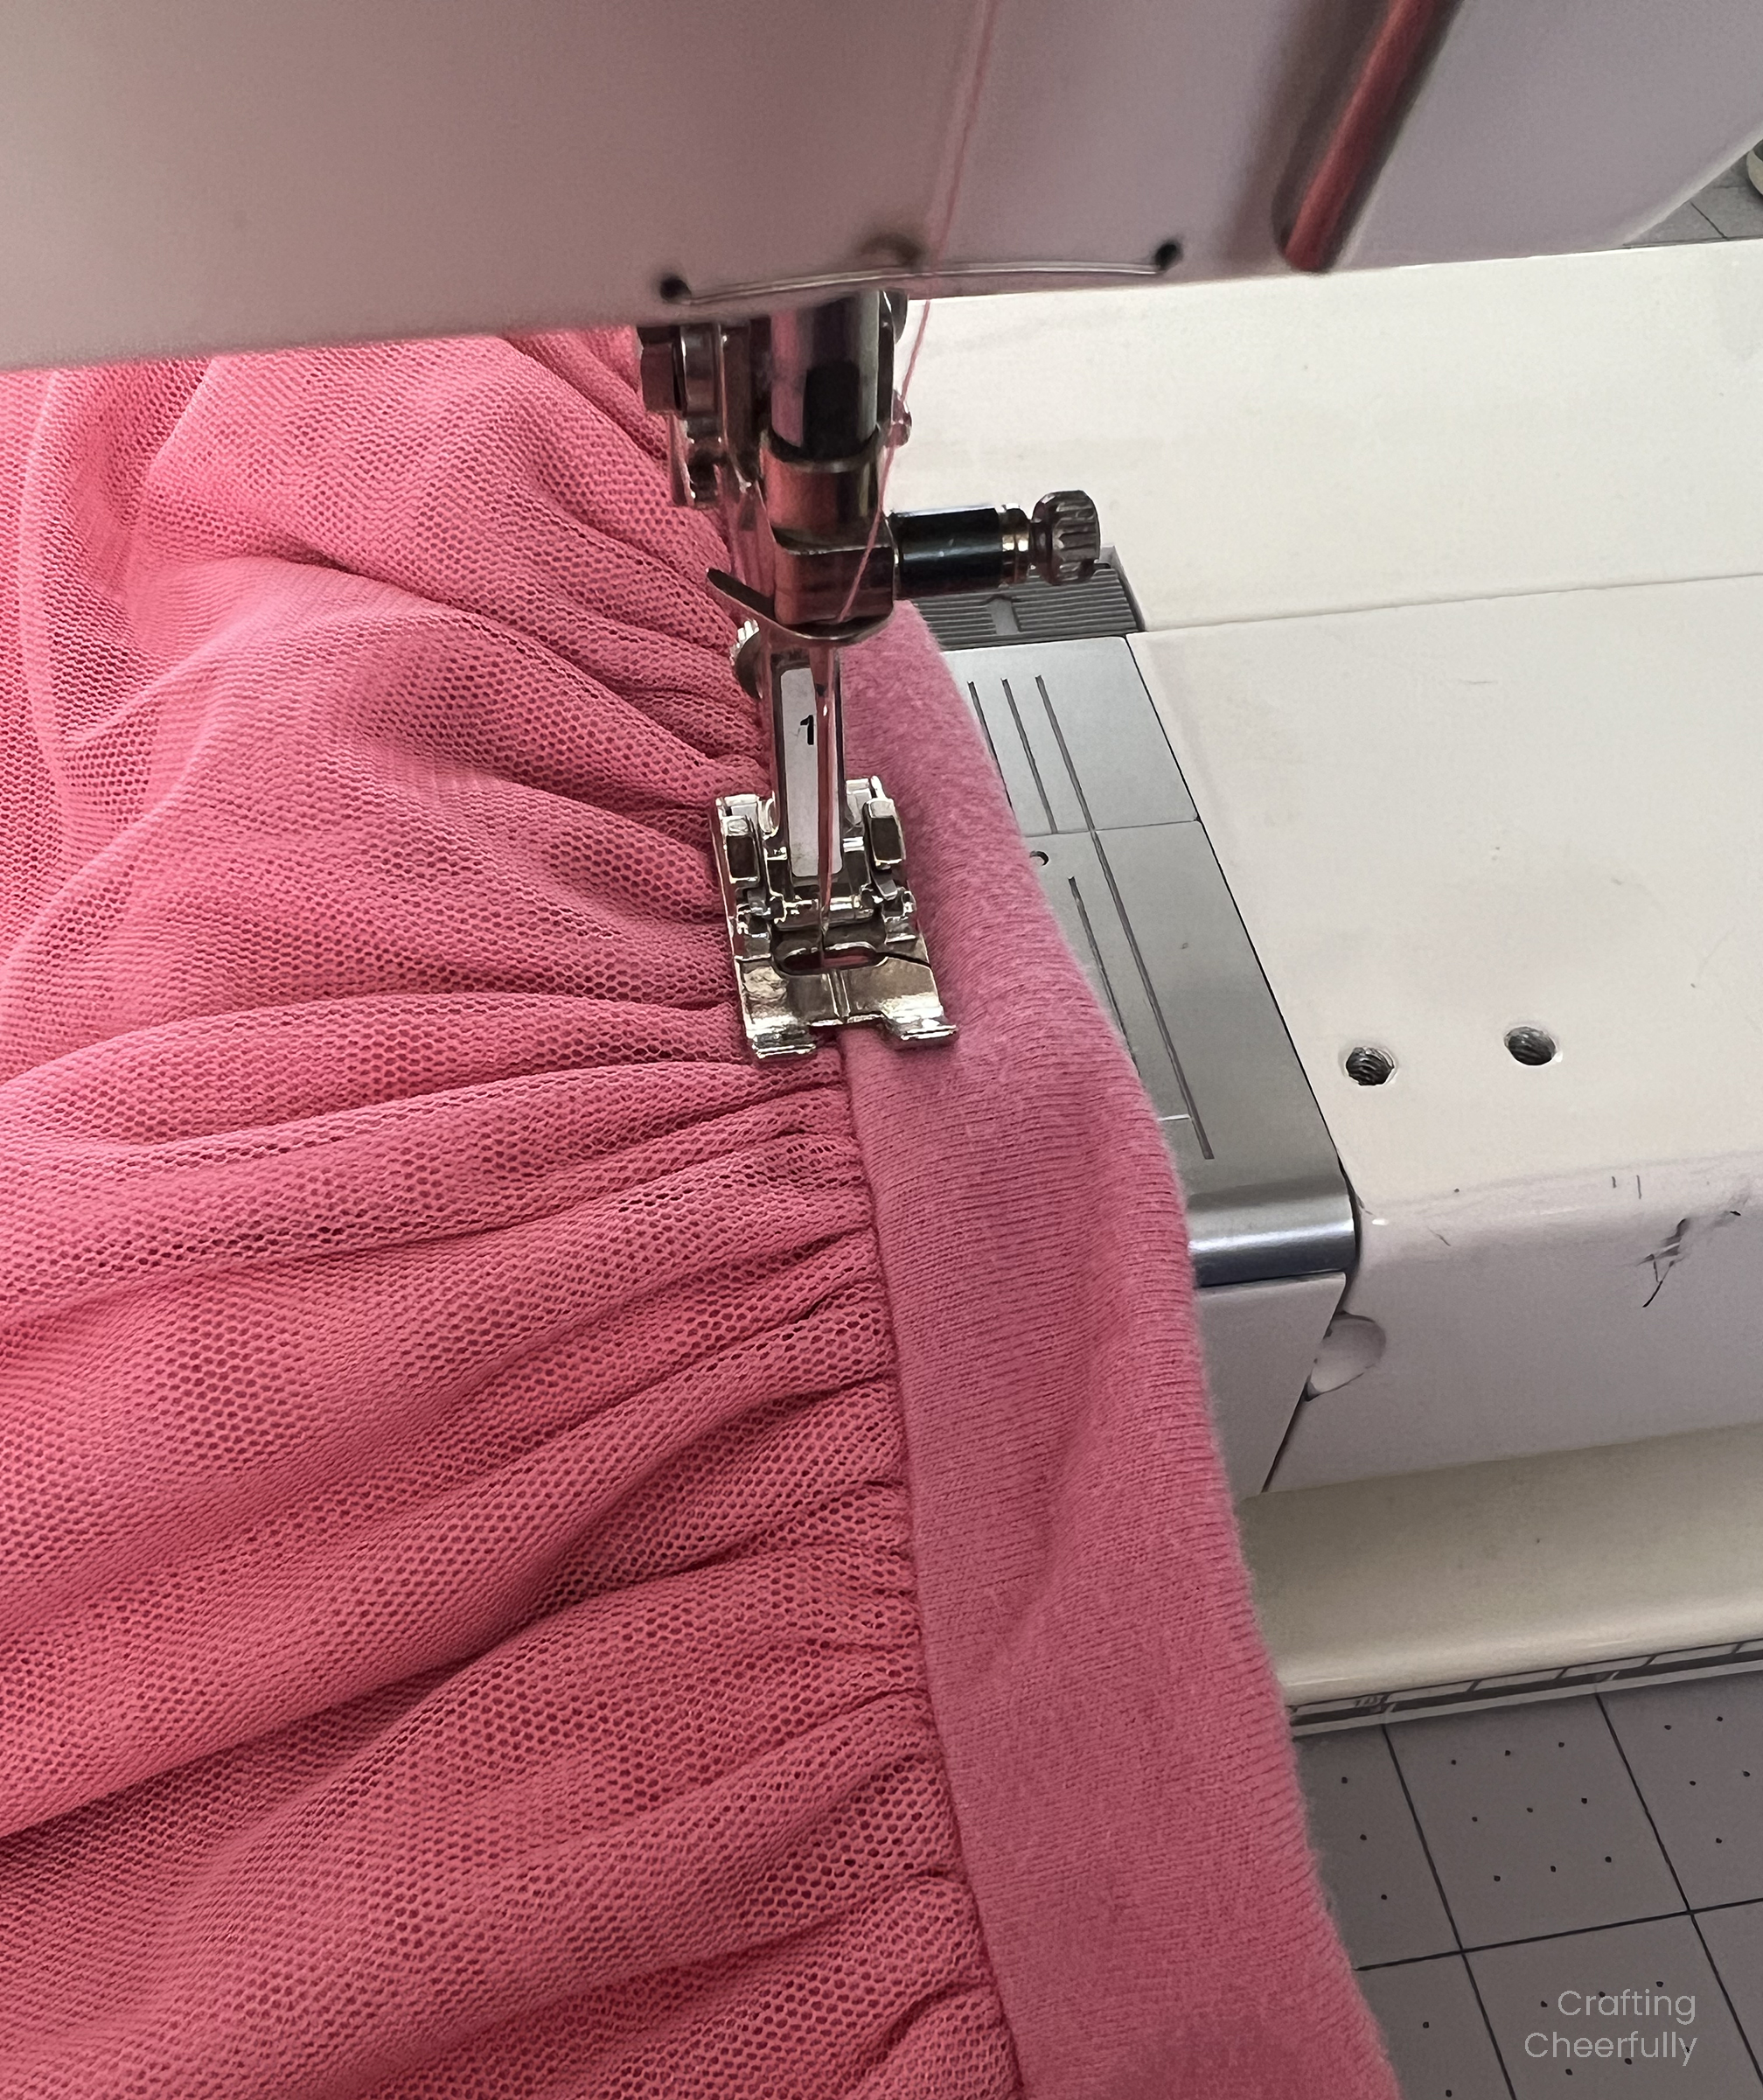
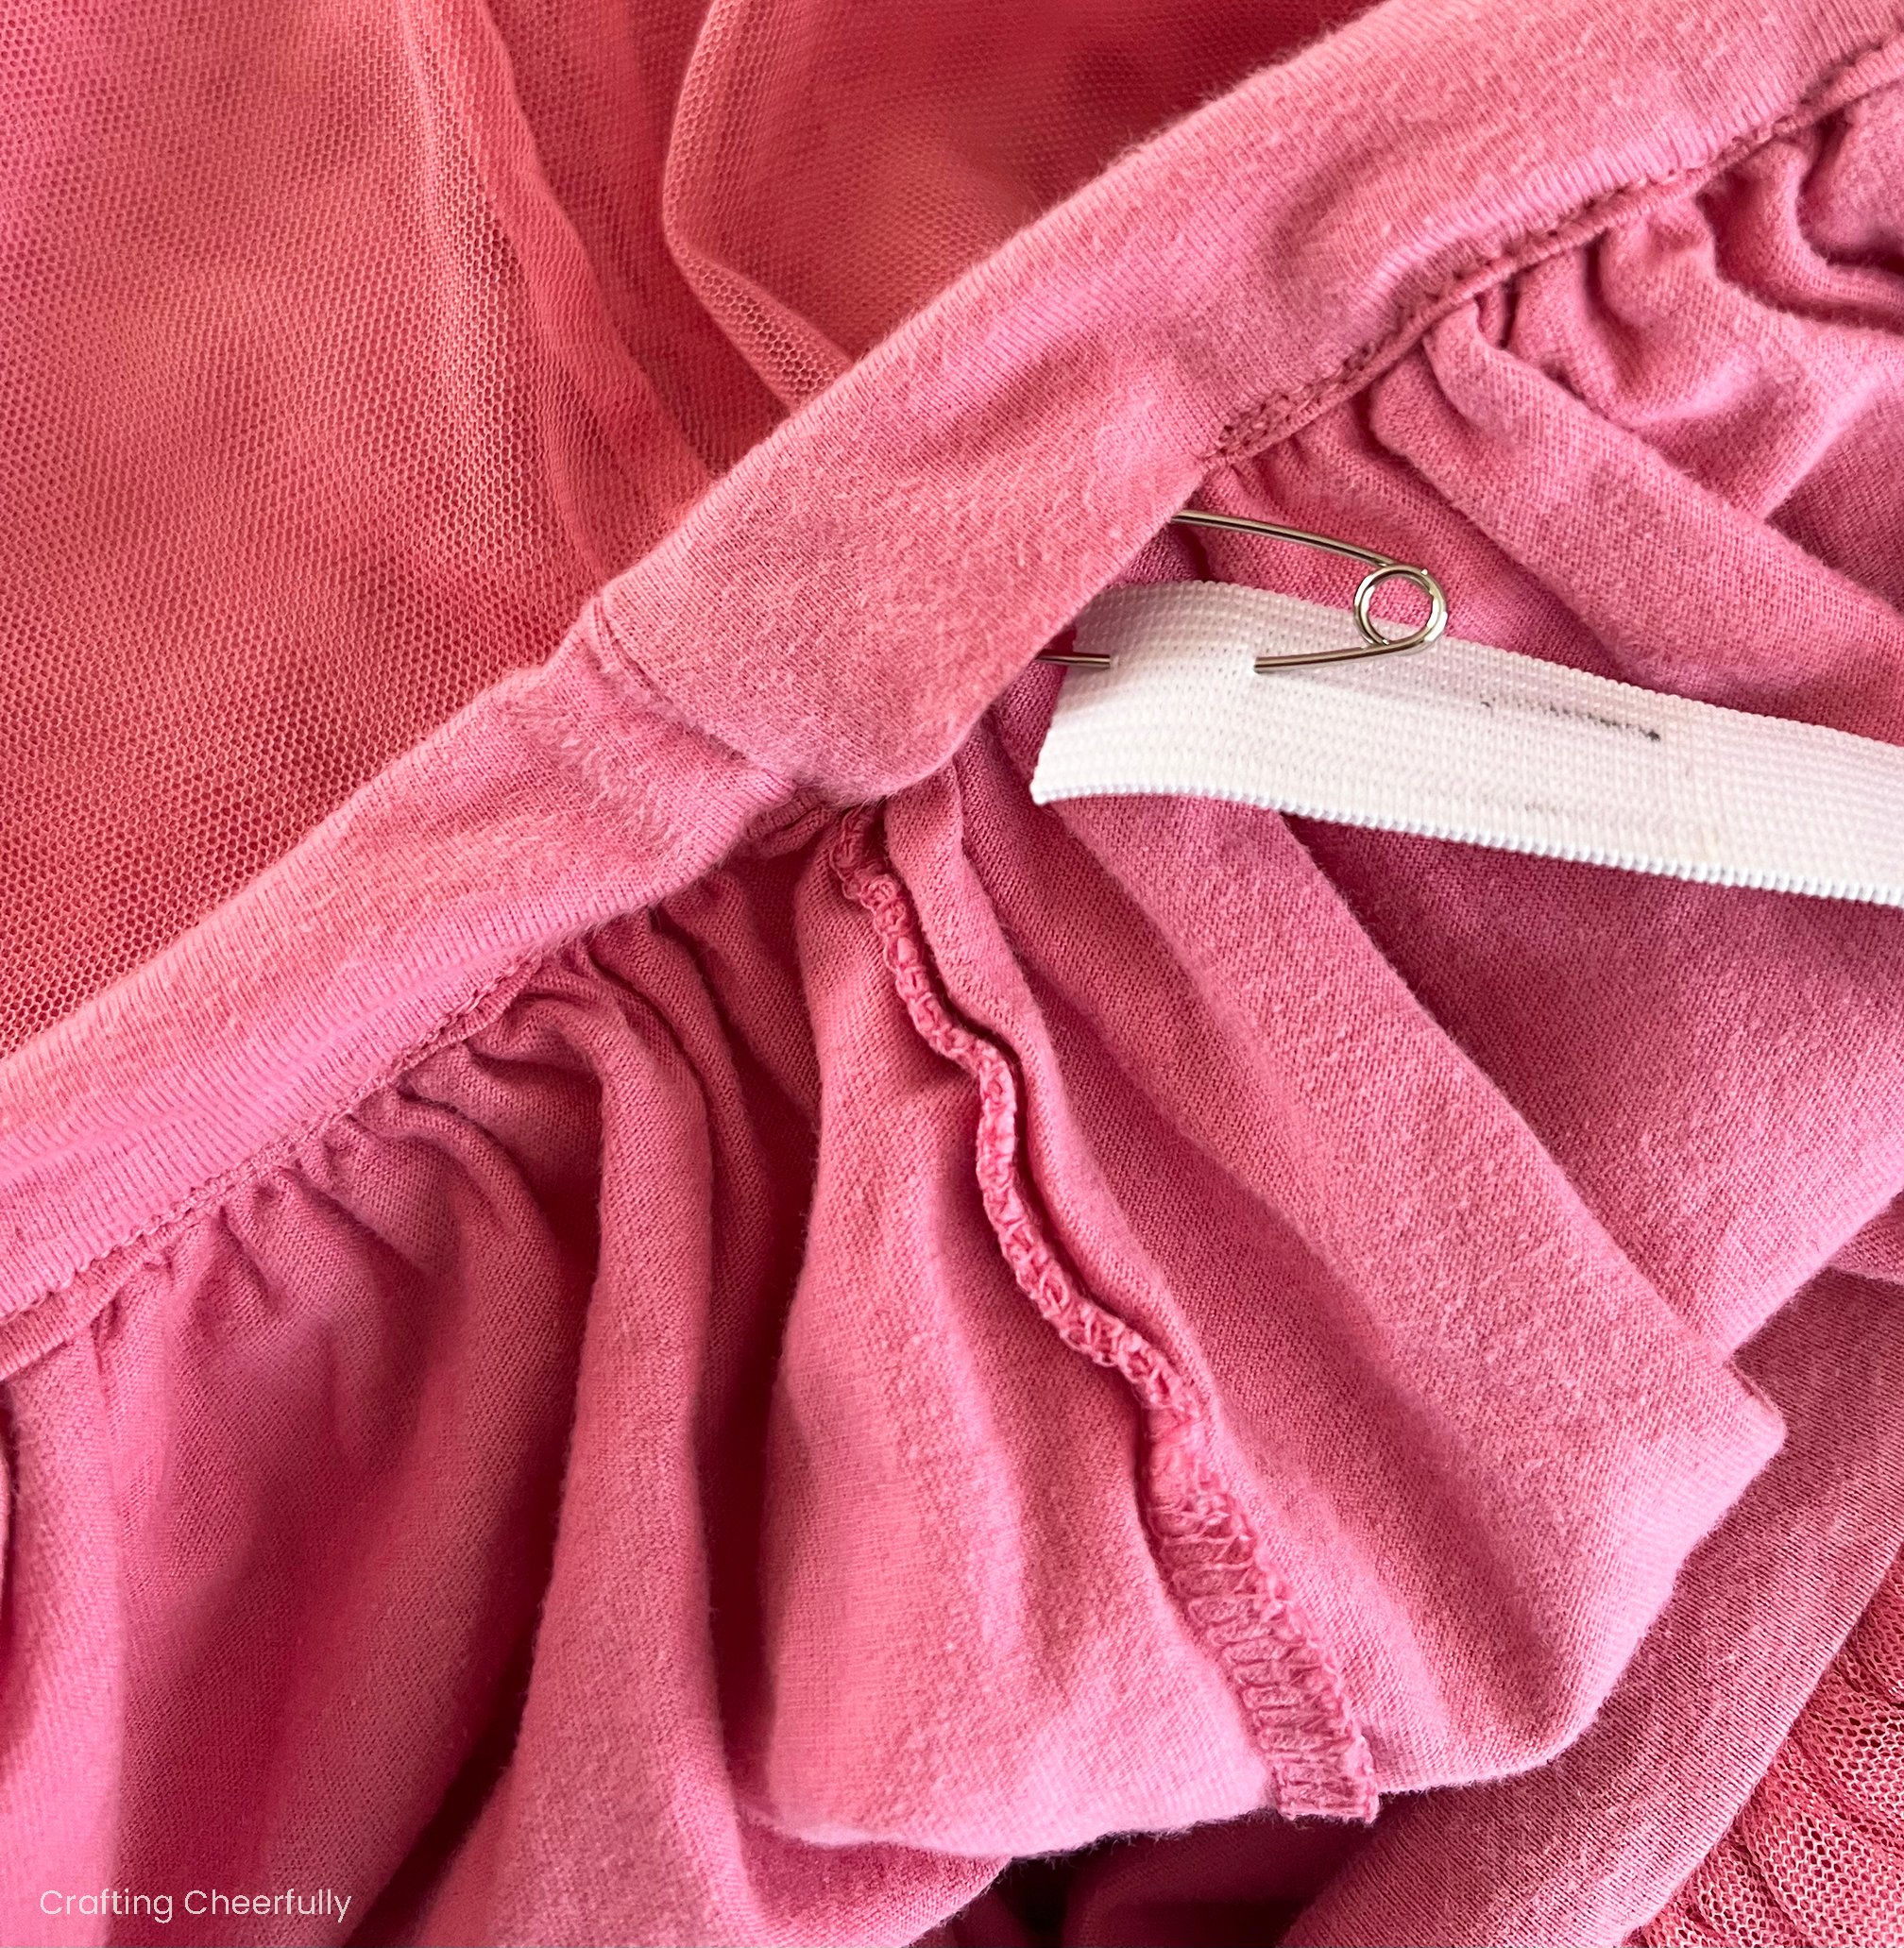
Step Three: Add the elastic.
Cut a piece of elastic to fit your child’s waist. I like to wrap the elastic around my daughter’s waist and ask her what is comfortable. Some kids like their skirts tighter than others and some elastic is more stretchy than others. Generally you can cut the elastic a couple inches shorter than your child’s waist measurement. Attach a safety pin to one end of the elastic.

Pass the elastic through the newly formed waistband casing using the safety pin to help push it through. You may want to pin the other end of the elastic to the skirt so you don’t accidentally pull the elastic all the way through.
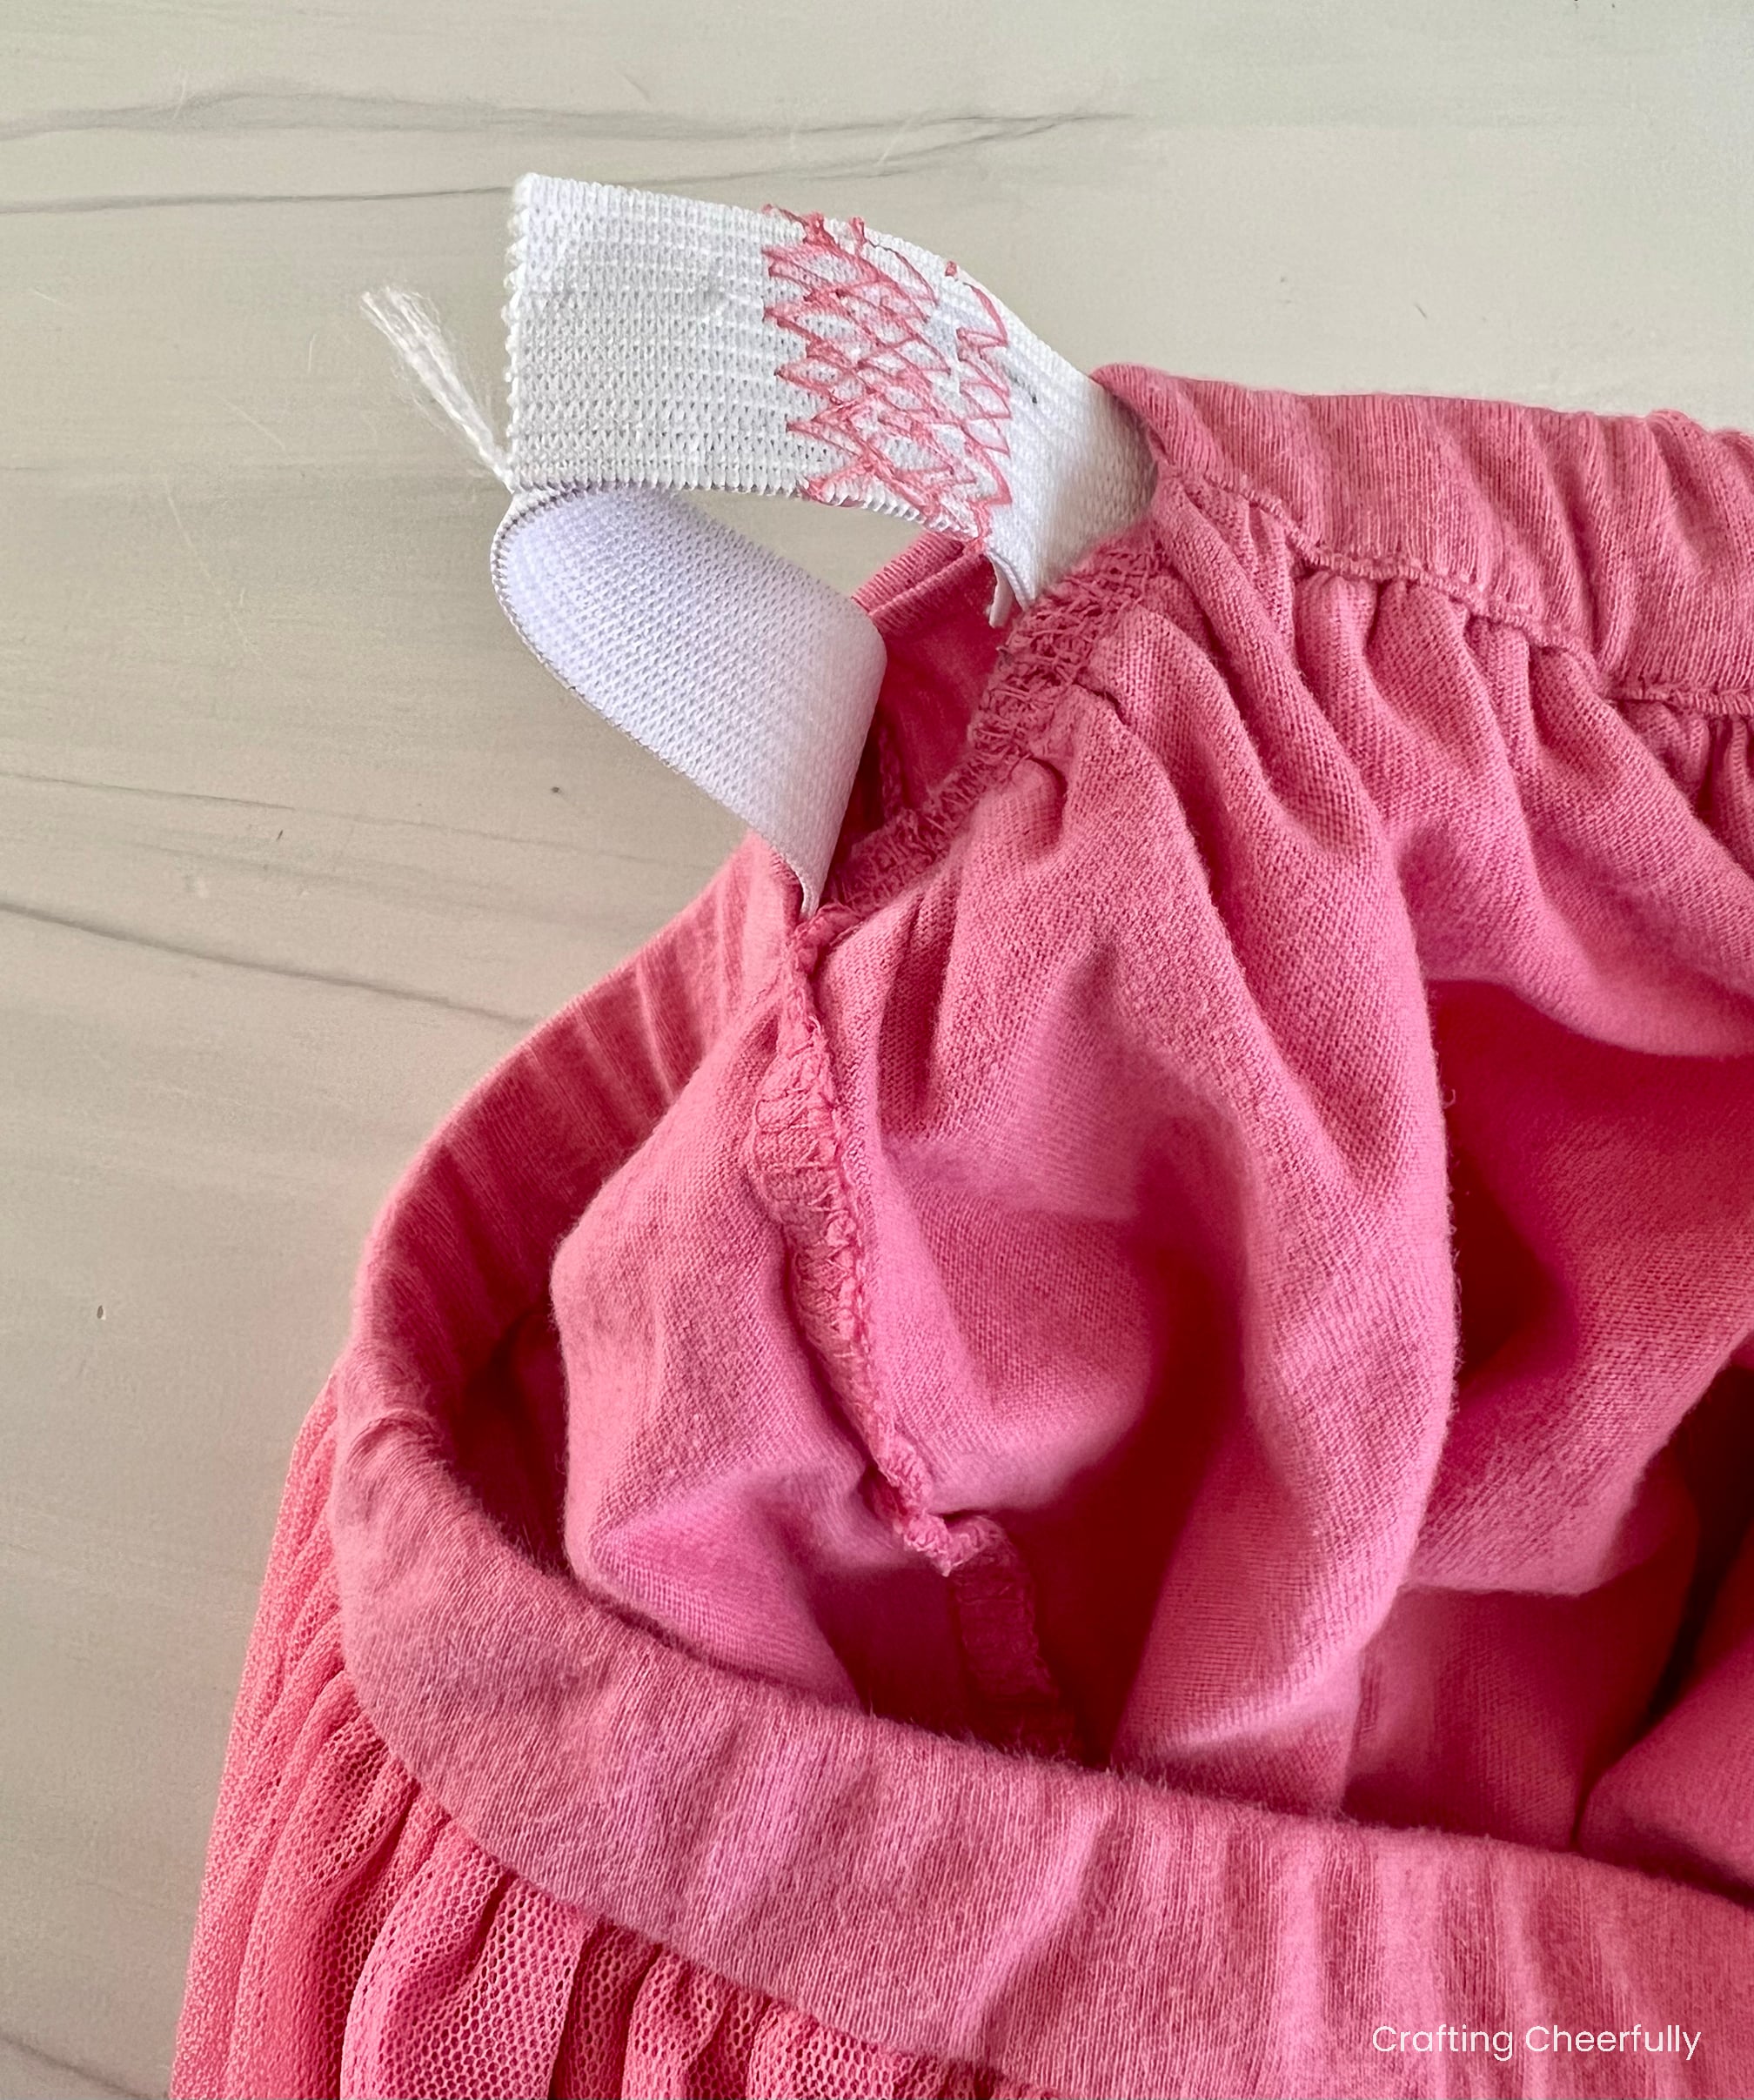
Once your two ends of elastic meet, pull them out enough so you can overlap them, then stitch them together with your sewing machine. I like to use a zig-zag stitch. Place the elastic back in the casing and stitch the casing closed.
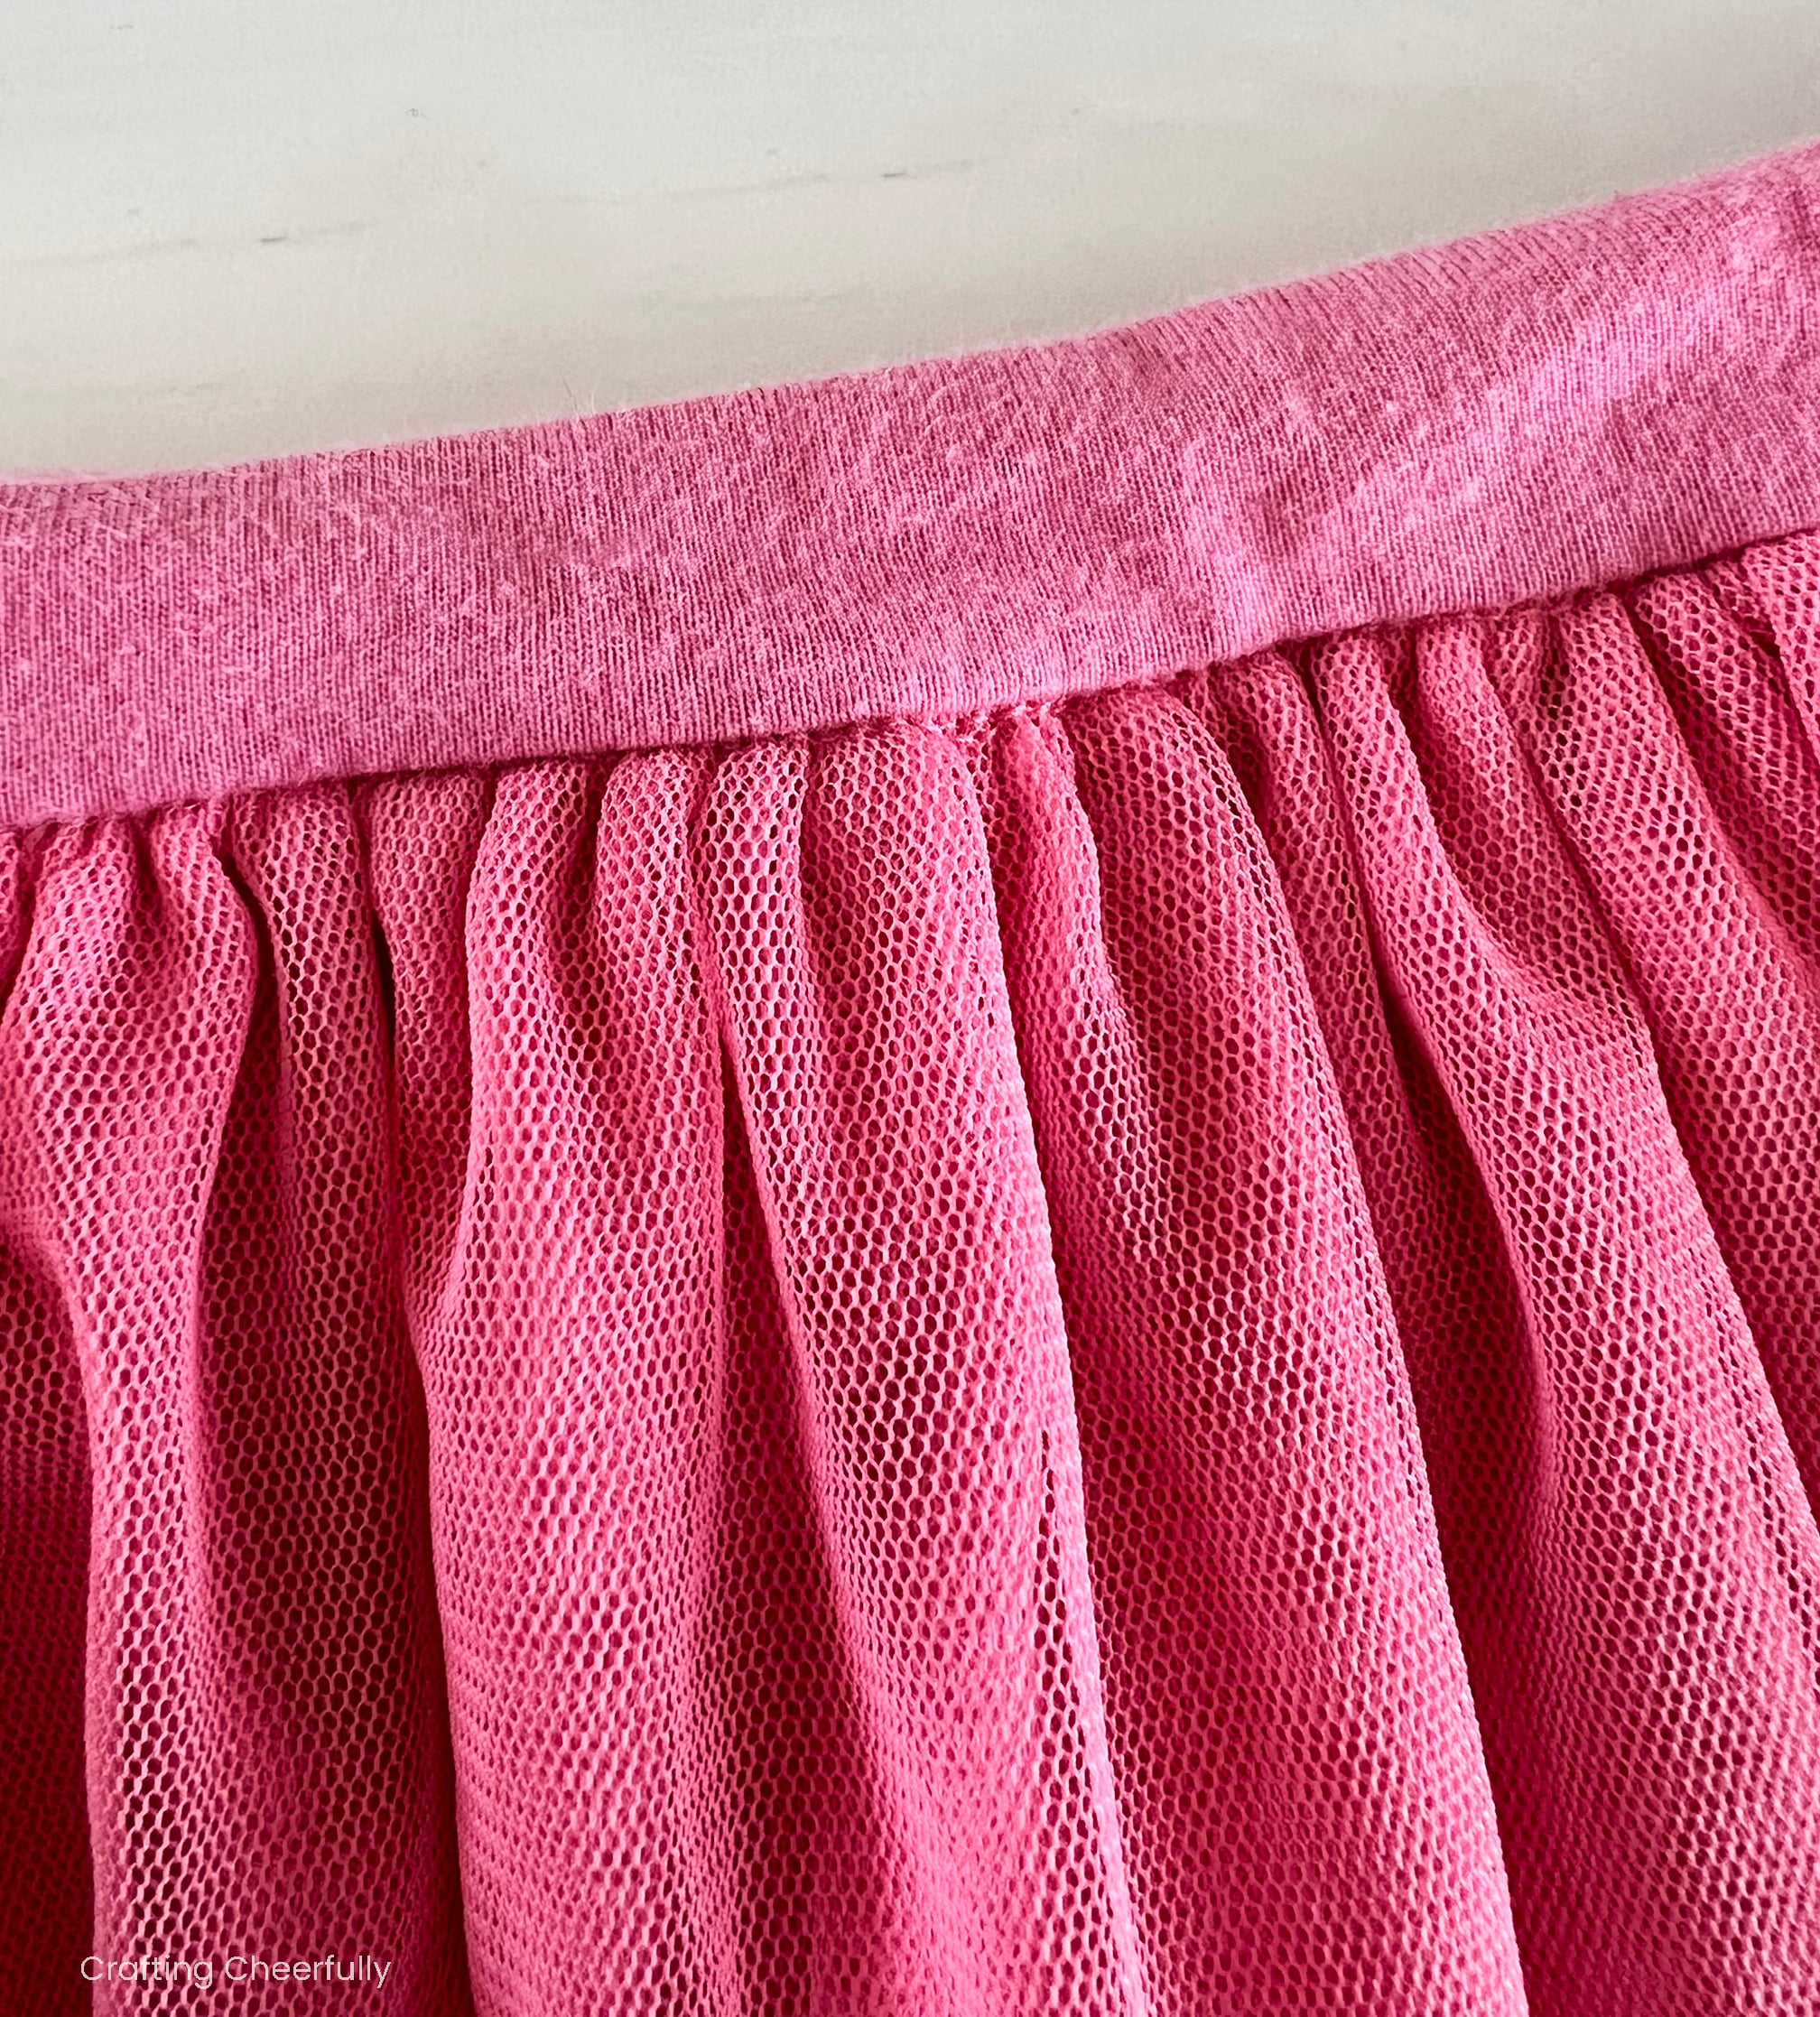
The skirt is finished! Once you learn how to do turn dresses into skirts, you may find yourself doing a lot! Even if the skirts are a little short, we just add a pair of cute bike shorts underneath and are good to go!
If you want to learn how to turn the leftover bodice fabric from the dress into a matching doll skirt, be sure to check out my tutorial on making Matching Girl and Doll Skirts! It’s a great way to use up the extra fabric.