
T-Shirt Wall Decor with Embroidery Hoops
Upcycle old t-shirts into beautiful wall art! A fun way to decorate kids’ rooms and a great way to save a favorite or souvenir t-shirt!

Hello Crafty Friends! Today I’m sharing a simple project for repurposing your favorite t-shirts into awesome wall art! This was a quick and fun project that uses inexpensive embroidery hoops to frame the cute graphics. At less than $2 a hoop this was way cheaper than using a frame or canvas plus I love how easy it is to stretch the shirts.
My kids have so many shirts with graphics they love. They grow out of the clothing or stain it so quickly this was a nice way to save some of their favorites. This would also be a great way to save and display souvenir shirts from traveling or shirts from school clubs and events – as long as you’re okay cutting them up!

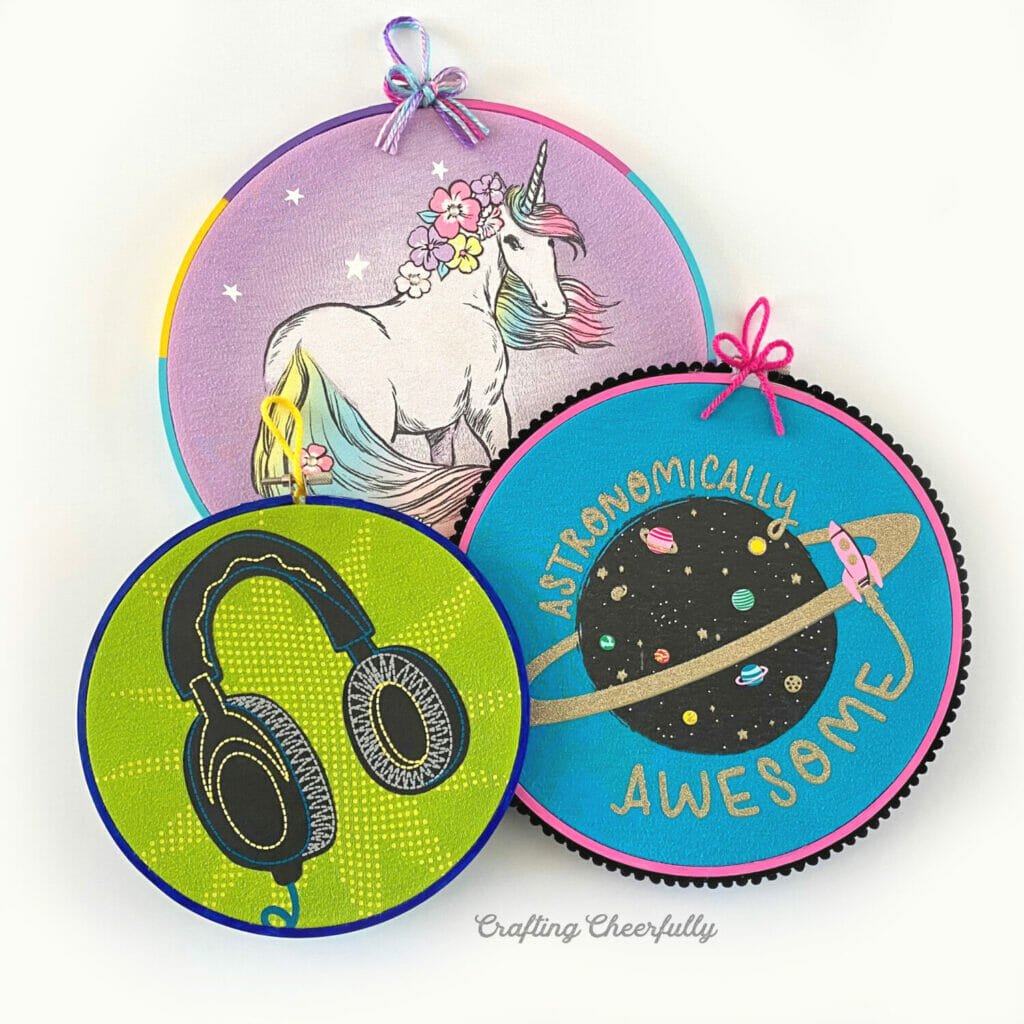
The three t-shirts above were transformed into cute wall art using embroidery hoops, paint and yarn! On one of the hoops I add some fun pompom trim around the hoop.

Upcycled T-Shirt Art
Supplies Needed for T-shirt wall art:
- Old t-shirts or pieces of clothing with cute designs on them
- Embroidery hoops
- Acrylic paint
- Needle and thread
- Tacky Glue
- Yarn, string or twine to add a hanging loop
- Piece of paper a little larger than the embroidery hoop – I used a sheet from this 12″ x 12″ Paperstack

Step by Step Tutorial
Step One: Stretch the design in the embroidery hoop. Start by finding an embroidery hoop that will fit around the clothing design you are using. Paint the hoop with acrylic paint if you’d like. You only need to paint the outer ring, the inside ring will not be seen.

Once your hoop is painted and ready to go, place it around the shirt design. Pull the fabric very taught and position it in the hoop how you’d like.

Turn the hoop over and cut away the rest of the shirt leaving about 1/2″ – 1″ of fabric. If your design is close to a neckline or arm opening, don’t cut anything away.

Step Two: Finish the back of the hoop. To finish the back of the hoop you will need to cinch in the fabric with a gathering stitch to keep it from showing. Use a needle and thread to add a running stitch to the edge of the fabric all the way around the hoop. Then pull the gathering thread to cinch in the fabric, pulling it to the back of the hoop. Tie a tight knot keeping the fabric pulled tightly.

Since my unicorn design was so close to the neckline of the shirt, the neckline edge is what was on the back of my hoop at the top. I stitched the entire hoop, going through the neckline, but that section did not want to lay flat. To help it lay flat, I used thread to go back and froth from the top edge of fabric to the bottom edge of the fabric. This lacing helped to keep the neck edge flatter.

Below you can see how my running stitch looked on a hoop that didn’t include a neck edge! Much easier and no need for the crazy thread lacing.

The edge of the fabric will not be seen now from the front of the hoop.

Step Three: The final step is to cover up the back with a piece of paper or felt. Lay the hoop on top of either the paper or felt and glue it down by running tacky glue along the back of the wooden embroidery hoop. Let it dry for a little while with a few large books placed on top. *Make sure the books are wider than the hoop so they are resting on the edges of the hoop and not denting your pulled fabric!

Once the glue has dried, trim the paper by cutting around the hoop carefully.

Use a tiny scissors to trim away the paper at the top by the tightening clasp.


Step Four: Add trim around the hoop! This step is of course optional, but go ahead and add some fun trim around the hoop if you want! I added a black pompom trim around my outer space hoop using hot glue.


Step Five: Finally, add a hanging loop and the hoop is done! Use yarn, twine, ribbon or string to add a hanging loop to the top of the embroidery hoop. Add a bow and glue it on using hot glue for a little extra charm.


The t-shirt wall art is finished and ready to be hung up!
I hope you enjoyed this fun craft! Do you have any old shirts you could turn into t-shirt wall art? If you love repurposing things to create something new be sure to check out my DIY Wind Chime made from marker caps and safari binoculars made from cardboard tubes. You can also learn how to turn used Cricut mats into DIY small world play mats for little ones or how to turn Play-Doh lids into ornaments! :)

I’m sharing this craft as part of the Creative Crafts: Recycled Crafts Edition! You can check out a bunch of other fun recycled crafts!


This is such a BRILLIANT idea Kimberly! I love how you finished the back of the hoops! Thanks for sharing as a part of the Creative Crafts Recycled Edition!
Thank you!! :)