Layered Paper School Bus Frame
Create a cute layered paper school bus frame using cardstock and foam dots! This frame is a fun way to showcase your favorite school photos.
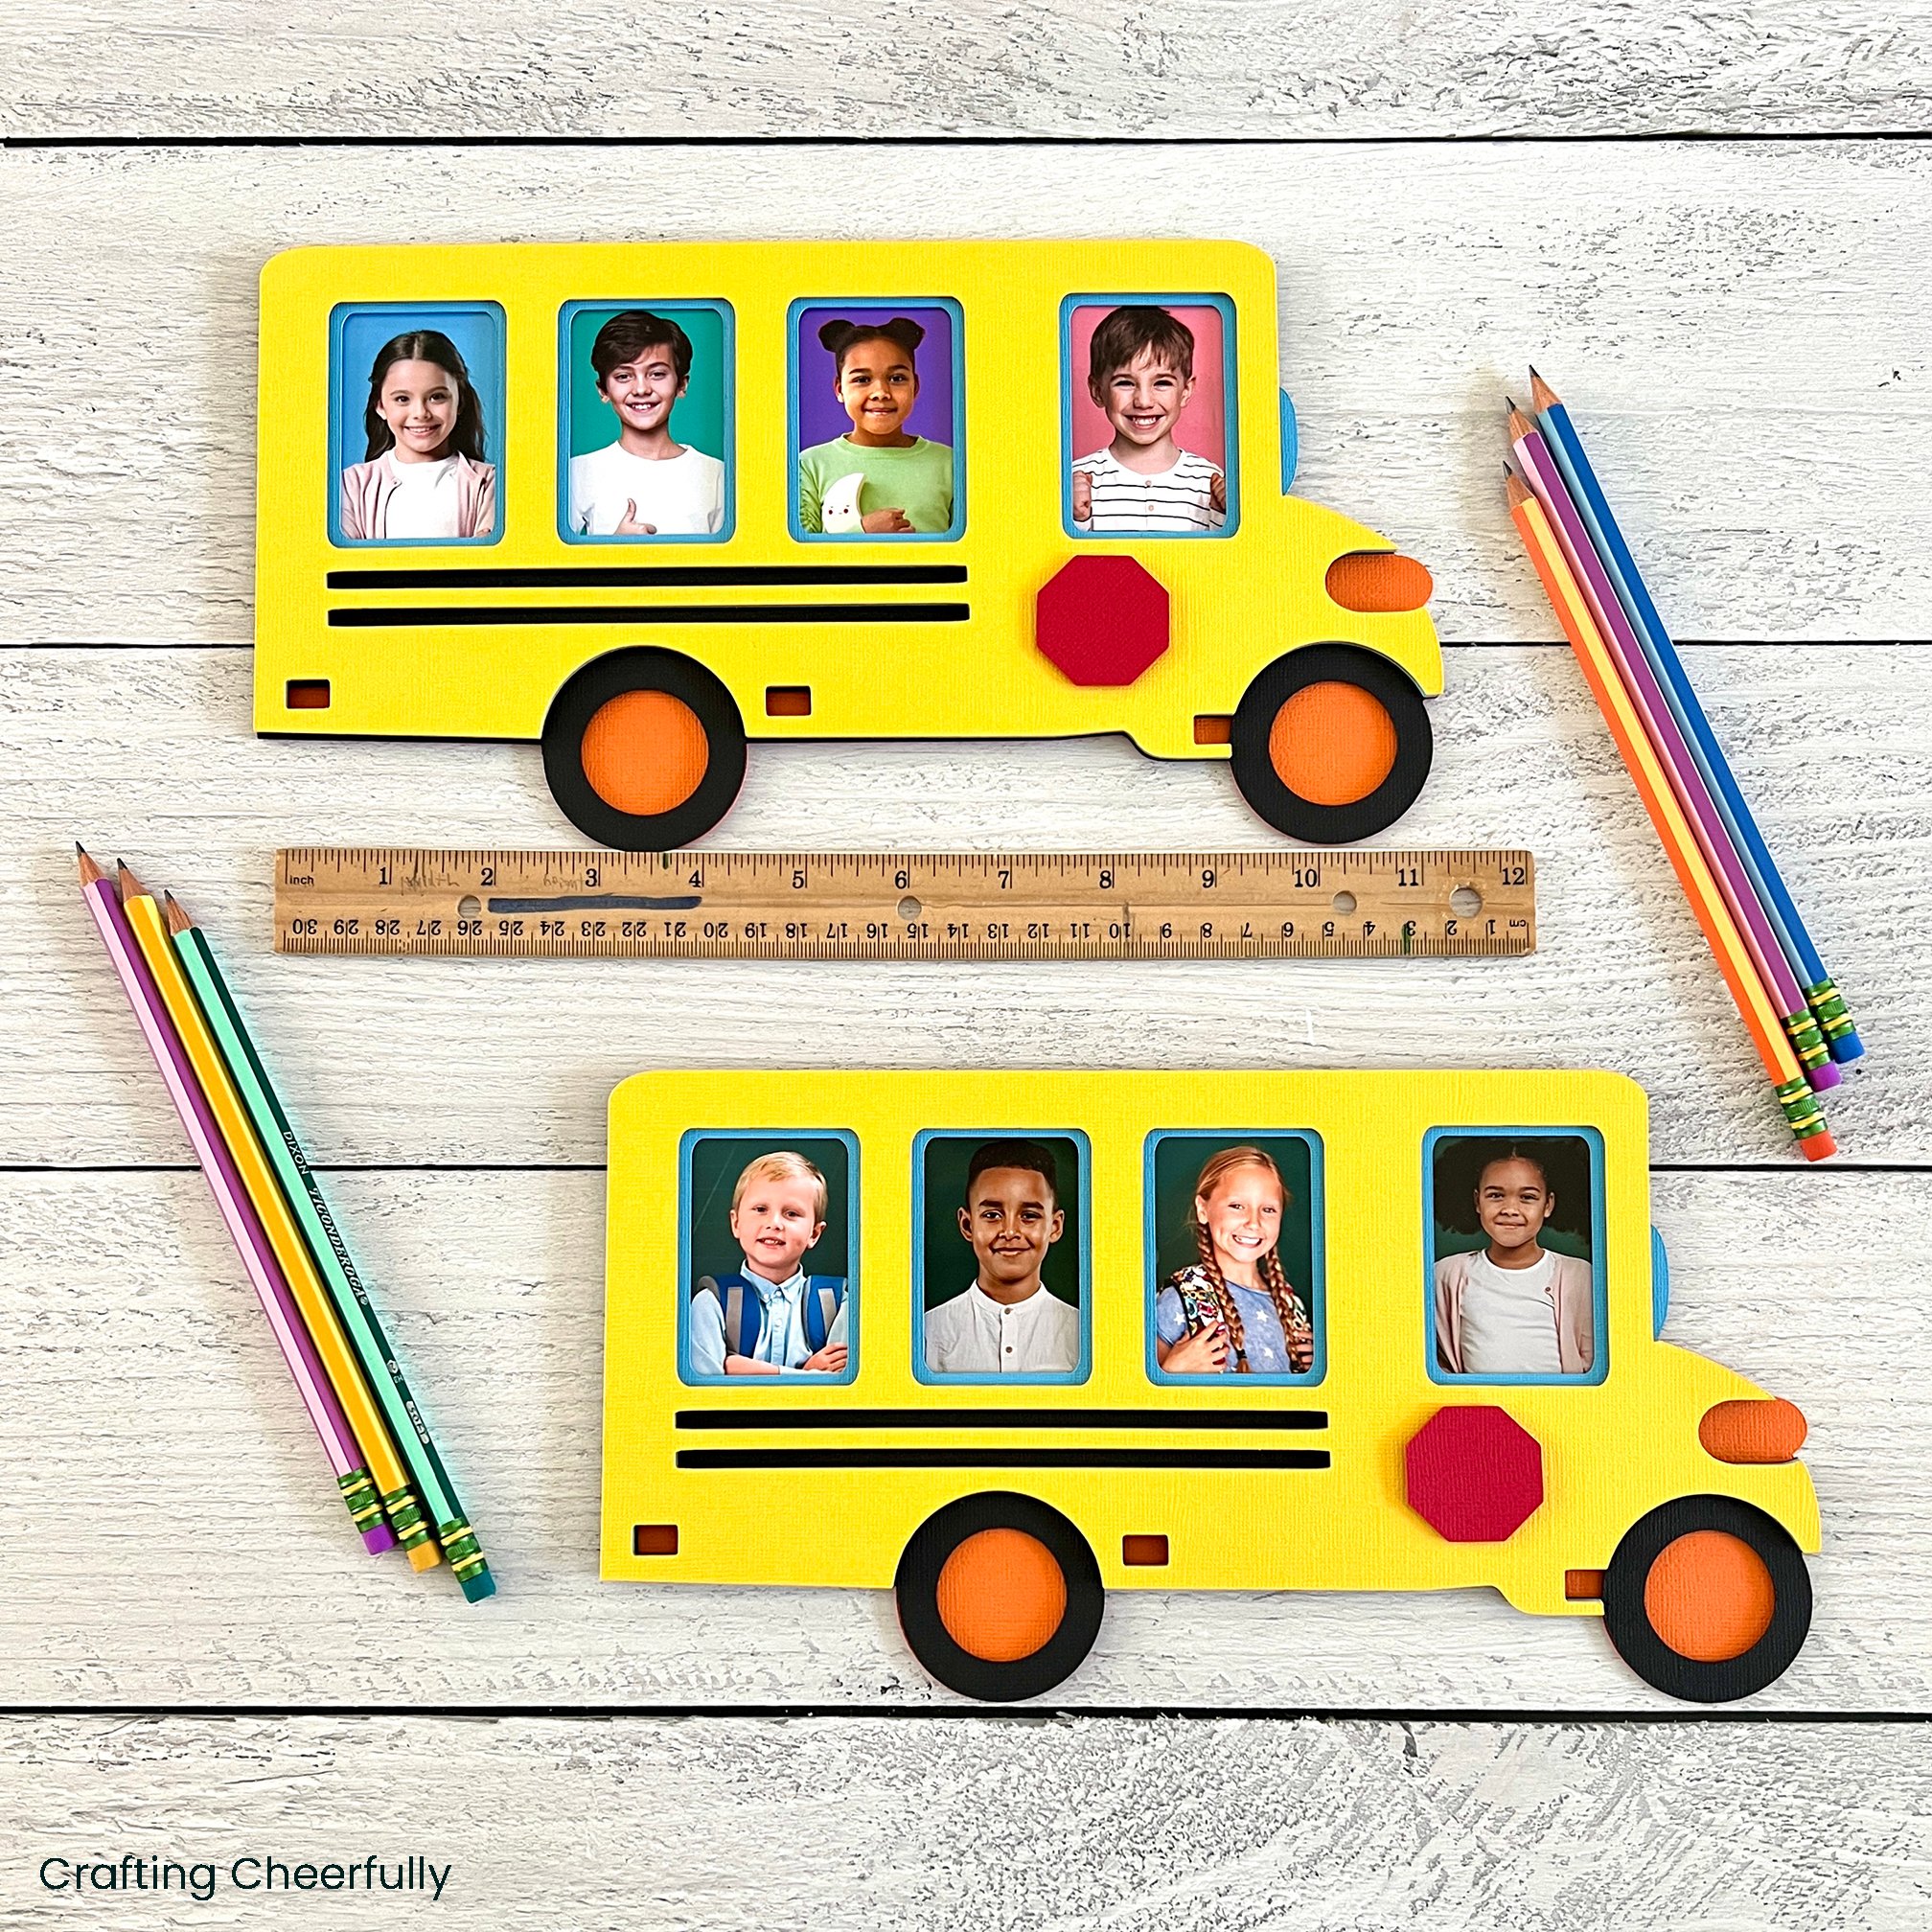
Hello Crafty Friends! Today I’m back with another photo craft perfect for back-to-school! This layered paper school bus frame is a cute way to showcase your favorite school photos. It is created by using cardstock and a Cricut cutting machine. This school bus features spots for four different photos in each of it’s windows – perfect for displaying those mini-wallet school photos!
There are so many ways you can use this school bus frame from showing off first day of school photos to highlighting their favorite school memories. This would also be a fun classroom decoration. Create a line of school buses on the wall or on a bulletin board with a picture of each child in the class. Add their names above each window for an extra bit of personalization!

I love creating layered paper crafts, especially frames. You can check out my other layered paper crafts that all include a special Cricut Design Space file. They are fun to display for the holidays or at special times of the year. I have a lot of friends and family who see them and think they are wood because of the dimensional effect created with layering the paper. They are always surprised to learn the frame is just cardstock!
Below is the tutorial for creating your own Layered Paper School Bus Frame. You can access my School Bus Frame file in Cricut Design Space.
Choosing the Paper
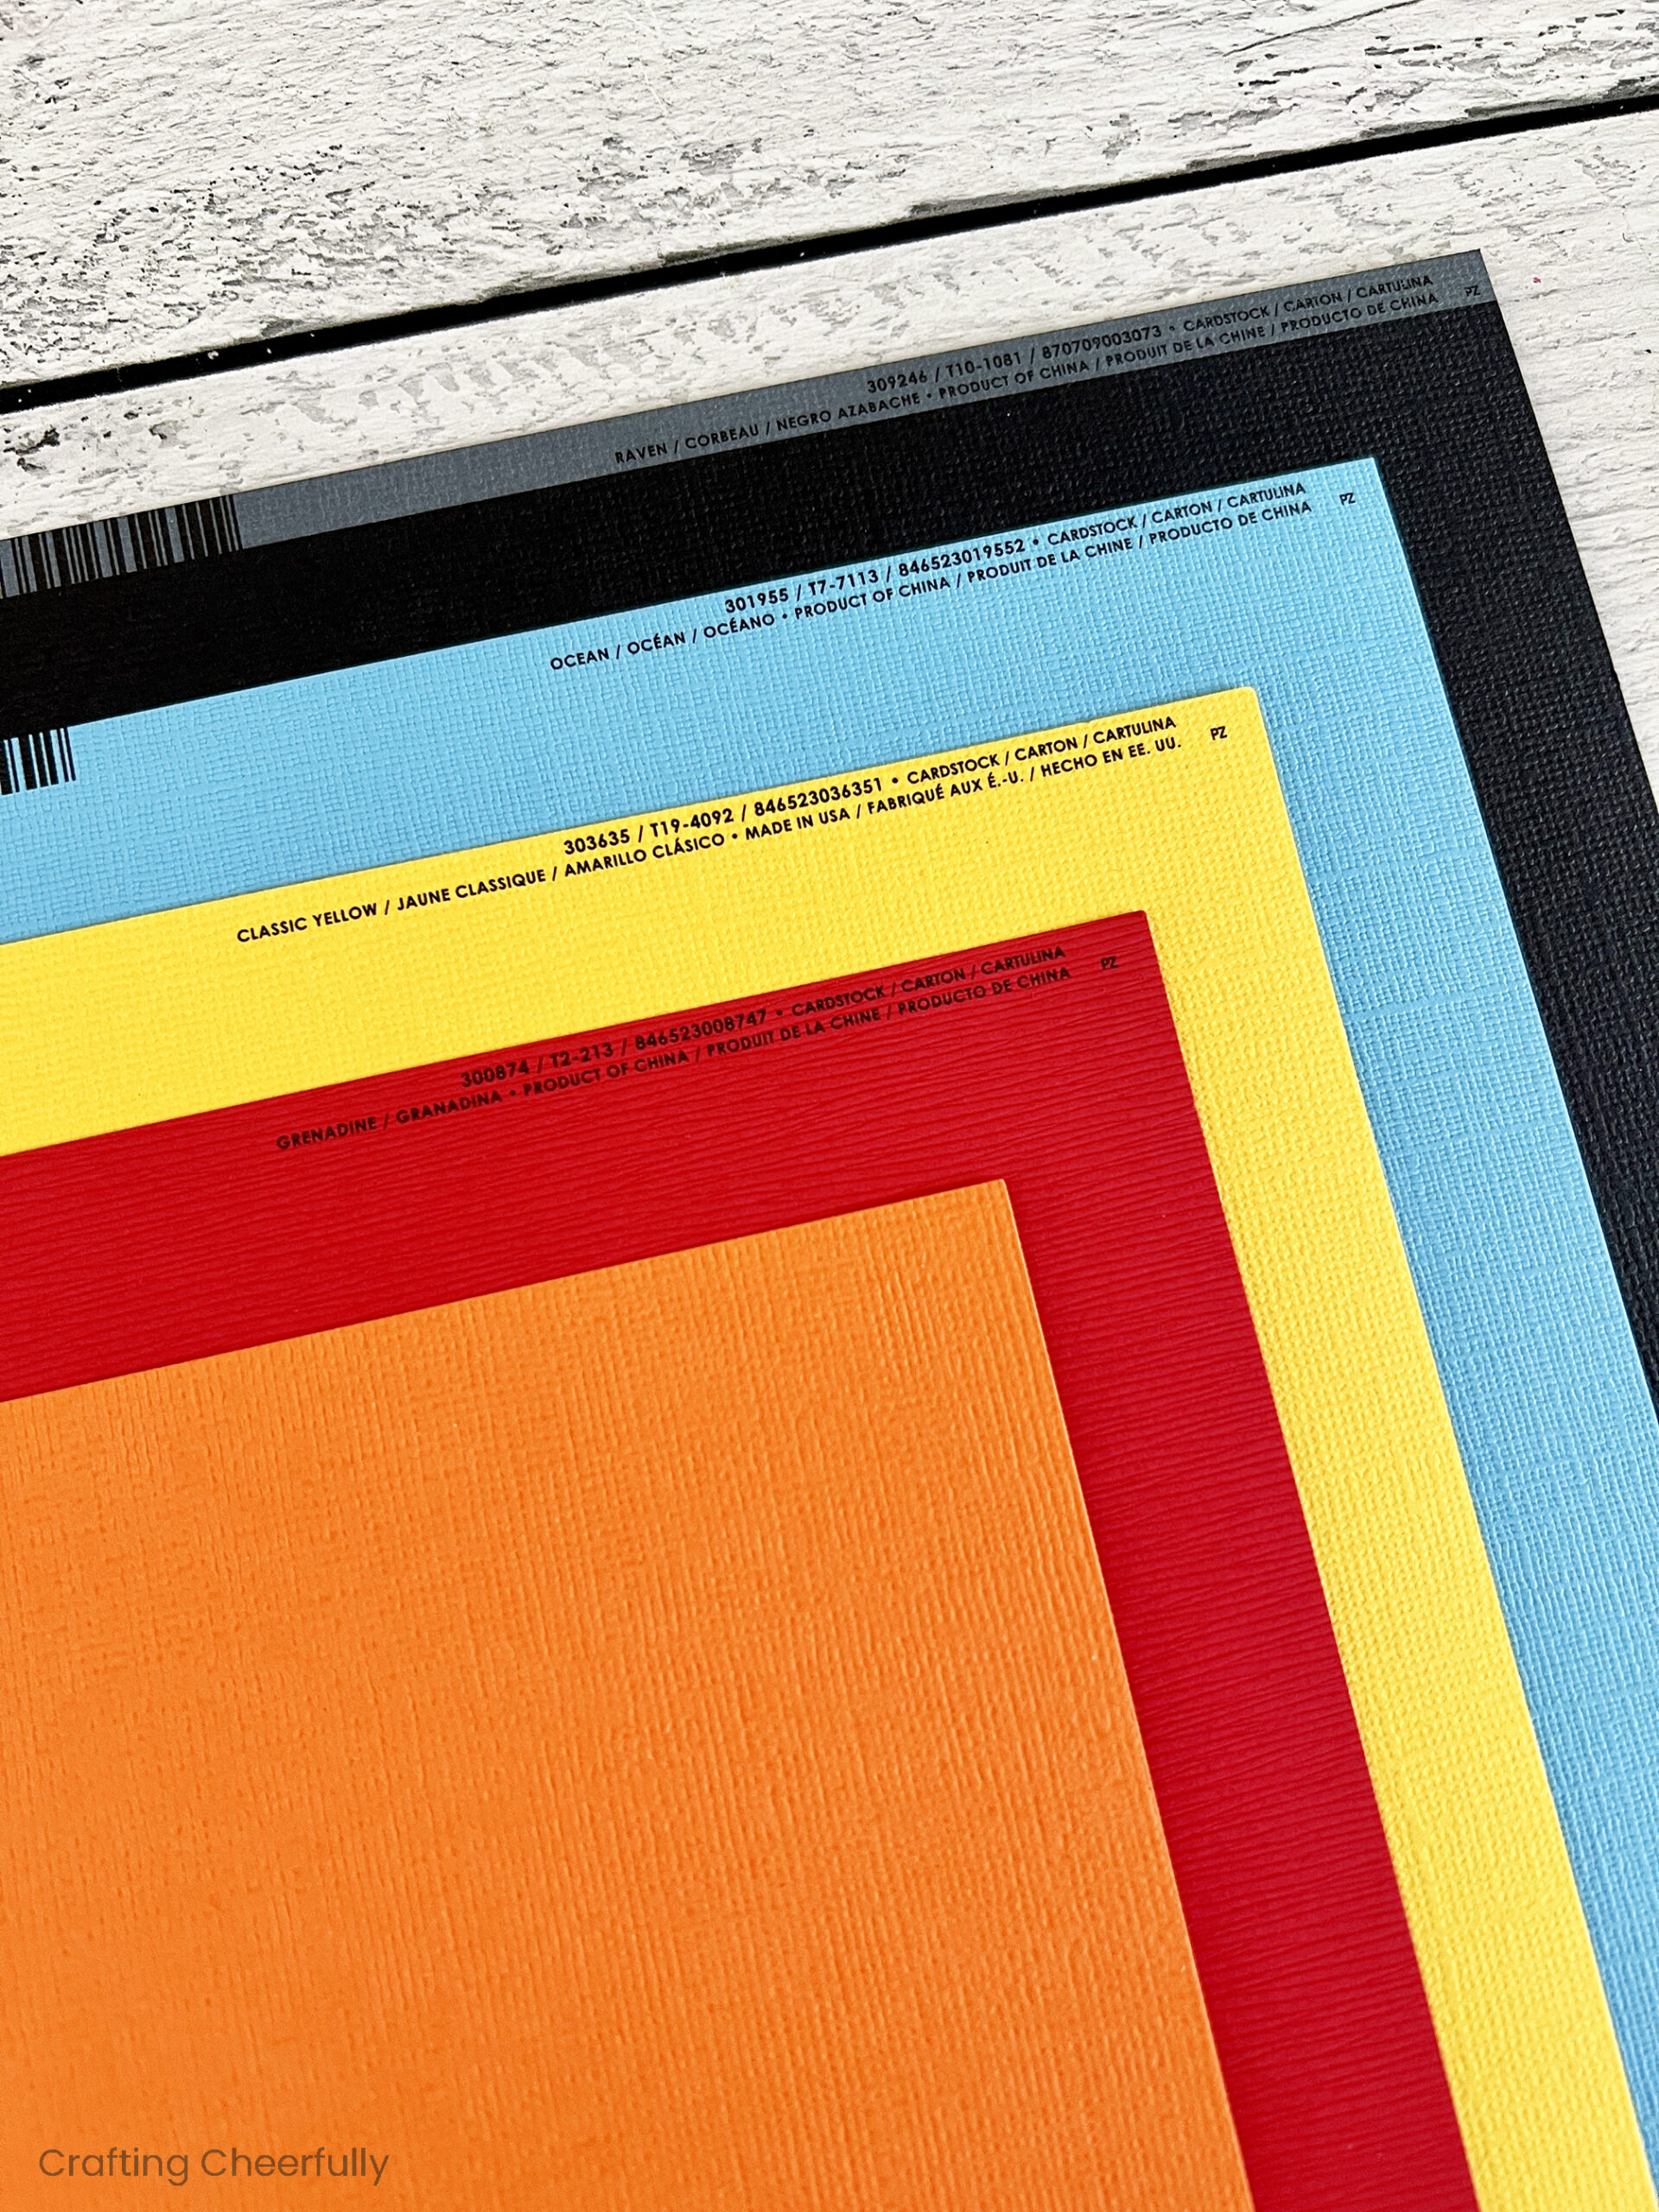
For my layered paper projects, I like to choose a sturdy cardstock that is also solid core. Solid core means the paper is the same color on the outside as it is on the inside. White core, or printed cardstock, is paper that is colored on just the front and back and the inside is white. I find with the intricate cuts, that solid core cardstock gives a more polished look and there is no white visible that may distract from the design.
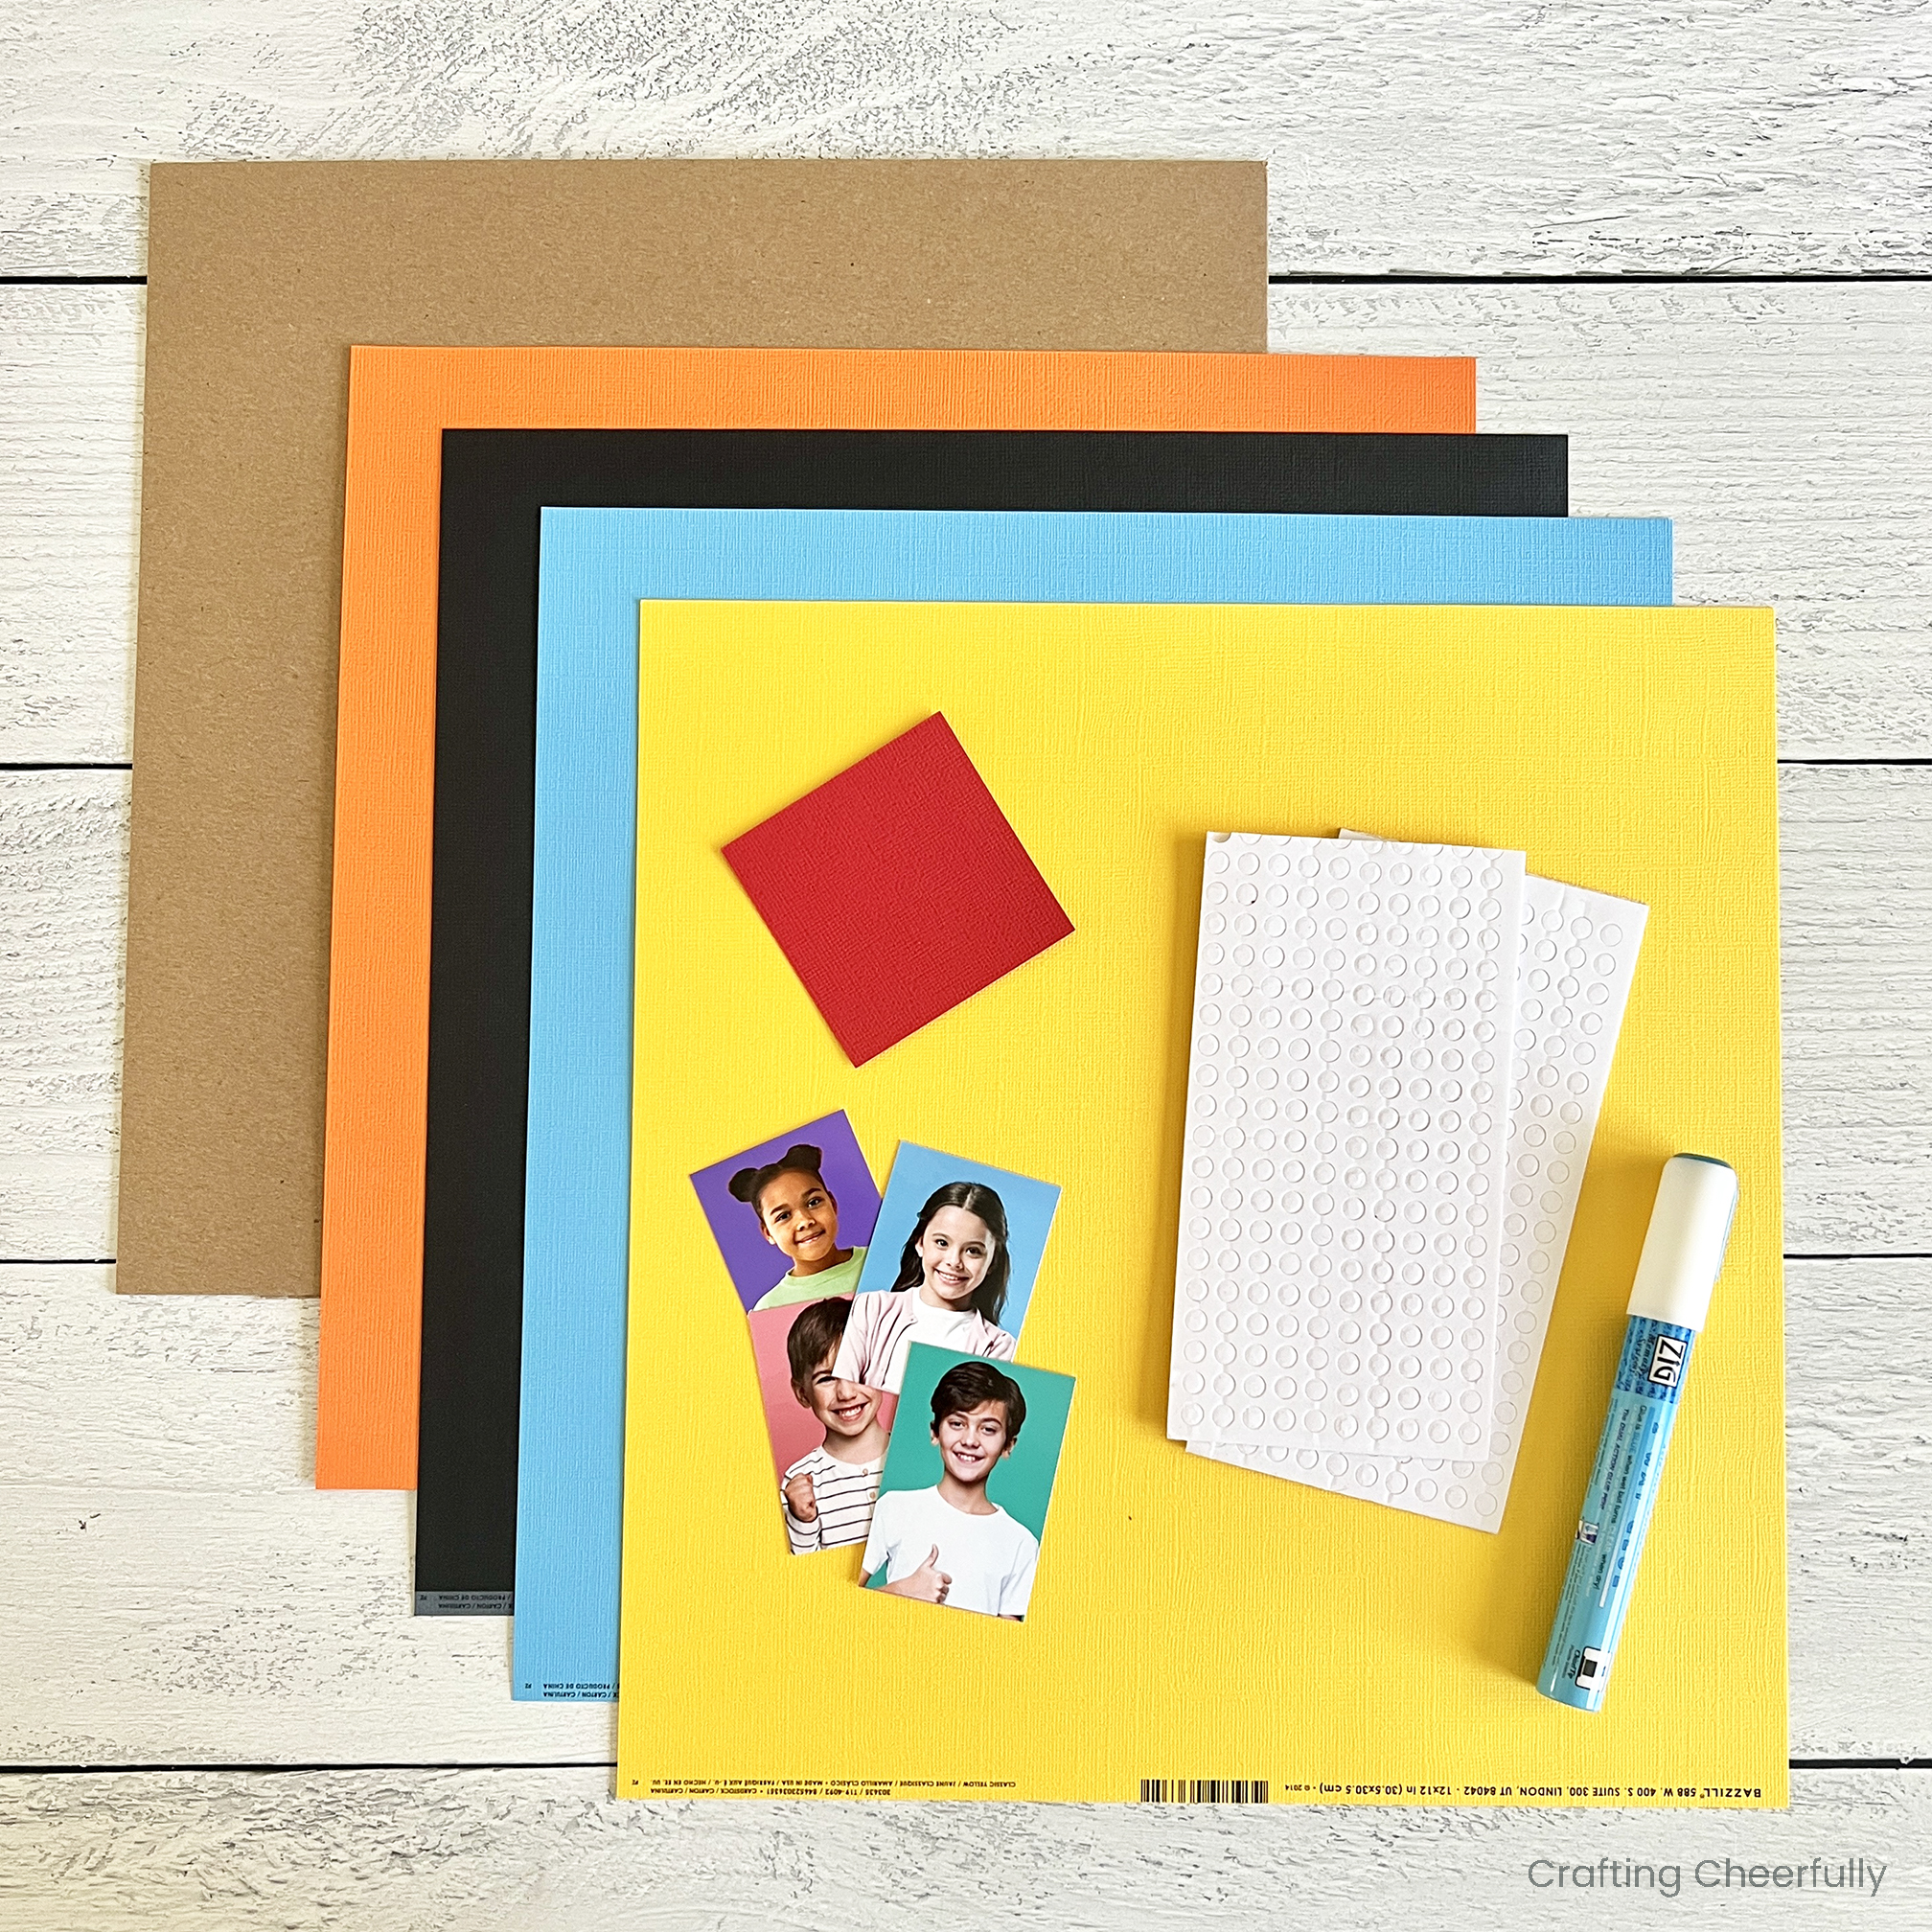
I used mostly 80lb Bazzill cardstock for this school bus frame and one sheet of American Crafts 80lb paper (the orange sheet). The sturdier cardstock will hold up better, especially if you display the school bus upright in an easel. I recommend using a layer of chipboard on the back of the school bus to give the frame even more structure and to keep it from flopping over in an easel.
Supplies Needed:
- Cricut Design Space File
- Cardstock – Orange (American Crafts Carrot), Black, Light Blue, Yellow and Red (Bazzill Raven, Ocean, Classic Yellow, and Grenadine)
- Chipboard – optional
- Foam Adhesive Dots
- Glue Pen
- Pencil
- Photos – Mini wallet size is best (1.75″ x 2.5″ or 2.5″ x 3″). The actual opening is 1.5″ x 2.25″.
- Cutting machine, cutting tools and cutting mat
Preparing the File in Cricut Design Space
I designed this School Bus Frame in Cricut Design Space using images that are part of Cricut Access. My school bus measures 11.5″ wide by 6″ tall. The openings for the windows are about 1.5″ wide by 2.25″ tall. They are the perfect size for the mini wallet-sized school photos that measure about 1.75″ x 2.5″. You can resize the school bus or change the colors of the layers, just make sure you select all before resizing so all of your layers resize together. There is one optional layer included, a Chipboard Layer which you can choose to use or hide before cutting.
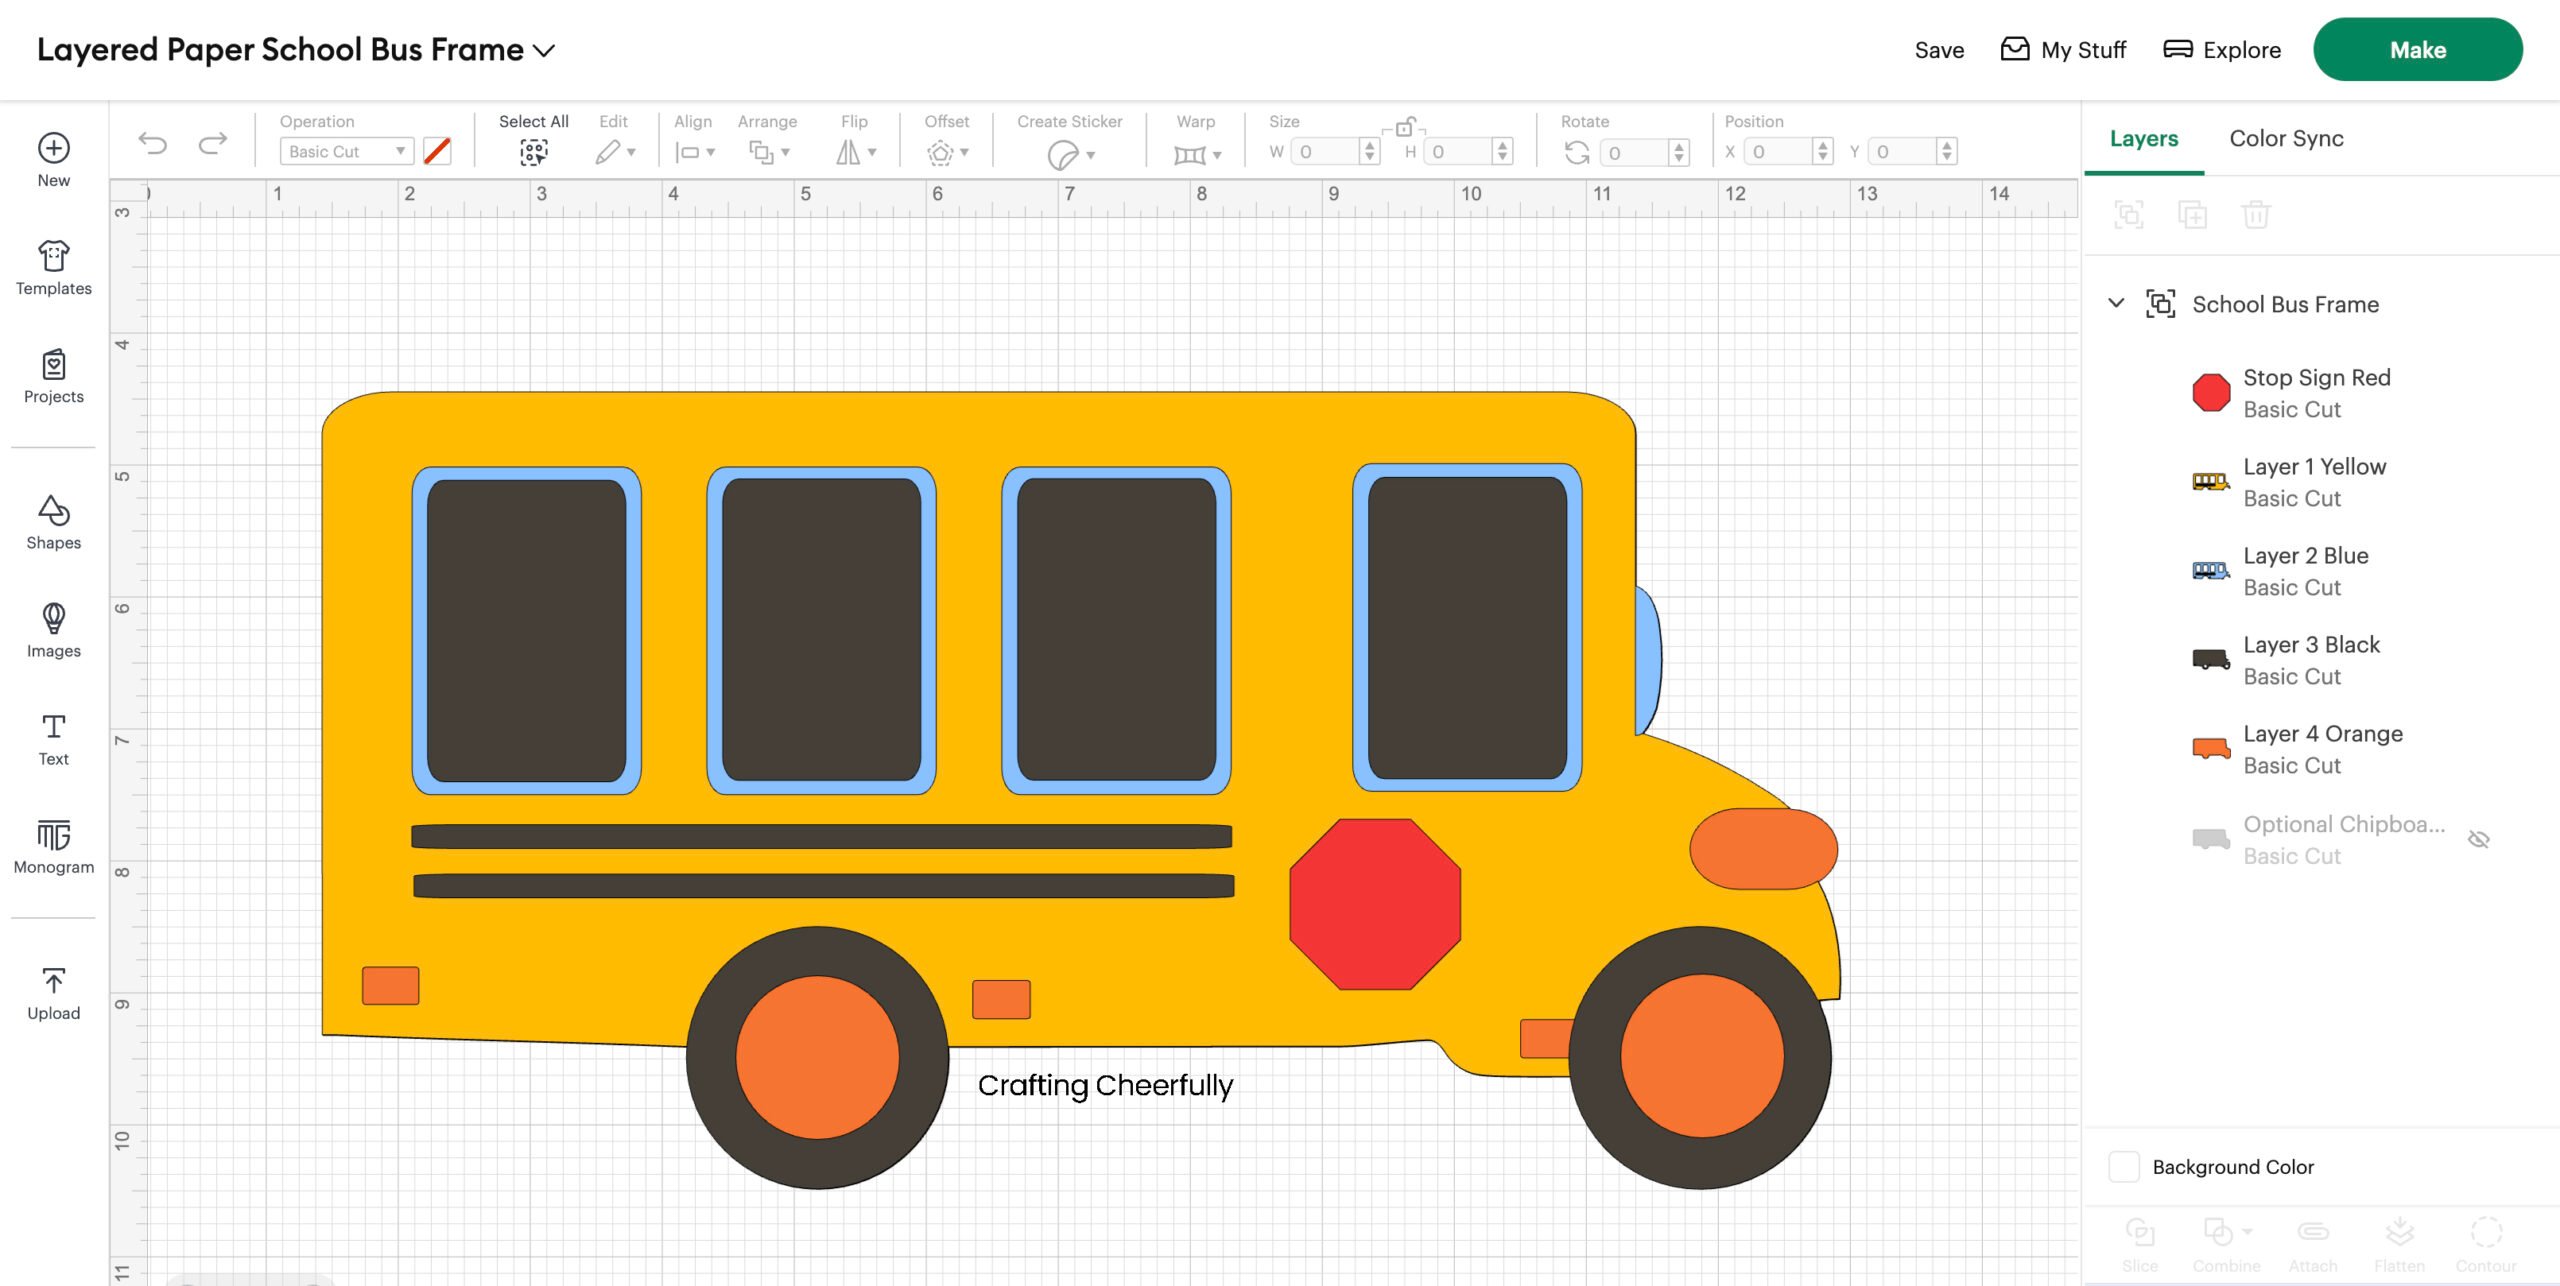
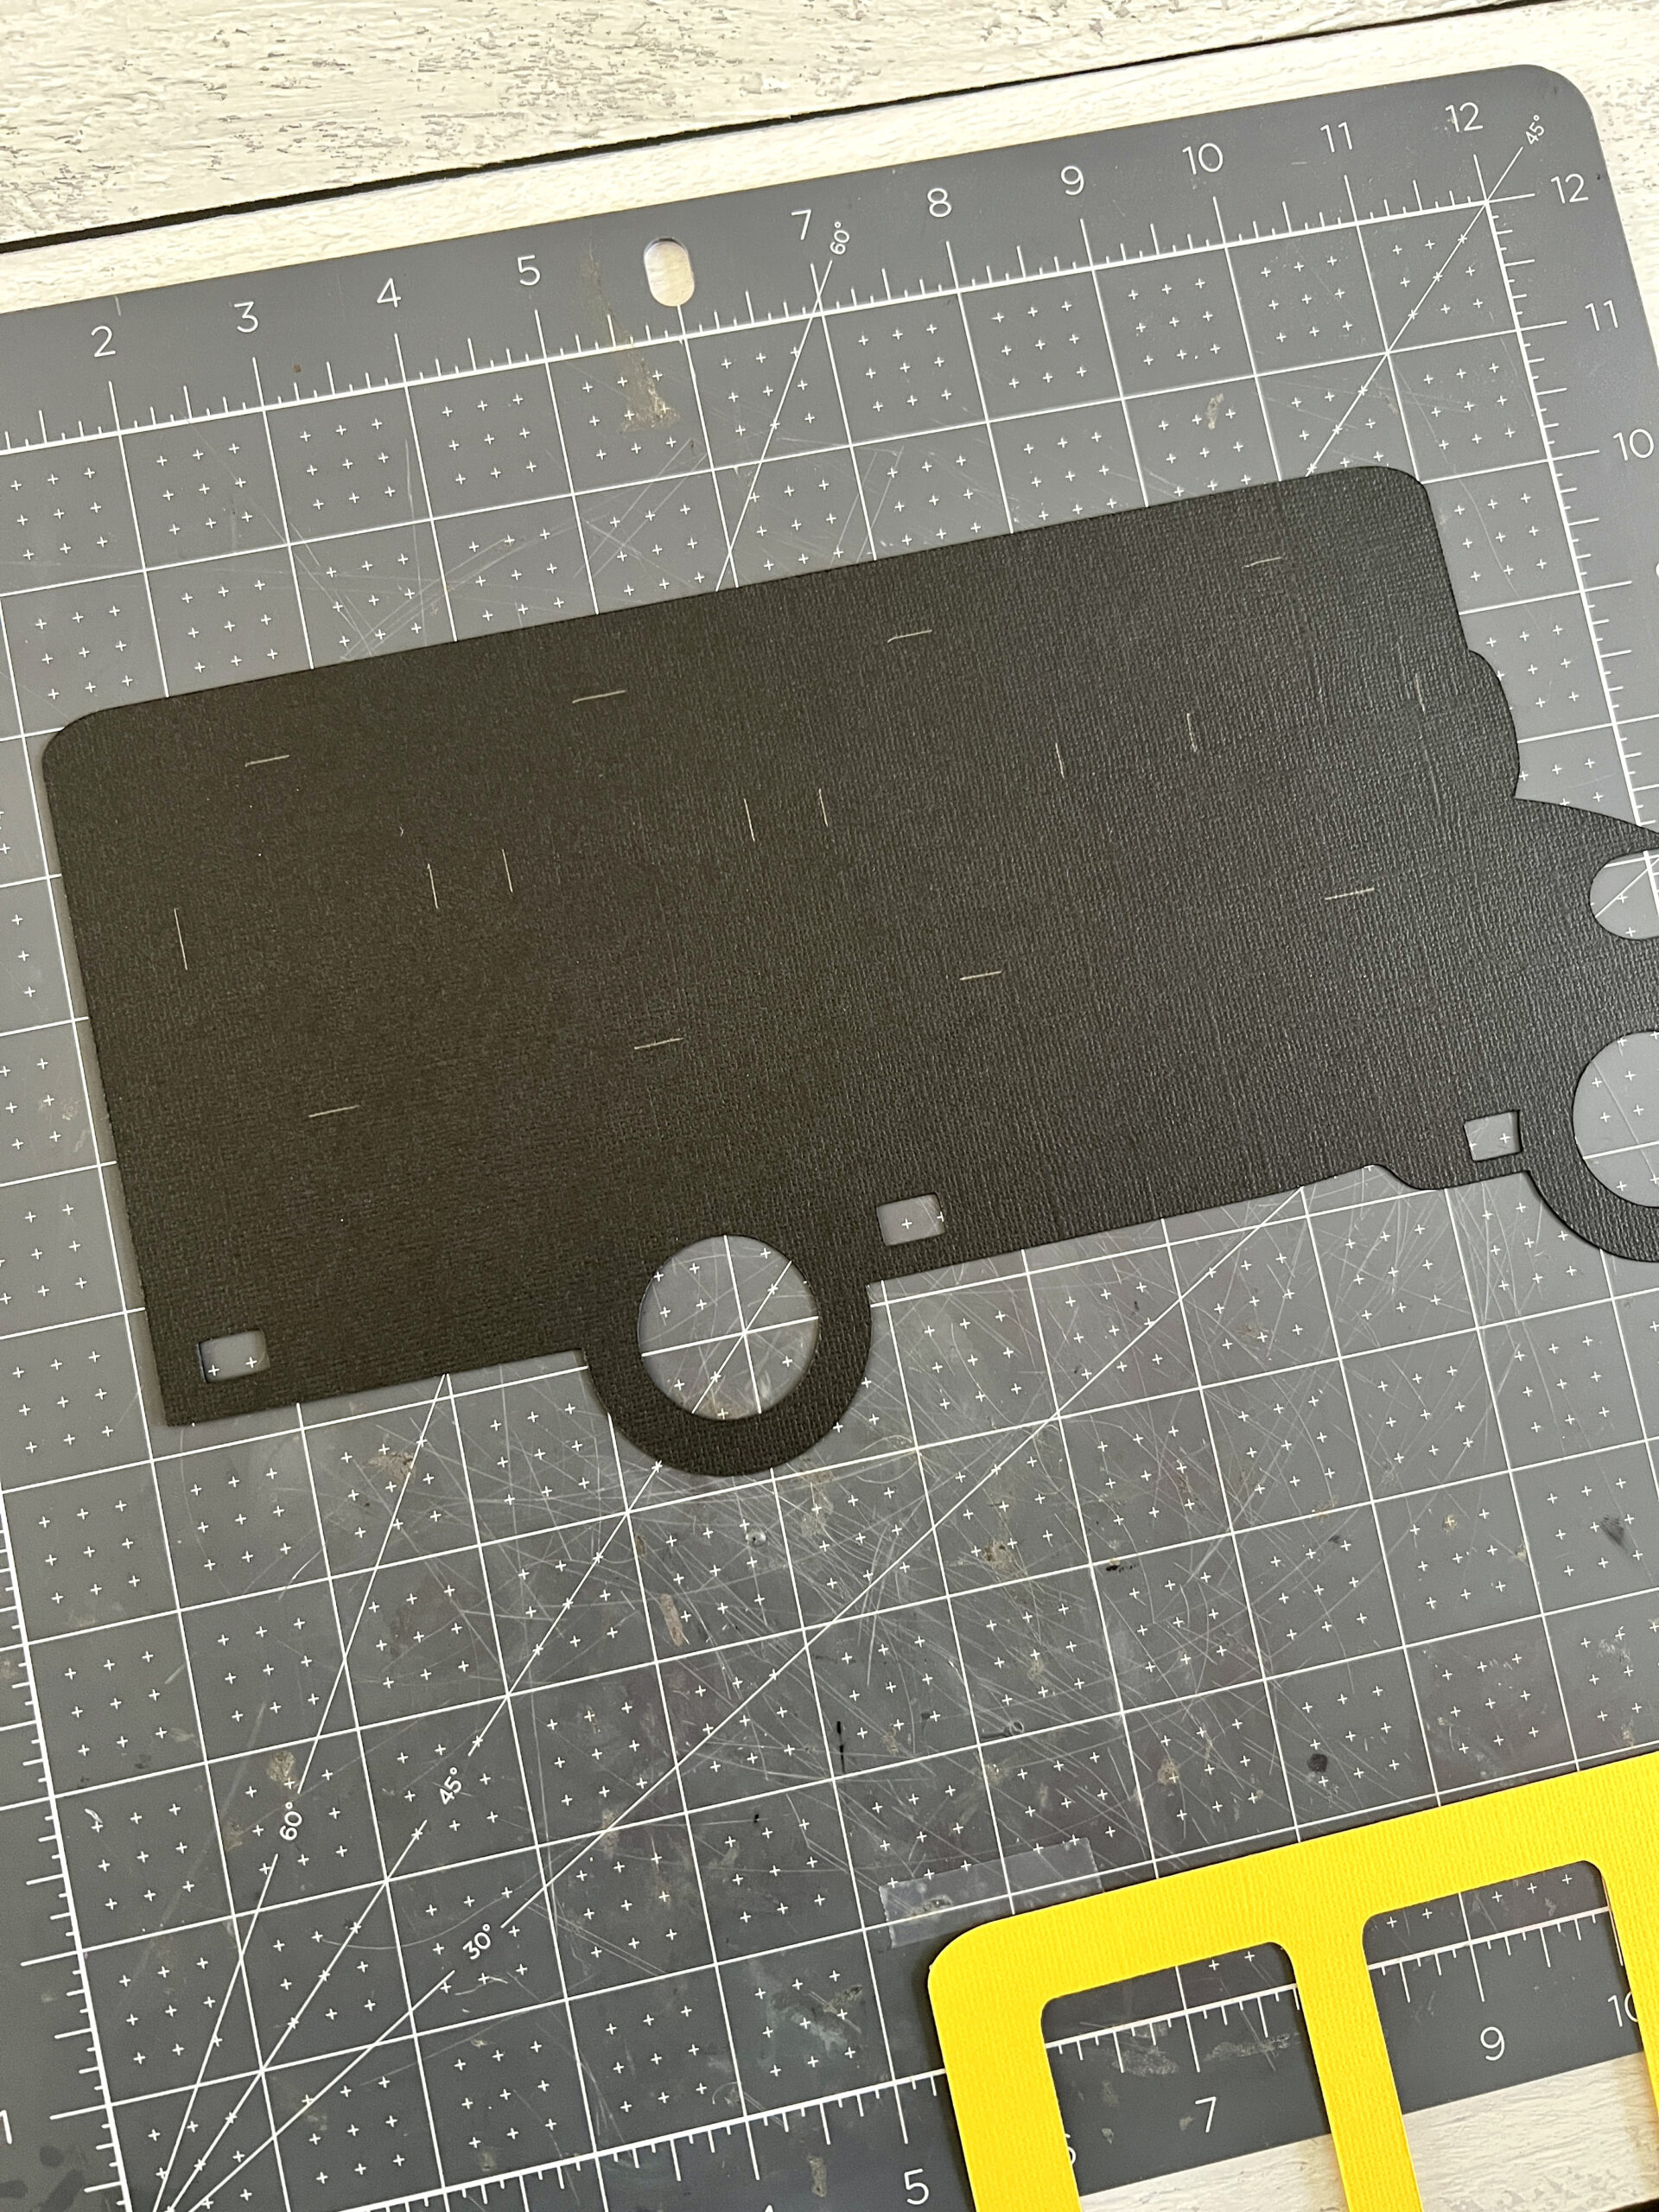
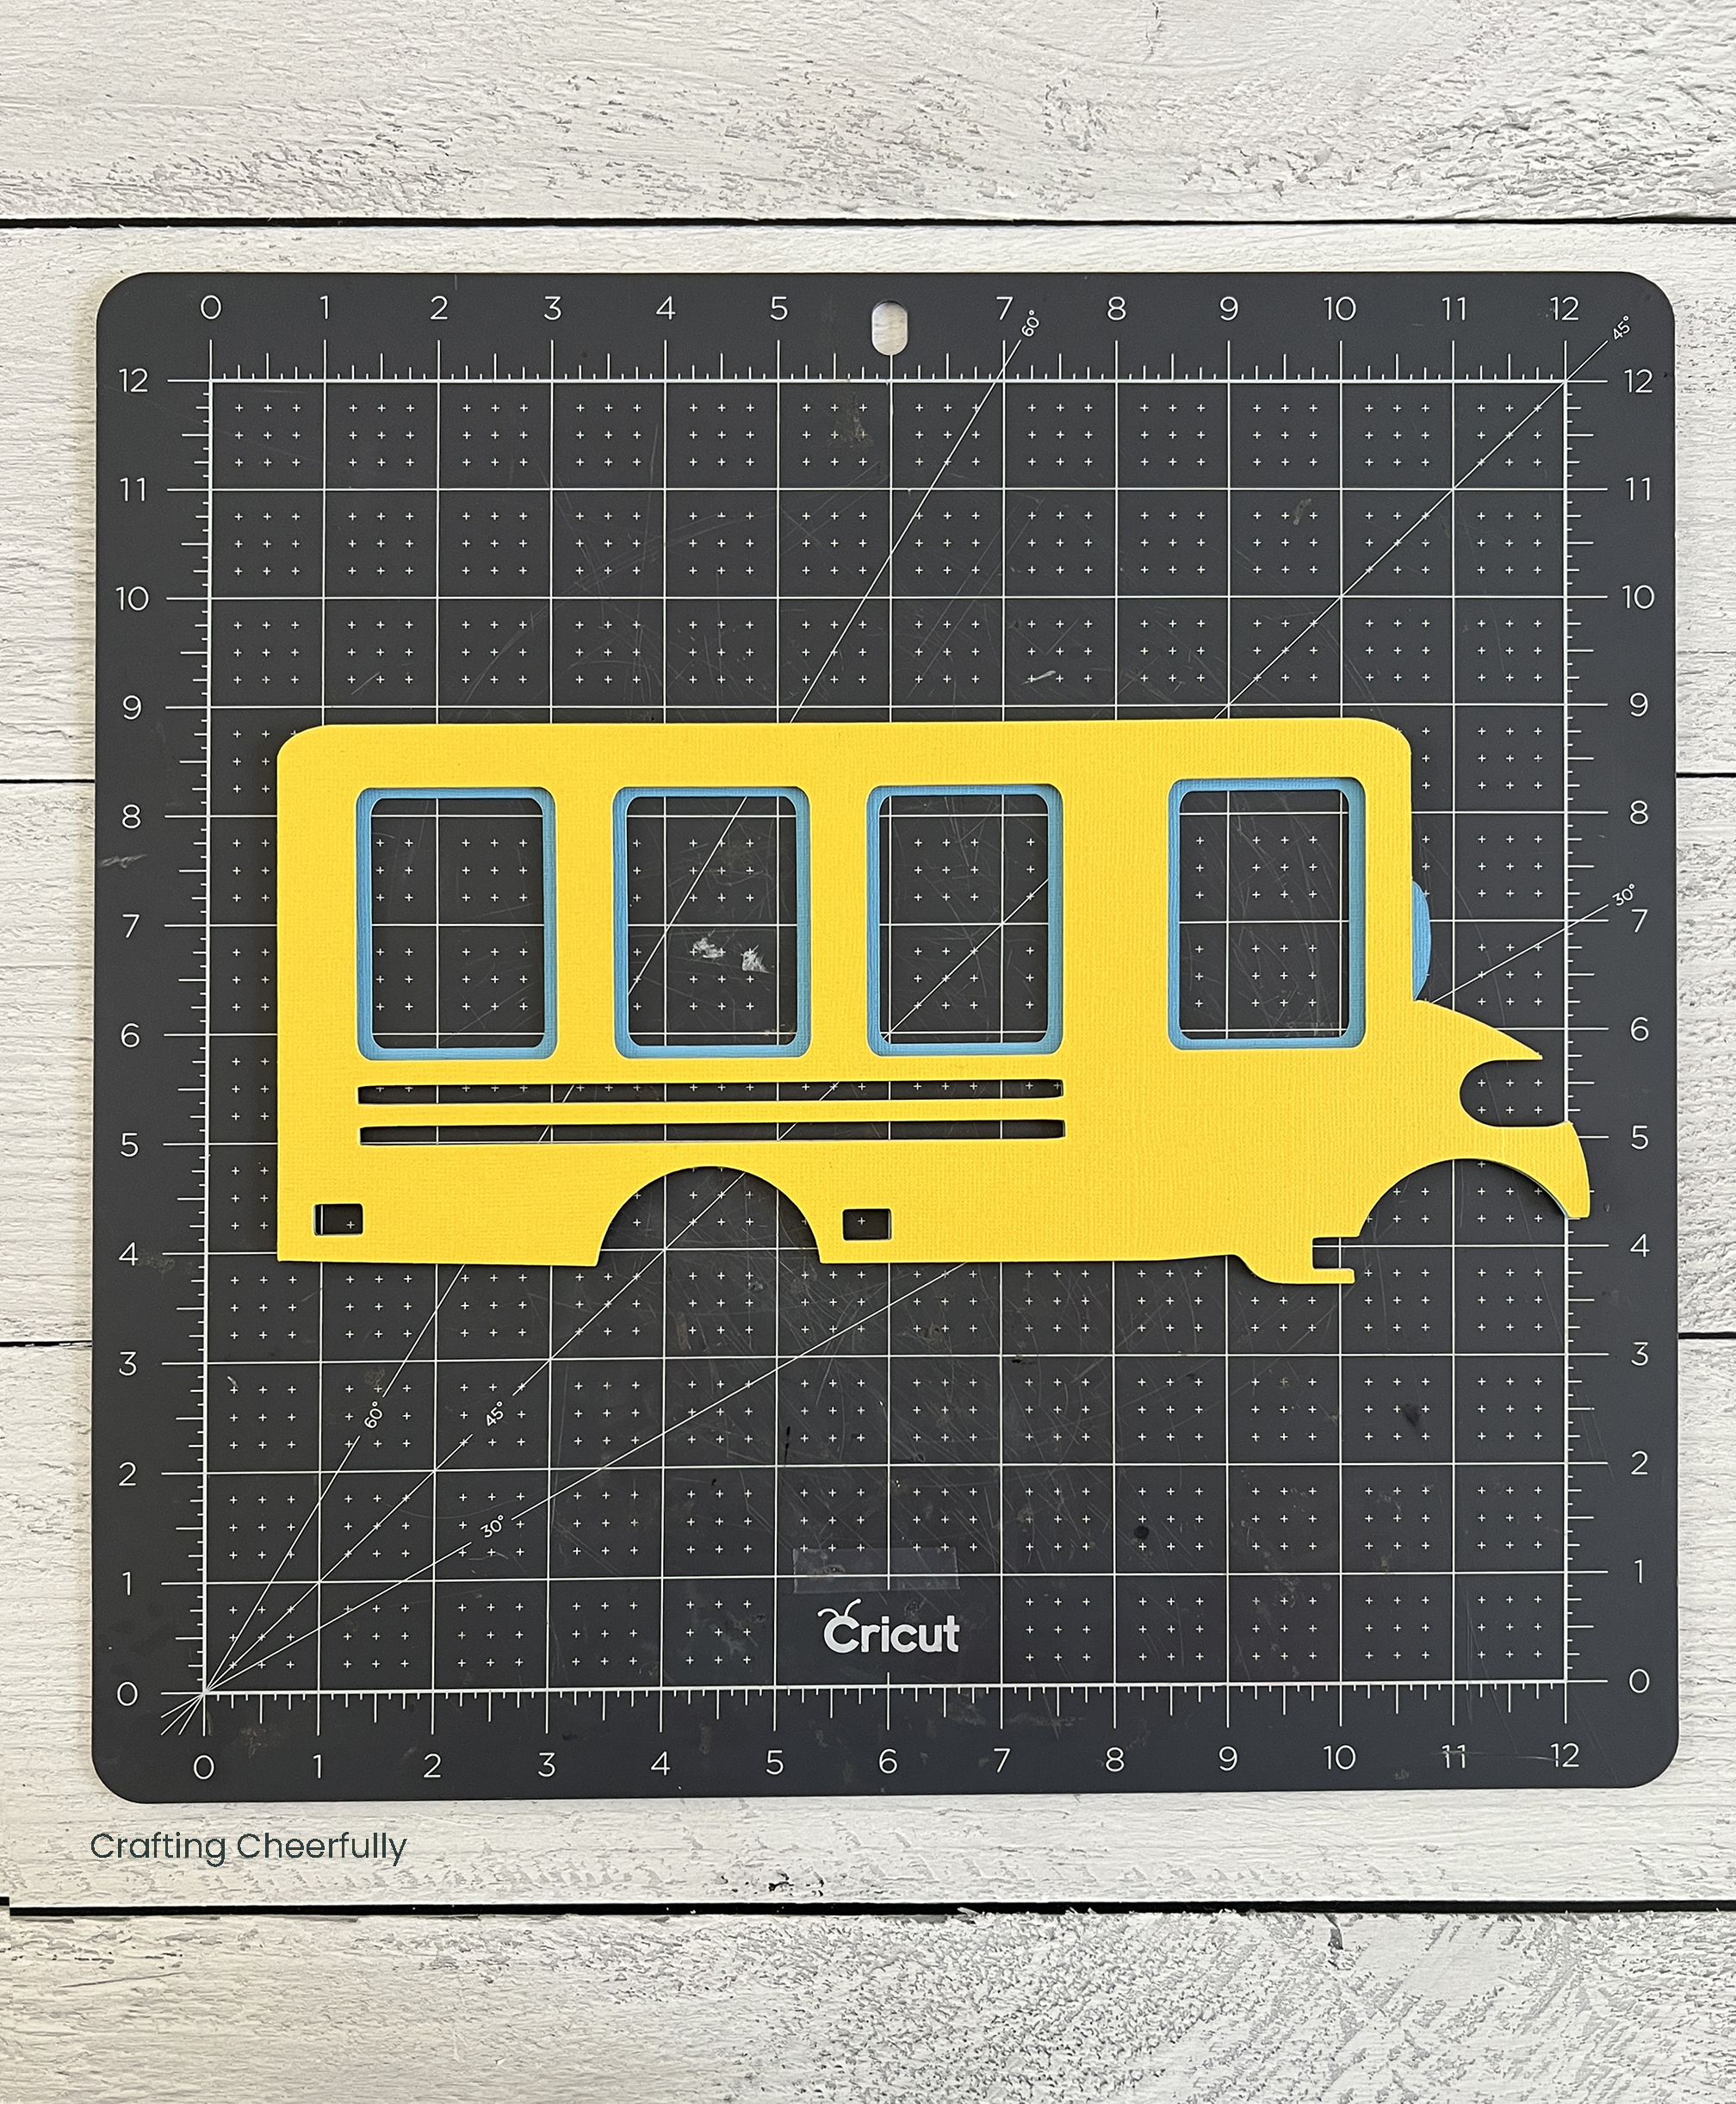
Cutting the Paper School Bus
Once the file is ready, cut out all of the layers of paper using your machine. The chipboard layer is optional and may require some playing around to find the right settings on your machine.
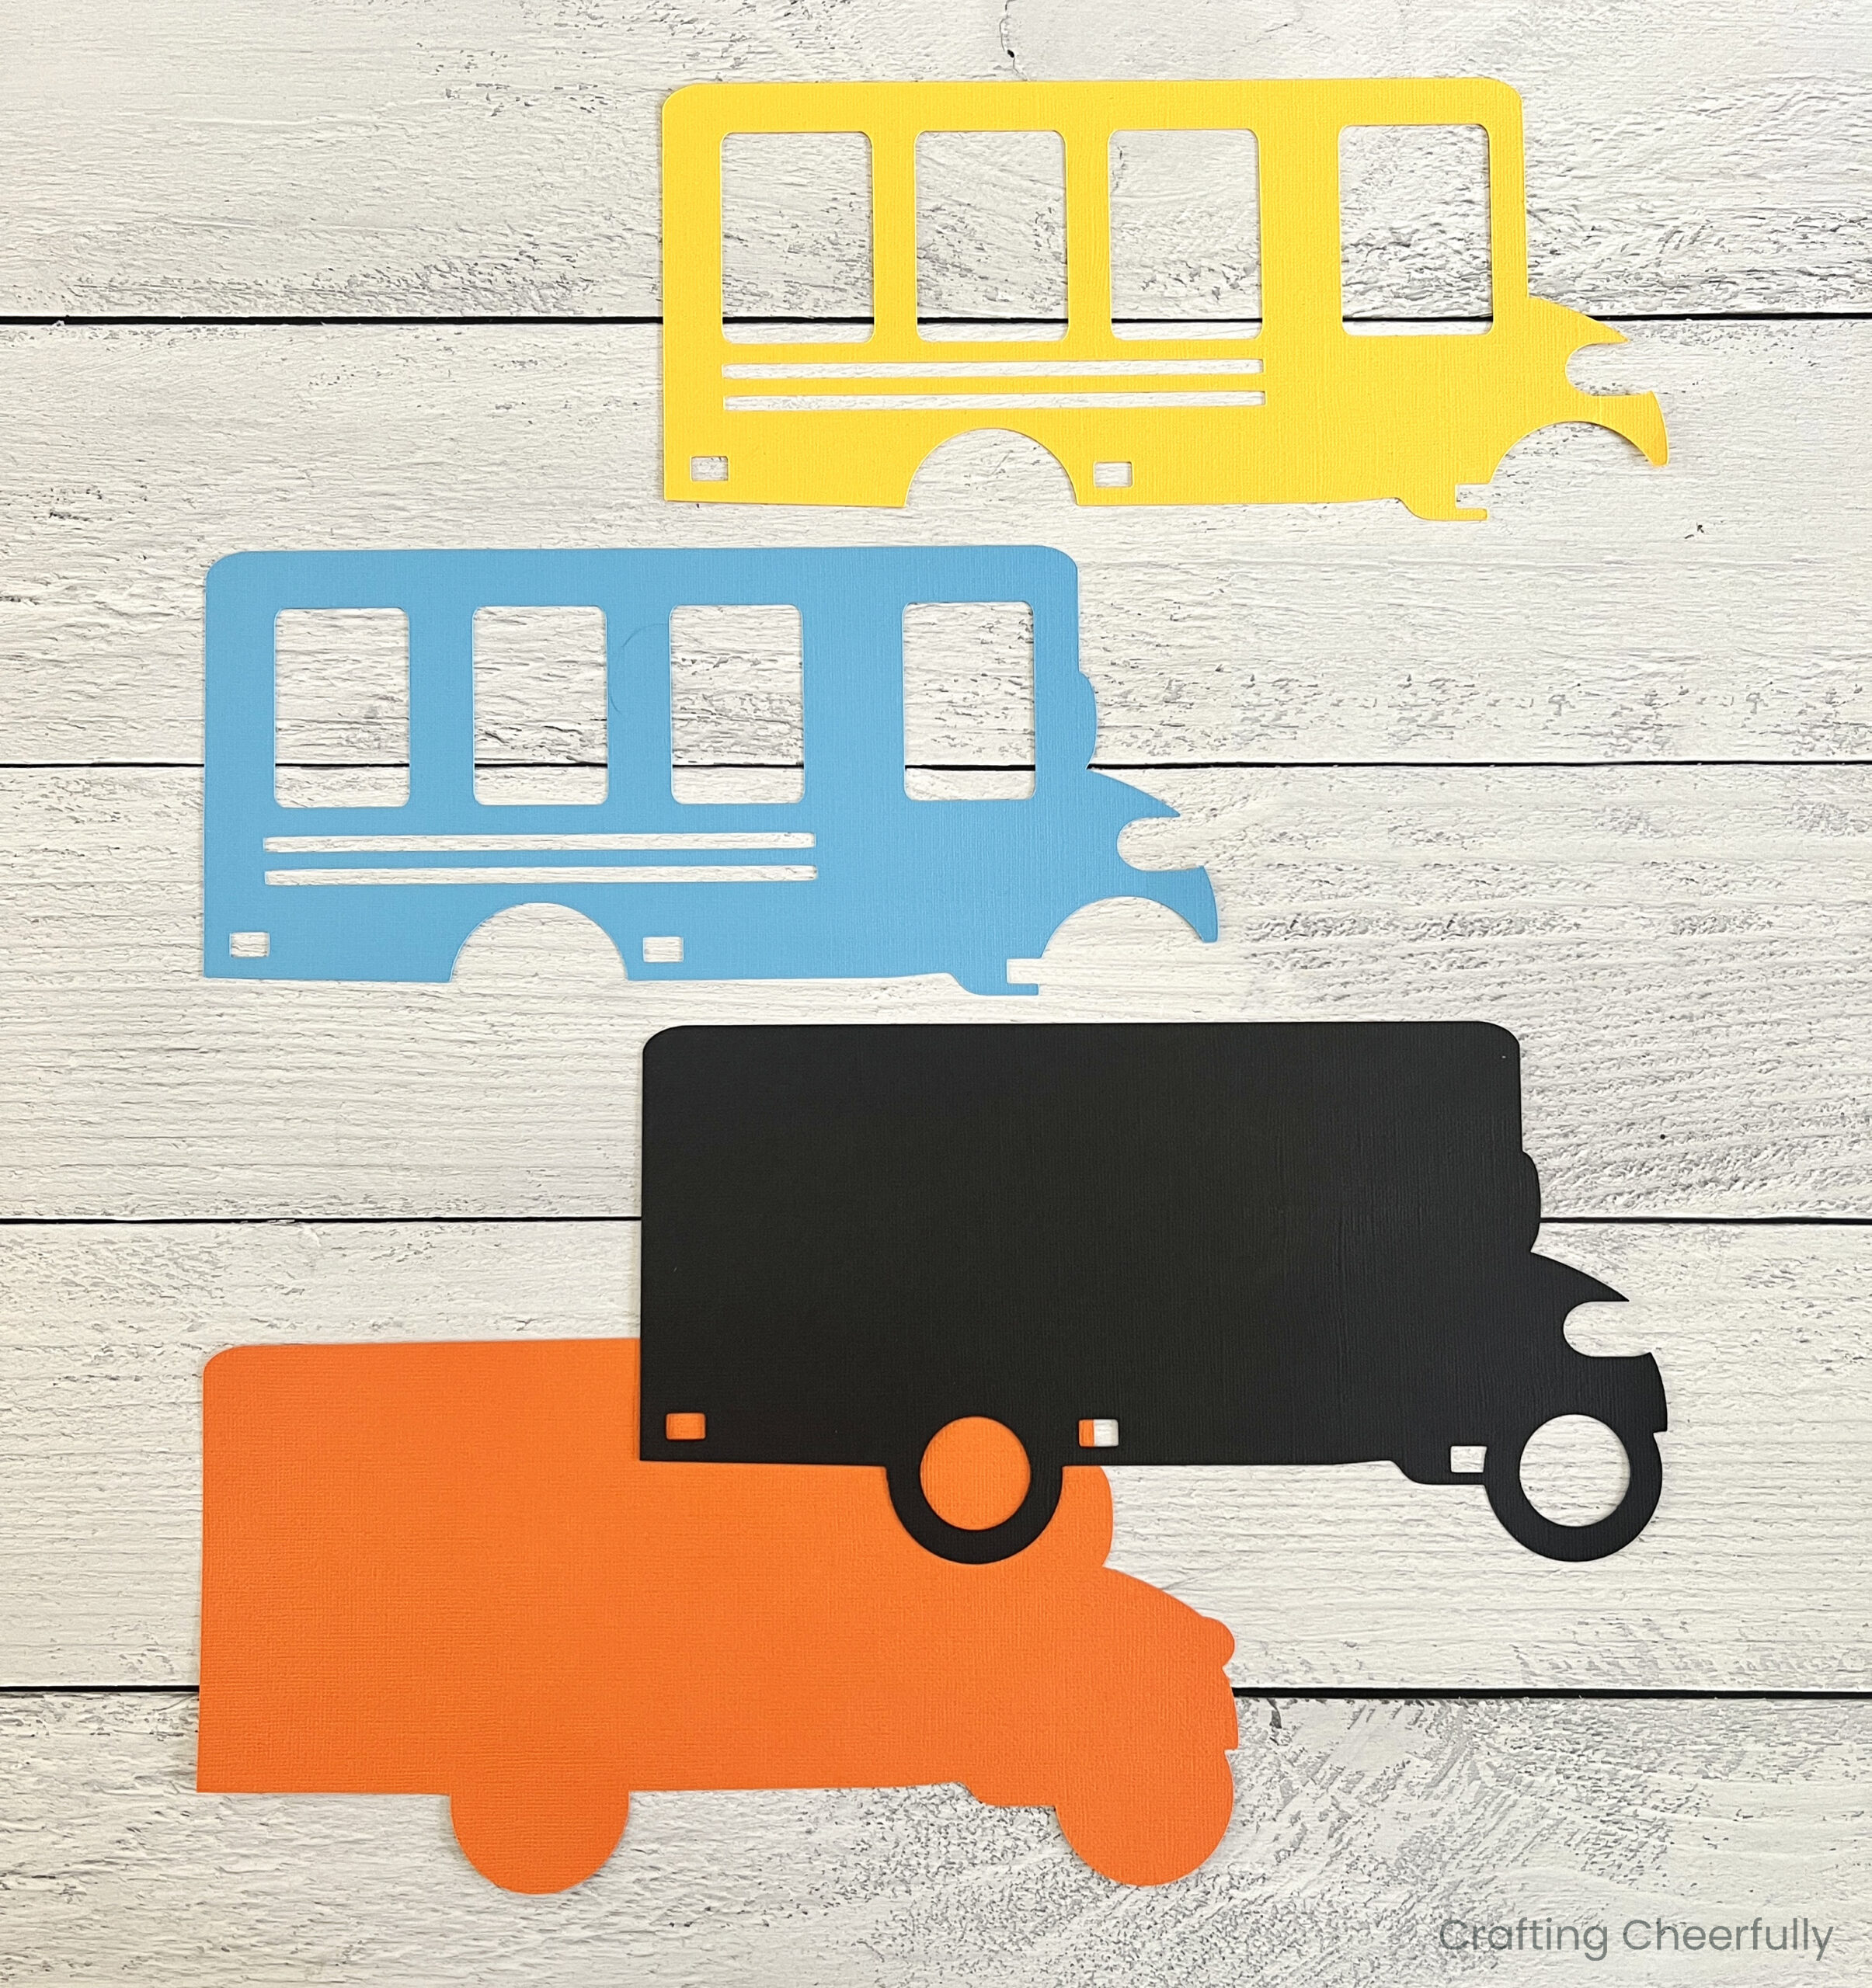
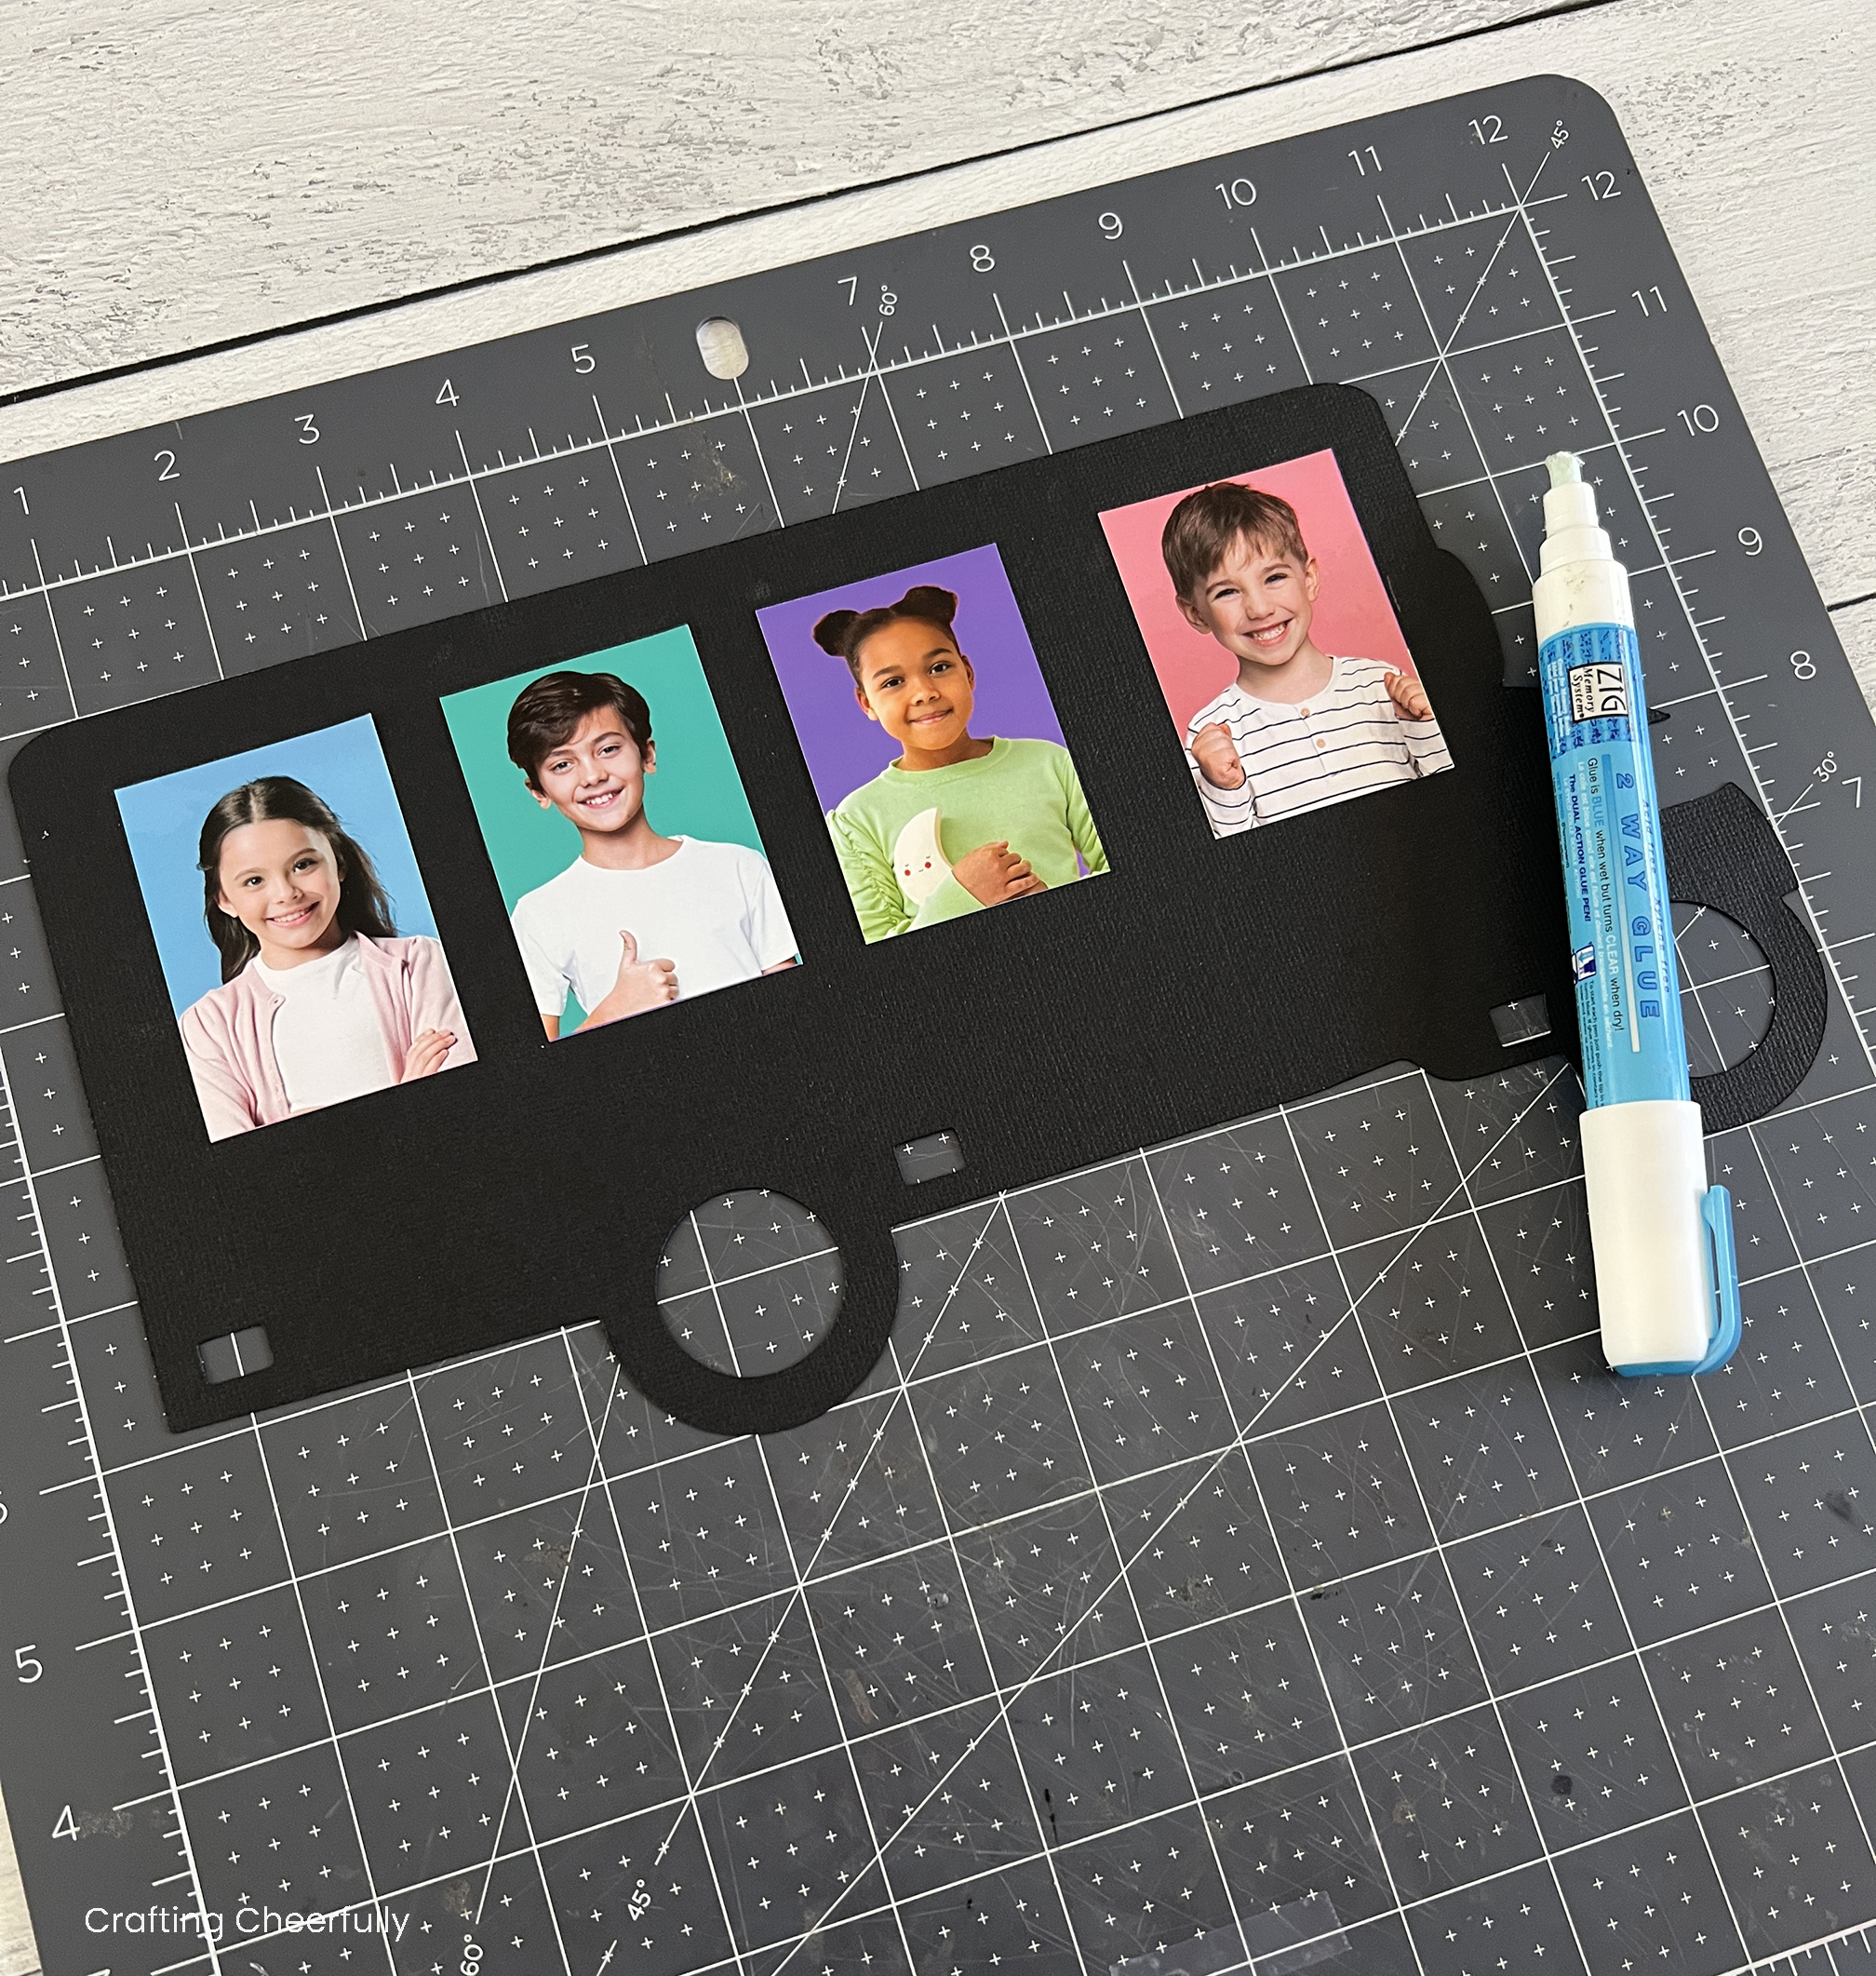
Preparing the Photo Layer
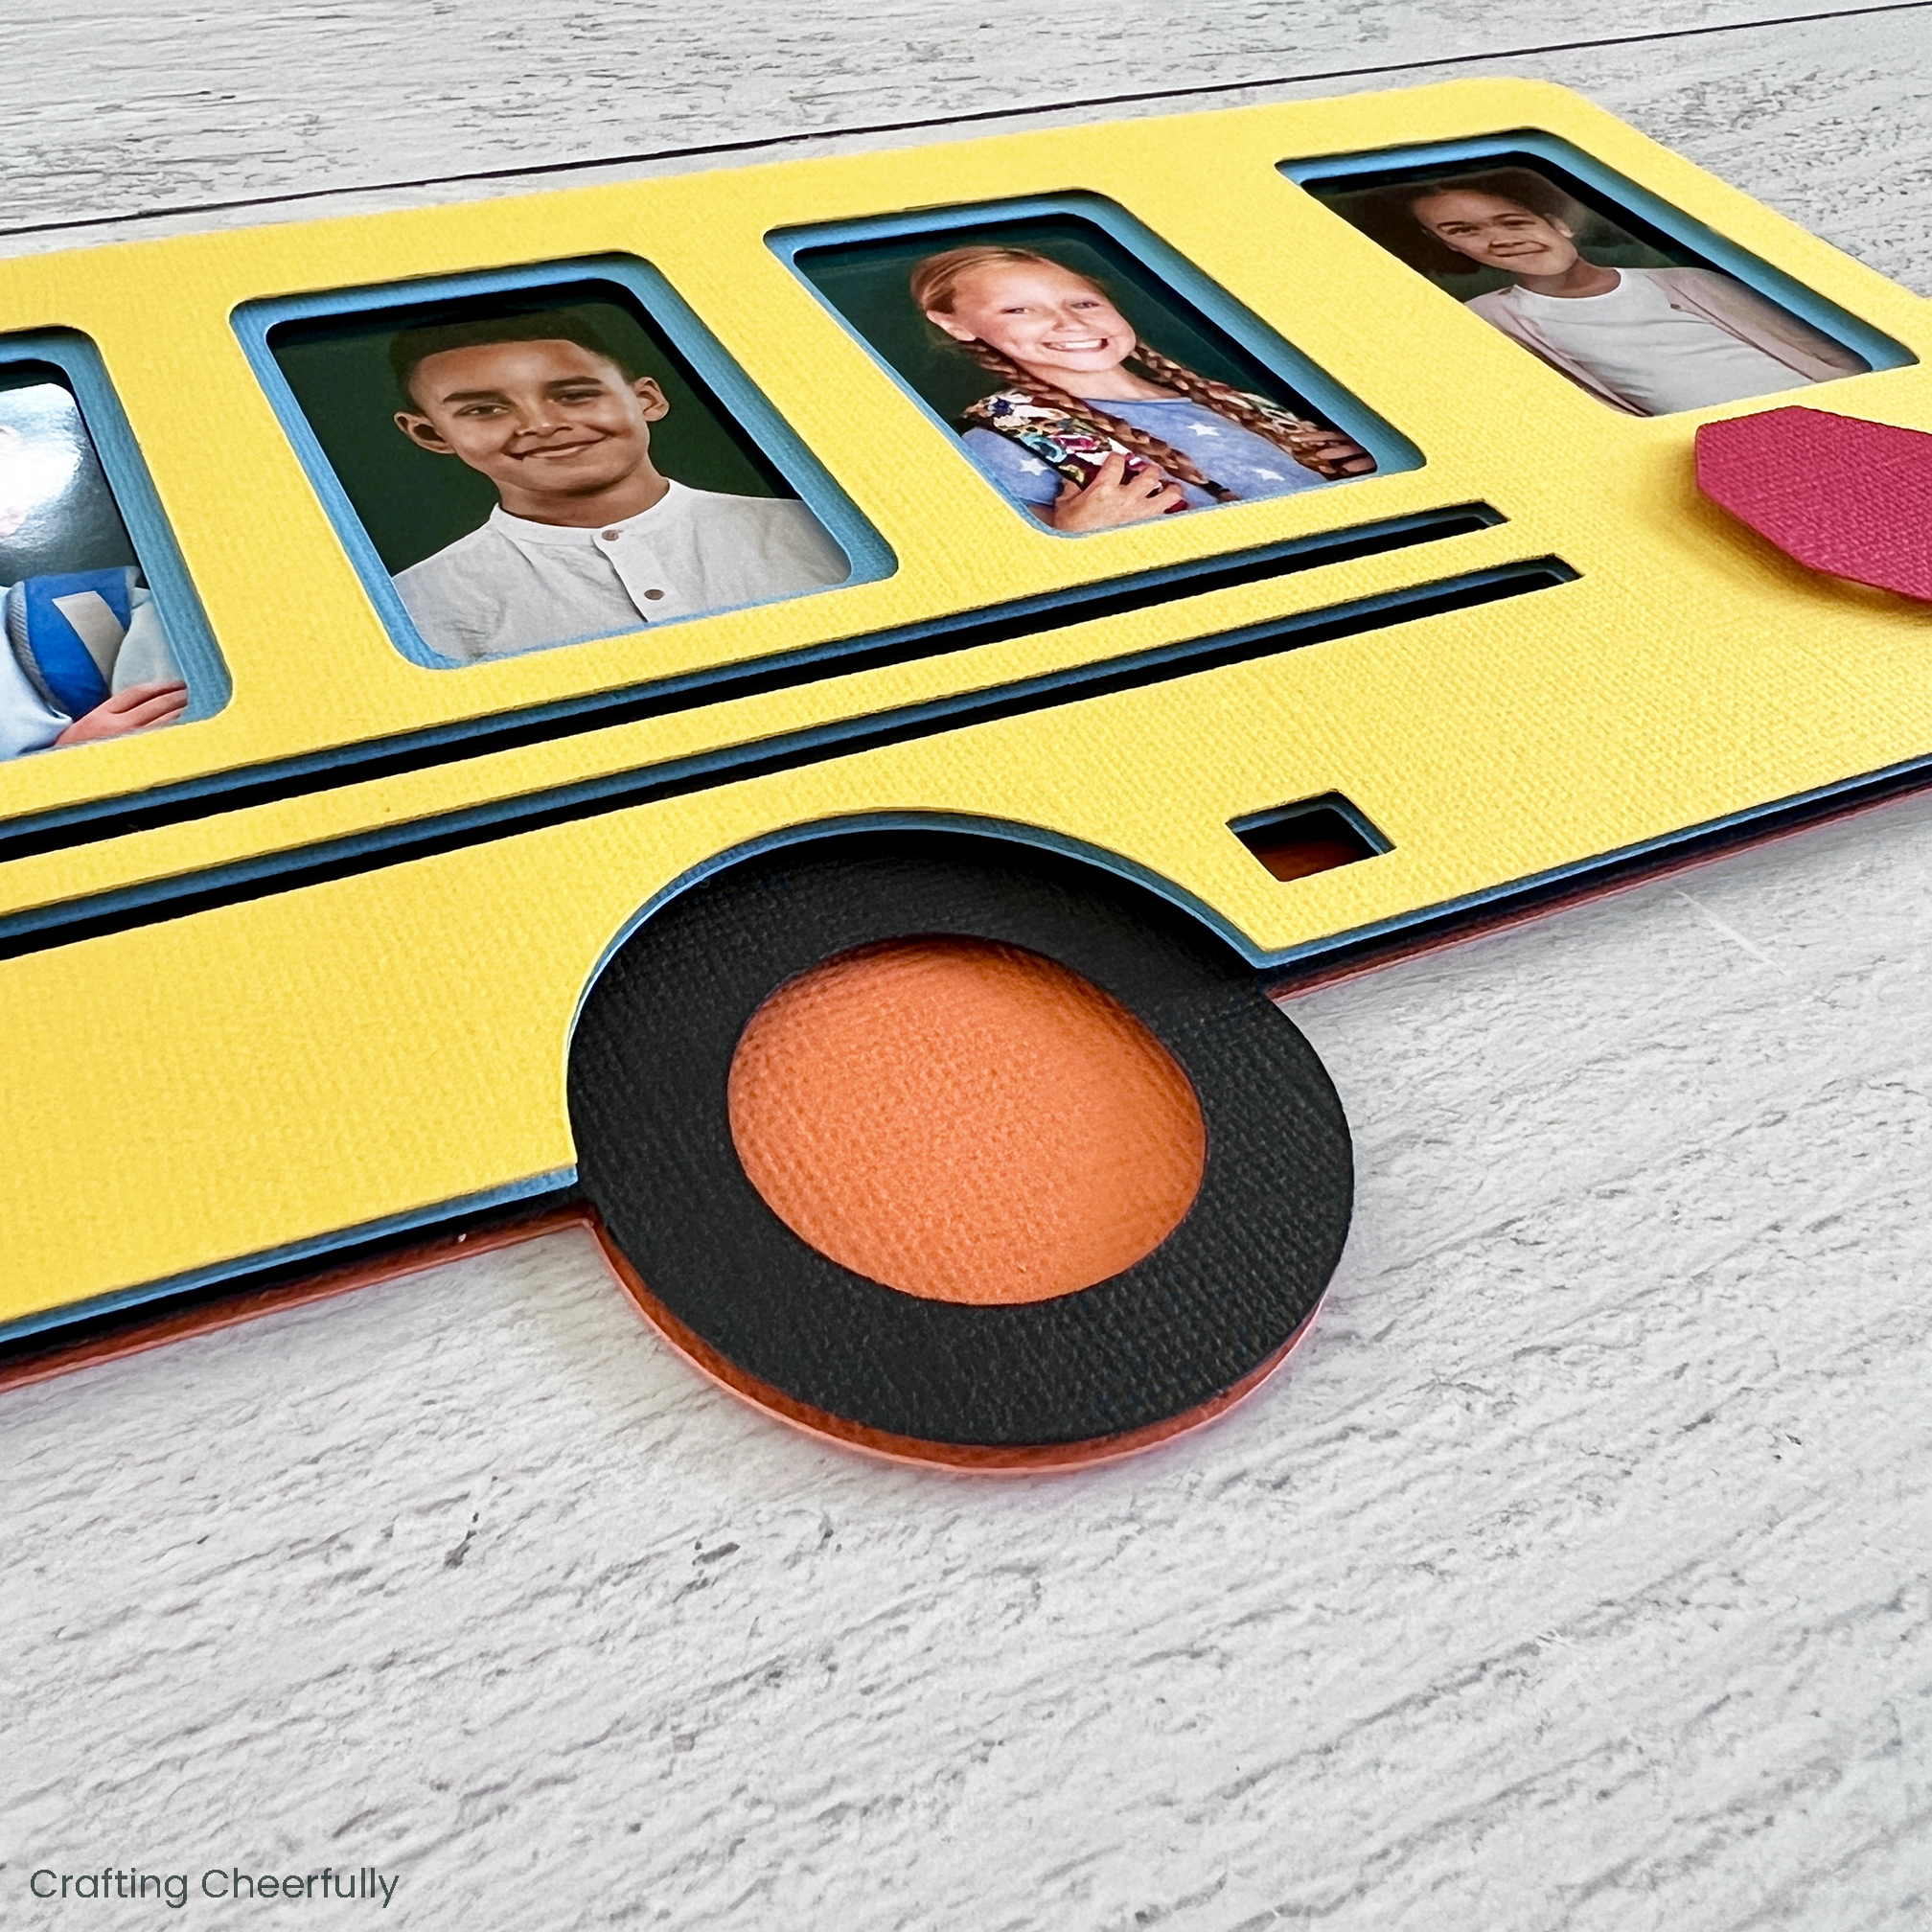
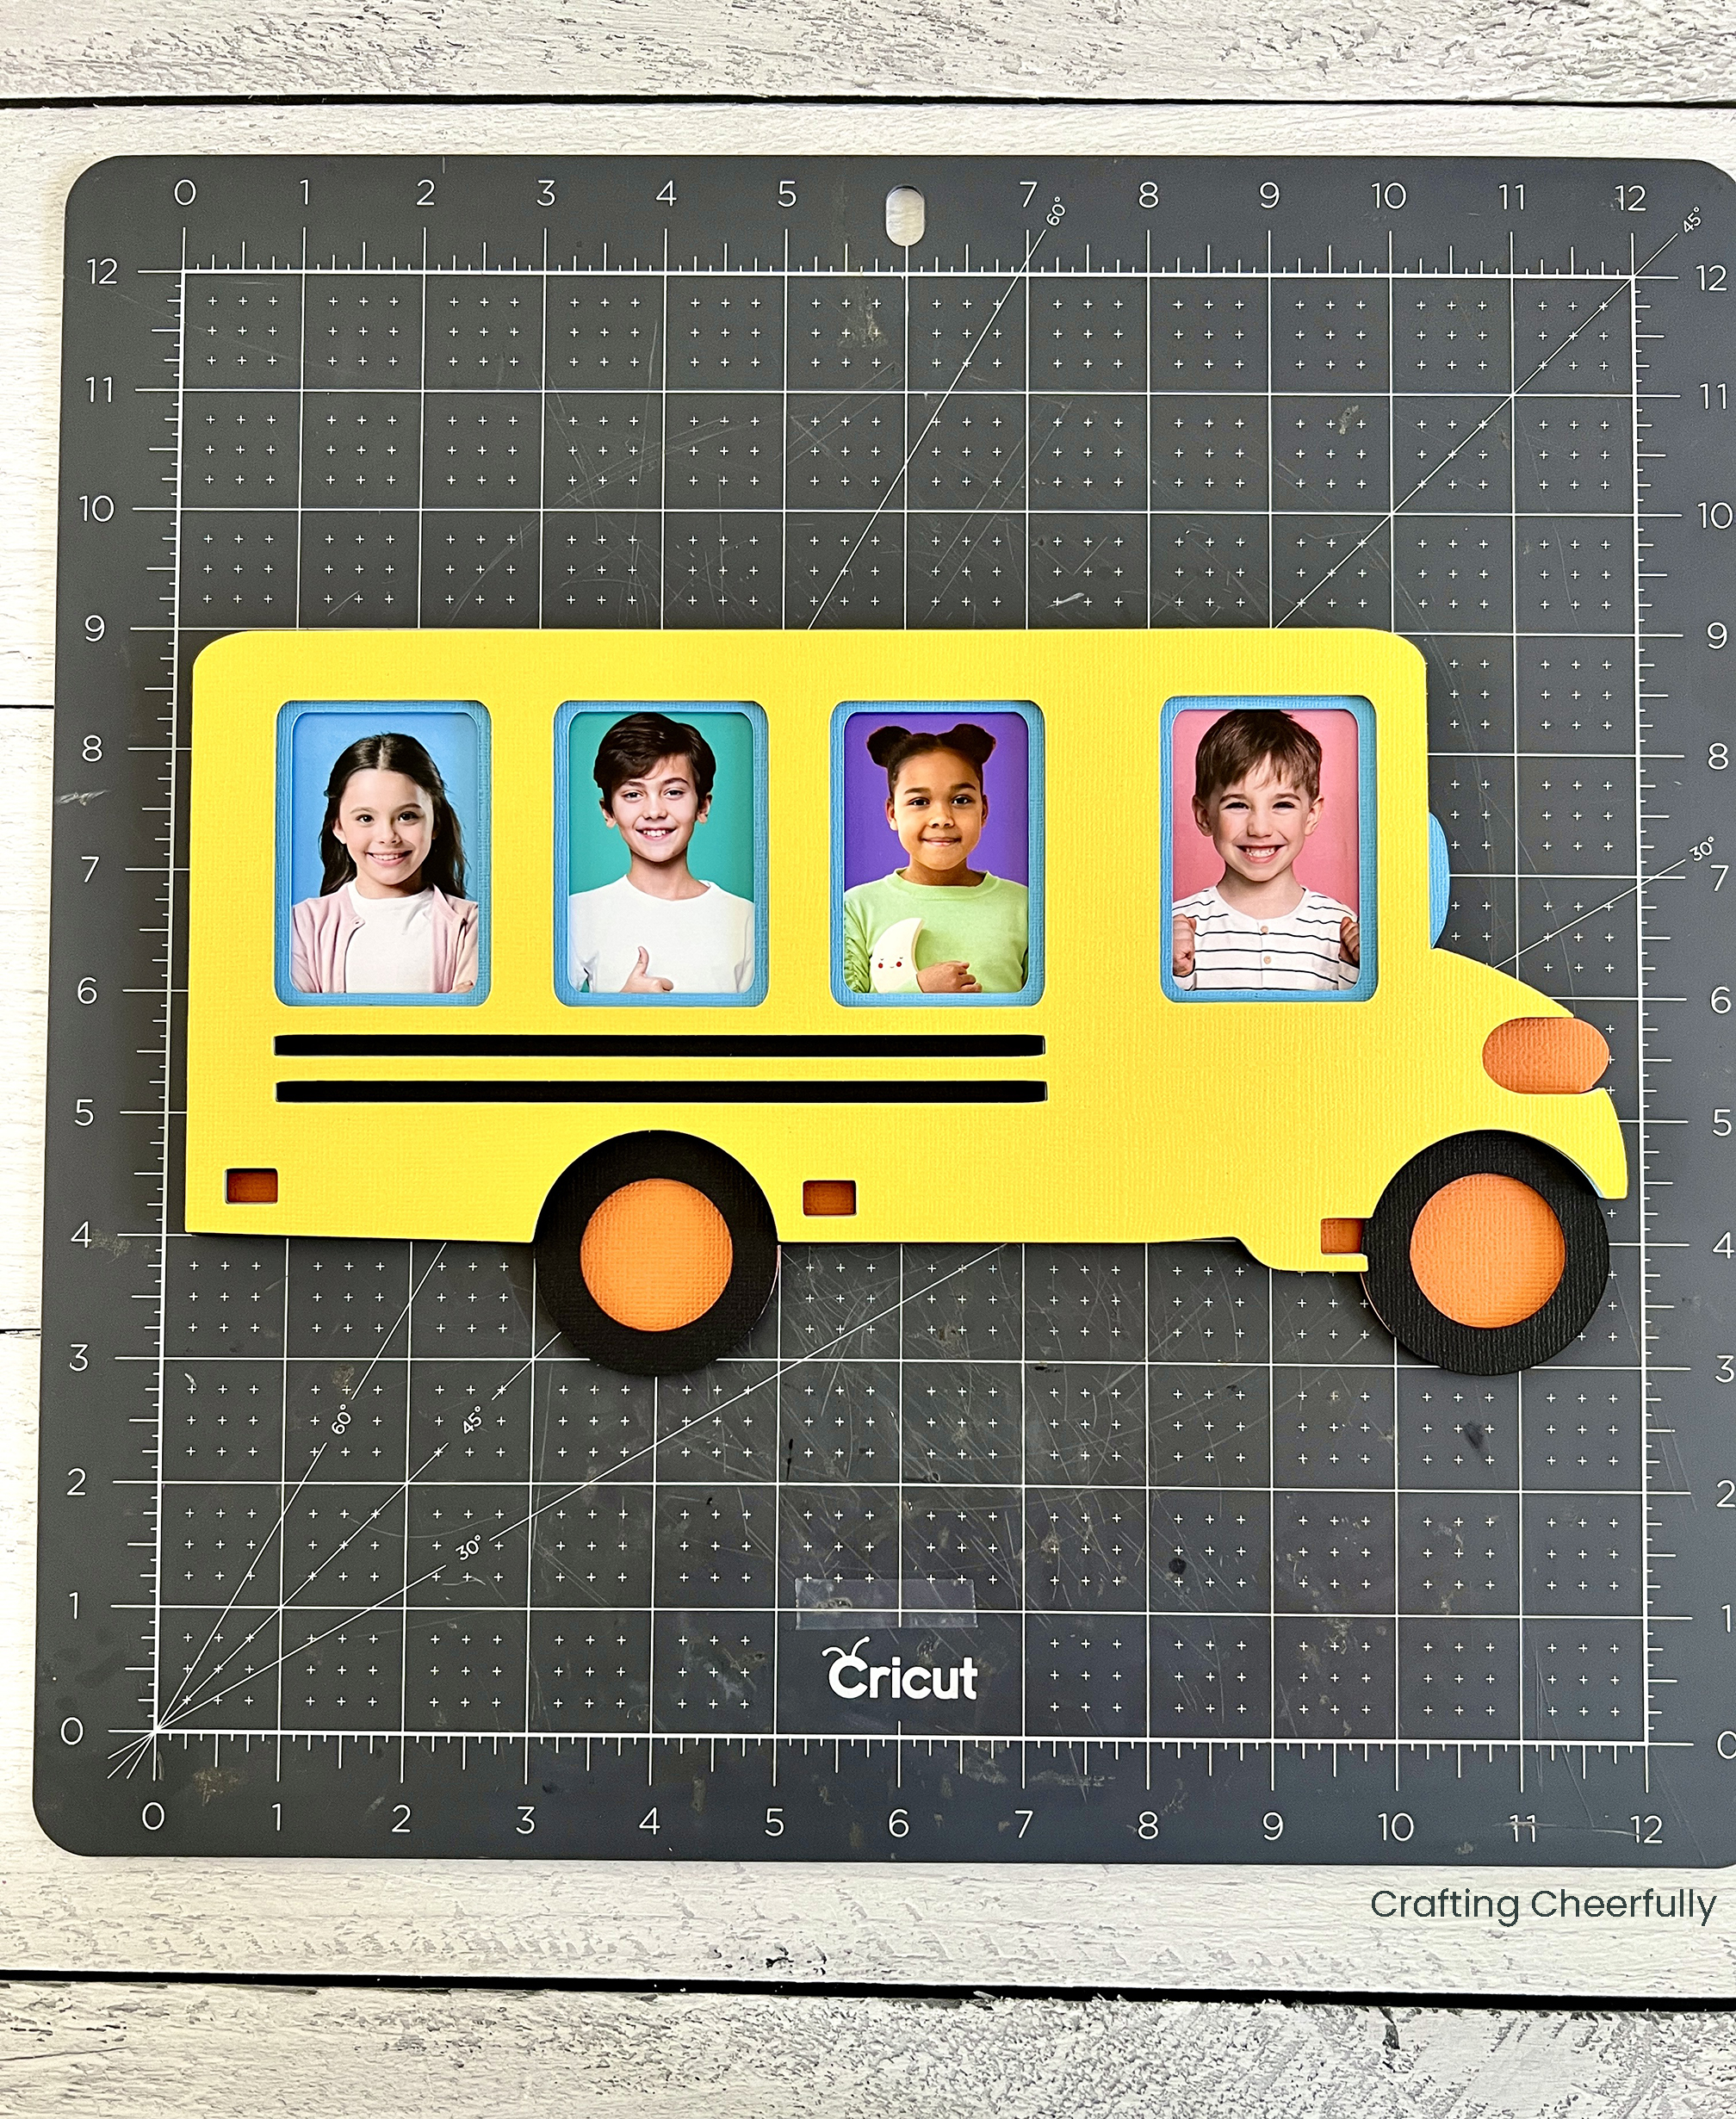
The photos are added to the black layer before starting to assemble the bus. Place the yellow layer over the black layer to mark where the windows are using a pencil. Use the blue layer to make sure you are happy with what parts of the pictures will be showing.
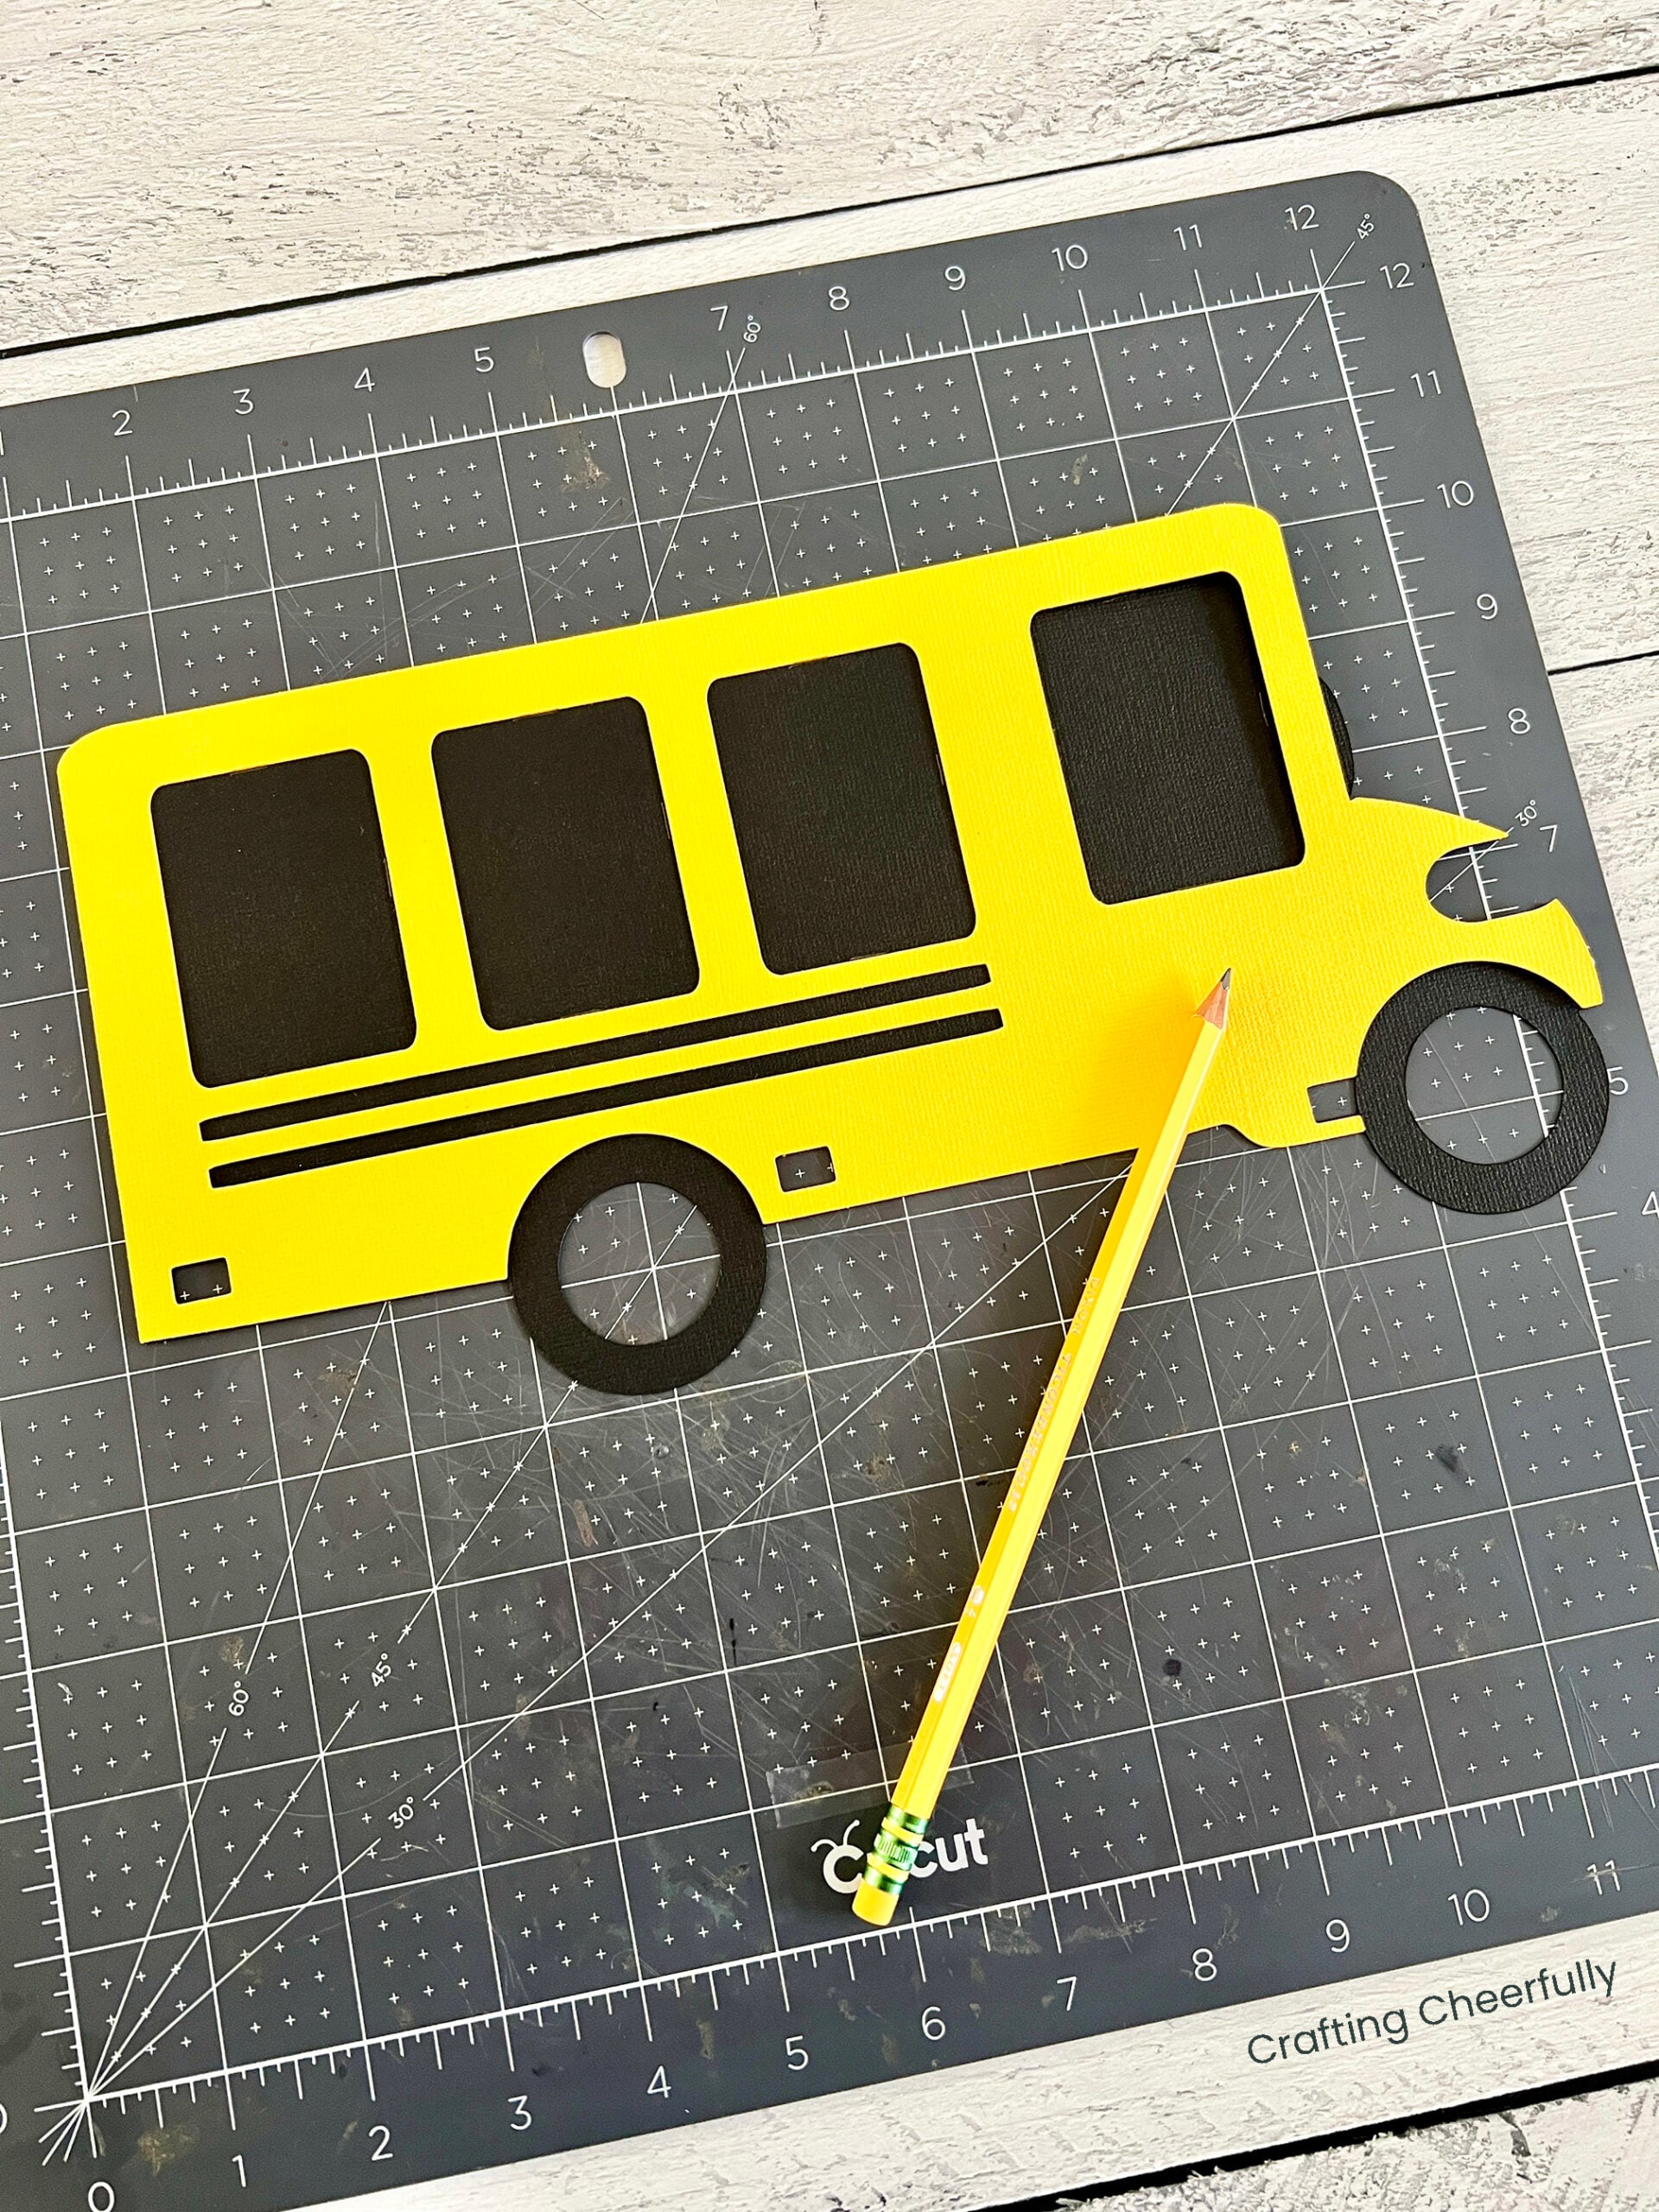
Use a glue pen, or another adhesive, to adhere the photos to the black layer following the pencil guide lines. This will ensure they are in the correct spot. I like using my glue pen, since it gives me a little bit of wiggle room if I need to re-adjust their position.
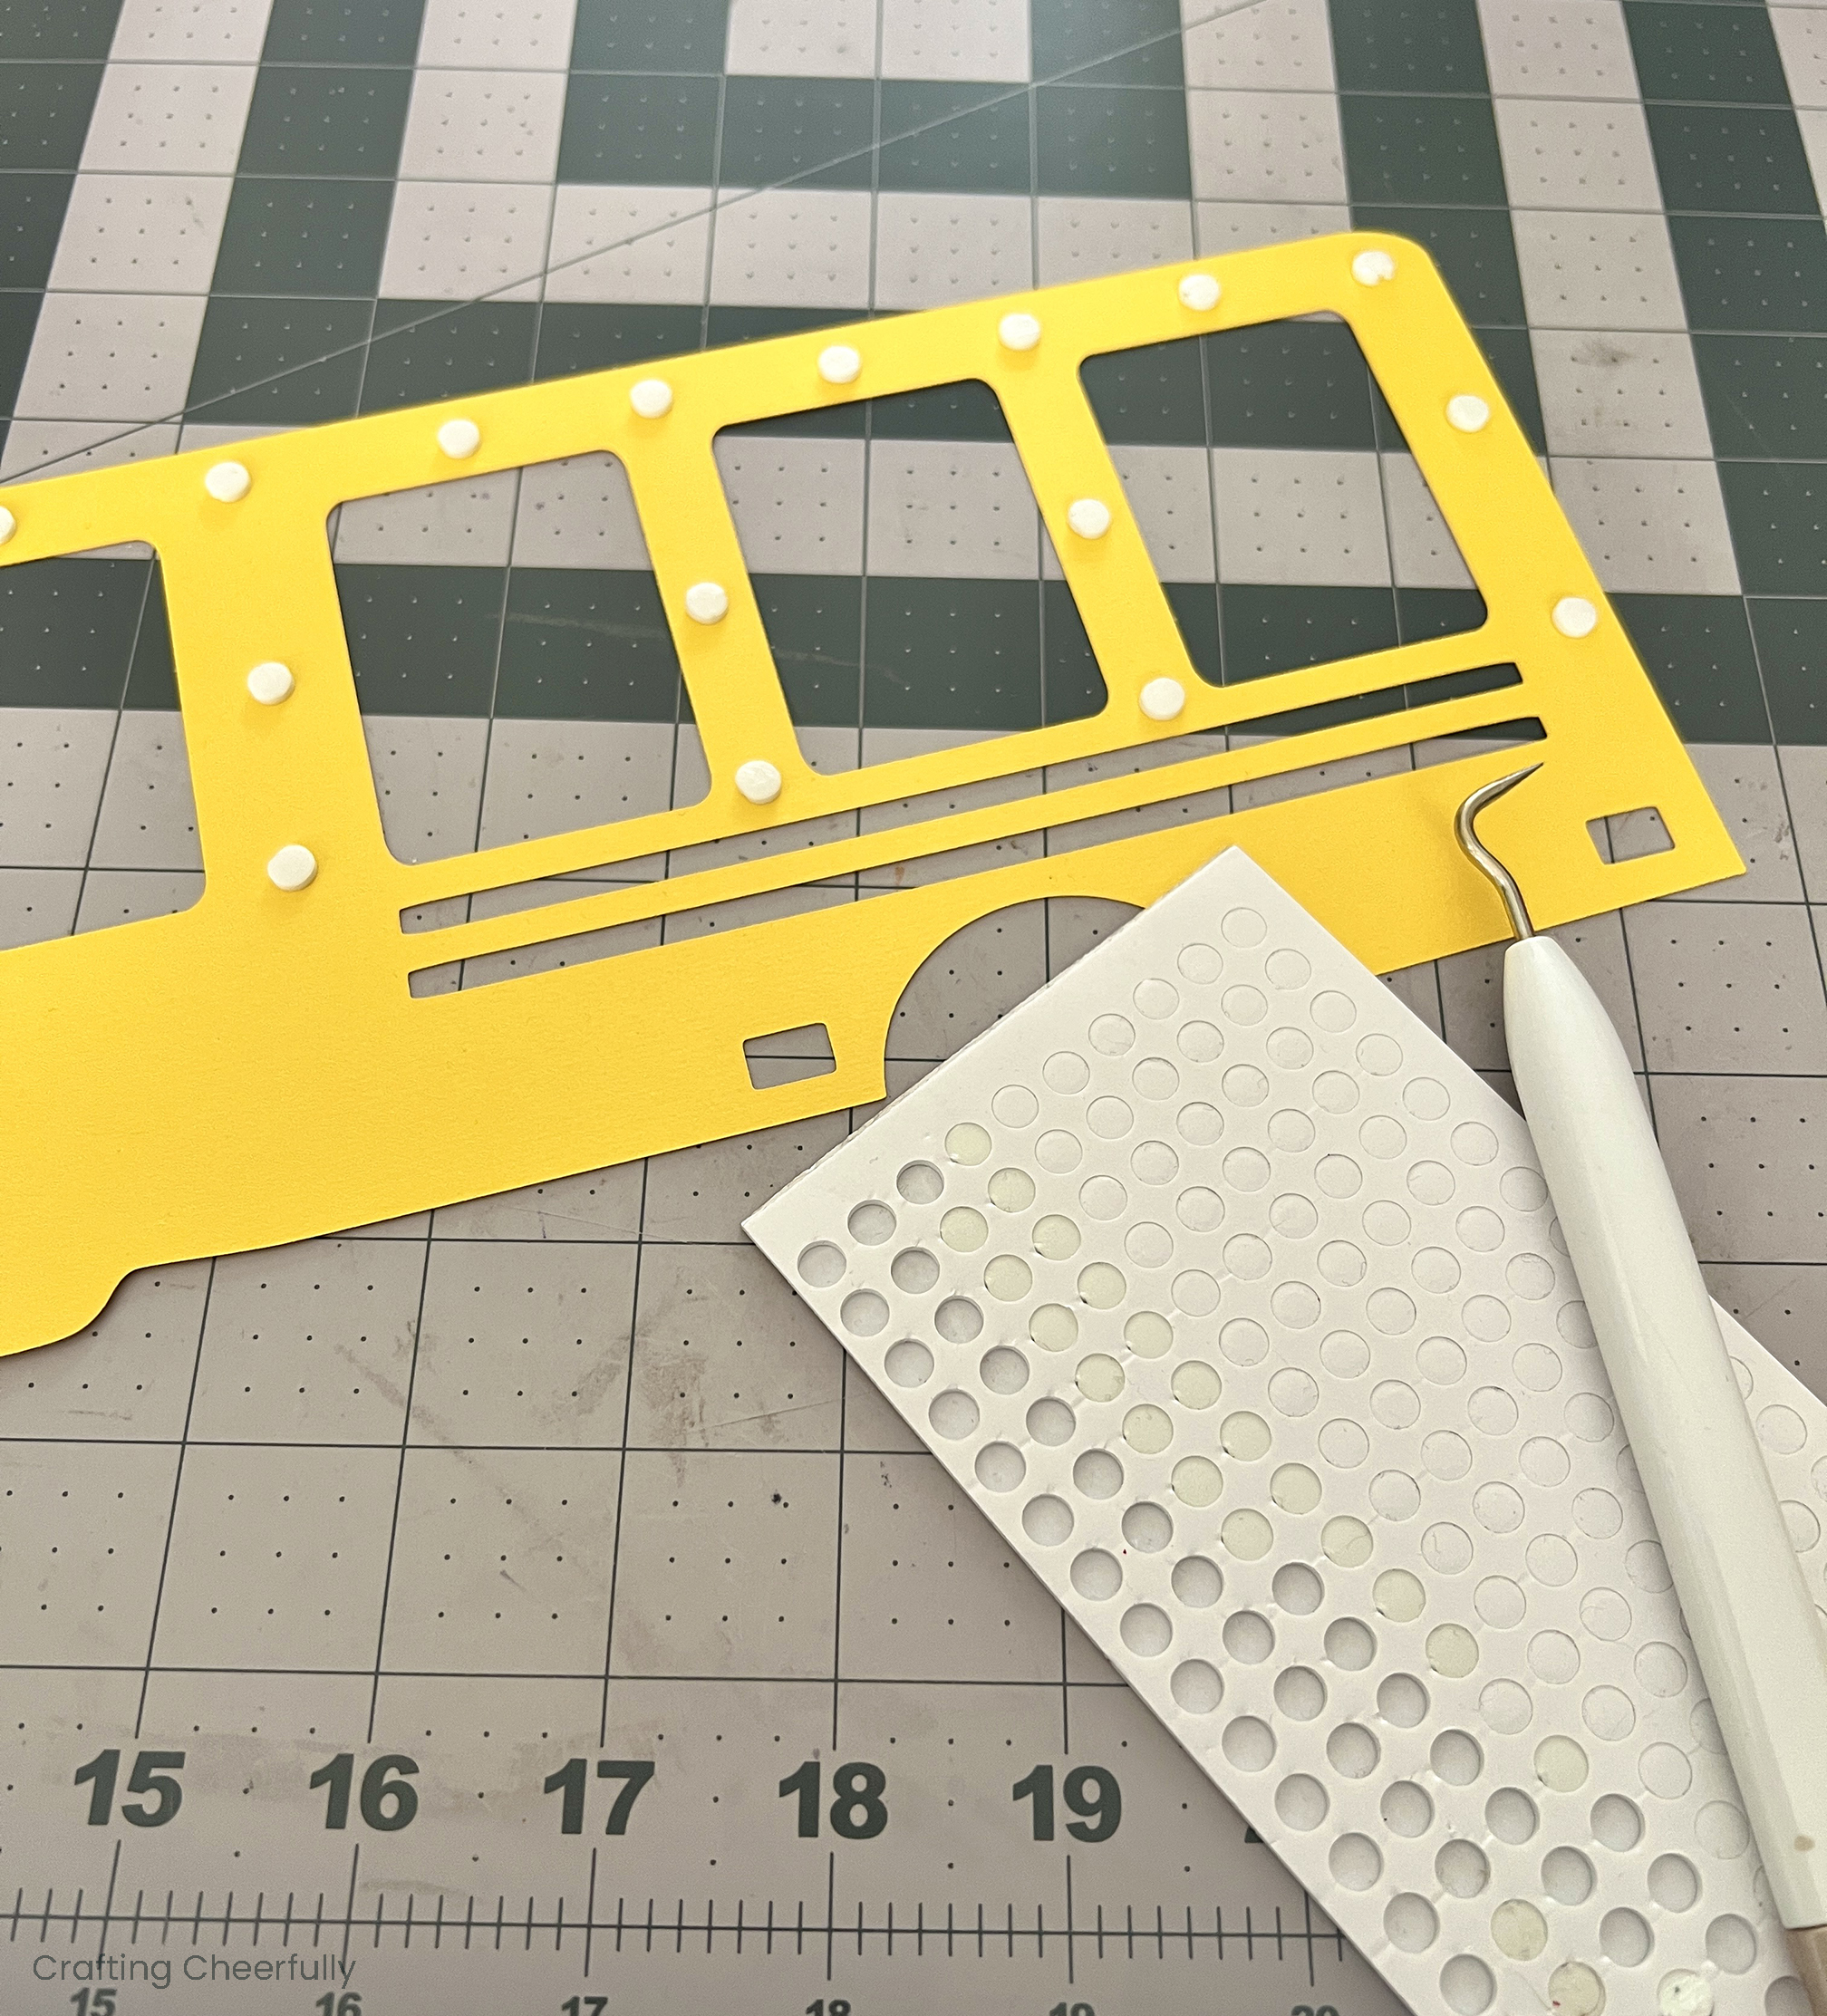
Layering the Paper School Bus
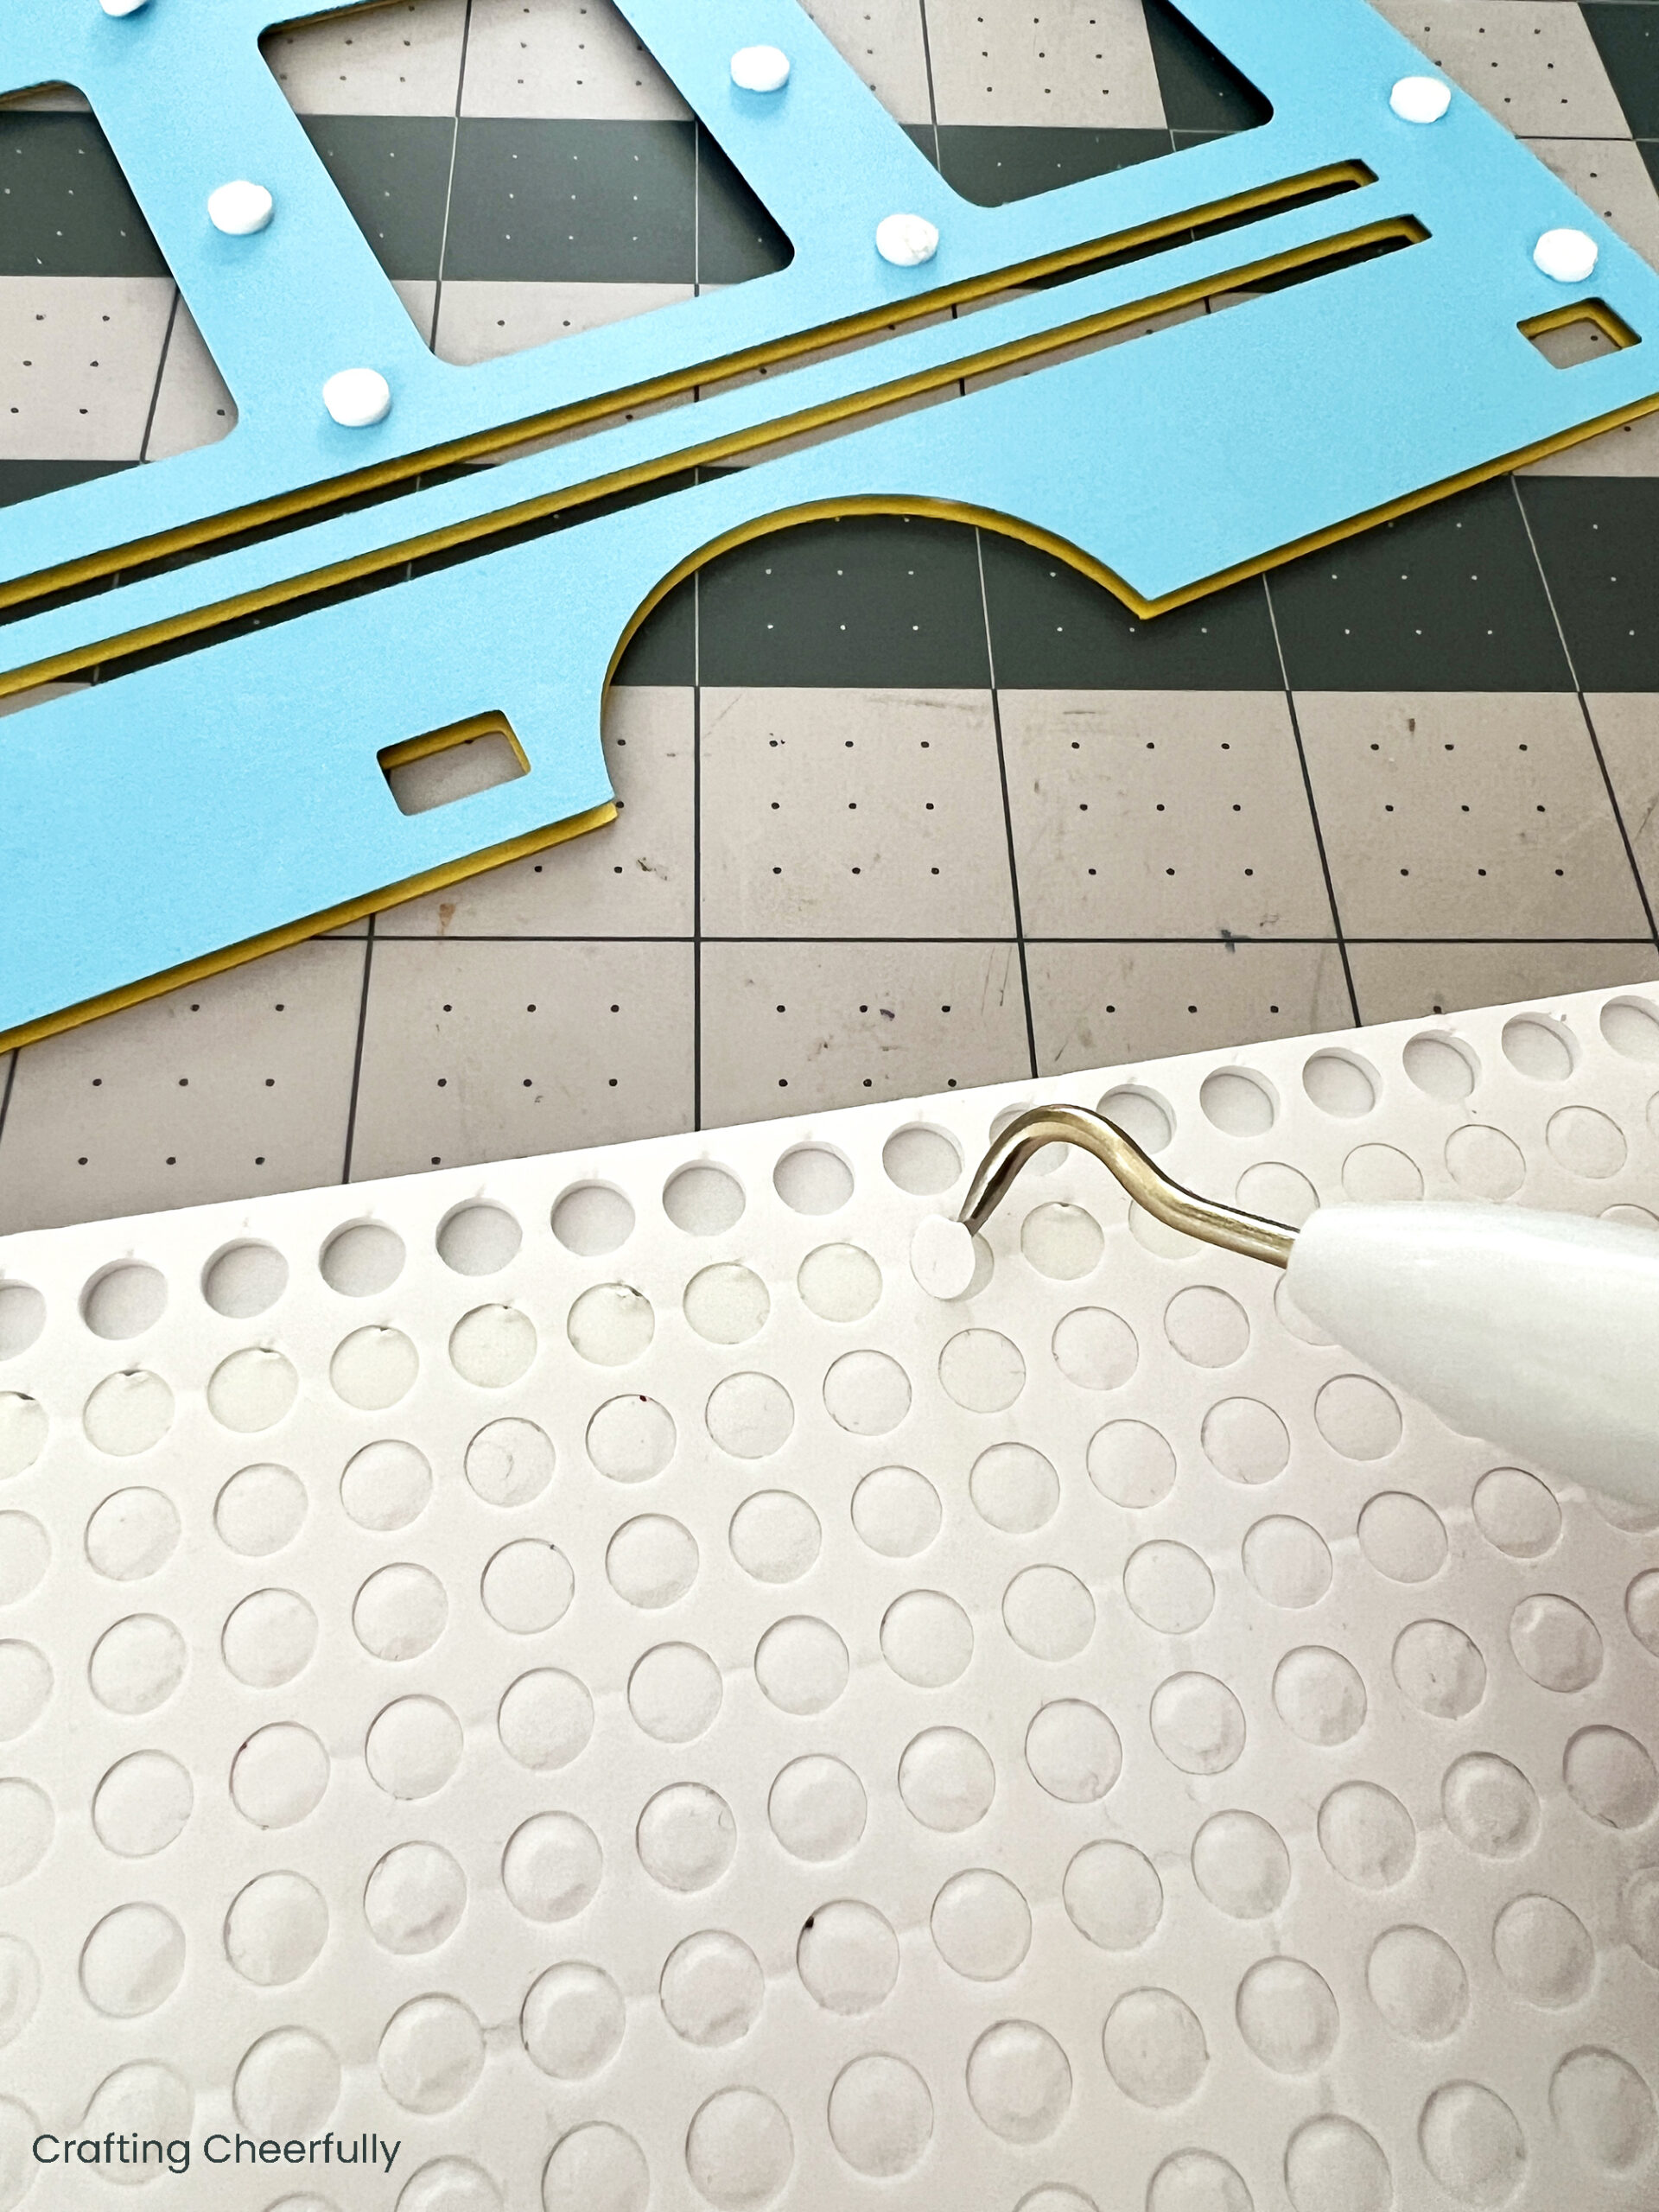
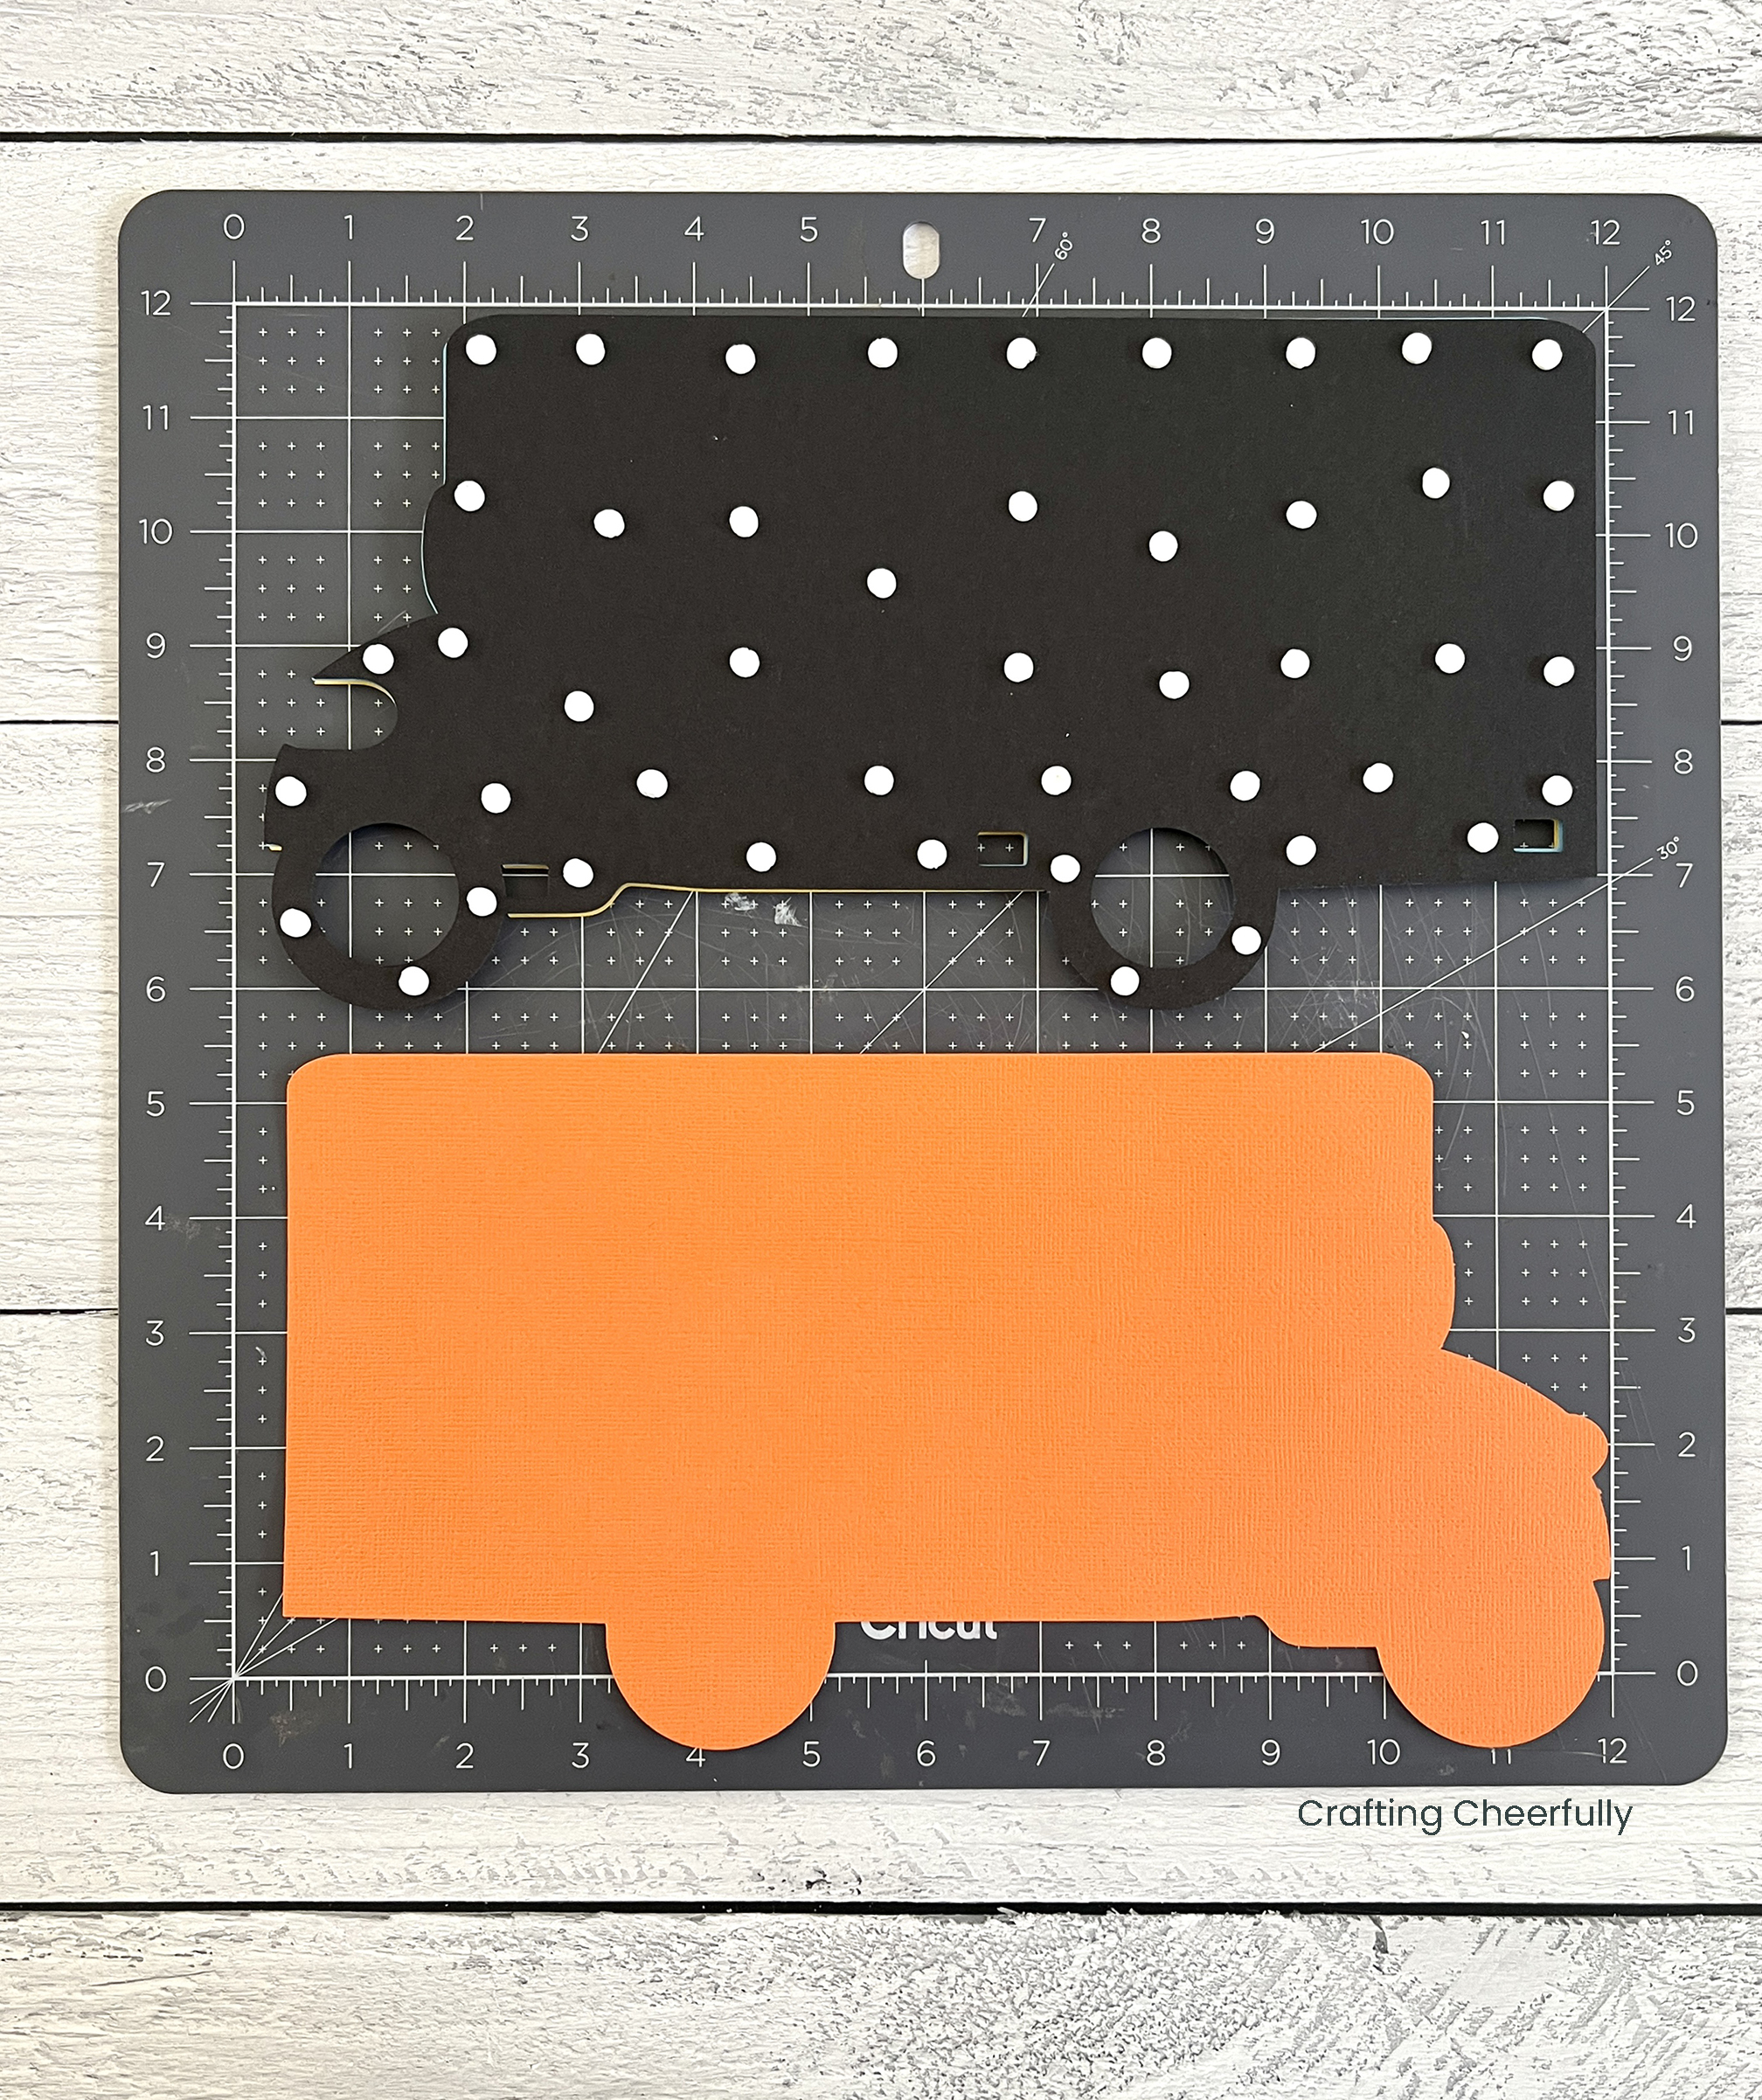
Start with the top yellow layer and add foam adhesive dots to the back. I like to add quite a few dots around the outer edges and fill in at the points where the paper intersects. It can be tricky getting the little dots out of the adhesive sheets, so I use my weeding tool to help remove the paper from each dot and also the dots themselves!
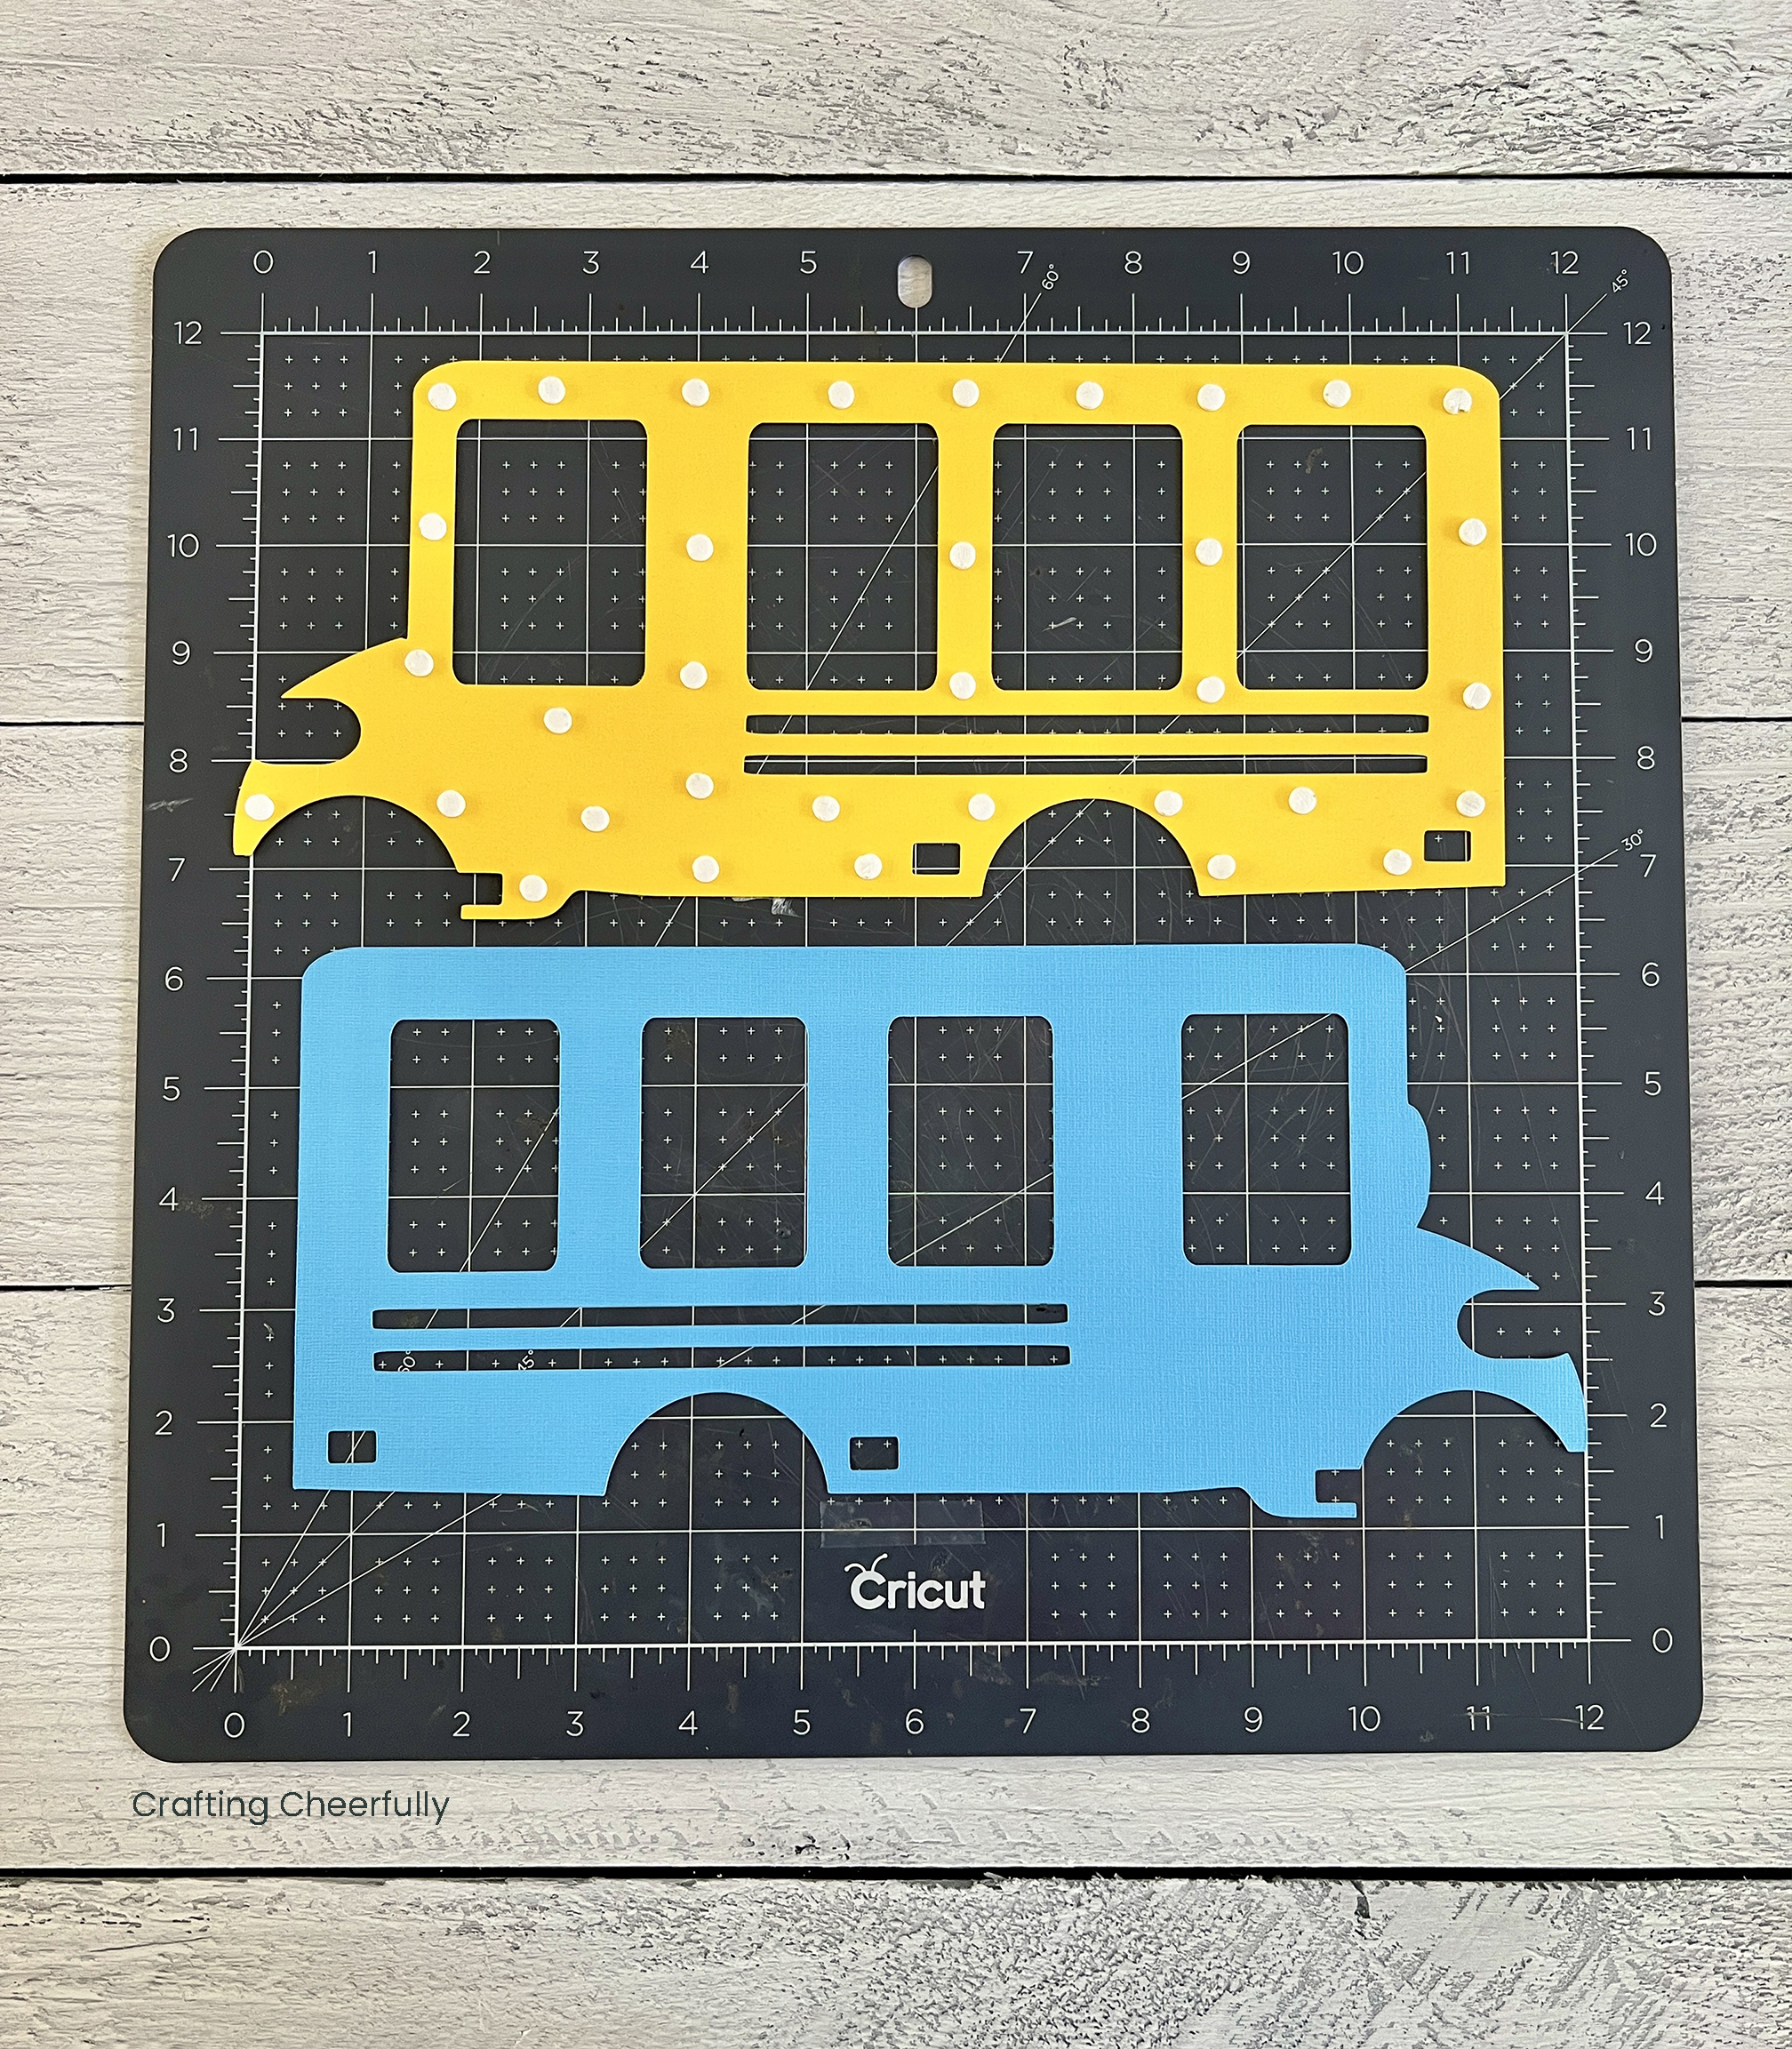
Once you have covered the back with foam dots, apply the top (yellow) layer to the second (light blue) layer.
Repeat for the next layer. Add adhesive dots to the back of the second layer (light blue) and adhere it to the third layer (black layer). I find it best to add my dots in the same place from layer to layer.
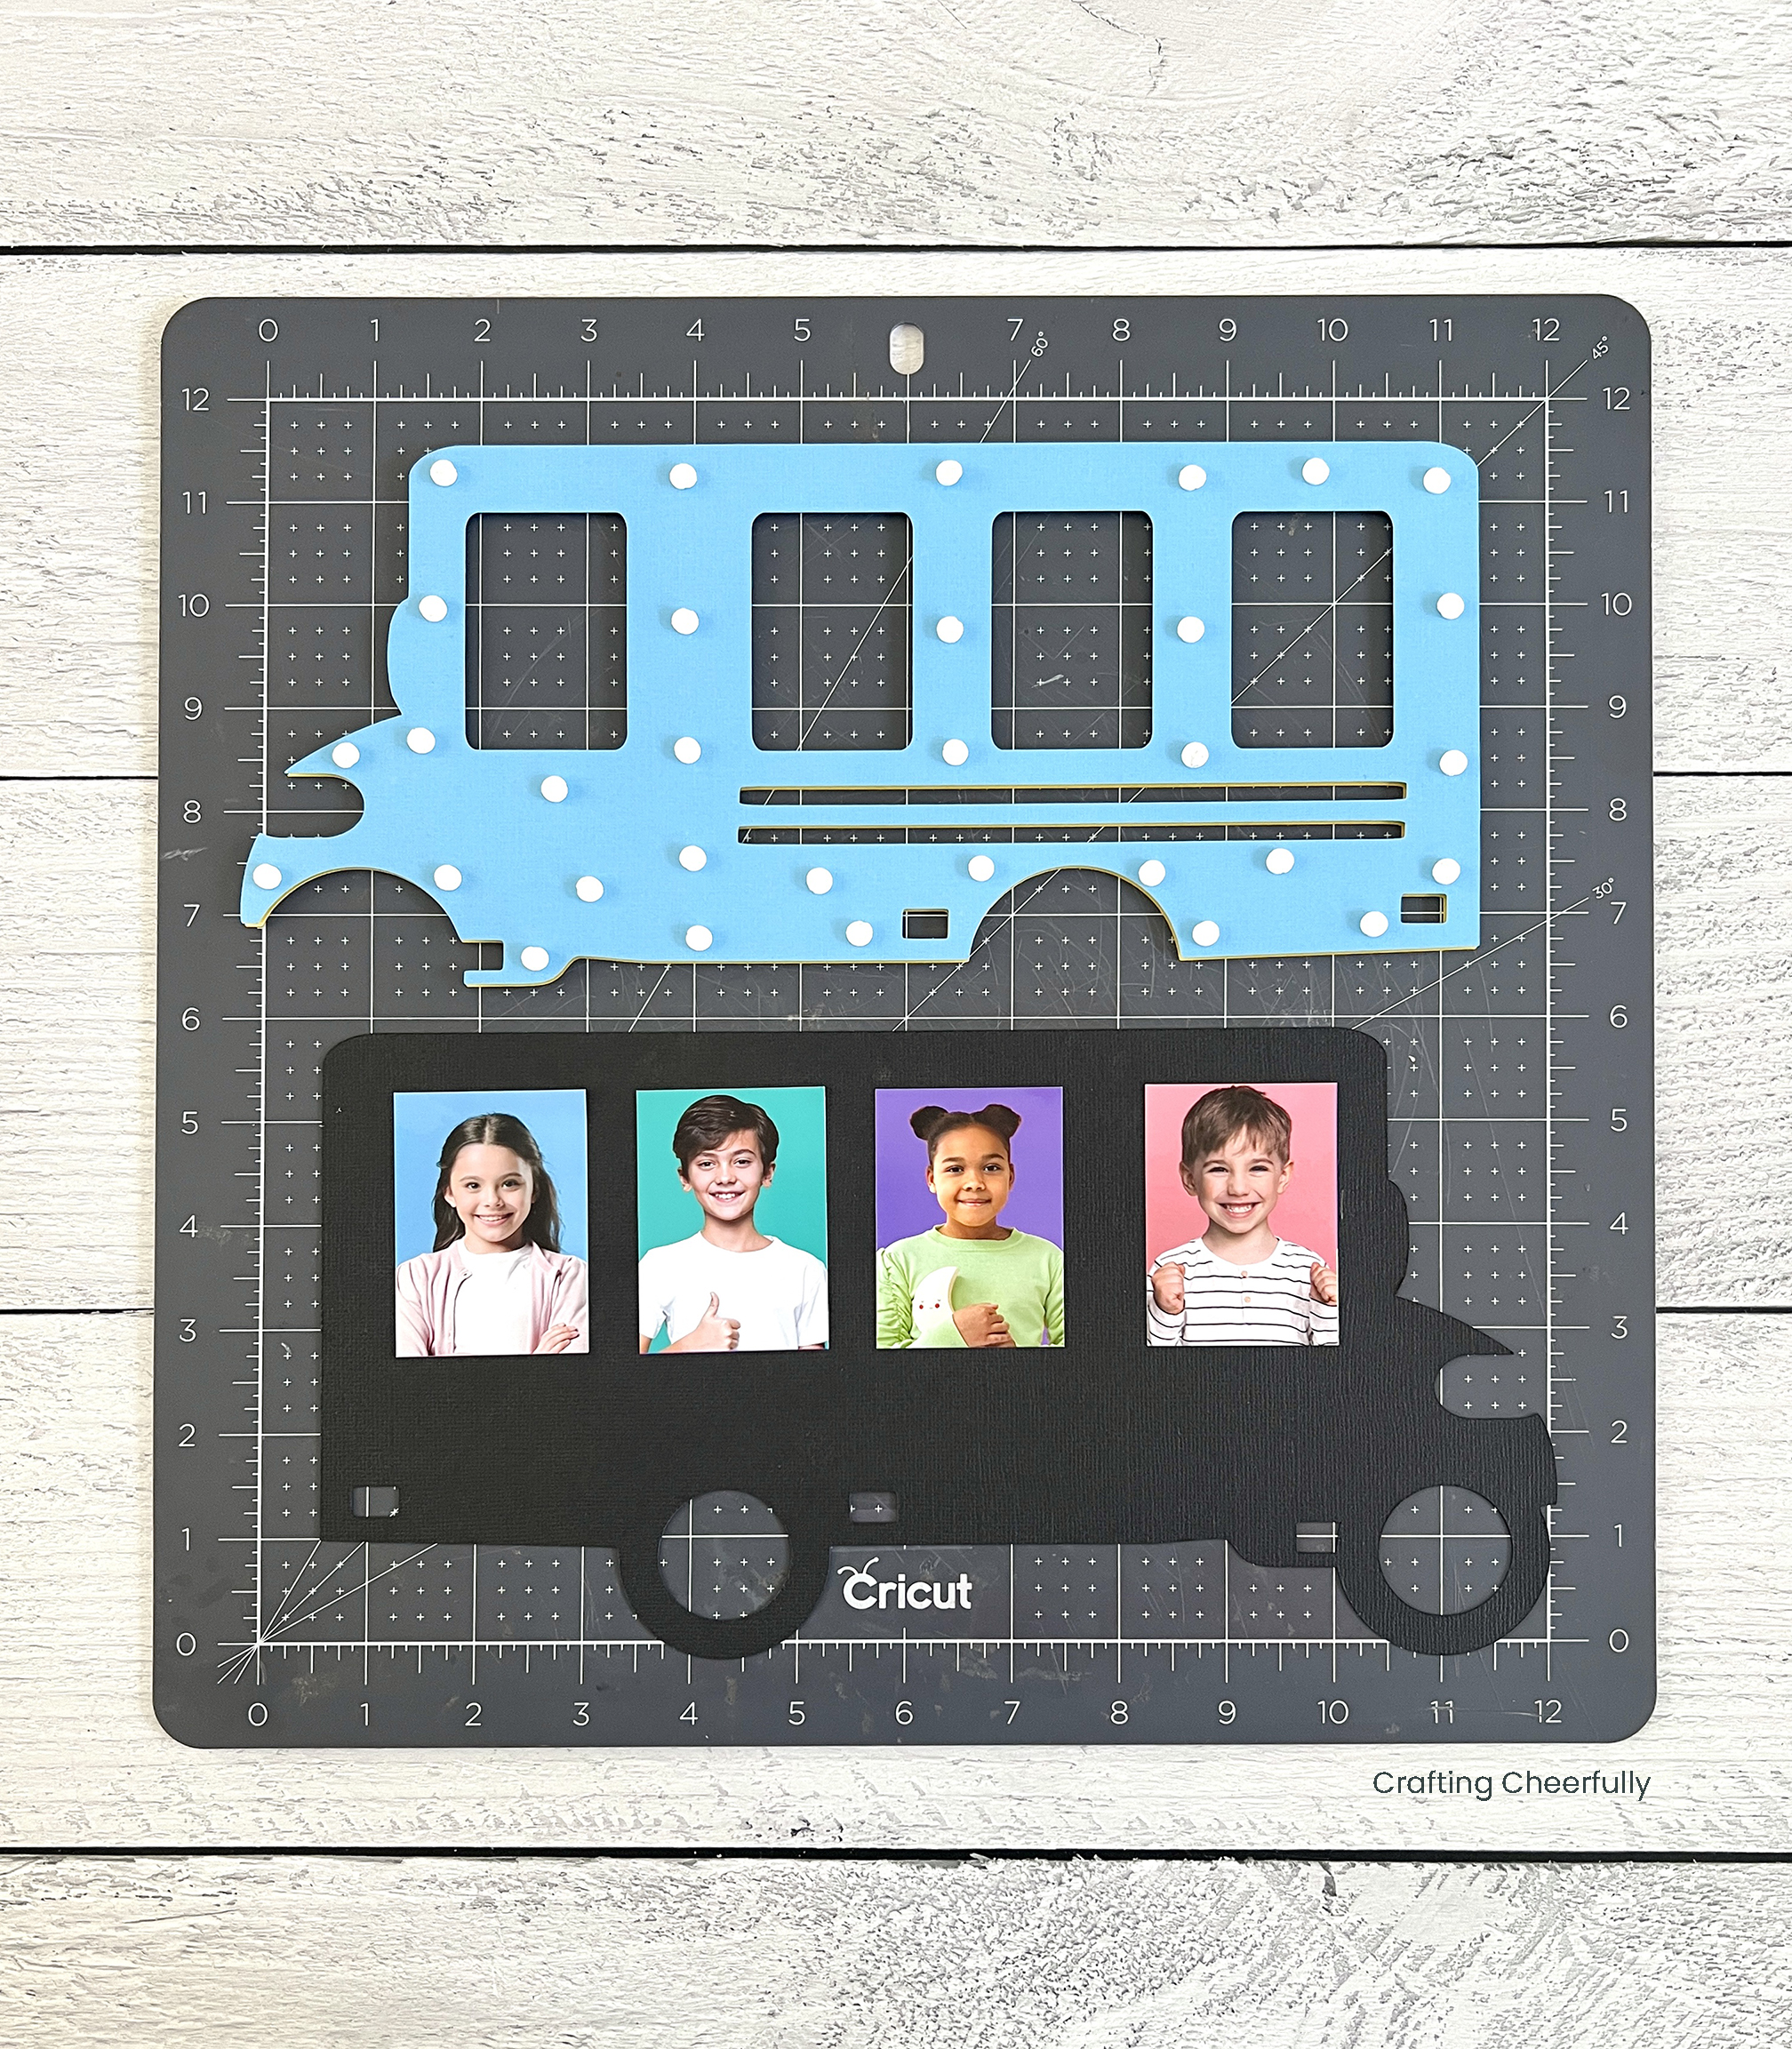
Finally, adhere the third layer (black) to the bottom layer (orange). If you plan to use the chipboard layer, glue the chipboard to the back of the orange cardstock before attaching it to the black layer.
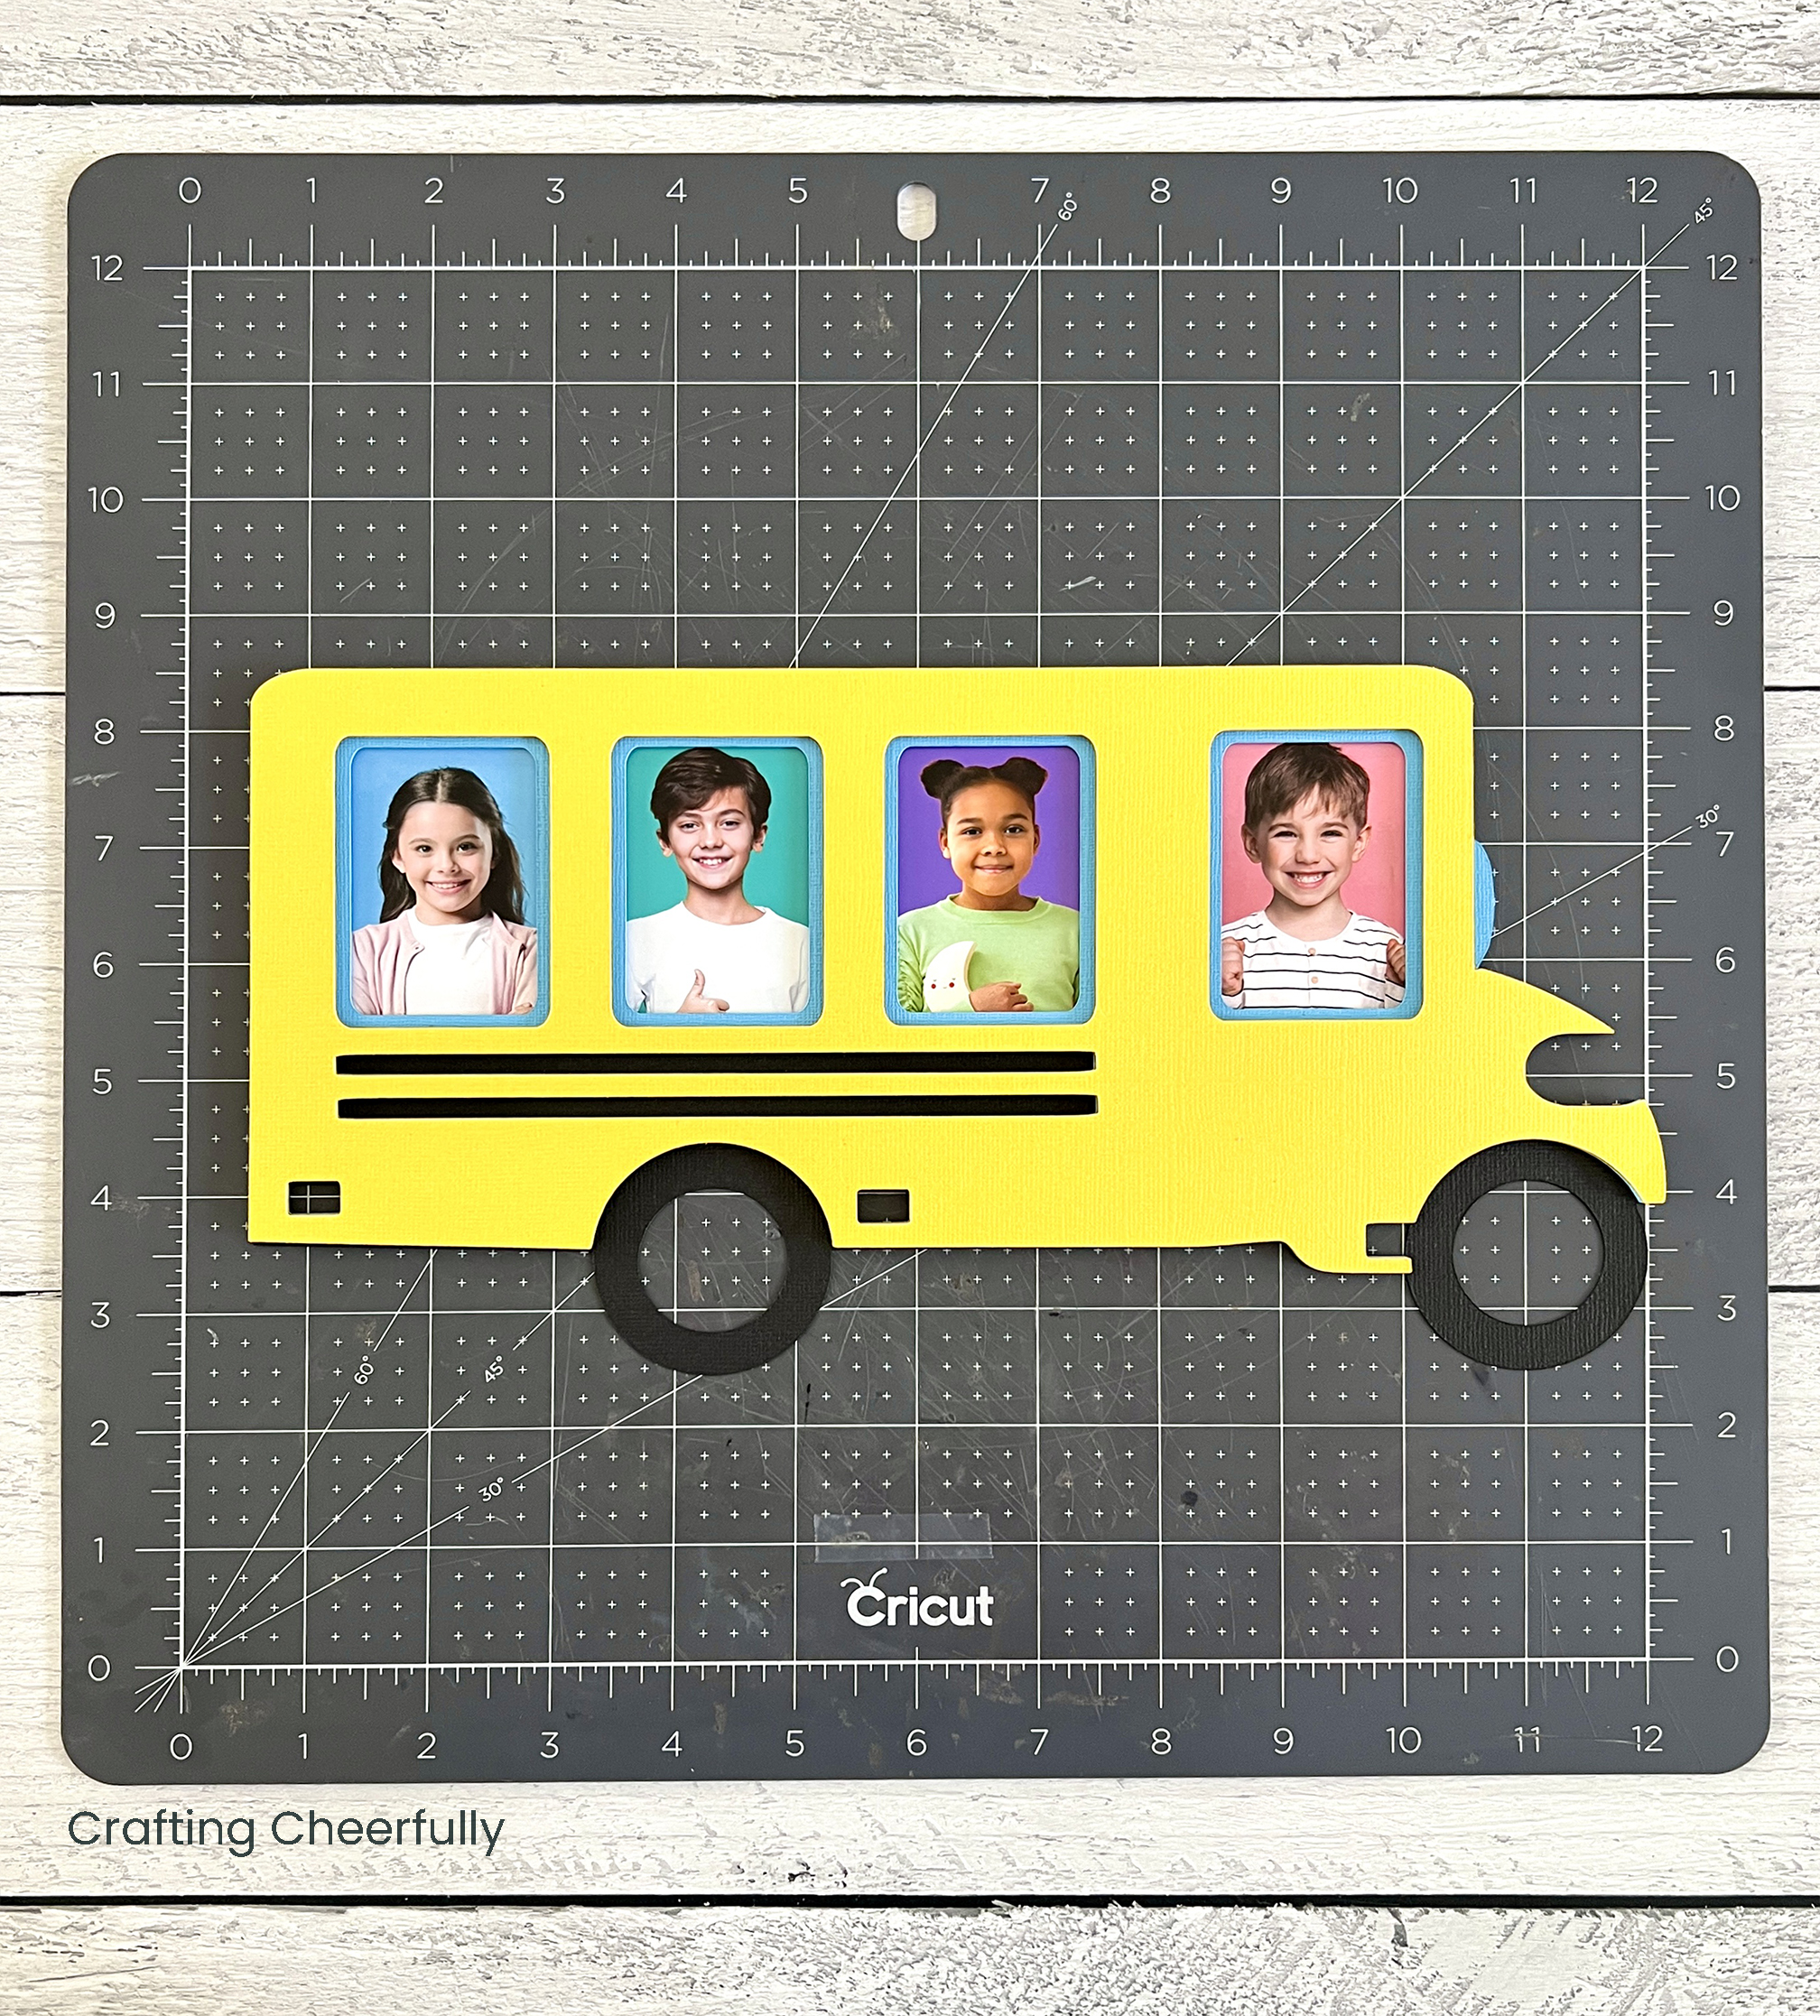
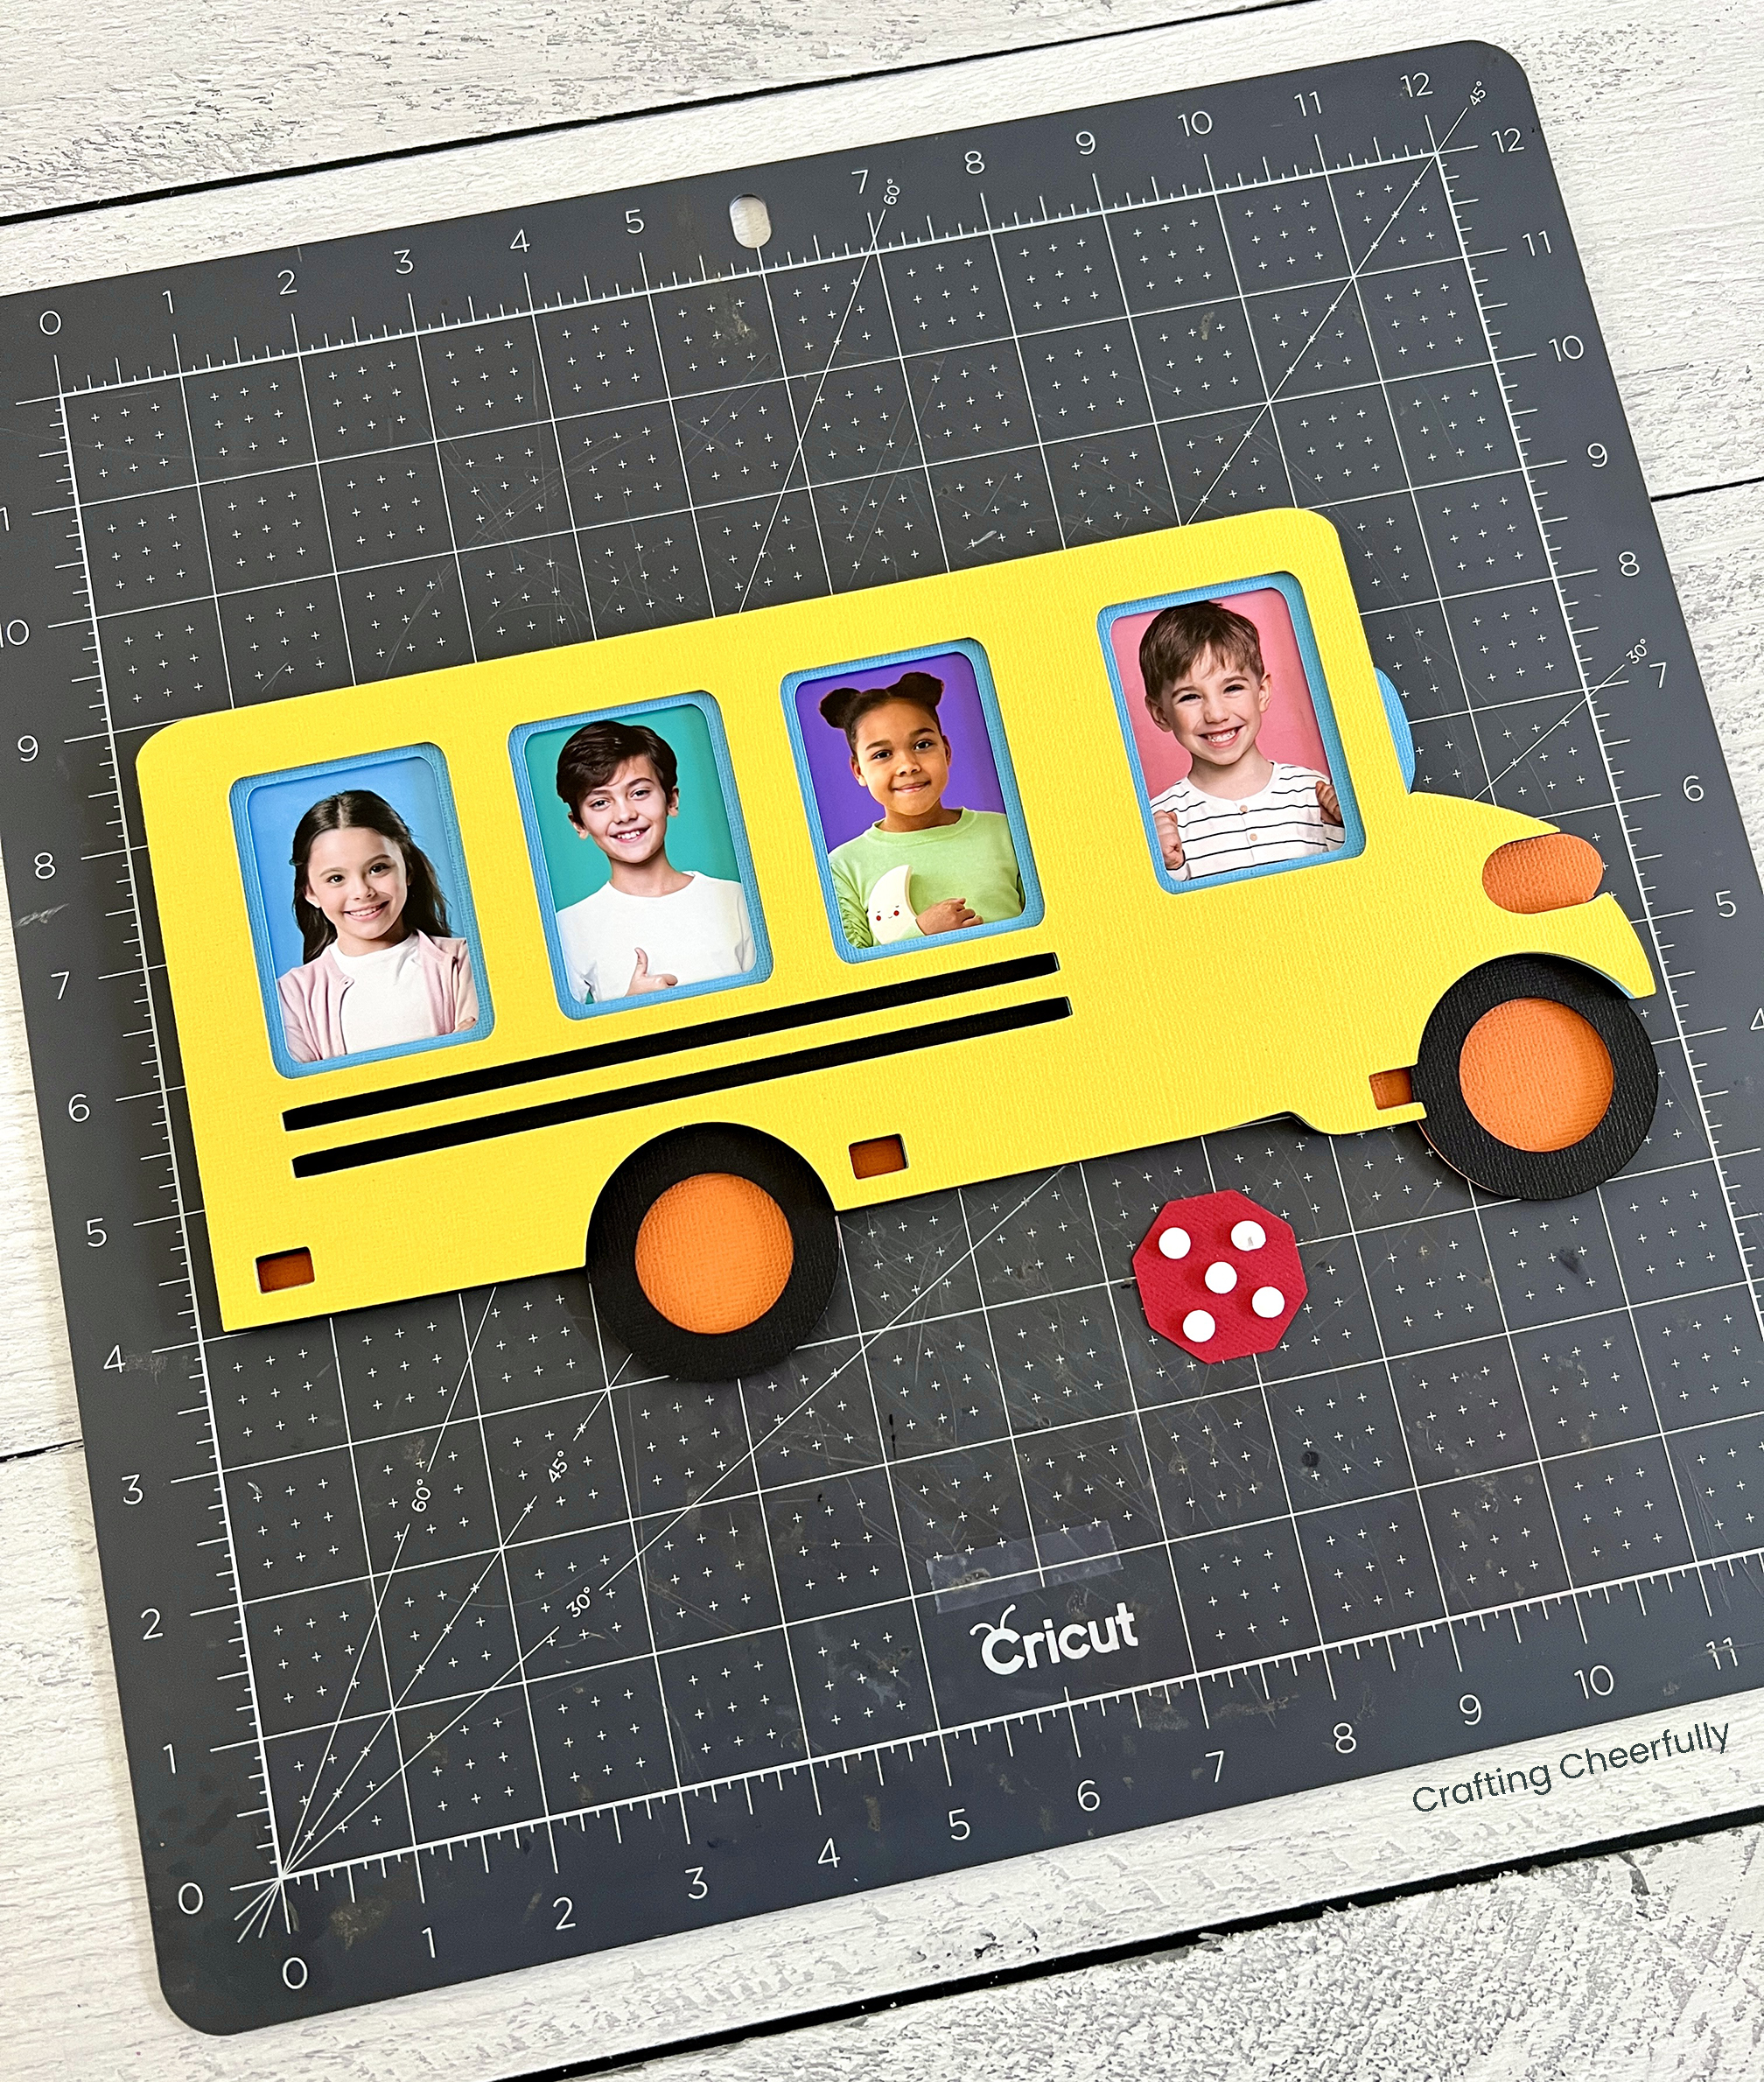
Add the Stop Sign
The very last step is adding a little red stop sign. Place a few foam dots on the back and apply it to the bus under the first window.
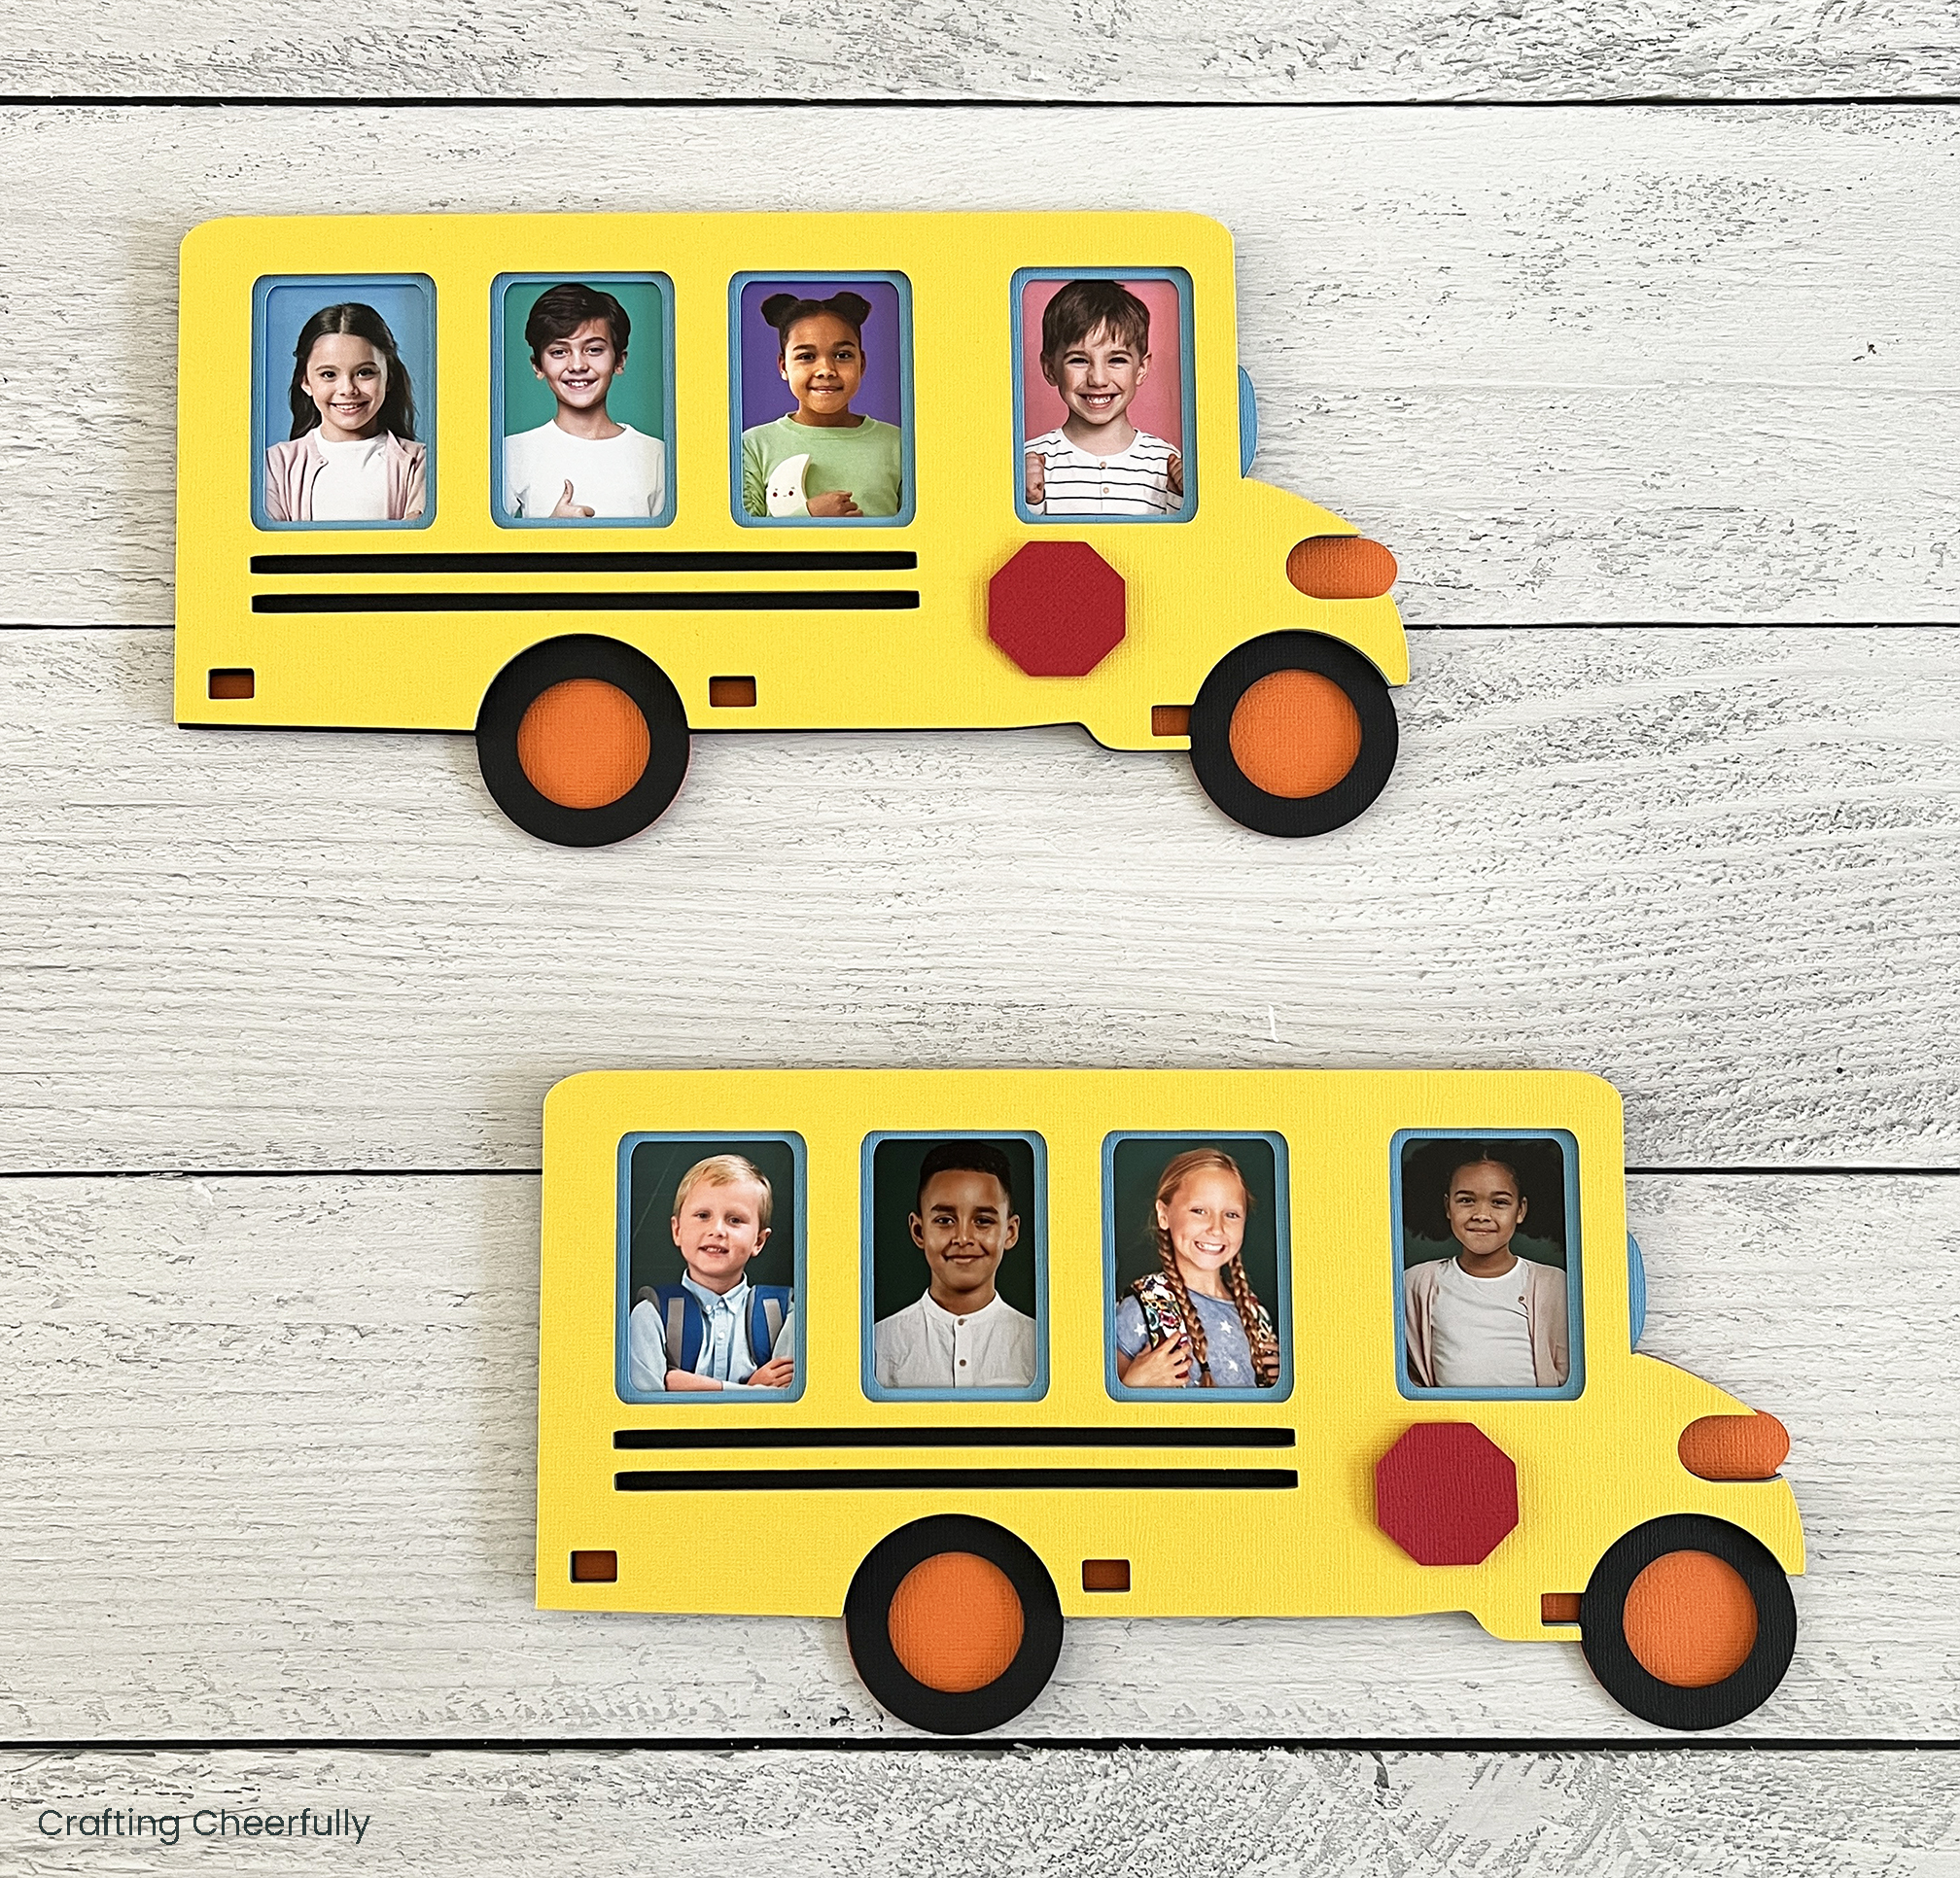
The school bus frame is finished! I hope you enjoyed creating this fun back-to-school craft. It’s another great layered paper craft you can whip up quickly with your Cricut cutting machine. I love that it only takes a few supplies – cardstock, foam dots, and glue!
Check out my other school-themed crafts for more fun ideas for back-to-school, learning decor, and fun teacher gifts! I have a couple more fun, school-themed crafts that can be made with your Cricut including my Apple Gift Boxes, Handmade Notepads, and Apple Dry Erase Board.