Christmas Tree Advent Calendar
Create a festive Christmas Tree Advent Calendar for the holiday season using tiny green boxes, cardstock, and gold foil!


Hello Crafty Friends! It’s the final day of my series “12 Days of Holiday Crafts” and I’m sharing one final Christmas craft with you – a DIY Christmas Tree Advent Calendar! This festive calendar is made from tiny boxes, cardstock and metallic gold vinyl for some extra shine!
I love creating unique Advent Calendars and have made a lot of them over the years. From a Puzzle Advent Calendar and Beer Advent Calendar I made almost a decade ago (before they were selling them in stores) to one of my favorites, a Kindness Advent Calendar we use year after year. They have all been so much fun to make and even more fun to fill with goodies and surprises.
I created a new Advent Calendar this year to gift to someone special and it is made almost entirely from tiny green boxes I found on Amazon. I have used these small boxes before and love their size – they are perfect for candy, small trinkets, and notes.
The tree is topped with a dimensional star created by layering different gold paper and vinyl I had on hand. It turned out so glitzy and fun. It matches the gold ornament numbers on each box – a great find in Cricut Design Space! If you don’t have a cutting machine, you could create the numbers on each box using stickers or write them with a gold paint pen.

How to Make a Christmas Tree Advent Calendar
Supplies Needed:
- Cricut Design Space File
- Small green boxes and gold ribbon 2″ x 2″ x 2″
- Gold numbers
- I used Gold Textured Metallic Vinyl and this Cricut Design Space File
- You can also use a gold paint pen to write the letters or number stickers
- Gold cardstock
- Green cardstock – 3 sheets of 12″ x 12″ paper
- Chipboard, foam board or cardboard for the base
- 1/2″ Double-sided tape
- Foam Dots
- Scissors
- If you are using a Cutting Machine:
Create the Gold Numbers
Step One: Create the gold numbers to label each of the green boxes. I chose to use my Cricut Explore and cut each of the numbers from gold metallic foil. You can use my Cricut Design Space file to cut the same ornament numbers as I did, or you can make the numbers your own way! If you don’t have a cutting machine, don’t worry, use gold stickers or write the numbers directly on the green boxes using a gold paint pen instead.

Create the Tree Base
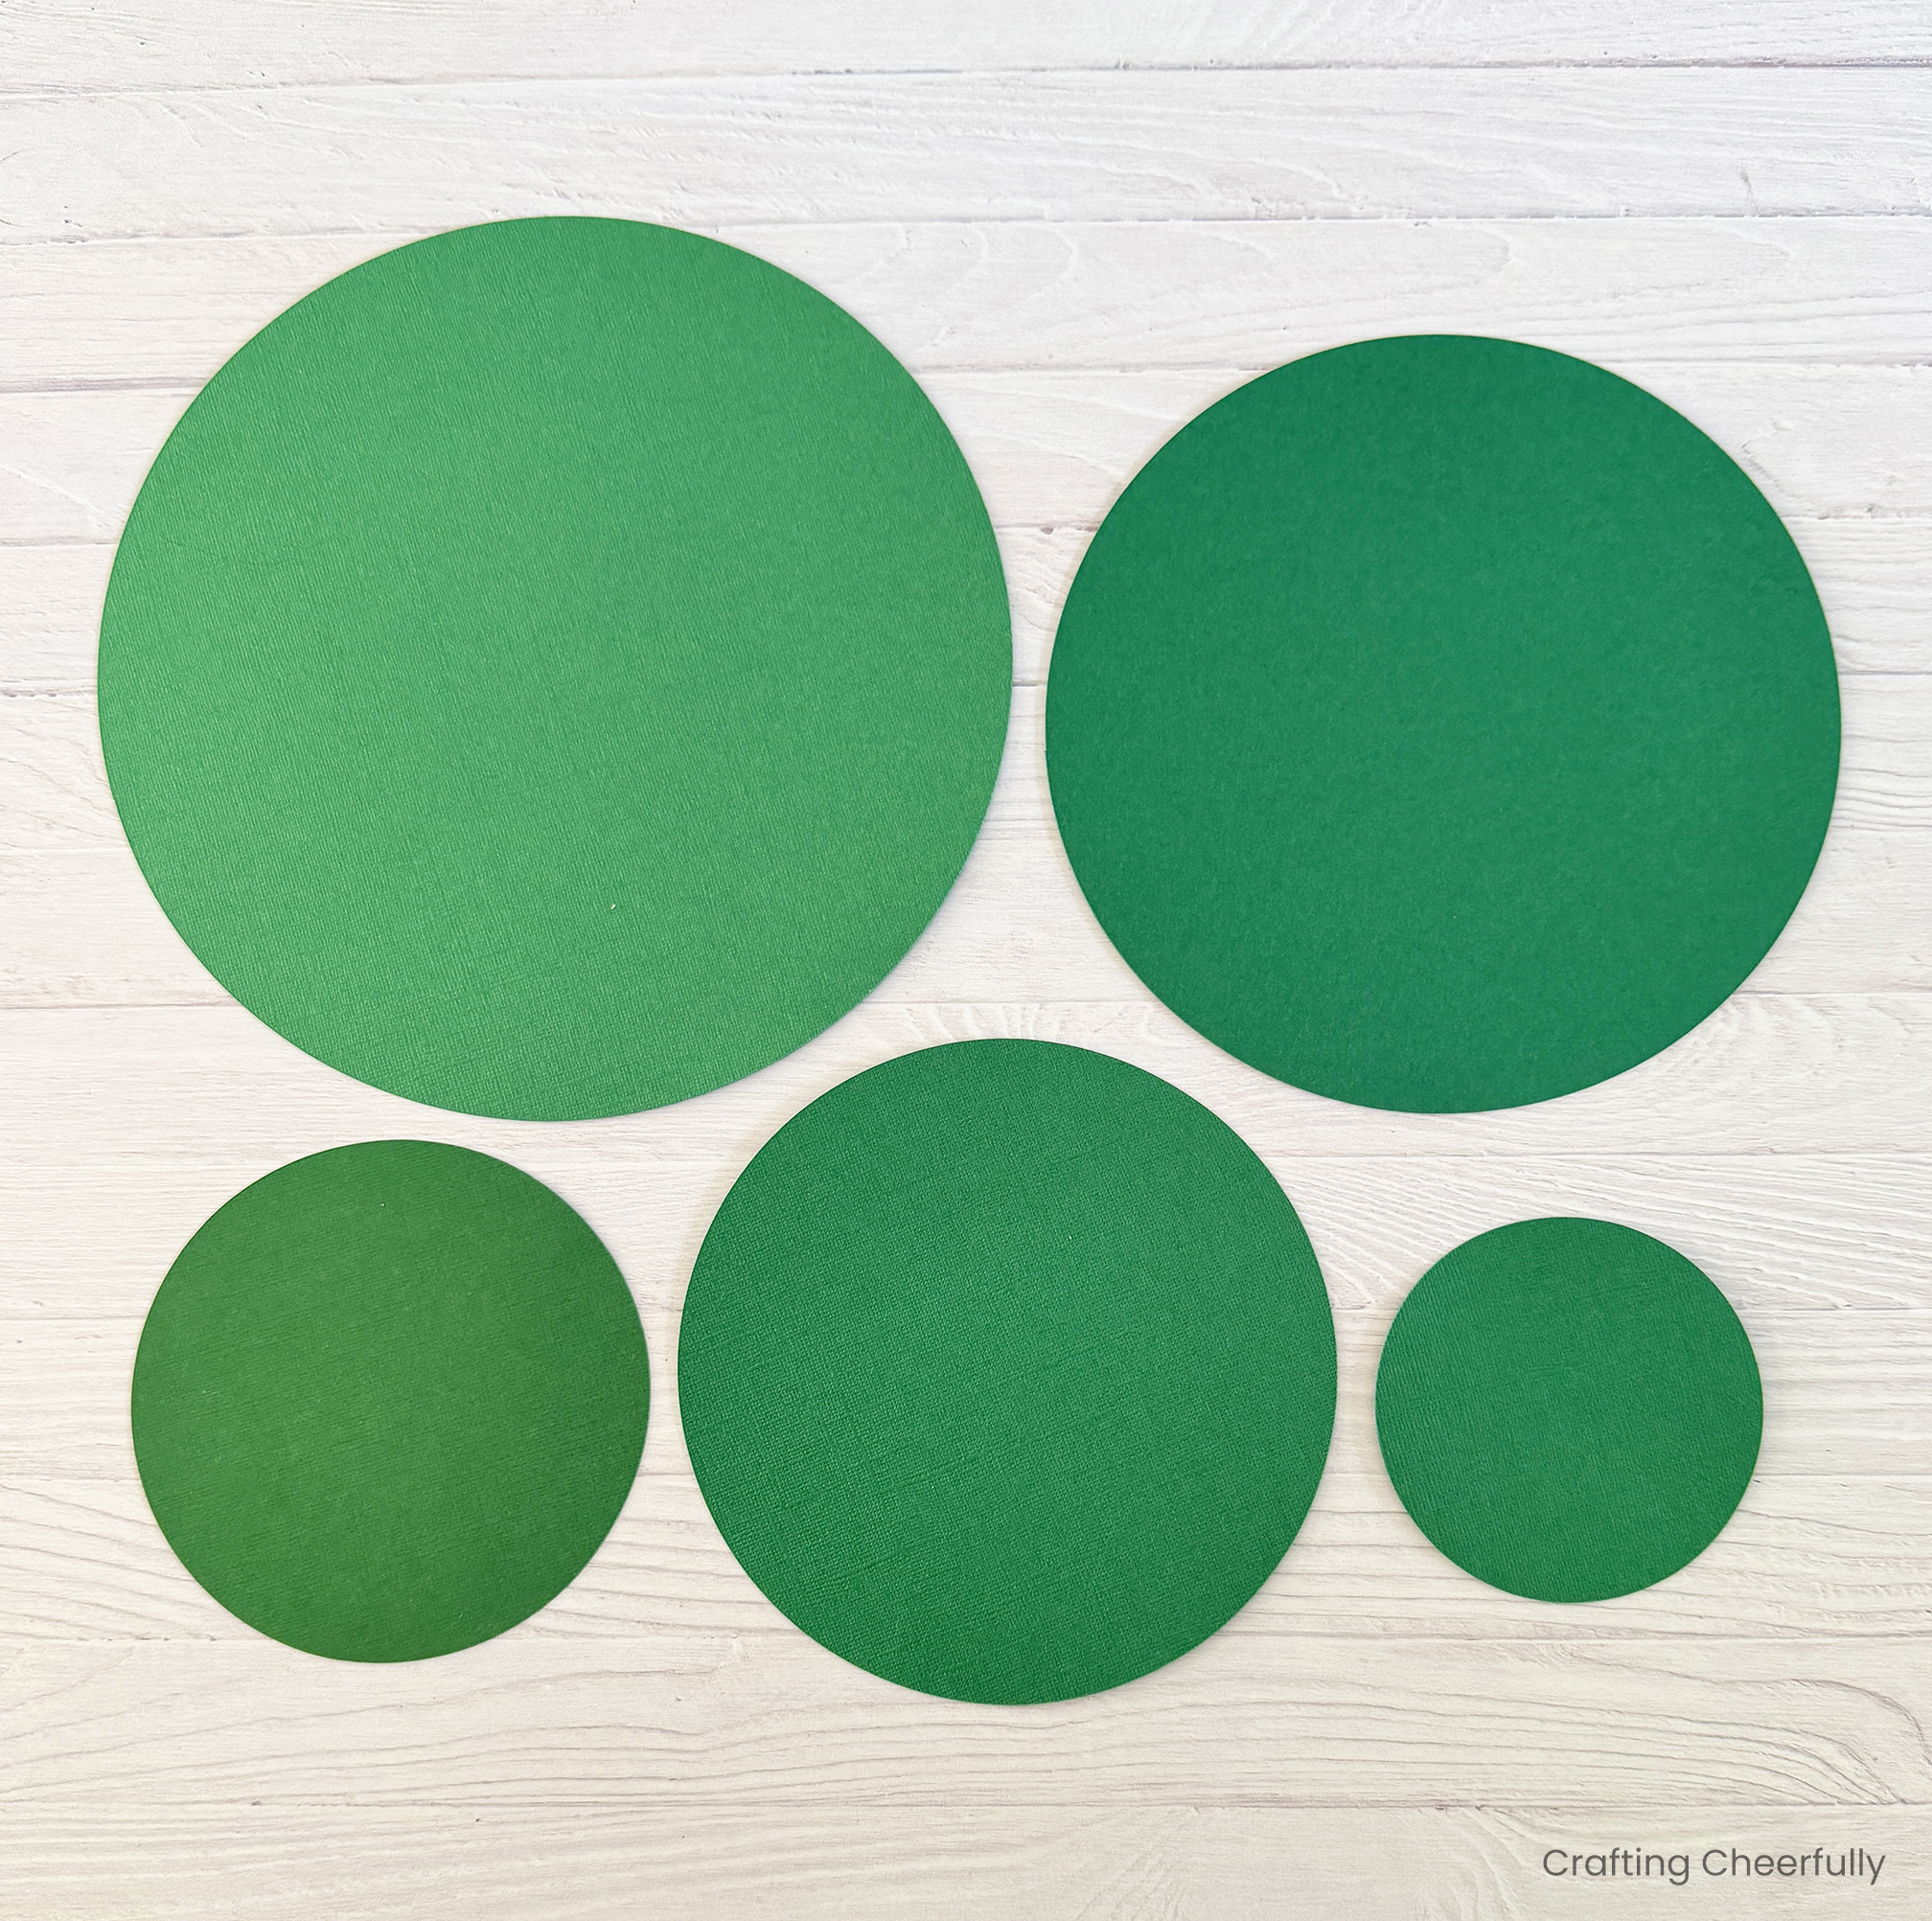
Step Two: Cut the five circles needed for stacking. I cut these using the Design Space File and my Cricut cutting machine. If cutting the circles by hand you will need five circles with the following diameter: 10″, 8.5″, 7″, 5.5″ and 4″.
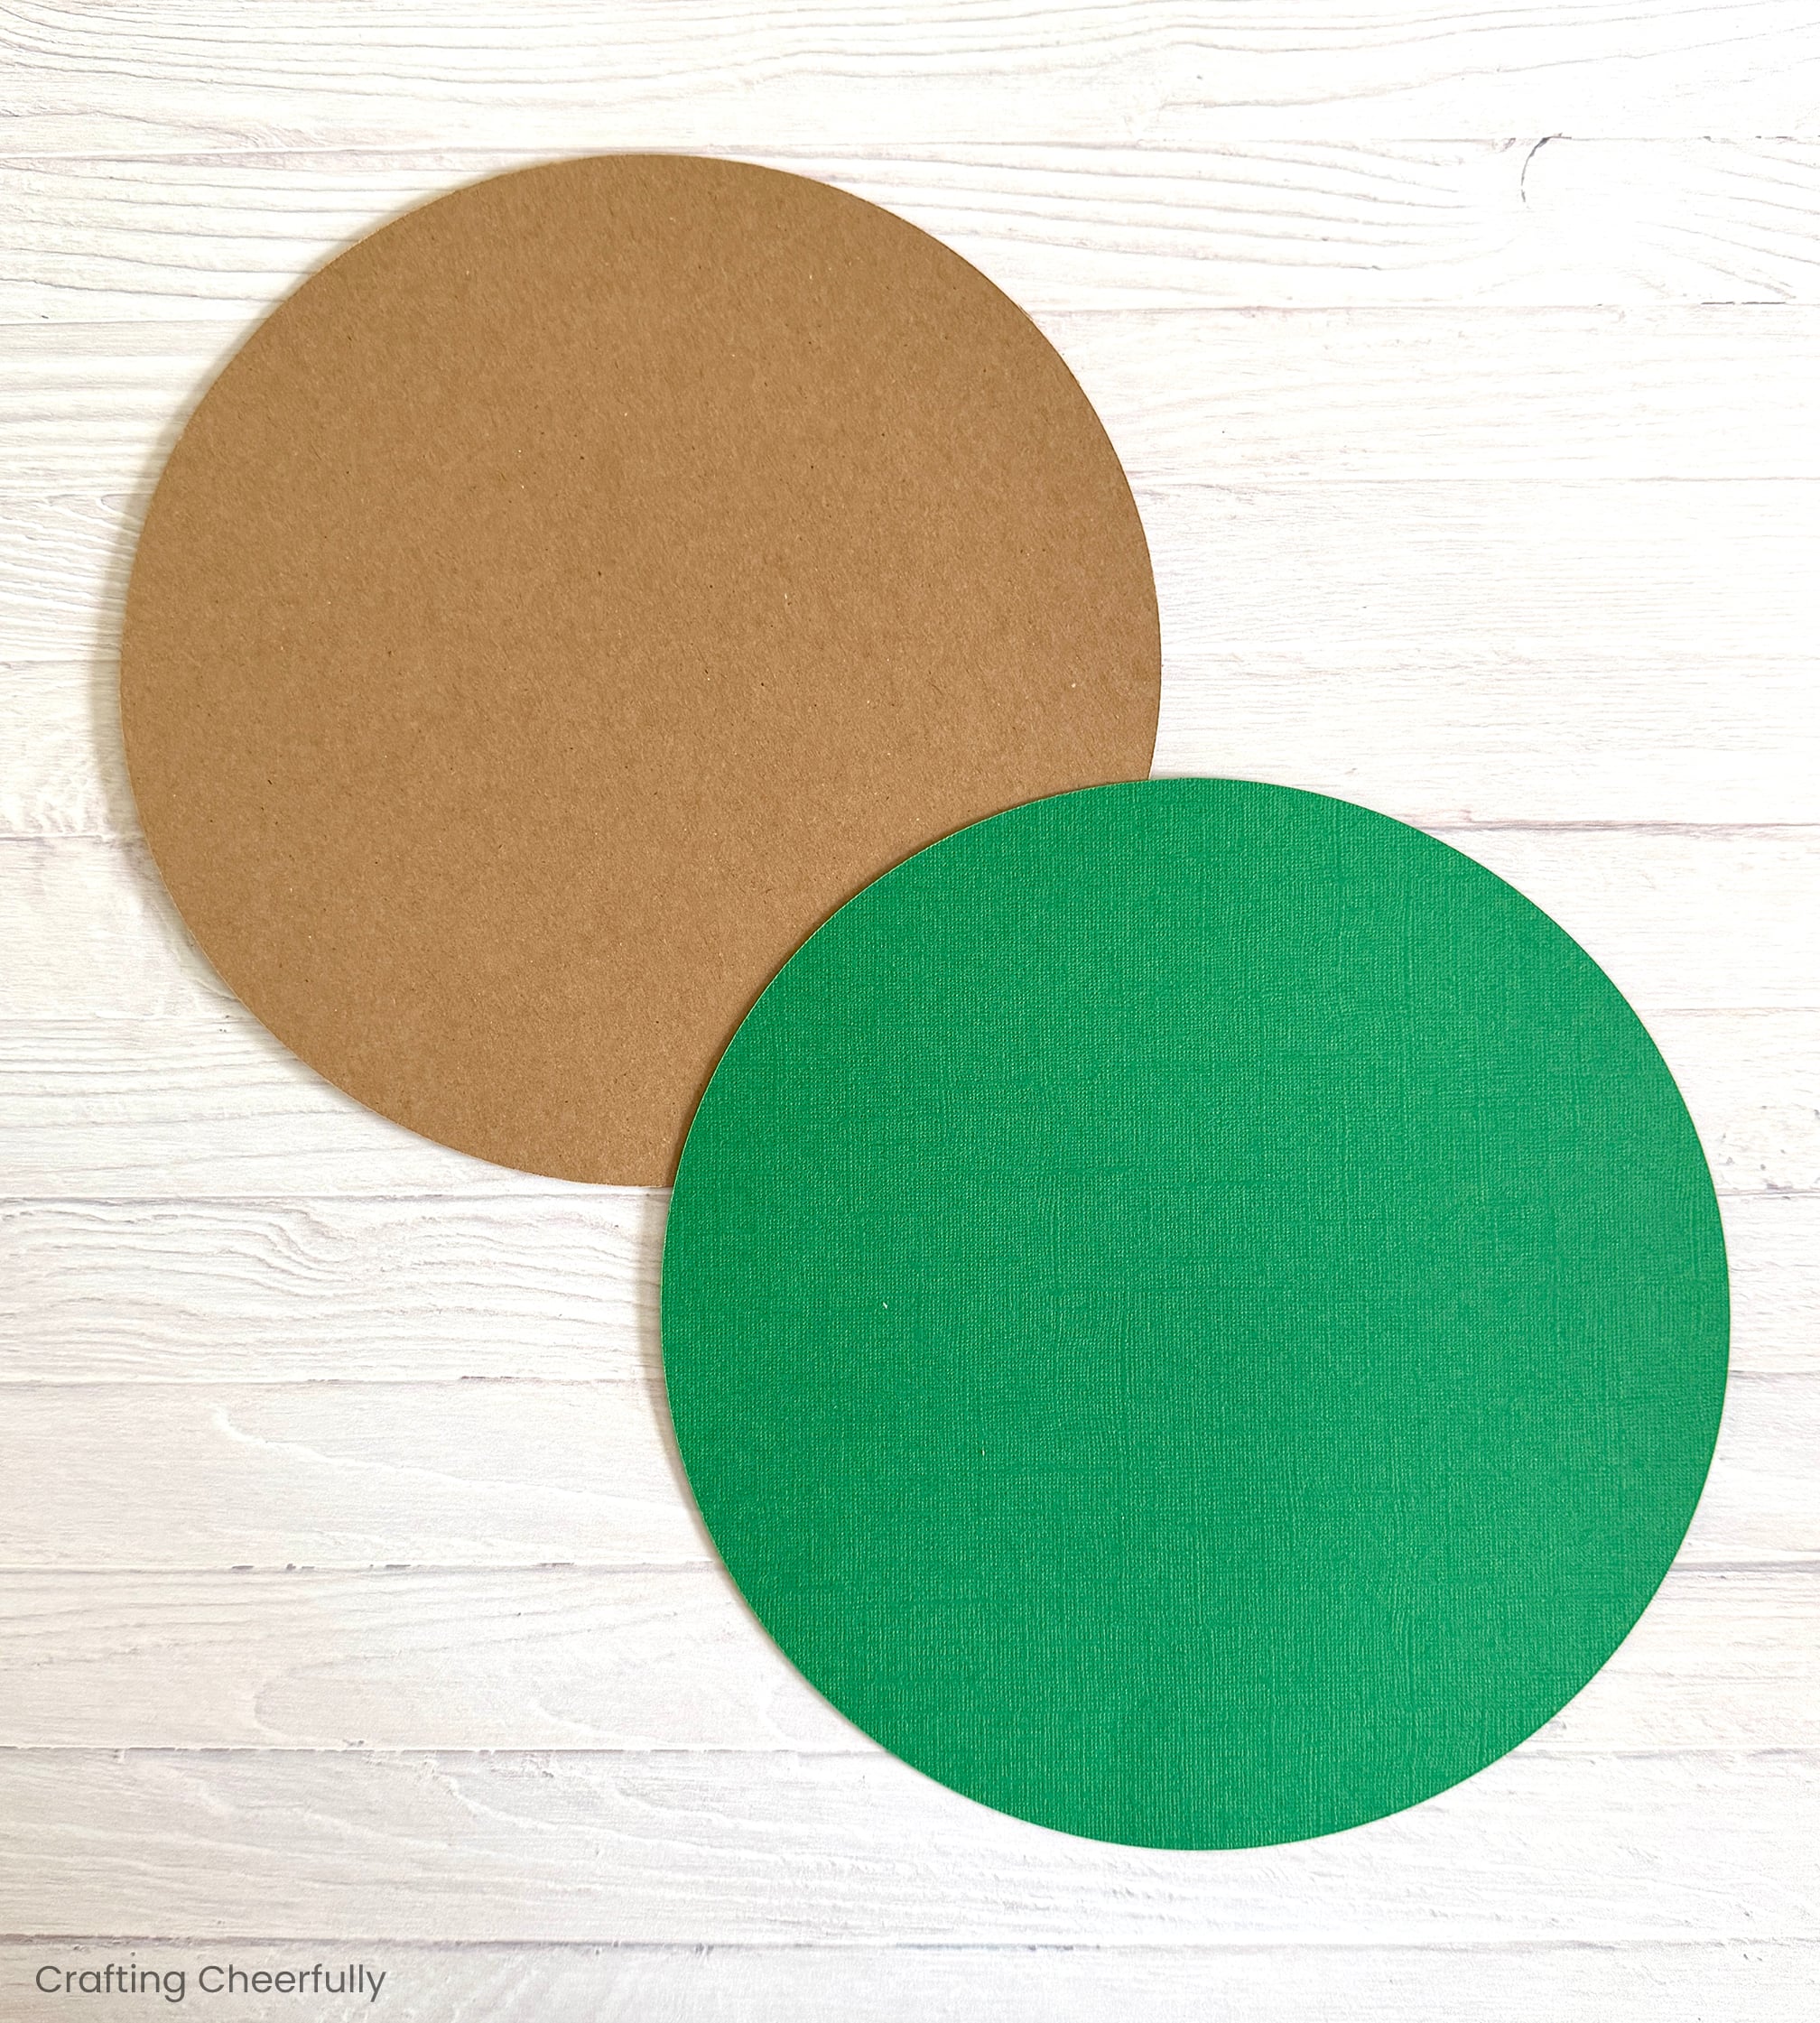
Cut a 10″ circle from chip board and adhere it underneath the large green circle. This will give your entire Advent Calendar a sturdy base!
Create the Tiny Boxes
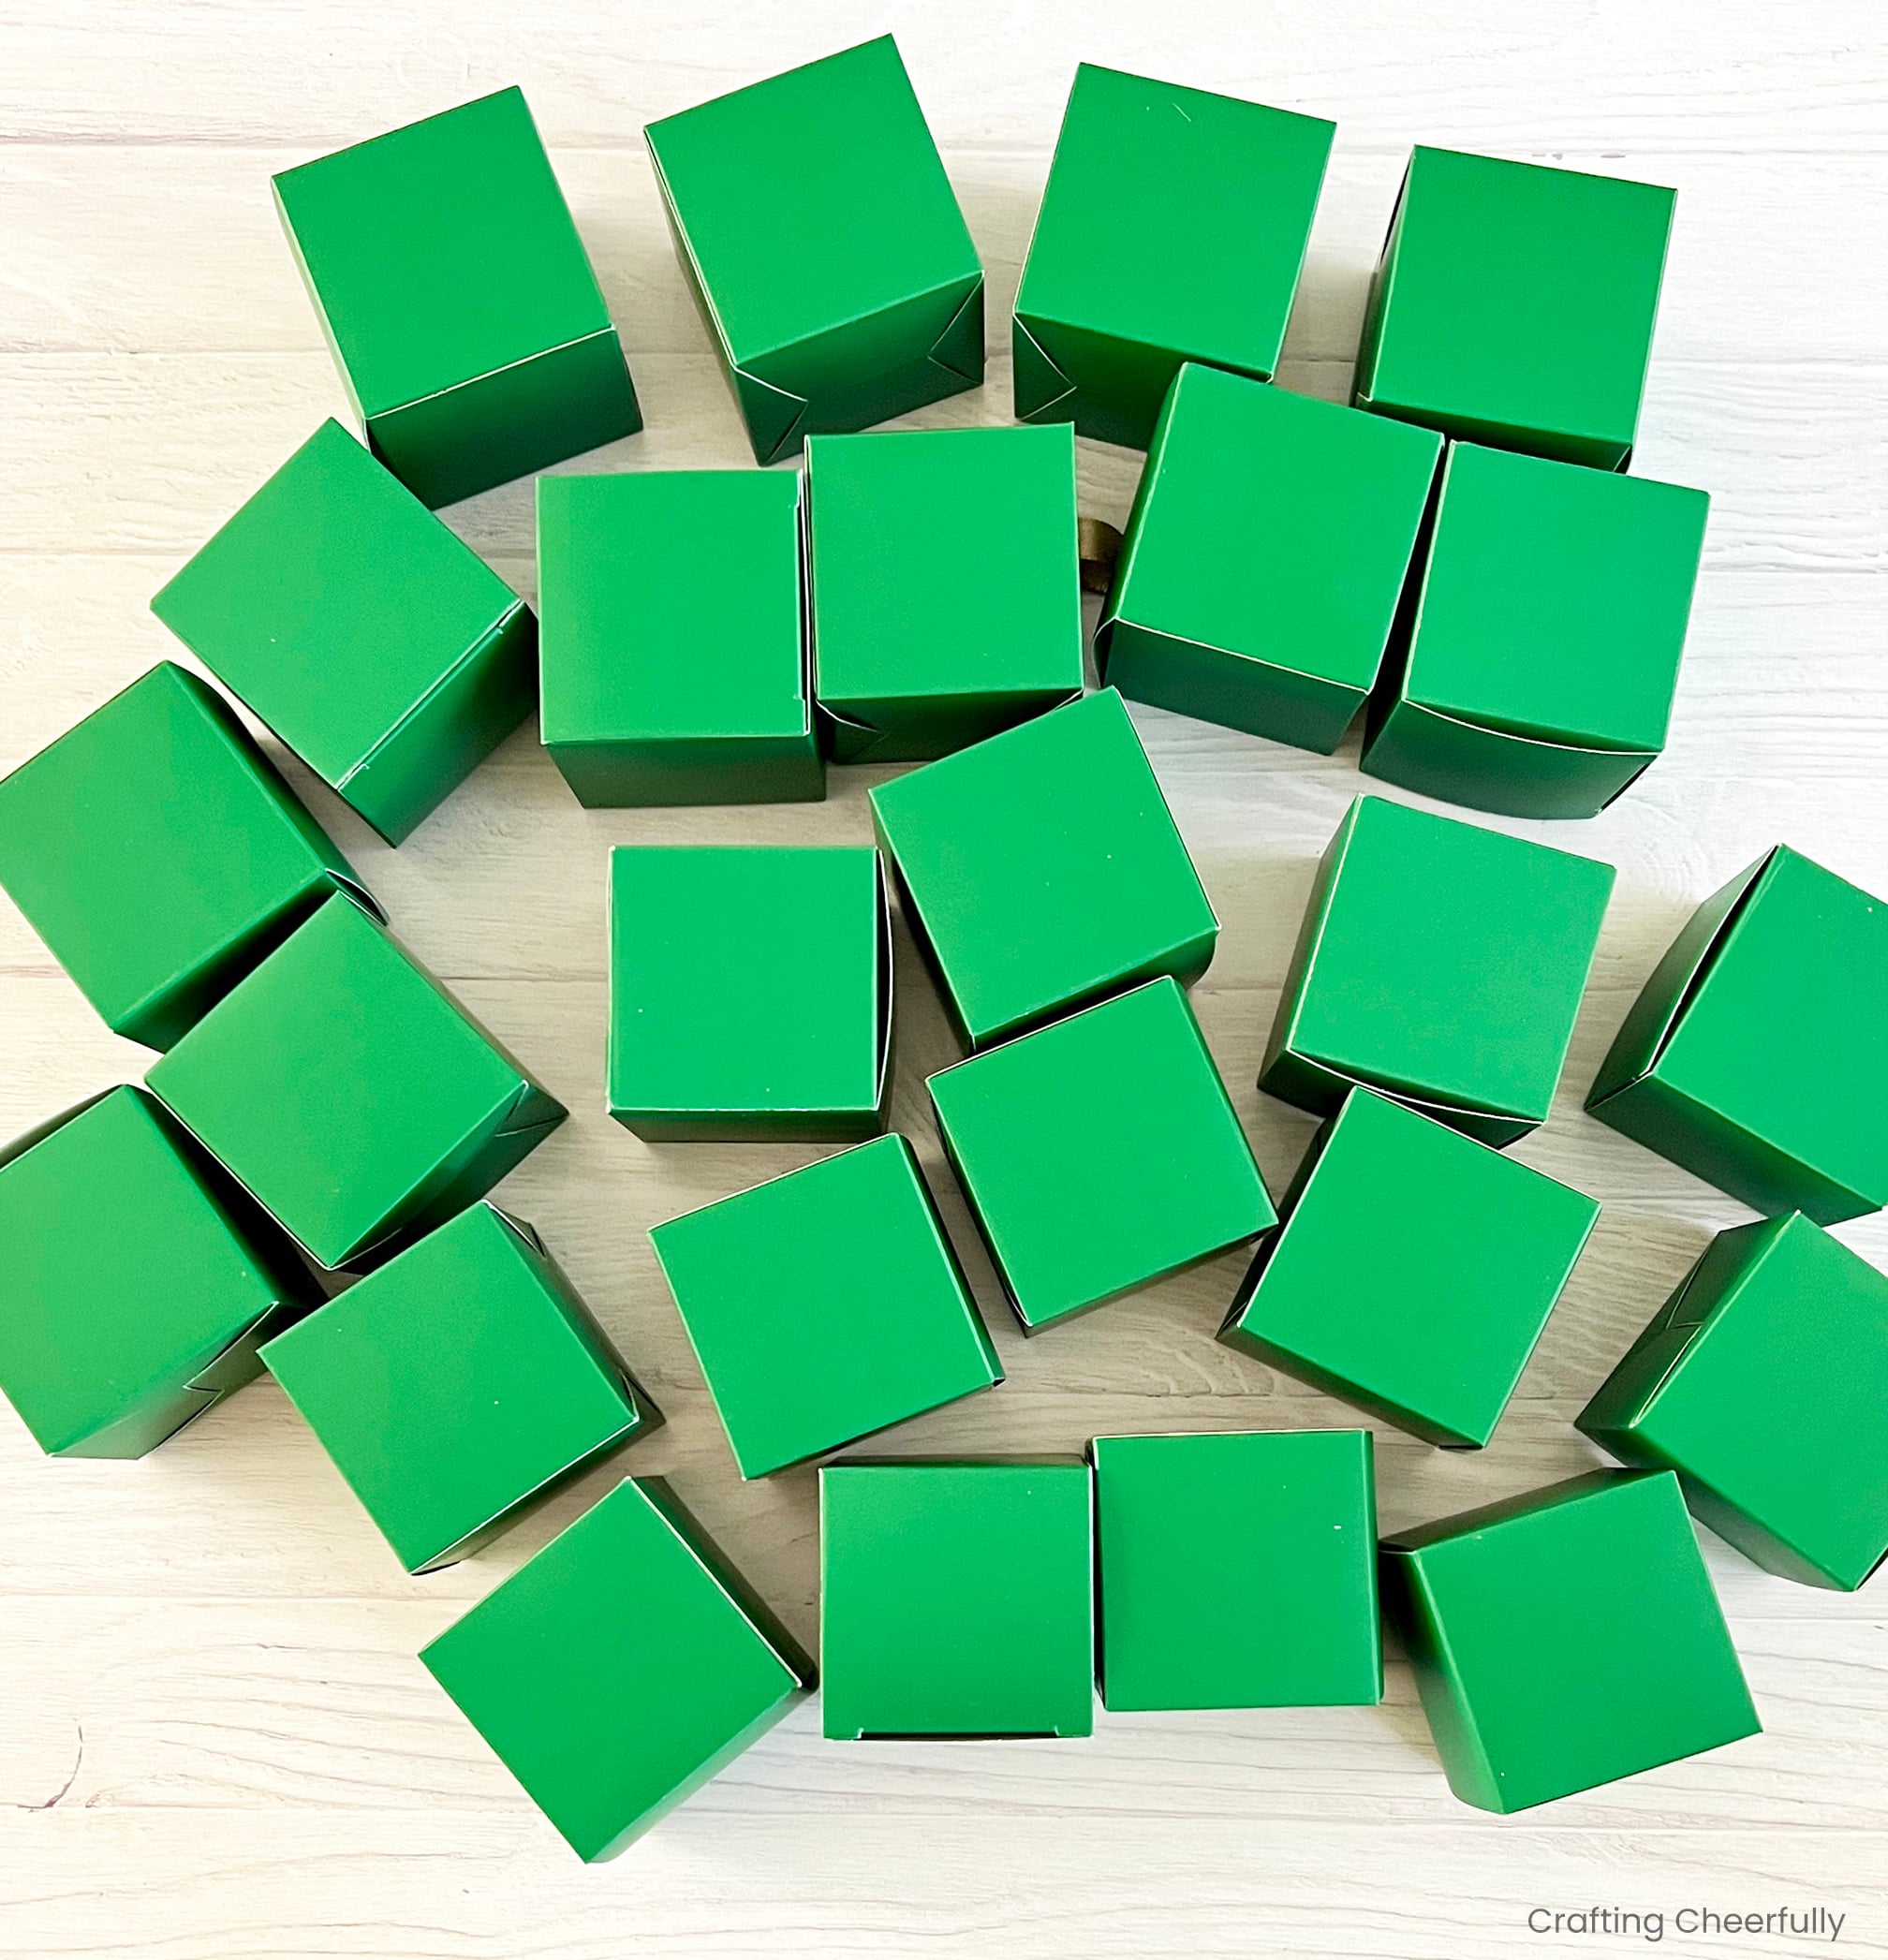
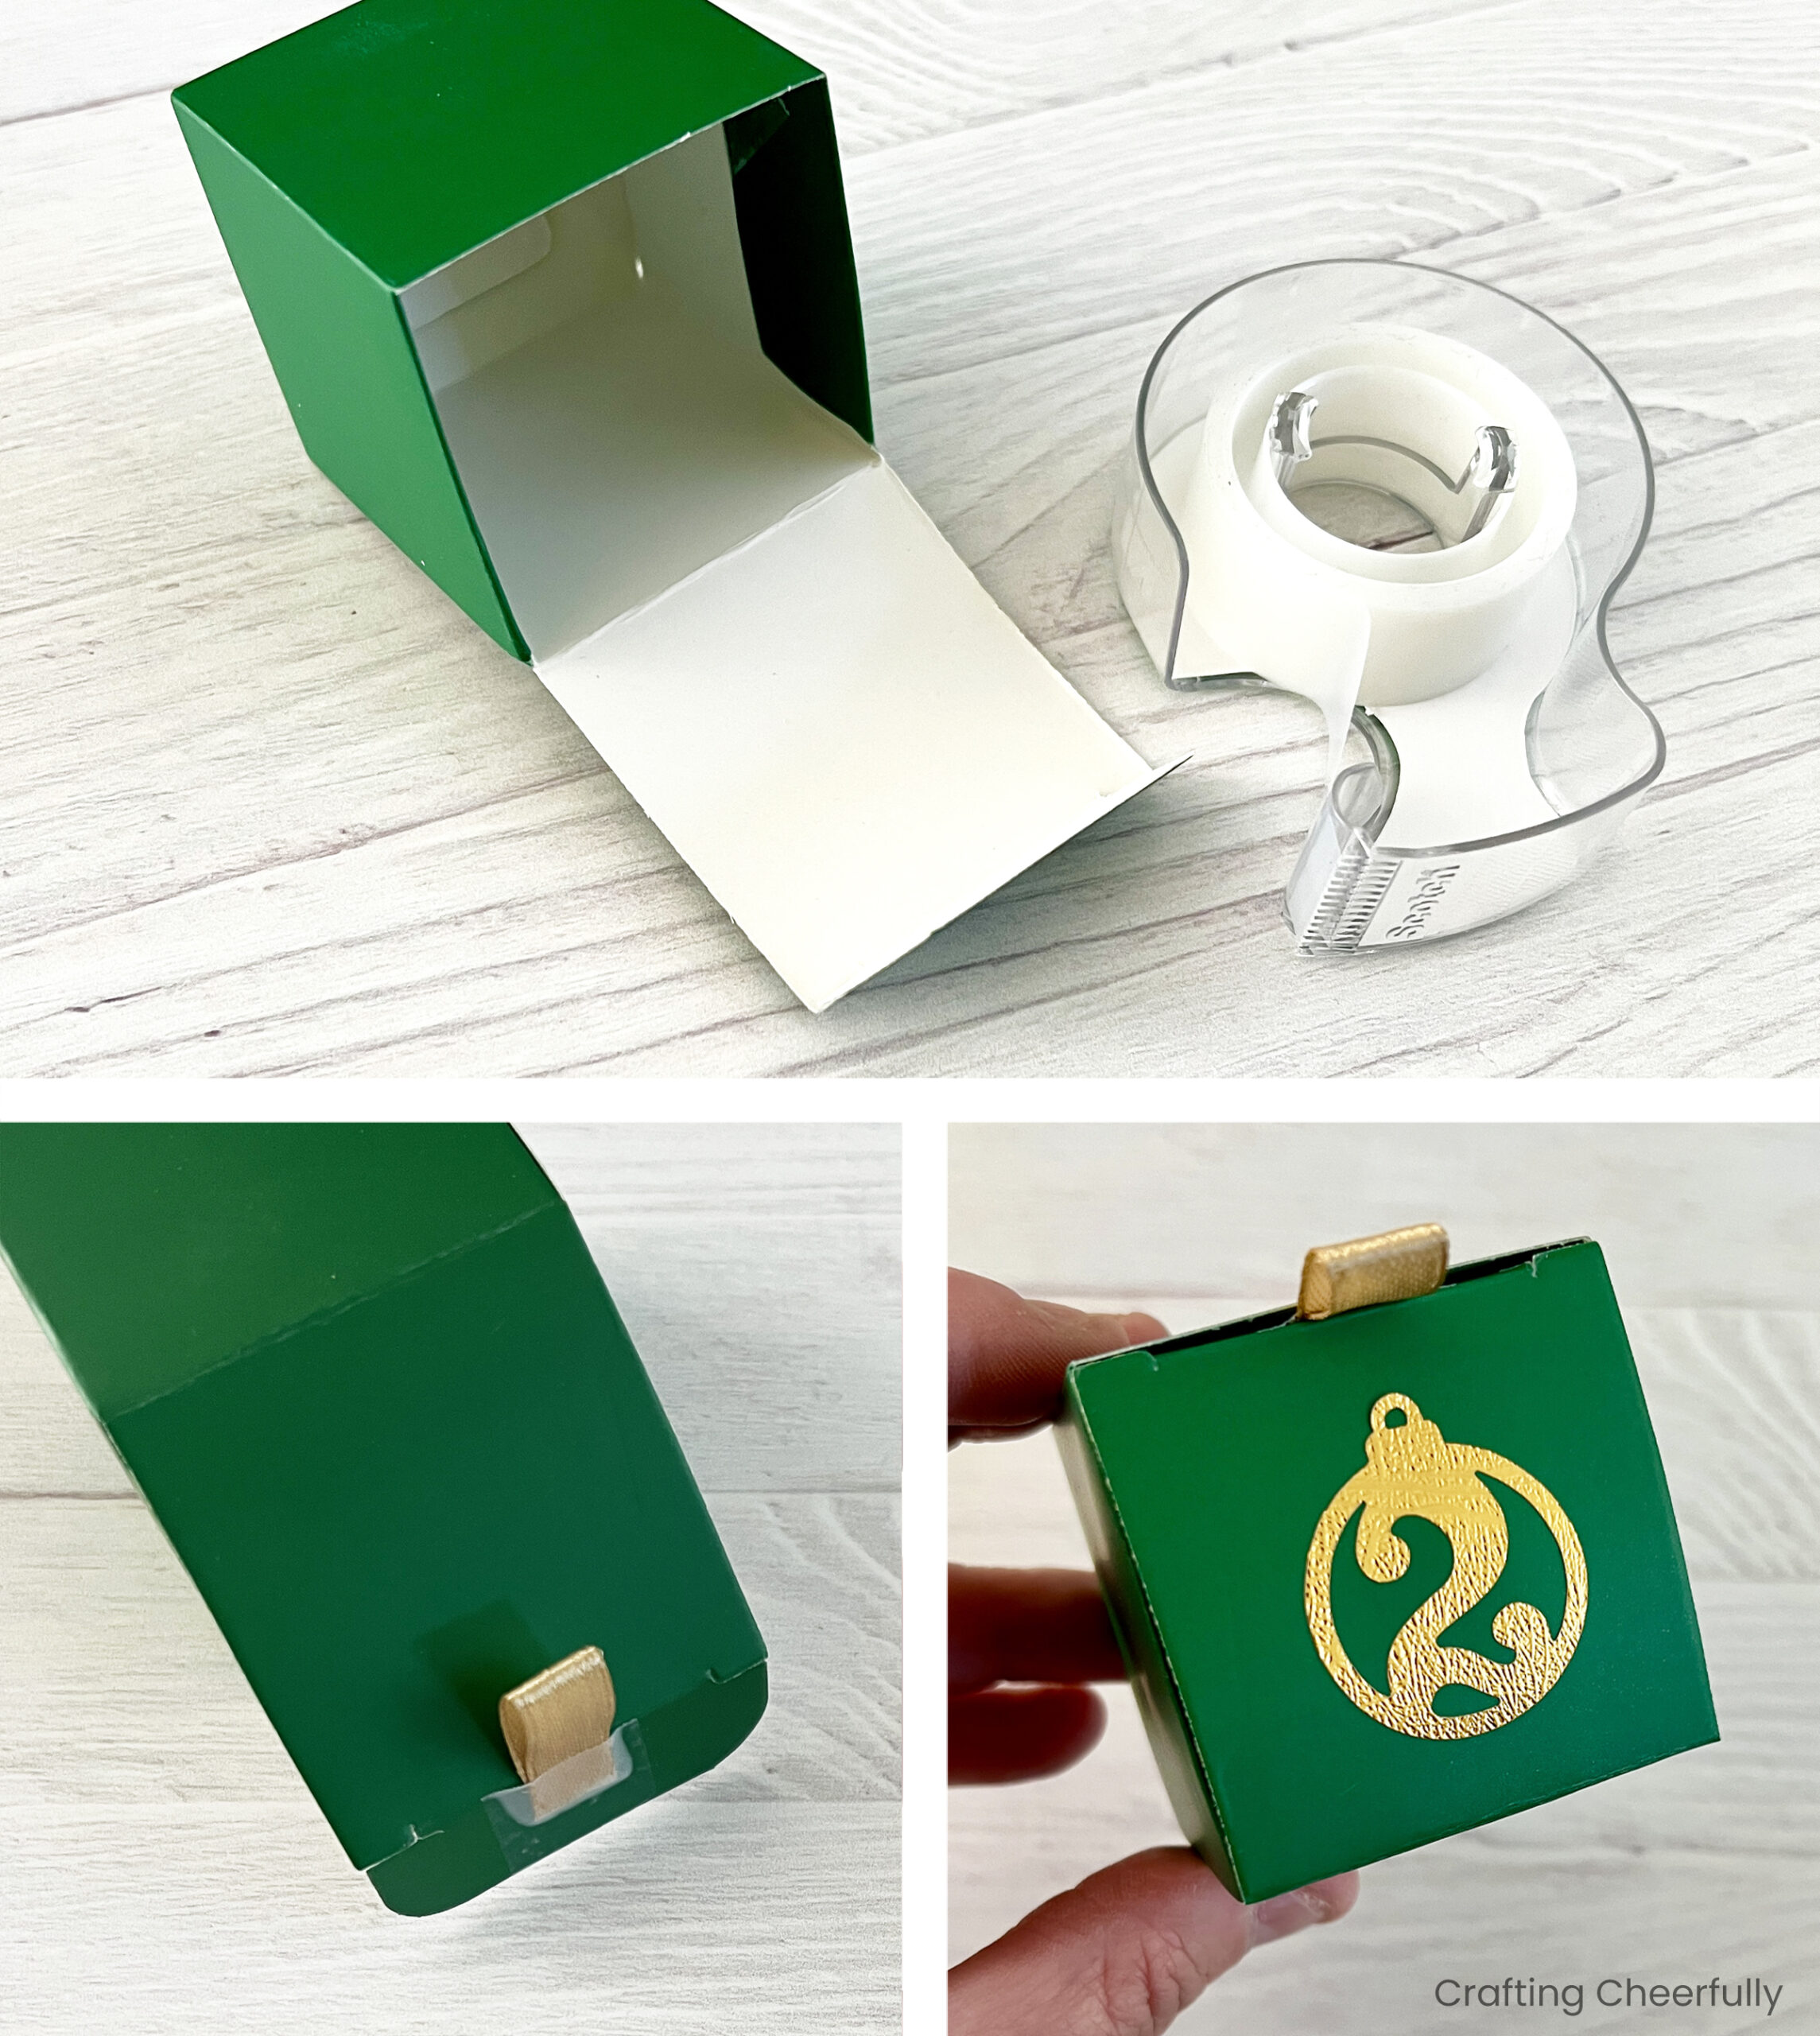
Step Three: Create the tiny boxes! The tree is built with five layers of tiny green boxes. Start by assembling each one, leaving the lid open. You’ll notice in my picture below I closed all of my little boxes, but this made it harder later on so I recommend keeping them open.
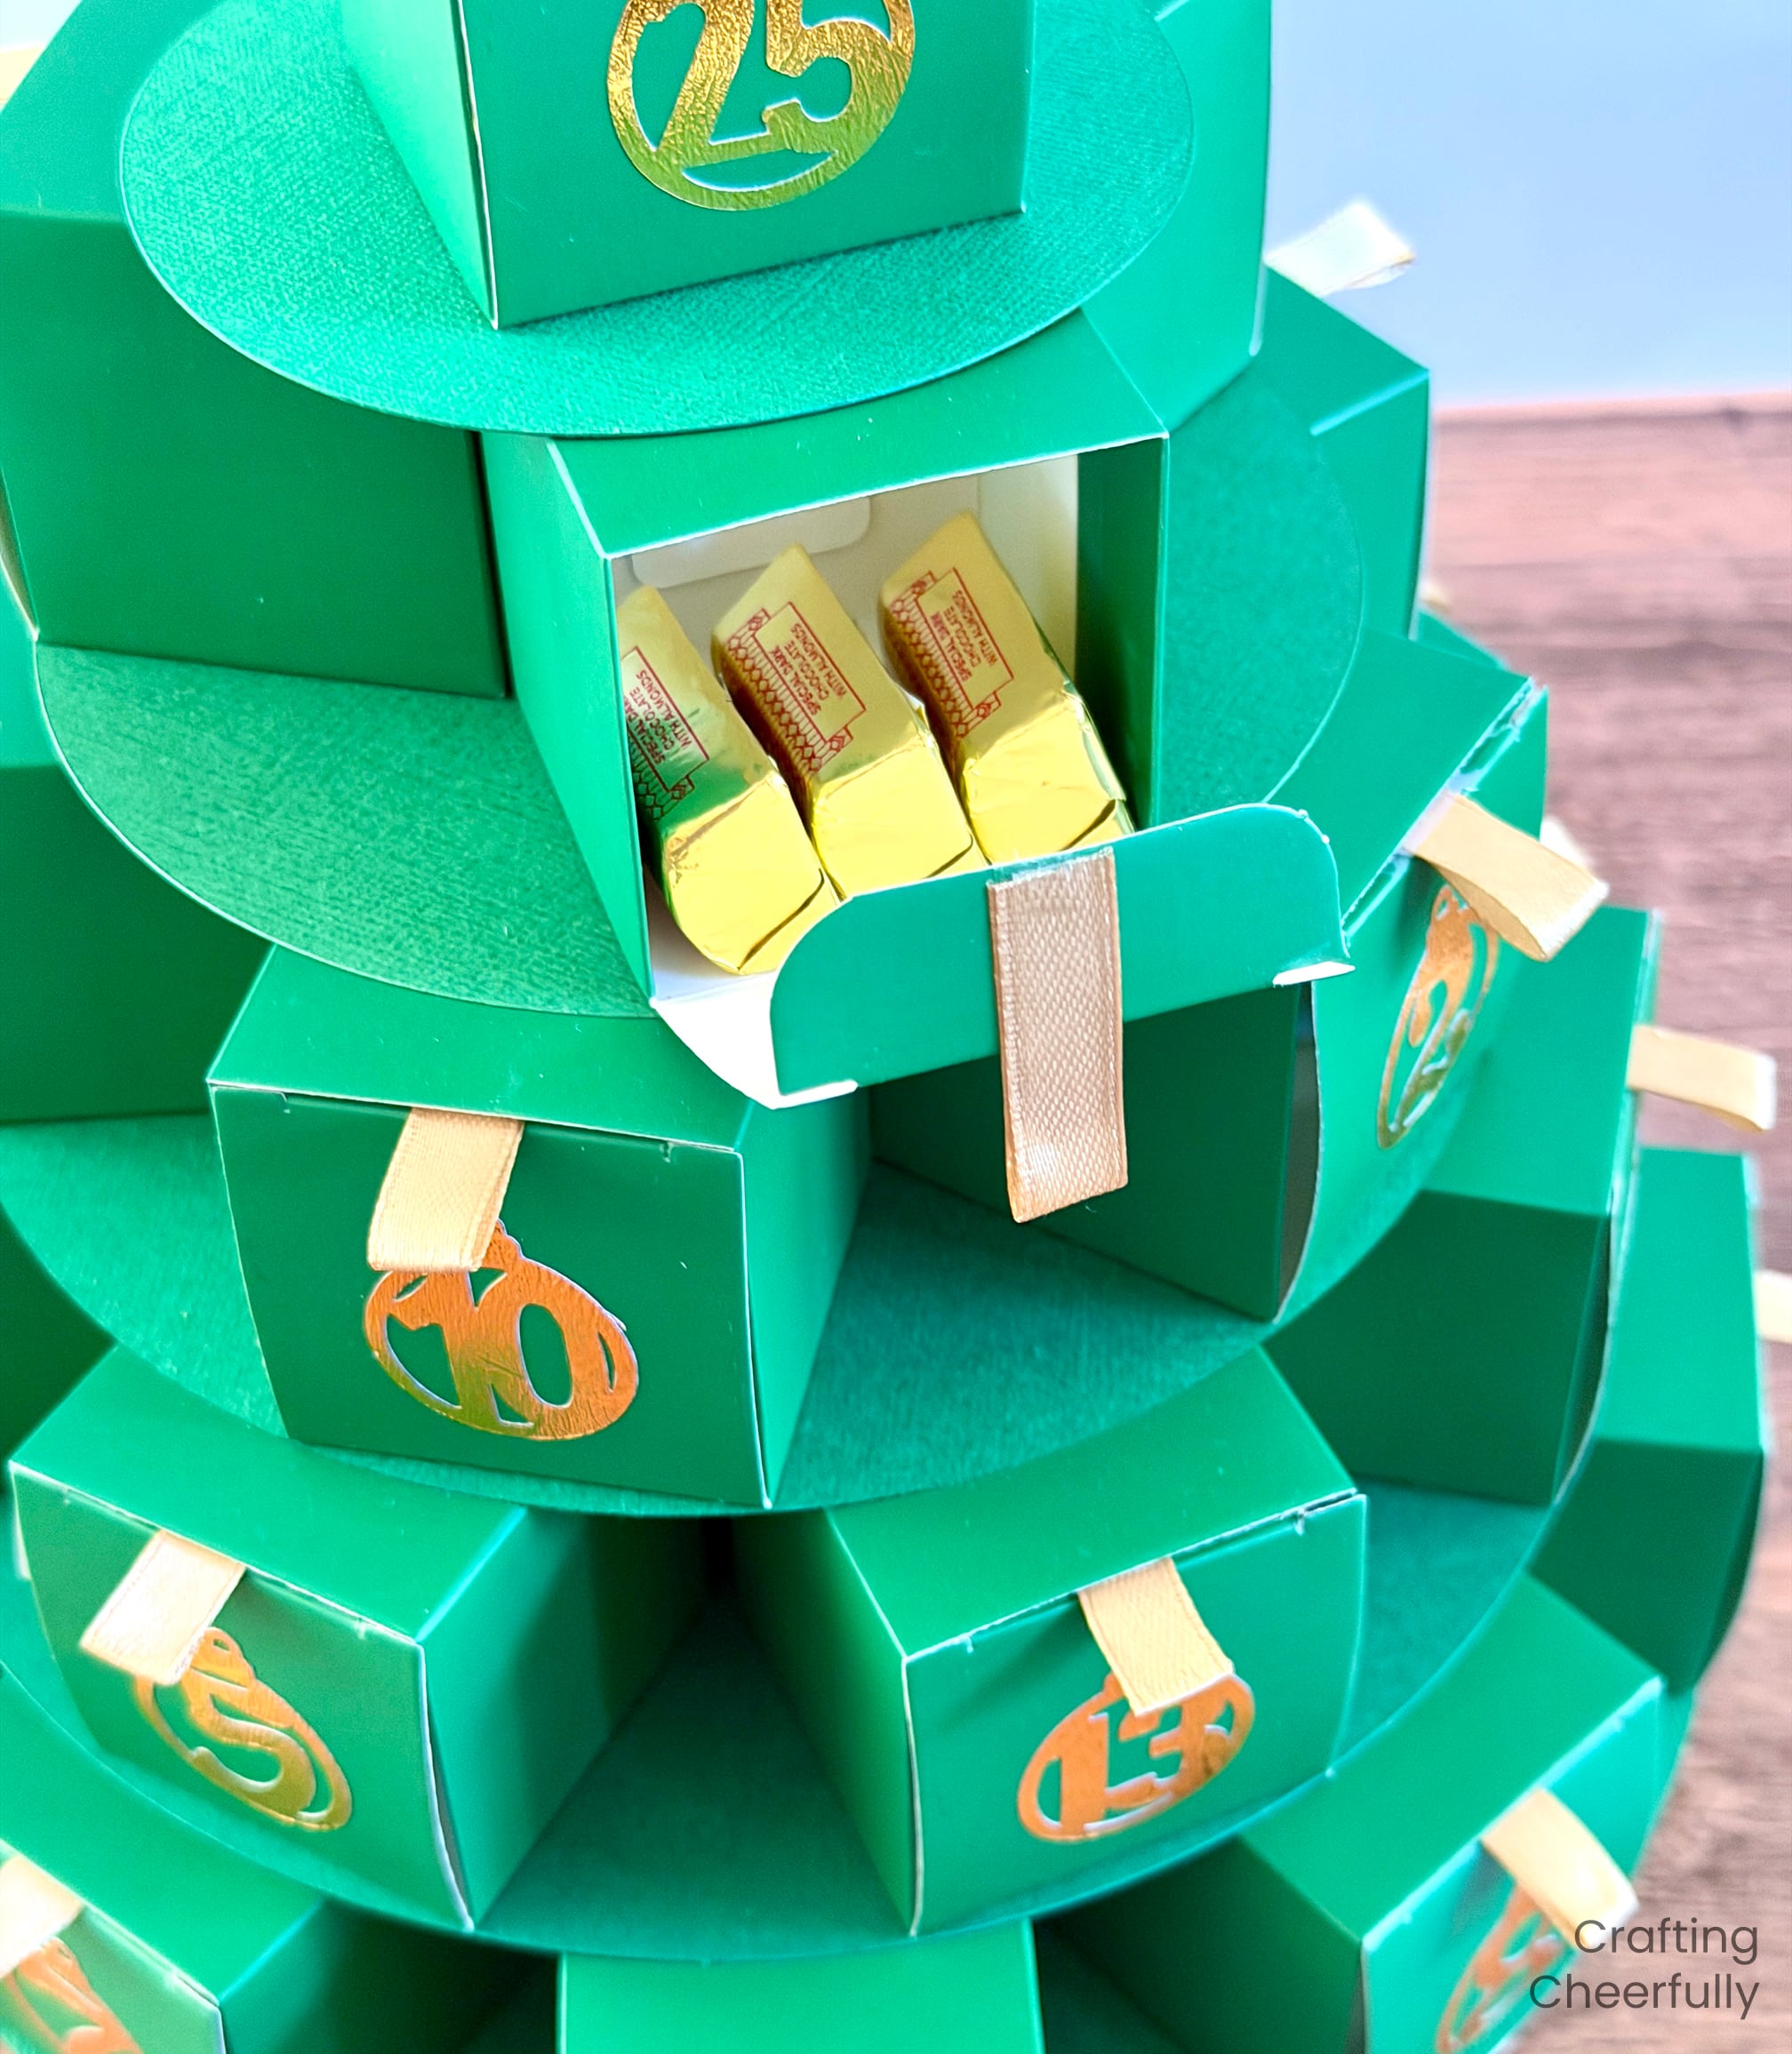
Step Four: Prepare each box by first folding in the side flaps and taping them down. This will make it easier for the door to open and close on the Advent Calendar. Next, cut a piece of ribbon that is about 3″ long. Fold the ribbon in half and tape it to the lid tab so it sticks out from the box when the lid is closed. Finally, add one of the gold numbers to the box. Position the number so the ribbon tab is at the top.
Stack the Tiny Boxes to Form the Tree
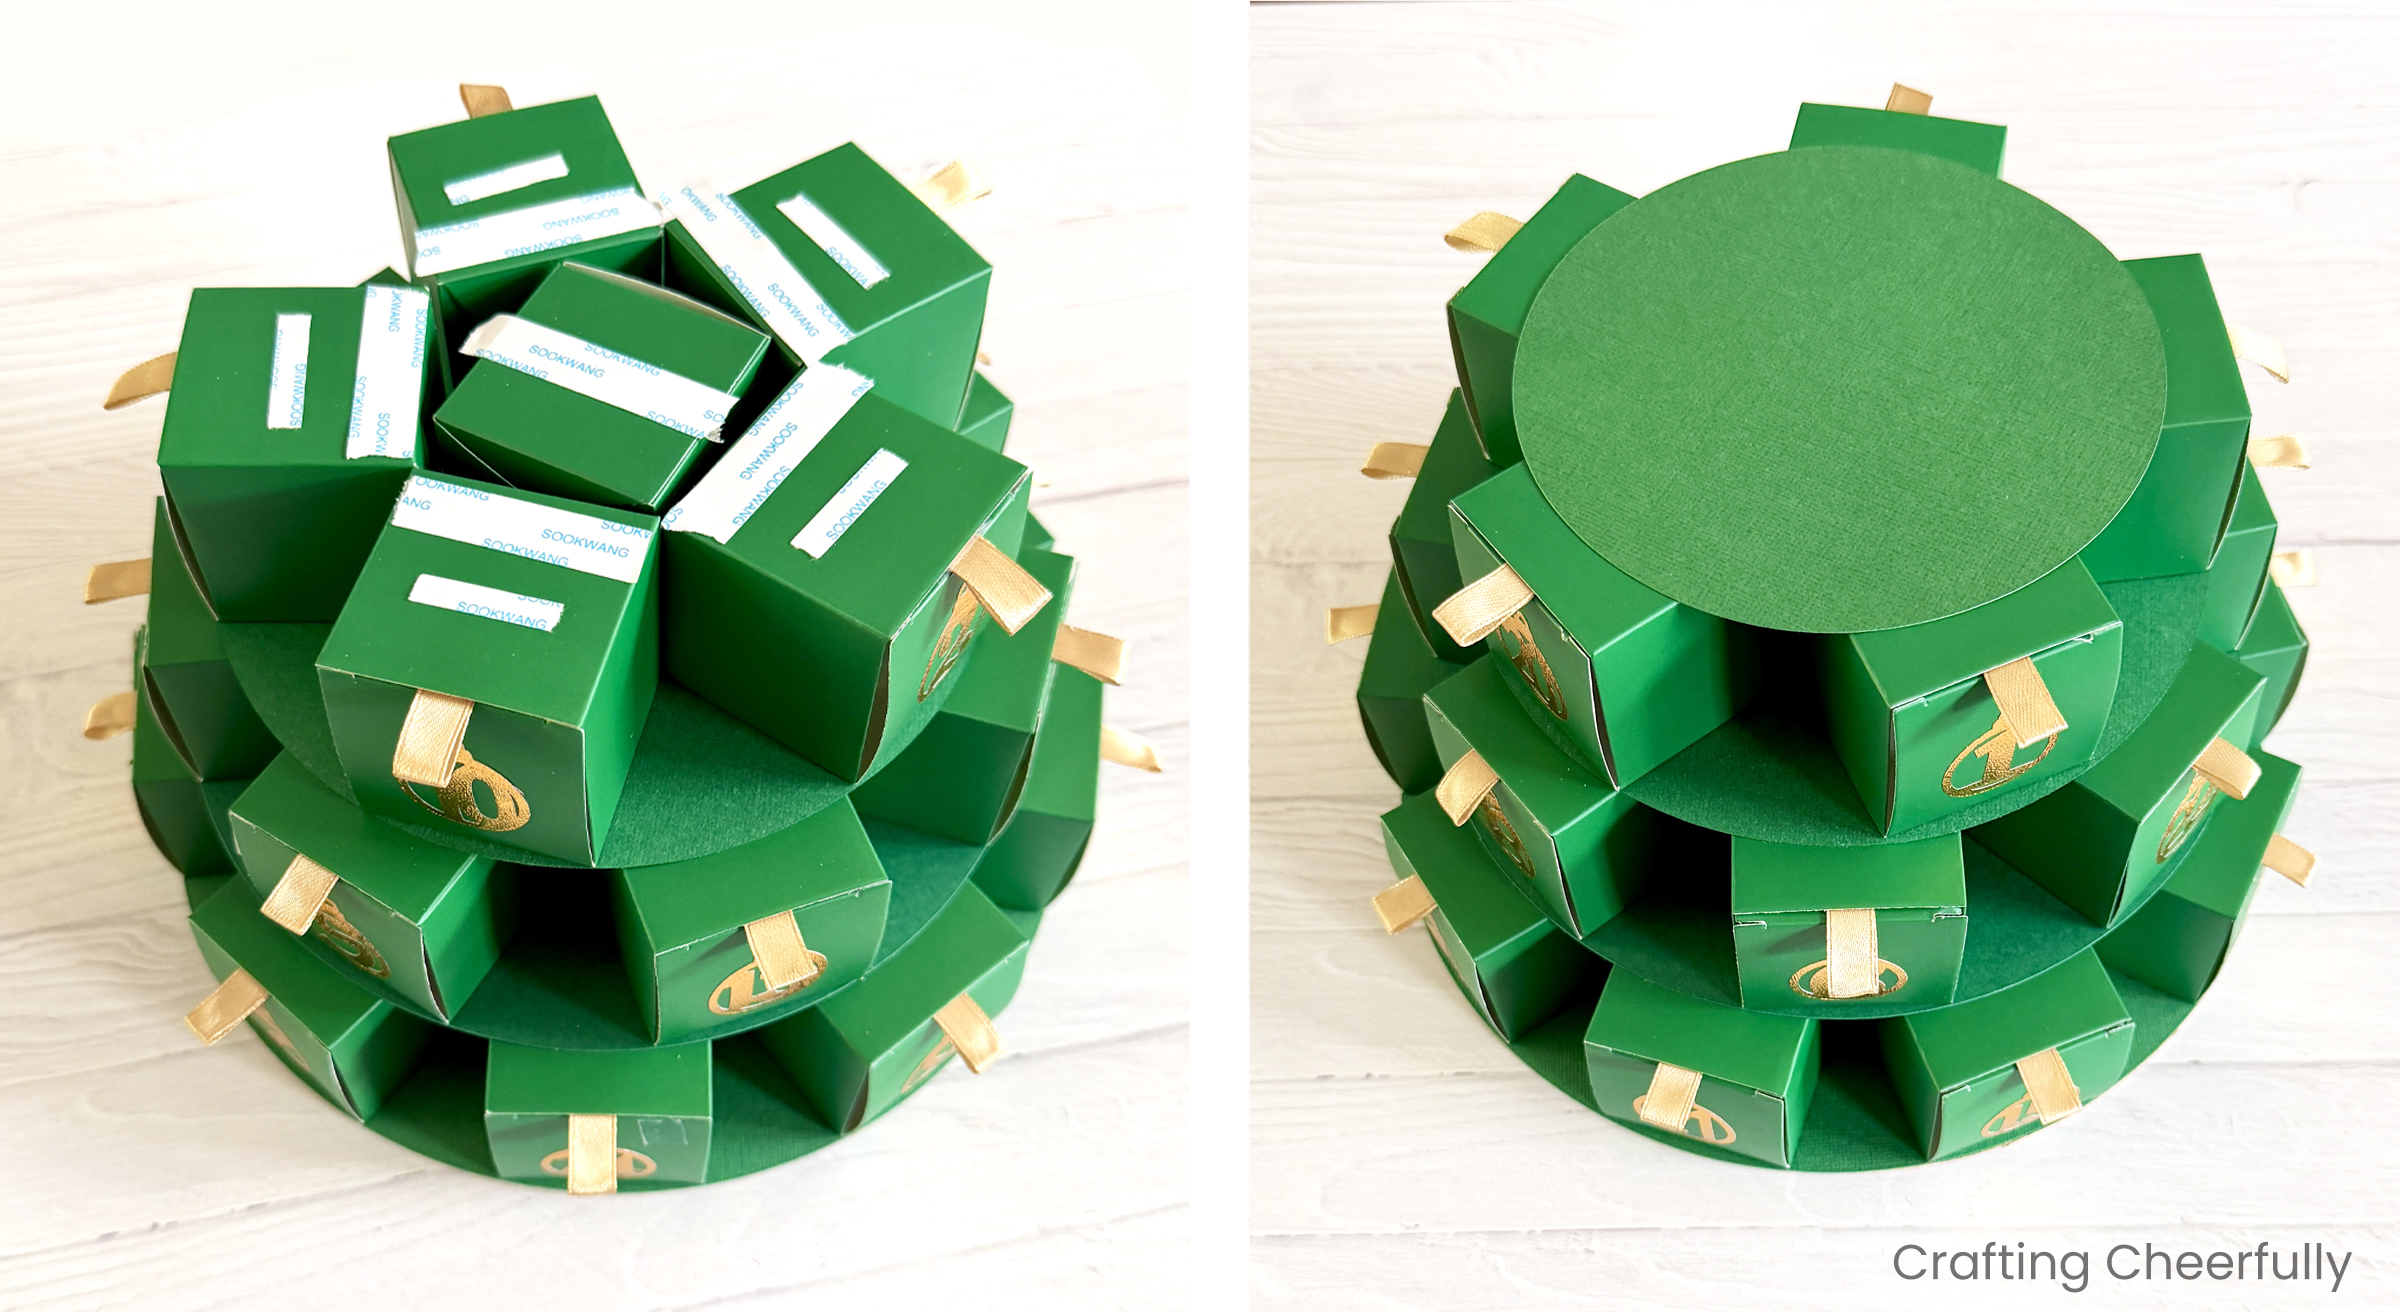
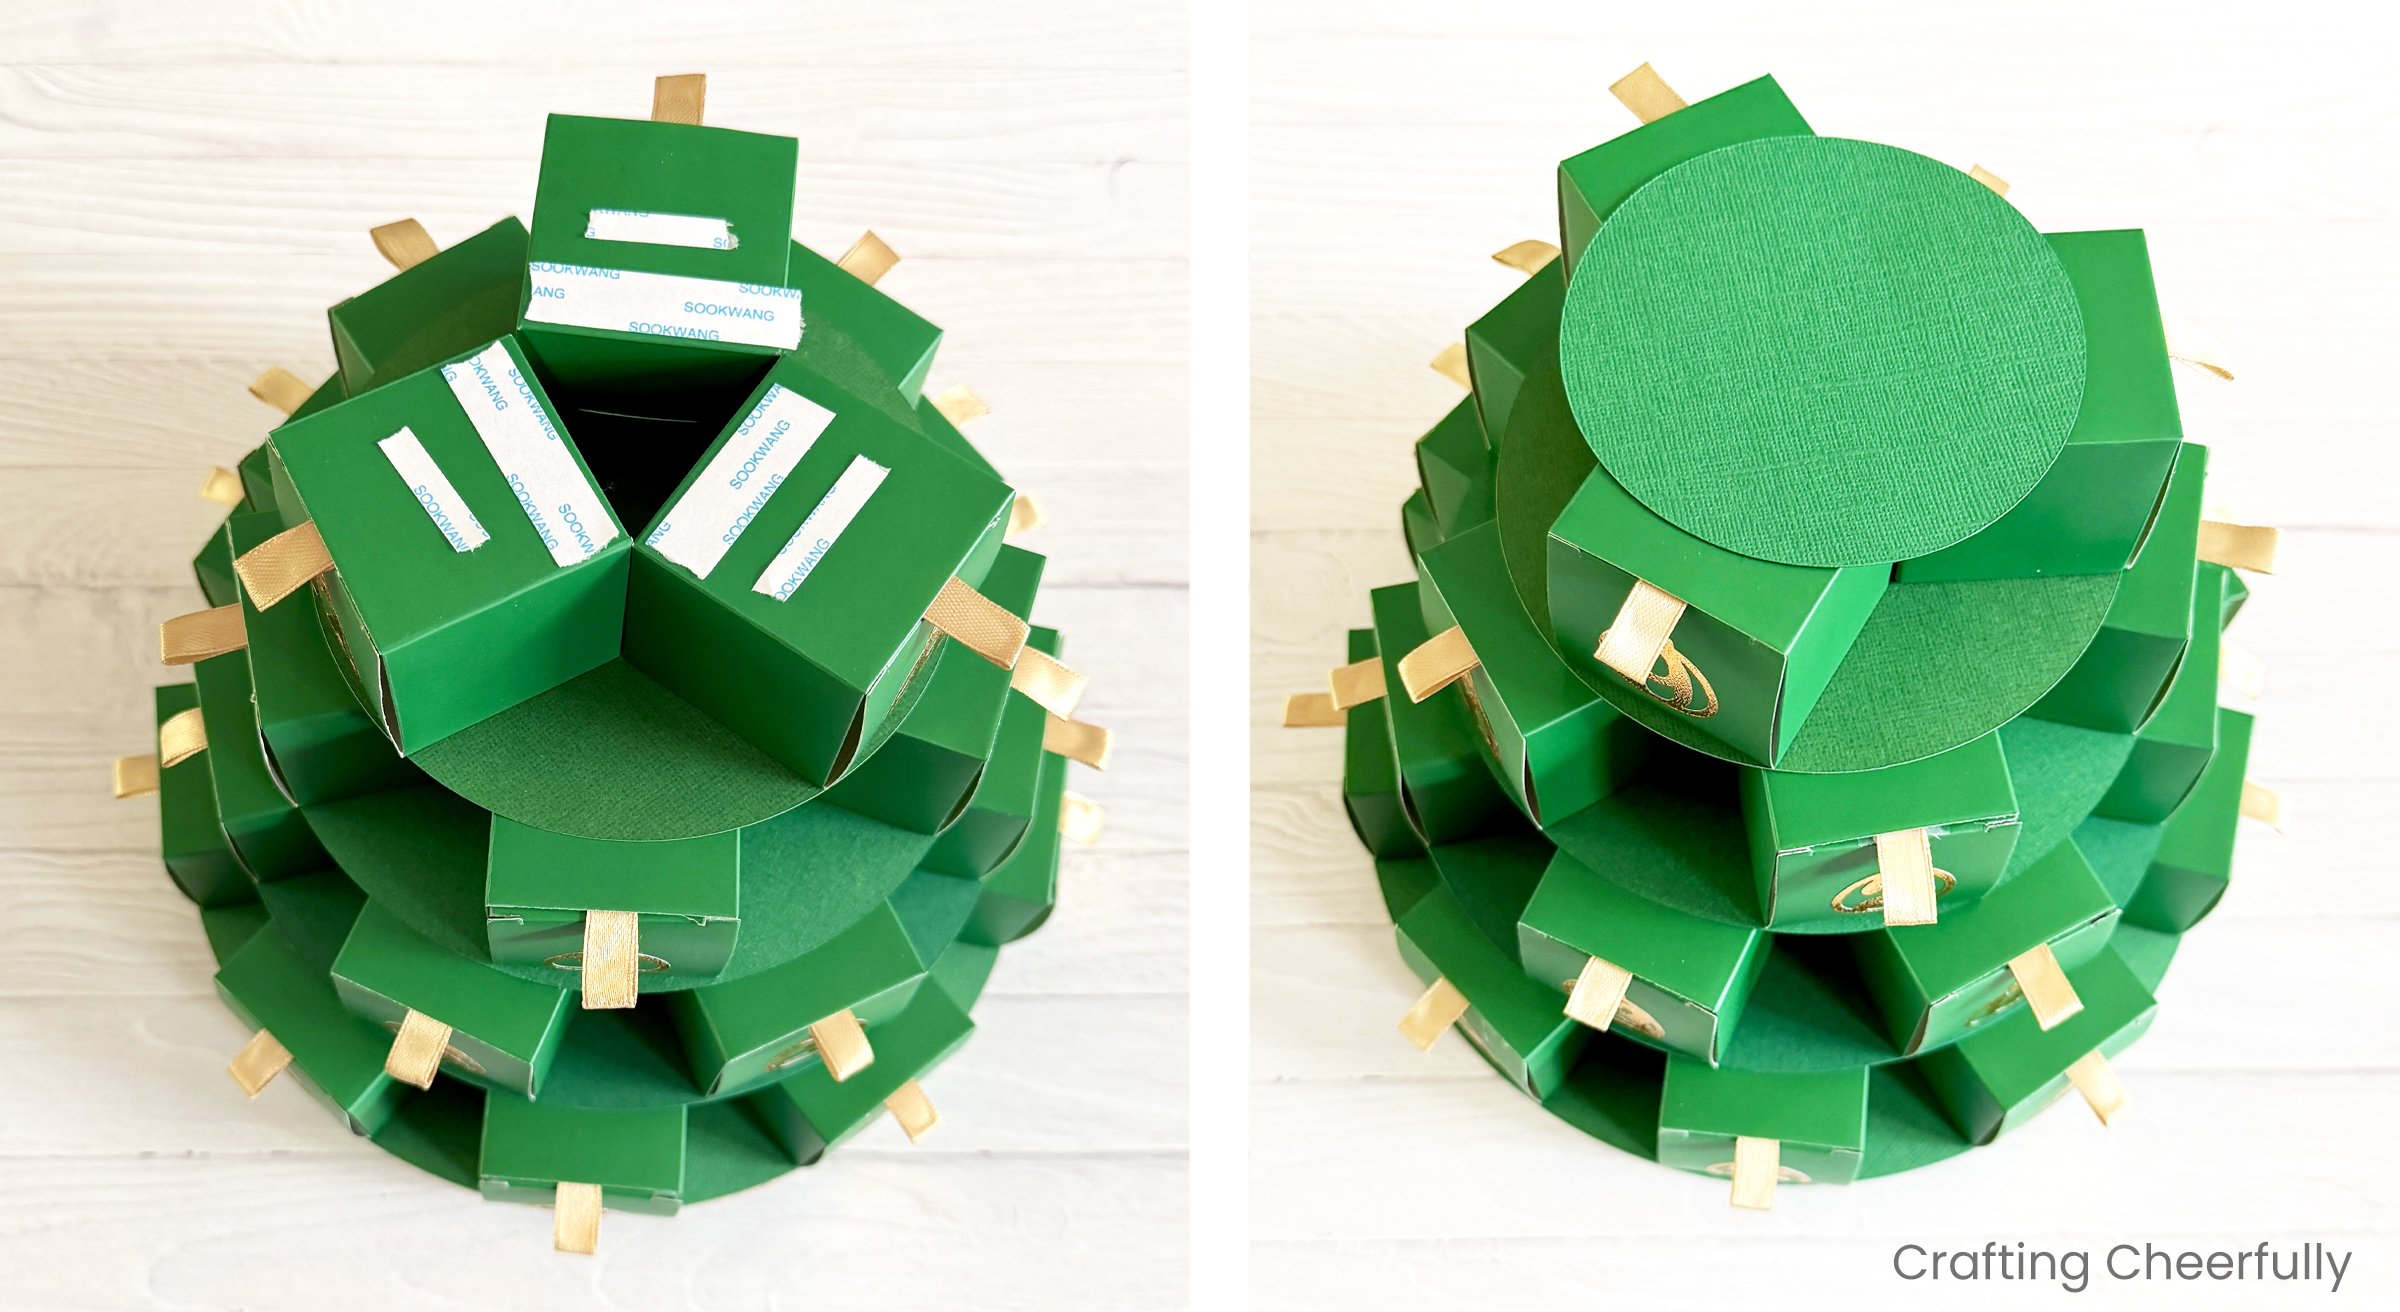
Step Five: Stack the first four layers of boxes on the round circles to create the tree. Below you can see the number of boxes that will fit on each circle platform. Be sure to mix and match the boxes so the numbers are spread out between the levels. I placed box 25 on the top level as the final day of the calendar.
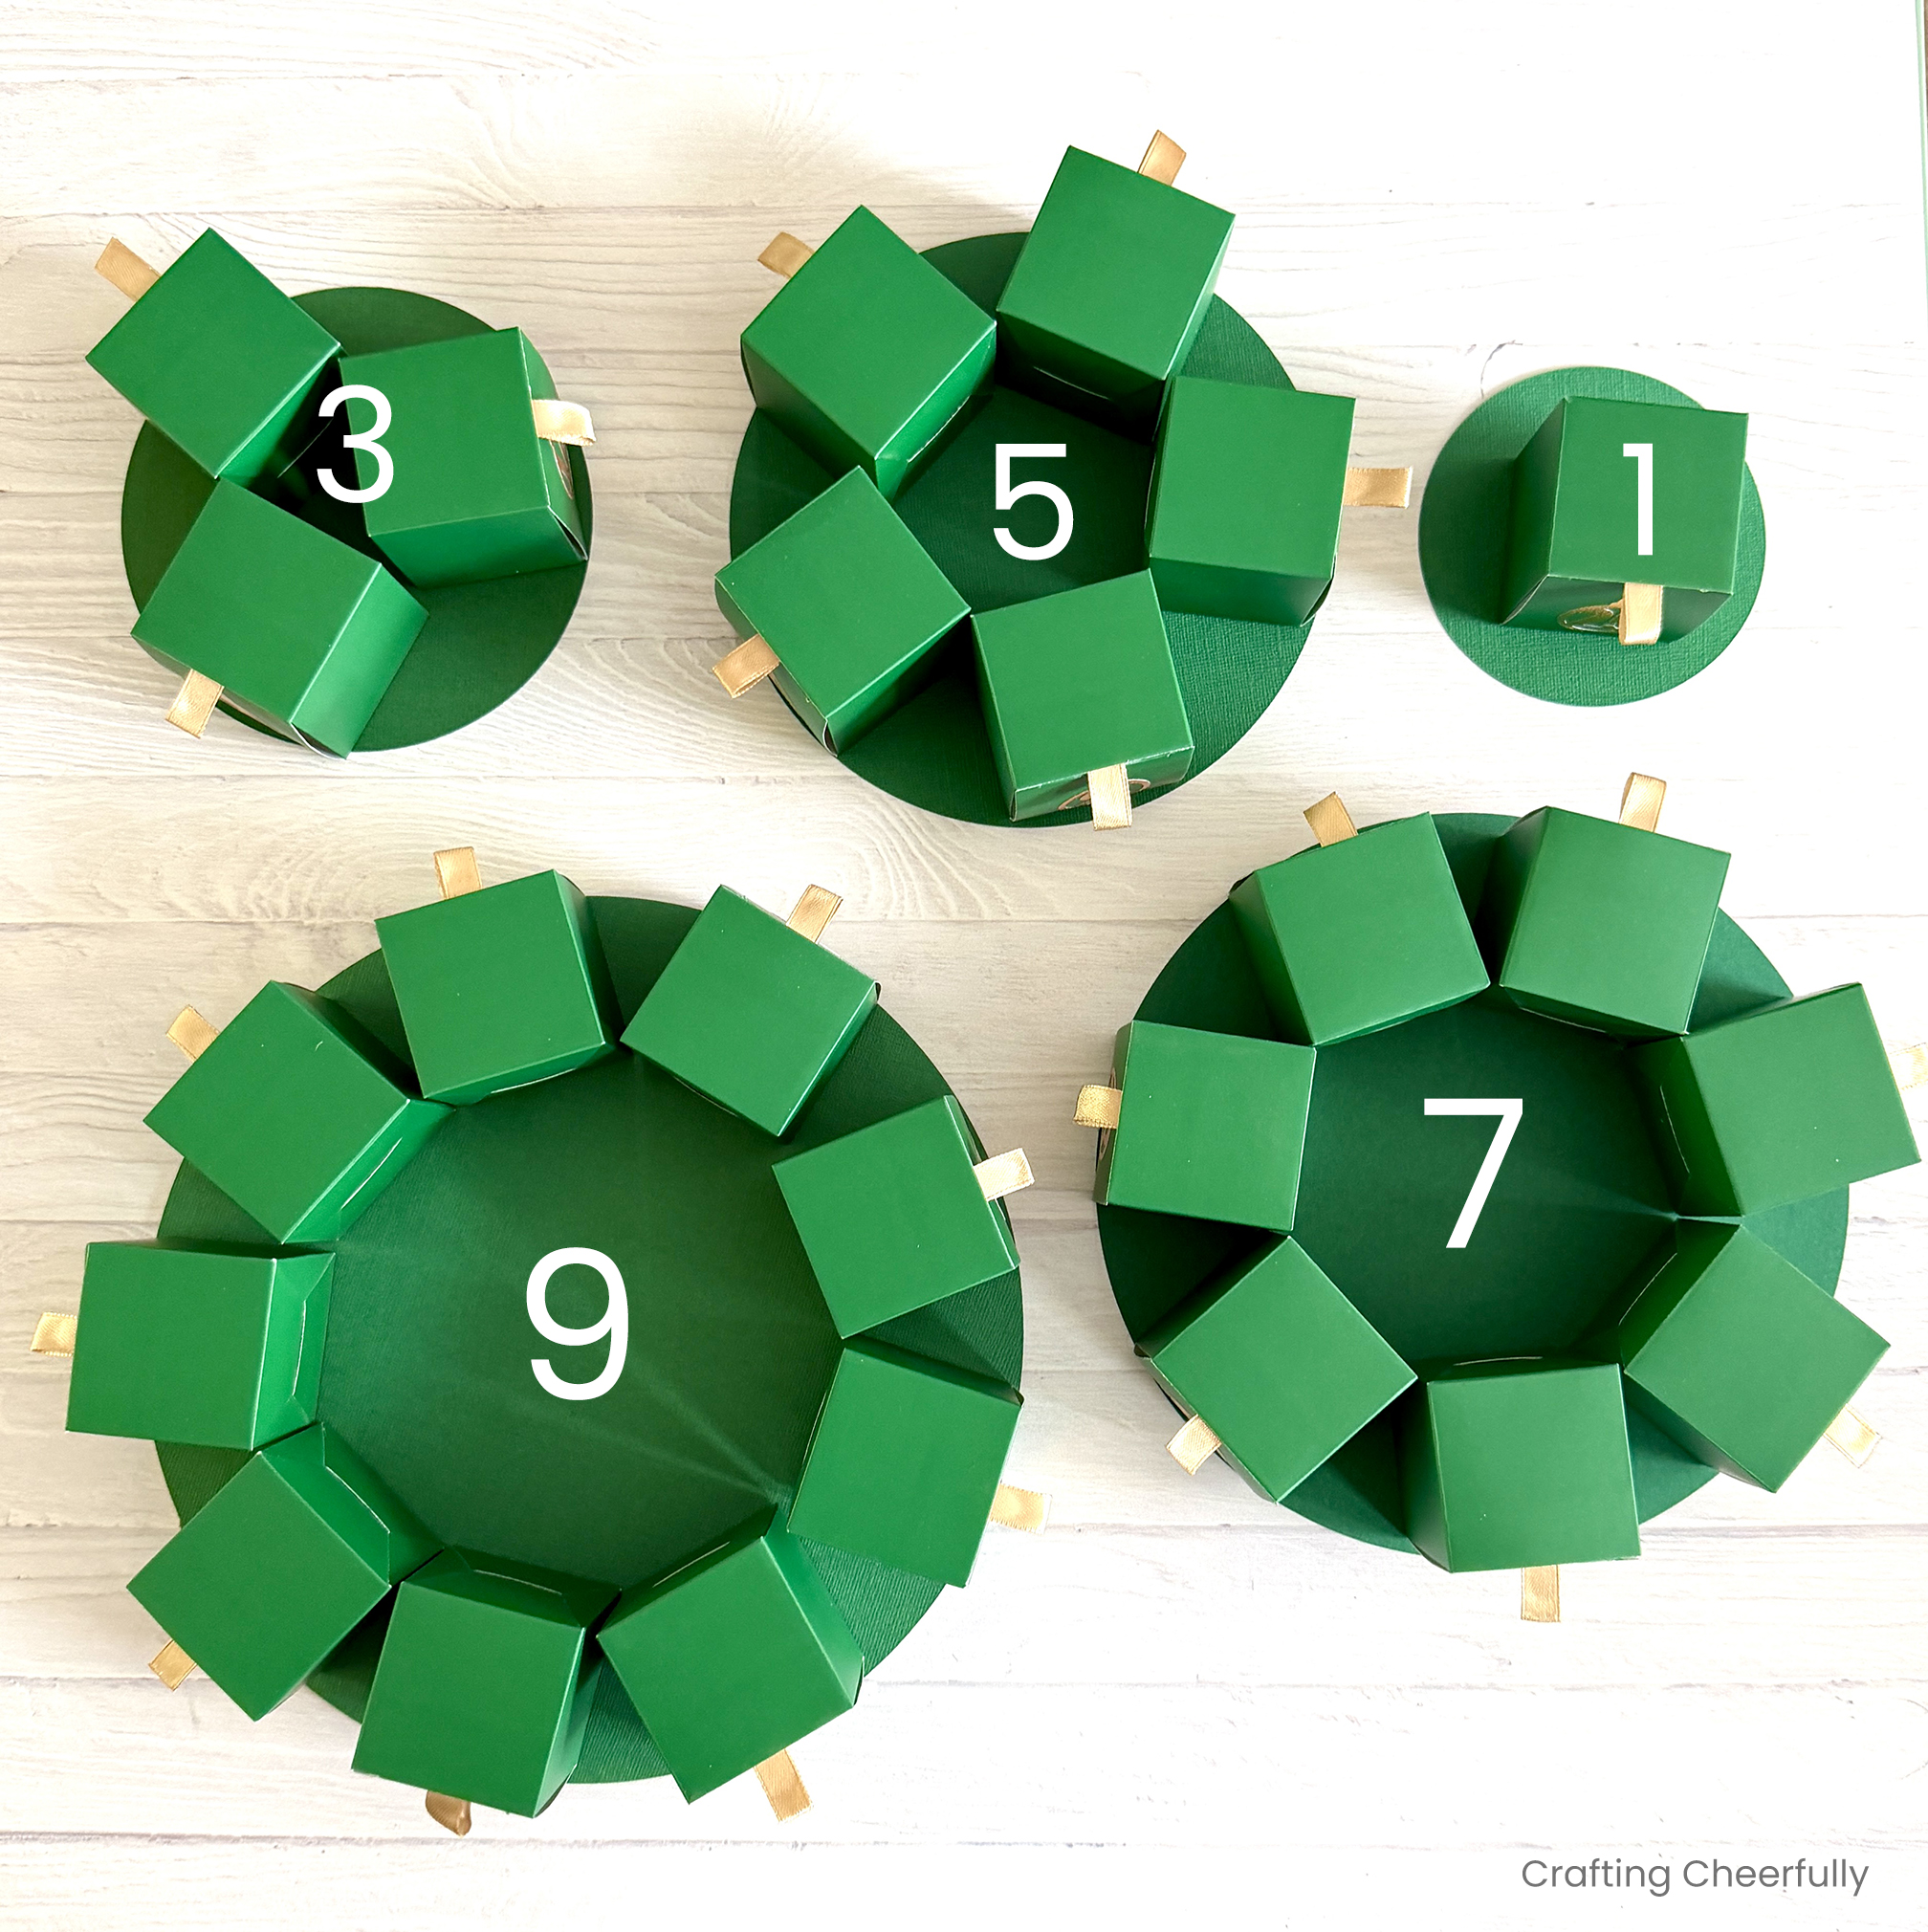
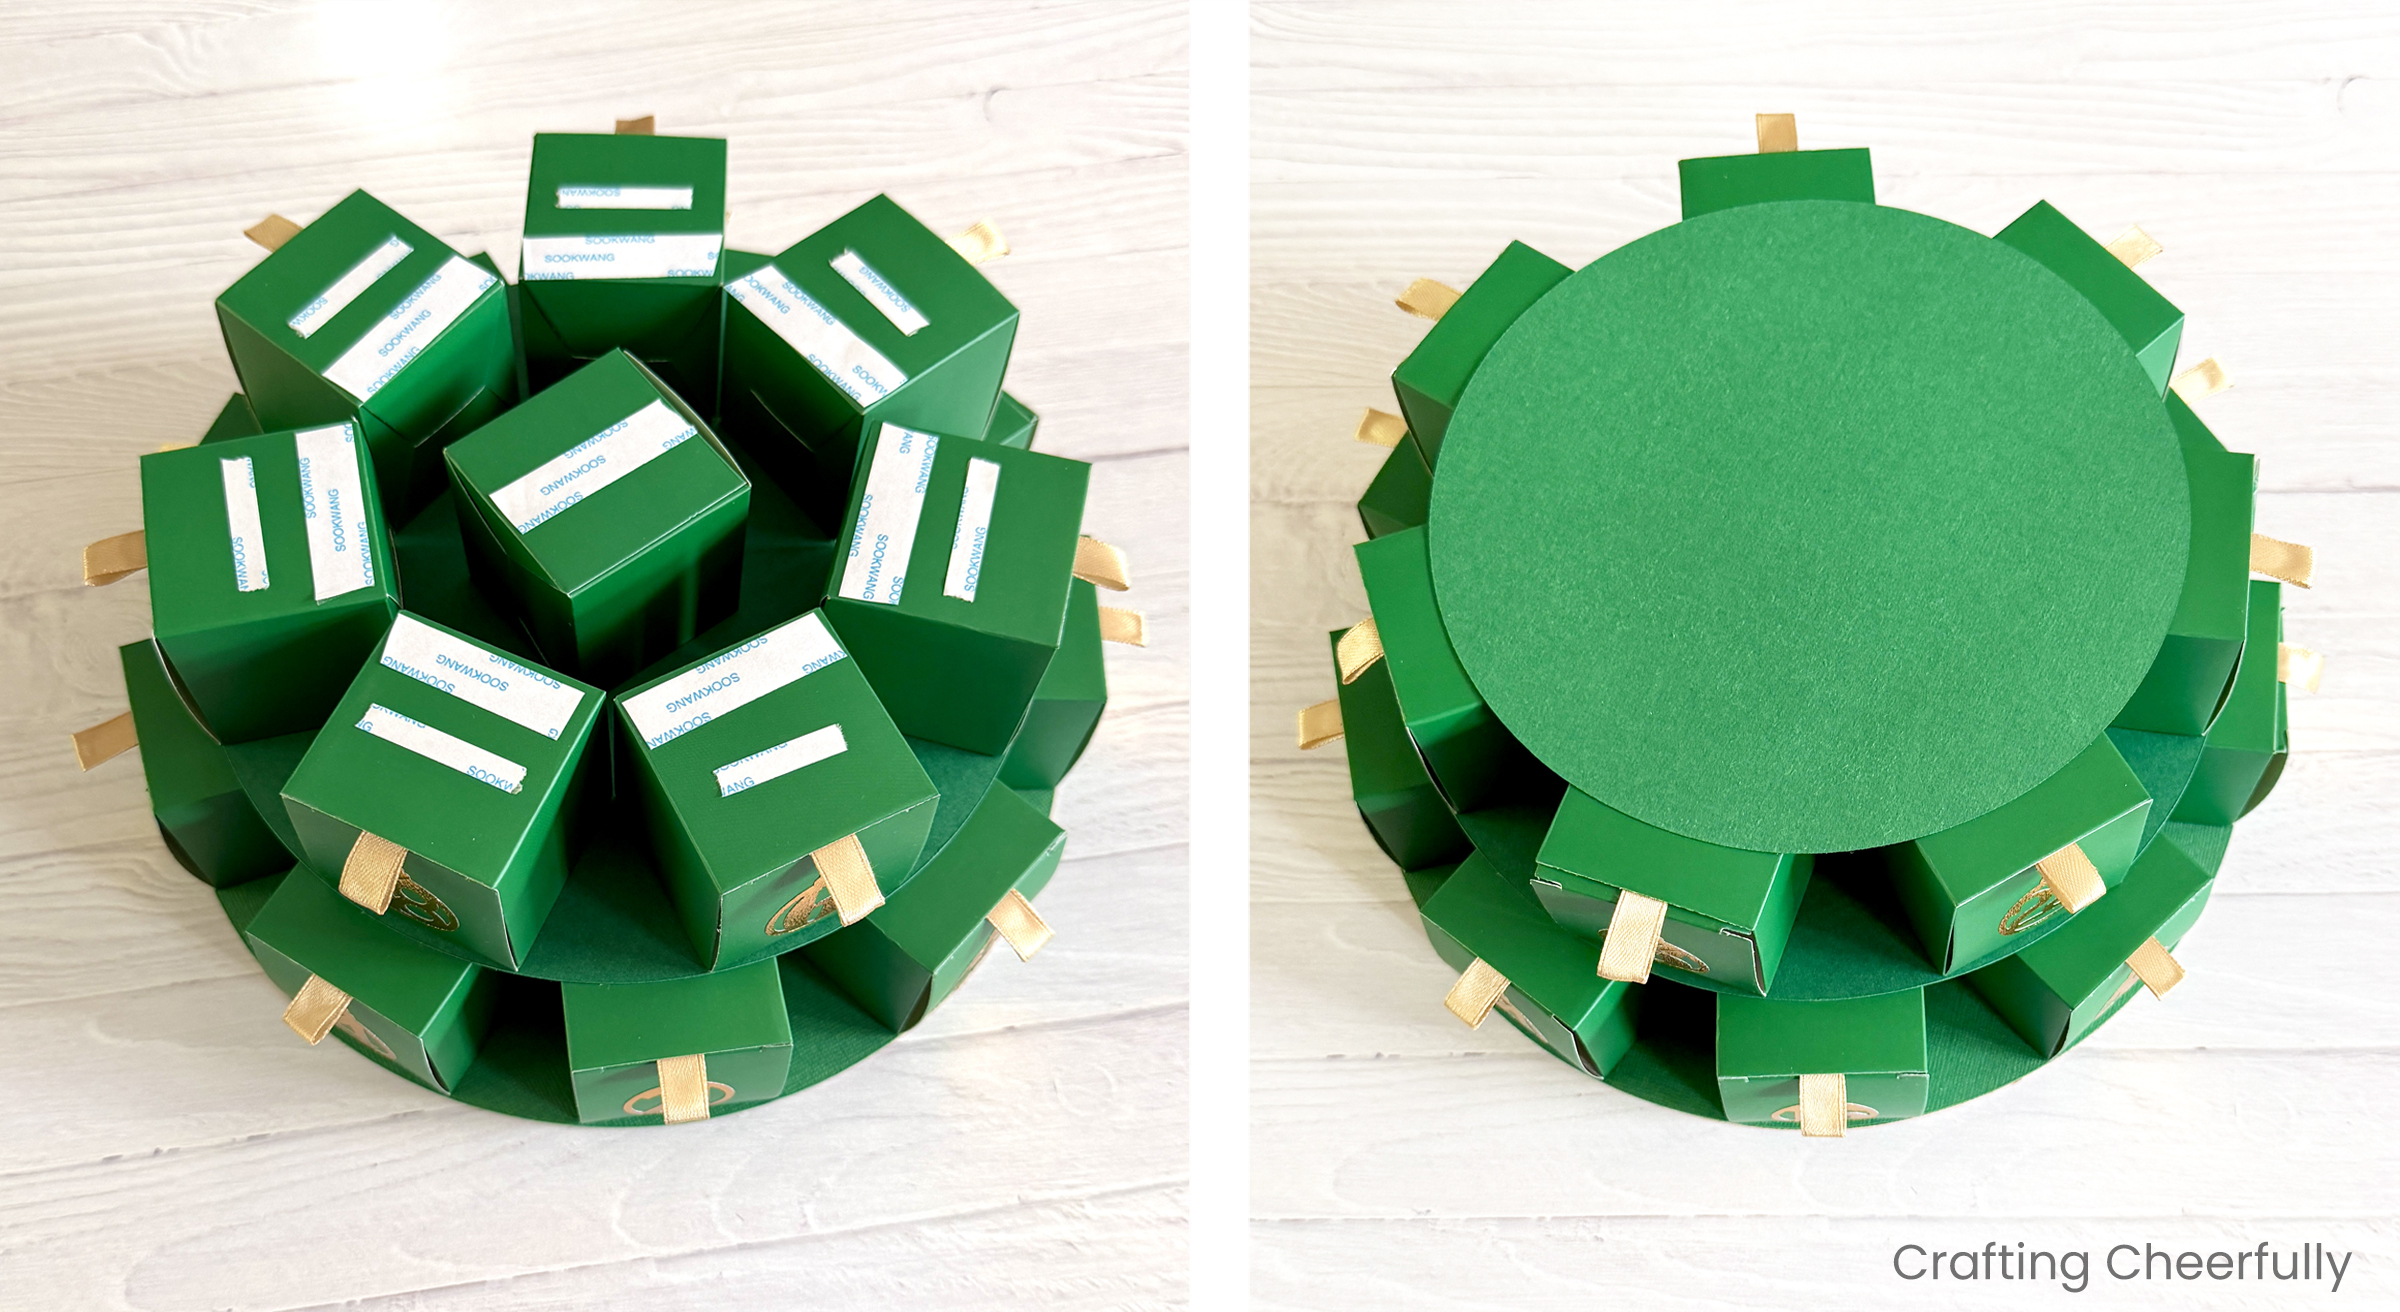
To attach the boxes, place strips of double-sided tape on the bottom of the boxes. Place them on the circles so the front edge of each box lines up with the edge of the circle. I placed a few empty boxes in the center of each layer to help support the layer above.
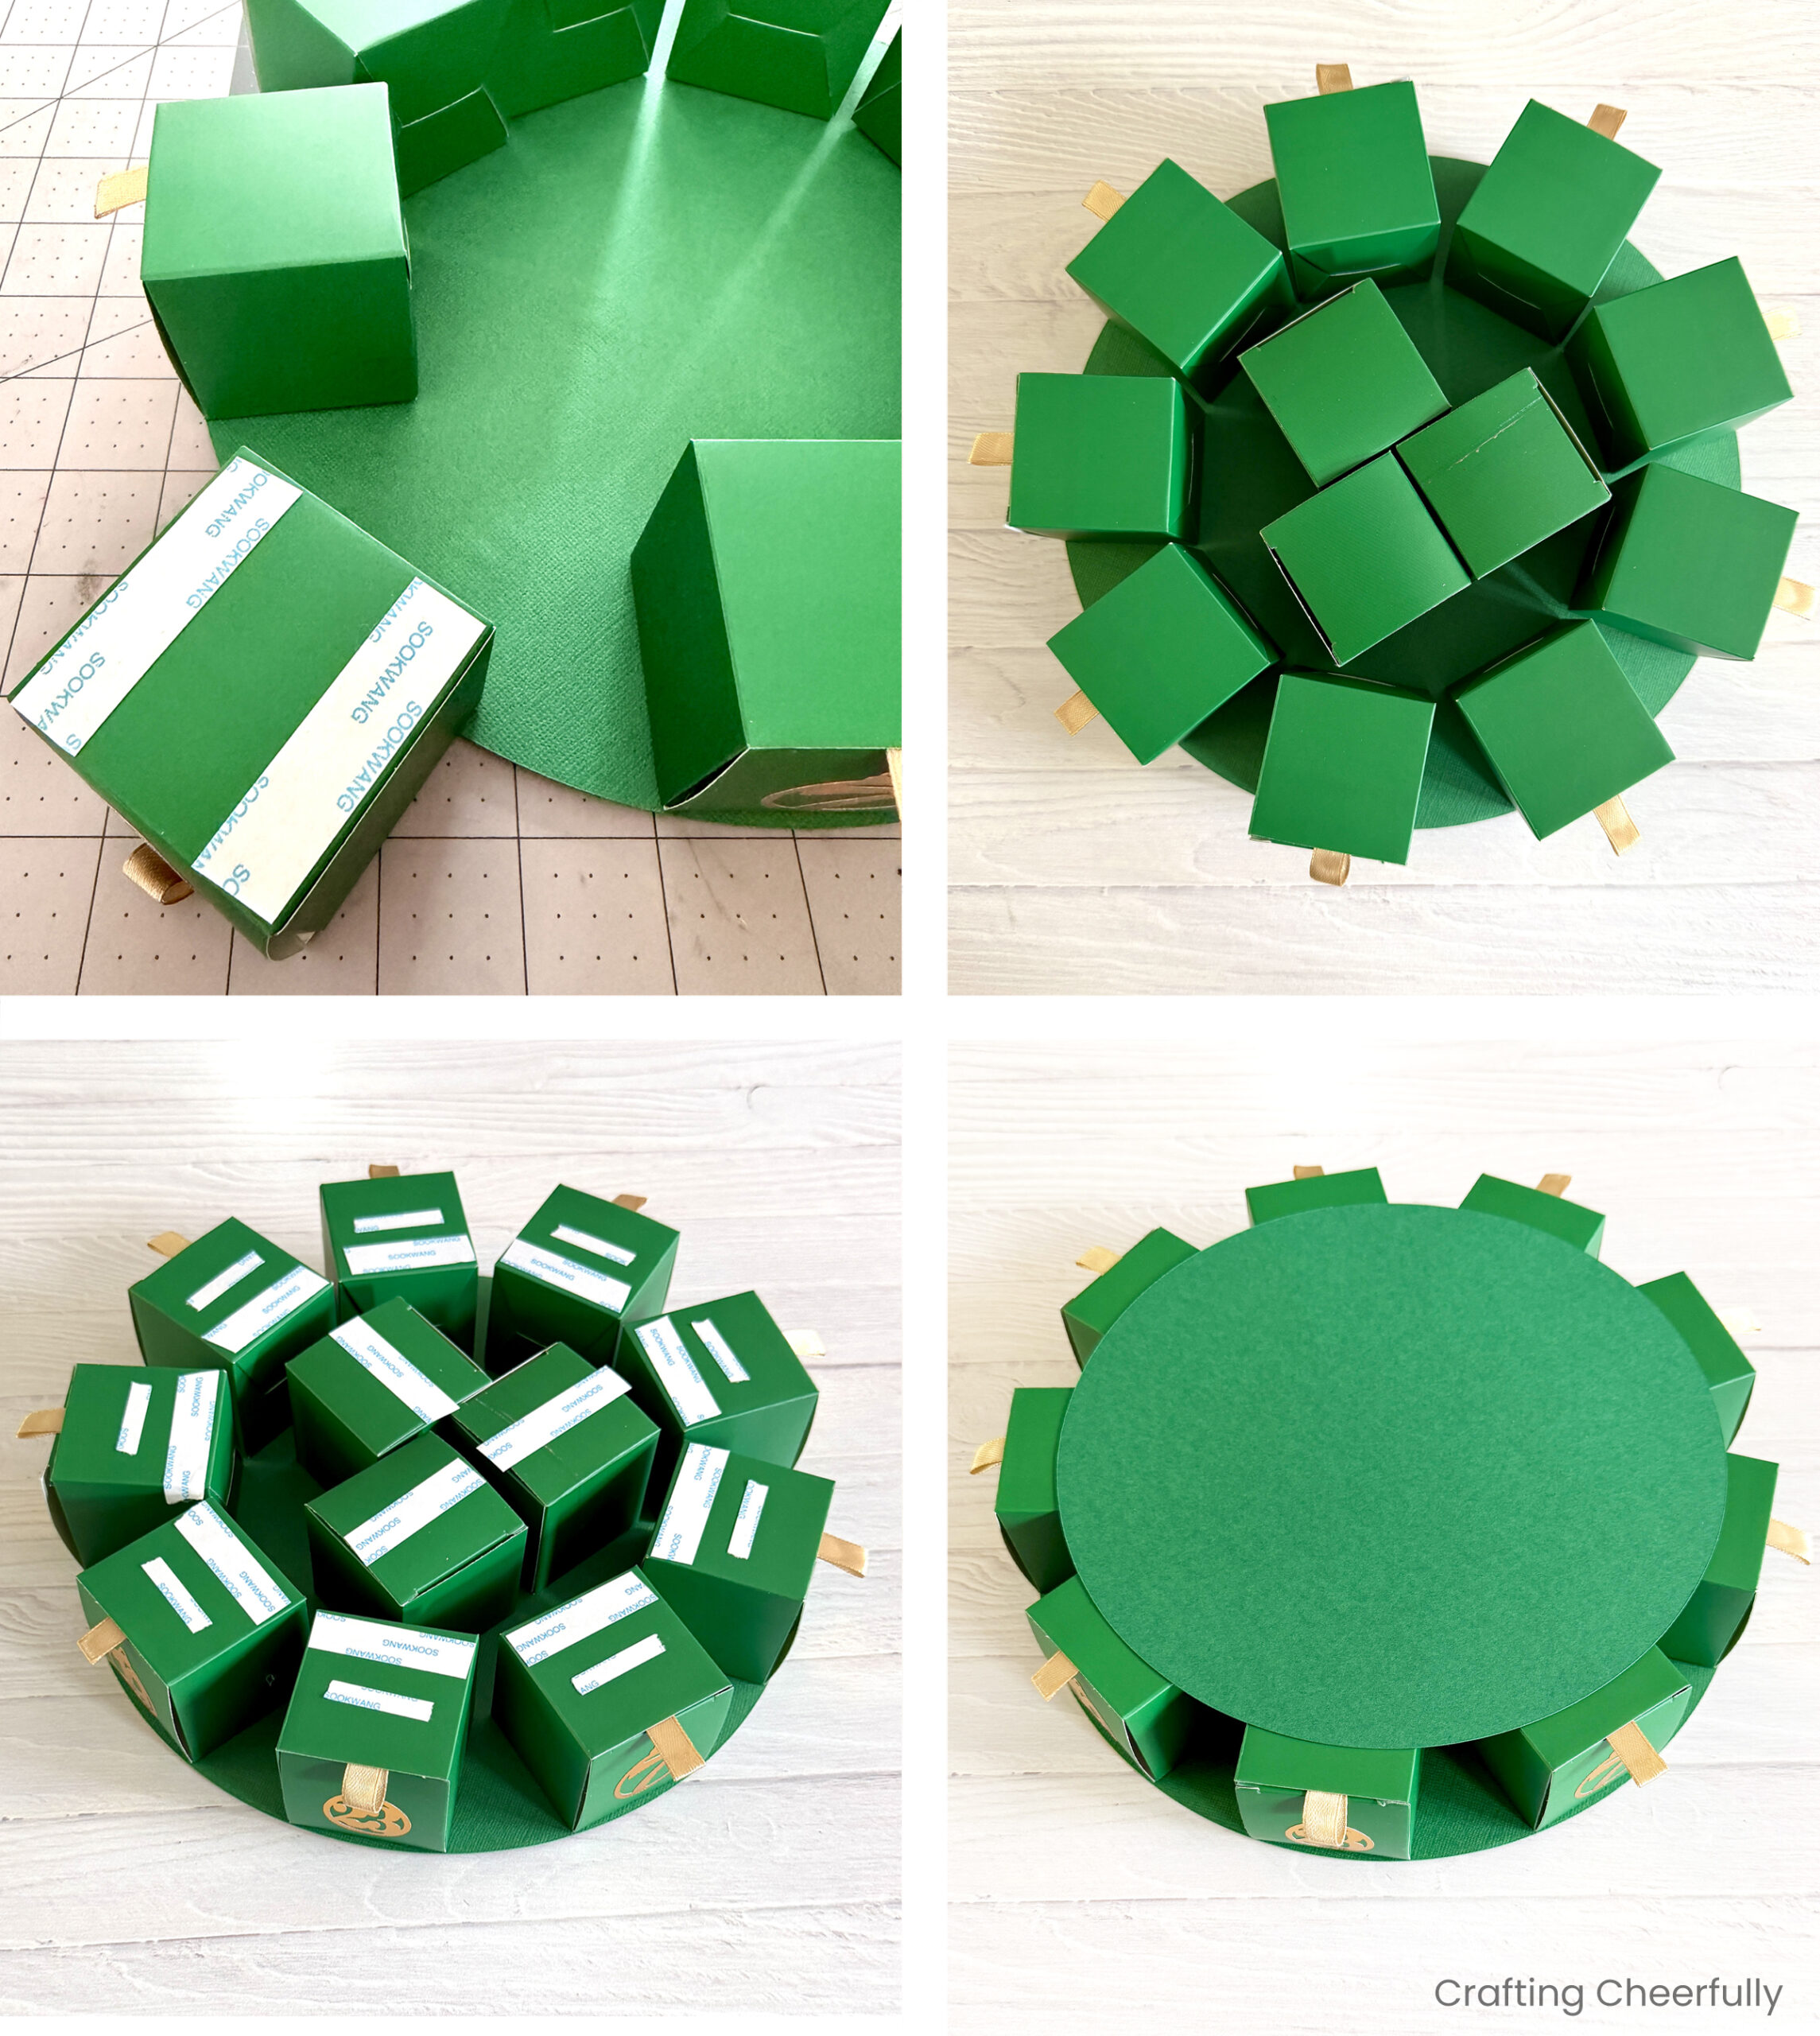
Repeat for the next three layers!
Make the Star for the Top
Step Six: Create a star to insert into the top box before adding it to the stack. Layer together gold cardstock to create two stars using glue or double-sided tape. I used foam dots for my center star pieces to make it them dimensional! Once the two stars are created, adhere them together with a popsicle stick between. Cut a small slit into the top of the final box and insert the popsicle stick star. It may have a tendency to flop over, but if you add treats inside the box they will help keep it upright.
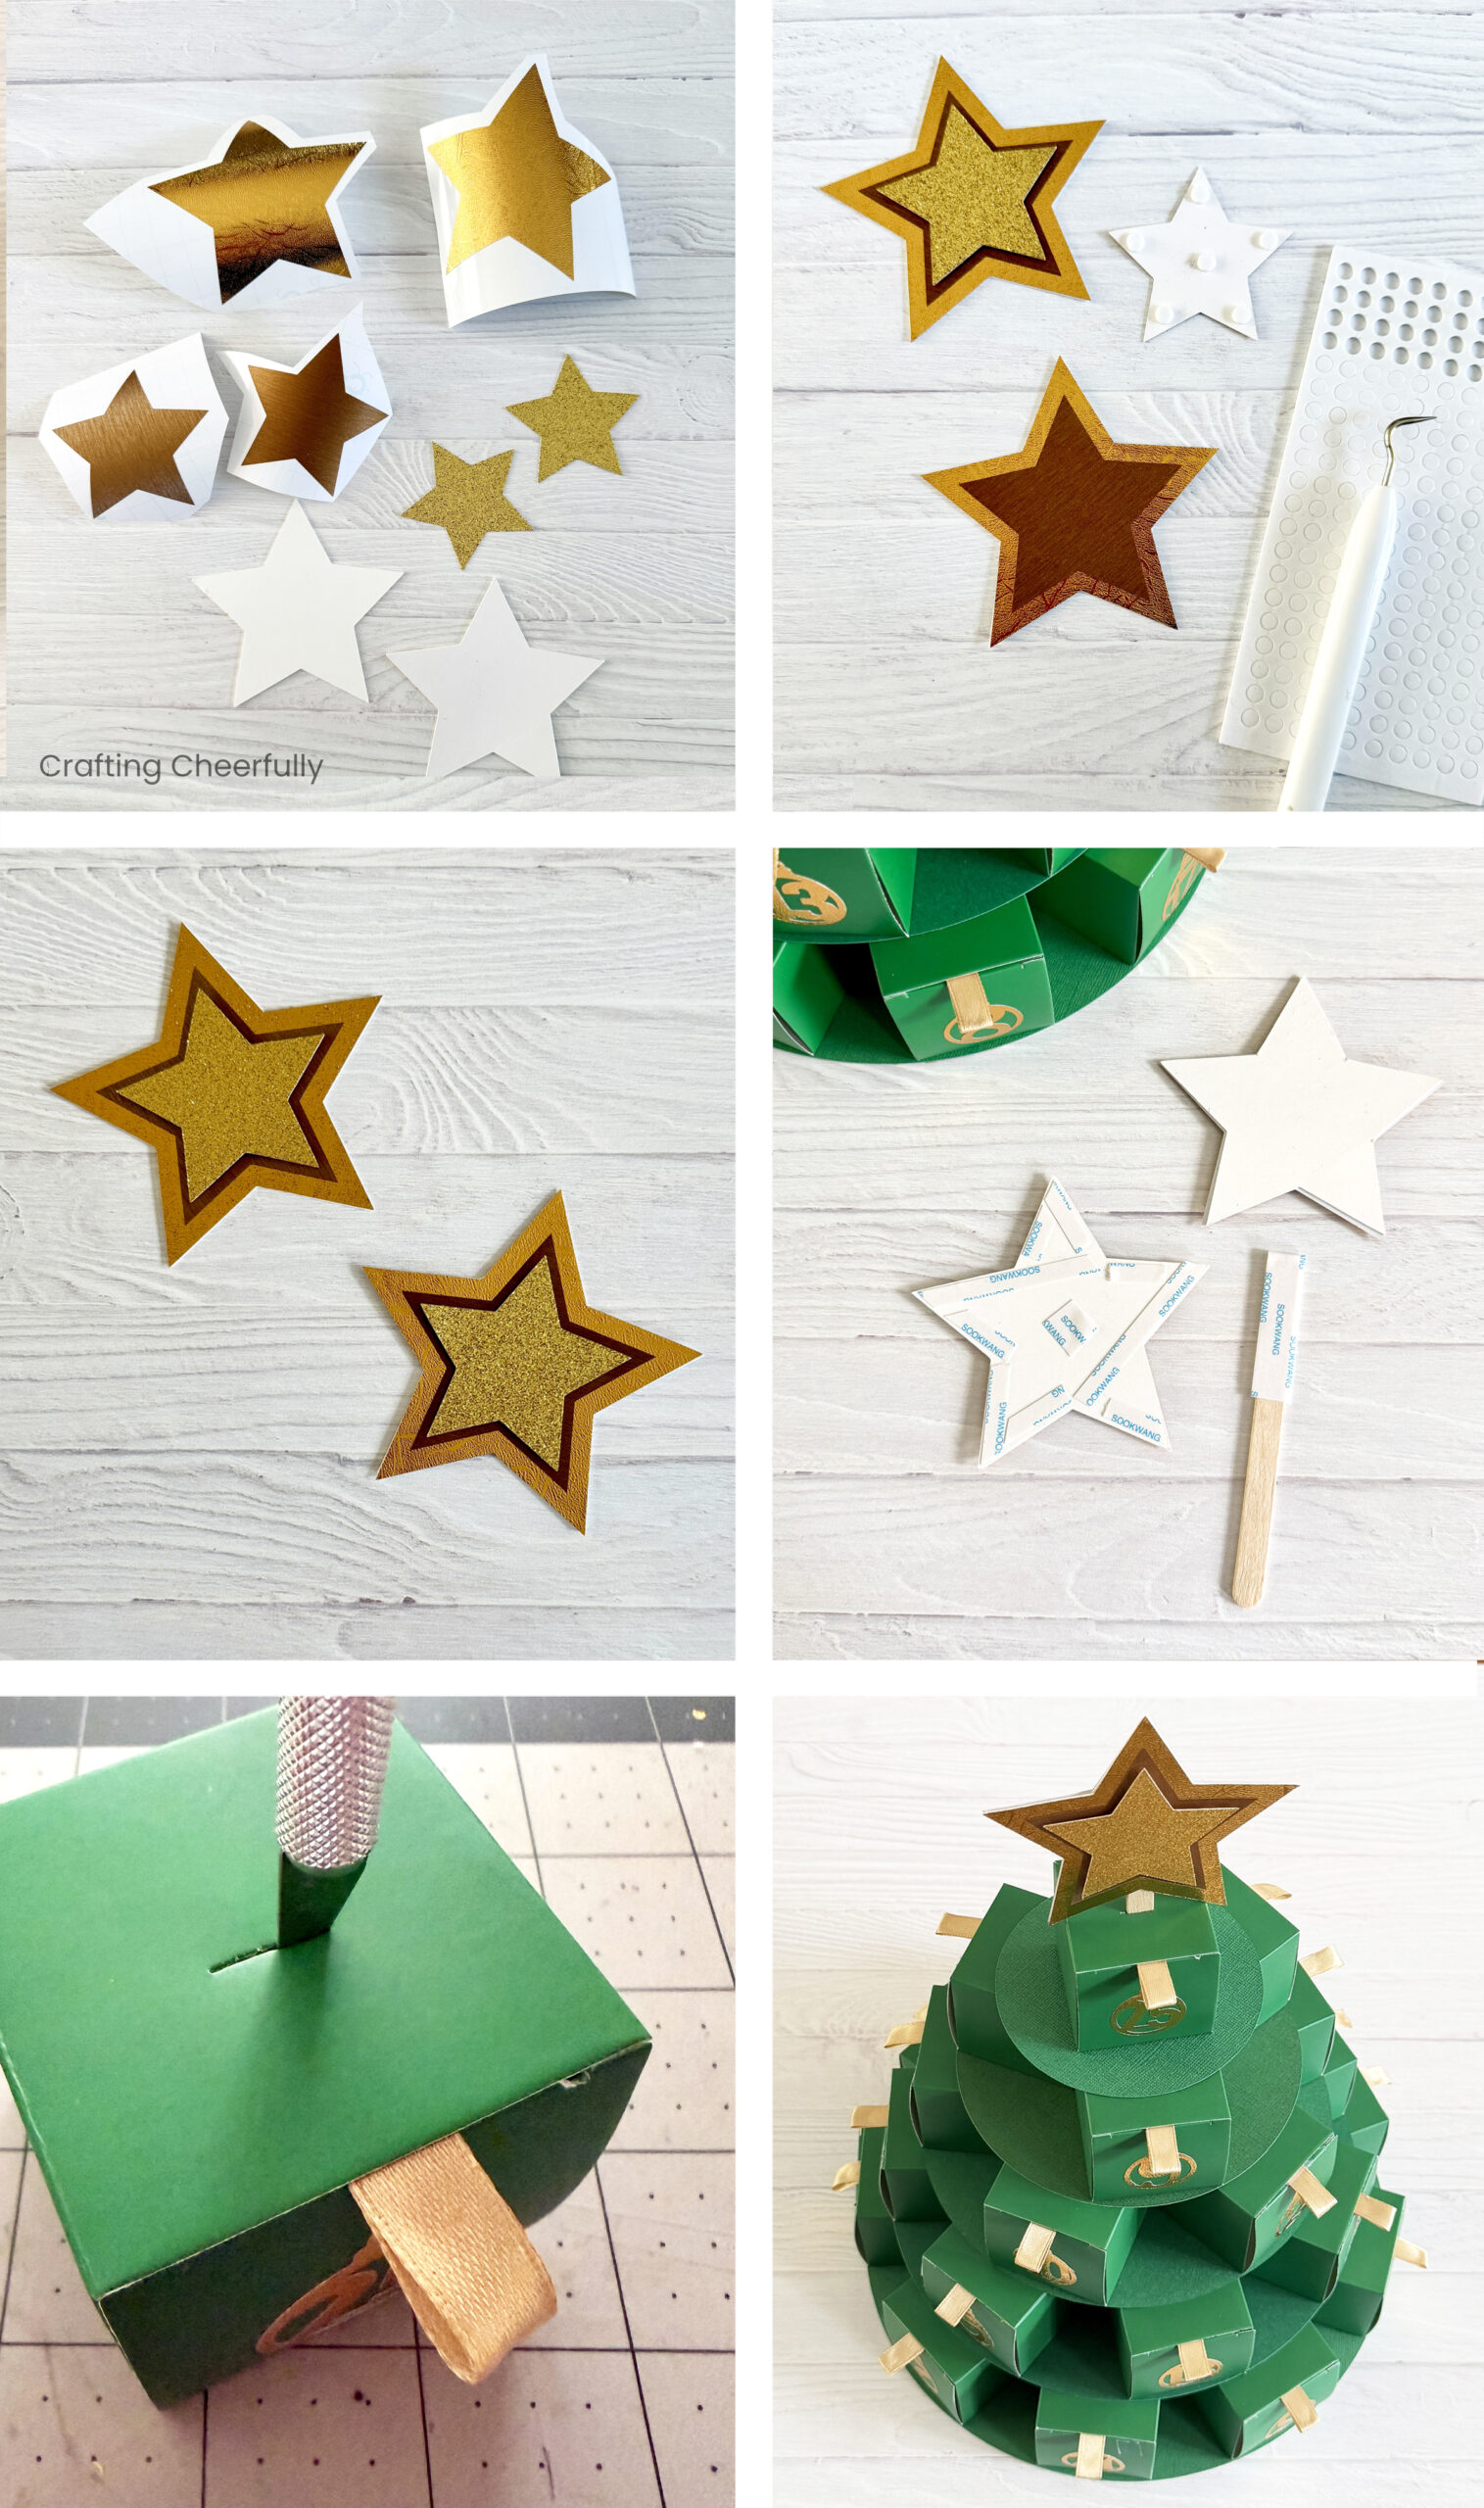
The Christmas tree Advent Calendar is finished and ready to be filled with sweets, treats and small gifts!
I hope you enjoyed today’s project and my “12 Days of Holiday Crafts” series this year! It was a lot of fun putting these crafts together. After doing this series for over 10 years it’s a fun challenge to come up with new holiday crafts each year.