
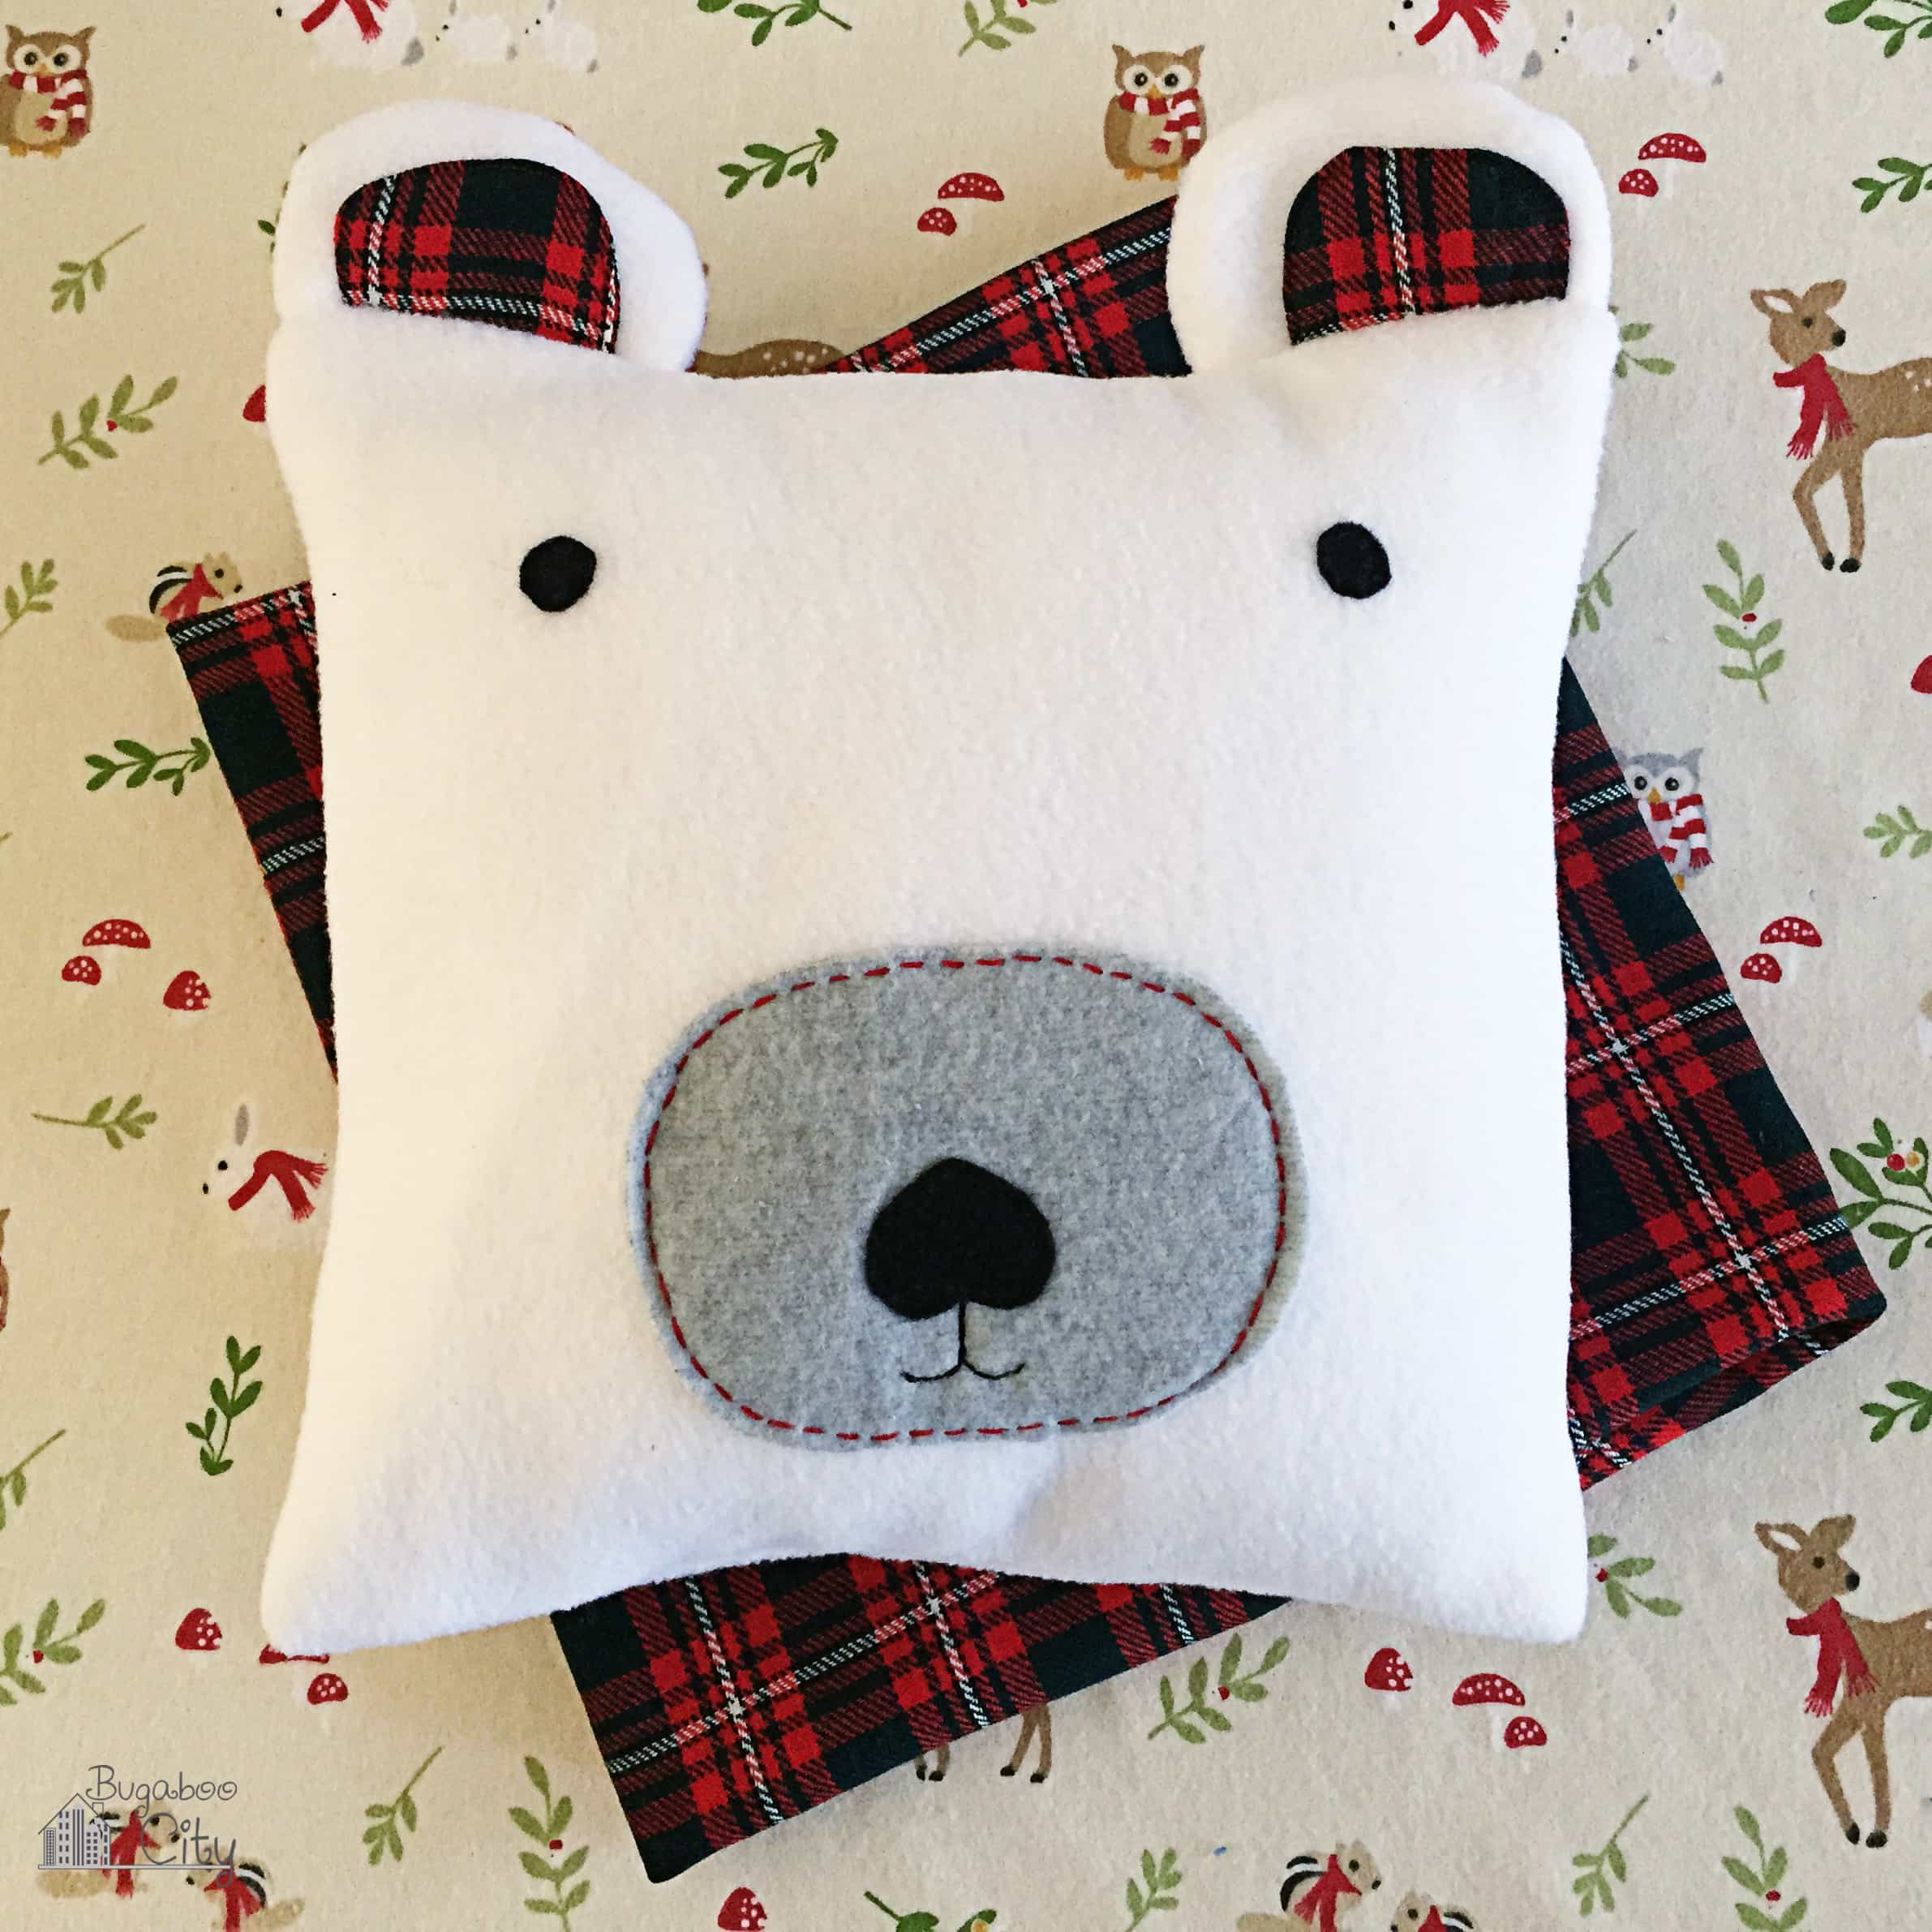
DIY Fleece Polar Bear Pillow
Learn how to make an adorable fleece polar bear pillow for the holidays or any time of the year! A great beginner sewing project and a wonderful gift.
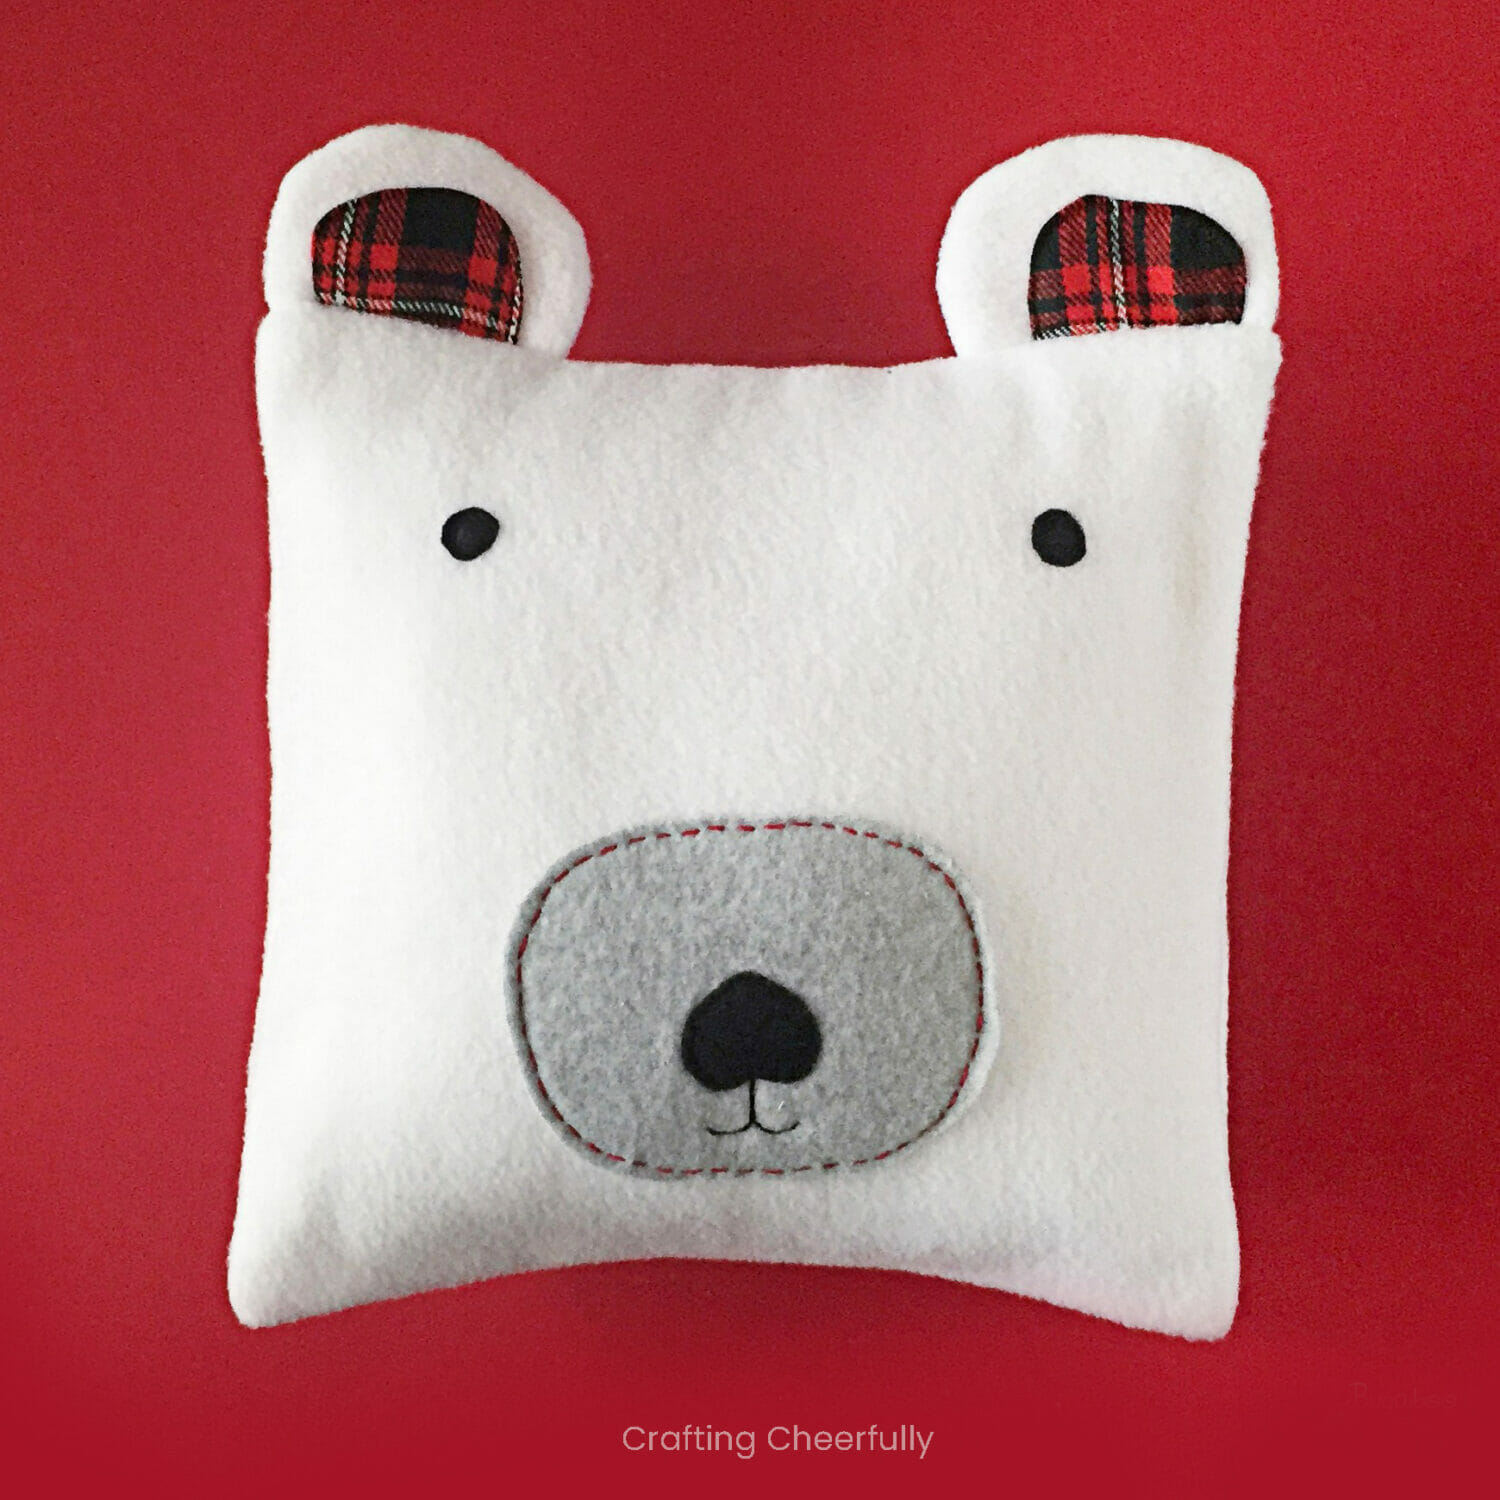
Hello! I’m back this morning with the Third Day of a Handmade Holiday – a DIY Fleece Polar Bear Pillow. These sweet pillows make such a great gift around the holidays – but also any time of the year. Fleece is so cozy and a really easy and forgiving fabric to work with. This is a great sewing project for both beginner and experienced sewers.
I made these pillows for my son and daughter and made them the exact same except I used different fabrics for the inner ears. This is a fun way to customize the pillows and make them unique. The red plaid makes this pillow feel ready for Christmas. Switch that fabric to blue snowflakes and it is now the perfect winter-time pillow!
Overall, the pillows come together quickly and are fairly inexpensive to make – especially if you have some of the supplies on hand. I have other fun pillow patterns that use fleece, like this Unicorn Pillow, Holiday Unicorn Pillow and Rainbow Pillow. All of them are made from fleece just like the polar bear and come with a free pattern to help you get started.

How to Make a DIY Polar Bear Holiday Pillow
Supplies Needed
- Free printable pattern – Grab the free file by filling out the purple form at the end of this post.
- White fleece – about a 1/2 yard
- Accent fabric for ears – under 1/4 yard, fabric scraps would probably work
- Grey fleece
- Black felt for nose and eyes – scraps
- Black embroidery floss and red embroidery floss
- 12″ Pillow Form Insert
- Sewing notions –
Step by Step Tutorial
Step One: Cut the fabric.
First, cut all of your fabric using the free pattern and the cutting guide below. You will have a total of 15 pieces – twelve from the pattern and three from the dimensions listed below. Don’t forget to pre-wash all of your fabrics.
- Cut one 13″x13″ square from white fleece (includes 1/2″ seam allowance)
- Cut two 9″ x 13″ rectangles from white fleece (includes 1/2″ seam allowance)
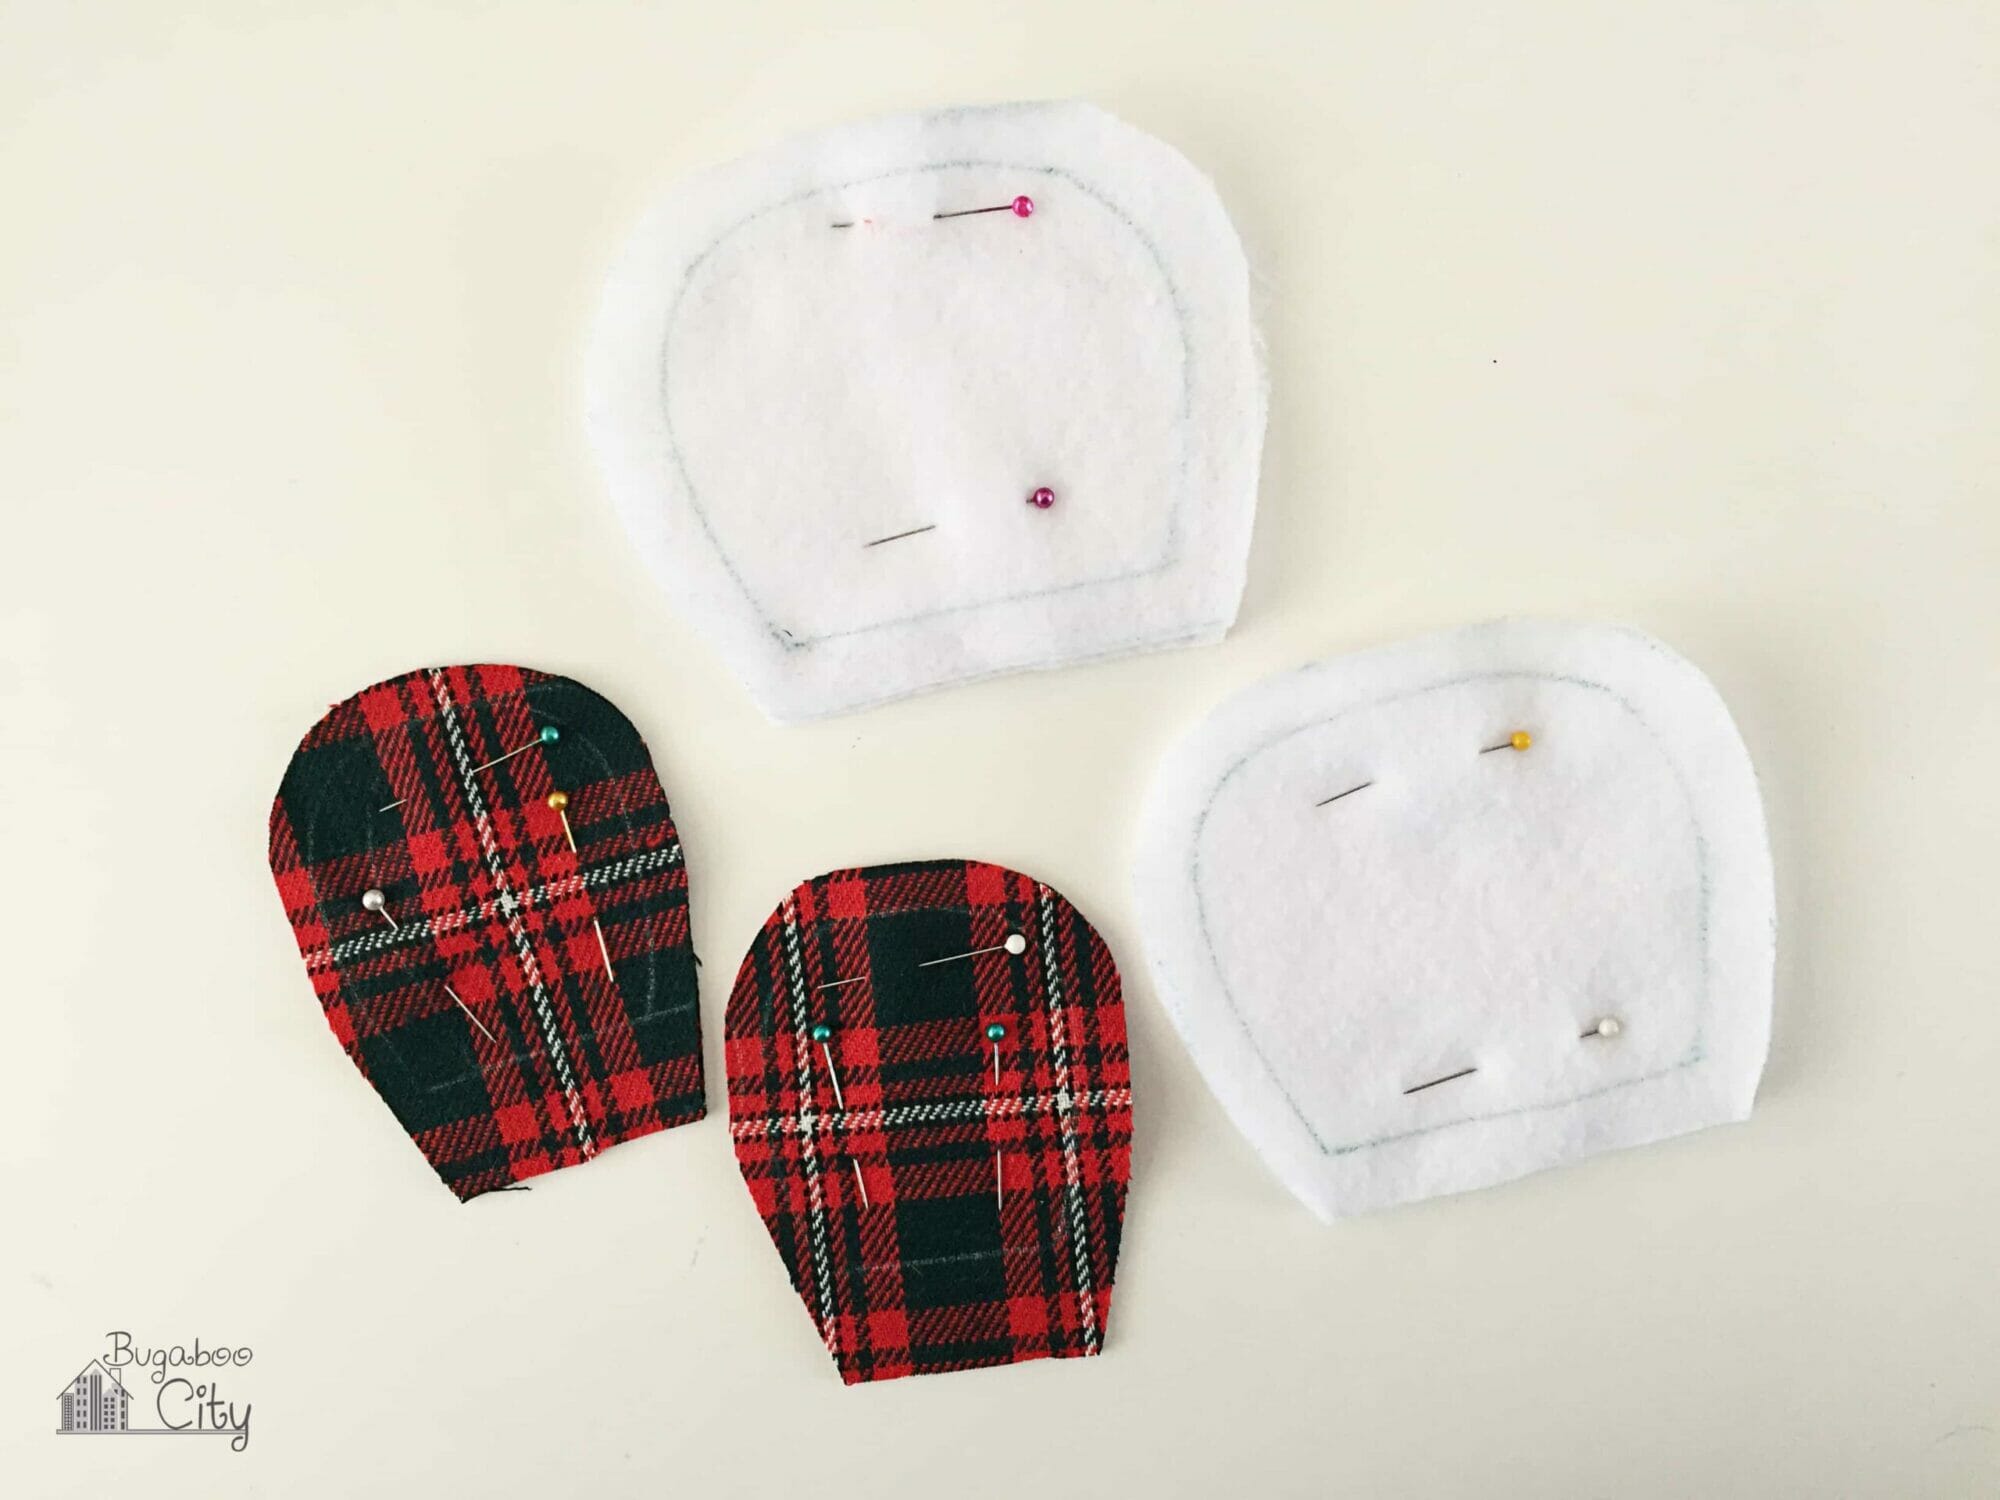
Step Two: Create the ears.
Each ear is made up of a white fleece outer ear and a patterned accent inner ear. First, sew two inner ear pieces together, right sides together, trim seam allowance and flip inside out.
Position the inner ear on the right side of one of the white fleece outer ear pieces and top stitch it.
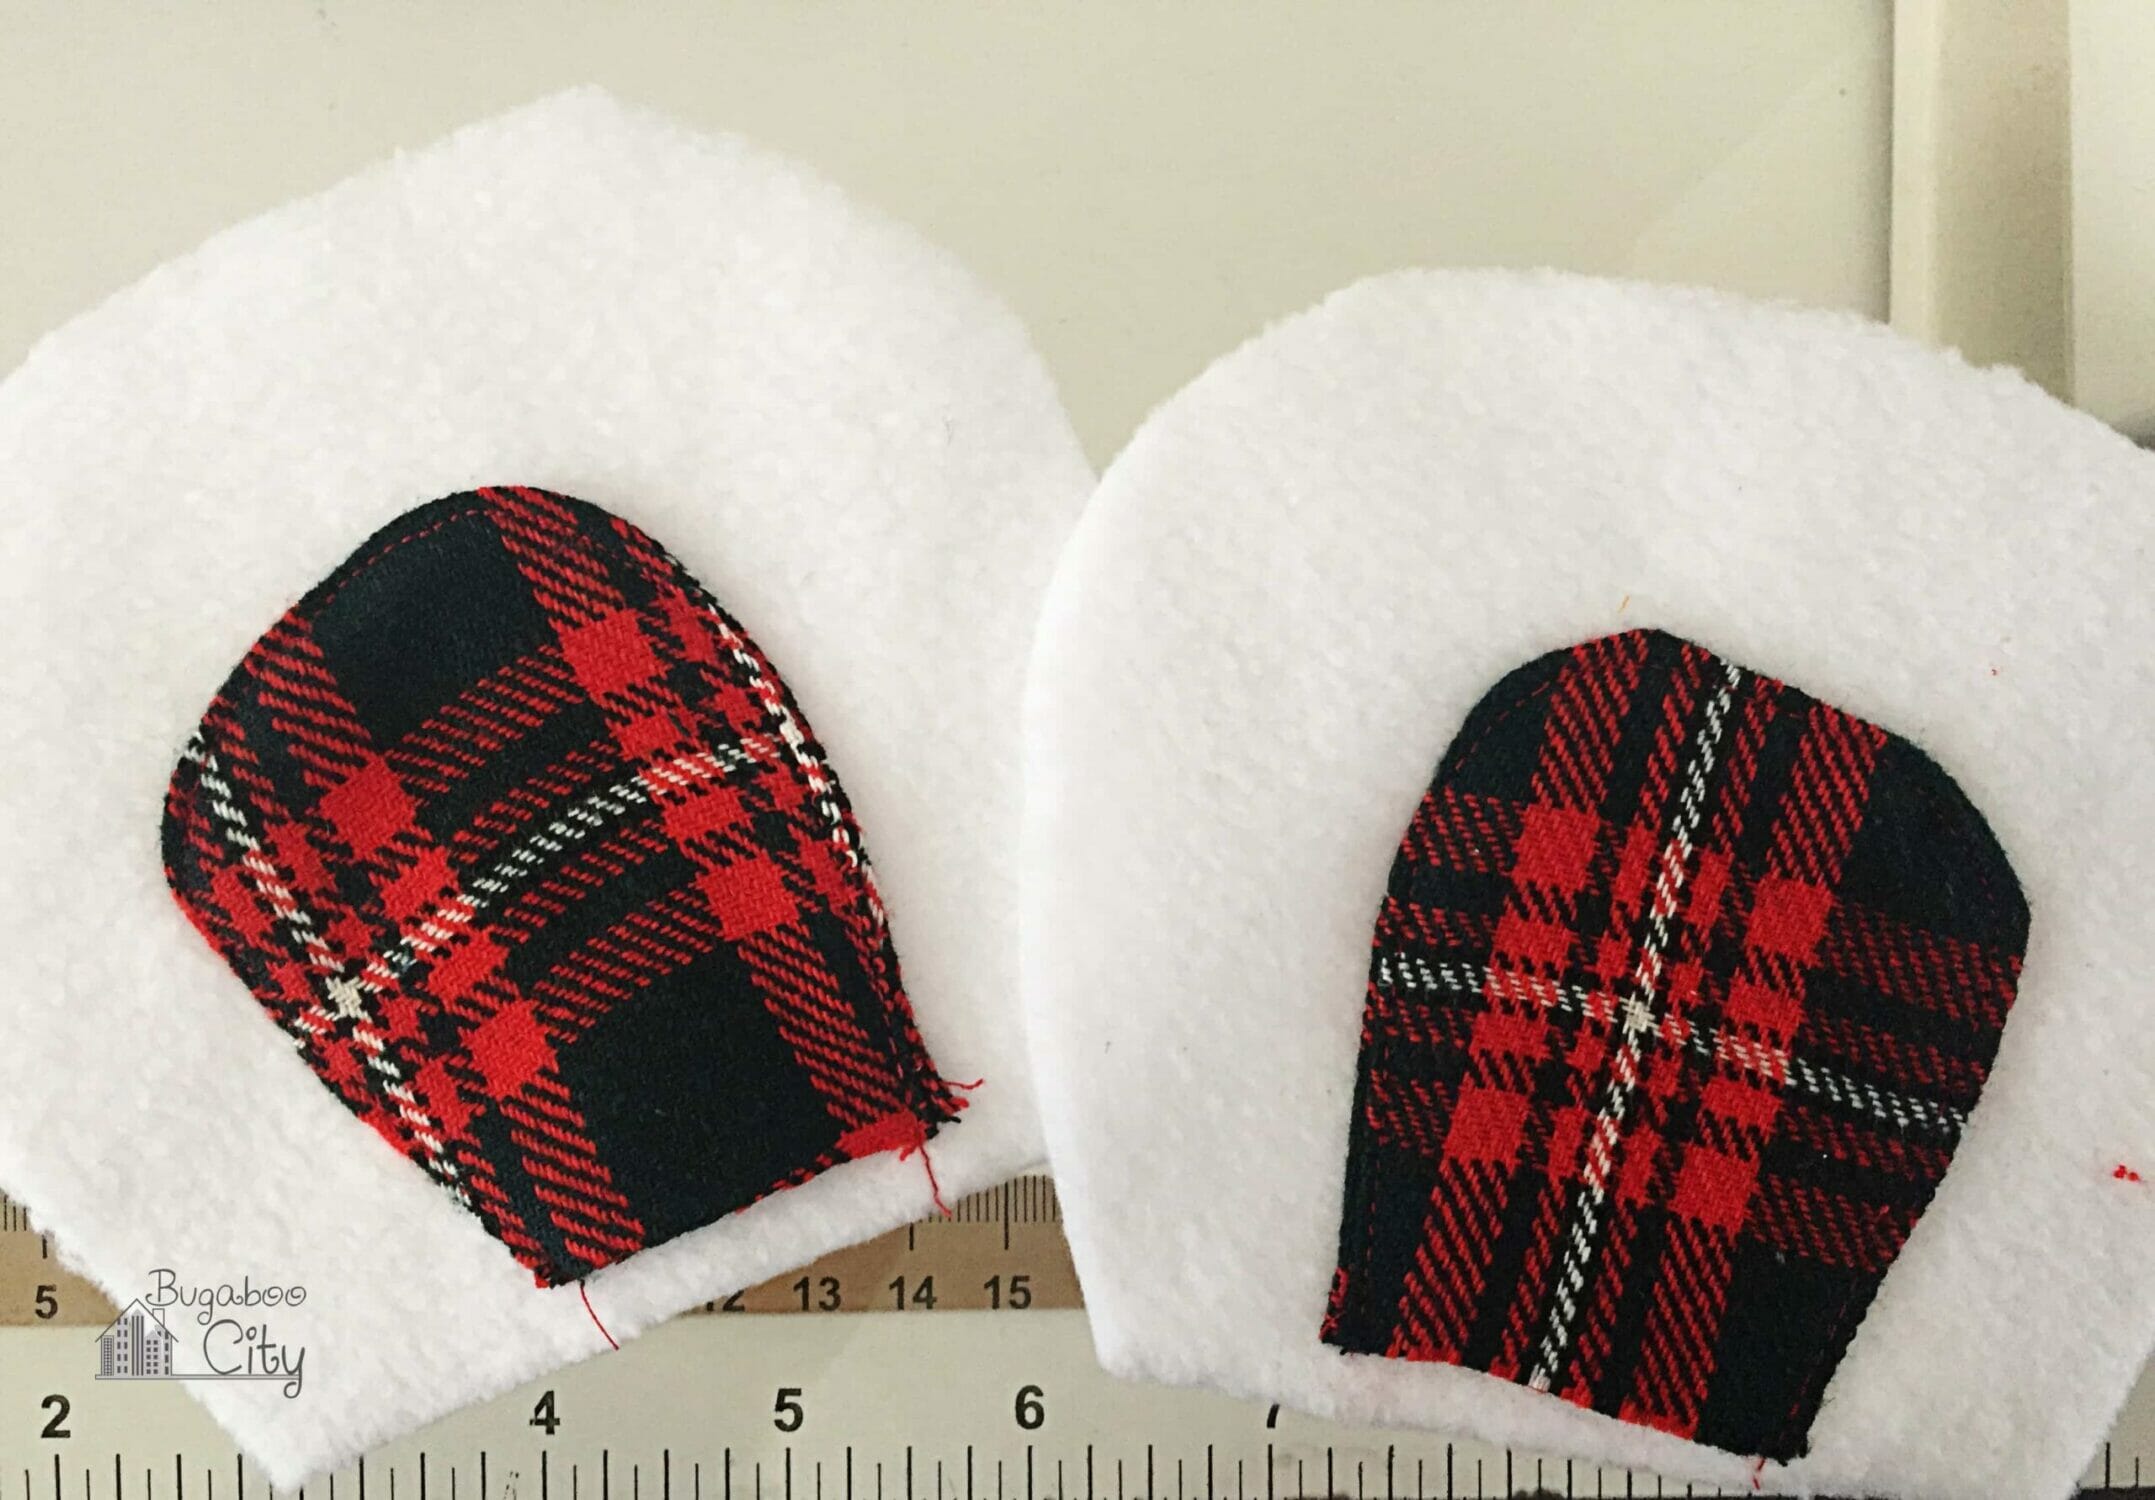
Next, sew the outer ear pieces with right sides together leaving the bottom open. The patterned inner ear piece will be sandwiched on the inside. Flip the ear right side out and the ear is completed. Repeat for the second ear.
Step Three: Stitch the front of the polar bear pillow.
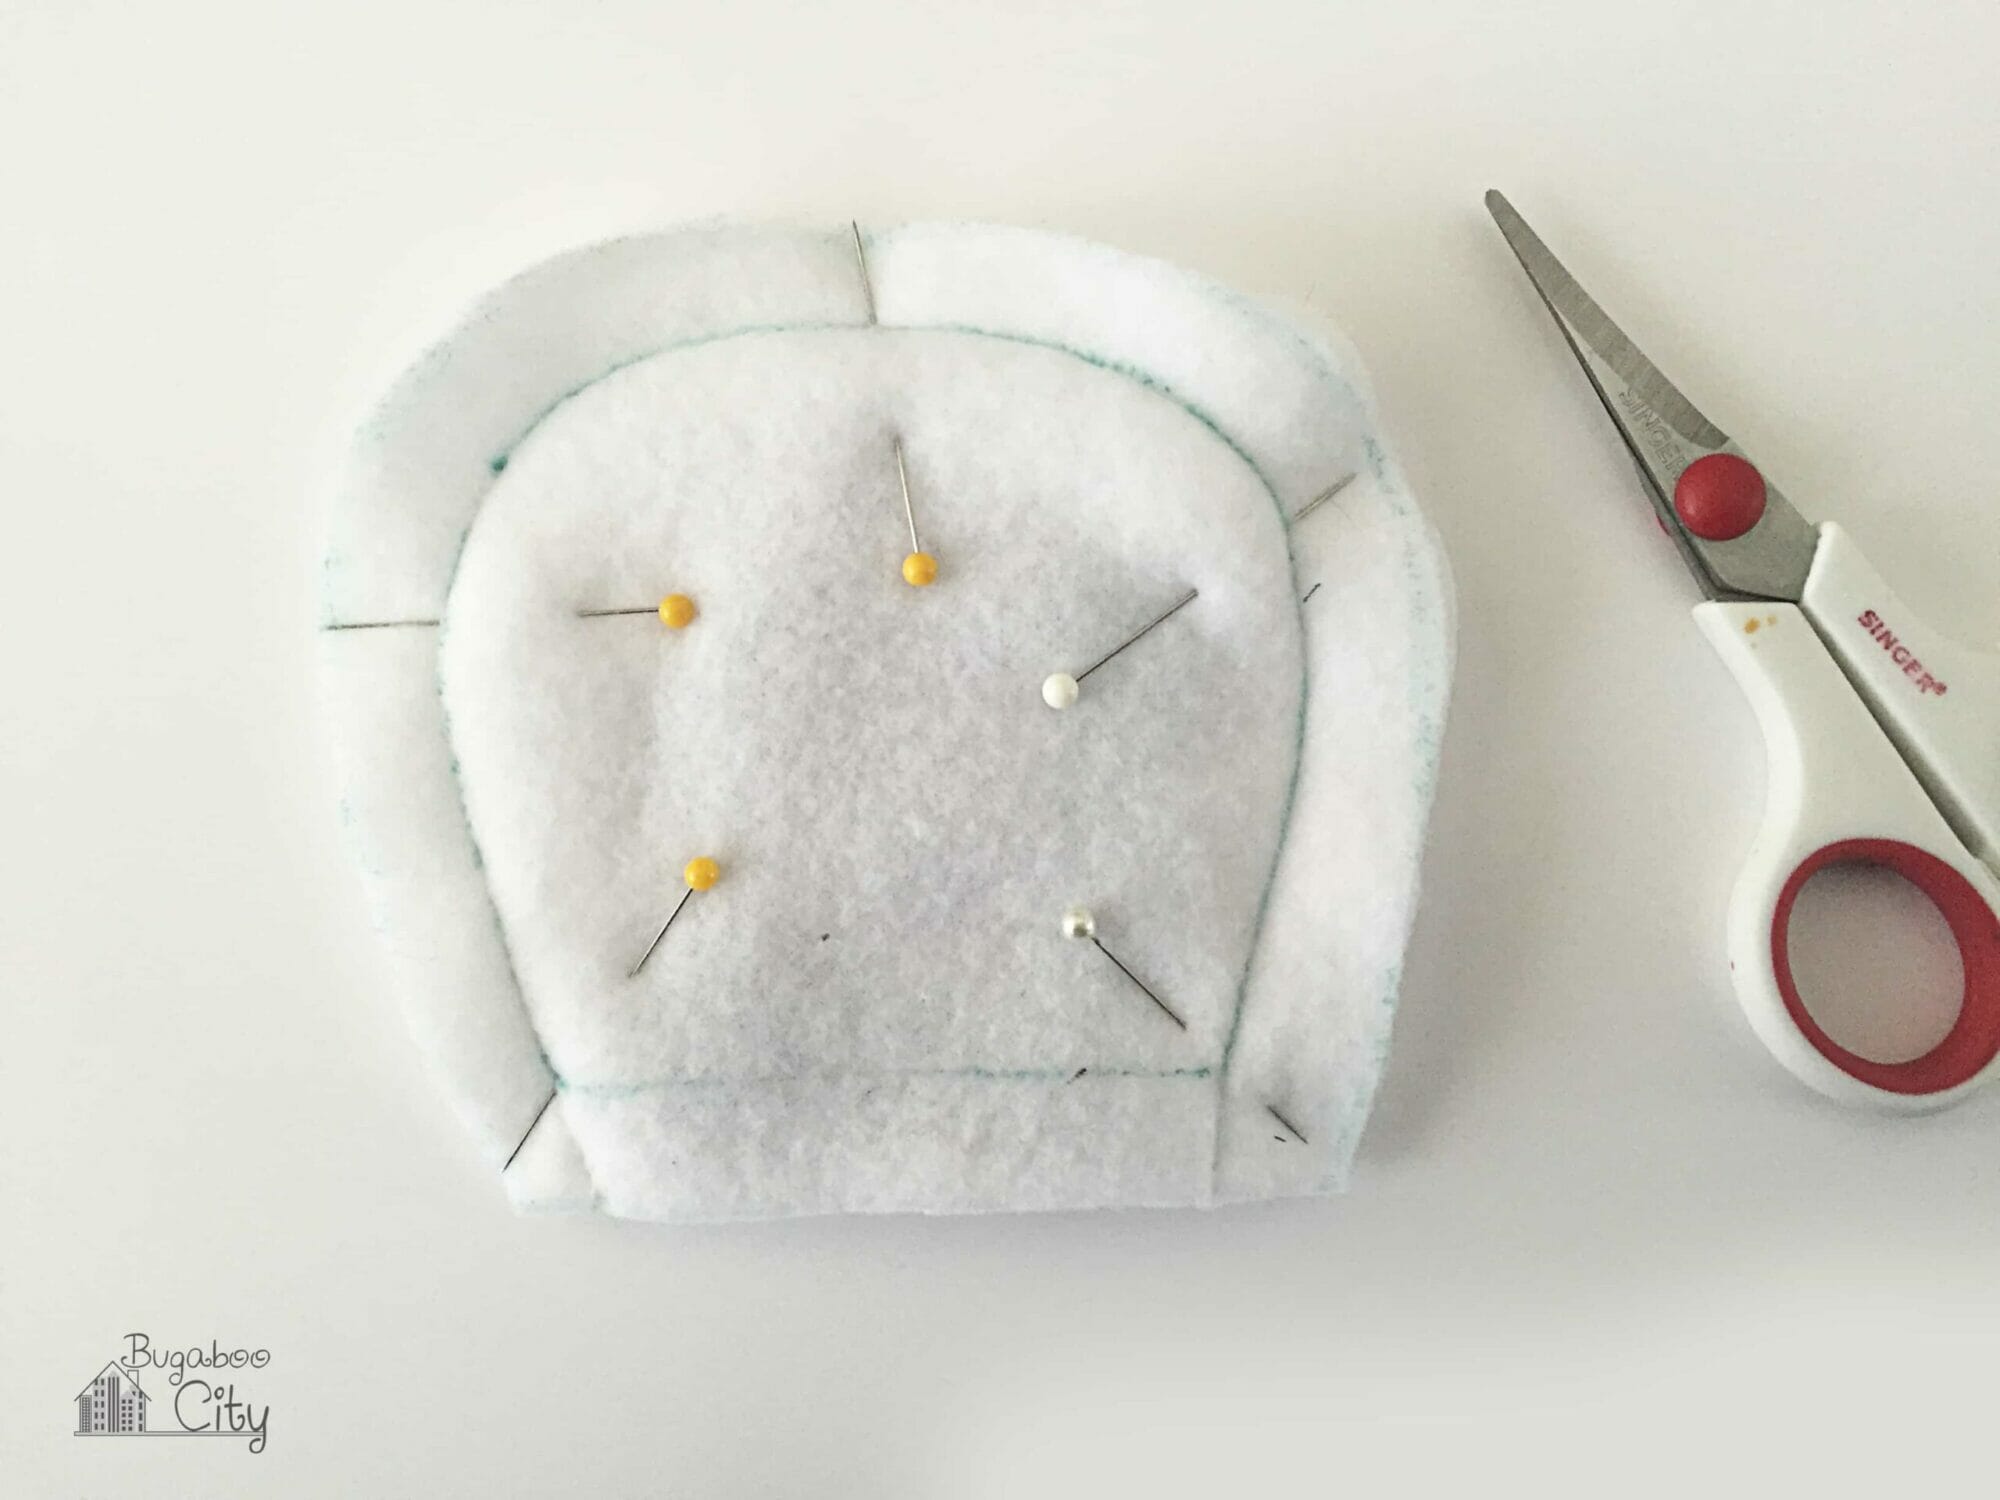
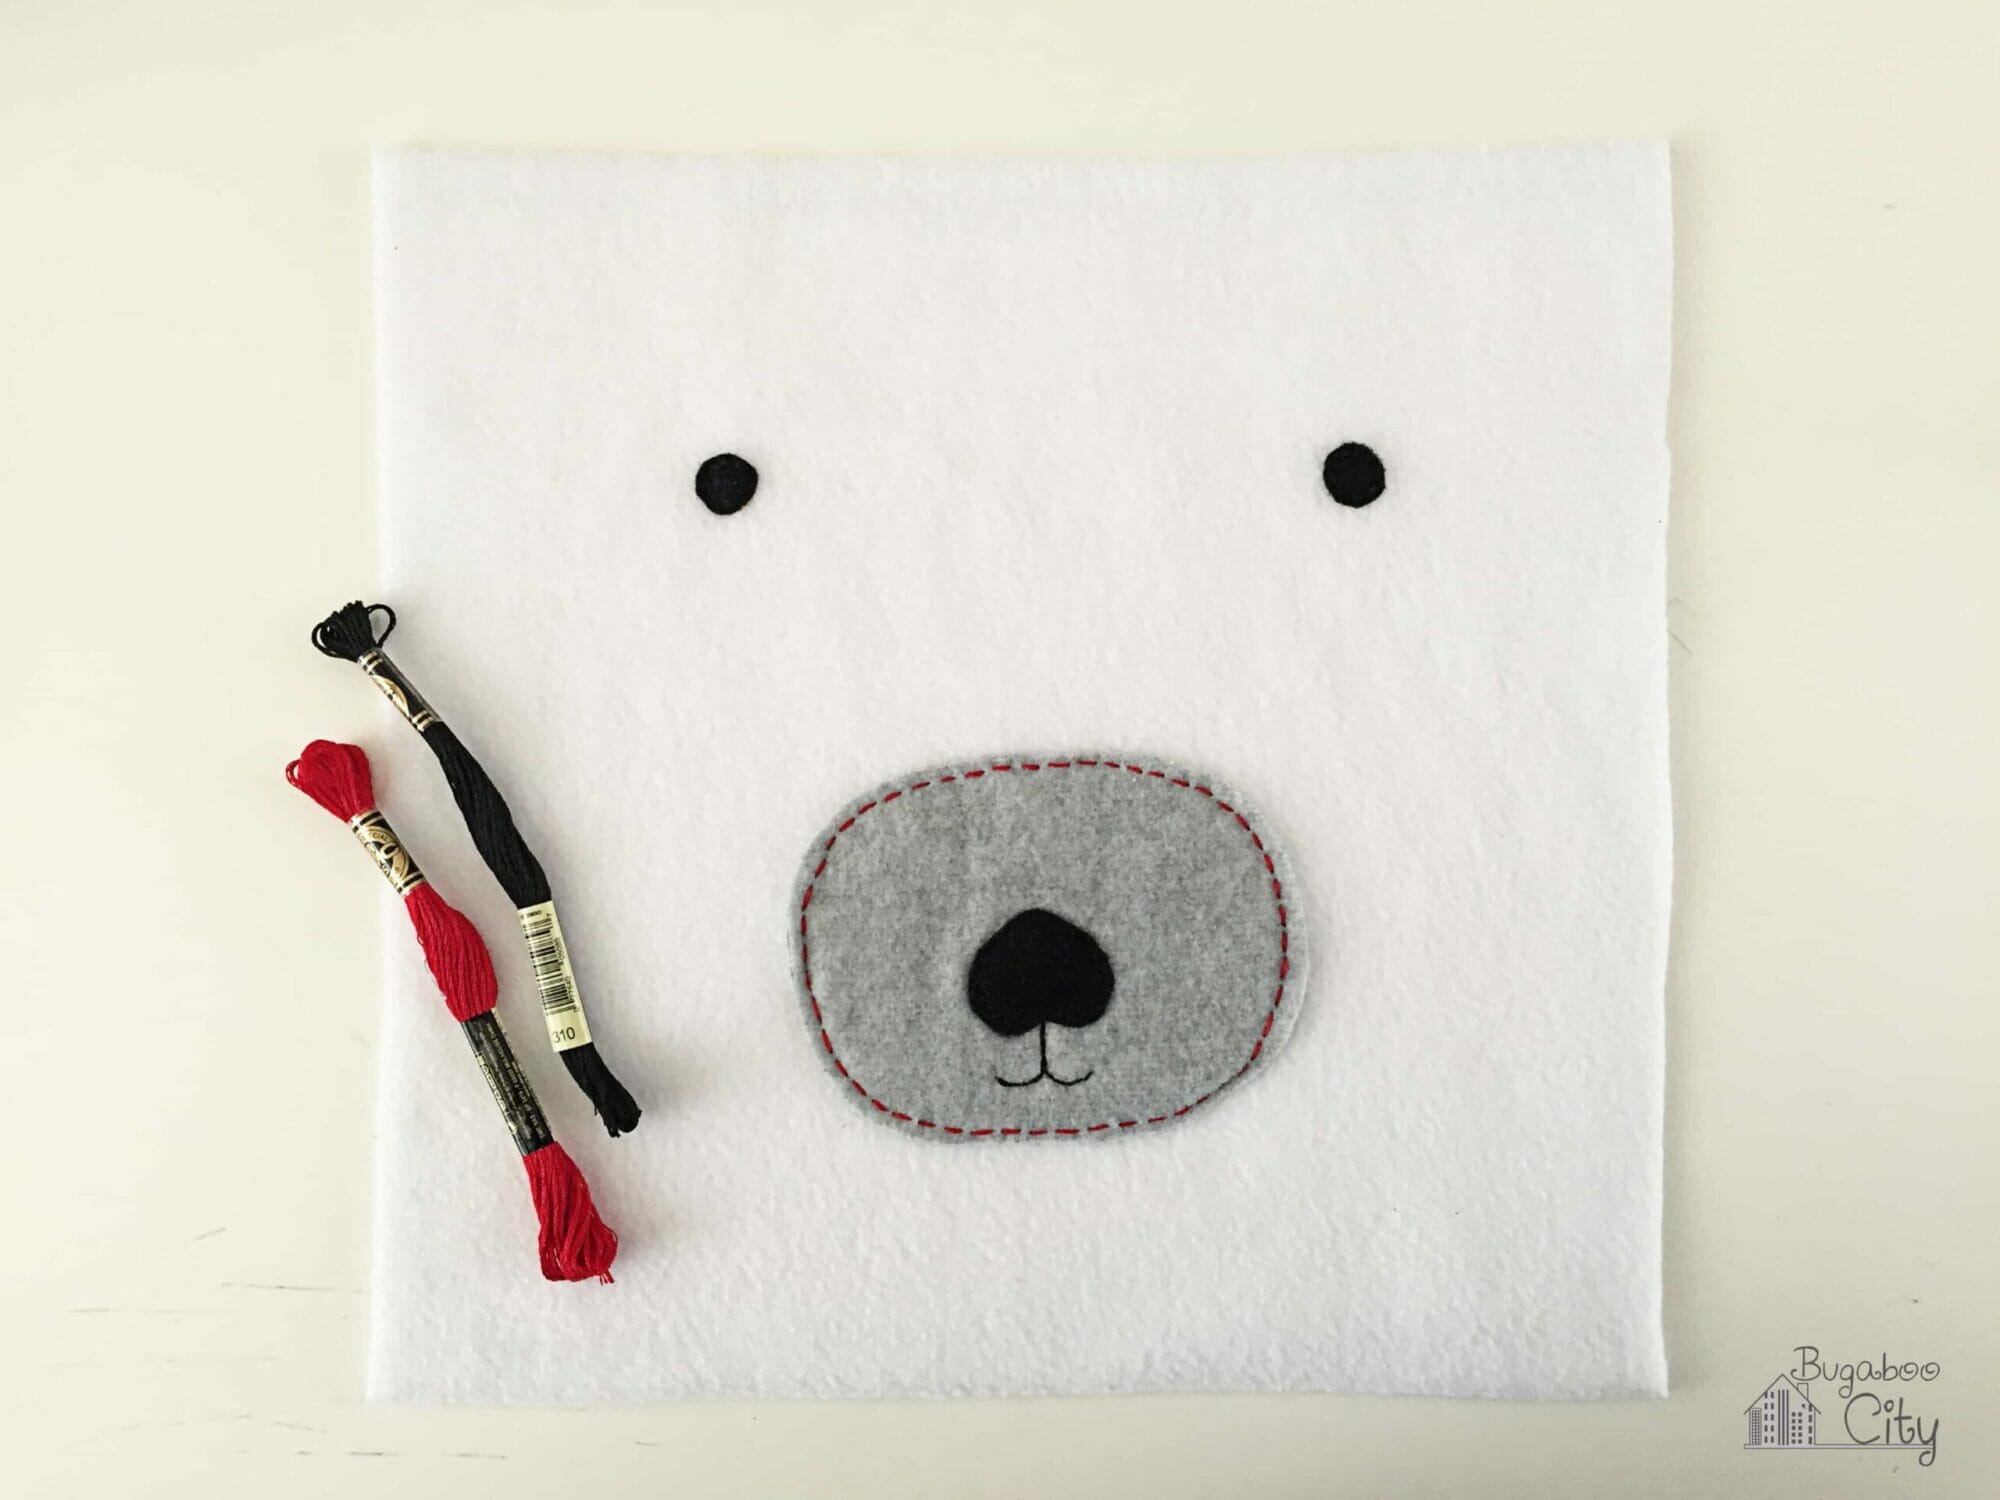
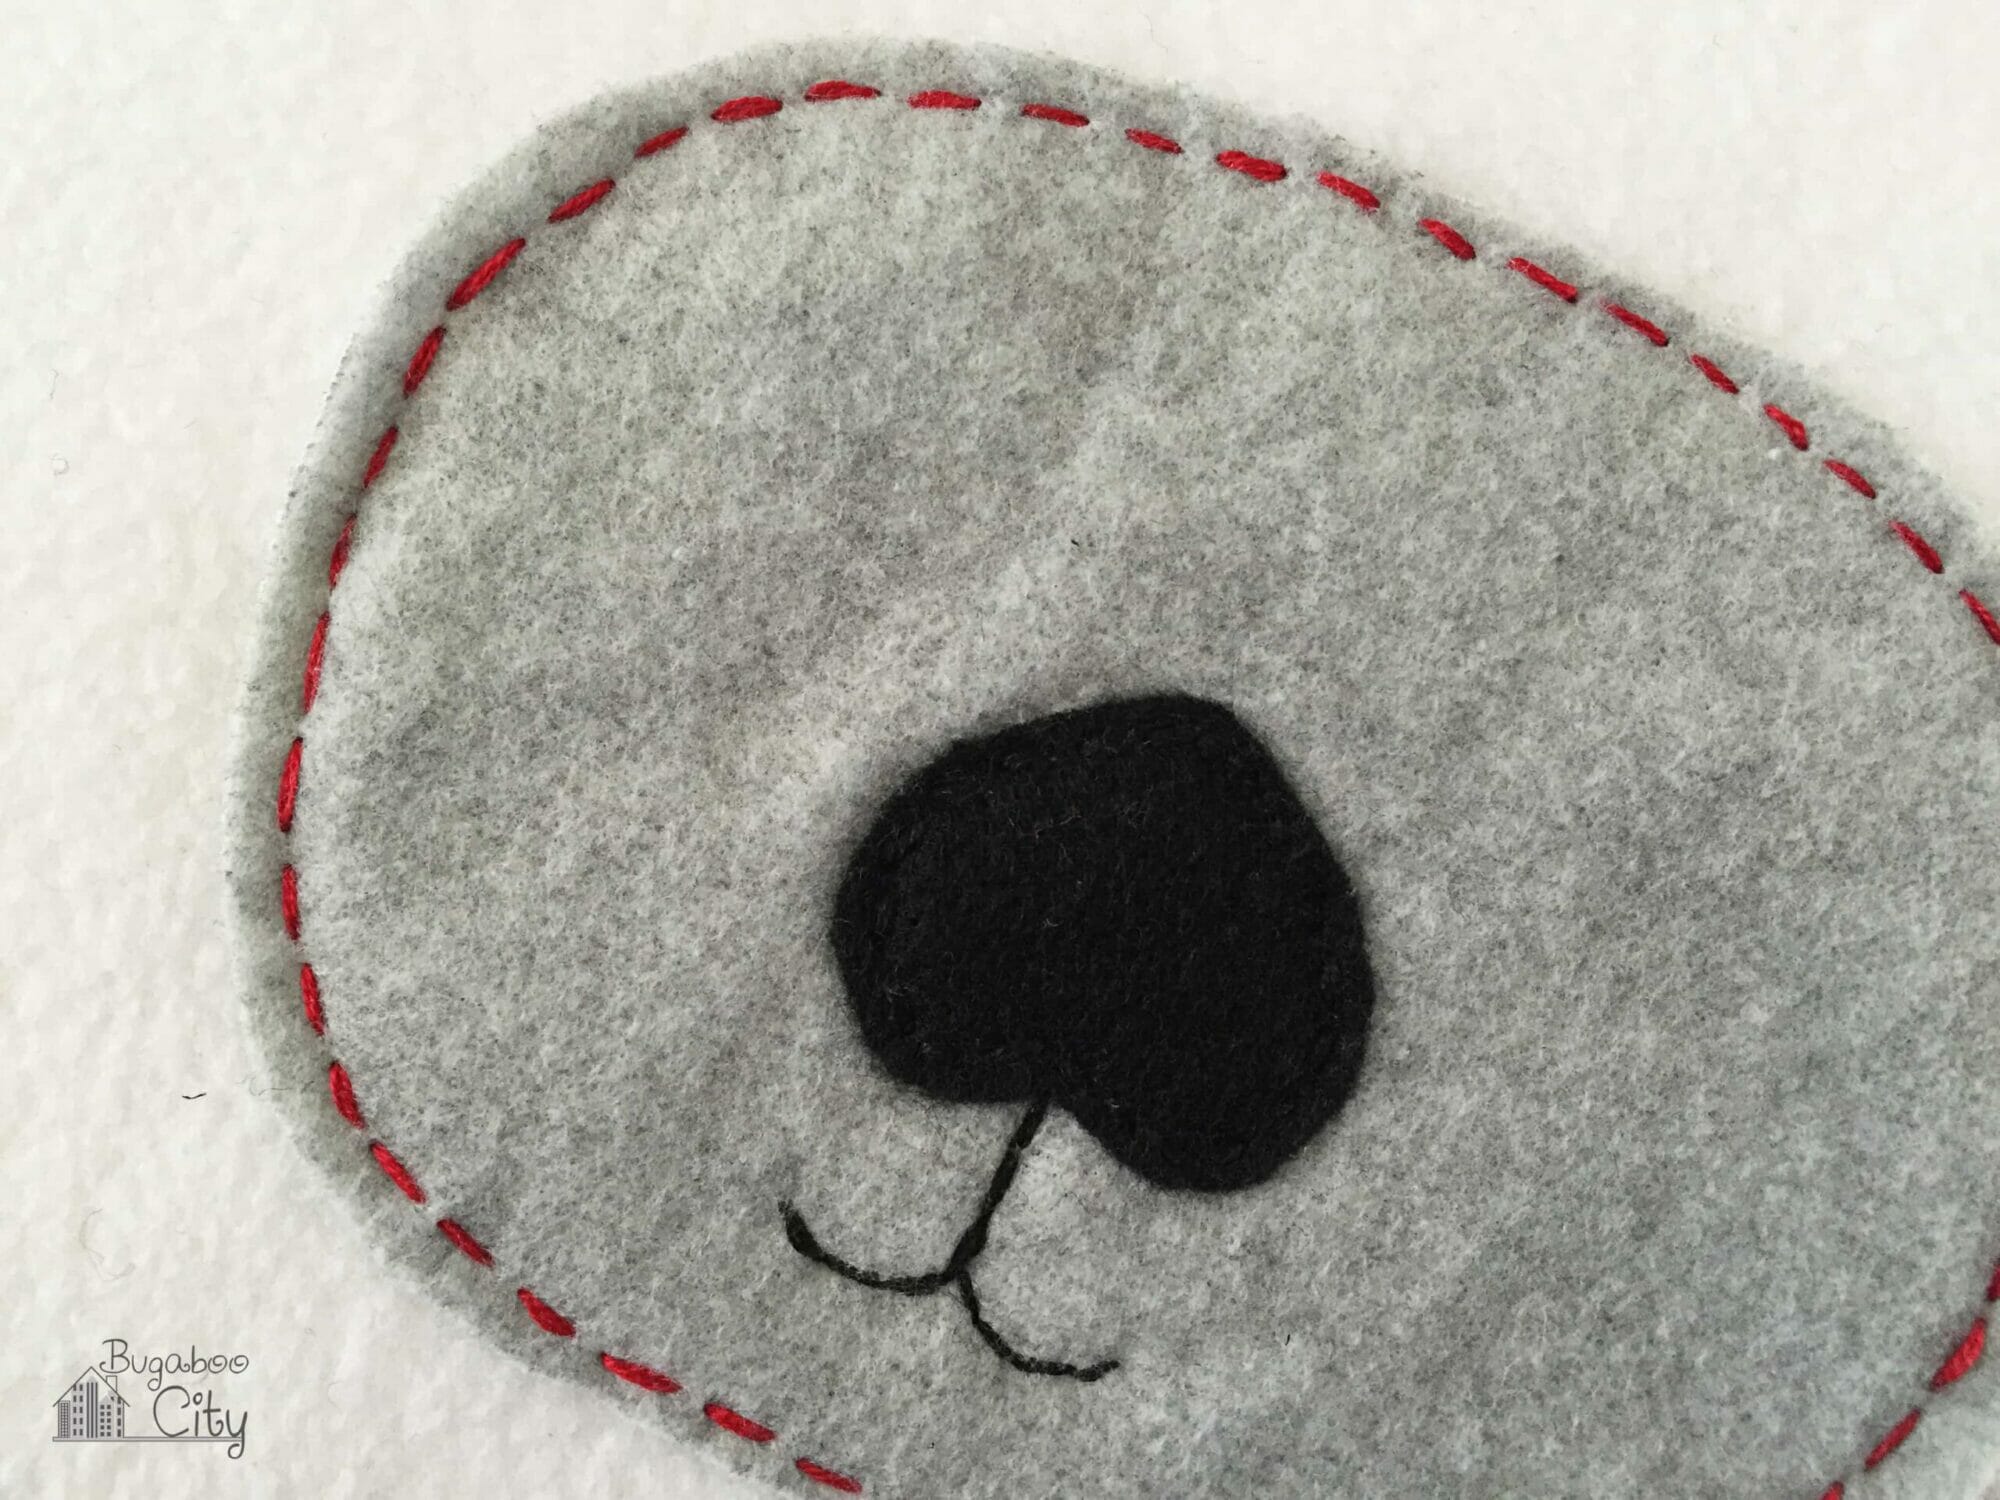
On the right side of the 13″x13″ white fleece square, pin the grey fleece snout and felt eyes and nose to the front of it. With embroidery floss, hand stitch them on. I chose to use a contrasting color for the snout. Hand stitch a mouth with black embroidery floss. I used a running stitch for attaching the pieces and a back stitch for the mouth.
Step Four: Sew the pillow together.
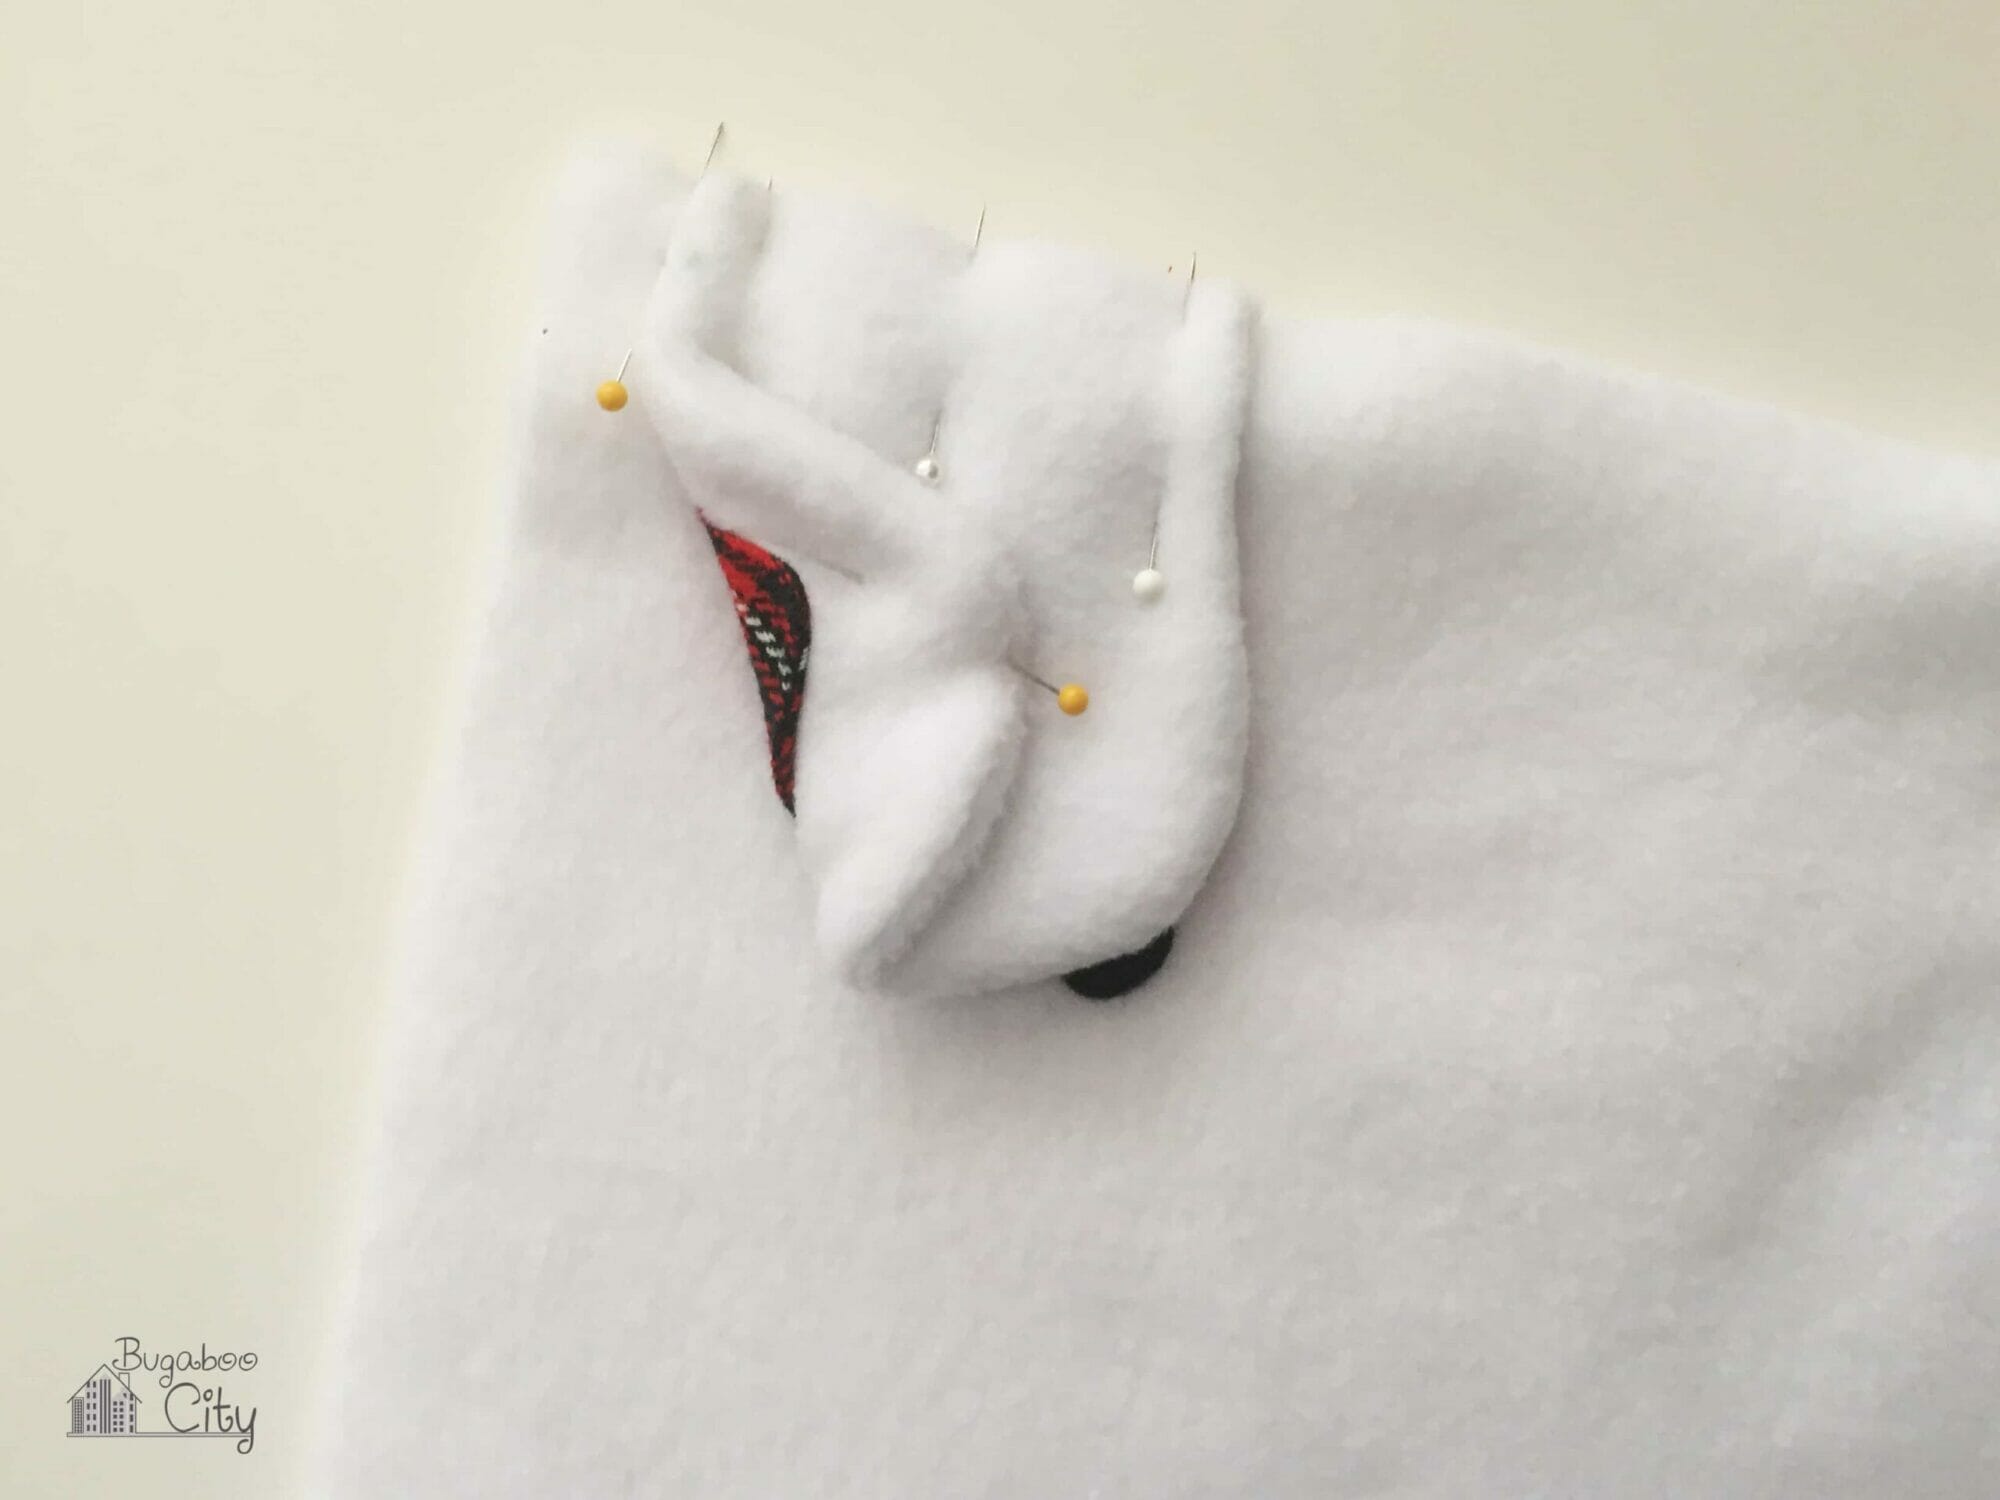
Pin the ears to the front of the pillow with right sides together. I pinned my ears about 1/2″ in on each side and used a pin to hold the tips of the ears out of the way of my stitch line. This way they aren’t accidentally sewn into the pillow seams!
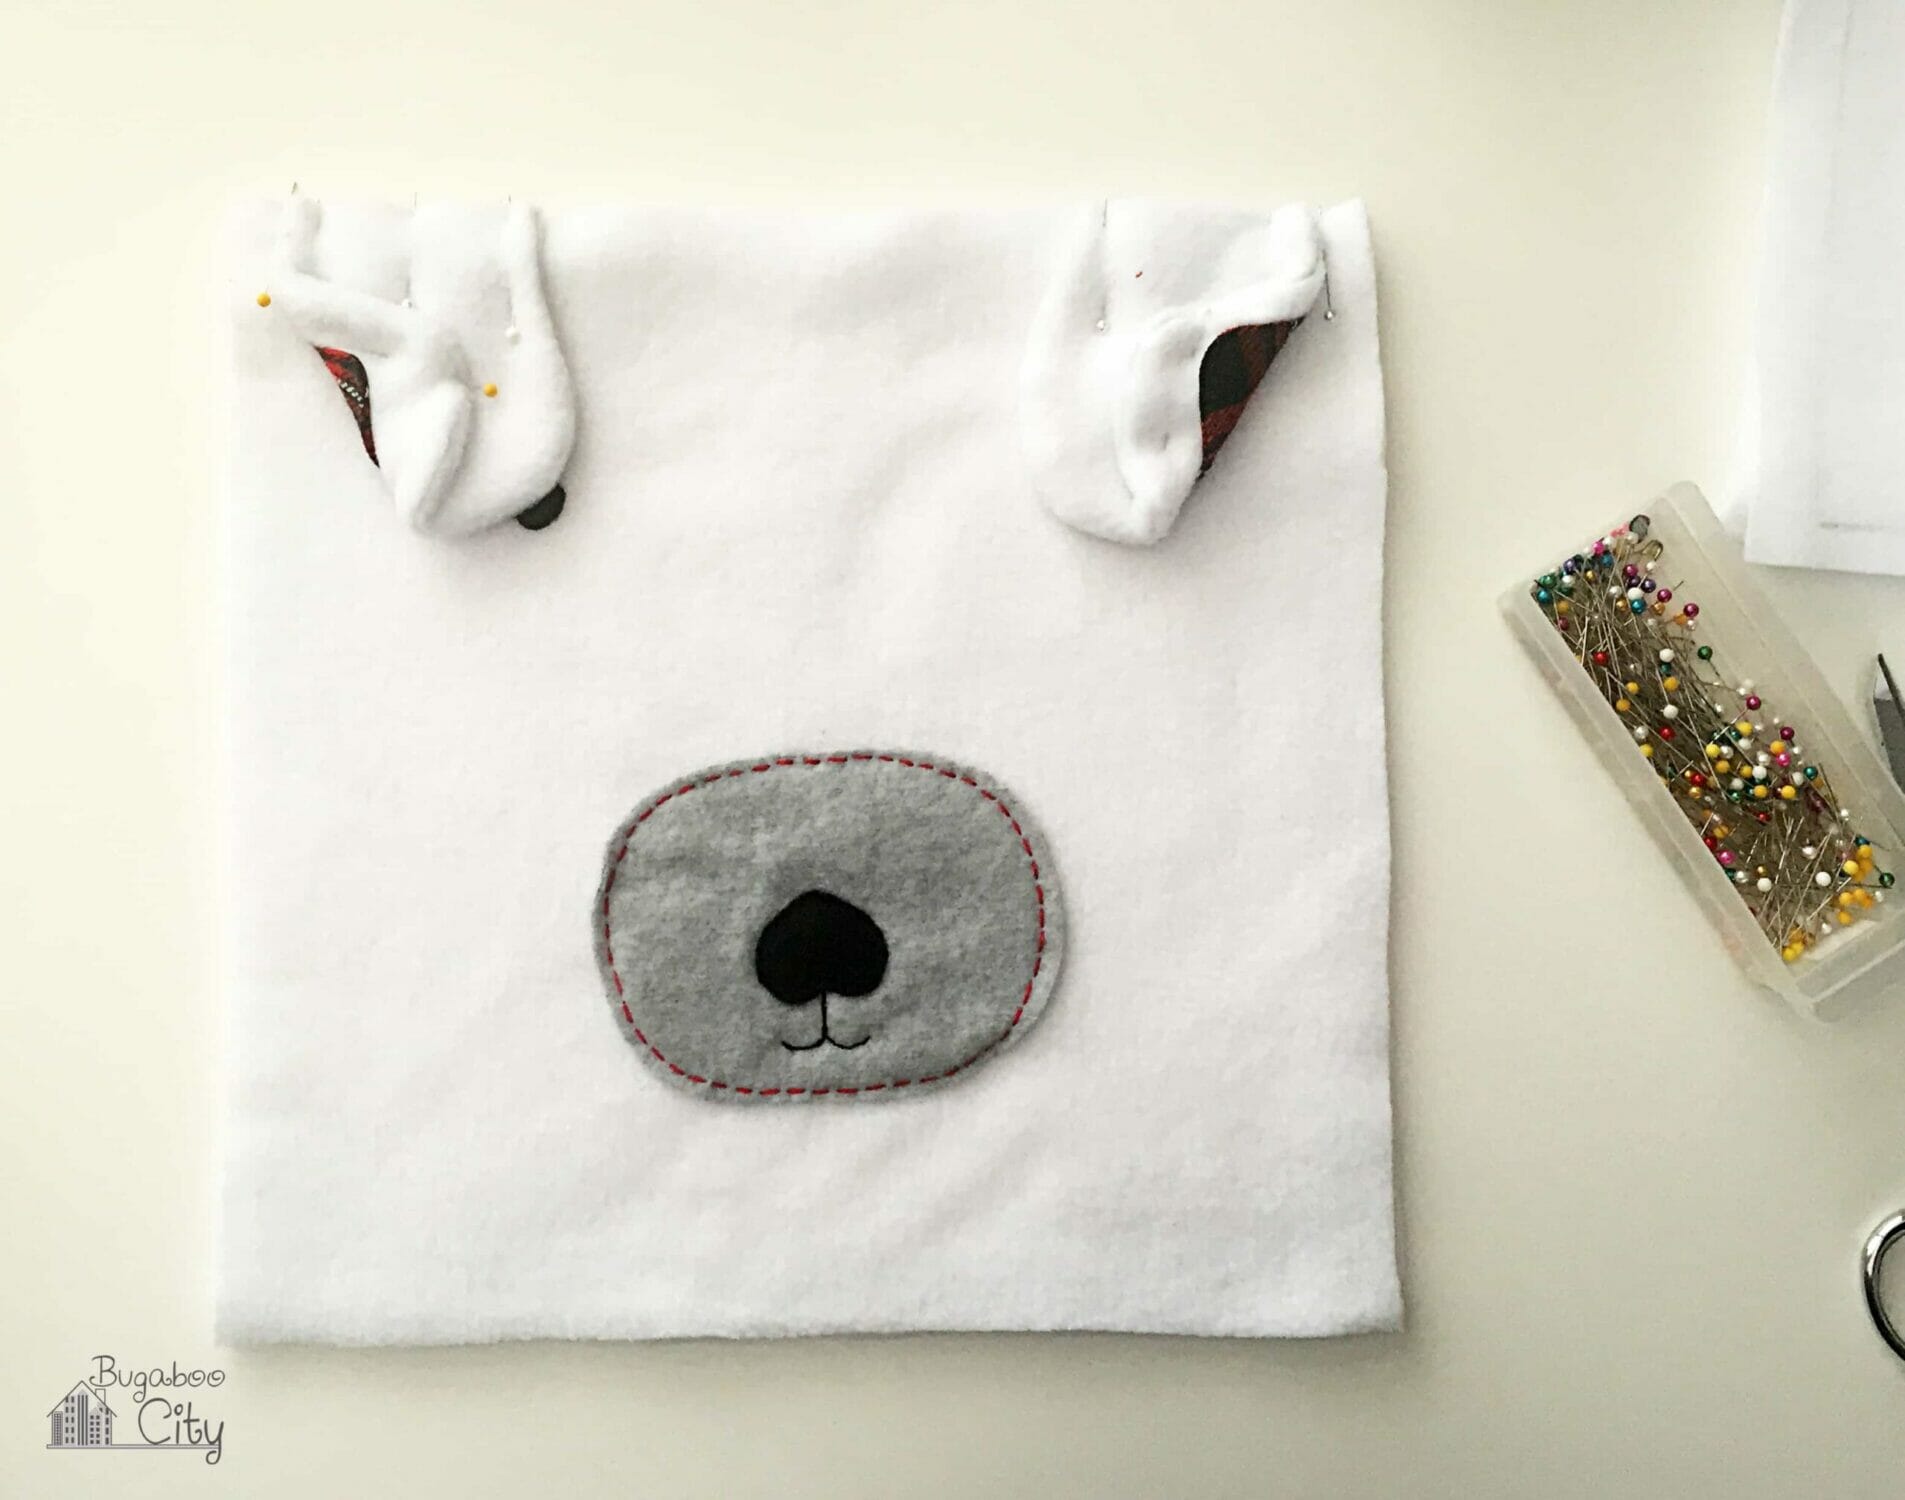
The two white fleece rectangles create the back of the pillowcase by overlapping one another. This way you can slip your pillow form in easily. Pin them to the front square, overlapping them, with right sides together.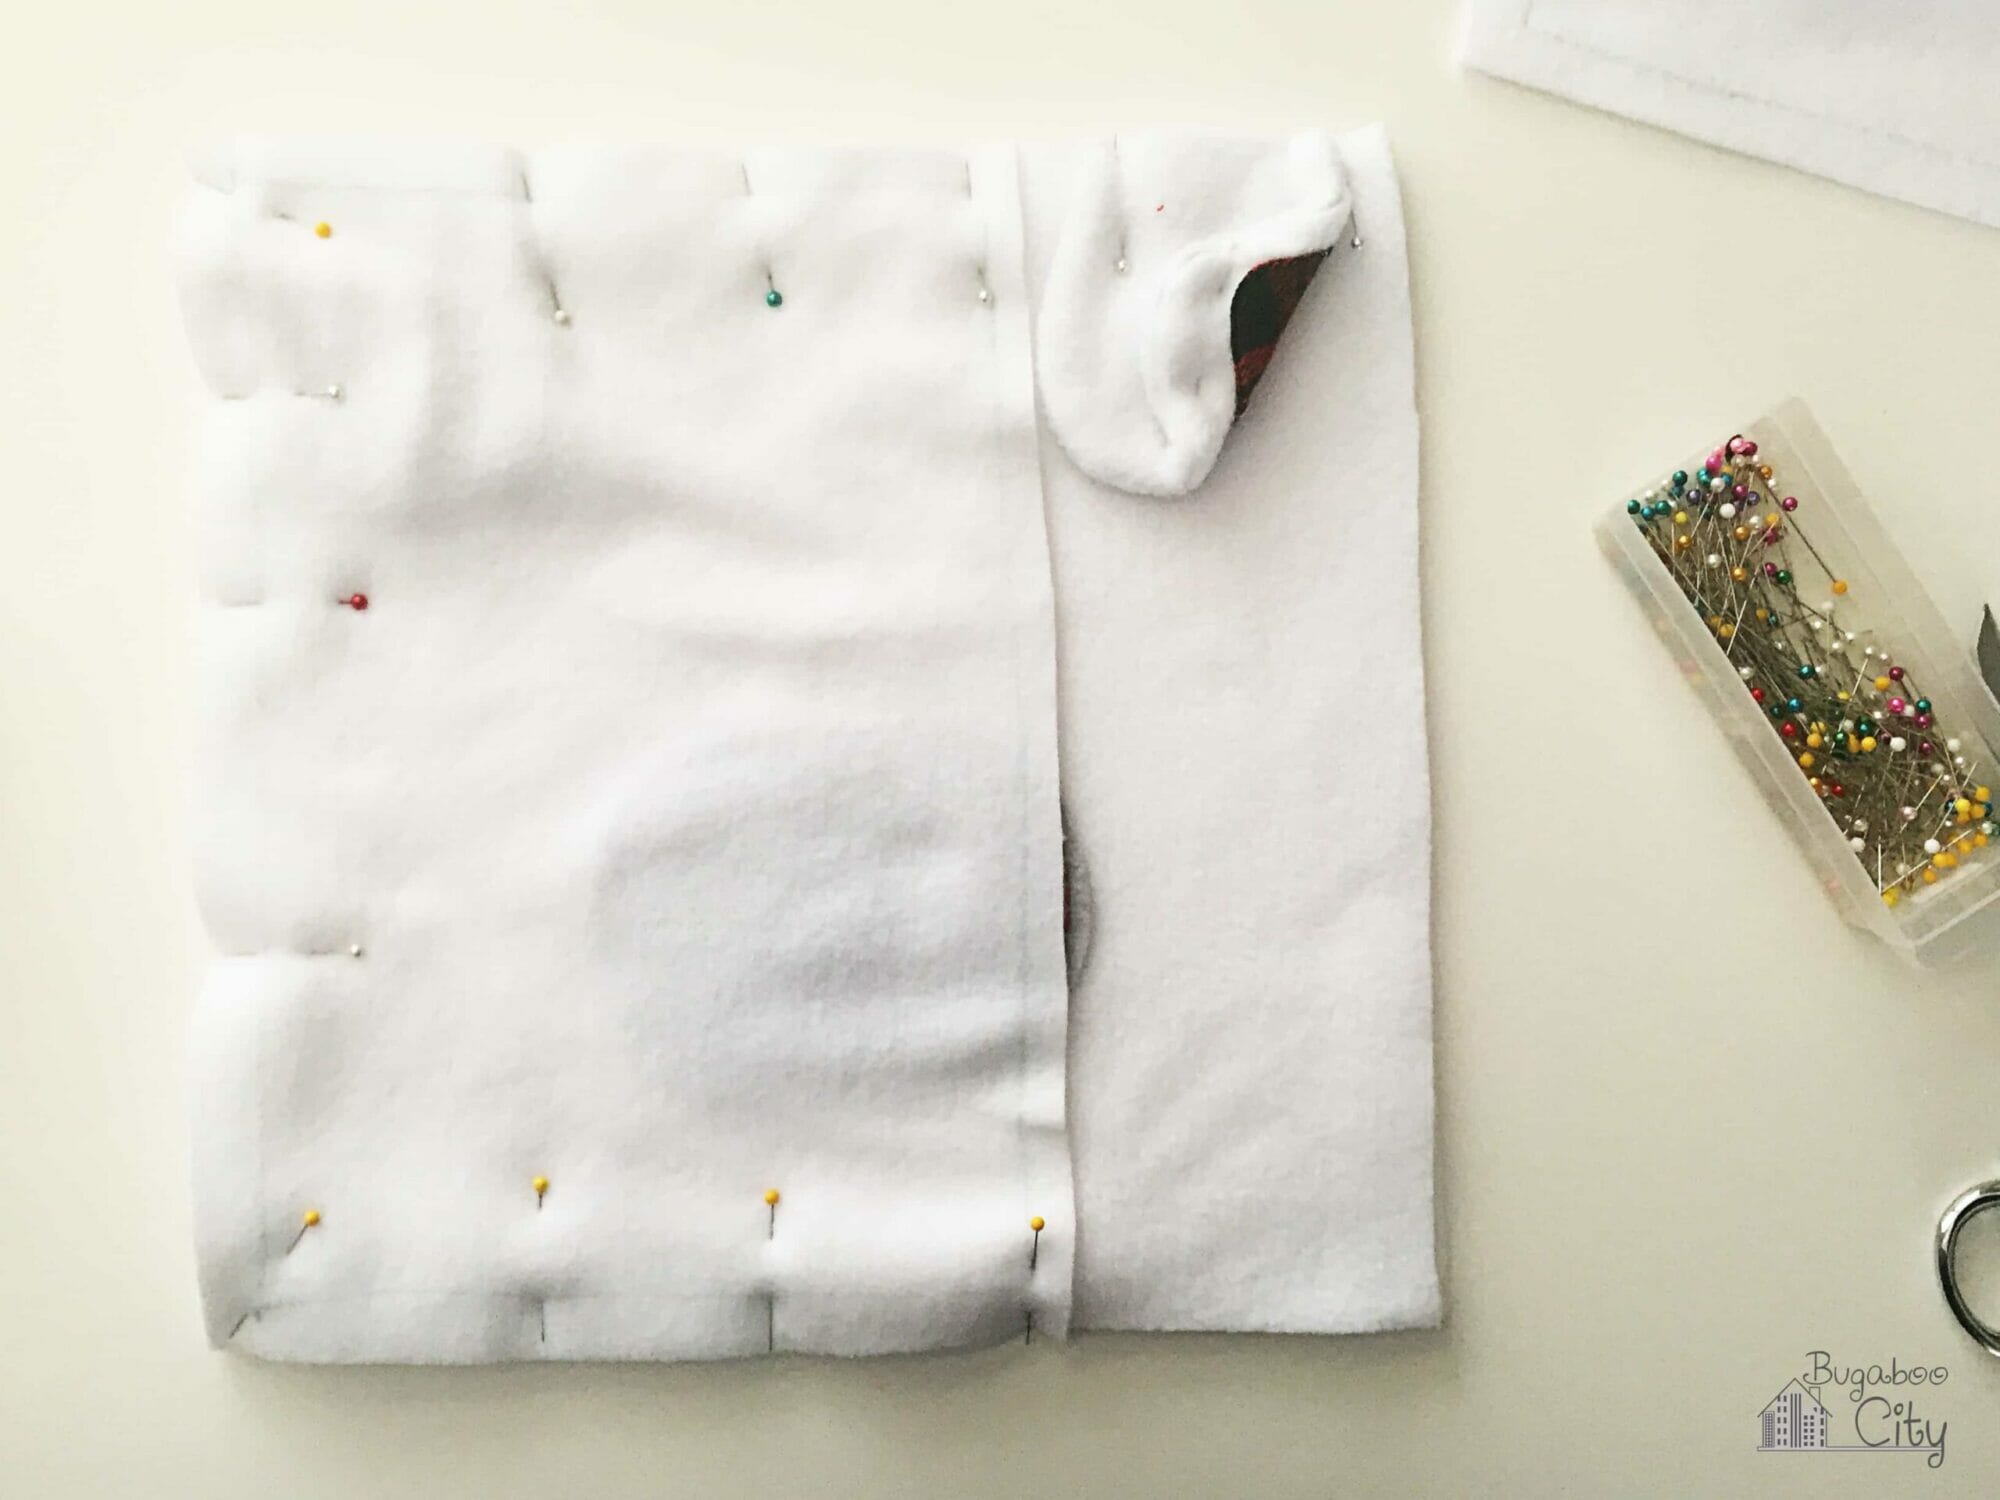
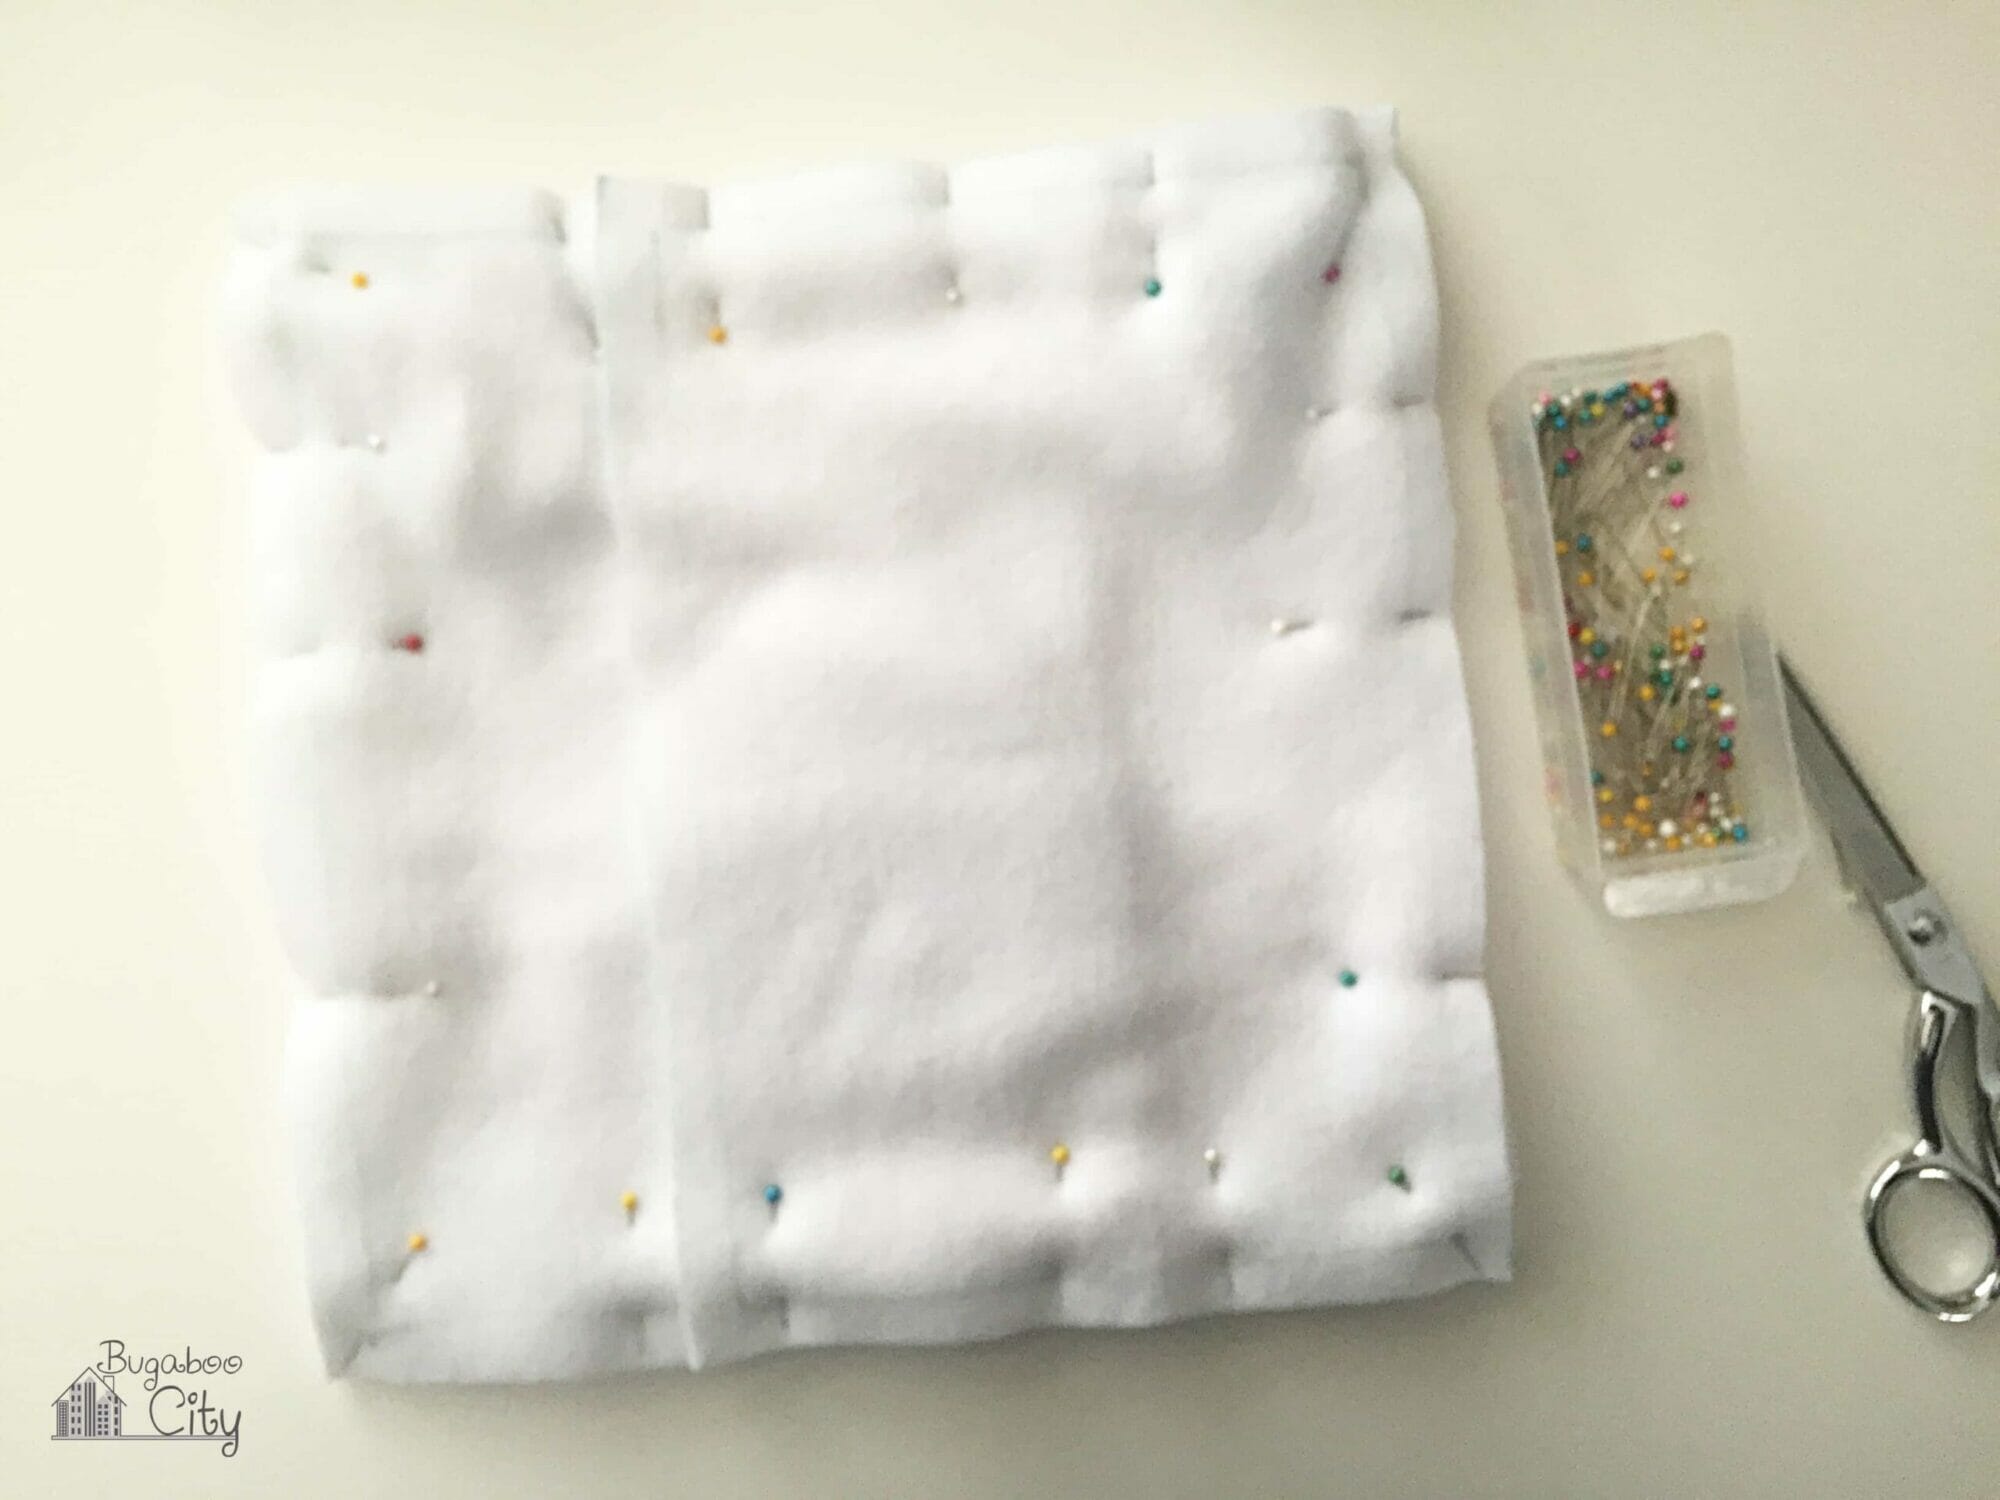
Next, sew around all four sides using a 1/2″ seam allowance. Clip your corners and turn the pillowcase right side out. Finally, slip your pillow from into the pillow case through the flap on the back.
Your Polar Bear Holiday Pillow is finished! These are so soft and a great size for children or for decorating your home :) I’ll be back soon with The Fourth Day of a Handmade Holiday! Yay Christmas crafting!
Check out these other fun fleece pillows perfect for holiday gift giving!


Get the Free Polar Bear Pillow Pattern!
Fill out the purple form below with your first name and email address! The free file will be sent straight to your inbox! If you have already filled out the form below, don’t worry – you won’t be added to my list twice! This freebie is for personal use only. I hope you enjoy crafting something special. Please let me know if you have any questions :)


Love it! I’m working on my nursery now and love the look of the pillow. So simple, it can work year round. Thanks for sharing!
Thank you!! I think they can work all year round too – especially with the right ear fabric! Good luck working on your nursery :)
Oh, he is cute!! I’ve featured your pillow tutorial on Craft Gossip: http://sewing.craftgossip.com/free-pattern-polar-bear-holiday-pillow/2015/12/03/ –Anne
Thank you for the feature!! :)