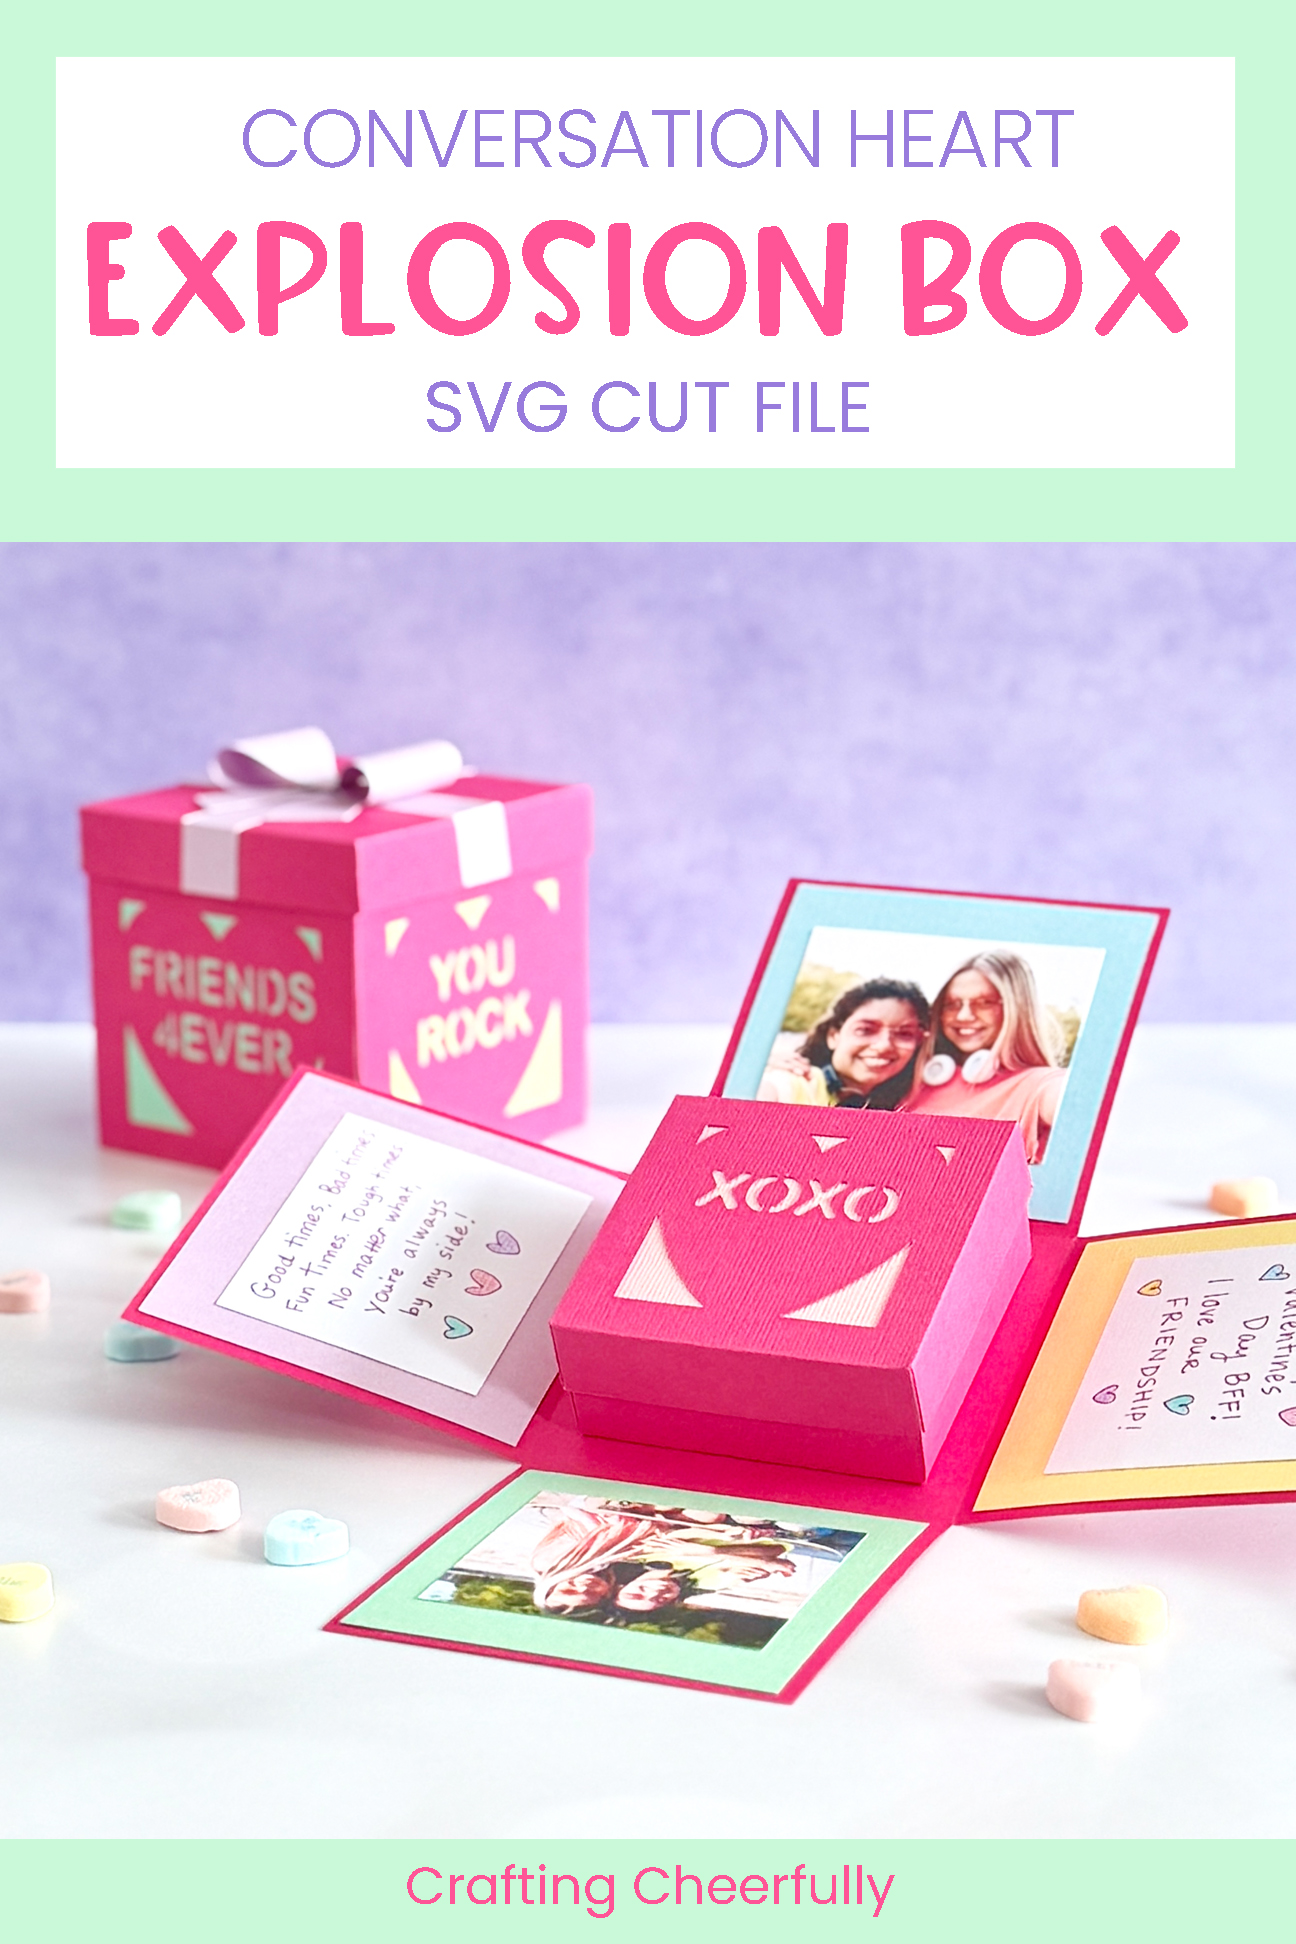
Conversation Heart Explosion Box for Valentine’s Day!
Learn how to make a sweet conversation heart explosion box for Valentine’s Day or Galentine’s Day! This gift is the perfect way to celebrate someone special!
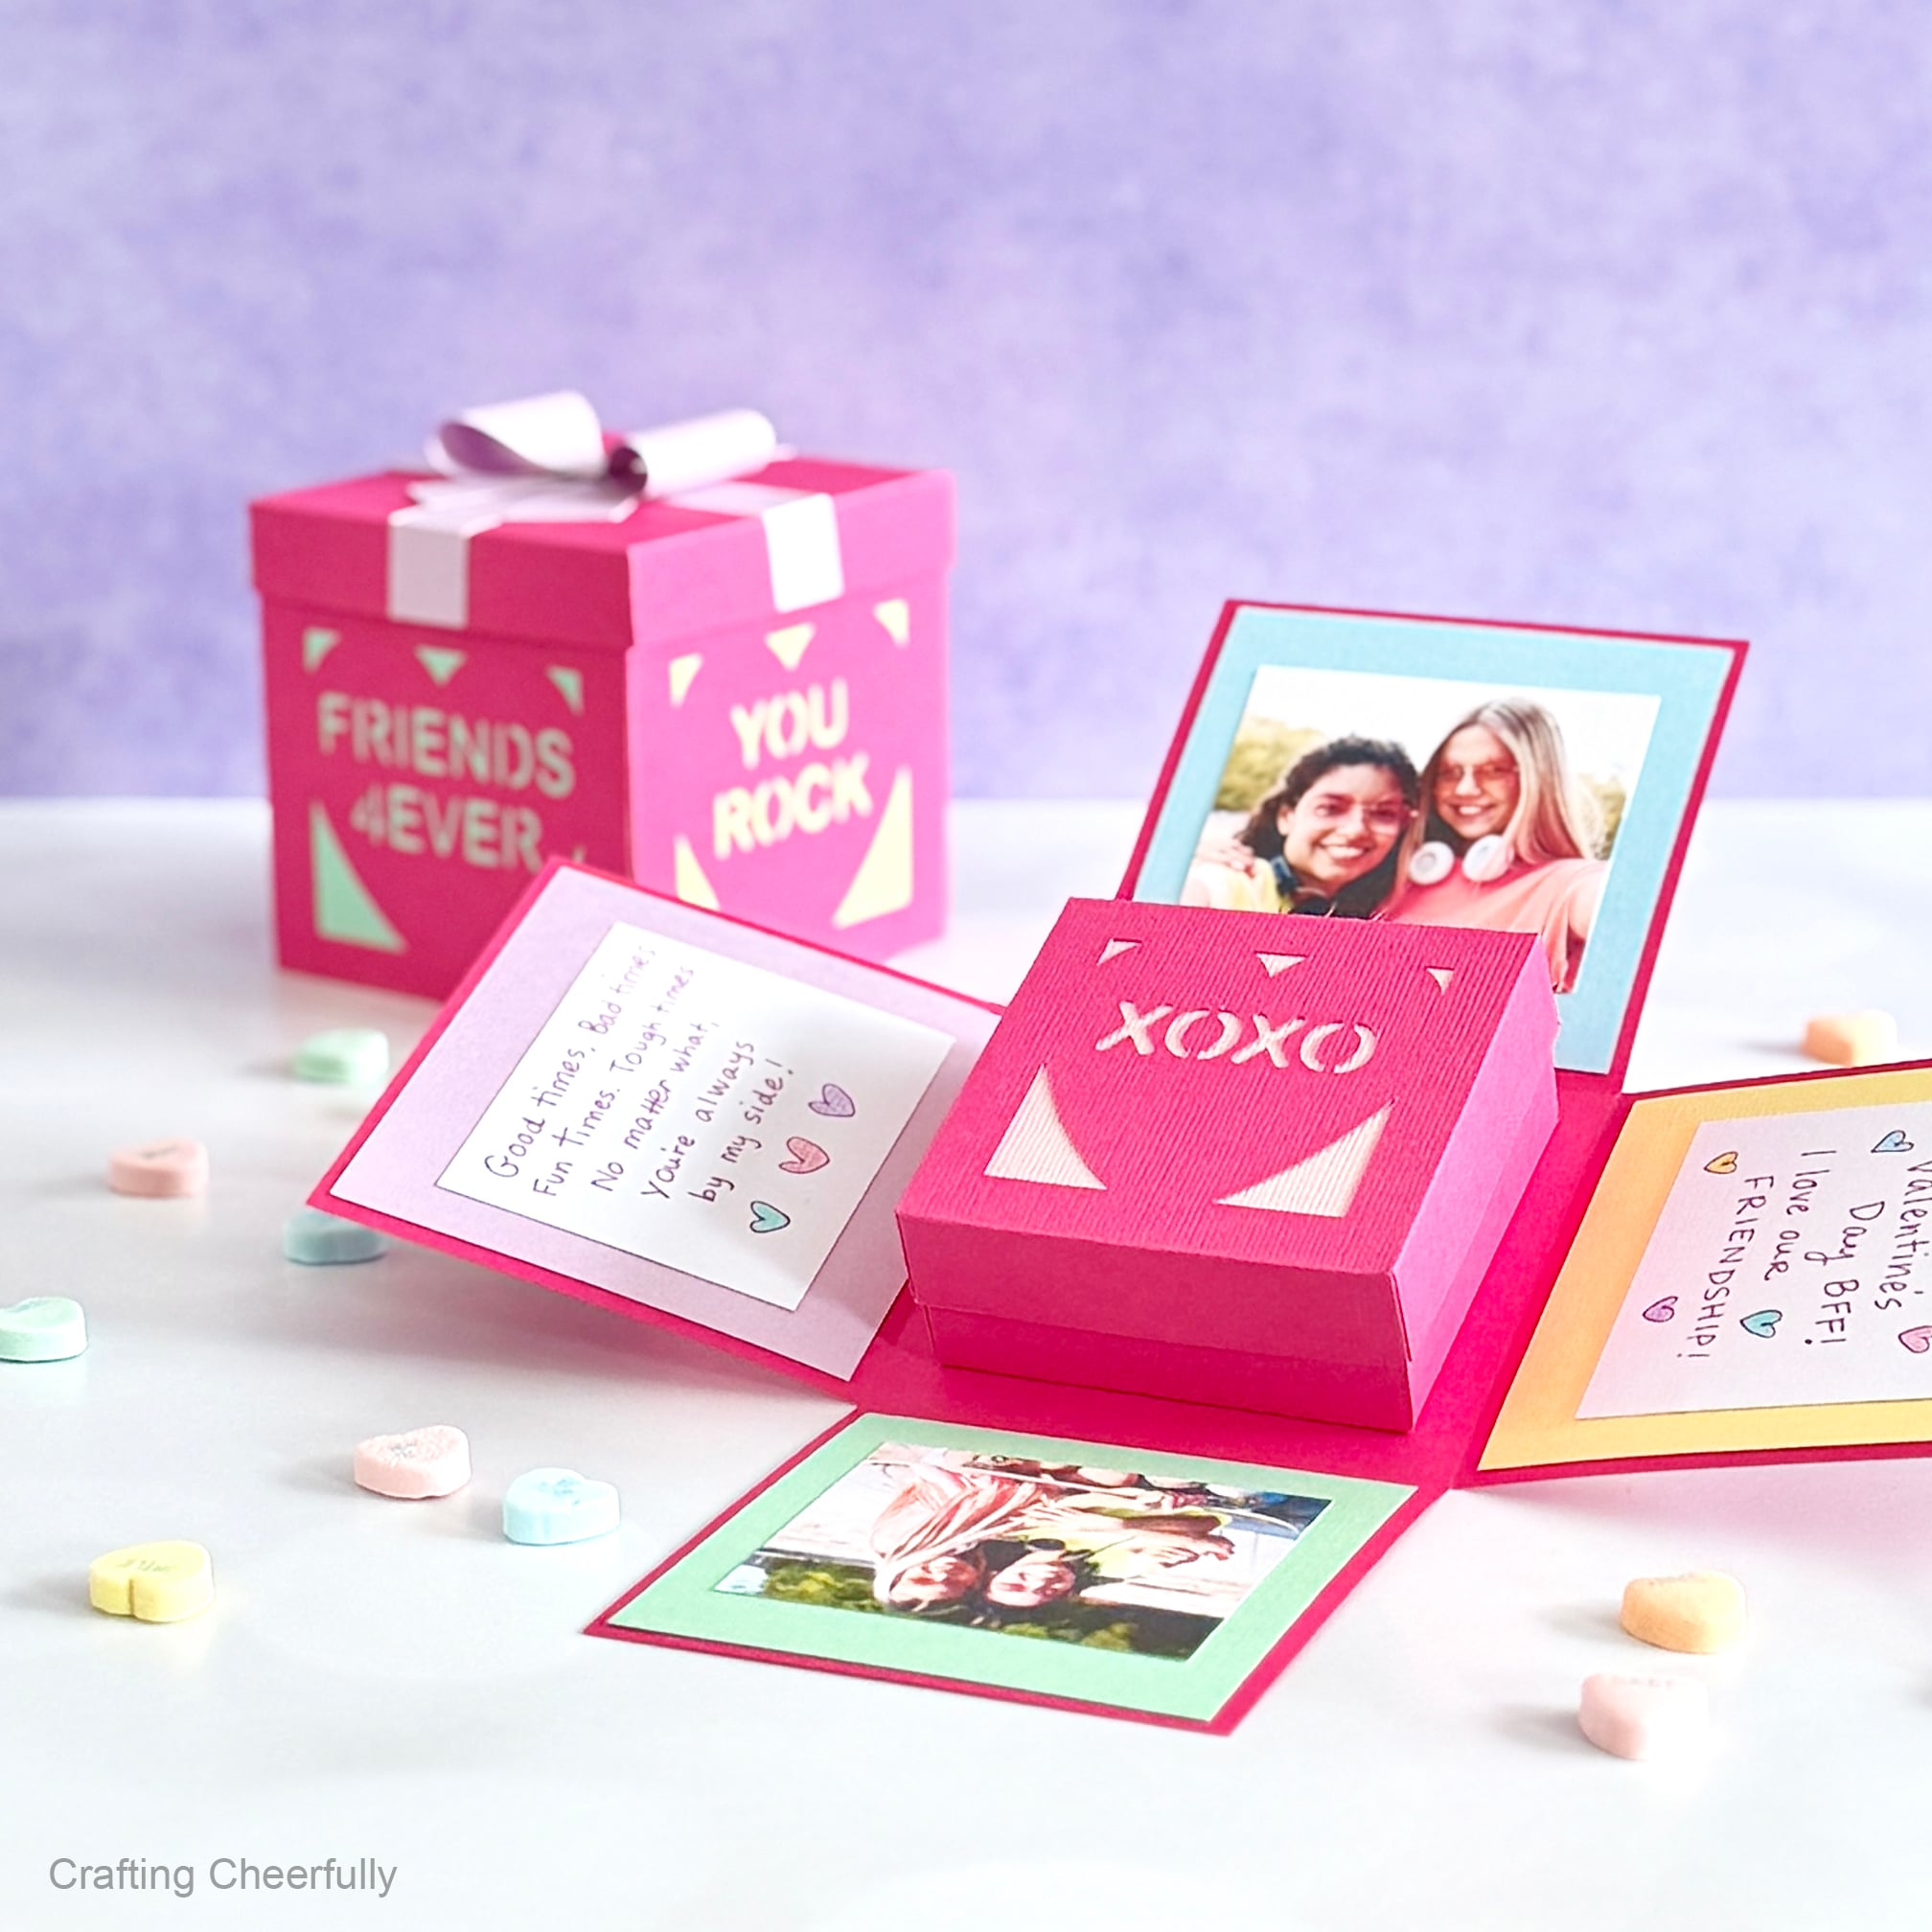
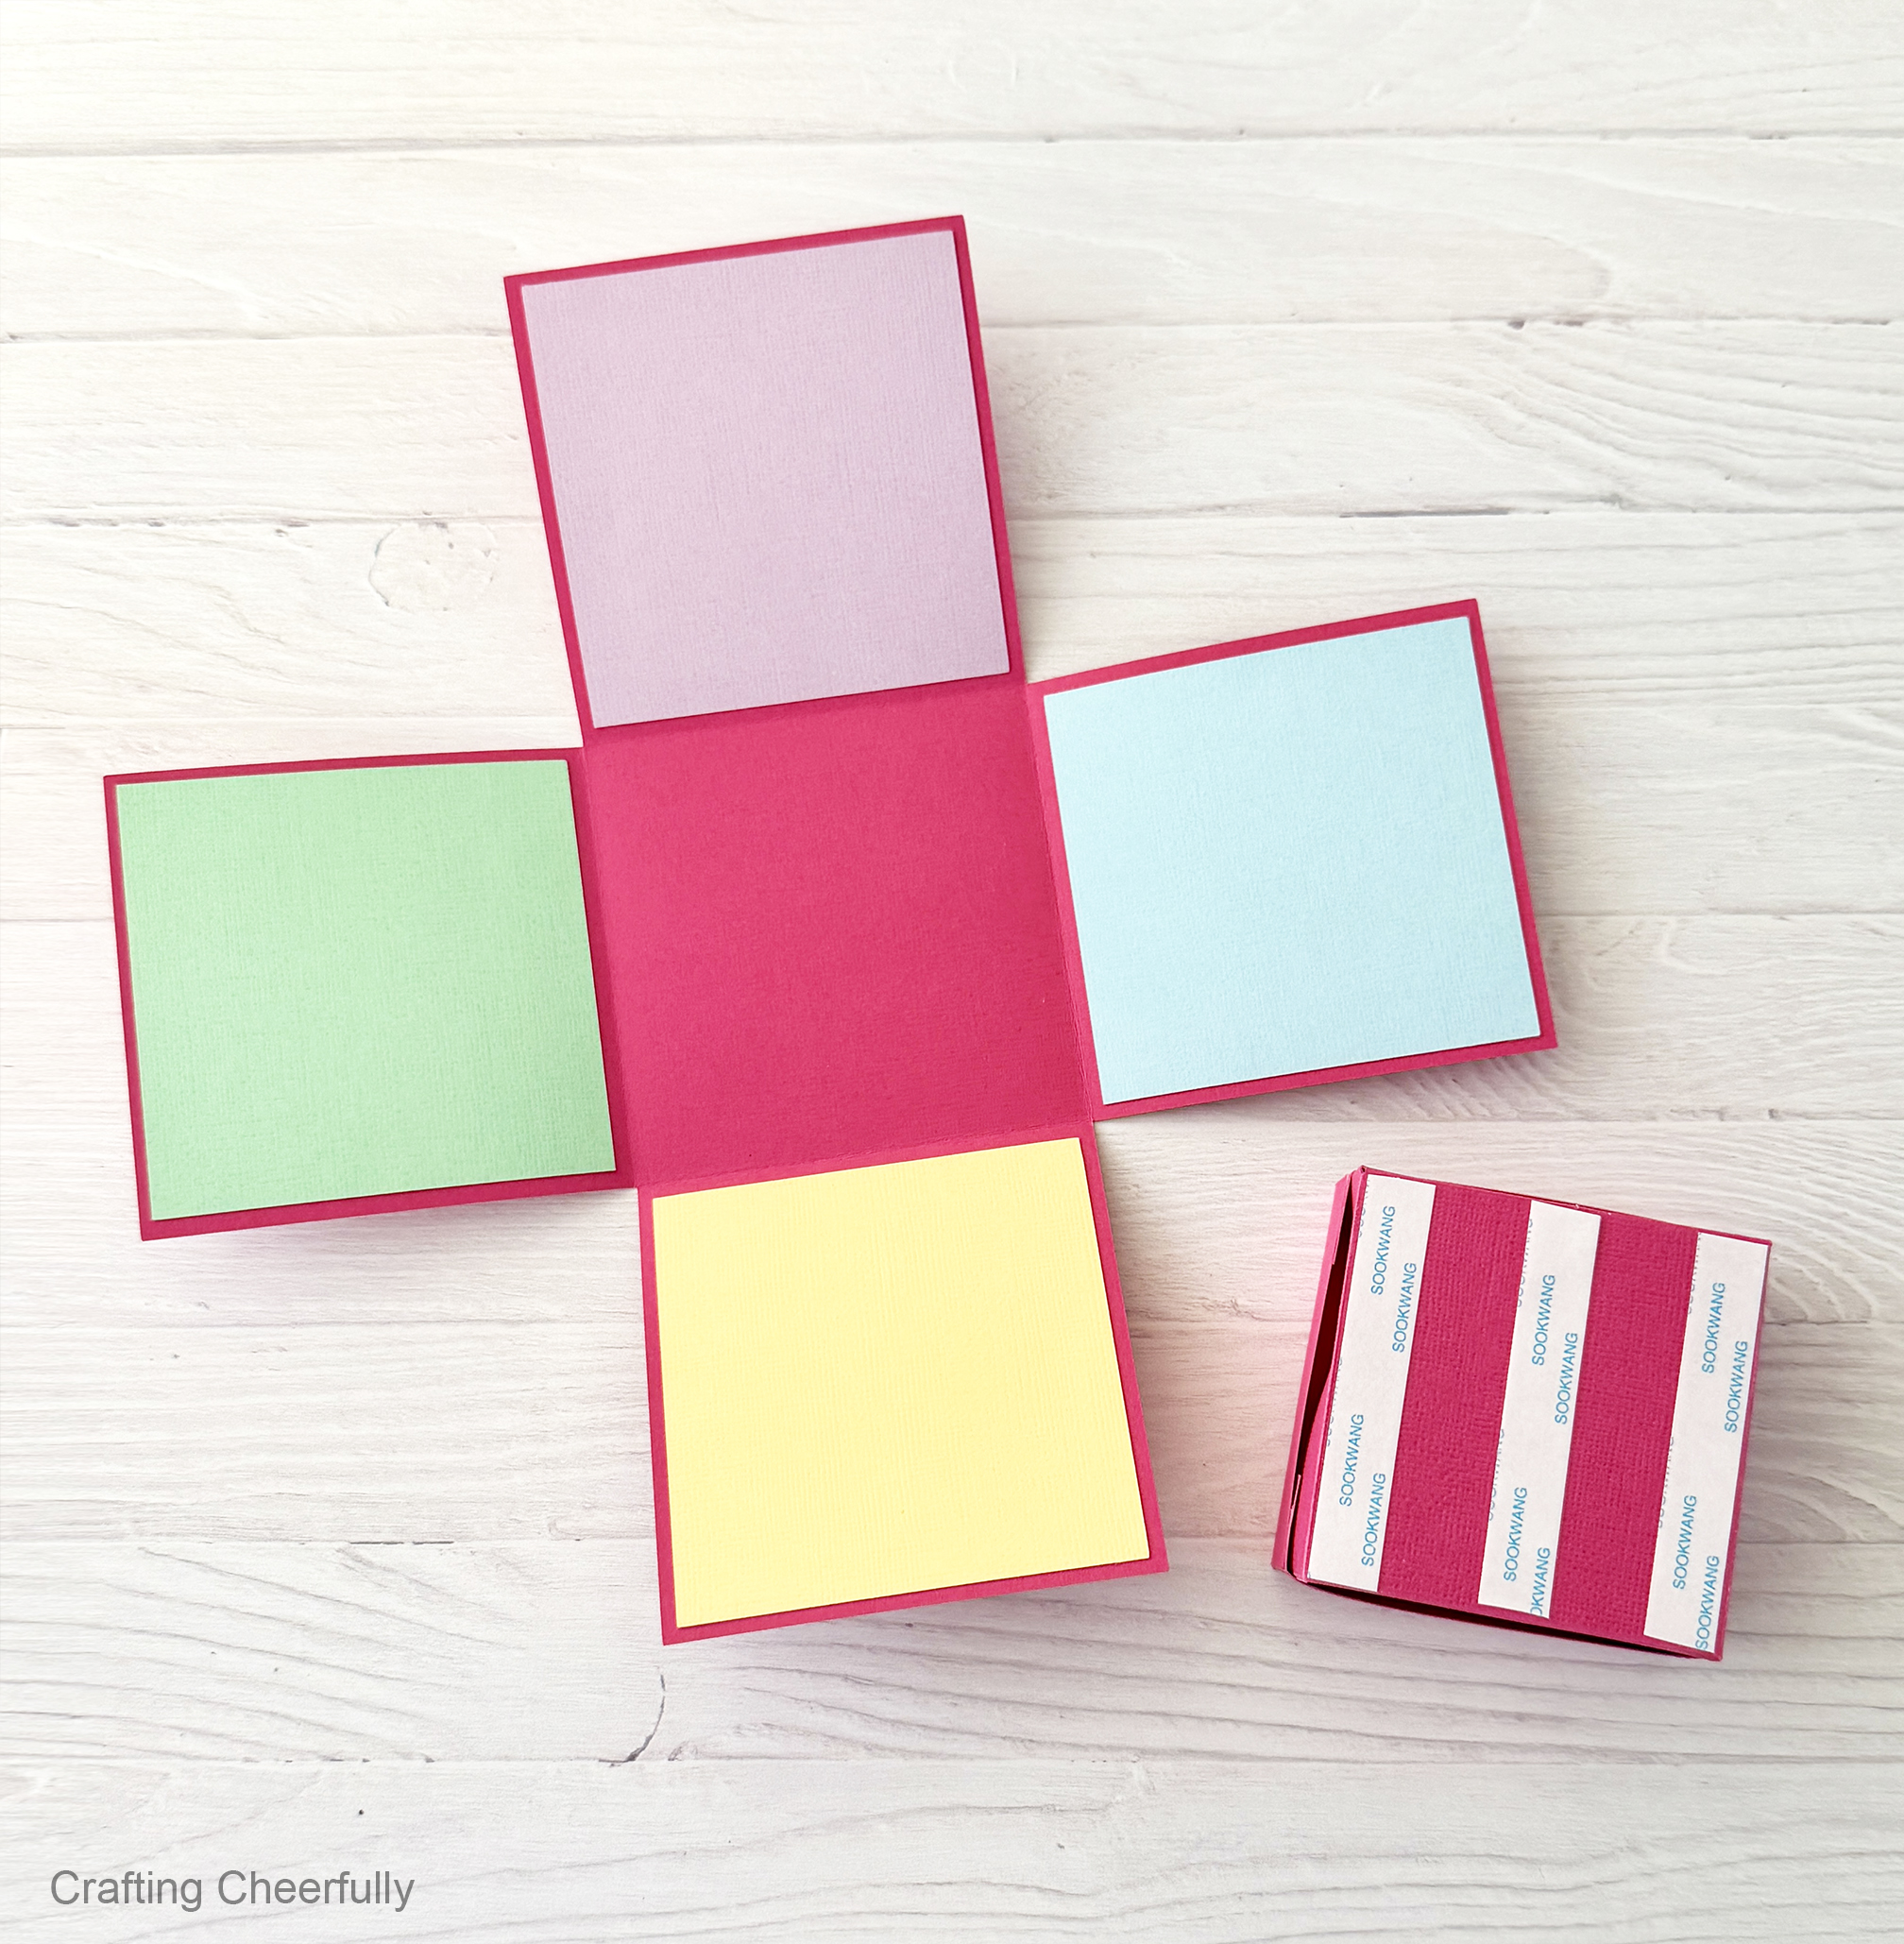
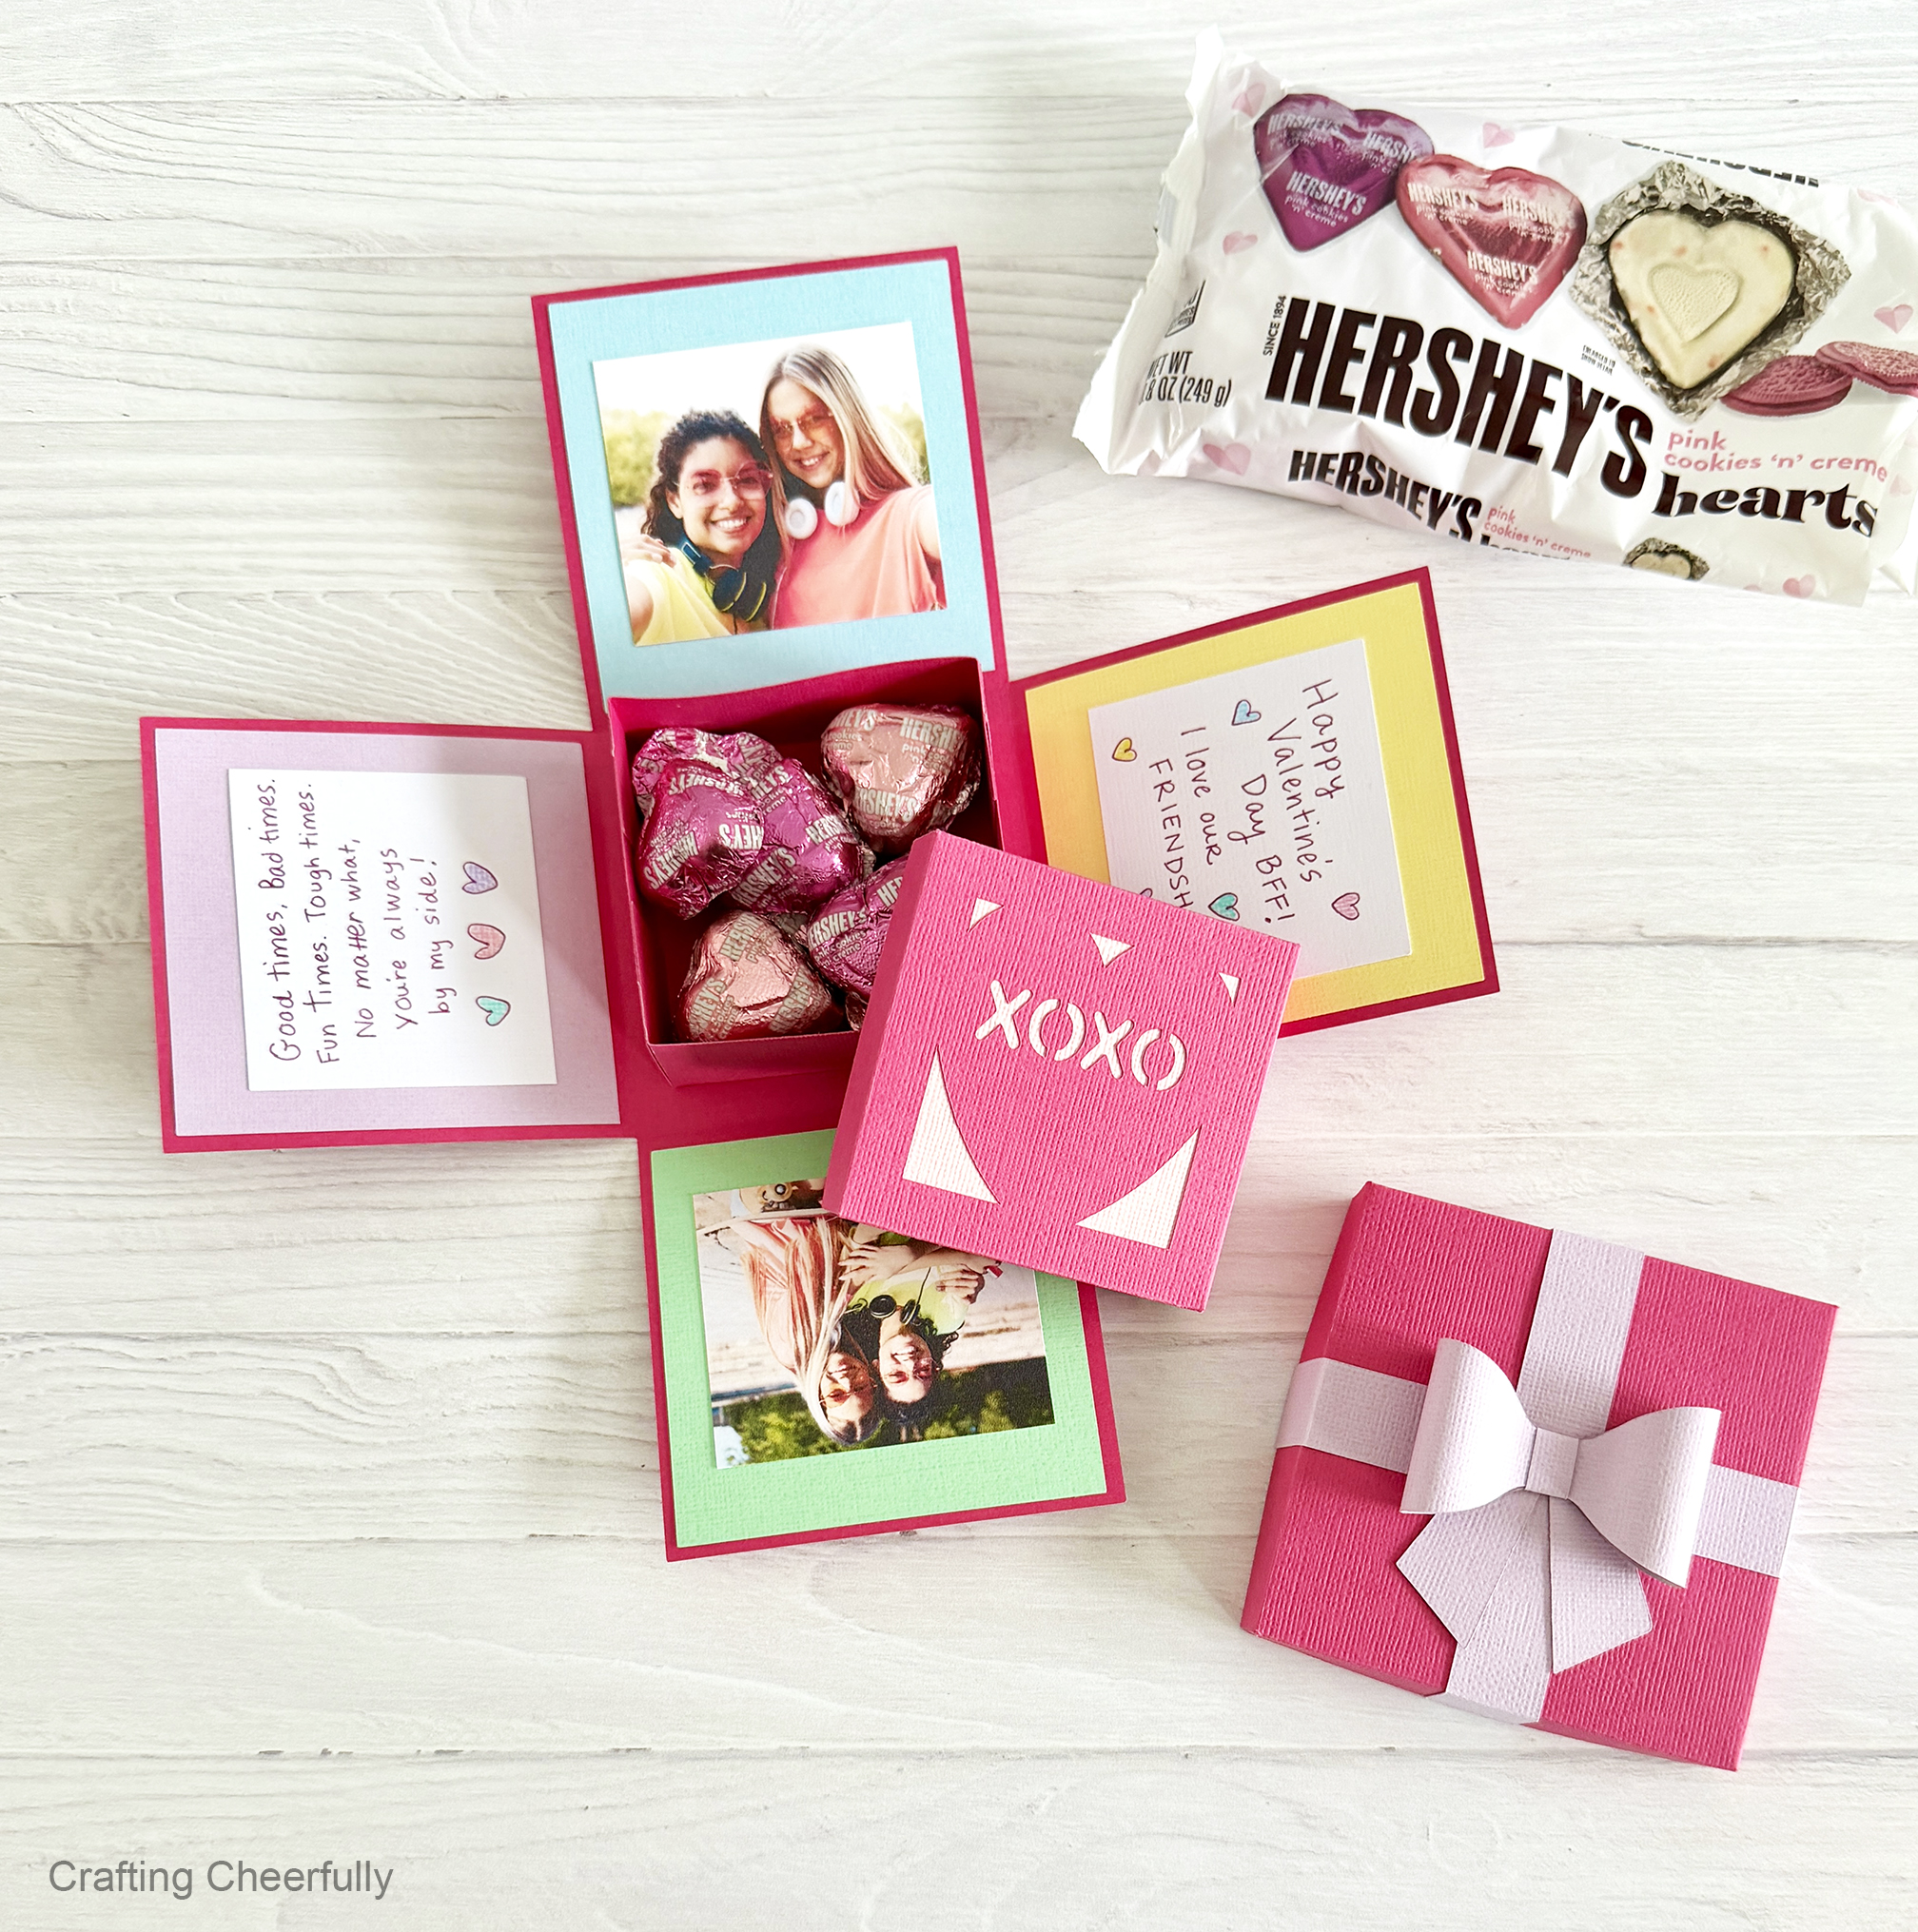
Hello Crafty Friends! Today I’m excited to share a new explosion box craft with you – this time for Valentine’s Day! What is an explosion box? When the lid is lifted off of the box, all four sides fall down revealing what is inside! It’s an exciting, unexpected surprise making them so much fun to gift.
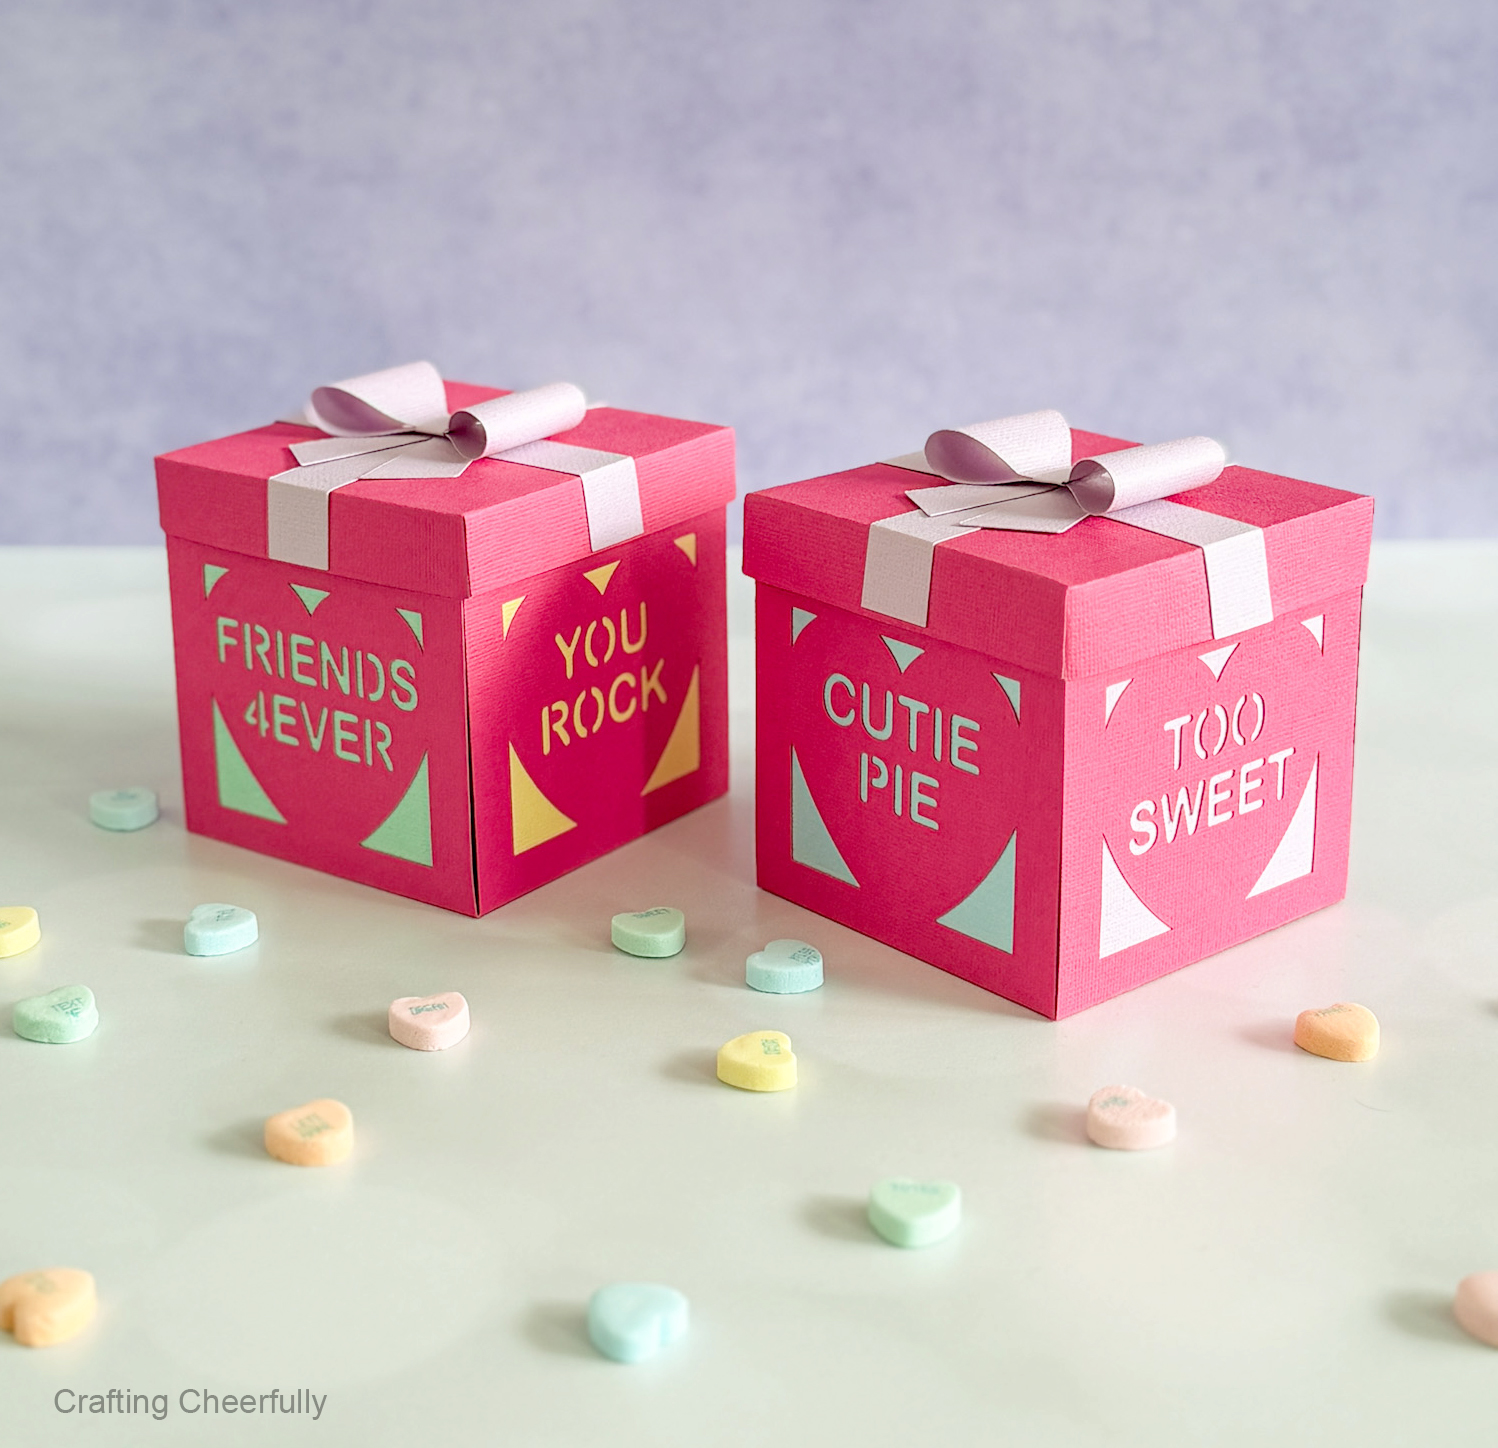
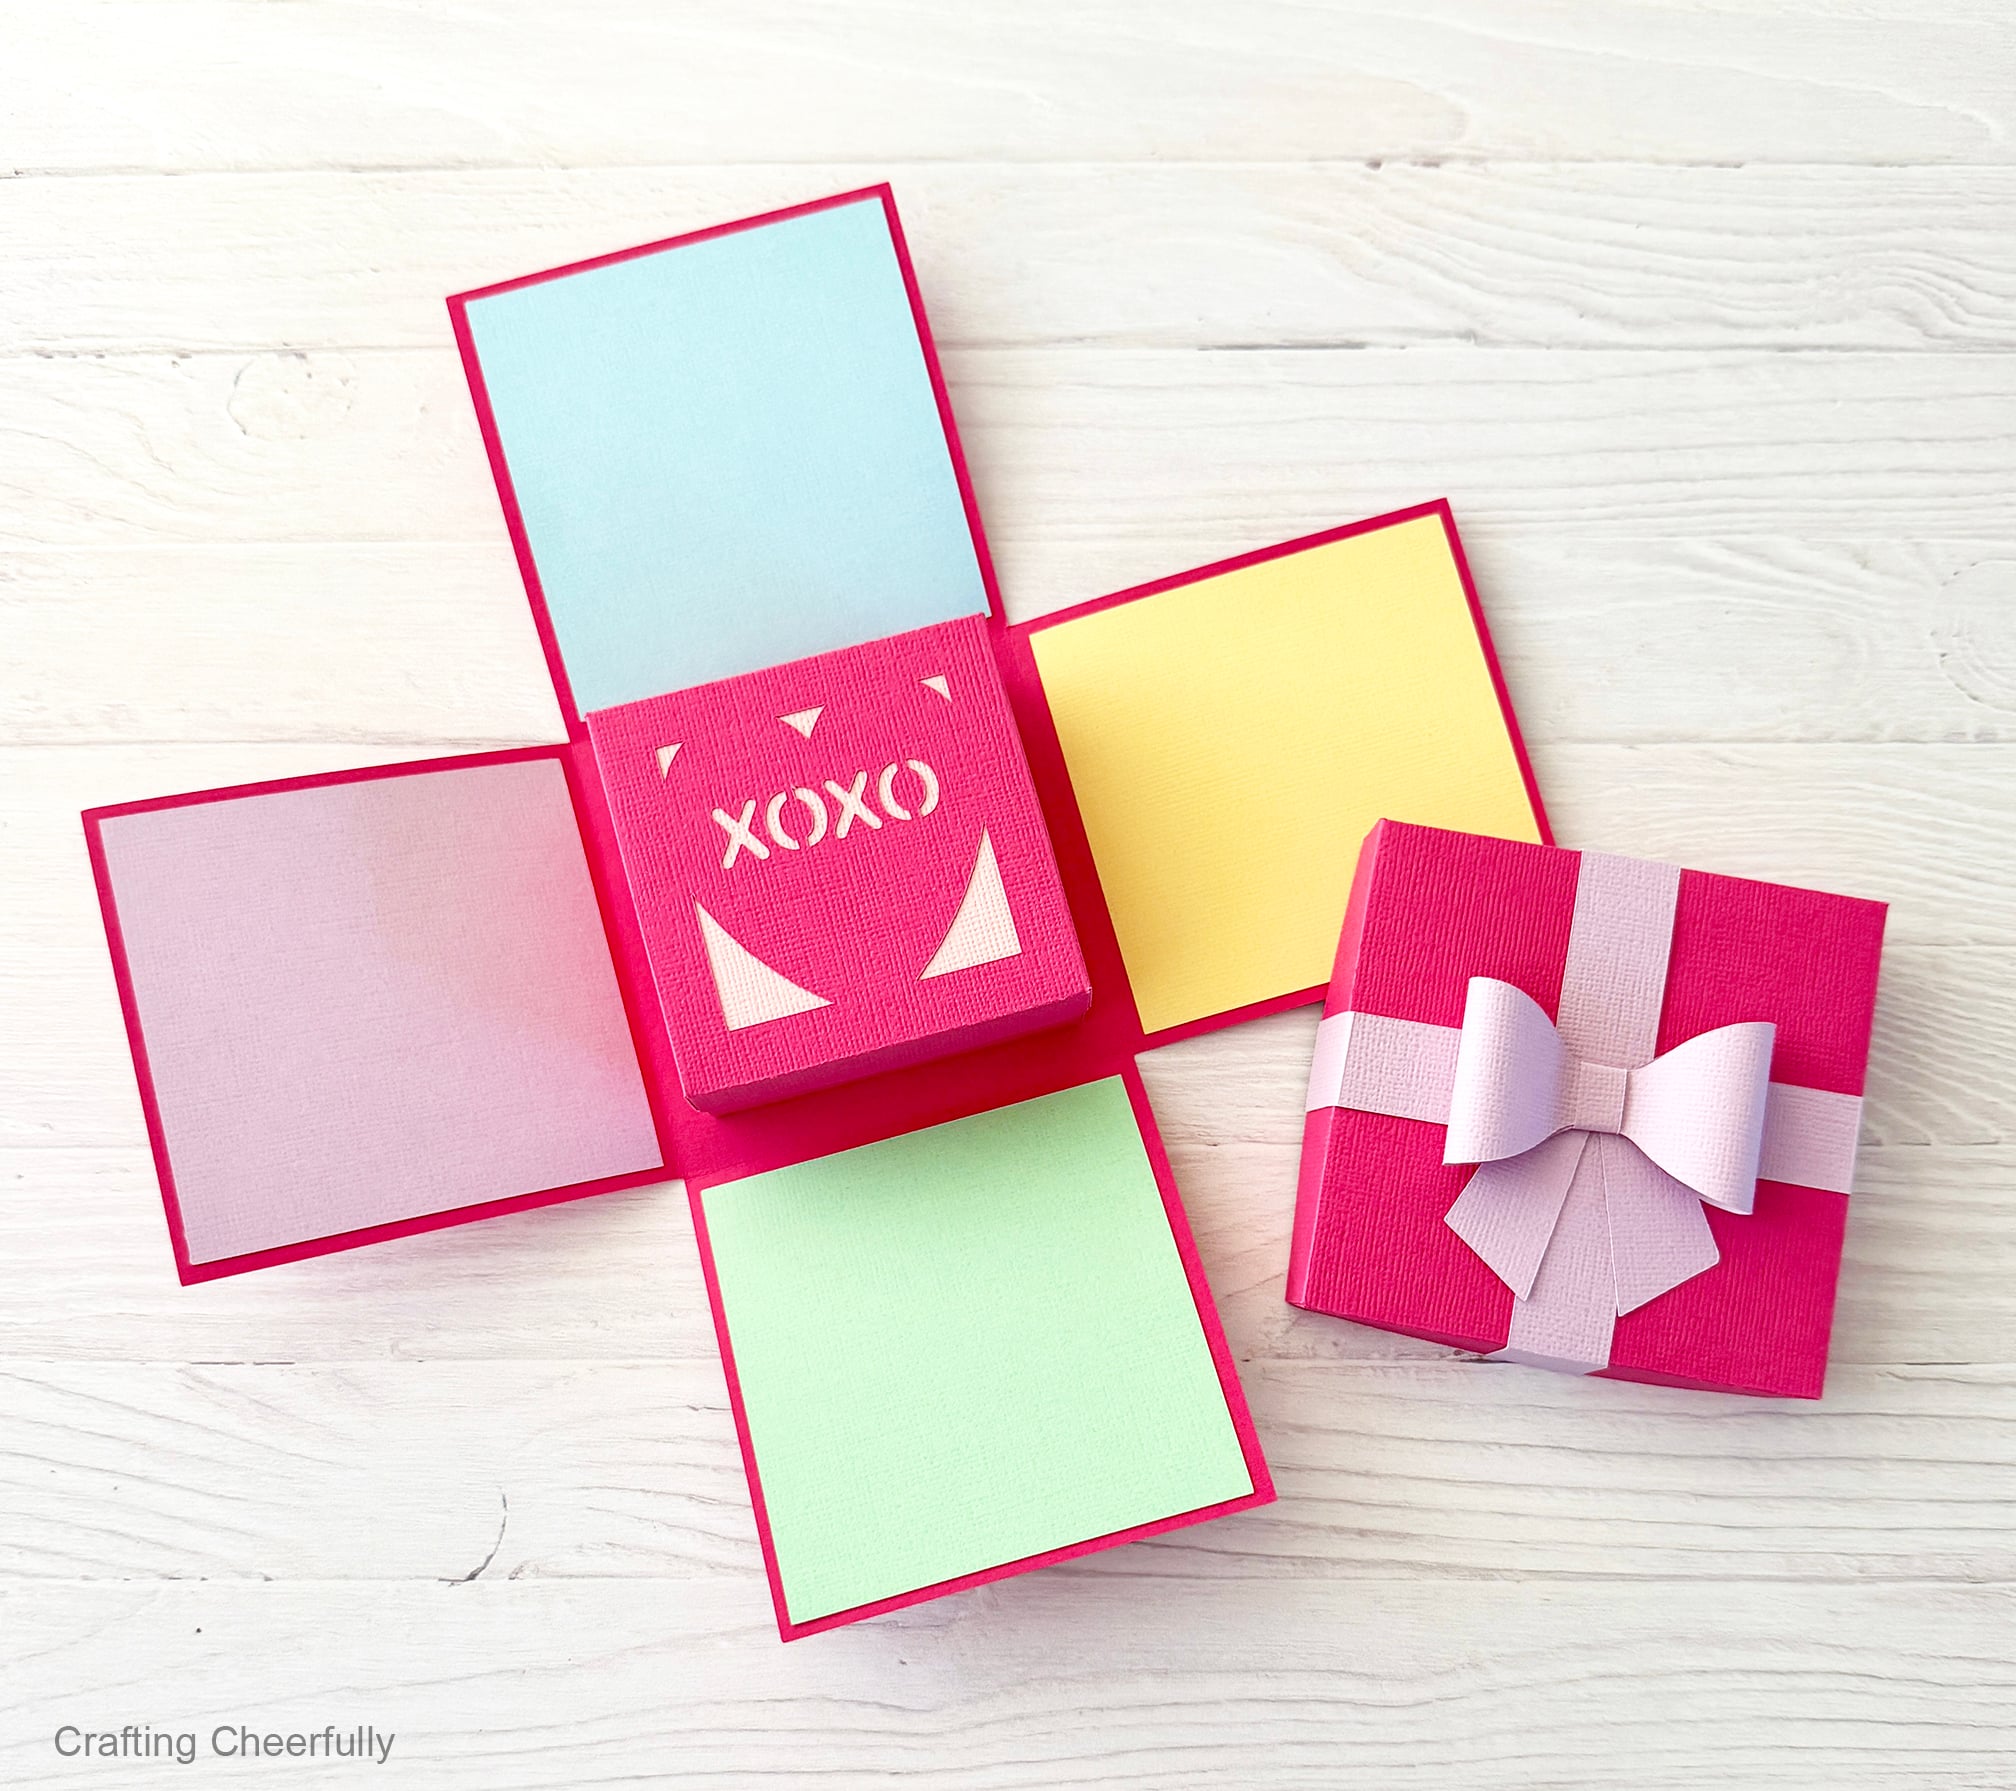
I designed this explosion box after seeing how much my family and friends liked my Christmas Explosion Box. For this Valentine’s Day version, each of the sides has a place to feature pictures and notes. This makes it perfect for gifting to friends, besties, daughters and even significant others.
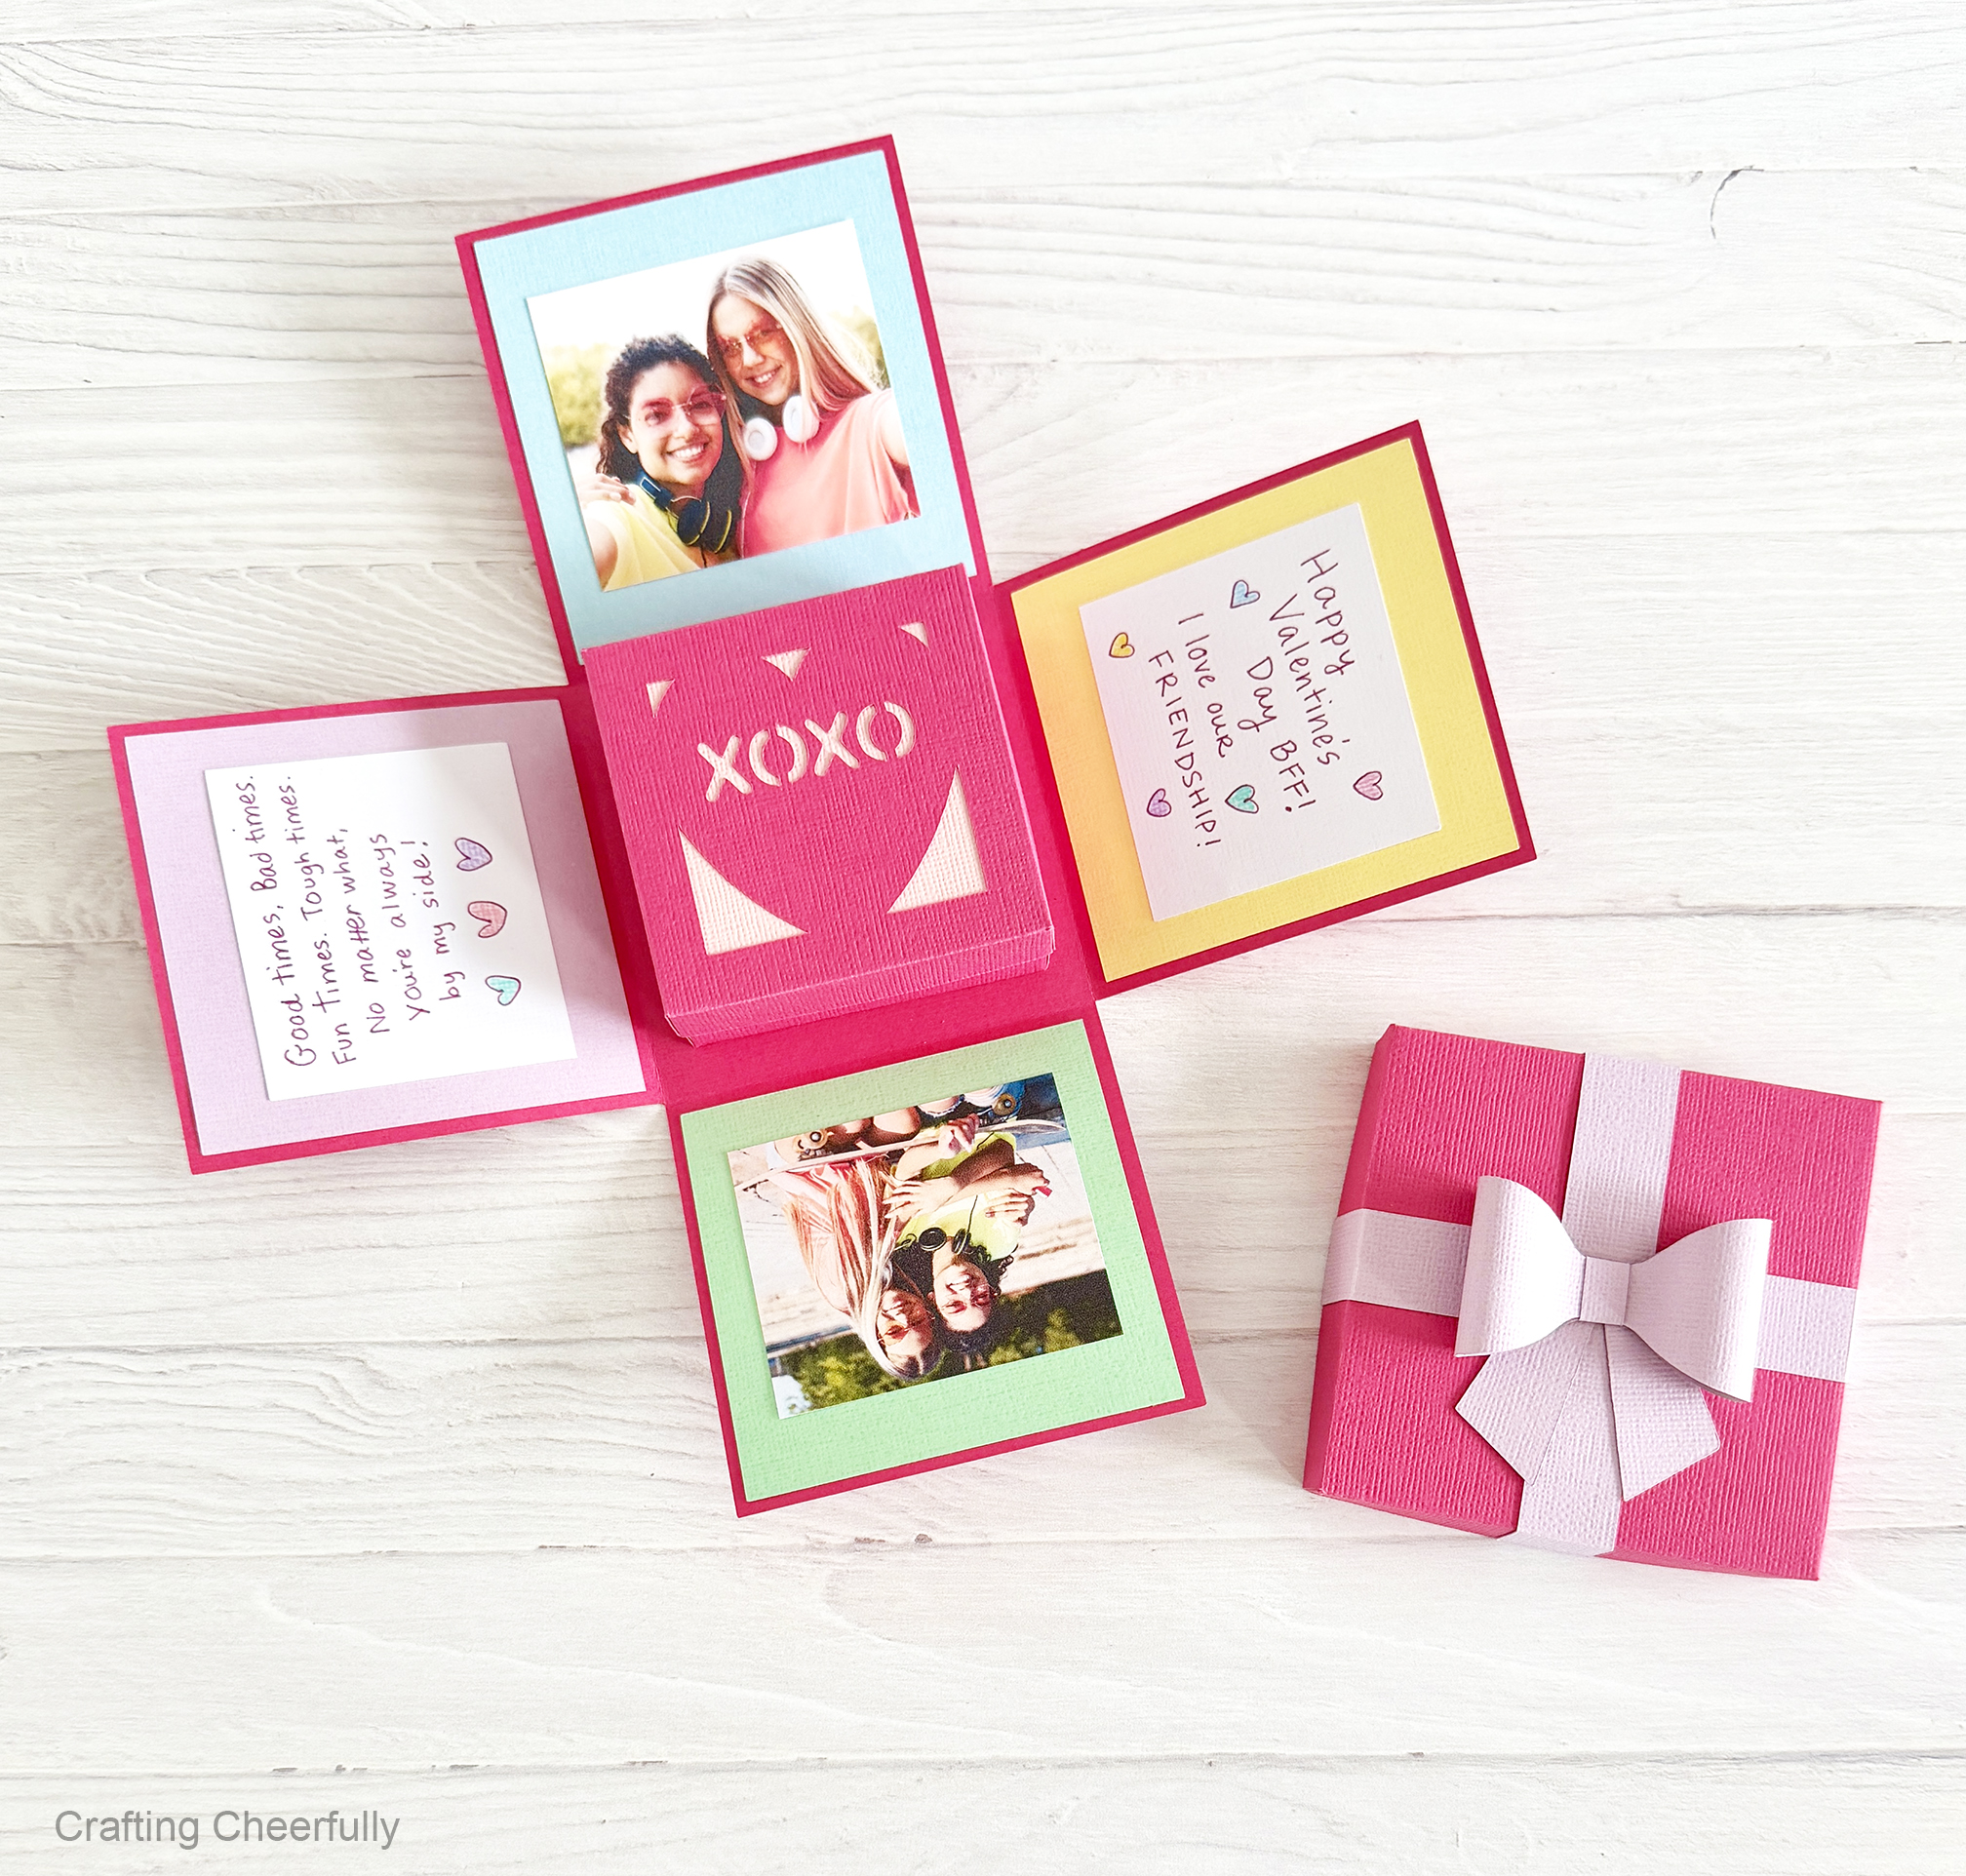
There is a small box at the center of the explosion box that is perfect for holding sweets and small gifts!
The inside of the explosion box can be decorated any way you’d like! Include photos, notes, drawings and more!
Explosion boxes are so much fun! Once you lift the lid up, the four sides of the box will fall down revealing the special surprise inside! Below is the tutorial for creating the box. You can find the SVG cut file in my Etsy shop.
Christmas Explosion Box
Supplies Needed
- SVG Cut File – Available in my Etsy shop. Thank you for supporting my small business!
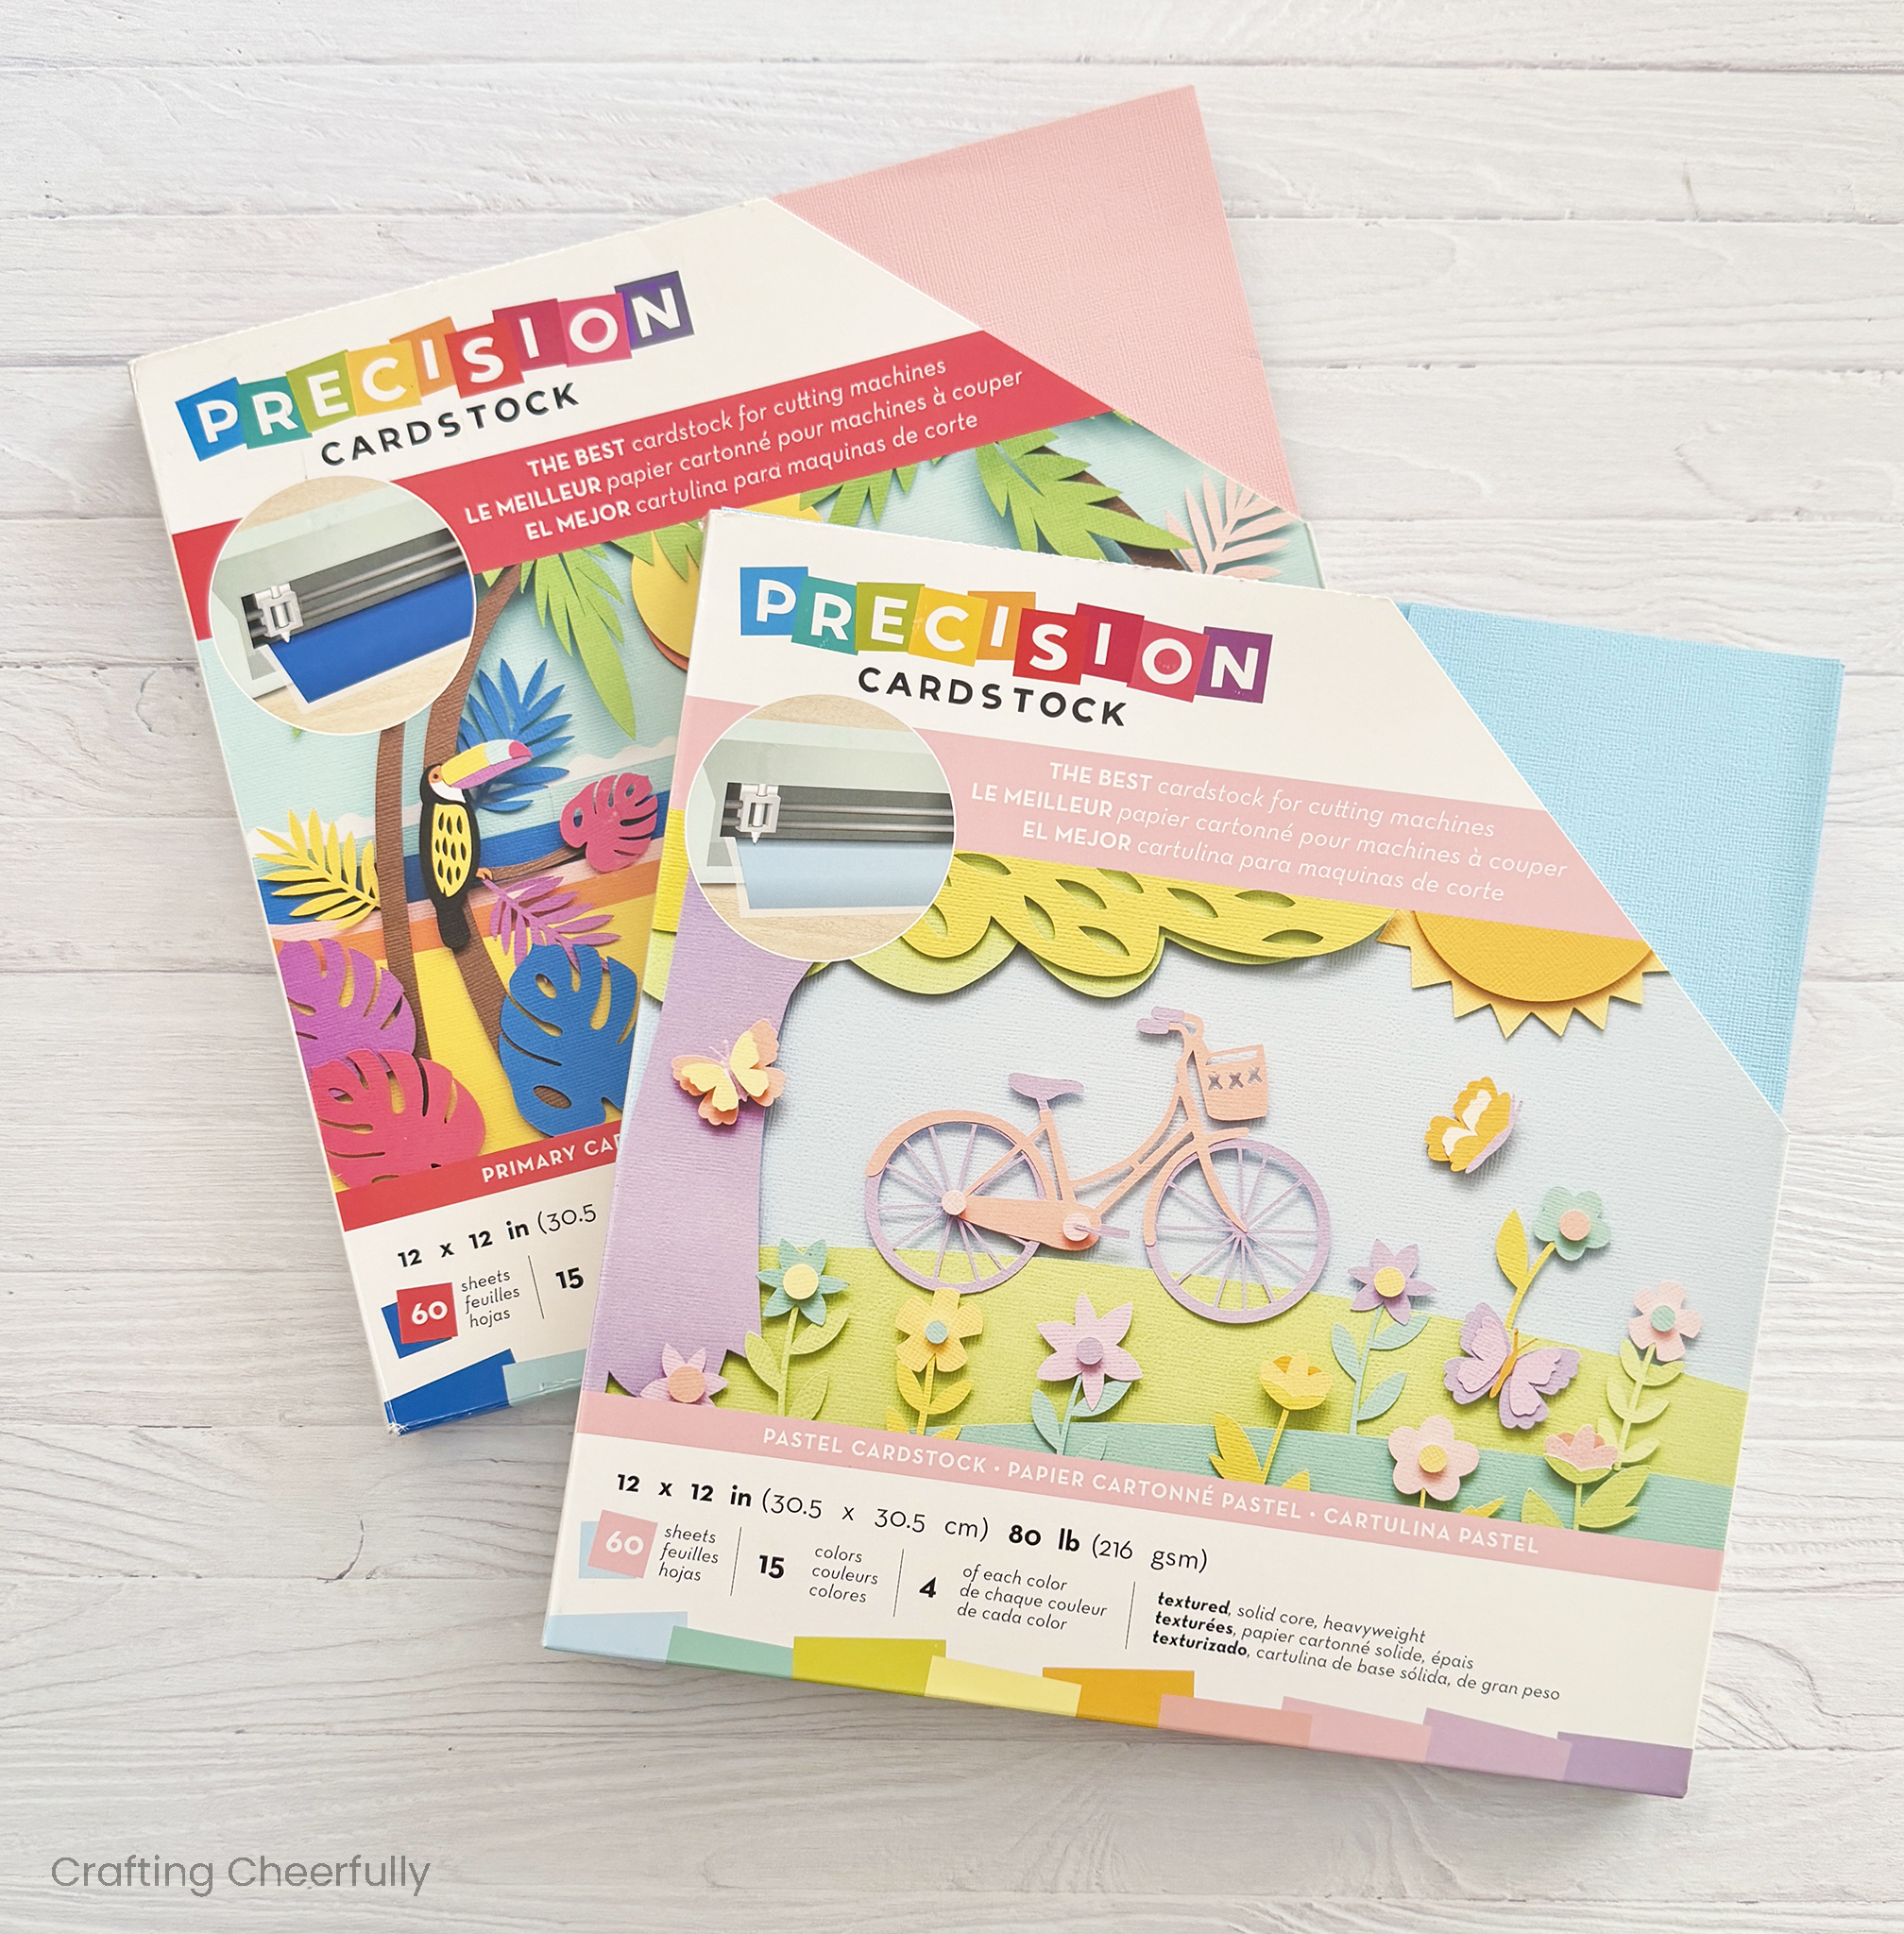
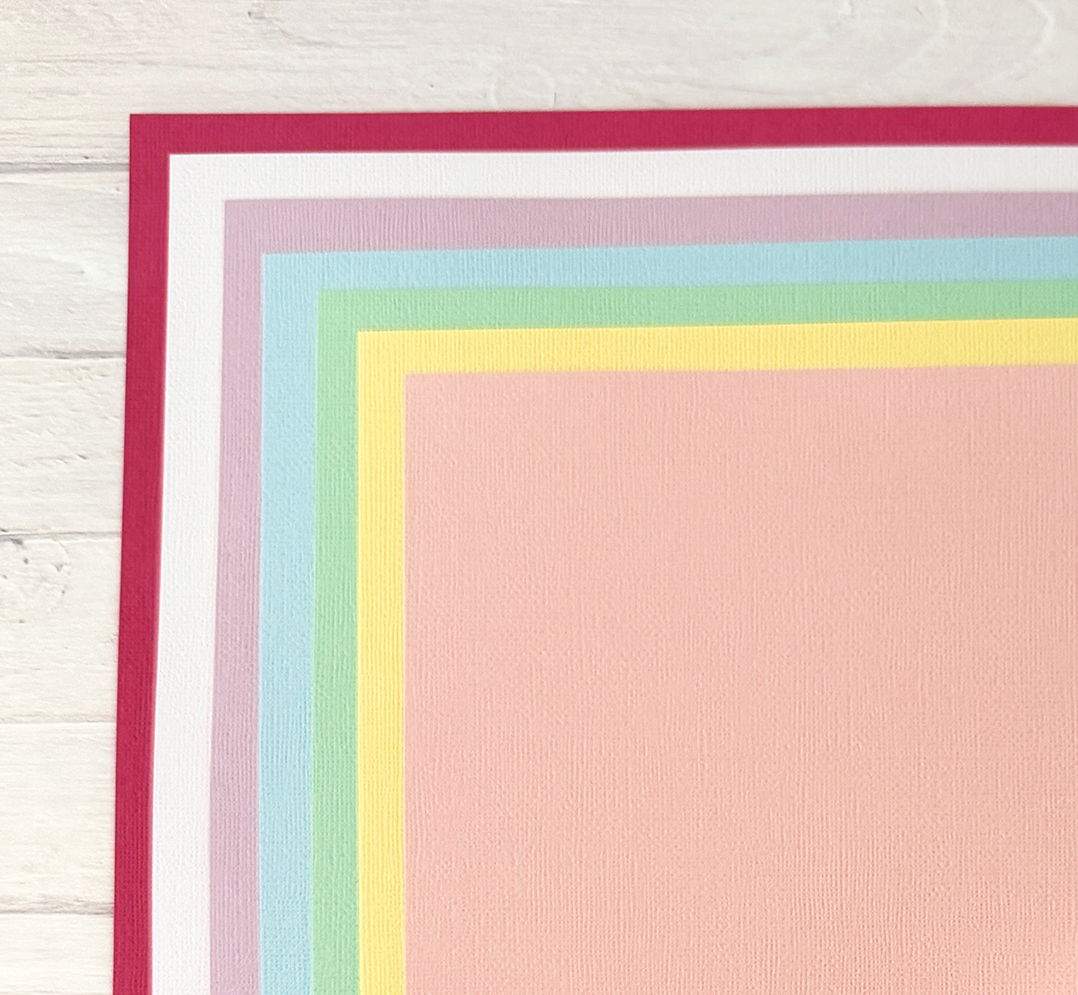
- Cardstock – I used 80lb cardstock from American Crafts Precision Cardstock.
- This is my new go-to paper since Joann closed and it became harder to get Bazzill cardstock. I used paper from the Pastel Precision Cardstock Pack and the Primary Precision Cardstock Pack.
- Double-Sided Tape – I used 1/2″ Scor-Tape, 1/4″ Scor-Tape
- Cricut Cutting Machine
- Cricut standard mat
- Cricut tools
- Cricut Brayer
Assemble the Box
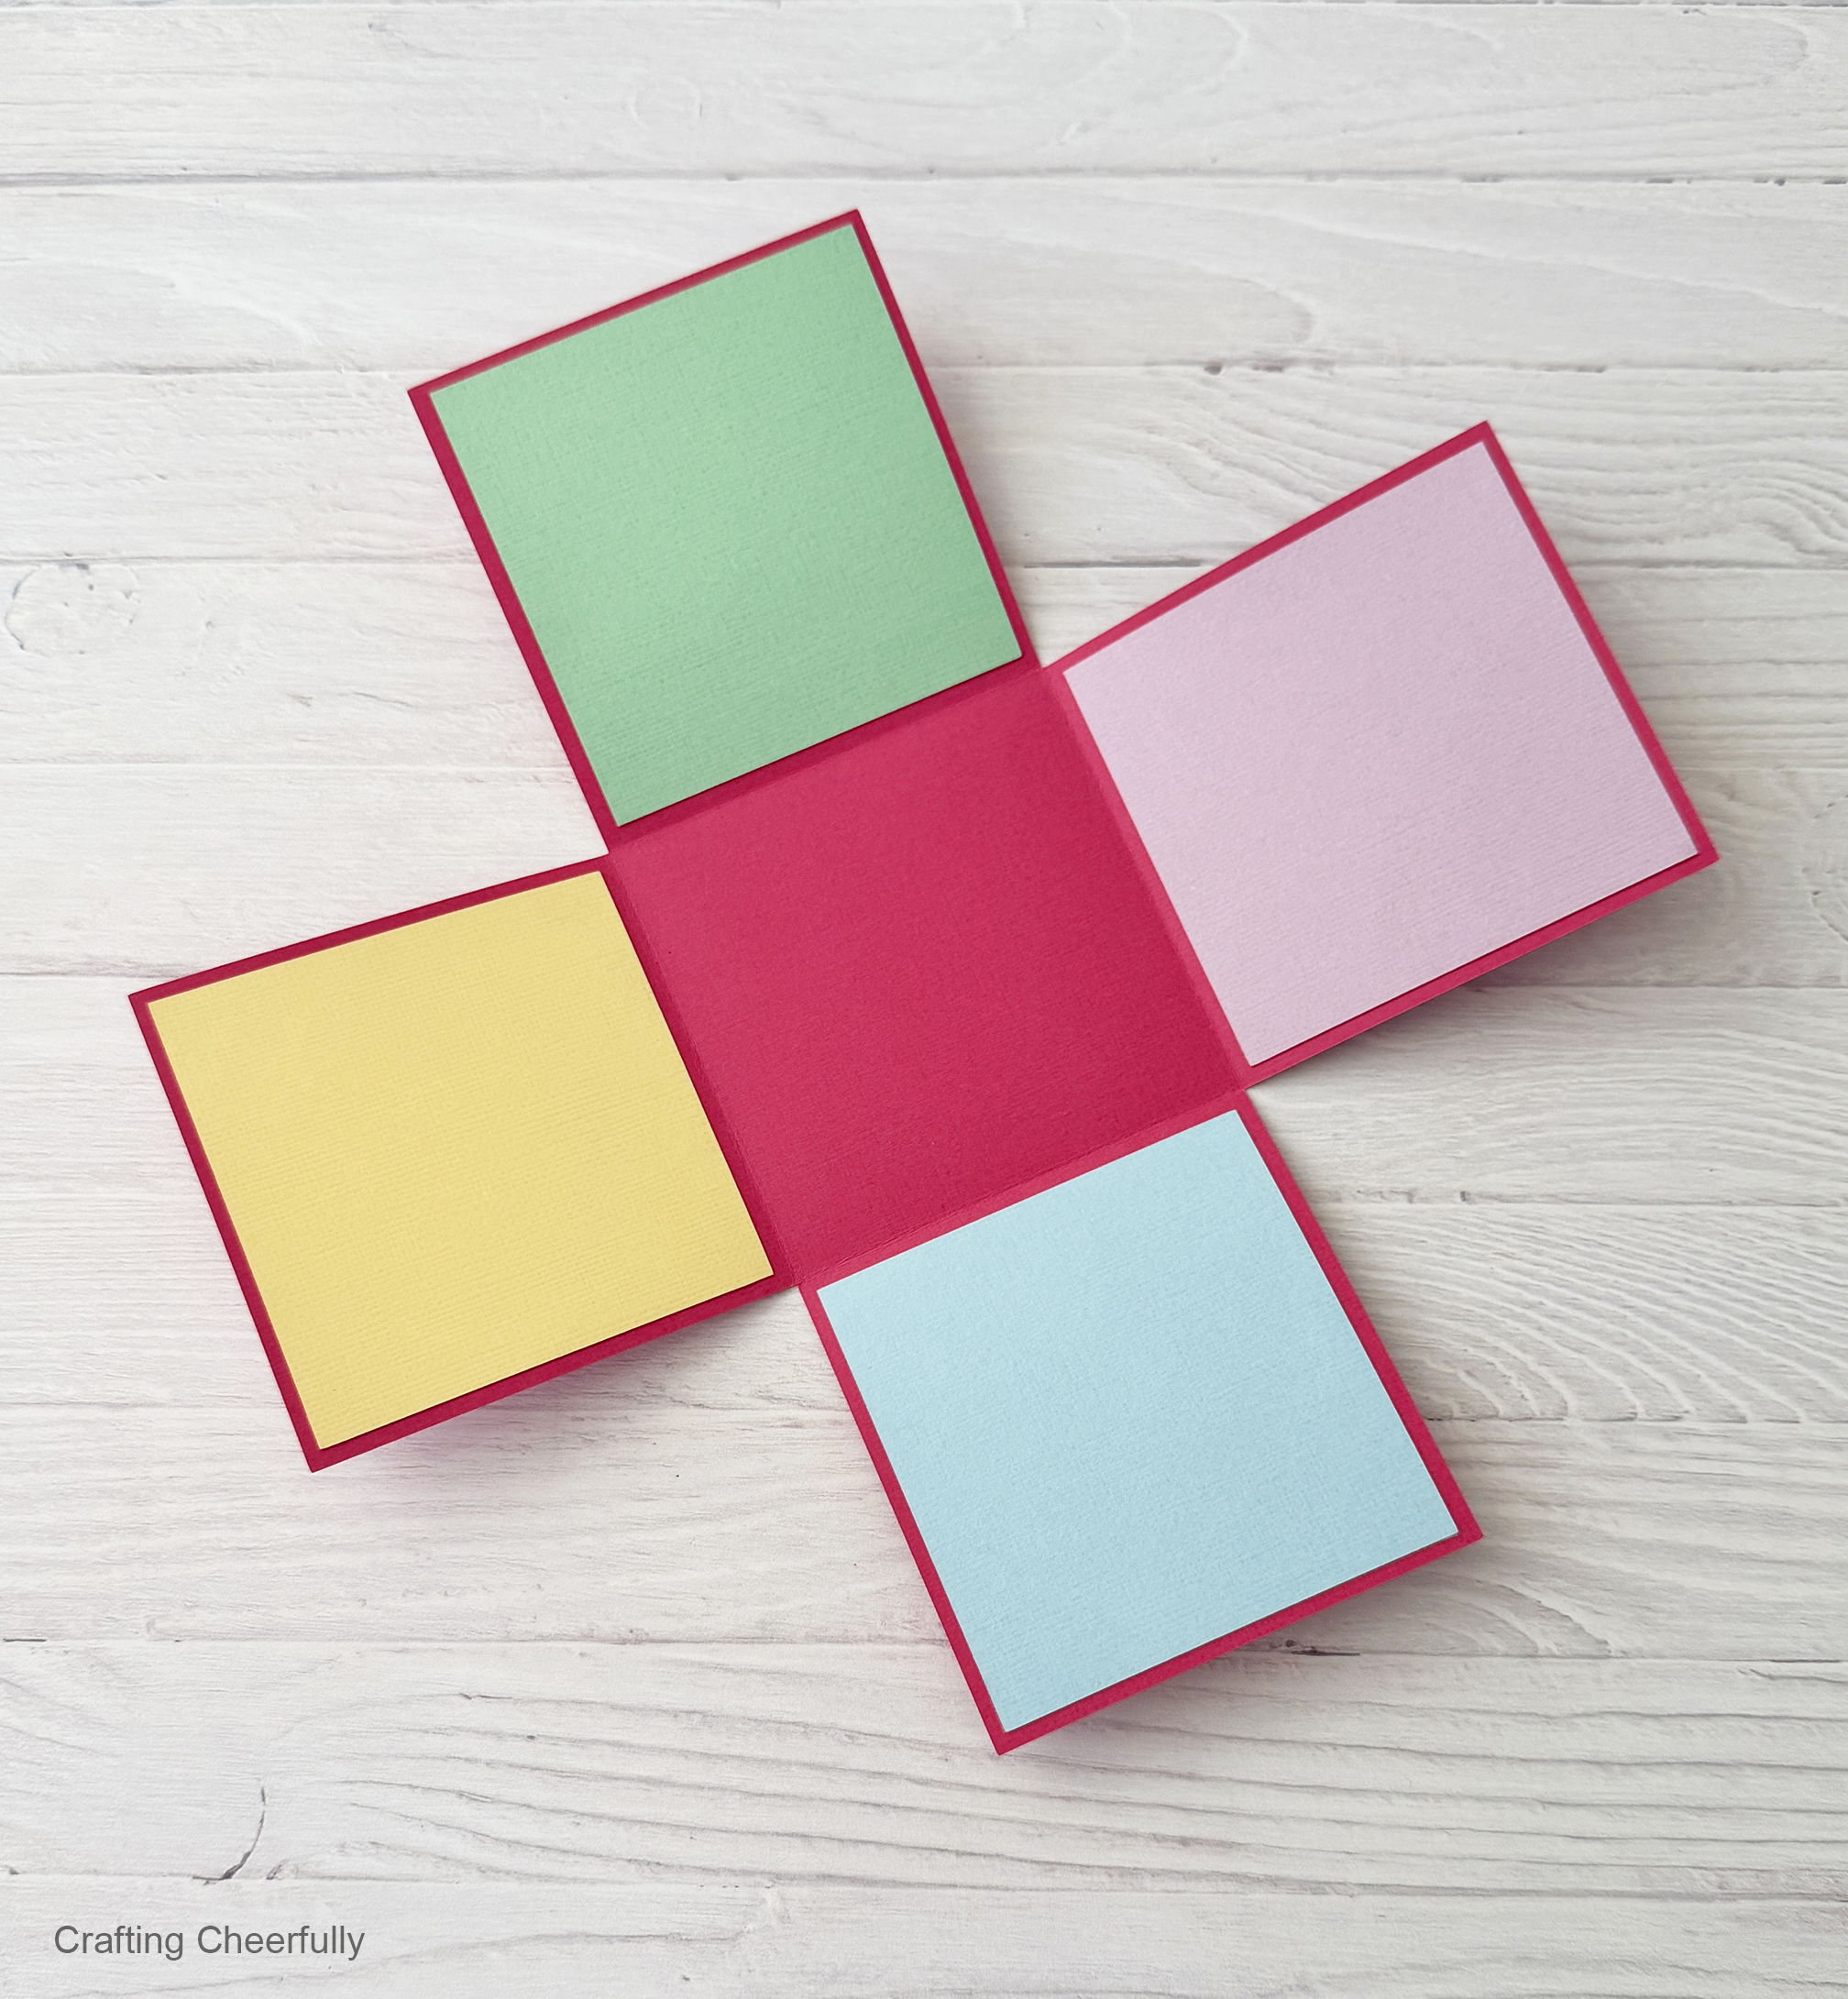
Step One: Adhere the white colorful squares of paper to the inside of each box side. I used 1/4″ Scor-Tape around the edges of each square. This was thin enough to not show through any of the holes.
Create the Mini Interior Box
Step Two: Create the box that is at the center of the explosion box. Fold the flaps along the score lines on both the box bottom and box lid. Add adhesive to the tabs and to the outer edges of the pink square. Place the pink square behind the lid cut out, then form the box and lid by attaching the tabs.
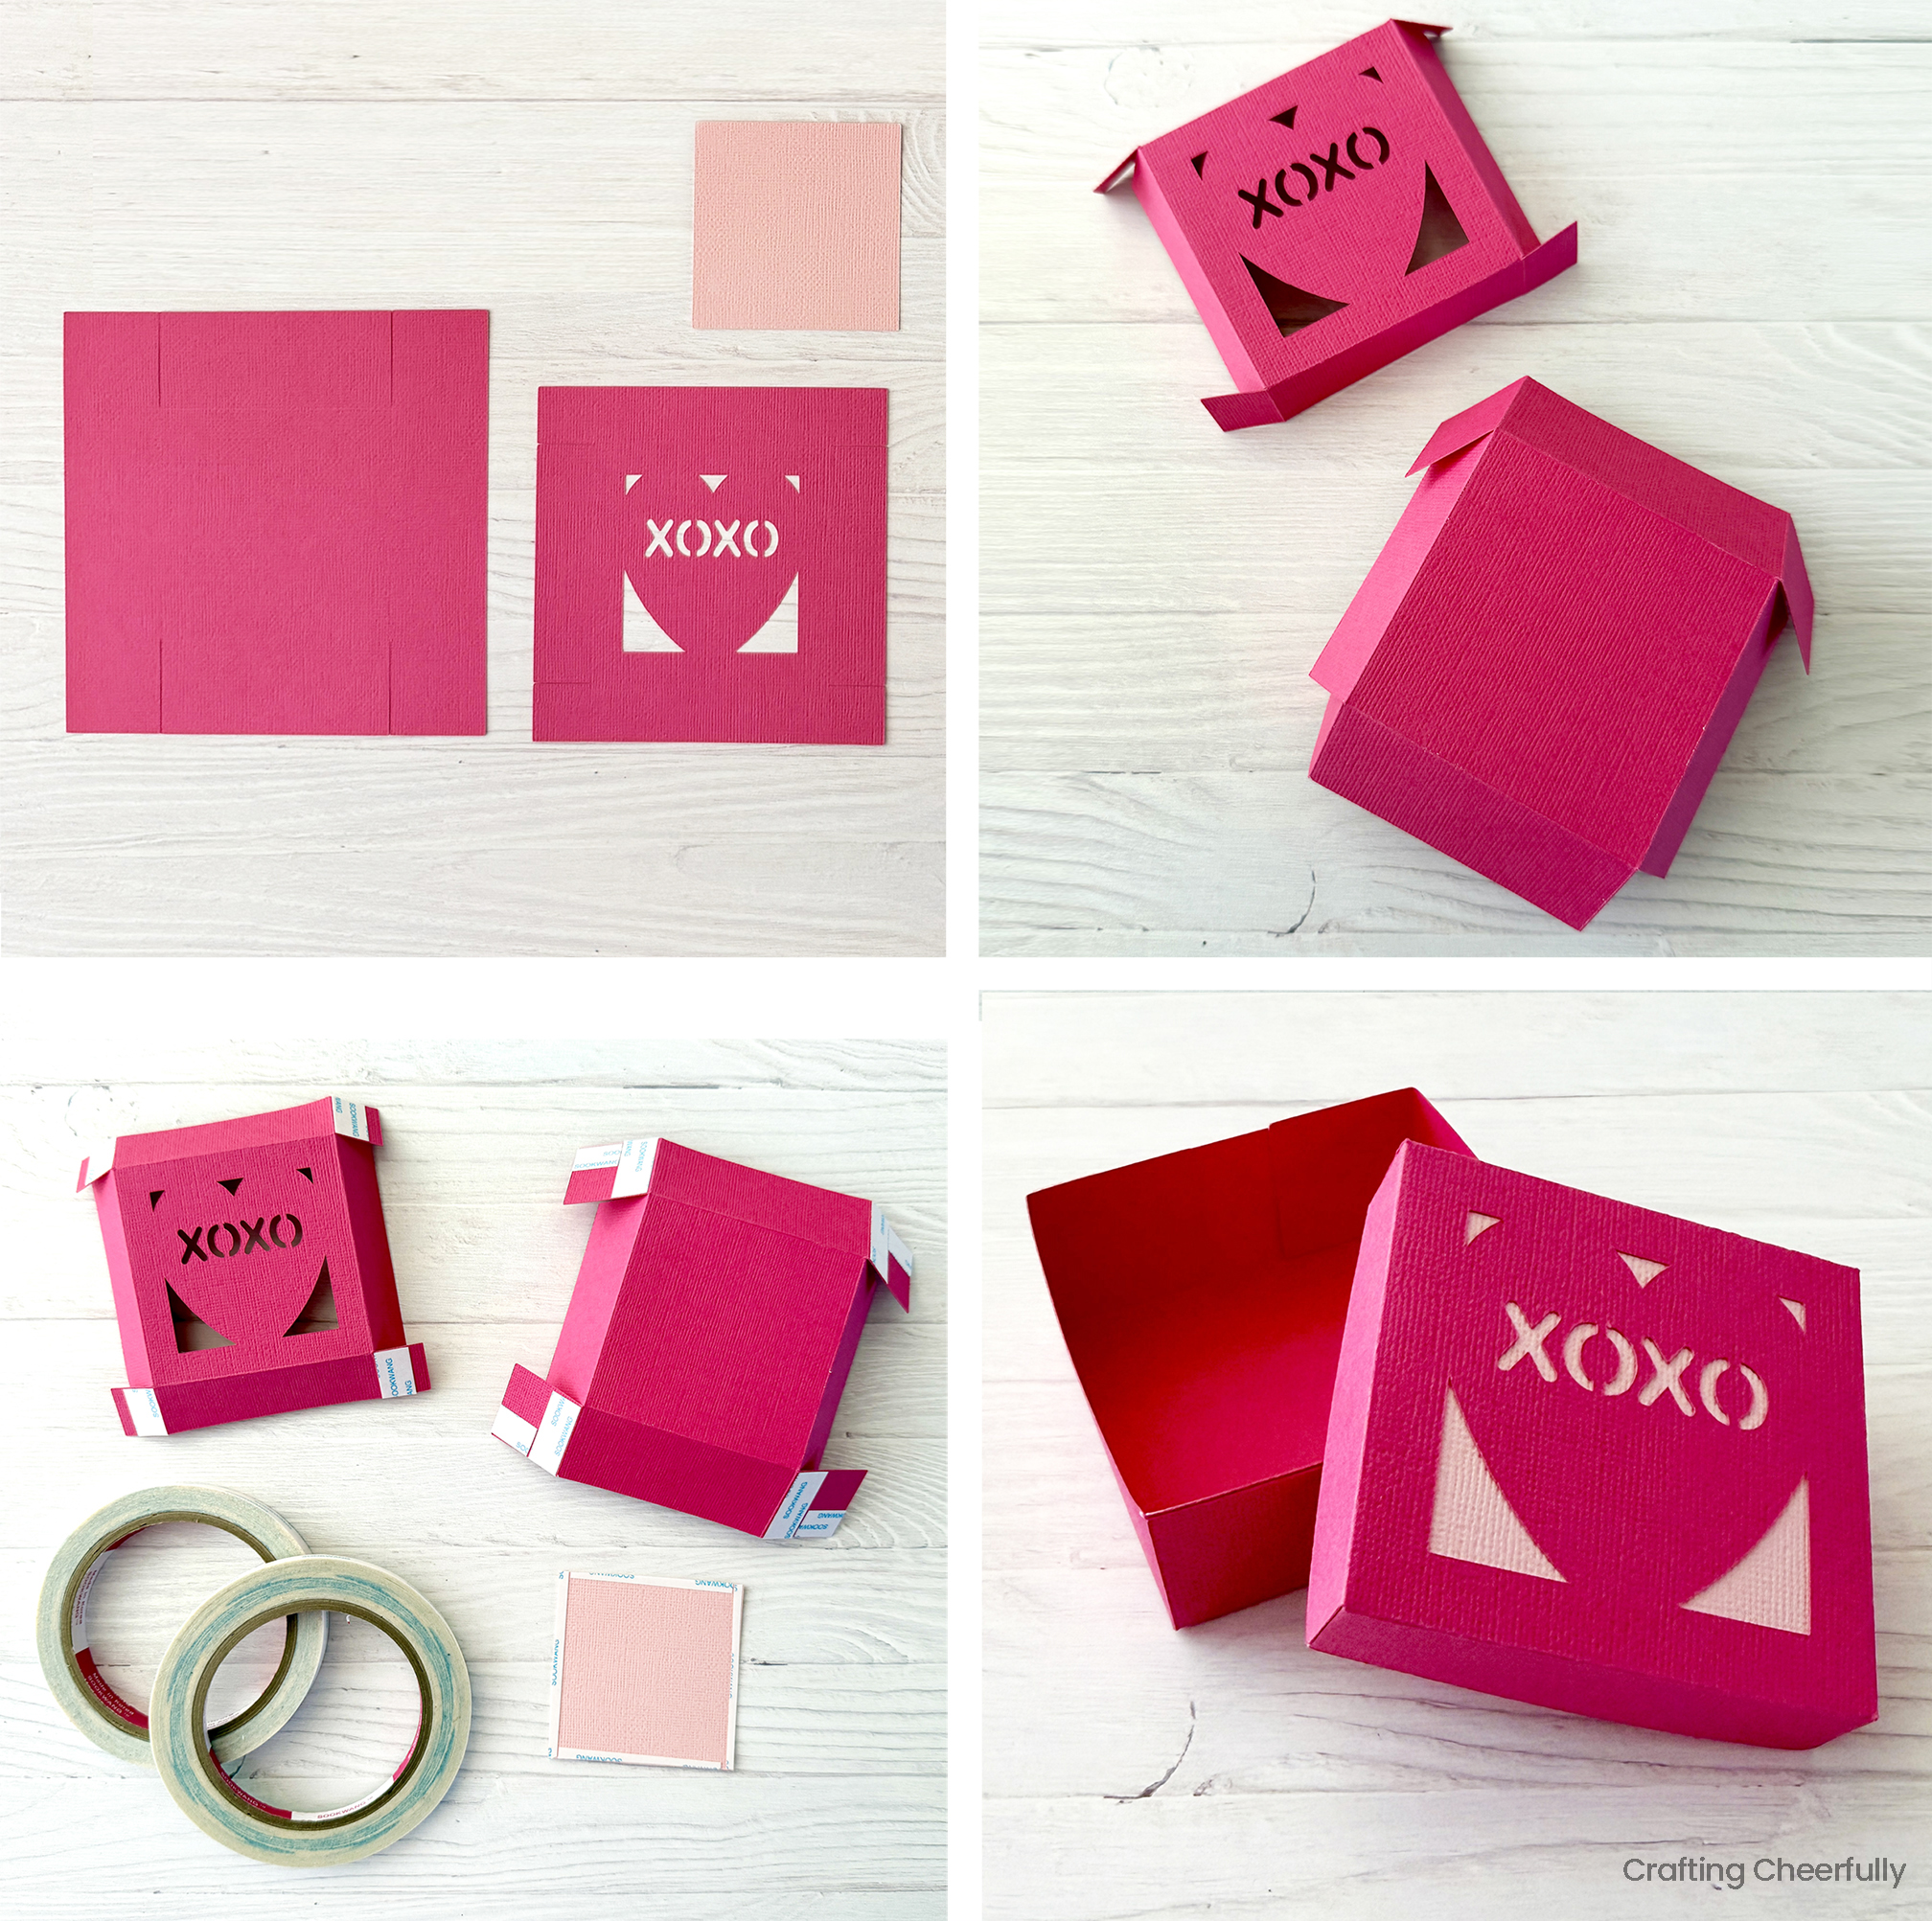
Add adhesive to the bottom of the box and attach it to the center of the explosion box.
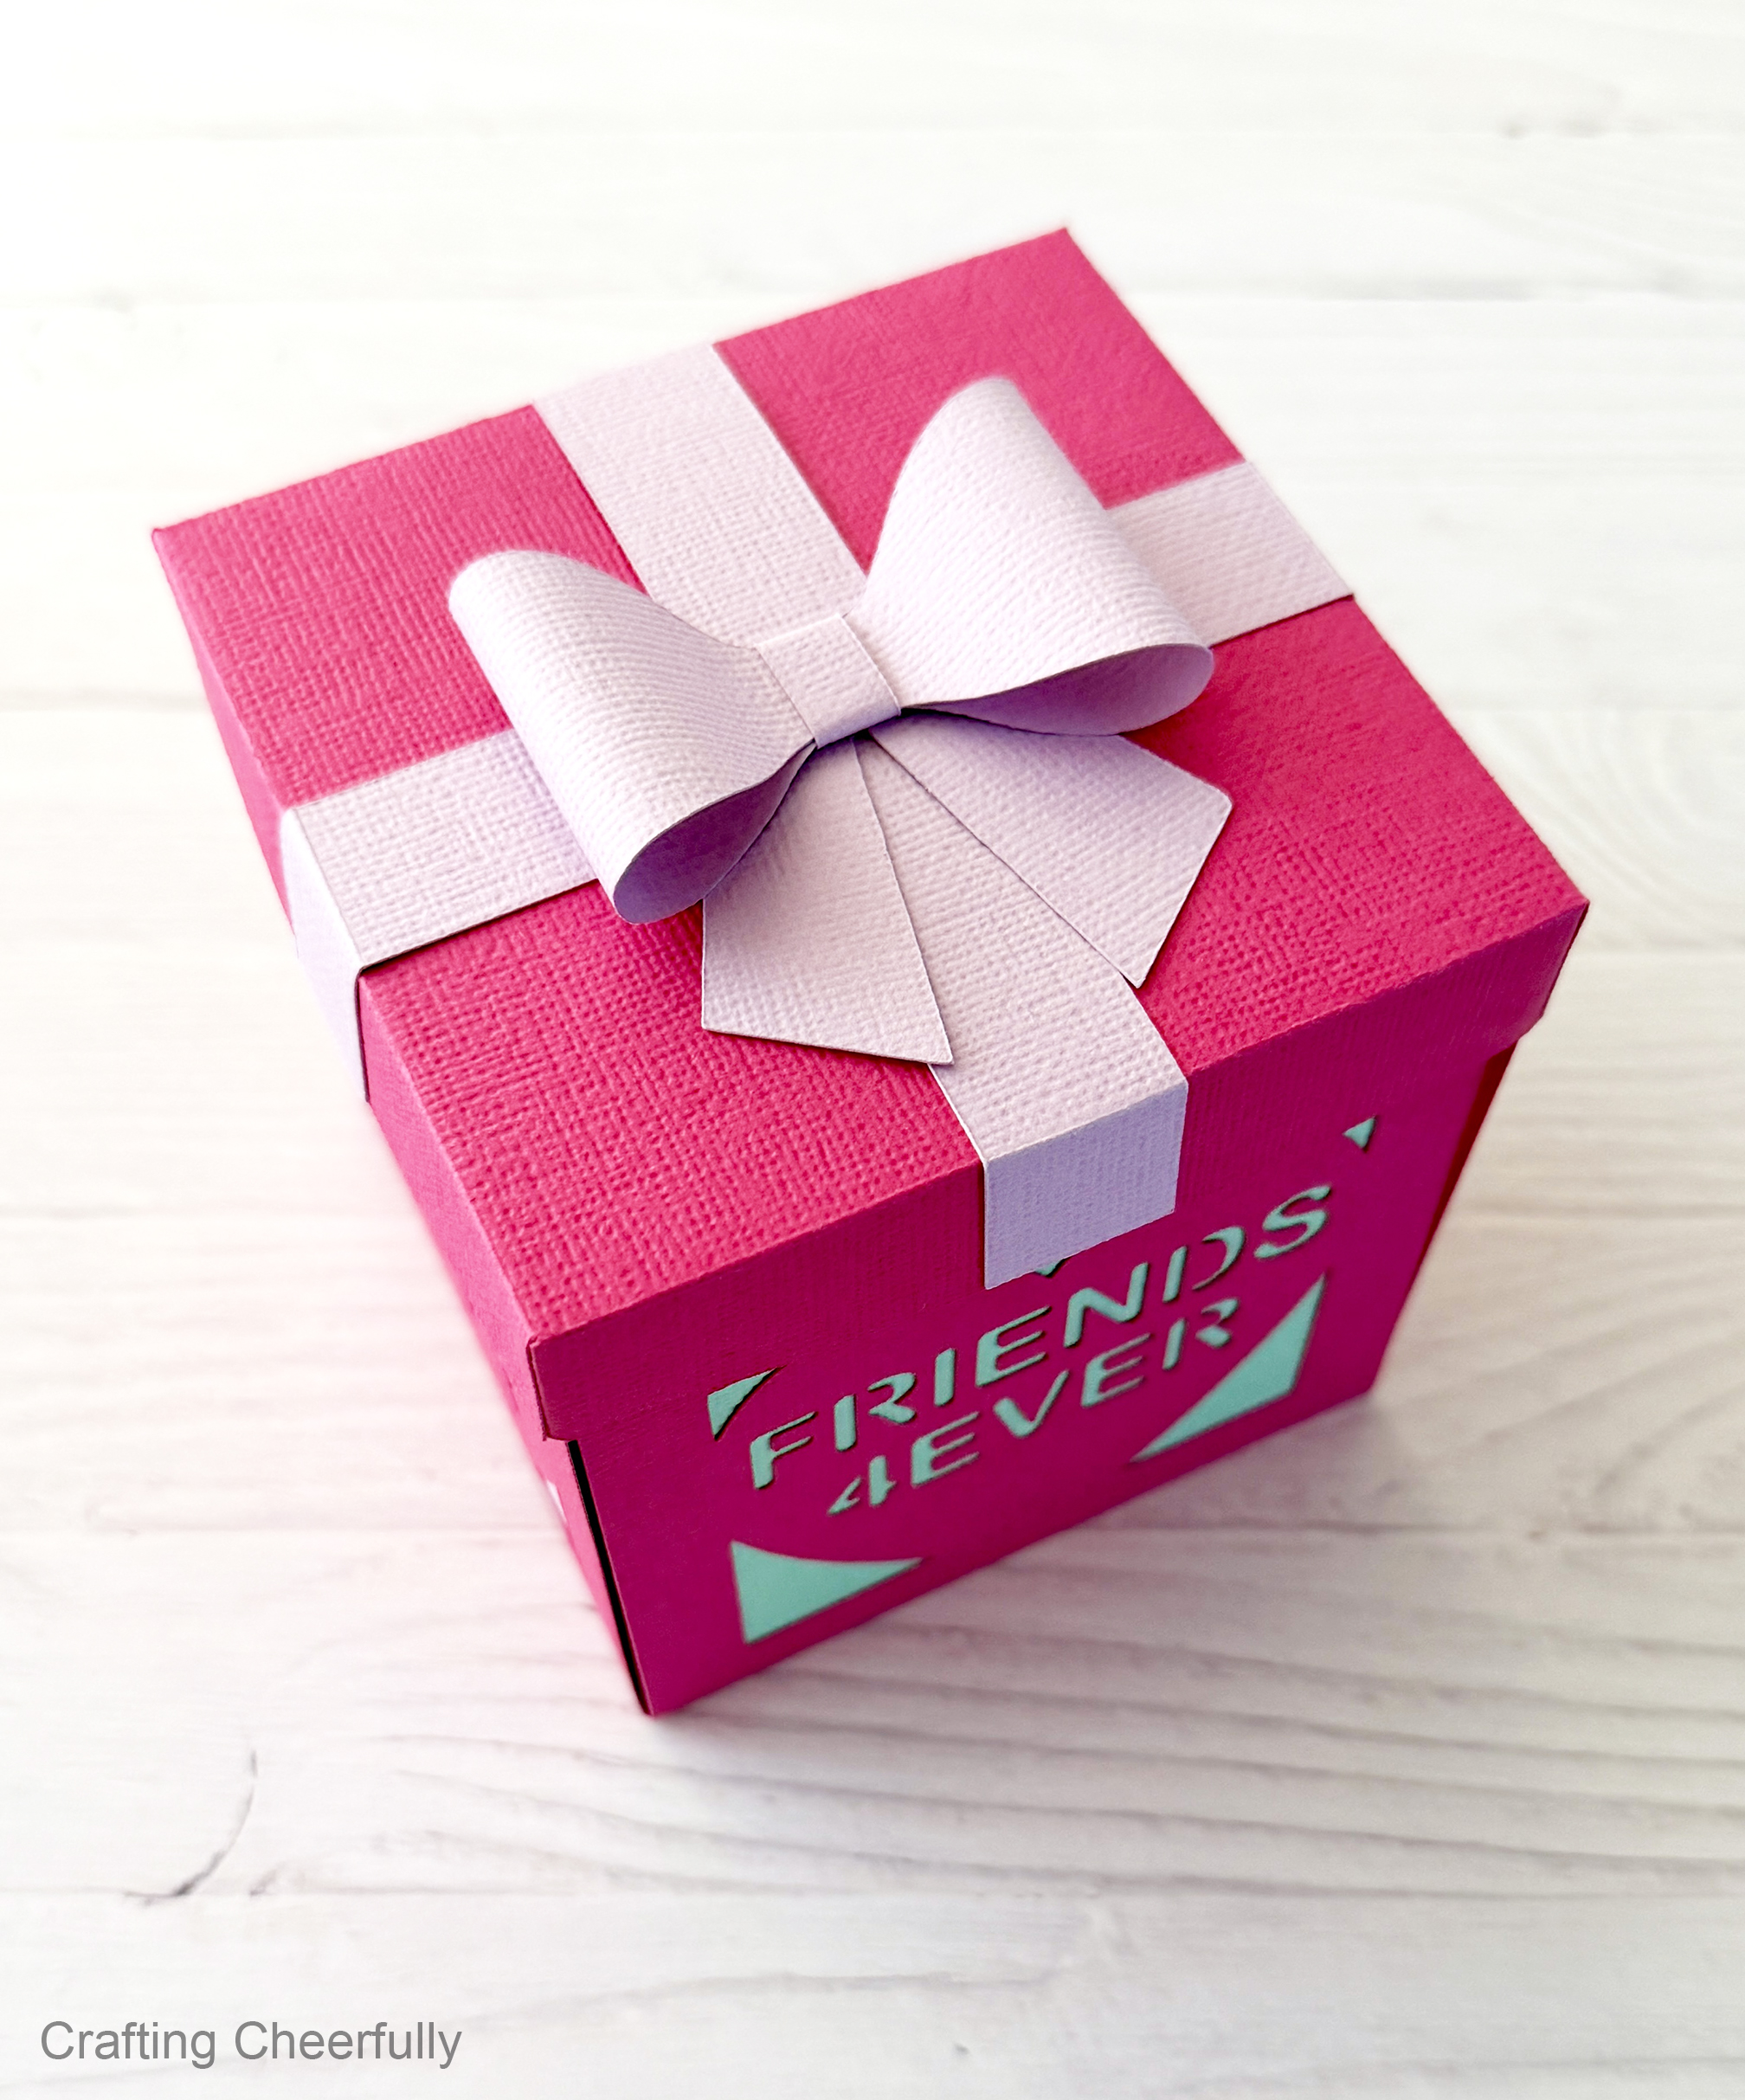
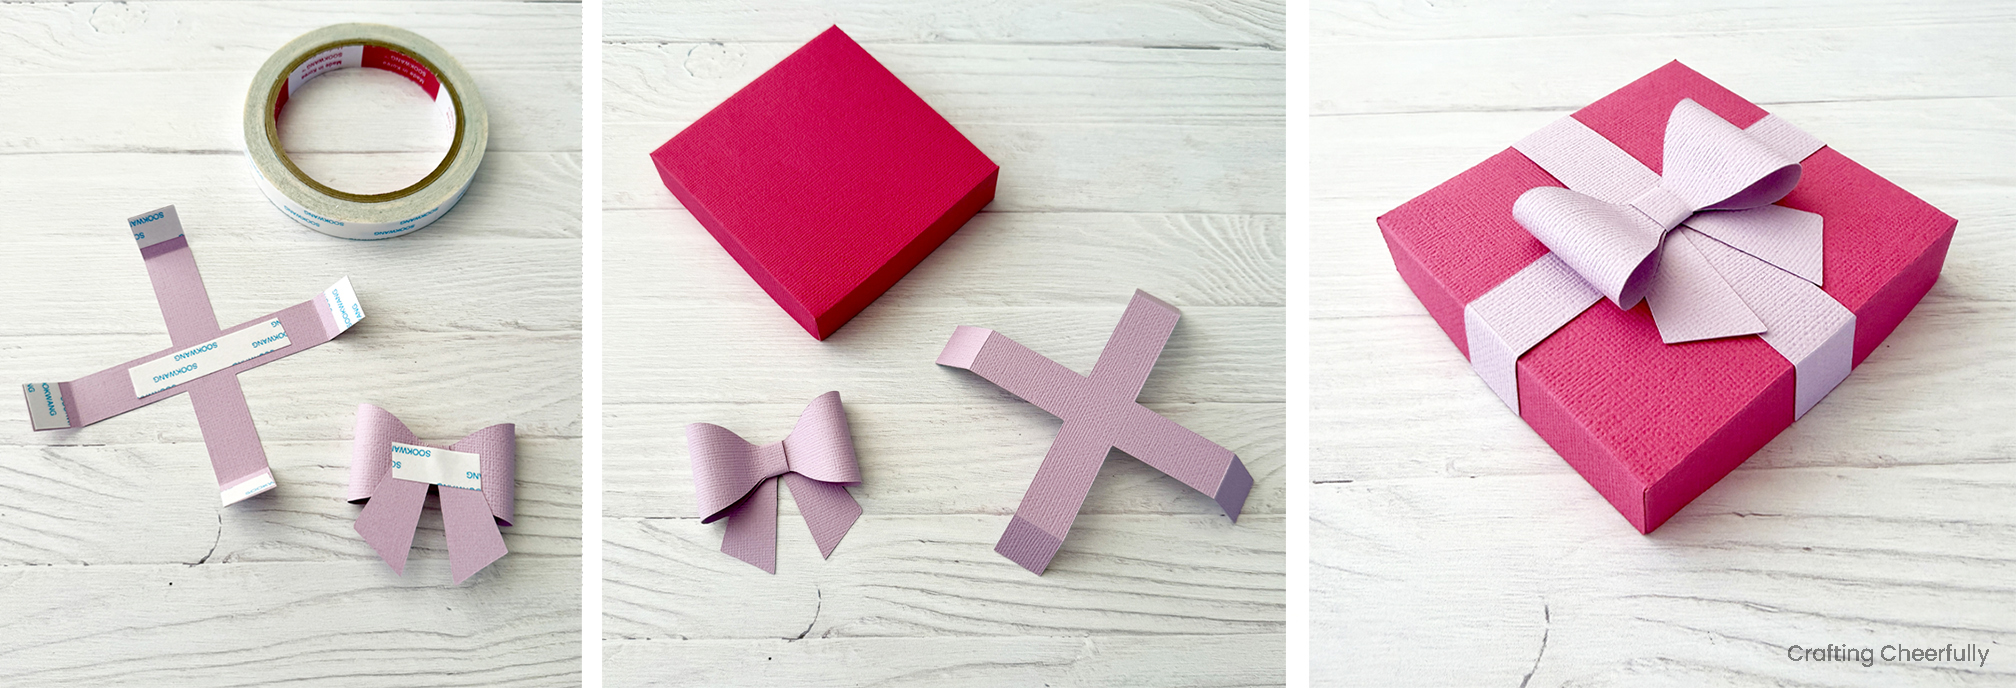
Create the Bow
Step Three: Create a paper bow for the top of the box. Start by rolling the loops of the bow with a pencil to help them form without creating hard creases. Place adhesive in the center and secure the loops to the center of the bow. Wrap the small rectangular piece of paper around the center of the bow, then attach the bow flaps to the underside of the bow.

Create the Box Lid
Step Four: Fold the box lid along the fold lines then place adhesive on the flaps and form the lid. Fold the ribbon piece along the score lines, then secure it to the box lid. Add the bow to the center of the lid.
The lid is complete! Lift up the side flaps of the box and place the box lid on top to hold them in place. When the lid is lifted up, the sides of the box will fall down!
Decorate the Inside of the Box
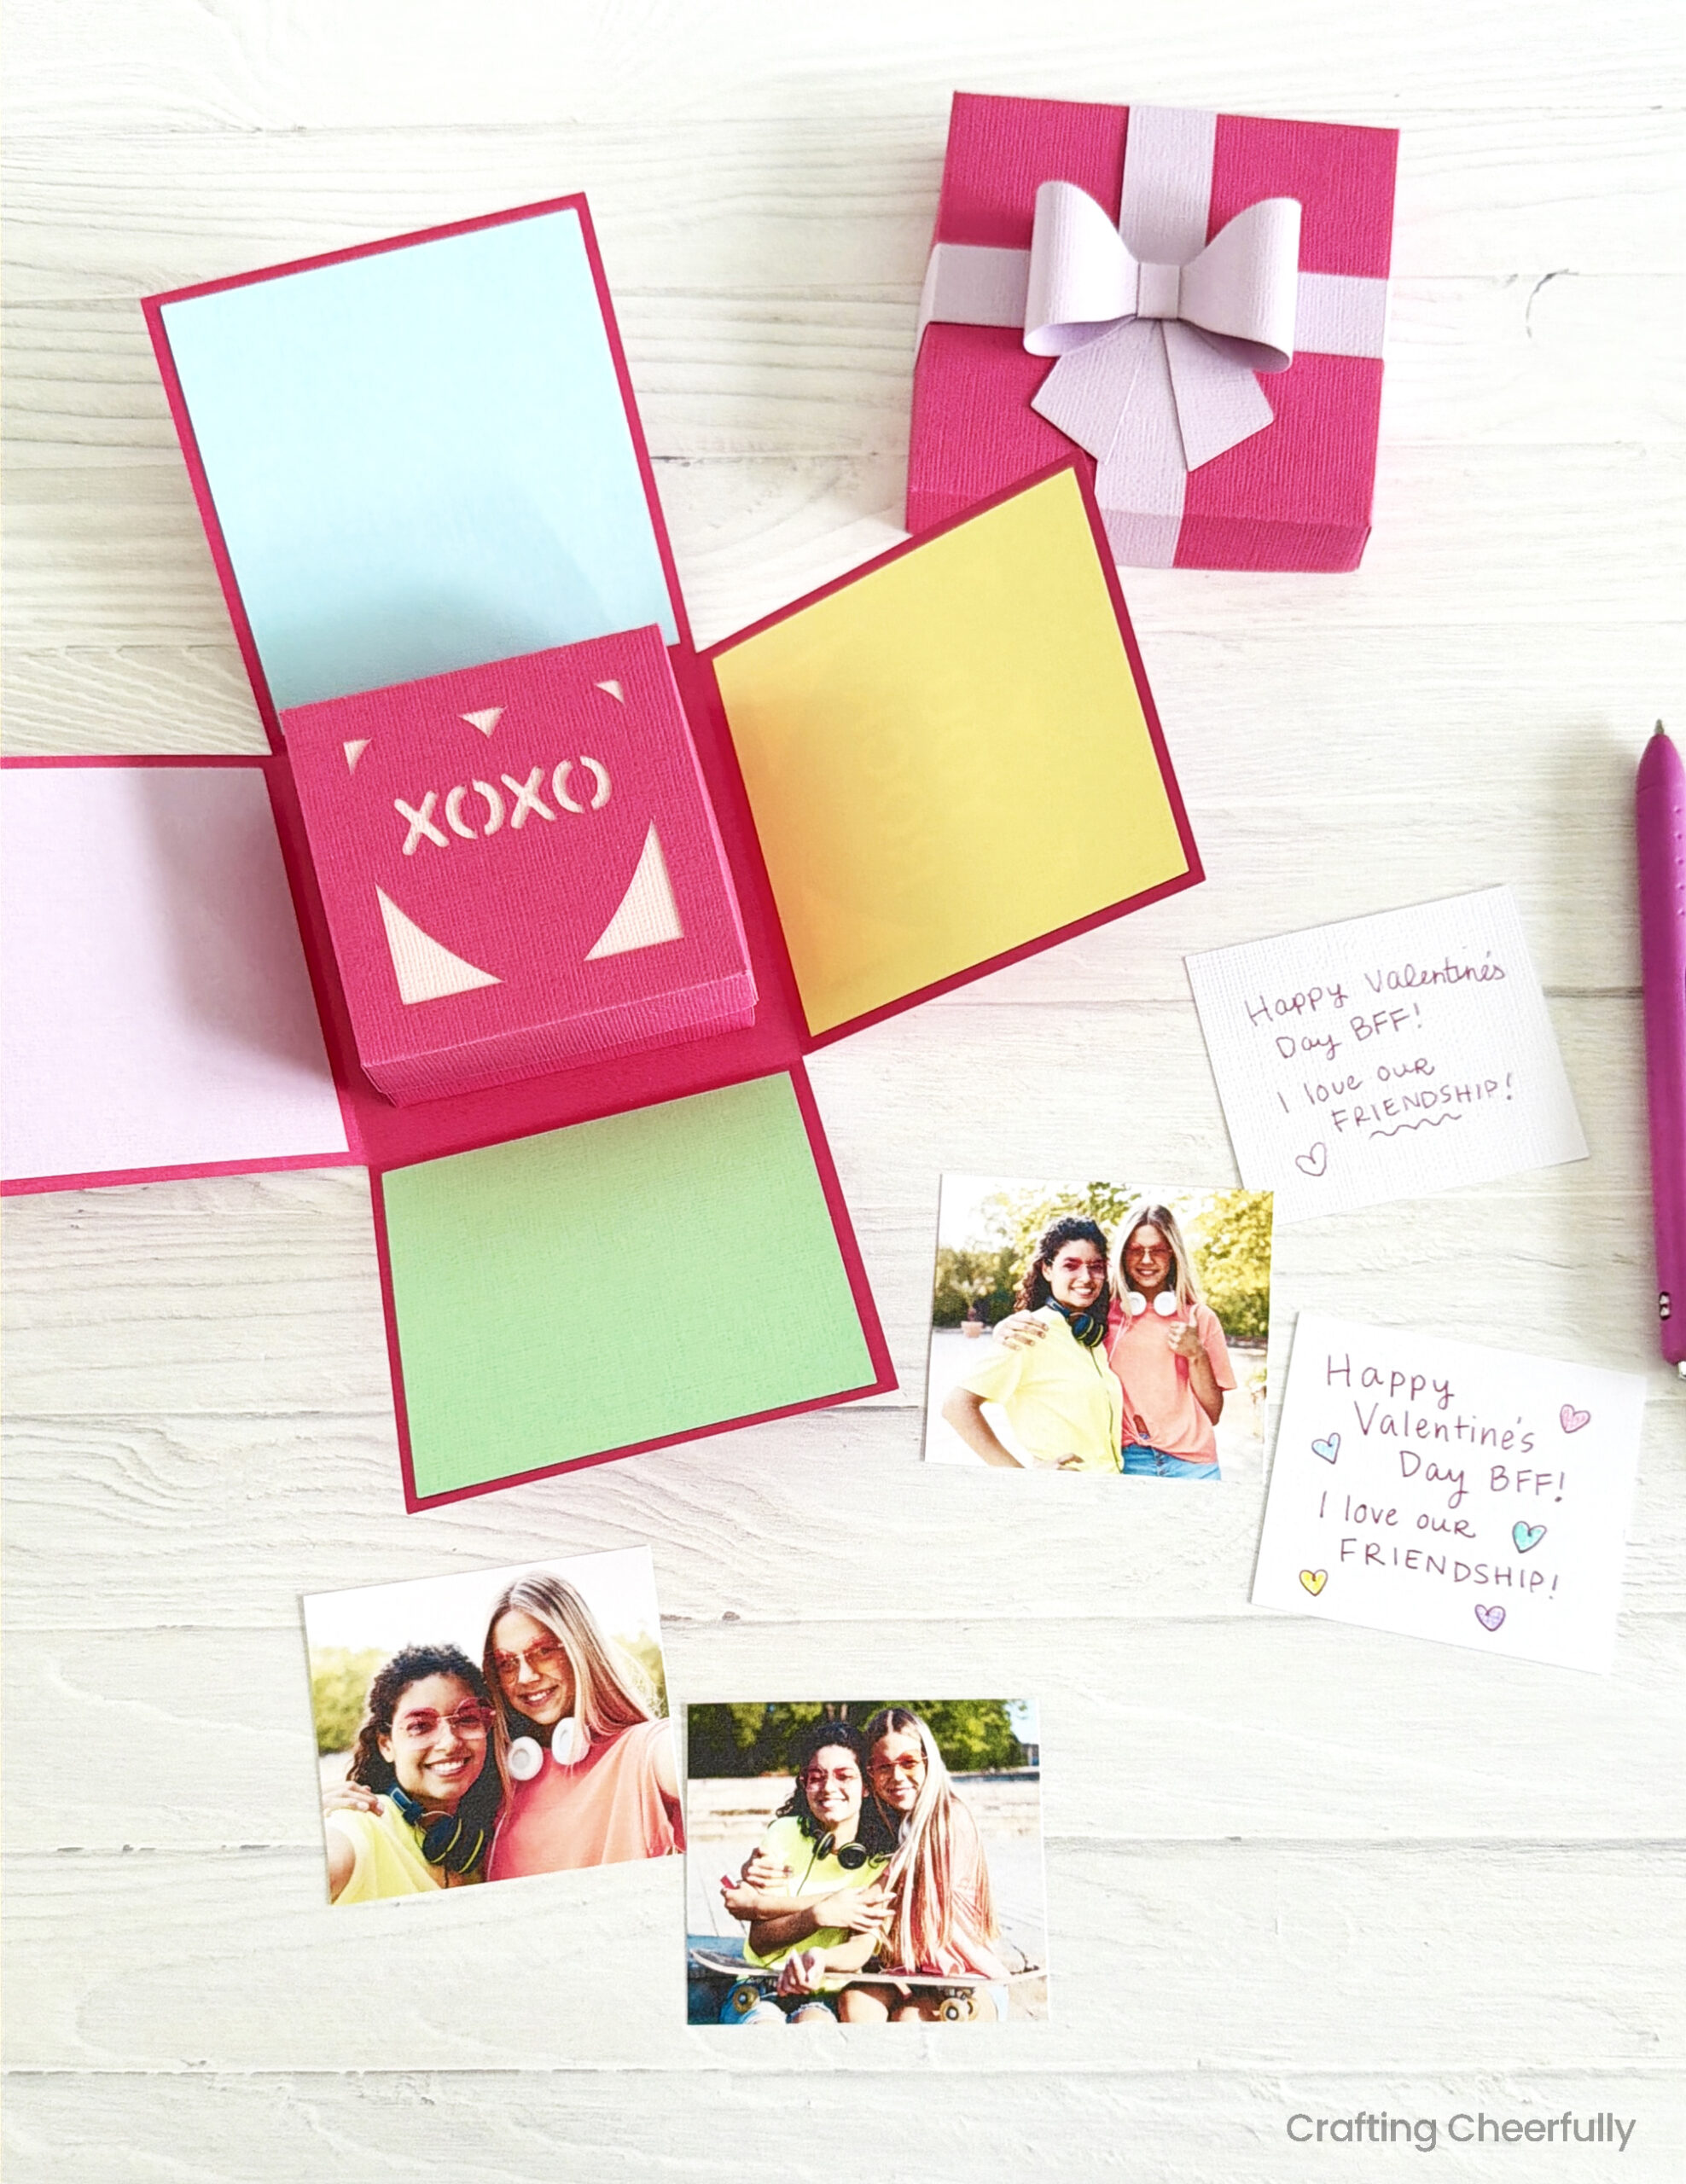
Step Five: Decorate the inside of the box with pictures, notes, drawings – whatever you’d like!
Fill the Box Treats!
Finally fill the center box with sweet treats, a small gift, or another special note!
The box is finished and ready to be gifted!
I hope you enjoyed this sweet Valentine’s Day explosion box! Check out my other fun Valentine’s Day crafts, including other treats boxes!! My Paper Heart Boxes and my LoveBug Pillow boxes are two of my favorites. :)