
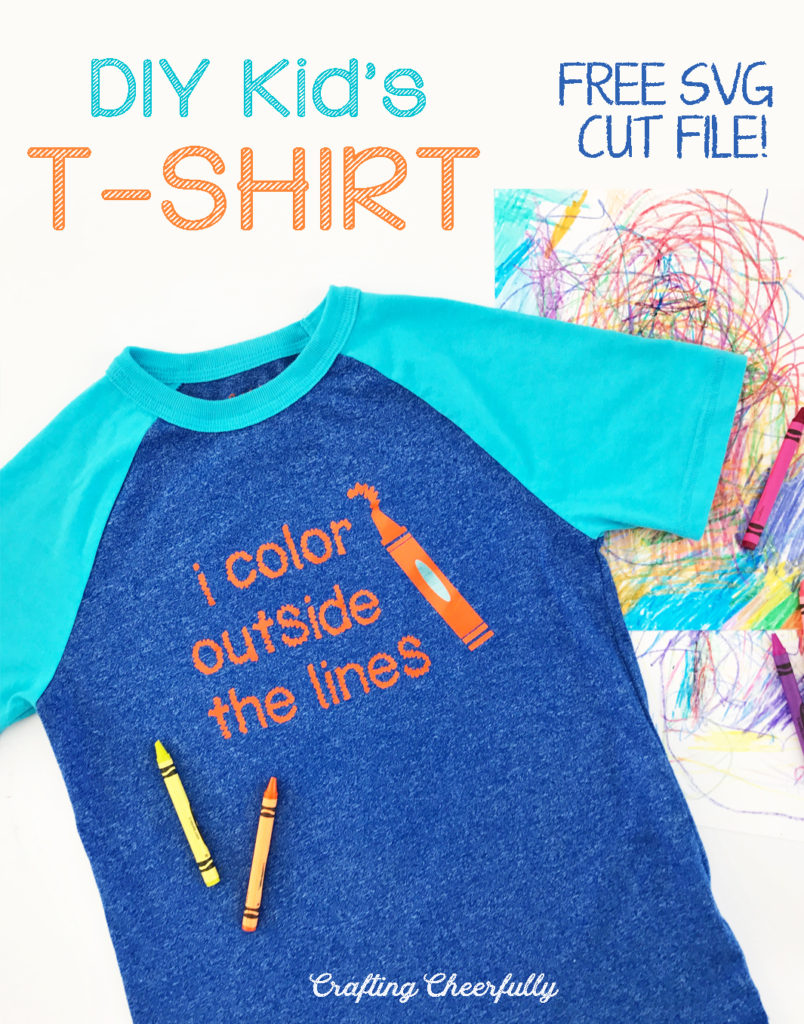
DIY Children’s T-Shirt with Cricut Iron-On
Create this fun t-shirt using Cricut Iron-On! Grab the free SVG cut file and a roll of Iron-On and you’ll be ready to create this DIY children’s t-shirt.
Making t-shirts may quickly become my new obsession! Last week I used my new cutting machine to make my son’s birthday t-shirt for our color-themed birthday party. I’m so excited with how it turned out! Since getting my Cricut Explore at Christmas, I have been antsy to try out Cricut’s Iron-on Lite. *This is not a sponsored post. These are products I chose to use because they looked fun :)
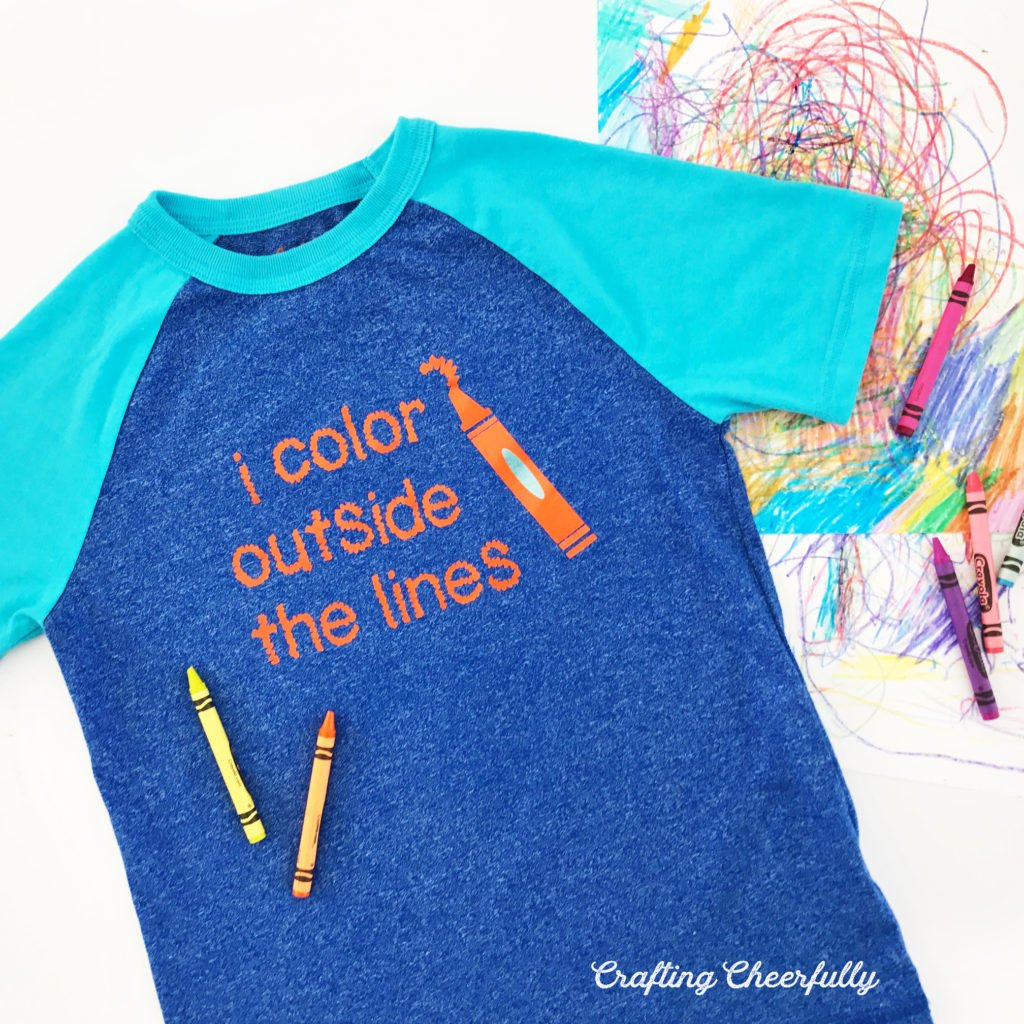
For our color-themed birthday party, I made my daughter a bright and colorful tutu dress (I’ll be sharing it soon!) and I wanted to make my son something in-theme as well. I remembered a t-shirt he had when he was a baby that had a crayon with a face and arms with the saying “I color outside the lines” and decided that saying would be perfect!
I designed the image in Photoshop and then turned it into an SVG file to work with my cutting machine. You can grab the free cut file for this DIY Children’s T-Shirt at the end of this post!

The t-shirt is from Target, the Cat & Jack classic baseball T-shirt in blue streak, and I found the Cricut Iron-On Lite in Pumpkin at Joann Fabrics. My son loved the shirt and was happy to have something special to wear for his big day.
This was my first attempt using Cricut Iron-On and I was pleasantly surprised how easy it was! I don’t own a Cricut Easy Press so I used my iron which worked well. I just needed to make sure that if a little corner of the vinyl was still peeling up, I kept pressing it!
DIY Children’s T-Shirt
Supplies Needed:
- Free SVG Cut File – Grab the free file by filling out the purple form at the end of this post.
- T-shirt
- Cricut Everyday Iron On
- Scissors
- Cricut Weeding Tool
- Press Cloth or Cricut
Step By Step Tutorial
Step One: Download the free SVG cut file and upload it into Cricut Design Space (or your cutting machine’s software). In Cricut Design Space, size the image to the height and width you want for your shirt. For my son’s shirt, which was a S(6/7), I made the image 7″ wide. I cut the image out of paper first to help me figure out the sizing.

Step Two: Cut the image. Before selecting “GO”, remember to “Select All” and “Attach”.
After selecting “GO”, reverse the image by selecting the “Mirror Image” checkbox. For more information on using Cricut Iron-On, check out this quick 3 minute video I found helpful, Cricut Explore: Working with Iron-On Lite. It goes into detail on settings, how to place the material on the mat and more.

Step Three: After your image is cut and weeded, place it on your t-shirt to be ironed. I used my Applique Pressing Sheet as a press cloth which worked well. (Update: I now use the Cricut Iron-On Protective Sheet which is very similar). Since it is clear, I could still see my image through it and make sure I was ironing each part while keeping it straight. I used a few straight pins to help keep the image in place.


You may notice I made a tiny mistake! Oops! I forgot to weed the oval cutout on my crayon! I fixed this by adding a piece of turquoise Iron-On Lite, cut to the same size as the oval. It worked out well and added some extra color! I figure one mistake for my first time trying this wasn’t too bad :)
The t-shirt turned out so fun and was perfect for our color-themed birthday party! Since it doesn’t say “birthday” on it, it works for any time of the year and I’m sure we’ll get a lot of use out of it this summer!

Get the Free T-Shirt Design File!
Fill out the purple form below with your first name and email address! The free file will be sent straight to your inbox! If you have already filled out the form below, don’t worry – you won’t be added to my list twice! This freebie is for personal use only. I hope you enjoy crafting something special. Please let me know if you have any questions :)


