
DIY Farmhouse Sign for St. Patrick’s Day
Create a rustic farmhouse sign for St. Patrick’s Day to decorate your home! Paint the sign using a stencil and then add a shamrock fabric banner to the bottom of the sign!

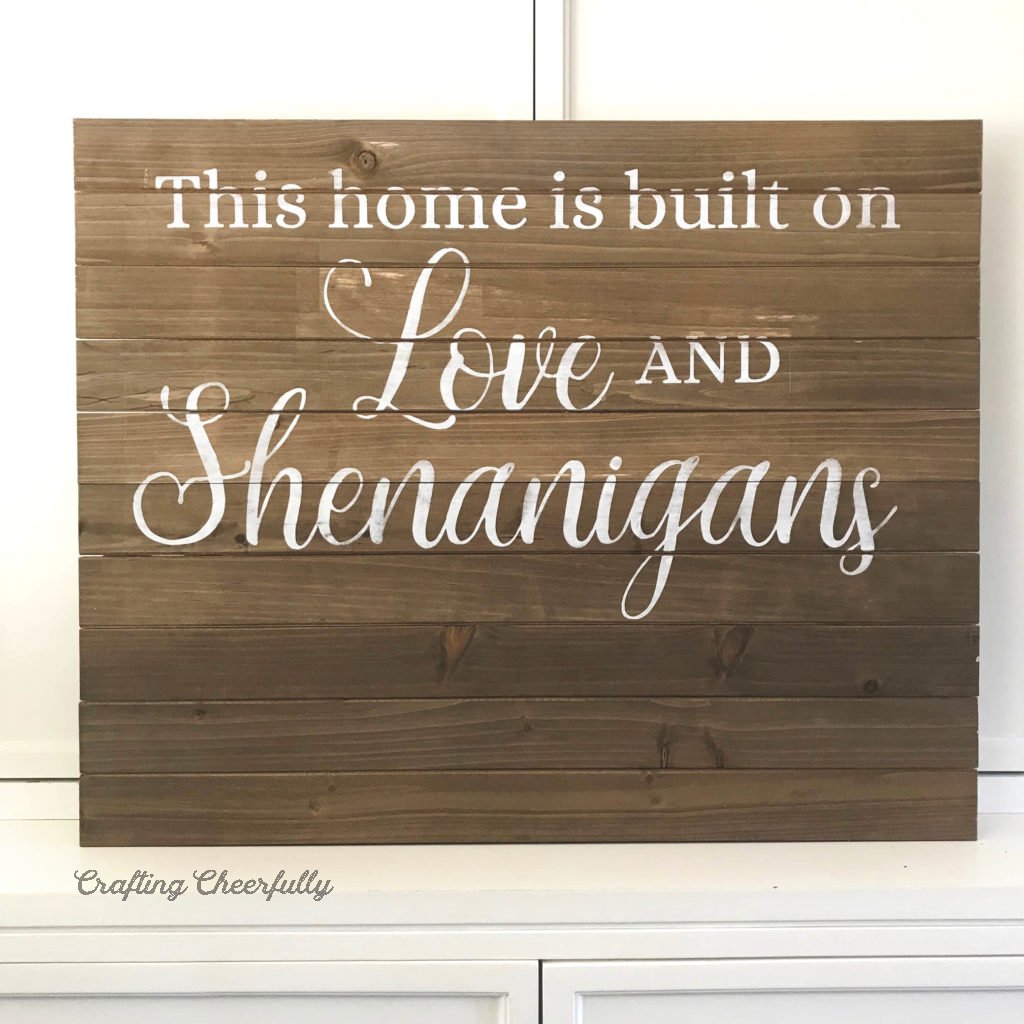
Hello Crafty Friends! Today I’m excited to share the a St. Patrick’s Day farmhouse sign I made for our home. I painted the saying, “This home is built on Love and Shenanigans” onto the sign using a stencil I created with my Cricut Explore.
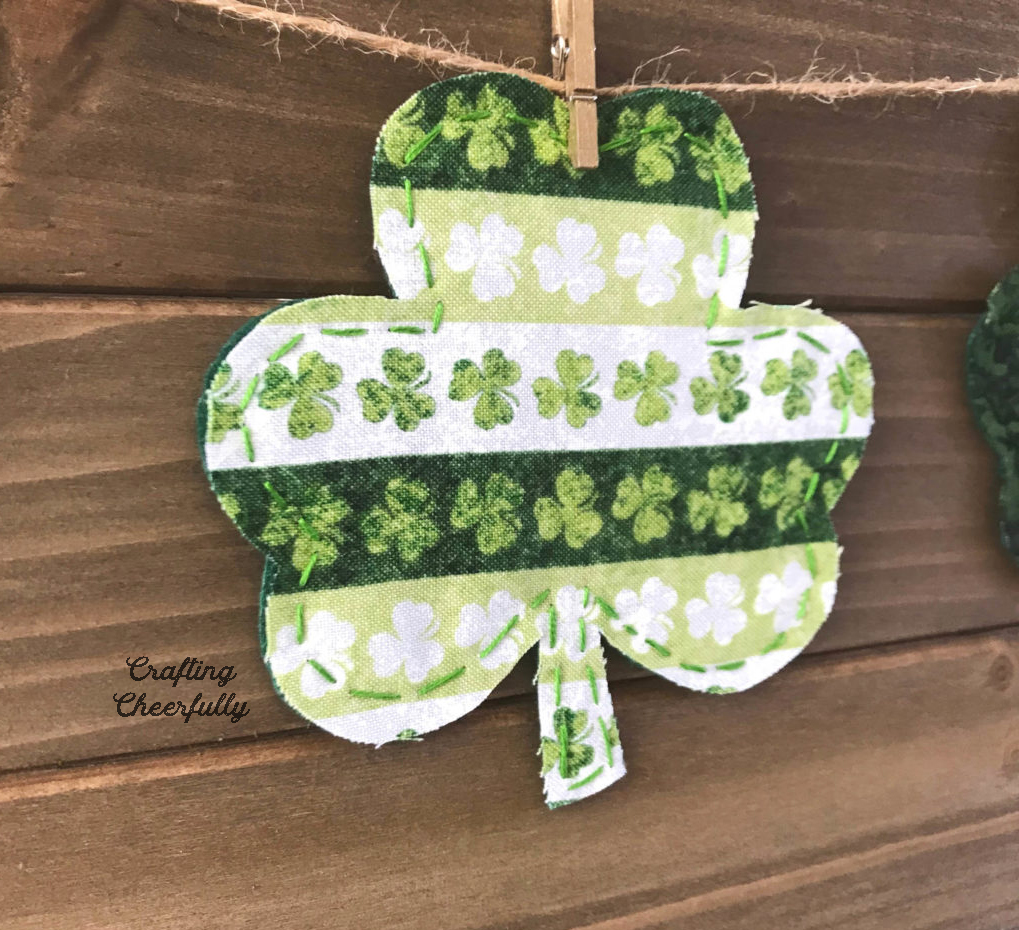
My favorite part of this new farmhouse sign is the cute shamrock banner I created for the bottom! The shamrocks are made from felt and scraps of fabric and they hang on a piece of twine with mini clothespins.
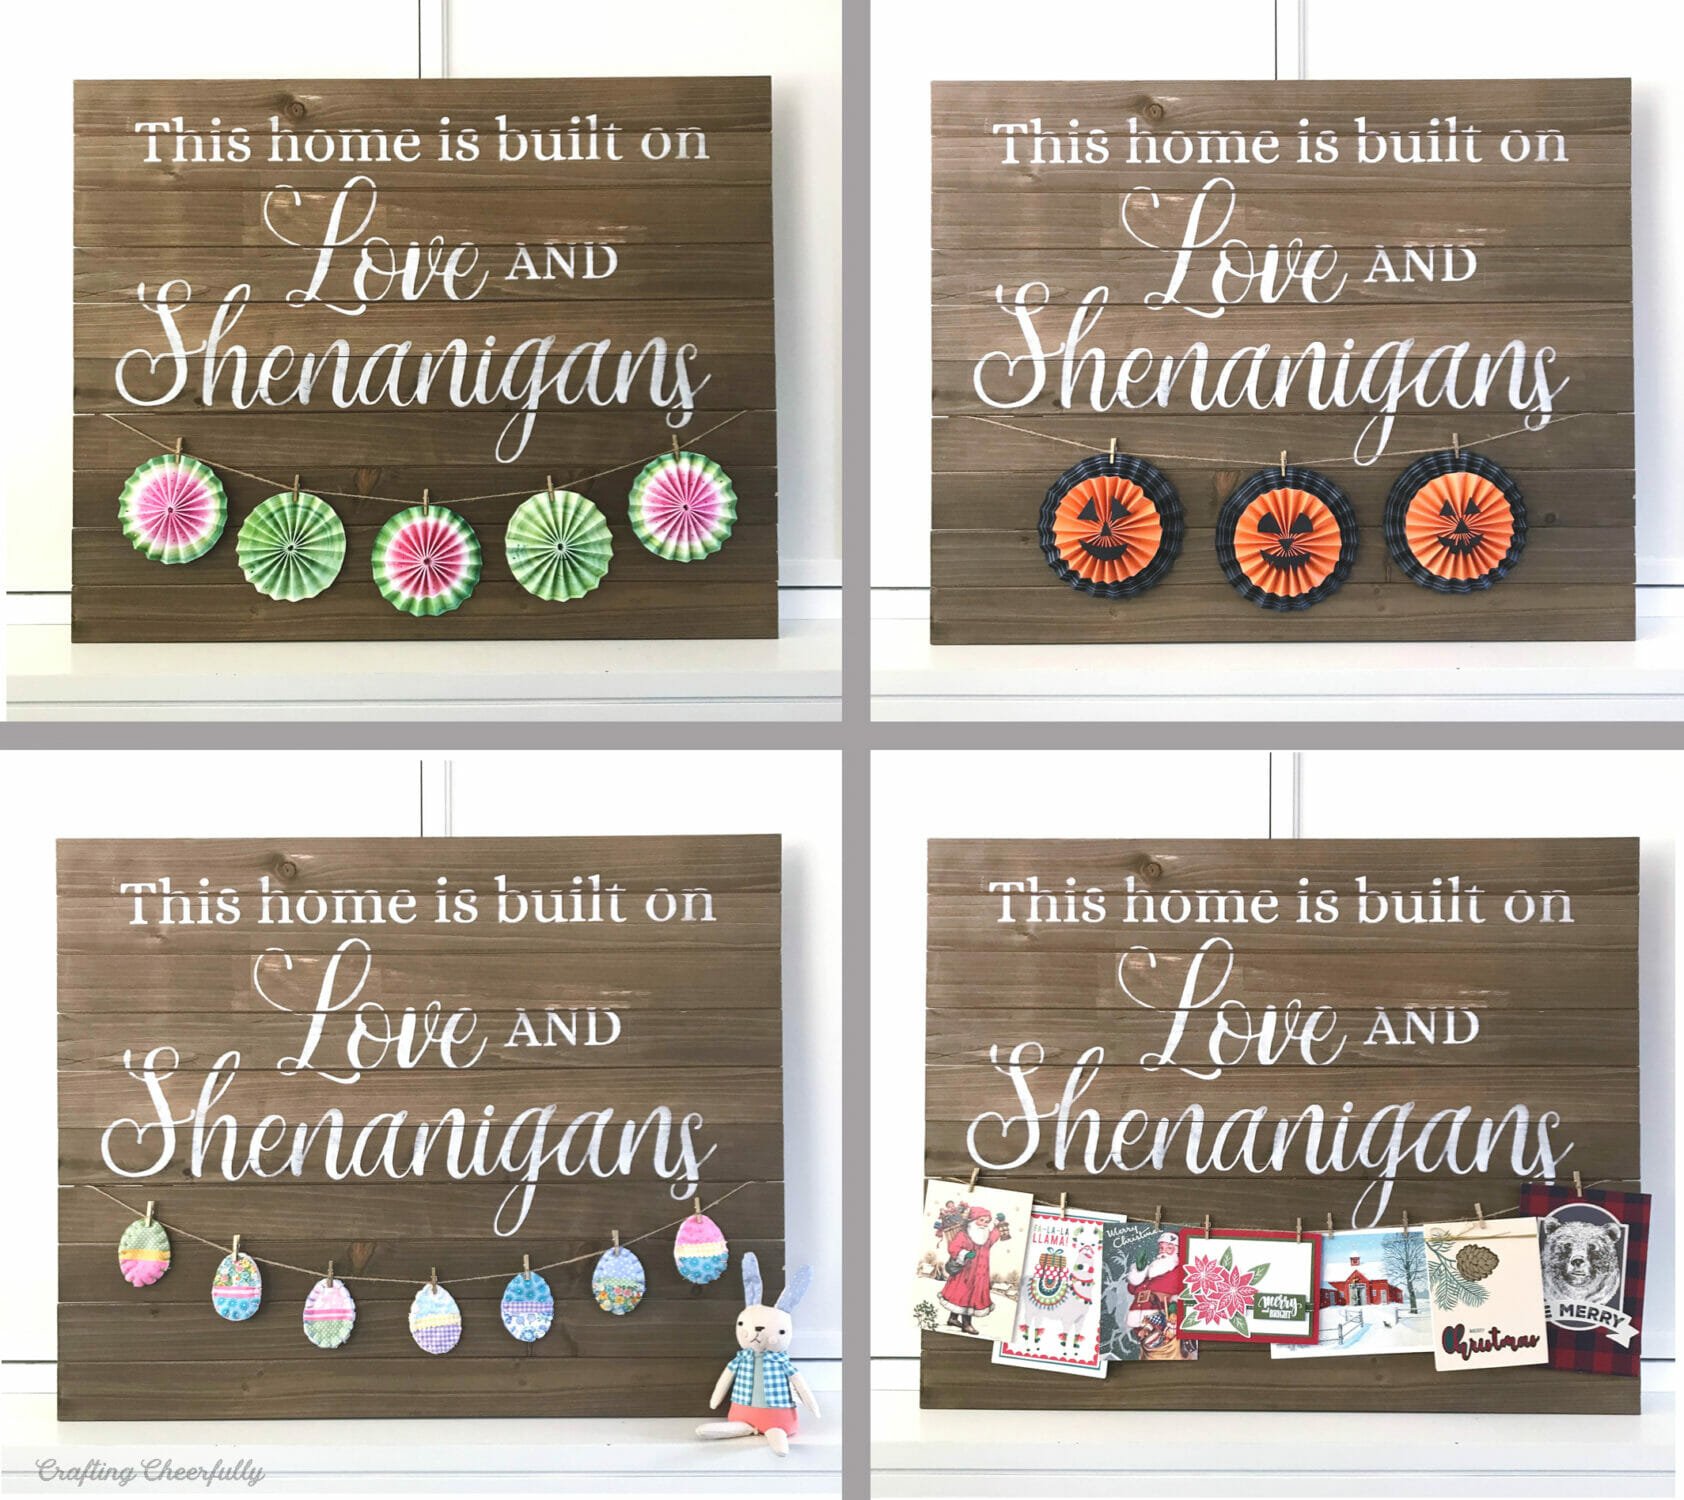
We keep this sign up year round and I love to replace the shamrocks for different holidays. Below you can see some of the fun things I’ve hung on this sign including Christmas cards at the holidays. The clothespins make it super easy to switch things up. The shamrocks are my favorite since they fit the saying of the sign so well, so I use them most of the time.
Whether you make your own farmhouse sign or buy one, you could easily add twine to create an attached banner. I actually just taped the twine to the back of the sign so that I can easily let it out or pull it taught depending on what I am hanging. Since the sign leans against our mantle, you can’t see the tape!
I created the sign using my Cricut Explore and Cricut Stencil Vinyl. I decided to paint the words onto the sign rather than using vinyl to give it a more distressed and rustic look. Below you can check out how I made the sign. I also have a tutorial for making the Scrap Fabric Shamrock Banner plus a free template for the shamrocks!

DIY Farmhouse Sign
Supplies Needed
- Wooden board – I used two boards from Michael’s craft store that each measured 11″ x 28″. I glued them together and added small piece of wood perpendicular to the seam to strengthen the join. My finished wooden board measured 22″ x 28″
- Cricut Stencil Vinyl
- Cricut Vinyl Transfer Tape
- White paint
- Sponge Pouncers
- Long Cricut Mat (12″x24″)
- Ruler, Cricut weeding tools

DIY Farmhouse Wood Sign
Step One: Create a stencil for the sign and cut it out.
Create a stencil to use for your project with the wording you would like to use. I chose the saying “This home is built on Love and Shenanigans” and used my Cricut Explore to create the stencil.
In Cricut Design Space, start by creating a rectangle the size of your wooden sign.

Add the saying “This home is built on Love and Shenanigans” using the text tools. I used the fonts Alice and Arabella, both available to download for free online. Below you can see the sizes I made each set of words.
- “This home is built on” – Alice 22.75″ x 1.82″
- “AND” – Alice 4.51″ x 1.39″
- “Love” – Arabella 8.98″ x 5.57″
- “Shenanigans” – Arabella 23.4″ x 7.3″


Attach the words if possible. This will depend on the size of the wooden board you are using. I was able to attach just the words “Love and Shenanigans” so they cut together. Attaching the entire saying would have made the image too large to cut on even an XL mat.

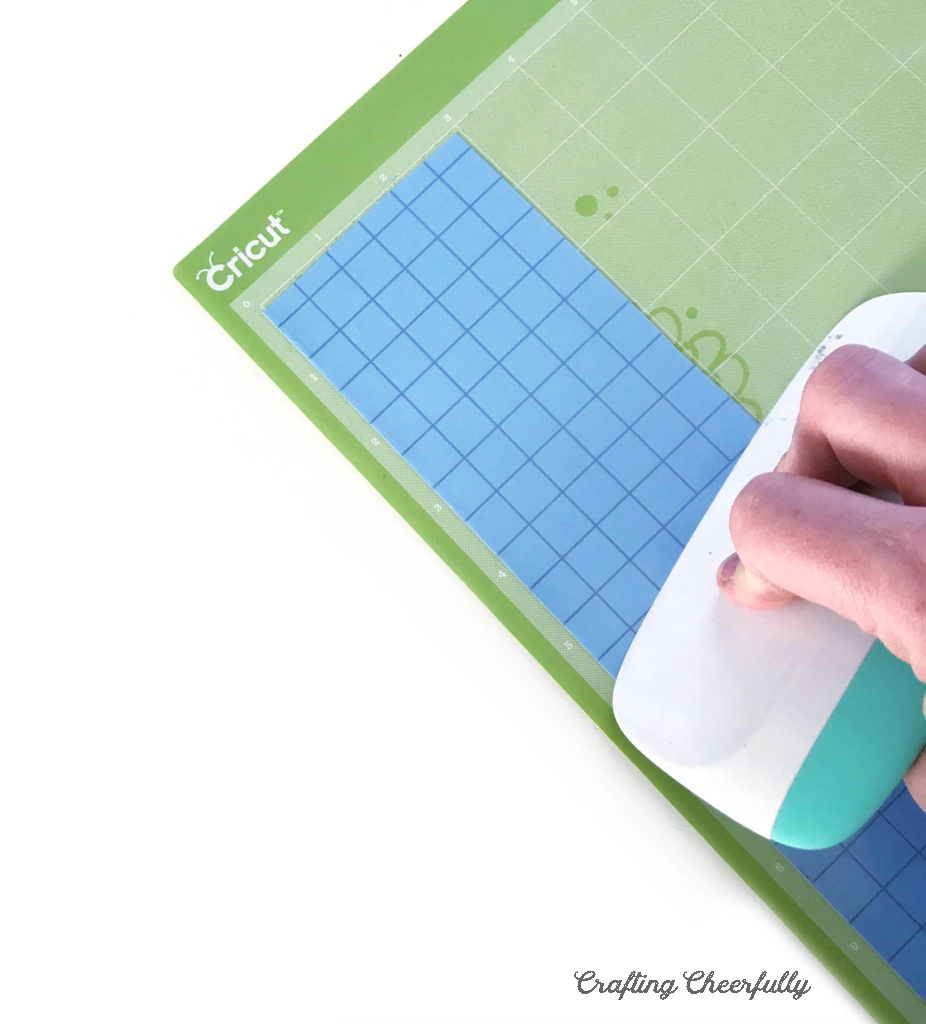
Before cutting the file make sure you hide the rectangle created to help you size the text since this does not need to be cut. You will need to use a large size mat for cutting the stencil material.


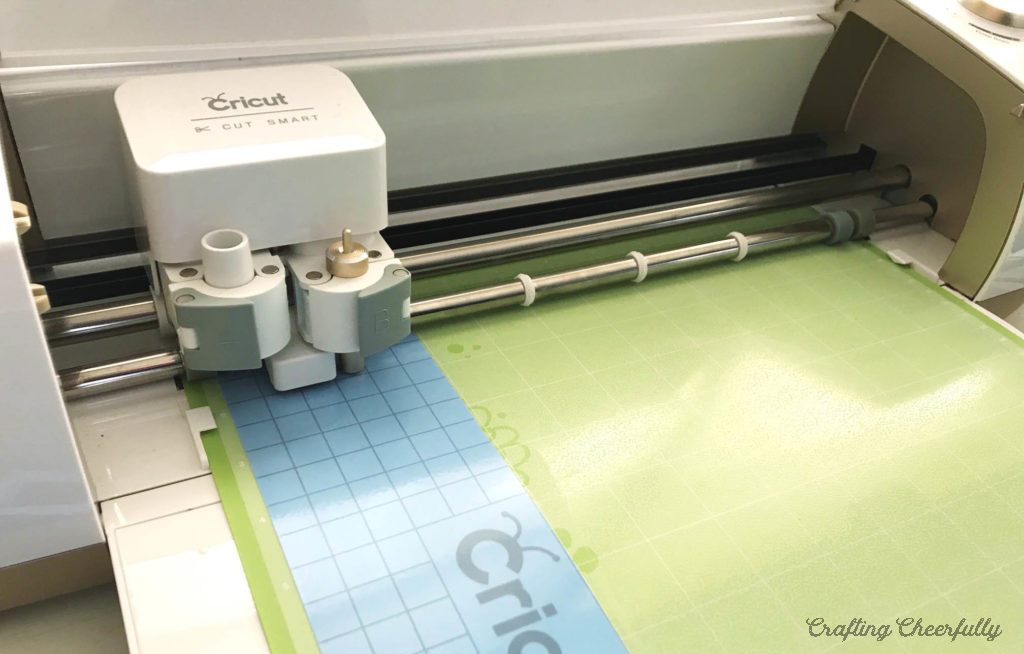
Step Two: Cut the Stencil
Cut the design out using your Cricut machine and Stencil Vinyl. Make sure to smooth your vinyl onto the mat before cutting and change your settings to vinyl on your machine.
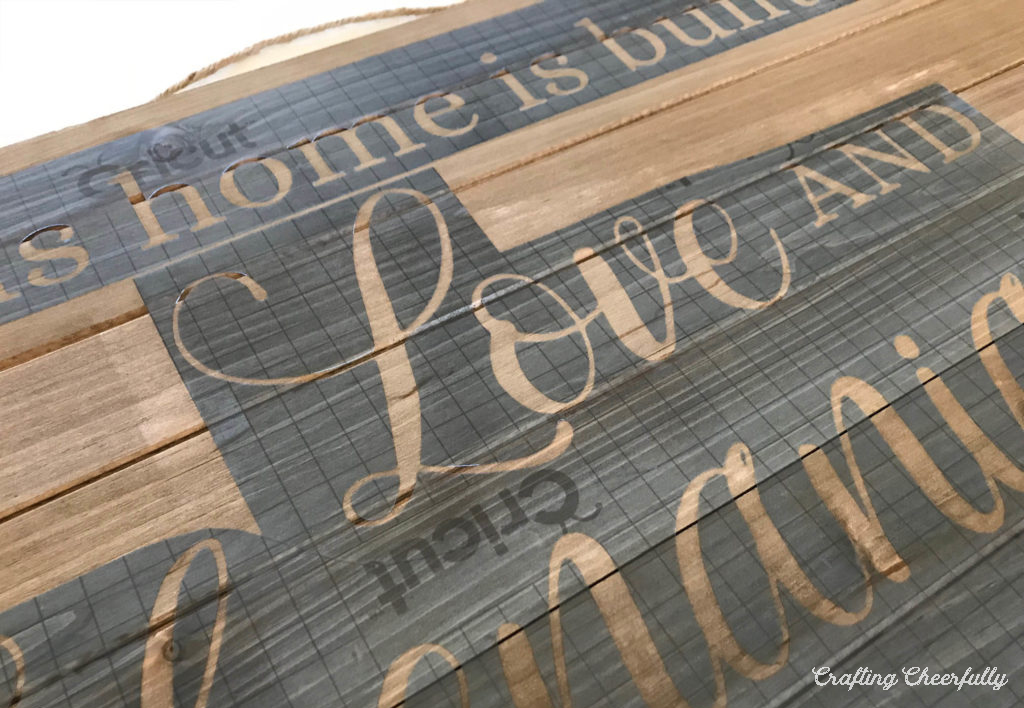
Once the two mats are cut, reverse weed the design removing the letters and leaving the background.
Step Three: Prepare the sign for painting.
Use Cricut Vinyl Transfer Tape to transfer the stencil design to the board. This part took me the longest since I needed to measure and make sure my words would be centered and straight. Make sure to leave room at the bottom of the sign for the banner. My design ended 9″ above the bottom of my board (except for the “g” hanging down lower). Press and smooth the stencil down to make sure paint won’t seep underneath.

Step Four: Paint the design!
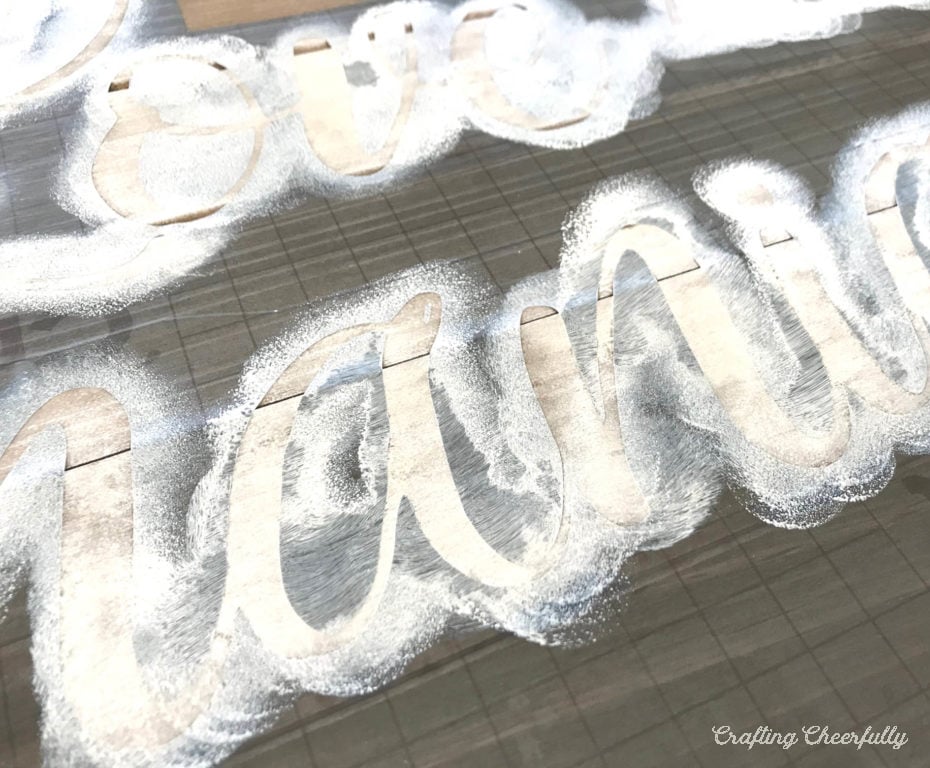
Once the stencil is applied paint the sign! I used a sponge pouncer to apply the paint. This worked better than a paintbrush because it applied the paint in a vertical motion which meant less paint seeped under the stencil. I purposefully applied the paint unevenly to give the sign a more worn look. To do this, just use more paint in places and less paint in others.
If you are want really crisp lines, you can apply the first layer of paint in a color that matches the background of your wooden sign. For example, if my wooden sign was white, I could apply a layer of white paint followed by layers of black paint. The first layer of paint is most likely to seep under the stencil and it will match the color of your wooden sign.

Step Five: Add the Shamrock banner!
My shamrock banner is made from stiffened felt and scraps of fabric. I have the complete tutorial for making your own on my blog. Follow the link below. You can also make a quick and easy banner using paper and patterned paper if sewing is not your jam.
How to Make a Fabric Shamrock Banner
I love how the sign turned out and I’ve been having fun adding cute banners to it each month. You can hang so many different things from the clothespins. Whether you make a handmade banner like the shamrock one or hang up cutout pieces of paper or greeting cards, it will be a fun and unique way to decorate your farmhouse sign!

![]()


