DIY Gingerbread Holiday Magnets
Use puffy paint and tag board to create these cute Gingerbread Holiday Magnets! A fun way to display your holiday cards! Free template with tutorial.

On the Eighth Day of a Crafty Christmas…
Yay, Christmas Cards! I absolutely love receiving holiday cards in the mail! Not only is it fun to get snail mail – but I love hearing from family and friends around the holidays. I love photo cards, artsy cards, yearly newsletters, cheesy pictures – all of it.
I have seen so many clever ways of displaying holiday cards and have often thought about making something, but my cards usually end up on the fridge. So I decided to create some fun holiday magnets to bring out at Christmas time to display all of our pretty cards!

These were so easy to make! I made them the exact same way I made our set of Harry Potter magnets, but instead of using black glue, I used white puffy paint. I printed the template directly onto Kraft paper so all I had to do was trace the images with the puffy paint – super simple!
They turned out so cute and they definitely make me smile when I look at our fridge! Below is the tutorial and the free printable template!

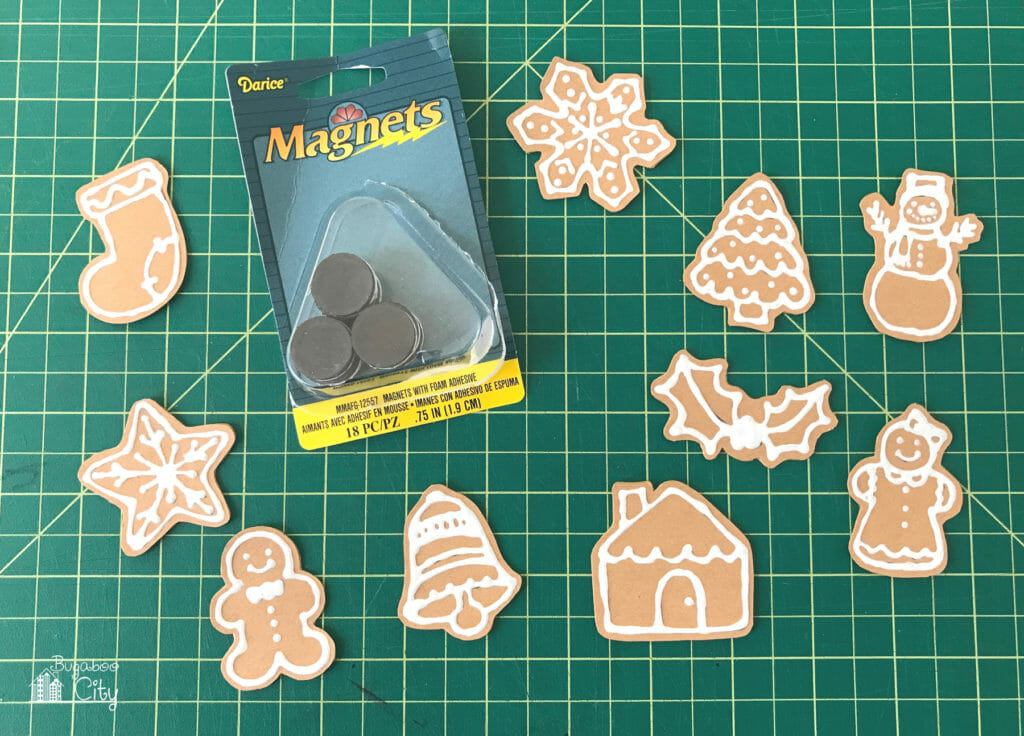
Supplies Needed:
- Free printable template – Grab the free file by filling out the form at the end of this post.
- Kraft Paper
- Chipboard
- White 3D Puffy Paint
- 3/4″ round magnets
- Scissors
- Glue Stick
Step One: Print the template onto Kraft paper.

Step Two: Trace the images with the white puffy paint. It took me a little bit to get a feel for the puffy paint and to know how much pressure to use when applying it. I practiced a little bit before starting on the real thing.
Some of the images are a little trickier than others, like the snowman. I didn’t mind a homemade look to these so I didn’t stress too much if the paint didn’t follow the lines exactly. I pretty much just tried to cover the black ink.
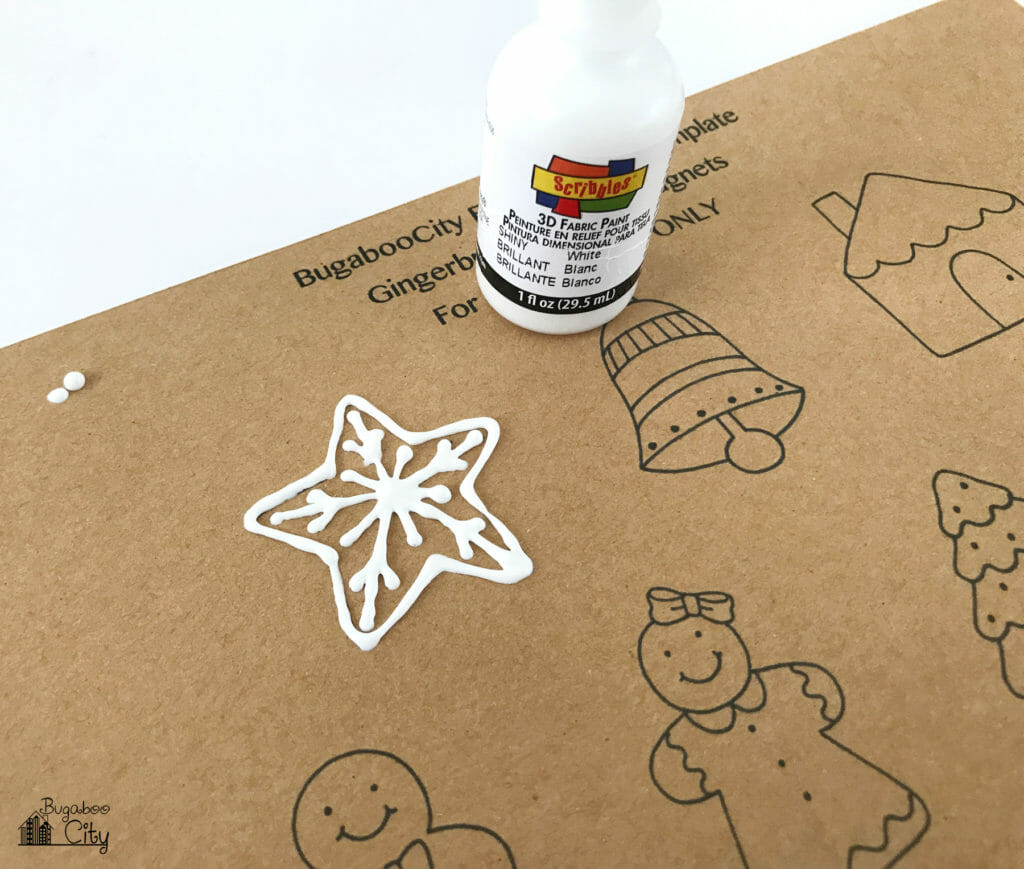

Once all the images were traced, I taped the piece of paper down to a board to keep it from curling up as it dried. I’m not sure if this is necessary, but I did it just in case!

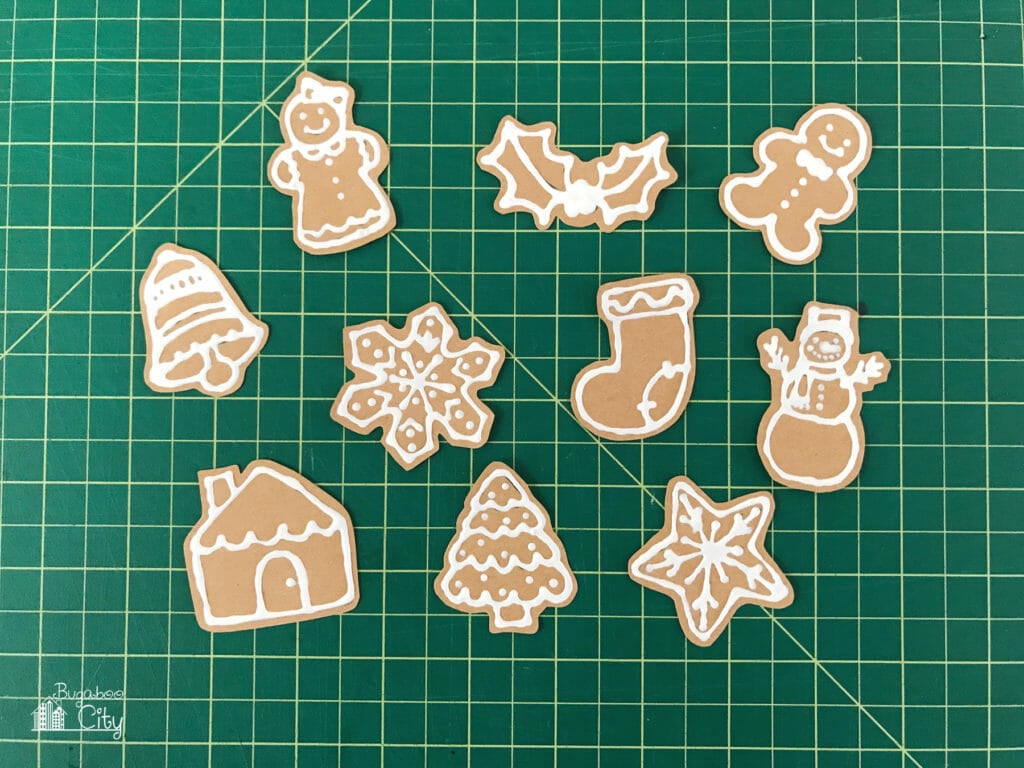
Step Three: Cut each image out. I first cut out all my shapes with a huge border and then used a smaller paper scissors to cut around them more closely. I didn’t cut right along the puffy paint lines because I wanted these to look like frosted cookies. I left a thin border all around them.
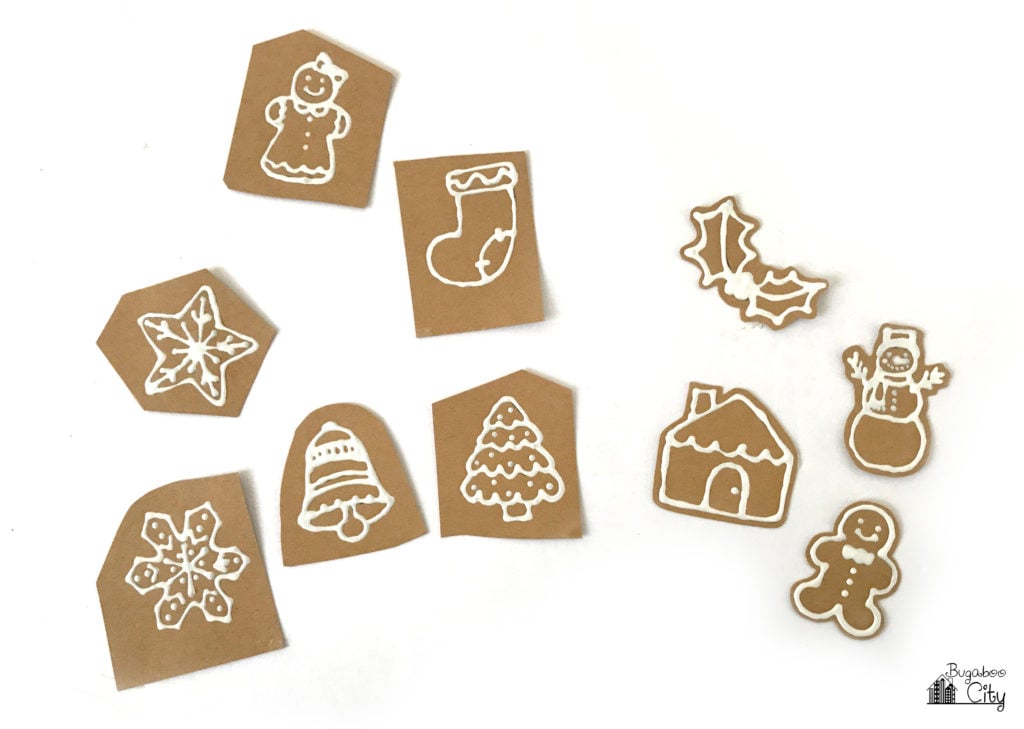
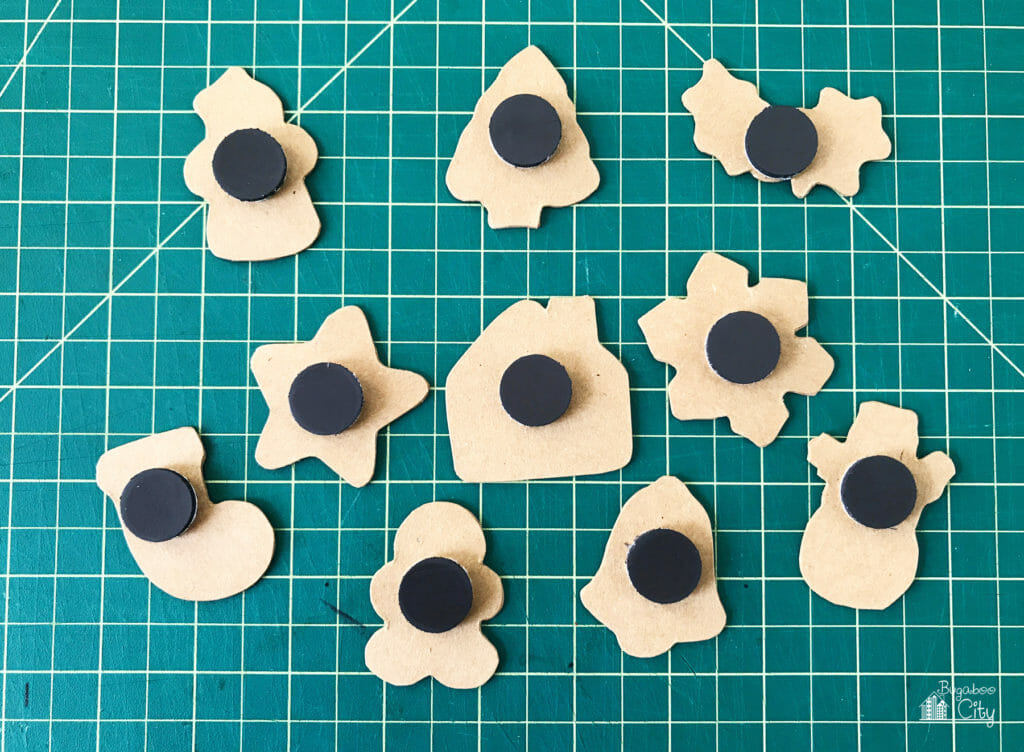
Once all the shapes were cut out, I glued them to a piece of chipboard to make them thick and sturdy.

Then cut the shapes out again.
Step Four: Add a magnet to the back of each image.
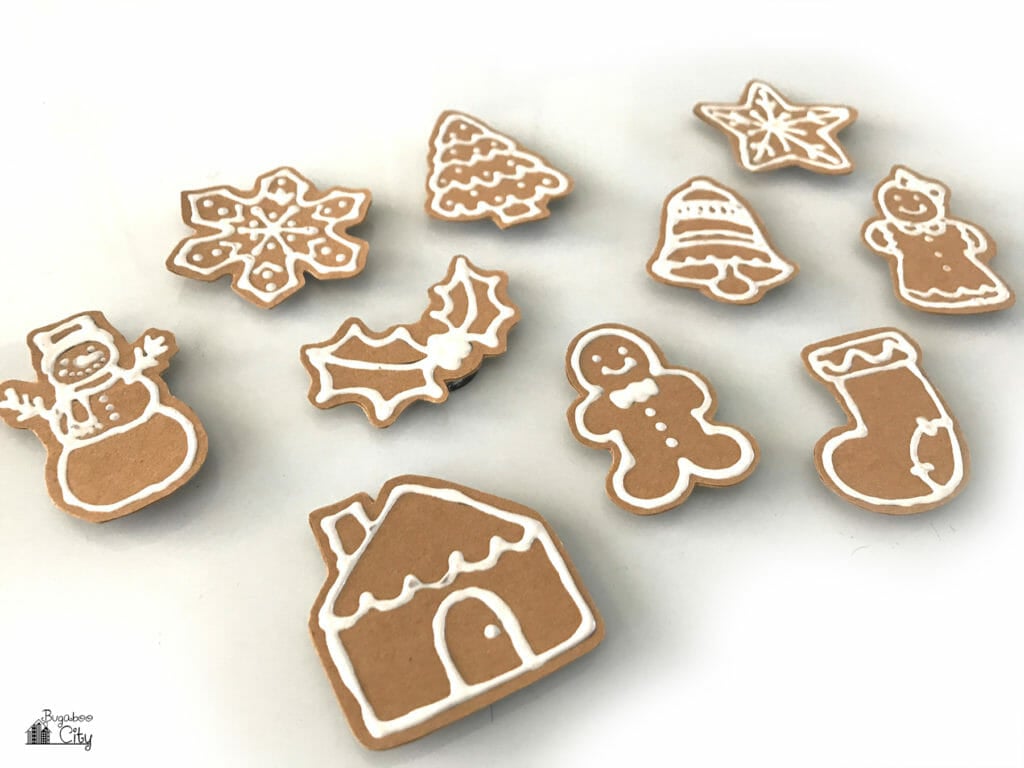
The gingerbread magnets are finished and ready to be used! I think they turned out so cute! Perfect for the holiday season :)
I’ll be back tomorrow with the 9th Day of a Crafty Christmas! Check out my other gingerbread-themed craft tutorials!
- Gingerbread and Peppermint Banner
- Gingerbread House Award Ribbons
- Color-Your-Own Gingerbread House Treat Box
- Gingerbread House Treat Box
- Gingerbread Cupcake Toppers
- North Pole Bakery Gingerbread Apron
- Gingerbread Magnets
- DIY Gingerbread Stuffies
- Gingerbread Paper Dolls
Family photos used for Christmas cards were from Freepik -“Family posing collective photo” Designed by Freepik. “Cheerful little baby boy playing near the Christmas tree” Designed by Freepik” Girl lying on the floor pensive with a pencil and a paper” Designed by Freepik.

Get the Free Gingerbread Magnet Template!
Fill out the purple form below with your first name and email address! The free file will be sent straight to your inbox! If you have already filled out the form below, don’t worry – you won’t be added to my list twice! This freebie is for personal use only. I hope you enjoy crafting something special. Please let me know if you have any questions :)