DIY Reindeer Christmas Sign Using Adhesive Foil
Use your cutting machine to create this festive DIY Reindeer Christmas Sign using Adhesive Foil. A great project to add to your Christmas Decor!
On the Ninth Day of a Crafty Christmas…
Hello! Today I have a festive project to share with you that I made using my Cricut Explore and Adhesive Foil – a DIY Reindeer Christmas sign! This project came about because months ago I found this wooden hanging sign at Joann Fabrics. It was on clearance – plus, one of the wooden planks was accidentally upside down so I only paid a few dollars for it. At the time I wasn’t sure what to do with it, but I’m happy I saved it because it was perfect for this Christmas project!

It’s coming up on a year since I started using my cutting machine. I have really loved using it and discovering different ways to make things. It has definitely pushed me to think up new projects I wouldn’t have been able to do before. You can find all of my cutting machine projects in one place now, under “Cutting Machine Projects” in the menu bar of my blog – many have free cut files!
For this project, I used Cricut’s Adhesive Foil. I am a huge fan of this material – I find it is similar to vinyl when I am working with it but a little easier. It is stiffer so when I am weeding my images, the foil pops out. The sheen the foil has is perfect for the holiday season!

Supplies Needed For DIY Reindeer Sign:
- Wooden sign – can be hanging like mine or just a large wooden board
- Cricut Metallic Matte Sampler Adhesive Foil or Cricut Gold Adhesive Foil
- Cricut Red Adhesive Metallic Foil
- Cricut Vinyl Transfer Tape
- Cutting Machine
- White Acrylic Paint
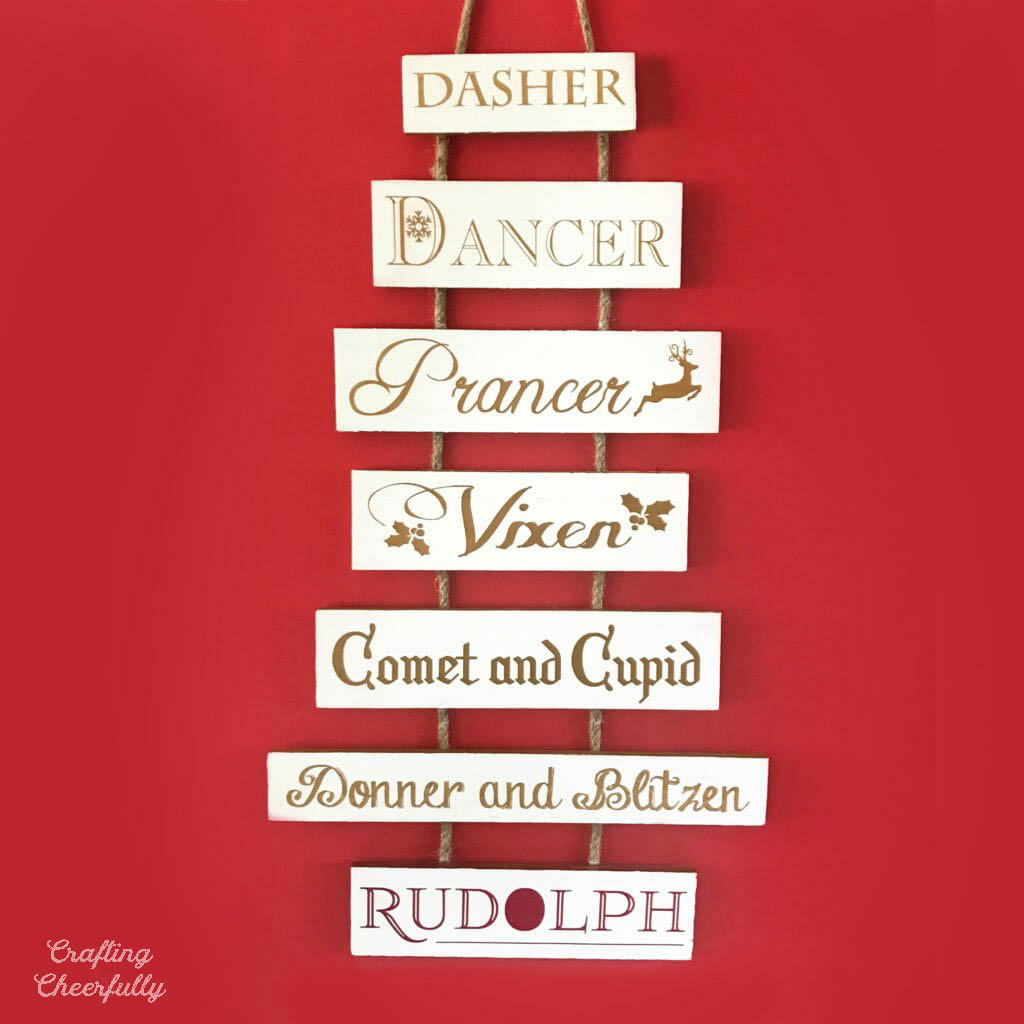
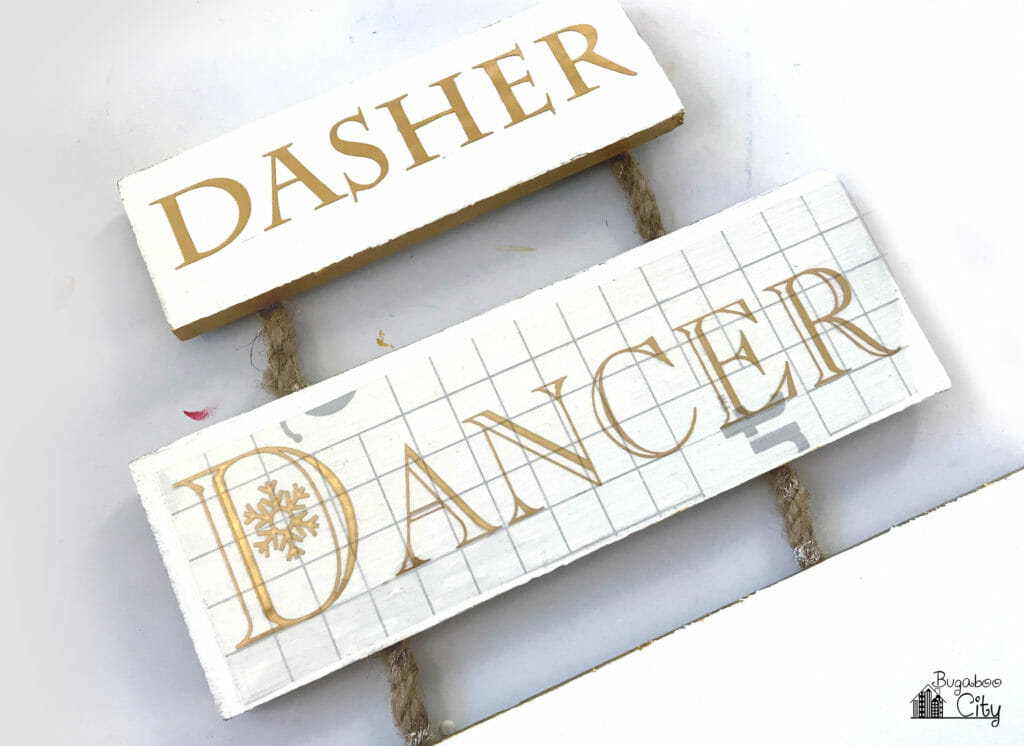
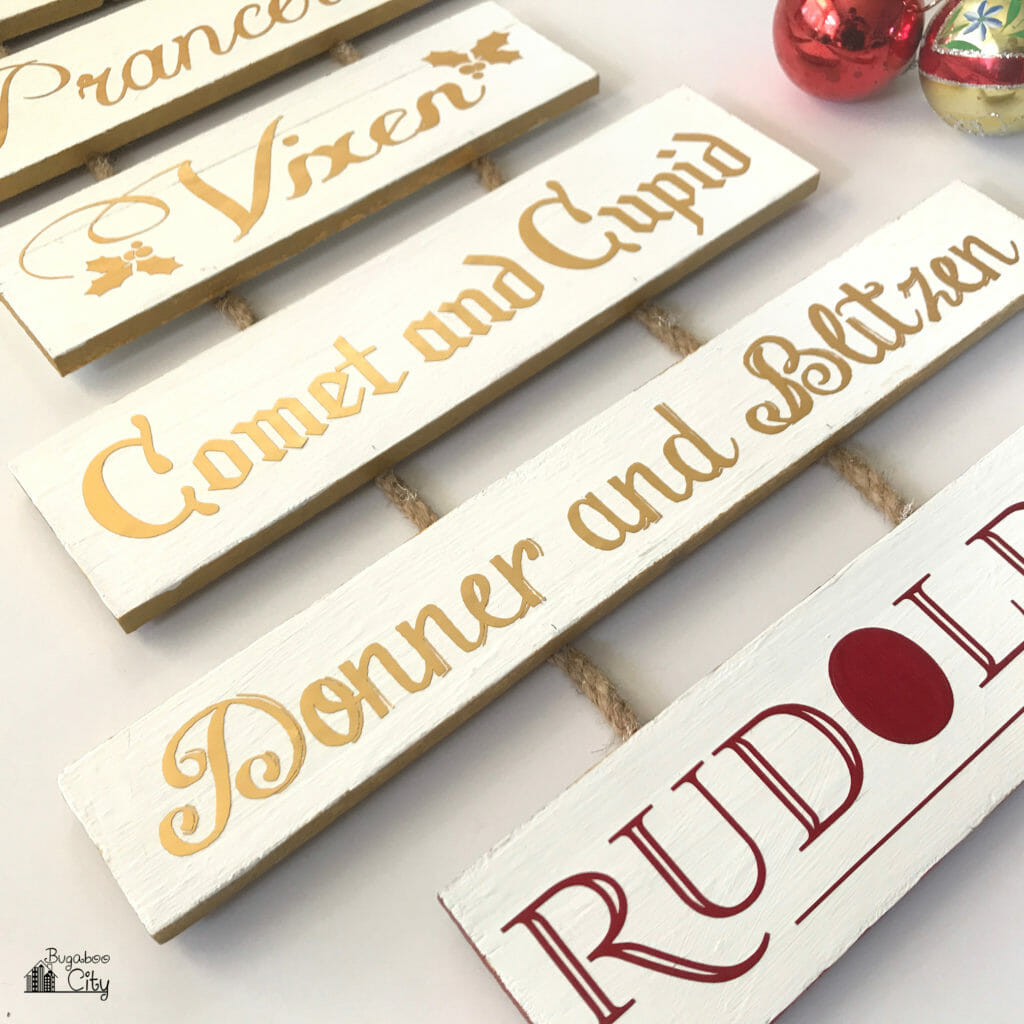
Step One: Since my sign was originally a beach sign, I started by painting over the blue and making it white. This took several layers of paint. I used gold paint to paint the sides of each sign – except for the last one which I painted with red sides for Rudolph. I also moved a few of the wooden planks around to better fit the names of the reindeer. You could make this same sign using one large wooden board rather than the smaller planks.

Step Two: Decide on your fonts! Below you can see the fonts I chose to use. I played around in Photoshop with a photo of my sign and the different fonts before going to Cricut Design Space. This way I could see how all of the fonts would look together.

Links to fonts: Charlemagne Std. | Christmas | Freebooter Script | Some Weatz Swashes |
Christmas Card | Chalk Hand Lettering Shaded | Foglihten No01
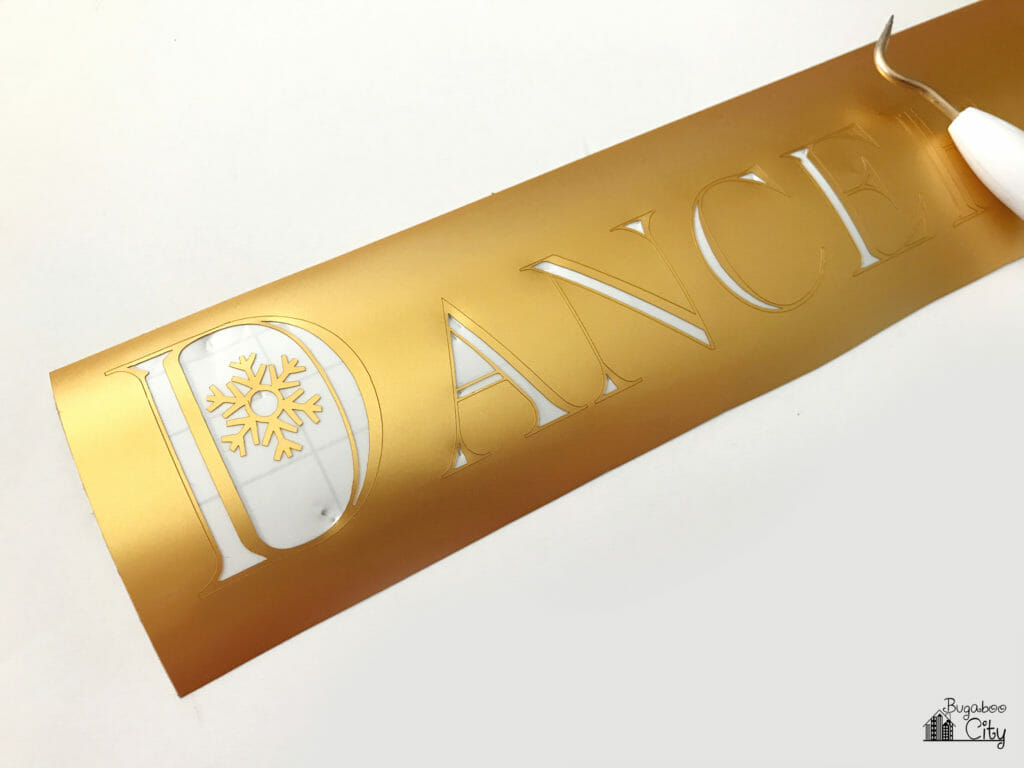
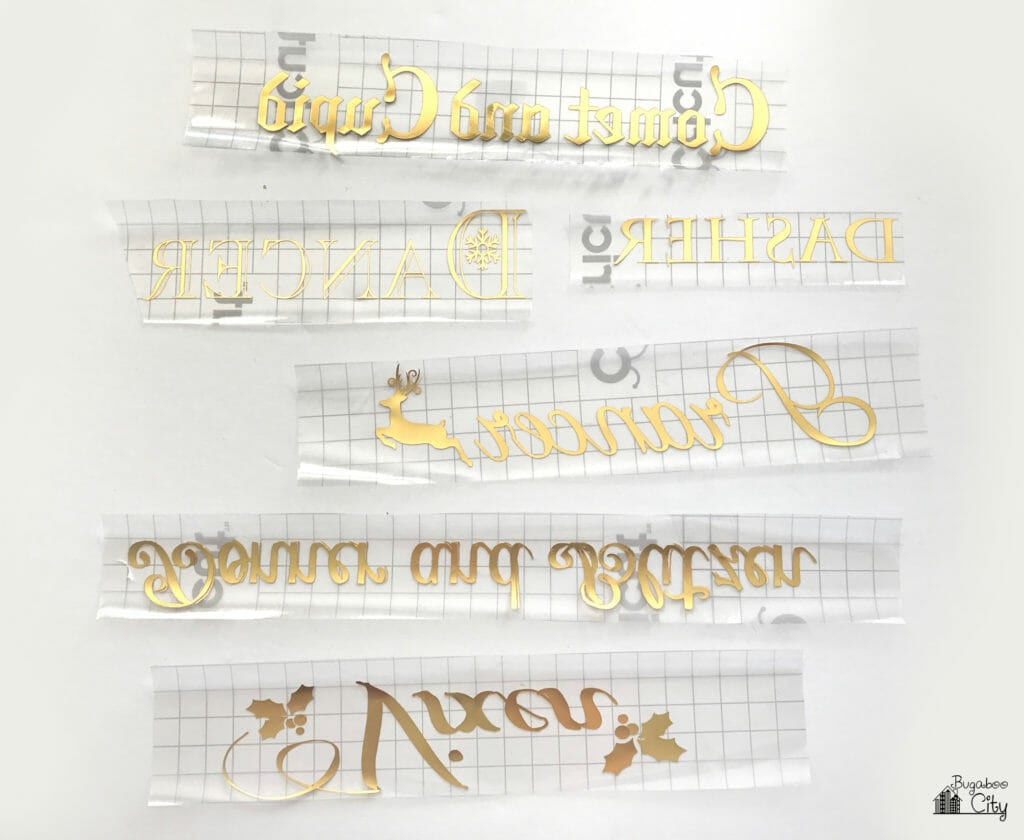
Step Three: Cut out the Reindeer names using your cutting machine! Once all of my fonts were decided, I cut out the reindeer names using my Cricut Explore. Make sure you measure your board or planks to decide how big the font should be. For all of the reindeer names, besides Rudolph, I used the brightest gold foil from the Metallic Matte Sampler. I cut all of the names at once and they just fit! The sheets in the sampler are 12″ x 12″. If you wanted your sign to be larger you could use some of the other metallic colors of foil in the sampler which would look really pretty.
I cut Rudolph’s name from Red Adhesive Foil and then cut out an oval to fill in the “O’ in his name to look like his red nose.

Carefully separate the names by carefully cutting around them. Weed each name.

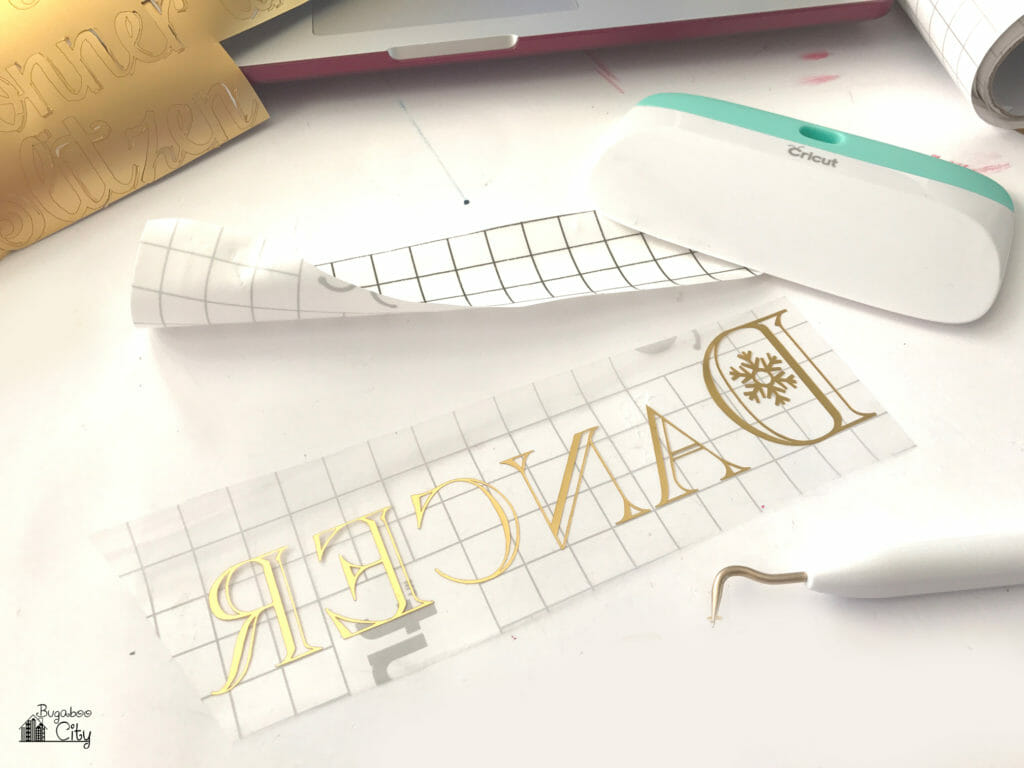
Step Three: To transfer the names onto my wooden planks, I used Cricut Transfer Tape. This video by Cricut does a nice job showing how to use the Transfer Tape to transfer your vinyl images – the same process applies to transferring the Adhesive Foil.
Once all of my reindeer names were applied to the wooden boards, my sign was finished! I reattached the twine used for hanging the sign with hot glue.

I love how this sign turned out! This sign was a gift to my mom because it goes so well with her Christmas decor – which is lots of white, silver and golds! Below you can see a paper banner I made in red and silver!

I hope you enjoyed this tutorial! Check out a few of my other holiday projects made with my Cricut!
- Christmas Tree Embroidery Hoop with Iron-On
- Polar Bear Pillow with Cricut Iron-On
- Christmas Cottage Pull Card
- 12 Days of Christmas Ornaments


![]()

![]()

![]()

![]()

![]()
*My “12 Days of a Crafty Christmas” logo was created using Maggie Malloy’s beautiful Sewing Logo Templates*