
DIY Mother’s Day Medallion Pin
Create a special paper medallion pin to celebrate someone special this Mother’s Day! Grab my free printable and choose from over a dozen different decorative tags you can use to create your medallion pin.
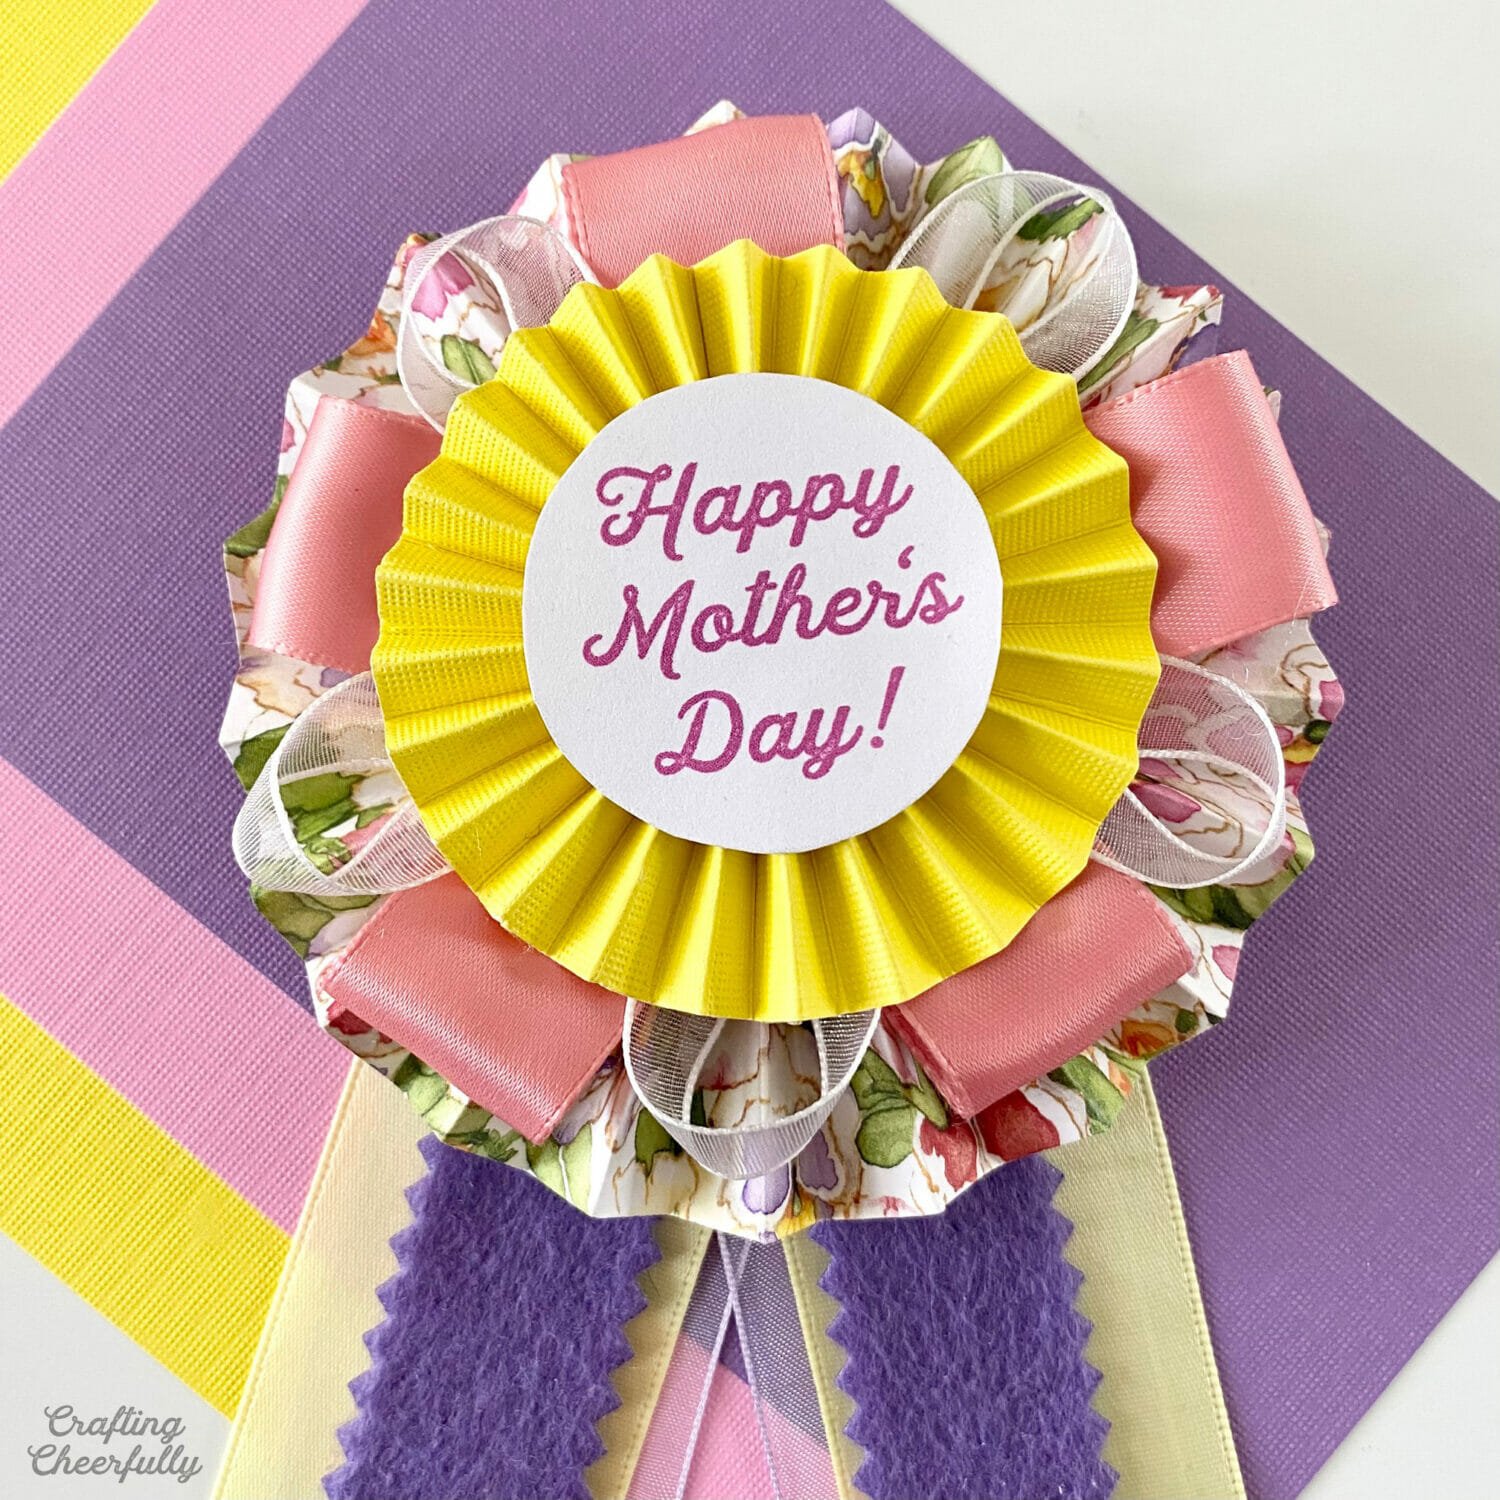
For Mother’s Day this year, celebrate someone special by making them a sweet handmade medallion pin! Medallion pins are a fun and inexpensive gift that really make the recipient feel special and loved!
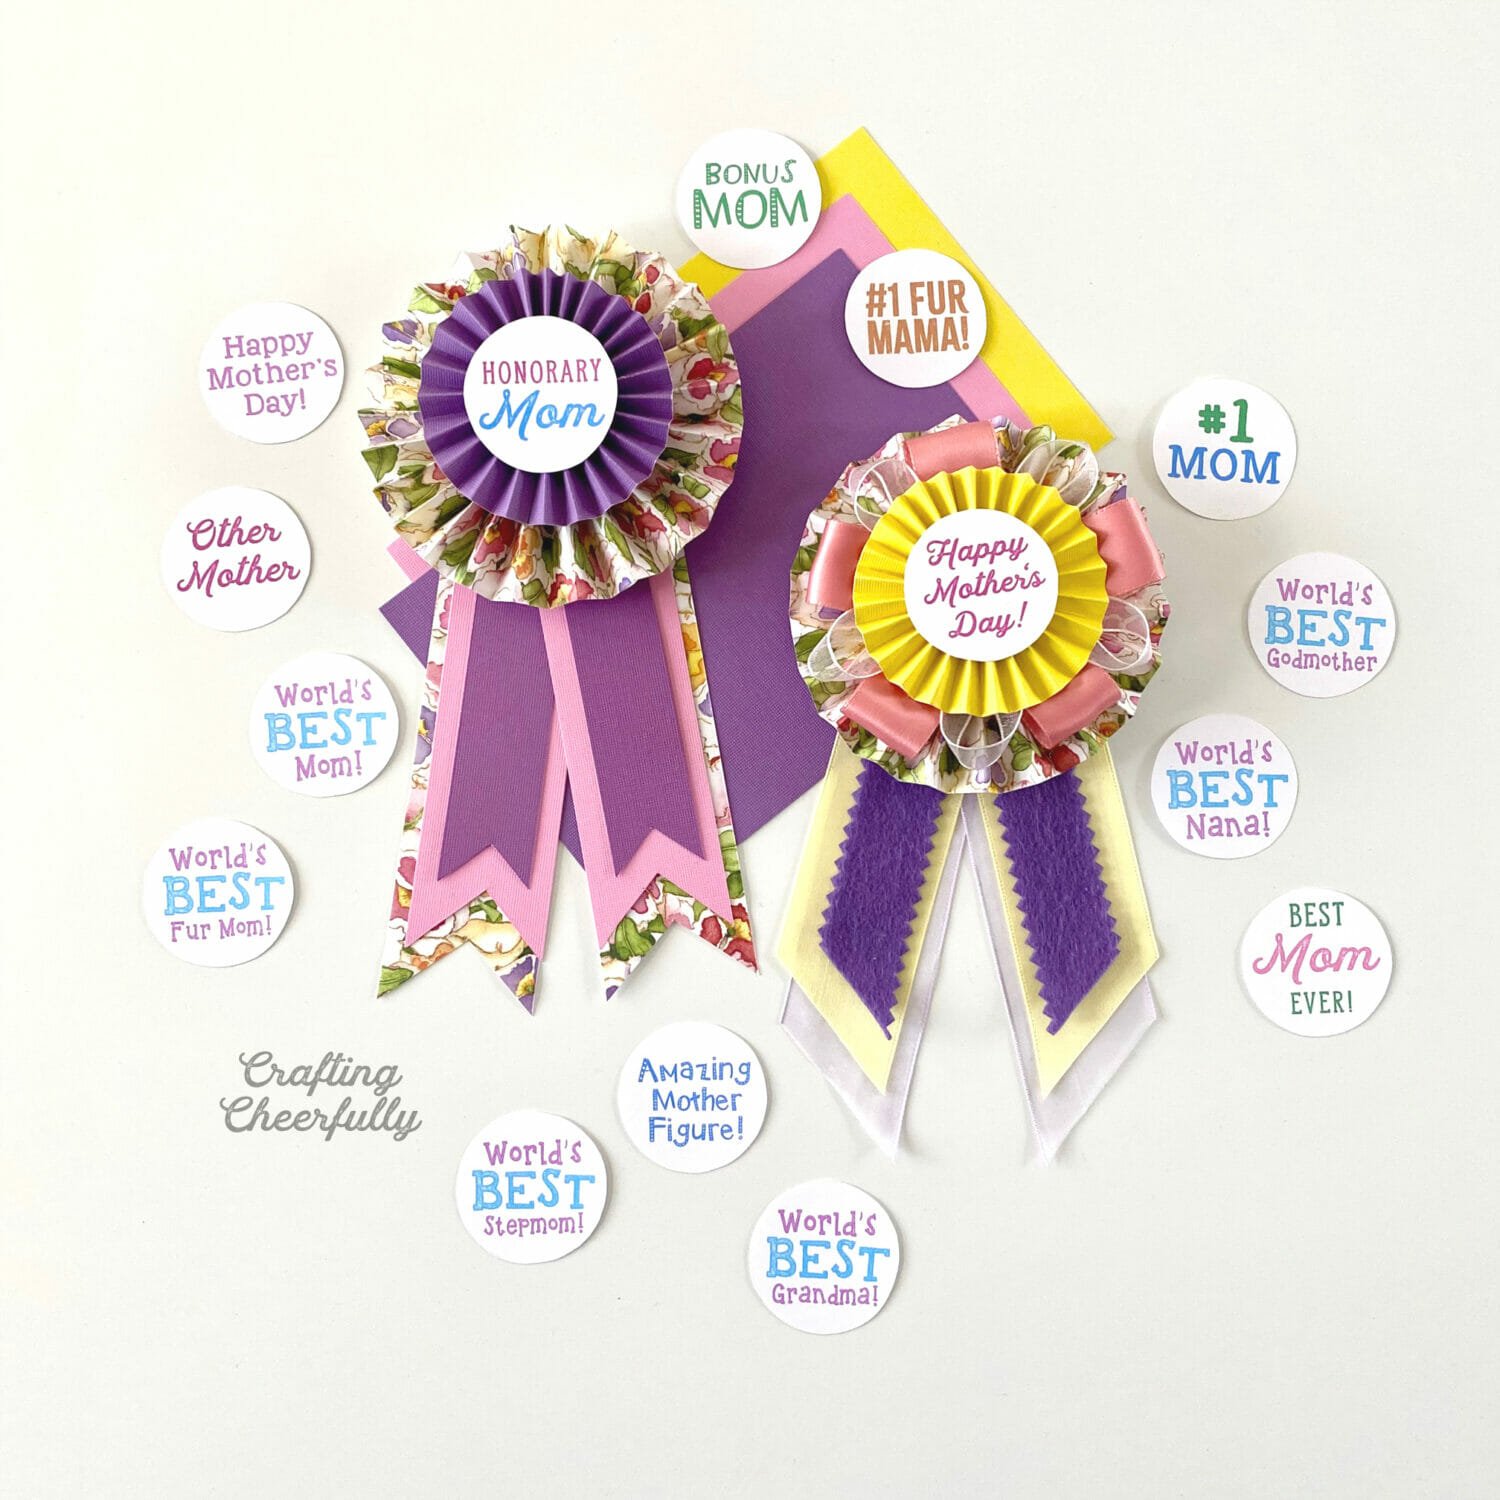
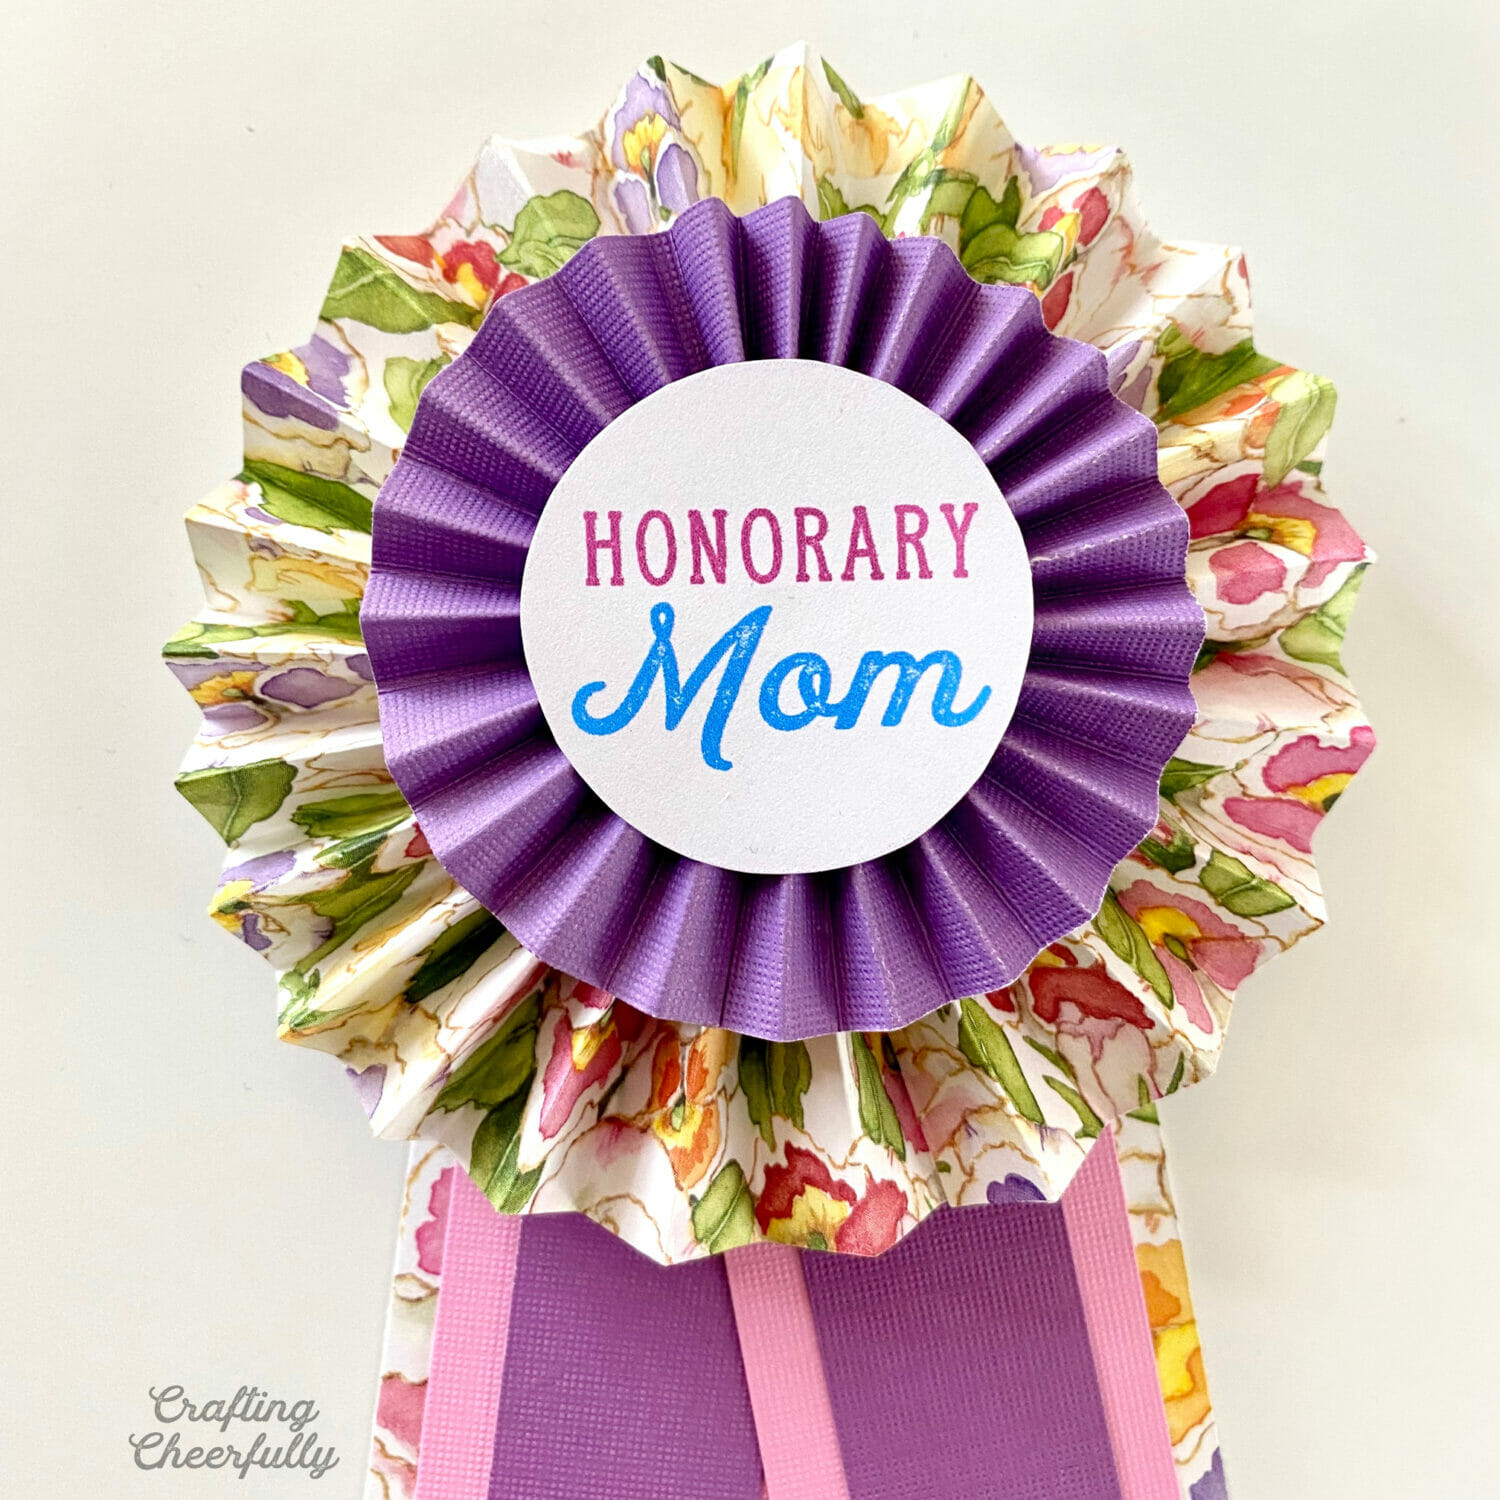
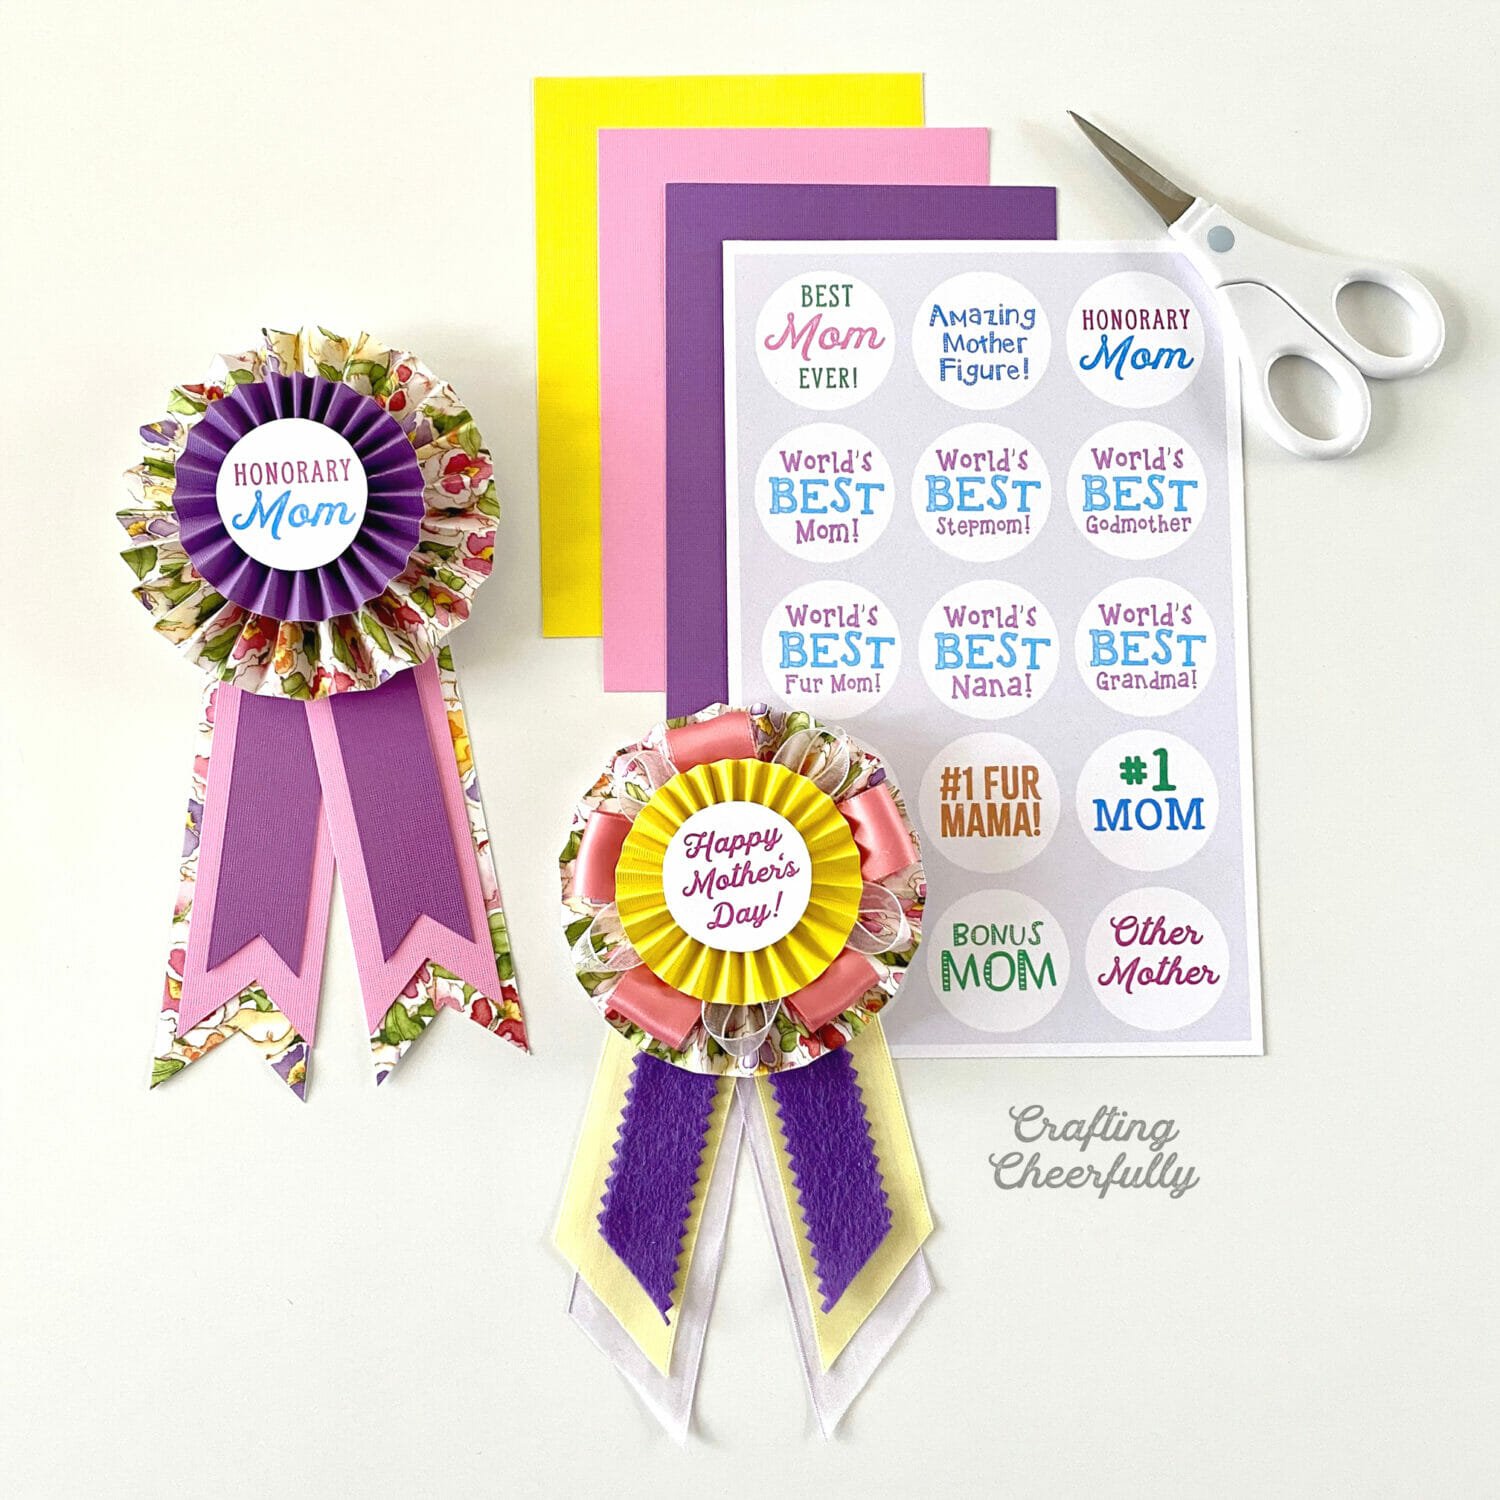
Create these pins using any combination of pretty paper and ribbons. I used a fun sheet of floral paper along with coordinating solid-colored paper and ribbons. You can skip the ribbons altogether and create the entire thing from paper. My favorite part is the customized saying on the top of the pin. You can download the free printable I created with decorative tags. They feature a bunch of different sayings and titles so that no matter who you are celebrating this Mother’s Day they can feel special!
More Mother’s Day Crafts
How to Make a Mother’s Day Award Ribbon
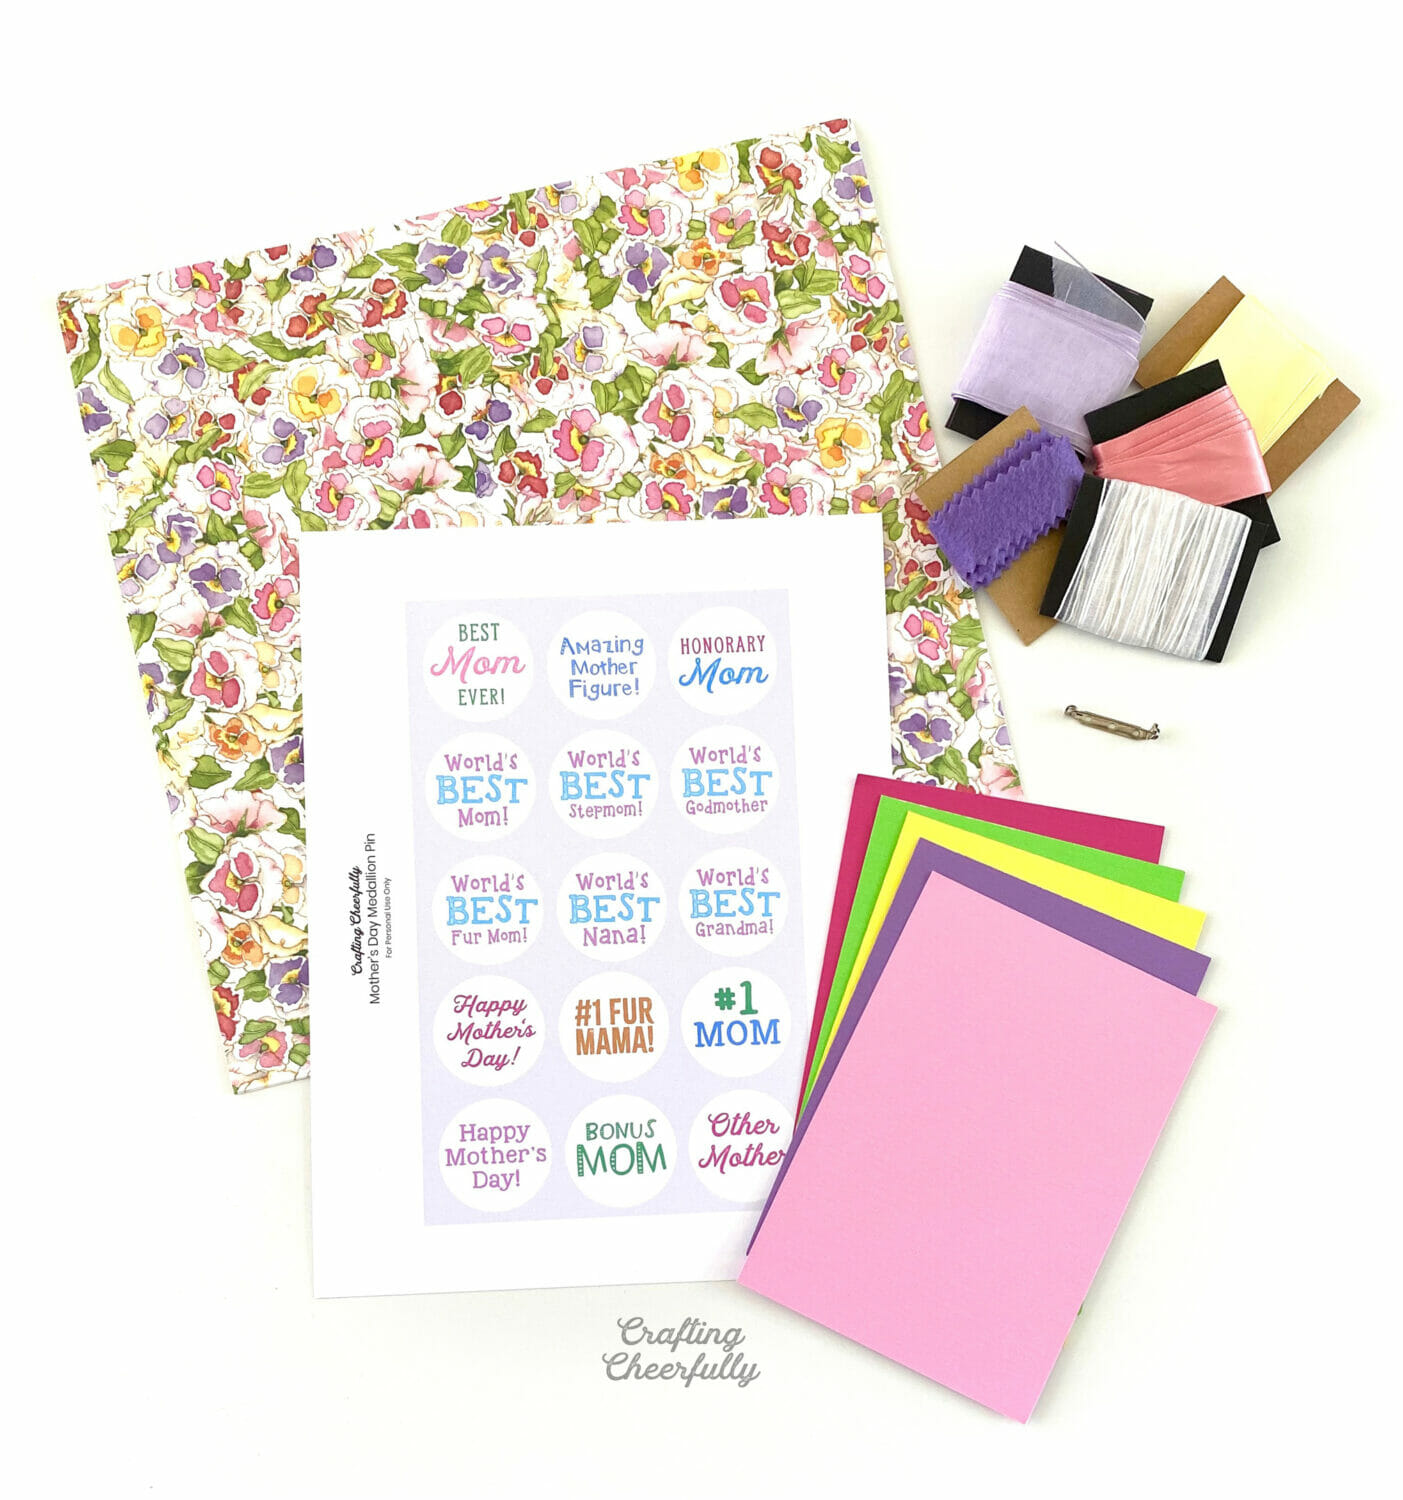
Supplies Needed:
- Decorative Tags – Grab my free files by filling out the purple form at the end of this blog post.
- Decorative Paper
- Ribbon
- Pin back
- Hot glue gun
- *optional – Tape runner or double-sided tape
- Scissors
- Paper Trimmer
- Scoring board
 Step by Step Tutorial
 Step by Step Tutorial
Step One: Download and print the free decorative tags or create your own.
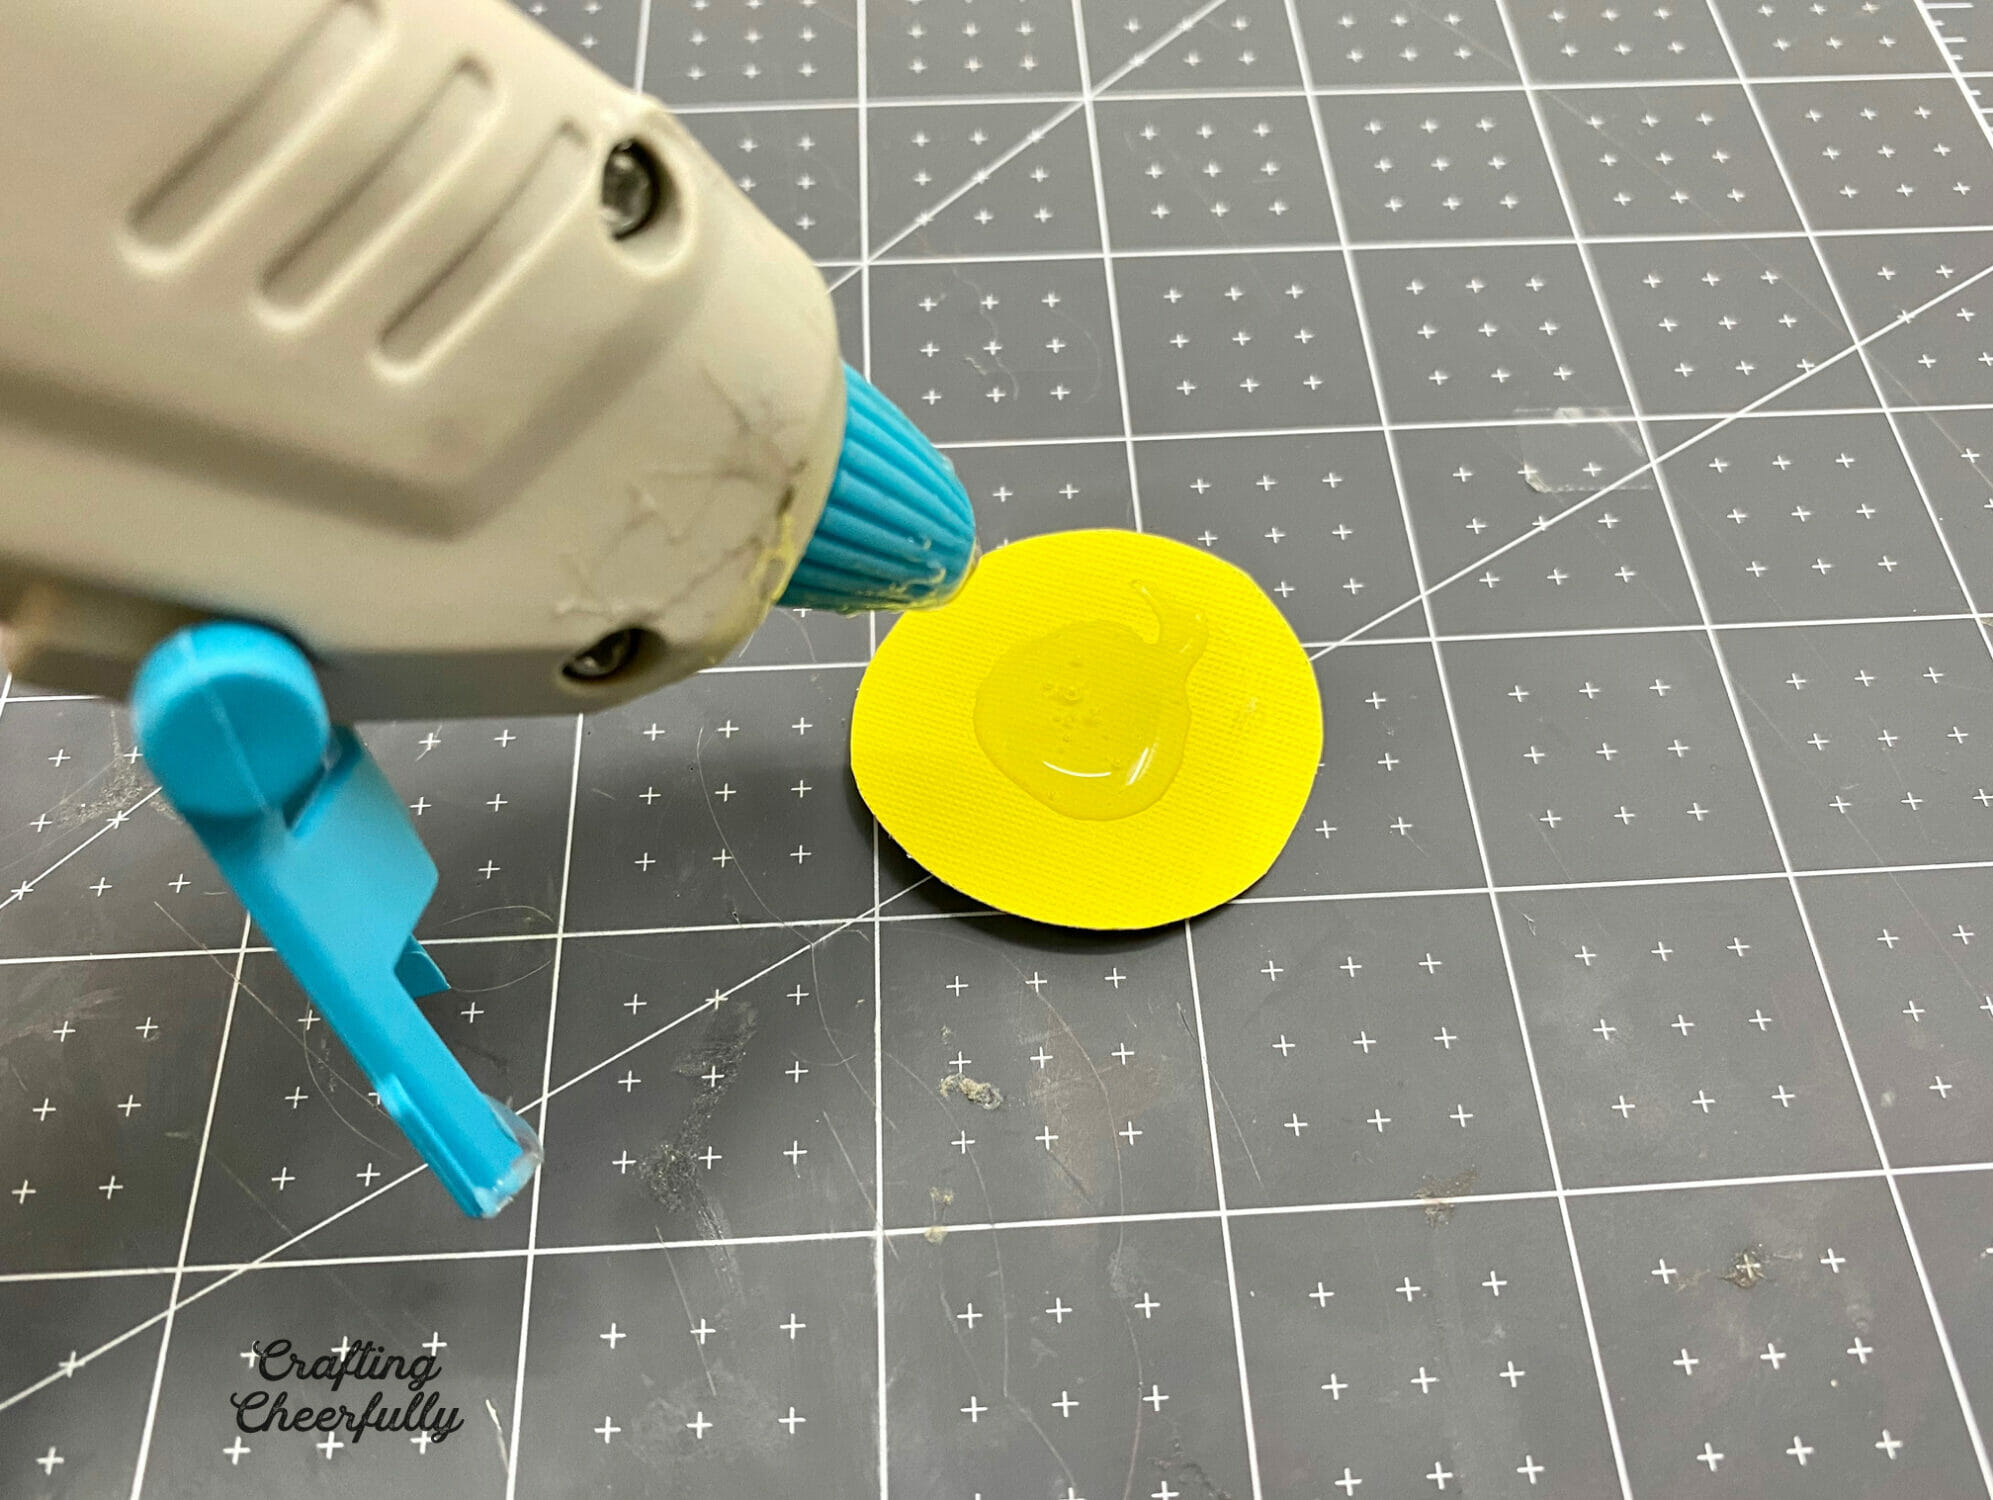
You can also use stickers, stamps or decorative paper. Cut out the decorative tag you want to use for your medallion. Use it to trace and cut out 3-4 circles from cardstock.


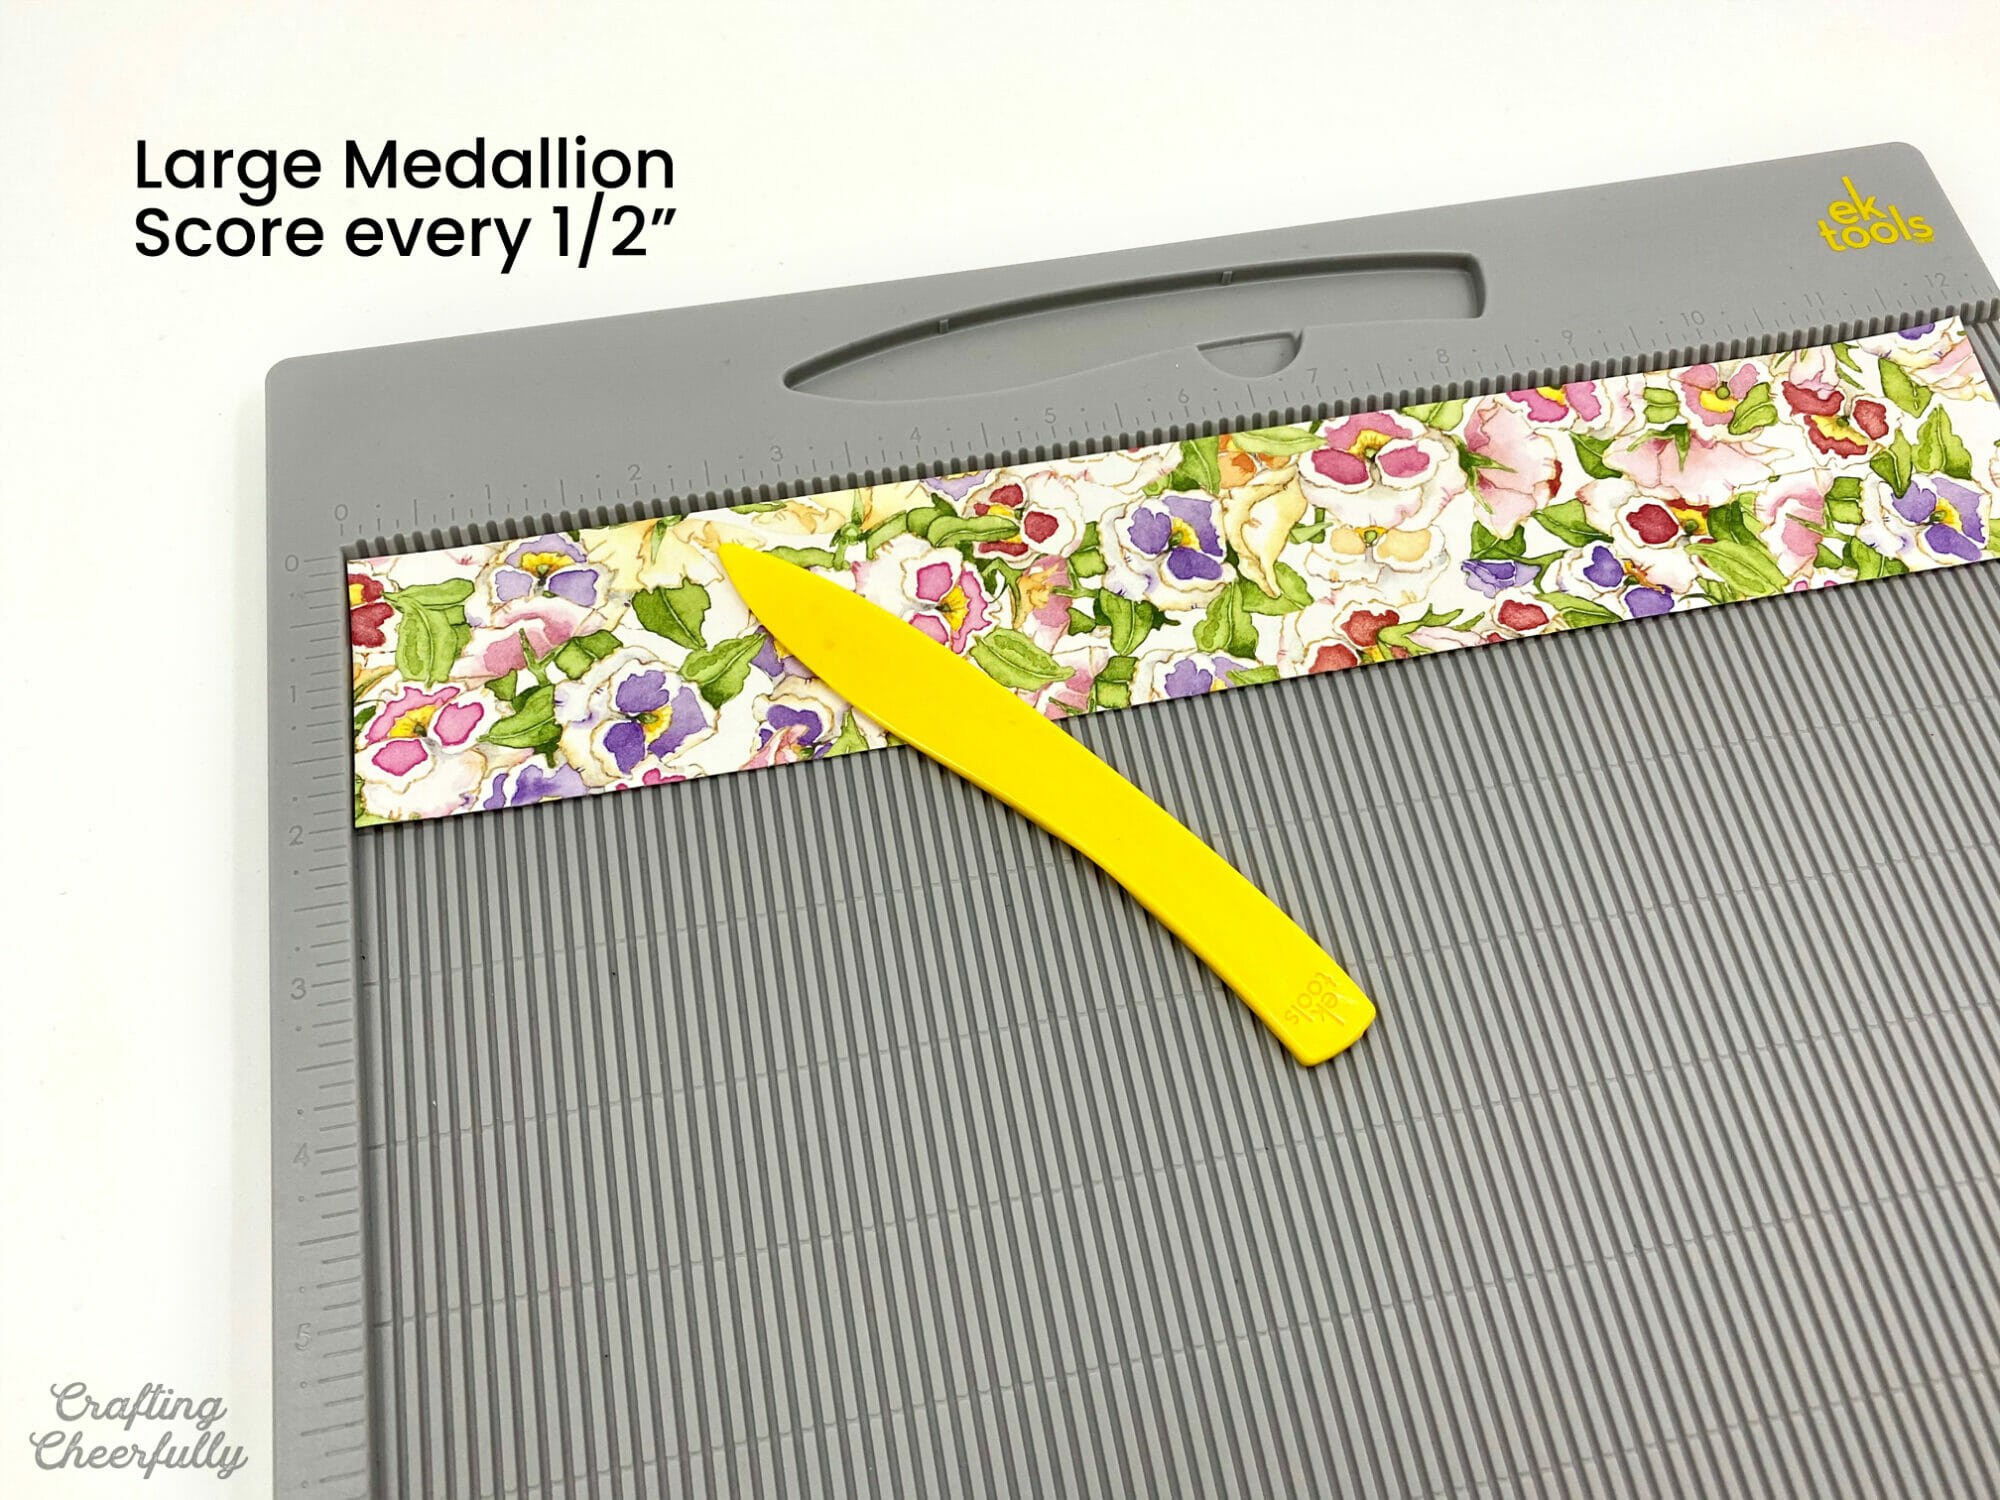
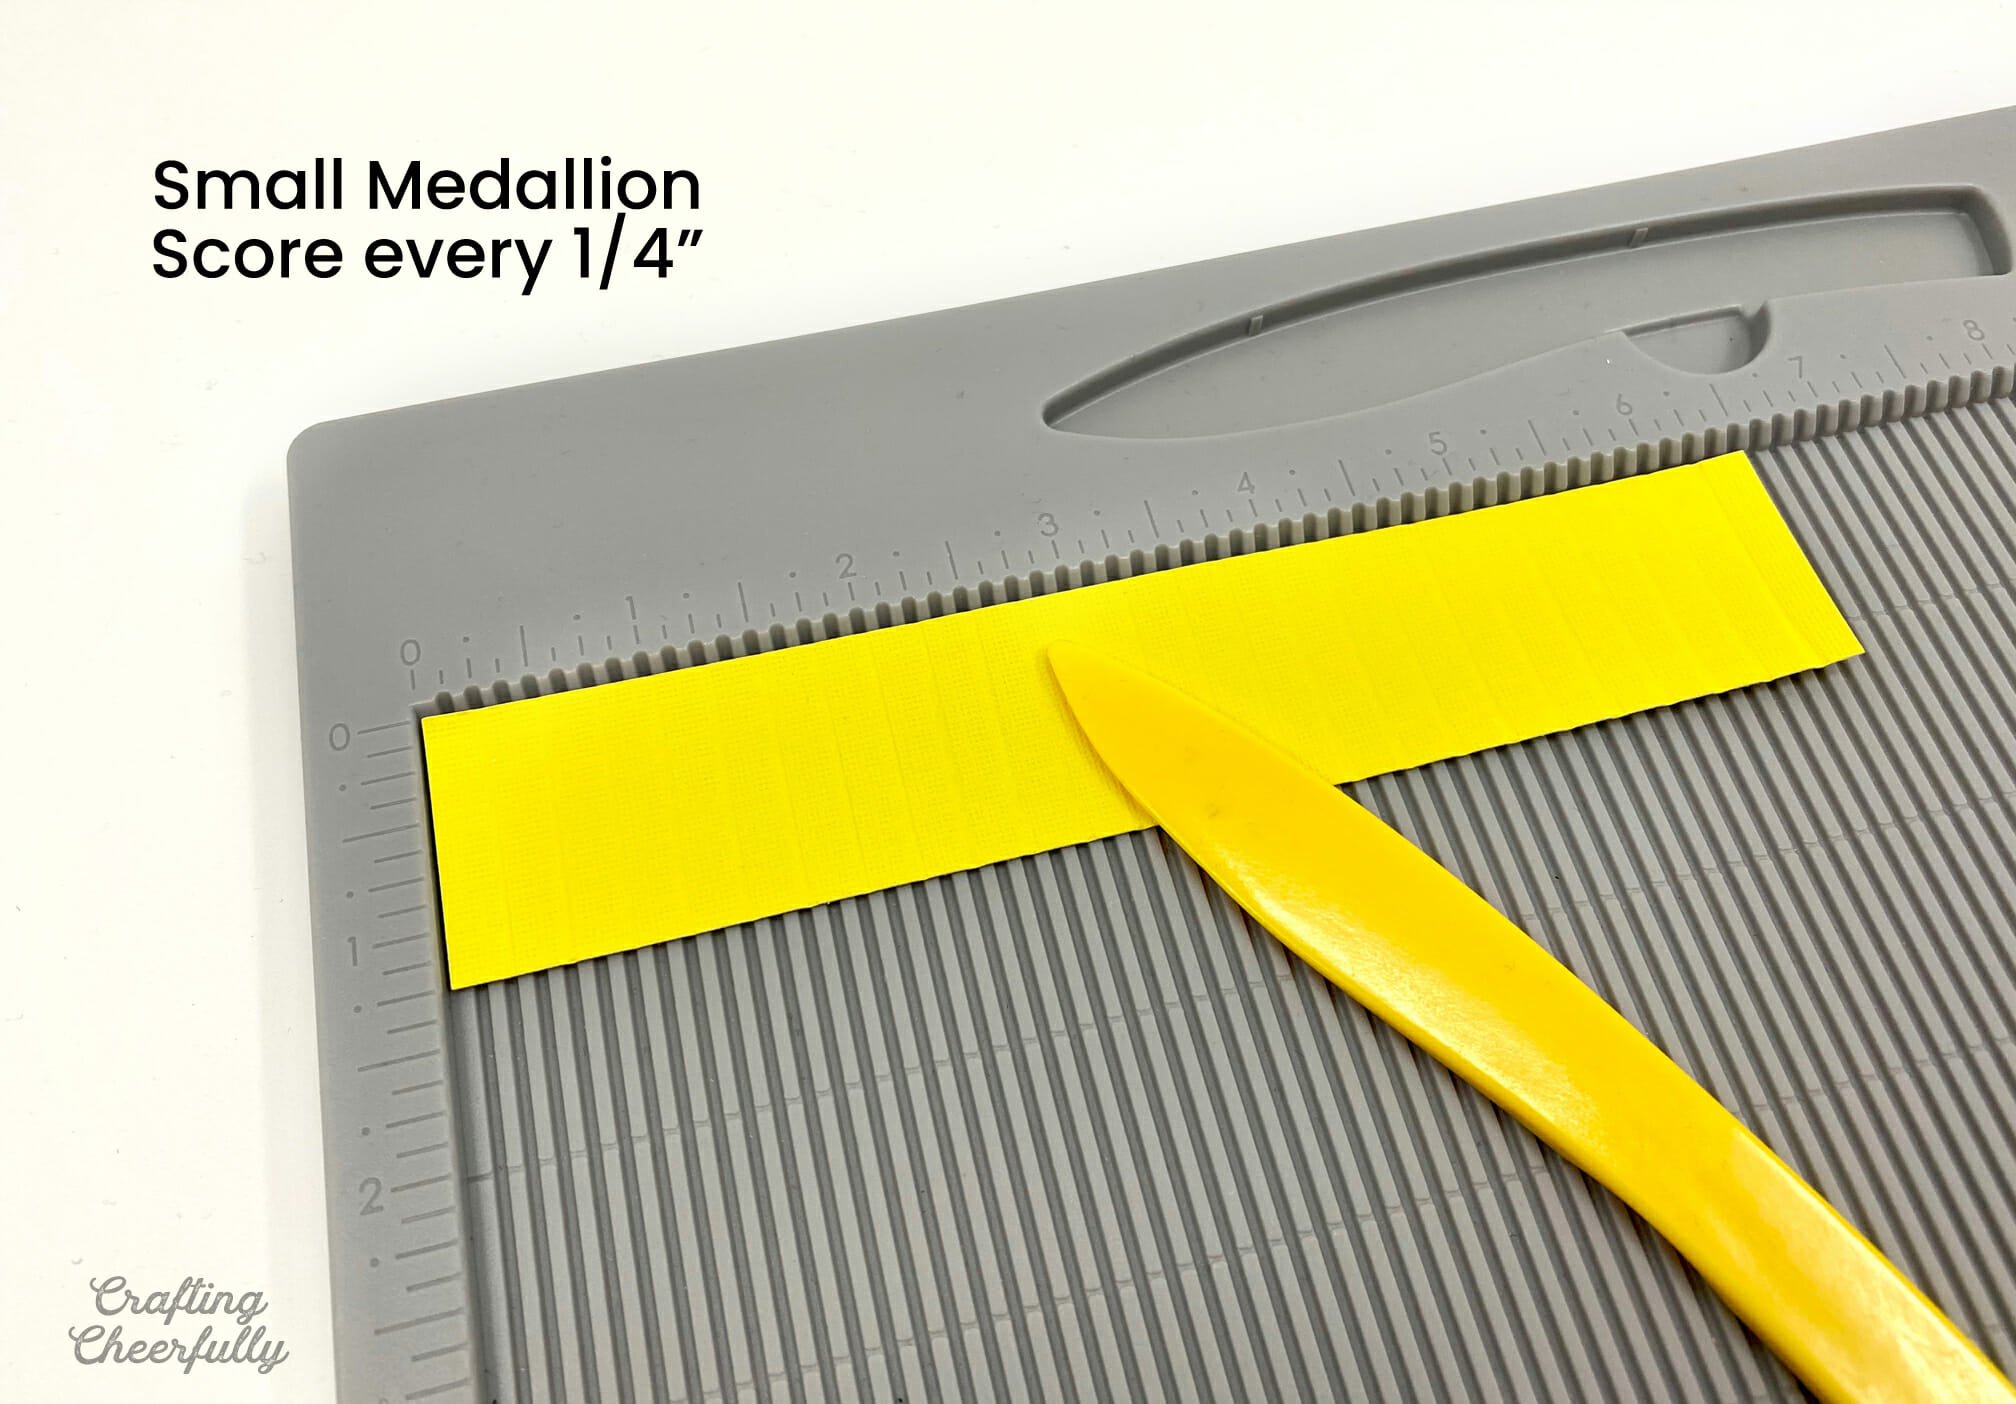
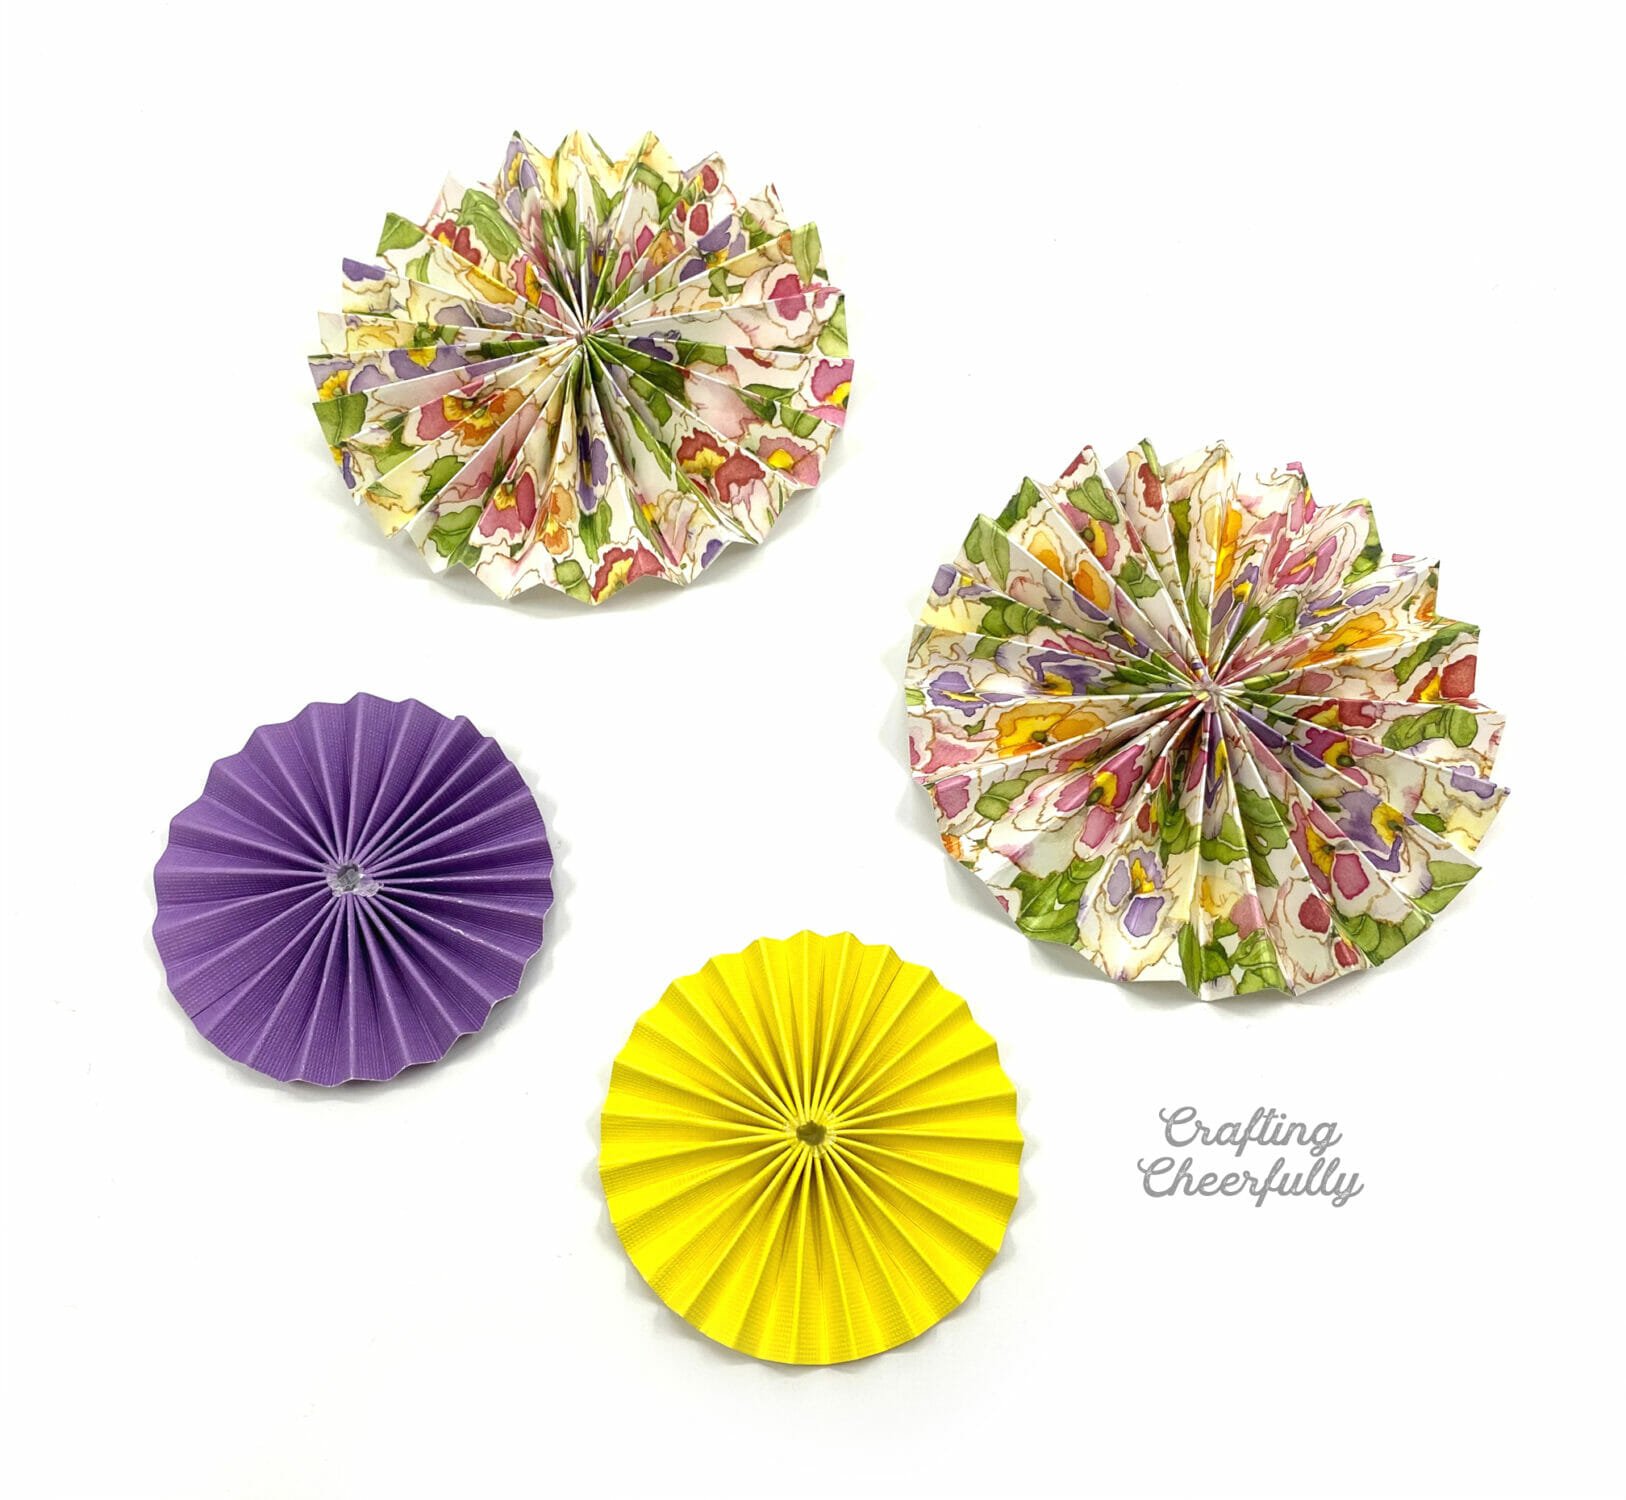
Step Two: Create the large and small paper medallions.
Start by cutting strips of paper to create the medallion. The larger medallion is made from 2″ wide strips of paper. I used two strips that were 12″ long. The smaller medallion is made from 1.25″ strips of paper. I used two strips that were 6″ long.

Score the strips of paper. Score the large medallion every 1/2″ and the small medallion every 1/4″.
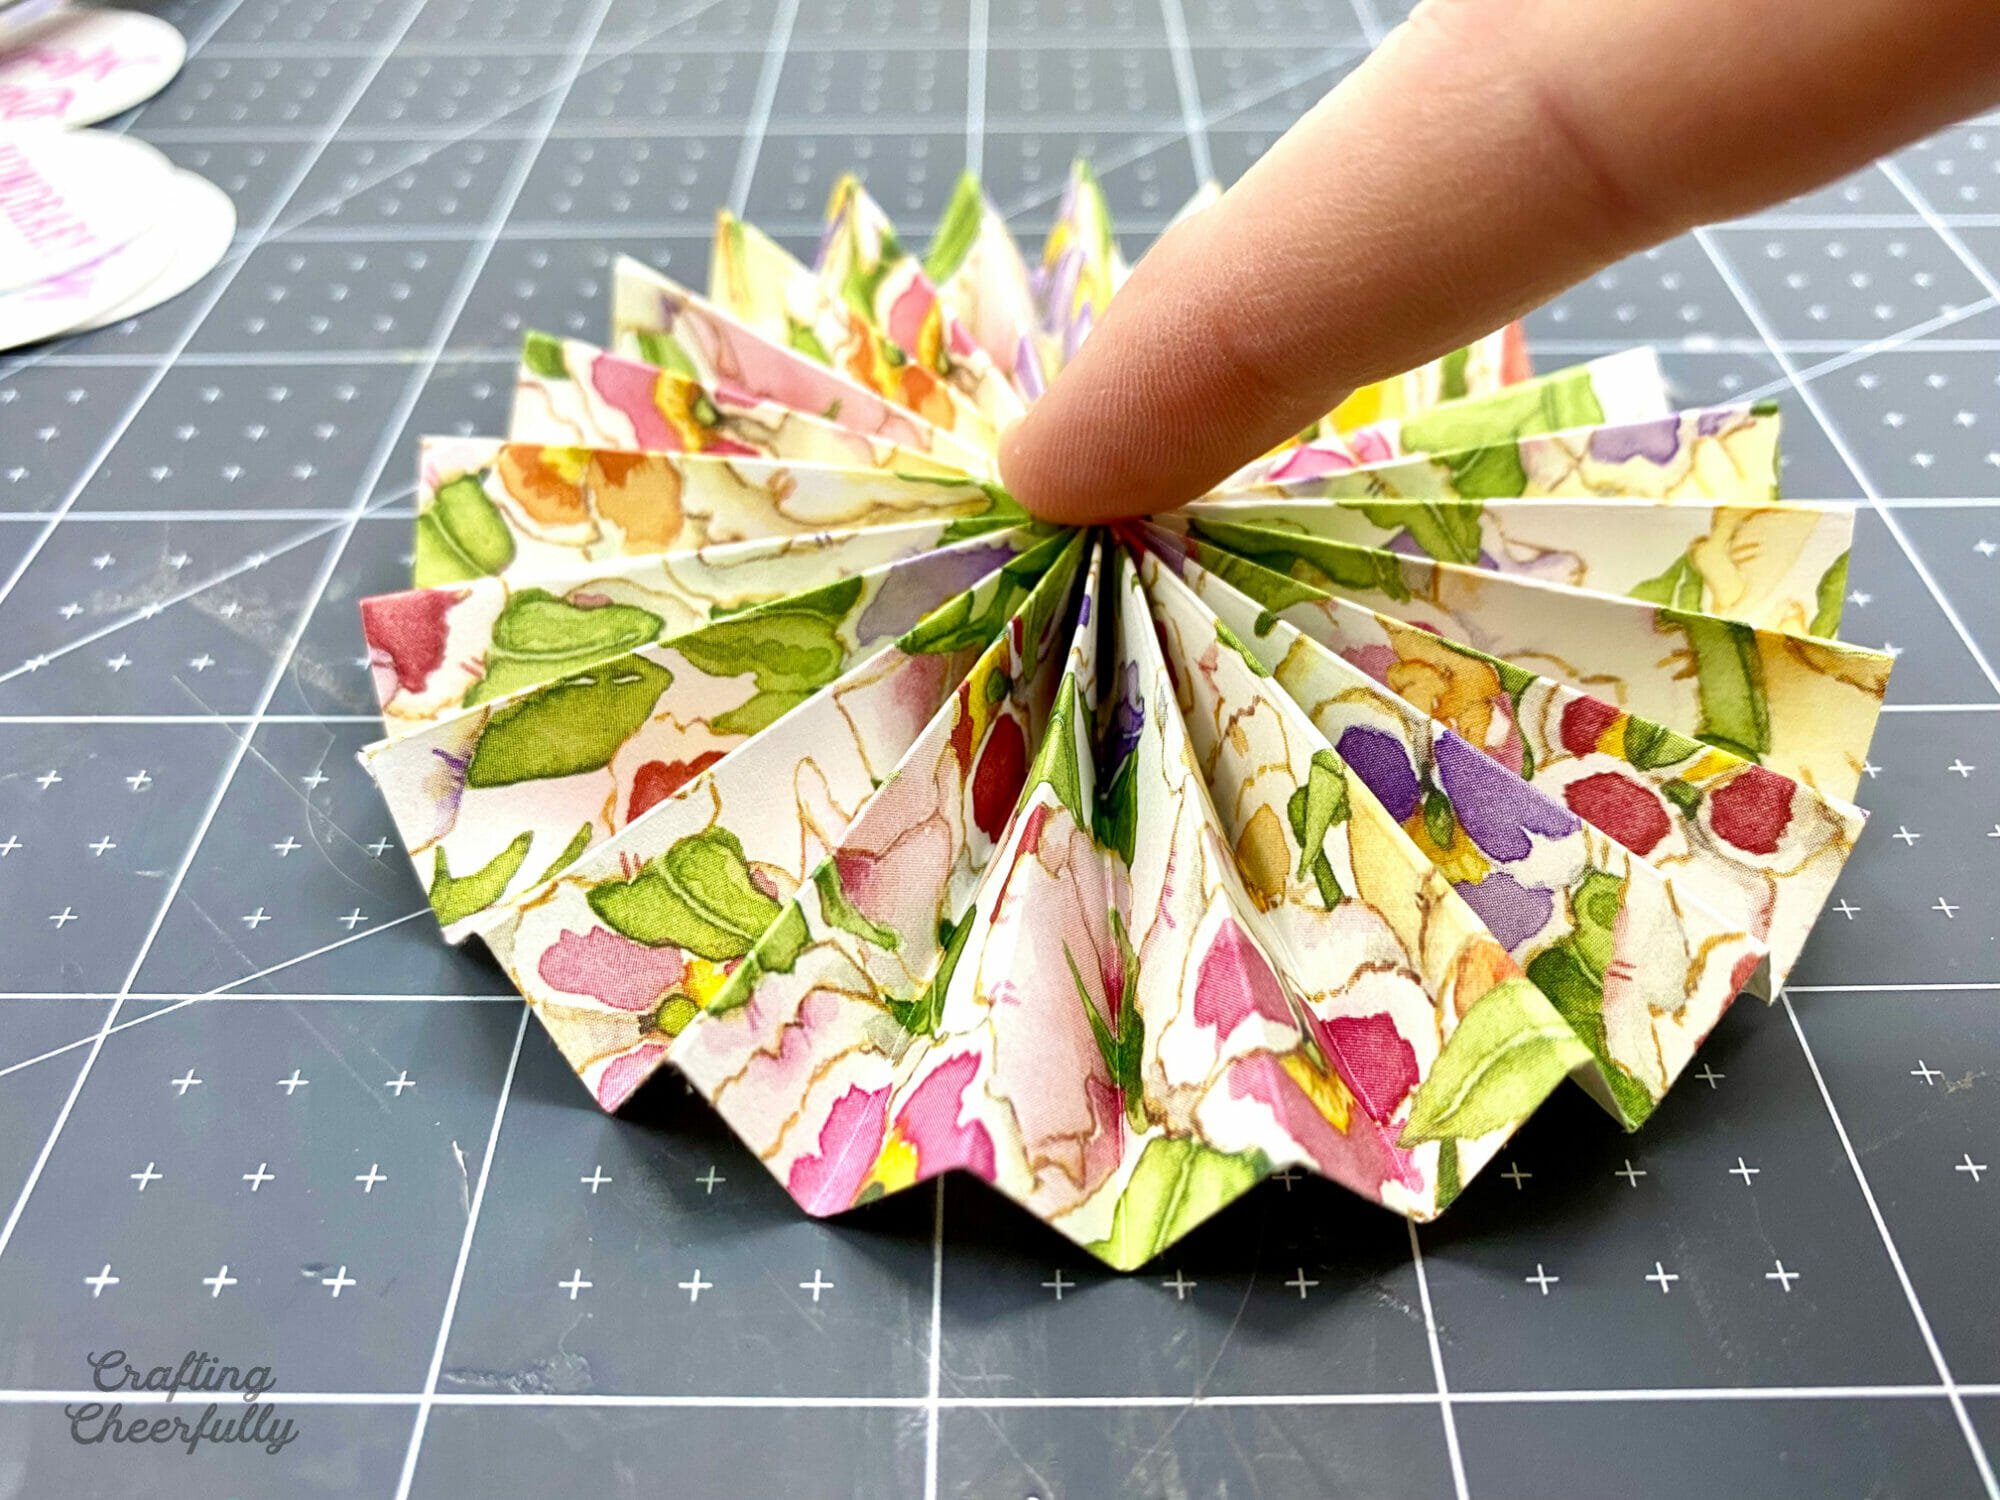
Accordion fold the paper strips along each scored fold line.

Connect the paper strips into a circle. I used double-sided tape to connect them, but you could also use hot glue, to connect the two ends. Each pin needs a large and small medallion. In the picture below you can see my medallions for two pins.

Use one of the circles you cut out in Step One for each paper medallion. Place a blob of hot glue on the center of the circle, then push one of the paper medallions onto it. Hold it for a minute to set. Repeat for the second medallion.
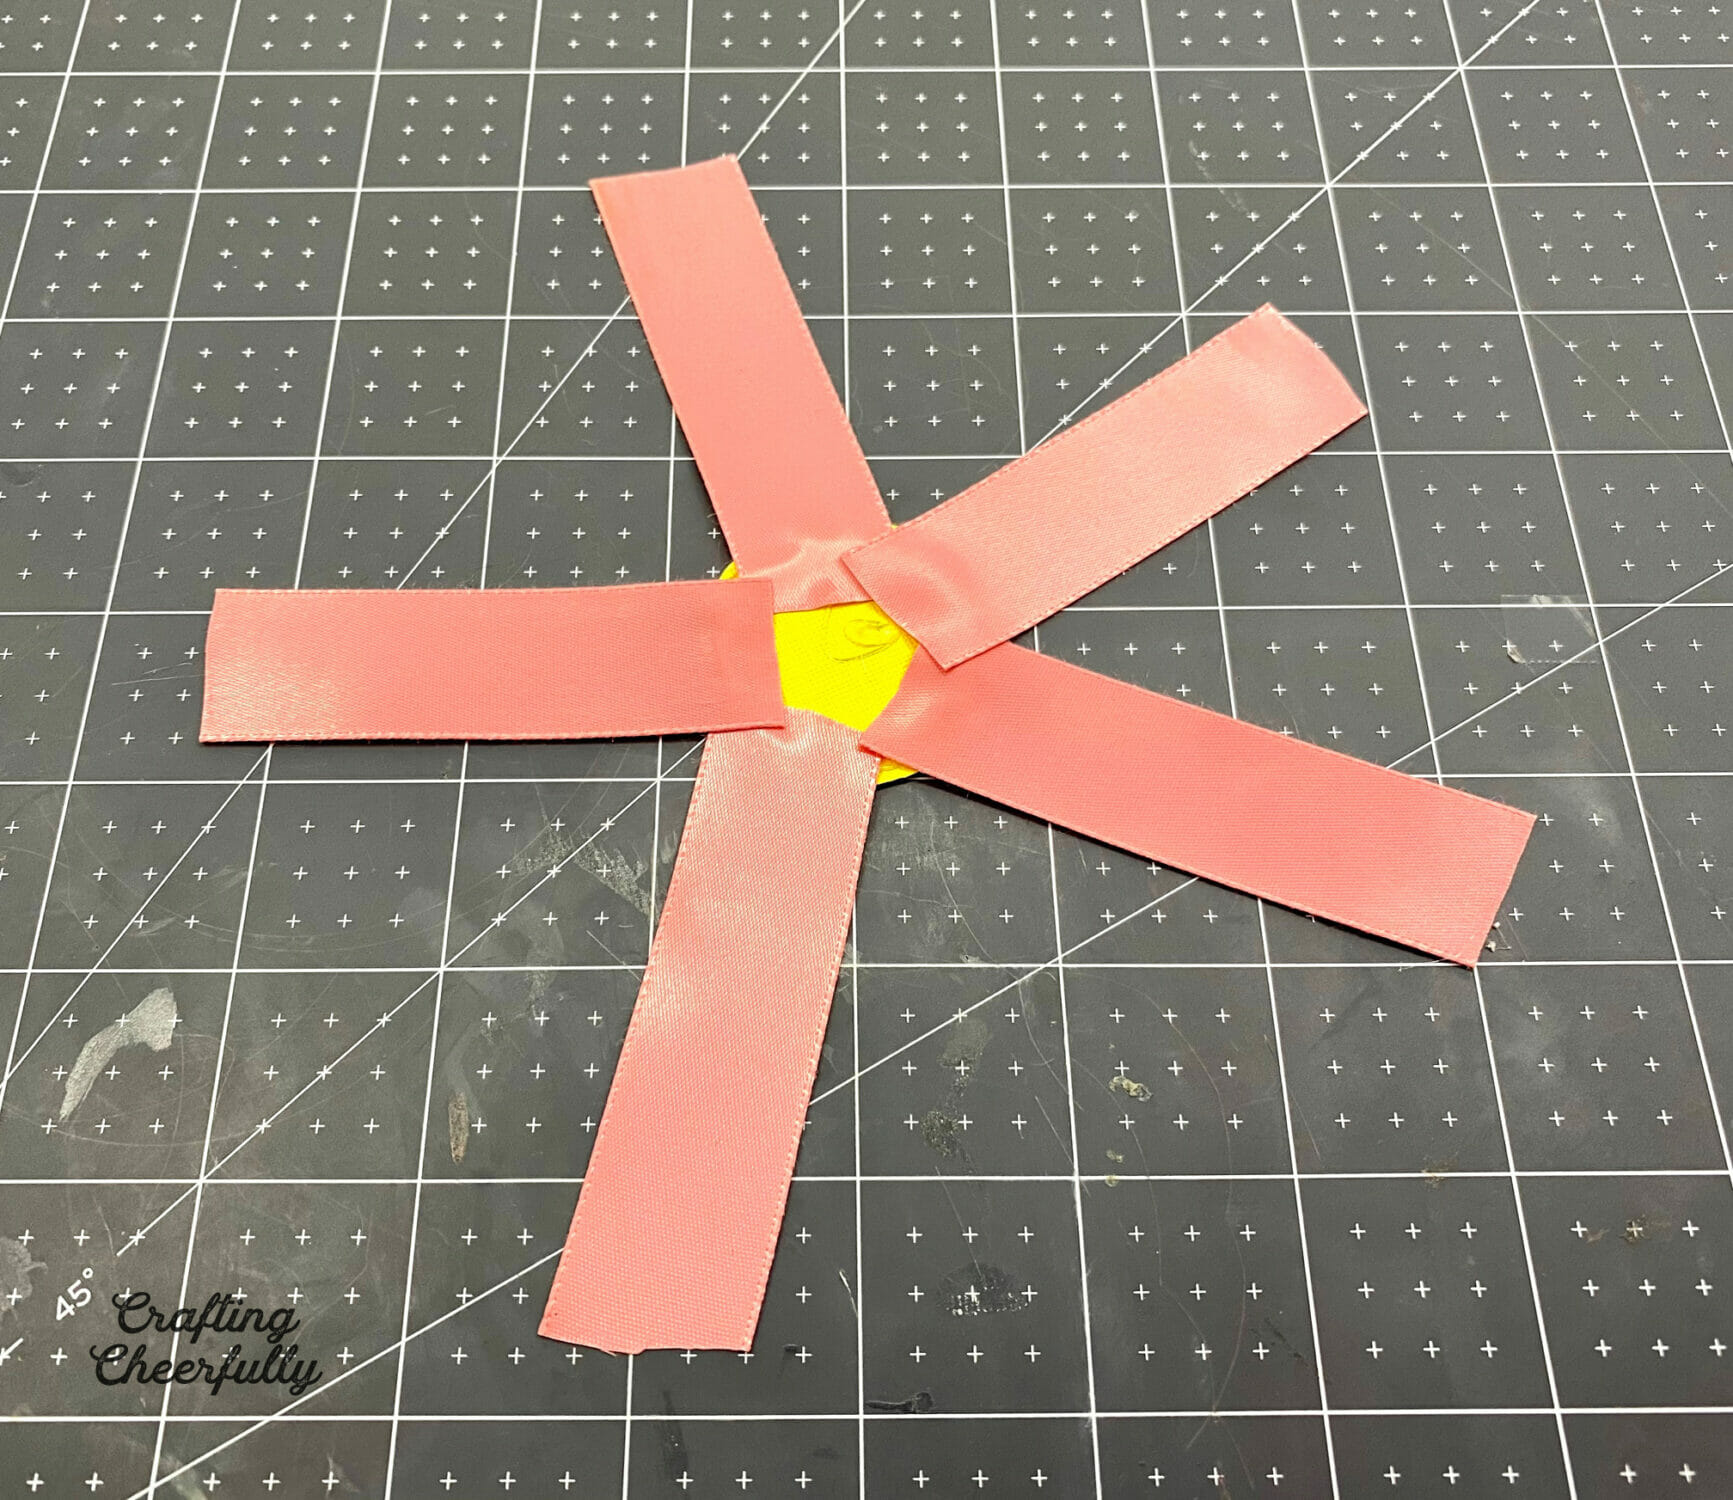
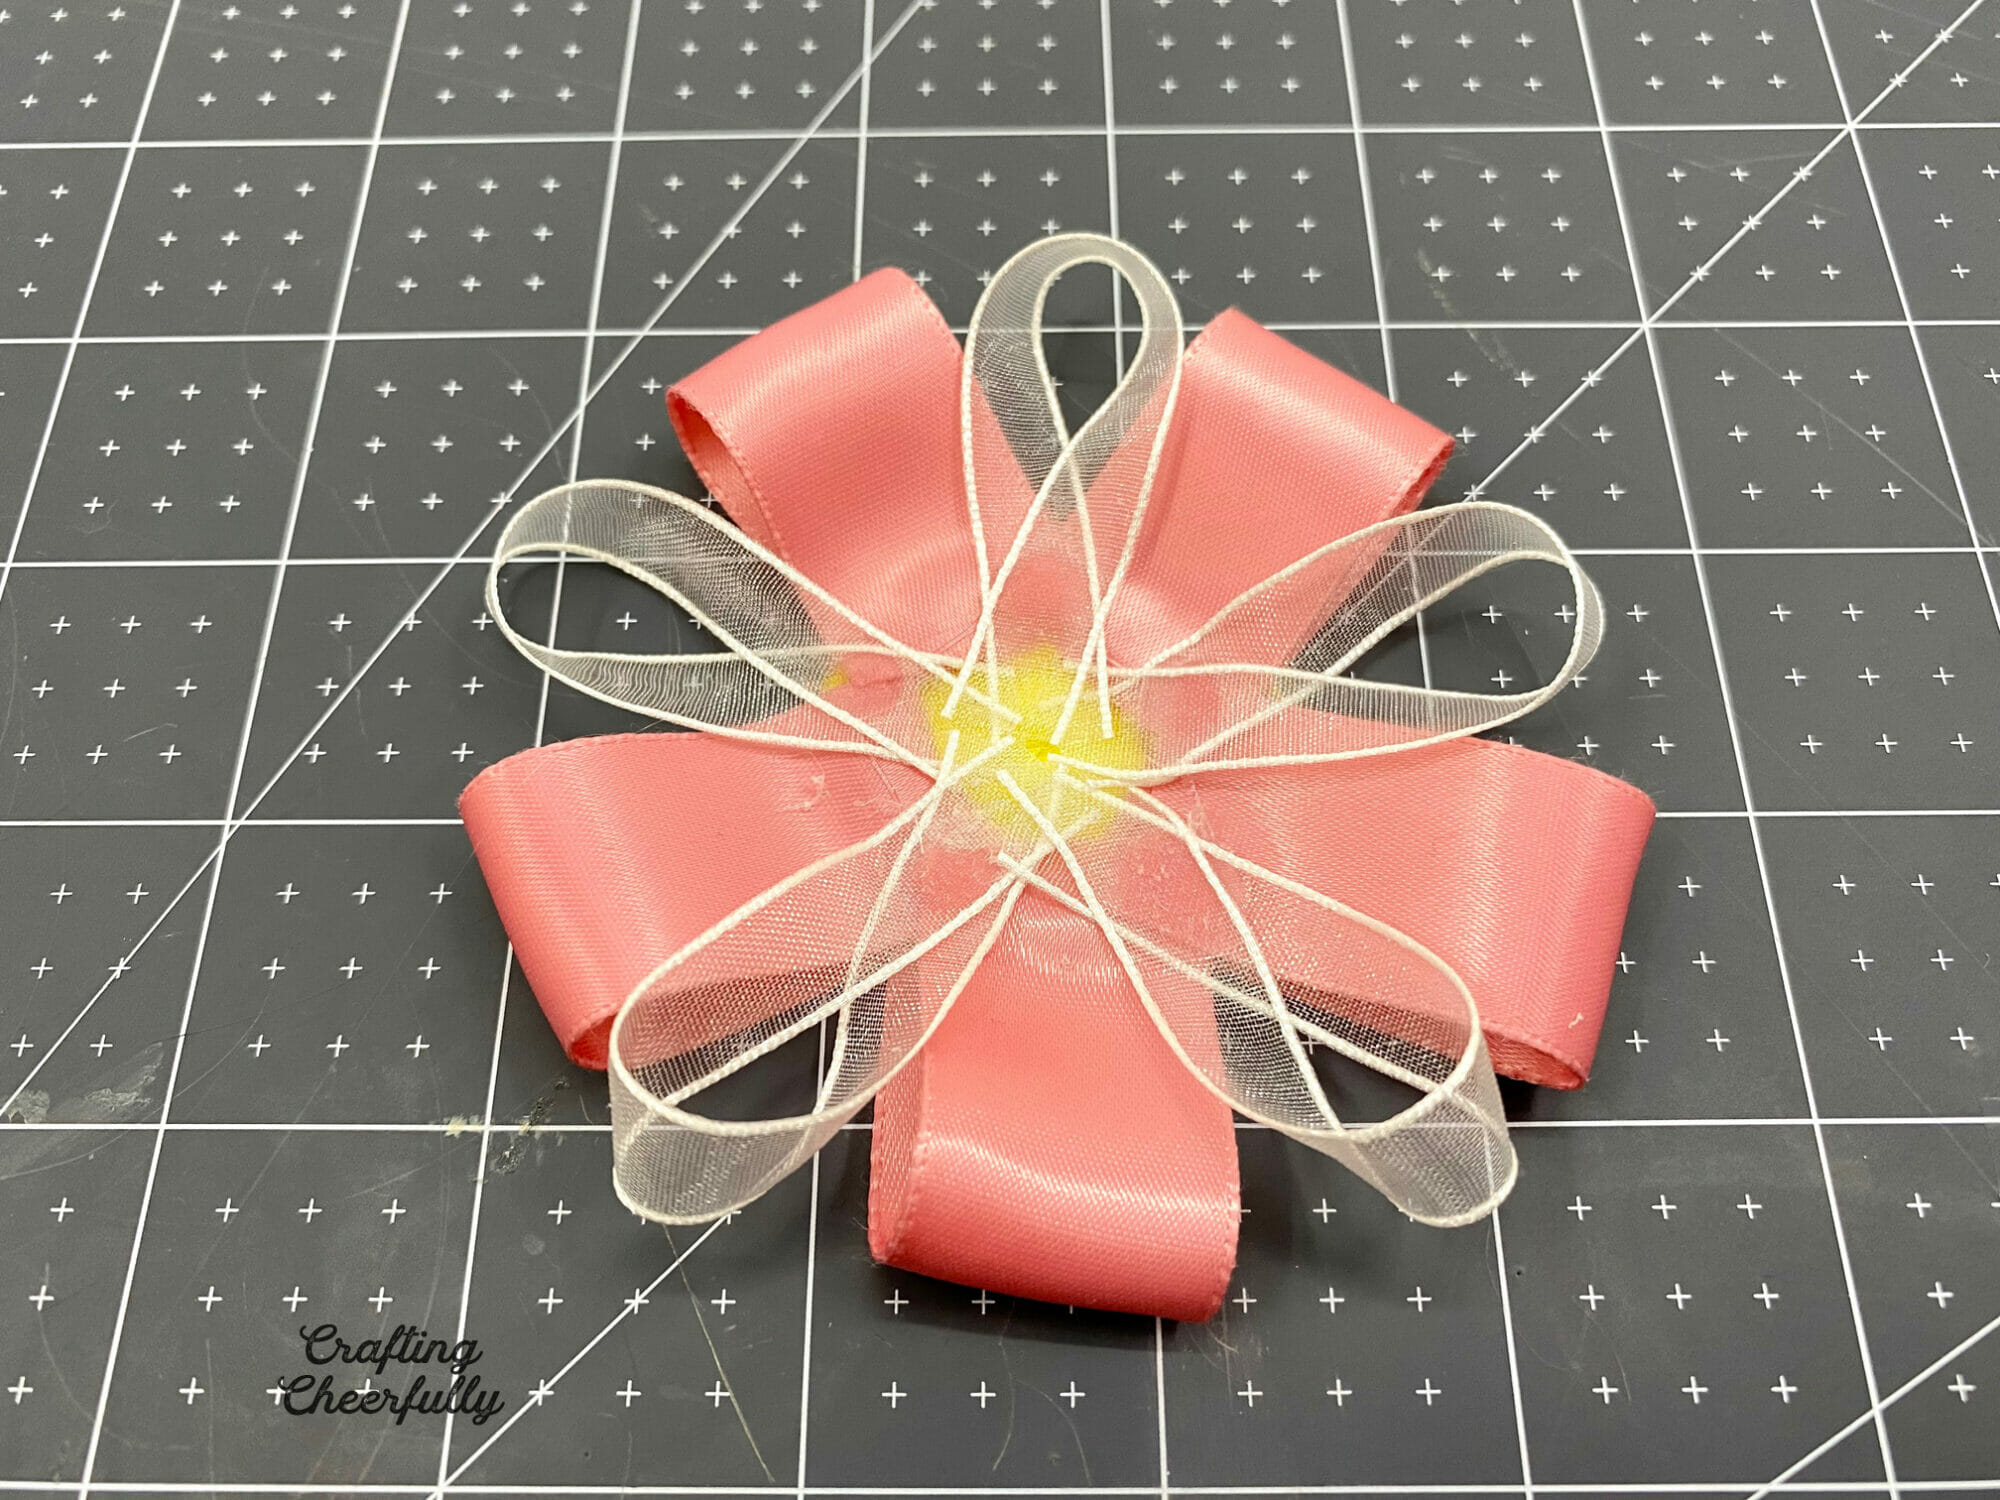
Step Three: Create the ribbon medallion!
I made one medallion pin with a ribbon layer and the other without, you can make them either way! If you’d like to add a ribbon layer, you’ll need the third paper circle from Step One and two sizes of ribbon. For my pin I used 5 pieces of 7/8″ ribbon (cut 2.5″ long) and 5 pieces of 3/8″ ribbon (cut 3″ long).
Use hot glue carefully to place the ends of the larger ribbon around the paper circle. I let the hot glue cool slightly before pressing the ribbon down or if you have finger covers this would be a great time to use them!
Next, create loops by glue the other end on top of the first.
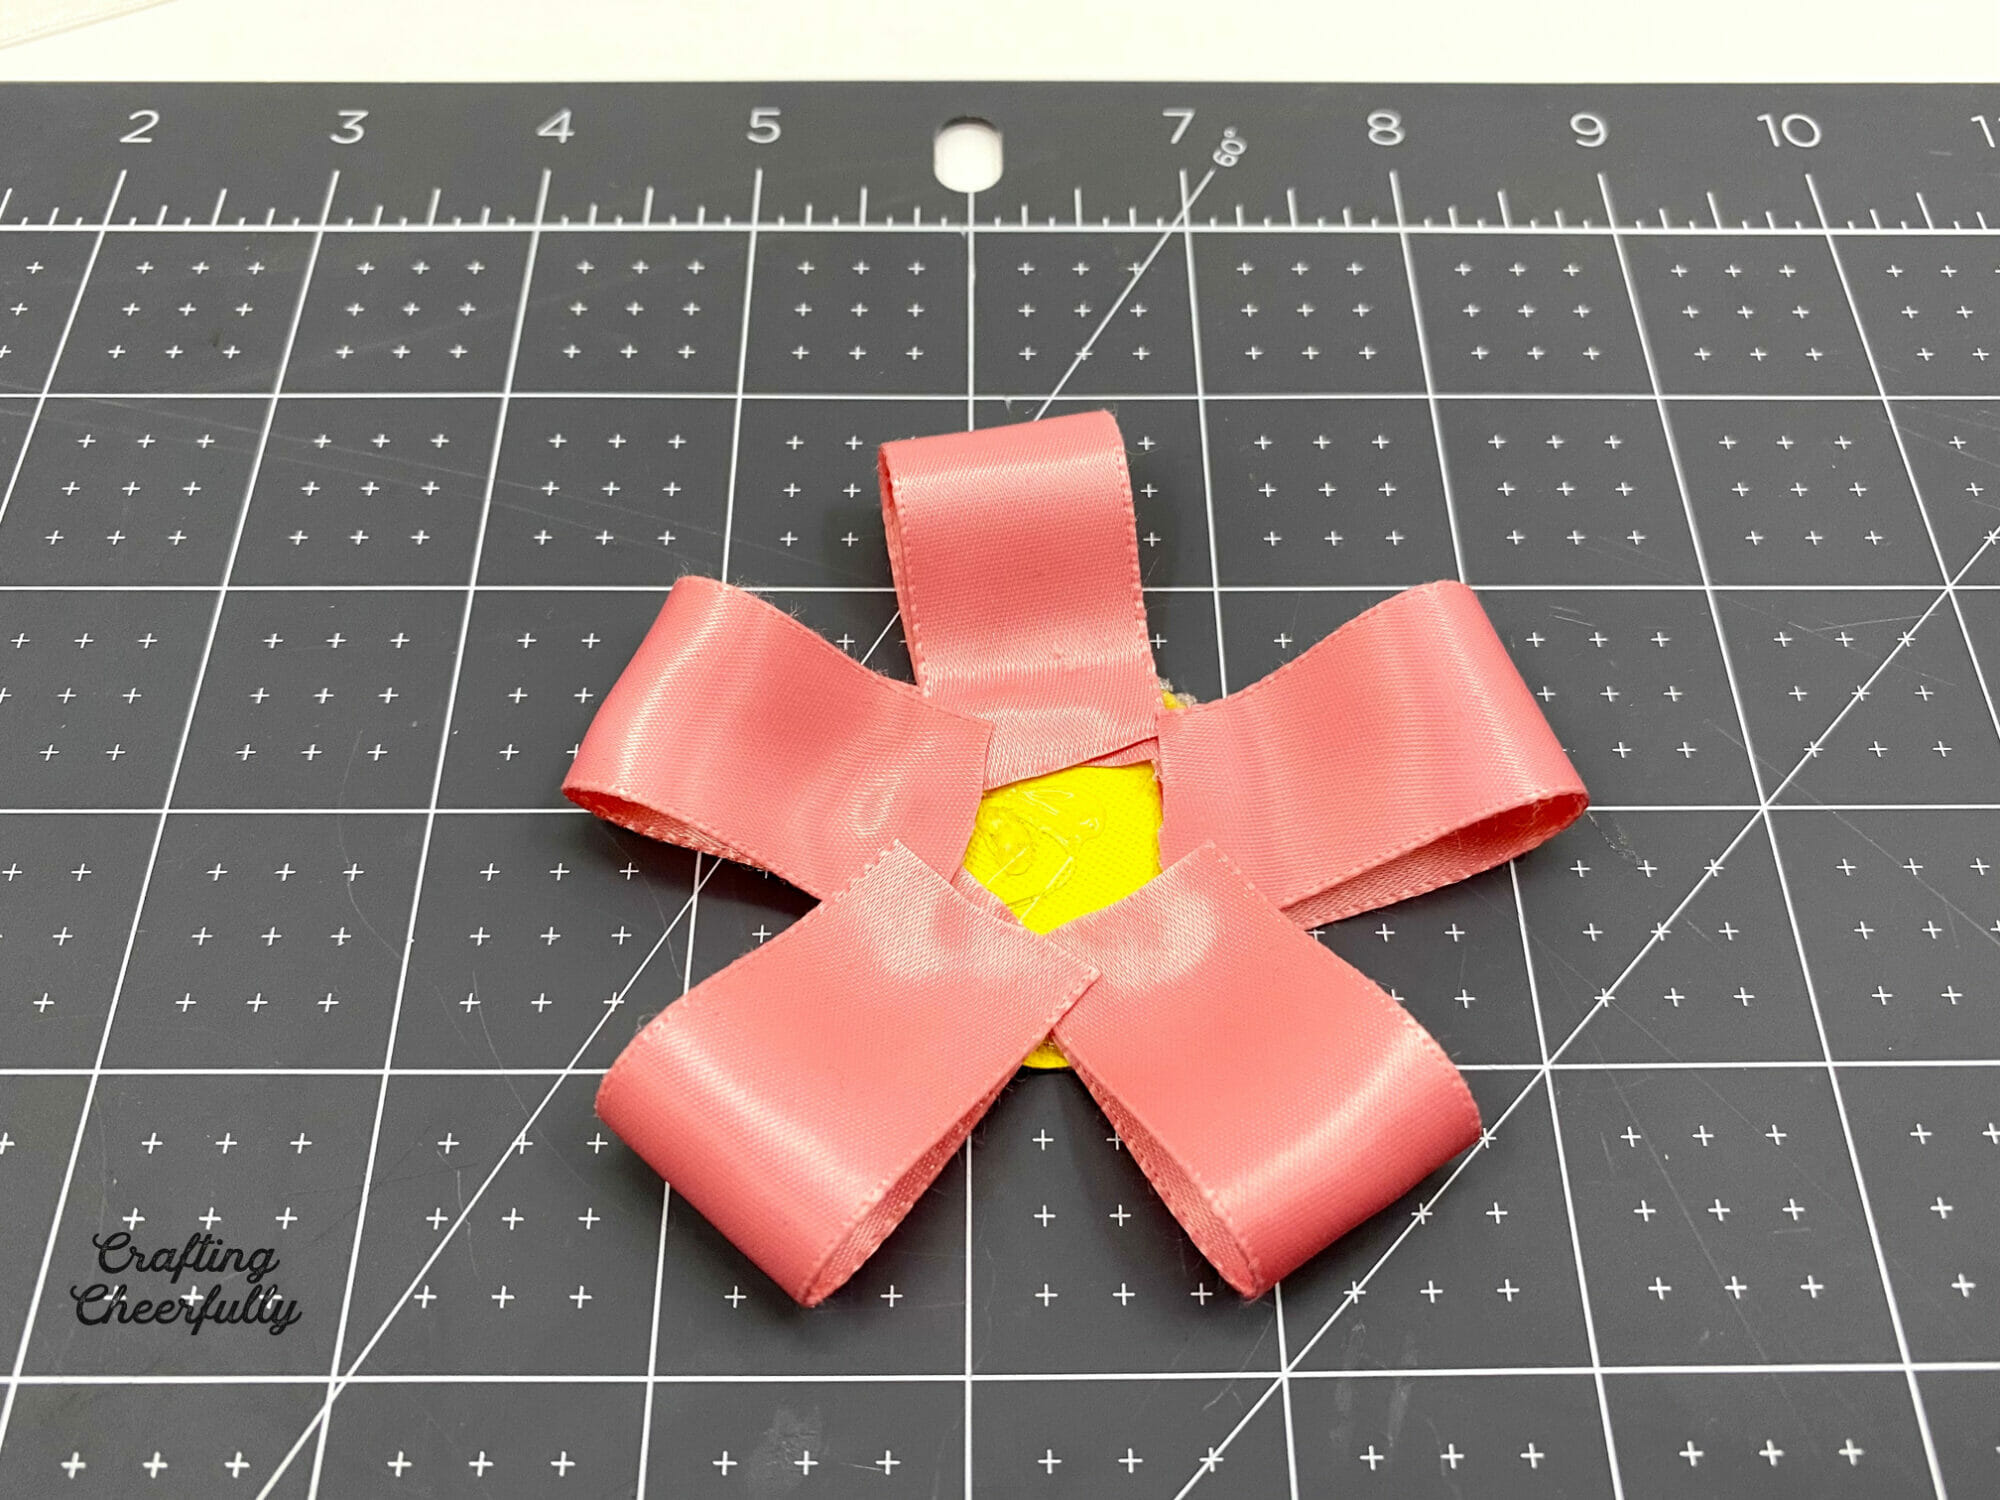
Repeat with the smaller ribbon. If you want to create the same type of loop, flip the end over when you glue the second end down on top of the first.
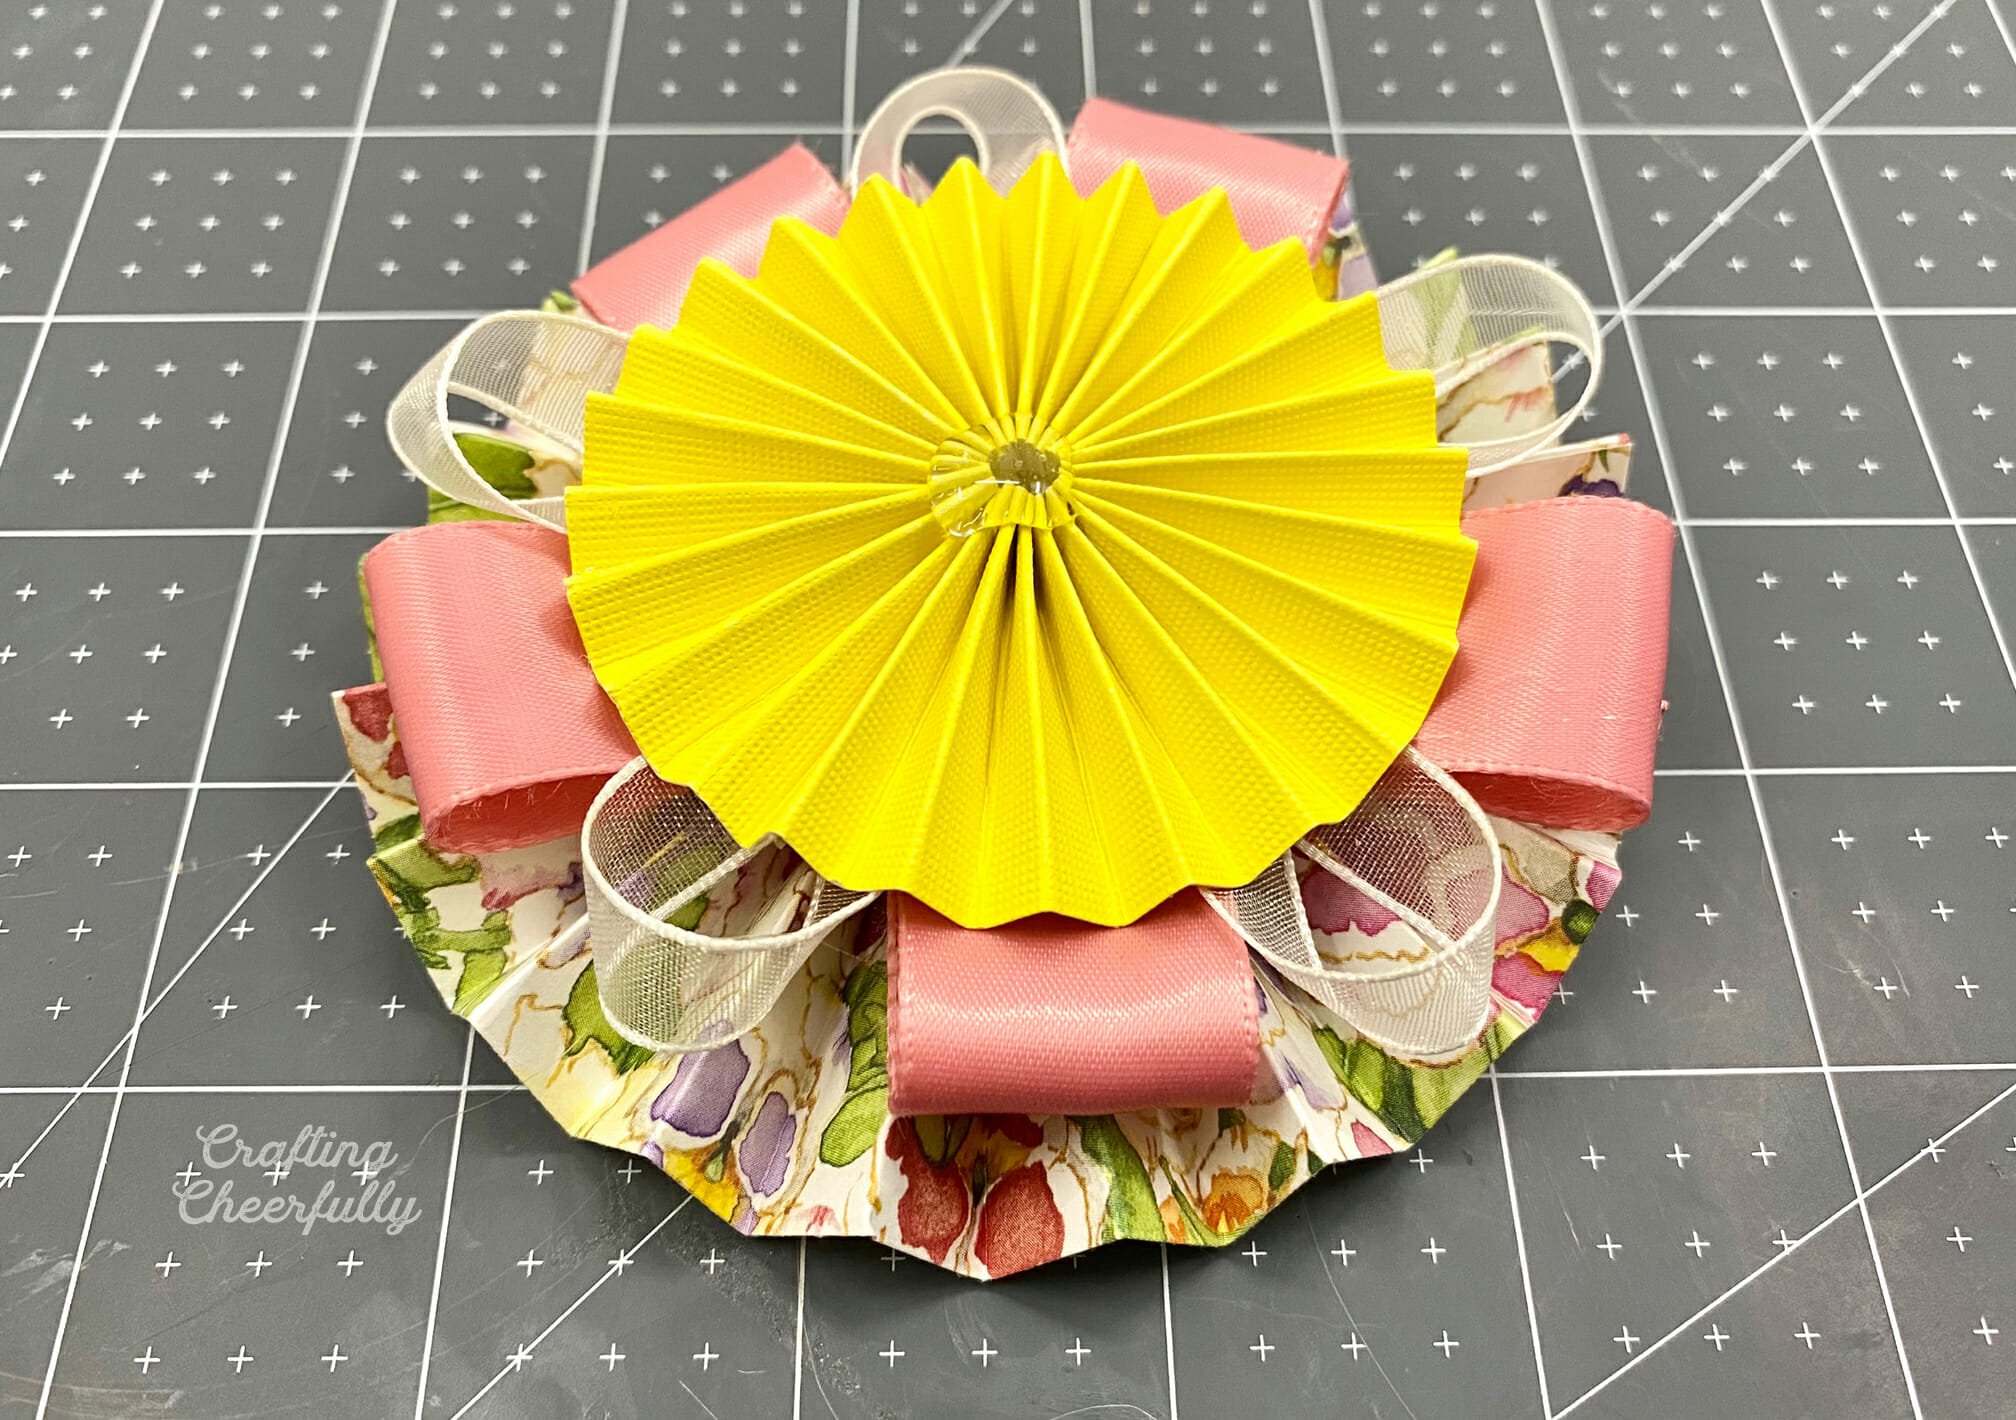
Step Four: Stack the medallion layers together!
Start with the large medallion on the bottom, next is the ribbon medallion is you are including it, then the small medallion and then finally the decorative tag on top!


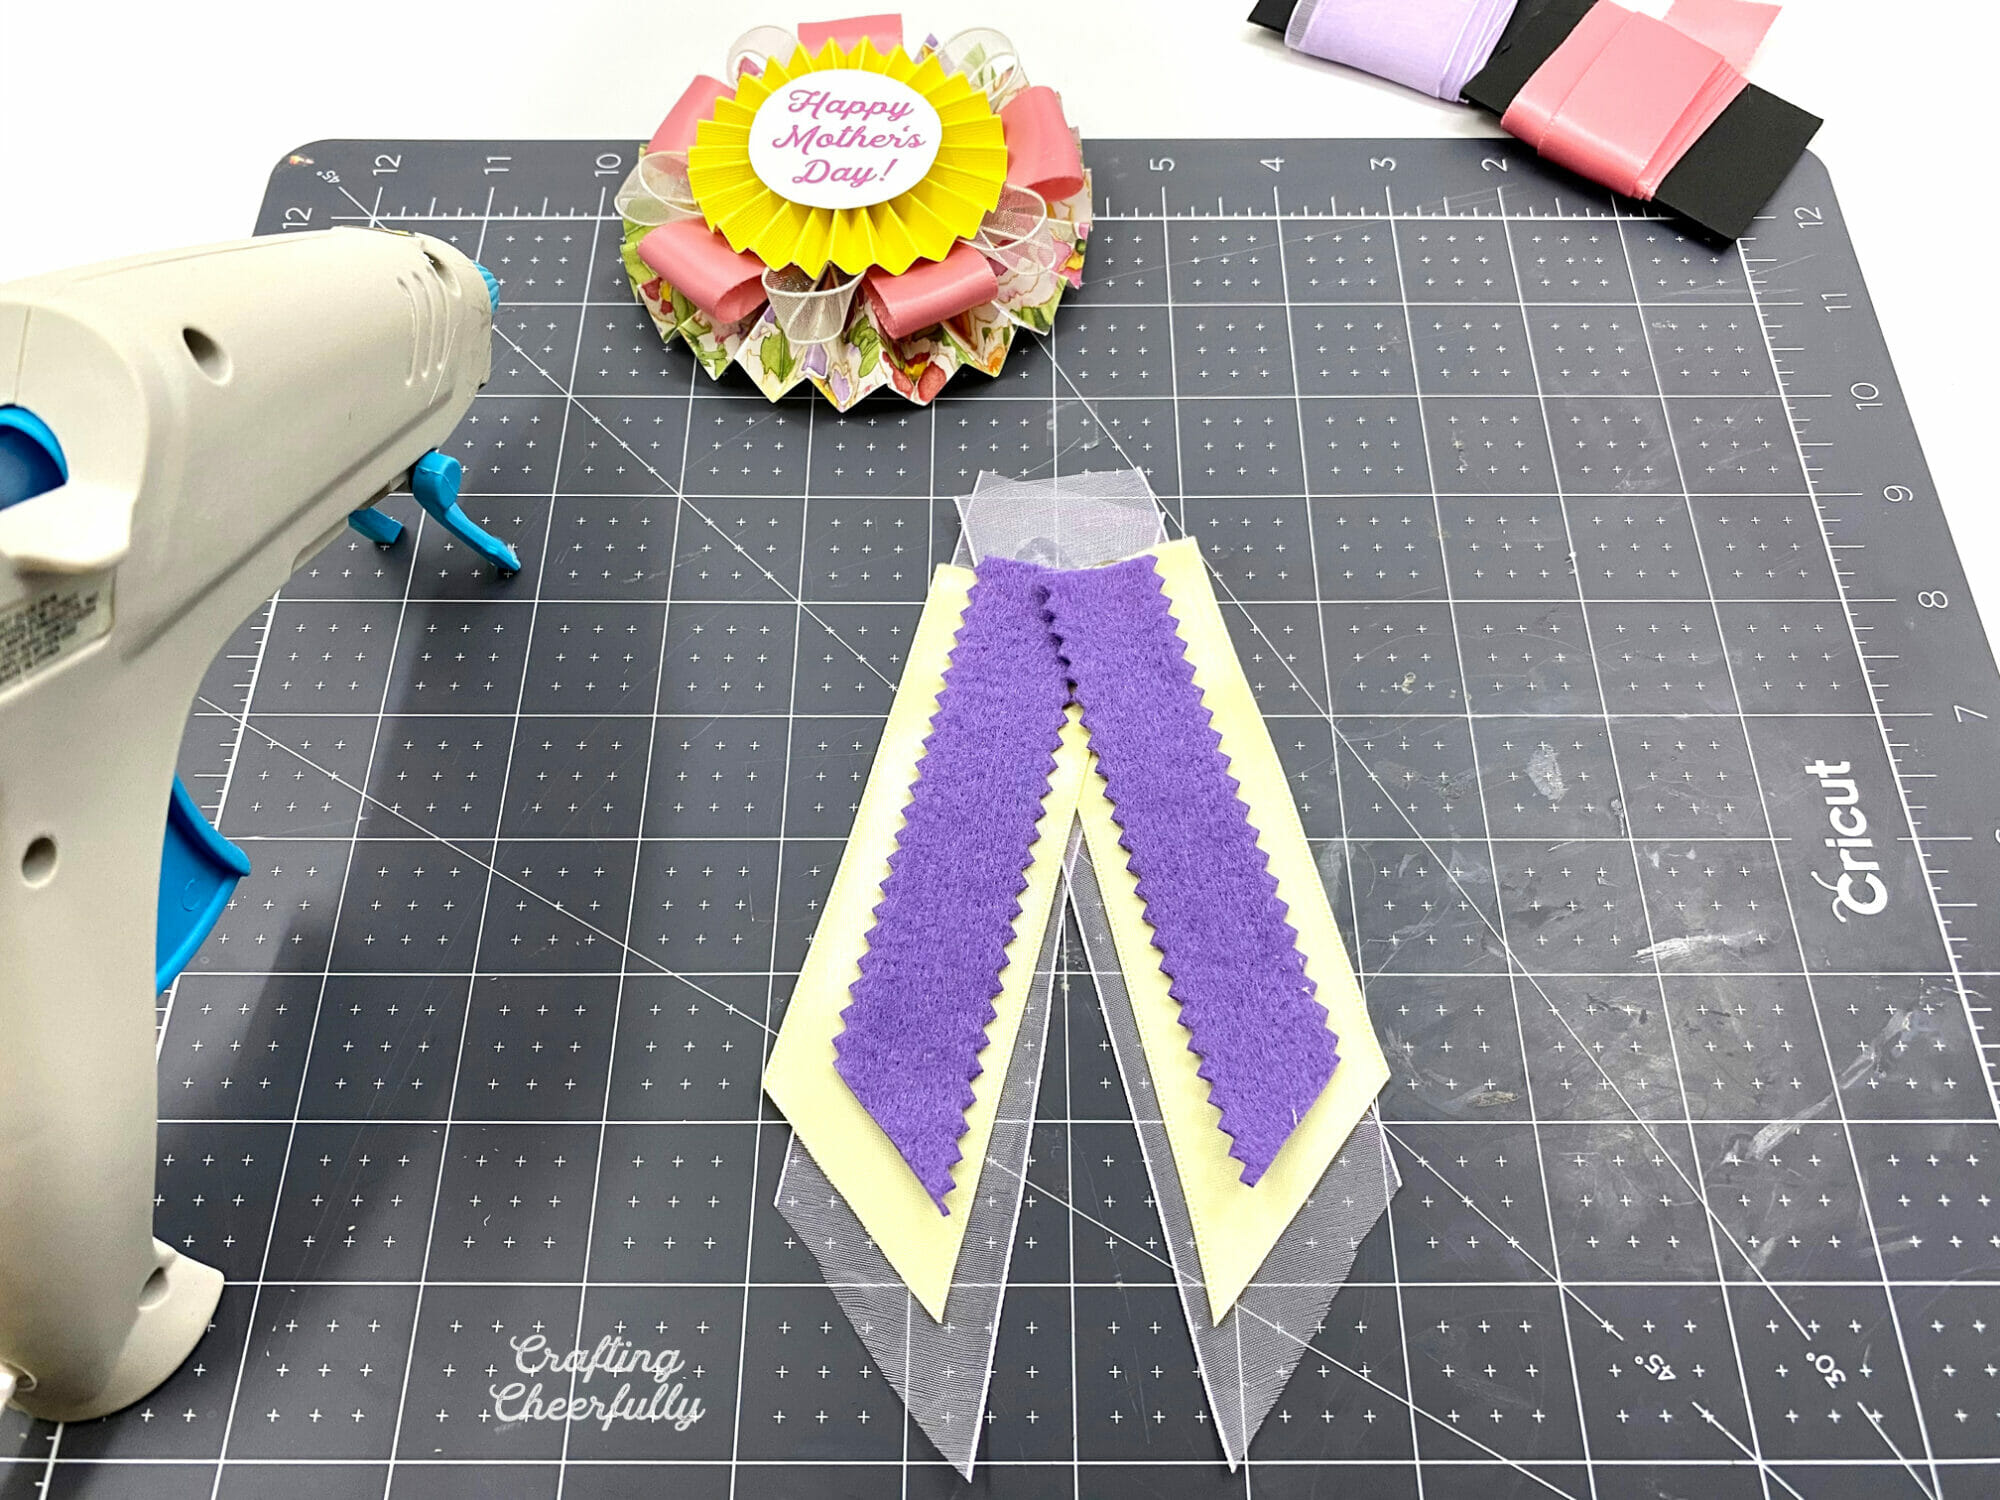
Step Five: Attach the ribbon ends.
You can use ribbon or paper to create the pieces that hang down from the medallions. Cut the ends on a diagonal or in a V and layer multiple pieces of ribbon or paper. Glue to the back of the large medallion. You can glue the ribbon to a fourth paper circle to make it easier to handle and create a more finished look from the back of the pin!
Step Six: Finally add a pin back to the back of the medallion and it is finished!!
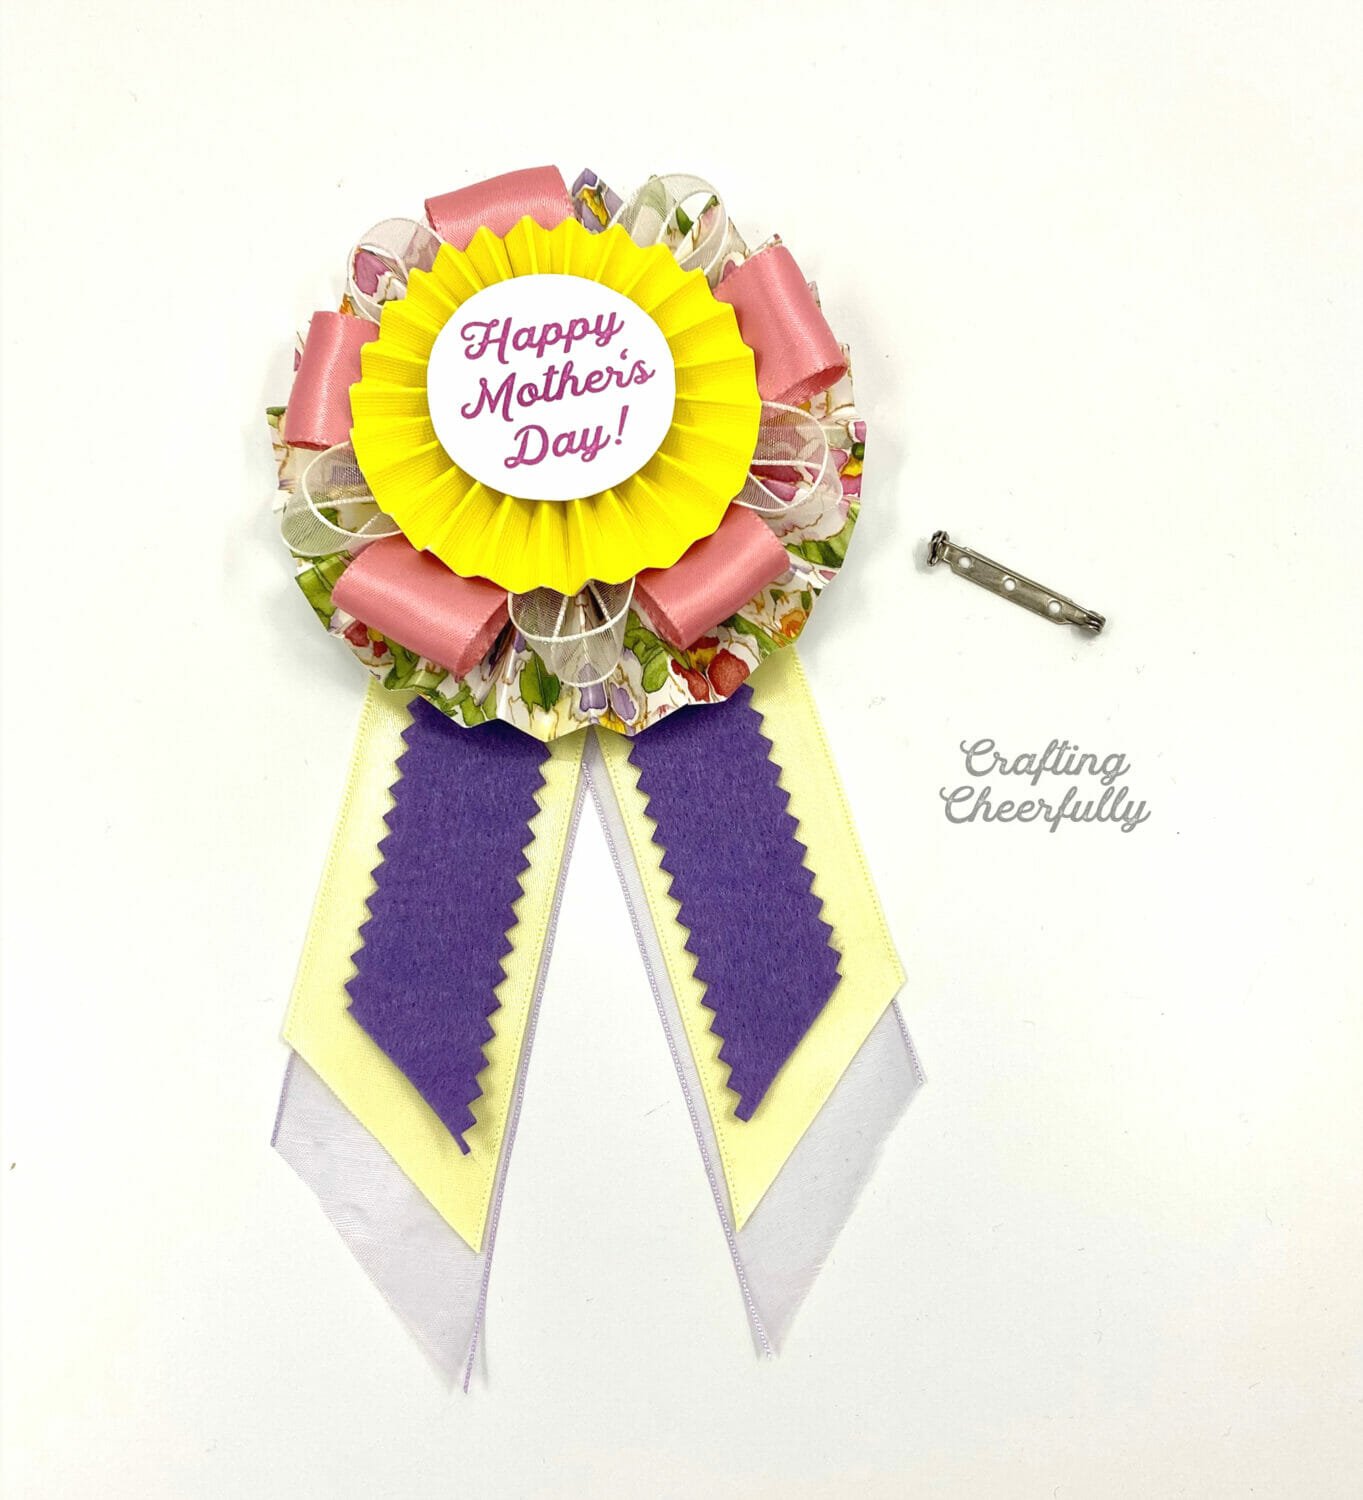
The Mother’s Day Medallion Pin is finished and ready to be gifted. I love the variety and personalization you can put into this gift and it makes such a beautiful keepsake! I hope the freebie tags help but also feel free to create your own using any message you want! Happy Mother’s Day to all of the wonderful moms, grandmas and people who fill the mother role in your life!
Looking for more craft and gift ideas, check out my Mother’s Day Crafts page!

Get the Free Mother’s Day Medallion Labels!
Fill out the purple form below with your first name and email address! The free file will be sent straight to your inbox! If you have already filled out the form below, don’t worry – you won’t be added to my list twice! This freebie is for personal use only. I hope you enjoy crafting something special. Please let me know if you have any questions :)


Just wonderful ideas. You are a grandmothers dream. Thanks
Oh thank you, that is so sweet!! :)